Category: Tools & Workshop

  • Why Mobile Carts Outperform Fixed Storage in Busy Workspaces

    The promise of a spotless workspace always looks good—until the friction begins. If you’ve set up a garage, workshop, or utility room with those satisfying wall shelves, crisp cabinets, or neatly stacked modular bins, you know the routine. Day one is all clear counters and smooth labels—the space radiates readiness and order. But let a normal afternoon unfold, and the cracks reveal themselves fast. The clutter that “shouldn’t” return starts creeping back, but not as chaos—this time, it’s awkward footsteps, blocked corners, and a subtle drain on your workflow every time you try to get something done.

    From Showcase to Slowdown: When “Organized” Trips You Up

    The trouble isn’t clutter—it’s how “organized” means working twice as hard just to keep the pace. On the first real project, you find yourself darting between cabinets for a drill bit, dodging the mower squeezed in for winter, then reaching around that shelf that always juts onto your path. Grab a handful of fasteners, make two trips since one never holds everything, then circle back to return what you forgot. Every extra step redraws those supposed “clean lines.” Spaces that look dialed in on day one suddenly make every movement feel boxed-in—and the overflow starts accumulating in the same tired zones every time.

    Fixed setups sell the dream of order. But after a few rounds of actual use, their real legacy is blocked walkways, double-duty movement, and corners that quietly choke up with overflow. That clear area next to the cabinet mutates into a dumping ground; the floor fills up as bins get shifted out “just for now.” Resetting after a job? Suddenly it’s a scavenger hunt, not a process—slowing you down before the next project even begins.

    The Hidden Cost of Fixed Storage: Reset After Reset

    Setup day isn’t real life—the true test is how long it takes to reset after each job. Too often, that means juggling bins to reach what matters, or abandoning tools near the door because shelving is buried behind “temporary” piles. The wall might be fully kitted out, every shelf labeled, but actually getting to what you need—and putting it away—requires constant reshuffling. You move a box to open a cabinet, nudge a bin to pull out a sander, then detour around a cart left parked in your work lane.

    Footprints get awkward and detours multiply. It’s not one big mess—it’s dozens of micro-obstacles: a half-blocked aisle, a tool left balancing on the freezer, a quick reach around a cabinet edge that you repeat for the hundredth time. What felt “efficient” at first slowly turns every 10-minute chore into an unintentional marathon—especially if two people are working at opposite ends or you suddenly have to haul larger equipment through those tight walkways.

    How a Mobile Cart Shifts Everything—Without Adding Clutter

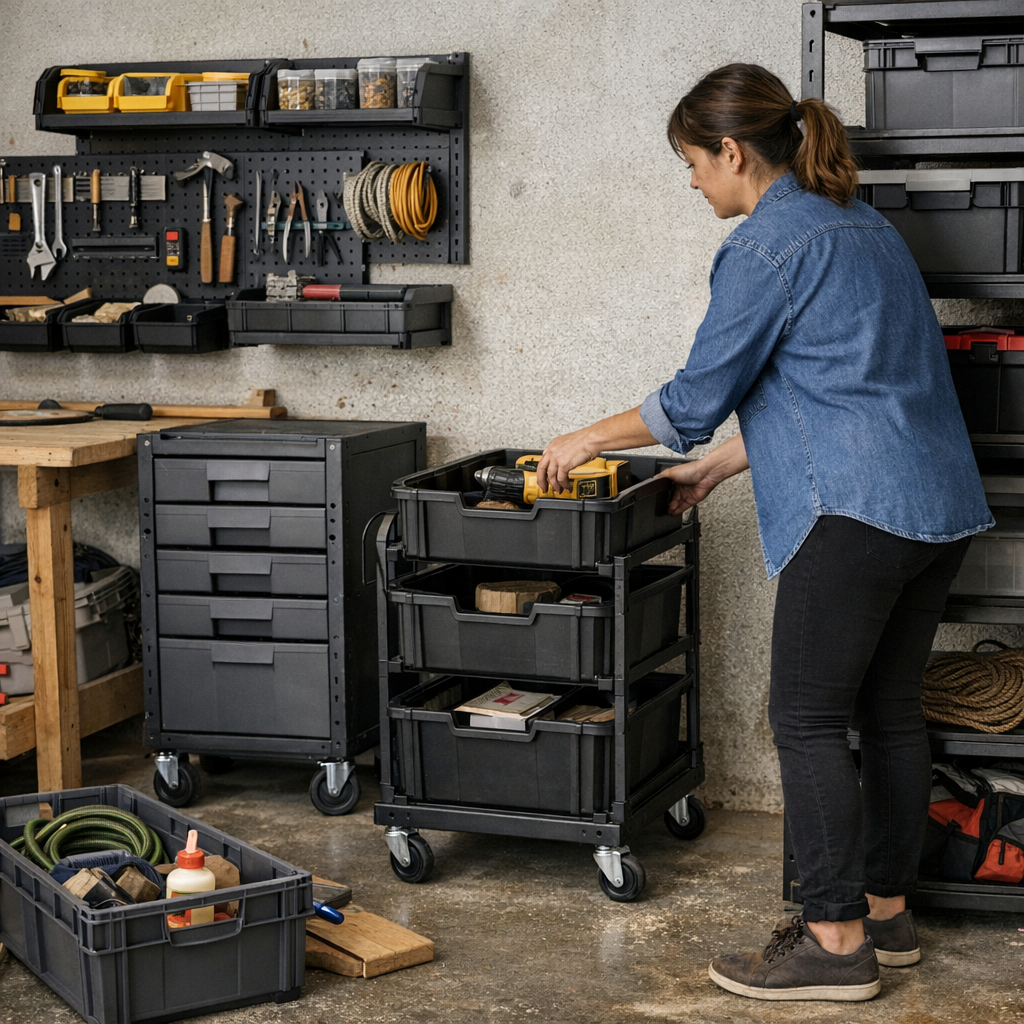
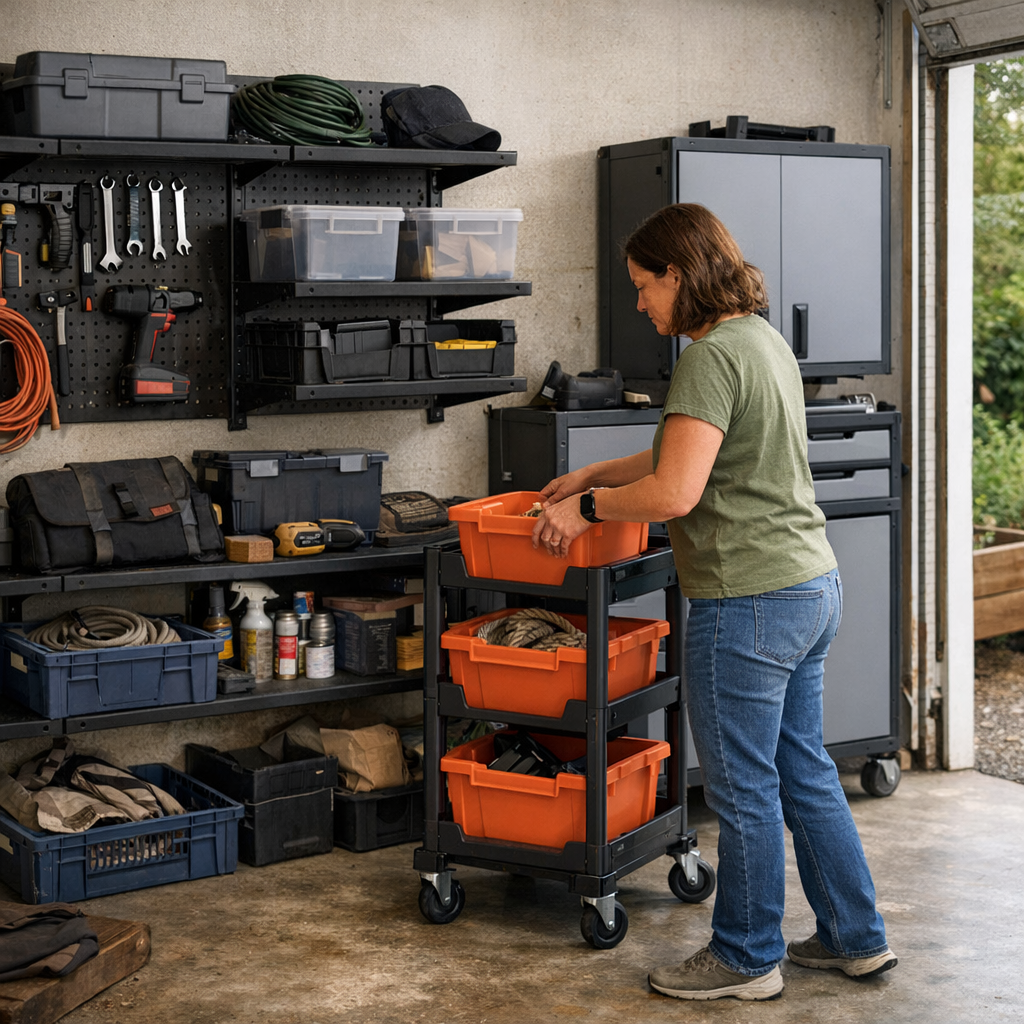
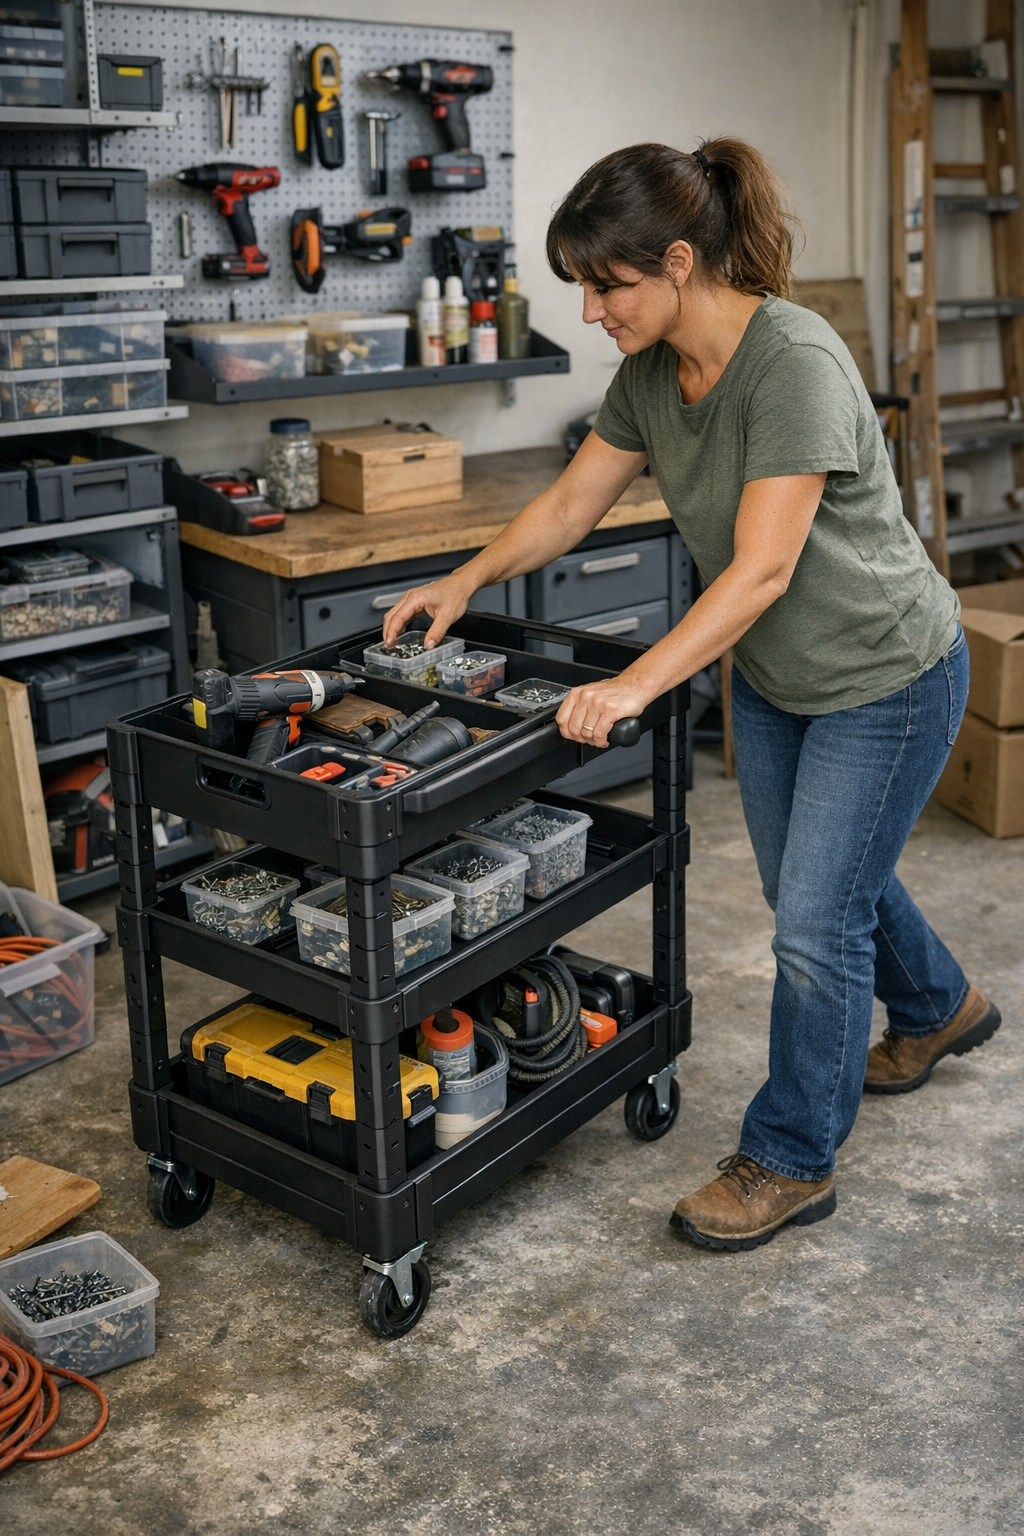
    You don’t need more storage. You need storage that moves with the job. Roll your core tools, fasteners, and small parts onto a heavy-duty cart—and the friction that drains your setup simply stops accumulating. Instead of zigzagging across the room for each piece, you work straight through: the cart follows you, not the other way around. Wall space could look the same, but now there are no dead corners or blocked pathways, because the essentials move with you, and nothing gets parked in the way for long.

    Clutter zones start to evaporate. No more overflow quietly sprawling behind toolboxes, under benches, or beside the washer. With a mobile hub, bits and tools return to you—not to a random flat spot across the room destined for forgotten piles. Flat surfaces that were once magnets for “just for now” gear finally stay clear, because your reset can actually keep up with your workflow.

    Real Setup Scene: Getting It Done—Or Getting Stuck

    Picture a bracket installation near the garage side door. With tools locked away in fixed cabinets, you shuffle across the room for a screwdriver, realize you’re missing anchors, kneel for hardware, then stand up only to remember the drill’s back by the door. Now, one box is underfoot, your balance is off, and the job that should take 15 minutes mushrooms into a series of stop-and-go corrections. A mobile cart changes the scene: you roll up, everything stays beside you, each tool returns to the same spot, and your path never tightens. The job finishes with less back-and-forth and almost no unnecessary detour.

    Mobility Isn’t About More Stuff—it’s About Easier Returns

    The cart doesn’t just haul extras—it unravels that relentless loop between using and resetting your space. When the job’s done, everything used is already on the cart, ready for return. Start-to-finish, there’s less scatter, no forgotten piles on random shelves, and your reset is nearly automatic. The visual calm and the open movement aren’t just an illusion—they’re a real improvement you can feel at the end of the day.

    What Static Storage Still Does Well (And Where It Fails Without Backup)

    Wall cabinets still earn their keep—just not for daily flow. Stash overflow, off-season gear, and backup supplies where they’re out of the way. But if you lean on these zones for every project, cracks show fast. The system might “look finished” right after setup, yet within weeks, new piles sprout in awkward spots the layout never anticipated. Clarity starts eroding not because you lost discipline—but because static storage can’t flex with your actual work rhythm.

    Notice yourself—or anyone else—repeating the same detours: shifting a cart just to pry open a door, weaving around gear you parked “one time,” or reaching past the same cabinet edge for the third trip in a row. These repeated movements aren’t mistakes—they’re your setup signaling it’s working against you, squeezing the room tighter even when there’s technically “a place for everything.”

    Flexible Fixes: Tweaks for a Smarter, Smoother Setup

    You don’t need to ditch your shelves or rip out what works. In most setups, background storage stays—wall cabinets for backup, shelving for seasonal tools. The real shift is making your daily-use gear mobile: a cart, caddy, or rolling chest that clears the main area after every session. Even a single high-quality cart changes the flow of the whole workshop or garage, letting you put hands on what you need, right where you’re working, without crowding the floor or wall zones for good.

    Four Tweaks That Help Right Away

    • Make overflow obvious: Any bench, floor corner, or shelf that always collects extra gear? Give that stuff a mobile home, not a permanent landing pad.
    • Use your cart’s top tray for in-progress parts: Fasteners, bits, or hardware stay visible and contained—not spread across every project zone or slipping underfoot.
    • Watch your walkways: If you have to move your cart (or a bin) just to open a cabinet door or squeeze by, reconsider where things live between uses. The return route should stay as clear as your starting lane.
    • Group tools by action, not by wall: If you always grab the same drill, measuring tape, and level, keep them together on the cart—don’t split them between fixed shelves, only to cross the room every session.

    Choose Flow, Not Just “Order”—And Make Your Setup Work For You

    The best area isn’t the one that looks arranged right after a deep clean. It’s the setup that lets you work straight through, reset in moments, and keeps corners from turning into overflow traps—even when projects pile up or routines repeat. Once you’ve swapped the headache of endless return trips for the ease of open movement, the case for a mobile zone writes itself.

    For real-life setups that hold up—the kind that don’t box you in or slow you down—mobility is the missing piece. The difference isn’t abstract: it’s felt every time you avoid that repeat detour, recover precious floor space, or end a day without hunting for lost tools. Try letting your essential gear flow with your work, and see how much more usable your space becomes.

    Visit StackNest for practical storage solutions that fit the way you really work.

  • Extending Reciprocating Saw Blade Life Through Smart Choices and Care

    The moment your saw lurches and the cut goes sluggish, you feel it—the blade isn’t up to the job. On paper, every reciprocating saw blade promises “professional results,” but only real-world cuts separate smooth progress from relentless struggle. At the bench or waist-deep in demo scrap, nothing exposes blade weakness faster than a few feet of buried nails, damp wood, or dense studs. That’s where tool performance stops being theory and starts costing you—time, effort, and finish quality.

    Blade Trouble Usually Hits Mid-Project—Not on Day One

    The first plunges often fool you: fresh teeth, quick pass, everything easy. But when you’re two dozen cuts in, heat builds, dust packs into the gullets, and the job shifts. Suddenly, a blade that powered through framing boards now shudders at every nail; control slips, and you feel your shoulders tensing, trying to muscle through. Cuts veer, edges rag out, and that simple trim-out stretches into bonus cleanup. If you’ve ever had a vibrating saw leave your arms buzzing for hours, you know the difference isn’t subtle—it’s the friction you fight with every pass.

    It’s not catastrophic failure that kills productivity—it’s the slow, creeping grind. A little more vibration, just enough burning pitch, twenty more minutes chasing ugly edges with sandpaper. Ignore the warning signs and you’ll feel progress grind down with each cut: more strain, less control, and a cutline you end up fixing instead of moving on.

    Why Some Blades Quit Long Before Others

    Not all saw blades fade the same way, and the reason rarely comes down to what’s printed on the label. It’s the nagging factors under real load:

    • Material matters: Bimetal blades tough it out; brittle carbon steel flexes, then fails.
    • The workload: Are you cutting old nails and wet studs, or clean pine?
    • Your approach: Do you force every stroke, or let the saw do the work?
    • Keep it clean: Ignoring dust quickly glues sawdust onto teeth—hello, friction and heat.

    Grab the wrong blade for the job, skip cleaning, or mismatch TPI to the material, and you get trouble early: grabs in the cut, wandering lines, and teeth that dull before the blade snaps. Sometimes the blade flexes sideways after three studs, or gunk bakes on the edge, ruining any hope of a clean finish. That’s time lost—not to catastrophic breakage, but to burned out edges and hours of sanding and rework.

    How a Dull Blade Draws Out Every Task

    Picture midway through basement framing—shavings on your boots, saw humming. A solid bimetal blade lets you steer, keeps vibration steady, and the passes smooth. A bargain blade? Three studs in, it starts pulling off line, rearing up at buried nails, and the cut grows a jagged tail. Sawdust turns to paste, teeth overheat, and every next cut takes longer. You feel the control slipping every inch.

    The Real-World Difference: Side-by-Side on the Jobsite

    This isn’t just warranty talk—it’s straight off the job. On a porch tear-down laced with half-hammered screws, I drove an 8/14 TPI bimetal blade through boards and hardware for an hour—line stayed dead straight, cuts clean, only a whisper of scorch on the exit. Swapped for a big-box carbon steel blade out of thrift: instantly the cuts wandered, noise amped up, and by the seventh post, it was bent, teeth caked, and fighting every entry. It doubled my time, left splinters everywhere, and forced a cleanup that nearly beat the demo itself. A cheap blade isn’t a deal when it drags down every pass and turns one job into two.

    Tweaks That Actually Save The Day

    No magic bullet—just small shifts that pay off. On that same porch, two habits changed the whole tempo:

    • Pace the stroke: Instead of raw force, pull out after every half-foot to shake dust loose—keeps heat down, saves edge life.
    • The right blade for the material: With nail-hardened timber? Stick to that bimetal 8/14 TPI and the saw stays controllable and smooth. That blade finished 48 plunge cuts before showing real fatigue—well past what the cheapo survived before it started tearing fibers and trashing finish quality.

    Real Friction From Routine Jobs

    It’s not just on showpiece decks—blade life bites you everywhere. Trying to square off old floor joists under the house, hacking stubborn roof braces, or slicing deck rails in a deep freeze: if you hit more vibration, have to lean hard, or the blade binds mid-cut, it’s usually not your saw failing. The wrong blade, dirty blade, or worn-down teeth force you to fight every step.

    • Can’t tell why progress has slowed? Pause and check for sawdust caking or the edge running hot.
    • More vibration than last cut? Odds are good you’re running dull—or mis-matched for the material.
    • Saw feels “grabby” or fights you? Pull the blade clear, tap off debris, and reset your technique—let the tool’s action, not your biceps, do the work.

    Your Quick Field Reference: Saw Blade Life

    How do you know a blade is finished—before it snaps?

    If you feel new vibration, smell burnt pitch, or notice the saw pulling off line, pay attention. Sticky gunk building on the blade often warns you before you see rounded teeth.

    Does it help to clean the blade mid-job?

    A hundred percent. Let pitch and dust build, and you’ll trash the edge in minutes. Habitually pulling up and clearing grit during the cut means cooler runs and blades that last twice as long.

    Is there really a “one-size-fits-all” blade?

    Not in the real world. For mixed demo—hidden nails, surprise screws—stick with a variable TPI bimetal for the longest run. But shift to dense hardwoods or all-metal tasks, and specialty blades pay for themselves in both time and fewer ruined passes.

    Real Performance Comes Down to Blade Choice

    The right blade isn’t just about speed—it’s control, smoothness, and less beatdown on your hands. In the middle of a dust-choked workspace, that means cuts that run true, less sanding, fewer unplanned breaks, and actual forward progress. Small mistakes in blade selection cost you sweat and time; the cheapest option often becomes the most expensive over a day’s worth of work. Forget the claims on the box—feel the difference as your workday stacks up, and pay attention to what you’re left holding: a finished project, or a pile of wood that needs fixing.

    Shop Gumboll for blades and accessories tested where real work happens.

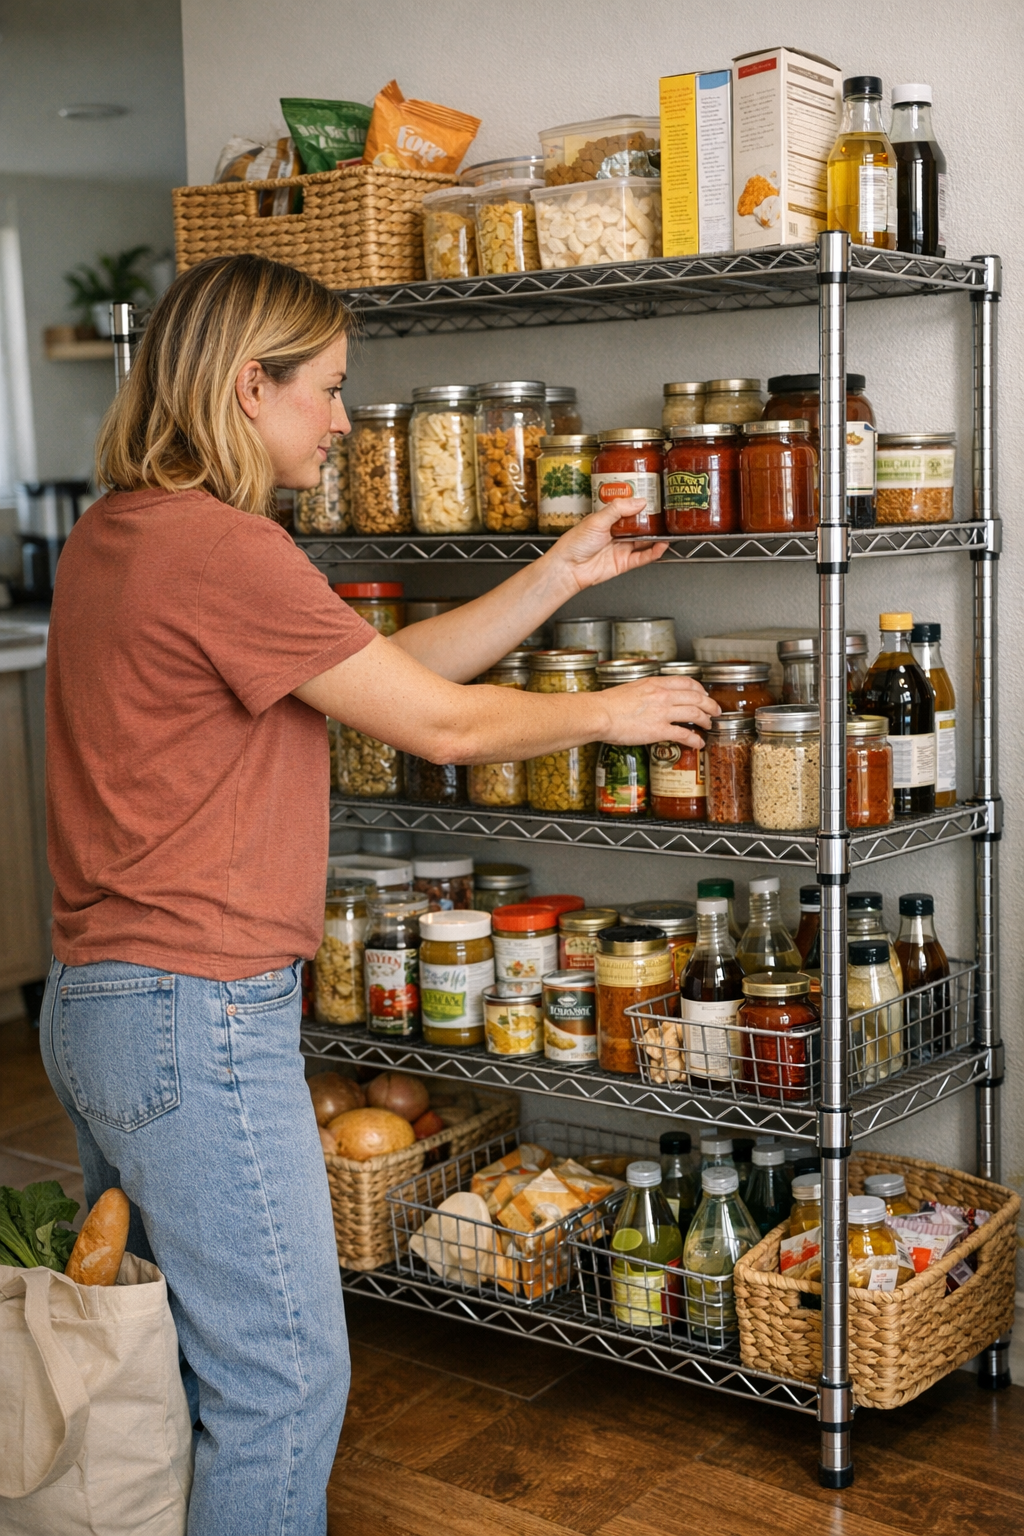
  • How Easy-to-Assemble Racks Improve Pantry Visibility and Cut Waste

    Most shelves look organized the day you stack them—but real life tests how well that order stands up. Walk into any pantry, closet, or laundry corner and you’ll spot the early hope: bins lined up, labels straight, supplies stacked just so. But routines crash into those good intentions fast. Within days, one crowded shelf forces you to reach awkwardly past boxes or shift a pile just to grab cereal. Bins meant for “snacks” swallow everything from juice pouches to condiment packets. Instead of order, you’re met with surprise stacks, hidden items, and the slow drift of clutter that chases efficiency out of the room.

    Where the Illusion of Organization Breaks Down

    It’s not tidiness you’re fighting—it’s the slow creep of disarray every time you actually use the space. Think of fishing through the pantry for oatmeal, only to upend bags and cans revealing three forgotten bottles of olive oil at the back. Or a hallway closet where “winter gear” lands behind last summer’s shoes, with scarves slipping out of sight beneath a heap of hats. What started as order quickly morphs into a maze, where finding one thing means disturbing five others.

    It’s not a lack of effort. Your rack or shelf—its depth, spacing, and visibility—quietly defines how fighting clutter plays out. When you can’t see what’s stored, you buy extras you don’t need or waste minutes hunting for simple supplies. The result: resets slow down and mess seeps into routines you want to keep easy.

    When “Neat on Paper” Shelving Fails in Practice

    Closed bins and fixed shelving can trick you with surface order. Stack containers and the shelf looks under control—until reality sets in. That bin marked “snacks” ends up holding tea bags, batteries, and sticky condiment pouches. Opaque bins high on a shelf become a guessing game, swallowing out-of-season boots or half-used cleaning sprays you’ll rediscover—too late—months from now.

    With an open, adjustable rack, every item claims a visible spot. No playing hide-and-seek with pantry staples. No lost accessories in “junk” bins. Stand back, look, and know what’s in stock—instantly. There’s no discipline barrier, no choreography to restock. Just honest visibility that prevents bins from blurring their roles and keeps everyday items at the ready, not out of sight and out of mind.

    Friction That Goes Unnoticed—Until It Costs You

    Storage friction is real—but so normalized it’s easy to ignore. If putting away groceries means a domino effect of moving jars to reach bagged snacks, or folding laundry stalls because you’re shuffling clothes between uneven stacks, you’re paying a daily penalty in time and patience. Restocking the bathroom turns into an excavation of half-empty bottles, and soon the neat closet turns vague as catch-all bins fill with keys, wrappers, and receipts that have nothing to do with their original label.

    Every slow search, every messy reset, quietly signals: it’s not your habits, it’s the setup. The problem isn’t owning too much—it’s shelves and bins designed for appearances, not for the way you actually move in and out of the space.

    The Power of Reworking the Rack—Not Just Rearranging

    Swapping “deep-and-distant” storage for a well-placed open rack does more than skip assembly headaches. Imagine unloading groceries and every jar, can, and snack lands on shelves where nothing hides in back, every category is clear, and you already see what needs restocking. The daily reset gets faster. You don’t have to argue with yourself about where the pasta goes each time. There’s no five-minute hunt for the last packet of rice buried behind boxes, and the false sense of “out of space” fades away—a few small shifts and you reclaim minutes (and sanity) every week.

    It’s not about the shelf looking nice on day one. It’s about a quick, easy return to order—every day after.

    How Overcrowded Shelves and Tall Bins Work Against You

    Trying to maximize space by packing every inch or stacking up bins quickly backfires. Small items “disappear” under bulk buys. Cans crowd front to back, turning basic meal prep into a balancing act. Instead of smooth routines, you’re forced to take out whole rows just to find what you actually need. Shelf spacing that’s too tight, or bins that block sightlines, only increase the odds of duplicate purchases and “mystery” stockpiles.

    If organization requires constant shifting and rearranging, the system is failing you. Even a little more vertical space per shelf, or an extra row with open access, keeps staples and accessories visible and ready—so sections keep their purpose and items don’t quietly vanish.

    Real-World Adjustments That Actually Work

    Schedule a “week-later” check—not just a move-in photo but a lived-in inspection. Notice which shelf sections have melted into junk drawers, which bins swallow unrelated odds and ends, and where stacked piles collapse before the week’s through. Often, it’s tighter shelving and concealed containers quietly working against you, not your organizing willpower.

    Try switching one deep bin to open rows in the entryway—watch how shoes, umbrellas, or bags sort themselves by use and stay findable. In closets, space out racks so folded clothes keep their shape longer and towers of T-shirts don’t tip. The best rack isn’t the one with the most labels. It’s the one where every item claims its own clear, visible spot—again and again.

    The Value of Storage Systems That Stay Honest

    The real reward of assembling the right rack isn’t pride when the shelf is pristine. It’s the payoff two weeks in, when you grab exactly what you need without digging, buy what’s missing (not what’s forgotten at the back), and recover your time from fighting clutter you never intended. The best storage offers steady, reliable access—so resets are a habit, not a hassle, and order keeps pace with the rhythm of actual life.

    Organization that stays visible and functional isn’t luck—it’s the product of choosing racks that let the routines, not the mess, set the pace.

    Shop ClosetWorks

  • Why Modular Storage Systems Only Prove Their Worth Over Time

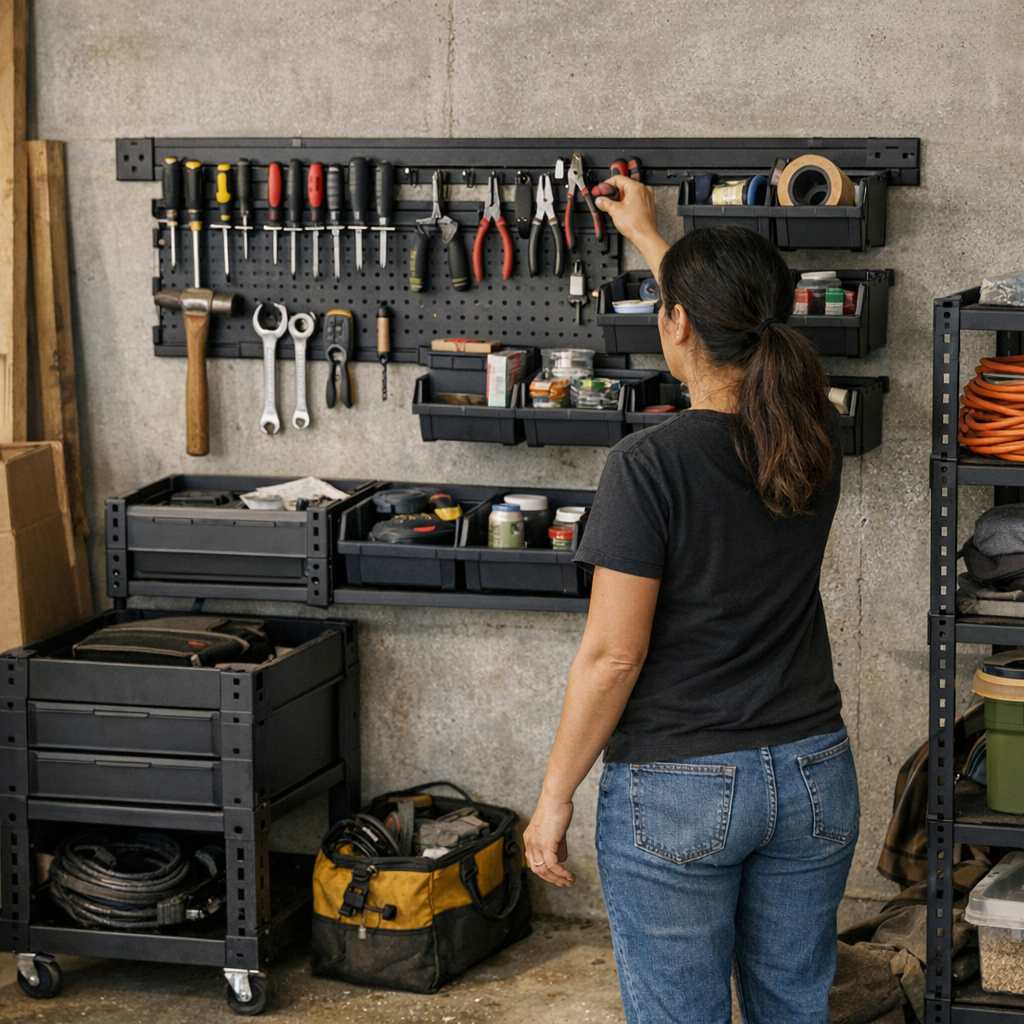
    The day you install a modular wall storage system, everything feels possible. The chaos of random piles and misplaced tools gives way—at least briefly—to crisp lines and clear floors. You rake in that first rush of satisfaction, walking a path that didn’t exist before. But what the new setup looks like on day one and how it works by week two? That’s where the real test begins. What feels orderly now can quietly slide back into friction: a bin that blocks your reach, a cart that always seems parked in the way, corners that become dumping grounds just out of habit.

    That “Fresh Setup” Feeling—And How It Fades

    The first day, you admire how the rails align, how every hook and bin looks like it was made for the wall. You stand back, floor clear, the bench visible for the first time in months. But daily use quickly chips away at the honeymoon. You find yourself swinging wide around a cart that used to sit neatly out of the way—or contorting to reach past a cabinet edge, again. That last rail, full of hope and space, morphs into a landing pad for odds and ends you can’t be bothered to sort.

    It’s never one big issue—just a steady return of small workarounds: awkward reaches, bins with no true home, shuffling gear from spot to spot just to get through the day. The “order” isn’t gone, but it’s leaking at the seams.

    When the System Begins to Resist

    You start a project, hauling out parts and tools, and suddenly find yourself detouring around a floor cart that’s wandered into your main route. A corner section designed to keep gear up and out of the way slowly turns into a blocked zone, or worse, a no-go zone. Those cleverly mapped wall rails sometimes force you to stretch or sidestep, making you realize: fitting everything on the wall is not the same as making the room work.

    This is where even “modular” becomes misleading. Storage that looks good standing still can oppose your habits in motion.

    Everyday Friction Has a Cost

    A scattered moment here, a pause there—these add up fast. A container set a bit too high becomes a chore every time you need that tool. Old paintbrushes and zip ties crowd a corner you meant to keep clear. Meanwhile, the hand tools you use daily start creeping back onto the bench because it’s faster than crossing the room to fetch them. You find yourself losing seconds—then minutes—to needless shifting and repeated shuffling. The real drain isn’t dramatic, but it’s permanent: resets take longer, and your “organized” system starts feeling like just another thing to manage.

    The Invisible System—Storage That Stops Being Work

    What separates a setup that lasts from one that just looks good for a photo? The best storage nearly vanishes in practice. You grab the wrench off the wall without pause. The floor stays open, not because you’re guarding it, but because your flows naturally keep it clear. After a day at the bench, reset means a handful of movements, not a full-scale re-sort. Everything you actually use lives in arms’ reach, not exiled to a rail across the shop because that’s where space was left.

    True modular efficiency comes from listening to use, not measuring shelf space. Choke points, awkward clusters, and overflow zones stand out fast if you pay attention. The real test isn’t day one’s tidy look—it’s whether your space stays easy weeks later, even as projects change and routines get messy.

    Real Friction: Scenes You’ll Recognize

    When Mobility Becomes Inertia

    Picture this: A rolling cart, meant to make things easier, sits next to your main workspace. It’s loaded with drills and cables, maybe half a toolbox perched on top. For a few days, the arrangement works—until you notice you’re always nudging the cart aside just to get by. Sometimes, you return from the other end of the bench and the only path is blockaded. What was a “flexible zone” is now an obstacle, demanding extra steps every single time. Movement through the room breaks down—slowly but always at the worst moment.

    Dead Corners: Where Good Intentions Go to Die

    That corner section you installed “just in case”—far enough from the daily action—soon becomes the exile for gear with no clear home. It’s where masking tape, leftover hardware, paint roller sleeves, and the odd single-use clamps wind up. At first, you ignore it. Give it a month, though, and that overflow eats up prime wall real estate and muddies the system. Even disciplined setups bleed efficiency here. The tell: you find yourself reshuffling the same pile, over and over, to free up barely a hand’s width more space elsewhere.

    How Small Tweaks Unlock Big Improvements

    The fix rarely means tearing up your whole system. Spot the recurring friction—where motion stalls, where bins stay empty or useless, where carts keep getting in the way. In one real shift, simply moving daily-use drivers and pliers off a mobile cart and onto a mid-wall rail cut several minutes from setup and shutdown. The “problem cart” was sent to a utility corner for long-term storage, restoring clear access to half the workshop and ending the ritual of reshuffling. As a result, cleaning up at the end of the day turned from a 15-minute sweep into a two-minute glide.

    Here’s a simple rule: Your layout should respond to your routine—not the other way around. Spend a week noticing the actions that feel clumsy. Shift the bin, swap the hanger, drop the shelf to a more comfortable height. These adjustments rarely require more than a screwdriver or a level, but the payoff keeps growing—less clutter returned, more flow gained.

    The Real Mark of a Working System

    An organized space means nothing if you keep tripping over “solutions.” The true win isn’t in pictures or diagrams—it’s a space you stop thinking about because it simply works: flows remain open, access is clear, nobody’s bottlenecked by a rolling cart with nowhere to park. Every time a reset is quick and you don’t have to reshuffle or rethink, your system has proven itself in real use.

    Every space reveals its own flaws and fixes only after repeated use. Instead of chasing the perfect layout, aim for one that quietly fits your actual habits. Tune, nudge, shift—until order feels lived-in, not just installed.

    Visit StackNest for practical modular storage solutions that fit real work, not just the plan.

  • How High-Quality Drill Bits Reduce Motor Strain and Improve Finish

    The gap between “fast” and “frustrating” appears after just a few holes. If you’ve ever marked out pilot holes across a run of shelves or knocked out pocket screws across a hardwood face frame, the rhythm is familiar—and the slowdown even more so. The early holes are crisp; you’re in control, bits bite easy. But by hole seven or eight, something shifts: resistance builds, the drill pitches higher, your wrist aches a little more. Next thing you know, progress drags and clean work turns messy, all because the bit isn’t keeping up.

    The Bit Choice That Sneaks Up on You

    When you’re standing in front of your toolbox, drill bits all lined up, every one of them can look ready for action—shiny edges, sharp spirals, slick with a new-coat shine. But that sameness disappears in real use. A junk-drawer bit and a truly good one only show their difference after repeated jobs: precision holes versus ragged tear-out, steady hands versus fatigue, real momentum versus forced stops just to shake out gummed-up flutes.

    Friction Builds—And So Does Every Hassle

    Your hands know when a bit is failing, even before your eyes do. Every extra ounce of pressure, every little shudder in the trigger hand—it’s the bit fighting the material, not cutting it. As a dull or low-grade bit overheats against hardwood or MDF, noise shifts up, the motor labors, and your grip gets tighter just to control wandering. Workpieces tell the truth: fuzzy-edged holes, singed rims, dust clinging to the flutes, bits too hot to pocket. The fix? More sanding, more cleanup, more stops than intended.

    When Repetition Exposes Weakness

    Nothing stresses a bit like real volume work. Drilling a dozen shelf pin holes, zipping fasteners through deck frames, or batch-joining casework—this is where a mediocre bit crumbles. By hole six, resistance mounts; by hole ten, you’re compensating for the tool:

    • Edge tear-out and chipped holes that eat up finishing hours
    • Drill strain—sometimes tripping safety cutoffs if you push through
    • Forearm and wrist fatigue as you muscle the bit to finish the job
    • Uneven cut, reduced controllability, and more battery draw

    The cycle is predictable: work slows, mistakes creep in, you use time fixing what a sharper bit could have avoided. All the while, the sense of control—the most important thing—slips away.

    That Moment You Swap—What Actually Changes

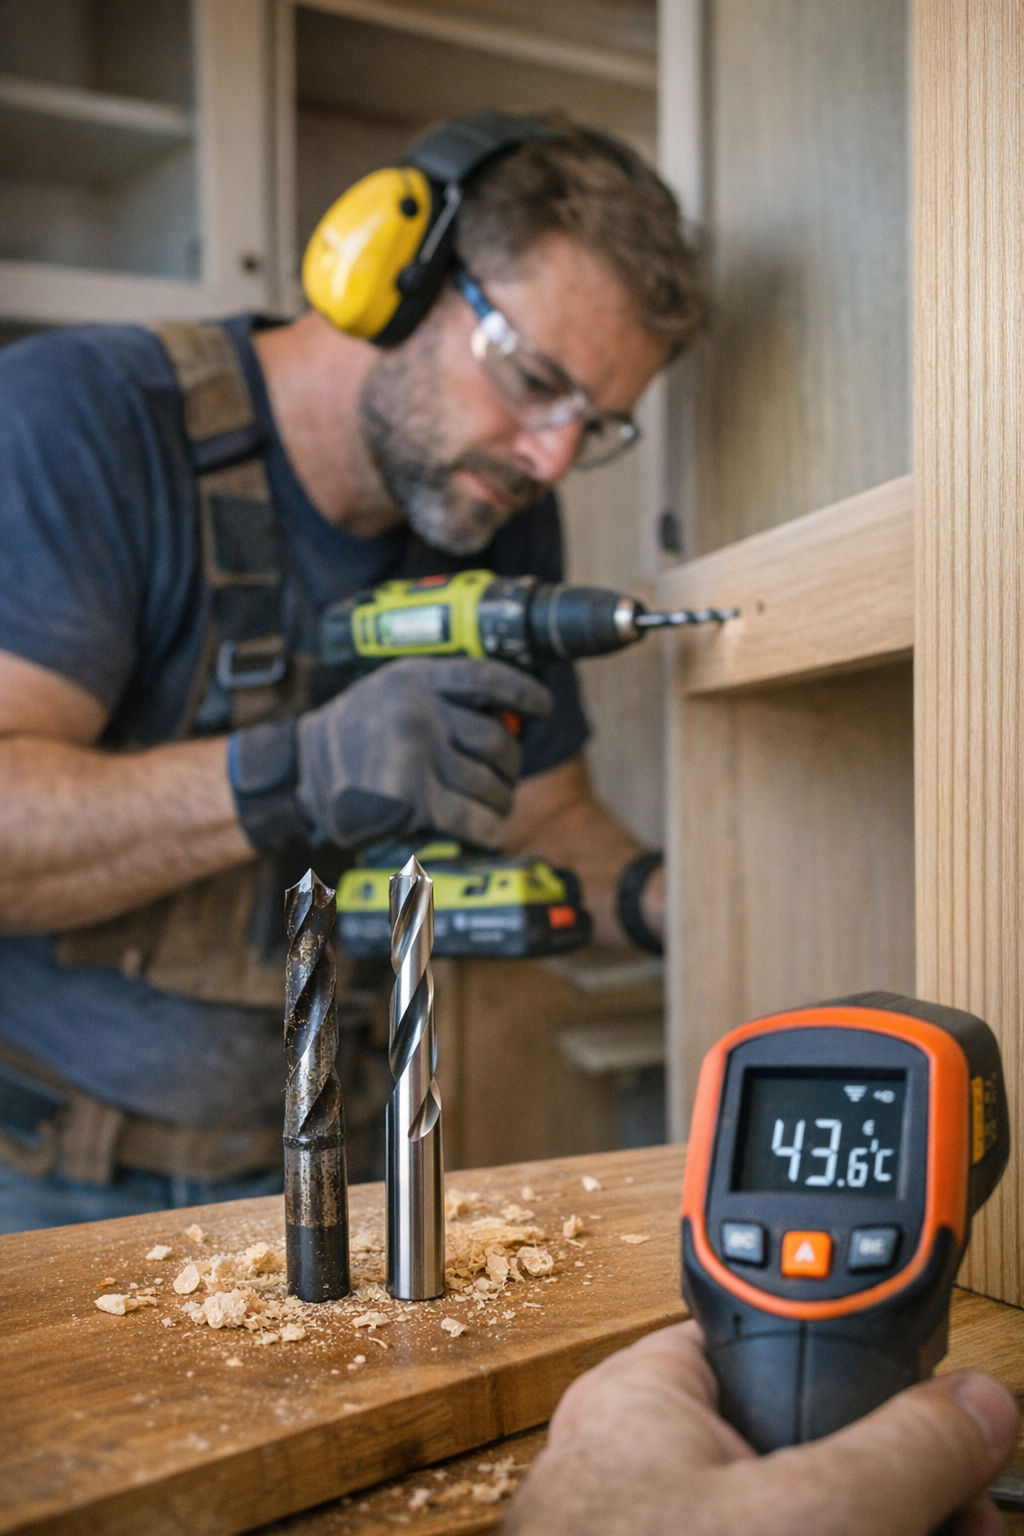
    There’s relief in reaching for a pro-grade, low-friction bit after you’ve battled through with a basic one. A real world run—drilling ten holes in kiln-dried maple—makes the difference plain. With a sharp, coated bit, the holes run cool (under 45°C checked by infrared), your drill stays steady, vibration is barely there. More importantly, you’re not chasing burnt edges or scraping battery packs before lunch. Each hole is as clean and accurate as the first, and your hands can focus on placement, not just forcing progress.

    Right Bit, Right Moment

    There’s a temptation to use one bit for every material, but anyone who’s chewed through plywood with a hardwood bit knows better. The feel changes: feed rate slows, dust clogs up, and the tool’s control drops off. Swapping in a bit specific to the wood at hand—maple, pine, or ply—lets the drill maintain speed, cuts remain sharp, and you get more holes per battery. It’s the difference between staying in flow or watching your tempo die out halfway through the project.

    Listen for the Signals Mid-Task

    A good bit going bad doesn’t always announce itself, but the sharp operator notices:

    • Heat and smell: The tip is hot to the touch and the faint bite of burnt wood hits your nose
    • Rising vibration: The tool starts to chatter and shake, grip becomes tense
    • Annoying noise: Drill noise ramps up, getting shriller with every hole
    • Messy results: Charred edges, chipped surfaces, even holes that refuse to stay round

    Any one is a warning: keep pushing, and you’re not just working harder—you’re wasting tool life and, worse, your own energy. Ignoring these cues costs time you’ll never get back.

    Quick Habit: The 30-Second Pre-Flight Bit Test

    Don’t let a cheap bit dictate your day. Just before kicking off repetitive drilling, take a half-minute:

    • Spin the bit—does it glide between your fingers or drag over a nick?
    • Test on a scrap—does it bite cleanly or skate and burn?
    • If there’s any hesitation, switch in a fresh one before it winds up costing you double in rework

    That habit deflects the most aggravating work—fixing holes that shouldn’t have gone wrong in the first place.

    Bit Quality Pays Off—Especially on Long Runs

    Over an afternoon, or a week, the differences stack up. With a truly sharp, well-matched bit, every step of the build gets easier: fewer slowdowns, less muscle strain, fewer surprise changeouts, smoother control as the job goes on. You start responding to slight shifts—more vibration, rougher edges—before they derail the task. It’s rarely about instant perfection or showroom results. It’s about less wasted motion, straighter holes, a finish that doesn’t need disguising. When you’re powering through real jobs—fitting shelves, building out a benchtop, hanging cabinets—the right bit feels less like an upgrade and more like the baseline you deserved all along.

    http://gumboll.myshopify.com

  • Why Modular Shelving Transforms Daily Access and Organization Efficiency

    There’s a difference between a closet that looks tamed for a day and one that keeps pace through the week’s real chaos. You notice it around Thursday, when stacks that started crisp collapse into leaning towers, bins blur with stray socks and scarves, and the morning scramble means poking behind lopsided piles for the “good” towel—again. The root of it? Fixed shelves that insist your stuff, your routines, and your categories stay frozen, even as everyday life frays the order.

    The Slow Slide Back to Mess

    Open any hallway linen closet or kitchen pantry and the signs show fast: piles edging higher than you ever planned, bins carrying a week’s worth of last-minute dumps, and categories once tidy drifting together by midweek. On fixed shelves, the neatness you started with always has an expiration date. The first time you dig for the right shirt or the back can, you trigger a small cascade, leaving the shelf a little messier each time. Resets stretch longer, and “organized” shifts from feeling possible to feeling like a lost cause.

    When Your Routine Collides with Fixed Shelving

    Think through any morning in a stacked closet. You reach for a towel, but grabbing one means steadying a pile about to tip. Towels rest on one mountain, sheets balloon in another, and hand towels wedge somewhere in the shadows at the back. By Wednesday, those careful stacks blur—slopes between categories, singles folded on top of the wrong set, and every “quick grab” threatens an avalanche. It’s not that you’re messy; the shelf forces your routines to fit a shape that doesn’t suit how you use the space.

    Every retrieval becomes a micro-obstacle. The deeper you reach, the more likely you’ll set off a silent reshuffling session—especially when you’re in a hurry.

    How Modular Shelving Actually Changes the Game

    Modular shelving breaks that noisy compromise. Shelves adjust to your stuff, not the other way around. Bring a shelf down to stop towels from stacking too tall. Set a new level for that pile of jeans that always wobbles, or carve a lower row for sheet sets so you can finally put them away without battle folding them to fit. Instead of one forced configuration, you get clear lanes: every category has its own space, shaped for what you put there.

    The real upgrade? Stability with less effort: you grab a towel without disturbing the rest. Separate shelf levels mean stacks don’t lean, bins don’t mix, and you’re not stuck refolding half a closet just to reclaim order. When a season’s needs shift—from sweaters to swimwear, or school lunch snacks to baking flour—just realign the shelf. It takes minutes, not an afternoon overhaul.

    Access Without the “Jenga” Moves

    On fixed shelves, grabbing something halfway down means a one-handed balance act. You brace the tower, dig for your target, then spend an extra minute rebuilding what you disturbed. Modular shelving turns that chaos into a single-motion reach: set stack heights and section widths so nothing has to give, and pulling out an item is as simple as sliding it free—no collapse, no side shuffles. Just as important: putting things back is straightforward. No more cramming towels onto a teetering heap or guessing which bin is safe to nudge open.

    What Looks Neat Can Still Work Against You

    Baskets lined on a deep shelf, or bins packed tightly, show well for a photo or a calm Sunday reset. But daily use exposes the flaws—overflow items crammed wherever there’s space, lids left off bins too hard to reach, and “just for now” placements that gradually unhinge any system. Fixed shelves ask you to stack higher or push occasional-use items farther out of sight, so your “quick grab” becomes a frustrating, slow puzzle more often than you’d admit.

    Modular shelving answers with shorter stacks and tighter borders: no spreading piles, no mixed-up baskets, just clear separations that last. It’s not about containing clutter so much as preventing its constant return—when every item actually fits its space, there’s simply less room for mess to spread.

    Scenes from a Real Closet Reset

    I spent too long rebuilding the same towel stacks on a shelf so deep and tall that nothing ever stayed tidy for more than a few days. Moving to modular shelves, I set a limit—nine inches high, nothing more. Suddenly, each towel came out and went back in without a topple. The edges stayed neat, towers didn’t sag, and I stopped budgeting Saturday mornings for re-folding and re-sorting. The most telling part isn’t that a shelf looks tidy for a photo. It’s that—after a week of hasty mornings and late-night drop-offs—you can restore that order in little more than a minute, not with the exhausting resets that fixed shelving demands.

    Modular shelving turns an endless battle for order into an occasional, near-effortless touch-up.

    Spot the Subtle Signs of Storage Friction

    If you find yourself pausing before pulling out a plate, rebalancing a pile of jeans to reach one t-shirt, or shimming bins in a closet every few days, you’re managing friction—not organization. Watch out for bins filled with a mixture of categories, stacks that tip after two uses, or the familiar two-hand pull. These are the red flags that your storage isn’t working for you—it’s quietly doubling your effort in ways you notice most on rushed or tired days.

    Actual Adjustability or Just Marketing?

    Not every “modular” shelf truly adapts to your needs. Some systems promise flexibility but only let you move shelves an inch or two—barely enough to matter when piles still outgrow their spots. Before committing, check that you can set shelf heights exactly where you need them. Genuine modularity means being able to convert a closet, pantry, or mudroom section in minutes, not facing the same overcrowded shelves every season.

    The Difference That Lasts Beyond One Clean Day

    The real reward isn’t a space that’s only photo-ready after a four-hour reset. It’s a closet, pantry, or laundry shelf that stays usable—where you know what’s where, categories don’t slip, and a five-minute pickup on Friday actually restores the whole system. When stacks aren’t forced too tall and every item has an obvious landing zone, the slow spread of clutter—and the dread of “organizing day”—finally fades. It isn’t perfection, but it’s daily, lasting clarity.

    Find shelving, closet systems, and practical storage tools that fit daily life at ClosetWorks.

  • Why Your Storage Setup Looks Good but Slows You Down Over Time

    The day after you finish organizing a garage, workshop, or backroom, it feels like you’ve finally cracked the code: bins stacked neat, carts pushed flush, cabinets squared to the wall, nothing out of place. But give it one real week. Suddenly, the cart that’s supposed to tuck neatly under the bench always juts out just enough to block your stride, the edge of a cabinet becomes a repeat bruise on your hip, and a supposedly “clear” floor sprouts clusters of gear—stuff marooned in limbo because there’s no fast, obvious place for it. In the rush of real use, the optimism of an “organized” space collides with the friction points you didn’t see until you actually lived with them.

    Looks Right, But Works Wrong: The Setup Disconnect

    Most storage plans impress in the planning phase or that first fresh photo. Labeled zones. Uniform rows. All the standard “rules” apparently followed. But reality rewrites those rules by the third full round of unloading groceries, digging for a missing tool, or cleaning up after a weekend project. What was a “logical” arrangement on paper starts to show its flaws in the flow:

    • You roll out the tool chest for access, then sidestep it again in the middle of the lane because it never quite slots back without effort.
    • That deep cabinet alongside the doorway—great for storage, but you keep catching the handle every time you swing past with an armful.
    • Bins are stacked to save space, but once they’re two-high, the bottom one rarely gets put away properly. “I’ll fix it later,” you promise—again.
    • The back corner by the utility shelf becomes the designated overflow, with stray bags or boxes collecting until you force yourself to clear it out.

    Organization isn’t a one-time act—it’s a living system. If you find yourself hesitating, slowing down, or skirting obstacles more as the week goes on, it’s a signal: your layout doesn’t match your actual patterns of movement and return.

    The Nagging Friction of Everyday Reset

    In real setups, tiny barriers add up quickly. Each moment you nudge a cart, slide a bin aside, or juggle two tools just to reach the third, the “organized” feel gives way to a cluttered routine:

    • Oversized carts or mobile units that sounded versatile in theory, but in practice always seem to land where you need to walk, or block a door’s full swing. You start walking the long way—just to avoid another micro-battle with a misplaced handle.
    • Wall panels crowded with hooks seem space-efficient, but grabbing that one wrench always means untangling a couple of hammers, or risking a rattle-and-crash as handles snag each other.
    • Baskets and modular bins, bought to tidy up, become unstable piles—the top layer gets emptied easily, but the lower bin becomes a black hole for half-finished jobs.

    Clutter never comes in as a tidal wave—it creeps in, the sum of daily detours and delayed returns. By Friday, the quick reset you promised yourself takes twice as long, and “for now” piles start to claim permanent territory.

    When “Organized” Layouts Get in the Way

    There’s a difference between “looks organized” and “actually fuels the routine.” It becomes clear after any burst of real work:

    • The chest you aligned tightly on install now floats an inch out from the wall—always in just the wrong spot, always getting nudged but never really fixed.
    • Baskets positioned for efficiency collect overflow when their groupings stop matching project realities. Their system stays pristine in theory but fails in rhythm.
    • The deep utility shelf’s back edge becomes a blind spot that collects gear nobody remembers until the season changes.

    Any time you’re juggling two objects to put one away, or go through the same awkward shuffle just to clear a walking path, it’s clear: the layout isn’t failing because it’s messy, but because it puts friction where your actual flow demands clarity.

    Subtle Tweaks, Genuine Improvements

    The best upgrades often aren’t dramatic—they’re surgical. Swapping a too-wide cart for a narrower one instantly frees up the main lane. Shifting a pegboard just six inches can eliminate the unnecessary corner-turn that made every reset awkward. Breaking up an overloaded bin cluster into visible, easily grabbed groupings can keep the return routine almost automatic, no second thoughts or extra shuffling required.

    If you find yourself always pushing something aside or working around the same obstruction, identify it and try a small, focused change. You don’t usually need more storage; you need storage that stays out of your way—letting you move fast, put things back as you move, and avoid “for now” piles altogether.

    Test Before You Commit: The Real-World Litmus

    Before settling on a new position or layout, run through your typical end-of-day reset. If anything—even by a single step—interrupts your flow, nudge the unit or reposition the panel and try again. Over a month, each tiny reduction in friction compounds, making it less likely for clutter to sneak back in and far easier to keep the whole area genuinely usable, week after week.

    When “Finished” Actually Means “Effortless”

    In the end, the storage system that works isn’t the one you admire; it’s the one you never really notice. If resetting, clearing a pathway, or grabbing the gear you need fades into background habit—no shuffling, no detours, no second thoughts—that’s when your arrangement has clicked. The payoff isn’t just a neater space. It’s reclaiming your workflow, project after project, with less setup and less cleanup slowing you down.

    The systems you stop thinking about are the ones that work best. Give your setup a few weeks. If your mind is on the work—not the storage—you’ll know you’ve crossed that line from “organized” to genuinely functional.

    Find practical, real-world storage solutions at StackNest.

  • Ensuring Precise Drill Bit Alignment for Accurate Straight Holes

    Anyone who’s drilled more than a few holes knows the moment when things start to slip: chips spit sideways, the bit wobbles in your grip, or a line of holes starts out straight but veers off—just enough to throw the whole thing out of whack. Misalignment sneaks up fast. A millimeter off at the start, and by the end, assembly feels more like covering up mistakes than building something real.

    How Slight Misalignment Derails Real-World Work

    Whether you’re laying out shelf pins along a kitchen wall, sinking fasteners through plywood, or adding joinery to a stubborn hardwood frame, the pressure is always there—get the hole right, or get ready to fix it later. Rushing setup to save time feels natural. Trust your hands, sight a rough mark, and go. But every missed alignment costs you more down the line. That tiny first slip leads to the next hole drifting; the project starts folding in on itself with each new pass.

    Each mistake gets harder to hide. Suddenly you’re spending as much time patching holes and shaving edges as you are drilling. Hardware resists. Pins snag or rattle. A clean row becomes a headache, and work that should be dialed-in now feels clumsy and slow. Alignment isn’t cosmetic—it shapes how the whole assembly feels under your hands.

    “Looks Fine” Is a Trap: Why Quick Visual Checks Fail

    Glancing over bits on the workbench, they all seem the same—sharp, clean, ready. You line up out of habit, squeeze the trigger, and expect the best. But the bit tells the truth. When aligned, it cuts forward with a steady hum—no hop, no roughness. Let the angle wander? You’ll know it: the drill chatters, the surface fights back, dust clouds up unevenly, and the tool seems to veer on its own. Veneer lifts, the face chips, and you can literally feel the bit strain against the wood.

    Every weird vibration or lopsided chip is a warning. That’s the signal things are off and the row you’re drilling is about to cost you. Ignore it, and no clamp or filler will make up for it at assembly. The line between crisp work and a patch job is often decided long before sanding or finishing—sometimes in the first ten seconds at the drill press.

    When Alignment Costs You: Scenes From Real Work

    Think about mounting shelving in a cramped alcove or retrofitting cabinets for new hardware. You hit the first hole just a hair off—doesn’t matter until the third or fourth, when pilot dimples no longer line up. Then the problems multiply: shelves tip, doors bind, fasteners only half-engage, brackets sit proud or float. Suddenly, nothing fits together without backtracking—more drilling, more sanding, more filler smeared everywhere. The effort spent fixing easily overshadows the time “saved” by skipping careful alignment.

    Across a real jobsite, you see the difference. One worker rushes, chasing measurements and fighting materials. Another builds in slow, precise steps: holes align, hardware drops flush, finished product looks intentional. The contrast is plain. Cutting corners early doesn’t save time—it leaves scars the customer, or even just your own hands, will always feel.

    Pilot Dimples: The Quiet Fix That Changes Everything

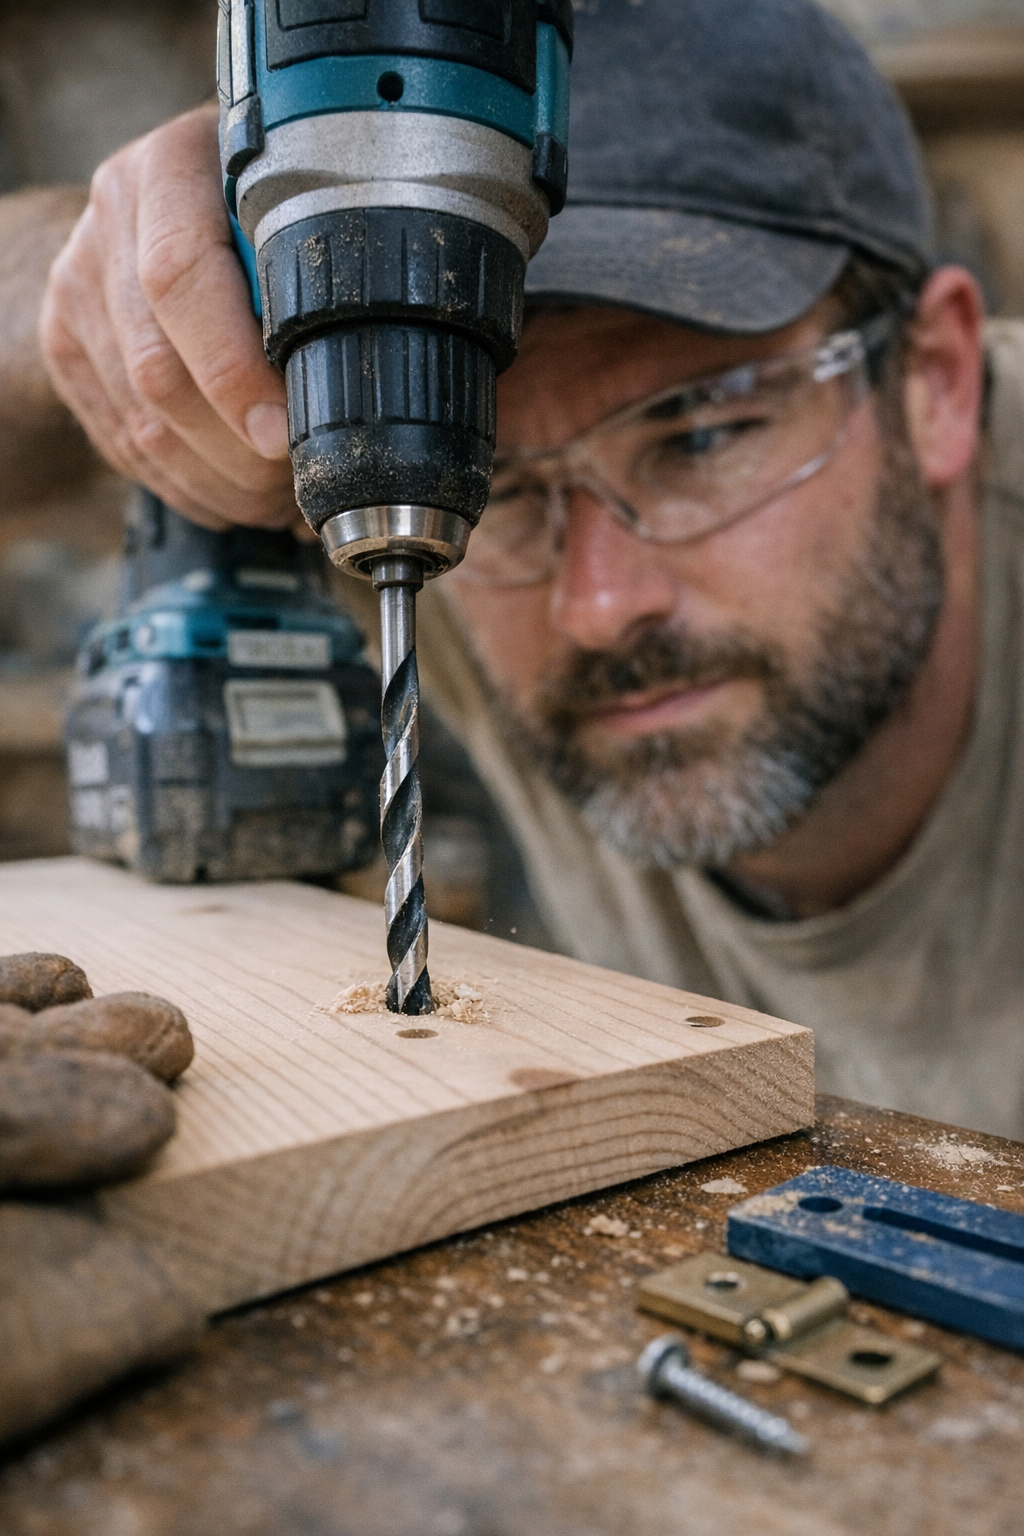
    The small act of making a real, visible pilot dimple—something deep enough to actually seat the bit—turns rough work into something repeatable. It’s not a pencil flick or a dent with a nail, but an actual punch, 1.5 mm or deeper. With a solid guide, the bit anchors instead of skating, and your control shoots up. Set the drill to speed before it touches the work: the initial bite is crisp, the exit clean. You’re not fighting tear-out or side drift—just making steady, reliable progress.

    A shallow dimple is a wasted step. Bits bounce, find the grain, or slide on tough faces—leading to torn edges and a creeping sense of sloppiness. Go a little deeper, and each start is consistent—even late on a twelve-hole row or across tough end grain. It’s a small habit, but it stacks up: cleaner surfaces, less tool wandering, and a smoother build from start to finish.

    A Routine That Actually Works: Lining Up for Success

    Level Your Eyes, Level the Work

    Forget “good enough.” The pros get their eyes right to the plane—checking left-right, up-down, and every possible slant before committing. Hunters for invisible tilt, they don’t press in until the bit sits laser-straight in that pilot mark. It feels deliberate because it is. This isn’t perfectionism for the sake of show; it’s the only way to avoid chasing misalignment through the rest of the project.

    Read Your Tools as You Drill

    Your drill broadcasts every detail: when the pitch shifts, resistance spikes, or chips fly uneven, that’s the clue something’s wrong. Pros stop—not push. They reset instead of muscling through, because filling or enlarging a gone-wrong hole means a softer grip, wasted parts, and a mess. Pausing to reset isn’t lost time; it’s earned precision and half the finish work later.

    Why Repairs Never Add Up to a Clean Build

    A misaligned hole can sometimes be rescued: dowel, filler, or oversize hardware. But it never feels right. The grip isn’t as solid, fasteners give under pressure, and visible patchwork becomes the calling card of every rushed job. The regret is immediate—wishing you’d taken a moment to double-check before drilling. Real shops solve these issues ahead, not after. In practice, prevention saves aggravation, time, and the sharpness of every next step.

    Reliable Drill Bit Alignment: Habits That Stick

    Never skip the mark. Awls, self-centering punches, marking gauges—any method that gives you a solid, visible pilot is non-negotiable. For every repeated hole, a drill guide or simple jig saves sanity. If you feel the drill labor or notice a tighter grip, stop and check the bit itself—dull or chipped bits magnify the risk of drifting off track before you ever touch wood.

    Keep that charger out: low batteries mean dropping torque, and that’s when misalignment goes wild, especially in thicker or denser stock. And every so often, check your chuck tension—if the bit shifts in the grip, no marking can save you. Cutting, sanding, even driving screws—every high-torque task starts with the small, deliberate choices that make the rest of the day easier.

    Alignment Isn’t Glamorous, But It Decides the Outcome

    Alignment doesn’t make a tool flashier or the build faster. But it’s the difference between final assembly that drops together in minutes and endless half-solutions: shimming, shaving, or wondering why that hardware just won’t sit flush. Precision comes from those quiet, routine moments—checking, anchoring, adjusting before you commit. Over the lifetime of a project, those seconds turn into smoother assembly, less fatigue, and a build that holds up in the real world.

    Discover power tools, sharp bits, and work accessories built for shop realities—not just showroom perfection—at Gumboll.

  • Why Simple Storage Solutions Outperform Complex Systems Over Time

    Every new workshop storage setup starts the same way: lined-up bins, fresh wall racks, open floors, and a wave of optimism. Look closer a few weeks later—after two hectic weekends or one unfinished project—and the shine quickly fades. Doors no longer open wide. A rolling cart blocks the aisle, while one high-traffic “return zone” fills up with pile after pile. Forget the clean grid for a moment: does movement feel easier, or are you constantly squeezing, side-stepping, and reworking your path? This is where most systems break down, and where the gap between “looks organized” and “actually works” shows up fast.

    Efficient on Paper, Clumsy in Practice

    Most modular systems seem brilliant at first: customizable racks, slot-in bins, neatly labeled towers. But after a few real cycles—move a toolbox, drag in lumber, return three things at once—the pain points multiply. Pathways narrow with each add-on. That one dead corner always seems to collect junk. Zones that looked smart on a diagram end up causing routines to double back. The evidence isn’t subtle—it’s the daily shuffles, the awkward detours, the feeling that every restock or cleanup is a minor puzzle.

    If you’re reorganizing your route just to live with the storage, it isn’t working. Real efficiency isn’t about how many bins you own. It’s about moving, returning, and resetting with near zero friction—even when the space is busy, messy, or both.

    Why the “Boring” Setup Refuses to Fail

    What keeps working, month after month, isn’t the most customized setup—it’s the one that disappears into your habits. Bare wall shelves. Long, open racks. The old “boring” solutions no one ever brags about. Why do these last? Because nothing asks you to sidestep obstacles, two-hand a container, or decode the right cubby while you’re carrying gear. Instead of offering options, these setups offer consistency: every return is obvious, every path stays open, and nothing blocks your way to a wall or doorway for the sake of looking modular.

    One open shelf along a wall might look plain. But after a dozen rushed cleanups, it’s the spot you trust to always be unblocked, always ready, perfectly suited for both lazy drop-offs and hurried returns—no Tetris required.

    When Over-Organization Stops Helping

    The tighter you try to design every inch, the more you risk crowding yourself out. Nestled zones, sliding compartments, and mobile pods all promise more capacity—but in reality, they often turn core areas into obstacle courses. Each “temporary” drop-off hardens into an overflow pile. Each step for order adds an extra motion tomorrow. Clutter grows not where you’re messy, but where your system expects too much planning while you just want to put things down and move on.

    The pile in the corner? That’s just your setup telling you where returning things feels like work. If the “fastest” path is blocked, your energy for maintenance will drain—until only the least-efficient habits survive.

    Scenes from a Cluttered Saturday

    End of a typical Saturday: you’ve wrapped up, tools in hand, extension cord slung over your arm, gloves tossed in a bag. Doorway’s half-blocked by the rolling cart you shifted earlier to fetch a drill—now it’s back in the wrong place. The wall panel with storage bins is visually perfect, but the front row bins fill up first, so the deeper ones stay virtually untouched. Every trip to put something away has a catch: shift a cart, dodge a half-open cabinet, or pile gear “just for now” where you know it’ll stay all week.

    These aren’t accidents or lapses—they’re the routine friction that accumulates when storage looks engineered but ignores how you actually move. The result: slow resets, doubled-up handling, and the creeping sense that organization has become a second job.

    Simple, Open Setups: Real Relief, Fewer Steps

    The magic of stripping back to basics is felt immediately. Remove the cart. Replace a wall of bins with a straight, sturdy shelf. Suddenly, nothing stands between you and a clean reset. No re-sorting or maneuvering around awkward angles; just drop the tool and move on. The “I’ll deal with it later” pile shrinks—because it’s as easy to return something right away as it is to put it off. Pathways stay open, and so does your willingness to use them.

    The effect isn’t just less clutter. The real win is mental: zero overthinking, zero need to memorize which compartment fits what. Returning is as brainless as pulling something out—and you stop burning time wrestling with your own system.

    When the System Fights Your Routine

    The most honest measure of your setup? Where do you keep “resetting” things that never quite stay fixed? Is the path between your workbench and the wall always a squeeze? Does the rolling rack camp in a high-traffic spot, just so you can close the back door? Does at least one cubby become a dumping ground for anything you don’t have the energy to properly return?

    If these patterns keep popping up, the message is clear: your storage is designed for organization’s sake, not actual use. If every reset takes two steps when it could be one, or if clearing up feels like untangling a mess you just finished sorting, the setup isn’t earning its keep.

    Clear Path, Lasting Utility

    The most resilient storage isn’t the flashiest—it’s whatever leaves your main walls and pathways available so you don’t have to think. The system doesn’t demand precision. There are no “just for now” piles left to deal with because the quickest, laziest return path is also the right one. Instead of managing overflow, you avoid it altogether.

    Over time, these plain arrangements require less and less attention. No need for another storage “refresh.” Just a space that always works, because it’s tuned to movement—not aesthetics or maximum compartment count.

    Practical Moves for Smoother Returns

    Forget how empty it looks—test how it flows at the busiest moments. Position open shelves where you find yourself stopping at the end of a job, not just where there’s spare wall. Notice the tight spots and rearrange before adding containers. If a cart or divider forces a sidestep or makes a pile inevitable, try removing it—and see how cleanup changes.

    If you’re hesitating or rerouting—even once per session— it’s a sign to revise, not add. In storage, simplicity isn’t modesty. It’s speed, clarity, and fewer problems to solve after a long day.

    The best system isn’t the most intricate on day one. It’s the one that never interrupts you, never adds a new obstacle, and always leaves you with enough space to work—no matter how many projects you start (or finish) each month. The clear path is the real mark of a setup that’s built for repeated, real use.

    Explore practical, real-use storage at StackNest

  • Why Modular Units Offer Safer Flexibility for New Storage Systems

    The line between a closet that stays calm and one that quietly breeds aggravation isn’t about how much you own—it’s about whether your storage can bend to the realities of everyday life. You’ve experienced it: that pile of folded clothes you stacked on Sunday sags by Tuesday, the bin meant for gloves slowly fills with tangled charging cords, scarves, and yesterday’s receipts. Every morning, you find yourself moving three things just to reach one, promising you’ll “fix it this weekend”—even though next week will bring new clutter anyway.

    When Fixed Shelves Start to Fail Your Routine

    Every closet starts out as a vision: shelves smooth and empty, baskets perfectly labeled, everything slotted into its “forever” spot. But after a handful of rushed mornings and a couple of extra shopping bags, the order cracks. That fixed shelf, once promising, now groans under the weight of winter boots tossed in hastily. Scarves intended for a single basket blend with hats and a missing mitten. You end up rearranging the same piles—move a backpack to reach a pair of shoes, lift coats to snag your umbrella, disrupt one shelf to get at the bag tucked all the way at the back.

    Instead of a single loud disaster, the breakdown creeps in quietly. Baskets overflow, stacks slouch, categories blur. The space that looked efficient on day one becomes a game of shifting things aside and putting off real resets until they’re unavoidable.

    Why Modular Storage Actually Works Day-to-Day

    Modular units—cubes, adaptable bins, movable dividers—aren’t just about modern style. What matters is flexibility on demand. They step in where fixed systems fail: when your kid brings home muddy cleats, when winter coats suddenly need more room, or when a new hobby kit appears out of nowhere. With modular storage, a crowded bin can move to a lower shelf for easier grabs, or merge with another unit to make room for something bulkier. You’re not locked into your first plan—you react in real time, without a full teardown every single week.

    The Real Price of Permanent Shelving

    Fixed shelves lure you in with a “finished” look. But the reality: every tweak is a chore. Want to reorganize? It’s never a two-minute fix—it’s hauling out every box, dismantling a pile of towels, or accepting that half your accessories will migrate out of view. That weariness builds: why bother resetting categories if you’ll just have to shuffle everything again in a few days?

    Everyday Reality: The Hallway Closet Slide

    The first week after installing crisp new shelves in your hallway closet, it looks like a catalog. By Thursday, boots edge out of line, a lunch bag blocks access to gloves, and that bin for hats devolves into a mix of everything abandoned on the way in. Need boots fast? You’re juggling three bags that all ended up piled in the way. Fixed shelves force you to disrupt any order you try to enforce—so items go wherever there’s a gap, and “sections” become imaginary lines.

    How Modular Units Keep Pace With Real Life

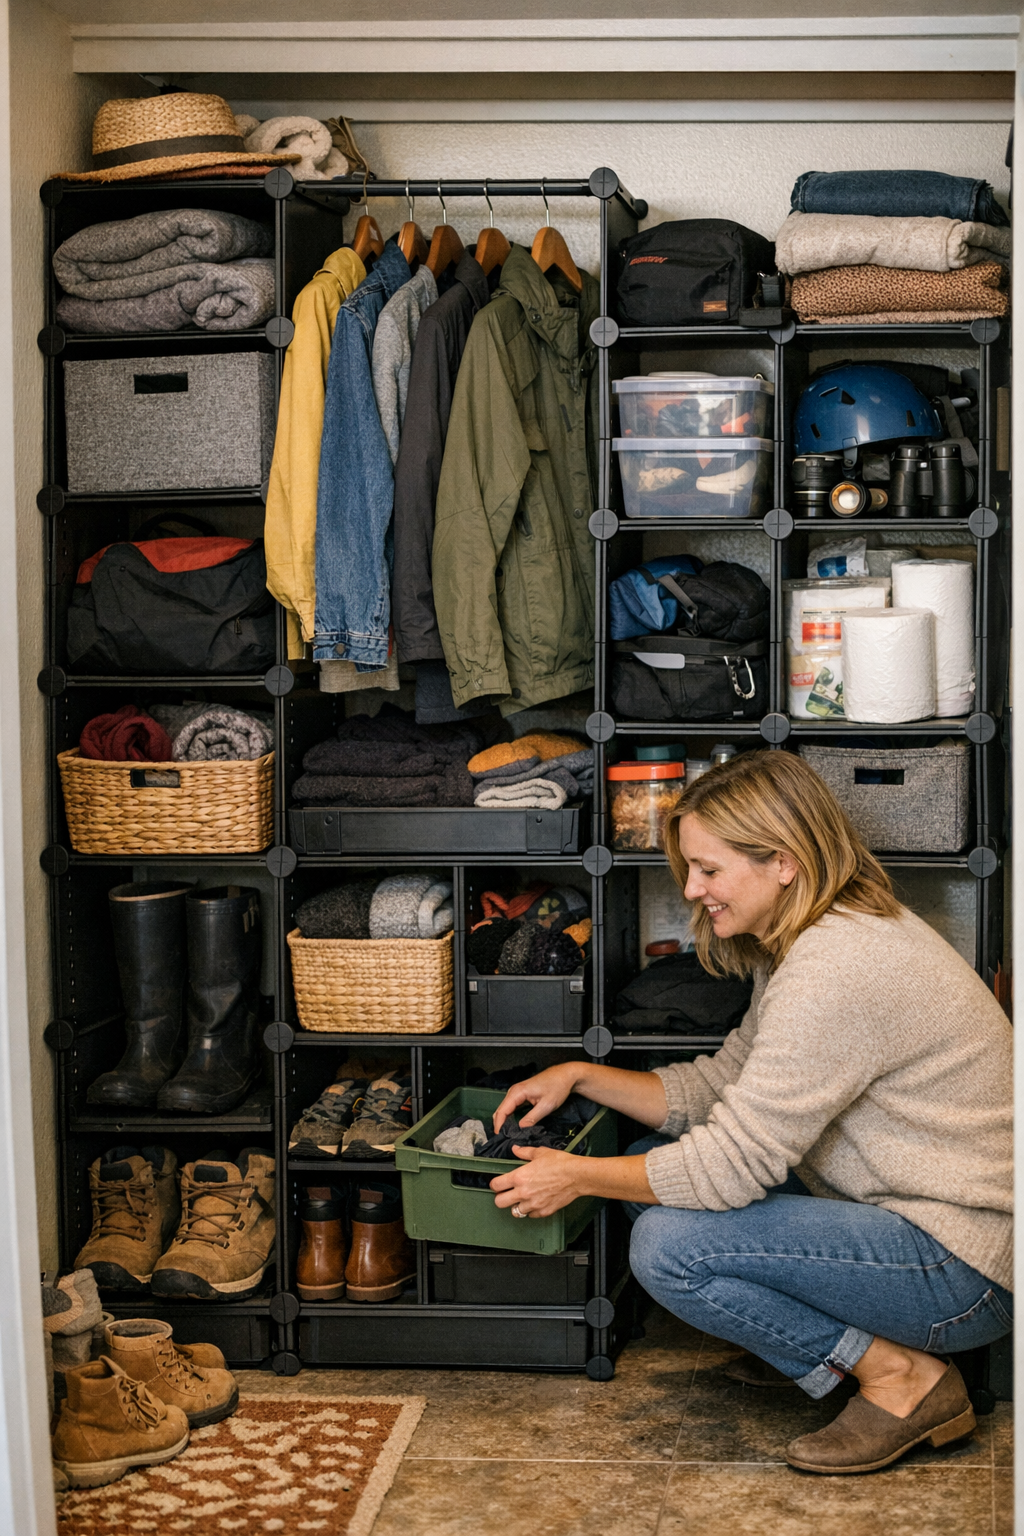
    Picture the same closet with modular cubes and bins—not fixed, but built for rearrangement. Suddenly, the gloves and hats are at kid level, not hidden under last season’s shoes. Soccer season means one bin slides forward for quick cleat access, while bulky jackets simply get more space for a few chilly weeks. When things need to move, you just lift and reposition a cube. No tools. No domino effect.

    After switching from a single long shelf to three-high stacks of modular cubes, everyday resets dropped to under two minutes. No pulling out an armful just to tuck boots away. No hunting for a loose hat buried under a lopsided tower. Each category holds tight to its zone, and a quick change doesn’t unravel your whole system.

    Storage That Shifts When You Do

    Closets are constantly in flux, whether it’s a sudden surge of off-season blankets, a family member’s new hobby, or just the normal chaos of living. The biggest storage regret? Installing a “final” system before you really know your patterns. Modular options let you keep pace with these shifts: stack higher for a growth spurt, split bins when clutter creeps in, pull a unit closer for daily use and push others back in low season. You set the rules as your routine evolves.

    Quick tip: Assign one cube as a loose “inbox”—temporary, random, overflow items land here first, so you spot patterns and prevent small messes from spreading out of control.

    Organized Isn’t Enough—Easy Reset is Everything

    It’s possible to have a closet that looks organized and still trips you up every day. The real test isn’t neatness after a once-a-month deep clean. It’s seeing how well the system rebounds after a normal week of hurried mornings, new groceries, weather changes, and last-minute rummaging. If you’re always reaching past three piles or warning kids not to “mess up the shelf,” your system isn’t helping you—it’s holding you hostage.

    Ultimately, genuine storage improvement means you spend less time fighting your closet and more time seeing what you need, grabbing it fast, and returning things without a ceremony. Look for a setup that serves your life as it is—not a closet that expects your life to fit a rigid plan.

    Shop ClosetWorks for practical modular storage and customizable closet solutions.