Category: Tools & Workshop

  • How Clear Dividers Transform Everyday Storage Into Premium Spaces

    Every closet and entry starts out looking orderly—but daily routines have a way of shredding that order until the baskets and bins meant to “organize” end up hiding a slow, silent mess. Shared spaces are the worst offenders: shoes pushing into backpack zones, scarves curling up with hats, sports gear wedged wherever there’s an inch to spare. That first-day, photo-ready calm rarely survives a single frantic school morning. What works for show rarely works for life.

    Baskets: The Surface Fix That Quickly Falls Apart

    Woven bins line shelves, everything tucked away and labeled. It’s satisfying—but only if no one actually uses it. Give it three busy days and the story changes. Socks land in the shoe bin “just this once,” hats end up buried under reusable bags, and soon a single item buried in the wrong bin is left there, because fishing it out means dumping half a basket onto the floor. The more people use the space, the faster the categories collapse. What felt tidy starts to feel like digging through lost-and-found every time you need something.

    The Quick Unravel: How Order Disappears

    Consider a real entry closet: day one, you have boots in a shoe bin, hats each in their own labeled basket, gloves paired up and visible. But by midweek—after rushed mornings, muddy shoes, surprise detours, and no time to gently sort—a single shelf becomes a tangle. You’re stacking hats on top of shoes, cramming library books next to the pet leash, and pretty soon, just grabbing what you need means shoving stacks aside. The “organized” space turns into a daily shuffle, slower and more annoying with every use.

    Boundaries Over Baskets: Why Clarity Wins

    Open baskets look nice—until you need to find something fast, or put it away without thinking. Spaces with real, physical boundaries—fixed dividers, built-in cubbies, clearly marked shelves—offer something soft-sided bins can’t: clarity that lasts past day one. Instead of hoping family members will police themselves, you give every item a landing zone too obvious to ignore. Shoes have a shelf, not just a pile. Gloves get a slot that never fills with scarves by accident. It’s these simple dividers that quietly enforce habits, preventing chaos from leaking everywhere.

    The Cost of Constant Reshuffling

    Without boundaries, baskets turn into blending grounds. A week in, you’re wrist-deep in mixed-up gear, reaching through a pile just to grab the second mitten, always nudging aside what doesn’t belong. Every reset becomes a full-blown sorting session instead of a two-minute tidy. It isn’t that baskets are bad; it’s that daily use inevitably shuffles them into entropy unless the shape of the storage does the sorting for you.

    Fixed Dividers: What Actually Survives Real Life

    The real stress test for any organizing system isn’t day one—it’s what the closet looks like after five days of use. Fixed cubbies or vertical dividers absorb the strain of routines. When someone tosses the wrong item in the wrong spot, the boundaries keep that mistake from spreading. Even during the busiest weeks, everything still lives in roughly the same spot, and grabbing something is a direct reach, not a scavenger hunt. You reset by moving a single thing, not by restacking or digging.

    Reset Speed: The Hidden Metric

    Picture this: arms full of groceries, dripping umbrella in tow. With baskets, you end up stuffing things “temporarily” wherever they fit, vowing to reorganize later. Later never comes, and the disorder grows. With fixed sections—slots for shoes, a marked hook for umbrellas, a cubby just deep enough for hats—putting something away takes a second, not a sigh. The faster and easier it is to return things, the less likely you’ll face a collapsing system by the week’s end.

    When Neatness Isn’t Enough: Choosing Order That Lasts

    It’s easy to fake order with a few matching containers, but only physical boundaries truly tame clutter. When the closet mirrors your actual routines—with a shelf for each kid’s shoes, a no-skid divider for gym bags, space for “everyday” and “once-in-a-while” gear—your storage survives rush hour and resets almost on autopilot. The energy you used to spend reshuffling baskets or re-folding stacks goes somewhere else. You get a closet that’s more than “presentable”—it’s just plain usable, day in and day out.

    Small Fixes, Noticeable Relief

    You don’t need a renovation—sometimes a strategically-placed divider changes everything. One new shelf gives shoes vertical room to breathe. A slim cubby for mail and keys keeps every morning less frantic. Labels on shelves stop the cycle of “whose gloves are these?” Sharing a closet means you need rules the space itself enforces. Tiny, clear boundaries make resets faster, prevent categories from blending together, and cut clutter before it starts spreading.

    Living the Difference: Storage That Works With You

    The real success isn’t in how perfect things look after a major cleanup, but in the moments where you reach for a bag, a hat, or your sneakers and find them—right where you expect, nothing to move, nothing in the way. It’s when you actually use your space and end the week with the closet still working, not overrun. That’s the mark of a storage system built for your real routines—and it’s the moment you stop managing chaos and start trusting your space to keep up with you.

    Find practical storage solutions built for the way you actually live at ClosetWorks.

  • Recognizing Hidden Wear: Effective Safety Gear Replacement Strategies

    Step onto any active jobsite and you’ll spot PPE that’s walking a thin line—helmets that look spotless but shift the second you tilt up a saw, gloves that “almost” flex but slow your fingers when you reach for a grinder, visors that grew hazy right where you watch for sparks. The real hazard? Not gear that’s falling apart, but protection that quietly loses its edge. One shift, everything feels fine—the next, a slipped grip, a fogged shield, and suddenly your routine’s broken, productivity drops, and you’re one mistake from an injury that should have been avoidable.

    Why Old PPE Lingers—And Sabotages Workflow

    Every fast-paced crew knows the cycle: deadlines stack up, parts start to lag, and last week’s “still good enough” gloves limp into yet another day. If a hard hat doesn’t show cracks, if gloves don’t gape at the seams, it’s tempting to keep them in rotation. But there’s a world of difference between what passes inspection and what stands up to the demands of a twelve-hour overhaul or a marathon sanding session.

    Most PPE doesn’t fail in dramatic ways—it erodes in the smallest moments that matter:

    • Gloves that twist in your palm as you torque a stuck bolt
    • A helmet that shifts off-center while drilling overhead—forcing you to pause, readjust, and burn time
    • Stiff gloves that clench your hand until your fingers fatigue after hours of sanding or fastening
    • A face shield that mists the second you lean over a spinning blade or lose your line of sight to a flaring spark

    This isn’t about dramatic failures—these are the overlooked slips, fumbles, and re-positionings that add risk, slow every cut, and make a simple battery swap suddenly clumsy. It’s usually during hard, late shifts—long runs of drilling, second rounds of cutting through dense board, desperately trying to keep pace—that worn gear finally reveals its limits. And once that performance slides, control and safety start eroding together.

    How Decline Shows Up in Real Work

    The Telltale Signs: Not Just What You See in the Locker

    The breakdown rarely jumps out at lineup. It’s the feel of the task that alerts you, more than what you see on the shelf. You grip a fresh drill bit, and realize your wrist aches more than it should—the “anti-slip” coating on your gloves hardened under sweat and solvent weeks ago. Or you’re hauling MDF onto an overtaxed saw and your helmet jolts loose as you look up, forcing you to pause mid-move, losing time and focus.

    Ask anyone on the tools long enough and the stories pile up: gloves that start sliding when you least expect it; palms that should feel textured but suddenly let go of a fastener; a supposed “secure” helmet that drifts forward every time you change drilling positions or crawl in to change a battery. Everything looks passable at clock-in, until a slip or twist in the thick of the job exposes just how much performance you’ve given up by not swapping gear sooner.

    On the Floor: Gear Failing When You Need It Most

    Picture a team rushing to replace coolant lines before lockout. Gloves that should grip tools now slip out of tired hands, visors are streaked where you need to see tight clearances, helmets don’t stay in place while reaching into low machinery. These gloves aren’t ancient—barely a month in, but hammered by overtime and chemical cleaners. Then, as a worker hefts a valve into place, the grip fails for a split second. Nobody’s injured this time, but you know: visible wear is a poor measure. Under pressure and repetition, protection goes soft long before it looks like it should.

    Building Smarter Routines: PPE That Keeps Pace With the Work

    Use-Based Replacement Beats “Wait-and-See”

    Instead of chasing “better” gear, the smartest shops anchor their safety routines to strict, use-driven replacement cycles. Take gloves: switch them every four months of actual field time, not just when they tear, and label them with a start date so no one’s guessing. Throw a five-second flex test into the weekly tool-up—workers catch stiffness or lost grip before it slows their work or risks a tool fumble. No more guessing: the result is less hand cramping mid-task, fewer dropped drill bits, and smoother, faster battery changes when those long days roll in.

    Hands-On Checks: Real Inspections in Action

    A quick visual once-over in the locker just isn’t enough. Instead, put gear on and actually run your routine: squeeze that helmet, bend those gloves, flick a wrench or snap a blade in and out. If movement feels off, or if a tool twists in your grip, it’s time to swap. The body spots trouble before the eye does—hands feel hidden fatigue, palms sense micro-slips, and headgear pressure tells you more than any checklist.

    Know Your Triggers: When to Retire PPE

    • Flex or Fit Drops: Helmets that shift when you reach up, gloves that stay rigid, visors that won’t sit flush
    • Surface Feels Change: Palms turn slick, shields cloud at eye level, liners flatten in the spots you sweat most
    • Outliving Service Time: Set a clear end-date—no gloves past four months of site work, even if they “look fine”
    • Follow the Manufacturer—Don’t Wait for Disaster: Replace helmets and visors on timeline, not when flaws finally show

    Ignore the “still looks good” trap: Solvent splashes, repeat washings, and dusty hands disguise wear. The only signal that matters is how the gear responds—in the middle of real work, not fresh off the peg.

    When Small Problems Cost Big

    PPE doesn’t quit in one leap—it slips away in slower grip, creeping hand aches, forgotten forehead bruises when gear slips mid-cut. Letting worn gear hang on until it fails means trading small, familiar problems for a bigger one—missed cuts, lost pace, preventable injuries. Spot the wear before it’s obvious—in that fatigue after a day of sanding, the pause when the drill handle just feels wrong—and you’re working safer, sharper, and faster across the board.

    For more on gear that keeps the job moving safely, visit Gumboll.

  • Why Flexible Storage Solutions Outperform Fixed Systems in Small Workspaces

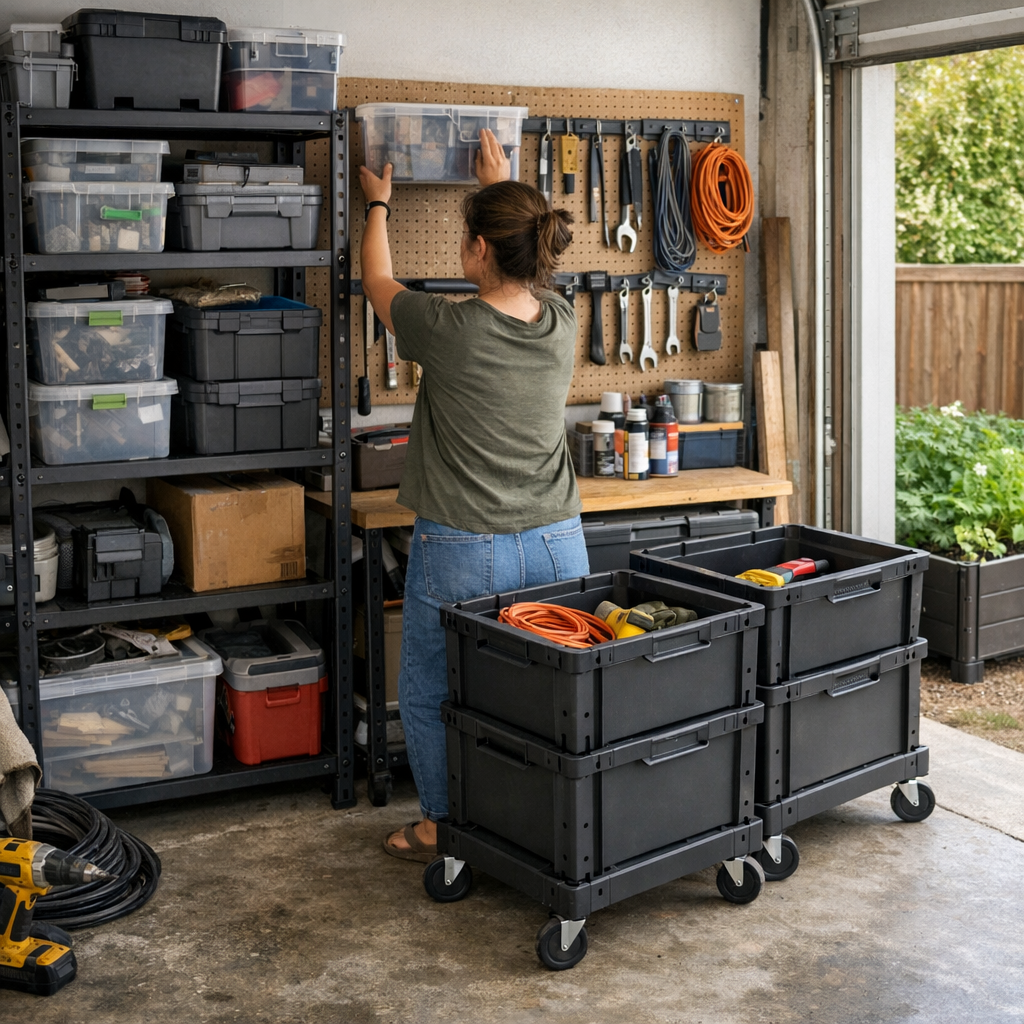
    The real challenge of any garage or workshop setup isn’t making it look organized for a photo—the friction shows up later, after a handful of busy days. Suddenly, you’re inching a cart sideways just to squeeze past the workbench. A bin sits half-blocked by a stray box. The shelf that once looked perfectly aligned is now a catch-all for whatever didn’t have a real home. What starts as “order” quickly slides into an everyday obstacle course, no matter how modular the system claimed to be.

    When Organization Turns Into a Roadblock

    Most problems don’t scream for attention—they creep in with small interruptions. You start the day dodging the same stack of bins left askew in a tight corner, or swinging open a cabinet door only to find yourself twisted, grabbing behind an awkward edge yet again. What felt like ample walkway narrows as tubs creep outside their original lanes. That line of shelving you admired on install day? It’s now collecting every odd-shaped leftover you can’t quite fit anywhere else—becoming less a solution and more a trap for the next round of clutter.

    The underlying issue usually isn’t mess or laziness. It’s a storage plan that looked fine on paper, but quickly fails under the pressure of day-to-day use. Every time you try to put a tool back in its spot—or grab something for a new job—you bump into the same friction points. Rigid layouts that can’t shift with your routine breed dead zones and force you to repeat the same awkward maneuvers all week long.

    Modular Ambitions, Real-World Failures

    True flexibility isn’t just swapping shelves or rotating which bin goes where. It’s about the entire setup falling in line with how you actually work—especially when stuff tends to move, projects overlap, or you rush to clean up after a long day. On a hectic morning, a fixed wall unit becomes a hard stop, blocking flow and choking corners with overflow. Rolling bins or pegboards can work—if they’re set up with actual movement in mind—smoothing out resets and making it easy to see and reach what you need without shuffling the rest.

    But “mobile” brings its own issues if you’re not careful. A cart with no assigned spot quickly becomes a blockade, parked wherever you last finished up. Modular components that roam aimlessly end up as clutter, piling into already-tight walkways. Flexibility that isn’t anchored to your real routes and habits only trades one kind of mess for another—just with newer gear.

    Real Example: The Overflow Magnet Shelf

    It’s the same story again and again: one deep shelf morphs from extra storage into the unofficial dumping ground. Within a week, it’s swallowing gloves, zip ties, half-finished projects, all just out of sight—but way too close to the area you need clear for tomorrow’s task. You dig a little deeper every time, pull things out, but getting them back tidily feels harder after each use. The “system” hasn’t really failed, but it never flexes to help—making every return cycle clunkier than the last.

    Why Fast Resets Matter

    The biggest win with mobile storage isn’t just rearranging bins—it’s restoring actual flow with minimal fuss. Picture that wall shelf you’ve hated: attach casters, and suddenly you can roll it aside to stash awkward items, then tuck it back and reclaim valuable walkway. No more blocked pivot points or awkward lifting to reach what’s behind. Fast resets mean clearing jammed paths without emptying half the space for every reshuffle. It’s not about “maxing out” every square foot; it’s about keeping the crucial walkways and work zones usable with the least effort possible.

    This kind of efficiency isn’t just cosmetic. When cleaning up or shifting projects takes less time—and fewer awkward moves—the space feels lighter. You spend less energy battling your setup and more time actually working. That’s what separates a functional workshop or garage from a static storage room with occasional access.

    Quick Audit: Where Is Your Setup Getting in the Way?

    Does the same cart get nudged out of the path multiple times a day? Is there a recurring moment you hesitate before putting something away because it means hunting for a buried bin? Those aren’t one-off annoyances—they’re signs your storage arrangement isn’t keeping up. The so-called “system” is resisting the daily rhythm, piling up micro-friction you feel more each week.

    Planning Beats “Just Modular”

    A major pitfall: assuming “modular” means the work is done. Wheels and customizable shelving can’t fix a lack of basic structure. A mobile battery rack with no clear dock will drift and clog your workspace. A rolling chest left in the middle of the room (because putting it away means unloading two other things) just creates a new bottleneck. Real improvement only shows up when your storage has mapped parking spots, obvious reset zones, and—just as importantly—a routine that enforces using them.

    An unlabeled, drifting “flexible” setup may look fine at a glance. But watch how you move at the end of a long day: if you’re backtracking to return tools or gingerly stepping around a bin jammed in the path, the weak spots are winning. Each delay is a silent drain on the whole setup’s promise.

    A practical shortcut: At peak use—when the garage or shop is busiest—do a “friction walk.” Where do bins collect or carts pile up? Where do you automatically slow down or sidestep? Flag those spots as top priority for anchoring mobile solutions—with obvious, logical parking built in.

    Daily Use Reveals the Truth

    First-day photos mean nothing after a full cycle of loading, moving, and repeat use. Real setups shine under everyday pressure: when marked zones make resets quick, and you’re not detouring around stranded carts or guessing where overflow should land. Wall and floor plans that focus on clear paths and flexible, assigned drop zones outlast any “fitted” system that can’t cope with late-night returns or new projects.

    The difference is obvious in practice: a setup that looks organized but still interrupts your movement, or one where you actually glide from job to job, knowing exactly where every tool and box lands on a busy week. When adaptability and zone planning come together, the workshop or garage space finally starts working with you—not against you—as the routines change and projects keep rolling in.

    See how StackNest modular storage can help you set up for real-life use at stacknest.myshopify.com.

  • Choosing Between Shelf Baskets and Open Shelves for a Functional Pantry

    Open-shelf order is always temporary. A freshly organized pantry almost dares you to disturb it—crisp lines, everything visible, each category in its place. But real life rips through any system that relies on “just put it back where it goes.” By Wednesday, good intentions are buried under the chaos of daily use: you’re stretching around a leaning cereal box to grab pasta, fishing for snack bars behind collapsing chip bags, and stacking backup cans wherever there’s a gap. The divide between “baking,” “breakfast,” and “dinner” becomes blurred until you’re staring at a shelf that’s familiar, but not functional.

    Open Shelves: The Fast Road to Shelf-Crowded Frustration

    The fantasy is clear sightlines—no digging, just grab and go. But open shelves in busy kitchens or closets rarely deliver that promise for long. A shelf that starts the week neat and inviting becomes a battleground of sliding bags and toppling stacks. You reach for a jar at the back, and suddenly three snack packets spill forward. Small items—tea bags, seasoning packets, twist-ties—begin inching into every “empty” space, making every next reach riskier and messier.

    Resets only get slower. After a big grocery trip, you’re not simply topping off categories—you’re moving piles and reshuffling stacks just to fit new stuff in. Soon, the system adapts to your schedule: when rush wins out, “just stick it anywhere” becomes the rule, and you stop trusting the shelf to behave. The more open the shelf, the faster it loses its structure.

    Shelf Baskets: Structure Where You Need It Most

    Baskets don’t just gather loose items—they impose needed boundaries that open shelves can’t enforce. Assigning a basket to snacks, to pasta, or to bottles keeps everything from drifting until the lines between categories disappear. That physical barrier may feel less “open concept” but makes the shelf sturdier under repeated use: snacks don’t spill into condiments, and oversized jars don’t swallow the breakfast shelf by Thursday.

    Midweek Shelf Stress, Solved

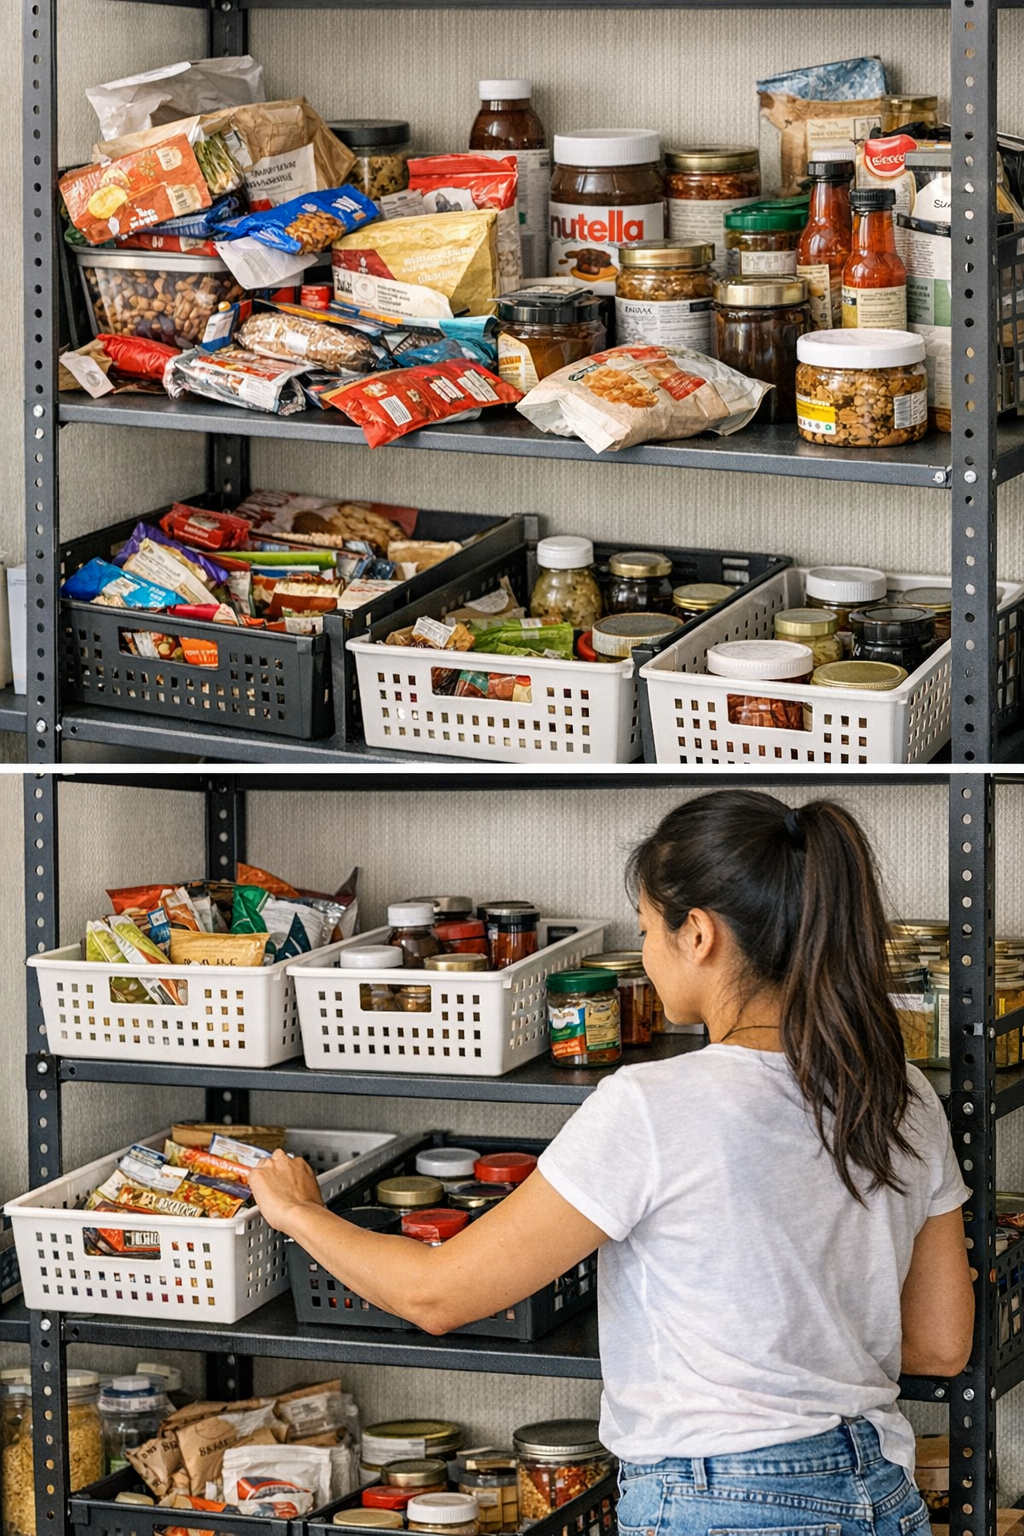
    Visualize the actual mess: foil-wrapped bars strewn beside collapsing bread, condiment packs stuck in oatmeals, everything askew. Now, slip in solid-sided bins: one for bars, a second for bread, a third for loose packets. Suddenly, you’re not dodging piles—you’re pulling a basket, grabbing what you need, returning the rest untouched. Packets stay together, no food lost in the back, and putting away a new box of crackers feels like a single smooth step, not a shelf-wide reshuffle. The shelf lasts through the week, lines hold, and resets feel manageable again.

    Why Category Boundaries Prevent Chaos

    Shelves with no boundaries breed mess. The challenge isn’t limited to pantries. Look at an entryway cubby: shoes migrate into bag territory, hats drape over mail, and each “zone” dissolves as things pile up. The same in the laundry room, where stray bottles and single socks roll from shelf to shelf. Introducing baskets puts walls between the categories that need to stay separate—for hoodies and hats, for sports gear, for those bottles that otherwise threaten to roll into the mop bucket. Awkward-shaped or round items finally have a “zone” instead of looming on a tilt into the next pile.

    Faster, Less Painful Shelf Resets

    The cost of losing boundaries is measured in wasted time and repeated frustration. Without baskets, you’re constantly restacking, shifting one stack to save another, rescuing tiny packets from under big jars. Baskets change the workflow: pull out, restock, slide back, all at once. The shelf resets in a single move, not five. The difference isn’t about looking neater—it’s about shaving minutes off the process, every single week.

    Balancing Visibility and Real Access

    It’s tempting to want every item visible, but a scattering of “see everything” means handling more chaos, not less. Clear or mesh bins work perfectly for snacks, small packets, or anything you need at a glance. Use these where grab-and-go speed matters—packing up lunches, prepping after work. Opaque, deeper baskets can hide bulk extras and backup supplies you check less often. Especially on high shelves, baskets save you from blind fishing: instead of reaching behind a row of bottles, you grab the basket and everything comes with it—no more awkward one-handed rescues.

    Beyond Pantries: The Open-Shelf Challenge Everywhere

    It’s not just a pantry problem. Anywhere you trust an open shelf to maintain order—closet sections, laundry rooms, wide entryway cubbies—the same drift happens. Shoes collect in entry corners, folded stacks lose their shape after a few days of quick grabs, and cleaning supplies scatter after just one shopping trip. Decorative baskets aren’t the answer—functional categories are. A shelf system that survives the week is one that expects the repeated, careless chaos of everyday life and has boundaries strong enough to push back.

    Details That Strengthen Shelf Systems

    • Pick mid-depth baskets—deep enough to contain, shallow enough to see inside and slide out quickly.
    • Label for real-life use—not just “pasta” or “cans,” but “lunch prep” or “quick snacks” so family knows what goes where and random stashing slows down.
    • Save opaque bins for rare-use or backup items—everyday categories belong in containers where you can confirm the contents in a flash.

    What Actually Makes Storage Useful?

    The best storage isn’t about picture-perfect stillness after a big reset—it’s about surviving weeks of real use without dissolving into a free-for-all. Open shelves only work if you’re willing to constantly rearrange. Baskets and dividers give categories a fighting chance, catch the stuff that naturally migrates, and mean you spend less time correcting the same shelf mistakes over and over. If your shelves keep losing shape within days, it’s the structure, not you, that needs fixing. Add barriers and boundaries that actually work for your routine—your future self will spend less time cleaning and more time just getting what you need, fast.

    Shop practical storage solutions at ClosetWorks

  • How Isolation Pads Cut Compressor Noise and Improve Workshop Precision

    If you’ve spent any real time on a shop floor, you know the dull pulse of an air compressor isn’t just background noise. At first, it fades beneath the shriek of saws or the punch of a brad nailer. But by midday—after hours of trimming, fastening, and sanding—the throb turns intrusive. It creeps through the concrete, shakes your bench when the compressor cycles, and before you realize it, small details start to slip: that mitre line never quite closes, dust drifts back across a finish you just wiped, and glued joints quietly shift out of square the moment you reach for a clamp. What’s behind these tiny headaches? Nine times out of ten, it’s the stubborn, silent transfer of vibration every time the compressor kicks on—especially if it’s planted bare on concrete instead of padded feet.

    How Compressor Vibration Disrupts Real Work

    The trouble doesn’t stop at the compressor. With every cycle, vibration radiates straight into the floor slab. If your compressor is unpadded, that steady pulse travels out and upwards—straight into benches, tool stands, and assembly tables. Over a typical shift, those invisible tremors multiply. They shake clamps just enough to loosen alignment, coax fine dust from cracks into wet finishes, and force you to recut a board because your stop block shimmied while drilling for hardware. The difference isn’t dramatic, but it’s everywhere—just enough to slow you down and nudge jobs off track.

    While a hammer drop or router startup is obvious, compressor vibration is the slow leak in shop accuracy. One pass, maybe it’s harmless. But when you’re cutting a dozen cabinet rails, mortising for hinges, or batch-sanding trim, the margin for error shrinks—and suddenly you’re chasing problems that shouldn’t exist. Out-of-square assemblies, hinge holes drifting just off mark, joints that won’t pull tight and hold. That persistent “just barely” wrongness eats at both precision and patience.

    Isolation Pads: The Quick Fix That Holds Your Accuracy

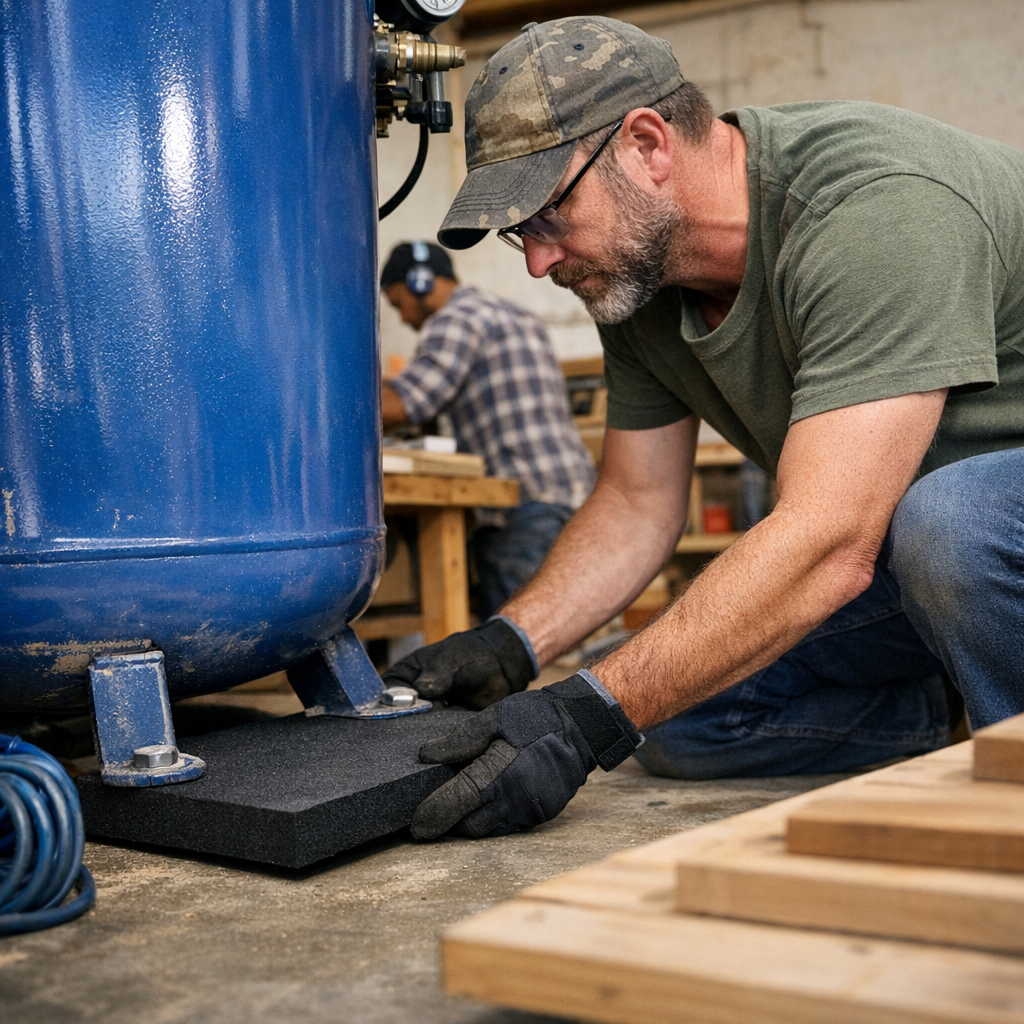
    Most shops treat compressor pads as an afterthought—until the work starts to suffer. Dense neoprene or heavy-duty rubber pads, properly placed, do more than just make the shop a touch quieter. They block much of the vibration at the source, guarding your bench and your work from the compounding, invisible shake. The difference is measured not in decibels, but in boards that don’t need recutting and finishes that don’t need a second pass.

    Real Example: Compounding Problems in a Fast Shop

    Take a typical Wednesday in a busy trim shop: cabinet doors lined up for glue, clamps closing in, and the compressor whirring to life every few minutes as drivers fire. Things look smooth—until you spot one door frame just slightly out of line and dust sticking to a finish you know you wiped. So you tighten clamps, re-square the frames, brush, and vacuum again. Next cycle, the dance repeats. What changed? In this case, cheap closed-cell foam pads under the compressor feet were already mashed flat and useless. Swapping them for 15mm neoprene pads stopped the micro-shake instantly. Suddenly, clamps gripped tight, frames stayed flush, and that finish went on smooth. The tools did their job; this time, the setup let them.

    Where Pads Solve the Most Headaches

    Not every tool is sensitive to a shaking slab, but when it matters—it really matters. You’ll spot the payoff (or feel the frustration) in these routine jobs:

    • Sanding and finishing work: Table vibration shakes grit loose, ruining a just-laid coat and forcing you to sand and refinish the patch—again.
    • Precision drilling: Micro-movement shifts jigs, nudging holes out of true. Just a millimeter off is enough to ruin hardware alignment in doors or cabinetry.
    • Long glue-ups and clamping: Persistent low-level shake pushes boards just out of plan, leading to open seams or edges that require extra sanding and adjustment post-clamp.
    • Fastening and assembly: Repeat vibration ramps up fatigue and makes it tough to keep nails, screws, or pocket holes perfectly flush—especially over a run of pieces.

    Let the unseen vibration slip back in, and you’ll feel it in wasted material, double-checks, and tool fatigue—not to mention the slow drag on morale by late afternoon.

    Material Matters: The Downside of Makeshift Padding

    It’s tempting to reach for that foam scrap or flattened packing rubber under the bench. But these fixes fail fast—compressing into uselessness and letting vibration return before you know it. You’re stuck thinking you’ve solved the problem, but the accuracy issues sneak back in anyway.

    Quality pads—thick neoprene, specialty rubber—spring back and survive repeat compressor cycles for the long haul. That resilience means consistent vibration control, no matter how many times the compressor fires. Each foot should have its own equal, level support; a single thin pad, or one corner that sags, is all it takes for vibration to find its path again.

    Shop-Tested Advice: Watch for Pad Fatigue

    If you find vibration creeping back after a few months, don’t just blame the tool. Get low and check for permanent compression or splits in the pads. Replace as soon as you spot it—results are immediate, with sharper cuts, steadier glue-ups, and smoother sanding from the first job on.

    Skipping Pads? Know When It’s Safe—and When It’s Not

    If your compressor fires up just for the odd brad nail or the stray tire, you might get away with bare-floor mounting. But as soon as your workflow chains benches, carts, or racks together on the same concrete, that gamble vanishes. Stability is the goal: a work surface that holds all through flush cuts, careful drilling, or a marathon clamping run. When precision matters—like installing hardware in hardwood, setting hinges, or getting face frames perfectly level—the cost of vibration is real, and chasing accuracy after the fact simply wastes time and energy.

    Don’t Let “Almost Right” Turn Into Costly Corrections

    The most common frustration in the shop isn’t the major blowout—it’s the slow bleed of tiny, repeating misses. You shouldn’t have to sand away a rough glue line three times, or re-drill because vibration shifted your template. Yet that’s exactly what creeps up when the setup isn’t stable. Batteries drain, blades dull, hands tire—controlling what you can early means the rest of your workflow stays smooth. Starting with the compressor feet isn’t glamorous, but it protects the effort you pour into each piece. It’s not about perfect conditions, just giving your tools a stable platform to perform at their best—one cycle after another.

    Discover tools and site solutions built for straightforward, repeatable results at Gumboll.

  • Why Prioritizing Shelf Height Improves Garage Organization Efficiency

    The garage was perfect—at least for a day. Shelves set by the level, bins snapped into their assigned places. Everything snapped into its new home, neat as a product photo. But within a week, that hard-won order starts undermining itself. Familiar tools pile up on the bench, a set of screws gets dumped on the cart, and you’re ducking, twisting, or reaching just to grab what you use daily. Suddenly, the setup that felt finished now won’t keep pace with your routine.

    When Looks Win—but Use Loses

    The promise of a modular wall is seductive: crisp lines, nothing out of place, every stud supporting some storage miracle. In reality, though, a layout designed for the empty room almost never survives your first week of full use. Returning the drill case means an awkward crouch to a bin set too low. The shelf set “just so” for visual balance is half a foot out of easy reach, so screws and tape measures accumulate on whatever surface is closest mid-task. Your hands search out shortcuts, and makeshift clusters—cordless tools on stools, hardware on carts—start threatening the whole zone’s flow. That “organized” look becomes an obstacle course the minute you try to work at your pace.

    The Trap of Perfect Grids

    The tighter the grid, the easier it is to create friction that lingers. Lower shelves turn into catch-alls: half-used tubes of caulk, a cracked flashlight, backup fluids, and all the ragtag “later” items. Bins at mid-level—chosen for symmetry—demand constant bending or twisting for basics. Every round of work nudges these annoyances further: dead corners go untouched, a rolling cart keeps drifting just to clear wall access, and you invent more temporary homes for the things you use most. Overflow piles creep in: sandpaper mountains on the bench, random bits tossed on an open cart because putting them away isn’t quick or comfortable.

    Even the act of moving slows. The modular cabinet near the door needs a cart scooted aside before you can reach inside. One awkward shelf cuts off part of your wall zone—a foot of wasted space you can see, but never quite use. These small, repeated inconveniences chip away at the satisfaction of having “everything in its place.”

    Where Friction Builds, Order Breaks

    The real breakdown isn’t overnight—it’s the tenth cycle where each step gets slower. A tool chest must be dragged out just to reach a side drawer. The cabinet that initially looked “flush” now traps your movement, forcing sidesteps or pauses between work areas. You catch yourself organizing the same five tools every evening, not because you’re messy, but because their supposed “home” isn’t where your hands naturally land.

    Resetting takes too long. You hesitate, knowing each cleanup will mean more bending and shuffling. “Order” becomes something you do at the end of the day instead of something that helps you get through it.

    One Real Adjustment Changes Everything

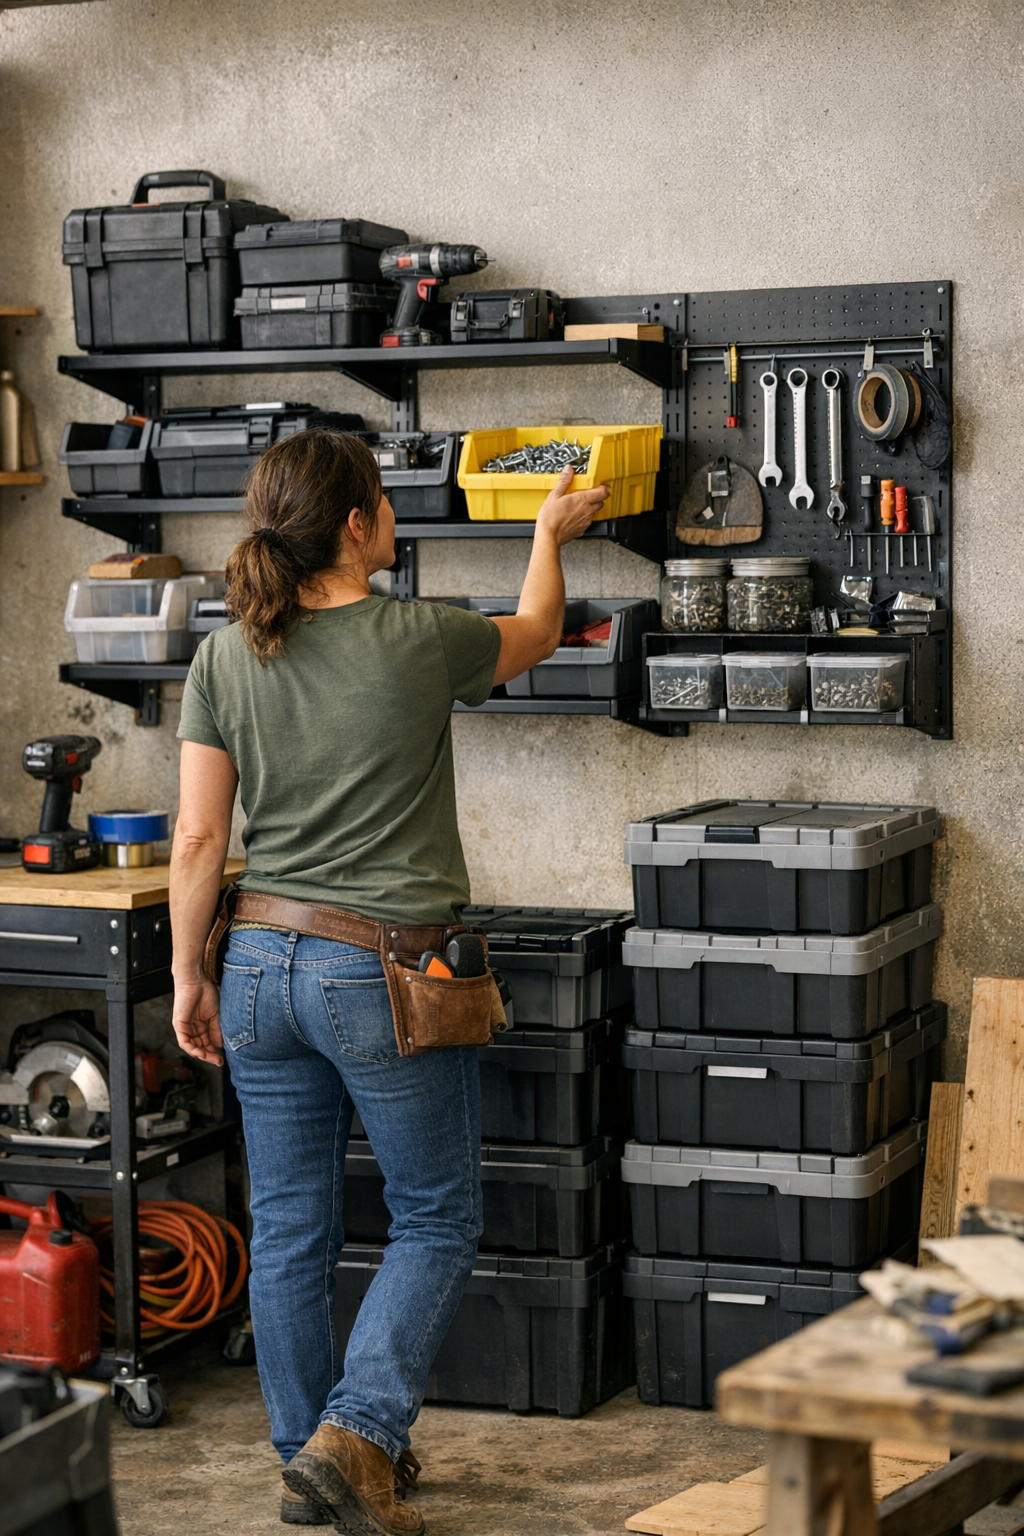
    Try shifting a shelf just six inches higher—or reworking one row of bins so your must-haves sit right between hip and chest height. The shift is subtle, but the result lands hard: drills, bits, and hardware fall into your hand at full arm’s reach. You return tools as you move, instead of staging them for a bigger cleanup later. The system runs at your speed, not against it. Overflow disappears as clutter stays in motion, never lingering on the bench or the path in front of drawers.

    The route between zones almost clears itself. No more rerouting the cart just to reach a bin. Resetting feels less like a ritual and more like a reflex—one less reason to procrastinate putting things back.

    Finding Your True Reach Zone

    Aesthetics fade during actual use—practical reach stands the test. In garages and workspaces, the “zone of least effort” usually sits from hip to chest height (about 34–48 inches up). Bins or shelves below that line gather things you don’t need now—or things you toss “for now.” Anything much higher is only worth using for gear you rarely grab or for lightweight items with no daily urgency.

    Instead of chasing symmetry when laying out your wall, chase routine. Act out your five most common tool grabs. Where does your free hand go? Where does your body turn or pause mid-step? That spot you keep returning to is your true storage zone—everything else can settle in above, below, or out of the way.

    Space That Works—Not Just Space That’s Filled

    It’s tempting to “finish” a wall when it’s empty, spacing everything for the look, not for use. But the moment your setup faces daily tasks, every misplacement exposes itself: a blocked corner when you bring in a ladder, a step stool always within arm’s reach, but in the path. One cart gets too close to the door. Behind a floor bin, a foot-wide dead spot collects dust and forgotten odds and ends.

    Active zones—whether a workbench or an entire garage—should clear as easily as they fill. If you find yourself hesitating to clean up because it means bending or moving things just to restore order, your system is already losing. The more a layout caters to your movement, the more likely it is to stay organized after the twentieth task—not just on setup day.

    If the Reset Is Smooth, the System Lasts

    The best setups feel almost magnetic—it’s easier to put something back than to drop it mid-stride. Tools settle into place as a part of your walk through the area. You roll a cart or twist a chest and everything is instantly accessible, no reshuffling required.

    If the path from “used” to “put away” feels natural, your storage holds up. If not, the overflow builds—until surfaces vanish and the wall grid is just a showpiece above the clutter.

    Spot-Test Your Setup’s Weak Spots

    Think your system’s dialed in? Take ten of your most common items and run through the real routine—return them in sequence, with gloves on or pushing a cart. Where do you pause, reroute, or put something down for “later”? That’s exactly where your arrangement needs a tweak. Sometimes a single shelf move or a cart rolled back by a foot turns frustration into flow.

    The setups that actually last don’t just look tidy—they feel easy, over and over. Build for reach, not appearance, and your space will work with you, not against you, no matter how many times you fill it.

    Find practical storage solutions at StackNest.

  • Why Air Compressor Pressure Stability Matters for Consistent Tool Performance

    Midway through the job, it starts—the subtle resistance, the telltale pause, the first few nails not driving cleanly. You feel it before you see it: a finish nail sits a sliver too proud, your spray gun spits instead of blending, and suddenly you’re second-guessing every cycle. If you rely on an air compressor to drive fasteners, paint, or sand, you know the agony isn’t about flashy specs. The difference between smooth progress and a late-night patch session almost always comes down to pressure stability—how well your compressor keeps up, not just the size of its tank or its top number printed on the side.

    Spec Sheets Can’t Warn You About this Problem

    Specs make shopping look easy. On the shelf, two compressors match up tank for tank, riding the same PSI numbers. But roll them out on-site and let the real work begin—a dozen rounds of trim nailing, stapling under a deadline, or carving through plywood while the garage bakes in the afternoon sun—and that’s when true performance reveals itself.

    Jobs aren’t won on a single blast—they’re lost in the rut of repetition. What the data points miss is the way a compressor holds (or loses) pressure across a string of activations. If your pressure swings wildly—7 to 10 psi between cycles instead of holding close within 2 or 3—it’s not just numbers. Suddenly, fasteners need hammering, you spend time correcting spray sags, and seams that started snug begin to open up. It’s a slow, sneaky tax on both quality and time.

    How Pressure Drift Chips Away at the Workday

    The real trouble never feels explosive. For the first handful of cycles, everything fires smoothly. The gauge is in the sweet spot; you think you’re winning. But hoses warm up, your rhythm quickens, and by cycle twenty the first head sits proud or a cut stalls for a split second. By cycle forty, misfires and half-done seams have you swapping out tools or reaching for sandpaper again.

    What you’re fighting isn’t a dramatic blowout—it’s an incremental drag. Every small pressure drop means fasteners don’t drive flush and need a second hit. Cuts burn or chip out. The spray gun starts spitting, so you double back with fine-grit or filler. The job gets longer while the finish suffers, and you feel it in your hands and your schedule.

    Fastening Under Pressure: A Scene from the Floor

    Picture this: You’re running baseboards through a hallway, knee pads scraping tile, peace shattered by the compressor wheezing to keep up. At first every nail zips in. Then you speed up, and before you know it, the finish gun hesitates. You can feel pressure lag through the trigger—not just noise, but your workflow stumbling. A couple of staples stand proud, the hose is warm to the touch, and now you’re spreading filler and prepping for a round of sanding that never should have been needed. One hallway becomes an hour of extra work, all because pressure slipped at the wrong moment.

    Instability that Wears Tools—and Patience—Thin

    The slow breakdown is the worst kind. It’s not just nailing. During cabinet assembly, drilling repeated pilot holes, or long runs with a sander, hidden pressure swings show up as skipped cuts, torn-out grain, or motors straining to keep up. Spray finishing? That perfect early pass turns unreliable as the pressure dips, making you tip the gun, overspray, or chase patchy coverage. Work overhead and you’ll find drive consistency evaporates—raised nails and missed drills you only notice on teardown.

    Spot the Creeping Signs Early

    Notice yourself waiting for the compressor to catch up? Do you pause after every string of activations, or wonder why some nails bury deep and others won’t set? That’s unstable pressure eroding your control and adding repairs to your list. If you catch that rhythm—adjusting your pace for the machine’s recovery—it’s not just annoying. It’s robbing your efficiency and tiring both you and your tools faster than you realize.

    Quick reality check: If your workflow is bending to fit the compressor’s recovery—not the other way around—the real problem is hiding in plain sight.

    The Real Upgrade: SCFM Where You Need It, When You Need It

    The leap wasn’t swapping up to a bigger tank or chasing the highest possible PSI. The true fix came from finding a compressor that delivered steady, repeatable SCFM at actual working pressure. Compare a 2.6 SCFM machine to one confidently running 4.0 at 90 psi: the difference is felt over fifty uninterrupted cycles. No stubborn fasteners, no tool lag, no patching nail heads. The last cut matches the first, and momentum carries you—not the compressor’s delay.

    When pressure stays rock solid, you spend less time sanding, less time re-drilling, and far less time in post-job cleanup. Tools run brighter, jobs end cleaner, and—maybe most important—you’re less fatigued, both mentally and physically, at the bell.

    Choose with Real-World Work in Mind

    If your day is packed with repeated activations—trim, cabinetry, sanding, drilling—focus on SCFM delivered during runtime, not just in a manual’s boldface. Ask yourself: will this compressor keep pace through twenty, thirty, fifty cycles, or does it sag, forcing you to circle back for rework? Don’t be fooled by top-line stats. Dig for what holds up under true, repeated use.

    One overlooked trick: Gauge pressure not just at the tank, but where it really counts—at your tool, especially during heavy runs. Upgrading to a shorter, higher-quality hose and checking your couplings can squeeze out that last bit of consistency and make tough sequences more manageable.

    The Number One Workshop Bottleneck

    Real shops aren’t perfect. Dust sneaks in. Weather swings. Someone else plugs into your air line. The compressor you trusted for casual weekend jobs staggers on a high-output day or when tool demands overlap. Try dividing your attention between sanding and nailing off a panel with a wheezing tank—you’ll watch momentum vanish quickly.

    Pressure stability doesn’t just smooth out your workflow—it shields you from backtracking, wasted effort, and avoidable fatigue. If you’re spending more time fixing than finishing, that’s the sign: invest in a compressor proven to stay the course, not just make the cut on paper.

    http://gumboll.myshopify.com

  • Why Open Shelves Outperform Stackable Bins for Everyday Storage

    The first glow of a freshly organized closet or utility space fades quickly the moment you need to grab something in a hurry. That crisp stack of closed bins, those neat modular organizers—suddenly, they’re not just décor. They’re the last barrier between you and the one thing you actually need when you’re halfway out the door. In these moments, the difference between open shelves with dividers and closed storage isn’t just about style—it’s about whether your organization holds up against daily life’s clutter and time crunch.

    Where Organization Breaks Down: The Friction of Everyday Reach

    On day one, closed bins and airtight lids offer an illusion of control. Everything lines up, the shelf edges are clear, and it feels—briefly—like you’re in charge. Then real life takes over. You’re rushing for laundry detergent with wet hands, or digging for a winter hat as the temperature drops. That’s when the cracks in closed storage show: to reach that detergent hiding in the middle bin, you end up shuffling stacks, unsealing lids, nudging three other containers aside. The more often you reach, the more chaos creeps in—because that “just one quick grab” turns into a tiny avalanche of displaced items and off-kilter stacks.

    Closed bins are great at hiding clutter, but they’re even better at hiding the things you need most. A new pack of batteries tossed on top. Last week’s receipts wedged behind. A stray cleaning spray balancing on the lid because pulling out the whole bin feels like too much work. Before long, what sits flush and perfect on organizing day becomes a layered puzzle in daily use.

    The Slow Slide: From Picture-Perfect to Unwieldy

    After a handful of real-world retrievals and returns, the shelf loses discipline. Bins once packed by category start to blend. A scarf lands on the cleaning caddy. Batteries migrate into the sewing kit. Folded stacks lean, lids wobble, and overflow crowds the shelf edge—items with no clear home pile up anywhere there’s a gap. You still see order on the surface—stacked bins, closed lids—but every grab-and-go means more silent reshuffling and less actual clarity.

    This slow drift is sneaky. Organization doesn’t implode overnight; it unravels one overlooked shortcut at a time. The warning signs aren’t dramatic but unmistakable: longer rummages, items slipping out of place, and that creeping sense of “I just put this away—why can’t I find it?” It’s not just about tidiness; it’s about speed and certainty when you need to rifle through your own stuff.

    Open Shelves with Dividers: Clarity You Can Hold Onto

    Swapping out closed bins for open shelves with dividers changes the rules of the game—especially in spaces you touch every day. Each item gets a visible “lane.” Gloves have their clean slot. Spray bottles sit upright, no pile balancing required. You see what’s there—nothing burrows down or gets stacked out of reach. If something wanders, you notice and reset before the clutter takes over.

    One-motion grabs matter. Need the lint roller? It’s not an excavation—just reach and go. Returning items is just as foolproof: the shelf itself enforces the boundaries. If a scarf sprawls into the next section, you see it instantly. That visibility doesn’t just keep things tidy; it makes resets automatic and quick, rather than a future chore.

    Real Closets, Real Results: A Week in Use

    Imagine an average week: Monday, you grab a flashlight from a closed bin, toppling a few odd-shaped chargers along the way. Midweek, the shelf’s surface is blocked by bulky grocery bags you dropped in haste—now you can’t slide out the lower bins at all. By Thursday, you’re burrowing for an umbrella, moving everything twice. By the weekend, categories blur, items end up where there’s space, and even a quick grab feels like work.

    With open shelves and dividers, the same week plays out differently: gloves, umbrellas, flashlights—each in sight and reach from the start. Dropping something back is a second-nature reset because the shelf itself tells you when something doesn’t fit or belong. Overflow isn’t invisible; it’s instantly obvious and easily corrected. Day-to-day, minor messes get caught and reset before they seed larger chaos.

    Spotting Storage Friction Before It Slows You Down

    Systems rarely implode, but subtle signals warn you when your storage is fighting back:

    • Endless reshuffling — shifting stacks and opening lids just to reach one thing, or rearranging three bins for a single spray bottle.
    • Category blending — finding hats with cleaning rags, lightbulbs where gloves were supposed to be, and no clear separation between zones.
    • Overflow stacking — items perching on bin lids or creeping across clear spaces, making everything harder to access and more likely to spill over.
    • Loss of visual lanes — overcrowding that blurs where one category ends and another starts. Edges get soft, resets become a bigger job each time.

    These aren’t dramatic breakdowns, but they drag on your time and chip away at the satisfaction of “being organized.” A system that requires workarounds is one you’ll quietly avoid using—or spend too much time fixing.

    Keeping Function Ahead of Appearance

    Make your storage purposeful, not just tidy. Priority items should be visible and within effortless reach. If a bin always needs shifting or a pile always needs rebalancing, consider carving that space into an open lane with a simple divider.

    Spot and solve for repeat clutter spots. Watch for where clutter piles up day after day—entryway shelves, closet bottoms, right inside the door. Open shelves with intentional dividers make these resets nearly mindless, catching drift before it spreads.

    Don’t chase catalog neatness—chase real-life resilience. The goal isn’t a frozen display, but a setup you can trust to recover quickly after a rushed morning or a messy week. A shelf that forgives misfires and invites fast correction will outlast anything that requires “just one more minute” every single time.

    The Real Benchmark: Does Your System Stand Up to Real Life?

    The best organizing setups aren’t the ones that look perfect for a photo—they’re the ones that stay usable when life spins you in a dozen directions. If you can see, reach, and reset your top-use items in seconds, your storage system is working. If you’re tired of reorganizing every few days, consider ditching the high-walled bins for a more open, divided approach. Over time, you’ll notice resets get quicker, things stay where they belong longer, and your shelves signal right away when it’s time to tweak—instead of waiting for another overhaul.

    Your daily space isn’t a display case. Let it breathe and flex with what you actually need, and organization becomes less about fighting clutter—more about making every grab, stow, and reset that much easier.

    http://closetworks.myshopify.com

  • How Elevated Modular Raised Beds Simplify Garden Maintenance Tasks

    The tidy garden layout you planned never quite survives first contact with real use. On setup day, your raised beds line up crisp and clever—neatly boxed, packed edge-to-edge, filling out every corner. For a moment, it feels like you’ve finally outsmarted the mess. But as the weeks grind on, the gap between “looks organized” and “stays workable” opens up fast. Leaf litter piles in unreachable crevices. Cleaning means prodding under edges or wrestling around dead corners. Every small task—pruning, clearing spring debris—turns into a series of awkward reaches, blocked off by the very clusters that promised efficiency. It isn’t long before the garden that felt perfectly packed starts slowing you down at every turn.

    Why Clustered Beds Go From Tidy to Troubled

    The logic behind jamming beds together is simple: less wasted space, more surface to plant, tighter walkways. On paper, you squeeze out efficiency. For the first week or two, maybe that holds. But then soil spills at the edge where beds meet. Water collects in hidden seams, feeding mildew and pests. Weeds pop up from underneath, out of sight and frustratingly out of reach unless you want to shift an entire section. Suddenly:

    • Debris piles at the places you can’t easily sweep
    • Pooled water lingers where you can’t dry it out
    • Roots snake under and between beds, impossible to snip cleanly
    • Every simple clean-up means contorting your arms, moving planters, or leaving corners untouched

    The busy garden starts to drag. The more tightly you pack, the more invisible traps you build in—where grime, rogue foliage, and frustration gather. The clean lines you loved at installation just don’t translate into effortless maintenance.

    The Unavoidable Dead Corner

    Most gardeners know that spot—the one that, by midseason, turns into a graveyard for mud, leaves, and lost tools. I had one: a bed wedged hard against the side wall, impossible to reach behind without uprooting a whole row. Cleaning it meant yanking awkwardly, spilling soil, and disturbing half the plot. So, like most people, I put it off. Weeks later, the familiar pattern set in—mold spreading in the dark, roots punching through cracks, every watering session deepening the mess. Resetting that buried zone stole an entire afternoon, all because the “efficient” layout left zero clearance for normal work.

    That story isn’t unique. Wherever dead corners and hidden seams exist, they turn minor chores into time sinks, creating chronic friction just beneath the surface.

    Spacing and Elevation: The Everyday Game Changer

    Contrast this with a setup where each bed—even by just a few inches—stands apart. Space all around, a modest lift above the ground. Suddenly, every task flows smoother:

    • You sweep from edge to edge without stopping—no more stuck debris
    • Roots and stray soil are visible, reachable, and cleared in one motion
    • Moisture dries where it should, not in hidden moldy pockets
    • Pest nests and weed outbreaks get spotted early—not after they’ve taken hold

    Just a 3–4 inch margin is enough. That gap means your broom slides underneath. Your tool fits those edge zones. Air moves. Overflow has nowhere to hide, so the setup is always a step ahead of the next headache. And when the week gets away from you, a quick sweep resets everything—no disassembly, no drawn-out battles with a dead corner.

    How Small Elevation Yields Big Returns

    Beds raised on simple frames change your routine. Four inches of clearance is enough—not to waste space, but to transform how you interact with every section. You see the weird pocket of compost before it festers. Pull one weed, not twenty. Move through the space, broom in one hand, without awkward reaches or tilting furniture. That subtle gap under each bed isn’t empty—it’s the difference between routine care and a weekend spent recovering from neglect.

    Setup Decisions Shape Daily Rhythm

    The true test for any layout is what happens after a month of real use. Do you reach for a tool and get blocked by a rolling cart, every single time? Is returning gear to its place a smooth flow or a series of stutters around poorly aligned edges? Do busy corners end up collecting every stray root and wrapper, or does the path stay clear and usable?

    Well-designed spacing isn’t just aesthetic; it’s operational. It makes every movement predictable, fast, and repeatable. When beds or shelves are set too tight, they create new obstacles, forcing repeated reshuffling and collecting hidden clutter. When there’s just enough room to see, clean, and move, nothing lingers or blocks your routine. The work fits your actual rhythm, instead of demanding extra workarounds to keep up the illusion of order.

    Small Shifts—Big Relief

    You don’t need to reinvent your whole setup. Even nudging one bed out a few inches, or lifting a section on simple blocks, can transform recurring pain points. Suddenly, the usual trouble spots don’t fill with lost soil or standing water. Reset days shrink from half a Saturday to a routine sweep. The best setups don’t just store and contain—they actively stay out of your way, so you spend less energy on friction and more time enjoying the space.

    For any workspace or growing zone, cramming more in rarely pays off. Instead, make sure every part is accessible, visible, and truly easy to refresh. Your back—and your workflow—will notice the difference the very next week.

    For modular raised bed frames, storage setups, and workshop zones designed to move with your routines instead of blocking them, visit StackNest.

  • Ensuring Precise Rivet Head Alignment During Extended Use

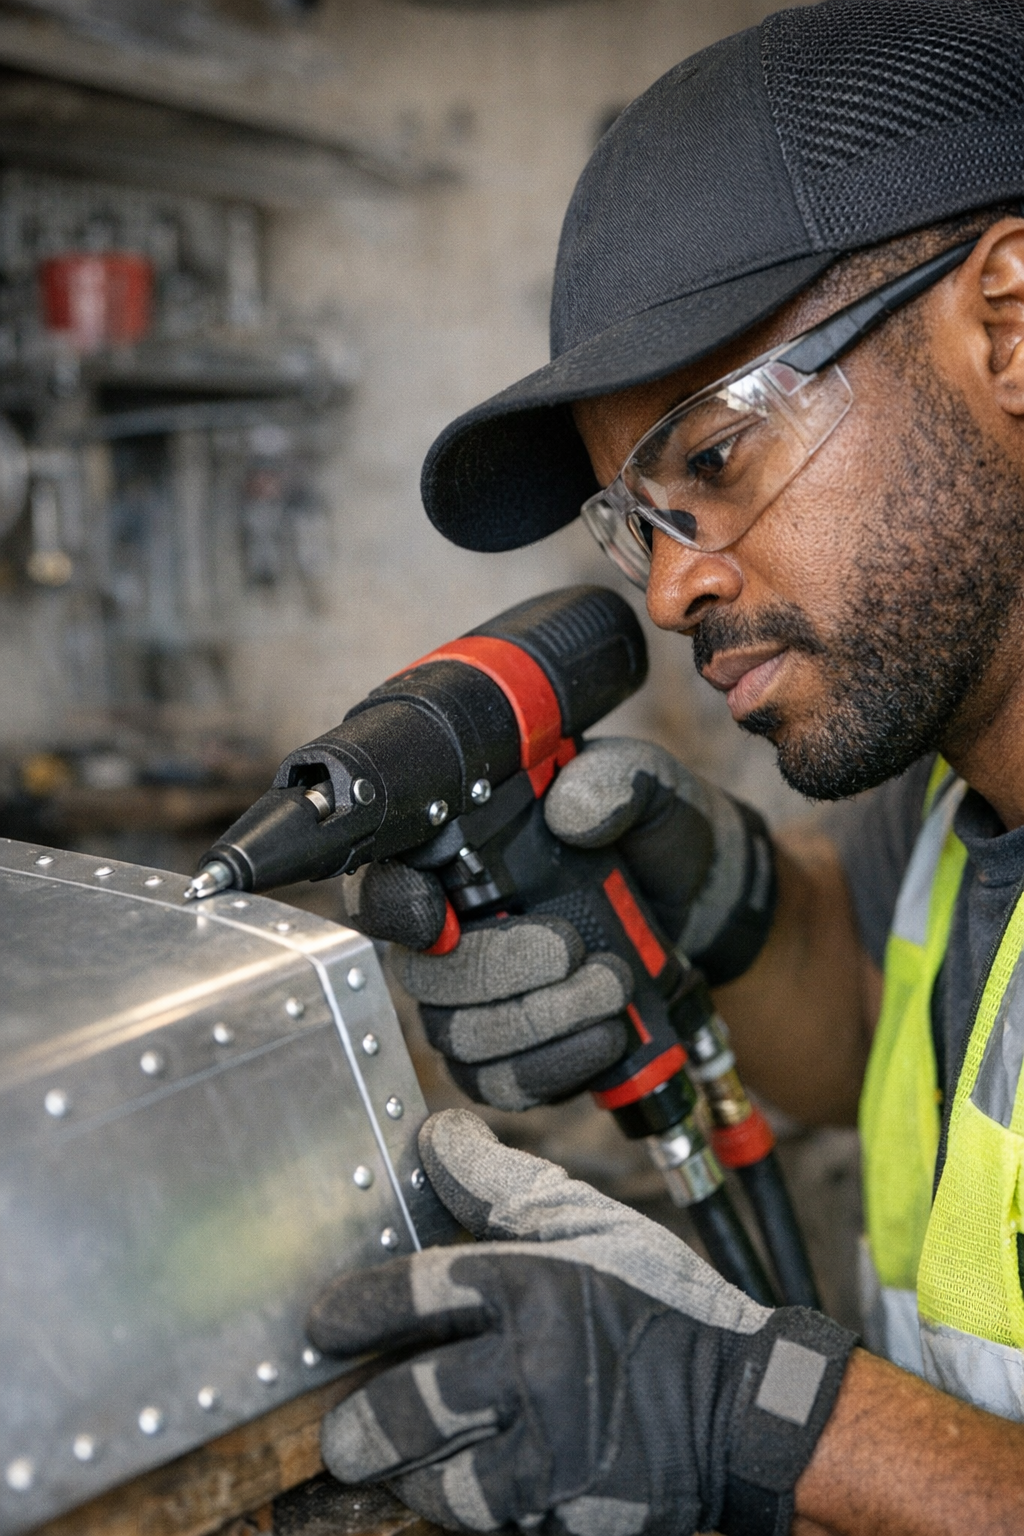
    By the third row of rivets, that creeping frustration isn’t just in your forearm—it’s running along every seam you check. Misaligned rivet heads don’t scream for attention at first, but they build up fast, especially if your rivet gun is working against you instead of with you. In any real shop, getting into a flow with repetitive fastening feels effortless—at first. You’re focused, the placement looks tight, and each pop echoes progress. But as fatigue rolls in and sawdust settles on the bench lights, what starts as a small drift in alignment turns into a bigger, more stubborn mess. Suddenly, sanding and re-drilling replace forward motion. This isn’t just about putting in rivets; it’s about not having to clean up after your own tools.

    How Minor Rivet Drift Turns Into Major Shop Friction

    No one loses time on their first five rivets. The real trouble sneaks up over the next fifty. Back in a cluttered corner, working a long panel, you check your line and realize the seam is rough—full of bumps and tiny chips you’ll have to sand out later. Keep using a gun that hides your sightline or slips under repeated use, and you find the same story: crooked rows, uneven gaps, and unfinished business that drags out your shift. The costs aren’t just in materials—they’re in lost patience and extra runs with the sander when the job should be out the door.

    Most alignment issues aren’t dramatic—they’re sneaky. The rivet head might be off by a hair, the seating just a touch crooked, that momentary wobble magnified when you’re holding a panel just-so. Hour by hour, what feels minor multiplies—until your “quick job” becomes a rework marathon.

    Sightlines and Consistency: Why Some Guns Make the Grade and Others Fail the Shift

    Spec sheets always promise ergonomic balance and heavy-duty credentials. But in the actual rhythm of drilling, fastening, and scrambling to finish overhead or sideways installs, it’s visibility and control that set the real winners apart. In the morning, it all feels under control—every hole lines up and every rivet sits flat. By late afternoon, your stance is off, your back aches, and the gun that seemed balanced now blocks your view just when you need clarity the most.

    When the trigger sticks out too far or the nosepiece is bulky, you can’t see the rivet head seat. A glance turns into a squint. If you’re working between beams, or stretching one-handed to catch the last rivet behind a bracket, every blocked sightline adds risk of tilt or misfire. Quick fixes become new chores—undoing what should’ve taken five seconds each.

    Ergonomics Aren’t Enough When the Job Gets Awkward

    It’s not enough for a tool to “feel good” when you pick it up. After twenty round after round—shoulder high, upside down, in a cabinet corner—you notice whether a gun lets you see your target.That critical moment before the pop: Is the rivet flush, or is your hand guessing? Bad design blocks you at the worst second and turns a precise job into a guessing game. Less guessing means fewer ruined rivets, less dusting, and a faster move to the next phase—whether that means cutting, sanding, or loading out.

    On the Floor: Small Misalignments That Dominate the Day

    Mid-way through a sheet metal install, you swap between overhead and side panels. Non-dominant hand locks in a rail, main hand tries to steady the gun—but the nose is clunky, and you lose angle just as you squeeze the trigger. Six, seven placements in, and you check: several heads off mark by three, four millimeters. Now comes the extra sanding, reaming out mismatched holes, and sweeping debris into a pile that just grows as the hours pass. Every small drift feels bigger as your patience thins.

    These aren’t rookie mistakes—they’re tool-induced. Each pause to correct alignment, each squat to clear metal shavings, steals momentum from the day. With the wrong gun, you don’t just lose a few seconds per rivet. You lose flow, rhythm, and the satisfaction of seeing clean rows run long and true.

    The Value of Actually Seeing Every Rivet

    After too many days chasing down subtle misalignments, swapping to a gun with a cutout around the die and a tapered, narrow nose changed everything. Suddenly, the seat was visible—even at weird angles, under lights, or with gloves in the way. Being able to confirm every rivet, before and after the pull, meant no more second-guessing or retracing. I adjusted my grip slightly forward for better tip control, and the drift dropped off. Seams looked crisp, jobs finished faster, and I wasn’t dragging the sander out nearly as often. Crucially, precision held steady deep into longer shifts, not just the first twenty minutes after lunch.

    How Fatigue and Tool Drift Quietly Kill Productivity

    All the high-torque numbers and “all metal” labels in the world don’t matter when, after three hours, your arms are tired and your line of sight is gone. That’s when rough edges, unwanted gaps, and accidental skews start piling up. If the rivet head is hard to see, or the tool vibrates with each cycle, you’ll end up fixing problems the tool created.

    Patterns to watch for: Are your seams sloppier after lunch? Do errors pile up as you rush to the finish? Mistakes that multiply with fatigue are usually about visibility and control, not skill or supply. The tool is losing its edge right when you need it most.

    Keeping Alignment Reliable: Practical Habits for Long Jobs

    Over a long day, a few non-negotiables separate a rushed fix from a satisfying finish:

    • Clear sightlines, always: Pick a slim, tapered nosepiece with enough cutaway to verify placement from your real working angle—nobody works straight-on for every rivet.
    • Steady balance, all shift: A gun that resists vibration and stays balanced when you’re working flat, vertical, or at arms’ length preserves accuracy, even late in the day.
    • Grip that adapts: When fatigue sets in or angles get awkward, edge your grip forward to manage tip drift and keep each pull controlled.

    Don’t judge your fastening tools by the catalog spec or those first clean placements. Ask yourself: When I’m tired and rushing, how much can I actually see? How steady is my repeat motion after fifty pulls? Those details don’t just save time—they save the whole seam from extra sanding, touch-ups, and lost hours you’ll never get back.

    http://gumboll.myshopify.com