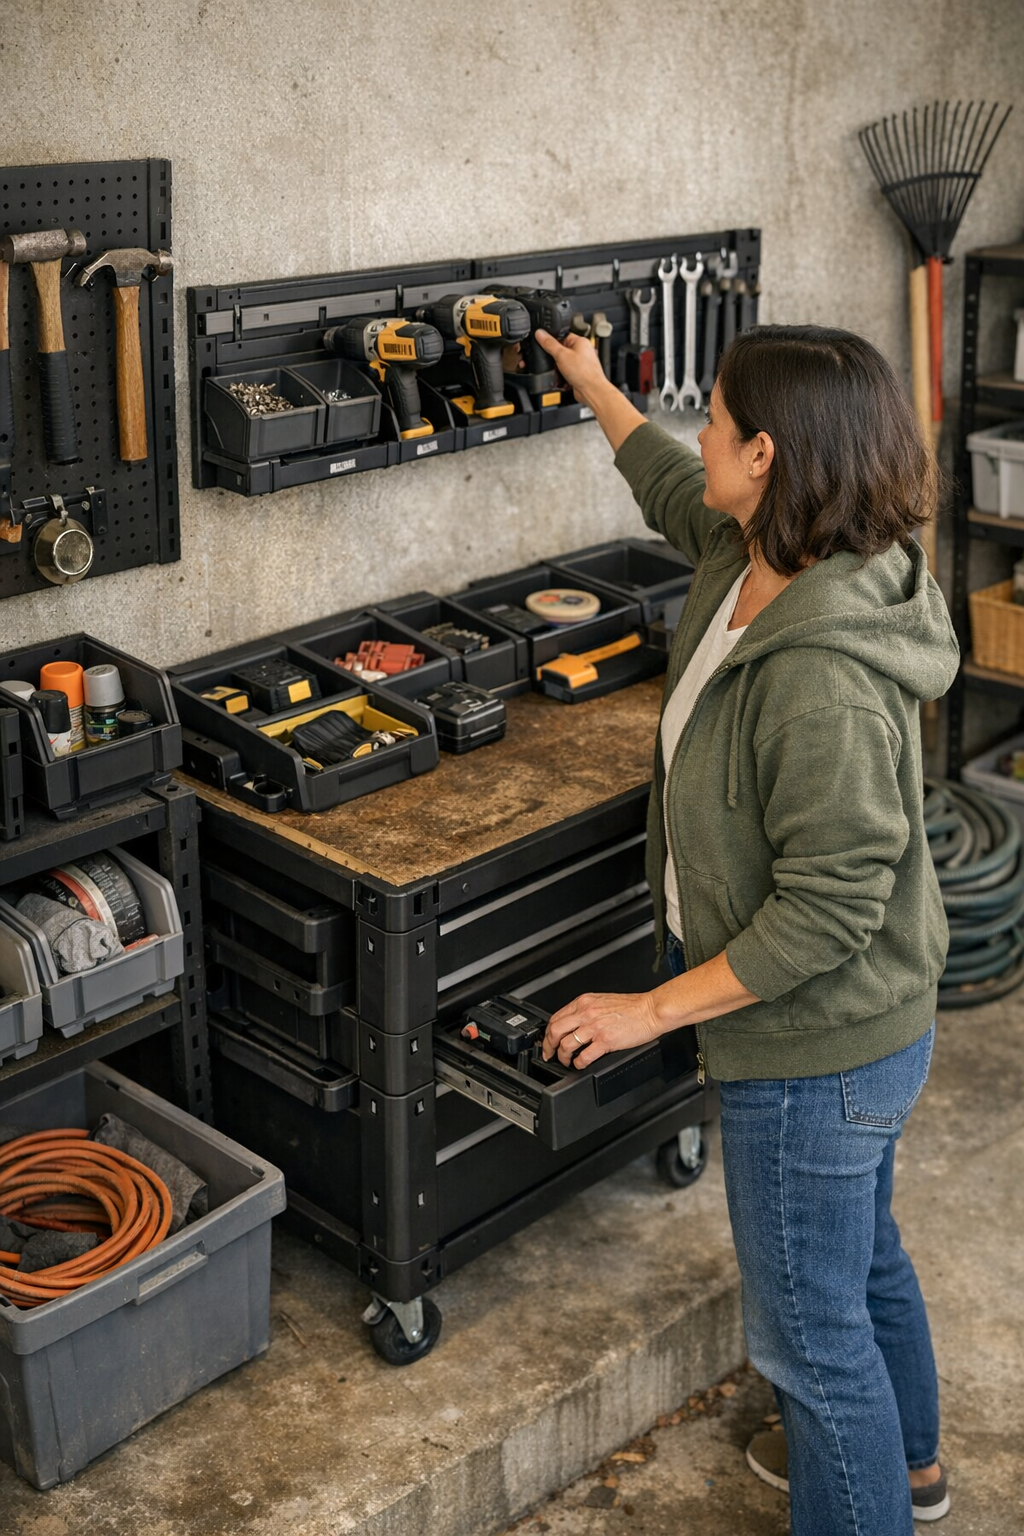
Category: Tools & Workshop

  • Why Modular Storage Needs Clear Boundaries to Stay Organized

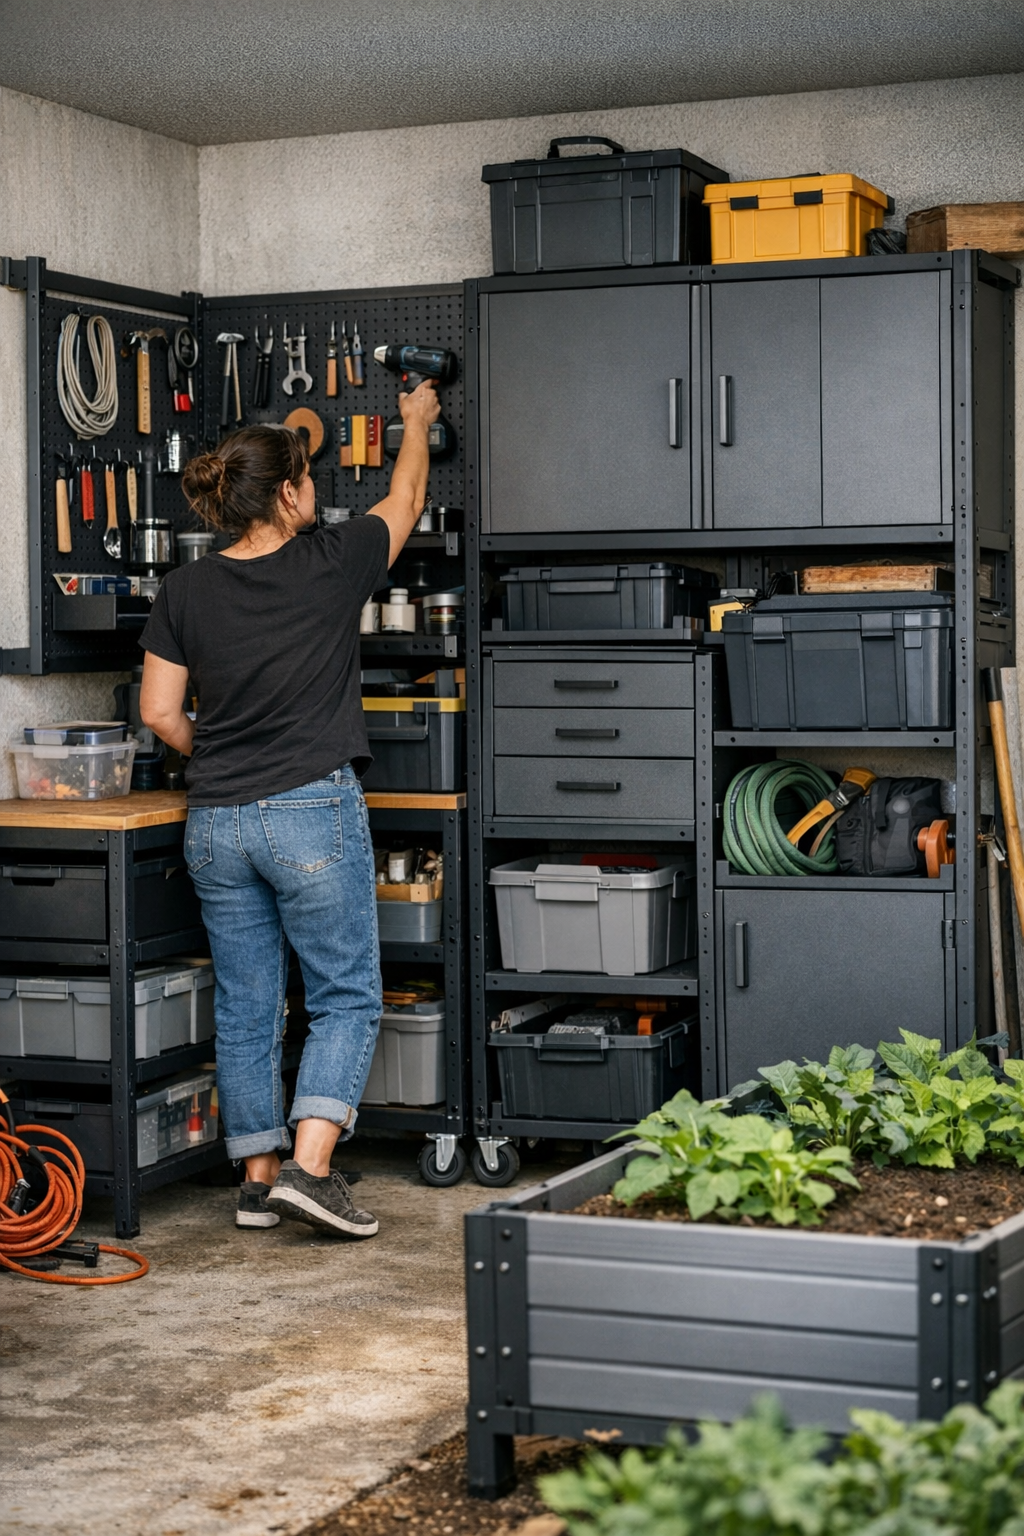
    The first day with a fresh modular storage system fools you. The bins nestle perfectly along the garage wall, the rolling cart tucks under the workbench, and every hook and rack gleams with possibility. You stand back, satisfied by order and newfound potential. Then, within a week, reality creeps in. Tools are returned just a little askew. A cordless drill is jammed at the end of a rail, because that’s faster than finding its original spot. Carts edge further from the wall, walkways press inward, and the utility zone you thought you solved becomes a maze of tripping hazards, overlapping gear, and improvisational storage that takes longer to use each time you walk in. The setup looks modular, but the routine feels stuck.

    When “Flexible” Storage Becomes Friction

    The sales pitch is always about control: rearrange, reconfigure, adapt to your needs. And at first—after installing a rail or rolling in a new cabinet—you do feel in charge. For maybe a week, every socket returns to its place. The shop vacuum rolls out and disappears in minutes. But the nature of real work cuts against the optimism of setup day.

    Start a quick repair, and tools scatter onto bin edges instead of being put away. Tight on time? You shove gear to corners “just for now.” By Friday, the cart meant to glide easily along the wall blocks two feet of walking space. The drill bits migrate from their labeled drawer to a catch-all tray, simply because the label is easier to ignore than to respect. The invisible logic that made setup satisfying dissolves under the real tempo of a busy week.

    The weak spot isn’t the system—it’s the lack of boundaries. Flexible layouts don’t keep gear from drifting. Rail ends invite piles. Flat-top cabinets turn into landing zones for whatever you can’t deal with immediately. Drawer organizers without clear dividers become jumbles of mismatched hardware. Each small shift edges you closer to the same chaos you set out to fix, only more annoying because you can see how neatly it could be—if only it would stay that way.

    Overflow at the Margins, and a Slowdown with Every Use

    Take a narrow garage or workshop: in theory, every inch gets used. But once flexible storage loses discipline, you’re stuck nudging the cart sideways just to pass. The wall space you thought you’d maximized now hides random handyman extras from past projects, shoved to the far end because that section is “open.”

    It’s the repeated detours that grind you down. Need a wrench? It’s behind three spray cans and a tape measure that rolled away from its zone. Want to plug in the battery charger? The outlet is blocked by the mobile toolbox you left a few inches off-target after the last reset. Every visit to the space becomes a low-level obstacle course that sometimes isn’t obvious until you’re in the middle of a job and lost fifteen minutes looking for the right attachment. The modular plan remains—on paper—but in action, boundaries blur and every task takes longer.

    Dead Corners: Where Flexibility Falters

    Worst are the corners and nooks left over after the main install. Flexible racks never quite fill them, so they become dumping grounds: a broken clamp here, leftover tile grout there. At first, you promise to come back and organize it. But over time, these dead spots grow into minor junk zones. They aren’t really useful, but you can’t reclaim them without disrupting everything else. The space is technically “used,” but never in a way that helps.

    Boundaries: The Quiet Fix for Daily Flow

    The key change comes when limits get added back into all this freedom. Boundaries—bumper strips at shelf ends, painted place markers on the floor, labeled zones in drawers—restore just enough structure to keep the arrangement serving you, not working against you.

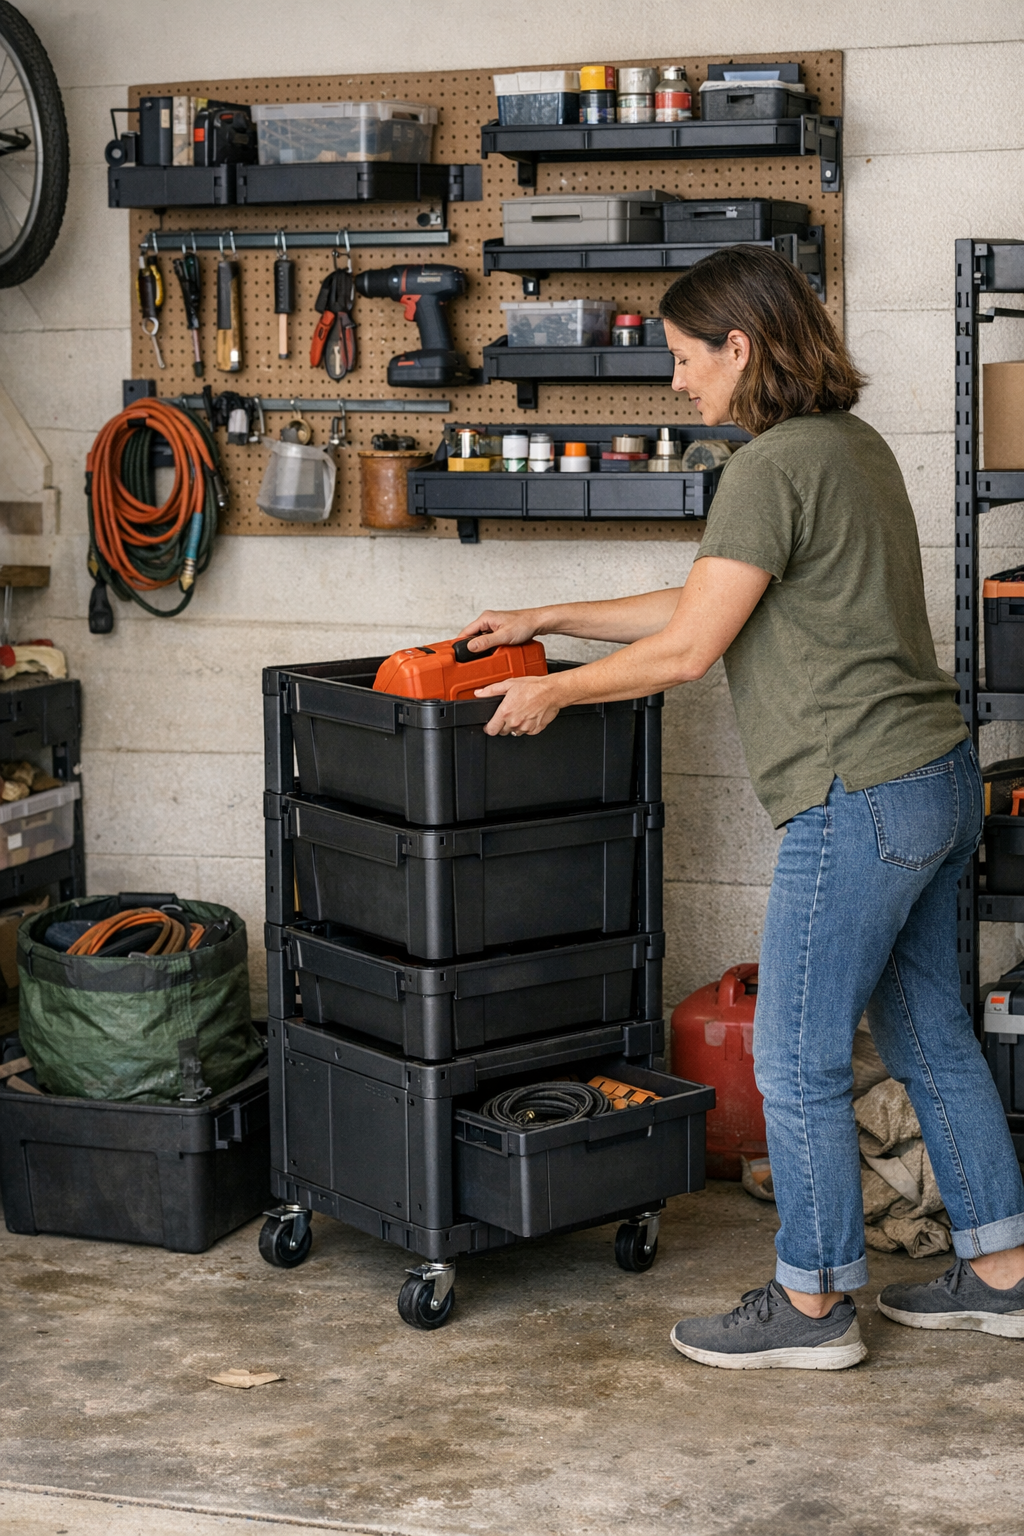
    Suddenly, the rolling cart stops inching forward because its wheels have a painted box to park in. Bins don’t fill with random odds and ends, because their slots are sized and labeled. A stop strip at the end of a rail keeps batteries from migrating into the next “category.” It’s not a full lockdown, just a real-world nudge that asks every tool: “Do you really belong here?”—and keeps your return flow brisk and automatic.

    The improvement isn’t showy, but it’s felt: no more pausing to recall which bin the wire strippers belong in, no more slow creep of overflow into walkways. Cleanups shrink from a weekend project to a fast sweep. Most importantly, your workspace feels as organized in mid-use as it does when you first set up—because the system tells you, at a glance, when things stray.

    Real-World Routines: Where Boundaries Prove Themselves

    • Blocked by the classic cart drift: You roll in to grab a chisel and find the cart off its mark, boxed in by tool piles. The cart with a marked parking spot and clear zones? You’re in and out—no detour, no juggling.
    • Overflow always finds the same spots: The end of the workbench rail, once pristine, becomes a logjam of tape rolls and loose hardware. A simple label or physical stop forces a category reset—if it doesn’t fit, it doesn’t stay. Finding gear is straightforward again.
    • The permanent “big sweep” shrinks: Without boundaries, resets balloon into unmanageable chores. With marked zones and limits, restoring order becomes a set of small, predictable actions. It takes minutes, not a half-day, to get back to clear pathways and categorized shelves.

    Making Flexibility Last Through Real Use

    Modular looks neat on day one, but the real test comes after weeks of heavy use. Can you walk the aisles without shifting tools out of your way? Does the wall space help you work, or does it slowly swallow your organization?

    The right boundaries make flexibility something you can actually count on.

    • Add end stops or bumpers on rails and shelves so gear has a reason to stay in-bounds.
    • Label bins and drawers—especially those you share with others or use for mixed categories—so tools remember their home, even if you forget.
    • Mark floor “parking zones” for mobile units. If a cart wanders, you know exactly where to return it—instead of guessing where it belonged.
    • Pay extra attention to those high-traffic transition spots—the tops of carts, edge shelves, the open end of racks—where overflow wants to collect first.

    The difference is practical: less time shuffling gear back into place, fewer surprise blockages in tight aisles, no “mystery zones” of random hardware collecting at the edges. The footprint stays predictable. You move around easily. And the area finally works in flow with your routines instead of throwing up new obstacles every week.

    Boundaries Build Dependable Spaces, Not Just Organized Ones

    The appeal of modular and mobile storage is real—but only when guided by real limits. It’s not about getting showroom perfection or maximizing visual impact. It’s about whether your setup lets you work, move, and reset—without stalling on clutter or wondering where things should go next.

    Create boundaries, mark your zones, and protect easy movement. That’s how you reclaim every square foot—and keep your area working through daily use, not just on setup day.

    Explore practical, adaptable storage solutions at StackNest.

  • Why Repeatable Storage Outperforms Aesthetic Bins in Daily Use

    The truth about home storage hits fast—usually right after that first rush of satisfaction fades. Maybe you stack your new bins along the top closet shelf, shoes arranged in perfect pairs below, scarves neatly folded in matching baskets. For a moment, everything looks under control, ready for the ideal morning routine. But the second you’re late, digging for gloves while balancing a mug, the weak spots in the system are exposed. Suddenly you’re pushing aside a jumble of hats and scarves to get what you need, and yesterday’s order is already slipping.

    Why Matching Storage Systems Fall Short

    Coordinated storage feels like progress—and it is, for the first week. A row of identical baskets or bins brings a quick surge of calm. But as soon as those bins face the pressure of real life, neatness gives way to subtle chaos. It starts with a single shortcut: you toss spare keys in with socks “just this once” or wedge shoes into whatever space is left. The next morning, you’re shifting stacks to find sunglasses lost in the mix. Each small compromise chips away at the system, until the matching bins are stuffed, categories blur, and grabbing anything starts to slow you down.

    Daily Friction: Where Style Masks Mess

    Uniform storage promises simplicity. But the design disguises the mess as it builds beneath the lid. Socks spill under hats, scarves tangled under gloves. By midweek, bins sag; stacks slide sideways; one container gets suspiciously heavy and hard to sift. End result? Instead of being invited to tidy, you start avoiding the area—opening the closet with a sigh because access means another reshuffle.

    Clarity Over Cosmetics: Defining Categories That Last

    When categories lose their edges, friction invades every routine. True organization means you can reach for what you want without moving a pile or running a mental checklist. Storage that’s only about appearances sets traps: every time you retrieve a winter hat, you half-upend a pile, and each return is a guess where things should land. Resets take longer, and you notice clutter creeping into corners—a sneaker at the foot of the stairs, an umbrella perched on a shelf where it doesn’t belong.

    Closet in Practice: The Cumulative Effect

    Picture a narrow coat closet. Monday morning: you’re holding a coffee, grabbing your tote—except the tote is buried behind yesterday’s gym bag and a half-unpacked paper grocery sack. To get it, you shimmy a stack of scarves to one side, tip a basket, and—at last—rescue your bag. Returning home, you know “right bin, right spot” matters, but exhaustion takes over. The gym bag drops wherever, and a minor mess begins its weeklong sprawl.

    This isn’t a matter of messiness—it’s about systems that require too much effort. Without firm boundaries between categories, bins get too full too soon, folded stacks unravel, and by Thursday, the closet’s order collapses. Left unchecked, the domino effect spreads: shoes edge into the hallway, lightweight bags stack on the floor, stray hats pile up where they shouldn’t. Each workaround is a drag on your time and mental bandwidth.

    Practical Structure: The Real Secret of Durable Order

    What reliably keeps a closet or shelf in shape? Not color coordination, but a system where separation is obvious and consistent. Storage works best when it reduces the need to think: this bin, always scarves—never mittens; these hooks, only for bags. Every item has a role and a slot, so resets are frictionless and don’t steal your time (or your patience) every morning or night.

    Dividers and Small Tweaks with Outsized Impact

    The answer isn’t always “buy more bins.” Sometimes, a single divider transforms daily experience. For example: slim an oversized basket into two smaller compartments, trading symmetry for utility. Suddenly gloves and scarves, once mixed, each have a clear home. No morning tug-of-war or nervous stacking. Or repurpose vertical space: add a shelf insert for small purses, or a simple rail for umbrellas—now each item is in view and easy to reach. Little changes like these keep piles from collapsing and make it obvious when something’s out of place, speeding up the reset, not making it harder.

    Recognizing the Warning Signs

    The signals are always there if you look: a stack that never stays straight, a bin growing heavier and less predictable each day, or new piles collecting on the edge of your hallway. If you’re moving three things to get one, or if “quickly putting it back” never seems feasible, your system’s failing silently. Don’t ignore slumping bins or containers that double as general catchalls—they’re signs your categories are blurred and that routine is on the verge of breakdown.

    Pause and diagnose: Is every item in this space still in the right place? Which category has grown beyond its boundaries? Are you using all the vertical or side space you could, or letting it go to waste? Sometimes, the best fix is splitting up a bin or labeling a section so you see, at a glance, what goes where—instead of spending time rearranging, hoping “this time” it stays sorted.

    Real Fixes for Real Life

    If you’re constantly re-stacking or second-guessing a bin’s purpose, try letting your daily actions lead the reset. Notice where your hands go first when you’re in a rush. If you always fish for keys in the middle of a mixed tray, give keys a slot near the door — not buried with everything else. If folded stacks fall apart by midweek, swap one big basket for two shallower ones. Most important, structure your storage for speed: categories with a clear home make quick resets possible, even at your busiest.

    What Lasting Storage Success Really Looks Like

    Effective storage isn’t how polished a closet looks on Sunday night—it’s how easily you can keep it together by Friday afternoon. Accessible bins, clear categories, visible items, and divisions that hold up to repeated use—these shape a system that feels stable. When each thing naturally returns to its place, clutter doesn’t have a chance to sprawl. The win isn’t showroom perfection; it’s not tripping over shoes in the entry or wasting five minutes looking for a glove as you run out the door. Instead, you reclaim calm corners and make every reset quick, confident, and almost automatic.

    Shop ClosetWorks for practical storage solutions to help your space work better—every day.

  • Choosing Air Compressors That Deliver Consistent Pressure for Remodeling Jobs

    Some problems don’t announce themselves—they creep in. You start a remodel with every tool sharp and the plan clear, but by mid-morning, your saw is dragging through soft plywood. The blade bites, stalls, and suddenly a straightforward cut becomes rough enough that the seam won’t close. That slow grind? It’s not just the saw. It’s your air compressor running out of breath, quietly turning a fast install into hours of frustration, sanding, and redone joints that never look quite right. If you’ve ever spent the last hour on site dead-leveling a run of baseboard just to hide uneven cuts, you know what underpowered airflow feels like—both in your hands and your timeline.

    Compressor Specs vs. Jobsite Pace

    On paper, choosing an air compressor feels simple—tank size, horsepower, CFM ratings line up in neat rows. But jobsite rhythm isn’t built in the spec sheet. It’s what happens when your tools face real, repeated work: window retrofits with sashes lined up, cabinetry runs where a slip costs a door, or crown installs that punish every missed millimeter. Plunge, cut, and reset—all depend on the compressor keeping pace, not just for the first cut but while you punch through boards all day long.

    The earliest sign of trouble is subtle—a hint of the saw vibrating or biting at the wood, a rhythm lost as air pressure drops. Ignore it, and minutes later the pile of splintered offcuts starts to outpace your progress. By late afternoon, you’re fighting both your tools and your backlog, all because a compressor couldn’t keep up with your everyday routine.

    Don’t Be Fooled by Tank Size—Consistent CFM Is What Counts

    Big tanks and bright horsepower stickers draw attention, but the field reality is simple: delivered CFM at your working PSI runs the job, not the tank sticker. For saw reliability and finish quality, steady airflow is the silent backbone. Two compressors may both claim 6-gallon tanks, but when cuts come fast and frequent—switching between circular saws and brad nailers, or jumping between miter and portable table saws—the slower-recovering unit loses steam fast. Even a brief pressure dip can cause:

    • Blades dragging mid-bevel, leaving rough or swollen edges on trim
    • Finish cuts that splinter in hardwoods or laminate
    • Extra sanding on every door, jamb, or fascia
    • Stalled tools while you wait on pressure, hands idle

    Every pause to let pressure recover throws off workflow. If you’re halfway down a line of window casings and the saw starts choking, that lost momentum ripples through your entire day—bit after bit, cut after cut, the falloff is visible in your stack of corrections.

    The Tell-Tale Signs of Compressor Lag On Site

    Picture a three-room window replacement, or back-to-back kitchen installs: In the morning, your saws hum, but by the second or third hour, you feel hesitancy on longer cuts, especially in denser materials. The sound shifts—saws get loud as motors strain, or worse, start stuttering mid-cut. As pressure falters:

    • Straight lines turn wavy, and blade marks show up in every plywood sheet
    • Fatigue sets in as you muscle through drag, increasing the risk of slips and slightly-off measurements
    • The team starts double-checking joints, recutting or sanding repetitively—small mistakes multiplying as patience thins

    When the compressor falls behind, your crew slows, not from poor planning but from battling unreliable air on every pass.

    The Difference After Upgrading to 5.1 CFM @ 90 PSI

    Switching to a compressor that reliably delivers at least 5.1 CFM at 90 PSI isn’t about hitting a bigger number—it’s about restoring rhythm and control. On sites that run tools hard, high-output portables keep saws cutting cleanly, from subfloor crosscuts to precision detail work. Suddenly, those chip-outs and wavy lines disappear. Edge sanding drops off the punch list. The saw feels responsive—not laboring, not pulsing—just steady, so you stay on your marks and keep your wrists fresh.

    The most telling change? At the end of the day, there’s no backlog of should-have-been-easy corrections. Crew morale lifts. Install stacks line up, and you’re wrapping a site, not looking for problems you created because your gear couldn’t keep up.

    Tank Size Isn’t a Shortcut

    Buying the biggest tank in stock can seem like insurance, but if recovery lags, the advantage is short-lived. High-frequency tool work—multiple saws running, swapping from cutoff wheels to nailers—demands sustained CFM, not just stored air. The tank empties after a flurry, and the inevitable pressure sag creeps in, throwing off accuracy and making every pass harder than it should be.

    Hard-Learned Signs Your Compressor Isn’t Enough

    Field experience says it all: when airflow drops, you don’t need a spec sheet to notice—it shows up in your work:

    • Cutting speed slows first. Pushing through each board gets awkward, control wobbles, and risks of blade wander go up.
    • Edges get ugly. Splinters, micro-tearing, and ragged cut lines force extra sanding or recuts—bit sharpness doesn’t matter if the airflow is off.
    • Stop-and-start rhythm ruins momentum. Instead of gliding from trim to trim, you’re stuck waiting for the tank to catch up or running idle drills just to burn time.

    Reliable airflow doesn’t just save your back; it conserves precision, pace, and keeps your focus where it matters—on the next measurement, not another repair.

    Field-Tested Tips for Choosing Compressors

    • Replicate job pressure, not just single cuts: Before you settle on a compressor, plug in your main tools and run several cuts or drill cycles in a row. See if blade or bit performance shifts as the tank drains.
    • Study the cut, not just the tool: Tiny splinters, burnt edges, or tool chatter often hint at lagging airflow before performance takes a nosedive—watch for these cues before relying on a spec alone.
    • Frequent pauses are a warning. If you find yourself rerunning lines, changing blades, or constantly cleaning up cut edges mid-project—question your compressor’s output. Upgrading CFM can reclaim hours from your day.

    What Seasoned Crews Pay Attention To

    The best crews ignore shiny new tanks and brand names in favor of results. They choose compressors that keep saws cutting straight and drills delivering consistently—even as batteries fade, air thickens with dust, or projects drag into overtime. Day after day, site after site, that consistency shaves time off every task: cleaner fits, fewer recuts, and energy left over for the details that make an install bulletproof.

    Payoff comes not in glossy marketing, but in cut stacks that slide tight and clean, no extra sanding, no covering up errors. It’s a standard anyone who works with their hands recognizes—the job’s done right the first time, from first cut to final fit.

    Find practical, jobsite-ready air compressors and more at Gumboll.

  • Why Visible-Only Storage Systems Fail Over Time and How to Fix Them

    Visible storage looks like the answer: Line the walls with hooks and shelves until every tool, accessory, and fastener sits in plain sight. On day one, it feels like rocket fuel for productivity—no more searching, no more forgotten gear, just quick grabs and fast starts. The space “looks” ready: racks are full, every slot has a resident, and you can actually see what’s missing at a glance.

    The Creep of Clutter No One Plans For

    But after the first round of real work, the shine fades. The logic of “keep it all visible” gets jammed up by the routines of a real garage or workshop. Projects drift from one weekend to the next; gear moves but doesn’t quite return; and the glimmer of quick efficiency is replaced by a cycle of subtle, daily friction.

    Paths shrink, steps double. Bins and buckets land on the floor “for now” and stay there. That open rack you added for convenience wedges against a cabinet, so now every time you swing the door, you have to nudge the rack out of the way—or, worse, just accept bruised knuckles. A hose loops where your foot wants to go. A cart you thought you could roll around for flexibility ends up stuck as a semi-permanent obstacle, blocking an easy path to your workbench. The more you try to keep everything out in the open, the more you’re forced to maneuver, adjust, and sidestep just to do simple tasks.

    When Clarity Becomes Chaos

    Visibility promises order, but real use guarantees overlap. Tools in heavy rotation migrate to the front of hooks, stacking in front of the gear you only use monthly. What started as a simple row—one tool per hook—becomes a tangle of screwdrivers, pliers, the odd extension cord, and something borrowed that never found its spot. Overflow boxes supposedly in “temporary” exile dig in right where movement matters most—at the edge of the shelf, underfoot by the entry, or in the last bit of open floor.

    Each grab turns awkward: reaching for a drill means moving two other items, or stretching behind a garden trimmer just to snag the only tape measure. Bags of fertilizer take over the floor next to the mower, while your planter supplies squat in whatever corner remains. The wall’s no longer a launchpad—it’s a shifting sea where seeing everything means nothing is actually easy to reach without a mini reshuffle.

    Overflow Corners and Ever-Expanding Dead Zones

    The mess isn’t just visual—it’s functional. Those empty shelf ends take in all the returns that never quite make it home. A bin you swore you’d empty “right after the project” becomes a semi-permanent junk drawer on the floor. Instead of dropping a tool back in its slot, you end up hunting for open space, dodging stacked containers as you work.

    Give it a couple of weekends and it’s obvious: a packed pegboard just means your everyday driver gets buried behind tools you only use twice a year, and stashing a box under the table puts it right in the way of wherever you need to stand. The promise of flexibility is so often undercut by small obstacles—resetting takes twice as long, and the space that should make every job easier instead throws up fresh barriers to getting started.

    The Real Price of Blocked Flow

    Movement is always the first sacrifice of “see it all” storage. Walk in with your hands full and you’re immediately stopped by yesterday’s stack of bins—or a cart that started mobile and ended up a squat, heavy checkpoint. You put these aside just to make a path, but eventually every trip means shifting the same stuff again and again. Handles from wall racks catch doors; corners become dead zones you circle around but never use.

    This isn’t a rare mess; it’s the default when visibility trumps actual workflow. Modular wall units fill every available edge, but leave nowhere reliable to return a spare box or project caddy. Each “put-away” starts to feel like a puzzle: do you pile it onto the stack, start a new catch-all, or just wedge it in wherever there’s an inch to spare? The zone sprawls—until nearly every job starts with a clean-up instead of actual work. Built-in flexibility ends up being a myth: your setup holds more, but supports less.

    Pushing Back: What Balance Actually Looks Like

    The real fix comes when you decide not everything has to be visible. After enough cycles of shuffling equipment, you realize only your true dailies deserve prime wall space. That old box of specialty fasteners? It goes in a labeled bin on a low shelf, out of your way. The trimmer that’s hardly touched this month migrates behind the cabinet door, not at hip height on the main rack. You’re not hiding things—you’re picking what actually earns easy reach, so fast access gear isn’t blocked by once-a-year tools or accidental piles.

    Sometimes a minor shift rewrites your entire reset routine. Drop a crowded shelf down one notch: now screws, gloves, and most-used micro-tools live at a natural, see-and-grab height. Overflow—batteries, specialty bits, out-of-season gloves—shift higher or lower, freeing the middle for the moves you make most. Suddenly, you’re not guessing where anything belongs or clawing through overflow to put things back. Your floor stays mostly clear, and dead zones shrink instead of multiplying.

    Real Habits That Actually Help

    • Cull or rotate gear each cycle: After every major project, take a few minutes to scan what you’re really using. If something’s been untouched for weeks, it doesn’t need prime wall space—it belongs off to the side or out of sight.
    • Adjust shelves so your daily tools aren’t buried: One notch, up or down, can change your whole flow. Give breathing room to the supplies that get grabbed over and over, not the gear that just adds weight to the system.
    • Leave open slots for returns—not just display. When a wall or rack is overfull, that’s a red flag. Don’t cram extras in—shift out the lesser-used, and let essentials breathe. Let cabinets or totes do the work of holding overflow, so only the best-used pieces fill your line of sight.

    Spaces That Actually Support Your Routine

    The shift is subtle, but unmistakable. Instead of tripping through the same tangled path, you’re clearing projects without a reset each time. Wall storage stops being a visual checklist and starts acting as real workflow support: permanent residents—your go-to hand tools—are always ready, while less frequent items stay tucked out of your way until you need them. The floor is for your feet, not for overflow.

    You feel the payoff every time you walk out: returns are easy, resets are barely a thought, and storage works with your habits instead of slowing you down. The space no longer punishes you for getting busy—it flexes, adapts, and holds its organization even through hectic weekends. Your shop doesn’t just look more usable; it actually is.

    See practical storage setups and find modular options that support real use at StackNest.

  • Why Closet Organization Fails Without Practical Storage Solutions

    It’s not Sunday resets that reveal the real state of your closet—it’s Wednesday mornings at 7:32 a.m., standing in front of tidy-looking shelves that have already started to betray you. The piles that stood tall on the weekend now blur into each other. That basket you labeled “gloves” is suddenly housing socks, receipts, and a stray t-shirt. In these rushed, everyday moments, the true friction of a closet’s weak spots shows itself—and small flaws start to multiply.

    Why “Looking Organized” Fails in Real Life

    On day one, everything feels hopeful: shelves neat, shirts stacked, baskets aligned. But the order fades fast. The daily cycle is what tests your setup. Grab one shirt from the bottom of a pile and the whole stack wobbles. Put something away in a hurry, and the bin swallows it whole—along with other “categorized” items that don’t quite fit their intended home.

    What undoes most “organized” closets isn’t a lack of effort; it’s the quiet, repetitive wear of daily life. Shelves that are too deep swallow small items until they migrate to the back, out of sight. Bins just slightly too big or vague become magnets for catchall chaos. Over a couple of laundry cycles, what started as distinct sections—sweater stacks, sock bins, accessory trays—become blurry, slow, and impossible to reset without a minor project. Each quick fix adds to the slow drift toward clutter.

    Real-World Friction: What Actually Goes Wrong

    The Vanishing Stack

    The morning rush exposes every flaw: You reach for a specific tee, but as you slide it out, the pile collapses sideways. A classic domino effect—by Friday, shirts and shorts have blurred into one sagging heap. Now, getting dressed means untangling piles, shoving one stack aside to reach another, and promising yourself a “deep reset” on the weekend.

    Baskets that Hide as Much as They Hold

    Baskets and bins seem like shortcuts to tidiness, but the wrong fit invites clutter. Toss in a hat, a scarf, or a pair of running gloves “just for now,” and soon you’re rummaging blind. If the basket’s too deep, smaller items vanish underneath bulkier ones; if it’s too open, categories bleed together. Retrieval takes longer, and you start to avoid using the bin at all—even though it’s technically right there.

    Dividers: The Quiet Fix Most Closets Lack

    No item creates order like a good divider. Without a clear edge, even the best-folded stacks devolve. Shirts wander into sweaters; towels melt into the jean pile. Eventually, your shelving becomes a single, confusing landscape. Every time you “put things back,” you’re actually pushing against a system with no boundaries—dooming yourself to repeat the same reset every week.

    Structural Details That Actually Matter

    Closet performance comes down to how a space absorbs everyday mess. How far do you reach just to find a small item? If a shelf forces you to move everything up front just to access the back, it’s too deep for daily use. Bins that don’t match what you own—either swallowing too much or spreading items too thin—slow you down and encourage mix-ups. Without the right boundaries, vertical space goes to waste and every “zone” eventually merges into the next.

    A closet isn’t made by one big storage buy. It’s tuned by the dozens of small, everyday decisions—where items land, which piles tip over, which sections become reshuffling traps. Miss the details, and you’ll always be one laundry load away from a new mess.

    Practical Tweaks That Actually Stick

    Small changes make mornings smoother. Adding dividers—even just every foot—can transform a shelf’s usefulness overnight. Suddenly each stack stays in its lane; you can pull out a pair of jeans without dismantling four other piles. Consider swapping a catchall bin for an open tray, so you can actually see and grab accessories instead of digging for them blind. Right-size your containers: shallow bins for socks, taller ones for sweaters, open baskets for daily gear.

    Next time you speed-tidy midweek, stop and notice: Which items always seem out of place? Which shelves collect mysterious buildup? Would one or two more dividers keep categories from mingling? Does a bin hide more than it helps? Mirror the closet to your routine, not to the label on a container.

    How to Tell if Your Closet Setup Works

    A closet that really works doesn’t demand a reset every time you do laundry. Good storage keeps shape after dozens of uses. Each category stays obvious and quick to reach. When a section consistently collapses or a bin always feels like a grab-bag, that’s the sign your structure isn’t matching your habits. Resets become less frequent and less dramatic; you spend less time fixing, and more time simply finding what you need—without moving half the closet in the process.

    Daily Durability: The Hidden Standard

    Real organization isn’t what survives a staged photo—it’s what lasts through skipped cleaning days and rushed mornings. The strongest systems keep categories from collapsing into each other and make even your most-used shelves feel intuitive. They withstand imperfect habits and carry you through busy weeks, not just tidy weekends. If clutter returns before Friday, it’s not failure—it’s a sign you need tweaks tailored for your everyday routine.

    The details don’t just make the closet look better—they make daily life easier and dramatically reduce the time spent redoing work you already did. Adjust your setup until finding things is effortless, not a mini treasure hunt.

    Shop practical closet organization at ClosetWorks

  • Maintaining Steady Air Compressor Pressure for Flawless Jigsaw Cuts

    The first cut always feels easy. Fresh blade, your grip steady, jigsaw humming as it glides along clean panel stock—lines true, no second guessing. But as the stack of cuts grows and sawdust piles up, you feel it: the jigsaw grips the material just a little tighter, edges start to splinter, and suddenly, each pass asks for more muscle than the last. Tool control slips by inches, not all at once. The culprit? Not your hands, nor a dull blade—it’s the air supply trailing behind, your compressor quietly falling short exactly when you need consistency most.

    The Real Cost of Compressor Fatigue

    Anyone who’s spent an afternoon knocking out cabinet carcasses or running cutouts for flooring knows the routine. Early on, the jigsaw sings—crisp pitch, predictable movement, dust neatly falling off the edge. The jigsaw’s power stays sharp, and each new section lands you closer to finish work.

    But by the third or fourth board, signs of strain slide in. The jigsaw’s motor pitch sags for a fleeting second, dust clouds linger longer, and sharp edges turn fuzzy. Cuts that started out clean now want correction with sandpaper or, worse, a redo with a fresh panel. It never shouts for your attention—the shift is a quiet frustration that stacks into hours lost and hands sore by end of shift.

    Where It Shows Up—in the Details

    Fastening misalignment. Out-of-square corners creeping in around the third cutout. Extra sanding eating into build time, or a drill bit binding halfway through a plunge because pressure dipped at the wrong moment. The more you demand from your compressor, the more each small deficit multiplies across the job—until “minor” cut quality issues start to define the day.

    Why Spec Sheets Don’t Tell the Whole Story

    Two compressors can look identical on paper—but only one stays reliable when the job drags on. Same tank, same PSI, same cues for when to recharge: on short runs, both seem capable. But when the real work begins—repeated cycles, back-to-back drilling, scalloped curves around pipes, or field cuts on trim—the slow performer can’t keep pace. Your jigsaw stalls on curves, drill bits smoke, sanders drop RPMs mid-pass, and suddenly you’re correcting, not building.

    The difference rarely jumps out in your first ten minutes. It’s the back-half of a project, as compressors get warm and air tools start to bleed pressure, that true reliability shows up—or doesn’t. Boards that started flush now edge apart under uneven fastening, gaps open at seams, and the “just one more cut” attitude turns into an hour of patchwork fixes.

    On the Floor: A Workday’s End

    Imagine kneeling for a late-day countertop install—alignment critical, tolerance tight, client in the next room. The compressor pulses slower behind you. The jigsaw stutters down a straight, blade kicks awkwardly at the turn, chips fly just enough to cost you a perfect fit. Sandpaper comes out, assembly slows, and now fatigue—not just in your arms, but in your schedule—threatens to undo the sharp line you started with. You’re not just wrestling the cut, you’re wrestling time lost to a tool support system that’s running out of steam.

    Red Flags: Spotting Compressor Drag Before It Costs You

    • Your jigsaw’s motor tone wavers or dips—just enough to break your confidence on tricky edges.
    • Fine dust accumulates quickly, signal of tools working harder and slipping out of tune.
    • Cuts start to feather or chip, no matter how careful the feed rate or blade choice.
    • You’re guiding the tool defensively: pausing mid-line, correcting, even pulling up short for fear of blowout.

    Ignore these signals and small mistakes pile up; before you know it, assembly turns into rework, and a half-day job stretches until the lights go out.

    Breathe Easier: Adjusting Cut-In Pressure for Real Consistency

    There’s no magic involved here—just a simple adjustment that gets overlooked. Raise your compressor’s cut-in pressure above stock settings. Bumping from a typical 90 PSI up to 110 PSI seems minor in theory. But on the workbench, that tweak keeps air flowing steady through every repeated cycle. Over a dozen back-to-back cabinet or flooring cuts, the difference is clear: fewer blade stalls, sweeps that hold course, less cleanup after the fact. It brakes that stop-and-go rhythm that wears you down and lets you keep focus where it belongs—on the precision of your line, not how far you can stretch one more cut.

    Staying Ahead of the Small Stuff

    Running tools hard in warm shops? Internal compressor moisture rises, quietly shortening how much usable work you’ll get before pressure stutters. That moisture build-up also brings pressure drops earlier than you think. Make it routine, mid-task, to bleed off tanks and check gauges—catching issues before they’re visible in your finish saves wasted panels and frustration.

    Shop-Smart Habits for Cleaner Results

    • Listen from the start: Inconsistencies show up after a handful of cycles—don’t wait for the cut to stall, tune in for subtle shifts in tool response after the first few boards.
    • Check your edges, not just your blade: Early feathering or chip-out signals air loss, not always dull hardware. Letting the compressor rest, or checking for leaks, buys you more use from every bit and blade.
    • Go beyond the tank specs: If you routinely run long lines—panels, installs, repetitive fastenings—choose compressors with superior recovery rates and proven duty cycles. Headline PSI numbers don’t make up for slow bounce-back after prolonged use.

    Time for an Upgrade?

    If you find yourself fighting for a clean finish with every pass, chances are your compressor is setting your limit—not just your jigsaw or blade. Productivity, safety, and the quality of the fit all hinge on the reliability of that air supply, especially deep into the workday. Don’t judge a tool setup by the first five minutes—judge it by how much correction and fatigue you’re left with at the very end.

    Find workshop-ready compressors, tool accessories, and more at Gumboll.

  • Why Overloaded Wall Storage Slows Down Your Workspace Efficiency

    The promise of a perfect garage or workshop setup kicks in the instant you clear the last pile from the floor: rows of bins, a grid of hooks, every tool finally off the ground. For a day or two, everything looks under control. But as daily routines crank up—school bags dumped near the door, tools rushed back after a weekend project—the old friction returns. What felt “finished” starts grinding at the edges. It isn’t mess; it’s the awkwardness that creeps into the circulation and flow, the spots that never quite work no matter how clean they look.

    Why Getting Things Up Isn’t the Same as Making Space Work

    The pitch is simple: wall storage clears the floor and makes gear easy to grab. In practice, though, actual use exposes the cracks. Day by day, the lines between “organized” and “obstacle course” blur. Between the car roof and the high shelf, crouching to plug in a charger, or edging past a heavy cart parked beneath the bins, you start to feel it: storing more isn’t the same as moving better.

    You notice it when grabbing a hand saw means ducking under a bike wheel. Or when unloading groceries means pivoting around the same garden tools that always block the path. The neat blueprint pinned up in your head doesn’t match the routine you actually walk.

    Maxed-Out Walls, Shrinking Pathways

    The more storage you stack along the walls, the more you chip away at how easily you can actually use the room. That meticulous lineup of bins transforms every wall into storage—unfortunately, it also blunts every shortcut. A hose left draped, a crate nudged in the corner, a backpack “parked just for today”—each one eats into the walkway. Soon, you’re twisting or side-stepping on autopilot just to fetch what you need, and every reset after a busy day feels slower and more frustrating.

    “It Fits” Doesn’t Mean “It Works”

    Most setups chase maximum density: racks, rails, shelves filled edge-to-edge. But then reality hits—reaching above your head to get the drill you use every morning, sliding a section of bins just to put something else away, or stopping to fish around behind one tower to find a missing wrench. There’s enough storage, but not enough slack. Each “efficient” fix winds up adding a new pinch-point or trip hazard, stalling the routine every time you try to return things to order.

    How Real-World Use Reveals the Pain Points

    It’s repeated, everyday movement that finds the flaws—and they’re almost never on the wall itself, but in the patterns the setup creates on the floor and in the corners. Watch what slows you down:

    • Entry Paths Become Zigzags: Wall-to-wall bins or hooks mean every trip—carrying bags, hauling a project, getting a mower out—requires snaking through a tighter maze, sometimes shifting a cart or crunching past jutting storage every time you come and go.
    • One Dead Corner Always Catches the Overflow: That “out of the way” floor zone becomes the permanent drop spot for anything you can’t quite fit—a cardboard box, odds and ends, leftover lumber. Resetting the area gets harder every time, until the pile becomes invisible clutter and the corners never clear.
    • Awkward Reaches and Impossible Returns: Everyday gear winds up on high shelves or buried behind rarely-used stuff. Returning tools becomes a chore—too much reach, not enough room—so things get left out or misplaced.
    • “Clean Floor” as a Mirage: What looks like an open path is really just a slalom between gear. One stray item blocks the way, and the space that felt organized feels boxed in, with every step rerouted or slowed.

    When the Wall-First Approach Starts Working Against You

    Over time, the system meant to restore order quietly starts to dictate your whole routine. Returning a heavy item means unstacking two things first. Beginning a project means five minutes of clearing, not creating. You hesitate to put things back because you know you’ll need to rearrange the setup later. The payoff in “neatness” drains away as each reset becomes another round of shuffling bins, sliding carts, or moving bags just to open a clear path.

    Living Around the Setup Instead of in the Space

    It’s a slow flip: instead of making storage fit your habits, the setup forces new workarounds—always moving that corner bin, always nudging the same cart aside, always leaving the ladder out “just for now.” Spaces that should flex between car drop-offs, projects, and daily comings-and-goings start feeling rigid. The wall’s filled, but the floor is never truly open, and “organized” means extra effort, not less.

    Restoring Flow Without Junking the System

    The fix isn’t tearing down what works—it’s untangling what’s stuck. Try this: pull just a third of the gear off the wall and move it to a mobile cart or tray. Now, the tools you grab daily are at arm’s reach, not buried or perched overhead. Entryways reappear. Instead of pulling a bike past the same lineup of bins, you have a clear line across the most-used routes. The space adjusts with you—rolling carts tuck away, corners are less jammed, and resets get faster because less has to be undone.

    Specific Adjustments That Make a Difference

    • Build in Breathing Room: Gaps between storage zones aren’t wasted—they’re space-saving in disguise. Leaving strips of blank wall lets you adjust, reach, and pivot as routines change, without having to empty the whole wall every time something shifts.
    • Mobilize the High-Turnover Gear: Keep everyday tools and supplies in rolling carts or modular bins that can move with you. Reserve wall hooks for seasonal stuff, long-handled tools, or things you rarely touch. Anything you use weekly should be easy to pull and painless to return—ideally, without a step stool or another round of reshuffling.
    • Monitor the “Reset Cost”: High-functioning setups make it quick to tidy up, not just pretty for a photo. If putting things away feels like a multi-step process, or you’re stacking gear back in waves, that’s a flashing signal to lighten the wall or spread out the load.

    The Pathway Test: Spotting Real-World Gaps

    The difference is clear in the patterns that persist: overflow pooling in the same trouble spot; the cart that always blocks a half-open walkway; the high bin you keep skipping; the stuffed wall that makes moving through the room slower, not smoother. Each missed return or too-tight corner is more than a quirk—it’s a readout of how the setup serves (or stumbles) in reality. No storage system is flawless, but the best ones let you reset without friction and move through the space without rerouting your day around your own gear.

    For storage solutions that keep real spaces flexible, reset-friendly, and genuinely easier to use, explore StackNest.

  • Choosing Between Adjustable and Fixed Closet Shelves for Everyday Use

    Closet frustration doesn’t usually start with chaos—it starts quietly, with routine snags you can’t quite ignore. It’s the moment you find your shoes stacked sideways because they’ve outgrown their original spot. It’s shelves that once looked perfect but now swallow your favorite hoodie behind a leaning pile of jeans. The difference between fixed shelves and adjustable ones isn’t just about construction—it’s about how your closet copes with your life’s shifting pace: winter boots replacing sandals, new work bags crowding out neat stacks, shared spaces blurring the boundaries between your morning and theirs. The tension isn’t visible in promo photos. You feel it when you’re pressed for time, when a shelf’s missed inch means rummaging, reshuffling, or watching clutter drift to the floor—over and over, day after day.

    The Real Stakes: How Shelf Type Shapes Daily Use

    On day one, whether you install fixed or adjustable shelves, the closet feels transformed—everything seems to have a home. But give it a few weeks of actual living, and the gaps show. The core challenge isn’t that one type is “better”—it’s that life, and wardrobes, don’t sit still for long. Today’s neatly folded sweaters become tomorrow’s toppling tower; the right shoe for the day is always under three others. With fixed shelves, the lines stay crisp but the system locks you into last year’s storage model. Too-tall stacks buckle, while unused air above thinner piles is wasted. Adjustable shelves tease you with flexibility—move one and suddenly your tall boots fit—but only if the reconfiguration matches your real habits and the system holds steady under load.

    Where Closet Systems Get Tested: Ordinary Routines

    Closet stress surfaces during the rush of actual use, not during setup. Shoes overflow onto the floor when a shelf turns into a catchall. Bags wedge themselves in awkward corners or teeter precariously on a too-shallow ledge. You reach for a folded T-shirt and half the stack flops forward—or worse, you tug out one sweater and topple two. In shared closets, someone’s gym shorts sneak into the workwear pile, and suddenly everyone’s searching. Fixed shelves with bad spacing breed overflow zones: baskets fill up, “temporary” piles become permanent, and what started orderly soon loses its structure. With adjustable shelves, the benefit is only real if an inch here or there lets you actually see, reach, and put things away at speed—put a shelf too high and your sweatshirts vanish into an unreachable alcove, too low and you’re stacking three deep just to make room.

    Everyday Trouble Spots: The Scenes You Recognize

    Picture an evening reset: hanging up your coat but having to nudge aside a wobbly pile of pants yet again. Shoes, once lined neatly, are now doubled up—because shelf spacing won’t allow side-by-side storage. You try stashing a new bag on the top shelf, only to yank half the stack with it when you need it next. Order dissolves in inches—a shirt half-off the edge, a bin caving in from one too many “just for now” items. These aren’t dramatic disasters; they’re the slow leaks of time and patience that make “organization” feel like an uphill battle.

    Why Shelf Adjustments Change Everyday Function

    One wrong shelf height can quietly sabotage an entire closet. With fixed shelves, workarounds multiply—spillover baskets, piles creeping onto open surfaces, resigning yourself to whatever the shelf dictates. Few people drill new holes or attempt permanent fixes; most just endure the friction. Adjustable shelving only pays off when you put it to use—and when changes actually bring order. Sloppy, uneven spacing just creates black holes where hangers get caught and folded things get lost. Unstable shelves collect “later” piles: heavy sweaters, odd-sized bags, or anything that doesn’t fit a designated space, quickly turning flexibility into quiet chaos.

    Shelf Spacing: The Smallest Fix, The Biggest Curtain Reveal

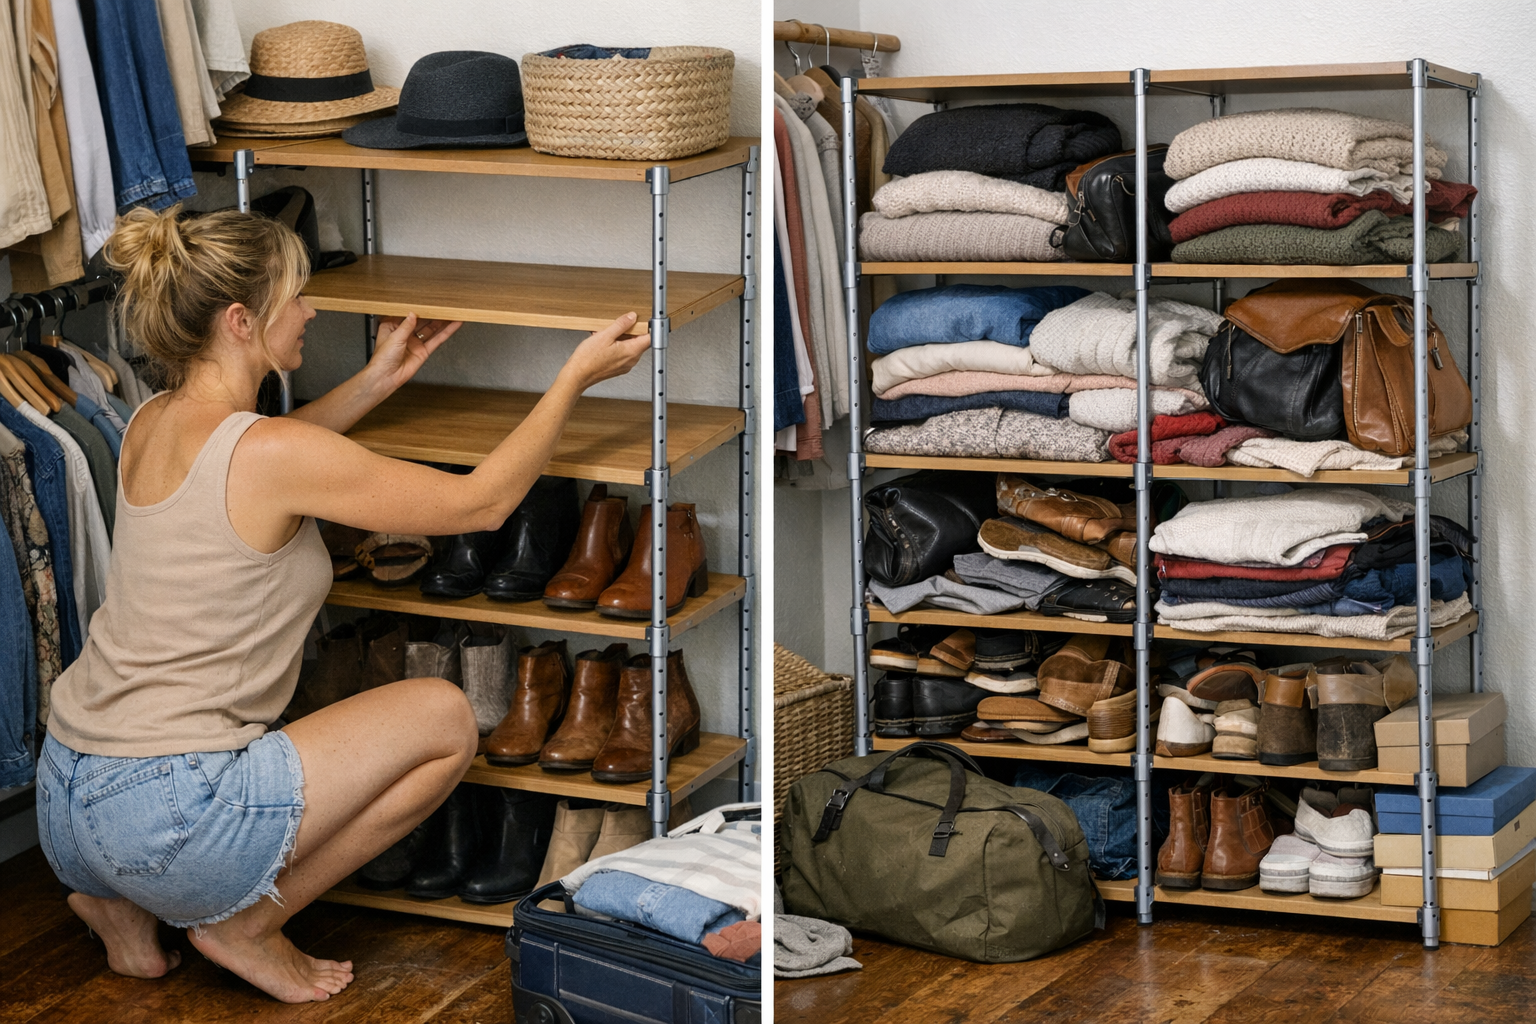
    Try never allowing the gap between adjustable shelves to be bigger than a shoebox. It’s a simple rule that pays off. Stacks stay stable, nothing topples, and you regain vertical space without the burden of balancing towers. Properly anchored shelves—no sag, no shifting—mean you can reach for a pair of jeans or a jacket without rebounding from a miniature avalanche. The visual calm isn’t surface-level; it’s faster resets, stacks that keep their shape, and daily searching reduced to a glance.

    Telltale Signs Your Shelf Strategy Is Off

    Problems don’t always announce themselves. More often, you notice it in the small ways: an extra move to fish out that one T-shirt, a shirtpile fanning out until it covers everything, or a row of bins that started neat but now mix shoes with scarves and batteries. If grabbing one thing routinely means moving two or three, or you lose five minutes a day re-tidying, something about your shelf strategy is quietly failing you.

    Beyond the Closet: Entryways, Bath, and Daily Drop Zones

    These lessons aren’t limited to bedroom closets. Entryway shelves too wide invite mail to drift, hats to mix with dog leashes, and keys to vanish under piles by Friday. In hallways and bathrooms, shelf spacing can turn towels into teetering stacks or hide everyday items behind a wall of toiletries. Fixed shelves bring symmetry but don’t forgive when categories multiply: you buy one extra basket, and the entire “system” clogs. Every reset takes longer, clutter never really leaves—it just migrates one shelf over, one corner deeper.

    Stability Vs. Flexibility: What Matters Most When You Live With It

    Fixed shelves deliver serious durability—indispensable for laundry rooms, utility spaces, or anywhere weight comes first. But in real, high-traffic closets, a well-built adjustable shelf can be just as sturdy if supported correctly and not overloaded. If you want flexibility without chaos, look for partly adjustable systems: enough tight anchoring for lasting stability, enough movement in the setup for actual daily adaptation. The best system isn’t strictly fixed or flexible—it’s the one that lets you reset in seconds, not minutes, and keeps the friction low when life gets busy.

    Making Small Fixes That Actually Stick

    Sometimes, a single shelf move is all it takes: anchor that wobbly tray, add just one more shelf to split a too-tall gap, or shift your most-used items to eye level. These are the details that transform “surviving the week” into “putting things away without thinking twice.” See if your space holds up after a busy weekend, not just after a fresh tidy-up—that’s the best proof you’ve landed on a real solution, instead of another short-lived arrangement.

    For more storage ideas built for real, lived-in homes—not just spotless catalog pages—visit ClosetWorks.

  • How Choosing the Right Oscillating Tool Blade Extends Cutting Performance

    The right blade proves itself when everything gets tough. There’s a moment every tradesperson or ambitious DIYer recognizes: you’re zipping through drywall with a fresh oscillating blade, thinking, “Maybe all these blades really are the same.” Then the job changes—old pine stud with nails, a crusty length of PVC glued tight, or lath buried in ancient plaster. That’s when the friction arrives: resistance suddenly stiffens, the tool’s vibration sneaks up your arm, and steering the blade starts feeling like wrestling a live wire. The job you thought would stay clean turns personal—edges burn, cuts wander, and you’re left sanding and reworking spots that should have been done hours ago. The difference? The wrong blade goes dull fast—and once that happens, every pass gets harder and every fix gets messier.

    When “Good Enough” Blades Give Out Early

    A fresh blade almost always looks sharp on the first soft material. But predictable jobs end fast. Dense wood, mystery nails, or tilebacker that crumbles like concrete—that’s where the shortcuts reveal themselves. With a lesser blade, progress starts to die by degrees: the tool shakes, the cutline drifts, and every push leaves more ragged fiber or scorched plastic behind.

    Real-world fatigue sneaks in fast. You notice it in small ways: more sawdust clings to a chattering blade, your grip tightens every time the tool bogs, and battery packs drain faster because dull teeth make every pass a power struggle. When you find yourself sanding burn marks or compensating with force instead of control, you’re not saving time—you’re stacking up lost minutes with every slip.

    Why “Universal” Rarely Means Equal

    Package claims don’t sweat on the jobsite. What matters isn’t the label—it’s how the edge survives real punishment. Two blades might look the same out of the clamshell, but add a floor stud with an unseen nail or a batch of cement board scraps, and the true colors show. One blade stays sharp, tracking straight through surprises; the other grabs, stalls, and starts to smoke at the halfway point. That’s not just a small difference—that’s the margin between smooth progress and an afternoon of fixing mangled edges. In real workshops, there’s no pause button: when a blade starts failing, your timeline unravels one jagged cut at a time.

    Real Jobsite Moments That Change Your Mind

    Picture a retrofit: cutting conduit slots in a wall built before WWII. First two passes glide, but on the third, the blade grinds into wire mesh hidden in old plaster—next moment, the tool shrieks, progress halts, and your nose stings from scorched metal. Popping in a carbide-tipped alternative, you’re back in control—mark stays true, progress restarts, and you cut out without risking the tool or your patience.

    Or you’re under a crawlspace, notching joists overhead. The economy blade makes a single heroic cut before sputtering out. Progress slows to a crawl—you’re forced to muscle each pass, risking a slip or worse, a busted blade. Meanwhile, someone with the right blade is finishing up, already packing tools while you’re still scraping splinters out with a chisel.

    Blade Wear Signals—Spotting Them Before Control Slips

    Fatigue isn’t announced, but it’s easy to feel if you know when to check. Tool vibration spikes, edges start to wander, and that faint scorched smell means your precision (and energy) are seeping away. If you’re pushing the tool into every cut, chasing a once-straight line, or compensating for chatter with muscle, the blade’s already spent. These early signals are warnings: ignore them and you’re guaranteed longer cleanup, more sanding, and the risk of damaging your tool—or the work itself.

    Material Is the Real Blade Test

    No two jobs are gentle. Old growth lumber studded with steel, layered wall assemblies packed with mystery debris, fiber cement board that chews up teeth—these are what separate blades built for display cases from blades made for daily work. Even the best edge gets tired eventually, but strong composition and sharper tooth patterns buy you those crucial extra passes where control, speed, and finish hold up. Carbide teeth consistently outlast standard bi-metal for wood-with-nail and abrasive applications, buying you fewer swaps and smoother finishing where the job doesn’t slow down.

    Quick Habit: Swap Blades Before They Fail

    Don’t be sentimental with a dull blade. The number one productivity play isn’t pushing through until the blade is smoking—it’s swapping as soon as you feel the work change. If the tool strains, vibration spikes, or the blade feels hot to the touch, change gears and switch blades. That handful of seconds saves hours lost to sanding, patching, or retracing missed lines. Especially on repeat tasks—like notching every bottom plate in a row—staying ahead of blade fatigue keeps the project moving and your hands out of the red zone.

    This habit pays off beyond tools—smooth cuts keep your workflow intact, precision saves touch-ups, and your arms don’t end the day shot from overcompensating.

    The Compound Effect: Every Cut Adds Up

    Blade choice isn’t just an up-front call. Every stroke either keeps you in the flow or drags the job down. Stronger, longer-lasting blades keep you ahead—on unpredictable jobs, in tight corners, and over the long haul. Don’t tune out the small signals: listen for vibration, watch for wandering lines, notice when the tool feels “off.” That split-second swap between dull and sharp is the simplest productivity upgrade available—keeping your outcomes neater, your fatigue lower, and your day on track, whether you’re cutting, drilling, sanding, or fastening the last piece in place.

    Find blades and accessories built for real workspaces at Gumboll.

  • Selective Visibility Transforms Modular Workshop Storage Efficiency

    On day one, every tool has its place. By week three, you’re already sidestepping the promise. Rows of hooks, lined bins, crisp outlines—a modular garage or workshop wall always starts tight. But after even a handful of real afternoons—muddy rakes coming in, drill bits swapped on repeat, bike helmets stashed for “just a second”—the setup fights back. Bins overflow. Trays crawl across surfaces to make space for whatever’s new. “Clear access” turns into a low-stakes shell game, especially after a hectic project or a hurried reset leaves clutter in its wake. It all looked organized, but now it’s a holding pattern. You’re working around your wall, not with it.

    How Fast “Organized” Becomes “In the Way”

    The slip is almost invisible, until it’s not. The neat look fades the moment the system meets real habit. That open-display grid that sold order quickly becomes a scavenger hunt. You reach for one socket and have to double-check—was it this rail, or the next? What should be automatic now takes scanning across near-matches. Hands pause, hunting through duplicates or wrestling the overflow. “Easy access” quickly comes to mean “always shifting something else out of the way.”

    These friction points rarely announce themselves. A rolling cart positioned a little too close so you have to nudge it away every time you need a tool, a tray you leave out once because putting it back takes too many maneuvers, or that dead zone behind a cabinet edge that’s always in the way but never quite usable—each small hitch stacks up. Resets drag out. Two minutes becomes ten. Before long, wall space gets used, but it’s not actually useful: tools wind up on benches, overflow piles in awkward corners, and moving through the area feels more blocked than before.

    When “Everything Out” Means Everything’s in the Way

    All-in-view isn’t always all-in-reach. Those modular layouts layer hooks and holders on every inch, hoping to bring order. But once the wall fills up, clarity fades. Cables snarl with hoses, handles blur, small tools disappear behind a line of clutter. You stop glancing—you have to pick your way through. It’s storage by display, but not by rhythm. Needing a tool means shuffling trays, pushing other things aside just to see what’s underneath. Easy access? More like constant reshuffling, especially when every inch is claimed but none is clear.

    How Overflow and Shuffle Slow You Down

    Picture this: you’re mid-repair, reach for your utility knife, and it’s vanished. Scan the wall—bins block bins, maybe it’s pinned behind a newly perched pliers set. What looked “sorted” is now just visually crowded, and everything you actually reach for is buried amongst items you haven’t touched this month. The mental tax grows. You delay putting things back simply to dodge the awkward moves. Tools land in stacks near your main bench—never a home, always a temporary fix. Every extra shuffle or move costs you time, breaks your flow, and frays the practical order you thought you bought.

    Selective Visibility: Making Prime Space Actually Work

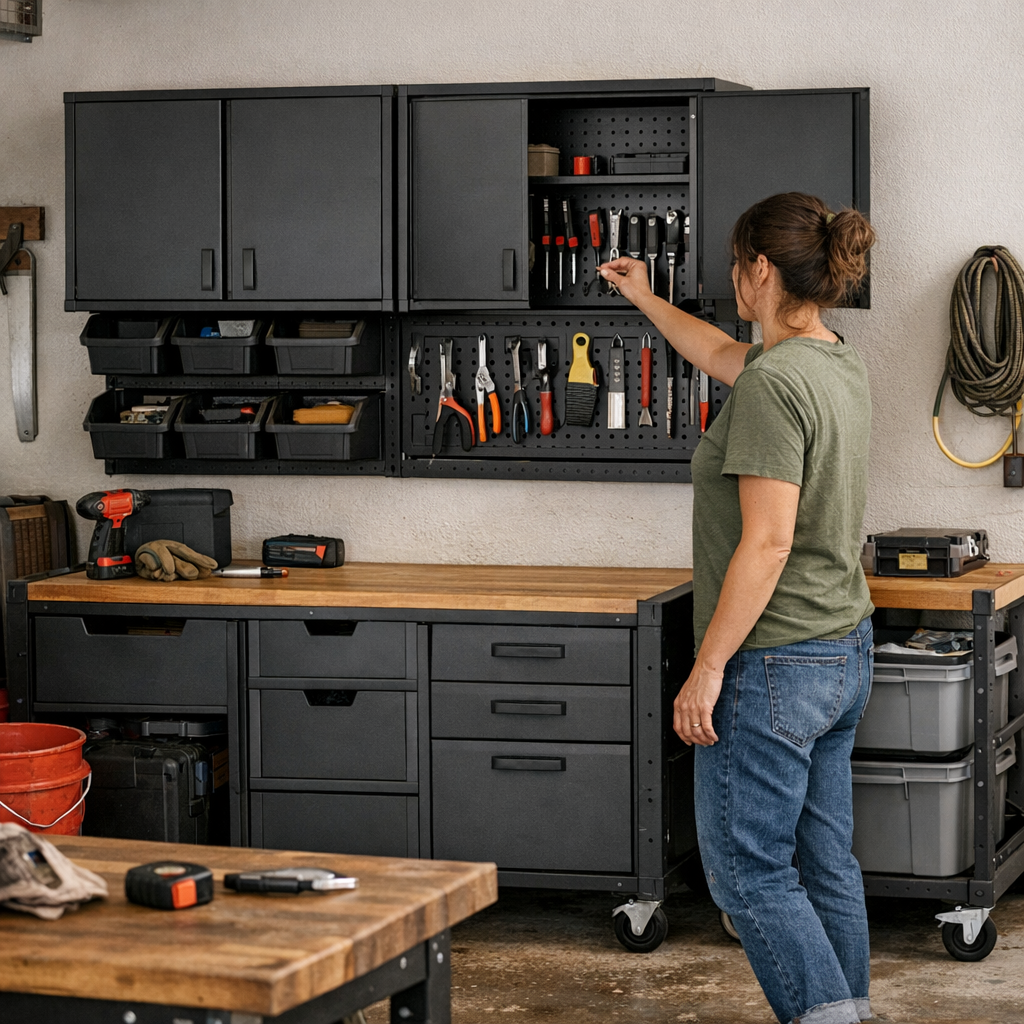
    Don’t show it all, show what you use. After the honeymoon, what steadily improves workflow isn’t more hooks or fancier trays—it’s dialing back on what’s displayed. Real setups thrive when they reserve wall space for the tools that stay in hand project after project, while everything else goes behind panels or into shallow drawers. Keep current essentials out front; tuck backups, bits, and once-a-year gadgets behind doors. The difference isn’t visual flash—it’s every movement feels more direct, with no shuffling just to get started.

    Live-in garages and workspaces make this obvious: project-specific items, neatly rotated, stay visible and accessible. Legacy gear—old hose adapters, an extra socket set, the sander you bring out twice a year—tuck away, freeing up the working surface. No more needing three moves to fetch one tool. No more bench-edge piles. No trays stacked atop trays. Each project starts faster, resets finish quicker, and the routine breathes again.

    Covered Storage: The Quiet Fix for Everyday Slowdowns

    In a small garage that ditched open bins for more covered drawers, the change showed up immediately. Only the active tools needed that week remained out. Everything else faded behind smooth panels. Cleanups stopped stretching. No battles to free up a hook. No running list of “where did that go again?” The reset phase shrank to minutes. Work patterns smoothed out—even when the project list grew, the physical drag didn’t. The wall became a launchpad, not a sorting station.

    Know When Your Setup Is Working Against You

    If you’re pausing just to get moving, your wall is overdue for a reset. Modular systems don’t fail loudly—they fail by inches. That tray you always have to move, the tools that land on the floor, the cart you shove aside every session—these signal a system that only looks organized. The space grinds against your actual routine, with open-access becoming open-obstruction.

    Watch for these visible signals:

    • Overflow piles grow on surfaces even though there’s “space” left on the wall
    • You need two or more moves just to put away—or retrieve—a single go-to tool
    • Cabinets and corners turn into choke points, not shortcuts
    • Sections stay outwardly organized but attract new clutter after every session

    Throwing more hardware at these friction points rarely solves them. The streamlined fix is always the same: remake your workflow for quicker resets. Hide what’s idle, simplify the route for your routine, and use covered storage to carve out repeatable, open paths. You’re aiming for a space that clears itself as much as you clear it.

    Modular, Not Monolithic: Let the System Flex with You

    Great setups flex with changing projects—and clutter patterns. Modular walls aren’t meant to be frozen in their first arrangement. Each season brings a new sort of overflow: early spring means gardening, late summer is bikes, winter’s all about fixing whatever broke in the cold. Your storage shouldn’t fight those routine shifts.

    Instead of maxing out every square inch, rotate what’s forward. Out-of-season gear? Behind doors. Rarely used tools? Covered bins below. That frees the wall for whatever’s genuinely active. In workshops or garages facing tight layouts or awkward footprints, this is the only way to cut down wasted time—less moving, less reshuffling, no more stepping around dead zones or blocked corners. When the arrangement feels stale or clumsy, flex it. The real win is how easily the setup morphs around your routine—not how much it can technically hold.

    Two Small Upgrades with Outsized Value

    1. Build a simple “landing zone” at your main project area. Make a short shelf, a small drawer, or a shallow bin right where you work—a spot to stage items you’re in the middle of using. Reset by clearing this zone first. If things stack up here session after session, it’s your sign that something’s wrong with your flow.

    2. Audit visibility—ruthlessly and regularly. Every month, glance at each hook, tray, and bin. Do you know exactly what’s there—and did you touch it this month? If not, cover or stow it elsewhere. The wall should only show what earns its spot. Clutter comes from over-exposure as much as from neglect.

    The Payoff: A Wall That Fades Away, Not in Effect But in Fuss

    The best modular setups eventually vanish from your mind. In garages and workspaces where the wall adapts, you stop thinking about storage because nothing interrupts your reach or slows your reset. Movement gets easier—you walk through, not around. Trays stay put. Benches clear fast. Dead corners lose their claim on clutter. The setup supports your routine without needing explanation. The real magic isn’t how packed or pretty the wall looks—it’s that you barely notice it at all, even after months of action.

    See real storage solutions and modular setups that keep your workspace working at StackNest.