Category: Tools & Workshop

  • Why Storage Systems Fail After Daily Use and How to Fix Them

    The first day of any closet overhaul feels triumphant—rows of matching bins, crisp stacks of shirts, categories clearly divided. But open the same door seven days later and reality blurs that picture. Bins have drifted. A once-separated sock pile now flirts with the belts. The scarf tucked away on Sunday is buried under bags by Friday. The frustration isn’t the mess itself; it’s realizing how quickly “order” loses its grip when daily life pulls, nudges, and reworks your careful setup.

    Where “Organized” Unravels: The Real-World Tangle

    Disorganization doesn’t crash in with a bang—it creeps up through a stream of petty interruptions:

    • The bin you reach for every morning has slid halfway down the shelf, needing another reposition before you can open it.
    • Stacks of jeans tip toward chaos as you tug out your favorite pair, sending the rest slumping forward.
    • Socks and belts, meant to stay in their own zones, end up mingling after one rushed search for the right accessory.

    At first, these slips are just background noise. But as the week wears on, you find yourself spending precious minutes nudging bins back, refolding shirts, and restacking what yesterday’s routine left askew. The satisfaction of organizing drains away each time you have to “fix” things just to make them usable again.

    Containers That Create More Work

    It’s easy to believe uniform bins and labeled baskets will solve every storage problem. The visual calm is real—until daily use presses them edge-to-edge and the cracks widen:

    • Pulled too often, bins start shifting the whole row, turning your shelf into a sliding puzzle.
    • Dividers may look official, but if they don’t pin items in place, the boundaries blur with every rummage.
    • Vertical stacks optimized for space make grabbing a T-shirt feel like pulling a block from the bottom of a Jenga tower.

    Photo-ready order fades the moment you grab in a hurry. In real life, busy entryways betray their system quickly—shoes spill beyond their intended line, bags and hats drift onto every flat surface, and returning anything means a two-step shuffle before the closet can close again.

    Reset Resistance: The Slowing Down of Every Day

    Daily friction becomes obvious when putting things back takes as much effort as finding them. If you have to lift two bins just to return a sweater, or rearrange a stack to squeeze in one more towel, the system is quietly sabotaging itself.

    The hesitation test: You’re left holding an item, scanning for a spot that won’t cause another collapse. Is it faster to just pile it anywhere and promise yourself a “proper fix” later? That promise adds up—and so does the clutter.

    In entryways, that means tripping over shoe piles and rerouting keys buried under unopened mail. In linen closets, folded towels shuffle forward until the neat stack spills into every spare inch. In bedroom wardrobes, the clothes you wear most hover on the edge—one step away from being permanently “out,” simply because returning them is too much work.

    The Stack-and-Slide Headache

    Stacking bins may look space-smart but breeds slow chaos. Tug one out, and the whole column shifts off balance. Suddenly, containers meant to keep “shirts” and “socks” separate start sharing contents—one ambitious grab or quick toss is all it takes.

    Pay attention: How often do you interrupt your routine to straighten bins or rearrange piles? If you’re spending time resetting your system every couple of days, your storage is demanding too much—and that’s the real thief of clarity.

    Why Shelf Height and Placement Matter

    Sturdy function starts with shelves and bins you can reach and reset in a single motion. Items you grab most should sit at elbow-height, with nothing stacked on top to create a barrier. When a shelf is stuffed up to the ceiling, every return becomes a balancing act—one wrong move and shirts, bins, or towels slide off, merging categories and sapping order.

    Make a simple shift: Remove a tightly packed upper bin. Leave a few inches of open space above your busiest shelves. Suddenly, daily grabs don’t topple piles. Each category keeps its lane, and tossing laundry on the shelf or grabbing shoes for a run becomes effortless, not a mini-reorg.

    Scenes from the Storage Frontlines

    Picture the folded shirt shelf after two laundry days: once-neat stacks now slouch and lean. Dig for what you want, and the next layer crumples, turning “organized” into a scramble. Or the hallway nook—Monday’s empty hooks fill with gym bags, umbrellas start slipping sideways, today’s groceries encroach on tomorrow’s coats. Spaces intended for one role quietly host everything at once.

    Small Tactic: Add Breathing Room

    Where it matters most, create intentional wiggle room. Resist the urge to maximize every inch. Give bins and baskets at least an inch of empty space on all sides—even if that means leaving a container out. This softens the daily jostle, preserves invisible boundaries, and lets your storage system absorb the shock of real-life routines.

    Lasting Ease, Not Illusion

    The best setups aren’t the ones that look newest—they’re the ones that still function at the end of a hectic week. You should be able to grab, return, and move on—no multi-step resets required. Systems that last have categories that hold, containers that don’t drift, and shelves that cooperate rather than block. The benefit shows up quietly: less reshuffling, clearer spaces, easier mornings.

    Storage doesn’t have to be perfect, just practical. With bins that slide but anchor, a little breathing room, and honest shelf placement, you can spend less energy on cleanup—and more on the things that actually matter in your day.

    See more ideas and storage solutions at ClosetWorks.
  • Why Movement Matters More Than Perfect Organization in Storage Spaces

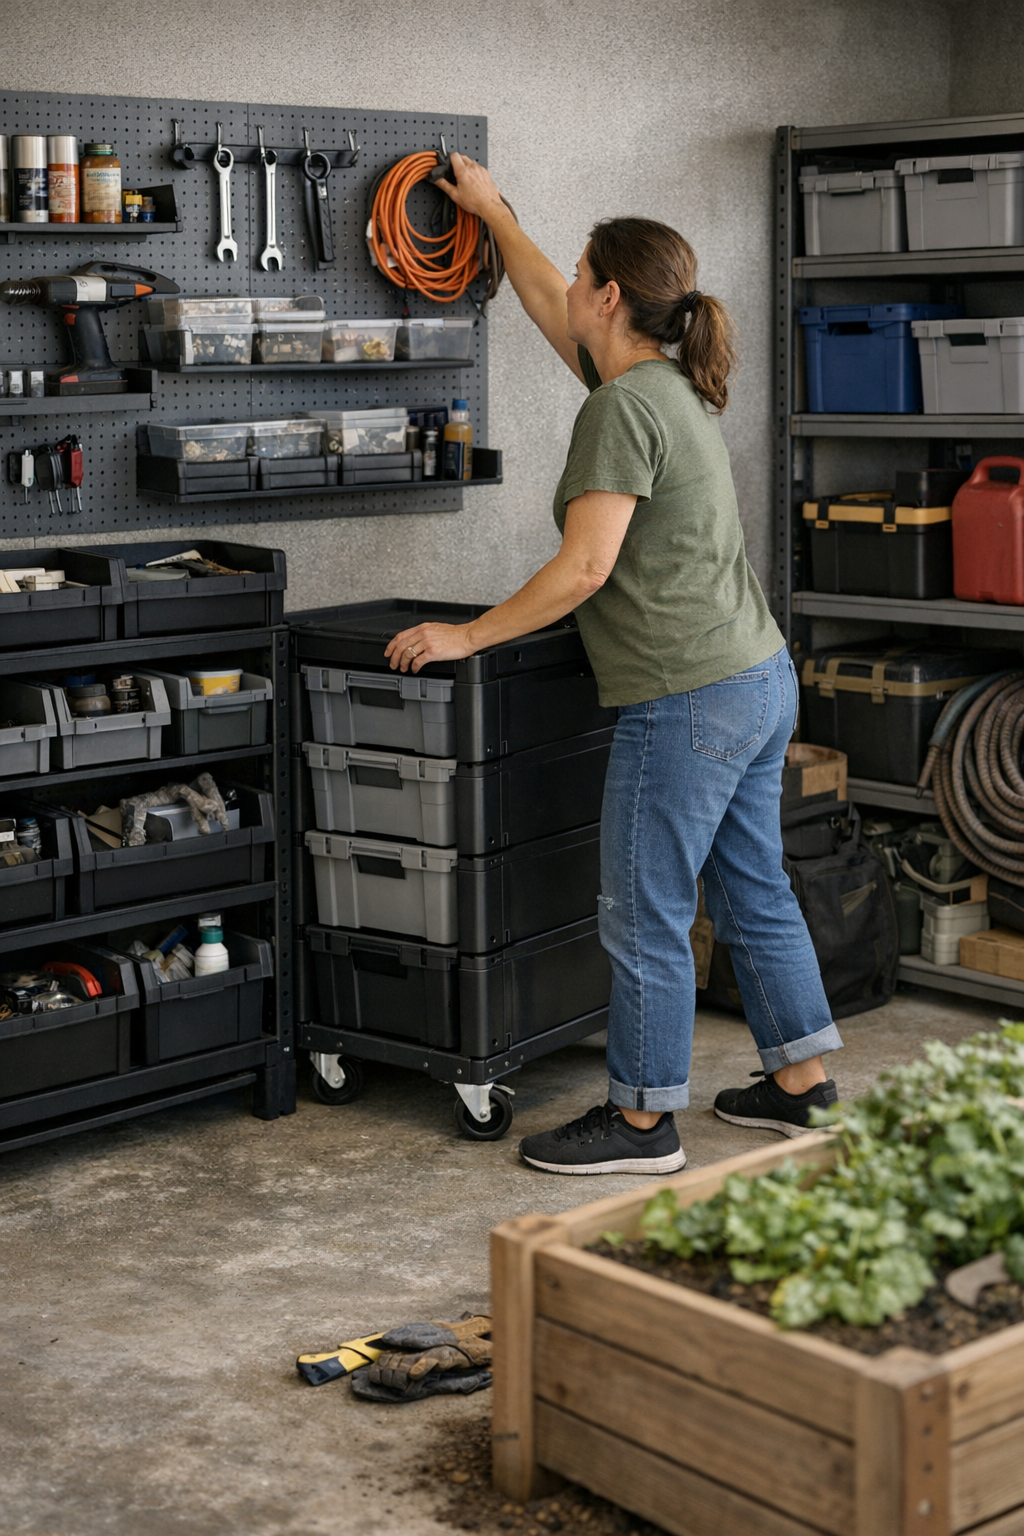
    Everyone loves the crisp satisfaction of a freshly organized garage, workshop, or backyard shed—a place where every tool has a label, every bin squares up in tight rows, and the floor finally looks clear. It lasts about as long as it takes for real work to start. The first time you pull out that mobile cart, open up a wall system, or reach for a drill mid-project, the “perfect” setup proves itself less perfect: storage fights back, movement stutters, and the tidy arrangement you sweated over quietly becomes the new source of friction.

    When “Perfect” Layouts Trip Up Real Routines

    The thrill of seeing everything snapped into place easily hides this creeping frustration—movement friction that sneaks up on you in your actual routine. The so-called mobile cart seems nimble until it ends up wedged between folding tables and parked halfway into the walking path. The low cabinet that fit so neatly along a wall now demands a sideways reach around its edge every single time you grab the one hand tool you use daily.

    Clutter isn’t the problem; it’s blocked flow where organization gets in your way. Detouring around a misplaced cart, sliding out bins stacked in front of the one you truly need, or hunting for a gardening glove in a compartment lost behind others—not only do these tiny disruptions add up, they slowly chip away at the sense of order you thought you’d achieved.

    The Real Price of Blocked Pathways

    The tension between looking organized and actually living with the setup shows up in small but relentless ways:

    • A rolling chest perfectly camps against the back wall—until fetching the shovel hanging behind it becomes a wrestling match.
    • Your cubby grid sparkles on day one, but every Saturday finds you stepping over the same baskets dumped out from last week’s project. The prime parking spot for your mower? Slowly overtaken by overflow you “temporarily” stuffed there.
    • The workbench with built-in storage looks efficient, but now you’re in the habit of shuffling bins on and off it each time you want to actually work in the space.

    Resetting these zones turns into an obstacle course of micro-shifts: carts that never quite return home, bins crammed blocking easy access, a heap behind the door that grows with every project. The more you have to maneuver around your system, the more routine resets stretch and frustrate—until even a quick tidy-up feels slow, clunky, and discouraging.

    Real Resets vs. Routine Resistance

    This isn’t just a once-a-season headache. In the day-to-day grind—especially in small or multipurpose spaces—these frictions show up after every use. Finish a job, and suddenly you’re sidestepping a half-moved cart, squeezing past a tray you left out for “just a minute,” or rerouting your return because bins have piled up on the “clear” part of the floor.

    It’s not just lost time—it’s a slow drain on motivation. Two minutes to “reset” balloons to five as you’re forced to touch the same items over and over. Eventually, the system meant to make things simple just breeds a quiet resentment and a feeling that your setup is working against you. The more you “fill” your space, the more you realize the real priority: how easily you can move and reset, again and again.

    The Shift: Serving Movement, Not Just Storage

    The biggest improvement rarely comes from adding more storage. It comes from creating open movement lanes and rethinking what “full” even means. The best setups respect your need to get in, reset, and move out—without choreography or second-guessing. That might mean not lining every inch of wall with storage, or carving out clear “parking spots” that don’t collapse into each other after a busy weekend.

    Sometimes, just leaving a deliberate half-cart-width between your mobile rack and the shelves behind it is the single tweak that transforms daily use. That split-second access—no sidestep, no “excuse me”—removes a routine interruption you’d accepted without question. Your wall tools, for example, become a simple reach, not a detour requiring you to drag something else aside first.

    Test It: The “One-Move Rule”

    Put your setup to the test: if you have to shift, slide, or backtrack just to get a tool you use every session, you’ve spotted a friction zone. Try re-assigning where carts park. Slide core-use bins up to eye level. Shift infrequent items—and only those—to the corners or deep shelves. The goal: one move, not three, to access anything you need all the time.

    Spotting Subtle Drains: Overflow Piles and Dead Space

    Let flow issues go unchecked, and you’ll spot the real cost quickly enough: zones that slowly fill with overflow, corners that become permanent drop zones, wall organizers that overflow onto the floor. Labeled bins multiply behind closed doors—and suddenly every “temporary” pile is part of your new normal. Those dead corners never get reclaimed; they just rearrange the obstacles.

    In reality, it’s not about the sheer amount you can store—it’s about how easily it all returns to place without a chain reaction of bumps, slides, and re-shuffles. Nobody plans to be tripped by their own organizing system, but it’s the most common side effect of ignoring circulation, bottlenecks, and how things land after real use.

    Designing for Effortless Repeat Performance

    Lasting ease isn’t about picture-perfect bins—it’s about setups that handle repeated routines without turning resets into relapses. Leave genuine lanes for carts. Prioritize wall zones for the dozen tools you grab on autopilot. Study your own traffic: wherever you get stuck or forced to shuffle, make a change—even if it means storing less on that one shelf. These adjustments last because they mirror your habits, not just aesthetic ideals.

    The right difference is immediate: No more pausing before putting things back. Less weaving around forgotten bins. A routine that feels like “coming home” to a zone ready for your next move, not a puzzle to be solved every time. Space welcomes you back because everything is staged for actual movement—not just on display for a camera.

    The glossiest storage layout isn’t always the one that works. What matters is carving out a plan that lets you flow—resetting, reaching, and moving with real ease—no matter how many times your week upends your best intentions.

    See modular and mobile storage that lets your routine flow at StackNest.

  • Why Inspecting Your Circular Saw Blade Before Use Saves Time and Money

    If you work a jobsite long enough, you see it: perfect cuts that suddenly go sideways, slowing workflow and sapping energy when there’s no room for error. Circular saws are the muscle behind framing, decking, and trim day after day. But in the real world, it takes just a single invisible chip, a dab of sap, or a blade with a hair too much wobble to turn easy rips into headaches. That early morning hum—with the saw gliding through plywood without a hitch—doesn’t last. By mid-morning, you’re forcing the saw through dense pine, the line starts drifting, and you’re wrestling burnt edges. You can check your stance and your technique, but the real villain is often the same: a blade you trusted without really checking, costing you speed, finish, and patience before lunch.

    The Small Faults That Steal Time—and Precision

    You don’t need missing teeth or a bent plate to ruin a cut. The real trouble comes from hairline damage: a chipped carbide barely big enough to catch a fingernail, or a smear of pitch that gums just one gullet. Stack two supposedly identical framing blades, and you’d swear either is fine. But send the wrong one through yellow pine on a chilly morning and you get telltale slowing, ragged breaks at the kerf, and that split-second shift from a steady hum to a thin, protesting whine. Nothing sours momentum faster than realizing too late that your lumber’s fine—it’s your blade that’s dragging the job.

    When a Single Tooth Throws You Off Course

    Picture breaking down twenty-some 2x6s for a floor, deadlines close behind. Layout is crisp. Blade’s set square. But mid-rip, the saw tugs just enough to jolt your control. The motor note sours, tiny scorches appear, and the cut edges start to splinter. Fingers instinctively blame the lumber, or maybe the tool. Nine times out of ten, you push through—only to discover, under shop lights, that one tooth’s bent, chipped, or gummed enough to send every board off-kilter.

    Payoff? Extra sanding, slower feed rates, more sawdust, aching wrists—possibly tossing good lumber when the damage goes too deep for a cleanup cut.

    Early Warning: The Telltale Signs of Blade Trouble

    Blade problems rarely declare themselves from the start. Instead, the warnings creep in:

    • Resistance builds up: Cuts feel heavier, pushing takes more effort than you expect.
    • The saw won’t track: Try to follow a chalk line, and the blade walks by the end of the cut—especially when ripping longer stock.
    • Unexpected burns or smoke: Clean hands but the wood still blackens? The issue is almost always blade-related.
    • Splintered or ragged kerfs: Smooth faces turn rough, even on good plywood or clear pine.
    • Odd whines, buzzes, or new vibration: A healthy saw runs smooth—a nagging chatter or odd resonance nearly always means blade trouble.

    These problems usually show up after the first handful of boards, when you figure your setup’s fine, and the real work starts. That’s why they’re so easy to miss—until your stack of bad cuts is too big to ignore.

    The One-Minute Inspection That Saves Your Day

    Most pros glance at the blade and move on, but a real check takes sixty seconds: flashlight in hand, run a fingertip gently along the teeth. What you miss by eye pops under a raking light—a chip, some dried pitch, a wobble you wouldn’t spot otherwise. Check for:

    • Bent, chipped, or cracked teeth—especially near the lead side
    • Glossy streaks of sap or pitch that catch light at the edge
    • Runout (is the blade wobbling?)—spin it by hand and watch from the edge for even a tiny shimmy

    This isn’t babying your gear—it’s about keeping momentum. There are days a one-dollar blade swap saves hours spent sanding, adjusting, or even recutting finished work. Toss a blade that “almost cuts” and you dodge the cost of wasted time, wasted boards, and frayed nerves.

    Don’t Trust Yesterday’s Blade

    Blades that felt brand-new at the end of one shift can foul up overnight—pitch you missed, micro-damage from a brush with hidden metal, warping from a hard drop. No matter how clean yesterday’s cuts looked, start each job with a check: a minute now saves a half-hour and a half-dozen ruined boards later.

    Jobsite Reality: The Morning Routine That Pays Off

    The real world isn’t a catalog photo. Plates clang as trucks unload, stands go up, and the noise rises fast. Before the first cut, our crew runs blade checks as automatically as plugging in the saws. Case in point: last week a guy wasted an hour fighting drift. The culprit? A tooth that looked fine until you traced your finger across it—there was the chip, left over from nailing the end of a board the day before. Swapping a blade and cleaning the housing? Ten minutes. Problem solved. One lesson, learned for good.

    Shop Habits With Real Payoff

    • Keep a flashlight on your belt. Don’t trust shop lighting—angle a beam across the teeth and every flaw jumps out.
    • Use your thumbnail. Eyes miss what skin catches. Run it around the rim for roughness or tiny chips before you mount up.
    • Track blade changes on big jobs. Mark the date or the cut count. Fresh pressure-treated lumber or long rips eat carbide fast—a two-day-old blade isn’t always a good blade anymore.

    Blade Condition: The Overlooked Difference Maker

    In basements, garages, and backyard decks, the gap between a sharp blade and a dragging one is clarity itself: clean, fast cuts give you control, let you move on to joinery or layout while energy’s still high. Sloppy blades force you into rework and endless dust—cutting accuracy turns into correction work, and hands fatigue twice as fast.

    Build the blade-check habit as you set up and everything runs sharper. Snag problems before they cascade. Jobs move cleaner, frustration stays low, and the only thing working harder is the saw—not you compensating for a dull edge you never bothered to inspect.

    http://gumboll.myshopify.com

  • Creating a Closet System That Stays Organized Through Daily Use

    Most closets start organized, but real routines put every setup to the test. After a week, “neat” turns into shuffling past overloaded stacks, digging through foggy bins, or watching piles slump and blend together until you’re right back in the muddle you tried to avoid. That quick morning grab for a favorite tee? Now it means disturbing three other items just to reach it. When the fix for one small frustration ripples through the rest of your space, the difference between a photo-ready closet and one that actually works becomes impossible to ignore.

    The Compound Effect of Everyday Storage Choices

    Choosing between a new bin or shelf divider seems trivial—until everyday use exposes the flaw. Three shirts neatly stacked on Monday quickly become a slouching, lopsided blend by Thursday. What started as clear rows slip sideways, merge, and force you to rebuild the whole stack just for one item. And once you add that fifth sweater or a new gym top, the boundaries vanish entirely.

    Each grab, each return, creates a ripple. The more you interact with your space, the faster weak systems reveal themselves: time spent straightening, guessing where something moved, or re-establishing “zones” that looked obvious before. Instead of a five-second pick-and-go, you’re mired in micro-adjustments that crawl into every morning routine.

    How Clutter Slowly Spreads—And Drags You Into It

    The small signs don’t take long to surface:

    • Shelves packed edge-to-edge by midweek, turning “visible storage” into a solid wall
    • Stacks drooping, folding over onto neighbors, or spilling just enough to erase any sense of order
    • Bins that started as category allies morph into black holes—socks vanishing under scarves, accessories slipping out of sight
    • Sliding one item out triggers a domino effect: three things shift, two items get buried, nothing feels easy anymore

    These aren’t just cosmetic annoyances. Each slip or merger adds friction, slows you down, and chips away at the idea that “organized” means effortless. Instead, every minor retrieval becomes a decision point—or a little sigh—about how much clutter you can ignore for another day.

    What Actually Keeps Your Closet Calm

    Closet systems that work in real life aren’t defined by how many racks or bins you squeeze in. They’re about stopping the spread, keeping lines visible, and ensuring every category has a fighting chance of staying put. Shallow, open bins prevent items from layering out of sight. Mid-shelf dividers nip pile drift before it starts. If categories start invading each other, your setup needs an edit.

    More hanging space isn’t always helpful if it forces tight reaches or stacks clothing too closely. The true upgrade is clarity—visible divisions, just enough structure—so each retrieval isn’t a balancing act or a hunt. Systems that are easy to reset in 30 seconds are the ones that actually survive a full week’s activity.

    Instagram Closets vs. Midweek Reality

    Perfectly staged closet photos look crisp only on day one. Tall bins and double-stacked rods might work until you actually need something from the bottom—or until stacks wobble and turn the “shirts” section into a crash site for mismatched gym gear. By Wednesday, carefully sorted areas blend together, and the act of keeping up starts to feel like another chore.

    The only test that matters: will you find things where you expect, without first rebuilding the shelf? If every row, bin, or section keeps its shape, your weekday rhythm flows. If not, even a small addition or quick grab leads to clutter that sticks around much longer.

    Real Mornings, Real Obstacles

    Imagine your normal routine:

    • Pulling out a shirt from the middle of a pile—then spending two minutes half-folding the rest just so the stack doesn’t topple
    • Hunting for a scarf that’s now MIA inside a bin mixed up with hats, gloves, and yesterday’s loose belt
    • Watching carefully sorted shirts start to tip, edge closer, and finally blend into a single, unruly heap by the end of the week
    • Each quick move leaves the shelf just a bit messier, until resets feel inevitable and exhausting

    When you need both hands for what should be a one-hand pull, or you hesitate to return something because it might set off a collapse, the system has become another small obstacle—one that builds stress with every round.

    The Power of Clear Visibility and Smooth Reach

    It wasn’t a major overhaul that fixed my own closet, just targeted changes that smoothed the pain points:

    • Shallow, open trays took the place of oversized, sagging bins. Now I see everything at a glance—nothing gets buried, nothing forgotten.
    • Eye-level dividers stopped rows from blending. A gentle boundary, easy to adjust, that keeps shirts from sliding into jeans or workout gear territory.
    • Lowering stack height added a feedback loop. When a pile started to grow, the visual cue was immediate—time for a quick reset before the chaos even started.

    With less stacking and more surface visibility, retrievals became frictionless. Returns stopped feeling like a gamble. Most telling: I didn’t have to “get organized” again a week later.

    Is It Time for a System Reset?

    If you’re sliding aside piles, untangling mixed categories, or regularly forgetting what’s at the back, your setup isn’t working with you. Long reset times, frequent straightening, and lost items are the system’s way of signaling it’s out of sync with real habits. Deep bins and broad, open shelves create hiding spots and encourage lazy piling—if you haven’t seen an item in weeks, it’s buried for a reason.

    The simplest correction is often the most powerful: insert shelf dividers or swap out deep bins for lower, shallower trays. The immediate visibility boost makes new messes—and missing items—impossible to ignore. Small, obvious cues let you act before clutter takes over.

    A Closet That Works for the Week—Not Just the Weekend

    The real value of organizing is measured in weekday flow, not the afterglow of a big cleanup. A good setup answers to the real demands: grab, go, replace, repeat—without slowdowns or silent sprawl.

    The right tweaks—bin height, divider spacing, and visibility—reduce the need for full resets. When you can see what’s there and put things back in a split second, order holds without effort. Instead of battling your closet, you use it—and move on, knowing it’ll hold steady until you’re ready for the next round.

    Shop storage solutions that are designed to handle real-life routines at ClosetWorks.

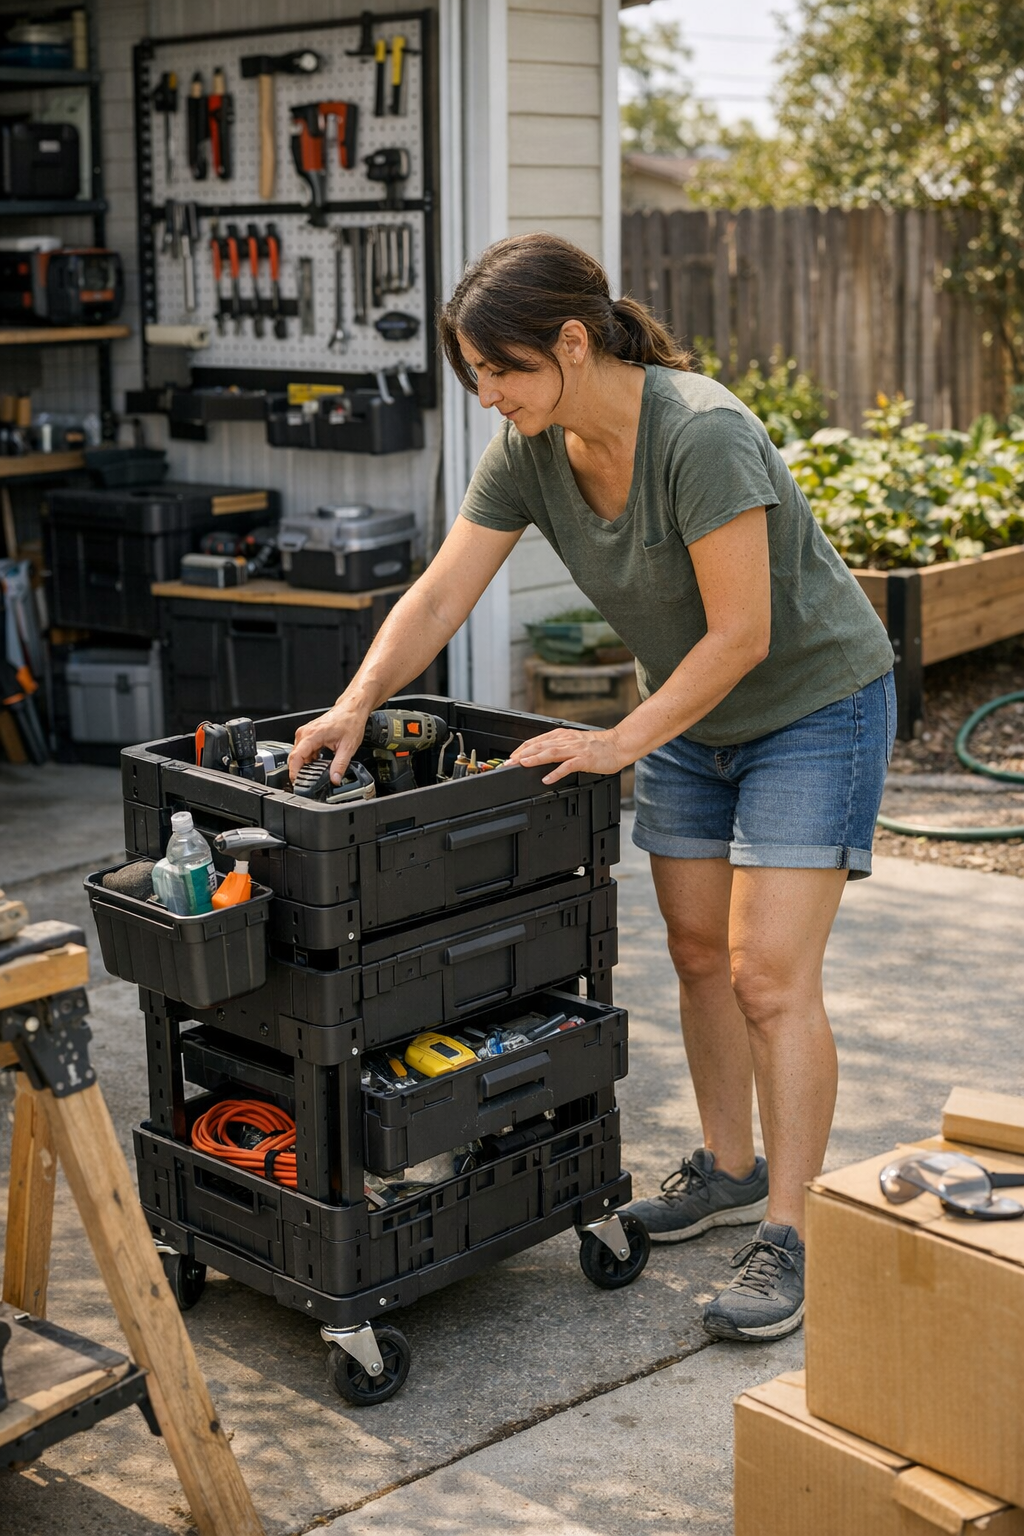
  • Why Mobile Tool Storage Transforms Workshop Efficiency and Flow

    Every garage or workshop looks organized—until you actually try to use it. The problem isn’t always clutter or neglect. It’s standing there, staring at a perfect grid of labeled drawers and wall racks, only to trip over the same blocked path, squeeze past a cabinet that always seems in the way, or shuffle tools in and out every time your project spills beyond that one perfect wall. What’s supposed to be an upgrade—the “everything in its place” system—becomes a stop-and-start obstacle. You find yourself dodging fixed shelves, retracing steps for forgotten tools, or improvising makeshift piles in open corners just to keep moving.

    Stationary Setups: Where Organization Stops and Frustration Starts

    Most setups start the same: fill the main wall with shelving, pegboards, or a bank of deep drawers. For a little while, everything looks under control. But start a real project—installing shelves outside, swapping tires in the driveway, just cleaning up yard tools—and the stationary system quickly betrays its limits:

    • Making three separate trips because the next socket or screwdriver is back on the wall, past the bikes, around the lawnmower.
    • Edging your way past a low bench only to find both sides blocked by deep cabinets—no good angle, nowhere for your knees.
    • Stacking the “overflow” tools into floor corners, because the wall rack is full but there’s never enough truly usable space.
    • Shoving open a cabinet door for the hundredth time, just to squeeze out the same wrench you always need, and fighting the door as you pivot through a narrow walkway.

    It’s not chaos, but it’s not flow, either. With every trip, work gets incrementally slower. Corners fill with odds and ends. You know where everything lives, but getting to it—actually putting it to work—becomes a tactical scramble more than a routine.

    Mobility Breaks the Pattern

    This is where mobile storage—rolling carts, compact chests, or modular cabinets—quietly shifts everything. The benefit isn’t just squeezing in “more storage.” It’s the ability to bring what you need to where the real work is happening, not the other way around.

    On a Saturday tune-up, instead of filling your arms with everything you think you’ll need (and inevitably missing something), you load key tools into a cart and roll them to the driveway. The setup moves with you—against the workbench, outside near the project, or down the line as you shift between tools. Every transition that used to mean starting over or stepping awkwardly around barriers now becomes a single, consistent flow.

    Real World Scenarios: How Static Storage Trips You Up

    Think back to assembling outdoor furniture last summer. The storage cabinet looked tidy, but the moment you needed a clamp or swapped out a bit, your hands were already full and your path was blocked by the same old stack of bins. Every unplanned step back to the wall cost you time and broke your rhythm. The corners became holding zones for whatever didn’t fit. At the end, it felt like you spent as much time resetting your workspace as working.

    Now, picture a cart loaded with just your essentials parked beside the job. No more juggling bits and running laps; no more fishing behind storage that looked great but never actually cleared your path. The cart slides with you, pivots where you need it, and parks out of the way when you’re done. You see the change in the rhythm: less time resetting, more time actually building, repairing, doing.

    Daily Friction: Where Static Setups Cost Time

    The same story plays out in daily routines. It isn’t just big projects—small repairs or quick tune-ups stumble over the old traps. Running to the yard with a single tool, then doubling back because the rest are anchored inside. Piling gloves, fasteners, or cleaners on the nearest flat surface because the shelves are full but never quite flexible enough. Your attention fragments, and little jobs sprawl out longer than they have to.

    With a mobile cart, a third of your daily-use gear follows you. Suddenly:

    • The blocked passage clears as you spin the cart, not your entire body, around fixed shelves.
    • No more reaching blindly behind the same cabinet for a tape measure you use daily.
    • The overflow stops accumulating in the same corner, because your storage flexes with project demands.
    • End-of-day resets shrink to seconds; just wheel the cart aside, instead of sorting scattered piles by hand.
    • Lock the wheels once—your gear stays put even on uneven ground, and you stay focused.

    It’s not a showroom transformation, but it’s a real relief. The difference isn’t dramatic at a glance—but over a week or a month, the space actually fits your routine, not the other way around.

    More Than Looks: Spaces That Work, Not Just Impress

    You know the difference the first time you don’t hesitate before starting a new task. Static wall systems impress with perfect rows, but if every little change in your workflow means more reshuffling, their rigid “order” just slows you down. Mobile systems don’t always win beauty pageants, but they keep pace with the unpredictable mess of real projects:

    • You set up faster—and clean up with a single push, not a dozen little cleanups.
    • Blocked zones and dead corners stay empty, not filled with the same old cast-offs.
    • Walking space and work surfaces stay clear—ready, not cluttered with what you “might” need next.
    • Wall racks finally become supporting players, not dead weight; the cart does the heavy lifting where it counts.

    No setup is flawless, but the old grind—reshuffling, dodging, backtracking—fades. The place feels like it’s finally working for you, not the other way around.

    Small Changes, Noticeable Results

    You don’t need a full overhaul. Shifting even a handful of your top-used tools—pliers, driver, tape, gloves—onto a mobile cart can unstick your flow instantly. A cart with locking wheels, or one that tucks under the bench without blocking aisles, turns the space from “arranged” to genuinely usable. These aren’t prestige upgrades; they’re practical, lived-in changes that stop the little frictions from stacking up day after day.

    If dust keeps building on one wall rack or the path past a cabinet never feels clear, pay attention—that’s your setup speaking. When your routine moves, your storage should follow. Make your organization work the way you do, not just the way it looks in an empty room.

    http://stacknest.myshopify.com

  • Why High-TPI Blades Are Essential for Cleaner, Precise Saw Cuts

    You’re hunched over a stubborn section of trim, saw humming, and realize with each pass that your choice of blade isn’t just slowing you down—it’s tearing your finish to shreds. It’s not until you drop the reciprocating saw and scan the splintered edge, the paint flakes, the ragged fibers that you understand: the blade in your hand just rewrote your afternoon. Now it’s extra sanding, touch-ups, and maybe a return trip to make things right—just because the right blade wasn’t in place when the job started.

    Where TPI Makes or Breaks the Cut

    In theory, picking a reciprocating saw blade is routine. You rifle through your bag, grab whatever isn’t bent, maybe check the label: “wood and metal,” “fast cut”—they all look the same before you start. But repeat trim removals, precision window fits, or tight jamb notches will show you the truth. The difference between a low-TPI and a high-TPI blade goes from invisible to everything in about three cuts flat.

    Low-TPI blades are demolition hammers—they make fast work of bulk cuts and nail-filled debris, eating up framing, and knocking down problem boards. But walk that same blade along visible trim or a delicate casing and you’re in for headaches: splintered edges, chipped paint, chewed-up surfaces begging for filler and far more sanding than the job deserves.

    High-TPI blades are for jobs you don’t want to do twice. Each tooth slices less material, slowing the cut but upping control—producing cleaner lines on window stops, crown, and baseboard. If you’ve ever stared down a feathered, splintered cut bleeding through your paint, you know why it matters. High TPI lets you guide the saw without carving scars you can’t buff out.

    The True Test: How Blades Behave in the Cut

    No one pauses mid-job to analyze a blade’s tooth count. But the work itself exposes what the packaging never said. Blades snap into place the same way; only the trail they leave behind is different.

    Real-World Side-by-Side Cuts

    Push a 14-TPI blade through pine trim and the feedback is noticeably smoother—a quiet hiss as the teeth eat cleanly. The saw’s vibrations drop, and the blade tracks with control, letting you follow tight pencil marks, easing the saw’s weight instead of fighting it.

    Now switch to a chunky 6-TPI blade. The start feels faster, but control fades. The tool bucks with each pull, chewing up big chips and leaving ragged kerfs and runaway splinters behind. Run your hand down the edge and you’ll feel every chipped grain waiting to print through paint or snap off under pressure.

    Afterwards, the real cost hits. With a fine-bladed cut, you’ll probably get by with a minute or two of light sanding. Go coarse and you’ll break out filler, scrapers, and curse as you try to erase what the blade already ruined. It isn’t theoretical—the extra labor piles up on every project, stretching timelines, burning through patience, and raising the odds that even your best patch will be the weak point for the client or inspector later.

    When Detail Work Meets Jobsite Reality

    You’re pressed for time, squeezed between painted drywall and a baseboard someone else shot in place decades ago. You reach for speed—a demolition blade, quick and dirty. The board pops off, but the edge is shredded, and the wall now sports a fresh scratch. Now you’re prepping the patch, sanding out torn fibers, and wishing you’d thought twice. Your knees ache, and every trip with the sanding block steals minutes from the next job.

    Swap in a 14–18 TPI blade. Yes, the going is slower and you feel the resistance, but you’re rewarded with a cleanly severed edge, no splinters, and a trim board ready for paint or reinstall in half the script repair time. The difference isn’t that you’re suddenly perfect—it’s that you save the only resource you never get back on site: time.

    Tweaking Your Routine: The Small Adjustment That Pays Off

    The best pros you meet have already made peace with the right blade for the job. There’s always a favored set clipped somewhere—a 6-TPI for smashing out rough material, and a 14-TPI for anything worth seeing again. After enough gouged shelf ends and chewed-up jambs, you learn: slower, finer, steadier blades can erase more headaches than any finish nailer or new sanding pad.

    Measured edge splintering dropped from 3mm to barely over 1mm—cut after cut, just by swapping to high TPI and giving in to a patient pace. This isn’t some shop secret. It’s ordinary jobsite logic: invest a minute in the right tool, cash out thirty on every patch and rework you never have to do.

    Common Questions—and Where Pros Draw the Line

    Does a high-TPI blade last longer in demolition?

    Absolutely not. High-TPI blades dull down fast when fed drywall nails, buried screws, or construction debris—they’re for precision, not punishment. Reserve them for those finish edges. Demolition eats blades, so let coarse ones take the hit.

    When should I skip high-TPI blades?

    Leave them on the bench for waste removal. If you’re ripping out rot, hacking through dirty studs, or blazing through sandwich materials, pick a coarse blade. High TPI will slow the process and just gunk up under pressure.

    Is it smart to swap blade types mid-project?

    Yes—if you plan ahead. Start rough with low-TPI for bulk removal, then drop in high-TPI blades where clean edges count. Waiting until splinters show up isn’t a time-saver; by then, you’re stuck fixing what can’t be truly hidden. Scope the finish work first, match your blade, and swap with purpose.

    The First Cut Writes the Schedule

    After running through piles of blades and endless offcuts, the math stays simple: choose your blade, choose your cleanup. Demolition jobs thrive on speed and coarse teeth. But for every hour you spend sanding, smoothing, and disguising damage, it’s the first poor blade choice calling the shots. Pausing to swap to high TPI wherever appearance or fit matters is the difference between a proud walkaway and another late night on your knees.

    Less regret, less fatigue, more jobs done right the first time—sometimes, all it takes is thinking as much about the small accessory as the big tool in your hand. If you’re tired of sanding out mistakes, start with a better blade, and let every next step run smoother.

    Visit Gumboll for proven blades and practical jobsite tools.

  • Balancing Visibility and Containment in Pantry Storage Solutions

    The first day after a deep pantry reset gives you a real, fleeting thrill. For a moment, the shelves look calm. Mesh baskets or solid bins sit lined up in quiet ranks, everything in its place—a scene that feels almost suspiciously neat. But the illusion rarely lasts. Within a week, after morning scrambles for cereal, rushed dinner preps, and a new haul of groceries, that crisp order unravels: shelves overcrowd with bags-on-bags, snacks vanish from sight, and you’re back to hunting—with frustration—for the item you swore you just bought.

    Why “Freshly Organized” Rarely Lasts More Than a Few Days

    Choosing mesh baskets or solid bins can feel like an obvious upgrade during a single afternoon’s overhaul. Both tame the initial chaos, but daily life exposes the gaps—literally and figuratively.

    Mesh baskets win for visibility. You spot what’s running low in seconds. Need another peanut butter cracker pack? It’s right there—until it isn’t. Small packets slip through the mesh, collecting in odd corners or falling out of reach. Crumbs settle in a silent layer below, and stray snacks wedge themselves just out of sight.

    Solid bins promise containment. Nothing leaks, nothing escapes, all the tiny bits stay wrangled. But that sense of control comes at a cost: every bin is a guessing game. Pull out the big plastic bin—it’s heavy, double-stacked—and realize you already had the quick rice you just bought, buried beneath a wall of boxes. “Organized” dissolves into “unfindable.”

    Where Pantry Systems Start to Break Down

    Clutter sneaks in quietly, not in big messes, but in the daily habits between full resets.

    It starts after a grocery run. One bag of trail mix goes here, another where there’s just enough space. No one wants to reshuffle bins, so new items land wherever they fit. Over the weeks, categories dissolve—snacks with grains, breakfast bars lost among canned soup, and favorite chips exiled behind pasta. Mesh baskets let the smallest items drift beyond reach, or slip out entirely. Solid bins hide forgotten packets, turning “grab and go” into “dig and debate.”

    The true friction shows up when you’re short on time: grabbing lunchbox snacks and watching a cheese stick fall through the mesh to the dark recesses behind the shelf. Hauling down a heavy bin, only to wonder, “Why does everything important end up at the very bottom?”

    Obstacles Multiply—The Slow Spread of Clutter

    It doesn’t take long for even a neatly sorted pantry to feel like an obstacle course. Too many containers jammed onto a shelf, or bins overflowing with mixed items, force you to move four things to reach the fifth. Baskets and bins, overloaded or oversized, invite the “I’ll just grab it for now” syndrome—an open bag or stray box gets left on the counter, inching its way into the kitchen routine. Clutter isn’t just shelf-bound; it migrates, one misplaced item at a time.

    Before you notice, category lines fade. The “snack” section swallows soup cans, breakfast shelves hide dessert, and even visually perfect pantries turn slow and awkward to use. Resetting the order takes more effort, and the cycle repeats, one snack rescue at a time.

    Real Solutions: Match Container to What You Store

    The best pantries aren’t all-mesh or all-solid—they’re thoughtfully mixed to fit what you actually have:

    • Mesh baskets give instant visibility on mid-size snacks, produce, and grab-and-go staples. Airflow helps, and you’ll always spot the last granola bar before it’s gone.
    • Solid bins lock down loose packets and tiny items—seasoning pouches, drink mixes, snack packs—so nothing escapes through a wire bottom or gets wedged somewhere weird.

    Pro move: If mesh is letting crumbs or snacks disappear, lay down a shelf liner or drop the tiniest packets into a small solid bin before adding to the basket. Don’t mix the smallest things with anything bulky; separate them and you’ll prevent the “lost and found” shuffle every single restock.

    How the Right Setup Changes Your Week

    Switching from a one-style-fits-all approach to a mix that matches your pantry’s real lineup changes everything. Crowded shelves stay clear longer. Post-grocery resets shrink from a full overhaul to a quick touch-up. When each container suits its load—and your routines—fewer things drift, and the line between “snacks” and “dinner” doesn’t vanish overnight. That means faster finds, steadier categories, and a pantry that feels as good on Saturday morning as it did on day one.

    Over time, instead of constantly shifting or reshuffling, your shelves hold their boundaries. Less rummaging, fewer lost items, and less time wasted moving stacks to uncover a stray sauce packet. The initial calm becomes a quieter, more lasting rhythm.

    Two Must-Do Pantry Checks

    • Only put items bigger than the mesh holes in mesh baskets. Losing snack bars or finding crumb trails? Rethink what goes where.
    • Clearly label every solid bin. Vague or worn-out labels lead to lost time and forgotten food. Even if you can’t see inside, you’ll always know where to look first.

    Most importantly: the real value of mesh versus solid isn’t style—it’s about how often you have to interrupt your routine for a reset, a search, or a rescue. Build your setup to fit what actually happens on your shelves. Adjust as your routines or grocery habits shift. Organization should feel easier to maintain the longer you live with it—not harder.

    Your shelves—and your routines—will work better for it.

    Shop ClosetWorks storage solutions

  • How Designating a Parking Spot Transforms Mobile Cart Efficiency

    On the day you first roll in a mobile cart, the promise is vivid: flexible storage, instant access, a tool that moves in step with real projects—not just catalog photo shoots. But within a week, reality creeps in. In the garage after a Thursday cleanup, or the workshop in the middle of a project, that “flexible” cart is right there in your way—blocking your one open pathway to the shelf, wedged where you need to walk, or drifting up against the wall so nothing else fits. The upgrade becomes a hassle: a shape-shifting obstruction that follows you around, quietly collecting clutter instead of clearing it.

    Mobility: The Everyday Hassle Hiding in Plain Sight

    Every setup starts with good intentions. You find the perfect spot for the cart—lined up by the workbench, everything within easy reach. For a day or two, it even looks sharp. But then the small hassles pile up. You roll the cart “just for a second” to grab the extension cord, then again to get the cabinet open, then again because it’s blocking the outlet you rely on for chargers. Every move is a detour—one more tug, one more pivot. Suddenly, instead of smooth flow, you’re squeezing past a handle or navigating a tight bend that didn’t exist before the cart arrived.

    What looked modular and open turns into a puzzle with changing pieces. One day the cart blocks the bin where you keep seasonal supplies; the next day, it’s cluttering the only open space you use for large projects. The result? Floor gets crowded, wall space goes to waste, and every “quick reset” becomes a round of reshuffling—moving the cart from trouble spot to trouble spot, with no clear resting place.

    The Slow Creep of Cart Drift

    It’s rarely an obvious disaster. Instead, the problem builds through the week: The cart never quite returns to the “right” place after you use it. A few inches off one day, a bit further the next—before long, it’s stuck in a dead corner collecting drop cloths, cables, and loose hardware. The area behind the wheels turns into a drop zone for whatever you don’t want to deal with now. Wall hooks for your most-used tools? Suddenly harder to reach. Shelves meant to stay open are partially blocked. You reach awkwardly around the cart more and more, while the “flexible” storage quietly becomes the messiest part of your setup.

    Instead of solving clutter, the cart invites stuff to accumulate: a stack of project odds on the lower shelf, bags of parts you forget to put away, gloves draped over the handle. Movement through the area gets choppy. The more you try to “flex” the cart into new spots, the more the rest of your workspace suffers. What you gain in theoretical mobility, you lose in clear routes and functional access.

    Why Assigning a Cart “Home” Changes Everything

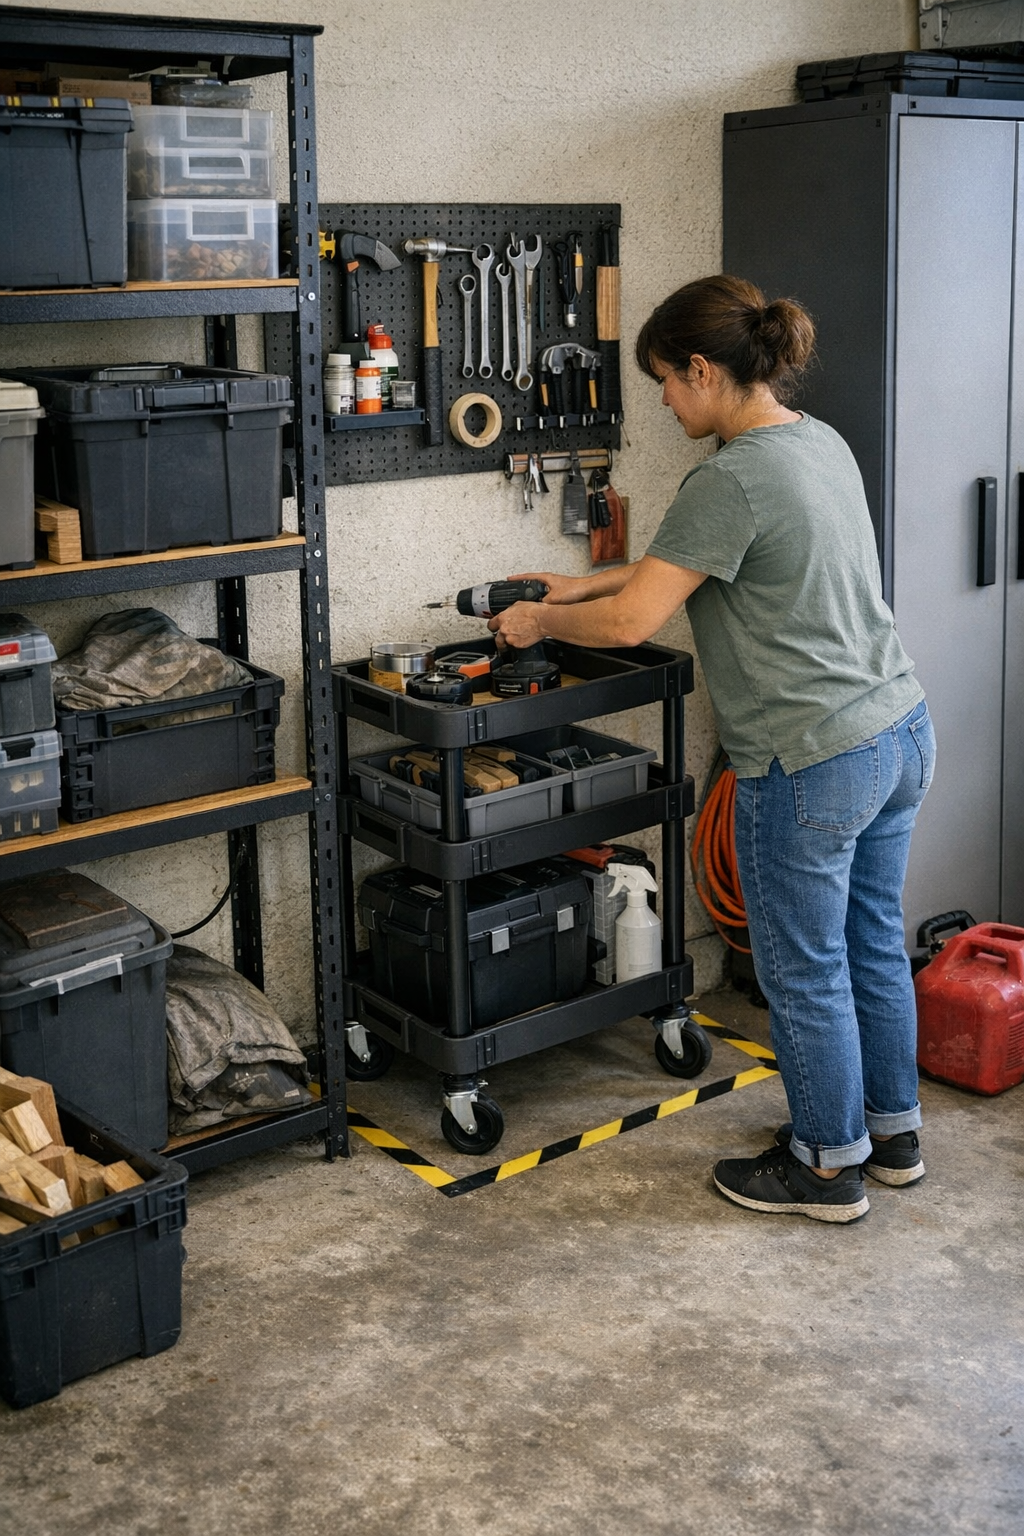
    More shelves or fancy organizers aren’t the answer. The real fix is simple: give the cart an unmistakable home base. In a busy garage, all it took was two strips of high-vis tape in a quiet corner near the main bench. From then on, the cart parked in the same spot every time—no wandering, no crowding, no “where does this go now?” One glance told anyone using the space exactly where to return the cart after grabbing tools, and the habit stuck after a few uses.

    With a visible, fixed dock, resets speed up. Roll the cart back to its taped rectangle, the walking path and cabinet doors stay clear. Power outlets aren’t blocked, and that critical zone behind the cart doesn’t turn into a new landing pad for overflow. You don’t have to think about where the cart belongs—the space tells you, and so the daily routine runs smoother. Even a subtle boundary holds back the chaos, anchoring movement and keeping wall and floor space as open as the layout actually needs.

    Inside a Real Reset: The Before and After

    Picture a weekend cleanup. You finish trimming hedges, stow supplies, wipe down tools. Without a set cart location, the final step is a vague round of musical chairs—push the cart here, then there, just trying not to block the door or scrape the car. By the time you’re done, it’s crammed into an awkward “good enough” niche, blocking one or two things you’ll need by Monday. Tools linger in the cart for days simply because returning them means maneuvering around a lopsided, out-of-place cart.

    Introduce a fixed parking zone, and the reset becomes almost automatic. The cart slides into its marked space—never blocking traffic, always giving you full use of walls and floor. Within a week, the routine is easier: park, unload, move on. No wasted minutes hunting for an open patch. No accidental buildup in corners. The space stays clear for spontaneous projects and the inevitable “I need this out, right now” moments.

    Small Adjustments That Actually Stick

    The beauty of a cart home is in how the benefit builds. It doesn’t require a perfect cart or a brand-new layout. What you’re preserving is not just order, but usable space: overflow drops off, cabinet handles are accessible, and the sense that your setup “almost works” gives way to routines that actually run cleanly. You spend more time working, less time shuffling, and fewer moments annoyed at what “should” be easy. And the fix is visible—a humble strip of tape is all it takes to reset the habit and keep your workspace working for you, not against you.

    The Payoff: Flow Returns, Cart Hassle Disappears

    After a month, trying to work with a wandering cart feels unimaginable. The open floor stays open. Tools come off the wall without an obstacle in the way. The cart is no longer a magnet for overflow or a giant trip hazard. Instead, it’s synced to your pattern: always where you expect, never in the way, always supporting—not sabotaging—your daily jobs. The routine gets easier not because you bought another storage solution, but because you anchored the one you have where it belongs.

    This isn’t a showroom transformation. It’s a real, repeatable improvement—the kind that makes everything else in your setup finally fit together.

    http://stacknest.myshopify.com

  • Why Cold Weather Drains Tool Batteries and Hurts Job Quality

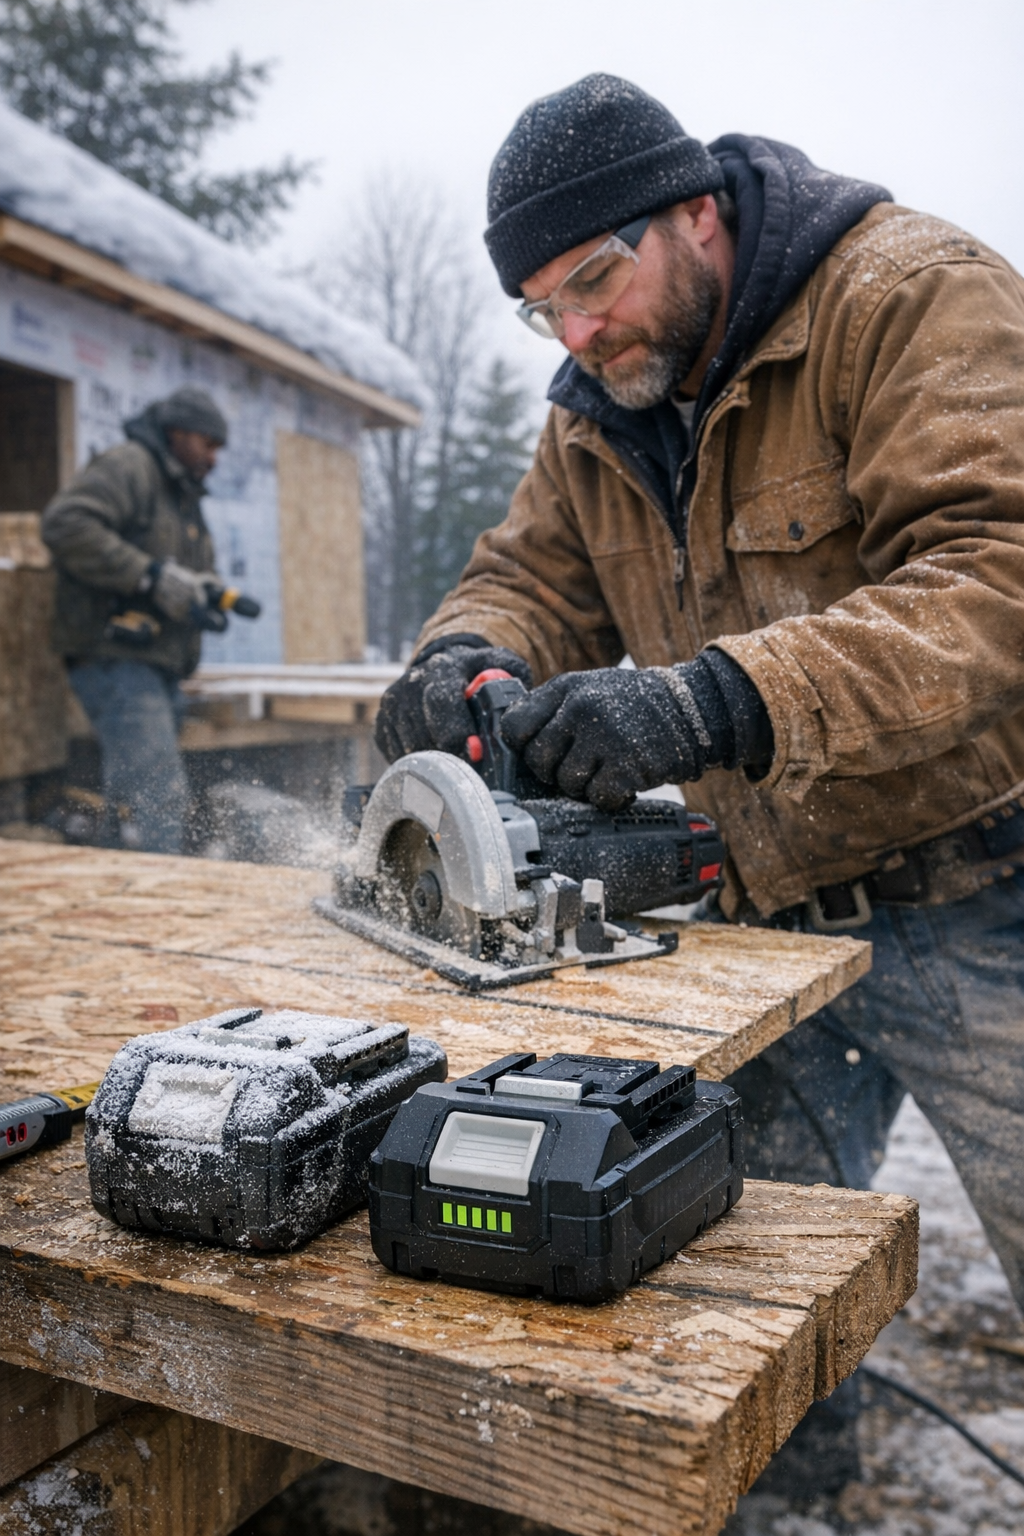
    No part of winter work tests your patience like a cordless tool sputtering because its battery froze up before lunch. The weather shifts, and suddenly, a job you could fly through in September turns into a stubborn grind. It hits out of nowhere: your drill chews through the first few fasteners like normal, then starts to wheeze and stall out. The circular saw that gave you perfect lines all week now jerks and splinters across the plywood. Power isn’t just down—it’s unpredictable, ruining your momentum and, more quietly, chipping away at the quality you thought you could count on.

    Cold Brings Out the Weak Spots in Every “Good” Battery

    The moment that temperature drops below 5°C (41°F), batteries that felt strong on the bench start putting up a fight onsite. You can load up the van with fully charged packs, but by coffee break they feel sluggish—drivers hesitate, saws whine under load, and you’re subtly pushing harder just to keep pace. At first, the difference is nearly invisible: a little lag on the trigger, a bit more chatter at the start of a cut. Ignore it, and it compounds—suddenly, your 16th-foot cut is wandering, and the board’s edge refuses to close up crisp. The time you lose isn’t just swapping batteries; it’s fighting the material and tidying up every miss.

    The Real Reason: Tool Batteries Don’t Just Drain, They Shut Down

    Cold snaps don’t just sap battery runtime—they choke off current, reducing both voltage and torque. A pack that gave you half an hour of consistent drilling indoors barely lasts half as long outside, and by cut seven or eight you’re compensating for dull power, not dull blades. It’s the details that slip: screws set proud, bit tips drift off mark, finish passes with the sander leave patches of raised grain instead of smoothing things right. Once you start noticing uneven sawdust clumps, or sanding dust balling up instead of swirling away, you’re no longer in control—the tool is fighting against itself.

    How to Read the Warning Signs in the Middle of the Job

    Listen for that mechanical groan or sudden change in pitch. You’ll feel the drag on a saw ripping dense plywood, or a drill bit that sticks halfway through a ledger as if it hit buried steel. Cold batteries make familiar tools feel foreign: you push harder, wrist fatigue creeps in, and tools vibrate instead of gliding.

    What Slips Through the Cracks: Quality and Control Go First

    It’s easy to write off a battery change as a fix, but every time you swap in a cold spare, you quietly lower your standards:

    • Cut lines fray and jump. A cold saw battery wobbles on sheet goods, so you’re left sanding out bumps or pulling a cut line back with a hand saw.
    • Fastening turns into a fight. Instead of a clean set, screws stall halfway, or you end up burring heads instead of seating flush on the first pull.
    • Sanding becomes rework, not finish. You end up running extra passes—not for a smoother finish, but just to fix new roughness introduced by tired power.

    Real Jobsite Choices: Work Smarter or Waste Your Shift

    Anyone who’s run deck ledger holes in biting air knows the drill: the bit glides at first, then stutters. You reach for that backup pack—except it’s been riding in the open bed since dawn. Suddenly, every screw needs an extra beat, and instead of a satisfying seat, you’re stopping after every third fastener to draw the bit back out. No loud breakdown—just lost efficiency, shoulder ache, and mounting irritation.

    On another site, I kept two identical 18V packs—one spent the night thawed on the dash, the other slept in the back of a metal toolbox. For most of the morning, work ran smooth. But late shift, I reached for the toolbox pack: the driver lagged mid-sheet, the saw wanted two hands to push, and blade drift stepped in. Nothing failed outright, but every cut needed intervention, and the board edges fluffed instead of closing clean. By the time I noticed, my rework pile grew—more sanding blocks, more wasted plywood, and sore hands from correcting things twice.

    The Hidden Drain: Compounding Fatigue and Wasted Motion

    The worst part? You barely feel the change happening. Quality drops in increments: sanding here, touch up there, and those “quick” tool resets pile up. Tool fatigue isn’t just battery swaps—it’s you making up the difference, every single time power fades just enough to slow work but not trigger a full stop.

    Winter Habits That Actually Save Your Workday

    There’s no secret sauce, but disciplined routines make a world of difference. The top crews manage batteries with intention—warming spares in the cab, swapping them every dozen cuts or so, and never leaving a pack to die out in freezing metal. Simple moves, like insulated battery bags, can keep you cutting straight and driving home every fastener with confidence instead of hope.

    How much does it add up? Swapping in only warm batteries—no matter how minor the difference felt at first—halved the number of sanding passes and kept the job on pace during a two-week cold front. The proof wasn’t just battery run time. It was in better fit-ups, smoother assembly, and less cleanup per sheet or board. The job simply moved forward—without the creeping slowdown and frustration cold packs bring.

    The One Golden Rule: Warm Packs Before Charging

    If you remember nothing else: always warm up cold batteries before recharging them. Charging a frozen pack scars cell life, delivering less run time with every cycle and cutting months off your batteries’ lifespan. Even ten minutes in a heated cab before plugging in can save you rotations—and money—down the line.

    Measure Progress by Results, Not Just Power Icons

    Too many jobs go sideways because crews rely on battery gauges, not real cut and drill quality. Your project tells the truth: more kicked-up edges, off-center drives, or missed screw depths signal it’s time to rotate, not just recharge. Recognize the signs early. **Stay a step ahead of winter drag, and your tools will deliver the same sharp edges, tight seams, and smooth surfaces you demand in July.** It’s not about babying your kit—it’s about defending your workflow from invisible slowdowns that never make it on the time sheet but always show in the finish work.

    Visit Gumboll for real-world jobsite tools, batteries, and accessories that work as hard as you do.

  • How Modular Furniture Keeps Storage Zones Organized Over Time

    The morning after new shelves go up, it all lines up like a catalog shot—shoes sitting in a neat row, jackets spaced just so, sweaters folded into crisp stacks beside bins for gloves and hats. For a brief window, it feels like you’ve finally pulled ahead of the chaos. But two days later, real habits start to rub out that order. Shoes get pushed into the sweater pile by an early-morning grab. An extra bag ends up on the coat hooks. The basket for hats morphs into a dumping ground for keys, receipts, and last-minute breakfast bars. The beautifully defined zones buckle—fast—and what started as clarity morphs into yet another muddled maze.

    When “Organized” Turns Into Just More Shuffling

    Most so-called ‘systems’ unravel in just a week of actual use. You dig through three bins for gloves while boots topple forward. What was a clean shelf becomes a layered mess—backpacks pinning lunchboxes, shoes jammed behind a tangle of scarves. Rigid baskets or shelves might look like answers, but they demand the impossible: routines that never shift. When life barrels in—unexpected weather, late soccer practices, a muddy dog—structure devolves into friction. Instead of order, every day forces you to dig, stack, and reshuffle just to get dressed or out the door.

    Fixed vs. Flexible: Where Real Storage Difference Emerges

    The first weekend, fixed shelves and dividers give you the high of possibility. But by Thursday, the weaknesses are obvious. Want to put away gym gear and it doesn’t fit? Too bad—the compartments won’t budge. Scarves overflow their corner; shoes stack up where they don’t belong. Each time you move one thing, you push something else out of place. Suddenly, categories blur: chargers in the mitten bin, mail with the hats, boots squashed under backpacks. The promise of order melts into a constant low-level annoyance.

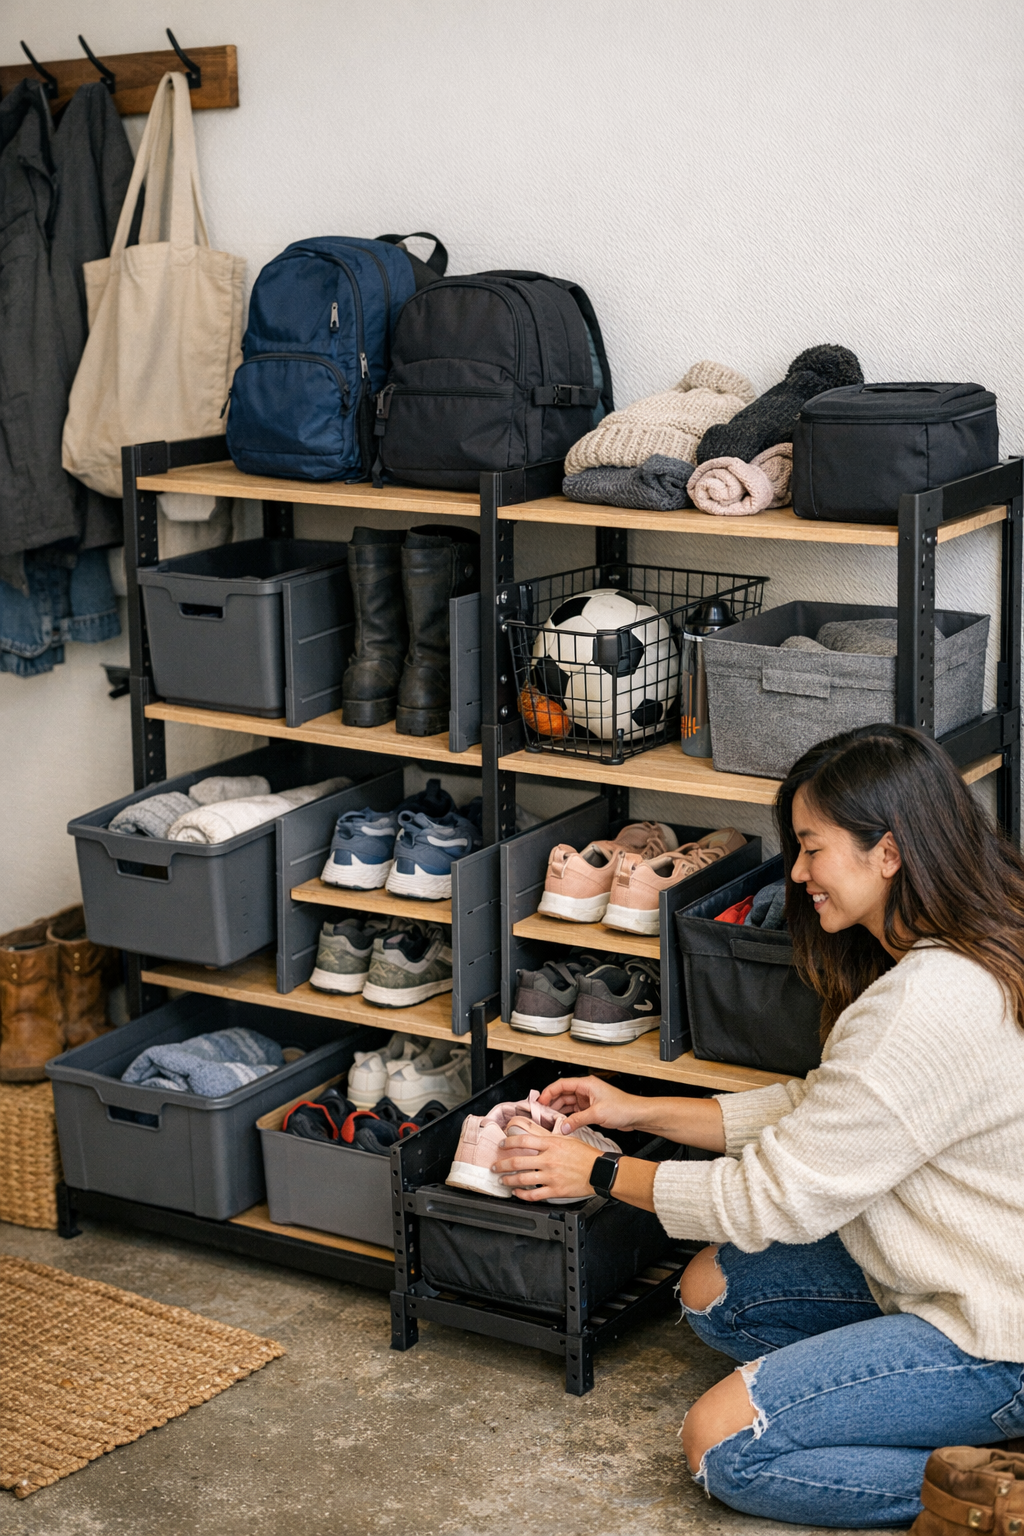
    Modular shelving breaks this cycle where it counts—on the days you wish you could just nudge the space, right now. Movable dividers, adjustable shelves, and cubbies that reset in seconds give you the power to re-draw boundaries before frustration sets in. Cramped backpack zone? Drop the shelf a notch. Too many shoes? Slide a divider to reclaim room. Instead of living in permanent rearrangement mode, you spend less energy catching up and more time using the space as it’s needed.

    The Build-Up: How Everyday Storage Friction Strains Your Space

    No one actually resets shelves every night—real fixes get pushed off. That means a single misplaced bin quietly grows into daily hassle. Shoes kick mud up and multiply across the floor. The ‘hats and gloves’ basket swallows everything from receipts to lost earbuds. Lower shelves fill fast, while the upper ones stay barren just because they’re a stretch to reach. Quickly, even small messes become routine time sinks—digging for matching mittens, reaching behind a pile just to get a jacket, wrestling an umbrella free without dumping half a shelf on the floor.

    Modular storage doesn’t eliminate all chaos—but it hands you simple, instant-tweak options that keep things from spiraling. As categories start to blend or anything gets cramped, a quick shelf slide or divider shift saves the day. Adjust one thing, and suddenly you get back clear zones and easier reach—with barely any thought or extra effort.

    A Real Entry Closet: When Permanent Dividers Fail

    Picture a family entryway: two shelves packed with shoes, an upper shelf for bags, and a few permanent dividers that looked smart on install day. By Thursday, lunch bags backed up on the shoe shelf so nothing is easy to grab. Wet winter boots invade the next zone, spreading puddles sideways until the fixed divider blocks cleanup. Before you know it, finding a glove means pushing aside backpacks, and the supposed gloves basket—now half-filled with isolated hats and receipts—loses any clarity. The lines between ‘zones’ vanish and resets become overwhelming chores, not quick fixes.

    The frustration isn’t a lack of effort—it’s the rigidity. When dividers won’t move, it’s impossible to adapt without emptying half the closet. The idea of true organization is replaced by constant, draining reshuffling.

    How Modular Adjustments Change the Game

    Now swap out those fixed dividers for sliding shelf inserts or adjustable slots. The next time boots crowd the sneakers, the divider glides over—no cramming or creative stacking. Bags overload the shelf? Slide it up or down and reclaim space. Resets aren’t a dreaded, once-a-week event. They’re a few-second fix: nudge, adjust, move on. Everyone finds their things; everyone knows where to put them back. The space isn’t just tidy—it’s recoverable, stable, and obvious, even as family patterns shift from season to season.

    This approach isn’t about keeping a space showroom-perfect—it’s about saving yourself from inherited messes and lost time with every simple reset. As routines change or clutter threatens, the layout flexes, and your sanity holds out longer.

    Modular Shelves: Worth the Shift?

    Do modular shelves really stay tidy?

    Only if you use their flexibility. Categories drift? Reset a divider before the mess grows. Backpack bin filling with random mail? Move a shelf before it becomes a black hole. Small nudge now, not a dreaded overhaul later.

    Who actually benefits from modular setups?

    Anyone whose space feels perfectly organized, then falls apart as soon as routines change—families with school years and summer breaks, anyone with rotating sports or activities, or those facing surprise weather one week and totally different gear the next. If sections lose their job as soon as life shifts, modular fixes matter.

    Are modular shelves better for tight spaces?

    Absolutely—if you adapt before it’s an avalanche. Lower a shelf just as boots multiply, widen an area before backpack sprawl, and you protect both usable space and your own patience. Ignore it too long and you’re right back in the cycle.

    Small Tweaks, Lasting Relief

    Modular storage won’t turn a jumble into a showroom, and it won’t rewrite your habits overnight. What it gives you is power over small, daily headaches: a two-second adjustment instead of a half-hour overhaul. Breathe life back into your closet or entryway before the clutter rules again. Each minor tweak buys you an extra morning where finding what you need is fast and obvious—and resets never have to be all-or-nothing.

    In the end, modular shelving means your storage works with your actual, evolving routine—instead of trapping you in endless sorting and frustration.

    Shop ClosetWorks storage solutions