Category: Tools & Workshop

  • Choosing Between Wire Shelf Baskets and Solid Bins for Pantry Organization

    A pantry shelf rarely fails on day one. It unravels on busy mornings when you’re reaching blindly for breakfast bars, or on grocery day, when new snacks force old ones deeper into the shadows. A shelf system that looks sharp after a weekend reset quickly shows its cracks as real life drags baskets and bins out of order—fast. It’s not just about starting organized; it’s about whether your setup survives the third restock, the daily grab-and-go, the inevitable snack raid when nobody wants to cook.

    Wire Baskets vs. Solid Bins: Holding Up Under Daily Pressure

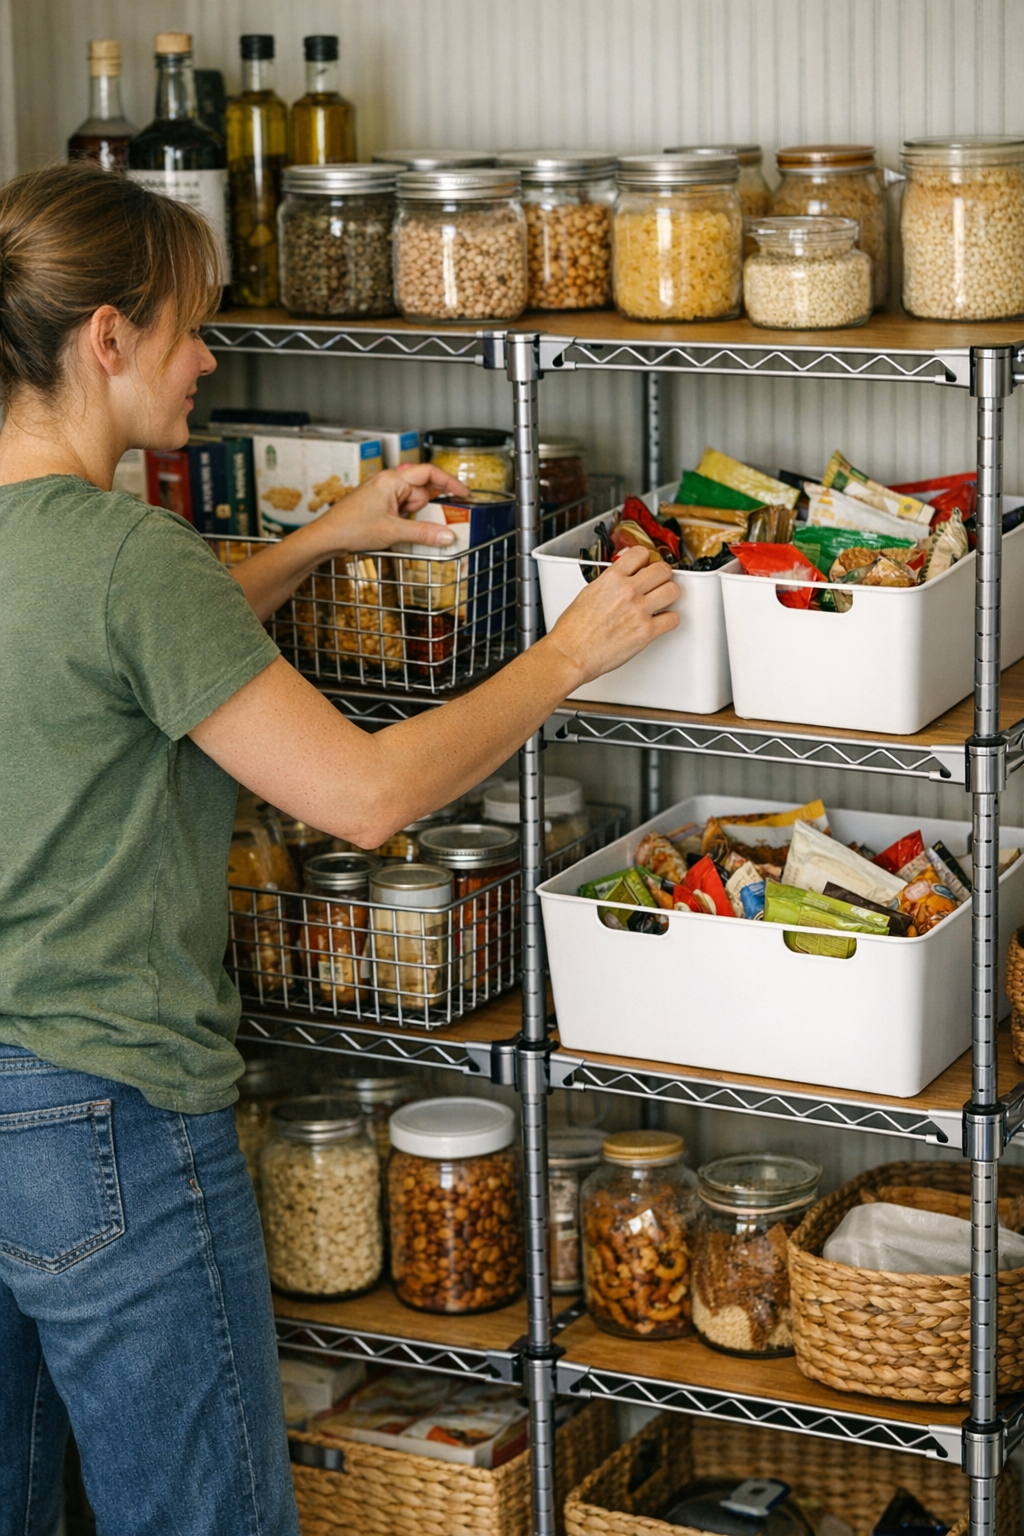
    At first glance, wire shelf baskets and solid bins both offer promise. Wire baskets seem perfect for keeping cans and tall packages upright and visible. Solid bins, by contrast, promise to corral the flood of snack bags and small packets that would otherwise drift everywhere.

    But the friction starts almost immediately—

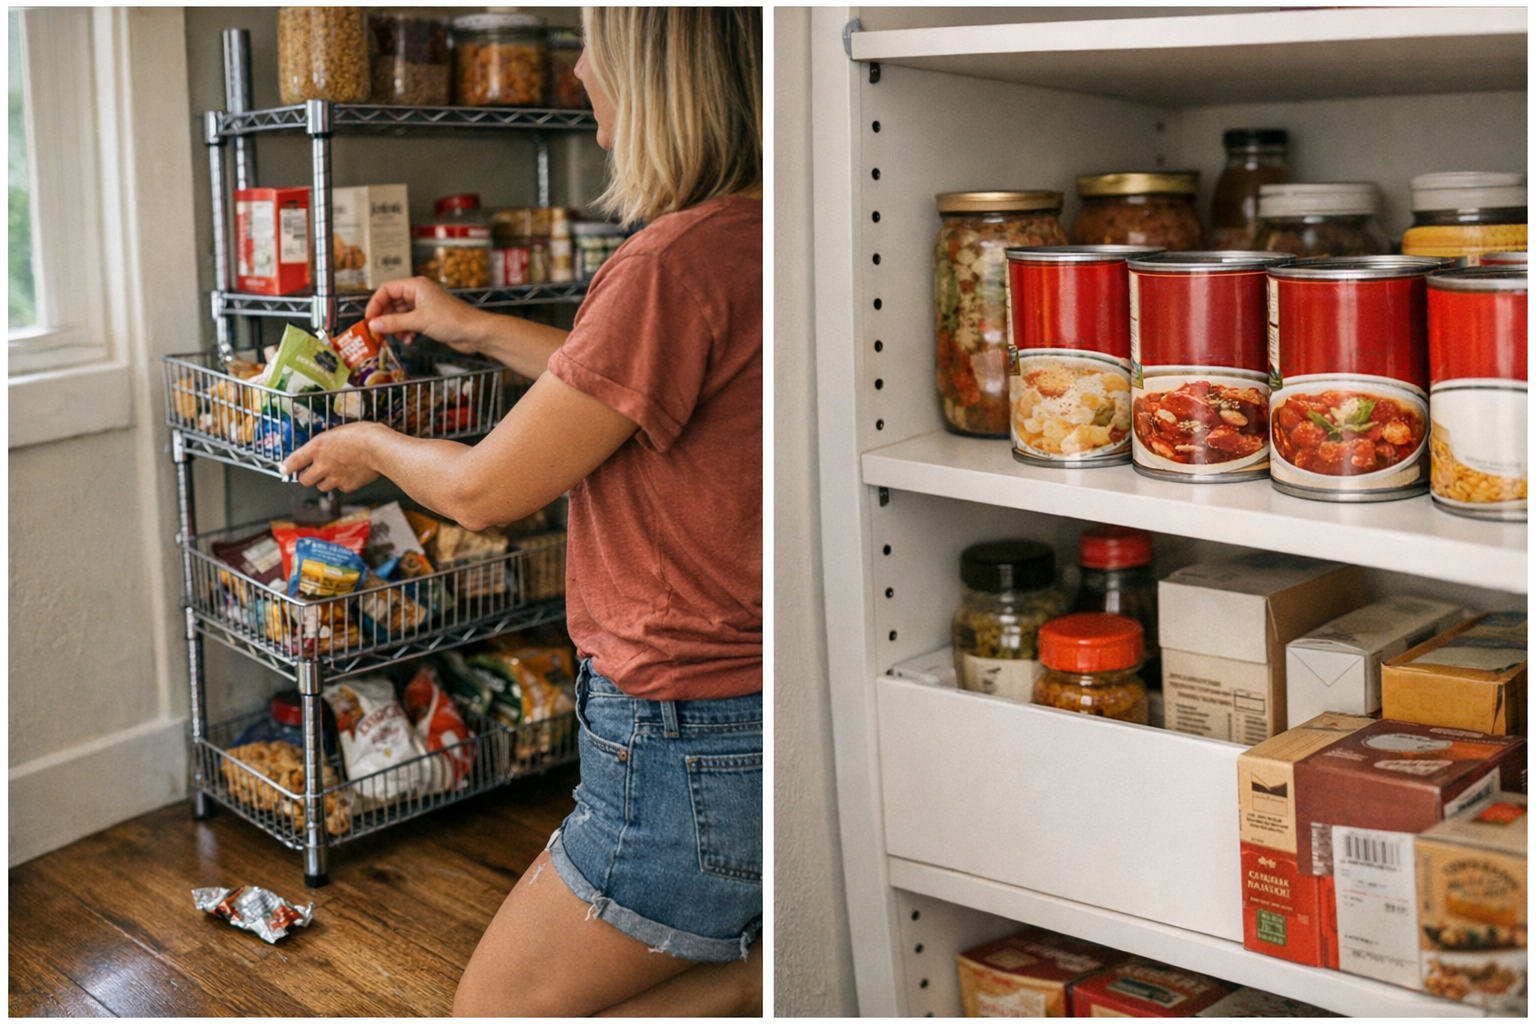
    • Wire baskets put everything on display, but loose packets slip through gaps or tip sideways, falling into a puddle at the bottom or even onto the floor.
    • Solid bins trap the chaos, but quickly become a mixed bag of forgotten food—old snacks hiding under newer ones, with no easy way to see what you have without digging.

    That promise of neatly drawn lines and controlled categories fades as soon as family routines hit. By midweek, containers meant to bring order end up reshuffled, overloaded, or hiding more than they reveal.

    Where Storage Fights Back: The Subtle Ways Shelves Undermine You

    The surprises pile up. You reach for rice, but end up shifting three cereal boxes aside. You hunt for fruit snacks, only to find the pouch slipped through the basket wire and disappeared behind the pasta. Solid bins, meant to prevent these escapes, turn into a hiding place where a single lost tortilla or energy bar resurfaces weeks later—if at all.

    Resets don’t last unless the container matches the contents: The urge to just toss stray packets in wherever there’s room creates disguised clutter—a bag sticking out above a bin lid, overflow snacks lined up in front, a row so tightly packed you can’t see what’s behind. Overstuffed bins turn category clarity into a guessing game. Before you realize, a five-minute shelf reset becomes a frustrating ordeal of pulling out entire drawers just to find Tuesday’s lunch snacks.

    The Real Signs of a Failing Storage Setup

    You can spot the failures by late in the week:

    • Shelves still look neat from a distance, but actually grabbing what you need takes two, three, even four steps or shuffles.
    • Overflow starts to stack up at the edges—loose chip bags perched on top of bins, rarely used items stuffed into corners “just for now.”
    • What was supposed to help you move quickly now slows you down. Each reset reveals new “surprises” buried since the last one.

    This isn’t just a problem for pantries. It’s laundry shelves packed so tight you need to move detergent to get to the dryer sheets, or closet baskets where folded shirts sprawl into piles after a few pulls. The false calm of an organized shelf only lasts as long as your routine doesn’t test it.

    Making a System That Survives Real Life

    The solution isn’t more containers—it’s the right container, with a clear purpose, in the right spot. The sweet spot? Combining wire baskets and solid bins, but giving each a strict job:

    • Wire baskets for sturdy, upright packages—things that stand on their own and don’t slip through cracks. Group by type: cans together, cereal together, baking goods on their own shelf.
    • Solid bins for loose, small items that otherwise scatter or collapse. Assign each bin a single category and resist the temptation to mix. The snack bin holds only snacks. If it stops fitting, snacks go elsewhere—not jammed in and forgotten.

    This isn’t about matching a magazine photo. It’s practical: categories stay obvious, items remain visible, and putting away groceries—especially for someone who isn’t you—becomes a no-thinking routine instead of a guessing game.

    When Mixed Storage Actually Works

    After a few weeks, the upgrade is clear. No more grabbing a bin and finding last month’s lunch bars at the bottom; no more watching half your snack supply migrate behind the baskets. The shelf edge still looks straight, but the real win is inside: you reach for something, and it’s right where it should be. Resets happen fast because you’re not re-sorting a lost-and-found—just putting each thing back in a spot that still makes sense.

    Small rules make big impact: Don’t let any container overflow. Leave enough room to see everything at a glance. If you start stacking bags on top or in front, it’s time to thin out or split the category. The difference in speed and clarity piles up, week after week.

    Adaptable Shelves, Everyday Routines

    Pantry friction reveals a wider lesson: Your shelf setup only works if it stands up to your actual habits. Bins and baskets are tools, not magic. What matters is how clearly they serve a single role, how easy it is to return something without thinking, and whether you can tell—within seconds—what’s missing or about to run out.

    Check back in on your setup a few weeks after resetting it—not for the staged look, but for honest traffic patterns and growing piles. The best containers are the ones your routine doesn’t defeat.

    Discover storage solutions that work with your routine—not against it—at ClosetWorks.
  • Why Assigning One Role to Your Storage Chest Boosts Workshop Efficiency

    Most garage and workspace setups look “sorted” for about five minutes. The bins line up, lids are flush, and drawers snap closed—the whole area polished for a weekend photo. But walk back in three days later, after a week of real, rapid-fire use. Screwdrivers missing, random cords wedged in where they don’t belong, overflow building up on any available flat surface. What started out organized turns into a mess of blocked paths and reshuffling routines—not because the storage is too small, but because the layout just can’t keep up with how the space is actually used.

    Surface Order vs. Everyday Chaos

    Most new chests and modular bins deliver a quick hit of order. Stuff fits, the workbench clears, and everything has a spot—temporarily. But as soon as you start peeling tools out for real projects, old friction creeps in: pulling one sparking a domino effect, each return feeling more like a puzzle than a reset. You close the lid, relieved for now. By next week, categories blur. “Put away” is no longer simple. What’s left is surface neatness masking the creeping sprawl underneath.

    These setups have a secret flaw—they make you the sorter, again and again. That seemingly versatile chest becomes its own recurring job. Every quick return is a mini negotiation: rearrange a wrench for the sake of the extension cord, move a tape roll out of the way of the bits. One awkward return, and the cycle of clutter builds up under the clean surface. The more general-purpose a storage chest gets, the more of your time it quietly eats.

    Lock In Purpose: Stop the Overflow Spiral

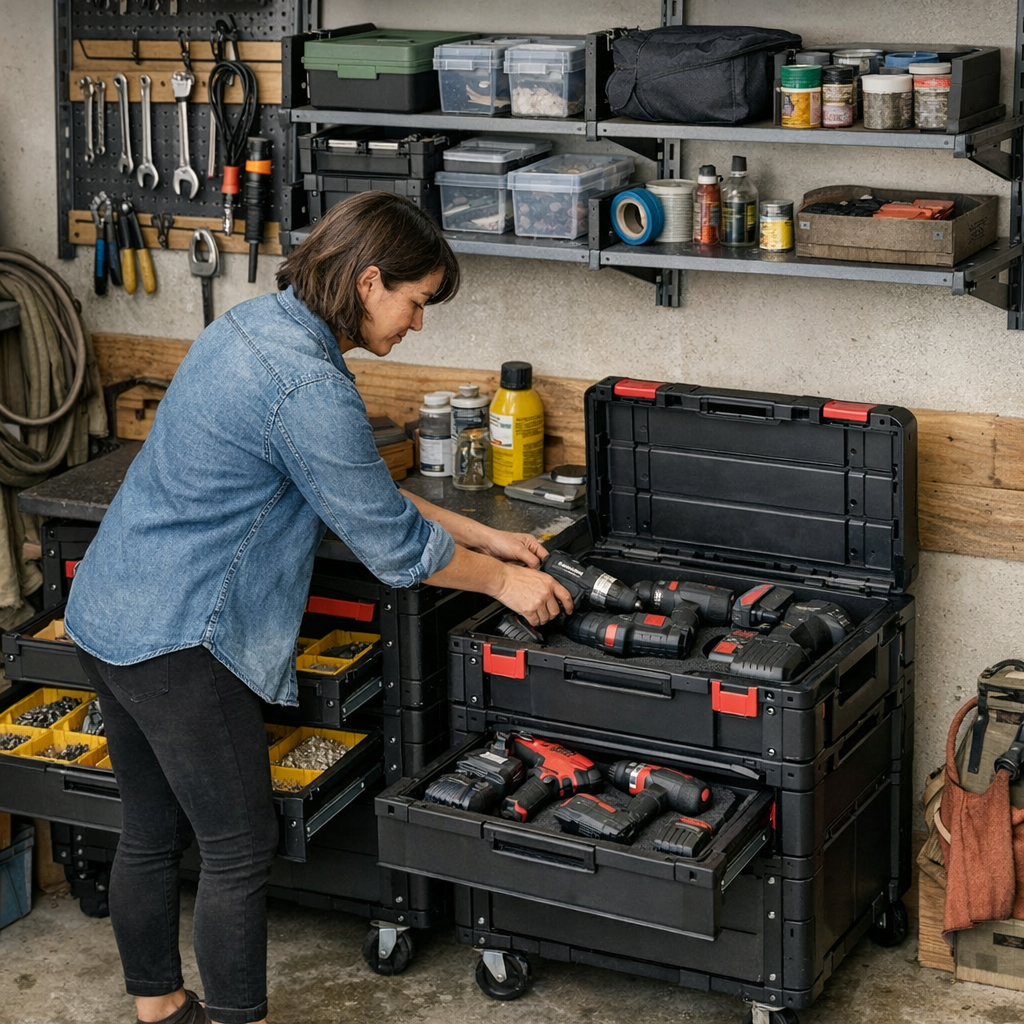
    The setups that actually work don’t just hold more—they work harder at keeping zones dedicated. Assigning only one job to each chest (fasteners, hand tools, garden hardware, project parts) blocks the slow re-mix of categories that turns every return into a headache. Suddenly, the question isn’t “what drawer did I use last time?” but “is this the battery bin or isn’t it?”

    This setup eliminates the most grinding friction: no more sifting for pliers under leftover zip ties, or batteries slipped into ducts of painter’s tape. You can walk in, reach for what you need, finish the job, and return it without hesitation—week after week. There’s no fancy subdividing required. This is about boundary lines, not intricate compartments.

    Recognizable Scene: Where Reset Breaks Down

    Picture weeknights in your own garage. On Monday, sections feel zoned—power tools here, clamps there. By Wednesday, you’re cramming in bike tools or a roll of tape “just for now,” desperate to clear the bench before dinner. Next, you’re sliding a whole drawer’s contents just to make room for one garden glove. The moment “put away” stops being a drop-off and turns into a slow shuffle, the system is working against you.

    The Creep of Overflow and Blocked Paths

    Chests seem perfect when they’re only half-filled and everything’s fresh. But force them to do multiple jobs, and tiny daily annoyances pile up. One drawer blocks another. You nudge a cart six inches down the aisle every week to get at the battery charger—until one day, you simply stop. The shelf above becomes a random drop spot. Corners fill up with boxes you meant to deal with “eventually.”

    This is the trap: storing things is not the same as streamlining your moves. A chest “fits” more, but afternoon after afternoon, you find yourself holding open the lid with your elbow, digging for what you need. You organize. You reshuffle. But the friction keeps leaking back in, slowing resets and making every job take just a little longer. Surface order survives, but workflow breaks down.

    How One-Job Zones Change the Whole Flow

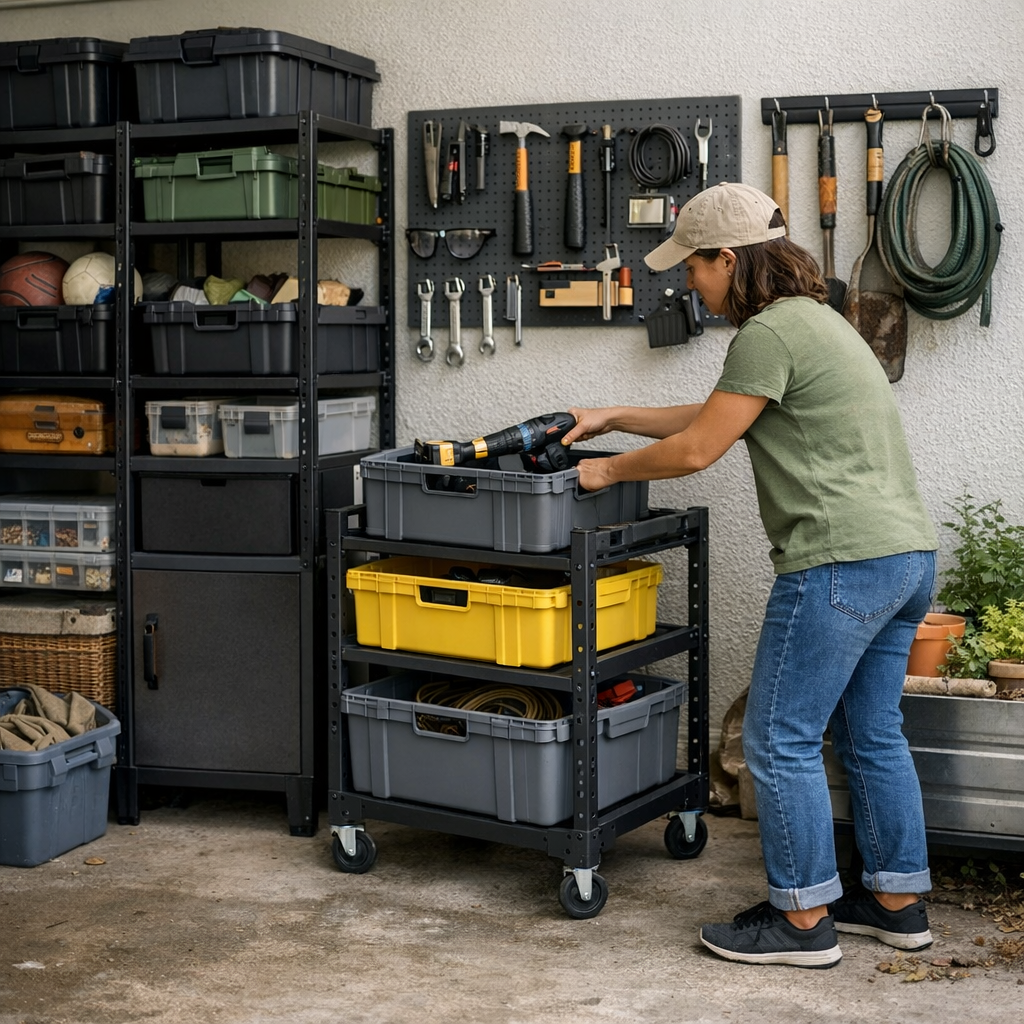
    This shift only clicked for me once I dedicated a rolling chest just for power tools and chargers. No more pushing aside garden pruners just to reach a drill. No stacks to move or corners to juggle. After a few weeks, it was clear: everything went back in seconds, and the shelves above stopped becoming “temporary” clutter landings. Movement through the garage got easier—no dead corners, no zigzagging around mystery bins. The space actually felt bigger, not just neater.

    The Patterns You’ll Feel Shift

    • No more shifting a cart just to plug in the charger, or reaching around the edge of one cabinet yet again.
    • Grabbing the right chest immediately, knowing the wall zone now means “gardening”—not “gardening plus whatever overflow fits today.”
    • The dead corner by the door stops collecting half-finished projects because the main layout never blocks movement or hides tools in overflow bins.

    This kind of clarity is quiet: less obvious than a freshly organized worktop, but far more valuable after ten resets and two months of real-world chaos. Suddenly, returning a tool doesn’t feel like another tiny project. It’s just—done.

    Questions That Pop Up Once You Try It

    Isn’t it overkill to have more than one chest?

    Not if you want lasting flow. Letting each chest own a category makes navigation automatic, not a guessing game. Two or three single-purpose chests—even small ones—beat a jumbo “do-everything” bin every time. Fewer collisions, fewer blocked drawers, fewer confused returns.

    How often do you need to fix a chest?

    The honest answer? A little, often. Drift shows up the third or fourth work session—sometimes after one weekend. As soon as overflow starts or drawers stick, do a five-minute reset. Don’t let the mess build. Small, frequent course corrections keep resets quick and the system intact.

    How do you spot when your setup’s failing?

    Blocked movement is your canary. Needing to move a stack or hold the lid open to rearrange? Batching returns because “it’s easier tomorrow”? That’s your signal: zones blurred, friction’s back. Get harsh with purpose, and reset the boundaries immediately.

    Real-Use Function: When Setup Finally Keeps Up

    Declaring victory after a deep clean is easy—that’s just tidying. The real test comes weeks in: Can you grab, use, and return without creating new clutter or blocking your own path? When repeated use is effortless, returns automatic, and there’s no hidden sprawl behind lids or under shelves, you’ve moved from looking organized to actually working organized.

    It’ll never be flawless. The best arrangements won’t eliminate every stray screw, but they’ll absorb chaos without collapsing. They make the routine simpler, not fancier. Adopting the “one chest, one job” mindset isn’t flashy—but after a dozen projects, it’s the difference between a garage that gives you momentum and one that’s always asking you to pause, rearrange, or start over.

    Find storage solutions suited for real setups and persistent use at StackNest.

  • Choosing the Right Ventilation Fan to Keep Your Workshop Airflow Consistent

    If you’ve spent more than a day in a windowless shop, you know the moment when air quality turns from afterthought to obstacle. What starts as a clean, sharp morning—run the saw, tap a clean mark, drill a precise hole—slowly blurs as invisible dust builds up in corners, clings to every tool grip, and creeps inside your mask. By midday, hand planes feel tacky, clamps drag across the bench, and even a fresh drill bit feels dull as grit collects in collets and pockets. This isn’t just a matter of comfort—it’s about whether your tools perform at their best as the real work piles up, cut after cut, clamp after clamp.

    Where Standard Shop Fans Start Failing

    We’ve all been there: prop up a discount box fan, flick it on, and hope for the best. At first, it stirs just enough air to keep dust moving. But layer in a couple hours of back-to-back drilling, an uninterrupted run on the sander, or a batch of plywood crosscuts, and that bargain airflow flatlines. Soon, dust starts pooling on your ankles, infiltrates tool housings, and settles inside blade guards and drill chucks—right where precision matters most.

    As the hours pass, cleanup time grows: you’re wiping hands after every cut, scraping glue haze that reappears on newly jointed edges, and pausing every 10 minutes to clear a view through your safety glasses. If your respirator is clogging before lunch and you’re spending more time brushing off tools than using them, you’re feeling the slow sabotage that underpowered fans deliver—every action gets grittier and less controlled.

    How a Workshop-Rated Fan Changes Your Workflow

    Real workshop fans aren’t just bigger—they’re built for nonstop cycles: sawing, sanding, glue-ups, and assembly runs without the air turning dense or sticky. When the dust extractor can’t catch everything, the right overhead or cross-bench fan sweeps out what’s left, keeping your handles dry, your cuts visible, and your bench clear even three hours deep into a build. Suddenly, clamp pads no longer grab at glue, and fresh glue lines dry crisp instead of cloudy.

    What a Weak Fan Costs You in Practice

    Take a run of birch shelf sides: With only a consumer-grade fan, the bench looked tidy for the first hour. By the second, switch tools—and every grip left fingers coated. On clamp-up, the tool faces left smears of sawdust, and the fine dust floated just enough to blur scribed lines. Each tool switch meant a full wipe-down and a lost minute, just to keep edges and slots crisp. Instead of getting into a rhythm, momentum stalls—control drops, bit changes get hesitant, and by the end, fatigue hits long before the work is done.

    Switching to a Real Shop Fan: What Actually Improves

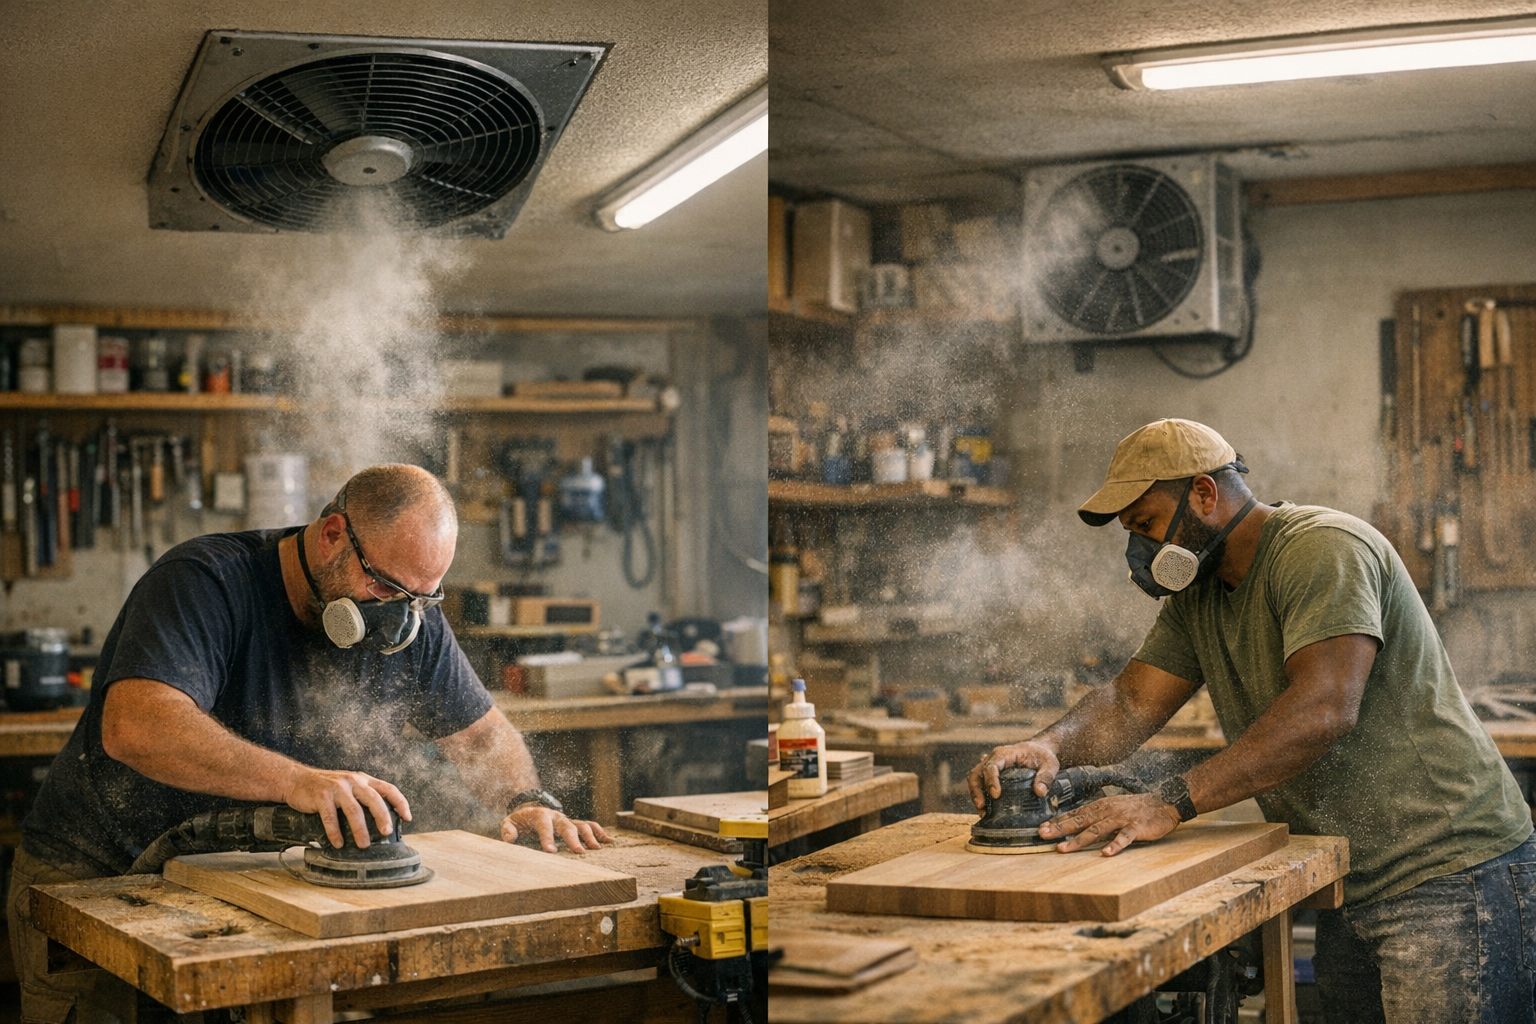
    When I swapped in a 600 CFM, continuous-duty shop fan with a fitted filter—pointed to push directly across the main assembly zone—the upgrade was immediate. Dust dropped where it should: into the vacuum, not across the bench. The burnt-motor smell disappeared. There was no cold draft or racket, just a steady hum, and for the first time, glue-ups stayed bright and clean late into the day. The difference wasn’t flashy: it was in predictable control. Drill bits didn’t seize up from grit, battery contact points stayed clean, and after hours of sanding, the respirator didn’t clog before the job was done. Less dust meant fewer mistakes and more confidence every time I grabbed for the next tool.

    Beyond CFM: Timing and Coverage Really Matter

    In a real jam-packed workday—shift from drilling pilot holes to routing edges, then run a random orbital sander across joinery—there’s never a pause for a full cleanup between jobs. If dust lingers between workstations, you’ll fight it from one operation to the next: rough cuts muddy your sanding, glue-ups stick to unexpected spots, and delicate measurement becomes guesswork as debris clouds your markings. A real shop fan keeps pace with you, reaching into shelf recesses and under benches, not just blowing air above eye level. Strategic airflow means you control the timeline—not the cleanup.

    How to Spot Subpar Ventilation Before It Kills Your Day

    Your shop’s air is probably holding you back if you notice any of these by midday:

    • Fine dust building up in router collets or along the rim of bench vises, hours after you started
    • Tool handles and chucks feeling rough or slippery, even with regular wipes
    • Lingering glue or burn odors that grow more pungent with each new process
    • Power tool batteries and bits picking up debris, leading to slow installs or connection issues
    • Energy dips and heavy breathing, even in full PPE—because stale, dust-heavy air catches up to you fast

    If this is familiar, you’re losing precision, comfort, and stamina every shift. Each pause to clear off a gauge or shake out a clogged mask is time and momentum lost—especially as jobs get longer and tool changes get faster.

    Bigger Impact: Sizing and Aiming Your Shop Fan for Real Jobs

    Start with the right capacity: calculate your workspace cubic footage, multiply by recommended air changes (usually 6-8 per hour for woodworking), and aim high if your air usually hangs heavy. But numbers alone aren’t enough if the airflow misses your real work zones.

    Positioning changes everything. Direct your strongest air across the active workbench, saw station, or sanding area—it’s wasted if it just whips past a storage wall. For L-shaped shops or odd corners, test adjustments midway through the job: sometimes, shifting the fan three feet is all it takes to keep glue areas or drill presses dust-free. If dust is still coating hardware or your tools feel slow by afternoon, rethink both position and power before doubling down on cleaning routines.

    Cut Time Off Cleanups With This Combo

    Pair a workshop-rated fan with a portable table-top dust extractor on high-dust jobs—sanding, routed dadoes, or quick hole runs. It’s not just about cutting visible mess; it means attachments, collets, and batteries come off cleaner, so next-tool switching doesn’t grind grit into moving parts or fresh finishes. Cleaner air equals fewer pauses and more solid tool performance, station to station.

    Consistency Over the Whole Shift—Not Just the First Hour

    The difference between “good enough” ventilation and real shop airflow is clear by day’s end: tools still grip right, clamps release clean, and your workflow doesn’t grind to a halt as dust builds up. Your second session starts with a workspace you trust, not a slog through sticky, leftover debris. Watch how your tool habits change when you stop constantly wiping, shaking, or bracing for mid-shift cleanup. In woodworking, as in every craft that stacks job after job, true ventilation keeps attention on the cut—not the cleanup.

    Find tools and gear to keep your workshop performing at its best at Gumboll.

  • Choosing Between Wire and Solid Shelving for Efficient Pantry Storage

    The real test of pantry shelving isn’t on installation day—it’s after a few grocery runs, when your morning routines collide with quick dinners, surprise guests, and last-minute snack raids. What began as a picture-perfect setup now reveals the friction points that make you rethink every shelf. Suddenly, the difference between wire and solid shelving isn’t cosmetic—it’s the quiet line between a space that works with your life and one that works against it.

    Where Frustration Builds: The Daily Use Test

    Your pantry starts off orderly enough: each shelf lined with boxes and jars, every item visible. Fast-forward a week. Now the oatmeal is hidden behind snack bars, one soup can teeters near the edge, and half-open chip bags slump in a lopsided pile. The slip between “organized” and “usable” is subtle but real, fueled by normal—sometimes messy—daily grabs and quick shoves out of sight.

    This is where shelving choices suddenly become glaring: reaching behind a stack of canned beans for one spice, fishing a packet out of a collapsed heap, or watching a sleeve of crackers wedge itself somewhere it doesn’t belong. These aren’t dramatic disasters—they’re the micro-annoyances that chip away at any sense of pantry control.

    Wire Pantry Shelving: Exposed, Breezy—and Restlessly Shifty

    Wire shelves sell the dream of breathability and easy scan-ability. You see every label. Air circulates. But here’s the inevitable reality: gravity is not your friend. Spice jars tilt and rattle. Biscuit packets droop through gaps. Flour and sugar bags lose their battle against the wire grid, toppling into ragged stacks or, worse, dropping through with a thud to the floor below.

    Breakfast Rush, Guaranteed Spill

    Picture a familiar scene: you’re in the weekday rush, aiming for a quick oatmeal packet. Instead, three pouches tumble through the wire, and a granola bar gets trapped at an angle you can’t quite reach. The shelf is technically “open”—but your food isn’t accessible when everything small migrates downward, hiding or mixing up with whatever’s last in line.

    Solid Shelving: Steady Surface, Subtle Hideaway

    Solid shelves end the drop-and-dangle problem. Every jar, can, or teabag stands firm; no more mystery items wedged between rails. But a new issue creeps in: the slow migration of items toward invisible depths. As shelves fill, cans retreat behind cereal boxes, baking mixes disappear into the gloom at the back—and before you know it, you’re double-buying peanut butter you already own.

    The Pile-Up Problem

    Stability comes with a tradeoff: out-of-sight means out-of-mind. Every restock pushes less-favored items further back, and soon the shelf’s back row becomes a zone of forgotten goods with expiration dates you haven’t checked in months. The space looks organized, but real access slips away behind those neat front rows.

    The Real Reset: When “Tidy” Fights “Functional”

    This all comes to a head during a reset—after a grocery run, or after a burst of heavy use. Wire shelves spark the hunt for dropped snacks and sideways spice jars, as you gather up what’s slipped through the cracks. Solid shelves keep uprights upright, but the reset is slower if you have to unload the entire front just to recover a single baking supply from the back.

    Grab-and-Go vs. Lost-and-Found

    Two fast realities:

    • On a wire shelf, a snack bag catches and falls—again—during one rushed grab.
    • On a solid shelf, you hesitate and squint, wondering if your favorite sauce is lurking behind those pasta boxes, lost to pantry limbo.

    Both frustrations stem from design, not your effort. One leads to sprawl, the other to deep confusion—the shelf determines the pain.

    Fast Fixes: Making Shelves Work Harder

    Here’s where simple upgrades bend reality: shallow bins or baskets on wire shelves corral those rogue packets, preventing messy pile-ups. Shelf liners instantly transform wire grids into a stable platform, keeping jars where you put them. Even a roll of grippy liner can save a week’s worth of annoyance by anchoring lightweight items in place.

    For solid shelves, clear slide-out bins rescue those lost items from the back—now you can pull forward the entire zone instead of reshuffling by hand. Labeling bins with clear, bold tags cuts down on blind rummaging and keeps categories intact, no matter how fast you need to reset.

    Micro-Adjustments, Macro Relief

    One easy move—a simple basket per shelf—means you’re reaching once, not digging three times. Small upgrades reclaim minutes from your week: no more chasing pouches that slid through, no more forgetting what’s buried behind a pasta barricade. Instead of accepting chaos, you shape your shelf to fit your rhythm, not the other way around.

    Staying Functional: Every Shelf Needs a Checkup

    No shelf style is invincible. Routines keep changing; grocery loads vary; family members treat shelves as a free-for-all. What works brilliantly one month can unravel the next. The trick is recognizing where your system loses discipline—where goods collect, categories drift, or resets slow down—and layering in small fixes as you go.

    Wire shelves reward you with visibility and air circulation, but they rely on good bins and liners as backup. Solid shelves offer sturdiness but demand a system: labeled bins, regular purging, and maybe a pull-out or two. The only real “solution”? Keep adjusting. Shelves aren’t set-and-forget—they’re an evolving backdrop to your routines. Give them a nudge, and you’ll reclaim not just storage, but usable, reliable space that fits how you actually live.

    Find more everyday storage solutions built for real daily life at ClosetWorks.

  • Narrowing Shared Storage Zones Ends Clutter and Conflicts Fast

    The promise of wide-open storage dies quickly in real use. That row of freshly installed shelves, those communal racks lined up along the wall—on day one, everything looks under control. You see space, clarity, the satisfying illusion that this time, order will hold. But give it a week of real mornings: several people in and out, projects starting and stopping, gear passing hands. Suddenly, bins drift out of place, categories bleed together, and that effortless access you imagined turns into low-level chaos. By the third reset, it hits you—beautiful storage isn’t the same as usable storage, and open layouts invite their own kind of daily friction.

    How Zones Unravel in Everyday Use

    Picture the usual garage or utility room: a big shelving bay runs nearly wall-to-wall, bins meant for sorting ‘big’ categories—sports gear here, tools there, seasonal in the back. Day one, it photographs like an ad. But by Friday? A drill sits on top of the soccer balls. Bike gloves end up jammed beside a hose nozzle. Someone pushes a tub aside to reach what’s behind, and now two ‘zones’ are mixed on the same row, each a little less clear the next time you walk by.

    Return flow—the habit of actually putting things back—falls apart quickly when a space gets busy. With every shortcut, “close enough” replaces clear boundaries. Miss the right shelf once, and by the next afternoon, you’re dodging a loose skate or sifting for the hammer that should’ve been a one-grab take. Meanwhile, moving around the space means shifting a tool chest or stepping over a cart that never quite rolls back where it belongs.

    Where ‘Open’ Becomes a Headache

    The snags are constant and specific:

    • You waste time moving a cabinet or tool chest—again—just so you can reach the one bin in the back corner.
    • Yesterday’s project stuff (a tangled extension cord, a garden tray) blocks access to what you actually need this morning.
    • The wall rack is either half-empty or overloaded and nobody remembers what’s supposed to hang where, so things double up or get stacked on the floor.

    It’s not just clutter—it’s a slow leak of momentum every time you move through the area. Resets, instead of being a two-minute tidy, now require a mini overhaul: rearranging carts, untangling categories, or negotiating whose stuff just turned the walkway into an obstacle course. Big open zones solve nothing if they turn into catch-alls or make small missteps contagious.

    When the System Breaks: Crowds and Crunch Time

    The test comes during weekends or shared sprint projects. You set out bins and labels hoping it’ll streamline access—then reality barges in. A ball rolls behind a planter. Kids’ boots end up wedged beneath old paint cans. Someone’s paperwork buries itself among garden gloves, and the main path narrows to a half-step, blocked by a cart that keeps shifting. Suddenly, “Where does this go?” becomes a daily refrain—and the clear start-of-week layout now needs a zone-by-zone do-over.

    The root problem isn’t the gear; it’s the vague zones. When everyone guesses at placement, the logic dissolves. Quick drop-offs become standard, arguments break out, and resets feel like daily chores. What looked organized on paper collapses under real, repeated use.

    Why Narrowing Zones Actually Works

    Segmenting storage by person or function flips the script. We overhauled our own garage with ruthless labeling: each person got their own shelf, distinct bins for activities, and wall hooks clearly marked for just one kind of gear. The transformation wasn’t fancier—it was simpler. Suddenly, gardening gloves had no path to wander into the painting section. The rolling module had a single job: ongoing projects only, never a dumping spot for any stray item within reach.

    The ripple effect was instant. After busy days, the reset took seconds: no head-scratching, no hunt for lost balls or planters, no moving someone else’s pile just to reach your own. For once, nobody’s boots ended up behind the tool chest. Movement through the area became straightforward—grab, go, put back. Every user instantly saw where things belonged, even in a rush.

    The Secret Behind Tighter Zones

    This works because it eliminates hesitation. If every shelf or hook says “this is for you” or “this is for this thing,” even the messiest user gets it right the first time. Drop-offs become mindless, not negotiated. That single clutter magnet on the wall finally holds only what it should—and the rest of the space stays clear for real movement.

    • Wall zones actually get used—no longer hiding overflow behind the main action.
    • Floor areas open up—gear only lands in its allotted footprint, not wherever there’s space.
    • Shuffling stops—every user’s path is direct, with less risk of tripping over a neighbor’s half-done project.

    Practical win: Use color-coded bins, shallow dividers, or clear, visible labels for each person or category. The discipline required is minimal; the drop in effort and “where’s my stuff?” discussions is huge.

    Are You Dealing with ‘Too Open’ Chaos?

    Your storage is suffering if you recognize these:

    • Carts or chests are always in the way—even after tidying up, there’s no clear path.
    • The same overflow zone gets refilled week after week, no matter how often you clear it.
    • You have to reshuffle bins just to access basics—nothing ever seems to stay where you put it.
    • Unused or awkward corners stay dead, never becoming truly helpful.
    • Zones nobody “owns” quietly collect everything else, growing into black holes of mixed-up gear.

    If this feels familiar, your next reset shouldn’t be bigger bins or taller shelves. Instead, shrink sections down. Assign true ownership or function, and block off catch-all zones before they grow. Even a simple strip of tape or a labeled divider can turn reset from a headache into a habit.

    From Looking Tidy to Working Effortlessly

    It’s easy to judge a setup by how clean it looks after a big re-org. But the test isn’t the photo—it’s a week of real use. The sign you’ve gotten it right? Each person moves easily, knows exactly where to return things, and nobody interrupts their own project just to hunt down a missing drill or open a blocked cabinet. The area stops drawing attention—and that’s the point: it works because it stops getting in the way.

    True storage success means less time reorganizing, less arguing about what “belongs” where, and more time actually getting work done—even in your busiest, most crowded stretches. Narrow zones. Clear lines. Real flow. That’s how you make storage not just look right, but work right.

    Visit StackNest for modular storage solutions built for real spaces and real routines.

  • Why Precise Ventilation Fan Placement Transforms Workshop Air Quality

    If you grind, sand, cut, or finish in a workshop, you know the drill: Floors swept, surfaces wiped, tools put away—by all appearances, the shop feels clean. But barely a week later, you run your palm over the bench and catch that stubborn film of dust. Corners have that telltale powder. Cloths pick up streaks. Even with the most obsessive cleanup routine, fine debris worms its way back in. Again and again, your projects suffer—coating turns streaky, sanding grips uneven, grinder bits start to labor mid-run. The gritty truth? More often than not, the simplest fix is right above your head: the fan that’s just out of place.

    The Hidden Complication: Misplaced Air

    No one blames the fan at first. After early sanding rounds, the air looks clear. Maybe the sander glides, the drills run smooth, your finish looks perfect. But after half a dozen cycles, those little signs return. The sander starts to catch. Brush bristles pull up dust where you just wiped. Varnish flashes with pinprick grit; drill bits come out less crisp than before. Every round seems to need more force, more finesse, more patience—while the air still looks okay. Behind the scenes, a misplaced vent or extractor lets the finest debris escape. What you don’t see builds up, quietly sabotaging control and tool performance every time you reach for them.

    That creeping micro-dust isn’t just cosmetic—it’s the enemy of smooth workflow and sharp results. It drains your effort, leads you toward needless troubleshooting, and slowly steals energy from your best-run shop.

    Airflow Where It Matters Most

    What actually changes the game? Position your fan or extraction right where work happens—directly above the sanding, drilling, cutting, or finishing zone. If the vent lines up with the exact spot where dust or vapor rises, every session gets cleaner by default. The extraction sweeps debris before it drifts. Saws cut with less drag. Sandpaper lasts longer. Your finish starts pristine and stays clear, even after several passes.

    This effect multiplies in dedicated shops where most work happens on one bench or panel saw. Even a fan a meter off to the side lets dust carve out invisible drifts and corners, only to float back or embed on the next pass. The extra friction isn’t obvious on day one—but at week’s end, after a series of routine projects, it’s the difference between surfaces that glide and tools that start to choke.

    How a Meter Makes or Breaks the Routine

    Imagine two nearly identical shops. Both run pine panels through sanders, apply finishes, swap out bits and blades on a set order. One key difference: The first has a fan straight over the workbench. The second has the same fan, but a meter to the side.

    • With direct exhaust, dust gets snatched away at the source. The sander needs less pressure. The drill bites clean and fast. Every finish goes down smooth, no stray grit. End-of-day cleanup means a sweep, not a second scrub.
    • Just one meter off, dust lingers under the bench and along tool racks. Sandpaper picks up invisible grit. Fingertips pick up fine debris every time you reposition, forcing you to re-wipe before staining or fastening. Before you know it, you’re pausing mid-project to shake out masks, swap filters, or get new rags. Progress gets interrupted—by cleaning, not work.

    That slight fan misplacement steadily compounds hassle. Each job creates a little extra drag, a slower tool, an extra cleaning break. Multiply that by each round, and you’re working harder for less precision and less satisfaction.

    Do You Need to Reposition Your Fan?

    The red flags show up in the middle of the job: finish that won’t lay flat, sander or grinder that seems to catch for no reason, drills feeling warmer in the hand. Fine particles coat even the best masks or goggles. Tack cloths go dirty before a full pass. You find yourself making one more sanding run, one more wipe, just to restore the finish you expect.

    Real-World Fix: Simple Moves, Tangible Payoff

    Last year, in a cramped garage shop, I tracked when and where airborne dust was most visible. It wasn’t hanging in the air hours after, but escaping right as I lifted the sander or grinder off a freshly prepped board. Rerouting the vent 1.2 meters directly above the sanding action, cleanup was cut down by two-thirds. What once took thirty minutes, now wrapped in ten. More than time: sandpaper needed less swapping, drill bits didn’t heat up as quickly, and my hands stopped picking up stray dust on every pass. Finish quality held up—even running three or four jobs back to back.

    Try before you commit: Before locking in a new vent or fan, grab a shop fan or portable extractor and move it directly over your main dust point. Watch which zones stay cleanest, and use a strip of masking tape to mark the most effective spot. That’s where you’ll see the true difference—before drilling, cutting, or mounting anything permanent.

    Extraction Precision = Better Tools, Better Work

    Dialed-in airflow does more than clear the air. It helps drills keep their bite, blades maintain full control, and sanders run cooler and cleaner. Less invisible grit means cordless tools hold battery longer, and their vents—or your lungs—don’t clog halfway through a task. It’s a small adjustment for a concrete payoff: better control, less fatigue, longer accessory life, and faster, uninterrupted flow from start to finish.

    What feels like a minor tweak—moving a fan less than a meter—directly shapes every pass you make and every result you get. The proof isn’t just in surface shine; it’s in how your tools sound, how your grip feels, and how your cleanup shrinks from a chore to a quick reset. Over dozens of jobs, you’ll see it: close enough isn’t nearly close enough.

    Find practical workshop equipment and ventilation solutions at Gumboll.

  • Choosing Between Deep and Shallow Closet Shelves for Daily Efficiency

    Shelf depth is the silent architect of your closet routine. Open nearly any closet—bedroom, entryway, hallway—and you’ll sense it instantly. Deep, seemingly generous shelves tempt you to load up, but what starts as “roomy” almost always ends with something lost or wedged behind a jumble. That favorite pair of socks? Gone, buried under sweaters. A stack of tees topples just to reach a hoodie. Closet depth doesn’t just shape what fits—it decides how fast your morning unfolds, how quickly you can reset, and whether “organized” ever lasts past the first chaotic week.

    Deep Shelves: Roomy at First, But Quick to Hide the Mess

    Deep closet shelves sell the fantasy: you stack comforters, layer bins, and squeeze in that duffel you never use. For a moment, the expanse feels transformative. Until real life crowds in. Soon you’re reaching over balled-up leggings and scooping blindly for that single t-shirt that vanished behind a second row. Bins that started sorted slowly fill with stray gloves, last-minute drop-offs, and odd shoes. The order you saw in week one gets replaced by routine frustration: to grab one thing, you upend three others. The deeper the shelf, the more categories start to blend, and the more invisible clutter drifts out of reach—including essentials you actually need.

    This isn’t limited to closets. Hallways fill with misplaced hats behind handbags, laundry shelves swallow that single cleaner bottle behind a wall of towels, garage bins quietly morph from “seasonal” to “mystery storage.” Deep shelving invites you to tuck more away—but every hidden inch is a hiding place for clutter and confusion.

    Shallow Shelves: Visible, Usable, Reliable—Every Day

    Shallow shelves force clarity. Instead of double or triple stacking towels, everything gets one layer. The jeans sit beside the tees, socks in their own basket, nothing tucked out of sight. There’s no clearing a path to get what you need. You reach, you grab, you’re done. There’s less shifting, less collapse—the stacks hold, and the arrangement never becomes a guessing game. The biggest change isn’t in how much you store, but how you use and access it: no second row means no hidden mess, and that “quick reset” you dream of actually happens, even after a busy week. When one shelf gets messy, it shows—so you spend 10 seconds fixing it instead of dreading a half-hour overhaul.

    Scene Shift: Hidden Depths vs. a Clean Layer

    Visualize your lower closet shelf—nearly two feet deep on move-in day, swallowing piles of comforters, a tangle of gym bags, boots lining the back. It “works”—until day seven, when you spot your go-to sweatshirt under a mountain of jumbled fleece. You’re left peeling back layers, shifting bags, and praying nothing topples. The shelf, once proud and neat, now sags beneath the weight of a system that stopped making sense.

    Now contrast a set of 10-inch shelves, each with a single job: socks here, towels there, nothing lurking behind. You spot what’s missing immediately. Taking one shirt doesn’t trigger an avalanche. Categories actually stay put. You reset between loads with barely a thought.

    How Depth Controls Closet Chaos (or Prevents It)

    Storage only wins if it keeps working when real pressure hits. Deep shelves create “layers”—shirts folded behind more shirts, baskets behind baskets, a catch-all bin just for overflow. It sounds efficient, but every layer guarantees extra juggling. Forgotten hats hibernate at the back. Next season, you’ll rediscover “lost” essentials dumped into the wrong bin. Resetting means pulling out half the shelf just to reach the bottom, while quick drop-offs blur the lines between categories. Disorder creeps in until you’re living around the clutter you meant to organize.

    Shallow shelves break the cycle. Their one-layer rule means there’s no invisible “back”—what you see is what you get, and restocking or cleaning up barely interrupts your routine. Maybe you store a little less per shelf. But everything stored stays visible, usable, and much less likely to tangle with unrelated items. Less time spent reorganizing, more time with a closet that actually performs.

    Make Space Work: Swap Deep for Shallow

    The most effective shift for many? Trading a single deep shelf for two shallow ones. Towels get their own space; linens land on a lower, reachable level. Suddenly, you’re not heaving heavy bedding to access pillowcases. Small upgrades pay off big: add a divider to block piles from “drifting,” or slip baskets side-by-side to give categories clear homes. Even if you can’t rebuild, one or two thoughtful tweaks can cut down on the constant shuffle and daily frustration.

    When Deep Shelves Make Sense—and When They Fail Fast

    There are situations where deep shelving wins: storing winter blankets, rarely-used guest bedding, or a few large bins you open twice a year. Here, maintenance is low and categories rarely cross. But once you use a deep shelf for multiple types of daily items—or skip internal separation—the cracks show immediately. Socks end up under scarves, cleaning sprays lost behind rags, and every reset means sorting the accidental mix. If you’re moving multiple items just to reach one, you feel the cost of lost time and growing clutter every day.

    The Sweet Spot: Shelf Depth That Fits Real Life

    Shelves under eight inches can leave essentials teetering or half-off the edge. But shelves over 15 inches—without some way to divide them—almost guarantee poor visibility and sluggish resets. For most everyday closets, nine to twelve inches deep is the magic range. It’s enough for a tidy stack of shirts or a handled bin, but shallow enough that no category gets buried. Maintenance feels light, because each row stays clear. Go wider only when you can insert dividers that “pause” the sprawl.

    Quick Fix: Divide Before You Stack

    Already have deep shelves? Simple fixes help: add upright dividers or designate a bin for each category. Label “zones,” pick a “home row”—make it obvious what belongs where. A few dollars spent now prevents a full-scale clean-out later. That’s the small difference between a closet you silently avoid and one that stays ready every single day.

    How Your Closet Feels in Use—Not Just How It Looks

    Organized for the first few days isn’t enough. The real test: Can you grab what you need and put things back instantly, or does every trip to the closet slow you down? Shallow shelves keep everything above board—no buried surprises, no forgotten piles of last season’s stuff. The systems you build (and the categories you set) actually last, making resets fast and daily use friction-free. In the end, the right shelf depth doesn’t just create space—it gives you a closet that works with you, not against you, week after week.

    Shop practical shelving and closet solutions at ClosetWorks

  • Why Firm Dividers Make Drawer Organization Truly Stress-Free

    You know the moment: you close the drawer on a perfectly organized row of shirts, socks, and belts—and feel a small victory. But even before the week’s out, that victory fades. Edges blur. Neat stacks lose their lines. The satisfaction of order is undermined, not by laziness, but by the ways real life pushes against fragile boundaries every single day.

    How Quickly Drawers Push Back

    This quiet unraveling doesn’t happen all at once. It’s the daily reach for a favorite shirt, the half-second spent fishing a sock from underneath a tangle, the small shuffle of a pile to get to what you actually need. Soon, sections that once seemed clear are unrecognizable. Categories begin to seep into each other’s territory—shirts slumping sideways, socks straying, scarves drifting across lines meant to keep the peace.

    It’s not chaos—just an unease, a feeling your drawer is now an obstacle. The culprit? Dividers and bins that look sturdy on install day but can’t take the strain of regular, impatient hands. Every grab, every hurried morning, and every unplanned reset erodes the order you worked so hard to create.

    The Slow Cost of Weak Boundaries

    The real friction isn’t visible junk, but the daily micro-struggles that chip away at your routine. Most dividers are too soft or too loose to stay put. That’s when the “maintenance tax” sneaks in: a little more nudging here, an extra straightening there. You start the week with crisp categories, but soon you’re sorting through socks mixed with t-shirts, belts that travel, and bins that collect everything—except what you’re looking for.

    This isn’t limited to dressers. Entryways quickly become catch-alls, where gloves slide into dog-leash territory and hats end up squashed under mail. Bathroom drawers set with the best intentions slowly melt into open landscapes—makeup brushes rolling into toothpaste tubes, hair ties mingling with travel bottles. Spaces that look organized after a weekend clean-out quietly revert by Thursday.

    When Looking Organized Isn’t Enough

    Matching bins and folded stacks are easy to put together, but they’re only as good as the boundaries that hold them. Soft-sided bins let contents slouch and mix. Stacks, no matter how perfectly aligned at first, lose shape the moment you reach from the middle. And in deep drawers or shelves, items slide backward, getting lost behind what you use most.

    Detecting Disorder Before It Spreads

    You’ll spot it in the subtle changes: piles tilting, bins no longer truly separate, and the extra time it takes to find a single item. That one-inch “gray zone” between two categories? That’s where socks cross into t-shirt territory. Pull out one thing, and something else topples. Eventually, the drawer requires a mini-reset after nearly every use—a slow, low-level loss of time and patience.

    What Actually Holds Up, Day After Day?

    Stability comes from boundaries that refuse to budge. Rigid, shallow dividers—fitted tightly, not leaving room for drift—beat soft barriers every time in high-use zones. Each space should match its contents: just wide enough for a stack of shirts or a row of socks, with walls tall enough to guide your hand but never so high they obstruct a quick grab. With a solid edge, each return is easy—there’s no pile collapsing sideways or slow creep from adjacent categories.

    The difference shows up immediately. Instead of bracing for a small mess every time you pull something out, you’re met with clear lanes that survive a week’s worth of real-life rummaging. The less you find yourself re-stacking, the more you realize how much easier the whole drawer becomes to use and reset.

    Real Spaces, Real Symptoms

    Every storage zone tells its own version of the same story. Open a family room drawer: remotes blend with coasters, batteries vanish beneath puzzles, and you spend extra minutes reshuffling to reach a charger. In the pantry, snack bins overflow and bread migrates into the dried-goods pile. Even closet shelves—supposedly sorted by season or style—lose clarity as loose stacks mix and “temporarily” out-of-place items linger for weeks.

    No setup survives everything. Overloaded drawers will always be trouble. The best systems aren’t the ones that look showroom-perfect on the first day—they’re the ones that bounce back quickly after normal use. When boundaries truly work, you feel less ongoing frustration: socks stop wandering, shirts stay stacked, and you stop dreading the small resets that come with every rushed morning.

    Low-Effort Tweaks That Actually Help

    If your storage feels like it’s always on the verge of slipping into chaos, a few practical upgrades can change the game:

    • Trade loose bins for fixed dividers in any drawer that gets daily use.
    • Add barriers in deep spaces—placing a low divider halfway adds a front zone so nothing sinks out of reach.
    • Adjust gaps between categories: if a stack keeps listing sideways, tighten the width until it consistently stays upright.
    • Seal off “creep lanes”—use a slim divider to prevent items from spilling into each others’ zones, especially in high-traffic drawers and shelves.

    What Real Function Feels Like

    A functional drawer doesn’t need you to remember a system or stage an Instagram photo. It lets you grab what you need quickly—without fishing, correcting, or bracing for the fallout of a single hasty move. The right boundaries fade from notice, quietly holding the line week after week, letting order survive ordinary life instead of resisting it.

    For storage that actually works, invest in barriers that stick. Every quick reach and unbothered reset is proof that your system is built for living, not just for looking neat in passing. The reward isn’t what you see—it’s everything you don’t have to fix.

    Shop ClosetWorks storage solutions

  • How Small Layout Changes Can Eliminate Hidden Steps in Your Workspace

    The showroom promise of modular carts and wall racks is irresistible—the sleek storage, the illusion of a spotless garage, a workshop that finally stays under control. You bring in that new system, arrange the bins, hang up the tools, and at first, everything looks solved. But then you start living with it. Not a month later, a new kind of mess sneaks in: not loose parts or wayward cords, but the constant, almost invisible contortions you make just to do simple things.

    Where the Trouble Hides in a “Clean” Setup

    The illusion holds up for a few days. Everything’s in its place, at least until you actually need to get things done. That’s when the cracks show: You double back for a wrench because the right bin is just out of reach. You thread your arm past the lip of a cart to fish out painter’s tape. You shuffle sideways between a tool chest and the wall—never quite fitting through—only to realize you’ve blocked your own escape route. One awkward step here, a bin moved there—none of it feels dramatic. But by the end of a real work session, your routine has been sliced apart by a dozen tiny, repeating annoyances.

    This is the friction nobody warns you about. The space still looks organized, but your workflow keeps snagging—hidden obstacles and off-kilter footprints turn everyday resets into stop-start marathons. It isn’t junk, it’s the geometry of your own system quietly working against you.

    Why “More Storage” Doesn’t Equal a Better Setup

    The problem almost never starts with too little storage. Instead, it’s the ugly mismatch between what looks organized by the numbers and what feels effortless in use. Your wall system eats up the only reachable spot, bins stack high right where you need legroom, and your mobile rack—so tidy at first—ends up collecting overflow at the far end of every job. You get more places to put things, but fewer ways to move naturally.

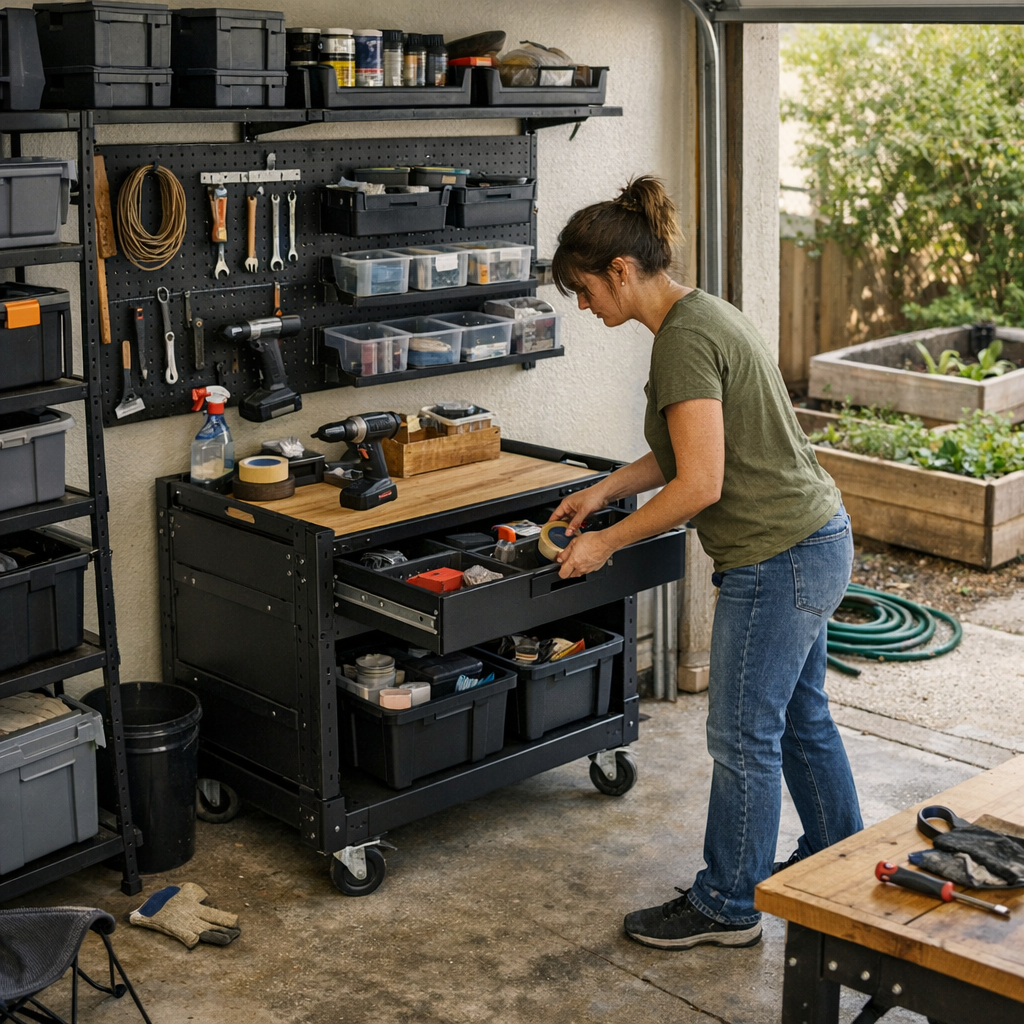
    Picture mounting a big tool board above a rolling cart. Sensible—until you realize the cart blocks access. Now every project begins with pushing, angling, or pulling everything out just to get started. The storage “solution” adds work to the simplest task.

    How “Almost Right” Layouts Steal Your Time

    It’s a familiar scene: a rolling cart shoved almost but never quite close enough to your main table. Each time you grab for supplies, you angle your body around the edge, careful not to send a bin tumbling. Dragging a cord or carrying a rake means a whole extra detour. By Wednesday, you know the exact dance—you move inefficiently out of habit, not convenience. It’s not truly disorganized, but it’s just wrong enough that you burn minutes and patience every time you work.

    Counting the Costs of a Poor Flow

    Every time you slide a cart to clear a path or shift a bin to find the piece you need, you’re giving up seconds—and focus. These adjustments fade into the background so quickly, you stop noticing them. But over a week, they take over:

    • Return flow gets jammed: You abandon tools in the “close enough” spot because the real home is a hassle to reach.
    • Overflow takes over dead corners—nothing ever resets all the way.
    • The main walkway narrows a little more after every session, now blocked by a cart or an awkwardly angled box.
    • Resetting for the next project turns into a scavenger hunt, not a smooth transition.

    The neat look is a lie. Unless the movement flows cleanly—unless tools and supplies come and go without gymnastics—no shelf or rack is truly working for you, no matter how perfectly labeled the bins are.

    Resetting Your Setup Around Actual Movement

    You won’t fix these pain points by buying another organizer. The answer is to study exactly how you work—for real, not in theory—and make the smallest changes with the biggest effects. Sometimes, moving a cart 18 inches, turning it parallel with your bench, or clearing a single “return lane” is enough. Suddenly, the tools you use daily are right where your hand expects them; the long-way-around shuffle disappears.

    In one ordinary garage, simply nudging a garden supply cart out of a walkway and rotating it meant tools could be put away in a straight line, without stepping sideways every time. That flow didn’t just look different—it felt like instant breathing room.

    Test Yourself: Where’s the Grind?

    Do you find yourself circling the same obstacle to drop off a drill? Always reaching around the broad edge of a cart for tape, or shifting two bins because the thing you need hides in back? That’s your setup fighting you—even if every label faces front.

    Here’s a five-minute audit: run your full space-reset routine, start to finish, five times in a row. If any bottleneck slows you every lap, it isn’t a fluke—it’s a flaw baked into your layout. Map those friction points, and you’ll know exactly what’s worth fixing.

    Small Tweaks, Real Flow: How to Unlock Your Space

    Perfection isn’t the goal, and it isn’t possible—but real improvement is always specific, never cosmetic. Forget another wave of reorganizing just for looks. Instead, try:

    • Bring your highest-use carts or cabinets into your natural flow, not blocking walkways or stacked at awkward angles.
    • Shift bulky wall racks to hold rarely used items—freeing up clear landing spots for daily gear.
    • Protect one straight “return lane” so you can reset tools and bins without zig-zags or backsteps.
    • Open up corners and the ends of rows, so overflow can’t quietly pile up and choke your movement.

    These surgical changes deliver more relief than any new shelf ever could. Each solved friction point turns a clutter-battle into a real, usable space—the kind you forget to complain about, because it simply works.

    The Feel of a Setup That Actually Works

    The right tweaks leave your space feeling lighter, not just neater. You step through without weaving. Tools snap back into place without a multi-step dance. There might still be a crowded shelf or a rough edge, but the path you actually use is clear, the routine unbroken. The urge to reshuffle every session fades—you return to work, not to rearrangement.

    This is the payoff: storage and layout that matches real movement, every time you show up—not just in the photos, but in the day-to-day loop.

    Find practical storage and modular solutions built for daily flow at StackNest.

  • Prevent Saw Motor Overload with the Right Blade for Wet Lumber

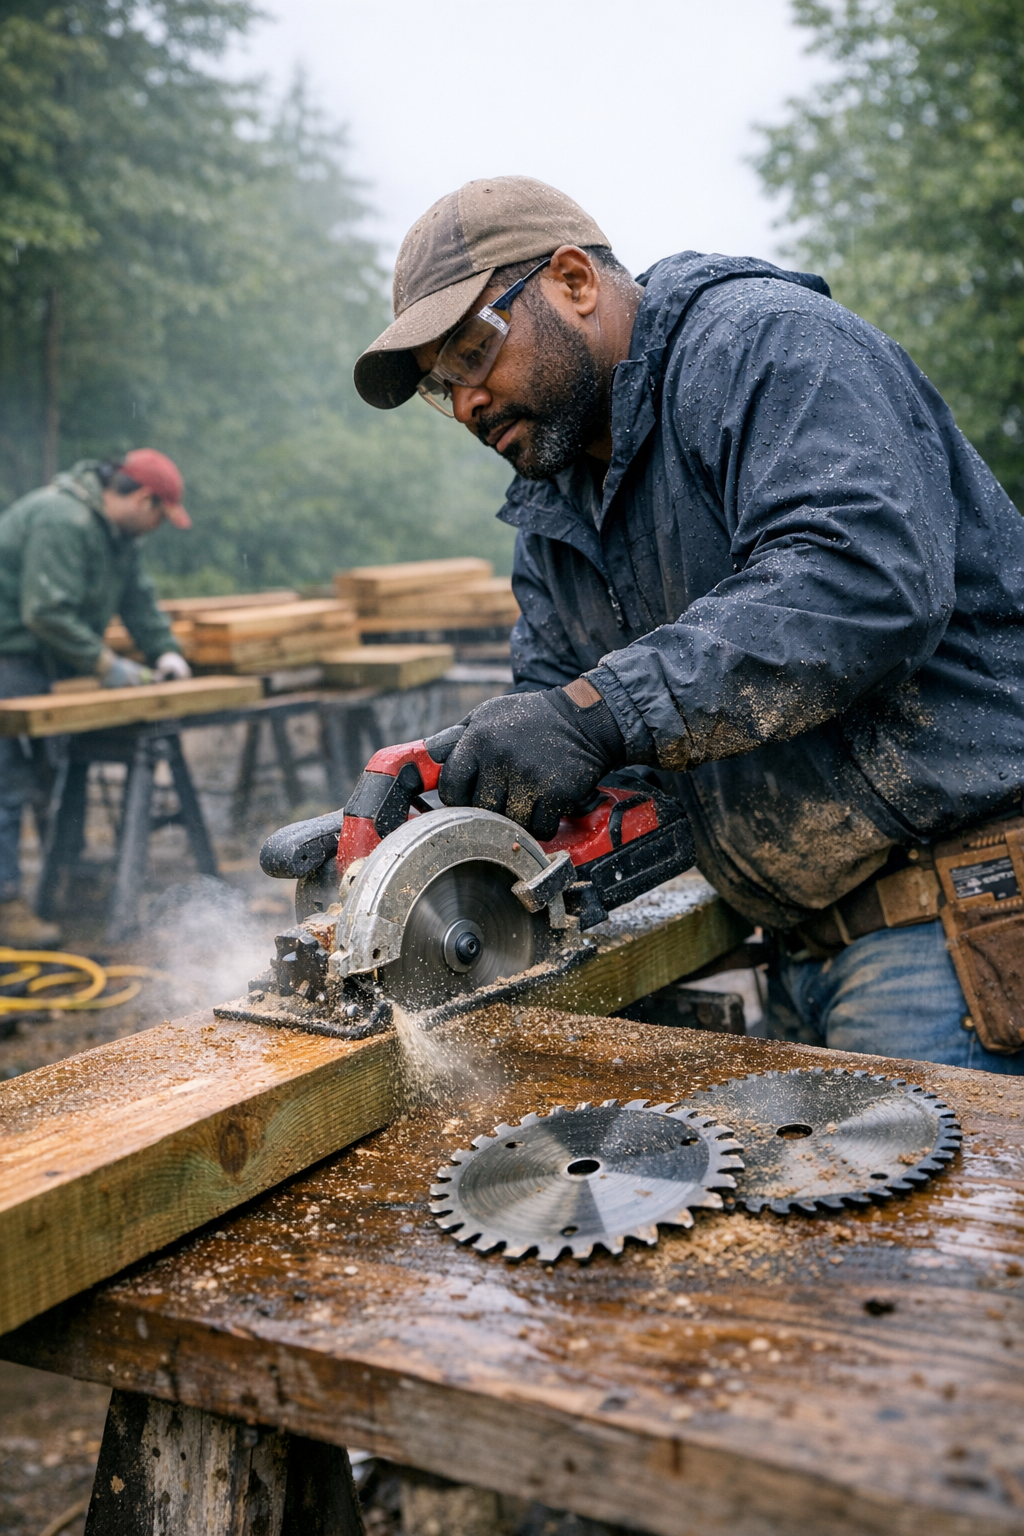
    Every crew knows the moment: stacks of wet lumber waiting at dawn, and a saw that should cut cleanly—but doesn’t. You line up for the first few cuts and watch the morning’s optimism drain away. That blade you trusted yesterday now stutters, grabs, and smears, turning what should be a straightforward job into a battle for every board.

    Feel the Drag Before You See It

    The frustration arrives before you even name it. At first, the saw chews through a plank or two. But then something shifts—the blade sags, the motor groans, and the familiar buzz of sawdust turns to silence except for chunks of damp waste sticking everywhere. Every pass demands more muscle, and you start to notice:

    • cuts are rough and splintered,
    • edges show dark burn marks,
    • sanding stations pile up with “fix-it” boards,
    • tool overload lights flicker more often, forcing unwanted breaks.

    None of this is random. The culprit isn’t just the soaked wood. It’s the wrong blade dictating the pace—making a hard job harder than it needs to be.

    Why General-Purpose Blades Stall Out in Wet Stock

    The “combination” blade seems like a safe bet—enough teeth for fine plywood, compact gullets for cleaner trims. But these same features choke when the job turns messy. Moisture transforms sawdust into paste, filling small gullets and jamming the teeth. By halfway through a stack, you’re not just working harder—you’re risking tool damage and spending twice as long to finish the same number of boards.

    Most job sites have watched someone force a smooth-sheet blade through green pine or sodden framing, feeling the saw shudder on every pass. The wood resists, the saw heats, and boards exit rough—if they make it out straight at all. Meanwhile, tool cycles get shorter. Sandpaper wears thin, and even batteries seem to drain faster as the tool draws more power to compensate.

    The Right Blade Does the Heavy Lifting

    This is where a true framing blade proves its worth. With a lower tooth count—typically 24—and deep gullets, these blades are engineered for pace, not polish. Each revolution tosses wet sawdust clear, which means the motor keeps its rhythm and the operator keeps control. Fewer stoppages; noticeably less arm fatigue; and best of all, a line of finished boards that just need a quick check, not a rescue mission with the sander.

    Recall any time your circular saw just quit mid-cut—not because the wood was too thick, but because the blade loaded with debris and overheated the system. Framing blades sidestep that pain. Instead of pushing through friction, you move through the work. You even notice the difference in battery changes and corded motor cycles—no more feeling like your saw is waging war on your shoulder or back.

    After the Rain: Jobsite Reality Check

    Picture a real morning post-storm: sodden deck planks line a temporary work table. The first worker rips into them with a combo blade—the motor stalls; the teeth stall, and every cut leaves burn and tearout. The next worker swaps in a 24-tooth framing blade. Suddenly the saw dusts clear, lines stay true, and nobody’s wasting ten minutes on every “rescued” plank. Instead of frustration, there’s a rhythm to the work—steady progress, less mess, a crew that actually finishes what they started.

    Catch the Early Warning Signs

    Small changes signal big coming slowdowns. Watch for these trouble cues:

    • saws straining and slowing mid-cut,
    • warm handles or smoking blades,
    • thick clusters of paste instead of sawdust,
    • redo piles growing by the minute.

    Ignore these and you risk more than the schedule—now you’re gambling on a burnt-out tool or blown circuit. One jammed cut echoes through the whole workflow, setting up lost time and extra labor long after the saw is off.

    One Small Change, Tangible Jobsite Gains

    A blade swap isn’t just about the tool—it’s about the people using it. Framing blades clear debris, hold speed, and avoid jam-ups, giving you back real control. Over hours, the payback is obvious: less downtime, fewer grip-and-push struggles, and a jobsite that moves more like a system, less like a slog.

    Battle-Tested Tips for Better Cuts

    • Start sharp, stay sharp: After a wet day, take 30 seconds to wipe and inspect both blade and guard—debris builds fast and sticks longer than you think.
    • Trust your instincts: If the saw’s sound dulls or the cut feels heavy, don’t wait—swap in a framing blade before you lose your stride.

    The difference isn’t magic—it’s just experience. Fewer resets, calmer workflow, surfaces that really are ready for the next step. The saw works for you, not against you.

    When the forecast turns sour and the boards are damp, that one simple switch can keep your build day from spiraling. Save your tools. Protect your pacing. End the day with fuel in the tank, not stuck at the sanding bench.

    http://gumboll.myshopify.com