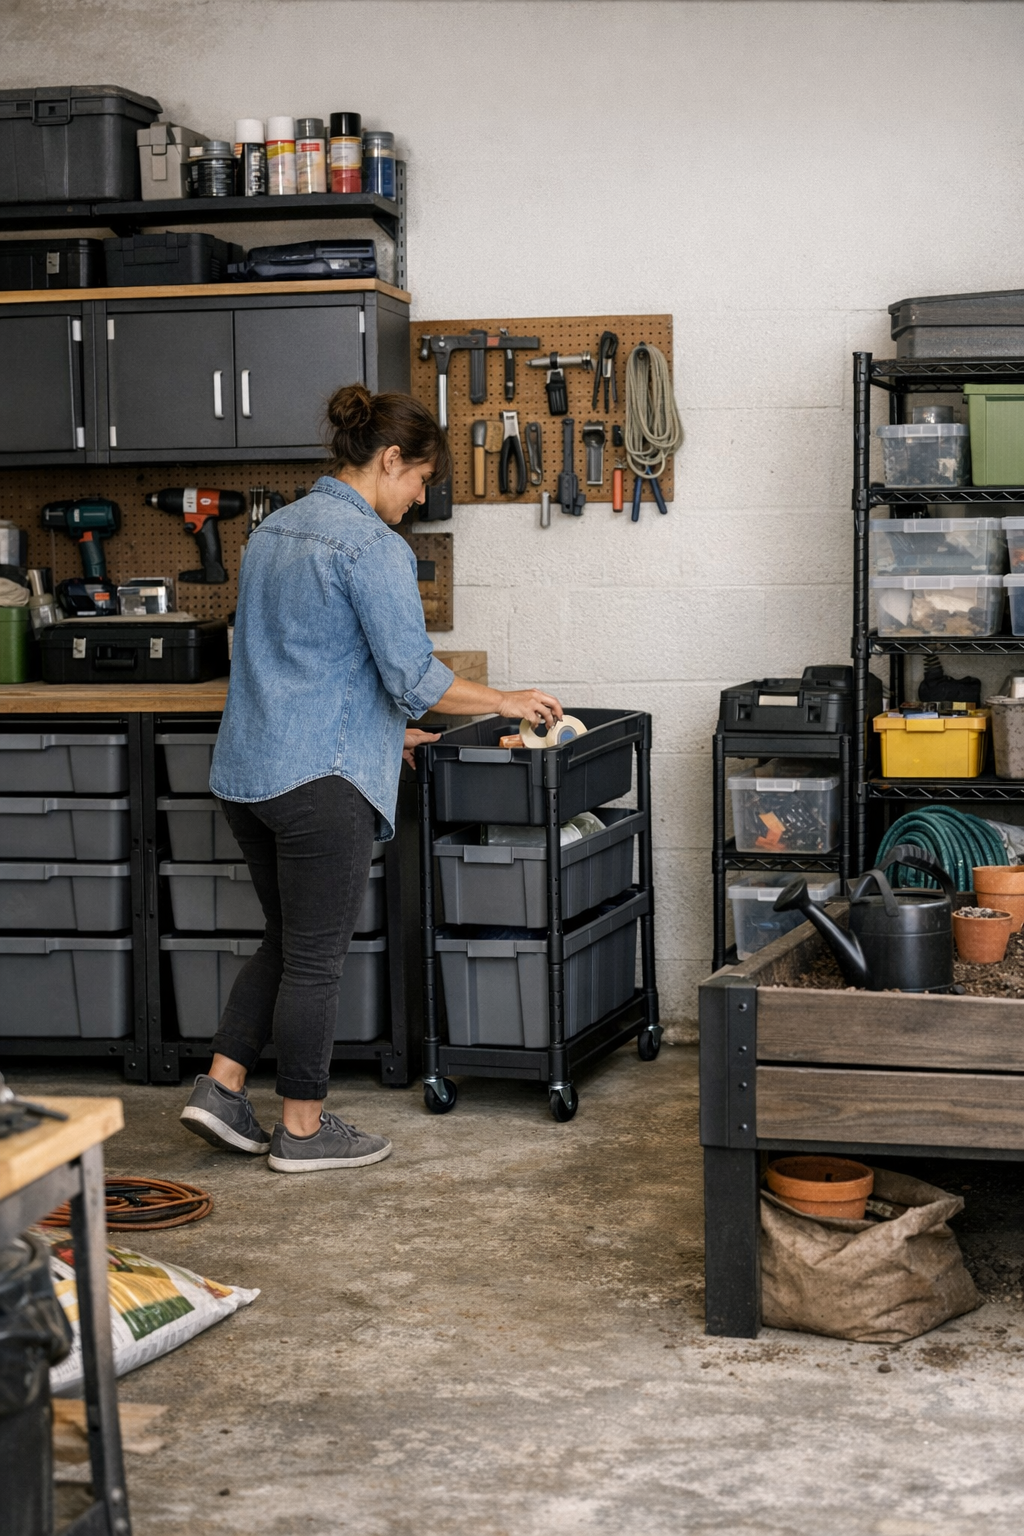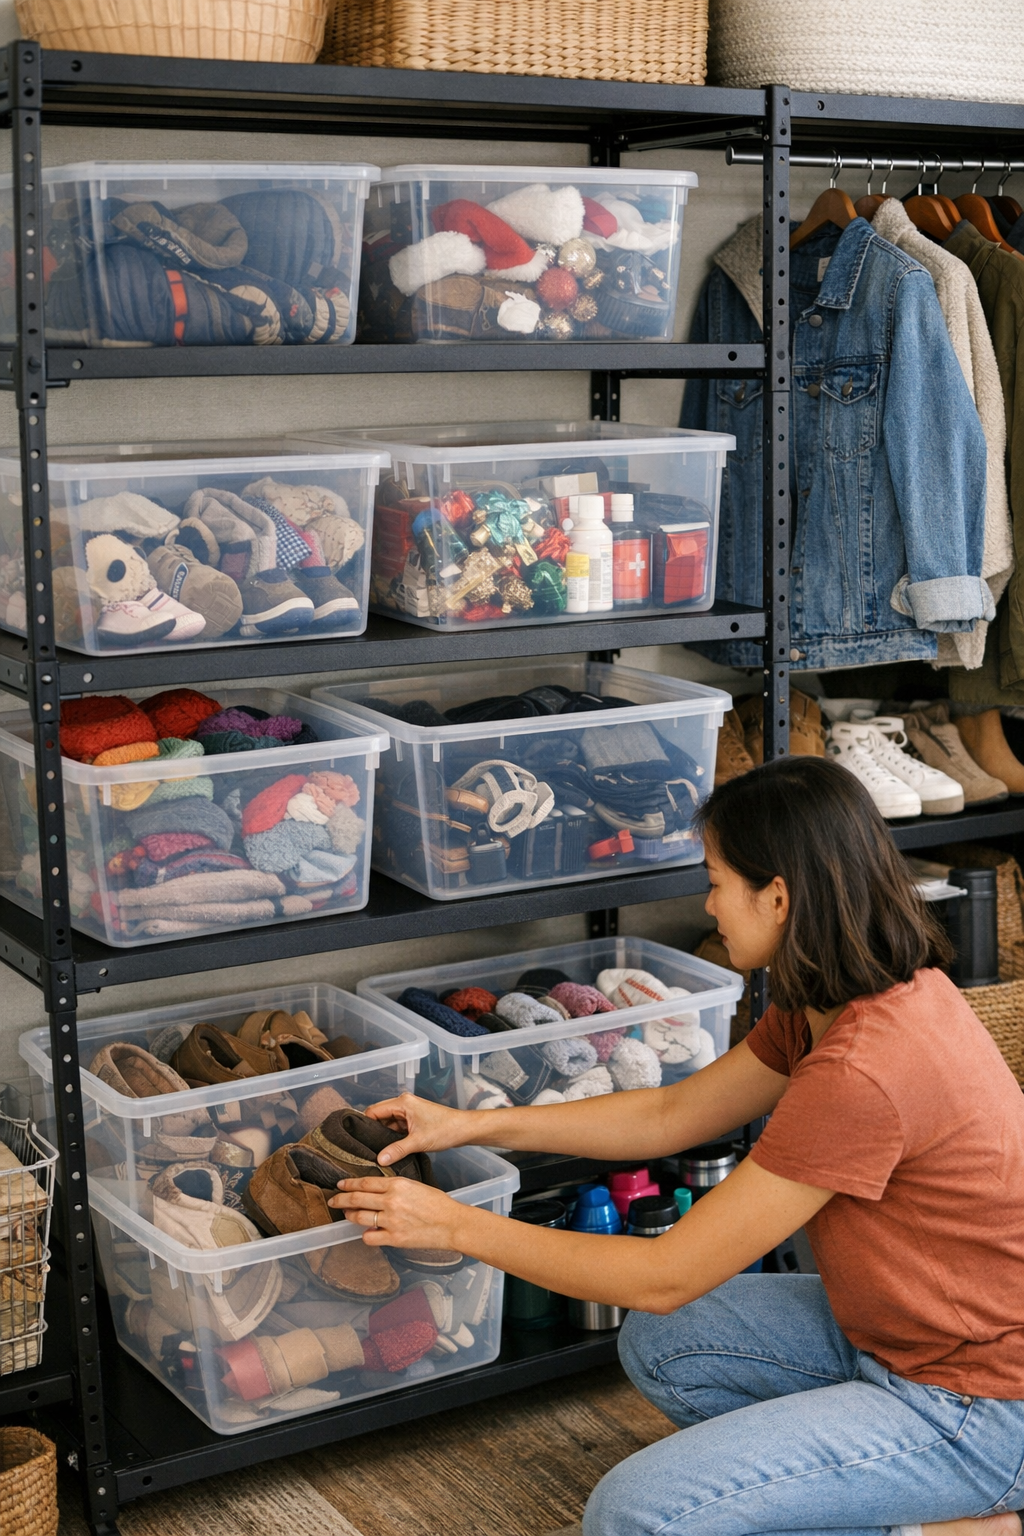
Category: Tools & Workshop

  • Entryway Storage Showdown: Bins or Baskets for Lasting Order

    The truth about entryway storage: the right container is the difference between a reset that sticks and a system that collapses by Thursday. It’s tempting to think organization comes down to picking bins that match or baskets that look great in a photo. But step into most front halls at 6 p.m.—after the backpacks drop, the muddy sneakers scatter, keys go missing, and mail piles up—and it’s obvious: what you chose for those few feet inside the door decides whether you regain control or fight mess on repeat.

    The Honeymoon Phase—And What Happens Next

    Fresh bins or baskets give that satisfying “after” shot. The floor empties, gear vanishes, and the bin lids fit—at least until life reloads the entry. By day three, the system is already stressed: kids drop shoes on top of yesterday’s jacket, that hat you need tomorrow is buried two layers deep, and whatever’s in the bottom of each bin stays untouched (and possibly unseen) until you’re desperate enough to dig.

    Baskets are friendlier for grabbing items on the go—but they also put clutter in full view. Scarves slip off stacks. Mail tumbles onto mittens. What began as an organized row turns into a jumble in plain sight. Bins keep chaos sealed up, but with every new “just for now” addition, visibility and order slip away. The difference between quick access and a chore comes down to what lives inside the container.

    Where Organization Breaks Down

    It’s not about hiding the mess. It’s about handling the mix that builds up day after day. Picture Friday morning after a busy week: you’re late, searching for your gloves. In a basket, yesterday’s bills and a tangle of headbands are in the way. In a bin, you’re fishing elbow-deep through shoes, a dog leash, and last season’s mask. Small items get swallowed by the pile—or worse, get put back anywhere space appears in the rush out the door. Each round of “fixing” ends up as shuffling, not sorting.

    Most bins and baskets fail the second they become general storage. What started as a hat basket becomes home to homework packets, snack wrappers, and sunglasses. A deep bin meant for shoes ends up with lunchboxes on top, or a lone flip-flop pressed somewhere under winter boots. The result isn’t just slower access—it’s family members asking “where’s my stuff?” and putting things down one room too far from where they belong.

    Why Category Separation Matters—Not Container Type

    What actually works in the long run? It’s rarely the bin or basket itself, but the boundaries inside it. Dump too many unrelated items together, and you get a mixed bag whose contents only get messier with every grab. When containers separate roles—by category, family member, or routine—the system stays usable long after the initial clean-out.

    Dividers change everything. Suddenly, there’s a narrow slot just for hats, a section for this season’s gloves, and a spot for each person’s shoes. One person’s muddy cleats can’t bury another’s ballet flats. No elaborate stacking or folding needed—just defined drop zones. Overstuffed bins become manageable again. In the chaos of daily comings and goings, a divider saves everyone from digging, guessing, or dumping out a pile to reset.

    Real Tactics That Survive Real Life

    Define Zones, Even in Small Spaces

    Oversized bins and baskets lure you into one-size-fits-all thinking. But smaller, purpose-specific containers—one for hats, one for keys, a narrow one for gloves—force separation and discourage mixed piles. A bin holding “whatever’s loose” becomes unmanageable fast; containers with a focused purpose make clutter harder to hide, easier to control.

    Use Dividers and Labels—even Makeshift Ones

    You don’t need custom organizers. Cardboard or thin wood creates instant sections in a deep bin. A strip of tape and a black marker signal “this half is for shoes, that half for mittens.” Labels on the front of baskets or bins help everyone—from family to guests—get things back in the right spot and avoid the every-morning treasure hunt.

    Don’t Settle for Out-of-Sight—Make Rules for What Goes In

    Just hiding mess isn’t enough. Every bin and basket in the entryway needs a clear rule—and a limited set of roles. “One item type per container” is a real test: if you reach for a hat and pull out last week’s paperwork, the system needs tightening. When items are truly isolated, resets go fast and you spot problems before they spread into the next room.

    Why Entryway Storage Decisions Echo Everywhere Else

    A good storage system at the front door isn’t cosmetic. It shapes how clutter—or clarity—spreads through the entire house. If you spend every week re-sorting, backtracking for keys, or snapping at kids to find their own shoes, the likely culprit isn’t family effort—it’s a container failing to set boundaries and keep categories clear.

    Switching to smaller bins, adding dividers, and labeling sections prevent constant reshuffling. Your entryway can survive changing seasons and active routines—without the rest of the house absorbing the overflow. Less time redoing the system means more hours where things stay found, and clutter actually remains at the door, not in the kitchen or living room.

    Let Your Entryway Work as Hard as Your Routine

    The right bins, dividers, and purposeful separation aren’t just organizing tools—they’re what keep that small square of floorspace from becoming a never-ending reset zone. Make each container earn its keep by making access simple, keeping roles clear, and isolating the mess before it multiplies. The reward isn’t a perfect photo, but a routine that moves forward, not backward, every time you open the door.

    Find practical dividers, bins, and category-focused entryway storage at ClosetWorks.
  • Why Reducing Items Improves Movement in Garage Storage Systems

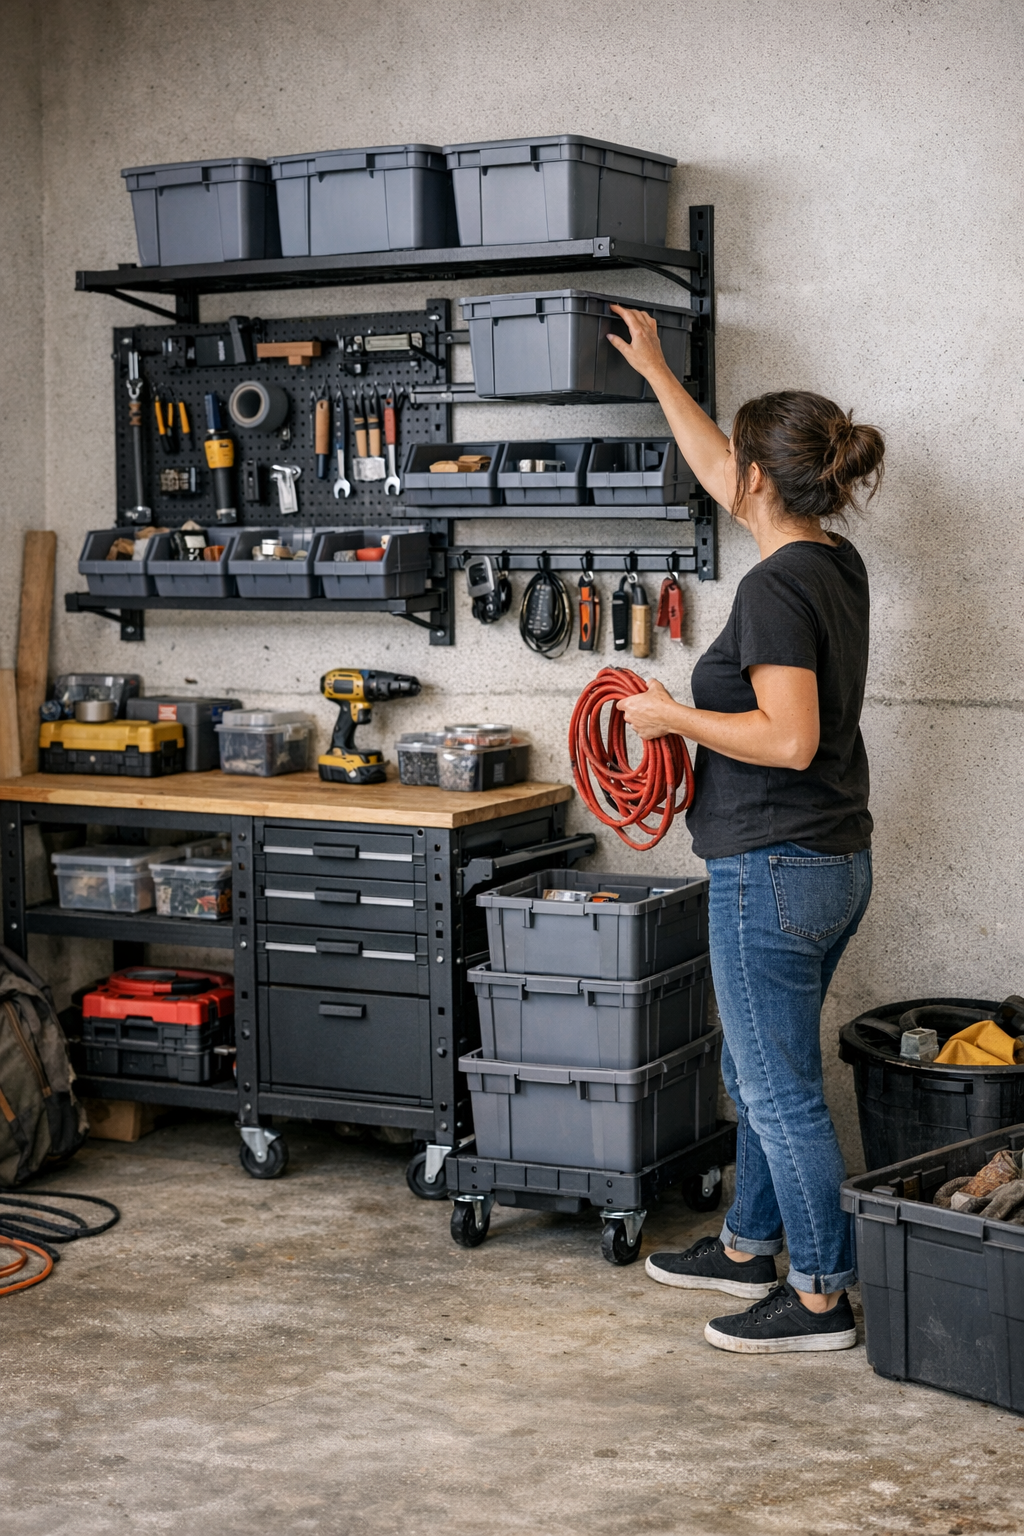
    The promise of a fresh storage system in your workshop or garage always feels bigger than the sum of its bins and shelves. You break open boxes, snap together racks, and—suddenly—everything finally has a place. For a day or two, it’s close to perfect. But real projects don’t stay clean. Give it a few work sessions, a few rushed cleanups, and a different friction creeps in: bins aren’t as accessible as you’d hoped, movement through your own space feels tighter, and tools land in new clutter traps you didn’t see coming. The difference between simply “holding more things” and actually making your routine faster becomes obvious the moment you try to grab, reset, or move—again and again.

    When “More Storage” Starts Creating New Problems

    Every new setup looks ideal in the first light: racks lined up flush, mobile carts stowed away, wall space covered in hooks and bins. But fast-forward to a Sunday project or that late-night repair. Suddenly the system you designed starts pushing back: you’re nudging a rolling chest out of the walkway for the third time, digging awkwardly behind corner bins, and stacking half-finished hardware on top of what used to be an “overflow” shelf because it’s easier than doing the shuffle yet again.

    What seems like efficiency on the surface—cramming more into every square foot—quickly exposes the spots where your routine actually breaks down. You know it’s happening when:

    • You’re reaching around carts more than you’re working on your project.
    • Simple grabs turn into two-step dances with edge bins or tucked-away racks.
    • The leftmost shelf, always in your line of sight, ends up piled with loose screws and tape rolls you can’t really return to their slot without a reset.
    • The floor closes in: one dropped bolt away from a trip hazard, just trying to keep tools off the surface.

    Adding storage space doesn’t fix the underlying problem if it slows down your resets or interrupts real movement. The sign you’re in trouble isn’t how much you can fit—it’s how easily you use what’s there, day after day.

    Why Edges and Corners Always Fill Up First

    Watch what happens in the edge zones and corners after just a week of “real use.” The wall-mounted rail that looks great in the catalog—the one with five bins spaced just so—turns problematic when you actually use it. Three bins let you reach and return without thinking. Add any more, and you’re dragging out a whole row just to grab a tape measure or utility blade. That extra shuffle drains time and chips away at the seamless movement you need when your hands are full.

    Corner shelves? They lure you in with “hidden” space. But by day three, they collect every oddball item, every “set it here for now” part, and every hardware pack you don’t quite know where else to put. The corner that started clear turns into a graveyard: tools collect, resets slow, and it becomes a spot you dread untangling at the end of any busy session. This slow-motion clutter is rarely loud until—suddenly—the main work area feels boxed in all over again.

    Storage Friction: It’s About Flow, Not Size

    Every trouble spot comes down to flow. If picking up your drill means inching around a chest of drawers, or if sliding out a bin disturbs everything around it, your storage is working against you. The real gap isn’t how much volume you have—it’s how much effort it takes to reach, return, and reset, especially when you’re moving quickly or cleaning up in a rush.

    During project sprints, nobody wants to restack bins or re-nest tool trays to reclaim space. It doesn’t matter if the system looks tidy; if you’re making extra moves, storage is failing its one true job: making routine use as close to automatic as possible.

    Spotting the Real Red Flags in Your Routine

    After a cycle or two through your full routine, these signals start popping up:

    • Shelves at shoulder or hip height that force you to pause—just to avoid knocking something else loose.
    • Carts or mobile chests parked in your path because there’s no slot for them that doesn’t block return flow.
    • Corners or ledges constantly catching hand tools and hardware that don’t quite “belong”—but never make it back to their home.
    • Cleanup stretching into a multi-step shuffle, with each reset taking longer every week.

    Every time you’re forced to move something extra just to tidy up or start your next task, it’s a sign: the system isn’t built for your real-life rhythm. Even wide-open wall panels or unused cubbies mean nothing if you’re fighting the same friction points every time you step in the door.

    A Small Reduction That Changes the Whole Flow

    It rarely takes a full overhaul to shift the setup—just the willingness to trim back. Real improvement comes from choices like yanking two bins off a shelf and leaving that spot open. Suddenly, the grab point you once struggled with is clean: one sweep of the arm, no awkward nudging or tangled sleeves. Clean up becomes muscle memory again. Over a week, you feel the difference as movement smooths out, resets get sharper, and the whole layout actually supports your pace instead of tripping you up.

    Practical move: If an area always gums up your flow—even if it looks organized—pull a bin or a shelf out for a few days. Run your normal routine and feel whether movement improves. Most of the time, less “stuff” in the edge means more clarity and less hesitation at every step.

    Smart Organizers Can Still Clog the Process

    The temptation is always to add another tier, insert, or micro-organizer for every category. But each extra piece can chew up precious flow if it blocks quick returns or forces you to shift containers just to reach the basics. Doubling up with dividers in mobile chests or hanging racks can make you work twice as hard for the same result. The only organizers that earn their keep are those that actually make the reset easier, not simply maximize the number of small objects a shelf can hold.

    Wall vs. Mobile: Where the Real Limits Show Up

    In theory, wall-mounted rails and mobile carts both extend your storage. In practice, their strengths turn into weaknesses if you overload or misplace them:

    • Wall systems: Free up your floor and create open sight lines—all good, unless you cram them so full that you’re stacking tools in front of tools. The second you have to reach past or pull out a row to get anything, you’re losing efficiency.
    • Mobile chests and carts: Let you bring essentials closer, only if their “docking” spot doesn’t clog your most natural path. Even a half-inch of wheel sticking out in the wrong place is an invitation to slow down or sidestep, especially after a rushed cleanup.

    Best outcome: keep the mobility and wall space, but veto anything that creates a dead zone, snags your motion, or adds friction to the simplest reset.

    Is Your Storage Working with You—or Against You?

    Check your space: if you’re always making multiple moves just to tuck things away, if you have to stop and think each time you walk through, or if you keep stashing overflow in the same tired corner, the pattern’s clear. Your storage system is technically organized—but functionally in the way.

    Most frustrations are not about too few bins or racks—they’re about too much content crammed into the same routine. The storage that truly makes a difference is the one that lets your workflow stay automatic, that clears the path for the way you actually move, and that needs very little extra effort to reset. Find the chronic blockages. Remove what you can from the pressure points. Watch how quickly the space feels usable again—back in sync with how you really work, not just how you thought you might use it when everything was brand new.

    When you no longer notice the storage system—when resets happen in a single motion without fumbles or re-stacking—you know the setup is finally supporting you, not the other way around.

    Explore more practical storage setups and solutions at StackNest.

  • Choosing Multitool Attachments That Maintain Precision Under Pressure

    A multitool only feels “universal” until you’re halfway through a job and the wrong blade or sanding pad starts slowing everything down. On the site or in a tight garage, you don’t need to wait long for the difference to show up—by the second hour, a so-so attachment is muting every cut, eating through your grip, and leaving behind a swath of corrections for later. The right multitool accessory looks like a minor decision at the start. On a real job, it’s the hidden fork that splits the day into steady progress or slow frustration.

    When Your Multitool Meets Real Resistance

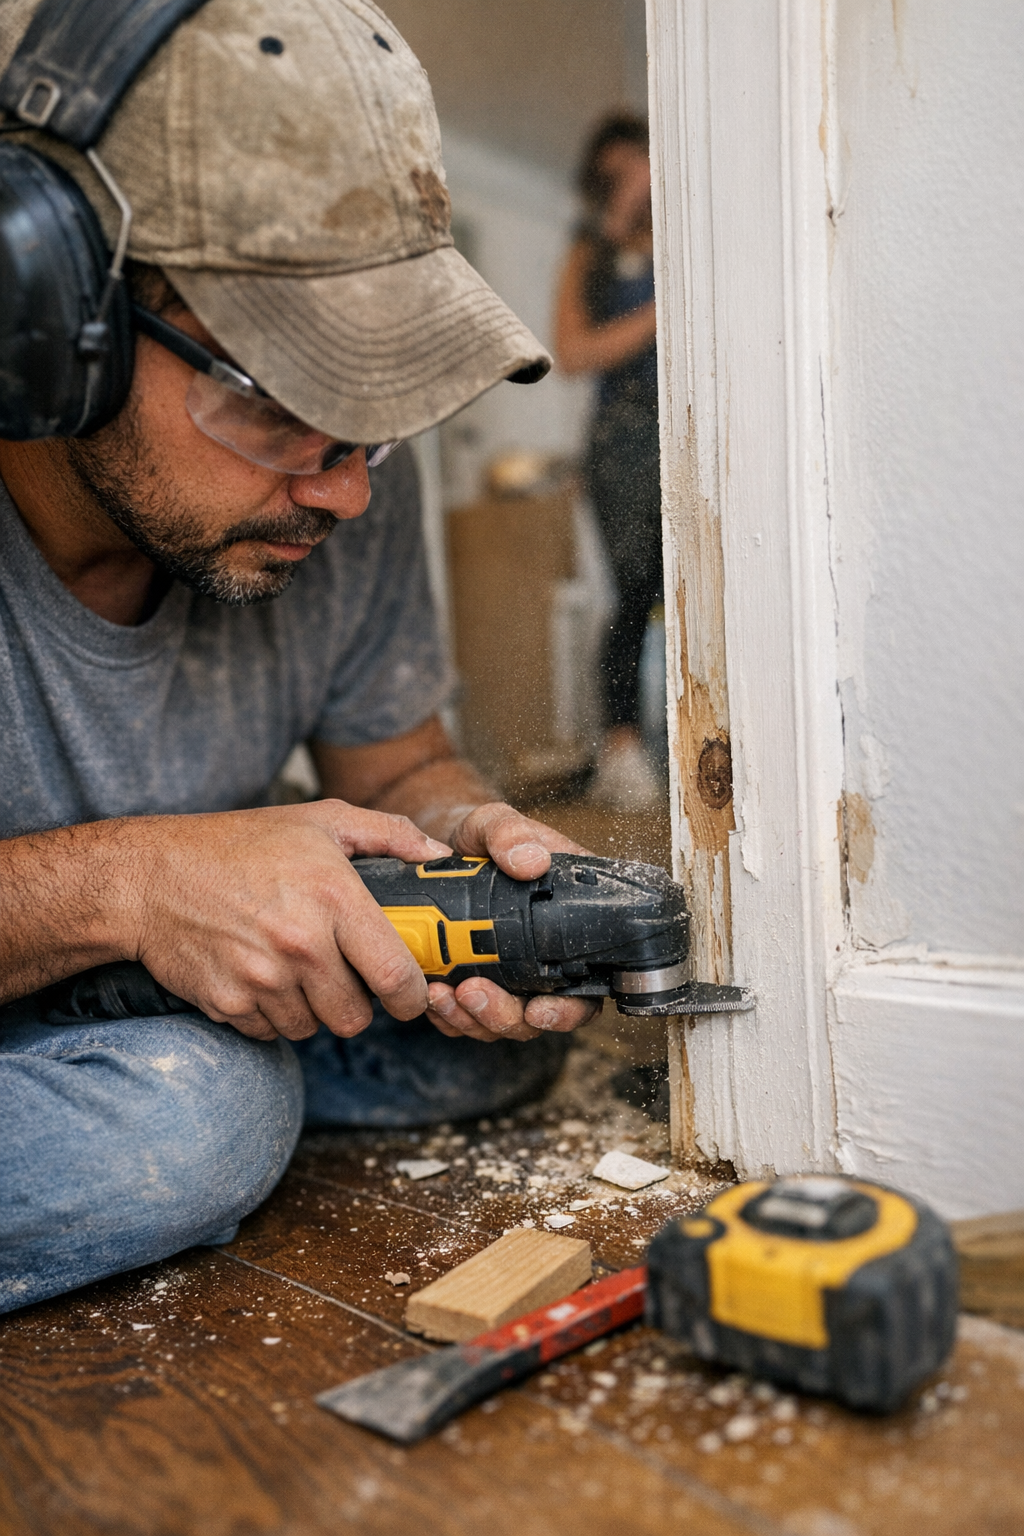
    Not all materials fight fair. The challenges don’t show up with soft pine. It’s when you butt up against ancient window trim or layered door jambs—glass-hard paint, splintery knots, gritty drywall dust—that a blade’s limits come out. Early on, every blade says it’s the “right one.” But as grit cakes up, cuts start drifting, and every edge loses sharpness, the issues get obvious: errant lines, messy reveals, and a tool that wants to jump out of your hands by the second or third board. That’s when an attachment decision you barely thought about starts punching holes in your workflow.

    Anyone who’s pushed a multitool across trim or through a patch of floor feels this: The first cut feels controlled. By board four, you fight blade wander, waste time re-sanding the edge, and start worrying about damage to finished surfaces. Hand fatigue sneaks in, grip gets tense, and the cut line you set hours ago is a memory.

    Look-Alikes in the Aisle, Night-and-Day on the Job

    Beneath the fluorescent lights, all multitool blades and sanding pads pitch the same confidence—universal fit, multi-material use, “all-day” durability. But the real judgment comes during the grind: when the paint is thick, the board is dense, and you have no room to stray off the scribe. Two blades boasting the same claim—diamond grit versus carbide tooth—might look interchangeable. Start running them through heat-soaked old oak, and the diamond grit keeps its line and stays cool; the carbide tooth bogs down, blurring the edge and littering the air with uneven dust.

    How Friction Compounds Into Cleanup

    Get a couple of attachments wrong and cleanup snowballs. One dulling blade makes an awkward cut, and suddenly five minutes of repainting or corrective sanding is tacked on. Fit and finish slip. When you break out the shop vac for the third time to chase paint chips and tooth debris, you realize the problem didn’t start with this mess—it started hours ago at the tool rack.

    Door Jambs: Where Efficiency Hits a Wall

    Take on a door retro in a house that’s had forty years’ worth of repaints. A fresh blade feels great on the first jamb. By the second or third, that carbide tooth blade is vibrating hard, unable to stay on the line, splintering the edge and spitting chips onto finished floors. You spend more time wrangling the tool than actually cutting, then double it on patching, sanding, and cleaning up gouges that weren’t supposed to be there. The fallout isn’t just sore hands—it’s a project stuck in a loop of rework, frustration, and wasted energy you can’t afford in the middle of a busy job.

    This isn’t “just” frustration—it’s costly backtracking: ragged edges, bigger gaps to fill, a pile-up at prep and finish. Better blades or pads would have streamlined everything. Instead, a small miss in selection jams up the entire surface-to-paint workflow.

    What Really Changes When You Use the Right Attachment?

    In practical terms, here’s what you’ll notice instantly:

    • Reliable line control. A diamond grit flush-cut blade keeps tracking true even as you work through dense paint, knots, or layered materials—no drifting to correct with sandpaper later.
    • Reduced vibration and fatigue. Less shake transfers to your grip, making accurate cuts easier and cutting marathon sessions down to size. By the late afternoon, your grip and forearm still have something left.
    • No more runaway heat. Good attachments shed heat without warping or dulling, so you won’t deal with burned marks or that harsh overheated-metal odor fouling the workspace.
    • Minimal rework. Instead of hovering over the sander or caulk trying to patch ragged cuts, you hit them once and move on—spending a fraction of the usual time on slap-dash touch-ups.

    In one remodel, switching from generic blades to a job-matched diamond grit cut cleanup between jambs from several minutes down to under ninety seconds—often the line between keeping pace or getting left behind for the next crew.

    Quick Tactics to Save Time (and Hands)

    Keep spares ready. When resistance changes or you see that first haze of dust on the blade or sanding pad, swap it out. A fresh attachment is cheaper than messy rework—and makes a noticeable difference in pace.

    Don’t trust the packaging hype. The real test is always in action: how a blade handles old screws, how a sanding pad does after the fifth corner. The display isn’t your jobsite—the grind is.

    Sanding: Where Accessories Make All the Difference

    It’s the same problem with detail sanding: the wrong pad turns a late-day task into hours lost. Standard multitool pads choke on paint flakes and dusty filler, forcing switch after switch and keeping you miles from a finished surface. Orbital discs fare better on flats, but lack the angle for corners and edge work. Miss the right match and you wind up with burned edges, gummed-up pads, and surfaces begging for a redo—double the frustration, half the finish.

    Small shifts in pad quality, fit, or abrasive grade affect your momentum more than any “multi-use” claim on the rack. The right sanding pad keeps dust and drag away from your best effort.

    Workload, Not Hype: The Only Real Test

    What matters most is performance under pressure—not marketing promises, not how slick the packaging looks. The only metric that counts: how well does the blade hang in when old screws crop up, corners need shaping, or wrists start to stiffen four hours in? Field-tested choices—diamond grit for heavy-duty flush cuts, job-matched sanding pads for awkward detail—free you from the grind of constant correction and unnecessary fatigue.

    Next time you’re staring down dense trim, stacked jambs, or a stubborn sanding run, remember: a small swap at the start isn’t just faster. It means cleaner cuts, more precise results, less fatigue, and a jobsite that hums along—even when you’re pushing into overtime.

    http://gumboll.myshopify.com

  • Why Clever Closet Systems Often Fail in Everyday Use

    The first days after a new closet system goes in, it feels like the upgrade you’ve always needed. There’s that satisfying sense of order: baskets slide smoothly, everything sits in its own compartment, and for a moment, you believe the old chaos has been finally fixed. But then life returns—rushed mornings, laundry cycles, and last-minute hunts for that one missing glove. Instead of effortless function, something slower creeps in: bins blur, stacks topple, and what once looked perfectly organized becomes suspiciously hard to use. You start to notice the difference between a closet that looks tidy and one that actually keeps up.

    When “Organized” Begins to Get in the Way

    On day one, it’s show-ready—by week three, small battles appear. Dividers that seemed clever now block quick grabs. A bin for scarves and another for hats start swapping contents after a few hurried evenings. Shoes, once lined up in defined rows, nudge over their borders or get buried under tote bags. That “maximized” shelf hides a toppled stack behind other items, so grabbing a sweater means shifting half the pile just to reach what’s in back.

    The real scene? Belts curling over dividers, gloves mixed with hats, and the top shelf crowded with random overflow you meant to sort later. Each time you reach in, there’s a moment’s pause: did you tuck those mittens with the hats or shove them on the shelf for now?

    Pressure Points: When Daily Life Tests Your Closet

    The proof comes in daily use—a Tuesday morning late for work, the scramble for a favorite shirt, or the end-of-day toss into a crowded basket. Those deep bins that once held everything neatly? Now they hide socks under scarves, forcing you to dig. Shelves you “layered for efficiency” demand you move two stacks just to put away a single folded tee. And the more you hurry, the messier it gets—each micro-delay adding up until resets feel slow and frustrating rather than fast and natural.

    Before the Mess Spreads: Catching Everyday Friction

    Notice the little stalls: Are you double-stacking to squeeze in one more thing? Shoving divider panels just to find a home for something? Do bins and baskets develop their own logic—half bags, half hats, all jumbled? There’s no system failure, just a growing mismatch between how you live and how your closet wants you to behave.

    The biggest sign something’s off? The reset. What should be a quick “drop it where it goes” turns into untangling a pile, digging to the bottom of a bin, or—worst of all—leaving things on the floor or shelf edge because putting them away is now a chore.

    When Clever Systems Don’t Fit Real Routines

    Fancy features sell—tiered shelving, elaborate dividers, bins for every possible item. But if your storage setup makes you stop and think every time, it’s adding friction instead of removing it. Picking out anything becomes a puzzle: which bin, which section, which stack? That hesitation leads to slumped piles, baskets full of the wrong things, and forgotten corners where nothing gets put back. The system falls behind because it expects perfect habits—and daily life is anything but perfect.

    The Category Creep: Why Distinctions Disappear

    Every item has its place on Monday. By the weekend? Not so much. A scarf lands with the gloves because you’re in a rush. The neat pile of shirts leans after one too many quick grabs. Category boundaries blur, not because you’re lazy, but because rigid rules break under real pressure. The closet didn’t adjust to you—you had to adjust to it, and that’s where the cracks show.

    Subtraction Over Addition: Simpler Zones That Work

    The fix usually isn’t another layer of bins or dividers—it’s making things simpler and more forgiving. Claim a whole shelf for just one type of item, even if it seems a little empty. Leave open space for fast grabs and lazy returns. Fewer partitions mean you don’t have to remember where everything goes or undo a divider when you’re tired. Resets get easier; you don’t need to nudge or rearrange, just toss and move on.

    Think of overflow, too. Instead of cramming into three shallow trays, let hats take over one space, scarves another. There’s less time lost fixing mistakes or reorganizing, and you reclaim the sense that your closet works with you—not against you.

    Vertical Space: Use What You Really Need (and Skip the Rest)

    It’s tempting to fill every inch above the shelf with extra bins, but that often just hides things further. Instead, try racks that adjust as seasons change, or leave simple headroom for single-category stacking. If grabbing something means moving three other things, it’s time to rethink—clarity beats maximization almost every time.

    Signs Your Storage Is Slowing You Down

    How do you know your setup’s not serving you? Watch for these:

    • Pausing before grabbing or returning anything—second-guessing where it lives
    • Having to move or disturb a stack just to access what you need
    • Baskets overflowing or contents blending until categories disappear
    • Items drifting: sneakers in with the gym bag, tees mixed with pajama pants
    • Resets that feel like correcting a mistake, not simply restoring order

    The aim isn’t a closet that photographs perfectly—it’s one that recovers easily and speeds you up every single week.

    Let Daily Use Lead: Closets That Actually Work

    The most functional closets don’t look staged—they just work, again and again. When storage fits real habits, friction drops away: broader zones, fewer fussy subdivisions, and enough give for routines to flex. The system adapts to you, not the other way around. Maybe it’s not catalog-tidy, but you’ll always know where things are—and resets become part of getting ready, never a dreaded chore.

    For practical solutions rooted in real closets and the way you actually live, visit ClosetWorks.

  • Designing a Garden Layout That Adapts to Changing Seasonal Needs

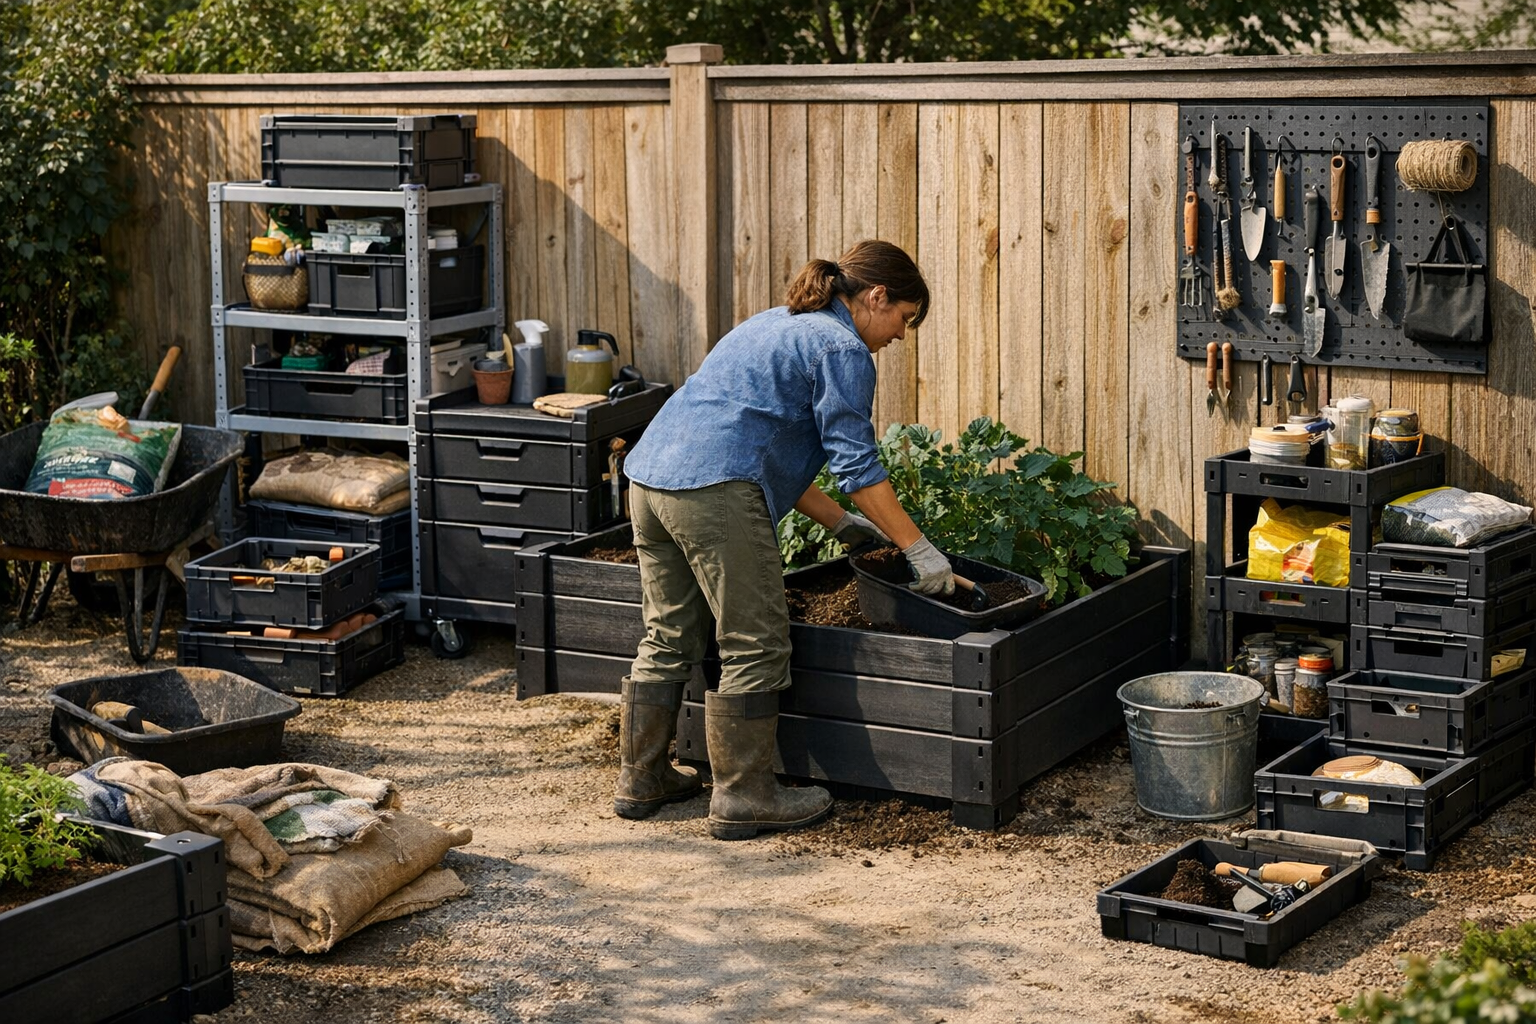
    If you’ve ever tried to keep a utility garden, workshop corner, or backyard work zone running smoothly, you know the gap between “looks organized” and “actually works.” Freshly set rows of raised beds and modular shelving always seem perfect—each tool lined up, pathways wide enough, storage carts tucked against the wall. By week three, though, that crisp order starts to buckle: a surprise bulk soil delivery clogs your clear route; a stack of garden trays appear from nowhere; one more tool means shoving aside what fit just yesterday. Suddenly, the setup meant to save time becomes another source of lost minutes and awkward workarounds.

    How a “Perfect” Setup Turns Into Your Daily Friction

    It always starts the same way: one arrangement that makes sense for today’s tools and tasks. Then new supplies show up, fresh needs take root, and the season shifts. That storage rack fits—until you need to slide it over and wedge a wheelbarrow through. The cart you stationed near the hose? Now you have to pull it sideways just to squeeze by, watering can in hand. What began as a clean, logical layout turns into a run-around: shifting a bin out from the wall, tiptoeing around the bed’s corner, dodging the muddy mound left by last weekend’s project.

    This slow slide into daily friction is sneakier than it sounds. Maybe it’s one wall hook that was perfect when you installed it—but now it’s jammed with trowels and tangled gloves. Or a modular bed whose edge pokes into your route, making every pass with a full bucket just a bit more careful. Over time, these little annoyances stack up, eating at your rhythm until the promise of “organized” gives way to second guesses and side-steps.

    Where Dead Space and Overflow Collect

    Every setup has its blind spots—corners that magically attract “for now” items: last month’s empty pots, extra rolls of fencing, the bag of compost you meant to use last weekend. At first, it’s harmless: just a quick pile in an unused spot. But dead corners become traps. Every time you have to reshuffle trays to get started or clear a ledge to find that one missing tool, you’re reminded the setup doesn’t really match the way you use the space.

    Eventually, the area that once seemed under control collects more and more overflow. Resetting at the end of the day stretches from a five-minute routine to a small project of its own. You’re not just putting things away—you’re working around piles, breaking your momentum. And when you need the whole space clear for a new planting or major project, the “system” you started with feels more like a maze built by your own best intentions.

    True Flexibility: The Real Difference Maker

    The setups that keep working aren’t the ones that look sharpest on day one—they’re the ones built to shift, not settle. This means keeping at least one border loose for staging, not boxing in every inch with permanent storage. Leaving space to actually roll carts in and out—no narrow gaps or blocked turns. Shelves and beds that can shuffle a little when needed.

    Real example: moving a bed just eight inches back from the usual border opened up space to pull carts straight through, not drag them sideways. That freed up the edge as a quick drop zone for muddy tools or overflow on harvest days. Tool returns and resets sped up—no more stacking or stepping around the problem corners. It’s a tweak that seems small, but over dozens of uses, it completely changes the routine. What once felt like a careful dance around pinch points becomes a direct route: unload, tidy, get back to the next job.

    Knowing When a Reset Is Overdue

    It’s easy to fall in love with a setup that looks perfect in photos or fits everything like a puzzle. But the real test is daily movement. If you find yourself shifting the same cart out of the way every time you refill a seed tray, or inventing new paths because of a stubbornly crowded corner, that’s the system asking to be reset. Organization isn’t about holding onto the first layout—it’s about removing friction as your daily habits and storage needs change.

    When to Stop and Rethink

    • One zone always piles up faster than you can clear it
    • Supplies migrate into awkward overflow spots instead of returning easily
    • Daily resets turn into multi-step shuffles or dreaded chores
    • You catch yourself bracing for another slow workaround just to get started

    Spotting any of these means it’s time to physically change the layout, not just tidy up.

    Tactical Tweaks—Not Total Redesigns

    Forget chasing an unchanging “ideal.” The most reliable workspaces flex continually. Plan for at least one staging zone that can absorb mess and extra supplies. Use modular beds and carts to give yourself real reroute options as your season or routine evolves. Carve out a single clear line between major workstations so you’re never forced into zigzags or awkward detours mid-job. These adjustments don’t promise showroom-level symmetry—but they do pay off with faster resets, easier tool returns, and less time wrestling with your own storage.

    The goal: movement and routine that feels smoother, not just neater. A setup that works with you day after day—no matter how many trays, tools, or carts the season throws your way—beats a “perfect” plan that trips you up week after week.

    See more at StackNest.

  • Why Proper Rivet Gun Stroke Adjustment Prevents Costly Finish Flaws

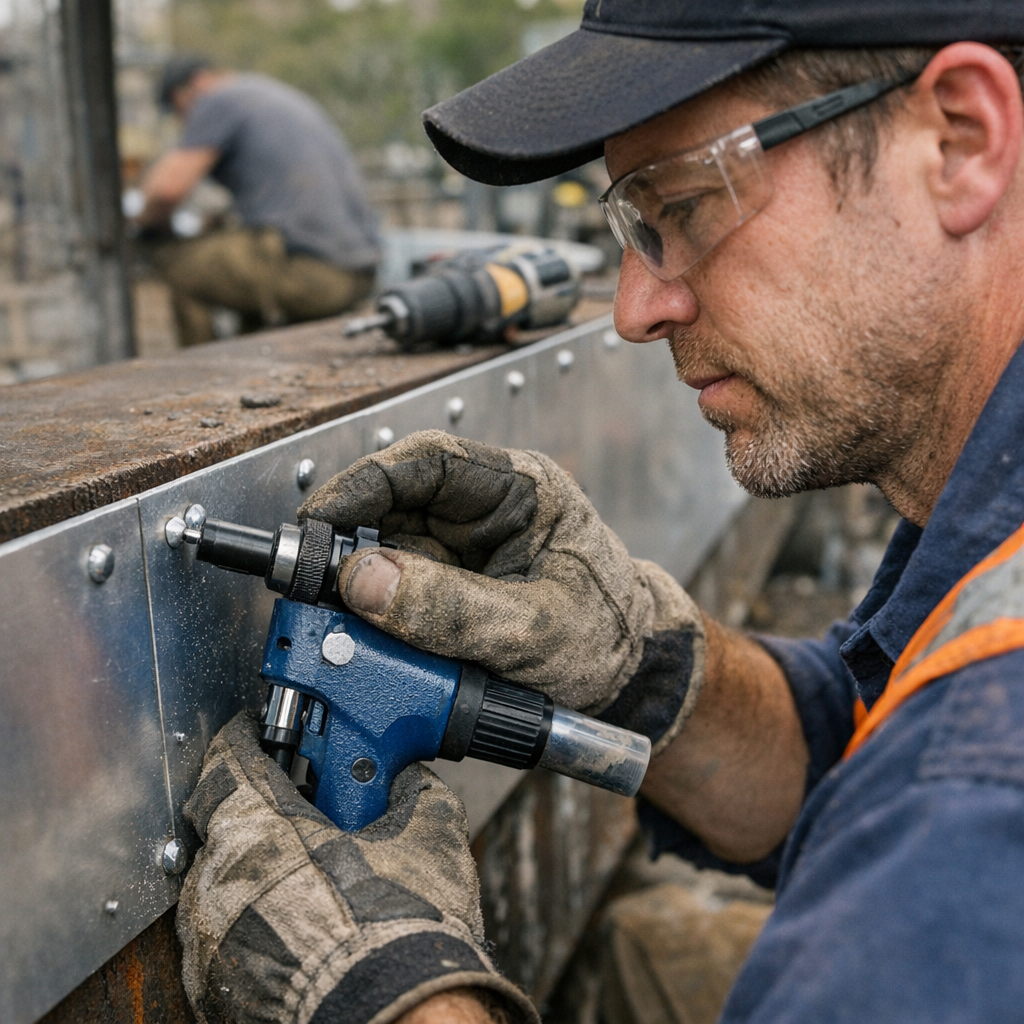
    Rivet guns rarely announce their mistakes while you work—they just quietly pile up the pain, especially in the middle of a demanding job. The first dozen rivets go down smooth. Heads lay flat, seams look tight, and every squeeze feels controlled. But as soon as you face a warped steel frame, a gnarly patch of doubled metal, or an awkward corner, a hidden flaw in your stroke adjustment exposes itself. One by one, rivets sit proud, seams lose their flush edge, and your grip tightens as if squeezing harder will pull the tool back on track. What started as clear progress becomes a stubborn fight—extra effort, mounting hand fatigue, and a finish you’ll be cleaning up long after the gun is put away.

    When Setup Slips: How Small Errors Escalate

    Jobs always start easy on a flat bench with uniform scrap—your rivet gun’s default stroke setting seems fine. But the real work is rarely that forgiving. Switch to a heavier steel channel or half-twist a frame to meet a misaligned panel, and suddenly every cycle feels off. The symptom list is unmistakable: fingertips buzz from new vibration, your glove snags on proud rivet heads, and by the final few pulls, half-broken mandrels demand two hands instead of one. None of it screams “stroke adjustment” at first glance, so you find yourself blaming the rivets or your own grip—until a crooked row or battered finish finally forces you to stop.

    Unlike a dull blade or a gummed-up drill bit, a poorly set rivet gun doesn’t announce itself with drama, just a slow stacking of inconsistencies. Those small imperfections—misaligned heads, rising cleanup time, irritating wrist fatigue—compound over every transition until your supposed quick job crawls to a halt.

    Why Stroke Adjustment Isn’t Optional on Tough Jobs

    The right stroke setting shapes more than the pull—it shapes your finish, your speed, and how your hands feel after a full shift. With thick or uneven metal, there’s zero wiggle room. Too short a stroke? You end up with proud, unstable rivets that catch every rag during cleanup. Too long? The gun bottoms out with a jolt, leaves ring dents in soft aluminum, and transfers leftover shock into your forearm.

    Picture fastening an aluminum handrail to a half-warped steel stair. The first stretch, everything clicks; then you hit a sloped joint. Suddenly you’re leaning harder into the handles for each pull, fighting to keep each head flush as the tool starts resisting you. A single wrong setting won’t just cost a missed rivet—it turns into repeated rework, visible surface marks, and wrists that feel every bit of the extra pressure. Over a few hours, that bad rhythm becomes the difference between a job you sign off with pride and one that sits with a not-quite-right finish under harsh shop lights.

    Cutting Corners? Here’s What It Really Costs

    No one wants to pause for an adjustment when the run’s in motion. It feels easier to push through with the factory default. But as the material changes—from thin aluminum panels to dense galvanized sections or layered overlapping joints—each mistake multiplies. Rivet shanks jam. Edges need more grinding. Your energy leaks out through every “just one more” squeeze. You start fighting your tool, then lose your workflow, and find yourself fixing small problems that should never have added up in the first place.

    Dialing It In: Real-World Gains from Quick Stroke Tweaks

    Adjustment isn’t busywork—it’s the core of smooth, repeatable results. On a live job, adding as little as 0.4mm to your stroke can shift everything. In practice, that difference shows up instantly: pull resistance drops, each rivet clicks flush on the first squeeze, and you spend less time adjusting your grip or double-checking your alignment by eye. That persistent off-center “pop” vanishes, and the finish line follows your chalk mark like it’s supposed to.

    No one can predict every curveball jobsite throws, but tight stroke control keeps you from getting blindsided. When the frame flexes or material suddenly stiffens—whether it’s humid out or the steel has finally chilled in the late afternoon—your gun’s default is never quite right. Quick micro-adjustments aren’t perfectionism—they’re insurance against slowdowns, fatigue, and hours spent correcting avoidable flaws.

    Field Cues: How to Spot When It’s Time to Adjust

    • Sudden spike in hand effort: If you’re squeezing harder for the same result, suspect the stroke before you swap rivet sizes.
    • Proud or uneven heads: A flush seam turns uneven, or rivets stand tall and vulnerable after popping.
    • Visible indentations or bruises: Ring marks or dented finishes almost always trace back to excessive stroke, especially on soft metals.
    • Material or thickness changes: Every new section, metal transition, or layering shift is a flashing sign—stop and reset before the next row.

    Pro tip from the field: Sweep a utility blade along your seam after every dozen rivets. More than a couple bumps or snags? Stop. Tweak the stroke right then while the problem is small. You’ll save hours over the lifespan of the project—and your wrists will thank you.

    Building the Habit: Small Adjustments, Big Wins

    The operators who set the pace never cross their fingers and push through—they pause, check, and tweak. A measured half-millimeter isn’t overkill. It’s the gap between a steady line and a patchwork you end up reworking under deadline glare. Each pause cuts surface vibration, reduces grip fatigue, and keeps cleanup to a minimum. As the job wears on and the frame shifts, those small changes protect your hands and your finish, keeping your workflow tight to the end of the shift.

    Tool setup isn’t a one-time checklist—it’s an ongoing rhythm. The sooner you catch subtle changes and adjust on the fly, the less your work feels like an uphill slog. Every correction now is one less inspection headache later, and a step closer to finishing strong no matter the material, angle, or degree of jobsite chaos.

    Find tools and equipment that stand up to real jobsite demands at Gumboll.

  • Why Pull-Out Pantry Shelves Outperform Fixed Shelves in Everyday Kitchens

    Pantry organization isn’t just about tidy lines and matching containers—it’s about whether you can actually grab what you need without setting off a chain reaction of chaos. If your weeknight cooking routine means digging past precariously stacked crackers or balancing a bag of rice on top of a box of granola, you know firsthand: storage setups matter most when the kitchen is busy, not when it’s freshly reset. The tug-of-war between fixed and pull-out pantry shelves shows up in these exact moments—the daily reach, the fast reshuffle, the silent sighs when last week’s tidiness has already unraveled.

    When “Organized” Shelves Hide Everyday Friction

    On day one, every pantry looks promising—labels forward, items lined up by size or cuisine, each category in its own neat section. Then real life happens. As you grab snacks, restock dry goods, and cram in new finds from the store, gaps close up, rows blur, and the back row becomes a black hole of forgotten or duplicate items. It’s a slow drift from order to quiet hassle: reaching past front stacks, sliding out half the shelf to find a sauce, or discovering a lost can months later during a hurried clean-out.

    Fixed Shelf Aggravations: Why Does Everything Slide Forward?

    Imagine a pantry shelf that runs deep. You’re reaching for a bottle of vinegar you know is somewhere in the back. To get to it, you unload a line of boxes—one tips, another falls, and then you’re left restacking everything. Even with good intentions, items creep forward over time, bins become mixed, and “categories” become fuzzy. The more crowded the shelf, the more impossible it feels to find what you’re after without building and dismantling piles. Cleaning? You won’t find that sticky spill until it has seeped beneath three layers of perfectly lined-up snacks.

    These aren’t just small annoyances; they’re where systems quietly fail. The fix looks simple—shuffle things back, tidy up. The reality is lost time, repeated resets, and eventually, dreading pantry “maintenance day” because you know what’s waiting behind that front row.

    Pull-Out Pantry Shelves: Reducing the Blind Spots

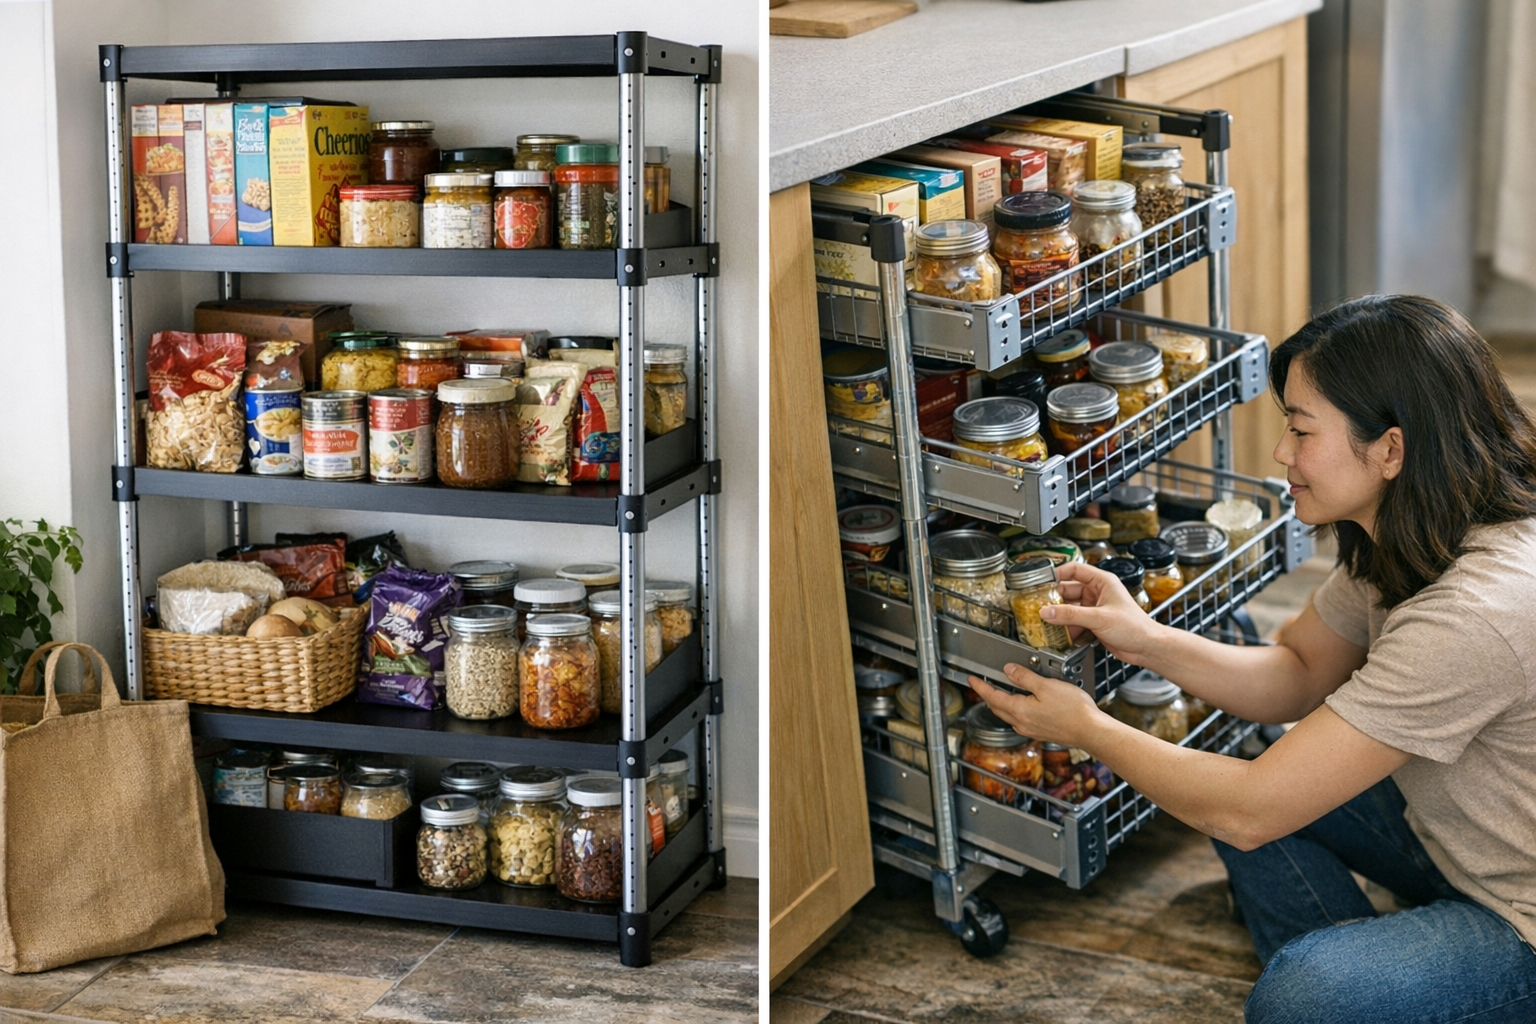
    Pull-out shelves break the cycle. With a single motion, the entire shelf comes forward and the contents—all the way to the far edge—are in plain view. There’s no hidden zone, no lost jars behind the pasta, no strange vertical stacks teetering because you can’t see what’s in back. You pull, you scan, you grab—no collapsing towers, no hunting for a hand mirror to peer into the depths.

    Quick Inventory, Quicker Reset

    The difference is most obvious after a grocery haul or when it’s time to check expiration dates. Pull out the shelf, and you can instantly assess what’s running low or what needs rearranging. There’s no cascading mess if you grab something from the far end. Categories stay clearer because you’re not constantly mashing things together to reach what you want. Over the weeks, you’ll notice fewer duplicates, less hidden clutter, and a reset routine that actually feels quick—slide out, move a few things, done.

    This isn’t magic; it’s a simple mechanical advantage that holds up as the pantry sees real use. When there’s no mystery area in the back, “getting organized” doesn’t require redoing your whole system every few weeks. You simply see what you have and put things back without creating a new stack of problems.

    The Fixed Shelf Upside: Strength and Simplicity

    Fixed shelves still win out in a few key scenarios. They’re usually stronger—a solid choice for stowing heavy kitchen gear, bulk flour, or cases of cans that would eventually strain a gliding track. In shallow cupboards and tight spaces, fixed shelves use every inch without worrying about room for slides or moving parts. Sometimes you want the absolute maximum volume for oversized items or awkward angles, and fixed shelves keep things straightforward.

    But the Cost: More Hidden Mess, Slower Recovery

    Those advantages come at a slow price. What starts as a fully stocked, perfectly aligned shelf gradually slides toward hidden clutter. Each time you stretch in for something small, you nudge other items out of place. Bins without dividers turn into catchalls. Before long, pantry traffic jams mean you’re repeating the same juggling act—move a stack, find the item, rebuild the stack. Even in other spaces—laundry, entryways, under-sink cabinets—fixed shelves invite clutter to gather in the shadows, just out of easy reach.

    Maintaining Order: Small Habits That Actually Stick

    Any shelf can work if you commit to a little routine care. Pull-out shelves perform best when tracks are kept clear—crumbs and stray bits build up, but a quick swipe every so often keeps them gliding smoothly. Fixed shelves invite hidden stickiness, so periodic wipe-downs—before the rings and spills turn into a weekend project—keep things manageable. Weekly check-ins, a simple adjustment here and there, and even the most well-used pantry stays functional, if not showroom perfect.

    Use-Tested Tips that Make a Difference

    1. Don’t overload pull-outs: Know the weight rating, especially if you’re drawn toward the convenience of loading in case goods. Distribute heavy items evenly—avoiding that dreaded “crunch” when you slide out an overloaded shelf.

    2. Use bins and dividers, but stick to clear labels: Divided bins corral categories and keep similar items together, regardless of shelf style. Clear labeling isn’t just for looks; it helps everyone in the house (kids, guests, partners) put things back where they belong.

    3. Set an auto-reset for deep shelves: A recurring monthly check stops minor messes from becoming full-scale pantry overhauls. Even five minutes spent scanning and shuffling can spare you the hunt for that rogue can of beans—or a mystery spill spreading under the cereal boxes.

    The Long-Term Test: Does Your Storage Still Work After a Month?

    Give your pantry four solid weeks of active use—cooking, stocking, late-night snacking, and rushed mornings. By then, the difference is undeniable. If you’re spending less time searching, less effort resetting zones, and finding fewer surprises at the back, your storage is actually supporting you. If not, and you’re stuck in a loop of sorting and reshuffling, even clever “systems” are secretly making your work harder.

    Ultimately, the best storage works with your daily rhythms, not against them. For real kitchens with real routines, pull-out pantry shelves often deliver cleaner categories, less lost space, and easier resets—especially in those deep, high-traffic cabinets. Fixed shelves do their job where strength, simplicity, or room shape demand it, but they ask you to stay vigilant to keep clutter at bay. The winning setups aren’t always pretty in photos—they’re the ones that gently pull you back to organized every single day, no matter who’s used the kitchen last.

    Find more practical storage solutions at ClosetWorks

  • Why Modular Storage With Clear Paths Beats Packed Cabinets Every Time

    The fantasy of a perfectly organized garage, workshop, or utility space collapses fast—usually the moment you try to get real work done. At first, every shelf, cabinet, and cart lines up crisp and spotless. But give it one week. Before you know it, that “picture perfect” setup reminds you what the photo missed: shift a rolling cart just to squeeze by, reach awkwardly behind a stacked bin to snag a tool, find yourself boxed in by some heavy cabinet you thought you’d use more. The frustration isn’t cosmetic. It’s the grind of daily resets and slowdowns built into a system that looked organized—but never learned how you really move through the space.

    Nice to Look At, Exhausting to Use

    Too often, initial storage setups are designed by the eye—not by the way you work. The temptation is to create a seamless wall of closed cabinets or shelves. On day one, it feels complete—until the first project, repair, or weekday rush. Suddenly, every closed door becomes a barricade. The walkway narrows because there’s nowhere to park a cart. You sidestep into a corner just to avoid that cabinet edge (again), or find yourself nudging a bin into whatever spot looks least in the way.

    The visual order that felt reassuring now steals time: you reach, shuffle, and reshuffle. That leftover stack of supplies? It lives in the overflow corner—the same spot that always seems one step too far. By the end of the week, “organized” means tripping over what you can’t put away and parking projects out of sight so they aren’t in the path. The result: a system that stores things but never truly supports how you use the area.

    Where the Setups Really Break Down

    The difference between a setup that helps and one that quietly wears you down becomes obvious with real, repeated use. It’s about flow: can you cross the workspace quickly, bring back supplies without re-stacking, and put tools away without detours? Packed, rigid systems conspire against you. Every extra shelf or closed cabinet adds a step—a little sidestep here, a reach over there—until you’re working around obstacles you paid to install.

    Ask yourself: Do you avoid a certain route because the rolling cart blocks it? Is there a spot you instinctively skip because it gathers clutter or is just hard to reach? Are you always doubling back for the same tool? These aren’t minor annoyances—they’re repeated friction points, the sign that your storage “plan” is winning a war against your actual routines.

    When More Turns Into Less

    It’s logical to think that using every inch—floor-to-ceiling storage, deep shelves, wall-to-wall cabinets—means less clutter. But in practice, more often creates dead corners, crowded walkways, and zones that become permanent overflow dumps. That “just one more” shelving run easily traps heavy or rarely used gear where you can’t get at it without a sequence of moves. With each project cycle, these black holes of blocked access multiply, making every reset slower and more frustrating.

    The Missing Ingredient: Space You Can Actually Use

    The best workspaces are built for action, not just display.

    One small tweak can shift everything. Instead of filling wall after wall, try this: leave a deliberate, open pass-through—maybe 16 inches wide—between major storage banks. Place a slim mobile rack on locking casters in the gap. Suddenly you’ve got a flexible “reset lane”: somewhere to drop a project-in-progress, move overflow bins temporarily, or just walk through cleanly, no rerouting required. It isn’t wasted space; it lets you keep using the setup even as your projects and supplies cycle endlessly.

    What Actually Happens After the First Week

    Walk through your own space on a Monday: the tool panel’s tidy, paint cans sorted, hardware in neat drawers under the bench. Then flash forward to Saturday. The rolling chest is wedged tight, half the bench blocked. Two bins sit in your usual path, and you have to slide trays just to get a screwdriver. That one supply box? It’s always in the way. The stuff looks stored, but you’ve lost clear movement. What used to take seconds now takes shuffling, searching, and second-guessing—proof that a “finished” setup can still interrupt work every single day.

    Why Modular and Mobile Means Fewer Headaches

    Locked-in storage lines work only for routines that never change. But most real setups serve shifting projects, rotating supplies, and shared spaces. Too much rigidity breeds bottlenecks and “dead zones”—places nobody uses except to hide overflow. Modular shelves, mobile carts, and purposeful gaps break that pattern. Need to clear the floor for a delivery? Roll something aside instead of unloading a whole wall. Got a new project? Wheel the parts where you need them, no reshuffling or full reset required. Weeks later, you’re still moving smoothly, and no corner is filled with a mystery pile of orphaned gear.

    Real-World Storage Reduces Routine Friction

    Every small instability in a setup—each needless reach, sidestep, or shuffle—turns into hours lost across a month. It’s easy to underestimate just how fast “organized” descends into “in the way.” Filling your garage or workspace with containers looks tidy for a day, but if every reset is a minor headache, the system failed. The best setups protect your movement: build-in pass-through zones, fallback areas for overflow, and mobile elements that flex with your tasks. Storage shouldn’t just corral mess—it should adapt to your routine so you can move, fetch, and put away without thinking twice.

    Two Simple Fixes That Actually Matter

    1. Hold back one open patch on purpose. Resist the urge to fill every wall. Leaving a single flexible area (just big enough for a cart or bench) gives you the breathing room to handle projects, manage temporary chaos, and survive busy resets without the whole setup unraveling.

    2. Walk your entire routine—literally. Every few weeks, load your hands, walk your route, and notice what slows you down. Where do you shift things, detour, or give up and pile something random? If you find repeat friction, don’t wait: adapt the layout before the clutter takes over for good.

    No One Notices “Perfect,” but Everyone Feels Clumsy Resets

    Stacking, labeling, and filling shelves is satisfying—the photo looks great. But watch what happens after a week of actual use: blocked walkways, sticky corners, overflow spots where every stray item piles up. That’s the difference between appearance and reality. The best storage setups learn from that tension. Leave room to move, choose mobile options, build in a safety net for surprises—and your workspace stops being a source of friction, even on your busiest days.

    Change doesn’t mean gutting everything you’ve built. Often, it takes just one smart, modular tweak to get you back on track—so every trip across the space feels easier and the “order” stays, no matter what the week brings.

    StackNest modular storage and organization systems

  • Choosing the Right Oscillating Blade for Efficient Adhesive Removal

    Adhesive removal always looks easier on paper—until you’re hunched over a floor, wrists throbbing, and every pass of the blade leaves behind more smears than progress. If you’ve wrestled with ancient carpet glue that won’t let go, or scraped mystery adhesive from a garage workbench for the tenth time, you already know the sinking feeling: the tool’s got muscle, but with the wrong blade, it’s like dragging a butterknife through tar. The right scraper makes or breaks your day. And that truth punches in much sooner—sometimes within the first ten minutes—than most people expect.

    Why “Almost Right” Blades Turn Into Extra Work

    At a glance, any oscillating blade feels pretty much like the next. Rip open a box of multi-tool accessories and most days you’ll just grab the nearest “scraper.” If it’s just a few glue blobs? No big deal. But under real pressure—stripping glue off old subfloor, or getting adhesive and dried caulk out of a hundred trim edges—a so-so blade burns through your energy faster than it clears anything.

    Small, nagging problems pile up. Standard-issue blades might snag a patch or two, but as the hours drag on, your arm tingles and your patience thins. Sudden chatter. Blade veers. Streaks and gouges crop up where you least want them. Multiply every minor slip and shake by the number of corners, doors, and panels in an average job, and “good enough” quickly means “hours lost and surfaces roughed up.” When you realize you’re spending as much time sanding scars and recutting seams as scraping glue, that cheap blade feels more like a penalty than a shortcut.

    What Really Happens When Adhesive Won’t Let Go

    Adhesive removal is never just a clean pass and done. Real jobs bring years of dried glue, random paint streaks, maybe mud, maybe sawdust. After a few passes, blades start to heat up, fill with gunk, and lose their edge. Suddenly every motion requires a little more muscle and the tool begins to fight you—heat warping the blade, edge drifting, work slowing to a crawl.

    That starter-kit flexible blade you tossed in for quick hits seems helpful—right up until the glue thickens. Now it bends, skips, even skates away from the surface. You chase the same patch two, three, even five times. The tool buzzes, the blade flexes, and before you know it, you’re fighting fatigue and making a tired mess of the job you meant to finish before lunch.

    Real Scene: The Wall-By-Wall Difference

    Imagine clearing six baseboards in a rental unit. The early runs, flexible and rigid blades fare about the same. But after a few meters, adhesive globbing onto a flexible blade turns every stroke into guesswork. The handle vibrates, scraping sounds go rough, and you find yourself buffing out streaks you didn’t see coming. Meanwhile, the worker who switched to a stiff, wide scraper is wrapping up steady, controlled passes—taking out old glue, leaving paint and trim lines sharp. Over a single board it’s subtle; by the entire room, you’re staring at a real divide in effort and finish.

    The Workhorse: Rigid, Wide Scraper Blades

    Here’s the overlooked truth: not every blade is built for the beating that real adhesive removal gives back. Rigid, broad blades—especially something like a 50mm reinforced edge—transform the way your tool hits the job. Size lets you plant the blade squarely and dig in instead of fighting slip and chatter. Pressure spreads out, so you cut instead of gouge. Passes grow consistent. Instead of tiptoeing around the surface, you work with confidence, making steady, workable progress you can feel in your hands and wrists by the end of the day.

    Switching to a rigid blade partway through a job doesn’t just save time—it steadies your workflow. Stubborn, rubbery glue finally lifts in whole strips. You’re not stuck pausing for clean-up or tracking back to erase smeared streaks. Especially under counters, around old adhesives, or stubborn tile mastic, the relief in control and speed is the difference between a drawn-out struggle and a manageable, even satisfying process.

    Quick Tactic: Don’t Ignore Blade Build-Up

    If you see glue building up on the blade, stop. Don’t push through—clean it. Clogged blades heat up and slip, ruining the finish and burning through tool battery or your patience. A wiped-clean, rigid edge slices more efficiently, protects the surface, and keeps wrist fatigue at bay. Those extra seconds to clear gunk off pay back in smoother workflow—every single pass.

    Blade Specs Matter—But Rigidity Wins Most Battles

    Carbide-tooth blades talk up their toughness, and for concrete-thick glue or adhesives studded with grit, they have their place. But in the daily jobs—old floor glue, construction adhesive on trim, sticky residues under paneling—choose width and stiffness over fancy coatings every time. Stock your kit with blades meant for scraping, not just cutting. Narrow profiles work for tight corners, but when the job is long and the adhesive stubborn, a rigid, wide scraper is the tool that keeps the job on track and you off the struggle bus.

    Better Blades, Lower Fatigue—Every Job, Every Room

    Most of us don’t start a job expecting to swap blades halfway through. Only when vibration takes over, seams start to fray, and fatigue sets in do we realize a dull, flexible blade can double our work and halve the quality. The right scraper isn’t about instant speed—it’s about trading in stalls, scrap-outs, and wrist pain for steady, clean, predictable progress as the day winds on and stubborn adhesive keeps fighting back.

    If you’re facing down old linoleum glue, caulk that won’t quit, or a deck patched with construction adhesive, don’t leave performance up to chance. The right scraper blade keeps its edge longer, delivers cleaner surfaces, and lets you end the job without the urge to switch wrists every hour. Less shaking. Fewer rough fixes. More stretches where the tool feels like an extension of your hand, not an enemy. Start smarter, and you’ll skip a world of rework no amount of grit paper or late-night patching will truly fix.

    Find the right scraper and tool accessories at Gumboll

  • Why Clear Storage Bins Improve Home Organization and Daily Efficiency

    Every storage system gets tested by the same ordinary moment: you’re in a rush, you reach for a bin, and right then the cracks start to show. The choice between clear and opaque bins is more than a question of looks—it’s the line between surfaces that only look settled, and shelves that actually hold up under real, everyday pressure. When you use clear bins, any creeping mess, sagging stack, or doubled-up category is right there in the open. With opaque bins, the surface stays calm… until you’re crouched on the floor, lids off, hunting for one runaway mitten or that backup phone charger you’re sure was here last month. The hidden chaos builds quietly, and you’re left smoothing it over, again and again.

    The Feedback Loop: Why Visibility Translates to Control

    The real difference is not aesthetics—it’s a feedback loop that shapes how you interact with your shelves. Spaces that get touched daily—entry closets, kitchen overflow zones, laundry shelving—demand visible storage if you want order that lasts past the first week.

    Clear bins put every frayed edge in sight. If your hats tumble into the scarf pile or the batteries migrate to the art supply bin, you see it at a glance—no need to stack and restack. Even as you pass by, you spot when folded towels start to lean, or when after-school clutter crowds out what’s supposed to be there. With opaque bins, you notice only when something’s missing… or after an offhand search has left lids as obstacles on the floor, with contents in mild disarray.

    Everyday Storage Under Pressure: The Real Test

    Consider the weekday squeeze: the closet’s stacked three shelves high. At the top, off-season hats hide behind a row of bins you barely touch. The shelf at eye level, though, is all action: gym shoes, extra jackets, the container for daily accessories. In a real moment—running late, hands full—it’s clear bins that keep you from digging through the wrong container for the fifth time. One look confirms: the phone charger lives here, the winter gloves are with the scarves, or not. No extra handling, no shifting a wobbly stack, no dragging containers onto the hallway runner just to find the lunch bag.

    Opaque bins, in contrast, slow you down at the exact wrong moment. “Maybe it’s in this one?” repeats as you check, double-check, and create a mini-wave of clutter—the very thing you hoped to avoid. No matter how tidy the shelf appears, the system quietly breaks down each time the wrong item is tossed back, or two categories start sharing one bin out of short-term desperation.

    When Order Slips Beneath the Surface

    Opaque bins can be a storage mirage. Smooth fronts and matching colors lull you into thinking the system is working—until you go looking for something and realize: the dog leash is buried under holiday cards, a backup charger is mixed with random cords, and last season’s scarf has vanished. Categories blur and migrate. It doesn’t happen in a dramatic avalanche, but one minor mix-up at a time.

    Clear bins, uncomfortable as the exposed mess may feel, keep those subtle disintegrations in check. If snack wrappers start piling on the towel shelf or garage clutter sneaks into the glove bin, you see it right away. Regular use doesn’t quietly unravel the whole system. Instead, those small corrections come naturally—no Sunday afternoon reset required.

    Bouncing Back Faster: The Real Value of Clear Bins

    Switch to clear bins and the daily reset becomes less of a chore. The path of least resistance is the right one—you drop folded socks into their bin with a glance, rather than a double-check. When groceries or seasonal gear come home, you spot open space (or overflow) in seconds. Fewer full-shelf rethinks, fewer moments lost searching, fewer “How did three chargers end up here?” discoveries. Over time, you spend less energy keeping categories straight and more time not thinking about storage at all.

    Does it turn your home into a showroom? No. Mess still creeps in, especially in shared family spaces or when routines shift. But clear bins raise a gentle, constant flag—so clutter never gains the camouflage that lets it multiply. Even kids and guests can pitch in, because “put this where it came from” actually means something visible, not just another sealed black box.

    Living With Nothing to Hide: The Honest Storage Tradeoff

    Clear bins demand a bit of honesty—you’ll see the late-night drop-offs, the half-unpacked craft kits, the lone unmatched glove. The payoff is real: forgotten gear doesn’t fester at the back, and you only buy new batteries when you can see the old supply is low. Shelves feel lived-in, maybe less styled, but also less likely to turn into storage puzzles you dread untangling.

    Opaque bins still have specific utility. Hide away messy yard gear or shield an open shelf from guest view—it does the job. But accept the compromise: faster to stash, slower to retrieve. Each layer of hidden buildup adds friction, and sooner or later, you’ll pay for it with lost time or duplicated purchases.

    Small Choices, Big Impact: Storage That Works With You

    Does your bin pick matter? Only every single time you reach for your stuff. Opaque bins lock you into a cycle of guessing and reshuffling. Shelves fill up before their time, vertical space gets wasted, and categories blend until “storage” starts meaning “somewhere, maybe.” With clear bins, you actually see when sections are drifting, when overflow is squeezing out original contents, and when a quick reset is due. Routine access stays fast. You waste less energy and fewer weekends battling back lost order.

    For clean, display-ready surfaces, opaque bins are a shortcut. But for storage zones that have to work day in and day out, visibility wins. Not because clear bins prevent all mess, but because they make slipping standards so obvious you can’t ignore them. That’s what keeps your closet—and your sanity—intact.

    Ready to see which bins actually fit your routines? Explore practical storage solutions at ClosetWorks.