Category: Tools & Workshop

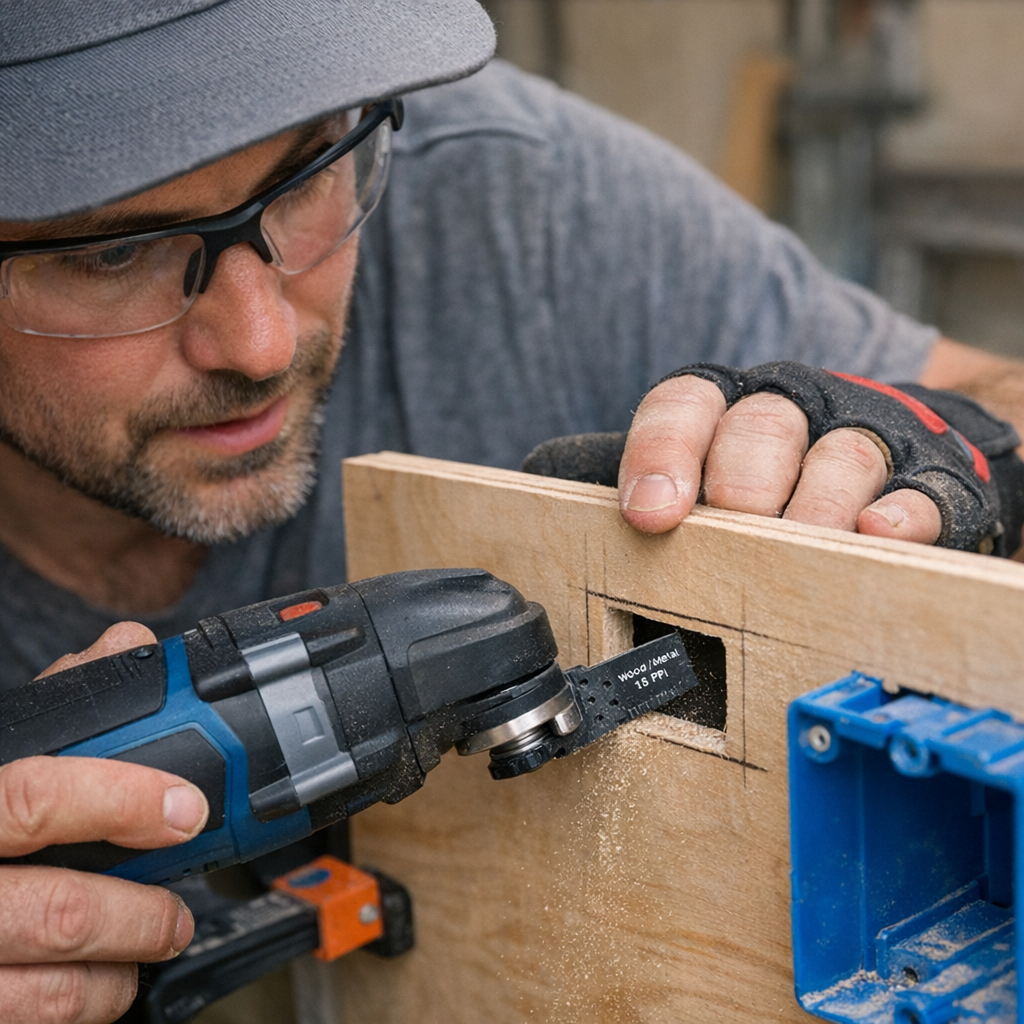
  • Choosing the Right Oscillating Tool Blade for Precise Detail Cuts

    You only notice the downgrade when it’s too late. Rip into plywood or MDF with a new oscillating tool blade, and sure—your first cut looks great. The line is crisp, progress feels smooth, and your confidence builds. But the instant you start tracing that tight corner for the second junction box—when repeat cuts are coming fast, in awkward positions, on finished surfaces—reality hits. Edges fray, seams turn rough, and the time you’re saving on “fast” cuts gets burned up chasing splinters with sandpaper. The cheap or dull blade that felt fine on pass one is quietly draining your time, precision, and nerves.

    Where Projects Unravel: After the First Pass

    The problems rarely show up in the easy opening move. It’s when you need three, five, seven cuts identical—on-site, mid-install, or while balancing a panel against your knee—that the general-purpose blade’s flaws multiply. Instead of slicing, you’re wrestling to hold your mark as the tool drifts, tears at the grain, or sags into a jagged arc halfway through. By the third box opening or second vent notch, you’re not finishing the job—you’re stuck on edge repair, backfilling blown corners and sanding down accidental overcuts.

    This isn’t just DIY frustration. On real jobs—installing window casings, running outlet cutouts, or building cabinetry—the margin for roughness vanishes fast. A few rough cuts become a pile of putty and wasted time. Fatigue grows, mistakes breed, and tidy work turns into a pro-level headache.

    The Right Blade for Real Momentum

    Walk the tool aisle and “universal” blades seem interchangeable. But the second you pull the trigger, design shows itself. An 18-TPI bi-metal fine-tooth blade isn’t about marketing—it’s about control, cut by cut. The teeth glide instead of grabbing. You can see it: rounded corners stay crisp, the line hugs the scribe, and there’s far less chip-out in hardwoods or laminated panels.

    You know the moment—a generic blade chatters because your angle’s barely off, veers out, or binds when you hit glue or layered grain. The tool feels like it’s fighting you for control. Swap to a precision fine-tooth blade, and everything steadies: the cut tracks where your hand wants, not where the blade drags you. Corners stay sharp. Less sanding, less correction. You stay in rhythm.

    Kerf, Vibration, and Consistency

    When shaping vent cutouts or tight insets, blade kerf matters. Coarse teeth “bounce out” on curves, forcing you wide, making for hours of messy correction. Fine teeth mean a tighter kerf, which keeps every cut cleaner with less rattle on the tool and less vibration in your wrist. Do one, two, or a dozen inlet cuts—clean edges save you effort on every subsequent pass. Skip the kerf drama, and you’ll see it: less dust cloud, more matching lines, and no rush for filler at the end.

    Blade Fatigue: Spotting the Drop-Off Early

    The warning signs are subtle—but they matter. Maybe you’re working in an attic or fitting panels overhead, and after a few tight cuts, the tool suddenly feels rough. More vibration. The edge looks fuzzy. You’re forcing progress instead of guiding it. That’s the moment when bad blade choice turns a small gap into an afternoon repair job.

    Swapping in a fresh, fine-tooth blade—purpose-built for under 3/4” wood—transforms the process mid-task. Instantly, the blade tracks smoother, leaves less residue, and the work speeds back up. The difference isn’t night and day, but it’s real: less effort, less frustration, less dust waiting for you at cleanup.

    Tighten Everything: Clamp, Steady, Execute

    There’s temptation to cut corners—hold a panel by hand, skip the clamps “just this once,” or rush setup in a tight space. That little shortcut almost always demands payback. Secure your workpiece and the blade holds its line. Vibration drops, wandering stops, and awkward corrections become less frequent—especially when working across tricky wood grain or layered material. Five minutes with clamps saves half an hour of apology sanding later.

    The Real Limits of “Universal” Blades

    “Multipurpose” sounds good—until you see chewed edges and can’t get a flush fit on finished surfaces. Matching blade TPI and tooth profile to your material isn’t snobbery—it’s insurance against wasted labor and re-work. High-TPI, fine-tooth blades excel on the materials where finish really matters: hardwoods, MDF, laminate, paneling. Especially when you need repeatable quality across a job, the right blade is the only thing between you and a production line of touchups.

    Don’t ignore blade fatigue. Push one blade through far too many cuts and you’ll feel it sag. Consistency slips as quickly as edge sharpness. Time spent wrestling with worn teeth is time not spent making real progress. Swapping out blades faster than you think you “need” to pays off by the end of the day.

    Repeatability Over Perfection

    The dream of the flawless first cut is a distraction. Real work—whether in a home garage or bustling jobsite—relies on repeated performance, not one-off heroics. The question is: can your tools make the next five, seven, ten cuts match that first? Or do imperfections spiral, turning a quick run into a patch job?

    Pros and careful DIYers check not just blade sharpness, but appropriateness—will this blade keep pace project after project? You can’t skip all finish work, but you can eliminate most of it by stacking repeated, clean results. In practice, that’s the best speed boost you’ll ever get.

    Habits That Actually Save Your Time

    Those who last in the shop or on-site work with a few unsung rules:

    • Clamp your material; “holding steady” isn’t enough for good results.
    • Guide the blade—never force it. Control is everything on detail work.
    • Swap blades sooner than later, especially when vibration rises or results slip.
    • Choose blade TPI and profile based on what you’ll cut and how many times you’ll repeat it—not just what’s on sale.

    Day after day, those habits matter more than the accessory on the label. You end up with less wasted effort, less ache in your arm, and more time for actual progress instead of rework. Cleaner panels, fewer fixes, better mood at the end of the project.

    Bottom line: The right blade and a few hard-earned habits do more for real jobs than any universal shortcut. You save time, you save panels, and you save your patience—cut after cut, job after job.

    Shop practical blades and accessories at Gumboll

  • Why Modular Storage Systems Outperform Fixed Setups Over Time

    The illusion of perfect storage falls apart as soon as real routines collide with it. Your garage, shed, or workshop corner might look dialed in on day one—shelves standing crisp, every bin aligned, carts tucked neatly in place. Then actual life happens: you reach for a buried tool, squeeze around a cart that never quite moves out of the way, or lose five minutes sorting through what was supposed to be “accessible” storage. The surprising truth? It’s not clutter that sabotages good organization, it’s the slow grind of daily use exposing where your layout was designed for looks—not for action.

    The Downsides That Show Up on Week Two

    That first Saturday, every shovel and socket has a labeled slot, and the whole setup promises to stay easy for months. But routines always shift. Spring brings new garden trays. The kid’s bike needs a quick repair. Partners start using the space for their projects, and DIY ambitions (big or small) mean tools are suddenly needed—and put back—in a different order.

    Clutter is subtle, not sudden. It’s the rake you leave by the door “just until you’re done,” or the detour around a stuck cart that only gets longer. It’s the shelf whose door never fully opens because another bin migrated into the way. Rigid storage shines for a photo—but often becomes the reason you’re shuffling, sidestepping, or stacking things out of sequence just to get by.

    Where Neatness Fails to Keep Up

    There’s a hard line between spaces that look organized and those that actually flex for how you work. Wall hooks and fixed shelves deliver that showroom promise: everything visible, “a place for everything.” But real utility falls apart when you’re:

    • Sliding a cart sideways every time you need that back bin
    • Reaching around the same clunky cabinet edge, again and again
    • Noticing tidy zones merging into catchall areas you never intended

    “It looks right” isn’t enough. Setups with zero slack leave nowhere for overflow—no open gap to toss a muddy glove, no place to stash that surprise supply run. Each time you invent a shortcut, stack gear “just until tomorrow,” or let a corner collect overflow, a friction point is locked in. All those micro-delays add up. What started clear can quietly become a maze: constant reshuffling, slowed-down resets, and a creeping sense that order is always just out of reach.

    Shed Realities: When Storage Becomes an Obstacle

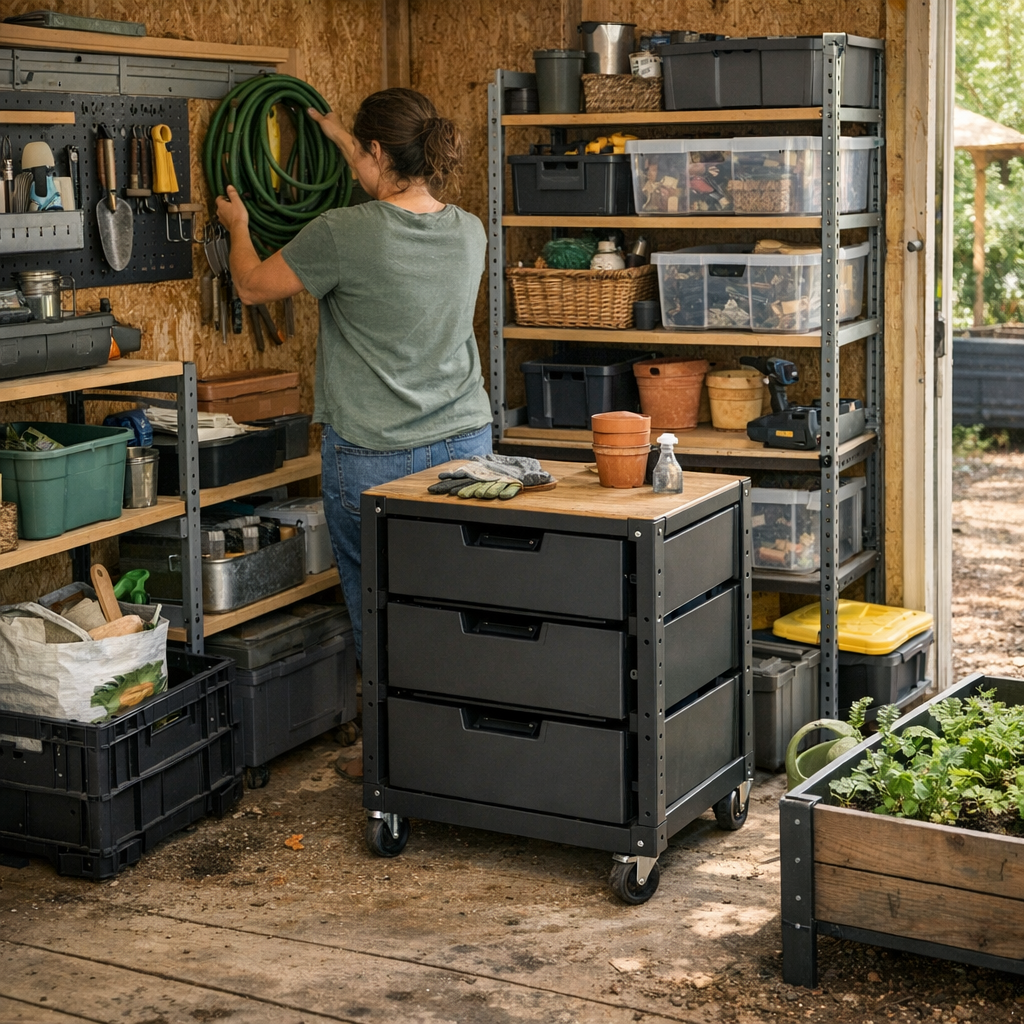
    Picture a backyard shed halfway through spring. The new rails still hold labeled bins. The mobile bench is front and center, and you can still spot the floor. But the rhythm changes fast: a delivery of soil trays clogs one side, muddy boots land by the door, and the rolling cart—once a hero—blocks the only workable shortcut.

    Now, putting tools away takes more steps. You squeeze past stacked boxes to prop open a wall shelf, only to discover the drawer is blocked by a poorly placed rake. Each reset feels heavier. Soon, you’re tossing things in the nearest open spot because resetting to zero requires moving five other pieces. The once-neat space starts building aversion—not habit. What was meant to help is now in your way.

    What Changes When Storage Can Move With You

    Shift even one piece—a fixed rack traded for a modular shelf, an open panel introduced, or a cart given space to pivot without boxing itself in. Sudden change: trays fit without cramming, the cart swings through cleanly, and returning a tool means one quick move, not three workarounds. Less sidestepping, less dented gear, no awkward shuffles between zones.

    This is what makes the difference: It’s not about prettier storage, but function that cuts down on friction. When the layout absorbs new projects or last-minute changes with barely a pause, you’re less likely to fall into the trap of stacking, jamming, or dreading the daily reset. The system stays light on its feet—even when you’re not.

    Minor Tweaks, Major Improvement

    Sometimes, freedom is just one mobile shelf or a panel left open. Suddenly, wheel paths are clear, zones don’t merge, and it’s easier to fix a workflow before chaos settles in. Resetting is a two-minute task, not a scavenger hunt—so you stay in motion, not in maintenance mode.

    Friction Finds: How to Spot Layout Breakdowns

    After a truly busy week, take a scan:

    • The same pile always forms where “just put it there for now” is the norm
    • Carts wind up off their tracks—because turning is a pain, not a habit
    • Wall storage darkens behind other gear, turning access into an event
    • Reset routines that take too many steps, or get skipped altogether

    If your quickest “clean up” is a new stack, your system is quietly tripping you up. When putting one thing away always means shuffling two more, or blocked routes force repeated detours, your storage isn’t adapting—it’s multiplying the grind. Every new workaround is proof the original setup just can’t keep up with you.

    Why Modularity Pays Off When Things Get Messy

    Modular storage isn’t about looking the part—it’s about each section, cart, or wall mount becoming movable parts in a working system. As projects shift, these components adapt. True modular setups preserve real movement paths, so even as gear cycles in and out, zones don’t blur and resets stay simple.

    The payoff isn’t a perfect catalog shot—it’s reaching for a tool and finding a way open, every time. Real-life storage needs to absorb change without demanding a full reset with every season or every side project. With shelves and carts that move (and room for slack), you finally get a setup that works with you, not against you—cutting out the friction that too often comes packaged as “organization.”

    See modular storage options built for real daily reset at StackNest.

  • How Vacuum Dust Seal Wear Impacts Cleaning Efficiency and Finish Quality

    Dust doesn’t launch an all-out assault on your shop—it simply leaks in, bit by bit, until you’re wondering why nothing ever stays clean. You push into another long sanding session or swap between the miter saw and drill, vacuum humming in the background. Everything looks fine at first. But then grit collects in the corners of your work, dust streaks appear under clamps, and that dry, persistent film blooms onto tools and bench surfaces you just wiped. Most days, it isn’t a catastrophic failure. It’s the slow betrayal by a tiny part you rarely think about: the vacuum dust seal.

    Good Seals Turn Problematic—And You Won’t Notice Immediately

    Vacuum dust seals usually survive a few projects looking completely normal. The rubber feels intact, the fit still snug, so during your quick pre-job check—right before you line up that first cut or clamp down for sanding—there’s no hint anything’s off. But midway through a batch of router passes or while driving a run of screws, thin clouds of dust start leaking past. It’s subtle: traces of powder at the vacuum’s rim, buildup ringed around hose fittings, a thin residue edging into your finish zone. The next time you wipe down after drilling panel holes, you catch your own reflection in a thin layer of grime you could swear you’d handled hours ago.

    These leaks add up fast in the real world. Seals wear out without dramatic visual cues—no bold cracks or rips, just a slow collapse. You get ghostly outlines under vise jaws, silt layering behind jointer stands, and dust sneaking into the spaces between tools. Suddenly you’re re-cleaning the same area or re-sanding a board you finished just minutes before, losing time and rhythm to dust you can’t keep up with. The missed warning signs are all small—until the mess becomes impossible to ignore.

    How Real Inspection Feels—Not Just What It Looks Like

    Don’t trust your eyes alone; dust seal failures rarely show up in a quick scan. The only way to catch problems early is to run your finger along the seal—feel for even compression, for that small but critical “spring” when you press in and release. Flattened, aging gaskets look perfectly normal but squash too easily or rebound only halfway. By the time the lid demands extra pressure to close, you’re already losing suction and containment, and dust is mapping out detours around your collection point.

    With every tool you run—circulating saw, sander, router, even when swapping out batteries to keep pace—the pressure grows. A tired dust seal turns every vacuumed moment into a cycle of diminishing returns. You’ll see the difference on edge work, in those hard-to-reach shelf corners, and most annoyingly, on just-painted surfaces that refuse to stay dust-free. You clean, and the powder comes back. Every finish pass feels sabotaged; your grip slips from surprise grit, and blade life quietly shortens as debris keeps sneaking back in.

    The Shift Midway: Telltale Signals That Matter in Real Time

    Picture a busy afternoon cycling between sandpaper grits and the drill press. Early on, everything is under control—your vacuum setup keeps pace without fuss. After lunch, though, dust laces the fence, clamps feel gritty, and the same haze shadows your workbench. When you pop the vacuum open to dump the bin, the rear seal has gone stiff, nearly flat, demanding awkward force to seat it again. That slight increase in hassle is a real-world signal: the gasket’s elasticity is shot. By closing time, your tools and surfaces have collected a stubborn silt, creeping into every corner, spoiling your final results and dragging out cleanup beyond the last cut of the day.

    The Real Cost: How a Faded Seal Wastes Time and Weakens Results

    A leaking seal sabotages more than cleanliness. Finer dust infiltrates moving parts, gums up delicate adjustments, dulls drill bits, and erodes blade precision. If you’ve ever had to wipe down mid-project or re-finish wood because unseen dust settled after your last sanding pass, you’ve paid the price. In active shops—cycling between fast cuts, grinding, and repeated fastening—a single seam leak means more stops for vacuum resets, wasted prep, and energy spent chasing the source instead of focusing on the actual work.

    Swapping out a crushed seal isn’t just a maintenance detail; it restores the baseline performance you need. That firm, uniform gasket isn’t hype—it’s the difference between an efficient cleanup that keeps your workflow smooth and a futile battle that eats away at your time and results. The fix is immediate: a fresh seal locks in airflow and stops the dust drift, so more goes straight into the vac and less finds its way underfoot or into your battery charger.

    Quick Checks: Catch Subtle Failures Before They Compound

    With each round of sanding, driving, or repetitive drilling, use these checkpoints:

    • Dust edging the perimeter of vacuum housings or hose connections—especially if it rings only part of the seal
    • Floating particles settling fast on just-cleaned tools, charger docks, or bench trays
    • Resistance when opening/closing the vac, or a seal that sits noticeably low and doesn’t “bounce” anymore

    Don’t be fooled by spotless appearances—dust will escape through the smallest breach, often lurking in baseboard nooks or drawer slides. Small, targeted checks catch trouble before it snowballs, saving you from wasted motion and drawn-out frustration.

    Swapping and Keeping Up: Habits for Shops That Actually Stay Clean

    If your days are spent knee-deep in sawdust or you’re clocking hours on high-dust jobs, make monthly seal inspections second nature. Press, don’t just look. If the seal compresses to half its original height, feels hard instead of pliable, or no longer rebounds, swap it—don’t wait until it ruins your next run. Most seals fail slowly, with stiffening rubber turning up only when the mess is already made.

    Pro strategy: Keep at least one backup seal in reach, especially before heavy weeks—falling behind on dust control during critical jobs means trading quality for frantic rework, or losing time that drains the whole schedule. As soon as you feel the seal lag, or catch dust sneaking in by the end of the shift, make the swap. Fast action locks in better tool control, less fatigue from redundant cleaning, and more time spent actually building or finishing instead of just managing debris.

    Chasing Dust Is Wasted Time: Rely on What You Can Feel

    Dust seals do their job best when you barely notice them. When they slip, the difference cuts straight into your energy, precision, and end-of-day pride. Don’t let quiet failures and skimmed-over details pile up—let your hands and eyes lead routine checks, respond early, and keep seal swaps easy. It’s not just about a cleaner shop; it’s about controlling the small frustrations that slow you down and quietly wreck your finish. The sooner you build these habits, the less time you lose to the dust that’s impossible to ignore.

    http://gumboll.myshopify.com

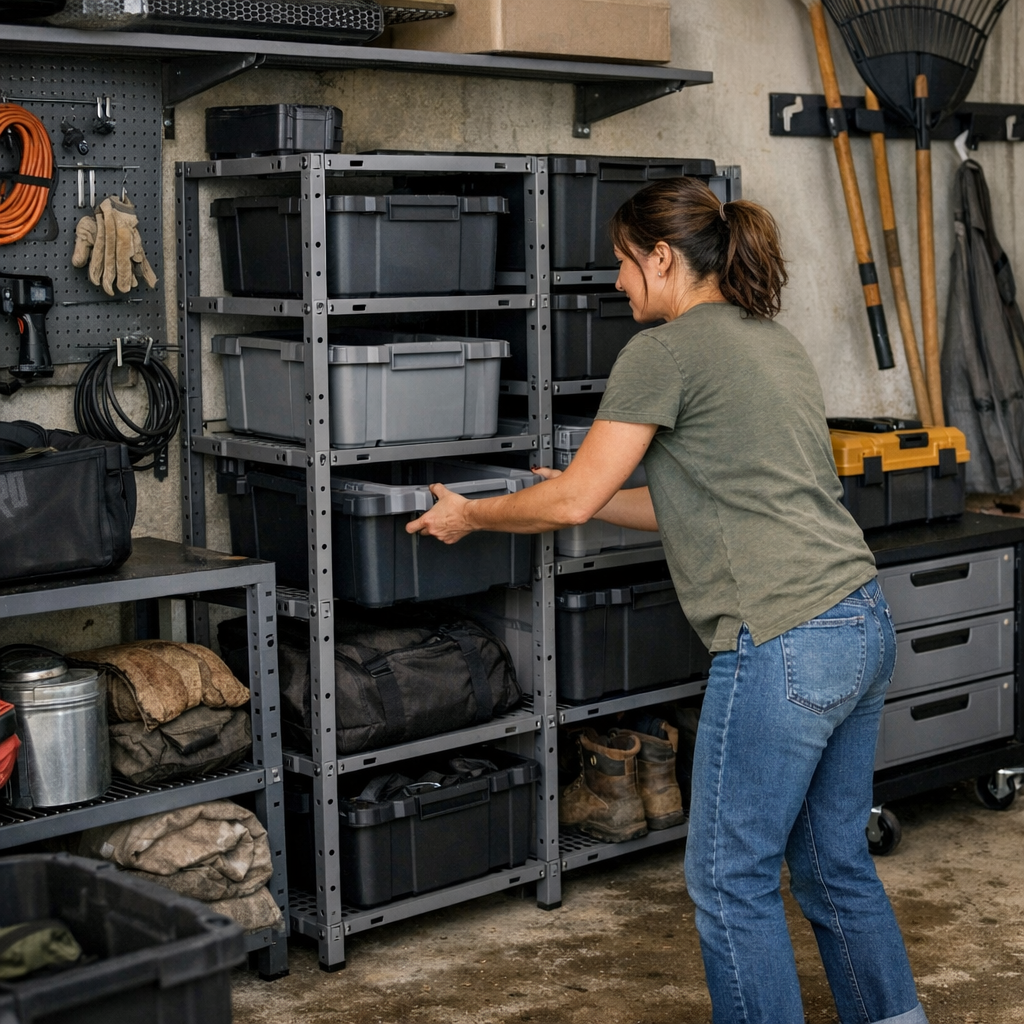
  • How Modular Storage Flexibility Solves Everyday Clutter Challenges

    Organized storage almost always starts with optimism. In that first week after installing new racks or lining up rows of bins, everything snaps crisply into place. Every item has a clean home. Pathways are clear, workbenches are easy to reach. It feels like friction is finally over. But the real tests don’t come on setup day—they creep in slowly, as your daily rhythm starts putting pressure on those seams. Suddenly, the system that looked seamless begins to catch and snag on routine use. A once-perfect layout becomes the background noise of inconvenience.

    The Neat Setup Mirage: When Order Hides New Headaches

    On day one, modular storage is a fresh slate. You stand back, admiring the symmetry—bins perfectly flush with the wall, cabinets squared in each corner. But within a few quick cycles of real use, small annoyances start to bubble up. The cart that rolled straight to the workbench now has to detour around a stubborn pile left by the entryway. That “temporary” stack of garden tools in the corner? Suddenly it has squatters’ rights. Even with everything technically put away, one area closest to the door always fills up, swallowing bags and gloves with each day’s return.

    This isn’t a matter of carelessness. It’s a side effect of treating appearance as function—confusing the visual order of bins and labels with the actual flow of your routines.

    How Clutter Mutates in a Modular World

    No plan survives contact with daily use. Rigid setups—no matter how modular they claim to be—install obstacles as soon as life deviates from their blueprint. A wall rack that “fills the space” translates to blocked corners you constantly shuffle around. Suddenly, to get a single tool, you’re reaching over carts or moving bins just to clear room for what’s next. Bins slide against each other so tightly nothing flexes. So the gear without a spot gets shoved wherever there’s a gap—often right in the path you need clear.

    In practical terms, it looks like this: stepping over the same stack of totes every time you try to get to the back door. Positioning a mobile chest in the only spot it fits, then having to muscle it out of the way each time you need the rake behind it. Outdoors, hoses and hand tools pile up around the gate, since the storage system doesn’t open up enough for a direct return. The footprint is used, but not useful.

    The Real Barometer: Can You Adjust Without the Domino Effect?

    The promise of modular storage is adjustability. But if making a change means pulling apart half your wall, the “modular” claim rings hollow. If every tweak means emptying shelves, shifting bins, or disrupting the whole lineup, what should be simple turns into a time sink. True modular design should let you change a piece—add a shelf, widen a gap, relocate one rack—without taking everything offline. The space should flex without forcing a tedious reshuffle.

    Real adjustment looks like this: you notice overflow forming near the entrance. Rather than dread a major teardown, you unclip two small panels, nudge one section a foot to the side, and open just enough room for carts to roll smoothly again. The rest of the system stays loaded. No pileup. No emptying bins. Minutes, not hours, to restore a clear path.

    The Everyday Creep: When “Just for Now” Becomes a Daily Hassle

    Consider a week in a busy garage. By Monday evening, everything’s tidy. By Thursday, that work zone by the wall has become a minor obstacle course. Each time you load out or return, unsorted gear builds in the same spot, steadily choking the main walkway. Getting a cart in or out becomes an awkward, multi-step shuffle. You don’t notice it happening in one big event—it creeps in through repeated, minor annoyances. The neat lines remain for show, but your mobility shrinks, and quick resets get sluggish. The system stops preventing mess and starts requiring extra effort to stay usable.

    This is the dividing line: a layout that stores your stuff but interrupts your routine is still a friction point, no matter how clean it appears.

    Fixing Bottlenecks Without Hitting the Reset Button

    The beauty of modular storage—when done well—is that you can solve workflow headaches with targeted tweaks, not monumental resets. Faced with a clogged entry, you shouldn’t need to unload an entire wall. In practice, undoing two anchor panels and sliding a section outward by a single shelf-width can clear the way. Nothing gets dumped out or stacked elsewhere. The floor is suddenly usable, and movements become direct again.

    The ability to make these small, strategic moves is where real flexibility lives. Access points reappear. Floor space isn’t doubled up as overflow. The system breathes with your routines instead of boxing them in.

    When to Rethink Your Layout: Real-World Warning Signs

    Keep an eye out for signals of a system grinding against daily life: narrow walkways that didn’t used to be crowded, tools that end up stranded in the same spot, repeated sideways shuffles to access a corner. If gear collects in familiar piles despite regular resets, or you’re forced to wriggle around the same cabinet edge every time you roll a cart, it’s not a passing phase—it’s a sign to adjust the pain point, not the whole system. Target the friction, reduce the busywork.

    What Makes Modular Storage Truly Adjustable?

    Not all modular systems are created equal. Durable construction matters—a lot. If shifting one section causes wobble or throws off the whole alignment, tiny fixes become new risks. The true test: can you detach, move, and re-anchor panels or racks without sagging, tilting, or needing to empty everything first? Sturdy panels and secure anchors let you flex the setup without sacrificing safety or ease of use. If a “modular” system can’t handle realignment on the fly, it’s just static storage in disguise.

    Better Storage Habits: Tweaking, Not Just Tidying

    The first setup is only a draft—never the final version. Expect edits. The minute you spot a pattern—overflow always in one corner, returns always blocking the walkway—move things around. Loosen up densely packed zones, even if it means the lines aren’t photo-perfect anymore. Modular is meant for evolving, not locking in. Don’t let bins cluster for weeks in a “temporary” zone that becomes permanent clutter. Embed quick, small resets after use instead of waiting until the pile demands an overhaul.

    The result: less repeated shuffling, clearer walkways, and a system that keeps adapting to make your routines smoother instead of slower.

    The Real Value: Storage That Changes with You

    Modular storage isn’t about how sharp it looks in the first week. Its value shows up in the months that follow—in the ten-second fixes, the paths that stay clear, the corners that adjust to new habits or gear. If you can fix a bottleneck, open up a zone, or get a return flow moving again—without pulling apart the whole structure—that’s a setup pulling its weight. Functional order, not just visual order, makes the difference between a space that supports your routine and one that quietly interrupts it.

    http://stacknest.myshopify.com

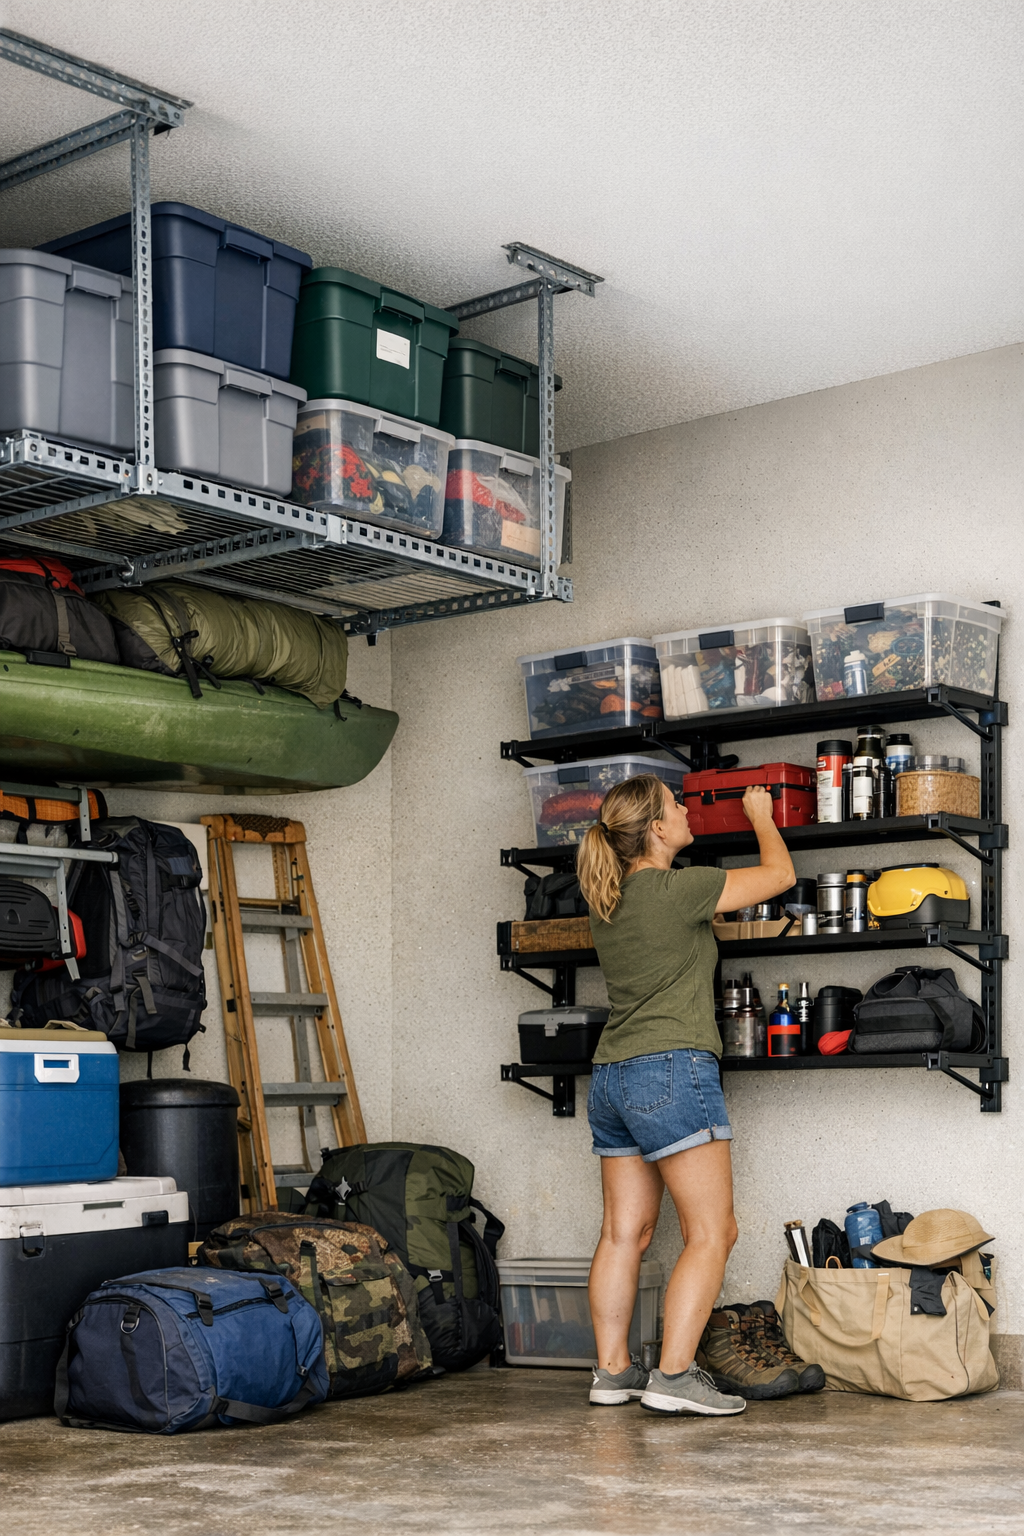
  • Choosing Between Overhead and Wall-Mounted Garage Shelving for Daily Use

    Garage shelving isn’t just about cramming more bins onto new racks. It’s about whether you can actually find the extension cord or ball pump on a frantic Saturday, or whether every “quick trip to the garage” becomes a small obstacle course. The real gap between overhead and wall-mounted shelving isn’t obvious during installation—it creeps in, week after week, as daily use exposes which choices keep your life moving and which quietly gum up the works.

    Garage Organization That Breaks Down in Real Life

    Everyone loves that first look at a reorganized garage: bins tucked above the car, shelves gleaming, every tool supposedly in its place. It feels like victory. But the first time you have to dig out the tire pump or hunt down holiday lights, the glow fades. Overhead racks make the garage feel enormous—until you’re dragging out the stepladder just to reach one carefully buried box. Half the time, shifting one tote means three others wobble dangerously or teeter over the hood of the car.

    Wall-mounted shelves start strong. Sports equipment, useful tools, and seasonal boots line up neatly—at first. Until you add one more soccer ball, then another, and suddenly you’re sifting behind ski goggles just to find the flashlight. Items you intended to keep separate bleed into each other’s space. A shelf that started as “paint supplies only” mutates into a jumble of lightbulbs, sandpaper, and garden gloves. The more you use the shelves, the blurrier the categories become, and the more things migrate to the floor “just for now.”

    Overhead Storage: The Highs and the Hassles

    Overhead racks win at reclaiming floor space, especially for stuff you rarely touch. Seasonal decorations, camping stuff, keepsake bins—these belong up high, clearing paths for your car or workbench and making the garage look open for once.

    But real-life retrieval quickly gets clunky. Need the cooler, but it’s wedged behind winter coats and old electronics? Out comes the ladder. You juggle stacks—trying not to drop the wreath bin—just to grab that one box you actually need. Start hurrying, and it’s easy to lose track of which bin is which, especially with faded labels or mismatched containers. Each trip up and down the stepladder adds minutes, and soon you’re avoiding the entire overhead zone unless you truly have to dig in. That floor space you reclaimed? It’s all too easy to “temporarily” drop overflow items down below, creating new clutter as you dread the effort of hauling things back up.

    Keep Overhead Zones Hassle-Free

    Use giant, unmistakable labels facing downward—a scribbled Post-It isn’t enough. And if a container is so heavy or unwieldy you can’t lift it easily alone, it doesn’t deserve a spot over your head. The goal: overhead storage serves you—not forces you to risk a bad back or pile clutter on the floor for “later” resets.

    Wall-Mounted Shelving: Convenience with a Catch

    Nothing matches the speed of grabbing what you need off a wall-mounted shelf. Battery charger? Garden shears? The soccer cleats your kid swears are missing? With a shelf at chest height, you’re in and out in seconds—no stacking, no stepladder, no searching through bins.

    But as weeks pass, even the most logical categories break down. Start by adding just one item that doesn’t belong—maybe a set of bike lights onto the tool shelf. Soon, space is tight, and you’re nudging one thing aside to fit another. Once you double-stack on a shelf, things fall out of visibility. Grabbing the dog shampoo means moving a tub of nails and a flashlight. The floor beneath the shelves becomes a catch-all for stuff that doesn’t have a real home, and before you know it, your “grab-and-go” system turns sluggish again.

    Keeping Wall Shelves Working (Instead of Caving In)

    Set firm categories—and respect them. When you find yourself stacking above eye level for everyday stuff, it’s a red flag. The moment two categories share a shelf, stop. Take five minutes to reset, before “just for now” becomes the new normal. The difference between a shelf that works year-round and one that turns into another messy pile is the discipline to reset before chaos finds a foothold.

    Using Both: The Hybrid Reality of Garage Storage

    Most garages wind up with some overhead storage and a wall of shelves. In theory, it’s perfect—seasonal and archive bins overhead, daily-use gear within reach. In practice, it’s messy: the toolbox gets tucked into the wrong overhead bin; bikes lean against shelves, and a pile of out-of-place bags accumulates on the floor. Overflow from wall shelves gets shoved onto overhead racks, and vice versa. The clarity of your system slips away with every hurried weekend or seasonal swap.

    Over time, resets get longer and more frustrating. Separation between zones blurs, routines lose rhythm, and the garage starts feeling like a project to avoid—just when it was supposed to save you time.

    Resetting the System—One Simple Rule

    After a month of tripping over bags and staring down a ladder, one rule cut the clutter: Only weekly-use items stay on wall shelves. Everything else—provided you can safely lift it—moves overhead. No more “just for now” drop zones. No more heavy bins teetering above. Drawing this hard line put the routine back in routine maintenance—and made clearing the garage less of a chore and more of a simple, automatic reset.

    Clues Your Garage Shelving Needs Tweaking

    • Stacked bins bow or tip, and it takes two tries to close a lid without something bulging out.
    • Shelves are packed end to end, forcing overflow into corners or onto the floor.
    • Labels get ignored or mismatched—suddenly, you’re guessing where anything is stored.
    • You have to move other gear just to get what you use most often.
    • Every reset starts with a hunt: “Where did I shove that last time?”

    You don’t need flawless, catalog-perfect storage. What you need is functional, stress-reducing organization—a system that keeps up with your real habits. When categories are enforced, access lines stay clear, and shelving fits the rhythm of your actual garage life, daily routines run faster and clutter stops spreading. It’s not about how great it looks when you’re done. It’s about how little effort it takes to keep it working as days and seasons change.

    Before you buy or install anything new, match shelves to reality: what you reach for constantly, what can truly live out-of-sight, and which items always end up in your hand anyway. Your future self (and your Saturday mornings) will notice the difference.

    Find garage shelving options that support real daily routines at ClosetWorks.

  • Designing Closet Storage That Supports Real-Life Daily Routines

    When an “Organized” Closet Still Saps Your Time

    You can measure and arrange, stack and label—but those perfect closet photos fade fast against the pressure of daily life. The real test comes not on organizing day, but in those unruly, low-energy moments: you’re getting home late, juggling bags, unzipping your jacket with one hand, and already feeling the dread when you see scarves sliding off the shelf edge and two baskets you’ll have to move just to put something away. That’s storage friction: the subtle ways even well-intentioned setups slow you down, trip you up, and leave clutter multiplying where you swore it wouldn’t.

    Why Closets Gradually Wear You Down

    Clutter creeps in, not with one disaster, but with a hundred small annoyances. You reach past a gym bag crammed in the front to dig out your only winter hat from behind. You try to slide one sweatshirt out of a stack, and the pile droops or slides, half the items now off-balance. Within days of a weekend reset, categories blur—workout tops in with pajamas, shoes squeezed alongside things that aren’t footwear at all. The problem isn’t your discipline; it’s a design that looks crisp when untouched but can’t cope with the habits and messiness of real routines.

    Most closets are built to perform on their first day, when everything is lined up, sorted, and perfectly folded. But real life isn’t steady or careful. Morning rushes, midnight wardrobe changes, laundry that isn’t folded right away—these are when you learn which part of your system demands constant reshuffling or quickly gives up its structure. The bins that swallowed everything, the shelf that always looks crowded, the corner that quietly hosts a pile of bags you forget about until you’re late.

    Death by a Thousand Small Setbacks

    A closet’s appearance can disguise daily grudges. When every retrieval means dislodging a stack, pulling out a bin, or moving items aside “just for now,” you start skipping the reset. The floor becomes a holding area for what you don’t want to deal with. Lidded bins that started off organized morph into black holes of mixed scarves, cords, and off-season gear. Shelf edges sag under the weight of half-used piles, and soon, your “system” starts to feel like an obstacle course.

    It’s not household chaos—it’s misplaced effort. The price is paid in seconds: each time you avoid fixing a pile, each time you leave something out because you can’t face upending a bin for it. The friction accumulates, and with enough repetition, even the most promising closet slips into disarray not from neglect, but from poor fit with the way real mornings—and exhausted evenings—unfold.

    Where Real Closets Let You Down

    Bins That Never Show You What’s Inside

    Large, deep bins with lids seem like peak organization—until you’re fumbling for a single missing glove and wind up spilling workout bands, old electronics, and out-of-season accessories everywhere. The more stuff they can hold, the more categories merge, and the less likely you are to put things away where they belong. Over time, these bins shift from “sorted” to “avoid opening at all costs.”

    Piles That Go Sideways (Literally)

    Stacks of clothes look sharp only as long as no one touches them. Thin shelves and too-tall towers can’t withstand the simple act of grabbing a T-shirt from the middle. Soon, you’re bumping half a pile onto the nearest chair, promising you’ll fold it later. With each grab-and-go, the stacks get messier, and the time to reset climbs, so often you just don’t.

    Shelves That Crowd Out Your Options

    Shelves suggest abundant space, but too often they become catch-alls. Without clear boundaries or divisions, purses migrate into sweater territory, gym shorts spill over on top of shoes, and “overflow” transforms what should be a single layer into a two-deep confusion. Every attempt to grab what you need means moving unrelated things—wasting precious minutes and fraying your patience.

    Entryways and Corners That Lose Their Boundaries

    These problems aren’t locked in your closet. The bench by the door gets buried under coats that outnumber the hooks, a “neat” basket slowly fills up with dog leashes, mail, and shoes that have lost their pair. What started out as a landing zone becomes a permanent clutter display. Every six weeks feels like a reset, but nothing really changes—because the setup isn’t designed for constant use, just occasional tidiness.

    From Surface Order to Real-Life Function

    The best closet stays steady—even when you’re running on empty. A smarter storage setup isn’t about flawless alignment. It’s about designing for your tiredest self: clear categories, open returns, and no “hidden” zones that trap the things you use most. Consider swapping lidded, deep bins for open-front, shallow ones at arm’s reach—no more stacking three heavy bins to get at a scarf. Drop in a simple divider: suddenly, folded pants don’t drift into T-shirts, and what goes where is unmistakable, even for a distracted mind.

    You might find the nightly “reset” transforms from a two-minute shuffling session into a few direct movements. The shelf edge stays clean, stray items are less tempting to leave out, and your organizing rituals start to shrink in both time and frustration. There’s less to fix, and less lost in the shuffle.

    What Actually Improves Daily Closet Use

    • Use shallow, open-front bins on your most-used shelves. You’ll see everything at a glance, and vertical reach becomes useful space, not wasted air above a buried pile.
    • Add dividers at the front of shelves or inside bins to keep categories from bleeding together. Every item gets a clear slot—which means you don’t undo a whole shelf to return one thing.
    • Leave some empty space by design. A shelf that’s 80% full absorbs temporary overflow and leaves breathing room, so one rushed laundry day doesn’t derail your whole week’s order.
    • Watch for friction you keep repeating: Is there a corner where things pile up, or a stack that never stays stacked? These are signals to revise—not signs you failed.

    Spotting and Solving Hidden Closet Trouble

    You won’t always notice storage problems until you live with them awhile. Signs you’re due for a tweak include:

    • Piles always leaning, even a day after you fold
    • Baskets where unrelated items keep cycling back together
    • Drop zones forming in the exact place you wish were always clear
    • Rummaging to find something you just put away (it’s there, but buried)

    Each minor snag is a clue: a warning that good intentions alone don’t build a closet you can actually live with. Smarter storage isn’t about a prettier surface, but about recapturing those seconds lost to avoidable mess.

    What a Real-Use Closet Feels Like

    When bins, shelves, and hooks match your everyday habits instead of aspirational plans, you stop dreading tidying up. Fewer traffic jams. Faster returns. You find what you need without having to re-stack or excavate. Your space settles into a rhythm—order that holds even in your rush, or on days you’d rather ignore the piles. The result isn’t perfection. It’s relief: a living system that actually makes your day easier, not just nicer to look at.

    For more practical solutions that make your storage actually work, visit ClosetWorks.

  • Why Consistent Battery Power Matters for Blower Performance on Tough Jobs

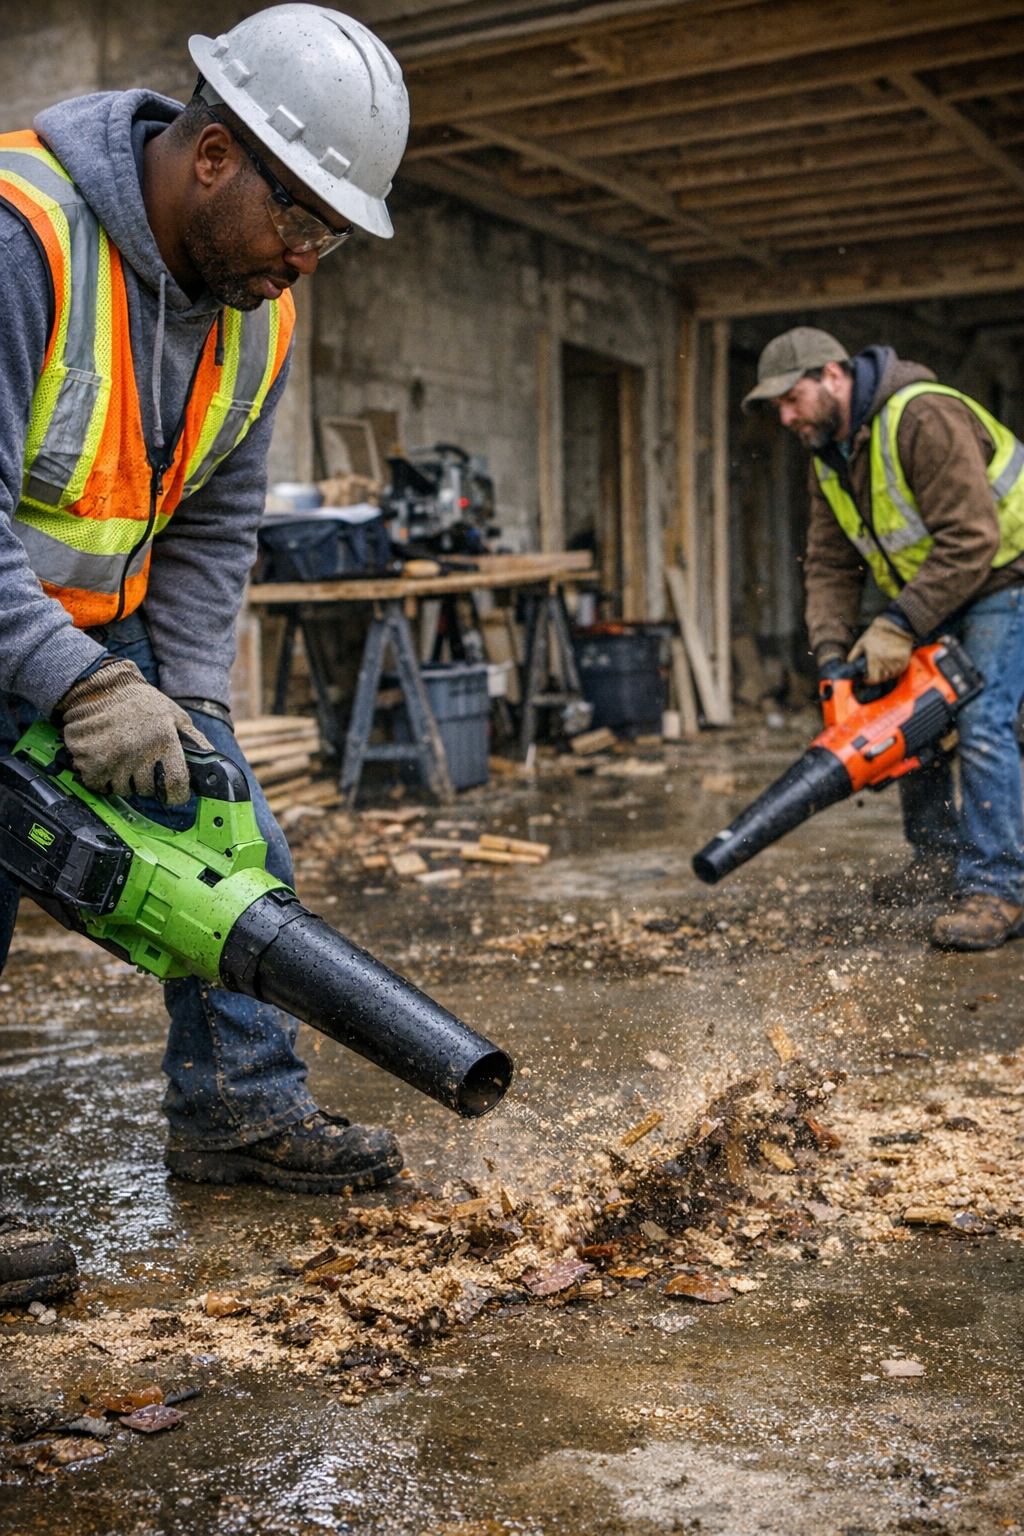
    If you’ve ever tried to clear out stubborn, damp debris from a cluttered garage or jobsite—long past quitting time, knees in the grit—you know this: on real jobs, battery blowers separate themselves only under pressure. The slick numbers on each box might be similar, but it’s the way a pack holds up in the grind, not on a spotless showroom floor, that makes or breaks your day. When cleanup isn’t just another chore but your last barrier to finally heading home, every dip in power, every scramble for a backup battery, turns into lost time you’ll never get back.

    What Specs Get Wrong

    It’s tempting to grab the blower boasting the highest voltages or biggest amp-hours. Who wouldn’t? But those easy-to-compare specs lose their meaning the first time you force sawdust out from under heavy tool benches or try to blast wet leaves glued to concrete. Set two blowers side by side—numbers matching, reputation solid—and you’ll still see one start faltering when dirt piles up. Pressure drops, the motor tone changes, and suddenly you’re stuck weighing whether to gut it out or start the awkward shuffle of battery swaps. If you even remembered to charge the backup after yesterday’s job, that is.

    Where Weak Batteries Show Their True Colors

    The top layer of dust on an indoor floor—any blower can breeze through that. But once you’re pushing into corners choked with dense debris, or wrestling with wood shavings packed tight by a rainy morning? That’s when batteries that seemed equal start peeling apart. Lesser packs lose torque fast. Airflow sags unexpectedly. Handles vibrate as the tool strains, leaving behind ragged debris trails you’ll need to hit again. By contrast, a strong, steady battery keeps your pace—not just at the start, but every pass, even when the mess gets real. Instead of fighting the tool, you stay focused on clearing what matters.

    Jobsite Reality: The Breakdown Begins in the Details

    Picture this: remodeling midweek after a storm, with muddy sawdust pressed flat along the walls. You send out two blowers. Both look fine, but by the third stretch, one chokes out—a taunting blink from the battery light. Now you’re detangling battery packs, grabbing half-charged spares, trying to remember which bits of floor you’ve already done. Meanwhile, work rhythm collapses. Missed corners stack up, tools go missing under shavings, and by the time you finish, a fast end-of-day sweep has ballooned into an extra half hour lost. It doesn’t take many days like this before you notice how much those pauses and misfires drain away, both time and patience.

    The Value of Power That Doesn’t Fade

    Switch to a battery built to hold at least 80% power through heavy runs—say, half an hour or more—and the change is immediate. You make each pass without second-guessing whether the juice will last. No sluggish dropoff, no mad hunt for an extension cord, no hesitating at the trigger just to ration output. Suddenly, end-of-day cleanups run as expected: not perfect, but predictable. You finish the run, not wishing you’d brought a third battery just in case, but knowing the corners you cleaned will stay cleared until the next job rolls around.

    Recognizing Battery Fade—And the Price It Extracts

    If your blower’s force starts dwindling—if sound, pressure, or vibration shift before you’ve managed a real dent in the mess—that’s more than a nuisance. Uneven power flow is a red flag for real-world inefficiency. Anyone who’s drilled lag screws into dense studs, run a sander longer than planned, or cut through knotty framing knows this feeling: tools seem identical until they’re pushed. Productivity rises or falls not on big claims, but on quiet, steady output under strain.

    The Everyday Variables That Wreck Run-Time

    Factors the product packaging won’t warn you about: early-morning cold, a jobsite under shade, or Friday’s leftover rain soaking everything you meant to clear. Suddenly your 25-minute battery pack limps through only 18, if that. Older packs fade even quicker, especially in low temps. Real-world performance can shift not by “up to” percentages but by full tool cycles—meaning you’re cutting tasks or switching tools mid-job just to get through cleanup. You won’t find this number on the box: you’ll spot it when your team’s rhythm falls apart on the fourth battery change before noon.

    Equal Specs, Not Equal Results

    Don’t buy the illusion that “identical” means identical. Two 18V, 5Ah batteries—even from the same brand—can deliver totally different days depending on chemistry, cell matching, and how well they manage heat when pushed. By the end of a long cut, or a slow grind through damp sawdust, one battery will still be running at near-full tilt; the other will leave you scrambling for a charger while the jobsite gets messier. It’s these internal differences, invisible at retail, that separate tools you trust from tools that throw off your whole pace.

    Workflow Lives or Dies on Run Consistency

    Jobsite frustration rarely comes from a single big letdown. It’s the steady drip of pausing for underpowered batteries, circling back to re-blow edges, or having to fetch a corded backup in the middle of a rhythm. If a battery’s output stumbles halfway through, you lose not just minutes but momentum and mental focus—sometimes the most difficult thing to recover after a long shift.

    Reliable runtime is more than a convenience—it’s a real skill multiplier in shop routines and daily sweeps. Steady, powerful output lets you stay on task, finish right, and walk off without worrying about tomorrow’s backlog of patches and redo passes. Every time a battery holds its strength, your body gets a break from awkward, repeated effort. The buildup of little wins becomes the real performance edge.

    Put Your Batteries Through the Tough Stuff

    Don’t trust a label or demo video. Try this: whenever you get a new battery or tool, throw it straight at the hard work. Take on a patch of stuck leaves after rain, or clear a mix of sawdust and scraps under a table saw. Watch for not just the initial power surge, but how long force and control stay consistent deep into the job. Those that start sagging early or struggle with heavier resistance aren’t the ones that’ll help you when deadlines mount. Real efficiency is built from tools that run hard and stay steady, not tools that only look good fresh off the charger.

    For real-world gear built for daily grind—not just for glossy specs—visit Gumboll.

  • Why Modular Raised Beds Transform Backyard Gardening Efficiency

    The promise of perfectly organized raised beds fades the first time your real routine collides with their rigid shape. On setup day, the geometry is crisp: neat rows, defined corners, a sense of lasting order. But as soon as you start actually using the space, cracks appear. Swap out a planting plan, bring home unexpected seedlings, or just try to clear up at the end of a long afternoon—suddenly, what felt tidy turns cumbersome. One blocked path or unreachable corner, and you’re left zigzagging through your own setup, working around the very order you created.

    When Fixed Beds Turn Efficiency Into Obstacles

    No backyard, garden, or workspace runs on a single, unchanging routine. My first fixed-bed layout looked logical on the drawing board but unraveled halfway through the season. Rearranging plants demanded awkward over-the-bed stretches. What used to be a path now funneled every trip—hose, wheelbarrow, compost bucket—through a shoulder-width bottleneck. Corners disappeared under stray tools. Cleaning up felt like untangling a maze: dragging a full cart around dead-ends, squeezing sideways just to reach a forgotten rake, doubling back to escape from behind an unmoving wall of wood and soil.

    The same pain points recurred, week after week:

    • That stubborn bed forcing you to navigate around it instead of through it
    • The unreachable side filling with scattered tools and clutter
    • Pathways closing in until even a hand truck struggles to pass
    • Entire wall zones wasted, hidden behind barriers that refuse to shift

    Much of what looks ordered on day one quietly morphs into lost space and repeated detours. Fixed systems mask these scraps of inaccessibility as “structure” while locking your workflow into unhelpful patterns.

    Modular Beds: Layout That Adjusts to How You Actually Use Space

    This is why modular raised beds aren’t just a trend—they solve the friction that fixed designs create. Modular setups accept that routines, plans, and even moods change. The path that worked in April might be a headache in July. Instead of resigning yourself to workaround after workaround, you can shift beds to create a shortcut, open up a tight area, or reclaim a corner that’s devolved into storage—all without dismantling your entire garden or workspace.

    The difference isn’t subtle: modular means resetting your space in minutes, not losing a whole afternoon battling a stubborn layout.

    Moving From Static Rows to Usable Flow

    Visual order can be deceiving—fixed and modular beds both start out tidy. The contrast is in day-to-day use. Last season, when compost delivery ran late, I needed to snake a cart down the main aisle. With modular beds, I unlatched two side panels, widened the route, and cut straight through. Resetting afterward took seconds. The fixed-bed section, though? It forced a three-point turn through flowerpots and corners—if the cart fit at all, it barely made it without scattering soil everywhere.

    It’s not just a once-a-year inconvenience. By midseason, those “just put it here for now” moments accumulate: tangled hoses stuck in blocked zones, overflow piling up in one hard-to-reach patch, every reset dragging out as you maneuver around an unyielding footprint. Flexibility doesn’t just save time—it keeps your setup from turning against your own routine.

    Routine Obstacles: Why Layout Matters More Than Looks

    Real friction shows up during ordinary tasks. Storm clouds build, and you’ve got two minutes to rescue seedlings near the back fence. But with fixed beds fencing off the straight route, your only option is a slow detour—dodging corners, risking a dropped tray. Modular designs let you snap open a panel and create a direct line, saving your plants and your nerves.

    Reach for the hose or a tool mid-summer, and you’re forced to pick your way around beds that were only supposed to organize the space. That “unused” zone in the corner? With a fixed layout, it’s condemned to become a dumping ground for overflow. Modular beds let you expose and reclaim dead corners, reshaping work zones before they devolve into chaos after every big project.

    The Problem Goes Beyond Gardening

    The same kind of setup friction plagues garages, sheds, and workshops. An inflexible bench or storage box pins down rolling carts, forcing awkward shuffles every time you need to clear space. Modular layouts—whether beds in the yard or cabinets in the garage—make the difference between clearing a path in seconds or juggling heavy objects just to get through.

    What Makes a Modular Setup Actually Work

    Of course, the benefit isn’t automatic—it depends on doing modular right. Early on with my own beds, I hit a snag: heavy rain loosened a few connectors, leaving panels skewed and gaps that trapped debris. Quick fix? Upgraded edge supports and tighter hardware. After that, moving and relocking panels was solid and easy, even after repeated changes. No more creeping misalignment or wasted energy realigning every week.

    Some lessons for a frustration-free modular routine:

    • Don’t rush square corners or skip level checks. Those shortcuts show up as headaches every time you shift the layout or roll a cart down the line.
    • Prioritize connector strength, not just speed. Fast-to-assemble, flimsy links can loosen fast. Durable hardware pays off in reliability and smoother resets.
    • Keep the foundation level and stable. Modular beds that teeter or open gaps drain time fixing later—especially if your routine means moving heavy loads or carts through the area.

    Living With a Setup That Works Backwards

    Over time, the “perfect” first-day layout loses its shine. It isn’t the place that’s never out of line by the end of summer—it’s the one you can reset quickly and use without dread. A modular approach means fewer blocked paths, less scavenging through spillover piles in corners, and a real sense of flow that sticks around after a big cleanup or the next planting binge.

    The best setup turns invisible. When you can move, access, and reset without second-guessing your own space, you finally get to focus on work—without fighting the system meant to help you. Visual order can come and go, but a layout that flexes with your actual routine will always feel more functional, less frustrating, and more genuinely yours.

    Ready to trade a setup that stalls for one that actually works with you? See modular raised beds and storage solutions at StackNest.

  • Why Router Base Plate Flatness Is Crucial for Consistent Cuts

    The difference between a flawless routed edge and a botched one is rarely dramatic—until you’re the one re-sanding for the third time in a cloud of dust. That moment when your arms ache, your patience thins, and a tiny, almost invisible problem—a warped router base plate—wrecks what should have been a clean, fast job. The longer you work, the worse it gets. One minor deviation at the router base turns into seams that won’t sit flush, edges that look “off,” and finish quality you just can’t rescue. You catch yourself thinking, “Wasn’t this supposed to be a simple run?” Only then does the true cost of a bad base plate come into focus.

    Where Flatness Fails You: The Trouble Isn’t at Setup—It’s in the Real Run

    On the assembly bench, every tool looks ready. The router base is snug, the screws sit flush, nothing obvious dips or bows. The first test passes—usually on forgiving pine or plywood—give no sign of trouble. The catch comes later, midway through a serious job. Working a full-length maple slab, you notice an uneven drag. The router dips slightly, pressure shifts. By the end, a gentle wave shows up along joints that were supposed to stay dead-on flat. Suddenly, the line between professional-grade output and amateur repair work is as thin as the base plate gap you missed.

    What makes this friction even sharper: you don’t see it coming. At first, it’s an oddly stubborn patch of resistance or a barely visible dip. Soon enough, it shows up as steps at seams, faint burn marks where pressure dropped, wavy profiles where your edge should stay crisp. Sanding hides some of it, but repeat the run a few times—on doors, on fascia, on the face frames where details matter—and the flaws multiply. Flatness isn’t a theoretical spec; it sets the standard for whether you trust the next pass, or grit your teeth and reach for the filler.

    Small Warp, Big Consequences: How Wear Snowballs Mid-Project

    No shop tool stays factory-perfect. A slight curve in the router base—a gap thinner than a business card—doesn’t announce itself boldly. But every pass forces you to chase the correct angle, adapt your grip, and work against the grain of your own muscle memory. After hours on a big build, that 0.2mm warp shows up in the fit of every seam and the hours lost to rework. What starts as subtle “grabbing” and odd chatter becomes a pattern: the first door edge looks decent, but consistency breaks down, and your final pieces look like they swapped hands halfway through production.

    It isn’t just pride at stake—those incremental misalignments mean more returns to the sanding bench, eating shop time you needed for the next job. Worst case, a ruined edge means tossing a finished panel and burning both material and profit. What should be routine control turns into an exhausting guessing game, just to keep corners square.

    Why Router Base Plates Warp: Shop Realities, Not Just Bad Luck

    The lifecycle of a router base is brutal. Hands constantly torque screws tighter, plates take bumps from benchtop drops, and heat cycles swell and shrink edges over time. Plastic bases start to arc around screw holes after a few dropped tools; cheaper aluminum plates can bend beyond recall with one wrong knock. The visual check offers false security—the plate looks clean and the screws are tight, but the next time you route, the tool rocks ever so slightly, rhythm breaks, and shallow cuts deepen unpredictably. By the time you discover the fault, it’s usually too late—the seam is split, or a deep burn has chewed through your maple edge grain.

    Field Test: When Subtle Defects Show Themselves Under Pressure

    Consider running a 3/8” round-over across a thick maple countertop. Initially, both your go-to router and a cheap backup feel identical—until a few feet in, and suddenly a tiny ridge appears near the midpoint. On closer inspection, the suspect base plate still looks fine. The evidence is only in the cut—a lip that no amount of pressure smooths out, and sanding can barely disguise. Multiply that by a set of cabinets, and you realize you’re sanding more, working slower, and still not matching the reliable results your best base always produced.

    The Straightedge Habit: A Shop Check That Actually Matters

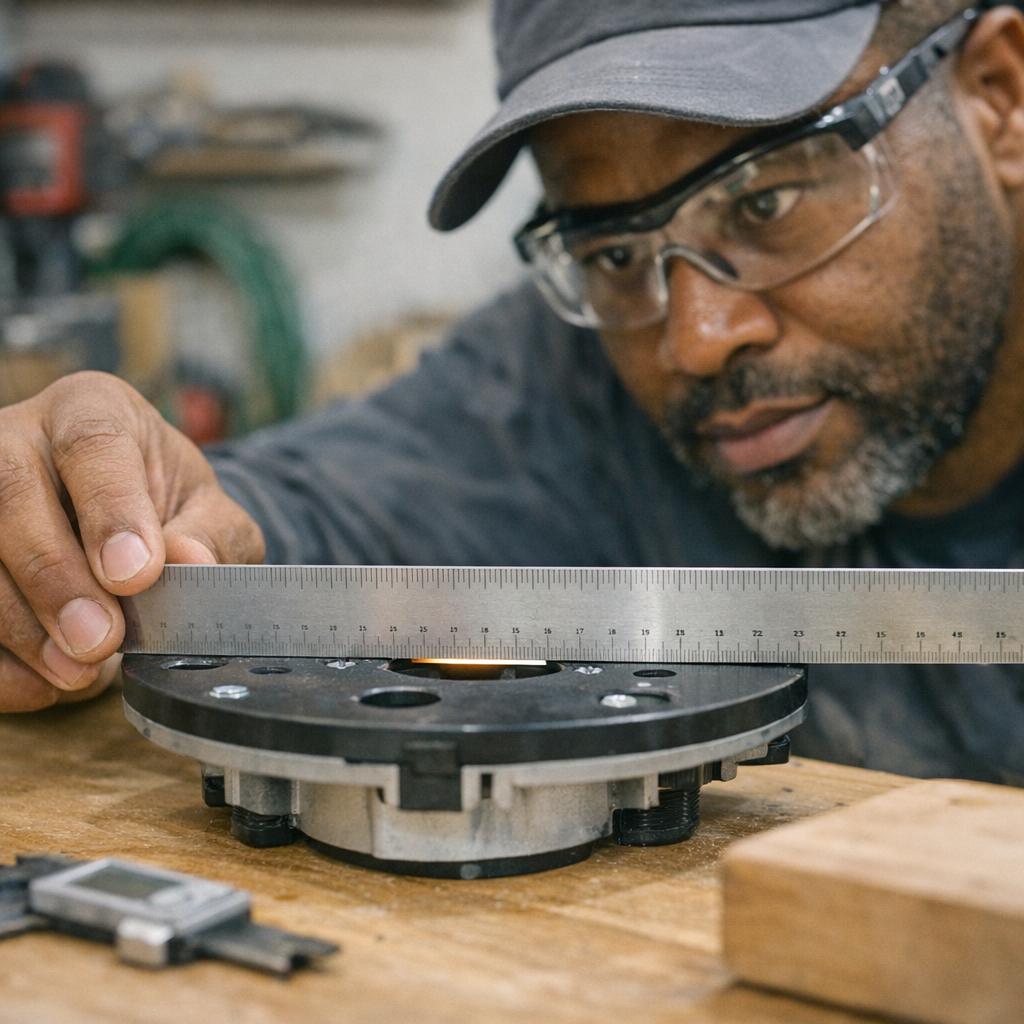
    The single most practical shift: check your router base with a straightedge before each big job—or after any drop, overtightening, or sudden stall. Lay the base plate on a dead-flat surface—the cast iron saw table, a scrap of thick glass—and sweep a metal straightedge across its corners. If you see daylight, especially more than 0.2mm, take action. Swap the plate, or set it aside for rough work. This isn’t fastidiousness; it’s a method to prevent unpredictable, costly rework, especially when deadlines and finish quality count.

    Shop-Worn Advice: Spend Small to Save Big

    Swapping a $25–$40 base plate stings less when you compare it to hours spent dressing seams on $100+ hardwood panels. Over months of production, the minutes recovered add up—less sanding, fewer rejected edges, more consistency across batches. In straightforward terms: a cheap base costs more in late-night rework and wasted materials than a replacement plate ever will.

    Saving Perfection for Where It Counts—But Never Ignoring Flatness

    If you’re doing demolition, quick rough-outs, or router work that’ll be buried under trim, a minor dip in the plate won’t ruin your week. But run architectural mouldings for repeat builds, or dress visible cabinet faces, and base flatness is non-negotiable. Smart shops keep a “runner” plate for finish jobs and a scratched, slightly warped spare for construction-phase mess. The distinction between the two? Visible results, not a clean spec sheet.

    Trouble Signs That Signal It’s Time to Inspect

    • Edges that suddenly dip or gouge during a run that started clean
    • Needing extra arm pressure to keep the router tracking true
    • Unexpected chatter, burn marks, or “catch and release” stalls
    • Panels that refuse to mate flush, despite careful fitting

    Especially in shared shops or high-traffic benches, a base plate’s true condition can change overnight—loosed screws, a single drop, or a tool that “walked” across a vibrating table. A two-minute check spares hours spent hunting the root cause of unpredictable, blunted results.

    The Payoff: Fewer Surprises, Smoother Workflow, Cleaner Results

    Achieving repeatable, professional work isn’t about chasing perfection on every tool or spec. But treating base plate flatness as essential—right alongside sharp bits and steady feed rates—can avert most headaches before they start. An extra glance with a straightedge lands you more predictable cuts, less fatigue from over-correction, and the sort of workflow where mistakes aren’t revealed at the finish line. It’s not a glamorous habit, but it’s one of the few that pays itself forward on every single job.

    Find more practical gear for router setups and shop work at Gumboll.

  • Creating Seamless Storage: How Closed Loop Systems Transform Mudroom Organization

    Mudroom Storage Frustrations: When “Organized” Isn’t Enough

    Walk through the door, arms full—your keys, the dog leash, at least one bag slipping. The mudroom bench, lined with crisp baskets, promises calm. But it’s a promise with holes. By the third day, the baskets start sticking, stray shoes wedge themselves sideways, and every “quick reset” becomes a juggling act. Each extra step—pulling out an overloaded bin, scooting boots that never quite fit back underneath, rescuing lost gloves mashed beneath a bag—chips away at your patience. Over time, the setup isn’t helping you; it’s just a new source of stress, camouflaged as “order.” The mudroom that should smooth out the chaos of family life quietly becomes another friction point—a spot where you dodge clutter instead of corralling it.

    The Closed Loop Advantage: Storage That Actually Stays in Sync

    A real “closed loop” storage setup doesn’t make you think. You grab what you need in a single step. You put things back just as easily, without clearing a path first. No puzzles, no wrestling baskets or shifting a mountain of winter boots to shove your work bag into place. In real life, any system that makes you rearrange, stack, or hunt simply falls apart. The mudroom can’t reset in a hurry—and the mess seeps out, spreading to hallways and kitchen counters.

    Friction in Action: Where the Mudroom Slows You Down

    The routine glitches are small, but relentless. Your sneakers are behind three pairs you don’t wear, so you reach, knock a stack sideways, and promise yourself to “fix it later.” Kids empty backpacks onto whatever surface is easiest, because opening (or even finding) the “right” bin takes too many steps. You spend more time moving things out of the way to get to your actual shoes than you do walking out the door. Over days, the storage looks managed—but it never actually functions the way you need.

    Mudroom Benches: The Real Test of Cubbies vs. Bins

    Bins seem like tidy magic—until you use them daily. Pull-out bins look organized, but with hands full or boots dripping, the extra motions are a dealbreaker. You need both hands. You have to set things down to open the bin. If there’s a traffic jam—basket blocked by a pile of shoes, or a bin too tight against another—all momentum is lost. The hidden mess gets shifted, not solved: shoes pile on benches, soggy gear gets abandoned anywhere flat, and after a week the “perfect” setup is undone by a handful of small, repeated hassles.

    Open cubbies fix some of that. You can toss shoes in without breaking stride and grab them on your way out. But nothing really stays separated. Dirt is in plain view, shoe pairs go missing, and sandals migrate to the “work shoes” zone by Wednesday. In reality, both bins and cubbies unravel if the design doesn’t match your daily move-grab-return rhythm.

    Scene From a Rainy Week: The Mudroom Bottleneck

    Picture this: you come home soaked, balancing groceries and a laptop bag. The entry is already choked with shoes left askew, that “easy to access” bin is wedged in place, and you have no spare hand to wrestle it out, so your wet shoes end up on top of whatever’s nearest. Flip this scene for every after-school drop, every muddy soccer gear dump, every time the laundry basket detours through the mudroom. You don’t need dozens of examples. Just one routine interruption, repeated every day, is enough to turn “organized” into yet another ongoing headache.

    It’s always the smallest resistance—a stuck bin, a shelf just out of reach—that kills the habit of putting things back.

    Flow Over Perfection: A Storage Shift That Actually Helps

    Here’s the real upgrade: swap those deep bins for angled shelves or open, shallow cubbies. Suddenly, access is direct. Shoes slide in and out—no scavenger hunt, no multiple hands, no bending or stacking. Designated spots emerge naturally; cleats and boots aren’t creeping into slipper territory. Every pair stays visible, so three-minute resets stay three minutes, not thirty. The result isn’t picture-perfect, but it is fast— and that’s what actually keeps the space under control.

    Ease Drives Real Habits—Not Just Neatness

    Forget aiming for the showroom look. The best system is the one that works on a Monday morning just as well as Sunday night. When putting something away is consistently easier than leaving it out, clutter fails to get traction. If it takes another step or a spare hand to reset, you’ll skip it. The real test isn’t appearance, but whether the right spot feels obvious even during the daily rush.

    Is Your Storage Setup Working—or Getting in the Way?

    If your mudroom feels like a battle zone, check for these friction points:

    • You have to move shoes or bags just to return something to its “spot.”
    • Shoes gather around bins, never quite inside them (or bins are always half-open).
    • Piles reform overnight, no matter how many times you organize.
    • Return paths are crowded—every surface attracts stacks instead of staying clear.

    Each extra motion is a sign you’re fighting the setup—not being supported by it. Over time, any excuse to skip resetting becomes the new routine.

    Cubbies or Bins: Which Survives Real-Life Use?

    Bins hide mess and hold grit at bay, but only if you can reset them in seconds. If you’re frequently in a hurry, bins become one more thing to move or reposition—and lose their appeal fast. Open shelves or angled cubbies make resets nearly automatic, even if they reveal a little more daily chaos. The goal isn’t showroom order: it’s a mudroom where things return to their place between uses, instead of migrating into the rest of the house.

    The Cost of Small Obstacles: How Tiny Hassles Become Big Clutter

    The cracks always start small—a bin off track, a shelf that’s too deep, a pile that never fits quite right. Soon, whole zones lose definition, categories mix, and putting something back becomes a workaround. Instead of discipline, you get improvisation. Shoes go wherever, bags stack in corners, and the mudroom shifts from organized to overwhelmed, one semi-blocked return at a time.

    Long-lasting organization isn’t about perfect lines—it’s about setups that survive repeated, messy, real use. If resetting isn’t easy, the system won’t last past the first week.

    Noticing Trouble Before It Spreads

    Overflowing bins and scattered shoes are only the final warning. The first clue is slower resets: you sigh before organizing, or leave one item undone every day. Certain surfaces become magnets for clutter—no matter your hopes. These are the signals that your storage design is getting in the way of daily life. Instead of blaming motivation, look for where things stick—literally or figuratively—and experiment with removing just one obstacle. Often, it’s that simple shift that keeps the rest of the room from caving in.

    A Real-World Tweak: Keep the Put-Back Path Open

    Want to fix almost any storage pain point? Focus on the return route. If there’s something to move—another bin, a fallen boot, a shelf too crowded—no one resets as they go. Make the direct path to “put it back” totally clear, even if that means rearranging shelf heights, ditching a bulky basket, or swapping in a row of hooks. When the return is always obvious and nothing’s blocking the way, the odds of staying organized skyrocket—especially when life gets busy.

    Storage That Works Because You Actually Use It

    No mudroom holds perfection, and no storage solution stays pristine. What matters is steady, low-friction resets: you grab, you use, you return, and the space recovers—again and again. The right setup shrinks the steps, removes hesitation, and adapts to the real chaos of daily life. That’s the only kind of “order” that lasts, even as seasons and routines change.

    See practical storage options at ClosetWorks