Category: Lighting & Work Setup

  • How Proper Stairway Lighting and Support Enhance Daily Safety and Confidence

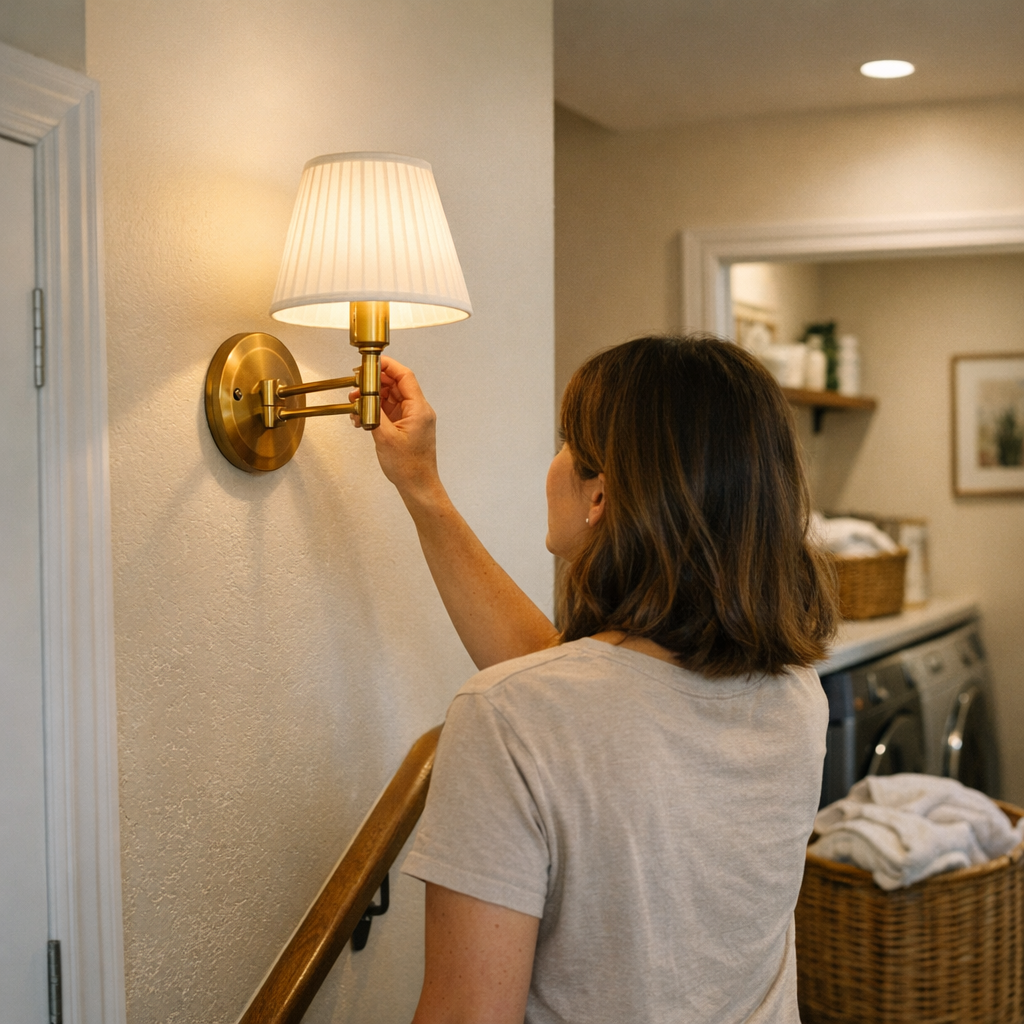
    When you pause at the top of the stairs, double-checking your footing, the problem isn’t bulb wattage. It’s a mismatch between lighting placement, support logic, and how you actually move through the space. Ceiling fixtures may look tidy overhead, but on lived-in stairways, they leave steps half-shadowed, bounce glare into your eyes, and let exposed cables or loose brackets turn familiar routines into moments of unease.

    Why “More Light” Doesn’t Fix Awkward, Hesitant Stairs

    At first, most stair layouts seem fine: a broad ceiling light gives the illusion of coverage. But as daylight fades or tasks pile up—carrying laundry, heads full of after-dinner plans—shadows start creeping in. The lower steps become a guessing game; half-lit treads steal confidence, and you catch yourself hesitating, glancing down, or reaching for the wall at landings. Every missed edge or uncertain corner isn’t just a small annoyance—it’s friction that builds, making simple movement less automatic and adding invisible strain to ordinary routines.

    These stalls and second-guesses are a built-in warning: your fixture and support aren’t tuned for how stairs really get used, especially at night or under pressure.

    The Ceiling Light Trap: Looks Orderly, Feels Patchy

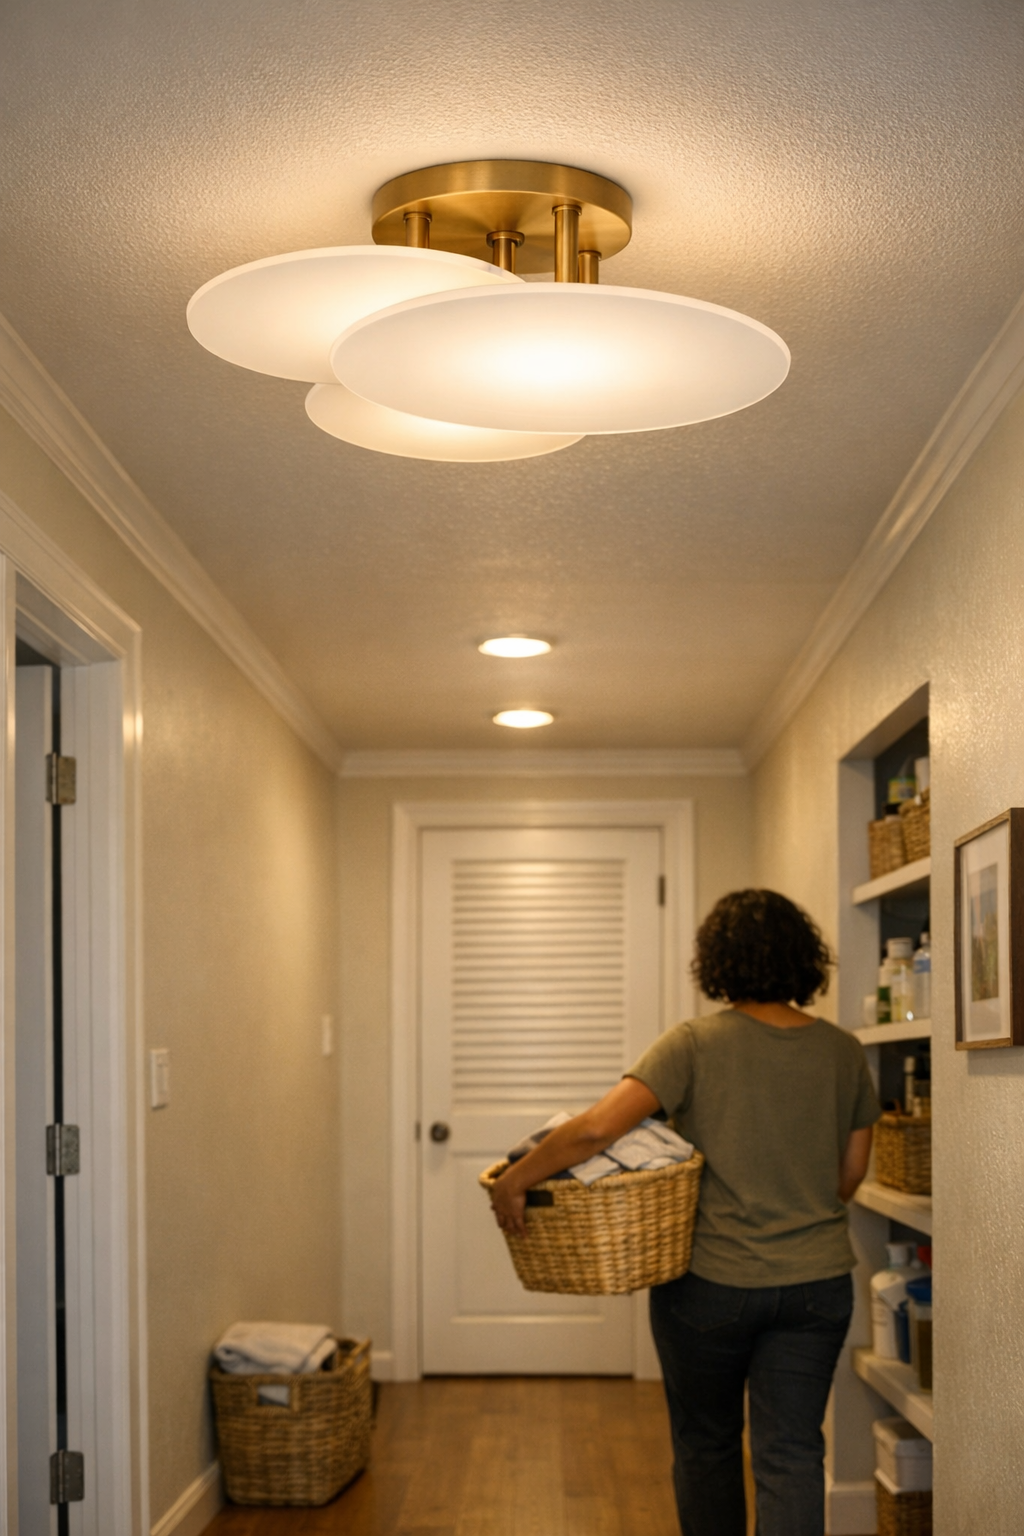
    Flush-mount ceiling fixtures might promise simplicity, but their weaknesses show up fast under regular use. Their broad, generic spread leaves critical edges dim—especially on twists, steep rises, or at entry/exit steps. Glare from shiny risers can blind you to where one tread ends and the next begins. Exposed cabling or awkward wire runs—maybe a “temporary” LED strip or retrofitted fixture—catch the eye for all the wrong reasons. Each dangling loop or makeshift mount is one more thing to snag a shoe, trip up a sleeve, or add visual mess right when you’re rushing or distracted.

    This isn’t a style flaw—it’s repeated routine disruption: glare burns, fuzzy step outlines, cables that pull attention, support points that complicate every climb or descent.

    Support and Position Change Everything

    The most effective stair lighting setups start with ruthless honesty: where do shadows, lost edges, or stray cables trip you up? Wall-level LEDs or step-focused fixtures, solidly bracketed and cable-disciplined, bring light right to the tread—making each step’s edge visible and cutting glare to the eyes. With cabling tucked inside trim or routed flush behind skirting, you move without thinking about what snags or shifts below the line of sight. Real clarity isn’t “brighter”—it’s predictable, unbroken edges underfoot and no visual noise at the periphery. That shift is startling the first time you tackle the stairs half-asleep or hands full—no more halting or overcompensating for hidden steps.

    Get the height, angle, or bracket wrong, and disjointed lighting returns: uncertain corners, jarring transitions at the landing, and a routine that still feels half-resolved. Support placement and cable discipline are what split setups that just photograph cleanly from those that actually remove friction every time you pass through.

    Everyday Scenarios Where Setup Fails (or Succeeds)

    • After-midnight water run: The ceiling bulb throws harsh shadows, and a loose cable at the landing turns a sleepy trip into a careful scan for cleared paths and secure footing.
    • Laundry-day climb: Arms full, you notice the patch between step lights—one dark edge forces a pause, and a barely-secured bracket catches on your jeans or forces you sideways.
    • Return home after dusk: Overhead glare flattens the stairs, and you find yourself freezing on the threshold just to make out where the drop begins, even though you walked this path a thousand times.

    Each missed cue or clumsy moment comes back to the same causes: inadequate support, careless positioning, and cables or hardware left to fight attention rather than disappear behind daily use.

    Making the Switch: It’s All Structure, Not Just Bulbs

    Replacing a broad ceiling light with four tightly-set, wall-mounted LEDs anchored by sturdy brackets gives each step its own clarity. No shadow gaps, no hunting for the tread, no flash of exposed wire to catch the eye or a shoe. The change isn’t just the light—it’s the cable run, discipline in support choice, and whether everything sits flush and vanishes into the background. When light is routed along the skirting or hidden in a trim channel, there’s no loose loop at the landing, no trip hazard or visual disruption, and the awkward, slow-motion stair-climb disappears. Movement shifts back to memory, not caution.

    The real win is absence: the vanished hesitation, the silence around cables, and the confidence that lets you trust your steps instead of thinking about where the light or wires fall next.

    When “Tidy” Isn’t Enough

    Not every cleaner-looking upgrade helps. A cable neatly out of view—if left loose or in the strike zone for bags or feet—still disrupts every trip. Brackets that look integrated but are positioned too high or low create their own recurring bumps or shadows. The true test isn’t how resolved the stairs look, but whether use after use, with hands full or eyes half-open, you forget the setup entirely. If you still notice the lighting as you move, something in the support or placement needs work.

    Common Mistakes and Quiet Fixes

    Bumping up brightness with a higher-wattage bulb—or swapping for a bolder fixture—often backfires, multiplying glare and washing out the visual cues that signal step depth. Downplaying cable routing or settling for “good enough” mounting breeds new issues: new places to snag, subtle but unpredictable shadows, or wobbly brackets that seem harmless until a nightly routine is interrupted. The best fixes are boringly practical: untangling cable runs, ratcheting brackets tight to the angle, and spacing lights so step edges never slip into darkness but don’t blind you along the way. This invisible work is what finally lets the hardware disappear and routine become automatic.

    Quick, Real Tips That Hold Up

    • Keep lighting tight to the action: Wall-mounted lights hugging the treads erase guesswork and keep cables managed and out of mind.
    • Force cable calm, not just order: Channel wires inside trim or route them behind skirting. Brackets hold everything flush—no play, no distractions, no contact between hardware and limbs in passing.
    • Stop chasing raw output: Brighter doesn’t mean better; too much light erases depth and hammers glare where you least want it. Even, focused coverage at the right height always beats blanket brightness.

    Let Real Use Dictate Your Lighting Choices

    When stair lighting is right, it goes unnoticed—you reach for nothing, spot every edge in stride, and never think about cords or where the fixture sits. The best setups solve for absent-minded use: when you’re loaded down or moving on autopilot, the setup quietly keeps hazards invisible and movement smooth. Forget “more light”—better placement, disciplined support, and invisible cable management trump extra LEDs or another stylish fixture for lasting ease. Only lighting setups that make themselves vanish stand up to the wear of real life and keep stairs safe, comfortable, and frictionless—no matter the late hour or how many hands you’ve got free.

    For practical lighting kits, mounting support, cable management, and all the real parts that make a difference, visit LightSupport.
  • Why Labeling Wires Transforms Indoor Lighting Maintenance Forever

    Indoor lighting rewires your routine—not just the room. In high-traffic areas like hallways, stair turns, and tight laundry work zones, a poorly labeled ceiling or wall fixture doesn’t just create a mess behind a cover plate. It leaves you guessing in every upgrade, repair, or late-night fix: which wire controls the stairway turn? Why is the mirror zone still shadowed, even after swapping a “brighter” vanity light? That quick bulb change or sconce replacement turns into a drawn-out process of trial and doubt—disrupting daily flow long after you’ve closed up the fixture.

    When “Looks Fine” Stops Working: Where Wire Confusion Begins

    Frustration surfaces at the worst moments: a hallway flush mount winks out just before guests arrive, and pulling it down reveals an unmarked jumble of wires. You try to upgrade laundry or under-cabinet lighting, but four indistinguishable leads appear—opacity, not clarity, hidden in the ceiling. What seemed handled years ago resurfaces:

    • Rush hour repair: The bathroom sconce is dead. You confront a blend of black and white wires with no hints—forced into slow deduction while time vanishes.
    • Mid-task frustration: Folding laundry in weak light, you pop open the fixture only to face a tangle that offers zero guidance. One wrong guess, and the whole room stays dim.
    • Stairway lighting mystery: Multi-switch setups mask “silent” wires. Changing a stair fixture unearths a surprise: the replacement throws shadow where safety used to be, undermining your confident routine at every step.

    The problem is invisible until it breaks your flow—forcing hesitation where you need clarity. “Looks fine” on install quickly becomes “why isn’t this working?” the next time real use exposes the missing logic.

    Labeling: The Small Habit That Pays Off Later (and Again… and Again)

    Wire labeling feels unnecessary during the first install—especially when colors look obvious, and new fixtures (like a utility-room flush mount or a stairway wall sconce) appear foolproof. In reality, even the most logical setup turns confusing once you can’t see behind the ceiling plate, especially years later or after a renovation shifts the wiring layout.

    Every high-use space develops its own quirks. A guest bathroom’s vent and light might share a hidden circuit, or a utility zone inherits mismatched splices. Skip labeling, and every revisit becomes a slow rediscovery, stalling basic fixes and injecting uncertainty into tasks you should finish in minutes.

    The difference is immediate for those who label wires at every open fixture—using durable tape and fading-proof ink before anything goes back in place:

    • Changing a mirror light isn’t a puzzle; it’s direct—no time wasted tracing invisible lines.
    • Under-cabinet task lighting upgrades finish fast, not in staggered sessions triple-checking connections by flashlight.
    • Stairway bulbs get replaced with confidence, never with a lingering doubt about which side controls the landing and which might leave a shadow at 2 a.m.

    Why Wire Mix-Ups Repeat—And Multiply

    The risk is cumulative: each guess at an unlabeled wire is a shortcut that compounds trouble. Color alone won’t save you—especially with past repairs, odd add-ons, or houses where codes changed mid-stream. Shared neutrals, recoded wires, and creative “fixes” lead to mismatched results, from stubborn shadows that won’t lift to flickering edges that make nighttime movement uncertain. It’s not only a technical problem—the visual toll persists for months: dim work surfaces, uneven mirror light, or a stair turn you cross with less certainty every time.

    When high-traffic corners—stairways, tight laundry tables, passageways—get locked into these compromises, routines shift: you fold clothes in shadow, move mirrors to chase clarity, or delay basic fixes out of wire confusion. Each missed match increases stress, not just maintenance.

    Labeling in Practice: Small Steps, Big Impact

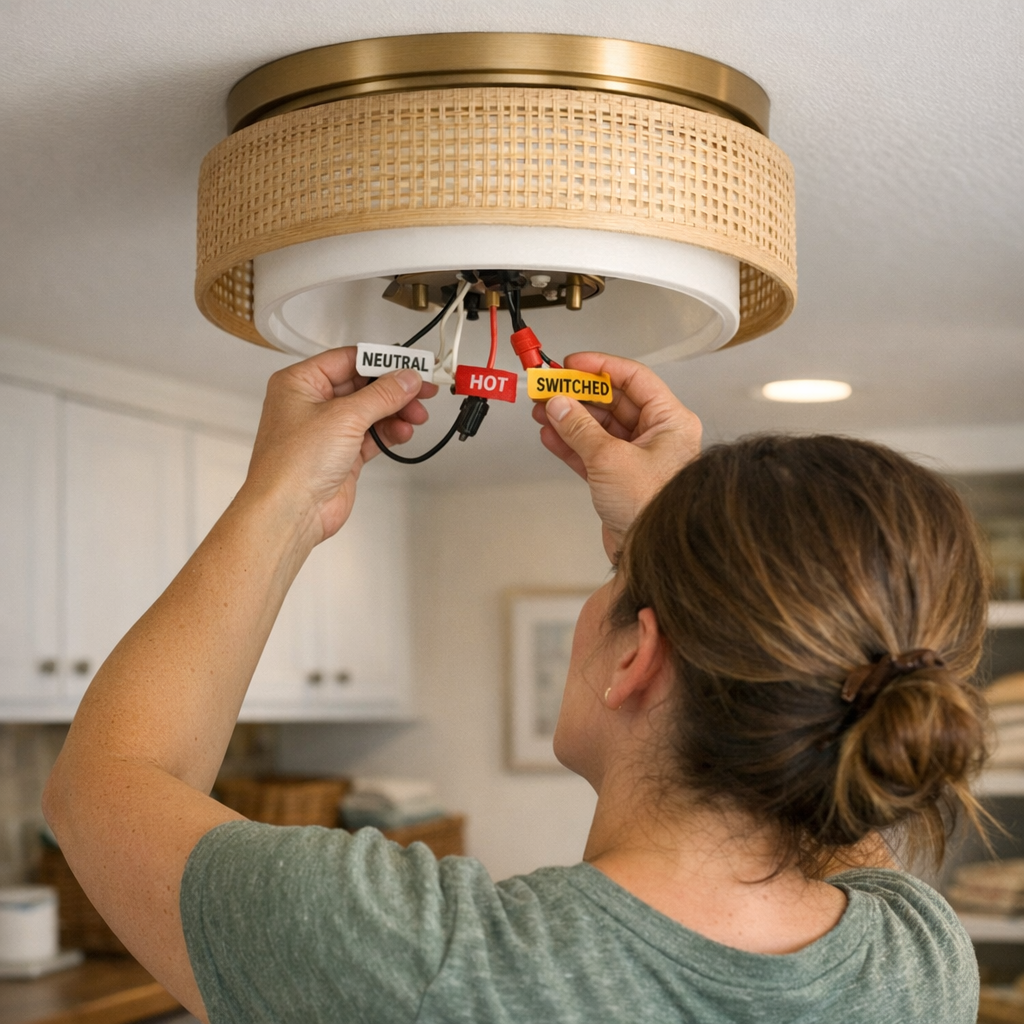
    One label at every connection flips the scenario: put the certainty at the wire, not in unreliable memory. Use robust tape with a permanent marker—write directly, “hot,” “neutral,” “switch leg,” or precise roles suited to the spot. Make tags easy to spot right by the connector so they survive both mounting and the next unscheduled repair.

    • Apply labels close to each join—don’t let them disappear behind plates or brackets where future-you won’t see them.
    • Mark clear abbreviations, fixture locations, or circuit hints if needed—short and unmistakable, not elaborate.
    • With fixtures upgraded often (like LED panels, bathroom sconces, stair lighting), check that labels remain visible—not just after install, but at every revisit, years later.

    This habit turns routine fixes—mirror swaps, under-cabinet improvements, bulb changes at the stair landing—into fast, confident tasks, not slow, risky evenings. Every zone that sees high use benefits: hesitation drops away, and maintenance fits into regular flow again.

    Lighting That’s Easier to Live With

    “Bright” isn’t the same as usable. Your home’s lighting lives and fails in everyday moves: missing labels mean shadows persist at the folding table, the hallway can’t be trusted for safe steps at night, or the bathroom mirror always needs adjustment for clarity. Real improvement comes not from dazzling lumens but from friction-free upkeep—every upgrade, replacement, or fix handled with certainty because the structure behind the fixture is clear.

    Labeling isn’t about technical perfection. It’s a basic step that keeps ordinary lighting frustrations from building up, especially in your most-used corners: laundry nooks, stair turns, hallways, baths. The payoff is visible—clarity and ease, right where routines depend on it.

    Find lighting made for real, repeatable use at LightHelper.

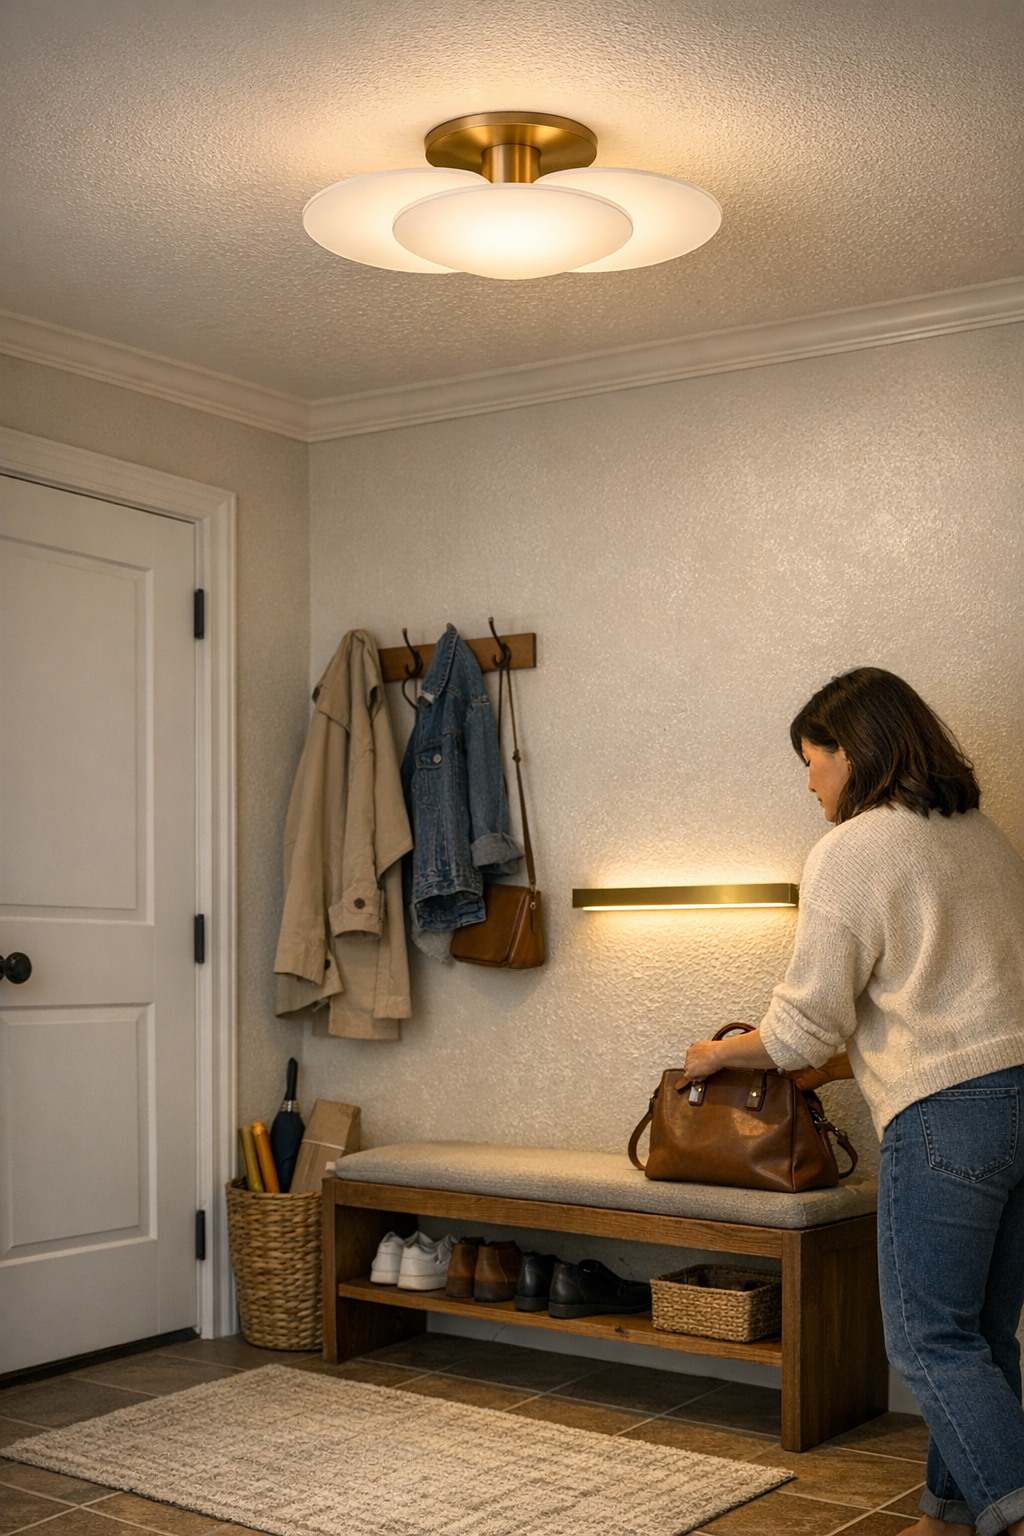
  • How Thoughtful Entryway Lighting Transforms Daily Home Routines

    Entryway lighting isn’t just a design choice—it’s a test you feel every single time your hand juggles keys, bags, or bootlaces as you pass the threshold. The friction isn’t stylish or subtle. It’s a hard shadow where you set down groceries, glare bouncing off tile into your line of sight, or a cable you step over twice daily that only looked tidy on install day. Entryways punish shortcuts: lights that miss the edges, exposed cords snaking along baseboards, hardware that blocks more than it reveals. These aren’t background annoyances; they accumulate, turning what seemed “done” into a minor obstacle each morning and night—and they keeping proving it, one routine at a time, until you finally notice which part breaks first.

    Where Entryway Lighting Fails: Friction You Live With Daily

    At first glance, the entry feels finished—light overhead, walls freshly painted, cords tucked (for now). But as habits set in, every shortcut exposes a flaw: the light that doesn’t reach where shoes actually land, the fixture set high but blinding at eye level, cords bent around every bench and shelf but never staying put. Movement exposes the failure points—muddy boots reroute around a glare zone, an armful of groceries bumps into a poorly placed sconce, shoe racks carve shadows that hide keys just when you’re in a hurry.

    • Bright in the wrong spot, dim where you need it. Overhead fixtures turn tile glossy at the door, but closet corners and bench zones stay murky and awkward to use.
    • Cables that refuse to stay hidden. What looked “neat” during setup becomes a tripping hazard or distraction, especially when pets, kids, or bags join the scene.
    • Low-profile fixtures that disrupt anyway. Sconces at the wrong height create blinding glare, or end up mostly blocked by coats, making entry less safe than before.

    Repeated Use Exposes the Weak Points

    The lure of minimal fixtures or simple installation almost always backfires in motion. That single ceiling light creates an artificial “bright spot” while everything that matters—coat racks, storage shelves, pet zones—sits in partial shadow. Invite someone over after dark, and both of you are crouched in the unlit edge, searching for dropped keys nowhere near the actual glow. It’s not just about appearance; after a week of real use, it’s the small hassles that grind: surface clutter, elbowing for space by the bench, tripping on plugs or lines meant to be temporary fixes but now permanent annoyances.

    • Trying to find a mask or hat by a shelf the lighting never reaches, you realize how much area is just “out of bounds” after sunset.
    • The overhead fixture flattens the room with glare but misses dust lines, dropped gloves, or the actual entry functions you use.
    • You detour around an exposed extension cord, or find a package in shadow you nearly squashed with the door.

    Shared Spaces, Shared Headaches

    When everyone’s routines overlap, poor lighting and messy cable management multiply frustration. The stroller parked by a backlit wall blocks what little visibility you have. Shoe racks or baskets shift shadows, and what was once a clear routine starts including surprise obstacle courses. The promise of a “hidden” cord or tidy wire vanishes after a week—revealing biting hazards for pets, tangle traps for kids, or another reason to crawl on cold tile just to reset a boot-dryer or misplaced adapter.

    Visible Solutions, Hidden Obstacles

    Swapping fixtures is tempting—flush-mount LEDs, slim sconces, and strip lighting promise more coverage. But without planning cable runs, mounting, and real usage paths, every upgrade risks introducing a new annoyance. Plug-in strips above a bench spill light—until the cord stretched across the trim defeats the point. A wall bracket promises tidiness, but a few inches too low and everyone is squinting or bumping their shoulder. The gap between “clean look” and “practical install” only closes when cables, mounting logic, and use habits match up in real time—not just in empty-room photos.

    Placement and path matter as much as style. Mount a fixture a palm’s length above reach, and suddenly the cables stay clear, and the glare lifts. Drop it close to arm’s height, and users pay for it every single pass-through.

    Why Cable Management Makes or Breaks the Setup

    Even premium fixtures are undermined by exposed or unruly cords. Good cable channels—painted to match trim, tight in corners, or designed for one-handed install—quietly solve problems you’d rather not notice twice. The difference turns up after just a few days: no more accidental tugs, no pet chewing, no “temporary” masking tape solutions, less distraction every time you open the door. Smart management isn’t about over-designing, but about preventing those persistent, avoidable friction points once people (and pets and furniture) actually use the entry the way they always do.

    Real Examples: How Everyday Fixes Shift the Experience

    Settling for “good enough” lights and cords lasts until the routine exposes real blind spots. Replacing a dated dome with a flush-mount LED finally pushed light into the storage and coat zones, ending the ritual of feeling your way across a dim bench each morning. A small, low-glare wall bracket above the shoe area killed the worst shadows, letting the floor stay visible—without blinding anyone pulling on boots.

    The biggest shift? Trapping the plug-in cord inside a paint-matched, snap-in channel: a tiny project that kept the floor clear and banished the cable loop you used to dodge. Suddenly, the switch was where you needed it, clutter stopped breeding in the corners, and the routine got back its rhythm—no more pet-level tangles or morning fumbles near the door.

    It’s rarely about sheer brightness. The change happens when lights and supports track with behavior—guiding, not fighting, your routines.

    Tips from Repeated Entryway Frustrations

    • Audit the space by routine, not by design. Mark where shadows hit when you grab shoes or toss a bag—this is where lighting and clutter problems reveal themselves.
    • Position wall fixtures above common reach—this keeps both glare and cables above pet, bag, or kid level, and out of traffic paths.
    • Install cable channels before you fill the room. Don’t trust “tuck behind furniture” methods—they’ll fail with the first furniture move or deep clean.
    • Test fixture placement using real objects: hang coats, leave bags by the entry, stage a package drop-off—then adjust height and angle so light follows actual movement, not just blank walls.

    Making Entryways Feel Ready, Not Just Finished

    True progress in entryway lighting and support shows up when what’s invisible stays that way: no cables waiting to trip, no glare zones you sidestep, no corners hiding clutter or hazards just out of view. It’s not about a staged “after” shot—it’s about proving, daily, that the mix of fixture, placement, and support hardware stands up to real movement and the friction of routines. Your entry isn’t done until the last workaround is gone and the space recedes into comfort, not complaint.

    If your entry still finds ways to interrupt your day, the problem likely isn’t the paint or the furniture—it’s a mismatch of light, hardware, and habit. Addressing those isn’t about a new style; it’s about finally building around the way the space is actually used. www.lightsupport.myshopify.com

  • How Hidden Power Boxes Transform Desk Cleaning and Workspace Efficiency

    Some desks look organized—cables looped tight, surfaces spotless, nothing obviously out of place—yet every routine still hits the same invisible wall. Wiping the desk means working around cords that snag, collect dust, and drag chargers and adapters back into sight. Brush crumbs toward the rear, and they settle in cable nests. One day it’s just minor clutter; by week’s end it’s a series of tiny slowdowns: a sleeve catching on a cable, an adapter shifting out, crumbs wedged behind cords. Fixes like cable clips or tucking wires behind monitors can make things look contained for one or two resets. But by midweek, the friction returns. The big, overlooked variable: when you hide power and cables in an under-desk box, does cleaning and swapping really get easier—or do you just trade one hassle for another the moment you need a device switched out?

    When a Clean Desk Isn’t Actually Easy to Clean

    A clear desktop is only half the story. Cables exposed anywhere—snaking behind the keyboard, crowding the desk edge, or trailing down toward the floor—magnetize dust and slow every cleaning cycle. What starts as a three-minute wipe turns into a full shuffle—lifting keyboards, shifting notepads, angling around tangled chargers. Power strips tucked to the underside or along the side give the illusion of order, but you’re still forced to reset your movement with every sweep. Workspace “tidy” too often means creating lines that look neat but leave constant obstacles for basic tasks like reaching for a notebook or clearing space for quick work beside the main monitor.

    Hidden cable boxes actually shift what you can do, not just how the desk looks. Anchoring cables in a slim under-desk container, tight to the rear edge but reachable, removes most of the drag from routine cleaning. Crumbs wipe off in one swipe. There’s no juggling adapters, no threading wipes between wires and the desk’s back edge. Surface clears, corners stop collecting debris, and the “reset” feels like a true return to zero—unless, of course, you’ve forced all your access requirements out of reach in pursuit of cleanliness.

    The Real Tradeoff: Clean Lines vs. Easy Swaps

    Hiding cables isn’t always a win. If your work is the same every day—one monitor, a laptop, a fixed lamp—anchoring everything out of sight mostly pays off. But if you swap in a different charger every afternoon, run alternating devices, or jump between ports mid-session, under-desk hiding turns quick plugs into multi-step interruptions. Now, grabbing a new cable means sliding under the desk, unhooking a box, and hoping you grasp the right cord by touch. It’s less friction during resets, but can be a hands-and-knees hassle if your workflow is in constant motion.

    Bundling vs. Concealing: Real Routine Differences

    Bundling cables with ties or channeling them in trays can look strategic—until a week’s worth of dust highlights every exposed seam. Every clean is slowed by minor obstacles, and the learning curve never really ends. Push everything into a hidden box and cleaning gets easier; cable clutter moves out of the way. But you sacrifice rapid access. When a charger dies, or a new device appears, what was a two-second swap can now drag into an awkward, contorted pause mid-project. The cost isn’t visible until that first day when your flow is broken by fumbling under the desk.

    Practical Scenes: How Cable Choice Shows Up in Real Work

    Rolling Back Your Chair—and Catching on Something Every Time

    You can organize everything within sight, but power strips or adapters that dangle or jut from under-desk organizers still catch feet and the chair base. Especially in setups with limited width or depth, every centimeter under the desktop impacts leg movement. One misplaced cable box eats knee room, forcing small posture shifts that only register after an hour—or when you realize you’re sitting farther from your screen than intended. Instead of a clear path, your legs navigate a low-level obstacle course every time you settle in or roll away.

    When Routine Device Swaps Become a Chore

    If your device list barely changes, hidden boxes fade into the background—until client work demands a tablet, phone, or second laptop. Every midweek change pulls you from flow: crawling underneath, opening the box, untangling cords by feel, hoping not to disconnect the wrong one. Quick device refreshes stall as the hidden organization becomes an extra step rather than a convenience. Where exactly you mount your cable box shifts this calculation—out of sight keeps the appearance tidy, but out of reach means slowdowns at the exact moment you need agility.

    Subtle Shifts That Change the Weekly Reset

    Location is everything. After multiple iterations, shifting my own cable box just forward of the rear desktop edge—leaving a 2–3cm overhang—redirected cables tightly down the wall and freed up the cleaning path. Result: dusty pockets where wire tangles used to collect disappeared, wiping the desk was no longer a dance around cords, and each end-of-day reset shrank from five minutes to just one. Pushed too far back, though, and every cable swap becomes a struggle—practically out of reach as soon as you’re seated. The sweet spot keeps the box visible enough to grab but invisible enough to keep the work surface clear and fast to reset.

    Small Details, Big Shifts in Comfort

    Set-and-forget under-desk cable management always risks tradeoffs. A bulkier box, an extra organizer rail, or drawer unit may help with cable mess but silently eats into foot clearance. Hours later, you realize your chair’s been off-center, or your knees squeeze around yet another “solution,” changing posture and energy in a way you only notice at the end of the day. You fix cables to declutter—but a poorly positioned storage accessory subtly adds new friction, rarely obvious during setup but persistent after a full week of work.

    Quick FAQ: The Moments That Matter

    How exactly do hidden power boxes make cleaning easier?
    They anchor mess out of reach, opening up full desk-surface wipes and speeding up debris removal. No cables to work around means the reset actually stays quick, instead of dragging into mini reorganizations every time you clean.

    Most common mistake with hidden power boxes?
    Mounting too far from reach, or squeezing them below drawer trays—forcing awkward, blind plug swaps when you need to adjust devices mid-session. Every port adjustment turns from a quick reach into a hunt under the desk.

    Does cable management really impact comfort?
    Absolutely. Bad placement eats legroom or blocks natural chair movement, causing posture shifts that sneak up hour by hour. What fixes mess visually can slowly take a toll physically—affecting how you settle at your desk or how drained you feel after a longer session.

    Design for Ready-Use, Not Just Looks

    Hiding cables inside a power box isn’t just about surface tidiness—it remaps how you reset the space, swap in new devices, or transition from notes to screens to chargers without hesitation. The win isn’t just cleaner photos; it’s a desk that can actually return to “ready” for work in seconds, not minutes or hours. A good setup makes fast cleaning and movement possible while keeping access possible for your real, repeated device habits. Ignore the balance, and your cable fix trades visual order for new friction. Get it right, and tidiness feels like a side effect of genuine usability.

    Explore the full WorkBasic collection

  • How a Non-Contact Tester Transforms Safety in Complex Lighting Jobs

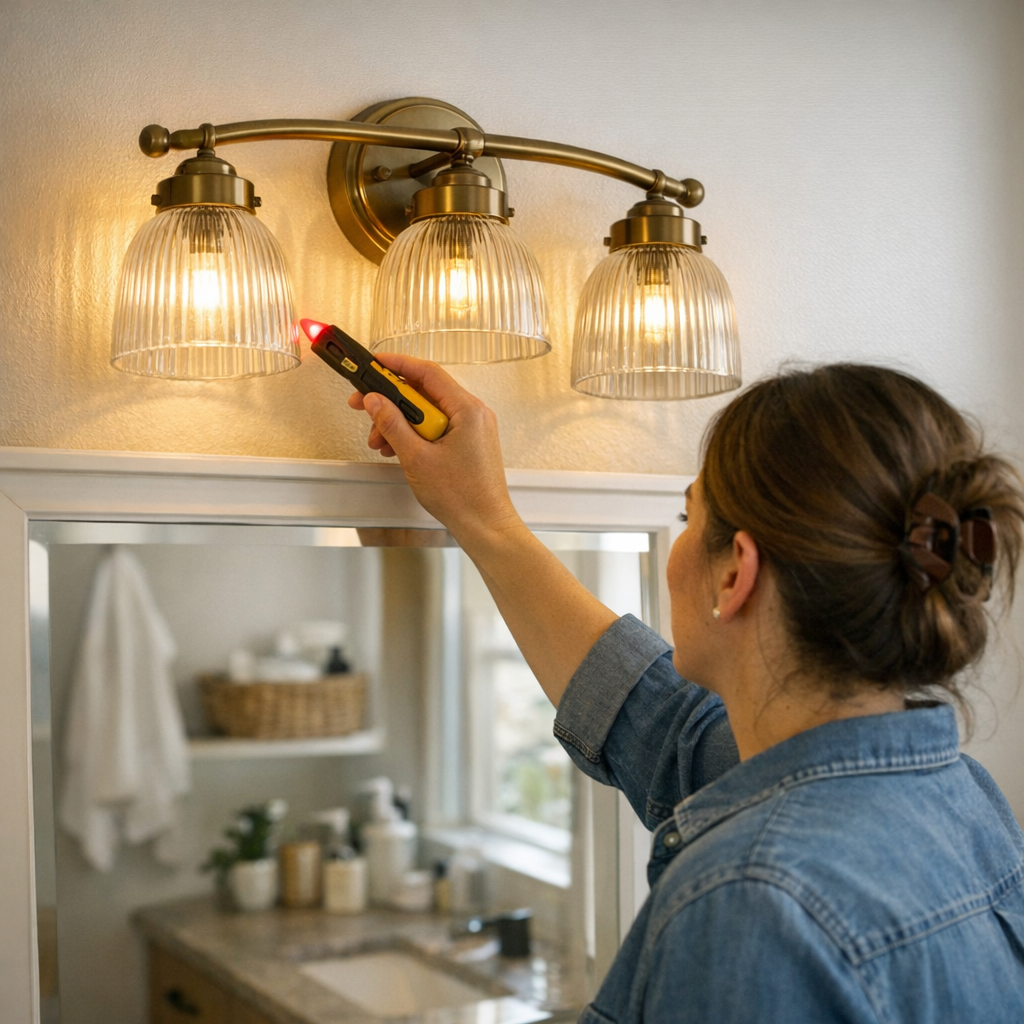
    The moment you flip the light switch and the room still feels uncertain, the problem is immediate—and common. In entryways, awkward stair turns, cramped laundry corners, or overbright bathrooms, safe movement collides with the limits of your indoor lighting. Flush mounts and sconces may fill the space with light, but the setup can still fail you right when it matters: hesitating at the top of the stairs, reaching blind behind a mirror, tracing wires through a laundry ceiling and guessing which fixture is really powered down. Here, lighting isn’t just about brightness—it’s about knowing for sure if it’s actually safe to reach, touch, or repair what’s overhead. Every time the fixture looks “off” but the wiring tells another story, risk hides behind routine, and what seemed like just another lighting job becomes a quiet walk through uncertainty.

    Real Lighting Friction: When Safe Access Isn’t Obvious

    Even in well-lit rooms, weak points reveal themselves as soon as you try to swap, clean, or fix a fixture. That flush mount in the laundry seems bright—until you find yourself up on a stool fighting reflected glare and guessing which of three cables is really dead at the switch. Stair sconces set up an even trickier problem: two wall switches, odd wiring colors, and an uncomfortable moment spent wondering if both the landing and hall circuits are truly off. In tight bathrooms, a “simple” vanity upgrade becomes a tangle of shadow, condensation, and hidden feeder lines—where looks deceive and a supposedly dead light stays quietly live. These are the places most likely to trip you up, especially when standard brightness and switch logic mask the gaps.

    When spaces like these see repeated use, the routines you trust—flipping the breaker, testing the switch, relying on your memory—break down. That laundry gets awkward when another switch somewhere else controls a feed you didn’t expect. Visual cues fail exactly where you want clear, reliable knowledge of what’s live and safe.

    The Non-Contact Voltage Tester: Cutting Through Guesswork

    A non-contact voltage tester turns that moment of hesitation—hand hovering, uncertain—into a clear yes-or-no. Especially where lighting logic is a mess: multi-way stair switches, overlapping bathroom circuits, shared feeds across laundry and hall. Instead of trusting that the switch position means safety, the tester gives you an answer the wiring can’t fake. The difference isn’t just peace of mind—it’s concrete: no gamble, no burning time dragging out a spare bulb or toggling random switches, no risking a live touch because you’re sure you killed the right breaker. One quick check, and you know for sure before you move.

    But the simple existence of a tester isn’t enough. The real change is in making it always accessible: clipped to your shirt, on your tool belt, or beside your stepladder—never buried under spackle knives or lost in a junk drawer. The urge to skip this step comes fast when you’re tired or hurrying. Friction wins any time safety gear isn’t instantly there, and in the pressure of real work, forgetting the tester is when mistakes multiply.

    Everyday Trouble Spots Where This Matters

    • At a stair setback: Ceiling and wall lights look “off,” but a third switch at the base might power a stray circuit—one fast test calms the nerves, especially in shadowed corners where the visual logic breaks down.
    • Reaching behind a bathroom mirror: Damp patches and erratic shadows unsettle your routine—the “off” illusion means nothing if the tester buzzes behind the vanity.
    • Under an overhead cabinet run: Clean surfaces, then a sudden dark band cast by undercabinet lighting—a touch test is only safe if the wiring doesn’t stay mysteriously hot, even when the room feels silent.

    Where Standard Lighting Habits Fail to Deliver Safety

    Ceiling fixtures, wall sconces, and even new LED flush mounts rarely account for bad wiring, extra feeds, or half-labeled breaker boxes. A missed side-feed in the hallway, or an old ceiling junction in the bathroom, quietly wreck the assumption that “dark” equals “safe.” That’s why jobs that feel routine—replacing a warm-glow bulb or untangling a cover plate—still force you to slow down, fumble with your phone flashlight, and wonder if you’re missing something. The risk compounds as you move faster: glare from a semi-flush, shadow across the edge of a wall light, bright but poorly directed light that distracts from real wiring paths. Every shortcut around safety is a chance for the wiring under ‘finished’ ceilings to fight back.

    The Added Risk in Damp and Utility Spaces

    In bathrooms, laundry nooks, and entry alcoves—where flush ceiling lights are closest and air stays humid—access is tight and footing less certain. Condensation beads on covers, and standing on a stool in a haze of steam, small wiring flaws blend into the background. Shared circuits, unexpected splices, and “just-in-case” feed runs amplify the confusion in ways bright bulbs can’t resolve. Flipping breakers becomes a guessing game, especially when a single circuit feeds both lights and a hidden outlet. Every attempt at “just trusting it” pulls you closer to a real mistake.

    Making the Safety Step Unmissable

    The game changes not when you buy a tester, but when you make it part of your automatic reach: clipped inside your tool apron, living next to your driver bit, or always on the tray with your stepladder. The habit doesn’t just save time—it rewires the sequence. Before you loosen a sconce, pop a mirror, or twist a flush-mount, the quick check becomes reflex. No guessing, no charting out which breaker probably matches the kitchen. One touch, confirm, move on. Over time, this shift becomes as normal as grabbing your screwdriver—removing doubt and freeing you to work faster and safer every time you face unpredictable home wiring.

    Frequently Noticed Questions in Real Use

    Can looks or switch position ever guarantee the wire is safe?

    Not reliably. Fixtures may look dark but still carry current, especially with multi-way switches and overlapping feeds. Only direct testing proves a wire is dead—never let visual cues replace a real check.

    What makes damp-rated zones uniquely risky?

    Moisture blurs the boundaries. Humidity increases both wiring risk and access difficulty, turning small mistakes or lazy checks into real hazards—condensation plus poor footing means you get only one chance to check right.

    Do all testers work equally on LEDs, dimmers, and tight fixture spaces?

    Most quality testers can detect standard voltage whether you’re working around dimmable LEDs, compact ceiling panels, or crowded wall boxes. In dense setups, slow down: a thorough pass with the tester is worth a few extra seconds for certainty.

    Better Lighting Habits Start With One Small Shift

    Real indoor-lighting safety isn’t about endlessly upgrading fixtures or maxing out wattage—it’s about repeated routines shaped by clear, fast checks. With a non-contact voltage tester within actual reach, even the trickiest setups—mirror lighting, stair turns, narrow laundry runs, entryway semi-flush—become less a guessing game and more a series of controlled, predictable steps. Instead of pausing for uncertainty or assuming the wiring follows the look of the switch, you move with confidence in spaces that may look bright but still behave unpredictably. That’s the quiet line between rooms that just look good and ones you can trust, week after week for every real-world job.

    http://www.lighthelper.myshopify.com

  • How Thoughtful Entryway Lighting Enhances Daily Routines and Safety

    The illusion of a finished entryway lighting setup breaks fast—usually within the first week of real use. You spot the gaps not during installation, but in the small, everyday frictions: reaching for keys in a half-shadowed niche, stumbling over a cable hidden by habit but exposed in practice, or wincing as ceiling glare floods your eyes but leaves the bench awkwardly shaded. What looked tidy at the start—a single overhead fixture, a streamlined lamp with minimal cords—starts tripping up daily routines long before it feels settled. The difference between what looks resolved and what actually works becomes sharpest in the rush of real life: missed edges, awkward shadows, and support hardware that feels more visible than helpful.

    The Slow Unraveling of Overhead-Only Lighting

    Overhead entryway lights can look crisp on day one, but real pace exposes their blind spots. That flush-mount fixture with a frosted diffuser? It photographs well but falls short by the end of a busy week. Glare ricochets off polished floors, edges at the bench vanish into shadow, and grabbing something from a low hook means stooping into murkier corners instead of acting in clear light. You notice, often when you’re in a hurry, where the “finished” look quietly fails the routine.

    This isn’t about atmosphere—it’s daily inefficiency. A ceiling light throws cold lines on the floor at dawn, while corners and action zones stay dim. Small items—keys tucked along the wall, dropped mail, shoes under a bench—regularly fade from sight. Every shortcut made during install becomes a repeated obstacle: forced searching, repeated squinting, stumbling over what should already be visible and accessible. Friction compounds: missed objects, fumbled routines, and entryways that never feel as resolved as they look.

    Cable Runs and Accessories: When Support Becomes a New Issue

    Quick plug-in lamps or peel-and-stick LEDs tempt with instant brightness, but their downsides pile up quickly. The surface stays tidy only until a cable creeps into a walkway or a bracket, once stable, grabs a passing sleeve or catches underfoot. Every exposed or lazily routed cord—especially without solid brackets or anchors—adds a new drop point, snag hazard, or visual distraction right where traffic is thickest and focus is lowest.

    Most entryways multitask—storage, drop zones, last-minute dressing—so hardware that looked invisible during setup soon becomes an obstacle course. In less than a week, most routines get slowed by their own solution: tangles under benches, rerouted cords inching loose, support points that seemed discreet but are now the visual focus of a usually ignored zone. The supposed quick-fix winds up giving you new clutter and a different frustration.

    Real-World Routine: What Slows Down Every Day

    Think about the pace on a Monday morning: one person grabs a coat from a wall rack, another digs for a bag near the bench, a third desperately checks under furniture for headphones. Bad lighting throws glare onto the seat and leaves hooks in shadow, forcing mini scavenger hunts, abrupt stoops, and defensive sidestepping. Even a setup that looked systematized on move-in day can undercut itself if a trailing cord or awkwardly placed bracket interrupts the fast “grab, go, drop” choreography that busy entries demand.

    Why Action Zones Demand Thoughtful Light and Cable Management

    The win isn’t just about overall brightness—it’s about placing usable light right where action repeats, and removing mess and friction, not just moving it. Wall-mounted sconces and slim LED strips, set at hand or shelf height (generally within 70–85cm from the floor) do what no ceiling fixture can: they deliver clear, shadow-free light at the exact points where you grab, sort, stash, or leave objects behind.

    It’s the difference you see in fewer problems: you reach for something on the shelf and your hand lands on it cleanly, without feeling around. Instead of glancing down to sidestep a tangled extension cord—or re-securing it for the third time—you barely register the bracketed cable tucked behind a coat rack. A routine proves its improvement: edges stay illuminated, corners don’t hide daily debris, and you stop tripping over your own fixes—both literally and visually.

    Bracket Placement: Small Moves, Lasting Improvement

    Entryway reliability often comes down to unglamorous but crucial bracket placement. When mounting points are anchored just behind shelves, under benches, or along wall supports, hardware disappears into the background—functionally and visually. This stops the slow migration of cables across traffic lines, the drift of mounting tape under temperature swings, and the sag of light bars that seemed level but end up tilted after a few weeks of real use. If hardware or cable feels sturdy at first but gets brushed, shifted, or knocked loose during the regular grab-and-go, you’re watching the actual limits of the setup play out.

    Small Practical Tips for Routine-Proof Entryway Lighting

    • Mount wall or shelf lights at hand level, not just for looks: Delivering light precisely to the active “grab zone” keeps you from repeatedly groping or squinting at bag, shoes, or keys in a dim stretch.
    • Use adhesive cable guides or robust brackets for every cable run: Tuck cords behind, along, or under furniture to eliminate both visual clutter and trip points—no unsightly tangles or accidental jerk-outs after the first week.
    • Leave exposed bulbs for elsewhere—use diffusion at entry points: Frosted or shrouded fixtures reduce harsh glare and stop the jarring “eye-flash” that stains first and last impressions when routines are under time pressure.

    The Real Test: Lasting Clarity Versus First-Impression “Clean”

    Setups that last don’t fight for your attention—they quietly support routine, staying in the background after months of use. What marks a routine-proof entry isn’t a perfect first look but frictionless function: grabbing keys, kicking off shoes, sorting pockets, all without side steps, blind spots, or cable-kicking detours. When lighting support is tuned—cables routed where you’ll never look, mounts chosen for both hold and invisibility, light targeted for the hand zone—the space feels settled, not staged.

    Everyday use is the only real stress test. Weak setups—those that leave glare trails, hide the bench edge in shadow, or let cables creep back into traffic—fail quietly but repeatedly. The right setup isn’t what impresses on day one, but what you simply stop noticing after the hundredth exit or frantic search. When entry lighting just “works,” it softens the entire morning scramble. For spaces where routines and traffic never let up, clarity and stable support are worth more than showroom polish every time.

    Find practical entryway lighting and cable support solutions at LightSupport.

  • How Strategic Power Strip Placement Transforms Your Workspace Flow

    End-of-day desk check: the surface looks organized, even neat. Papers stacked, keyboard shunted aside, cables routed with care. Yet there’s that lingering sense—you still have to reach, shuffle, untangle, shift. The real culprit isn’t always the obvious clutter but the power strip, half-hidden, never fully out of the way. Even with everything “put away,” you keep dragging cables across the desk, bumping chargers, rerouting plugs. Hiding the power strip deeply can backfire: you escape visual mess, but with every laptop change or phone recharge, you’re ducking under the desk, fishing behind drawers, breaking workflow for the simplest reset. The work surface may look under control, but real movement tells a different story.

    When “organized” doesn’t mean “friction-free”

    The difference between a desk that looks clear and a desk that actually supports work shows up fast—especially if you switch devices or tasks throughout the day. You sweep the top, but that power strip and its cables creep back into reach; each cycle brings new little interruptions. Switch from a keyboard to a notebook, and the cord tugs at your wrist. Reach for your phone, and a blocky charger slides into the way. After only a couple rounds, you spend more time adjusting your path than focusing on the task. A tidy desk doesn’t always mean a frictionless one: true usability emerges only in repeated, shifting use.

    The problem is practical, not cosmetic. Every time you knock a plug with your elbow or graze a cable while sliding a notebook, that small pause accumulates. These unnoticed hassles splinter your focus and add up over a workweek. What looks ordered in the morning feels cramped and uncooperative once you’re two hours and three device swaps deep. The real test isn’t how the surface appears but whether every routine movement—reaching, plugging in, grabbing a notebook—can happen without resistance.

    The trap of hiding the power strip—too well

    Shoving the power strip out of sight—behind, below, or beneath stacked drawers—feels like the obvious fix. Suddenly your desk appears pure: no cords, no chunky blocks. Mouse glides uninterrupted, phone and tablet fit where you want them. But this aesthetic win can quickly sabotage practical use.

    Midday, you have to switch out a laptop, plug in a drawing tablet, or reconnect a monitor. If the strip is clipped to the desk’s far rear—or buried behind a mobile drawer—you’re ducking under, stretching cables to their limit. A quick device swap turns into a midair wrestle, cables knotting below, charger bricks dangling just above your knees. After a few rounds, setup drifts back toward disorder: cables looped onto the desktop, chargers left on top for speed. The repeated effort to “keep it clean” winds up slower and less workable. The very hiding place designed to streamline ends up introducing new obstacles with every change in routine.

    How placement changes your everyday motion

    Reach defines workflow. Find the right spot and your hand simply lands where it needs to—a plug swap happens almost blind, no interruption. Place the strip too distant, and you crouch and fumble just to attach a charger; too close, and the surface quickly crowds again. Overtight cable management promises tidiness but creates cable tension, tugging out power blocks or snaring your notebook’s edge with every move.

    The most functional setups put the power strip just under the leading edge—right or left, depending on which hand does the work. The path for each charger runs straight down, short and predictable, preventing droop or tangle. No need to pull out the chair, crawl under, or shake cabinets loose. The desktop is left clear for note-taking, sudden sketching, or spreading out reference material without charger bricks breaking stride. Unplugging a device or moving a monitor arm mid-session becomes as simple as reaching under the desk, not as disruptive as emptying a shelf or moving storage bins.

    Scenes from real-world use

    – Lifting a notebook beside your keyboard and not snagging a cord across your forearm.

    – Swapping in a second monitor or device mid-task—no full-body reach or blind fishing for plugs.

    – Plugging in a charger by touch, not sight, returning it to the same reliable spot every time.

    – Clearing the desk for a quick brainstorm, knowing you can reset to work mode with no cable shuffle.

    Common pitfalls—and what fixes them

    The classic mistake: hiding power strips so thoroughly that normal work becomes a physical puzzle. When the strip is shoved to the far rear or crammed under a deep drawer unit, every reset slows down. Sore wrists from blind fumbling, dropped adapters knocked behind storage bins, and cables that climb back onto the surface after just a day or two—these are clear warnings that the visual “fix” doesn’t hold up to repeated use.

    The shift comes from thinking of the power strip as an anchor, not clutter. Mount it right where your working hand naturally drops: under the front edge, or slightly to the dominant side. Offer every cable a direct, few-inch path, and keep only enough slack to move the devices you actually use. A well-placed power strip makes swapping out blocks or chargers possible by touch, without seeing—or searching for—anything. Desk stays truly clear, and resets are as automatic as returning a pen to its holder. This is when order and usability begin to align for more than a single clean-up cycle.

    Tuning the setup for how you actually use your desk

    No workstation setup is static—it’s an ongoing balance between appearance, reach, and the real cycles of your daily routine. Hiding clutter without losing access is the difference between a desk that looks good for photos and one that adapts to switching tasks, regular note-taking, device rotating, and the late-day shuffle. You’ll recognize the ideal power strip placement when it vanishes from thought: nothing blocks your reach, no sudden pausing to stand or fumble, no creeping mess from cables forced to run too far. Instead of fighting a setup with every cycle, you simply move, plug, or reset.

    Quick Q&A from real setups

    Where should you mount your power strip? Directly under the front or side edge of your work surface, on the side you naturally reach to most, and within easy seat-level reach.

    Does hiding cables always make things easier? No. If access means crouching, pulling boxes, or feeding overly long cables, tidiness fades and routine friction returns fast.

    What are the first signs of poor placement? Hand strain, awkward or slow device resets, cables drifting onto the desk again, and a clean look that only lasts until the second work cycle.

    What the calmer desk actually feels like

    When both access and invisibility are balanced, daily work gets quieter—no cable shadows in your field of view, no brick-sized blocks drifting across the surface, no device collapse mid-cycle. The change isn’t dramatic, but unmistakable: smooth, unbroken motion and steady focus. If the familiar drag, crawling, or shifting returns, it’s a sign to revisit placement, not to surrender to surface clutter or start hiding everything all over again.

    Explore the full WorkBasic collection

  • Why Proper Breaker Zoning Is Essential for Reliable Indoor Lighting

    The real failure in most indoor lighting upgrades isn’t the fixture—it’s what happens when a single breaker shorts and half your daily routes vanish into darkness. You finally install a flush mount in the hallway or a wall sconce by the bathroom mirror. For a few days, the space looks fixed: no more glare bouncing off tiles, no more shadow swallowing the counter. Then you’re faced with a dead switch late at night, laundry pile in hand, and realize the laundry, stair, and main hall all went dark at once—not because of a failing bulb, but from the hidden trap of overloaded or badly zoned circuits. The surface looks finished; the reality is the routines are still held hostage by a single slip at the breaker panel. For indoor lighting that actually works, electrical planning—how you split, group, or isolate your lighting zones—makes or breaks the experience after install day.

    When Circuit Decisions Turn Into Daily Disruptions

    It’s easy to think a room is “done” the moment a new ceiling light or wall fixture clicks on. But true test comes during normal life: the moment a breaker snaps from an unnoticed overload, or a midnight hallway trip ends in a stumble because one switch darkened multiple critical spaces. The shadows are tamed on the first day, but a single circuit mistake brings disruption again, this time as a blackout right where movement and focus matter most.

    It’s not some rare fluke: you’re inching toward the cellar stairs at dusk, laundry basket tight in your arms, hit the stairwell switch—and nothing. Not just a bulb out, but no light for steps, no visibility at the landing, no way to check the next tread except by glow from a distant room. The wiring isn’t to blame—the breaker took down all nearby zones at once. Instead of losing a single light, your whole evening flows into frustration. That hesitation at every stair, the way you lean into the dark by habit—these are daily costs of a breaker plan built for convenience, not use.

    Why Breaker Planning Matters More Than Fixture Choice

    In most setups, the breaker box is “set and forget”—until darkness underlines every mislabel and grouping error. Dependable indoor lighting isn’t just in hardware choices; it’s how you divide and defend your zones electrically. Breakers—not bulbs—are the thin line between a space that works and one that erupts in chain-reaction failures. Stack too many fixtures—especially those in distinct rooms—on one breaker, and every small error ripples outward: a kitchen task light goes out when the laundry flips, a stair becomes invisible if a bathroom GFCI trips, or one overload means scrambling room to room with a flashlight, tripping breakers just to finish a routine.

    It’s common to pair a bathroom and a nearby utility on a single breaker for “simplicity.” All’s well until heat, moisture, or an extra appliance triggers an outage. Now, two unrelated zones vanish. This doesn’t just inconvenience—it reshapes habits, pushing you to work “around” failed lighting rather than trusting your setup to keep pace with your routines.

    Repeated Friction Points: Real Use, Real Annoyance

    These are not isolated mishaps. They’re predictable, repeat interruptions: missing the mirror’s edge when all vanity lights go out together; pausing halfway up a stair because shadow swallows the landing; feeling a countertop fade as the last under-cabinet light shares a breaker with a misbehaving corner. The weak points aren’t just visible—they’re built into every routine where overloaded breakers create flickering, unreliable transitions.

    Close Calls and Workarounds: Why Good Enough Isn’t Enough

    Your new fixture works the first week, but it’s the next month when trouble appears. One breaker trip, and an entire run of hall or stair lights vanishes, leaving the movement path fractured—a clear, repeated risk at bad moments: an early-morning search for keys, a late-night trip with arms full, a scramble for the breaker box when you’d rather not move at all. What could be a minor maintenance hiccup becomes a recurring safety problem. A laundry zone and stair each assigned their own breaker—carefully mapped—means that even when a bulb shorts at 2 a.m., only one small area goes dark. The rest of your path stays lit. That’s the everyday impact of a breakered setup designed with real routines, not just diagrams, in mind.

    “It Looks Bright—So Why Isn’t It Reliable?”

    The big visual fix—modern flush mount floods the ceiling, hall glows, new sconces line the wall—can hide a brittle, behind-the-wall flaw: all those upgrades run through a single, overburdened switch. Any trip, overload, or short acts as a domino. The result: a bright room that fails “blackout” tests when it actually matters. Every circuit reset is a hunt across darkened rooms. Every missed trip becomes a hazard that isn’t obvious until normal movement is interrupted not just once, but over and over.

    Practical Signals That Breaker Zoning Needs Work

    How do you know if your breaker logic is sabotaging your routines? Ask yourself—and check—these:

    • Flip each breaker off. Where does daylight fail? A whole stair, utility area, or mirror losing light from one switch is a danger sign.
    • If turning off a breaker floors both hallway and bathroom, or resets ripple from laundry to kitchen, zoning boundaries are ignored.
    • If a bathroom trip leaves you feeling your way along the kitchen counter, or a hallway fix shuts off mirror lighting, your plan is making routines riskier, not safer.

    The short rule: if darkness stops your normal route, your zoning betrayed you. More often, the pattern repeats until you finally bother to map—or fix—it.

    Addressing High-Frustration Zones: Laundry, Bath, and Stairs

    Some spaces punish sloppy breaker plans more than others. Bathrooms and laundry corners aren’t just about brightness—they weather humidity, heavy traffic, and distracted hands. One shared breaker can wipe out light—often after moisture or a heavy plug sets off a nuisance trip. With stairs and landings, one blackout can mean missed steps or a halted climb. Poor zoning here multiplies cost: every reset becomes uncertain, every outing relies on backup light, caution, or simple luck that the wrong fixture hasn’t failed on the same overloaded circuit.

    Real-World Tip: Start With a Label, Not With a Wrench

    The real fix starts at the breaker. Don’t upgrade another bulb or swap a fixture until you’ve mapped and tested each zone. Grab a second person, flip circuits one by one, and walk every path—see which rooms black out together. Label what you learn. Make sure no important area gets paired by accident. Ten minutes spent mapping zones can erase years of frustration—and makes every future lighting upgrade instantly better in practice.

    Everyday Lighting Isn’t Just About Brightness

    Indoor lighting that works after install day is about consistent, predictable function in real rooms. Flush mounts, sconces, under-cabinet strips, bathroom lights—they mean nothing if a single trip disables whole corridors or blocks a mirror exactly when visibility is crucial. A setup only “looks” upgraded until you live with it through a few failed evenings; the true upgrade is when you stop noticing what might go dark. If routines never stutter, stairs and counters stay visible, and breaker resets are minor and contained, your system is actually helping you.

    Before your next lighting change—especially if you’re tired of moving cautiously, stumbling at turns, or resetting panels by flashlight—start with the breaker, not the fixture. Reliable lighting comes from smarter, better-divided, clearly marked zones—not simply more wattage or trendier fixtures.

    Shop LightHelper for practical indoor lighting solutions

  • How Thoughtful Corridor Lighting Transforms Long Spaces Into Seamless Paths

    Corridor lighting rarely fails the day you put it in; it fails every week after, whenever daily movement exposes the cracks the install hid. The moment a cable sags in your sightline, or you find yourself squinting past glare just to carry laundry through a shallow stretch, it’s clear: a corridor that looks “done” can still act unfinished. One misplaced bracket or a too-neat line of fixtures can turn a hallway into a slow obstacle course—hesitating at the alcove, shifting your footing near an unlit edge, or hunting for a switch when your hands are full. These small breakdowns add friction to a space you cross ten times a day, making the difference between a corridor you trust and one you brace for.

    When “Tidy” Lighting Fails Real Routines

    Walk into any newly lit corridor and at first glance, it seems resolved—a perfect run of slim ceiling lights, matched sconces, cables aligned and flush. That order collapses once real use begins: arms loaded, night trips with awkward reach, the split-second need to see a threshold clearly. Suddenly, flaws you never noticed become routine detours:

    • Shadowy gaps where a ceiling light falls short of the next doorway—you hesitate without meaning to
    • Polished floor glare bouncing off the first step, just where you turn toward the entry
    • A pocket of darkness beside the closet, never fully caught by any beam, making you fumble every single time
    • Cables that sag just enough to grab your attention—or your shoulder—before the space itself even registers

    The trouble rarely kicks in while you’re standing still. It finds you in all those small, moving moments: stepping between rooms, guiding a visitor, or just following the same path each night only to run into the same weak spots.

    Why Even Symmetrical Setups Let You Down

    Corridors often get installed by the rule: panels spaced even, brackets centered, symmetry enforced. Yet symmetry means nothing if it puts the gap right where traffic flows—doorway, closet, bend. The lighting looks organized from a distance, but as you walk, it splits reality: the “perfect” grid maps directly onto awkward seams. Brackets that disappear at first start to crowd your line of sight, or leave enough slack for cables to dip into reach. Glare isn’t always a bright spot on a wall—it can be a shifting distortion over tiles that breaks the space up, even though the fixtures themselves look “correct.”

    Invisible Until You’re Moving

    Lighting issues in a corridor almost never announce themselves at first. They emerge in the flow:

    • Slowing instinctively by the supply closet because the shelf and switch are too dim
    • Trying to shift a bulky box, only to pause at a dark line the fixture never covers
    • Adjusting a cable for the fourth time because a bracket wasn’t placed where people really pass by

    What appeared settled on day one becomes a source of delay and low-level annoyance—every single trip down the hall.

    The Cost of Weak Transitions

    The real trouble in corridor lighting starts at the edges—the handoff points between rooms, corners, and doorways. Near the kitchen junction or laundry turn, you notice yourself hesitating. Missing overlap around alcoves, closets, or even tight switch zones forces daily “stop-and-check” moments. Instead of a clear run, you’re squinting for illumination or waiting for a spill of light from another room. This isn’t headline drama—it’s that steady, background stress that repeats a dozen times a day, for every person using the hall.

    Setup Decisions That Actually Make a Difference

    Tweaking support and placement—rather than piling on more light—is the shift that actually dissolves friction. The difference comes from:

    • Overlapping beams: Positioning fixtures so their coverage meets and slightly overlaps at critical points—by doors, switches, corners—blocks shadow seams and makes thresholds instantly visible.
    • Support at high-traffic lines: Shifting a bracket off the “visual center” so it actually anchors a fixture over the corridor’s real walk path, ending sag and blank spots where people move most.
    • Cable and mounting discipline: Swapping out a loose surface mount for a flush cable holder or bracket ensures cords stay out of view and don’t drift into the area you reach and move through every day.

    Real fixes might mean taking down one continuous light bar and installing two overlapping ceiling panels to target the midpoint—or moving a wall fixture to finally throw coverage across each closet door. It’s rarely about adding volume; it’s about correcting for where the original install ignored human patterns.

    One Small Adjustment, Big Day-to-Day Relief

    After replacing a single run with overlapping ceiling panels and pulling a mounting bracket directly over the supply closet’s path, the old “hang” at the dim corner vanished. The corridor stopped dictating movement. In daily use—crossing with groceries or organizing shelves—there was no need for route-workarounds, no pausing for eyes to adjust. The far end of the hallway finally linked to the rest, blending smoothly instead of feeling like a separate, awkward zone.

    What Actually Fixes Broken Corridor Lighting?

    The real solution isn’t in maximizing output—it’s in reading the space. Watch for:

    • The spot where people naturally hesitate or take extra care—often it’s not where the main beam lands
    • Repeated workarounds: detour around cable slack, always reaching for a patch of usable light, nudging a fixture back into place
    • Glare lines making reflection zones harsh, while the next step is left dim

    By overlapping light at key points, bracketing for real movement, and keeping cable paths fixed and flush, you resolve the friction points. What you get isn’t just a cleaner look—it’s a corridor that disappears as an obstacle. Whether it’s shared apartment traffic or a work-from-home hallway, the effect is less resistance, more automatic movement, with fewer “corrections” demanded by the space itself.

    Small Details, Repeated Impact

    Corridor lighting rarely fails in dramatic ways. The discomfort is cumulative: a sagging support, a persistent dark patch at a junction, a cable that starts to snag. Maybe you lose only a second here and there, but across hundreds of trips, these seconds add up to a drag on focus and comfort. The fix is rarely more light; it’s shifting a bracket, nudging overlap, or locking down cable runs right where the routine breaks down.

    The real difference: a corridor that doesn’t just look finished but feels natural to use again and again—ditch the visual friction, erase the hesitation, and let the setup finally serve the routine.

    See practical solutions, accessories, and support for real corridor lighting at LightSupport.

  • Choosing Under Shelf Bar Lights with Softened Corners for Comfortable Workspaces


    A desk can look organized but still wear you down hour by hour. Bright surface lamps leave streaks across your monitor. Shelves cast stubborn shadows just where you need clarity. And what should be a tidy, usable workspace turns into a mess of minor frustrations: glare patches, creeping eye fatigue, and a constant sense that your “clean” setup still gets in your way. The promise of under-shelf bar lights—streamlined, even light with no desktop clutter—only pays off if the physical details deliver. The real test isn’t how the setup looks after a morning tidy, but how friction creeps in when you return for late work, juggle devices, or reset for the third time in a day.

    When Light Structure Quietly Shapes Your Workday

    Slide a bar light under your shelf and the first session feels like an upgrade—no lamp base to work around, no obvious dead zones across the desk. But move through a week of normal routines and new distractions surface: a harsh-edged light bar sits just at your left periphery, its sharp corners catching you with sudden bright spots every time you slide a notepad closer. By Wednesday, you’re tilting your monitor, scooting the chair, or shifting your phone charger to make the space feel workable again. The hard boundary of an exposed light end tugs your attention every time you try to get comfortable.

    This isn’t random discomfort: Your eyes feel scratchy by late afternoon, your elbows keep bumping cables or organizers as you adjust your seating, and your hand drifts to shade a patch of glare just to read page margins. Setup friction multiplies—quiet, sure, but always there, especially if you work long stretches at the same desk.

    The Hidden Difference Between Looking Tidy and Working Smoothly

    A freshly reset desk with a flush, square-cornered light looks perfect—but within ten minutes, reality returns. The notebook slides next to the keyboard, a stray charging cable tangles with your pen, and you’re hunting for a highlighter behind your mouse. That “straight edge” of the under-shelf light becomes more than a visual finish: angled flares shoot onto your hands and new shadows cut across your workspace. You end up rearranging, not working. The appearance of order comes at the cost of repeated micro-delays—subtle, but steadily wearing down your workflow.

    Don’t mistake a tidy surface for a smooth process. What seemed efficient quickly turns into a routine where you’re constantly resetting positions, fighting minor distractions, and burning focus dodging light artifacts instead of getting through your actual tasks.

    Where Lighting Decisions Echo in Everyday Workflow

    Take any real afternoon: answering emails, thumbing through a notepad, jumping back to the spreadsheet. A hard-edged bar light amplifies desk mess. Cables or notebooks sticking out? They cast new, high-contrast flares. Reach under the shelf for a pen—glare knifes across your vision and you pause, readjust, lose your next thought. By midweek, the simple routine of swapping between digital and paper work slows down, replaced by awkward angles and a rhythm of “move, squint, nudge, continue.”

    It won’t wreck one session, but across hours, it piles up: your desk stops feeling like an extension of your workflow and starts acting like a surface that pushes back—a place you have to fix again after every stretch of real productivity. A clean line in the morning grows into static in the afternoon.

    A Small Fix With Noticeable Impact: The Softened-Edge Bar

    The easiest mistake is living with this routine—a little chair scoot, another failed lighting reset, never fully accepting why the setup annoys you. Swap in a bar light with softened, rounded corners and the desk starts to cooperate: glare drops, the boundary between shelf and working surface softens, and those jumpy bright spots at the edges go away. This isn’t a dramatic switch, but after a few days, the difference is concrete: you stop squinting, no longer shade the desk with your hand, and your monitor doesn’t need a last-minute tilt. The background friction recedes. Workflow feels like it belongs at the desk rather than circulating around obstacles.

    You’ll notice this mostly after breaks: walk away and return, and the workspace is “ready.” No extra habits, no overcorrecting for the light, no new workaround. The setup stops asking for attention, which means you regain lost seconds—and lost focus—each cycle.

    Real-World Observations from Extended Use

    The payoff isn’t instant; it builds through real use. At first, a soft-edge bar light just works—but the real win comes after a busy Thursday, when you realize you haven’t rubbed your eyes or shifted your chair to chase away a glare line since Monday. Repetitive desk cycles—charging, flipping between paper and screen, plugging in another device—feel less draining. The subtle edge between light and darkness blurs just enough to keep your sightline steady and your workflow smooth, no matter how often you cycle through focus, reset, and return.

    This is how good desk gear stays invisible: no repeated workaround, no setup tweaks between every session. Visual noise falls away, and the desk supports the work—even through the mess and movement of a real, busy day.

    FAQ: Decoding the Specifics of Under Shelf Bar Lighting

    Why do softened bar light corners matter, really?

    Hard corners and exposed edges throw sharp beams at awkward angles, disrupting sightlines as you reach, reset, or adjust your seat. Softer, rounded or frosted edges blend transitions—no sudden glare, just a usable, calm pool of light wherever your work drifts.

    Isn’t this mostly about looks?

    No. This is about the physical structure shaping your daily tasks. The fixture’s edge actually changes how your desk feels after several rounds of device shifts, note-taking, and resets. Styling is secondary when comfort and workflow are on the line.

    What’s the biggest recurring mistake?

    Mounting the bar too near the desk edge and picking models with raw, unfrosted ends. It’ll look clean at first—but day after day, you’ll dodge new glare hotspots and start modifying your behavior just to deal with badly directed light. Every approach or midday reset becomes slower and less natural.

    What Actually Makes the Desk More Usable

    Picking an under-shelf bar with softened, well-finished corners is about removing small, repeated irritations—the invisible static that slows and exhausts desk work over time. Real improvement shows up as the absence of friction: fewer interruptions, no chair shuffle just to escape a bright line, less compensating for light where it shouldn’t hit. Every session resets smoother, and you spend more time moving between tasks and less time fixing your setup. The desk just works, even when your workflow is unpredictable.

    The real metric: when you stop thinking about the gear and simply use the space, it means your setup is finally pulling its weight. Every physical structure should serve the pace of your work, not the other way around.

    Explore the full WorkBasic collection