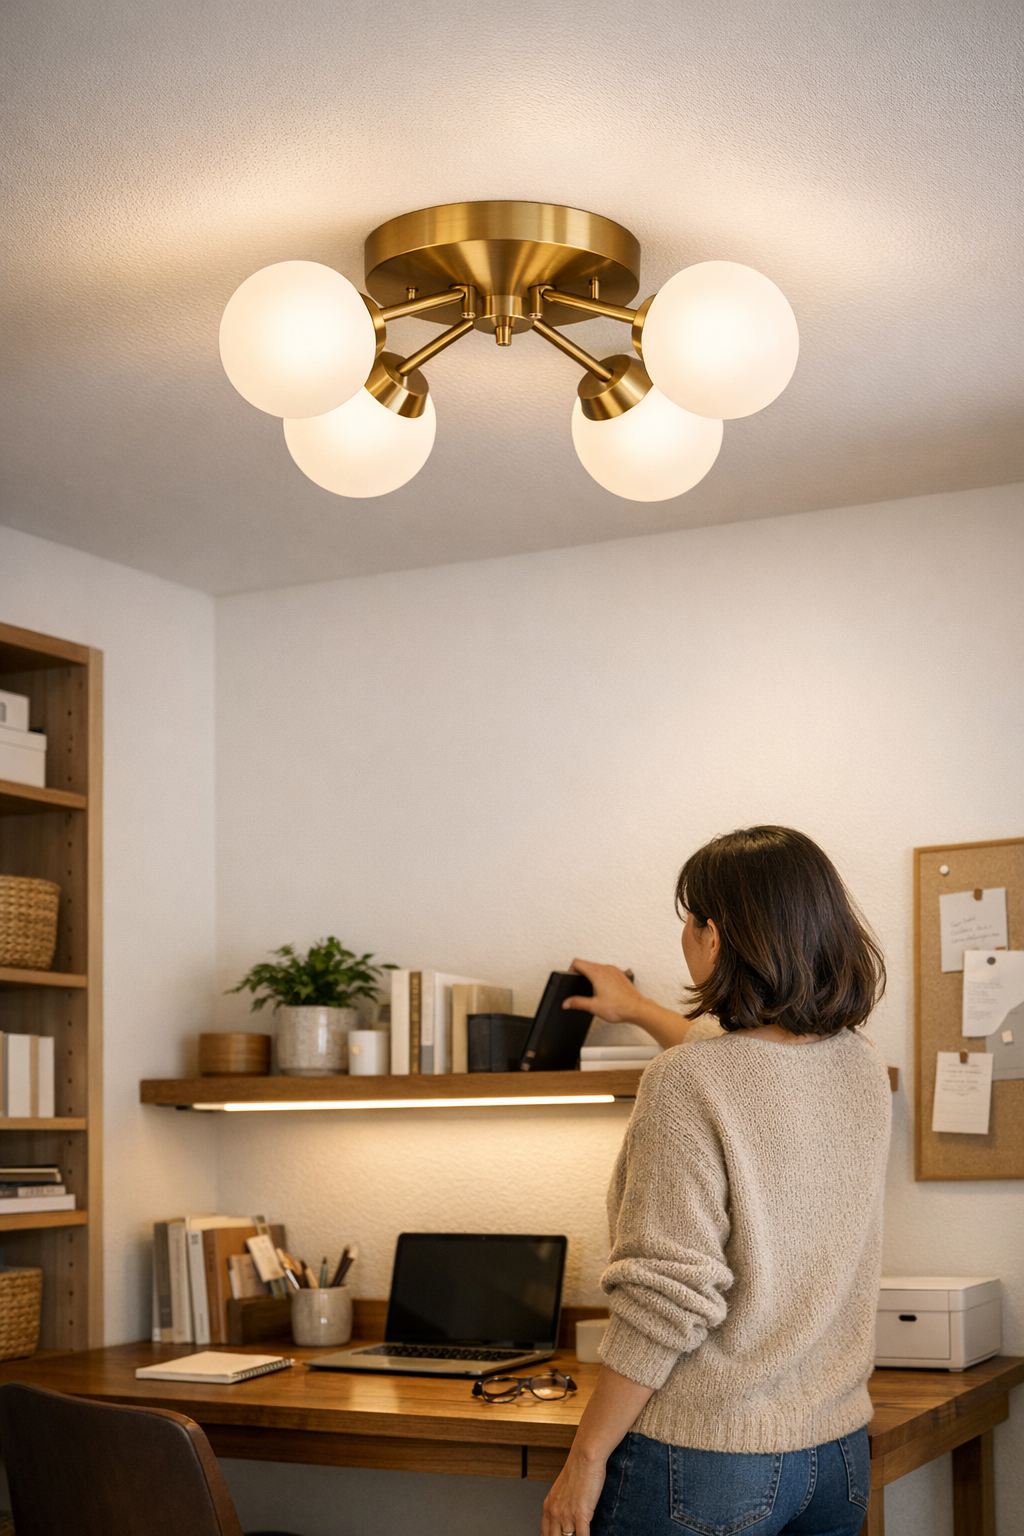
Category: Lighting & Work Setup

  • Why Wearing Shoes Matters for Safe and Precise Indoor Lighting Installs

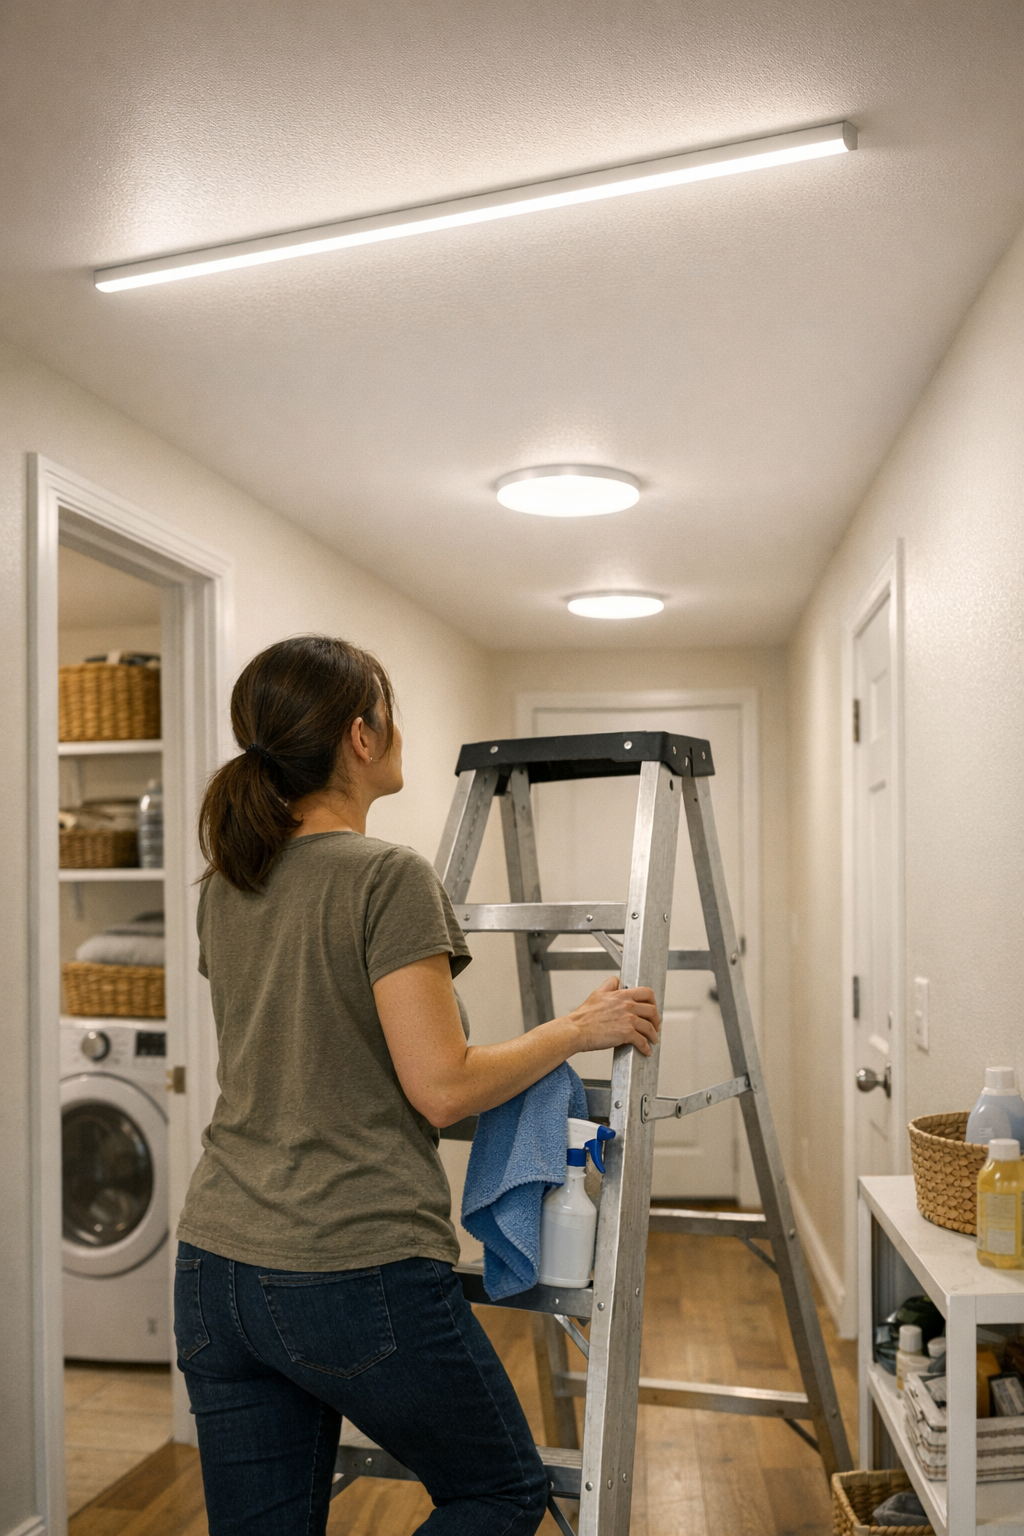
    Installing a new ceiling or wall light in a hallway, stairwell, laundry, or bathroom looks simple—until a week later when you spot shadows cutting across every step, or realize you always end up twisting sideways to see yourself in the mirror. The moment you rely on unsteady footing—a sock on tile, a shaky chair—the odds of a slightly crooked fixture go up, and on hard floors or narrow turns, those half-hidden mistakes become part of your daily routine. Most people don’t notice while mounting the light, but every shadow line, glare patch, or missing edge is a signal: the way you install lighting (even something as basic as what’s on your feet) quietly replays itself, day after day, in real-world use.

    Why Footing During Installation Still Matters After the Job Is Done

    Lighting isn’t just about flipping the switch on day one and calling the job finished. When you install flush mounts, semi-flush ceiling fixtures, or wall lights in a space with hard flooring—think bathroom tile, stair runners, or laundry room vinyl—the support under your feet decides how steady and level your final result is. Grabbing a few seconds barefoot or in socks speeds things up, but it’s where most lingering annoyances get built in. A light that looks centered at first can end up tilting twin shadows across the hallway, or making a staircase landing less visible, all because the install slipped half an inch during a rushed, unbalanced moment. Often, you’ll only spot the result as shadows break up the path you walk every day or as the countertop edge fades on laundry day.

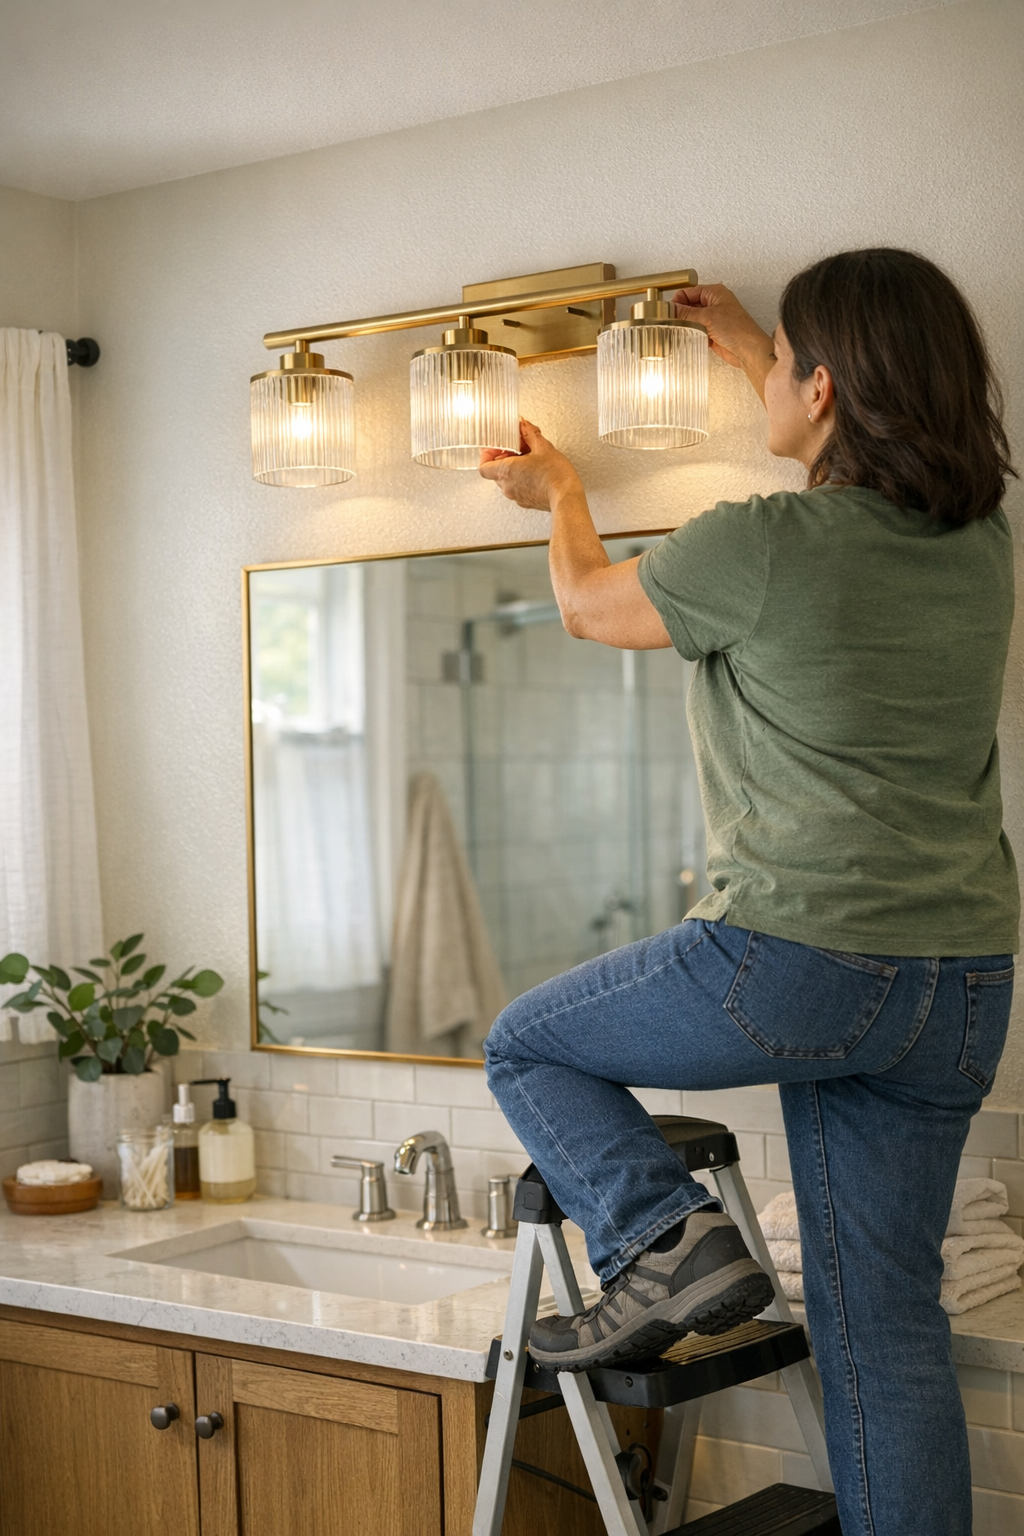
    Picture how a wall sconce set askew while you balanced badly on wet bathroom tile can shift the glare line just enough so it crosses the mirror—and you keep dodging it by leaning left every morning. Or a flush mount in the hallway, installed from a shaky step, that leaves one side always a little too dim, no matter how bright the light itself seems. These are not dramatic failures, just recurring friction that buries itself into daily habits and movement, never quite going away.

    The Repeated Friction of a Room That Isn’t Quite Right

    Navigating the Same Space, Noticing New Frustrations

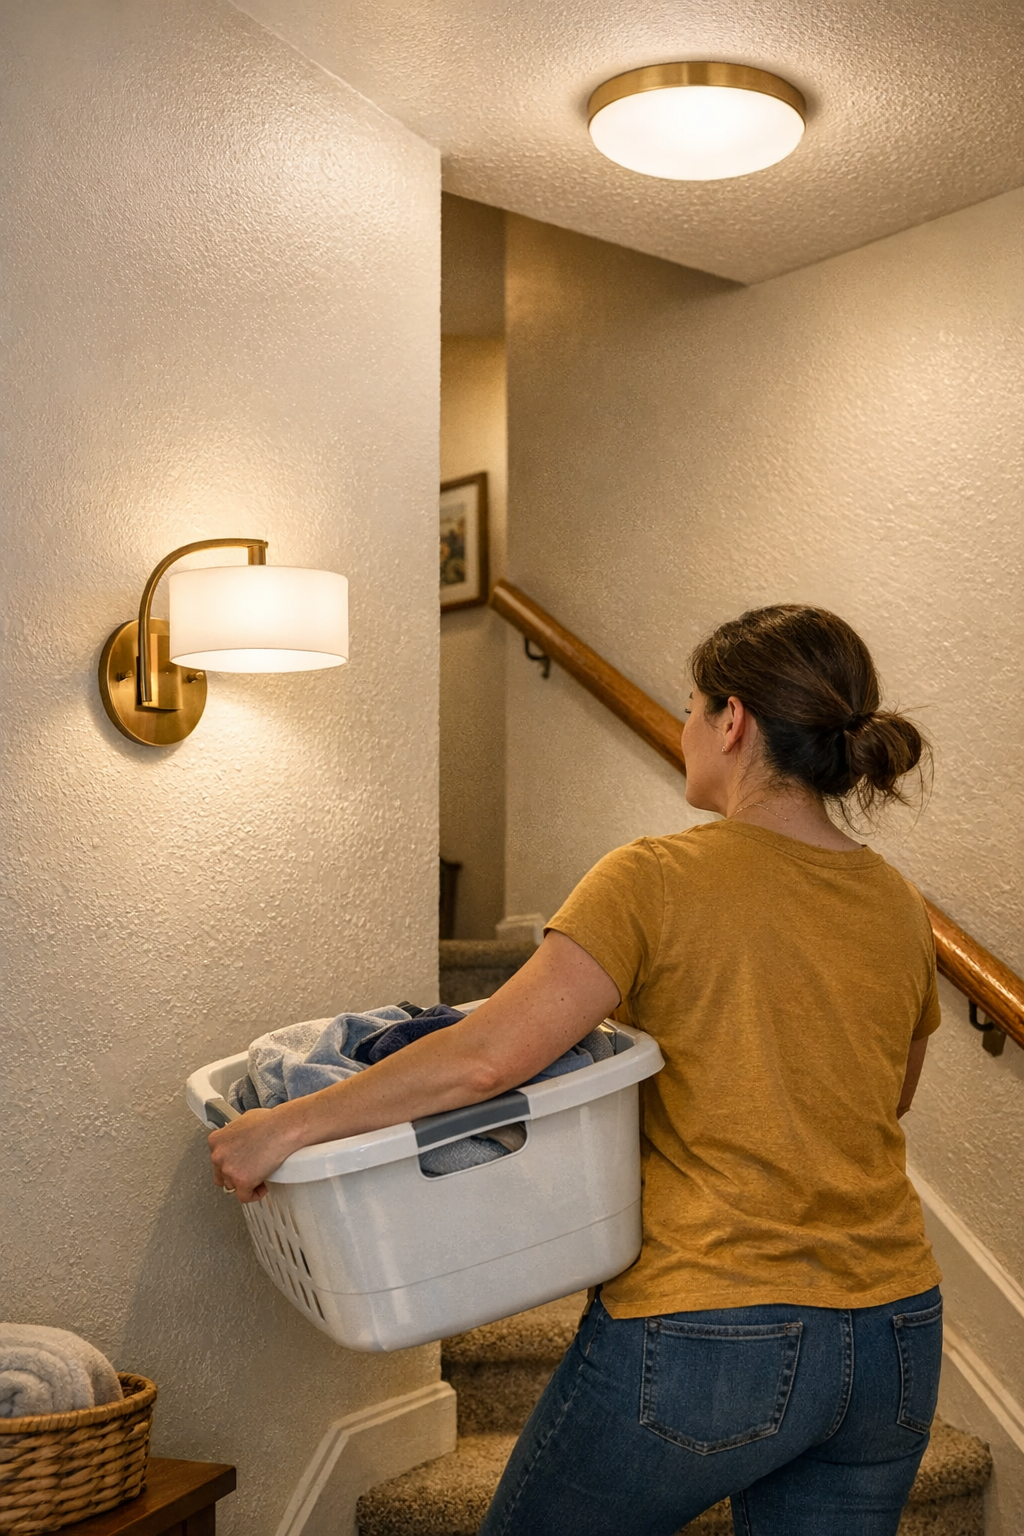
    Fixtures don’t have to be wildly crooked to make a difference. In long hallways, a light that misses the true center throws extra shadow down one side, leaving your feet or bags to blur into the gloom. Moving through that space feels subtly wrong each time, forcing you to adjust course or slow down. Stairwells are worse: a misplaced fixture, just slightly off, can make the turn at the landing harder to spot at night—and the result is everyone in the house gets used to double-checking their step instead of moving confidently.

    Mirrors, Edges, and the Cumulative Effect

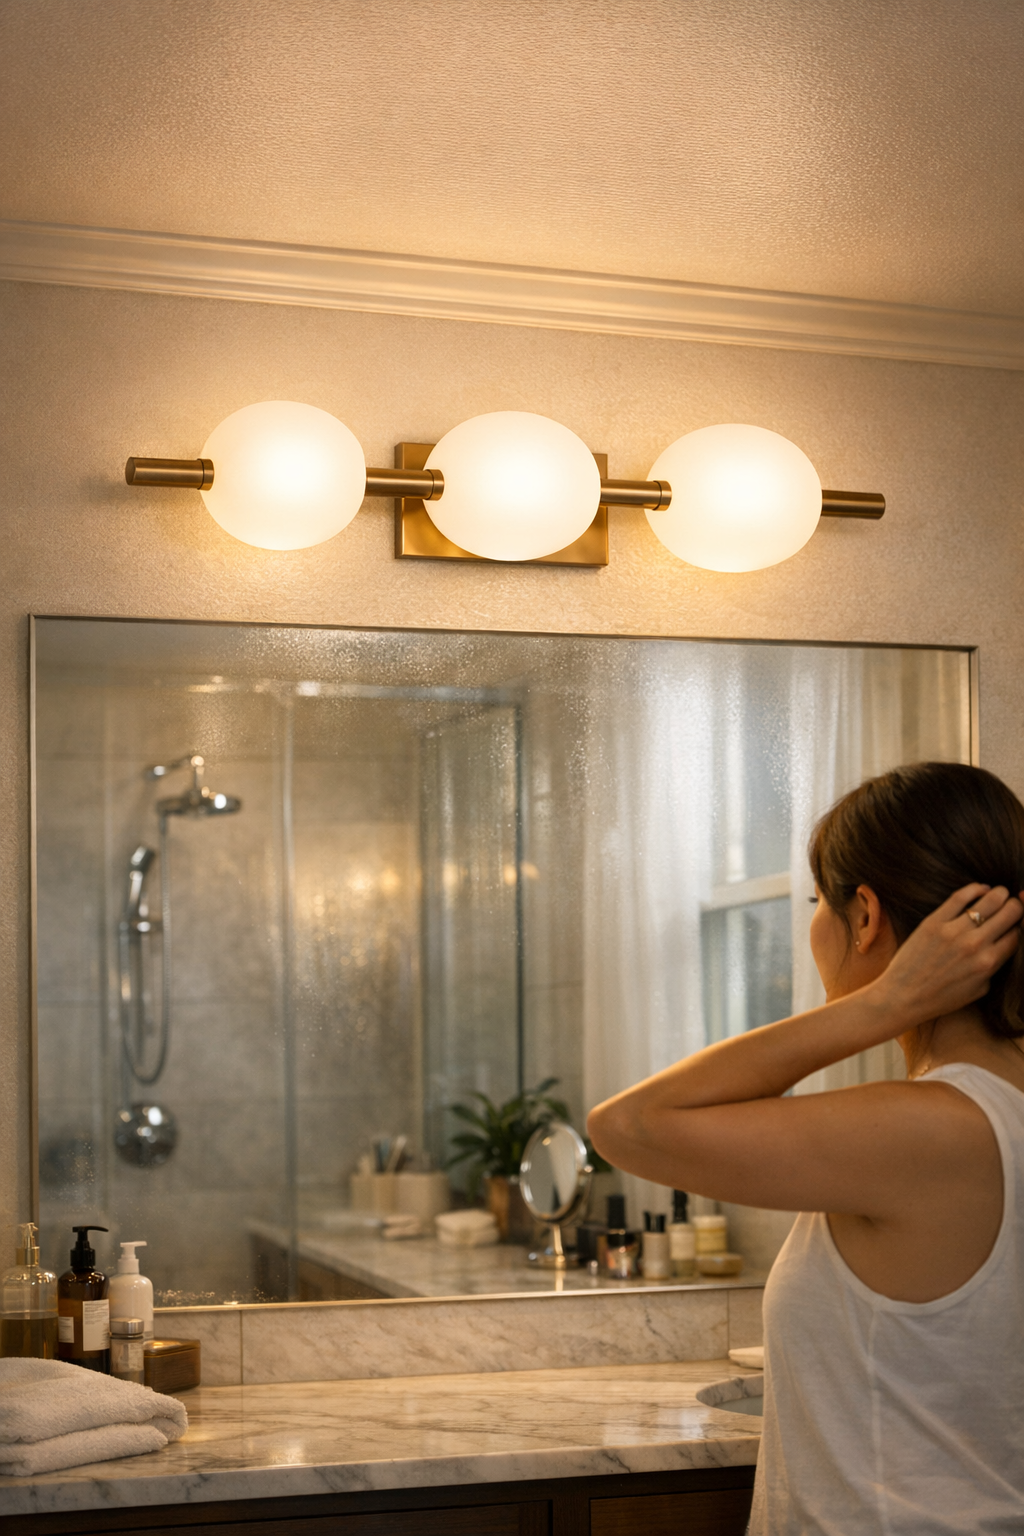
    Bathrooms and laundry areas throw lighting mistakes into sharp relief every day. Install a vanity light while awkwardly perched on a towel or slick tile and the mirror will glare on one side, shadow on the other—so you start unconsciously hunching closer, or flipping your posture just to avoid the bright edge. An under-cabinet fixture, slipped behind the line because you hurried on shaky footing, means the counter edge disappears every time you try to read garment tags or work late at night. These aren’t single-use frustrations: they build into routine detours and distractions, like always squinting at dials you can’t quite see or sidestepping a shadow that shouldn’t be there.

    Lighting Placement: More Than Just Visual Symmetry

    Lighting installation mistakes aren’t about trends or visual taste—they’re the difference between a fixture that flatters the room and one that quietly undermines its purpose. A flush mount off center by half an inch might seem trivial, but in a hallway it can plunge one wall into shadow while throwing glare back from the opposite side. In a damp bathroom, an unbalanced install can make a mirror feel unreliable every time you shave or do makeup, simply by sending the light askew. If you keep squinting after a new light goes in, or find yourself reaching across a patch of shadow to start a load of laundry, it’s not random—it’s the after-effect of poorly controlled, rushed installation under unstable footing.

    Small Missteps, Big Consequences

    How Subtle Errors Become Daily Annoyances

    Routine traffic—kids dashing through halls, hands full of towels heading down stairs—magnifies every misstep made during install. Humid bathrooms or laundry spaces pose extra risk: a fixture mounted too quickly, without solid stance, can start to sag or drift over months, slowly twisting shadows or letting glare creep in at eye level. You rarely notice right away. Instead, the cost builds in constant, low-level inconvenience that never fully leaves the routine—a dark patch that steals outline from a stair, a glare line that doubles each time the light hits the mirror just wrong.

    The frustration isn’t in the type of fixture or the bulb, but in whether light consistently lands where you need it—across months of real use, not just the first impression.

    Real Example: Laundry Room Relief from a 30-Second Fix

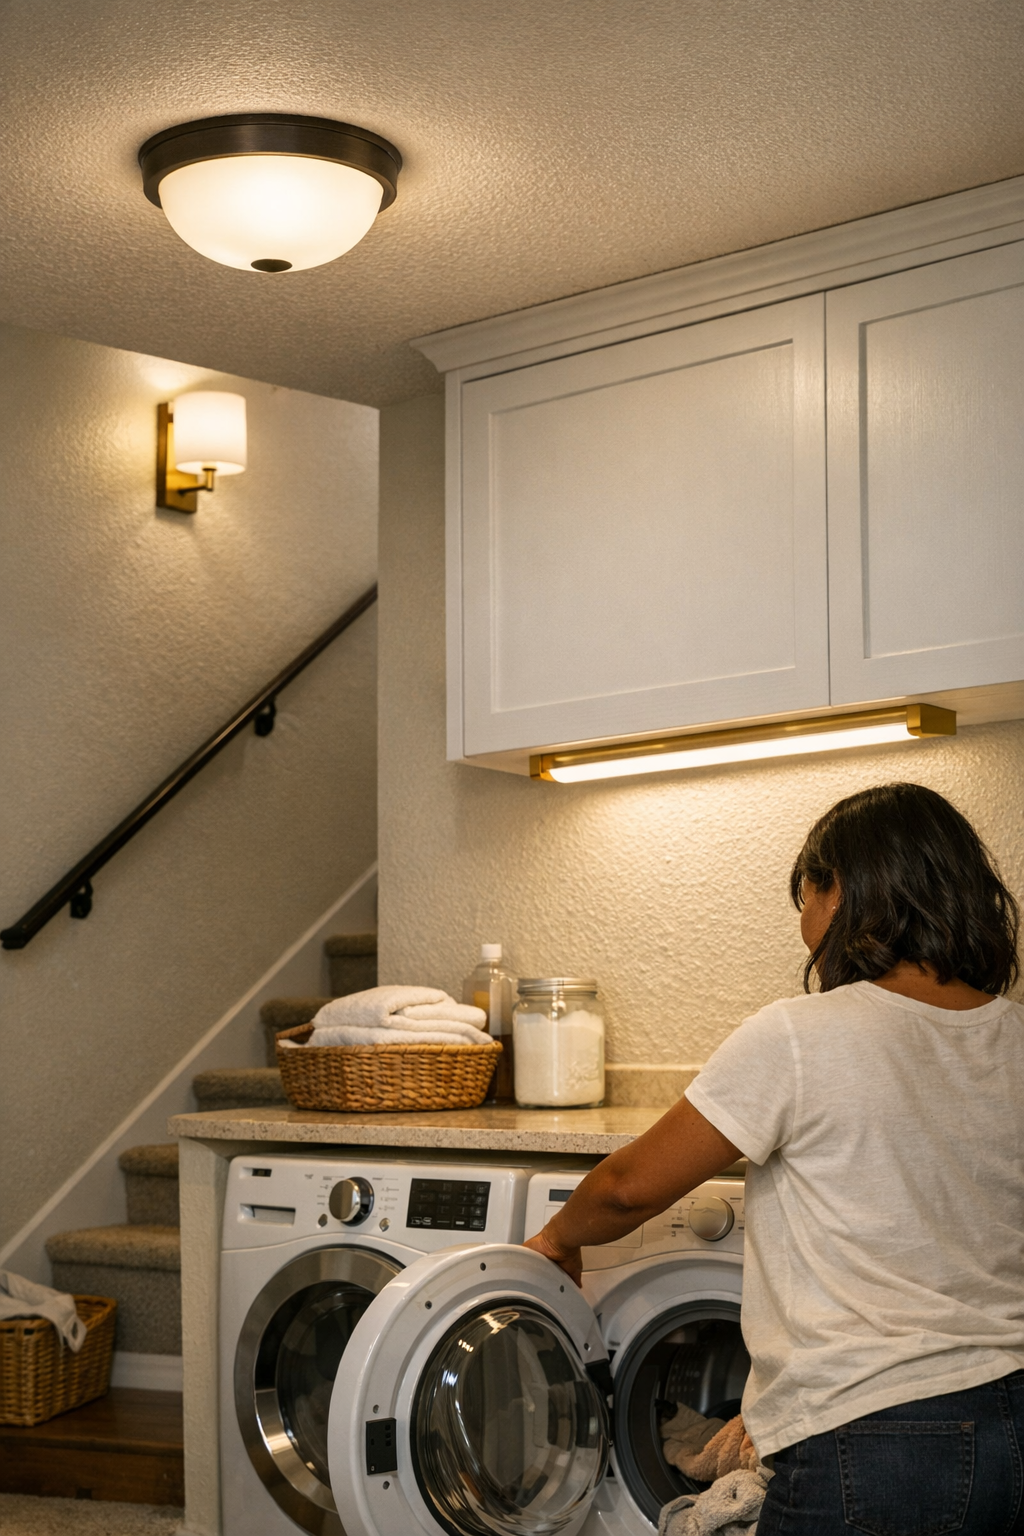
    Moving a ceiling light squarely over a cabinet run—taking thirty seconds to pull on shoes first—fixed a problem that had dragged on for months: the washer’s controls no longer vanished in shadow, and reaching for the “start” button became easy and automatic again. No dramatic makeover, just relief from the old loop of squinting and second-guessing under a fixture that had always looked slightly off for want of solid footing during installation.

    The Logic of Supportive Shoes: It’s About Control, Not Formality

    Wearing supportive, closed shoes for indoor installs seems unnecessary—until the first time you try to align a flush or semi-flush light above a glossy tile floor or narrow stair tread. Shoes turn “good enough” into actually level, giving hands and arms the steadiness needed to hold fixtures in place while marking or fixing. The result is not just fewer slips on ladders, but fewer surprises as months of humidity or movement pass: straight lines stay straight, lights stay level, and you stop wasting time fixing phantom shadows or glare streaks that should have been solved on install day.

    Quick Tips for Reaching Real Lighting Clarity

    • Wear supportive shoes for every install—even the “fast” ones. You’ll move steadier and keep flush/sconce fixtures better aligned, especially on hard or slick floors.
    • Check alignment from real-use angles, not just from across the room. Walk the hallway, stand at the mirror, or lean over the work counter, making sure the light lands cleanly from each spot you’ll actually use.
    • Take extra care in areas with hard flooring or regular humidity. Poor footing in these spots builds future problems, from new shadow patches to a fixture that droops over time.

    When the Installation Matters Most: Everyday Lighting Scenes

    Hallways with one wall faded into darkness, mirrors that force you to dodge a glare slice, steps left unsure at the stair landing—these moments show whether a careful install actually solved the space, not just brightened it. Real relief comes when you cross the room without squinting, turn a corner with full confidence in your footing, or finally find the laundry button in plain sight instead of fumbling in shadow.

    Properly installed lighting should disappear into your routine, supporting movement and vision without demanding attention. If a fixture constantly reminds you of its presence—through glare, shadow imbalance, or unpredictably lit corners—it’s usually not a hardware problem, but a signal that footing, alignments, and placement were never fully dialed in. Those small details in the install set up months—sometimes years—of either seamless use or constant workaround. A few minutes spent on stable footing can spare you a lifetime of minor daily irritation.

    Explore practical indoor lighting at LightHelper

  • Balancing Desk Clutter and Accessibility with Power Brick Storage Solutions

    Here’s the hidden cost of exposed power bricks: Even in a workspace that looks spotless, you’re never more than one charger swap or device handoff away from a sudden tangle. Those power adapters and trailing cables always start tucked away—but as soon as your routine shifts, they creep out: nudging past your feet, catching your chair’s wheels, blocking the legroom you need to scoot back, or making a simple unplug into a full under-desk contortion. The difference between a desk that looks organized and one that actually stays usable is most obvious at those moments—the exact point when you need to swap, charge, or shift, and your setup either gets out of the way or drags you back into annoyance. For anyone moving between notebook, laptop, charger, or monitor during a typical workday, the friction from power bricks adds up fast—and what hides the mess sometimes hides a new problem.

    When neatness hides new headaches

    The all-clear look of a cable-free desk sells itself fast. Sealed cable boxes and sleek containment promise tranquility—no adapter lights, no cords cluttering the edge. But neatness on the surface only works until you actually work. Shift from laptop to monitor, hunt for a missing charger, plug in a phone, or let a colleague use the next seat, and those “clean” setups start to resist change. Suddenly, the design you chose for tidiness becomes a slowdown: removing a panel, untangling a cable, and guessing which plug is which—all to make a minor adjustment.

    Every “tidy” enclosure multiplies steps for basic resets. You reach awkwardly below or behind, pop open a cover, interrupt your workflow tracing which adapter goes where, sometimes forced to undo cable ties just to free one plug. What started as organized now means pausing before every device swap, feeling a little sting at every slow-down, and quietly dreading the pileup as more users, accessories, or last-minute changes stack up. In shared or multi-role desk setups, every person trying to plug in turns order into confusion, and “hidden” just means out of reach when you need it most.

    Seeing “organized” for what it is: visual order versus true flow

    On a desk built for real, repeat use—especially if surface space is tight or multi-tasking is constant—the cracks in invisible cable management are immediate. Imagine trying to switch between a monitor, laptop, and phone, all running off adapters stored in a box you have to open every time. Every device change is now a hunt. Cables feel organized on the surface, but need five times the effort when you’re busy.

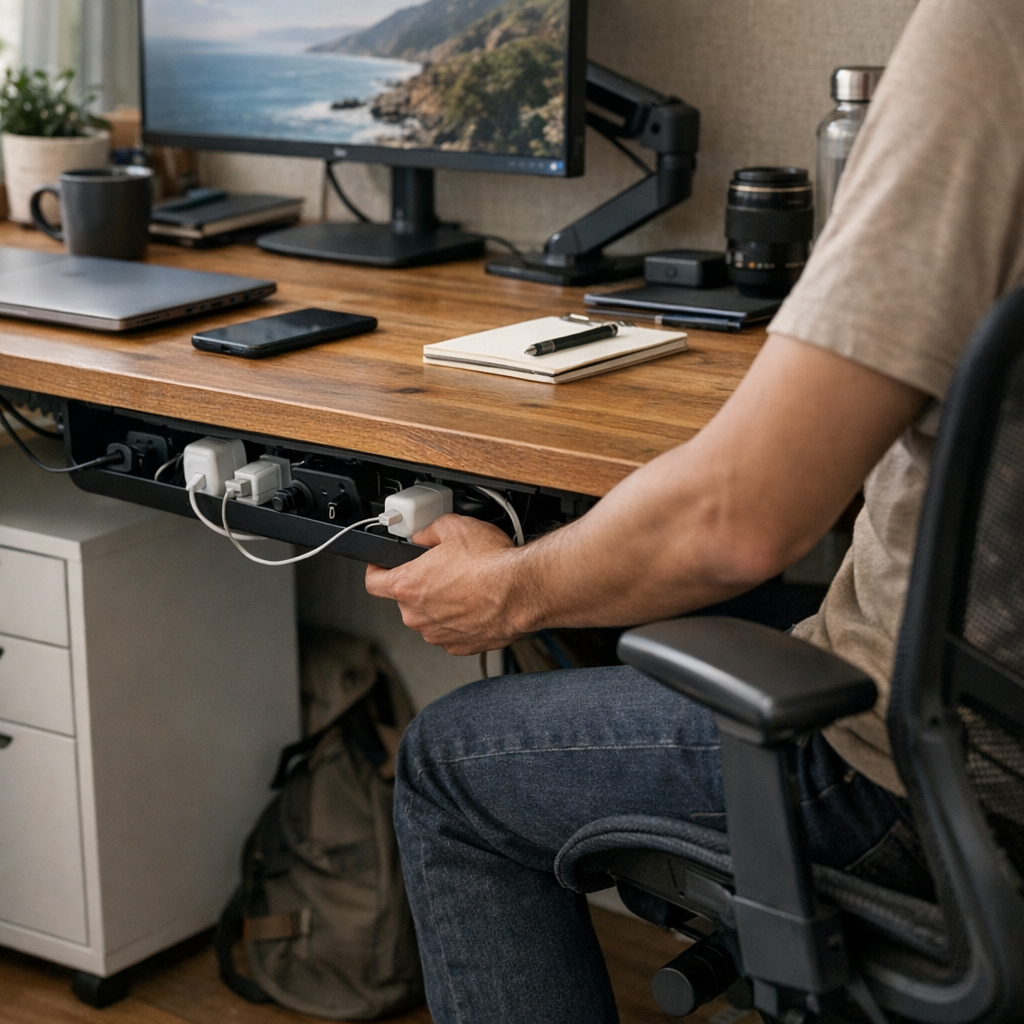
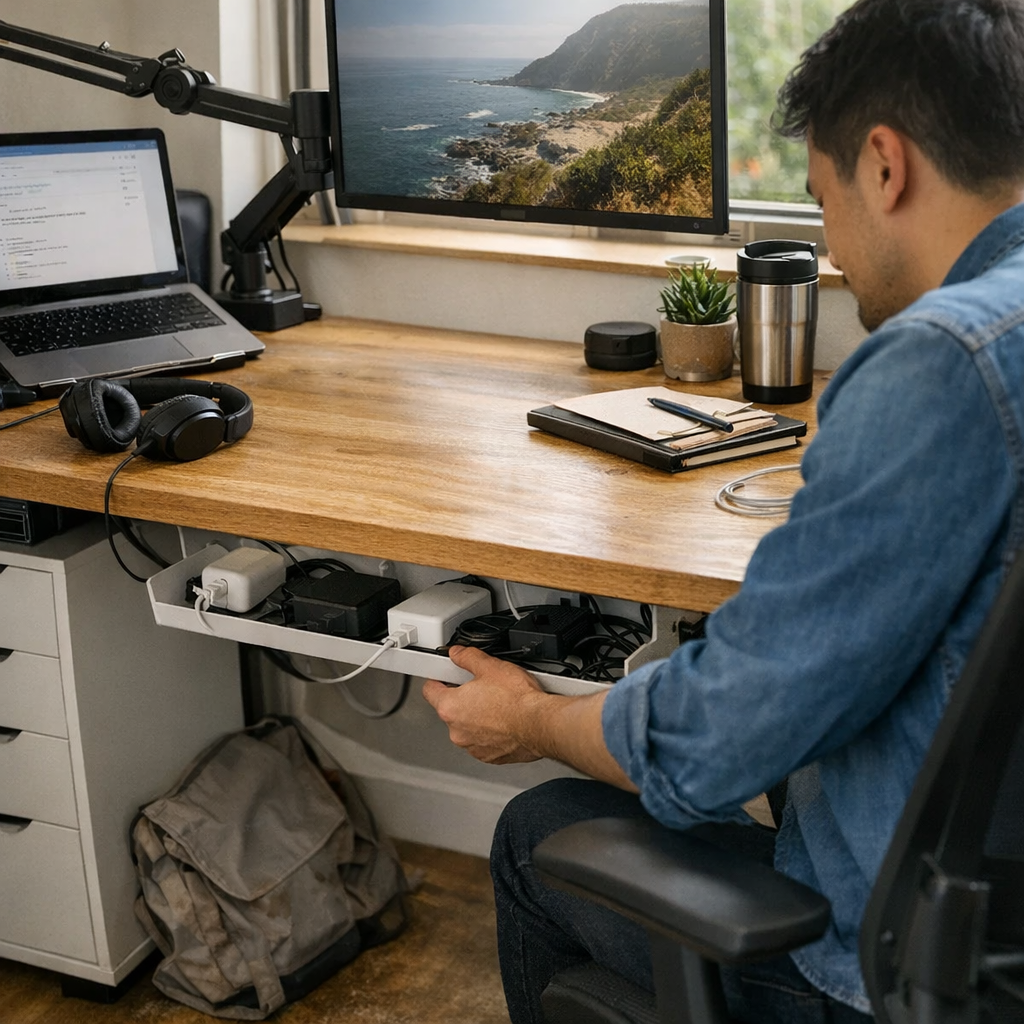
    An open under-desk tray flips the script: it keeps power bricks and cables off the working surface and out of foot range, but access is instant and unblocking any device is as direct as reaching behind you. Swapping a charger takes seconds, not a ritual of crouching and box-opening. You lose the “perfect” minimal look under the desk, but you stop breaking your workflow every time your tools need to change. Your routine resets shrink down, your desk surface doesn’t crowd so quickly, and actual switching—especially with compact workspace depths—stays fast enough to keep up with you, not slow you down.

    Real scenes: where design rigidness gets in the way

    Take a day when you’re toggling between focus mode on your drawing tablet and jumping onto a call from your laptop, or passing the workspace to someone else. With every power brick closed off in a box, each shift means crouching down, unseating the box, untangling cables, and maybe labeling each plug—hoping you don’t disconnect the wrong thing. The smooth desktop line is never the bottleneck; it’s the under-desk wrestling and reset time that burn up your minutes and patience. Multiply that interruption several times through the day, and your so-called order has cost you an hour of drag and distraction by week’s end.

    Now, swap in a slim, rear-mounted tray: bricks are up and out of sight, feet roll under easily, and a swap is one smooth reach. Tracing a cable is immediate. Charging swaps no longer knock you out of flow. For desks with limited depth, or where leg space matters, the difference is even more visceral—no more cables creeping down into your reach, no more wheels snagging the wrong wire, no more searching for spare adapters mid-cycle.

    The practical reset: how a small change paid off

    After months of “clean” cable boxes, I found myself resenting every reset. Getting under the desk to release a plug, then re-coiling everything for tidiness, turned into a loop I started avoiding, taking shortcuts that made things messier over time. A switch to a basic, open tray—a strip just wide enough for the core adapters, letting a few inches of slack hang—freed up my surface, banished bricks from foot-level, and let me swap devices without breaking step. No more cable dread, no more secret stash of spares cluttering the floor. The win wasn’t visual; it was the way I stopped thinking about cable friction and started thinking about my work again.

    Chasing a catalog-perfect look forced constant upkeep; settling for practical concealment gave me an actual routine. If clarity means forgetting your cable management even exists, this switch earns its keep every day.

    Common questions in real use

    How do you actually hide bricks yet avoid cable headaches?

    Partial concealment beats full enclosure every time. Use an open under-desk tray to collect bricks and cable loops, but leave plugs visible and grabbable from the edge or side. Avoid boxes or panels that turn a cable swap into a reset process. Instead, opt for trays or cradles at the rear desk edge: one-handed in, one-handed out.

    Why not just leave everything out for quickest access?

    Loose bricks and cables do more than look messy—they turn into hazards at your feet and obstacles for chair movement. It’s only a matter of time before you roll back and catch a cord, or give the desktop a sudden yank that kills power mid-task. Every exposed cable adds visual clutter and risk that’s hard to ignore during long days.

    What fits best with shared or high-switch workspaces?

    Open trays win. In flexible or team-shared desks, plug swaps and quick handoffs are constant. Being able to see and trace every cable without a full tidy cycle prevents conflicts, stops device “borrowing” from turning into cable scavenger hunts, and keeps both solo and collaborative work moving. A tray grants open access without giving up control or order.

    Surface order versus everyday reach: what matters more

    The structures hidden under your desk determine how much friction you actually live with—not just how neat the space seems on first look. “Organized” isn’t how well cables disappear, but how little they slow you down. Whether with a cable tray, rear cradle, or accessible mount, the point is less about hiding and more about preserving flow—especially in active work zones with daily device or seat shifts. The moment you reach for a charger or cable and forget the management system is there, you know the structure is working for you, not against you.

    The most effective workstation adapts to the real sequence of your day: frequent changes, quick switches, and a surface that stays ready for the next cycle—not dressed for a photo shoot. The less cable and brick management interrupts your flow, the easier it is to leave your desk clean and return to it eager—not dreading hidden clutter resets or inconvenient cable boxes.

    Explore the full WorkBasic collection

  • Choosing Bathroom Lighting That Minimizes Mirror Glare and Enhances Visibility

    Most bathroom lighting fails not on the first day, but on the hundredth use. Step up to the mirror: the overhead bar looks clean, the room looks bright—not bad at a glance. But as you brush your teeth or lean in to shave, you squint against mirror glare, lose track of the sink’s far edge, and tilt your head to dodge a sharp reflection slicing straight across your line of sight. What was supposed to be better visibility is suddenly a daily obstacle. The light that promised an upgrade becomes a source of blurred outlines, awkward shifting, and searching for that one clear spot that never lasts.

    Why Glare Becomes a Daily Problem—Not Just a Bad First Impression

    The first days after swapping a fixture—maybe a flush overhead mount or a crisp LED bar—can trick you into thinking the problem is solved. The room pops, the glass gleams, and everything seems upgraded. Then real bathroom routines set in. You help a child reach the faucet and the mirror flashes a double image; you angle for a careful shave and a band of light lands right in your pupils. Instead of clarity, you inherit tangled reflections and uneven hot spots each time you move. The problem isn’t brightness, but misdirected light that creates new obstacles at every angle.

    This isn’t a one-off irritation. Week after week, you find yourself contorting posture to escape the beam, delaying tasks for better light, or simply leaving the fixture off to avoid the headache. Gradually, basic routines grow inefficient—washing, grooming, even quick rinsing stalls as friction sneaks in. The inconvenience is rarely dramatic, but it is cumulative. Weak lighting structure turns into a pattern of missed details and slowed mornings.

    Mounting and Placement: The Hidden Details That Fix (or Worsen) Glare

    It’s not just about lumens or wattage. The position and support logic of every fixture—height, spread, and angle—control whether light works with you or fights the routine. Bathroom-rated fixtures serve a technical purpose in humid zones, but that’s not the whole story. Design and placement shape the experience:

    • Fixture too close to the mirror: Your own light source becomes an enemy—reflected directly at you, it competes with the original, doubling visual noise right where focus matters most.
    • Bad mounting height or angle: Even the “right” fixture can skim across the glass, spotlighting your eyes and leaving patches of harsh, unhelpful brightness instead of true, even illumination.

    Busy mornings expose these flaws: two people crowd the sink, and suddenly everyone is angling for the “good” spot, chasing away glare instead of just using the room. The wrong placement turns quick tasks into small battles for clarity.

    Common Setups: Why Single Overhead Fixtures Fail Routines

    The streamlined promise of an overhead bar, flush ceiling mount, or centered LED seems simple: keep the sink clear, throw light across the whole worktop. But this setup breaks down the minute you try to use it for anything precise. That “crisp” new strip throws two bright streaks in the mirror, multiplying shadow doubles and drowning out the lines you actually need to see—edges of stubble, mascara, stray toothpaste drop. The more centered the bar, the worse it gets: light beams at your face, corners fall into gray, and the reflection never fully cooperates.

    Typical routines make this obvious: someone leans in to inspect a blemish and gets hit by direct glare; another person resorts to moving bottles to find lost brushes hiding in patches the light never reaches. Even the neatest install leaves cable lines trailing across a wall or bundled under a shelf—tucked away at first, but catching the eye and adding small visual friction each day.

    Living with a Subpar Bathroom Light: The Real Repeated-Cost

    Weeks in, the limitations multiply. Children stand on tiptoe, dodging shadows that will not leave their faces. Adults wipe streaks from the glass edge they never clearly saw. The illusion of “brighter” disappears: you trade one frustration for another—now with more contrast lines in the mirror and missed spots everywhere else. What passes for a resolved setup in photos falls short every time the real-life routine demands clarity, fast cleanup, or simultaneous use.

    Humidity, messy hands, and splatter only magnify every flaw. Wires once invisible slide into view near the sink, while mounting hardware draws focus instead of fading out. Not only does the space look more cluttered after a few weeks, but it also begins to feel harder to actually use—turning background support into a daily irritant.

    A Small Change That Makes a Lasting Difference: Rethinking Fixture Placement

    What finally broke the glare cycle wasn’t bumping up the bulb wattage, but changing where light meets the room. Swapping the overhead bar for a pair of wall-rated sconces, mounted about a hand’s width from the mirror edges, moved the light source out of the reflection and directly onto the face.

    The improvement was immediate and practical: the sink and counter stayed evenly lit, no more shifting to dodge a reflection, and even on rushed mornings the mirror stopped flashing stripes at eye level. Mounting cables vanished below sightlines, and the “invisible” aspects of the install—hardware, supports, brackets—all finally stayed invisible. Small layout corrections did more for clarity and comfort than endless tweaks to bulb strength or fixture design ever could.

    Real-World Tips for Better Bathroom Visibility

    • Direct light toward people, not glass: Side sconces or wall panels just outside the mirror’s edge prevent the worst of cross-reflection and keep facial details visible, especially in shared use or quick checkups.
    • Stick with support hardware made for bathrooms: Steamy rooms punish generic or makeshift setups—bathroom-specific mounts, secure cables, and protective housings last longer and reduce friction as routines repeat.
    • Audit cables and corners after a week: Install that seemed “clean” on day one might turn distracting by day seven. Revisit the run of wires and the look of brackets; if they jump out at you, they’ll slow you down tomorrow.

    Why Shadow-Free Surfaces Matter More Than “Total Brightness”

    Routines fall apart not from lack of light, but from bad lighting structure. Overhead bars and mirror-top strips almost always leave behind shadow bands, double reflections, or glare that gets progressively worse with every use. Well-placed support lighting—side bulbs, wall sconces, even under-shelf lights—fix the structure that overheads cannot: they stop shadows under the eyes, keep the sink perimeter clean, and let small details stand out. In rushed mornings, quick grooming checks, or messy cleanups, that functional clarity pays off more than any upgrade in raw brightness.

    If you’re still avoiding part of the mirror, dodging stray cables, or fighting dim corners in a bathroom that looks “done,” the lighting isn’t solving the problem—it’s just moved it to a new spot. Bathroom setups that pull their weight are built around real routines, not just surface appearance or first-day photos.

    For more setup supports, lighting solutions, and mounting ideas that bring visibility and comfort to real-world routines, visit LightSupport.

  • Optimizing Home Lighting for Safe and Clear Movement Paths

    The ceiling looks lit—until you actually start moving through the space. In hallways, stairwells, or utility corners, that’s where “good enough” lighting turns into a daily source of slip-ups. A centrally mounted flush or semi-flush fixture tricks the eye into seeing clarity at a glance, but that effect collapses the moment your routine changes: hands full of laundry, a box, anything awkward. Peripheral vision swallows up shoes left at the hallway edge. Glare catches your eyes mid-turn. Edges of a staircase fade; the far wall of a laundry room stays a murky void. Every second-guessing pause—at a stair turn, by the closet door, approaching the washer—signals that what looked “bright” from the doorway actually leaves movement, safety, and routine in the shadows. The fixture’s specs promise coverage, but repeated use exposes its real gaps.

    Why “Bright” Isn’t Enough: Hallways and Stairs That Interrupt Movement

    Brightness by itself is only the surface test—easy to pass during an empty walkthrough, easy to fail during real-life routines. The actual challenge is coverage. One ceiling fixture dead center lights a hallway or stairwell enough for empty rooms, but not for crossing with both hands occupied after dusk or during a rainy afternoon. The failure point isn’t the bulb’s output; it’s where the light never lands.

    With a single fixture, shadows cluster where corners meet thresholds, closet edges, or the start of a staircase. Carrying anything bulky—basket, ladder, box—suddenly means stepping blind at one or both ends. Even a new, high-output bulb shines mostly in the center, while the periphery stays unpredictable. Glare adds a second kind of friction: a semi-flush lamp at eye height throws a harsh reflection or hot stripe across a glossy wall, making you angle your head away from where you actually need to see. Movement becomes self-conscious. You hesitate by the stairs, slow down at the turn, or squint to map a path you thought was “lit.”

    Accumulating Friction: Where Incomplete Lighting Repeats Small Failures

    Poor lighting doesn’t betray itself on installation day—it shows up the fourth, tenth, twentieth time you move through the same spot holding something larger than a phone. A staircase throws a steep shadow across the step you need; in laundry rooms, the far side of the washer sinks into gloom. Narrow hallways amplify the problem, turning your own body into an obstacle that blocks the thin beam or throws half the floor into darkness. You scan for missing shoes or an uneven step, not because the bulbs are old, but because the setup simply doesn’t reach where you live. Patterns emerge: you always pause at the upstairs turn, tilt your head around glare, fumble for an invisible light switch, or re-position laundry to see the machine controls. Over time, these aren’t minor quirks—they become the landscape of daily irritation and near-miss stumbles.

    Unlit Angles: How Gaps Turn Familiar Paths Into Risk Zones

    Every staircase and hallway has recognizably weak spots—the place where a beam stops short, a dark fringe forms by the door, or a glare zone masks the next tread. These aren’t rare; they’re embedded in the design when fixture placement or style isn’t mapped around real movement.

    • Juggling a ladder through a narrow stair? The fixture creates new shadows exactly where your sightline falls, breaking up a clear read on each step.
    • Carrying a basket through a utility hallway? The middle glows, but both ends of your route fade. The last step to the door becomes a guess in partial darkness.
    • Boxes up the stairs? Top-lighting throws your shadow right over the next tread, obscuring depth, making each climb feel riskier than it should.

    These friction points aren’t design flaws on paper—they’re failures of real-life support. The annoyance isn’t lower brightness, but the abrupt loss of usable, predictable light exactly where routines press against the limits. Each interruption chips away at the comfort and confidence you expect from your own space.

    How to Stop Lighting From Becoming the Bottleneck in Movement

    The easiest mistake is to prescribe “more light” when the problem is poorly directed or insufficiently distributed light. The practical fix: rethink placement and spread, not just wattage or lumens.

    Placement solves what output can’t: In high-traffic hallways, swapping from a single ceiling light to a pair—so each end of the run gets at least a meter of its own true coverage—rewires the entire space. Shadow lines dissolve. Turning a corner with a bulky load stops feeling like an act of faith. The edge of the utility area, the last stair, and the threshold into the laundry are all consistently readable. Corners no longer operate as trapdoors for dropped shoes or loose edges—you see what’s underfoot without conscious effort, daylight or not.

    Stairwells, angled passages, and wide laundry zones fail for the same reason: spacing that leaves the ends or turns in semi-permanent half-light. Overlap is the answer. If one fixture’s spread doesn’t quite reach, double up: ceiling panel at the far wall, secondary flush mount at the entry, or a hardwired wall light supporting at the turn. Predictable, unbroken visibility turns every motion—down the stairs, across the laundry, into the utility closet—from an uncertain maneuver into a smooth, automatic one. “More lumens” won’t protect from a shadowed riser or a darkened machine edge; a smarter spread will.

    Fixture Types: Making the Function Show Up Where It Matters

    Flush mount ceiling lights win in low ceiling or corridor environments by pushing out even light where movement happens, avoiding bulb-in-eyeline bursts of glare. Semi-flush mounts and wall sconces can fill wider or angled spaces—only if aimed so they overlap coverage without creating fresh glare or dark patches at the boundaries. In long halls, a staggered arrangement lets each unit compensate for its neighbor’s edge, especially at doorways, turns, or alcoves where shadow otherwise pools. Wall sconces or hardwired fixtures are genuinely useful only if walls aren’t blocked; otherwise, they become more style marker than real support. For most movement, ceiling mounts are the backbone—seeing the whole route, not just the decorative corners.

    Checklist: Signs Your Lighting Isn’t Keeping Up

    • You pause at stair turns or landing bends, unsure of your step, despite the room looking “done.”
    • You shield your eyes or angle away to dodge glare while walking, not just standing.
    • One end of a corridor always feels duller—noticeable with any speed or on cloudy afternoons.
    • Utility or laundry corners force you to lean or hunt for a dropped sock that’s swallowed by shadow.
    • The room cleans up nicely, but you can’t safely carry a chair or wide laundry bin from end to end without hesitating.

    These signals all point to the same constraint: lighting that checks the box for room “illumination,” but repeatedly fails at real-wayfinding, working, or cleaning. What matters isn’t how the space appears; it’s whether you move through it automatically—no head-tilt, no squinting, no second guesses on your next step.

    Simple Shifts for Real-World Lighting: Lessons From Daily Use

    • Space fixtures to erase shadow traps. Two points of light in a corridor or at a stairway landing break up longstanding gloom; the trick is to overlap their coverage, banishing both the dim edges and the harsh midline glare.
    • Target the walking surface, not just the look. Mount fixtures and aim bulbs so the light lands on the route—stairs, corridor floors, laundry room edges—rather than glowing from afar or bouncing pointlessly off crown molding.
    • Test the setup as it’s used—not just empty. Walk the hall with a laundry basket, climb the stairs with a tote, open the closet with a box in hand. Weaknesses show up fast: shadowed treads, dark closet entry, or a blinding spot no walkthrough could reveal.
    • Skip the overdecorated fixture in working zones. If “style” comes at the cost of safe, even spread—if the glow vanishes where your feet fall—the daily inconvenience will outweigh any design pop.

    The Difference You Feel: From “Lit” to Actually Usable

    A room that only looks bright is easily exposed by regular routines—the pause at the stair, the squint in the hallway, the lean to see what the main bulb misses. A lighting setup proves itself the fifth time you move a laundry basket, carry cleaning supplies, or simply walk a path after dark. Success is simple: you stop thinking about the light because every corner, step, and surface shows up. No guessing, no glare, no hesitation. That’s the difference between visible light and predictable function—what makes a setup feel finished in use, not just in photos.

    LightHelper builds lighting for these real-world movement zones.

  • Balancing Cable Management for Efficient and Tidy Workstations

    A desk can look perfectly organized at 9am—and by lunchtime, you’re back untangling charger cords. Cable clutter doesn’t go away with a single clean-up. Power adapters and USB leads resurface throughout the day as meetings, charging routines, and quick device swaps disrupt yesterday’s perfect setup. The real problem isn’t choosing between “hidden” cables and visible ones; it’s whether your cable access matches how you actually work. If plugging in a phone requires getting down on one knee or sliding out a cabinet every time, those clean lines cost you time and attention. Most desks don’t fail visually—they fail when each step to connect or reset becomes a small interruption.

    When a Clean Setup Turns Awkward by Wednesday

    You can organize yourself into a corner. Fully-hidden cable trays and power strips look tidy on day one. By midweek, small frustrations are everywhere: charging your headset means reaching under the desk or wiggling open a drawer while balancing a call. Hunted ports lead to awkward stretches, and drawing a cable out from deep under the surface feels like dodging desk legs or catching your sleeve every time. Exposed cords? They’re always there, but soon creep over your notepad, block the path to your mouse, and catch on your elbow when you reach for the pen beside your keyboard. Layers of minor friction accumulate—cables shift, chargers slide just out of reach, and each reset expands into a routine detour.

    What started as “this looks organized” turns into a cycle of repeated interruptions and rushed clean-ups. You don’t just lose aesthetic points; you lose pace. Hiding too aggressively puts the essentials out of reach, while visible chaos distracts you and disrupts even basic flows by Friday afternoon.

    Power Access Versus Visual Calm: The Balance You Actually Feel

    Desks are designed for order, but work creates mess. When you tuck every cable away, the reality shows up fast: switching devices during a meeting, recharging a Bluetooth mouse, swapping in your tablet—every change pauses your rhythm if access is buried behind a drawer unit or under a monitor riser. Edge-clamp trays and accessible cable boxes behave differently. You can recharge on the fly, swap chargers by touch, and adjust positioning with a flick of the wrist. What seems minor at setup matters after three days of real use.

    Leaving all cables loose solves speed, but at a cost. Drag a chair back, and you snag a cord under the wheels. Wires drift into the middle workspace, crowding your writing pad, getting wedged under a laptop stand, or forcing you to nudge adapters aside at every notebook refill. The surface isn’t just messy—it becomes an obstacle course. So the neatest-looking desk might slow you down, while a “convenient” one quickly dissolves into tangled frustration.

    A Real-World Example: How Cable Placement Shapes the Workday

    Picture crunch mode: two laptops propped up, a phone needing a mid-shift top-up, headset always rotating. When your power strip disappears behind a metal desk leg or lives inside a rear tray, every plug-in request interrupts your flow: you’re crawling under the tabletop, tracing the right cord, bumping your knee against drawer storage—while your call window ticks down. If you relocate the strip to a shallow tray or clamp it near the front edge, something changes. Now you slide in the charger with one hand, barely looking away from your main screen. The cables are just visible enough for you, invisible to visitors. After dozens of swaps and plug-ins a week, those lost seconds reclaim momentum—and just as important, your workflow doesn’t break for a minor reset.

    Why “Hidden” Isn’t Always the Same as “Effortless”

    Reach is more important than appearance. Smooth desk photos can mislead: all cables vanished, but not a hint of how anything plugs back in. Conceal everything, and routine flexibility collapses the first time you need a new charger combination or a battery rescue before a call. If every device swap means awkward bending, arm contortions, or routing fingers through a blind corner, you’ll start delaying plug-ins or letting batteries run down “just to avoid the hassle.” Order remains, but efficiency drops—and the next real reset is closer than you think.

    The best setups aren’t absolute: slim under-desk trays you can still reach, clamp-mounted boxes on a usable edge, or simply gathering live cables with a flexible sleeve—each keeps your chargers near, not in the way. Out of direct view, not out of natural reach. Saving just a few seconds from each device swap hints at convenience, but what really changes is how often you have to reset, adjust, or fight the desk itself to keep moving.

    What Actually Changed My Workflow

    For months, I tried the standard deep tray: cords routed behind drawer units, power bricks hidden under a broad plastic shelf. At 9am it looked sharp—by noon, I was ducking below to rotate chargers, snagging my sleeve, losing sequence with two laptops and a phone. The shift: move that power strip forward, clamp it under the desk right at arm’s reach. Instantly, cables were within a natural grab, unseen from the door but visible to me. Plugging in and out stopped being an “occasion” and became background movement. Five minutes of rearranging fixed weeks of fiddling. There was even a little extra legroom. Most telling: I returned to work, didn’t just tidy it.

    Quick Cable Management Q&A

    How do I keep cables out of sight without losing easy access?

    Try slim trays or clamp-mount boxes fixed to the desk’s front or side—hidden from most views, but an arm’s reach away. This way, chargers and adapters are accessible for every mid-session swap, instead of forcing you to crawl or stretch beneath the surface.

    What’s the main drawback of sealing every cable below the desk?

    Too much concealment means every device update becomes a process—unfastening boxes, tracing hidden wires, crouching for a connection. Over days, this adds up, making you more likely to leave chargers sprawled out “just in case” and turning your permanent clean-up into recurring makeshift fixes.

    Is it better to use a clamp or adhesive for cable control?

    Clamps allow on-the-fly adjustments and routine reconfiguration—they shift as your charger locations change, or if you re-route storage to clear leg space. Adhesives are set-and-forget, locking you in; fine if your arrangement never shifts, but limiting anytime your desk habits evolve or your workstation grows.

    Summing Up: When Desk Order Translates to Real-World Ease

    A tidy desk is only an upgrade if every core action—charging, swapping, resetting—stays friction-free as your work changes. True organization isn’t about hiding everything; it’s about minimizing the resistance between your intent and your next move. When your cable management balances invisibility with reach, clutter fades as a mental drain, and the desk finally supports—not interrupts—your routine. Each tweak is one less pause, and over time, those pauses make the real difference between merely looking organized and actually working with less drag.

    Explore the full WorkBasic collection

  • Why Bathroom Rated Lighting Outperforms Standard Fixtures in Humid Spaces

    Most bathroom lighting fails in quiet, everyday ways—and it starts sooner than anyone expects. What looks clear on move-in day turns unreliable after a few cycles of real use. Back-to-back showers? The “bright” ceiling light fogs up by noon; dim corners grow on the mirror edge. Spots form around screw caps, and a haze settles on the lens—no matter how often you wipe. These aren’t just eyesores; they chip away at basic bathroom routines. Brush, shave, or clean, and you’re always angling for better light or fighting fresh streaks that refuse to wipe away. Let humidity rule the room, and even rated fixtures that promise clarity start to reveal their limits, while standard ones become a headache fast.

    Why Standard Fixtures Fade Fast in Steamy Bathrooms

    Conventional ceiling and wall fixtures are barely designed for dusty offices, let alone steamy bathrooms loaded with repeated use. Seams, trims, and any exposed join are magnets for moisture; just one crowded morning pushes steam behind the lens and into every screw socket. Two weeks in, what once looked unremarkably bright is now patchy: the lens grows permanently overcast, rusty halos bleed around mounting points, and the beam above the sink starts to fray at the edges—all before you realize you’re squinting after every shower. Brightness drops just where you need clear, even light—at the mirror, by the shared counter, under the wall cabinet—and the fixture edges never feel completely dry, especially in the corners you reach for most during routine cleanups.

    It never fails spectacularly. Instead, discomfort grows: you find yourself re-wiping spots every few days, angling your face to dodge uneven glare, and by week’s end, the routine feels slower, less certain, more awkward. Little chores drag out. That sense of an always-ready bathroom quietly collapses.

    Where Moisture Really Collects: Edges, Mirrors, and Overlooked Spots

    Steam always settles in the worst places—behind glass trims, inside shallow ceiling fixtures, along the cold metal frame above the mirror where visibility matters most. Family bathrooms with double sinks or shelf runs get the worst of it; every rushed shower blasts more condensation into seams and trims that were never meant to seal tightly. It’s the low joints, underside edges, and just-above-eye-level surfaces that always go overlooked and start darkening first.

    The first signal: After install, all lights look clean. But wait even a month. Lens haze creeps in, mineral edges spread, and watermarks etch themselves above the vanity. These aren’t just ugly—they physically disrupt the light beam, scattering and dulling output so you’re left fighting darkness in the room’s most essential zones.

    Invisible on Day One, Obvious After Repeated Use

    Early on, it’s easy to miss the difference. Switch on the sconce or ceiling panel and the whole room seems evenly lit. But as weeks stack up, every shower leaves more film, and every cleaning wears down hardware finish. One morning, you’re forced to lean in closer for shaving or makeup, finding that familiar fog holding tight to the lens. Screws and bracket covers pick up corrosion—their heads turning the same dull color that won’t ever quite wipe away. Even if the ceiling looks fine while sitting down, the “useful” sections—tight vanity corners, shelf edges, the spot near the towel hook—always seem stuck in semi-shade.

    Bathroom-rated, fully-sealed fixtures don’t just promise better specs—they behave differently under attack: even after the worst steamy Monday, their lenses remain clear, the light spans evenly across the functional counter, and the worst corners stay lit. The difference isn’t in catalogs, it’s in the routine of never having to adjust your stance just to see what you’re doing.

    The Real Test: Mornings in a Shared Bathroom

    Picture the recurring friction: a two-shower morning, ceiling already sweating, and the fixture above the sink holding a fresh line of fog. With a non-rated light, cleanup becomes part of the routine. You wipe moisture from the trim—yet the edges of the room stubbornly stay blunted. The glass around the mirror keeps dimming, and you catch yourself moving your head or twisting to find a useable angle, especially when time is tight. Eventually, those blurred areas become accepted obstacles; every streak resists, every cleaning takes longer, and the fixture stops supporting you and becomes another thing you have to manage.

    Over time, annoyance deepens. Anyone who’s tried to touch up makeup or trim a beard with compromised lighting knows: the light is no longer a silent help, but a point of daily negotiation.

    What Changes With Bathroom-Rated Lighting?

    The real improvement comes after installation—when a fully sealed, bathroom-rated fixture shrugs off what used to be relentless buildup. Back-to-back showers? The lens remains clear; condensation slides off rather than collecting. The vanity, once sliced by shadow, stays reliably lit edge-to-edge. Corners near the mirror, which once disappeared for hours behind haze, become useable again—even right after the hottest morning rush.

    It’s the small difference that counts: that one strip beneath a shelf stays bone-dry, the area in front of the main sink never needs emergency cleaning, and the fixture itself—gasketed, with every joint protected—asks for almost no maintenance. Clarity stays routine, not another chore.

    Key Features: What to Look For in a Rated Fixture

    The only serious bathroom fixtures are labeled for “damp” or “wet location” use. Anything short of that is a compromise. Search for gasketed trims, sealed lenses, fully enclosed wiring, and tight seams, especially above the mirror, over shared sinks, or where steam lingers longest. Even on a wall that rarely takes direct spray, ordinary fixtures start to fail at their weakest visible points—the exposed screw, loose trim, or low-profile joint that collects just enough fog to ruin the finish within a few busy weeks.

    The old method—scrubbing streaks off a standard lens week after week—never stops the problem; it only chases symptoms. Properly rated lighting prevents most buildup, so you’re not stuck in an endless cleanup loop.

    When Repairs Become Replacements

    Here’s the most expensive lesson: the moment rust or haze takes hold, it’s usually permanent. Swap bulbs all you want; the beam keeps fading, the ceiling line yellows by degrees, and mounting points develop pits that don’t clean up. By the time the hardware grows loose or the lens stays cloudy for good, full replacement is the only real fix—costly, disruptive, and avoidable if the original install had been sealed from the start. The right fixture stops humidity at the source, skipping years of slow breakdown and forced cleanup.

    Everyday Upgrades Make the Difference

    The benefit of matching bathroom lighting to real, repeated use isn’t “better atmosphere.” It’s escaping daily annoyance—no more squinting, shifting, or wiping after every busy morning. Improvements become visible where you use them: fewer shadowed nooks, persistent clarity along countertop edges, and a fixture that quietly resists rot and routine mess. The change isn’t just from extra brightness, but from light that actually stays reliable, month after month, in the most punishing space in the house. Even one switch-out can transform a bathroom from obstacle course to dependable support.

    For lighting and support fixtures that stand up to real, repeated use in every space from steamy bathrooms to hard-working work surfaces, see what’s available at LightSupport.

  • How Three Points of Contact Lighting Enhances Safety in Every Home Space

    Most homes “look bright” on paper—until daily routines reveal the truth: You’re halfway through the hallway or rounding the stair turn, and a stretch of flooring simply disappears into shadow. You fumble for the rail, slow down at the bend, or tilt the laundry basket for a better angle. The ceiling light boasts plenty of lumens, but one reach or step off-center, and surfaces turn unpredictable. The problem isn’t just mood—it’s practical: poorly placed or single-point lighting quietly stalls everything from moving laundry to finding the edge of a counter. The right fixture isn’t just what fills the room with glow; it’s what makes each repeated step, grab, or glance obvious and effortless. Most routines break down not from lack of light but from light falling in the wrong place at the wrong moment.

    Why “Looks Bright” Doesn’t Mean “Works Right”

    Traditional flush mount and semi-flush ceiling fixtures promise evenness. In reality, they often cast dramatic shadows right where daily movement demands clarity—a stair tread, hallway crossing, laundry corner, or face in the mirror. The “impressive glow” overhead can leave whole zones unreliable the minute you cross into them. You’ll see it in scenes like:

    • Climbing the stairs, the first few steps are visible, then a pocket of shadow breaks your pace at the curve.
    • Hallways look lit, yet the threshold near the door or wall edge fades out, forcing anyone carrying groceries or a hamper to hesitate or steady themselves.
    • In the laundry room, you lean forward, and your own shadow darkens the washer’s edge, obscuring spills or stray buttons.
    • At the bathroom mirror, top-down light carves deep face shadows, so you have to crane for an even reflection or miss small details during your routine.

    These aren’t minor quirks—they’re repeated friction points that slow you down, chip away at your confidence in the space, and raise the risk of missing spills, tripping at turns, or missing the small hazard you meant to catch early.

    Shadow, Glare, and Broken Routines: How Lighting Friction Builds Up

    Relying on a single “bright” fixture means improvising around its failings: pausing at a dark stair mid-turn, blinking through glare above the bathroom mirror, or making multiple passes across the laundry counter because the far edge remains in partial darkness. Movement that should be automatic turns tentative. Glare forces your eyes to recalibrate; shadows hide the very surfaces you need. The result isn’t dramatic—but it adds friction to every trip, every reach, and each repeated task. Over time, the invisible costs stack up as slowdowns and small slips you never needed.

    The “Three Points of Contact” Indoor Lighting Method

    Borrowing from the principle of keeping three points of physical contact on stairs, three points of lighting contact means using a combination of ceilings, walls, and task fixtures. The aim: every key surface, stair, mirror, work area, and turn point stays both visible and free from harsh contrast—no dark wedges, no glare, no missing edge when you move.

    Ceiling Lights: The Wide Sweep

    Flush and panel-style ceiling lights deliver the field of general brightness, but as soon as the room bends, narrows, or the cabinets create overhangs, the single-source setup starts missing patches. In long corridors or L-shaped spaces, you might notice one wall clear while another side loses detail, especially away from the dead center. Ceiling fixtures set the baseline but rarely finish the job on their own.

    Wall Lighting: Closing the Gaps

    Wall sconces and hardwired wall lights let you position light exactly where overhead coverage fails. For example, putting a sconce just before a stairway curve eliminates the unseen edge that causes hesitation. Eye-level wall lights in hallways or corners polish off shadow lines and let your vision “track” forward naturally, reducing the urge to slow down or scan with a phone flashlight. You see where you intend to step—without second-guessing.

    Task Fixtures: Precision Where You Need It

    Task-focused and under-cabinet lighting exists to make sure you’re not working against your own shadow. Mounting a strip beneath kitchen cabinets, above the washer, or beside the vanity mirror switches the surface from a guessing game to fully visible. This means finding lost buttons, checking for stains, or shaving in even light actually becomes possible, instead of improvising with poor angles and missed spots. The difference: it fixes what matters most, right where your hands, face, or work zone are actually in use.

    How Real-World Improvements Play Out Over Time

    After a week, the effects are plain: the stair sconce kills the urge to hesitate at the turn; the under-cabinet light in the laundry means missed change and detergent smears become obvious before you close the lid. Bathroom mirrors stop producing harsh “face halves”—making routines faster and less awkward. The gain isn’t just brightness or aesthetics, but reliable, interruption-free paths through daily spaces. The lighting now serves your routine, not the other way around.

    Two Small Fixes With Outsize Impact

    • Keep pausing in the same spot? A well-placed wall sconce there may outperform any “brighter” bulb overhead—placement beats power every time.
    • Edge of your workspace always dim? Drop a task or under-cabinet light exactly where you lose visibility. One addition can free you from years of tiny, repeated workarounds.

    Most adjustments are simple add-ons or swaps—no redesign needed if you target where you actually move and work, not just where the old plan said the ceiling bulb belonged.

    The Shift from Visual Brightness to Practical Clarity

    Piling up brightness in a single fixture only goes so far—true comfort means layering light where it fits the task, angle, and real texture of your routines. Until wall lights or task lamps fill in the weak spots, your home may look “done” yet still frustrate you in motion. The three-contact method turns spaces from visually impressive to genuinely usable. When critical steps, edges, and surfaces get their share of real, directed light, your path through the day actually becomes easier—even when your hands are full or focus is elsewhere.

    Find lighting solutions for ceilings, walls, and task surfaces at LightHelper.

  • Transform Your Desk Outlet Corner with Open-Access Cable Management

    The neatest-looking desk can still bait you into a daily tangle. Try swapping one device, and the “organized” outlet corner turns on you: cables drag out, adapters bunch up under your feet, and that last bit of desk space you cleared is suddenly lost to another sprawl. Even with every cord tucked, every strip hidden, you’re still kneeling under the desk mid-task—searching for a plug, bumping a drawer, or yanking a whole cable mess loose just to reach your charger. A tidy setup lures you in, but in the crush of real work, the outlet corner is where order keeps eroding, and every fix seems to unravel faster than the last. It isn’t just a workspace issue—it’s the bottleneck the rest of the desk can’t ignore.

    Why tidy-looking solutions keep getting in the way

    Looks clean. Works awkward. That flush cable box or sleek tray delivers five minutes of calm—cables tucked out of sight, adapters masked, the illusion of control restored. But the next device swap breaks the spell: to trade one charger for another, you need to slide trays, pop lids, or wrestle coiled cords out of their slot. Closed organizers hide mess, but turn every plug-in into a thumb-wrestling match. Where you wanted friction-free access, you’ve built a micro-maze—especially if device changes happen more than once a day.

    Actual workflow exposes the trap: set a notebook down, reach to plug your phone, move a monitor—within minutes, a “clean” corner holds you up. Cables resurface, plug swaps turn into little battles, and you break working rhythm just to reach power. A spotless look forces extra motions—none of them visible until you’re in the middle of a real task.

    The repeat-realities that reveal where setups fall short

    Hidden clutter, new friction. Fast-paced work punishes bad decisions fast. Let’s say it’s Monday: you dock your laptop, unfurl the monitor cord, go to charge your phone, then realize the ring light needs in. Suddenly, the box “organizing” your cables wants you to lift it, coax cords out, and—more often than not—it never sits back the same. Every mid-session tweak—new charger, loose cord, last-second accessory—becomes a clumsy reset just to maintain basic function.

    The cost isn’t mere seconds. Each forced reach, dragged drawer, or clattering adapter wastes focus. Multiply that over a week: you start skipping device swaps to avoid the friction, letting clutter win back space inch by inch. The so-called efficient station is now quietly slowing you down—less of an upgrade, more of an invisible anchor on your routine.

    Making the outlet corner invisible—and easy

    The real improvement isn’t about hiding the problem—it’s about removing friction. Swap the closed cable box for a slim open-access tray, fixed below or behind the desk edge. Cords run clear in a single untangled path: out of sight from above, but one-reach accessible. Need a new device? Slide the plug in—nothing to lift, fish out, or push aside. Cables don’t fall or catch. No two-handed resets, no awkward fishing mid-task. Everyday plug-ins collapse from a sequence of steps to a single, smooth action.

    This shift changes behavior: you no longer hesitate to trade chargers, refresh a connection, or add another cable for a pop-up task. The outlet corner fades—there when you need it, backgrounded when you don’t. Floor clutter vanishes, under-desk tangles are gone, and your line of sight stays clean without any corner drama creeping back into each session.

    Everyday examples of the hidden difference

    Morning setups get frictionless. Walk in, dock your laptop, stretch the cable over—there’s no pile to dodge or cable to fish up from behind a drawer. The first plug-in of the day feels like pressing a switch, not untangling a net.

    Midday device changes don’t kill momentum. Snap from a call to a tablet session—charge ports are always in reach, no box lid to fight or charger to hunt down. You maintain flow between roles instead of resetting your space for each tiny transition.

    Shared desks avoid compounding mess. Where people swap stations all day, open trays block the rise of cable nests and dangling adapters. Every user finds their port instantly. The cleanup before closing is a two-second sweep, not a five-minute cable sort.

    Quick FAQ: Open-access outlet corners

    How do I keep my outlet corner tidy without losing easy access?
    Install a shallow, open cable tray beneath or behind your work surface. Position it where you reach forward—not below knee level—so cables stay hidden when seated, but can still move freely. This cuts floor tangles and ends the daily ritual of popping lids, shifting drawers, or ducking under the desk.

    Why do sealed cable boxes keep snapping back to messy?
    Because every hookup disrupts the setup. Closed boxes only hold their form when rarely touched. With daily swaps, wires stick out, lids get left half-off, and the whole shell traps yesterday’s chaos—putting the tangle out of sight, but never out of life.

    What’s the most common outlet storage mistake?
    Over-spec’d, under-used organizers: deep or lidded boxes in the busiest zones. You trade a row of cables for a barrier you have to navigate every day. The true upgrade is direct, nearly invisible routing—accessible but protected, hidden but not buried.

    The outlet corner that stays quiet, session after session

    The best desk setups don’t just snap into place for a photo—they stay frictionless when the real work starts. An open cable tray keeps the corner silent and low-maintenance, so resets happen in a blink and no cord pile creeps across your feet by Friday. The truly lasting difference isn’t how organized it looks, but how rarely you have to think about it at all. When the outlet area stops demanding your attention, the desk supports you rather than sets a trap—whether you share your space or work alone, the payoff is a routine that finally matches what you expected from a “well-organized” setup.

    Explore the full WorkBasic collection

  • How Linear and Panel Ceiling Lights Restore Room Boundaries and Clarity

    The light looks clean, but the edges keep messing with your routine. You swap in a flush-mount ceiling fixture, check every corner for shadows, and step back—everything seems even, the room brighter, setup “complete.” But the relief fades the next time you reach behind your desk: the outlet is there, but its edge is lost in a shadow the fixture never touches. Try grabbing a charger or notebook from the back of a shelf—suddenly you’re squinting, sliding your hand along a blurry line, second-guessing whether the end is there at all. The surface may look organized, but the cues you rely on—clear edges, visible boundaries—keep falling into a low-contrast haze. In every shared space or compact work zone, it’s the difference between a room that works and a room that quietly trips you up.

    The Subtle Problem with “Clean” Ceiling Lighting

    Wide flush-mounts, LED discs, and domes are designed to tidy ceilings and create a seamless flood of brightness. The appeal is real: minimal clutter, uniform glow, fewer visual distractions. But the tradeoff sneaks up fast. These fixtures flatten the room’s logic: shelf edges dissolve into nothing, charging cables run unseen across the floor, and organizers slip into the same soft field where nothing pops out. Step into a space “finished” by overhead diffusion, and you’ll spot the pattern—looks neat, but daily tasks start dragging. You spend extra seconds poking through a shadowed tray, inch a chair closer to see what’s tucked behind your monitor, or reach toward a lost USB cable thinking it’s still there. The more you use the room, the more little slip-ups add up. A setup that looked resolved interrupts you again and again.

    Why Lighting Boundaries Matter for Real-World Use

    Most people don’t discover lighting failure until daily movement exposes it. The real issue isn’t “is the room bright?”—it’s “can I see what matters, right where I use it?” Workspaces and shared rooms rely on visible cues created by light and shadow. Without them, you fumble the edge behind a monitor, miss a box sticking out under a shelf, or fail to see the gap where a dropped pen rolled away. Standard diffused ceilings swallow these edges whole. Everything glows, but the surfaces blend. In spaces that shift roles—work then craft, conversation then cleanup—losing that surface definition means losing speed and certainty. The desk that once felt clear now forces you to hunt for its outline; a shelf becomes a gray plateau instead of a usable divider.

    Everyday Friction: A Lighting Scenario

    Take a multipurpose family room: work zone, play zone, storage, all under one ceiling light. The glowing flush-mount makes the whole area look composed, but real use tells another story. Chargers vanish into the shadow under a bench, toys drift to the floor’s vague boundary, and you find yourself bent low, checking whether the remote’s tucked against the skirting or simply lost. Quick tasks stall out, and “resetting” the room turns into a loop of double-checking and frustration. The visual map you need—the sharp corners, shelf ends, bin margins—gets washed out, leaving decision fatigue just beneath the surface.

    Linear and Panel Lights: Restoring Useful Edges

    Upgrading a plain overhead fixture to a linear or panel ceiling light is less about how the room looks and more about whether the space works. Install a linear panel (say, 120 cm) above a desk or shelf in place of a dome, and the result is direct: desk and wall edges become visible; notebooks and cables no longer hide. The space regains orientation. Boundaries and structure reappear—not because the room is brighter, but because the light runs along the working edge rather than puddling at the center.

    What flips the script is directional spread. Linear and panel fixtures, when mounted parallel to a key surface or zone, don’t flood everything equally. Instead, they define the long run of a shelf, the border of a desk, the back line of a shared table, without the glare or hot-spots of old strip lights. Now, the high-use areas are readable without bending or guesswork. You sweep a surface and spot stray items before cleaning becomes a hunt. The space functions—the setup starts to cooperate instead of quietly resisting routine use.

    Support and Placement: Making the Fix Hold

    The fixture matters, but so does the support. The biggest win is stolen by a simple miss: bad cable paths and bracket placement distract from the gain. Ceiling-hugging brackets and thoughtful routing—tucked along a wall, kept tight against trim—keep the fixture low-profile and out of mind. Leave a cable to snake across the open field, or mount hardware that projects awkwardly, and you’ve traded one distraction for another. The goal isn’t just a sharper surface but a room that doesn’t keep reminding you of its patchwork fixes.

    Tip: Choose frosted covers for your linear or panel lights—diffusion matters. This avoids harsh contrast, but still carves out the lines and surfaces you need to see. Particularly useful in zones that flex, where routines overlap or you share space day after day.

    Living with the Difference: Looks Polished vs. Feels Resolved

    For most, the shift isn’t instant; it’s day-to-day relief. Swap to a linear or panel fixture and the subtle drag eases. Small items stay visible, chargers don’t slip out of sight, and the time lost “resetting” surfaces shrinks. Clear desk edges, shelf lines, and bin margins let you check what matters and move on. In contrast, rooms with old domes or globes demand workarounds: dragging a lamp close, nudging a chair for a better angle, or endlessly tidying because clutter never actually leaves—just slips beyond the general glow. The difference? It’s not what you see in a photo, it’s what you stop repeating every day.

    Real-World Fixes for Common Lighting Setbacks

    • If you keep shifting the main light: Pause and check what’s missing—surface and edge clarity, not just brightness. The wrong fixture forces you to move, tense, or reposition just to see your own workspace.
    • Cable and bracket headaches: Use the lowest-profile hardware you can fit, run cords along walls or behind trim, and avoid stretching lines across visible ceilings. Good support keeps new clutter out of view and lets lighting do its job.
    • Still losing track of small items: Mount linear fixtures parallel to desks, benches, or shelf runs—not across them. This casts gentle, readable contrast right where items most often go missing.

    Worth the Swap: From Subtle Frustrations to Surfaces That Work

    A standard ceiling fix always looks fine on day one. But under real routines—shared work, storage, play—the hidden cost builds. Edges blur, searching eats into your focus, and small chores become repeat annoyances. A basic dome substituted for a well-supported linear or panel light changes the logic of the room—especially if you solved for cable clutter and mounting from the start. The payoff isn’t a staged “after” photo; it’s less drag, fewer small frustrations, and a space that finally lets you move on without a second thought.

    http://www.lightsupport.myshopify.com

  • Why Proper Lighting Placement Transforms Stair and Laundry Safety

    Where lighting quietly betrays you: The stairwell looks fine at noon, and the laundry nook seems bright enough when you move in. Two days later, the difference shows itself—a sharp shadow on the stair turn makes your foot hesitate. Socks and cleaning supplies vanish behind appliances, and what passed for “well-lit” now trips you up or stalls the routine. Without warning, simple habits become a daily obstacle course, thanks to shadows and glare that the basic fixture didn’t warn you about.

    Where “Bright Enough” Fails in Real Spaces

    Ceiling lights promise total coverage, but routines prove otherwise. Grab laundry on a late night: the back edge behind the dryer is still a black hole, making you kneel and grope for missing socks. Take stairs before sunrise: a centered flush mount slices neat shadows across every step just where your foot lands, forcing you to slow and check each tread. The room glows overhead, but the pathway itself remains uncertain—your instincts hesitate where light never quite reaches.

    It’s not brightness—it’s about how light lands and where it falls short. Most “all-purpose” lighting passes on first inspection but breaks down the instant movement matters. Places like stairways, hallways, and laundry corners punish lazy lighting, exposing every missing beam at turning points, hidden shelves, and uncertain landings. When you use a room for more than standing still, the flaws stack up fast.

    Common Pitfalls: How Typical Fixtures Let You Down

    Ceiling Lights—Good on Paper, Risky in Practice

    Flush and semi-flush ceiling fixtures seem to check the box. In stairwells, though, they create a lopsided spread. Center a light overhead and the lower half of the stairs gets murky—especially when the fixture sits above your line of sight. You spot the next step a half second late or shuffle for the rail because your eyes can’t trust the shadowy outline at the turn.

    Wall Sconces—Stylish, but Isolated Illumination

    Sconces favor symmetry, not safety. If they’re spaced for looks instead of reach, pockets of shadow blink into existence behind cabinets or along the wall beside the laundry. You end up swinging a basket side-to-side to catch any last shirt, or pausing mid-step to squint at the floor’s edge—places that invite mistakes when you’re distracted or tired.

    “High Output” Still Leaves Blind Spots

    A brighter bulb ups the lumens but not the coverage. Glare bouncing off tile or glass can blind you just as much as darkness does, especially when you’re searching for a stair edge or pulling supplies from a recessed shelf. Even with high output, the corners left untouched stay stubbornly dim as you circle and double-check the space.

    The Real-World Friction Points: Overlooked but Constant

    The first sign of weak lighting isn’t eye strain—it’s how your routine slows down: Now, hunting for socks at the back of the laundry or hesitating at the stair’s mid-flight becomes normal. Movement gets interrupted, footsteps pause for a beat, and the flow you took for granted has turned into a series of minor checks and recalibrations. The “good enough” setup unravels every time you cross a dark patch or miss the zone that needs to be clearly seen.

    • Stair mid-flights and turns feel risky after dark, with shadows pooling where steps change direction.
    • Small essentials vanish behind a utility cabinet, despite the ceiling light claiming total room coverage.
    • Hallway corners become places to shuffle, not stride—one side of your movement path falling away in dimness.
    • Early morning or post-dusk routines reveal weak spots—always the task zones, edges, or surfaces that matter most.

    The truth: What looks “lit” isn’t truly usable. Safety and confidence only show up when every angle, turn, and reach point lands in reliable, overlapping coverage—not just center stage or wherever the blueprint says a fixture should go.

    Targeted Fixes: Where Structure Beats Sheer Output

    The breakthrough isn’t about flooding the area with more wattage. It’s about strategic source placement: a second damp-rated flush mount at the stair landing, a dedicated fixture over the laundry’s cabinet run. Instead of chasing lost socks into the shadows or guessing at steps, these tweaks close the gaps. Shadow edges retreat, movement flows naturally, and every inch finally matches the routines that expose the setup’s weak points.

    What Changed After the Setup Shift?

    The pacing shifted, and the stops vanished. Gathering laundry stopped being a crouch-and-search routine. Every stair, even one-handed or half-awake, revealed itself clearly—no need to hug the wall or guess in the gloom. The light began to serve the routine, following the action instead of just decorating the ceiling.

    Practical Tips for Daily Lighting Relief

    • Layer ceiling and wall lights for real coverage—ceiling mounts give general fill, but wall or directional fixtures erase shadowed edges exposed by footsteps, baskets, or cleaning tasks.
    • Let activity—not drawings—dictate placement. Put fixtures at stair turns, above reach zones, and in the corners where hands, eyes, or small items go missing.
    • Use damp-rated fixtures without hesitation in spaces prone to humidity or moisture. A standard fixture in a laundry or utility space isn’t just a short-term fix—it’s a future dark spot once humidity takes its toll.

    Questions People Ask Once Friction Sets In

    Should I use a ceiling light or wall light for better stair or laundry visibility?

    Both—never one alone for problematic zones. Ceiling fixtures fill the air, but wall lights chase away recurring step and edge shadows. The combination is what finally stops the guessing.

    Is it more important to choose a bright fixture, or to think about placement?

    Placement, every time. Over-bright, poorly placed lights cause glare or leave dead spots. A moderate, smartly located fixture lets you see and move with certainty. Real-world use exposes errors in placement—not just weak wattage.

    What if I use a standard fixture in a utility or laundry area?

    Humidity and routine are relentless. Non-rated fixtures lose ground to steam and moisture, failing early and leaving your most-used surfaces in shadow. The cost is more than a bad bulb—it’s years of dropped items, second-guessing steps, or slips in dark, damp corners.

    From “Good Enough” to Truly Usable Lighting

    The difference is obvious during the small, repeated moments: safe at the stair’s turn instead of tentative; no more squinting behind the washer; never losing your step mid-hallway. What looks “lit” is often just the absence of darkness, while functional lighting is about every daily move feeling smooth, unhesitating, and safe.

    The real question isn’t “Is it bright?” but “Does every step and reach feel clear?” In hard-use indoor zones, lasting improvement requires coverage that fits the actual routine—flush or semi-flush for area fill, wall or task lights for shadow-prone spots, and always a moisture-safe fixture where needed. Zones with recurring strain should dictate your setup, not just plans on paper. Lighting built for movement and daily retrieval keeps those trouble spots from stacking up over time.

    See lighting that’s mapped to real movement and true coverage at LightHelper.