Category: Lighting & Work Setup

  • How Hiding Power Cords Under Your Desk Transforms Workspace Efficiency

    Every organized desk promises clarity: cables tracing the edge, nothing dangling, paper pile trimmed. But within the first hour—rushing to connect a charger, shifting your notebook, unplugging something for a call—it cracks. The neat cable path drags across your notes; a USB cord tugs the edge of your laptop; the “tidy” setup drops a plug just enough to tip a mug. If you work at the same spot all day, or switch devices more than once, these frictions become routine. The surface stays clean—sort of—but the workflow stutters. What looked organized from a distance is, up close, just another reason to untangle, nudge, reset, and lose focus. A desk that photographs well won’t stop a cable from slipping back over your reach path, or keep a charger from rearranging your papers every time you move.

    Why Visible Cable “Organization” Isn’t Enough

    Visible cable order is fragile if you actually use your desk. The line of clipped cords, the single sweep of “minimal” wires—they’re set for stillness, not for a session where you swap a keyboard for a tablet or slide your chair to jot notes. Real routines break the illusion. Every unplug means feeling blindly for a dropped end. Any device shuffle brings another obstacle: a phone cable trailing where your mouse should go, a sketchpad snagging on a power brick, a monitor riser crowded by looping USB lines. These aren’t messes—they’re micro-disruptions. Most users end up nudging a cable off the mouse pad half a dozen times a day, then moving the charger again to make room for a new device. Looking neat doesn’t keep the work pace smooth when your connections keep reverting to the same tangled annoyances.

    This is motion friction, not mess. Enough drag and delay, and the desk stops feeling like a tool—it starts feeling like a staging area you have to fix after every task. Even expensive cable clips aren’t enough; the daily tide of chargers and adapters turns the primary workspace into a rerouting zone. Clearing the surface just restarts the slow creep of usable space being taken back by cord spillover and plug pileup.

    How Hiding the Power Area Changes Actual Desk Use

    Moving cables beneath the desk eliminates routine interruptions you stop noticing—until they’re gone. Installing a cable tray or power box under the surface isn’t just about hiding clutter: it removes the hand-threading, the cable chase, the accidental coffee knocks, and gives you back actual surface to work on. This change is most dramatic on cramped desks, but even with plenty of room, separating cord traffic from active workspace divides friction from flow.

    Instead of always working around a cable looped near your notebook or dodging a laptop plug where your elbow should pass, you reach just under the desk edge: chargers and adapters are out of view and out of the way. Device swaps become a single down-and-up motion. Your desk—finally—stops blending task space and infrastructure. More notably, it disrupts the old clean-up-reset-fidget cycle that used to follow even short sessions.

    Frequent Charging Is No Longer a Disruption

    Multiple devices demand frequent connections—a laptop, a phone, hard drives, headphones, a lamp—but shuffling cords shouldn’t interrupt flow. With power routes tucked below, you stop re-routing cables over your keyboard or risking a cable heap falling into your lap. Outlet access is smoother (not buried), cable slack stays contained, and the small but constant friction from surface-routed chargers disappears. Momentum doesn’t reset every time you change a device or run out of power—the upgrade is visible in flow, not just appearance.

    Choosing the Right Under-Desk Setup—Details That Matter in Practice

    The key is concealment that remains tactile and reachable, not buried. Position the under-desk cable tray close enough to reach without awkward stretching, but not pushing into knee or leg movement. Mounting a tray about 8cm from the desk’s rear edge means you can touch and swap cables without crawling underneath or overstretching wires. This becomes the difference between “hidden and functional” and “hidden and forgotten.”

    At the end of the day, clearing cords stops being its own task. The main plugs you use stay put, isolated from paper shuffles or chair slides. The tray absorbs unwanted slack, so cords loop downward instead of snaking across the desk or straining device ports every time you shift your setup. The daily reset is shorter because most problems never surface in the first place.

    Desk Depth and Movement—What Changes

    Shallow desks amplify every spot lost. When you move chargers and strips below, all your depth is usable for work, not as a holding strip for adapters or tangled cables. Drawer pulls, monitor slides, and quick chair adjustments become easier—you aren’t snagging anything vital or pausing to wonder what might pop loose. There’s less “accidental unplug,” fewer times you hesitate before tugging on a cord, and far fewer micro-delays between tasks. Only after repeated use does the difference click—the surface stays prepared, and the reset routine nearly vanishes.

    Real-World Improvements: Not Just Cleaner, Actually Easier

    The real value shows up quietly: the morning where nothing falls across your notebook, the day you swap devices mid-meeting and don’t have a tangle to fix, or the end-of-shift “quick tidy” that’s truly quick for once. Cables out of sight—but never out of reach—mean your desk function is ready for shifting priorities. No more chasing a rogue cord off the edge or spotting a stray plug distracting in the corner of your eye. This isn’t cosmetic. It removes enough daily interruptions that work feels noticeably less fragmented.

    Working with Change—Is a Hidden Power Zone Always Practical?

    If you’re constantly changing hardware, sharing space, or shifting layouts, choose trays or boxes you can open quickly and that allow generous slack for transitions. Don’t force concealment so deep that you lose everyday access or make maintenance a chore. Swap and check connections with a quick glance to prevent cables from wearing, detaching, or silently overloading below the surface—concealed isn’t invincible, and periodic checks matter in setups with moving parts.

    Quick FAQ for Desk Clarity in Heavy Use

    How do I keep the desk clear without losing charging access?

    Mount key chargers and the main strip under the desk, within seated reach. This keeps the work surface completely clear but lets you plug or swap devices in seconds—no need to tighten or reroute cords in the middle of a task.

    Will hiding cables make it harder to move things around?

    Use flexible trays or cable boxes that allow enough slack and easy reach. The right tray lets cords move with you, minimizes crawling, and turns cable swap into a minor reach, not a chore. Don’t trade concealment for access.

    Is there a downside to keeping my power area hidden?

    The desk looks neater, but “out of sight” risks out of mind: chargers overheat, wear accumulates, or a crowded strip gets overlooked. A periodic under-desk check prevents the hidden zone from turning into a blind spot for problems.

    The Real Gap: From “Looking Tidy” to “Working Easily”

    Hiding cables below the desk does more than create a photo-ready backdrop: it shifts daily effort from constant re-adjustment into predictable, unbroken use. The key difference isn’t cosmetic, and it isn’t just for show. A well-separated power zone is what keeps session after session flowing—ready when demands shift, not just neat when you walk in the room.


    Explore the full WorkBasic collection

  • How Fixed Task Lighting Transforms Everyday Work Surfaces Without Extra Brightness

    Why does a room that shines at first glance fall apart in real use? You step into a kitchen or bathroom lit by fresh overhead fixtures—everything “looks” bright. But the moment you slice at the counter or check your face in the mirror, the catch becomes obvious: the lighting doesn’t land where you actually need it. A kitchen looks crisp until your hands disappear in your own shadow mid-chop. A bathroom mirror glows, but step in close and one side of your face blurs into darkness, the other caught in glare. General ceiling lights fill the volume but miss the working zone, forcing your routine to bend around the lighting instead of the other way around. These aren’t rare hiccups—they are everyday friction, making ordinary routines feel more annoying, uneven, or slow, no matter how “bright” the room appears.

    The Friction Behind “Well-Lit” but Poorly-Working Rooms

    Most lighting problems aren’t about wattage—they’re about direction, placement, and what happens after a week of real use. In kitchens, every time you lean over a prep surface, the line between overhead light and your reach creates a shifting shadow. You adjust your stance, tilt the board, or pause to check what’s been missed. In the bathroom, even an upgraded ceiling fixture still leaves one cheek in gloom once you step closer, making detailed routines—shaving, skin care, makeup—awkward and slow.

    The pattern repeats in laundry rooms and work corners. Spaces seem bright until you spot the patchy shadows creeping along the back wall or across the folding surface. Suddenly you’re squinting for stains or tracing a stubborn crease that only shows in the right angle. The consequence is always the same: extra moves, uncertain details, small moments lost to chasing clarity. It’s not just distraction; it’s time and effort eaten up by a setup that calls itself finished but keeps falling short where routines actually happen.

    How Fixed Task Lighting Delivers Real Clarity

    Task lighting changes the entire dynamic by putting light exactly where it counts. Under-cabinet strips, wall sconces, or vertical mirrors-side fixtures don’t just add brightness; they cure the shadow lines and glare points that slow you down. With focused task light aimed at the true work zone, you stop strategizing around the gloom and start using your space as intended.

    What Actually Shifts Day to Day?

    • Cooking and prepping: Every inch of your counter is evenly lit. No more awkward reach, no more food hiding in dim patches or hands swallowed by your own silhouette. Tasks move faster because visibility stops being a variable.
    • Mirror routines: Side or wraparound vanity lights balance your reflection, so every detail is there without squinting for contrast or fighting a line of glare. You lean in and see what’s actually there first try—no spins or double-checks required.
    • Laundry, workbenches, utility spaces: Directed lighting over folding, sorting, or cleaning spots eliminates the dull fade that slows you down. Stains and creases are visible the first pass, not only after a second hunt under a brighter bulb.

    When Overhead “Brightness” Backfires

    Too often, the instinct is to upgrade to “brighter” or larger ceiling fixtures, thinking the problem is total illumination. But high-wattage flush and semi-flush mounts flood the room while leaving the real work zones largely unchanged—or worse, produce more glare and sharper shadow boundaries. Mirrors stay uneven, corners remain dim, and work surfaces depend on your angle not to fall into a blind spot. The more you chase brightness from the ceiling alone, the more you notice yourself side-stepping, tilting, or hunting for the actionable patch of light every time you need to focus.

    Spotting the Red Flags

    • You habitually lean or twist to catch extra light at counters, sinks, or mirrors.
    • Shadows jump across your hands and tools with nearly every movement.
    • Cabinet edges, corners, or one side of a hallway never reach full clarity, even after swapping bulbs.
    • Half your face drops into murk at the mirror, despite the room looking “well-lit” overall.

    These patterns aren’t quirks—they’re direct signals your current setup is outmatched by your real routines.

    What Steady, Directed Task Lights Actually Change

    Replacing a single stretch of overhead lighting with a focused under-cabinet or vanity fixture can change daily workflow overnight. By sending clear, shadow-free coverage right onto the work surface or mirror edge, routines become faster and noticeably less strained. The task stops being dictated by glare, and the room finally works at your pace. Over sink or stair, a properly placed sconce or flush-mount keeps every step in sight, each fold and cut straightforward—no more pause, tilt, or squint required.

    Even hallway or stair turns change: well-placed ceiling or wall lights can eliminate the fading edge, preventing one side from falling away as you pass in low light. It’s not about visual drama or decorative appeal—it’s about the space actually holding up after dozens of real repetitions, not just the first impression.

    Pinpointing Friction: A Practical Test

    In any task zone, mark where the shadow or glare always breaks your flow—the line where overhead light consistently fails. That’s your target for fixed, directional lighting: an under-cabinet run, an angled wall sconce, or a vanity bar precisely placed to catch your reflection without diffusing into the ceiling. Skip the urge to blanket the whole room in overhead glow; solve for the spots where friction repeats. That’s where task lighting matters most and pays off every day.

    The Real Price of Shadow and Glare

    Every ignored patch of shadow or slice of glare quietly increases your daily load. The fight for visibility wears you down, even if you don’t notice at first—lost minutes adding up as you check for missed spots, redo tasks, or simply move slower to avoid mistakes. General ceiling light may flatter the room, but when the gear is wrong, routines stay clumsy and repetitive. Task lighting isn’t a luxury or a visual upgrade for showrooms—it’s the fix that recovers control, pace, and reliability after months of repeated use.

    Leaving a room “bright” but structurally mismatched means you trade the space’s full comfort for a string of minor slowdowns, double-work, and perpetual second-guessing. Get the layers and the direction right, and suddenly your routines don’t just run—they snap back into focus, again and again, without you even noticing.

    Explore practical indoor lighting solutions at LightHelper.

  • How Under Cabinet Lighting Transforms Everyday Kitchen Tasks with Clear Illumination

    You spot it as soon as you start working—the kitchen counter looks bright, the desk feels tidy from across the room, the shelf glows under ceiling lights. But step closer, and the flaws surface fast: shadows pool at the back edge, your arm blocks the light, and every reach under a wall cabinet throws your own silhouette across what you need to see. The surface that’s supposed to simplify your routine now makes you pause, squint, or shuffle things forward. The disconnect is sharp—from a distance, rooms look resolved; up close, the task zone stays awkward. This is where typical overhead and wall lighting break down: you notice the gap every time you cook, fix, or read at the same spot, and the inconvenience compounds as the week stacks up.

    The Everyday Struggle with Shadows and Glare

    Each return to the same surface brings back the same friction. Overhead lamps throw your shadow over the work, so you lean sideways or twist your neck to get a useable view. Glare bounces off glossy areas—tiles, steel, even crumb-strewn counters—making cleaning and reading detail harder with every repetition. Ignore it, and the strain collects: missed edges when you wipe, crumbs left behind, fine print still in the dark. Add a plug-in lamp as a quick fix, and now there’s a new cable snaking between your tools, or a glare line catching your eye with every move—another problem traded for the last one.

    The Hidden Cost of Imperfect Setups

    Exposed or tangled cables break the illusion of a clean setup before anything even gets used. A bracket or stick-on mount that seemed steady when new starts to rattle after each cleaning session. A lamp nudged to reach one spot never seems to land back at the right angle, so small adjustments eat into every task. The routine shifts from simple work to small, repeating interruptions—things look organized, but every use reopens the same weaknesses.

    Where Overhead Lighting Falls Short

    A room can look crisp on a checklist—wall sconces, ceiling fixtures, clear desk edges—but as soon as work starts on a surface pressed against a wall or under a shelf, the limits show up. Overhead light simply vanishes at the hinged dark seam where work meets the wall or the underside of cabinets. No matter how bright the general light, the crucial back edge stays vague. You’ll catch yourself pulling items forward, chasing usable light. The space looks finished, but the dim zone never quite resolves—a real setback for any surface that’s meant for prepping food, reading small print, or sorting parts.

    The Daily Reality of Shadow Zones

    The repetition is impossible to ignore: slicing vegetables with your own hand casting a blur, searching for a screw at the back of a shelf by feeling more than seeing, juggling jars just to spot a label. Every time you adapt your position or bring in an extra flashlight, it’s a signal that the core lighting plan is outmatched by real routine. The friction is lived-in: workarounds become habits, comfort gets replaced by constant adjustment, and the best you get is “it’ll do for now.”

    How Proper Under-Cabinet Lighting Changes the Game

    Direct under-cabinet or under-shelf lights solve the missed spots that main fixtures can’t touch. Placement is everything: a slim LED bar or adhesive strip tight beneath the front lip of a shelf shifts light right where hands work and details matter. The difference is immediate—no more hand shadows, no more guessing where the counter’s edge stops, and far less shifting just to see. Instead of improvising, you see and reach with ease the first time, without dragging lamps or hunting for better coverage.

    A Real-World Upgrade: Less Strain, More Clarity

    The most practical fix is this: fixing a low-profile LED directly under your most-used shelf with its cable pressed flat and hidden. Before the swap, maybe a plug-in lamp hogged counter space—its cord pooling in puddles when the sink gets busy, or snagging every time you rearrange containers. With a permanent bracketed light, suddenly every inch of the surface reads clean, no cable chaos, no lamp to keep nudging back, no bouncing glare to dodge. Late-night tasks lose their hassle; you find yourself matching labels or measuring small pieces in one try, not a series of workarounds. The setup actually steps out of your way.

    The Role of Support: Clean Holds and Cable Calm

    Brightness alone doesn’t win. Support hardware—solid brackets, clean cable runs—keeps the solution working under pressure. Lights that wobble with each grab, or cables that drag through crumbs and catch on containers, turn a fix into another nuisance. Only with cables routed tight against the structure and a stable mount does the solution settle into the background—and stay reliable across cleaning, shared use, and everyday motion.

    Most Common Mistakes—And Why They Matter Fast

    If a lighting setup falls short, it almost always fails here first:

    • Loose, visible cables: They trap dust, snag cleaning rags, and stack up distraction by the day.
    • Shaky mounting or brackets: A single careless bump shifts the light, so you’re fussing with angles instead of working comfortably.

    Weaknesses that seem minor on install become big annoyances after a week—especially if more than one person is reaching, cleaning, or moving things in the same zone. What looked organized on day one soon feels unreliable or cluttered.

    For Lightly Used Spaces, General Lighting Might Suffice

    If a shelf holds storage and rarely gets touched, or a counter is used once a month, the shortcomings of overhead-only lighting barely register. But for any spot you use several times a week—making lunch, charging tools, sorting supplies—a properly mounted under-shelf light, with secure support, changes the experience from make-do to actually smooth, saving your eyes and your time every visit.

    From “Looks Clean” to “Actually Feels Right”

    The difference is obvious after a week of real use: the space isn’t just visually finished, it works—no dark corners asking for improvisation, no cables or brackets breaking the flow, no rerouting your tasks around a weak edge. Solid support does more than hold up the light; it holds up your routine. It’s the move from “tidy on inspection” to “nothing gets in my way when I use it”—lighting and mounting logic designed for movement, for regular cleaning, for actual living. When everything stays easy week after week, you stop thinking about the setup at all—and start trusting that what looks resolved finally matches up with how you need it to work.

    Visit LightSupport for practical lighting solutions and installation accessories that make real spaces feel clear, usable, and easy to maintain.

  • Balancing Desk Tidiness and Efficiency with Power Brick Placement

    The invisible power brick trap is easy to miss—until it turns your “organized” desk into an obstacle course. A perfectly clear desktop looks finished: power bricks gone, adapters hidden, stray cords finally out of sight. For a day or two, the order feels like progress. But as you cycle through a normal routine—charging a laptop between meetings, switching devices, resetting after a focus block—smoothness evaporates. Surface clarity exposes a different kind of friction: what used to be one quick plug now means shifting your chair, reaching past storage drawers, or feeling blindly behind the desk’s edge just to change a line. The mess is gone, but every reset costs you extra movement and micro-interruptions that add up. The clean look starts to feel like a slow trap rather than a true upgrade.

    When tidy setups cost you more movement than mess did

    Order is only effortless on paper. Picture two desks: both spotless up top, both with a monitor and keyboard in the same place. But on the first, the charging brick is pinned inside a cable box at floor level, zip-tied under drawers. On the second, it’s in a shallow tray just beneath the wrist rest. When your phone battery dips mid-notetaking, the difference sharpens: Do you squat and twist for the connection, or reach down without pausing your workflow? The more you change devices, the more each hidden brick shows up as an extra stretch—one quick bend multiplied by dozens of cycles per week.

    Every bonus movement adds up fast. On busy days, where devices rotate and breaks are rare, each crouch or reach drags on your pace. The illusion of order becomes a friction tax—paid in scrambled posture, broken focus, and lost momentum that never quite gets noticed until the next reset is already late.

    Desk clarity versus daily friction: Where misplaced neatness backfires

    The logic is simple: surface tidiness looks neat, but the space under and behind your desk drives your real workflow. Maybe you invested in a dual monitor arm to clear the desk, lifting the screens for extra room. Below, you go all-in with a deep cable box anchored to the floor, everything tucked away. But when it’s time to swap a laptop or plug in a power bank, you’re on one knee, moving a storage drawer, squeezing between cables you can’t quite reach. That “out of sight” feeling becomes real-world interruption—especially if you’re rotating devices repeatedly through the day.

    The silent penalty is momentum. Team desktops, shared benches, and hot-deskers feel it first. What starts as pride in a clean aesthetic quietly flips into annoyance when a cable swap means hunting under the desk, moving gear, or dodging tray corners. Too often, visual neatness gets prioritized over the far more important need for fast, consistent access.

    How small setup tweaks restore rhythm and reduce interruption

    The right fix rarely means adding more organizers—it means rethinking access. Shift power bricks from a hidden floor box to a slim under-desk tray, mounted just behind the main desk edge. Not visible from a seated position, never crowding knees, but always reachable in an arm’s normal range. Now every reset becomes a small, tidy reach instead of a body-shifting pause. No more crouching or chair scooting just to plug in a second device.

    The payoff is visible in repetition. After a few cycles, you notice the reset points fading. Hands flick cables without searching, device swaps don’t stall your next block of work, and the desktop still looks composed. The workspace doesn’t just look streamlined—it lets you move through tasks without the drag of hidden obstacles, keeping the rhythm of your day steady.

    Practical use scenes: Recognizing where desk setups help—or get in the way

    Cable management is about flow, not just appearance. On any normal workday—switching between a laptop, a tablet, backup earbuds—it’s never just the device you’re moving, but everything in the way: power cords, monitor arms, sometimes the storage drawer you bump every hour. If cable access is “out of sight,” it fast becomes “out of patience.” Repeat offenders show up in real use:

    • Pushing aside a notebook only to find the charging cord tangled between a riser and the monitor arm
    • Wanting to plug in a second device mid-call, but hesitating because the adapter is two trays away, blocked by under-desk clutter
    • Dislodging a cable from a brick while adjusting leg position, then hesitating to crawl under and re-connect until the next break
    • Losing the first moments of focus after a task switch, detangling or re-routing charging lines before the real work resumes

    The core friction: a setup that hides clutter but also blocks routine movements, making reliability and speed pay the price for surface order.

    Finding the balance: What “out of sight, but not out of reach” means in practice

    The strongest workstations don’t just hide mess—they keep your daily reset points open. Bricks and adapters should vanish from sightlines, but not drift beyond regular reach. Mount a shallow tray just under the front desk edge, let your most-used cables clip flush underneath, and routine swaps shrink to a single, repeatable motion. In setups where space matters—shared benches, narrow surfaces, under-desk storage—this balance saves more time in use than hours spent tidying ever will.

    There’s always a tradeoff: between clean looks, functional access, and what truly needs to be arm’s-length for your workflow. But the cost of friction is visible in how often you avoid plugging in, delay switching tools, or lose flow to tiny physical interruptions. The quickest-looking desk isn’t the one with nothing in view—it’s the one that lets you move, charge, and reset without breaking stride.

    Quick answers for power brick placement dilemmas

    How can I hide power bricks but still reach them easily?
    Install a slim under-desk tray or cable channel within easy arms-reach of your work position. Cables stay hidden, but a quick hand movement lets you swap, adjust, or unplug with no need to slide your chair or break posture every session.

    What’s better: floor cable box or under-desk tray?
    If you swap devices or work flexibly, under-desk trays almost always outperform floor cable boxes. They eliminate knee-bending and back-twisting, making every connection and swap faster. Floor boxes may look cleaner at a glance, but their price is constant interruptions every time you touch a cable.

    What’s the tradeoff with fully hidden power bricks?
    Total concealment usually means bigger workflow interruptions. You’ll break seating position, stretch awkwardly, or even kneel below the desk for routine swaps. Across a week, those tiny slowdowns build up, undermining even the cleanest setup.

    Making your desk setup easy to trust—shift after shift

    Many desks look organized. Only a few feel smooth in real use. The difference is access: having every tool and plug where the routine happens, not one step removed. In fast-paced or high-use setups, the desk that balances hidden clutter with visible, reachable connections always outlasts the “perfect” look. The best proof isn’t in appearance—it’s in noticing that your next reset, swap, or charge takes no thought at all. The power brick problem disappears the moment your setup stops slowing you down, and the work reclaims your full attention.

    Explore the full WorkBasic collection

  • How Magnetic Trays Improve Visibility and Efficiency in Work Zones

    Bright ceiling and wall lights rarely fix what actually goes wrong during real tasks. In laundry nooks, utility counters, or entry shelves, rooms can look fully lit but still sabotage small jobs: dropping a screw while changing hardware, then watching it vanish at the exact moment both hands are busy. The pressure isn’t just dimness—it’s that fasteners, washers, or fuses reach the edge of the counter, escape the strongest beam, and drop straight into shadow right when you need them most. It’s a problem that doesn’t show up in walkthroughs—it reveals itself every time you lose track of something crucial mid-routine, no matter how many fixtures you switch on.

    Day-to-Day Frustrations: When Light Isn’t Enough

    Picture a laundry area with a flush-mount ceiling light and under-cabinet LEDs flooding the surface—a textbook “well-lit” setup. But start a quick repair, and small parts tell the real story. A screw slips. In one blink, it leaves the central pool of light, picks up a dense shadow at the counter’s edge, and drops out of sight. Every routine brings this pattern: the room glows but safe, clear grabbing distance fizzles away the moment a piece bounces or slides. The illusion of plenty falls apart in seconds as you lean, search, or trace your hand around the border, interrupting flow and patience.

    Stair landings, mirrored vanities, even long hallway shelves repeat the same disguise. Floors and counters look bright yet leave edges unpredictable and awkward: screws hide along uneven light, batteries roll to corners, and you find yourself lunging or twisting, breaking rhythm for something that should have stayed easy. Most lighting solutions leave these blind spots untested—until the friction builds with every routine task.

    How Shadows and Glare Create “Lost Zones”

    No matter how well ceiling lights promise broad coverage, in real rooms, shadows cling to seams—under shelves, at wall junctions, behind faucet necks, along deep counter edges. Even flush and semi-flush mounts with impressive specs let light fade too soon at sidewalls or where the work surface meets a tall item. Small under-cabinet strips often streak glare into your eyes but leave a gap near the front lip where the action happens. The net effect: hardware drifts or bounces once, and vanishes out of the visible zone, while glare makes seeing detail harder, not easier.

    Every lost minute is a repeatable problem, not a fluke. You don’t notice it on a product label—but you feel it on your third tilt of a lamp, or fourth time sweeping a hand along the edge to recover something barely out of reach. These aren’t “bad” lighting plans; they’re setups that weren’t forced to answer to hands-on, edge-of-counter tasks or moments when storage and visibility need to work the same beat.

    The Role of Magnetic Trays: Anchoring Visibility and Flow

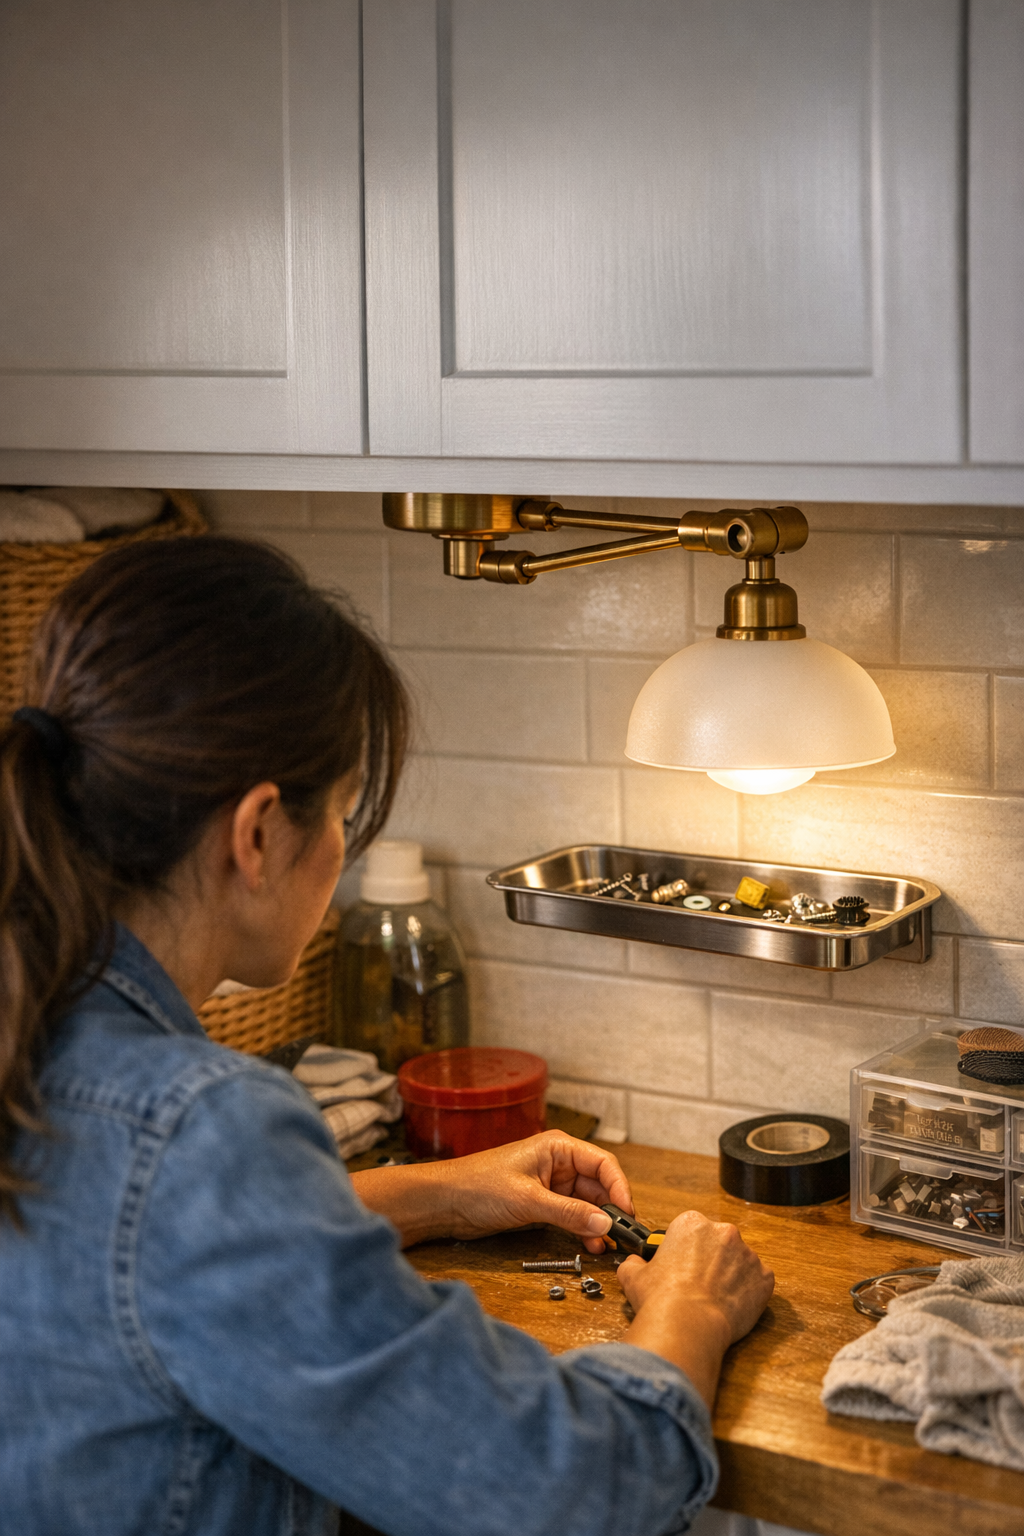
    Enter one stealthy fix—a slim magnetic tray snapped under the task beam or under-cabinet glow. It isn’t just storage. It is an anchor: fasteners and electrical bits stick where the real light falls, not wherever a shelf happens to be clear. The friction vanishes—no more fingers fumbling into shadow, no more routine broken by another round of hide-and-seek with rolling washers. Every retrieval is clean, not a rescue.

    Example: on a three-foot counter, a single tray placed dead center under ceiling task light stopped the worst pattern. Dropped hardware stayed inside view; no more switching on your phone’s flashlight to spot a missing nut, no more crawling to scan underneath detergent bottles. The upgrade is not about new brightness—it’s about ending constant detours from the usable zone.

    Where Placement Makes the Real Difference

    Most setups fail on this point: mounting the tray out of the main beam. Off to the side, and each part still disappears; the glare-free sweet spot is missed. Place it directly within the task light—under a wall sconce, centered beneath strips, or in the clear footprint of a flush mount—and you take away the edge zone where parts vanish.

    Real example: Setting the tray immediately to the right of the washer, directly inside the hardwired task light, kept screws visible during a shelf repair. Before: hardware rolled under containers, gone for days. After: everything locked in reach, no surprises even after a clumsy drop. Placement, not the tray itself, changed the routine.

    “Looks Good” vs. Actually Works: Lighting That Supports Repeated Use

    Upgrading to brighter flush mounts, semi-flushes, or contemporary linear panels promises relief, but for detailed tasks, the shadow trap lingers. Edges still go dark, especially at night or when the angle shifts. The room feels “done,” but you still break stride to hunt for lost bits. It’s the oldest trap in household lighting: the appearance of brightness replaces functional clarity at the margins. Until a tray or anchor gets placed under true working light, the surface stays unreliable.

    This is the real split: a space that looks completed versus one that quietly eliminates the old interruption. When the anchor supports your actual hands-on routine, you move without hesitating—no more squinting into corners or shaking containers hoping for the missing screw. The difference? No slow decline in mood, no break in pace, and nothing “just out of reach.”

    Quick, Concrete Tips for Better Setup

    • Test at night, not just midday: Drop a washer or screw during after-dinner chores. Notice where it lands; keep adjusting tray and light until nothing slips into the dark edge zone.
    • Go slim for tight counters: On shallow shelves and laundry surfaces, low-profile trays avoid blocking movement or crowding the beam—crucial for real working space.
    • Declutter before you trouble-shoot lighting: Even a perfectly-lit tray fails if surrounded by old batteries or tangled cords. Only clear edges turn brightness into true usability.

    From Repeated Frustration to Reliable Routine

    The difference between high-spec fixtures and truly usable rooms appears in the routine—not the catalog photo. Hallways, laundry corners, stair turns, and repair counters prove lighting setups by how well they handle constant, boring, invisible problems. One tray, anchored right in the task-zone lighting, quietly ends endless side-searching and momentum-killing interruptions. The “polished” look matters less than daily reliability where your hands move most.

    Forget glamorous pivots—dependable fixes come from matching the placement of every anchor to where task light and movement meet, not just where a fixture lands. That gap, overlooked by nearly every walkthrough, is what turns “well-lit” spaces into rooms you can actually use—no more fight with edges, shadows, or vanishing hardware.

    http://www.lighthelper.myshopify.com

  • Optimizing Work Area Lighting for Clear and Comfortable Task Spaces

    The real test of workspace lighting isn’t how a setup looks on day one—it’s how it holds up after days of routine interruptions, overlooked cables, and stubborn shadows at the desk’s edge. That first week, even a new LED strip or low-profile lamp seems like progress. But the pattern starts: you angle a desk lamp for the fourth time in one afternoon, dodge a line of glare bouncing off your laptop’s bezel, or catch a loose cable with your elbow every time you reach for a pen. It’s never just about adding more lumens; real clarity means shaping light and support so they solve the drag points you actually face—where you sit, write, plug in, and move, hour by hour.

    How Good-Looking Setups Come Up Short in Use

    A tidy lighting install rarely survives unscathed when real routines return. Cables tucked for the photo become a tangle the moment you route a new charger. Fixtures “hugging” the shelf edge leave awkward shadows that creep across paperwork by late afternoon. The bright spot covers half the desk—never the half where your hands are actually working. Instead of a streamlined workspace, you get a surface sliced into glare, dim patches, and cable clutter—no matter how resolved it looked fresh out of the box.

    Everyday friction piles up quietly: an arm grazing an exposed bracket, your mouse snagging a hidden cord, or a desk lamp base that blocks the only spot big enough for your notebook. Overhead lighting claims daylight color, but you still have to shuffle between islands of brightness and shadow. Each awkward mounting choice or misrouted wire becomes a permanent speed bump, making a so-called “minimal” workspace feel crowded and resistant to actual work.

    Where Lighting Fails: Surface Gaps and Shadow Traps

    Lighting that sells itself in catalog photos can undermine you at the desk. An under-shelf strip staged for symmetry often throws light too far back, leaving the front of your workspace dim. A slim bar running tight along the wall fades before it reaches your papers. Task lamps fixed at one angle let shadows hover where you need edge clarity most—usually where tools, reference sheets, or a secondary monitor push past the available light. The surface still looks clean, but the daily use is marked by squinting, repositioning, and chasing brightness that never lands where you want it.

    Even small misalignments—just an inch too far back or forward—mean constant adjustment: shifting your chair, pulling notebooks into a usable patch, or stacking objects to catch the right angle. Clean lines and tidy photos dissolve by midweek, revealing what the lighting scheme missed: reliable, shadow-free use across the whole desk, not just the zone pictured in a staged shot.

    Glare and Dimness: Everyday Annoyances

    Glare and dim corners linger, no matter how “upgraded” the fixtures sound. Overhead lights rarely map neatly onto a segmented desk or multi-use kitchen counter. The working center glows, but edges where details matter—margin notes, stacking trays, supply bins—stay washed out or reflective. The fix isn’t amplifying the whole room but targeting: a lamp with an adjustable head or a slim support bracket allows you to melt shadows and steer light where the task keeps moving. Without that, every switch of task reveals a spot you still can’t see clearly.

    Cables and Supports: The Quiet Aggravation

    Even when light placement seems right, unmanaged cables and brackets create a constant, distracting presence. A power cord draped across a desk’s live edge snags sleeves, collects dust, and never stays tucked after the first rearrangement. By week two, that invisible cable clip you noticed only during setup becomes the reason your chair nicks a wire or your laptop charger is never quite in reach. Exposed routes and poorly placed brackets disturb the surface flow, pulling attention from the work to the hardware every time you tidy up.

    Real cable management means low-profile brackets tucked just below reach lines, clips guiding cords tight to furniture legs, and tethers that never intrude on writing or mouse movement. Well-chosen supports aren’t about visual minimalism for its own sake—they free your movement without reminders, keep tool storage usable, and erase the loop of “which cord is in my hand?” every time you need to change a device or clean the desk.

    Support Placement: Looks Versus Function

    A bracket or support can look flawless after installation but fail the usability test immediately. You only realize how intrusive that “minimal” fixture is when your elbow hits it for the tenth time, or you can’t lay documents flat because the support hardware claims your only clear spot. Long term, even tiny mismatches between hardware location and task space become ingrained annoyances, making the most stylish setup quietly difficult to live with.

    The solution isn’t a bracket you never see—it’s the mount or support you stop noticing because it aligns with how you really use the surface, not how the room was staged for a photo.

    What Actually Changed My Space: One Practical Switch

    The tipping point for my own desk wasn’t a new fixture—it was swapping the old fixed under-shelf light for a movable desk lamp, bracketing it with a wall mount, and hiding cables with clips just below my reach. Suddenly, the light tracked with my workflow, the cord never flicked my bag off the edge, and the illuminated area reached both my notepads and the laptop’s far keyboard. Even on a crowded day, I had enough usable space for another person without sharing glare or blocking a task zone.

    Incremental, targeted lighting and support shifts compound into the difference between a space that just looks neat and one that’s friction-free across days—not just the first hour after setup.

    Real-World Q&A: Troubleshooting Common Lighting Friction

    Why is my work area still dim despite a new overhead light?

    Ceiling fixtures broadly light a room but leave working surfaces patchy, shadowed, or uneven. Direct, task-focused lighting—like a desk lamp or under-shelf mount—aims brightness right where your hands, eyes, and tools are. That targeted beam makes surfaces actively usable rather than just visible from a distance.

    How do I know if I have glare or just not enough light?

    Sharp reflections, forced squinting, or “hot” spots are clear signs of glare—usually from misdirected beams or glossy work surfaces. An overall dull workspace signals light that’s too weak or distant. To fix glare, steer light across the surface, not at your eyes; for dimness, bump either fixture proximity or beam spread, not just bulb strength.

    Does cable management really affect routine comfort?

    Yes. Unkept cables snag, make cleaning clumsy, and force you to notice them before you notice your work. When cords are routed flat, clipped tight, and kept out of reach zones, you stop thinking about them entirely—a usability upgrade you only feel when the chaos is finally gone.

    Lighting and Support Decisions That Quietly Hold the Room Together

    Sustainable improvement doesn’t come from piling on more light or chasing the slimmest fixture—it comes from small, repeated adjustments: targeting light, anchoring supports, laying cables so flat they vanish from memory. Over weeks, these shifts separate “looks done” from “never interrupts.” If you find yourself shifting lamps, moving piles for a clear inch of light, or wrestling the same cable every day, the setup is costing more attention than it saves.

    Effective lighting and support recede into the background, holding the space together so you can focus—not by reaching perfection, but by solving the daily patterns that keep interrupting you.

    www.lightsupport.myshopify.com

  • Creating a Stable Outlet Zone to Keep Your Workspace Organized and Efficient

    Cable chaos doesn’t wait for clutter—it starts as soon as the first device connects. Even on a desk that passes for “organized,” the order collapses under normal use: power strips creep out of reach, charger cables bunch around desk legs, and every new plug-in sends adapters wandering or slipping off the edge. By the end of a single week, what looked like a reset surface becomes a trap for wasted motions—chasing the right cord, crawling for the power strip, bumping a loose cable loose with your chair. Visible tidiness fools the eye, but real friction begins the moment your hand can’t trust the outlet to stay where you left it.

    Where the Calm Outlet Zone Really Matters

    Hiding clutter is not enough if the parts you actually use won’t stay put. A hidden but loose power strip is only quiet until you reach to plug something in—then it slides, tips, or drags a tangle of cords toward your feet. One tug throws the whole outlet zone into confusion, leaving you half underneath the desk, reconnecting a cable that was fine seconds ago. The difference between a work-ready setup and one that just looks neat, but refuels this cycle of interruptions, is unmistakably sharp if you’ve ever rolled your chair just enough to scatter your chargers again. Unless the core—where outlets and cables regroup—stays anchored, each attempt to streamline slips right back into disorder.

    Why Temporary Desk Fixes Don’t Stick

    Every surface cable clip, stick-on tie, and “quick fix” is temporary at best. Photo-ready tricks last just through the video call. By midweek, monitor arms have shifted and dragged wires behind them, shared cords have been tugged off-balance, and any exposed cable path gets caught by feet or backpack straps. You’re left tracing which cord crosses which, digging for a wayward adapter halfway under the center drawer, and untangling what yesterday seemed sorted. This is more than aesthetic failure—it’s burnt time, recurring with every minor reset, until you notice how much work it steals back in small jolts of hassle.

    Surface Order vs. Repeat-Use Stability

    A handful of cable ties or a strategically cropped desk shot can create the illusion of control. Real stability only becomes obvious after full cycles of use: a “clean-looking” desk drifts off course the first time you adjust a monitor, while an anchored cable tray shields cords from daily bumps. The result is quiet—even boring—reliability: connections wait at hand, and the desk doesn’t need your time to recover after every session.

    Noticing the Weak Points: Real-World Setup Friction

    Watch how the breakdown happens in use: plug in a laptop and the power strip travels with it; grab your notebook and the charger cable flies off the corner; push back your chair and your foot yanks out the monitor supply. None of this is unusual. The more devices and people share the space, the more the flaw repeats, eating into your flow without ever becoming a single dramatic collapse. Only when you anchor the outlet zone—a tray mounted under the desk surface, a deep box fixed behind the legs—do the small frictions stop dictating the pattern. Cord paths stay predictable, connections land in reach, and hand-to-plug access is always where your muscle memory expects it.

    Compounding Disruptions: When Setup Choices Add Up

    No single snag ruins a workday, but the sum is what steals your focus. Each awkward reach below the desktop, every rescue of a cable mid-task or rerouted adapter, adds invisible seconds to the clock. Anchored cable flow gives those seconds back—not by winning a style contest, but by refusing to repeat the same breakdown, hour by hour.

    What Anchoring Outlets Changed About My Workflow

    Trading a sliding, floor-level power strip for a mounted tray seemed minimal—until it stopped daily patchwork repairs. Before, every chair shift sent cables skittering, and every morning started with a small reassembly ritual just to get the monitor and laptop powered up. That never-ending reset faded after I fixed a tray behind the desk’s rear edge and let the cords hang in loose, short loops: enough movement to flex, but not enough slack to tangle or slip. Returning to the desk stopped meaning scanning for dropped adapters or re-plugging bent chargers. The reset happened automatically—the workspace actually awaited use, instead of demanding one more fix.

    Some Real-World Clues Your Desk Needs an Anchored Outlet Zone

    • You chase lost cables behind the desk more than once a week.
    • Your power bar slides sideways or backward after almost every use.
    • Plugging in a fresh device twists, unseats, or knots other connections.
    • Other users move chargers and leave the whole zone rearranged.
    • Long sessions start and end with your chair snagging, loosening, or stressing crucial cords.

    If two or three of these happen in your week, the outlet zone is almost certainly floating—never fully “organized.” Quick fixes do not hold: adhesive clips peel away, cable ties loosen, and even adapters shift whenever the desk itself wobbles or a drawer closes.

    FAQ: Anchoring Outlets and Cables for Real Work

    How do I keep cables and power strips from sliding or falling?

    Cable trays or cable boxes mounted to the desk frame—or directly to the underside—lock cables in place for every task. Anchored setups eliminate the crawl for dropped connections and keep your key adapters present at the surface. Lightweight adhesive clips, even strong at first, rarely hold up against daily reach and adjustment in high-traffic areas.

    Loose or Fixed: Should the Power Strip Move?

    Loose strips might appear flexible, but every adjustment demands another round of untangling. Mounting the strip under the desktop, or inside a drawer unit that opens toward your main reach path, creates an always-accessible zone. The cords stay reliable; you stop playing tug-of-war each time you need an open socket.

    What if multiple users need the outlet zone?

    Shared cable trays or cable boxes work best when installed with space for multiple device types. Cable routes should branch out gently, not overlap, so one person’s move doesn’t disrupt the whole setup. This means chargers and adapters remain accessible, regardless of who last used the station, and the outlet zone holds its shape throughout the day.

    The Practical Payoff: More than Clean Looks

    Anchored outlets deliver consistency, not showroom perfection. You stop rescuing cables and simply get back to work, no matter how often the rest of the desk changes. Small desks, shared setups, and high-volume device switching see the contrast first: the difference is not a prettier workstation, but one you stop having to adjust. Anchor power and cable flow once and the result is fewer resets, less lost time, and an end to the slow drain of scattered interruptions every work session.

    Explore the full WorkBasic collection

  • How Headlamps Solve Hidden Lighting Problems in Indoor Workspaces

    A room can look bright and still make every routine harder. Flush mount ceiling lights, semi-flush fixtures, and wall sconces all promise “full-room” illumination—until you’re hunting for a lost washer under the cabinet or fighting a shadowed corner at the end of the hallway. The real test isn’t how a fixture looks the first day; it’s whether you still need to drag your phone flashlight out after the third time a glare hits your eyes just as you lean over the work surface. That’s when the failings of ceiling-only setups and even new wall lights become obvious: glare kicks up near mirrors, corners stay dim, and a bright room still interrupts the flow of basic tasks.

    When Everyday Tasks Reveal the Gap in “Even” Lighting

    A routine week doesn’t test your fixtures when you’re standing in the middle of the room—it’s when you’re down low by the washing machine, tracing a pipe in a bathroom corner, or stretching across a kitchen run. The first day, a flush-mount ceiling panel looks like it covers every inch. But try wiping under a cabinet edge or fixing a bolt near the wall, and you’ll find yourself shifting for a better angle, only to be handed more shadows or sharp glare exactly where you need clarity. That’s when the showy spread of a ceiling fixture collapses into work-arresting guesswork and you start keeping a flashlight nearby just to finish what should be routine.

    Shadowed Corners and Blocked Sightlines: The Quiet Culprits

    Rooms rarely feel “too dark” overall—it’s the steady friction at the edges that wears you out. A kitchen looks brilliant standing at the doorway, but the counter’s front edge vanishes once you lean in with a cutting board. A bathroom vanity’s twin sconces balance the mirror…until you turn sideways and one cheek disappears into uneven shadow. Hallway lights spread outward but leave the moulding along the floor pale and the corners cold. Each time your body, a shelf, or a tool blocks the beam, you get a visible streak of uncertainty—a line between what’s merely lit and what’s actually usable when your routine moves off center.

    The Reality of Repeated Use: Why Fixed Fixtures Hit a Wall

    The trouble isn’t a single dark spot—it’s the way every small flaw stacks up. Sorting laundry under shallow cabinets exposes the same blind angle, week after week. Each shadow means a slower search, a missed stain, a pause to aim your phone light. Chores stall out mid-step not because you lack a fixture, but because the placement was designed for an empty room, not an occupied task. As soon as natural light drops or your hand breaks that fixed beam, you move from “looks bright” to “routine interrupted.” Few rooms feel balanced for both appearance and movement.

    Movement Makes All the Difference

    Static lights force you to fit their narrow conditions. Step toward the edge of a hallway or shift position at a vanity and the lighting changes beneath you: glare at eye-level, sudden shadow on the counter, the stair landing dropping into dimness right as you take the turn. The catch is always location—what’s lit for show is rarely aligned with your hands, your eyes, your next step. That’s why a bright-looking space can leave you redirecting, ducking, or hunting for better light rather than simply finishing the task.

    How a Headlamp Breaks the Cycle of Frustration

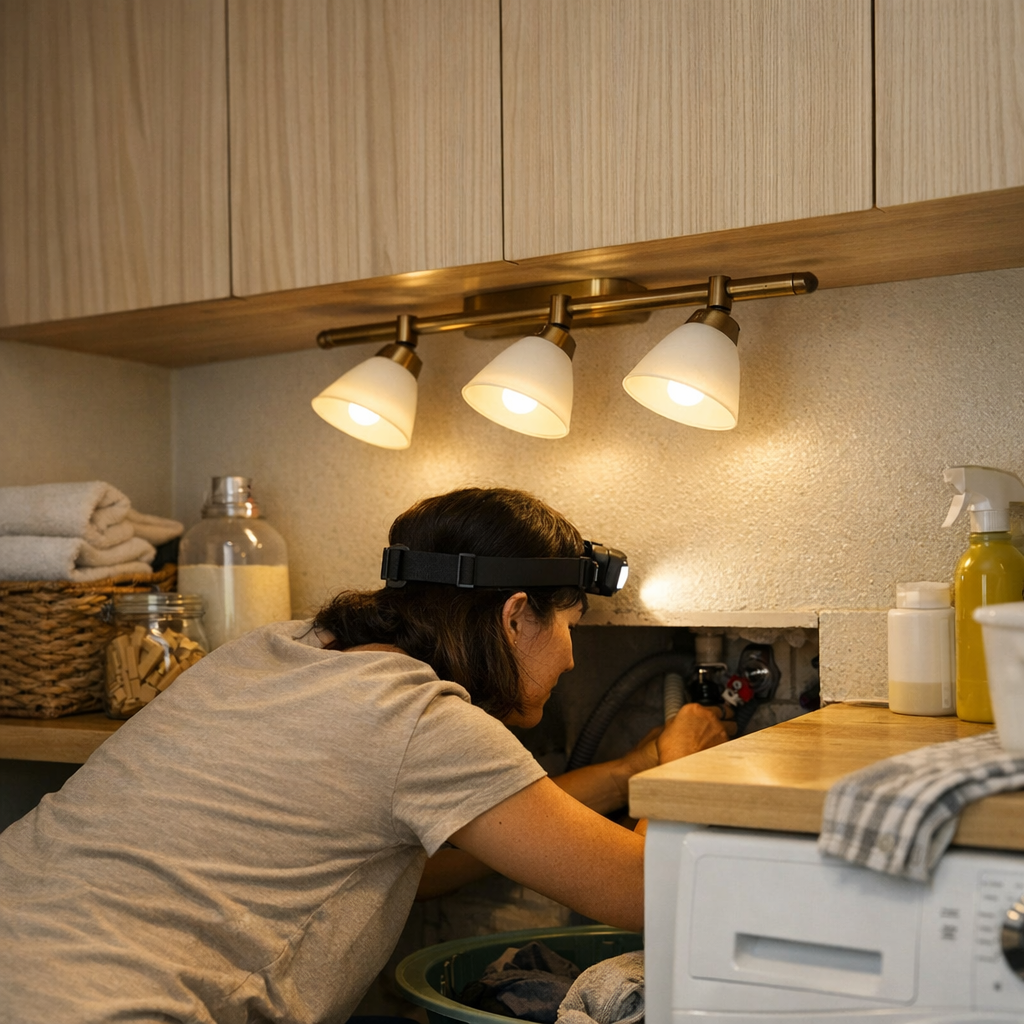
    Adding a headlamp solves what static fixtures cannot reach. Instead of flooding the whole room with more watts, a headlamp tracks your gaze, flipping the usual search for clear light: wherever you need focus—an appliance label, a jammed clamp, a stripe of grime on tile—the light arrives. Suddenly pointing, twisting, and tracing under a cabinet or around a corner stop involving acrobatics or extra gear. The best improvement isn’t cosmetic, but practical—wherever your vision goes, the light keeps pace, and the friction vanishes.

    Real Impact in Real Spaces

    No overhaul required: placing a headlamp by the laundry machines or on a shelf in the utility zone means usable, targeted light on demand. In repeated use, the differences aren’t about style, but flow and function:

    • Instructions on appliances stayed readable, even as evening light failed.
    • The back corner under the cabinet—once always missed—became visible through the entire cycle.
    • Working with both hands free, tool tips didn’t disappear behind your arm or produce surprise glare.

    In one laundry area, this simple fix eliminated the usual pattern: no more groping for dropped bits under a shelf, no more guesswork finding a misplaced stain. Tasks sped up not because the room seemed brighter, but because the old mistakes—missed dirt, lost screws—slipped away.

    Why Mobility Matters in Task Lighting

    Even “task” fixtures like under-cabinet strips or wall sconces only win if nothing gets in the way. Their impact drops fast if an arm, object, or shelf runs across the beam. That’s the real annoyance of fixed solutions: the angle you need is never quite lined up, and rerouting your routine slows progress. A headlamp breaks that trap by tying the beam to your movement. You get two free hands, zero shadow surprises, and the flexibility to shift without losing clarity—key differences when a job repeats over and over.

    Useful Tip: Keep Lighting Tools Where the Friction Is

    Place your lighting where frustration repeats. Store your headlamp on a hook inside the utility cabinet, clipped to a shelf by the washer, or right above the hallway kink where shadows ambush your eyes. Don’t bury the solution; put it at the heart of the problem zone, right where the edge of routine blurs into inconvenience.

    The Practical Payoff: Fewer Mistakes, Smoother Routines

    This is not just about adding brightness—it’s about clearing invisible obstacles that ceiling and wall setups leave behind. With mobile, targeted lighting, time spent readjusting, double-checking, or retracing steps drops fast. The basement corner and laundry cupboard may never glow like a catalog photo, but on a weeknight, the change is obvious in what goes right, not how things look. When friction drops, tasks actually finish, and the space finally keeps up with the pace you need.

    For real solutions to the most persistent indoor lighting annoyances, see what works in actual homes at LightHelper.

  • How Smart Adapter Placement Transforms Your Desk Workflow

    An exposed adapter does more than look messy—it physically slows you down, crowds your desk, and turns each return into an unnecessary reset. If your workday starts by shoving aside power bricks just to make space for your laptop or untangling charger cables before you even type, you know the friction isn’t just cosmetic. Every morning minute spent tracing the right cord, brushing against a plugged-in adapter, or propping a notebook between plugs is a visible tax on focus and flow. Messy adapters erode desk real estate, interrupt momentum, and make “resetting” your workspace a repeated chore instead of a routine.

    Why hiding adapters works—until it doesn’t

    Pushing every charger out of sight—wedged under the desk, sealed in a drawer—looks tidy at a glance. That “staged” workspace helps only until actual work starts. Need to connect headphones before a call? You’re reaching deep under, searching by feel. Swapping from notebook to tablet? The neatly hidden charger now means pausing and fumbling through your setup. The trap is clear: what looks organized quickly collapses into slow, awkward movement when device needs shift by the hour.

    The desk that looks finished often falls apart under real demands. As soon as the first unexpected power warning pops up or a guest asks to plug in, you hit the downside of concealment: every change becomes a minor obstacle—more steps, awkward reach, less flow. The layout built for display slows you down in real time.

    Where cable management setups really show their strengths—and weaknesses

    Repeated use exposes where cable setups hold up—and where they fail. On a tight workstation, where the surface only barely fits your main devices, one rigid cord or misplaced charger can derail your workflow. Adapters tucked into a cable box or under-desk organizer seem invisible—until you’re crawling under for access, or pulling trays out just to swap a plug. The desk looks uncluttered, but the actual working routine feels clipped and indirect.

    You’ll spot the tension at these points:

    • Mid-meeting, reaching for a headset charger behind a monitor, breaking focus to fish for cables.
    • Trying to plug in a weirdly sized tablet brick, only to realize reaching it means shifting half your setup or pulling out a bin.
    • Clearing space for handwritten notes, but the last few inches are blocked by a loose adapter always slipping into your writing area.

    Each time you’re yanked out of flow—a cable snags your arm, a power brick bumps the edge of your notebook, or you need two hands just to reach a socket—it’s the “organized” cable fix getting in your way. Solutions meant for tidiness mutate into new interruptions.

    What changed my return-to-desk habit: A real-world tweak

    Switching from a wall-mounted power strip to a slim, under-desk cable box along the work edge did what no decorative tray or cord wrap managed. The practical gain: almost 16 centimeters of rear-edge desk space—enough for a full-sized notebook, not just a tangle-free visual. But the true upgrade was behavioral: cables routed through clean slots let me plug devices in blind. No shifting gear, no tracing through a cable maze. The power bricks hid in reach—not buried. A quick glance confirmed no dust trap building up, and end-of-session reset time dropped off. Not perfect, but infinitely less excuse for ignoring cable mess as cycles repeat.

    The thin line between access and order

    Pushing every cord and brick completely out of sight is a short path to awkward workflow. Storage boxes screwed shut under panels or tucked behind drawers achieve impressive invisibility—and almost guarantee frustration the first time you need a charger or have to help a visitor plug in. Rigid “tidy by hiding” setups drain speed from day-to-day use more quickly than they save visual peace.

    The only cable setups that last are built for change and reach—not just for appearances. Open trays, simple cable boxes, and covers you can shift without tools let you add or move chargers as gear requirements flex. That means a small shift in routine—new tablet, guest phone, device swap—doesn’t break the whole system or invite cable creep back across your workspace.

    Real-world FAQ: Common adapter placement questions

    Where should adapters go to keep the desk easy to use every day?

    Place them in a cable box or tray just behind or beneath your primary work edge—hidden from sight, but fast to reach from a seated position. Keep charging tails close to your main working area (where plugging in happens most), and stash less-used spares somewhere tidy but never so deep you forget them. The working zone and the charger zone should overlap just enough to avoid daily reacharounds.

    Is complete concealment worth the trouble?

    Full hideaways force you to break rhythm every time you need to charge or swap. If you cycle through devices—phone, mouse, tablet, headset—every day, prioritize open trays or easy-access boxes. Looks matter, but practical reach and swap speed matter more if equipment switches more than once a week.

    Why not just leave all adapters visible for convenience?

    Leaving bricks exposed adds dust, blocks your best writing or sketching zones, and quickly attracts visual noise. What starts empty at 8 a.m. clutters itself by midday, burying everything faster and making fast resets harder. “Convenience” is brief; entropy is relentless.

    How it all adds up at the end of a work day

    True workstation order isn’t about hiding every cable—it’s about coming back to a desk that’s ready for work, not for untangling or shuffling. If a setup forces the same annoying adjustment every cycle—plugging in, swapping, clearing free space, shifting position—it hasn’t solved the core problem. An “organized” system that slows basic actions is still costing you minutes and effort.

    The best cable structures—enough concealment to quiet the view, enough access to let you move—restore desk momentum, not just appearance. The work becomes simpler, not just neater. When interruptions fade, focus returns, and the difference is felt in every task—long before anyone sees it. The day ends with a desk that feels ready, not just reset.

    Explore the full WorkBasic collection

  • Solving Screen Glare with Smart Work Area Lighting Solutions

    Almost every “finished” desk—overhead light on, lamp in place—fails the second real work starts. Bright ceiling fixtures and a polished table may look sharp in morning photos, but as soon as you settle in, the gaps show. Glare crawls across your monitor, cables snake into sightlines no matter how often you tuck them, and shifting in your chair becomes routine just to dodge a stray reflection. The desk looks ready, yet every work session drags into a quiet negotiation with your lighting: you’re constantly tilting screens, inching notepads closer to the edge, or squinting at document highlights that fade into shadow. It’s not a simple issue of brightness or bulb choice—it’s about how support and light combine in the actual zone where work happens, and what goes wrong when they don’t fit.

    Where Glare Sneaks In: Real-World Screens, Real Annoyances

    Even when a room feels “fully lit,” routine desk work quickly reveals lighting patterns that undermine focus. Familiar friction points show up fast:

    • Glare bands crawling across the monitor whenever you move your head or tap the keyboard
    • Task shadows pooling right where you need to annotate, mark up, or actually see what’s in front of you
    • Exposed cable runs crossing the visual field—reminders that the last fix didn’t solve the daily tangle

    These aren’t minor annoyances. Adjust your chair once, then again. Pinch the bridge of your nose after an hour lost in spreadsheets. Watch as half your desk effectively disappears—the line between light and shadow splits your usable workspace, making it hard to find the right spot for any task. Over time, this drag accumulates: more fatigue, shorter focus, productivity quietly slipping as each day turns into another round of lighting acrobatics.

    Overhead Lights and Desk Lamps: Why They Miss Where It Matters Most

    Standard overhead lights and center-set desk lamps chase the illusion of order, but rarely help in repeated-use trouble spots. Ceiling fixtures flood the room but fire down at steep angles—good for filling space, bad for anything with a screen. Glaring bands cut through the top edge of your display, or flare in the background whenever you look up. Instead of clarity, you get a parade of white streaks and faint ghosting that keeps moving as you try to work.

    It isn’t just computer displays. Glossy surfaces—whiteboards, metal edges, glass table tops—catch and bounce light, turning every practical corner into a guessing game. The space snaps a nice photo, but after one hour you’re shifting between hot spots, defending against annoying side-shadows, or just avoiding whole stretches of your own desk because the lighting always makes those zones a strain.

    Shared Spaces, Shared Frustration: When Lighting Multiplies Distraction

    Grouped desks and flexible setups magnify the gap between “looks complete” and “actually workable.” Picture two people at a long shared table—overhead lighting and matching lamps look perfect, but when both start working, sharp glare bands find every screen. One leans over to avoid a reflection. The other nudges their lamp, and the cord slips into full view, trailing over shared work zones. Midweek, frustration wins; someone decamps to a corner table just to avoid the relentless pattern of glare. To visitors, there’s no obvious flaw, but anyone using the space feels the silent divide between visual finish and genuine, lasting comfort.

    Under-Shelf Lighting: Subtle Placement, Noticeable Comfort

    A forward-facing under-shelf LED strip sidesteps these recurring problems with quiet precision. Instead of light blazing straight down, the fixture tucks 15–18 cm behind the shelf edge, running parallel to the work surface. Suddenly, the light lands where your notebook, keys, and hands actually go—leaving monitors free from flare and keeping the area you use most consistently visible.

    The difference isn’t just comfort, it’s a reduction in clutter: cables route invisibly along the bracket, and the strip’s beam forms a working zone without washing over your screens or throwing harsh edges onto nearby tools. No dramatic reveal—just a daily lack of distraction as markups remain visible, handwritten notes sharpen, and browser tabs resist the usual noon dimness, hour after hour.

    Tip: For cable control, use adhesive cable clips or a flush cord cover behind the shelf bracket—this hides stray lines, keeps the desk edge clean, and snuffs out the last visual reminders of drag-and-drop fixes.

    Small Fixes, Lasting Impact: Repeated Use Sets the Standard

    Desk setups solve nothing if they only perform in a single snapshot. What counts is whether the layout quietly outlasts a full week of shifting routines, keyboard sprints, and late-night work. Add a low-profile LED or shelf-mounted strip: suddenly, you stop losing half your focus to shadow edges, cable clusters, or the quiet battle to keep your screen readable at 4 pm. The change creeps in with less eye strain, no more fighting for the one well-lit patch, and the background frustrations slowly fading from daily rituals.

    The setups that last aren’t flawless—they’re just less demanding. Fewer posture tweaks, less glare-diving, more time spent using the desk instead of negotiating its limits. Over a month, you’ll see fewer notes written in angled corners, screens that finally hold their clarity, and a noticeable drop in the low-grade annoyances that quietly drain your best work time.

    When to Rethink Your Setup

    If glare, bright shadow bands, or the shifting white lines of reflected light haunt your work as the sun moves—or every time you shift your chair—the heart of the problem isn’t the screen, but how the light is aimed and supported. Shuffling lamps, pinning paper diffusers, or taping cable guides might stall the issue, but none fix the basic misalignment that comes from having the wrong lighting angle or a messy cord path in the first place.

    Search instead for targeted, low-profile fixtures—ideally under-shelf or bracket-mounted strips with flexible placement. Focus on mounting positions that route cables behind brackets, keep the source above hands and not screens, and let you tweak location as work patterns change.

    Lighting and Support: The Overlooked Partnership in Everyday Clarity

    Most setups promise tidiness but leave daily friction untouched: cords that tangle into sight, shaky bracket placement, or fixtures that shoot light everywhere but the real work surface. Just swapping one overhead panel for a bracketed LED strip and a clean cable run out of sight transforms both function and focus. With the right pairing—support that stays out of the way, light that takes aim at your actual work zone—you lose the visual clutter and gain a setup that adapts quietly to shifting routines.

    Lighting and mounting that responds to how you actually use a space—not just how the room is drawn out on paper—erases the daily stress points that linger in even the most finished-looking room. The payoff isn’t just tidier appearance; it’s subtle, everyday clarity and a space you’re less likely to abandon for some better-lit corner.

    Improve the actual usability of your lighting and support, not just the surface impression: LightSupport