Category: Lighting & Work Setup

  • How Proper Wall Light Support Prevents Visual Clutter and Mood Disruption

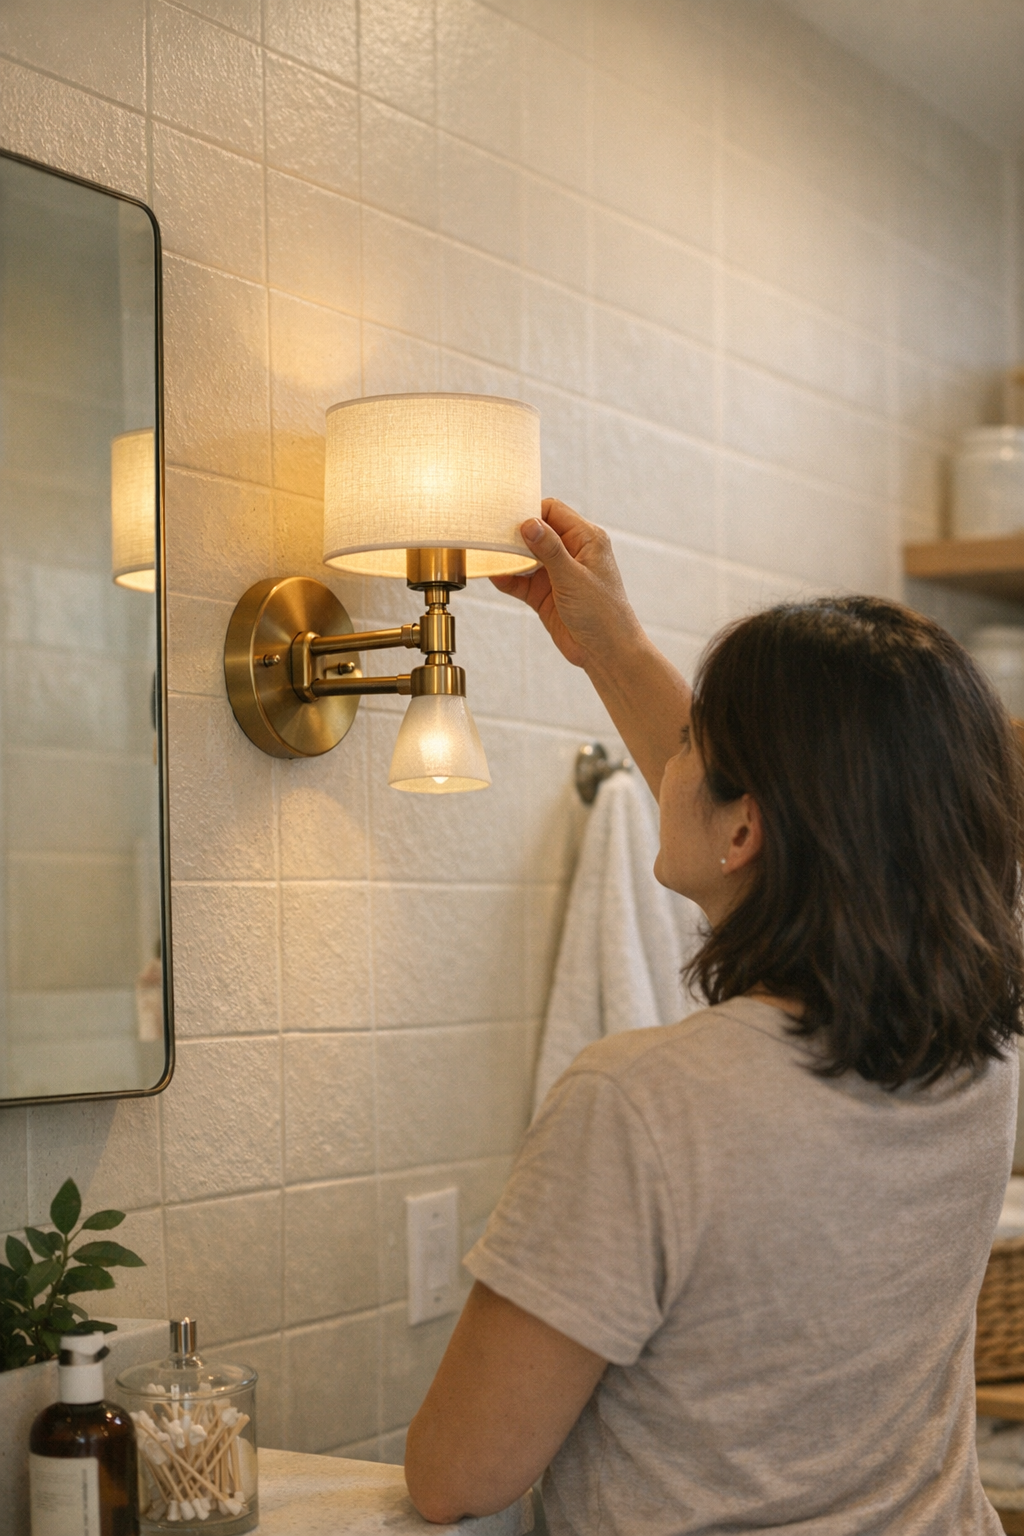
    Wall lighting isn’t just about making a room look tidy—it’s supposed to make work and everyday routines feel easier. But the promise of a clutter-free workspace falls apart fast if you ignore bracket depth, cable route, and what happens once you actually start living with the fixture. What looks minimal for a week can turn frustrating as cables drift out of hiding, glare stripes cut your desk, or one support decision leaves half the work surface shaded and the rest just as interrupted as before.

    When Clean Lines Fade Into Distraction

    On Day One, mounting a slim wall light makes the workspace look almost resolved. Desk clear, wall sharp, everything feels aligned. But almost immediately, practical frictions surface: glare splashes across the work edge you actually use, the outer half of your desk lands in shadow, and the cable you thought was hidden becomes the feature your eyes find first. By the end of the first week, these details aren’t just visual—they change how the space is used. You start angling books toward the center, nudging chairs to escape dim corners, or storing panels to prop up a cord that refuses to stay put. The clean look decays into routine corrections you didn’t sign up for.

    This is the visible difference between “looking organized” and “feeling comfortable long-term.” A bracket pressed flush to the wall can shrink the light’s reach, making you rely on backup lamps. A cord routed too loosely starts swinging out, interrupting your sightline with every movement. Every fix—moving a lamp, re-angling the fixture, tuck after tuck of cable—adds low-level distraction. Over time, the setup starts to feel like a series of failed shortcuts, not the simple upgrade you imagined.

    Where Wall Lights Actually Make Sense

    Wall lighting pays off in rooms where ceiling fixtures dominate or desk, shelf, or floor space is tight. Shared home offices, narrow passages, and odd corners near bookshelves or doorways are prime candidates. The best setups use wall-mounts to open the view and keep surfaces flexible. But even in these spots, daily use exposes shortcuts. If the beam doesn’t reach the work edge, dusk means leaning into unlit patches. A shallow bracket stops the light short, leaving the far end of your workspace permanently dim. And any exposed cable—especially across a blank wall—will hijack the look and make the install feel busy, not clear.

    Routine Use: Where Friction Shows Up

    The real tension surfaces in repetition. Notebooks shift, calls start, and you repeatedly avoid the dim edge. You end up relying on clamp lamps pitched just out of the frame. Each time you walk in, the cable is the route your eye traces—never the light. That ‘invisible’ support becomes a permanent variable, interrupting the supposed order. A wall setup chosen for looks alone breaks down as soon as habits meet reality.

    How Support Choices Shape Comfort—Not Just Appearances

    Mounting a light flush for aesthetics can quietly shrink usability. Pulling a fixture too close to the wall will throw the working surface into half-shade, making you hunt for add-ons—a backward step from the first goal of wall mounting. Let a cable snake loosely down the open wall and each day brings more visible friction, with your focus shifting to exposed plastic instead of the surface below. “Minimal” setups that ignore support and cable logic start to require extra work just to hold the illusion.

    True calm comes from support that fits real movement and use—not just a tidy photo. Even a bracket only 10 or 12 centimeters deeper can pull light fully across the desk or reading edge, finally making those areas usable again. Cable channels, conduit that blends to wall color, and thoughtful cable routes—especially behind shelves—cut visual noise before it starts. These are small choices that prevent the entire setup from slipping back into disorder.

    Small Adjustments That Make a Lasting Difference

    Consider a typical snag: a shared workspace with an unlit desk edge that stays stubbornly dim. Swapping a shallow bracket for a deeper one brought the fixture out just far enough to send light where hands, pens, and displays actually go—no backup lamp needed. Redirecting the cord behind a row of bookshelves and hiding it inside a wall-toned channel cleared the sightline. These tweaks didn’t deliver a sudden transformation, but routines stopped grinding. Tasks stopped being interrupted by setup awareness. Lighting worked, and attention moved back to the work surface instead of cable anxiety.

    Practical Cable Management—What Actually Works

    Cable details, if left exposed, don’t just clutter—they can undermine the fixture itself. The most reliable approaches are direct:

    • Paint-matched cord covers: Run the cable inside casing finished to fade against the wall. Visibility drops, attention resets to the lighting, not the wiring.
    • Behind-furniture routing: If shelving lines or bookcases are nearby, route cables hard against, or behind, these blocks. Your major sightlines stay undisturbed.
    • Built-in or surface cable channels: Some wall lights arrive ready-made for integral routing. If not, adhesive cable tracks set the lines where you need—out of view and under control.

    None of these solutions feels ornamental; all require slightly more upfront intent. The difference is immediate: a day-to-day work zone that truly stays clean, not just staged once for a photo.

    The Pattern You Want to Avoid

    Setup regret almost always traces back to shortcuts—fixtures chosen for appearance, not for beam reach or cable path. Once uneven light or a stray cord enters the routine, the whole room starts performing for the wrong reasons: dark zones, harsh spots near monitors, and cords creeping back into view. These aren’t one-off annoyances. They become the new “normal” until your supposed upgrade simply repeats the old desk clutter—in another form.

    What Makes a Wall Light “Liveable” Over Time?

    Everyday support is the test, not first-day neatness. The most workable wall fixtures are the ones where bracket choice, cable management, and beam direction match how you occupy the space:

    • Light coverage reaches all the key surfaces—no shadowy edges, no dead zones under shelves or next to walls
    • Wiring stays out of main sight lines—either hidden or genuinely backgrounded by color and placement
    • Bracket depth is chosen for practical use, not just wall geometry
    • The system stays visually quiet even as you rearrange or add new routines

    The Real Payoff: Lighting That Stops Needing Attention

    Rooms with order that holds up for months—where light and support choices stand up to daily friction—didn’t get there by luck. The difference is design and bracket placement that pre-empt distraction, plus cable management that vanishes in daily experience. The result isn’t showroom perfection, but a background you stop noticing because nothing tugs at your routine anymore.

    If your wall lighting still pulls you into setup tweaks, or you keep fighting small points of glare, cable drift, and uneven light, check the bracket, the beam’s landing zone, and especially how cables shape what you see and do. Those practical changes will outlast any fixture style or finish, and make more difference than two hours spent on décor.

    Find lighting setups, mounting accessories, and support solutions designed to make these changes easier at LightSupport.

  • How Hidden Power Zones Transform Desk Organization and Focus

    Clear desk, confused workflow. Your workday starts with an open, distraction-free surface. But by the second video call or mid-project reset, chargers and chunky power strips inch their way back onto your desk. The real friction isn’t clutter you can see—it’s the cables and bricks that sprawl into every quick reach, turning what looks tidy into a crowded, constantly-interrupted workspace. If you ever sit down, glance across your surface, and already feel mentally scattered before typing a word, exposed power gear is usually the culprit. Those charger tangles don’t just look untidy—they wedge themselves into your routine, slowing every handoff between keyboard, notes, and screen, and turning each reset into a minor obstacle.

    Why fake cable order collapses fast

    Sliding a power strip behind your monitor or anchoring it to the far edge only delays the problem. It feels organized for a day or two, until you need to plug in a phone mid-call, swap out a laptop charger, or untangle a cable after shifting your mouse. Cords migrate forward—creeping over notepads, jamming under keyboard legs, or looping back from the “neat” rear corner. You’re left fishing for chargers behind the monitor, accidentally unseating plugs, or clearing space just to find the right brick. Over and over, tidy setup photos collapse under the weight of daily movement and quick device switches.

    Appearance versus friction after actual use

    Every organized desk looks stable for about a day. Product photos, desk tours—even first-morning setups—capture one frozen instant. By day three, old friction returns: cables forced out of the way by notebooks, stray adapters that shift with every move, and a surface that reverts to “sorted mess.” Resetting before each session becomes a chore. If you swap devices regularly, that ritual isn’t just keeping your space neat; it’s evidence that your setup isn’t really supporting your workflow.

    What a hidden power zone actually does

    Moving all power and charging under your desk strips visual drag from the workspace—not just for looks, but for how you move. A metal cable tray or box bolted to the desk’s underside corrals power strips, adapters, and loose cords. Now, all device charging routes drop straight down and disappear underneath, while your main surface stays reserved for whatever’s active right now—keyboard, notes, mouse, or tablet. After long, multi-stage work sessions, this difference is sharp: instead of loose bricks resurfacing every hour, only the devices you’re actually using are visible. You sit, scan the surface, and don’t have to claw back depth or nudge chargers out of the way. Task shifts and notebook grabs go faster, the physical and mental clutter is cut—and the desk’s “clean” look matches its function, not just its photograph.

    Access friction: the trade you actually feel

    There’s a catch. Stashing cables and adapters under the desk reduces constant cable spill, but introduces a new pause. Fast device swaps—plugging in a client’s machine, topping up a phone in panic mode, untangling headphones—now mean a reach-under, a second’s pause, or even a knee bump. If the tray sits too far back or gets jammed with bricks, accessing power mid-routine can interrupt your work rhythm more than expected. And during a rush, those seconds stack up into real hesitation, especially for anyone used to a single power strip always on hand.

    Where hidden power slows or speeds you up

    Picture an average cycle: spreadsheets open, notebook laid beside the keyboard, phone buzzing low on power at arm’s length. With the power strip on your desk, plugging in is a simple sweep. With it hidden, you push back your chair, reach under the edge, sometimes drag on a slack cable, and often bump knees on the tray or brackets. It doesn’t feel like a real delay until you find yourself stacking calls, frantically researching, or working from a shared surface where every device is in motion. In high-traffic, high-swap setups, the seconds lost to under-desk power start to add up exactly when your routine is under stress.

    Reset momentum: the clear desk that actually works

    After enough reset rituals—adapters spilling over, wires snaking between notebook and elbow—a concealed tray at the desk’s back edge changes the equation. Suddenly, the zone behind the keyboard stays clear, even during three-device charges: laptop, headphones, phone, all in use. The difference isn’t aesthetic; it’s practical. Your hand can reach for a notepad, plug never bumps loose from a rapid mouse shift, and break-to-work restarts get shorter. No more wasting the first minute of every session just nudging bricks into place. The surface feels consistently ready, meaning the energy lost to physical friction each cycle nearly vanishes—even if the rare device swap below desk level does take a little longer.

    If you use a height-adjustable desk

    Standing desks expose a hidden risk: every vertical movement tests your cable management. Without enough slack, raising the surface yanks plugs out, drags adapters off the tray, or even shifts devices unexpectedly. Most under-desk trays fit standard strips, but chunky bricks or extra adapters need planning and a trial fit. For setups with dual monitors, work laptops, and frequent device swaps, precision in routing pays off—there’s no hidden fix later if you run out of tray space. A poor fit means repeated midweek reshuffling, not silent organization.

    Surface speed or hidden clarity?

    Some routines demand both. If you’re jumping between devices in back-to-back meetings, a lone adapter on the surface—easy to grab, always in reach—beats any fully hidden system for speed. Hot desks, client calls, and team setups often justify that one visible plug. But the tipping point comes in repeated-use, multi-device workstations: if your hours are spent toggling through resets and dragging adapters back into stacks, moving power out of sight breaks the loop of “looks organized, acts chaotic.” You choose between instant access and smoother flow—or adopt a hybrid, leaving one surface option for emergencies without letting everything else sprawl back onto the desk.

    Real test: setup reveals itself over the week

    The value of hiding power strips rides on the details you notice only after real use. Under-tray setups can easily run out of space, tangle cords when rushed, or get blocked by awkward brick sizes. Before mounting, group all adapters, dry-fit the tray, and practice a full week’s worth of swaps—don’t trust first impressions. In shared or family workstations, occasional surface adapters or a pop-out extension cord provide flexibility without surrendering the whole desk to clutter. What survives after five days of resets signals what actually works—not just what looks sorted at noon on Monday.

    Takeaway: visual calm, invisible pauses

    Moving power strips and bricks under your desk stops clutter from constantly resurfacing, giving the main surface back for working—not tidying. But it’s not an all-win trade—quick swaps can get slower, and poor fit or awkward under-tray layouts can add new friction. The payoff is simple: if your sessions depend on clear, fast resets and minimal surface interference, a hidden power zone is worth it. But if device swaps during high-pressure calls dominate your week, a hybrid approach wins out. In the end, the right setup is always revealed by how much time you spend juggling—not just by how organized your workstation looks in a photo or after a single, careful reset.

    Explore the full WorkBasic collection

  • Prevent Lighting Fixture Issues with Proper Hand-Started Screw Installation

    One rushed shortcut during lighting install—especially with a power driver—can undermine every routine that follows. A ceiling light looks flush above the laundry sink, a vanity strip brightens the mirror, a hallway sconce sits square after install. But what you don’t see on day one is often what unravels everything after a week of real use. Cross-threaded screws or stripped heads—usually from forcing things fast in a tight zone—let fixtures sag, hum, or shift until a steady space becomes an ongoing irritation.

    Lighting That Holds—Or Starts to Slip the Moment You Use It

    Fixtures can look perfect right after installation. The flush mount sits even, the wall light sits steady, everything aligns. But invisible installation mistakes take hold before you even flip the switch. A ceiling fixture set too quickly can drag a gap at one edge—barely there, until the first bump with a laundry basket or a door slam makes it obvious. Bathroom sconces that lined up along the mirror slide off-level just from weeks of steam and wiping the glass. Under-cabinet task lights—so clean on day one—start to gap and collect dust or moisture near the mounting points where a screw was rushed and couldn’t bite properly.

    This kind of failure isn’t random. It’s almost always in the most awkward places: above mirrors, behind laundry units wedged to the wall, back corners under cabinets, stair turns where your hand can barely fit. Those are the spots where grabbing the drill feels easiest—right up until the next cleaning, bump, or quiet vibration makes a loose thread or compromised anchor finally show.

    Routines That Expose Every Weak Point

    Repeated movement exposes fixture flaws more than first impressions ever will. Stepping up the stairs, tossing a towel in the laundry, swinging a door—each routine flexes mounts and fixtures. A flush mount near the washer that shifts when bumped. A vanity mirror light that starts humming with every open-and-close. The edge of the under-cabinet light that tilts further each time you wipe the counter, until shadows fall over the sink’s lip and you instinctively lean closer to see.

    Everyday use is relentless. Corridor footfalls loosen a misaligned semi-flush. Damp air amplifies the slant of a hurriedly fixed wall sconce. You start to hear a buzz that wasn’t there, see dust or bugs settling in the crack that grew next to a driver-driven screw. The flaws don’t just annoy—they disrupt safe movement, shadow the work surface, or force you to work around the lighting you paid to improve.

    One Bad Screw, Months of Small Interruptions

    The real problem always comes during upkeep. That moment when a bulb goes, or the fixture needs a clean, and the screw head is locked or stripped—no way to open without more tools and time. You’re left extracting hardware, re-mounting under less access, repeating the very fix that a hand-tightened screw could have prevented. For any fixture in a spot you have to clean or see daily, one installation shortcut turns small inconvenience into a recurring hassle.

    What Happens When You Hand-Start Screws—Proven in Utility Spaces

    Commercial and utility spaces make it obvious: a run of under-cabinet lights, each mounting screw started by hand, not drill, stays anchored month after month. Wipes, vibration, heat—no gaps, no slip, the panel stays true. When you have to unscrew for dusting, the fixtures come down smoothly: the anchor is still intact. The single screw forced by drill in the tightest corner? Its section always shows the first slip—gap at the edge, growing grime, uneven light scatter over the worktop. The difference isn’t whether the room glows, but whether that light stays useful with every routine knock, wipe, and adjustment.

    Slower Means Fewer Repairs

    Hand-start every screw. Especially in blind corners, damp areas, and every place you can hardly get a grip. When the thread starts clean, the light fixture holds. Even above the mirror, by the stair turn, under the shallowest cabinets. Time spent now buys months without shifting shadows, loose wires, or the tilt that makes you avoid using part of the counter or mirror. That reliability? Built in a single, patient step before any tool ever touches the screw.

    Common Lighting Mount Problems—And What Actually Causes Them

    Why do mounting screws cross-thread in lighting installs?

    Answer: Because drilling at an angle, or forcing the screw straight into the box or drywall anchor, often distracts from feeling the threads line up. The screw cuts its own off-kilter path—especially easy in older surfaces, patch jobs, or shallow wall boxes. The tighter the access, the easier to mistake speed for success.

    How can stripped screw heads put the whole fixture at risk?

    They make maintenance a struggle and stability a gamble. A stripped screw can’t be tightened or loosened safely. You risk a fixture coming loose over time, or wires getting pinched and exposed in ways that invisible misalignment can worsen. Each skipped cleaning session or unmade bulb change just deepens the problem—until the whole light feels risky to use.

    Is careful, hand-started mounting really necessary for flush mounts, sconces, or task lights?

    Absolutely, especially where movement, moisture, or daily cleaning test the install again and again. Every damp bathroom, busy stairwell, or high-traffic hallway proves: hand starting means the fixture stays tight and flat, wires behind the ceiling stay unmoved, and the light itself doesn’t become a future obstacle. The more routines and traffic, the more this microscopic care pays off.

    Lighting That Survives Real Use, Not Just Looks Good Once

    Reliable indoor lighting isn’t about a room looking bright the day it’s finished; it’s whether each fixture stays secure and usable after daily bumps, wipes, and shifts. That flush mount above your washer that doesn’t rattle when steam fills the room, or the stairway fixture that holds level all through winter boots and raincoats, signals a good install—one built on hand-started threads, not drill-forced shortcuts.

    Day after day, the difference is this: do you move confidently through the room, or do little stutters, shadows, or ill-fitting gaps make you pause, detour, squint, or just quietly regret the last-minute push to finish?

    For flush mounts, wall sconces, vanity runs, or work-area lights in busy, tight, or damp spots, the quickest way to an unreliable setup is speeding past the basics. The most useful, trustworthy performance always comes back to the details nobody sees—especially that first, slow turn of each screw.

    Visit LightHelper for practical indoor lighting that works, not just looks finished

  • How Wall Sconces Transform Workspace Lighting and Reduce Glare

    The problem in most desk setups isn’t simply too little light—it’s light that lands in the wrong place, at the wrong angle, turning a “bright” room into a field of small, daily frustrations. Sit at any desk under a single ceiling fixture: the top of your keyboard glares; your arms cast sharp shadows right where you need to see details; the back edge of the desk sinks into dimness. You straighten posture. You shift your chair. The lighting looks finished but never quite fixes the friction—until you realize you’re spending more energy managing glare and hunting for usable space than actually working.

    When Overhead Lighting Looks Bright, but Still Fails to Deliver

    In most home offices, shared study corners, or tight bedrooms, you’ll spot tidy ceiling domes, LEDs, or recessed downlights—symmetrical, promising complete light. Yet with every session, something nags: you angle your monitor to dodge a steady flash of reflection; paperwork migrates across the surface, always seeking the one glare-free zone; you lose time groping at shadowed desk corners for a missing pen.

    Overhead setups breed a stack of familiar friction points:

    • Bright ceiling light throws your forearms or hands into hard, distracting shadows—right over keytasks.
    • Desk and shelf edges vanish into shadow, forcing constant shifting, and making organization feel like guesswork.
    • Glossy desk surfaces or laptop screens catch relentless reflections, leaving you squinting, not seeing.
    • Cable runs, however “organized,” start grabbing your eye—with clutter growing more obvious the longer you use the workspace.

    Why Wall Sconces Change the Tone of the Room—and the Routine

    Wall sconces aren’t just decoration—they’re targeted tools for shifting the whole lighting dynamic. Positioned around eye level, sconces push usable, diffuse light sideways across the desk and immediately erase the most persistent issues from ceiling-only setups:

    • Instead of a single hot spot, you get clear, even coverage that reaches the awkward desk edge and shelf recesses where work actually piles up.
    • Lateral light cuts across shadows—not just softening the margins, but breaking up the hard lines that overhead beams always draw.
    • In compact corners or beside stacked shelves, the right sconce sidesteps the need for another clunky lamp base; you keep precious surface open without sacrificing usability.
    • Support pieces—when managed properly—move cables out of sight and out of reach, keeping both movement and vision clear, not just on day one but after a dozen uses.

    The routine shifts fast: small print stays readable no matter where it lands; you don’t have to squint for keyboard symbols in the evening; paper passed across the desk stops vanishing into shadow under your own arm.

    Scenes Where Setup Friction Remains: Not All Solutions Are Equal

    Ceiling lights that look “done” at a distance can unravel the minute you settle in. Real use exposes every weak spot—especially if you’ve made quick fixes or underestimated support placement:

    • Central lights swamp the immediate area but leave the back edge of the desk murky. You end up physically tracking light, shifting seats, or craning over the middle to see both text and screen.
    • DIY clamp lamps clear away some clutter on paper, but during real work, the brackets intrude. Cables nibble at your workspace, snare your sleeve, or wedge between shelf items as you reach.
    • Wall sconces installed as an afterthought look clean when new, but let their cords crawl down the wall or across reach zones and watch the “upgrade” become another maintenance chore.
    • Supposedly sturdy brackets start shifting after a week. The light creeps off target—sometimes millimeters at a time—and every nudge to realign is more distraction than improvement.

    The real test isn’t how a setup cleans up for a photo—it’s how many times in an average day you have to adapt, compensate, or silently curse a fix that created its own leftover hassle.

    How Effective Wall Sconce Placement Rewrites the Workspace

    Here’s a typical reality: your desk runs against the wall, no windows nearby. The overhead LED makes a well-lit pool in the center but burns glare across your keys and leaves the right edge—where your notes sit—deep in shadow. Every note you jot means nudging your chair or hunching to escape your own shadow. As the hours drag, your comfort drops, and you catch yourself rearranging, not working.

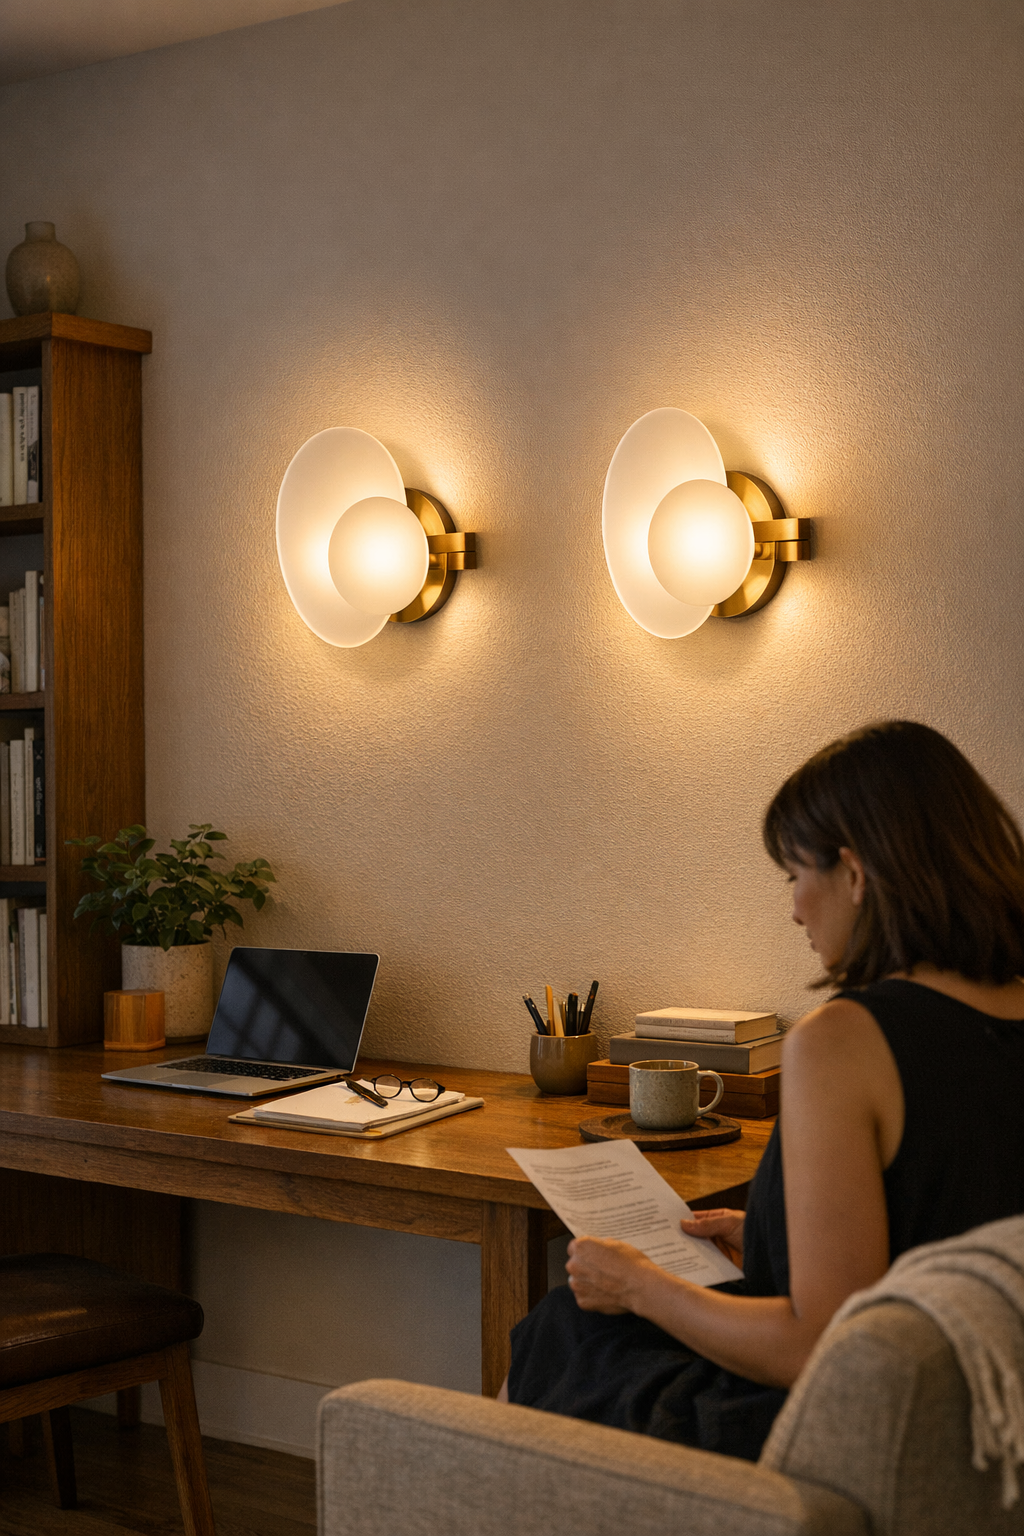
    Add two wall sconces, just above eye level and spaced out on either side. Instead of one glaring spot, the entire desk—both edges, all corners—gets bathed in balanced light. The difference: no more shadow-chasing or posture adjustment every time you switch tasks. Tucked cable covers seal off visual mess so the focus shifts back to actual work, not the distractions collecting under your line of sight. Even during wordless evenings or spreadsheet marathons, the lighting quietly disappears into the background—until you notice you’re no longer fighting with it.

    This isn’t “brighter” lighting—it’s a shift from hostile to helpful, from working around a setup to letting it work for you.

    Tip: Small Adjustments for Big Comfort

    Never mount sconces by guesswork. Use painter’s tape to mark planned spots and actually move through your workspace. Is the light in your direct line of sight? Do cords cut through your key paths? Is any bracket right where your reference book or keyboard needs to go? Five minutes of testing this way almost always reveals friction before it becomes a built-in aggravation.

    Trade-Offs: It’s Not About “More” Light—It’s About the Right Light

    Adding side lighting isn’t about cranking up the wattage. When sconces are angled toward real work—and installed with support that keeps cords unobtrusive—brightness doesn’t need to increase. Instead, the light stays steady across surfaces, so shadows and distraction drop. You move your eyes from screen to page and back without a pause. The urge to “fix the light” evaporates.

    But trade-offs creep in when sconces are pushed too close to mirrors or left with cords exposed. Bad support—brackets that wiggle, cable runs that cross every reach—just brings old annoyances back in new forms. Solutions that only solve noise or aesthetic leave the functional hassle in place.

    The Real Win: Small Daily Habits, Actually Improved

    What actually changes with a well-supported sconce setup isn’t showroom drama—it’s subtle relief across countless daily habits:

    • Your chair stays put, no more shuffling just to see the corners of your own desk.
    • Papers stay legible from any angle, without a black stripe of shadow wherever your hand lands.
    • The urge to move a lamp or fix a cord mid-session disappears.
    • After a long workday, what stands out isn’t the light—it’s the lack of friction, clutter, or the usual pile of minor annoyances.

    Making Lighting and Support Work Together for Real Life

    Sconces aren’t perfect, and neither is any one-time installation—but they solve a daily-use problem that ceiling lights and makeshift desk lamps rarely touch. If your setup keeps fighting you—glare, shadow, cables always just in view—then targeted support, smarter mounting points, and solved cable runs will do more to smooth your routines than any wattage boost. The mark of a solved setup isn’t how it looks the first day, but how it quietly disappears as a source of friction week after week.

    For lighting and support options that actually hold up under repeated use, Visit LightSupport for practical lighting and support solutions.

  • How Under-Desk Cable Trays Transform Corner Workstations for Better Flow

    If you’ve tried turning a desk corner into a daily workstation, you know the drill: cables managed at first, desk wiped down, nothing loose in sight—yet by day three, the mess is back. The desk looks organized; cables tucked behind the monitor, adapters wedged along the far edge. But in real use, friction keeps leaking in. You reach for a notebook: your forearm drags a wire. Pull your chair in, and suddenly a cord lurks underfoot. Slide open a drawer and an overlooked charger snags the track. The surface stays “tidy,” yet each session you’re stumbling over the same stealth obstacles—restoring order is part of the routine, not a solved problem. This is the reality of most corner setups: what looks sorted isn’t actually supporting your workflow.

    Where surface order falls short in daily use

    A neat desk is not a usable desk. You can sweep cables into a box or run them behind the screen, but most workstations don’t live in still-frame mode. Even basic tasks—moving your laptop aside, swapping power bricks, plugging headphones into a port—reveal the gaps. Hide every cord and you’re soon prying open cable boxes for that charger, hunting through a tangle to connect a backup drive, or untangling wires that rode up with your arm. On Monday, everything resets; by Wednesday, transitions grow clumsy and each new device reveals where the surface “order” starts to fall apart.

    The difference between “contained” and “temporary”

    What actually divides a dependable setup from one constantly in recovery mode? It isn’t whether cables are visible; it’s whether they hold their routes as the day unfolds. In corner desks—especially those with under-desk drawers or tight leg space—the weak links show up fast. Chairs pinch cords, drawers drag adapters into the open, or a casual monitor adjustment takes a wire for a ride. “Contained” means your monitor arm can swing, storage opens fully, and you’re not tensing up before moving anything. “Temporary” means working around your own system, hoping nothing pulls loose each time you return.

    When work heats up, friction multiplies

    The cracks in corner setup logic show up during real deadlines, not quiet afternoons. Switch tasks quickly—camera on, notebook out, second laptop charging—and you’ll spot every flaw as cables catch, drawers jam, or plugs shift into reach zones. Superficial tidiness can’t withstand rapid switching: it collapses into re-setup mode. Even cleaning the desk becomes a chore if dusting means disturbing a nest of cords under the surface every single time.

    How cable choices affect the “return” routine

    Cable friction rarely shouts—it ambushes you on return. Set everything up, then leave for a break; when you sit back down, a drawer won’t open right, or a cord blocks the chair’s path again. Too-rigid cable layouts fight anything that moves: trays crowding leg space, boxes sliding across the desk, adapters shifting with every small bump. Now you’re nudging your laptop back after a cord drags it off angle, or working around a charger that’s drifted into your drawer gap for the third time that hour. The organizational system is dictating your decisions, not supporting your movement. It drains pace, bit by bit.

    Visible order vs. real workflow freedom

    Tidy cables can sell a photo, but daily productivity exposes the compromise. If you’re fidgeting with a drawer or avoiding an outlet because “organization” made it harder to move, you’re trading looks for real utility. Plugging in a device should be faster, not an invitation to unravel or rethread what the desk is hiding. Daily friction is a clearer test than any staged workspace shot.

    What changed when I switched containment methods

    The breakthrough wasn’t a total desk overhaul—just swapping a clunky cable box for an under-mounted cable tray, set three finger-widths back from the desk’s edge. Suddenly, device chargers lined up, plug-in points stayed flexible, and loops quit falling into my workspace. Drawers opened—always. Not once did a wire block my reach or snake under my feet. Returning to work after a long stretch, everything was where it should be, reset was instant, and the mental noise of cable maintenance simply vanished.

    The tray was firm enough to steer cords clear but loose enough to let me route or unplug as needed. Access stayed easy; routine movements no longer collided with cable runs. It felt less like a “neat desk” and more like working in space designed for motion—no forced resets, no hidden hooks, no attention spent where there shouldn’t be any.

    How to spot if your corner setup still needs work

    • If you find yourself leaving drawers closed because opening them means combating a cable, your containment is failing, not finished.
    • If moving your chair always pulls something loose or threatens to, your routing isn’t mapped for real movement.
    • When outlets end up blocked by adapters, or new devices create fresh crowding, you’re exposing a system that doesn’t adapt to routine use.
    • If you catch yourself resetting, untangling, or clearing cables before each “real” session, that’s your desk signaling it’s not actually supporting your rhythm.

    Frequently asked questions from repeated use

    How do I contain my cables without blocking storage or drawers?
    Mount an under-desk cable tray a few centimeters back from the edge—above foot traffic, behind the typical open drawer range. Open drawers fully in dry runs before screwing down the tray to dial in placement. This preserves access without letting cords drop into your main reach zone.

    Is surface tidying enough, or do I need something under the desk?
    Surface solutions work for a first impression, but for real repeat use an under-desk tray or guided run is essential. It prevents cords from creeping into work paths and keeps drawer, plug, and leg access clear—all day, not just after a reset.

    Does a cable tray actually matter, or is it a visual upgrade?
    The difference becomes obvious across weeks: a tray positioned for your workflow means fewer interruptions, faster swaps, and less time spent managing cables. You stop anticipating friction; you just return and get to work. Utility beats a photo-ready finish every time.

    Letting the corner desk actually “settle in”

    A stable corner workstation isn’t about hiding cables at all costs—it’s about structuring space so power, signal, and device swaps happen without adding obstacles. Clean looks matter, but the best setups are the ones you don’t have to babysit. If week after week you’re moving through tasks without battling wiring, your corner finally feels permanent—not provisional. That’s the mark of a desk supporting, not resisting, how you work.

    Explore the full WorkBasic collection

  • Why Dry-Fitting Canopies Prevent Common Indoor Lighting Problems

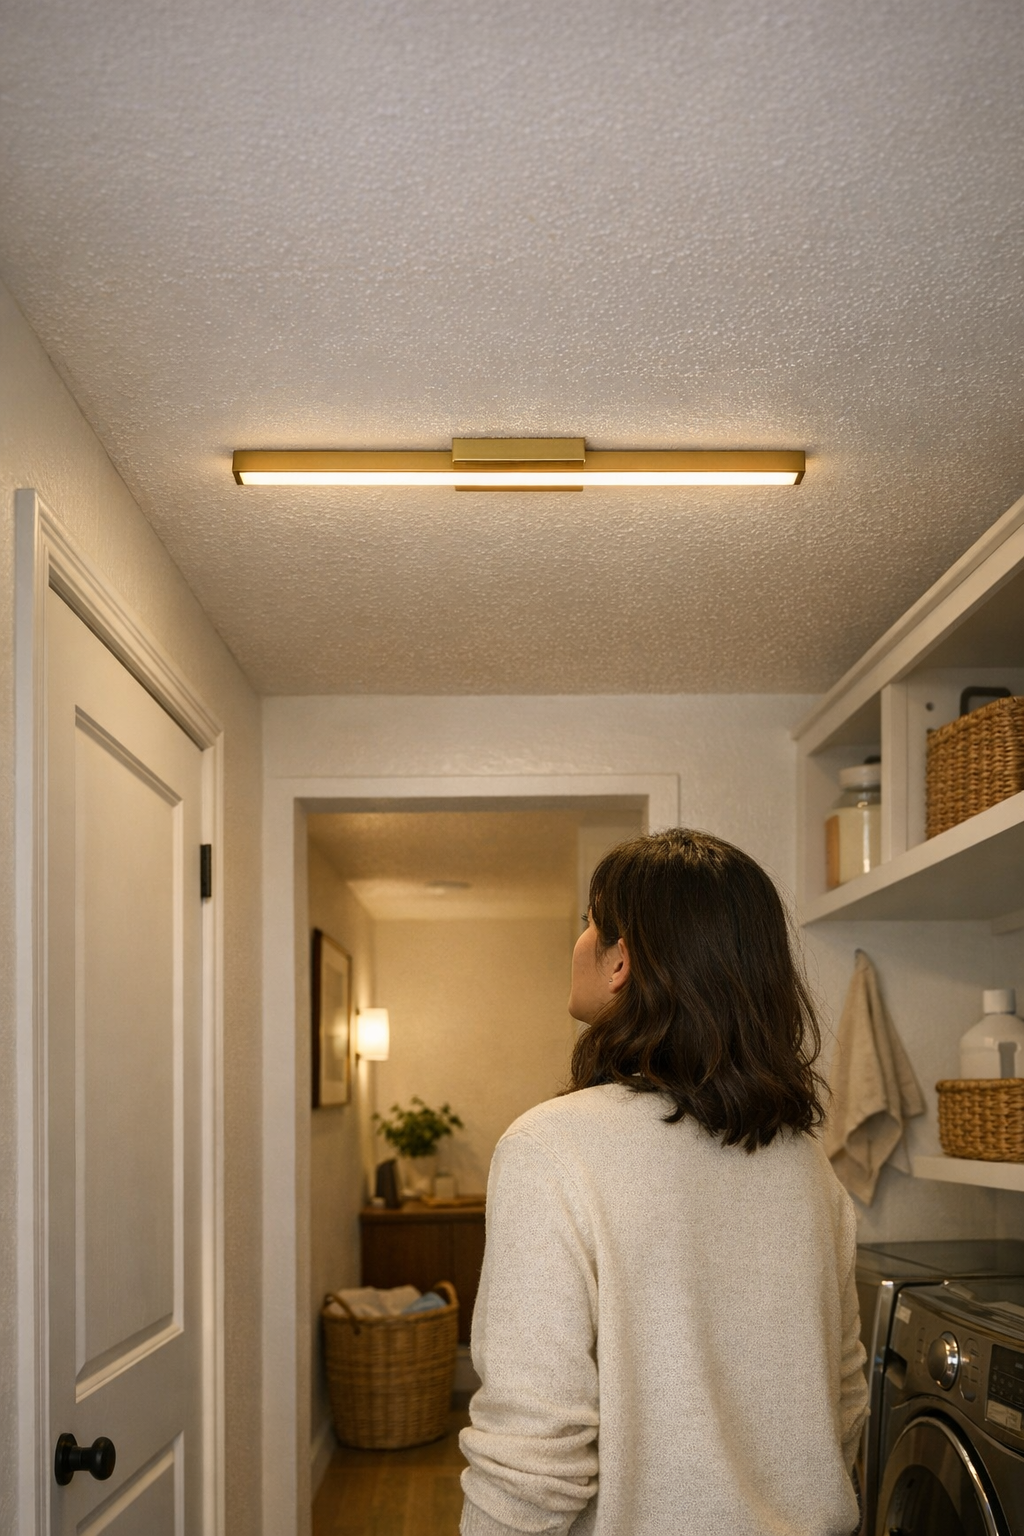
    Most hallway, stairway, and laundry lights are installed to look finished—then quietly make daily life harder for years to come. You notice it not in dramatic failures, but in regular routines: a passage that feels dim, glare flaring across a mirror edge, shadows pooling along a step, or a “bright” room where you’re still guessing at the edge of the counter. These aren’t just the result of fixture choice or lamp wattage. Instead, the problem almost always starts with a single overlooked move: skipping a full dry-fit of the canopy against the actual ceiling or wall before wiring it in place. This is where usable lighting can go sideways, literally, affecting every flush mount, semi-flush, wall sconce, or utility fixture you rely on.

    One Overlooked Step, Many Daily Headaches

    Miss the dry-fit, and your fixture’s shape and spread are now set by uneven trim, warped plaster, or hidden ceiling seams—not by where the light should actually fall. It might look fine until nightfall or the rhythm of the week returns: turning into the hallway, you notice a crescent of shadow hugging one baseboard; doing laundry, you fight glare splashed at eye level; leaning to shave, half your face is evenly lit but the other side stays lost in shade. The inconvenience is not just cosmetic—it’s woven into every pass through the space, magnified by real use and movement.

    Small Installation Mistakes, Big Room Consequences

    Skip dry-fitting, and the fixture’s final position defaults to wherever brackets find the path of least resistance. It might rest high on a corner of crown molding, twist slightly to fit an old electrical box, or sag fractionally where the ceiling dips. The difference feels subtle at first, then becomes routine friction:

    • Flush mounts in hallways project crescent shadows down one wall—making a previously clear path look uneven or vague after dusk.
    • Vanity lighting over a bathroom mirror tilts just enough that a shadow line forever splits your reflection, forcing you to shift position to find good light.
    • Laundry lights sit proud or crooked, leaving visible gaps that collect lint and dust, and making bulb swaps or wipes much more fiddly than they should be.

    By the time you notice, it’s become a daily irritant—the kind of thing avoided until it quietly shapes how confidently you move or work in a room.

    Why Dry-Fitting Matters in Everyday Spaces

    Functional indoor lighting isn’t about looking good at rest—it’s about behaving well the moment you actually use a hallway, pause at the laundry sink, or turn into a stair landing. These are spaces where alignment flaws punch above their weight:

    • Stairways: Even a slight tilt throws a persistent shadow across risers—making the step edge disappear at night, or hiding dust as you clean.
    • Corridors and entryways: An off-center canopy pins brightness overhead but can throw walking paths into shadow, turning a “lit” corridor into an uneven obstacle.
    • Laundry and utility rooms: When the fixture base doesn’t sit flush, glare spills over the wall instead of the counter, making folding and sorting both harder and less safe.

    Minor mounting flaws are persistent: not a one-time error, but a source of recurring discomfort, uncertainty, or low-key annoyance that accumulates with every use.

    The Canopy: More Than Just a Cover Plate

    Many lighting canopies look like trivial trim. In practice, they’re the single pivot point for controlling how—and where—light lands in daily use. Just a slight tilt or small gap at installation can redirect an entire fixture. On a sloped stair landing, failing to dry-fit guarantees a streak of shadow lingers at the top step—never erased by swapping bulbs, only solved by getting the mount truly flush to the real surface. A bathroom sconce that “almost” fits creates decades of lopsided reflections and repeated small adjustments each morning and night.

    Daily Use: Where You’ll Feel Every Flaw

    What does this look like in real life?

    • You’re constantly shifting in the mirror to dodge shadow—never quite getting both sides of your face evenly lit.
    • One corner of the hallway feels vague or unfocused, no matter the time of day.
    • A laundry fixture that looked fine from below now shows open box edges and collects fuzz—right where you reach every week.
    • A room that looks “finished” but leaves you navigating around only half-usable lighting every time you pass through.

    Nothing dramatic, but hard to ignore—and much harder to fix once installed.

    Building a Smart Lighting Habit: Always Dry-Fit First

    The simplest way to dodge these issues: always dry-fit the canopy before committing to wiring. Don’t trust straight lines or new paint—hold the fixture in place, step in and out, and check it from every angle you actually use. Stand in the doorway, crouch by the washer, look up from the stairs. Watch for pinched trim, exposed gaps, or a tilt that only shows when real daylight hits. Adjust for all the hidden irregularities—old plaster, paint buildup, non-flat ceiling lines—so the fixture sits truly flush where it counts. Once you know the fit is clean and the spread is right, then (and only then) wire everything in.

    This habit pays off immediately in visible ways:

    • Bathroom vanity: A two-minute dry-fit catches a tilt that would have split your reflection. The shift means you wake up and see yourself clearly, not in lopsided shadow.
    • Stair turn: A trial fitting reveals a gap that would have left a sharp shadow just where you land with your laundry baskets—so a quick spacer saves you years of awkwardness.

    The room doesn’t just look brighter—it works better, with lights that support your routine instead of fighting it.

    Where This Matters Most: High-Traffic and Task Zones

    Anywhere you move, pause, or reach repeatedly exposes tiny misalignments. Ceiling lights amplify these flaws: misalignment on a flush or semi-flush mount goes from invisible to glaringly obvious once you view it along the corridor, down the stairwell, or across the entry. Wall sconces and under-cabinet fixtures might seem more forgiving, but cleaning, changing bulbs, or simply reaching across a counter brings every gap or shadow back into view.

    Zoned and task spaces—vanity mirrors, kitchen counters, laundry folding surfaces—turn “minor” flaws into constant interruptions: one cheek in shadow, counter edges lost, dust pooling where there should be light, awkward angles every single day. Especially in spaces used after hours or with dim outside light, the cost of a bad fit multiplies over time.

    A Practical Tip for Immediate Improvement

    For every swap: keep a pocket level and a strip of tape handy. Even if you’re in a rush, a quick dry-fit using both will instantly reveal tilts, gaps, or pinch points that wiring alone can’t undo—making it possible to prevent a month of frustration in just five minutes. It’s the difference between ongoing hassle and a fixture you forget about (for all the right reasons).

    Why It’s Worth the Small Extra Effort

    Skipping this step isn’t a trivial shortcut—it’s a structural choice with years of visual side effects. Dry-fitting locks in alignment before a single wire is touched, delivering even, usable, glare-free light that won’t keep interrupting your daily routine. If there’s a secret to rooms that actually feel clear, tidy, and well-lit every time you pass through, it’s often found at the canopy—not the bulb or finish.

    Test the fit before you wire. The habit is simple, and the improvement is immediate—because good indoor lighting is about how it works, not just how it looks.

    LightHelper indoor-lighting fixtures

  • How Wall Sconces Transform Layered Lighting and Reduce Glare Indoors

    The desk looks organized—until the lights switch on and evening routines actually begin. Standard overhead fixtures create glare across the center, plug-in lamps leave uneven pools, and the “clean” look falls apart after regular use: harsh shadows slim the usable edge, reading becomes a squint, and the only way to fix it seems to be shifting lights and untangling cords. What looked like a resolved setup in the morning quickly turns into a game of avoid-the-glare and chase-the-dim-corner by night. The more you adjust, the more exposed cables, unstable lamp bases, and areas of weak lighting break the illusion of a truly functional work zone.

    Why “Brighter” Isn’t Always Better

    The default response to a dim workspace is usually a stronger bulb or another lamp—yet this almost always just rearranges the problem. Instead of clarity, you get new glare points, darkened shelves, or tired eyes darting between bright slabs of light and fading peripheries. The work itself—editing, sketching, sorting—gets harder as the day ends and you’re left compensating for failed coverage, not just weak light.

    Plug-in lamps seem flexible at first. But every attempt to position them for better coverage leads to another cord exposed, another angle that doesn’t quite fit, another pattern of moving lamps just to make a surface usable. By nightfall, that “hidden” cable network becomes the most visible feature of the space. Lamps promising adjustability end up fighting with your layout, needing a nudge or a slide every time your focus shifts.

    Seeing the Gaps After a Week of Use

    No setup flaw is as obvious on day one as it is after a routine week. The shadow creeping across the desk after sunset remains, no matter how many times you reposition the lamp. Corners fade into uselessness, and that perfect surface turns into a patchwork—one side overlit, the other frustratingly dim. Every fresh task means rearranging, not working. The new lamp solves little: it just trades a dark spot for a new staple of background glare and cable mess that rebuilds itself daily.

    “Adding brightness” rarely solves where the coverage breaks down. Instead, the friction moves: now your working area is well-lit, but the zone right beside it turns into a problem. The urge to buy another lamp creeps in—but you know the limits just repeat with every cord and base added.

    The Subtle Payoff of Layered, Directed Light

    This is where wall sconces start to break the pattern. Not just as decorative objects, but as layered support for surfaces missed by overheads and table lamps. A correctly placed sconce can fill the pocket of gloom under a shelf run, give clarity to a desk’s far corner, or even neutralize the sharp contrast that ceiling fixtures throw onto walls and workspaces. The change isn’t instant drama; it’s cumulative relief—not needing to adjust lamps for every shift in activity, not having the edge of your table dissolve into shadow every night, and not chasing cords that keep defeating the attempt at tidiness.

    Sconces work because they let you target problem spots. They reduce the harsh divide between lit and unlit, offer real coverage at the working edge, and keep the background from becoming a source of reflection. The difference only appears after days of use—surfaces remain actually visible, not just apparently clean, and you notice less interruption in whatever your routine demands. But a sconce fixed purely for symmetry or “decorative balance” can end up as useless as a lamp in the wrong place—making new shadows, missing real work areas, or simply swapping chaos for patchy, indirect glare.

    Why the “Clean and Calm” Setup Falls Short

    It’s easy to get pulled into the peace of a central fixture and scattered table lamps. The space appears open and organized; cords are tucked away by morning. But repeated real use pulls those weaknesses straight out:

    • As daylight fades, one edge always lags—forcing awkward reach or messy repositioning.
    • Room corners drop into shadow, even if you added extra lamps before.
    • A new task means moving a lamp (or unclipping another) before you even begin.
    • Cord management unravels during actual use; what looked concealed at first now trails across the work surface or catches on a chair.

    Sconces, placed along these weak zones, close the gap. Frame the shelf line, aim along the desk edge, spot the dim reading nook. The change is not showy: details remain visible after dark, you stop dodging cables, and the rhythm of walking, reaching, or shifting a setup finds actual stability. Indirect light from a sconce also calms the hard reflections overhead lights aggravate, making under-shelf or display areas workable past sunset instead of just tolerable.

    Scenes From Daily Use: Where Sconces Change Everything

    Picture a mixed-use room—work, reading, resting. Ceiling light floods the middle, table lamps attempt to fill gaps, but by evening it’s the same struggle: a wall-length shelf stays in shadow; screen glare bounces into your eyes; reading zones fade, and the “good enough” desk starts requiring constant lamp choreography. Only when slim wall sconces got mounted just above the shelf—hugging that stubborn 90cm line—did the routine break. Suddenly, the far side was visible. The need to shuttle lamps between zones was gone. Cables that once crisscrossed paths were out of the way. The room didn’t just look neater; it actually supported the way you wanted to use it, hour by hour.

    True improvement shows in what you stop noticing: fewer breaks to reposition lighting, no irritation from maze-like cable layouts, fewer moments of deciding which shadow to live with.

    Smart Layering Beats Adding More Lamps

    Sconces don’t just “add” light. They build a zone, make space readable, and clear working surfaces without the mess of competing pools or the hassle of visible cables. What’s changed isn’t just style—it’s the fact you stop improvising every time you need clarity at a different edge or corner.

    The best results come by pairing sconces with under-shelf strips or discreet wall panels for full, even background light. Success depends on how you place them: angle to dissolve a shadowed corner, space close enough to overlap but not create hotspots. Sometimes it takes a week of moving a chair, testing surface visibility, or nudging the sconce a few centimeters—but when placement clicks, the setup works in the background, not against you.

    Tips for Placing Sconces Where They Matter

    • Target persistent problem spots—the reading corner, desk edge, or awkward shelf run that fades after sunset.
    • Protect your eyes from glare—mount just above line of sight, but not high enough to wash the ceiling or kick glare into the sofa zone.
    • Make the light land where it counts—a minor shift in placement, even 10cm, can mean clear coverage or a leftover dim edge.
    • Check overlaps—when combining sconces with panels or strips, make sure you’re solving darkness, not stacking glare and missed zones together.

    The Quiet Comfort Gains That Build Over Time

    Well-placed wall sconces won’t always impress in a quick photo, but their value shows up day after day: less shuffling of lamps, fewer cord quick fixes, visible coverage at the edges that once demanded compromise. Lighting adapts with your routine—which means as you rearrange, move, or rethink your setup, the real clarity and steadiness don’t dissolve.

    Not every challenge is solved by an extra fixture. But introduce a support layer to neglected wall runs and shadowy edges, and “enough light” gives way to a space that keeps working all evening. The desk, the shelf, the reading chair: each zone actually usable, not just staged. What matters most isn’t the look—it’s the almost invisible ease that builds with every repeated use. LightSupport

  • How Grouping Desk Tools by Use Frequency Boosts Daily Workflow

    The satisfaction of a neat-looking desk is real—cables tucked, supplies lined up, surfaces looking empty enough to breathe. But for anyone who works more than an hour at a stretch, that surface-level order doesn’t last. Mid-morning, a setup that looked sharp at 8 a.m. can already feel crowded or awkward: you grab a pen, shuffle a notepad, snake your charger under a tray, push a drawer closed against a cable bulge. Suddenly, the logic behind your desktop organizer matters a lot more than its appearance—and what worked for a clean snapshot can start breaking down under repeated, real-world tasks. Where your most-used items live, how often you reach past obstacles, how many detours you make between keyboard, notebook, monitor, and device all add up to a workspace that either speeds you up or drags you down.

    Why a Picture-Perfect Desk Isn’t Always Fast to Use

    Looks can be deceiving. A symmetrical spread of pens, markers, cables—each in its own tray or compartment—can still trip you up in practice. Say you keep a basic desk tray sorted by type: every paperclip, pen, flash drive, and sticky note grouped “where it belongs.” Trouble is, the pen you actually use for every rushed call winds up buried between three highlighters and a USB stick. You fish or shuffle, each time losing seconds. These aren’t just tiny slowdowns; they break your momentum, forcing small resets. The core issue isn’t the presence of clutter—it’s when your organizing logic ignores your actual work rhythm and frequency of use.

    On a desk that feels crowded even when it looks clean, these invisible roadblocks pile up. Need to jot a number in a hurry? The pen is behind a decorative storage jar. Plug in a phone to charge? The cable has migrated under two stacked notepads. Even a compact desk can disguise wasted movement: a drawer that hits a stray cable, an organizer that blocks your elbow, a device tray that demands you sweep aside papers every time you swap from keyboard to notebook. Cleared surfaces only matter when they make daily resets and transitions easier—otherwise, tidiness is just delay, not progress.

    Grouping by Use Frequency: The Shift That Changes Workflow

    Function almost always wins in the long run. The fastest desks aren’t symmetrical—they’re grouped so what you use most is always nearest your strongest hand, within clear reach, with nothing hiding or overlapping. If your main pen, sticky pad, and phone charger anchor the space you touch most, your workflow changes: every reach is direct, and the rhythm of switching between tasks (mouse to notebook, plug to device, screen angle tweak) feels noticeably easier. This frequency-based grouping doesn’t showcase every tool equally, but it actually supports your work rounds.

    You feel the difference most sharply in multitasking bursts—voice call to quick note, laptop to manual sketch, adjusting your monitor so the webcam lines up just right. Each time something blocks your sweep—drawer resistance, tangled cable under a monitor arm, the “good” pen behind backup supplies—your attention stutters. These half-pauses multiply across each day, adding friction and fatigue. The Instagram-ready desk might impress, but the frequency-prioritized one means you stop hunting, shifting, or apologizing for where things landed after a busy block. Less perfection, more flow.

    Seeing Friction (and Momentum) in Real Desk Routines

    Real tension shows up in moments most people ignore: needing to take analog notes while on a video call, sliding your chair back and discovering the under-desk drawer unit blocks your feet, trailing your laptop’s charger over the corner of a desk organizer one too many times. The clutter isn’t visual—it’s structural. If your favorite pen and notepad are front and center, your hand-to-paper switch is natural. But one layer of stuff—even those sorted, well-placed supplies that looked smart on Monday—means awkward interruption with every transition.

    Physical setup details matter more on busy or shallow desks. An organizer wedged too close to the cable tray drags every time you connect a device. A shallow desktop disappears under a single monitor riser and lamp, leaving nowhere for your arms during typing sprints. In one setup, backing up a chair repeatedly bumped a side-drawer, making you unconsciously sit forward and hunch. Shifting passively-used tools—backup drives, extra cords—out of live zones restored the main surface for what you actually use, not what justifies a tidy picture. The direct effect: you sit, start, and cycle through work with fewer corrections.

    What Actually Helped: How I Adjusted My Desktop Organizer

    The leap in usability happened when I stopped organizing by category and arranged strictly by reach and repeat use. The main pen landed in its own slot right where my right hand returns after typing, with the sticky pad and charger beside it—everything else took a step back. Scissors, less-used cables, and backup batteries were exiled to rear or side slots in the organizer. This forced order made the routine direct: no scanning, no nudging aside a pile, no mental inventory before each action. After five full workdays, I spent less time resetting or reshuffling the surface than at any point in the previous month. The only ongoing tweak was a weekly sweep: move forward what crept backward, move back what I’d only used once, and resist the urge to reward symmetry over ease.

    Desk Setup FAQ: Real World Sorting

    Which items actually belong in front in my desktop organizer?

    Watch your hand movements for two days. The items you reach for every hour (usually: main pen, go-to charger, notepad) earn front-and-center space. Everything else moves back or gets sidelined, even if it looks neater all together. Don’t guess—track which tools land in your hand zone and adjust for reality, not initial expectation.

    Will grouping by frequency really save me time if my desk already looks organized?

    Absolutely. Even perfectly arranged setups still waste time if your top tools aren’t freely accessible. Every detour—moving a decorative notebook to plug in, fishing for a favorite pen among less-used spares—multiplies over the week. The real win is less wasted attention, quicker resets, and no end-of-day desk overhaul needed to catch up with your work pace.

    What if nearly everything feels essential for my desk’s front zone?

    Most desks carry “front-line” tools that don’t pull their weight. As an experiment, reduce your front zone to the top three or four things you grab each hour. Anything else can be temporarily shifted out. At the end of a week, odds are you’ll find half that list never really earned its space—open room that makes your actual cycles smoother. Shift priorities as projects change, but don’t be afraid to prune aggressively in the name of flow.

    Living With the Change: Fewer Setbacks, Smoother Reset

    Switching to frequency-based grouping rarely leaves you with a spread worthy of a catalog photo, but it does unload friction most people accept as normal: less scanning, less shifting, less redoing what a smarter logic would prevent. Chaos will still creep in, and a hard deadline will scramble any plan, but the difference is clear—a desk that recovers fast and matches the way you actually move through work. If a tool stops being essential, it drifts back; if a new routine takes over, your organizer adapts. It’s about less friction, not perfect stillness.

    Function outlives appearances every time. One week after rearranging based on reach and rhythm, I was working faster, pausing less, and clearing my space with less thought—no fuss, just flow. The real proof is in how few times I catch myself grumbling about the setup now: it fades into the background, exactly the way a good desk should.

    Explore the full WorkBasic collection

  • Why Pre-Assembling Lighting Fixtures on the Floor Improves Long-Term Performance

    Bright doesn’t always mean right—especially in a hallway, laundry, or bathroom where you actually move, reach, and work. The fixture overhead can shine strong on install day, but after a week of real use, the weak points show up: a shadow slicing across the laundry counter just as you grab detergent, or an overhead glare that forces you to squint each morning at the mirror. This is the kind of lighting inconvenience that slips in slowly, shifting the room from “finished” to “frustrating” with every new routine.

    The Overlooked Reality: Lighting Alignment vs. Just “Looking Bright”

    A well-lit room on paper isn’t always usable in practice. It’s not just about the wattage, or the first impression under fresh paint—alignment and structural fit decide if light stays steady, or if a cabinet edge fades into shadow right when you need to see. A flush mount or hardwired wall light may seem to handle the load, but if the alignment slips and trims don’t seal cleanly, localized shadows and edge glare quietly sabotage key spots: the folding station, the hallway turn, the sink run.

    “Lit up” means nothing if the light misses where you live and work. Any fixture looks flawless when first mounted, but within a month, base sag and lens drift can create dim pockets that no one warned you about—right where you search for socks or scan the mirror for a breakfast crumb. That gap between first-glance and lived-through is where real lighting problems start collecting.

    Assembly Choices: Floor Pre-Assembly vs. Overhead Piece-by-Piece

    Every proper install comes with a choice: fully assemble the fixture on the floor, aligning trims and sealing lenses before you climb, or risk building it overhead, one screw and shield at a time, while you balance on a ladder. The stakes are higher than just speed. Pre-assembly on a stable surface locks in structure, making sure your lighting holds its shape after weeks of use, steam, door slams, or vibrations—not just during the first walk-through.

    When Overhead Assembly Starts Letting You Down

    The typical approach is to wire and build directly overhead, prioritizing safety and connection over every other factor. But with a shaky base, dropped screws, or forced alignments, trims pull off true, lenses skew, and small errors multiply. At first, it just feels a bit off. In a few weeks, you notice:

    • Shadow bands fall in odd directions as a semi-flush tilts with each door close.
    • Mirror faces turn uneven—one side washed out in glare, the other falling into shadow from a pulled trim.
    • The subtle but escalating rattle from a laundry ceiling light displaced by spin-cycle vibrations.

    The Hidden Win of Floor Pre-Assembly

    Spending the extra moments to align and seal every part on the floor pays off every day. The fixture arrives overhead with structure held firm—trims locked, lenses even, every angle checked. In squeezed quarters—a low-ceilinged bathroom, a narrow hallway, a laundry boxed next to a utility sink—this discipline shows: the beam lands where it should, not halfway down the wall or lost behind a cabinet run. Glare patches and creeping shadow are kept in check before they can interrupt your routine.

    Lighting Scenes That Reveal the Difference

    Hallways: When a Simple Trip Turns Annoying

    Imagine the routine: a long hallway with one central flush-mount. As weeks pass, a fixture assembled overhead can slip—just half an inch, just enough that a shadow line now traces your regular path. You find yourself stepping left at night, adjusting a coat, pacing around the unpredictable shadow. The flaw is subtle but persistent, multiplying every time you walk through.

    By contrast, a floor-aligned fixture stays where it’s meant to—beam straight, shadow minimized. Movement feels natural. Every corridor step lands in clear, even light. Lighting becomes invisible, which is exactly how you want it when half-awake or carrying laundry baskets at 6am.

    Laundry Room: Rattles and Dark Corners No One Warns You About

    Small rooms punish shortcuts. Overhead-assembled fixtures leave room for error—a trim just loose enough to vibrate, a lens angled to make the dryer’s edge dim. You shrug it off until the spin cycle, when the rattle gets louder and the far corner stays murky no matter how many times you wipe the lens. Those dark pockets aren’t “character.” They’re unforced errors, born of rushing what needed still hands and a flat surface.

    Pre-assembly closes the gap: all screws tight, all shapes checked. The fixture holds its place. Covers stay silent, no matter how many cycles you run. Even after weeks of slam-shut cabinets and steamy utility loads, the beam remains even and the rattle never starts.

    Bathroom: From Glare Patches to Even Mirror Light

    Bathroom lighting doesn’t just fail in the dark—it fails with glare, shadow imbalance, or moisture drifting inside a loose-fitting lens. The real cringe isn’t bad style, it’s the moment you shave or do makeup and realize one cheek’s in spotlight glare while the other is lost to a dim patch. That unevenness traces back to how the fixture was mounted—misaligned on a ladder, rushed to finish before steam fogs the glass.

    Pre-assembled vanities and sconces press flat and tight, holding their shape and keeping moisture sealed out. Mirror light is even, side to side—no guessing, no squinting, no realignment needed after the third shampoo bottle knocks the fixture. Every face wash and morning check is clearer, simpler, and less interruptive.

    Why Pre-Assembly Pays Off Again and Again

    Floor pre-assembly isn’t about saving time on day one—it’s about saving hassle every time you use the room. Error-proof trims block future shadow creep and stop covers from buzzing loose just as you step onto a damp floor or fill a laundry basket. You shouldn’t need a ladder for routine life. Lighting should stay quiet, even, and securely out of the way, month after month, not just barely holding on through week three.

    • Long-term stability—spend more time using, less time re-tightening trims or adjusting coverage.
    • True task clarity—no glare, no shadow at the counter or mirror where you need visibility most.
    • Better resilience in wet rooms—tighter seals, less dust and steam intrusion, function preserved between cleanings.

    A Real Tip for Busy Spaces

    For any area that sees daily movement and occasional humidity—think laundry, bathrooms, busy stairwells—give yourself margin: pre-assemble every major part at floor level, in daylight if you can. Align the trims, set the lens, test the fit before you even pull out the stepstool. Ten minutes spent here spares you hours of future glare-fighting, trim-tightening, or battling with a fixture that never quite centers itself above the mess. That’s how you avoid the slow slide from “looks bright” to “feels off.”

    The Difference Week to Week

    The mark of good lighting isn’t how a room looks the next day; it’s how naturally your movement, routines, and sightlines hold up week after week. Floor pre-assembly makes it less likely you’ll ever catch a shadow swallowing the hallway’s end, squint against glare at the sink, or tiptoe around a laundry dark spot. Instead, the light stays quietly reliable—the signal of a fixture whose only job is to let you work, move, and see clearly whenever you return.

    Visit LightHelper for practical indoor lighting solutions.

  • Solving Shadowed Counters with Smart Under-Cabinet Lighting Solutions

    Ceiling lights promise room-wide clarity but rarely deliver where it counts. Counters, desks, and shelves look finished under bright fixtures—until you reach for anything at the far edge and find your hand working in shadow. Glare flashes off steel, crumbs build in the dim back strip, and every day you adjust your routine or your body just to see what you’re doing. If you’re shifting cutting boards, dragging paperwork forward, or squinting to catch a lost USB cable behind a monitor, your lighting setup is probably more “finished” in appearance than in function.

    When Bright Overhead Isn’t Enough

    Step into any kitchen or shared workspace after dark. The overhead light softens the whole room on first glance—but when you move closer, the back of the counter or shelf fades out. Shoulders or a cabinet edge cast live shadows, swallowing whatever you try to clean, fix, or prep in that zone. Routine tasks—reading small print, spotting grit, untangling cables—turn into back-and-forth shuffling for every patch of working light, while the rear edge keeps refusing to cooperate.

    This isn’t a style flaw; it’s a persistent setup drag. As days go by, shadowed zones quietly shape your habits: kitchen gear migrates to the front edge, sticky spots get missed, and you wind up working in awkward positions. The “clean” look of the main room contrasts with the frustration of missing details, unfinished cleanups, or blind grabs for the right tool.

    The Repeated Friction of Dim or “Solved” Setups

    Patterns repeat. A kitchen counter scrubbed spotless still collects debris along the dim rear. A workspace feels organized—yet as soon as you push bills or chargers toward the back, you lose sight of them. Decorative sconces glow after dusk, but a reading nook stays one lamp short unless you shift it for the fifth time. The friction isn’t about age, trend, or fixture cost; it’s about how light actually lands after months of use, not in catalog photos.

    The problem isn’t how the fixture looks overhead, but whether every regular movement is met with clear, usable light—or with old workarounds and new annoyances.

    Why Under-Cabinet and Shelf Lighting Changes the Daily Equation

    Filling the gap means putting light where the action is: under-shelf or under-cabinet strips and compact task fixtures that bathe the working edge directly. The difference is immediate. You stop skimming a cutting board forward just to stay out of shade. Slivers of clutter—coffee grinds, stray screws—actually stand out for quick cleaning. Pulling items from the back isn’t a test of memory or manual dexterity.

    • No more shadow fights: the rear surface is just as visible as the front.
    • Mess can’t hide, so less builds up behind toasters or beneath monitors.
    • Routine tasks keep flowing, instead of stalling when light fails to keep up.

    Installed right, even cleaning at midnight feels simple: every patch, from backsplash to appliance edge, finally stays in plain view instead of hiding mistakes until daylight.

    Seeing the Flaws: Placement, Glare, and Cable Distraction

    But pushing more light under shelves is only an upgrade when it fixes more than it complicates. Poor placement creates a new band of glare straight at your eyes, while exposed cables dangle into awareness every time you plug in or wipe down. Support hardware that seemed subtle easily transforms into an everyday nuisance: a bracket edge catches your sleeve, adhesive peels, or you’re forever rerouting a cord that breaks the clean line. A “solution” that draws your focus to its cables or blind spots is simply a new problem, not a hidden helper.

    The real mark of good under-cabinet lighting is forgetting it exists—because every work surface, spill zone, and tool drop is already visible, with nothing pulling you out of the task at hand.

    Real-World Setup: Day-to-Day Improvement (Without Extra Fuss)

    Consider a straightforward switch: a slim LED strip, anchored just behind the midpoint beneath an upper shelf using discreet brackets. The cable routes cleanly along the cabinet’s run. The result? No cold spot along the backsplash, no dangling cord to brush, no glare lines to shift around. Every inch stays lit, and that final inch—where pots or chargers love to disappear—finally becomes part of the workspace instead of an awkward blind zone.

    After a week, your routines shift quietly. You clean thoroughly the first time, stop repositioning lamps, and kitchen gear doesn’t migrate to the bright front edge out of habit. Even late-night cleanups find the last crumb, not just the easy ones. This kind of setup doesn’t just tidy the room visually—it removes the pause and fidget from familiar everyday motions.

    Small structural calls—using diffusers for softer light, mounting with real brackets instead of adhesive, tucking cables behind existing lines—separate persistent clarity from setups you’re always tinkering with to fix yesterday’s shadow.

    Common Under-Cabinet Lighting Questions Answered

    How do I avoid glare with under-cabinet lighting?

    Aim the strip or fixture at the backsplash, not out toward you. Use built-in diffusers to soften edges, especially where countertops are glossy or reflective. Before committing, stand at your usual work position and watch for harsh reflection—not just from the light, but off utensils, tiles, or your own wrist.

    What’s the most common mistake with shelf or counter lighting?

    Placing the fixture at the shelf’s front, which creates harsh highlights and persistent rear shadows. For even coverage, mount slightly behind the midpoint so both the work area and rear wall get clear, balanced light without glare bouncing back at you.

    Can I install under-cabinet lighting without an electrician?

    Most new plug-in LED strips attach with brackets or adhesive and don’t require hardwiring. But skipping proper cable management turns a crisp setup into something you notice for the wrong reasons—loose, snag-prone cords breaking up an otherwise clean line, or leaving small safety risks where bags, pans, or papers cross by.

    Edge-to-Edge Visibility Trumps Looks-Only Solutions

    Lighting the surface is not about dazzling the room—it’s about removing weak spots where routines stumble and clutter hides. The real payoff is cumulative: chores move faster, cleaning is complete on the first pass, and you stop working around the same dim zones day after day. The difference isn’t just visual; it appears in every task that finally runs smoothly instead of being interrupted by gaps, glare, or flickers of setup regret.

    When you build lighting and support to fit your actual daily movements—countless routines at the edge of counters, the back of shared desks, the strip beneath shelves—you finally close the gap between how a space looks and how it truly works.

    Find practical lighting and support options at LightSupport.