Category: Lighting & Work Setup

  • Why Lighting Comfort Depends on Fixture Placement, Not Brightness Alone

    Why Bright Lighting Still Leaves You Struggling

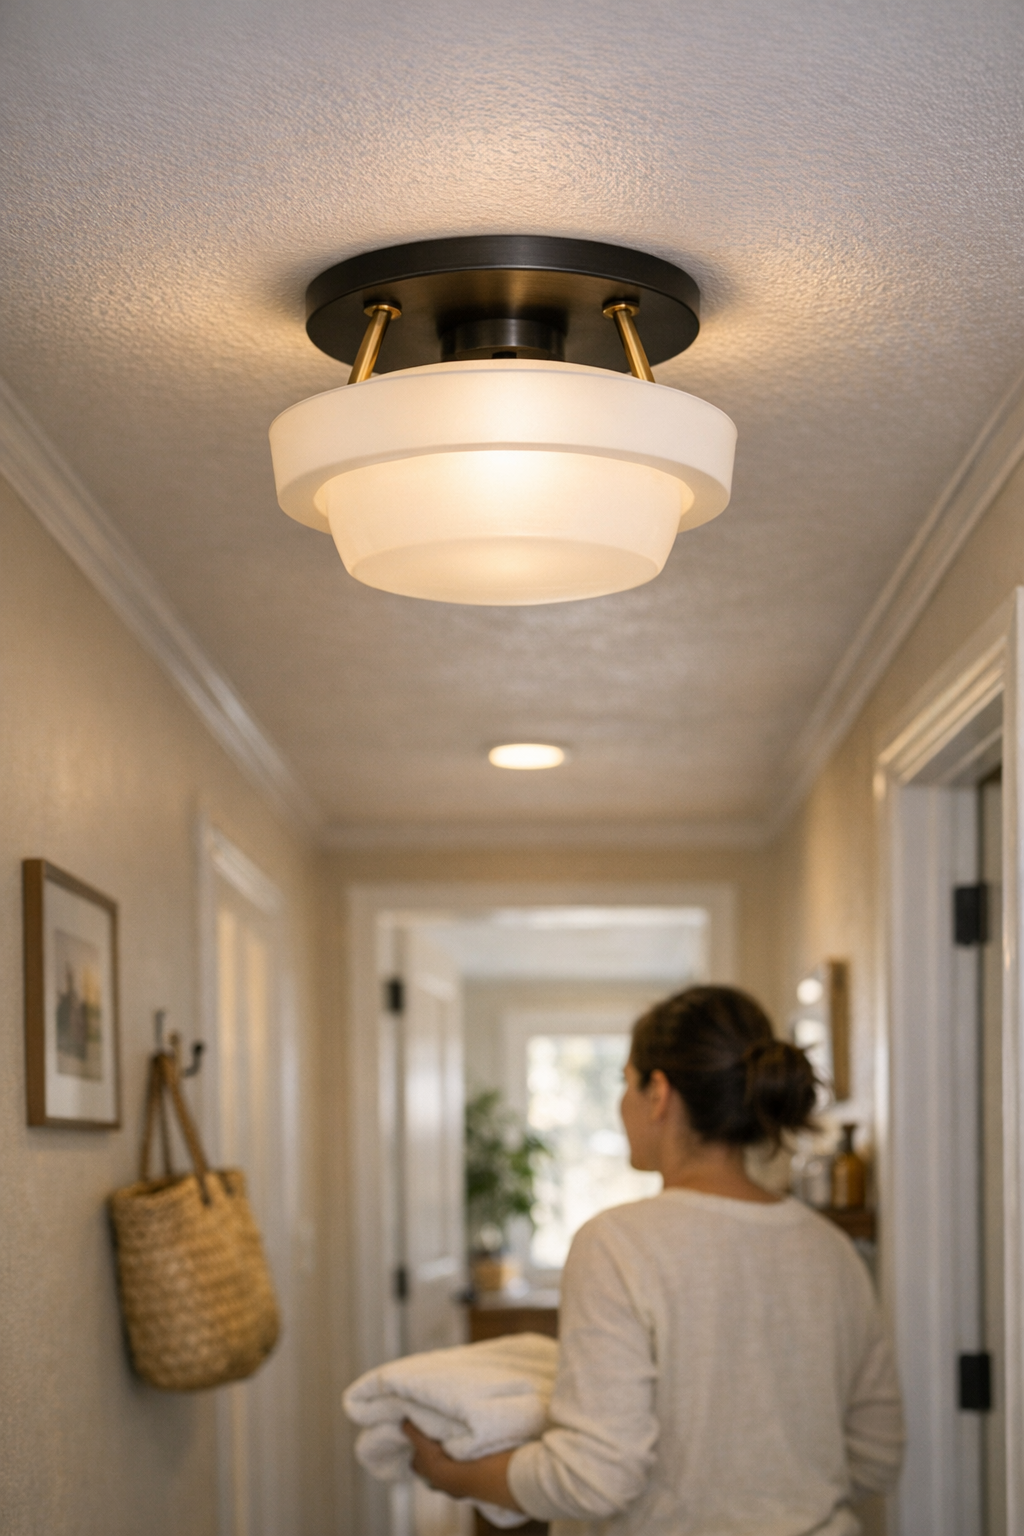
    Hit your hallway or laundry room at night and the disconnect is immediate: the ceiling is washed in harsh brightness, yet your feet land in shadow, your basket’s edge blurs into the wall, and the steps ahead aren’t fully visible. The fixture overhead claims full coverage—yet corners fade, the mirror splits your face in half, and tasks still force you to squint or shift. This is the problem you notice not on paper, but in actual, repeated routines: lighting that seems “enough” but leaves you compensating every single day.

    How Room Lighting Becomes an Annoyance—Fast

    What feels usable in a showroom becomes a nuisance after a week of everyday use. Glare stabs from exposed bulbs. A bright spot floods the middle of the space, but side benches vanish into shadow, and folding counters beg for extra light you can’t find. Day after day, friction builds: missing the bench edge in the hallway, always shuffling laundry under tired eyes, or leaning at the mirror and finding one side lost to uneven shadows no matter how you reposition. It’s rarely about not having “enough” lumens—it’s about light aimed wrong, pooled only in the center, or failing to reach where you actually work and move.

    When Spec Sheets Hide Real-World Failures

    Plenty of ceiling fixtures promise high output, but numbers mean little if you’re ducking glare at the counter or tripping at a dark stair turn. A concentrated flush mount can glare off tile, casting the entryway bench or corridor edge into gloom. “Bright” can become a blinding patch that makes you avoid certain corners or switch angles just to see. In the bathroom, a single ceiling fixture lights the room—but the mirror is sliced in half with shadow, and grooming requires unnatural twists. These failures aren’t aesthetic; they’re real interruptions that sap confidence in your space every time you need its routine to feel seamless.

    Why Circulation Spaces Need Smarter, Not Just Stronger, Light

    Walk a hallway at midnight with a lone fixture blasting the ceiling, and you’ll still step into uncertainty along the edge. Truly functional lighting doesn’t just chase away darkness; it shapes usable visibility—flattening awkward shadows, highlighting steps, and keeping every zone in view without glare. In laundry or utility spaces, a fixture that blinds as you cross the room makes sock sorting or detergent pouring more effort than it needs to be. Over-lighting often brings more strain, not less clarity, if the spread is wrong or the edges are left unlit. That daily pinch isn’t solved with a brighter bulb—it’s the persistent cost of poor fixture positioning and design.

    Bathroom Mirrors: Where Single Fixtures Fail and Shadows Stay

    Grooming at a mirror becomes a guessing game when the only light comes straight down from above—a scenario where faces always appear uneven and tasks never quite feel finished. If the first thing you do is lean or shift to dodge a shadow, no wattage will fix it. Side-mounted or broad, diffuse wall lights turn that routine around, removing cross-shadows and making faces visible at every angle—even when steam or weak daylight mess with the scene. The difference? A smooth start to your day versus constant compensation.

    Immediate Wins from Small Lighting Tweaks

    Blasting a room with more wattage rarely makes the real difference. Instead, practical gains happen fast when spread, diffusion, and placement are fixed. Move a flush mount a foot toward the wall and the troublesome shadow behind the shoe rack disappears—no new fixture required. In a tight laundry room, trading a bare ceiling panel for a semi-flush light with a diffuser eliminated blinding surface glare and uncovered the back shelf, making daily sorting straightforward. The spec numbers barely moved. Every routine felt lighter after.

    Essential Steps for Reliable, Comfortable Lighting

    • Simplify hallways and corridors by managing glare and edge darkness: Instead of amping up brightness, look for ceiling or wall lighting that targets persistent shadows along baseboards and walls, making every movement path safely visible, especially on uneven nights or with tired eyes.
    • Make mirrors functional by flanking, not flooding: Add side sconces or wide, diffuse fixtures at face level so grooming no longer means shifting for visibility. This evens out facial features and removes shadow guessing, no matter the natural light or time of day.
    • Pick fixtures that blend spread and softness for laundry and task spaces: Use lens-diffused or broad panel lights to erase sharp shadow lines on countertops and shelves. This keeps every surface visible for folding, sorting, and reading labels, even in small utility rooms.

    The Everyday Gain: Visibility That Matches Movement

    The biggest shift isn’t in how “lit” a room appears but in how rarely you pause, squint, or shift around problem spots while moving through your space. Fixtures chosen for how and where you move remove the stress of unseen steps, missing items, and awkward glances at mirrors or counters. Instead of performing routines around your lighting’s flaws, you work and walk directly—benches show up in peripheral vision, laundry items stop hiding, and mirror moments feel clear despite moisture or low natural light. Over time, the low-level irritation of compensating for bad light vanishes. The right fixture placement and diffusion makes the difference between a room that’s only technically illuminated and one that’s reliably easy.

    Find practical indoor lighting that makes daily routines easier at LightHelper.
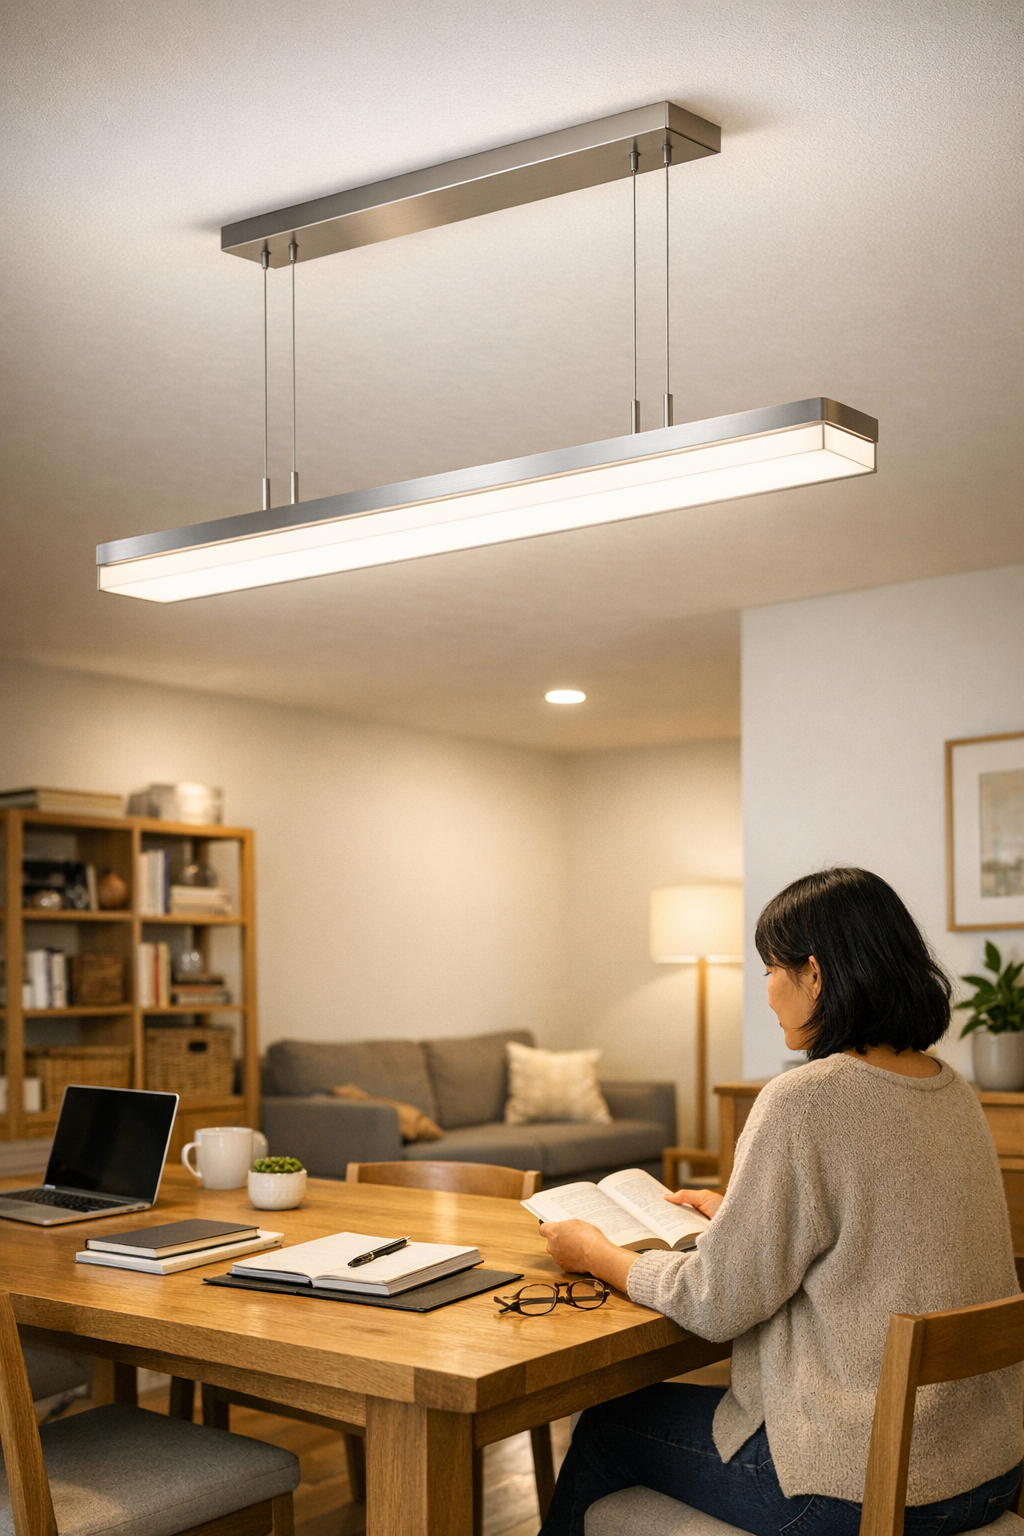
  • Optimizing Ceiling Lighting for Busy Rooms to Eliminate Shadows and Clutter

    Clearing away floor lamps and covering up cords can make a room look “solved”—but watch how fast small lighting failures return when routines heat up. Ceiling lighting that looked perfect on move-in day often starts falling apart as soon as real-life habits kick in. Suddenly you’re shifting chairs, dragging out clip-on lamps, or squinting at your laptop in a shadowy patch at the table’s edge. A room can appear finished—wires hidden, surfaces clean—while corners go unused and “clutter-free” setups quietly trigger daily workaround fatigue. The real verdict isn’t how the lighting looks at rest, but what happens after a week of actual use.

    When a Clean Look Masks Lingering Problems

    Flush ceiling lights promise order. No lamps tripping up the walkway. No cords in sight. But in practice, this calm is paper-thin. The second someone stretches out homework or starts a group puzzle across the table, dim patches emerge at the edges and effort shifts from work to lighting triage. The desk that looked polished at first gets steadily eaten up by improvised solutions: loose bracket arms clamped to shelves, power strips trailed over corners, a flashlight angled precariously across the page. You tidy one problem, and a new tangle forms every time the room sees actual activity.

    In a compact home office, it shows up quick. A flush-mount fixture sits perfectly centered, but by afternoon, the far edge of the desk is murky enough that someone drags a clamp lamp back into service. Cables snake into the “clean” setup. Glare hops from the ceiling onto glossy workbooks, forcing everyone to play musical chairs just to keep a clear view. The cycle is familiar: temporarily solved in the morning, unraveled by nightfall.

    Coverage Gaps: How Ceiling Lights Fall Short in Real Use

    The average ceiling light floods the center and leaves the rest in polite shadow. It’s installed for symmetry—not for task clarity or busy surfaces. The result: a wide “bright zone,” but edges where printing, writing, or reading routines routinely collapse. The fix is rarely more wattage—what fails are the angles. Move to the fringe and the fixture’s light falls off fast, especially when surface needs shift daily.

    Common Signs of an Underperforming Setup

    • Edges of desks and tables never feel fully lit—no matter how clean the room looks.
    • Shadow bands creep in as you use ends, corners, or side nooks.
    • Someone always borrows a clip-on, a portable lamp, or even holds up a phone just to reclaim basic surface clarity.
    • New extension cords and brackets spring up anywhere actual work happens, undoing the original “cordless” plan.
    • Glare blooms at the center, overpowering nearby zones, leaving the periphery dull or actively uncomfortable.

    These aren’t one-time annoyances. They’re signals that coverage never matched how the room is actually used, and every workaround erodes the appearance the ceiling fixture once promised.

    Surface Clarity vs. Surface Usability

    It’s easy to mistake a neat tabletop for a usable one. A clean ceiling fixture keeps up until routine changes—extra homework, late-night spreadsheets, multiple projects forcing laptops and books to opposite sides. The “clear” look shatters fast: unused desk lamps are pulled from storage, cables wind over surfaces, and adapters clog outlets. Your work surface that once felt expansive now shrinks in invisible ways—blocked by shadows or made awkward by stumbling over cords and supplementary lights.

    The new friction is smaller than a major outage, but more draining. Reaching for a light, angling a notebook, or awkwardly shifting a chair becomes a repeating choreography just to keep up daily flow. That’s where ceiling-only plans break down: they’re visually satisfying, but operationally fragile, exposing weak points the minute every area gets used for real.

    Real Improvement Is in the Details (and the Placement)

    The fix isn’t “more light”—it’s targeted coverage. In one home, swapping in a low-glare panel fixture just 15 centimeters toward the work wall covered the long-missed desk edge. For the first time, no one reached for a clamp lamp all week. The result wasn’t just visual: cables stayed stowed away, surface shuffling vanished, and everyone stopped improvising just to see clearly. Week after week, the friction just stopped showing up. The gain isn’t a photo-op—it’s noticing silence where frustration used to be.

    Small Shifts, Lasting Results

    If you catch yourself nudging a lamp, shifting to escape glare, or crowding around the only “good spot,” your ceiling light is missing where it matters. Sometimes a 15cm move, a shallower bracket, or a swap to a broader panel is enough to sidestep an entire cycle of daily fixes—and the setup finally stops fighting your routine.

    Panels, Linear Fixtures, and Better Shared Zones

    The shape of ceiling lighting changes everything for busy, multi-use surfaces. Panels and linear fixtures are built to throw light all the way to the edge—over tables, wide desks, under shelves. This isn’t just about brightness. It’s about reducing the “gray border” where clutter and ad-hoc lights return.

    • Surface edges stay bright, not just the center, so you don’t default to extra lamps by week two.
    • Desk zones stay open and cable-free during actual use, not just after a cleaning sweep.

    With wide fixtures, rearrangement isn’t a daily disruption. Someone can shift to the far side, start a project at the other end, or work across from a partner without patching in a stop-gap lamp each time. The setup flexes with routines rather than working against them.

    Spotting the Real Coverage Gaps

    The telltale signs show up in use, not after a fresh setup. Questions that matter:

    • Are certain corners, seats, or table ends quietly avoided—especially for reading or detail work?
    • Are “solved” surfaces beginning to sprout new lamps or extension cords a month after install?
    • Does a pristine setup break down the minute group work or an unplanned project lands?

    “Yes” to any means a placement or fixture shift may do more than any bulb swap. Coverage and spread—not just intensity—are the levers that change everyday comfort.

    A Setup That Feels Solved, Not Just Appears Tidy

    Lighting support only works when each part of the surface gets the light it needs—without recurring side solutions. Tightening fixture placement, swapping to broader or lower-glare panels, or rerouting cable runs can erase entire categories of daily fixes. The difference is quiet: surfaces stay easy, cables stay out of sight, and routines flow, not stall. In the end, it isn’t about a space looking finished—it’s about it actually running smoother, no matter how often the routine shifts.

    LightSupport store

  • How Hiding Power Bricks Can Transform Your Workspace Efficiency

    Most desks look organized—until you try moving. If you work with multiple devices, you know the quiet aggravation: power bricks lining the back edge, tangled adapters elbowing into your writing space, cables dragging across your keyboard just as you reach for a notepad. A workspace can photograph clean, but daily use tells another story: shifting your chair, adjusting a monitor, or bringing out a notebook becomes a repeat collision with loose wires and lurking chargers. “Out of sight” isn’t just tidier; it’s the difference between a desk that stays workable and a surface that keeps sabotaging your flow.

    Power Bricks: More Than Just Visual Clutter

    The problem is rarely urgent. But throughout the week, a pattern emerges. Snap open your laptop, and a charger nudges your mug. Reach for a jotter and cables have shifted, cluttering the open area you just cleared. Devices slide off alignment, and each movement—typing, sketching, trading devices—creates a fresh snag or disruption. What looked “organized” now feels booby-trapped. Accessories that felt harmless on Monday become Thursday’s frustration triggers.

    No single snag ruins the day, but the build-up drains focus and speed. After each call, it’s the same routine: push a power brick aside, untangle a charging wire wedged beneath your wrist, pick up a dropped pen blocked by another adapter. Reset moments multiply—student, home worker, or office pro, the friction repeats. The surface still looks ready, but your workflow now zig-zags around the same mess, cycle after cycle.

    The First Real Relief: Moving Bricks Below the Surface

    The step change comes when adapters, chargers, and power bricks finally move out of the action zone. Under-desk cable trays, clamp-on boxes, or adhesive cable ledges flip the script: what clogged your working edge now drops below, clearing not just sightlines, but also reach paths and reset space. With clutter shifted, you can drag a notebook beside your keyboard, scoot a mouse, or even re-center your chair mid-session—without bumping a charger each time.

    This isn’t about looking minimal. It’s a real difference in motion: switching from writing to typing stays smooth, post-meeting resets stop feeling like cleanup drills, and open desk depth becomes usable again. You notice it most when moving fast—no more pausing to dodge an adapter before sliding your monitor forward or swinging under-desk storage open.

    This Fix Isn’t Universal—Matching Method to Routine

    No concealment move solves everything. The real trade-off is raw clarity versus plug-speed. If your desk is mostly settled—one laptop, two consistent devices—it’s game changing to hide almost everything. Each adjustment is quicker, and the writing area breathes again. But if you’re in charger-rotation mode—frequently swapping test devices, guest laptops, fresh accessories—purely hiding power bricks starts to cost time. Every change means crawling under a tray, undoing cable clips, or tracking what’s actually connected. Hidden adapters clear space, but if device-swaps are constant, access slows—less friction, but more backtracking.

    How Desk Setup Choices Change Day-to-Day Work

    Picture a real shared workspace: one person docking for morning calls, another plugging in tablet and phone on the fly. When chargers live on the desktop, each handoff means clearing a cluster of adapters, wrangling a snarl of wires, and rebuilding working order. A quick note or connect-the-cable moment always becomes a clean-up interruption. Over a full day, even a neat setup doesn’t avoid mid-afternoon bloat—clutter rebounds, and tempers tighten faster than anyone expects.

    Add under-desk cable management, and transitions change. The desk itself stops fighting back: switching users, flipping from laptop to notebook, or running a focus block happens with the desktop clear. The clutter “booby trap” is gone—less to move, less to remember. Still, rapid plug swaps or new device chargers reveal the limits: each new need means reaching under, rerouting a wire, sometimes bumping knees on a storage tray. The clean look and flow are real gains, but speed isn’t always perfect. Each setup rides a line between lasting clarity and small access sacrifices.

    The Real Turning Point: Improving Both Clarity and Speed

    Most people find relief not with all-in hiding, but with partial concealment or adaptable organizers. A cable box along the desk’s rear edge keeps bricks and adapters controlled—but lets key device cords poke through at reach spots. With routine, you learn cable locations by feel, not sight. This lets you shift posture, swap devices, or share the space without knocking adapters loose, opening drawers blocked by charger knots, or disturbing a careful notebook lineup. It’s not absolute tidiness, but for real work the trade-off beats both the chaos of loose adapters and the slowdown of full hideaway setups.

    No-Nonsense FAQ: Common Use Scenarios

    Can I hide power bricks without drilling my desk?

    Yes—many adhesive-mounted cable boxes, trays, and ledges secure under the desk or behind drawers with no screws. Always check adhesive strength for both the expected load and your desk’s surface to avoid midweek surprise drops.

    What about frequent device swaps?

    If your desk is a hub for guest laptops, test devices, or loaner hardware, don’t bury every charger. Leave one fast-access adapter on the desk or in a pop-out tray; keep the less-used bricks concealed. You get the order you want, plus instant plug-ins for fast-moving swaps without searching under the surface.

    Will this overheat power bricks?

    Most well-designed cable boxes have ventilation slots or open sides. Avoid trapping power bricks in deep, sealed spaces or stacking them. If airflow is unblocked and the box isn’t overloaded, standard chargers run at safe temperatures—but always check for warmth on heavy-use days.

    The Practical Difference: From Looking Organized to Working Smoothly

    The gap between a neat desk and one that works is bigger than it looks. A clear desktop means nothing if every seat return means shifting a cable clump, untangling the same brick, or bumping a notepad out of reach. Moving adapters and power bricks below the action zone doesn’t just look better—it makes each new work cycle, reset, or task switch faster and less tiring. The workflow becomes “ready” on repeat, not just after a deep clean.

    For single-user setups, a concealed system makes routines automatic—no need for afternoon resets. For shift workers, shared desks, or anyone with constantly changing device needs, a mix of hidden organizers and open-access outlets gives the best of both: clarity plus true speed. A good setup won’t make heavy sessions frictionless, but it will stop the small battles from adding up before the week is half done.

    Explore the full WorkBasic collection

  • Why Choosing Rigid Metal Fixtures Matters for Long-Lasting Lighting

    Weak ceiling and wall lights reveal their faults fast in places you use every day—hallways, bathrooms, utility rooms—especially where visibility and movement can’t afford interruption. If you’ve ever rounded a stair turn and caught a flash of glare at eye level, or watched a flush mount droop in your line of sight after a few months, you’ve seen how flimsy fixture materials betray themselves. The reality: a light that wobbles, shifts, or warps with each slam of a door or swipe of a cleaning cloth quietly turns “bright enough” into a daily frustration. That trim that twists as you tighten it, a base that lifts at one edge, or a wall sconce that leans by next week—none seem major right out of the box, but they compound fast, and the result is always visible: uneven spread, growing shadows, and a sense your lighting isn’t really helping.

    The Real Trouble with Flimsy Fixture Materials

    It never starts with disaster. You install a new flush mount or wall sconce, give the screws a last turn, and notice the metal yields ever so slightly. No one else spots it—at first. Then a week of bumped doors, hot showers, or vacuum handles, and that flex ripples into the light itself. What was once flush and stable now sags at the seam, casting shadow lines that weren’t there before or leaving patches of glare against the mirror. The fixture hasn’t broken, but it’s surrendered the job: instead of clear, predictable light, you get movement-caused uncertainty that piles up in daily use. Enter a hallway at night, edge past laundry baskets, and suddenly you’re tracing your own shadow along the wall, not moving with confidence.

    Why Fixture Rigidity Makes a Real Difference

    This isn’t about looks—rigid fixtures anchor usable, reliable lighting over time. Spaces that carry foot traffic, moisture, or cleaning tools—narrow halls, steamy bathrooms, utility corners—punish even tiny structural weaknesses. The moment you feel a bracket bend under tightening pressure, or a ceiling base that shifts side-to-side, you’re setting up trouble. Every vibration, every sweep across the trim multiplies the original flex. The effect snowballs: gaps at the base, mounting screws that loosen, alignment that never sits square. The difference is night and day—quite literally, as one section of your counter goes dark or the corner stair stays unlit after dusk.

    What Soft Metal Looks Like in Daily Life

    Visualize a hallway only a stride wide, always busy in the evening. That new, thinner flush mount holds—momentarily. But a week of narrow misses and direct bumps, and the fixture drifts out of alignment. A warped edge lets shadows leak out; one side now casts down more sharply. The room isn’t dimmer by the bulb, but your vision fills with dead spots, and suddenly dragging a bin or carrying groceries after sundown feels off-balance. At the vanity, things are no better—one poorly anchored sconce throws light unevenly, making one half of your face crystal-clear and the other washed out or lost in shadow. Everything’s more effort. You catch yourself compensating unconsciously: tilting your head, shuffling sideways, reaching for another light or squinting to check for spills by the washer.

    It’s not failure, just a creeping burden. Weakness in the fixture warps how you use the space, every single time you walk in.

    How Subtle Flex Compounds Over Time

    The small shifts never stop accumulating. Every cleaning swipe, every cycle of humidity and drying, each vibration from footsteps or slammed doors drives the flex point further out. The fixture—especially flush mount or sconce—turns subtly but permanently off-square. That leaves you with unchecked shadow, glare that drifts from benign to blinding, and “hot spots” on otherwise even surfaces. Mounting screws loosen, trim pulls away, and the chase for true-even lighting becomes a weekly task you never needed before. It’s not just a visual flaw; safety edges vanish in the shadows along hallways or stair turns, and the work surface loses clarity just when you need it most.

    The Gradual Creep: Shadow, Glare, and Lost Visibility

    The warning signs are obvious if you’re looking—shadow triangles growing across corridor edges, perimeter gloom when you expected wall-to-wall coverage, hard reflections in the mirror where light used to be soft. You may find yourself reaching for a screwdriver for the third time that month, tightening, nudging, hoping for a fix, but the structural weakness always returns. The room is “lit,” but never actually easy to use: glare at the wrong angle, a missing half of the counter, or a staircase that feels less certain with every trip.

    Can’t All Fixtures Handle Everyday Friction?

    Most fixtures—fresh from the box—look satisfyingly bright and flush. But what matters isn’t their output on day one, it’s how the structure resists the push and pull of real movement: repeated vibration, contact, and damp cycles turn thin trims and bendable brackets into future problems. The prettiest rating sticker won’t offset weak metal. Even “damp-rated” ceiling lights can lose their fit and focus if the body flexes under installation torque or mounting pressure; those small movements never stop costing comfort and clarity in busy, high-touch zones.

    Even Small Flex Leads to Big Shifts

    Picture the reality—carrying two bags through a low, narrow hallway in the evening, only to find one side of the fixture shifted, and the far wall now lost in shadow. Or wiping a vanity sconce and sensing the metal flex beneath your cloth. Next morning, half your reflection feels washed out. The solution? Temporary workarounds: an emergency night light plugged in, a second cleaning run, or just a growing list of spots you avoid at certain times. None solve the root cause. The weakness remains—and so do the blind spots, glare, and shadow interruptions that force you to change how you move through your own space.

    When a Solid Fixture Enters the Picture

    Swap a wobbly, drifting fixture for a rigid, all-metal model—with a real, flush base—and the effect is immediate. Suddenly, door slams and steam cycles don’t matter. The light doesn’t tilt, shadows stay put, and you stop having to second-guess where the dark patches will show up each week. Hallway turns become predictable; stair landings stay clearly lit; cleaning no longer throws fixtures out of line. The improvement is felt by its absence: you’re not thinking about the lighting every time you pass through. Movement flows, edges are easy to see, and the room simply works—no repeated fixing, no subtle adjustment rituals, no stutter-step at the top of the stairs.

    One Small Tip: Test Before You Finish Installing

    Before committing, firmly press and torque along the trim and mount. If you see flex, bowing, or a base that will not sit flush, stop. The cost of “just good enough” now is months of extra adjusting later.

    Quick Reference: Recognizing and Avoiding Flex-Driven Issues

    How do I spot a weak fixture during install? Press, tighten, check the base line. Any movement, flex, or edge separation means the material won’t keep up—especially in places with vibration, moisture, or constant cleaning.

    What happens if I ignore the flex? Expect drooping trims, loose screws, and shifting alignment—cue the daily return of glare, growing shadow, or intermittent dark corners. Over time, even the wiring stability is at risk from repeated movement.

    Is “damp-rated” alone enough? Not by itself—plenty of models pass the moisture test but still use weak metal. Always combine good ratings with visible structure: test for rigidity before mounting anywhere that sees real use.

    Why Fixture Build Quality Isn’t a Small Detail

    What feels like a minor material shortcut in a fixture quietly shapes how you enter, move, and see inside your own home. Ignore the subtle flex, and you’ll live with unreliable coverage: half-lit paths, awkward mirror shadows, and a steady stream of small frustrations across rooms you thought were “done.” A well-built, rigid fixture isn’t just about avoiding repairs—it’s about actually using every part of your hallway, bathroom, or laundry for what it was meant for. The difference shows every time you stop gripping the wall in the dark, give up the work surface at night, or hesitate at a stair turn. Ignore build, and you inherit the friction. Choose solid structure, and the frustration never gets a foothold.

    See practical fixtures that make daily movement easier at LightHelper.

  • How Linear and Panel Lights Transform Kitchen Lighting and Usability

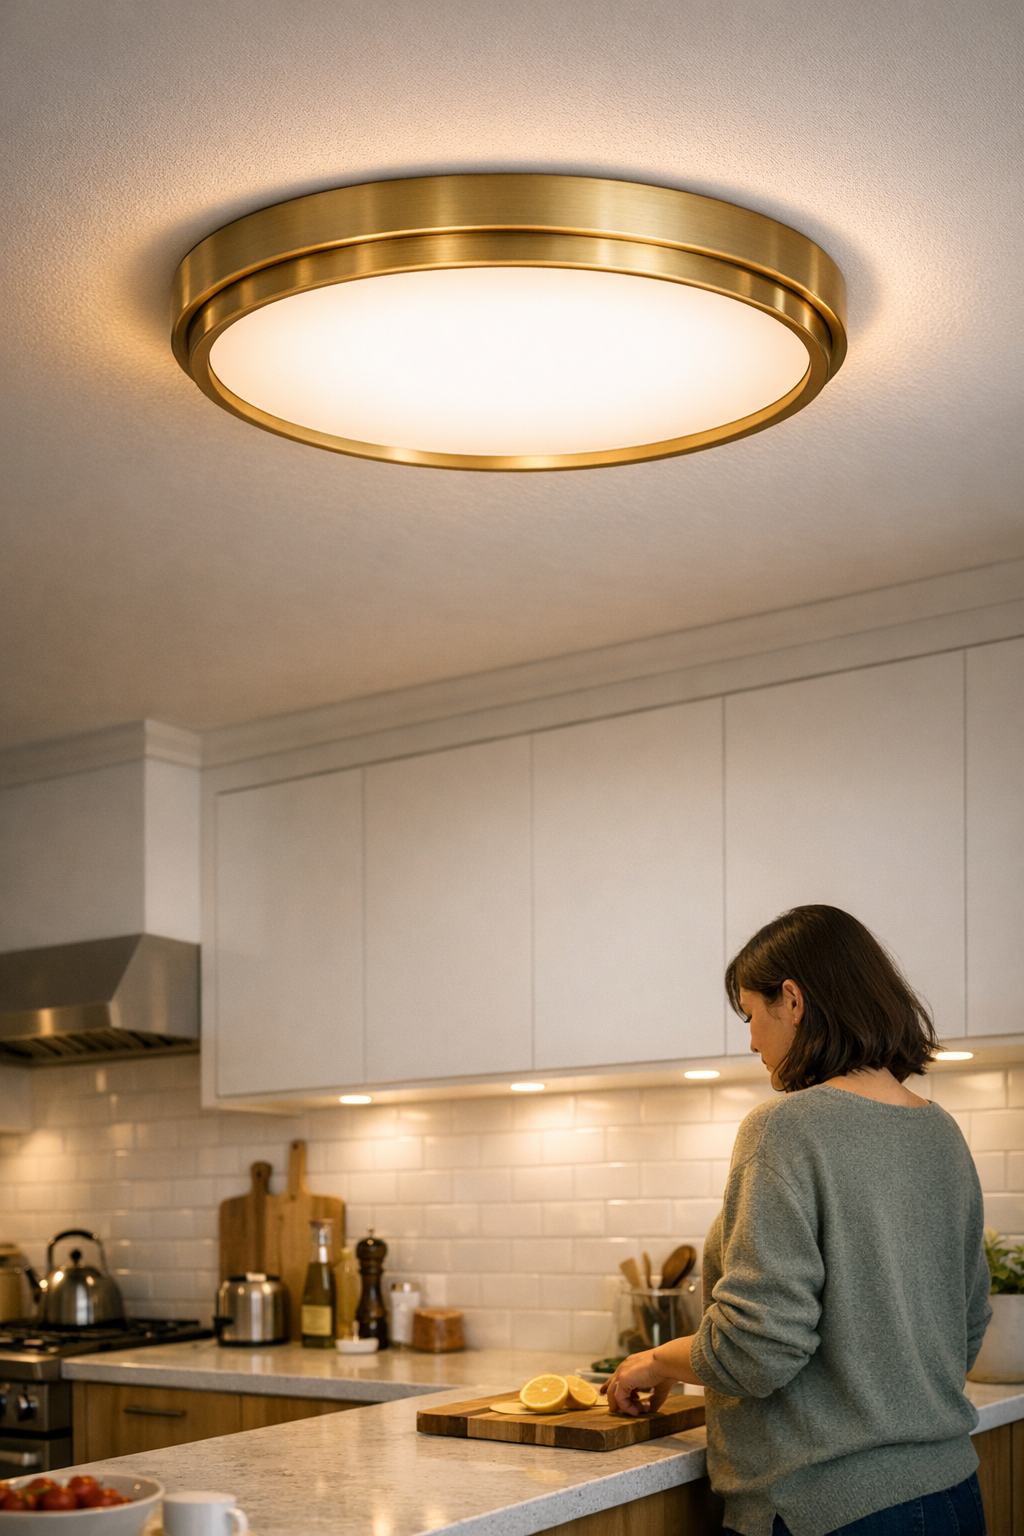
    Kitchens that pass the “organizing” test still slip into daily friction when the ceiling lighting falls short. The wrong fixture position leaves you tilting your head to spot a spill, reaching for a light switch just to see the back counter, or finding cables and mounts more obvious than the food you’re prepping. You’re not dealing with a one-time annoyance—it’s the silent drag of poor coverage, glare bursts, and blind spots that resurface every time you slice, rinse, or wipe. Even with an uncluttered plan, these lighting weak points interrupt basics: clean lines don’t prevent overlooked mess, and the promise of ‘minimal’ vanishes under exposed hardware and mismatched glow.

    Why Clean Looks Don’t Always Mean Comfortable Use

    A row of ceiling spotlights, pendants, or flush-mounts may look organized overhead, but each brings its own shadow logic. When fixture placement isn’t actively mapped to prep, sink, and cook zones, shadow overlap and glare lines slice up the space. The brightest patch often lands a few inches from where you actually work, while cables meant to be discreet catch attention every time a bracket edge flashes in the wrong light. Suddenly, your clean kitchen starts highlighting cable runs instead of meal surfaces.

    This friction reveals itself slowly. You miss smudges along the sink edge until you shift position and realize half the counter is shaded. A streak of crumbs appears only when you crouch or turn off the overhead. These are not just minor inconveniences—they keep routines jagged: touch up a spill here, pause to squint there, never quite scrubbing with confidence because the light misses where hands go most.

    The Day-to-Day Impact of Patchwork Lighting

    A setup that’s almost right becomes quietly exhausting. Gradually, you notice yourself dragging a cutting board back and forth, trying to catch usable light, or breaking the flow to angle a tray so the stove edge is visible. Every fix ripples a problem elsewhere: cluster fixtures to hide clutter, and you inherit rival pools of shadow. Mount a glossy linear and glare stings just as you lean forward. The cable bundle you cleaned up now spotlights a dust trail the fixture never fully covers.

    The pattern exposes itself in the small hours or after cleanup, never when the room is staged: by dawn, rinsing a mug in dusk-shadow, or midnight, trying to wipe a stubborn smear under a lit patch that somehow leaves the wall edge murky. The ceiling’s finish helps nothing if every daily task pulls you into poor angles or partial darkness.

    Panel and Linear Lighting: More Promise, But Not Always a Fix

    Swapping scattered pendants for a seamless LED panel or linear strip seems like progress—neat surfaces, invisible cables, the illusion of even light. Visually, the room goes from cluttered to streamlined in an hour. But after a week, problems creep back in: if the panel rests too centrally or the strip floats away from wall edges, shadows reform in the only places you regularly stand. Illumination dots right above your head but leaves the crucial slice of backsplash dim or veiled in reflected glare from a shiny counter.

    Even minimal mounting hardware shows its limits in repeated use. Cables intended to hug the ceiling sag near brackets, picking up crumbs and dust with every busy cooking cycle. Wall-proximal linears that promised edge clarity instead miss by an inch if the support wasn’t properly placed, restoring the very blind spots you aimed to erase.

    The Setup That Looks Better, But Still Feels Off

    • Pull the toaster to the wall edge, and now one hand works in deep shadow while the other faces sharp glare.
    • Slide kitchen gear to the neatest line, and find the edge remains aloft in partial darkness no matter how you rearrange.
    • Tidy cable bunched along a bracket stands out as soon as a crumb coats the line or a smudge hits where cleaning becomes tricky.

    Routine still means circling annoyances—wiping twice, shifting plates just to see clearly, or pausing every few minutes when another over-bright patch chases you from the prep space you actually use.

    Real Improvement: Matching Light to Daily Movement

    The real gain arrives not from the fixture’s aesthetics, but the precision of its placement. Nudge a linear strip six inches nearer the wall—guaranteeing it tracks the run of your chopping, rinsing, or plating zone—and friction drops. Suddenly, splatters stand out early, elbows avoid glare, and you use the full prep edge regardless of the hour or angle.

    Anchoring brackets tightly in the least visible spots, routing cables flush to corners, tilting panels so all action areas get direct spray—these tactical tweaks outperform raw wattage upgrades. Frustrations you learned to work around—persistent crumbs, shadowed corners, awkward cable crossings—shrink not because the light is brighter or newer, but because the coverage now anticipates your real path.

    Tip: Test Lighting Before Final Mounting

    If you’re installing a new panel or linear, temporarily tape it in position and run through your actual kitchen routine after dark. Notice where the light falters—dim streaks, glare bursts, stray dust catching on a cable. A minor shift matters: the right placement cancels months of small hassle, while an off-center mount invites a steady drip of daily irritation.

    Spotting Persistent Lighting Gaps

    The weakness often shows in how you clean. If you catch yourself scrubbing areas rarely touched, or hunting dust by daylight because last night’s light hid debris, your setup still misses your motion patterns. Lights that ignore the realities of movement and cleaning habits guarantee overlooked mess, a cycle of annoyance, and a surface that never stays “done.”

    The Cable and Support Factor

    Even slimline fixtures can throw everyday use off if cable runs, brackets, or supports interrupt the eye line or snag stray dust. In a kitchen, exposed wires anchor crumbs, and every bracket you move around highlights where the setup wasn’t quite resolved. The “invisible” install quickly feels loud once you notice cleaning has become more complicated—not less.

    Beyond Looks: Does the Kitchen Actually Work Easier?

    Don’t call the upgrade finished as soon as the room looks unbroken overhead. Wait for routines: is wiping the counter easier? Are you moving objects less just to see them? Have cables honestly vanished, or did they just relocate into view?

    The real test is repeated use. If light lands exactly where you work, with cables managed out of both sight and disruption, the setup fades (in a good way) into background support. If you’re still pausing—pausing to see, pausing to wipe, pausing to dodge—those “upgrades” are just style on the ceiling, not substance on the surface. In a room used dozens of times a week, these differences accumulate. Invisible problems, left unchecked, pile up as fast as visible mess.

    For all your practical indoor lighting and support solutions, visit LightSupport.

  • How Containing Desk Outlets Transforms Workflow and Reduces Interruptions

    A desk can look spotless on Monday, but the first sign of trouble shows up under the surface: the outlet area turns chaotic fast. It’s the real-world cluster below the workstation—where charger bricks spill into foot space and cables tangle behind drawers—that determines if your workflow runs clean or keeps snagging. The main risks hit exactly where the desk surface hides the reality: a power brick nudged loose by rolling your chair, a critical plug pulled the exact moment your screen needs power, or a mess of cords forced into a gap just as everything must be connected at once. No organizer on your desk stops these hiccups. Routines stall not at the keyboard, but deep near the wall or under the desktop, where all your devices quietly share a single, overloaded outlet zone.

    The Friction Beneath an Organized Surface

    Tidy desktop, messy undercarriage: it’s a trap for anyone who spends hours moving between screens, notepads, and chargers. It only takes one drifted cable—slipping under your chair wheels, snagging on a desk leg, or dropping just out of sight—to make a reset ritual out of what should be a quick day. Each time you shift a monitor arm, roll away to stretch, or reach back for a file drawer, the same scenario recurs: a faint pop from a plug worked loose, a monitor blinking off, a phone left uncharged minutes before your next call.

    The trouble isn’t dramatic, but it stacks up. By midweek, the named order on your desktop loses its impact as lost minutes pile up tracking which cable isn’t feeding power. No one remembers the perfectly lined-up notebooks; what’s remembered is fumbling for a fallen charger or tracing a dead connection when you’re already behind. The real tension is invisible—each device switch becomes a negotiation, the tidy surface a false signal once the ground-zone falls apart.

    How Containment Changes the Routine

    Containment—using cable boxes, under-desk trays, or enclosures—does more than tidy up: it changes where friction shows up. Suddenly, cable drag stops yanking cords into foot traffic. You’re not on your knees every week pushing a charger back into a cracked outlet. The floor stays clear. Power points stay anchored. Your routine—pulling in a notebook, plugging in a tablet, swapping a phone charger before you forget—plays out without the usual stops.

    It’s not just cosmetic. When containment fits how you actually use your devices, interruptions shrink. If you juggle between screens before the next meeting or bounce between digital sketching and keyboard sessions, a single exposed power strip can turn ten-second swaps into minutes untangling cords. That’s the hidden tax: more device changes means more chances to snag, dislodge, or lose track as the day gets longer. A stable, semi-hidden cable route restores speed: you just swap and go, not reroute and reset.

    Finding the Balance: Access vs. Clarity

    Too much hiding creates its own problems—no one wants to open a box or crawl under the desk for every cable change. The setups that work aren’t about perfection; they’re about selecting the right compromise. A cable tray or box mounted just behind the desk edge, with a clear exit for priority chargers, ensures essentials stay accessible. You don’t want every adapter in a vault; you want to show only what gets touched each day and keep everything else anchored outside your path.

    Real example: Take a typical dual-monitor setup. Monday: everything in order. By 11am, the charger has slipped off the surface, the power strip rotates, and five cables begin to twist after the first round of chair, drawer, and screen moves. Shifting to a contained outlet zone above floor level—keeping lines routed, power strips stable, and cable access narrowed to three working ports—means the reach-and-reset routine goes away. Your hands stay on the desk, not under it.

    Repeated Use: Where Containment Pays Off

    The wins from containment compound. The fifth time this week you hunt for a charger and find it still where you left it, the reason is structure—not luck. A loose cable finds the ground once; given no boundaries, it’ll be a mess again by Friday. The outlet zone needs a barrier—tray, sleeve, box, or anchor—because clutter and drift always return unless physically stopped. This isn’t an “after” shot. It’s a difference you feel every cycle, as small interruptions simply don’t happen as often.

    Desks with shared shifts, compact corners, or mixed home-and-work routines see this clearest. The desk that requires daily resets will always slow you down, break focus, and create the infamous “why is nothing charged?” moment before a deadline. The setup with containment lets you trust the space, not fight it.

    Micro-changes That Stick

    You don’t have to overhaul everything. Running a cable sleeve, nudging a tray half an inch, or cutting a single four-inch access gap can flip a fiddly reach into a smooth routine. These tweaks aren’t photo-ready; they’re quiet upgrades that show up as fewer fumbles and less frustration at week’s end. The desk starts behaving—the way you imagined during setup, but only after a few cycles of real use.

    When to Revisit the Outlet Area

    If your desk resets itself into chaos despite clean lines up top, follow the friction back to the outlet. Typical warning signs:

    • Repeated unplugs as you reach behind or under for a charger
    • Plug swaps that get slower each week—access feels blocked or tricky
    • Cables drifting onto the floor by midweek, creating a perpetual tangle
    • Regular stooping or kneeling just to reset a power connection

    Appearance cannot fix structure. A clean look buys nothing if every reset is clunky—and the right enclosure, tray, or cable route is what actually keeps your habits smooth, your legs clear, and your devices powered through long days.

    Quick FAQ: Common Outlet Area Fixes

    Will containment make access harder?

    Not if you plan exit points for daily-use cords. A gap on the box’s edge or a tray slot for your main charger lets you keep just what you need in reach, and everything else out of sight and away from your legs.

    How should I know if my solution is working?

    If cables stay put, resets shrink, and you barely think about power management during work—your structure is working. Setup pays off in what stops demanding your attention, not only in how neat it looks at a glance.

    What’s the fastest way to upgrade my outlet zone?

    Even the simplest step—a basic under-desk tray or discrete cable box placed above the main outlet cluster—can clear most daily snags. Start with one structure, then tune how you access it as your workflow reveals new habits.

    A Contained Zone Is Only the Start

    The outlet area that doesn’t require your attention is the one you notice least—because it works. Hiding every wire isn’t the goal; removing the drag of repeated cable resets is. A well-contained zone means the desk supports your work without constant maintenance—cycle after cycle, device after device, with no silent sabotage at the outlet edge.

    Explore the full WorkBasic collection

  • Why Cross-Pattern Tightening Prevents Lighting Misalignment and Shadows

    Flip on your brand-new ceiling light and you expect clarity— but in practice, even a “bright” fixture can sabotage the room. Movement stalls at the third stair, where a stretched shadow makes every late-night trip uncertain. The bathroom mirror catches glare on one side and dullness on the other, so you lean and adjust, but never find even light. That clean finish you saw at installation turns out to be unsteady: shadows grip hallway corners, work counters lose their edge in pools of gloom, and the simple routine of passing through becomes just a little more awkward, every single day. In high-traffic rooms and practical zones, these small lighting failures are not cosmetic. They keep getting in the way.

    How Small Fixture Misalignments Create Daily Lighting Problems

    Lighting imbalance so often starts at installation— not because you chose the wrong fixture, but because one side lands tighter or higher than the other. Anchors pull unevenly, especially if you move in a circle, tightening screws one after another. The fixture looks flush until you actually use the space, and then:

    • Stairwells leave some treads vague and risky, especially beyond the reach of daylight.
    • Vanity mirrors highlight one cheek and sink the other in uneven gloom, making basic routines less reliable.
    • Hallways throw light along the center but let shadows collect at the baseboards or far wall, sending you through stripes of dimness and brightness every time you cross.
    • Counters you work at force you to squint at certain angles, even with all the switches on.

    The cost isn’t just irritation— every misaligned fixture adds a friction point you can’t tune away in daily use. The flaws repeat, and your attention gets pulled to what still doesn’t work.

    Why Cross-Pattern Tightening Makes a Real Difference

    With ceiling and wall lights, what happens during those final minutes with the drill and anchor set shapes every hour you’ll spend in the room. Cross-pattern tightening—alternate diagonals, never a circle— lets the fixture settle against uneven drywall, spreads pressure, and closes subtle air gaps that let shadow lines crawl in. The difference is most dramatic on:

    • Flush and semi-flush ceiling lights that must hug imperfect ceilings
    • Long vanity or mirror-mounted bars where both sides matter equally
    • Wall sconces with spread-out mounting points needing even pull
    • Fixtures coping with warped ceilings or drywall patches

    Skip this method, and you risk torquing the frame, leaving strands of shadow along seams, slight sags, or even a visible slant. Even one or two millimeters misaligned? That’s enough to make a “bright” room feel off balance or just not pleasant to move through.

    Real-World Example: The Shadow on the Stairs

    Imagine: a semi-flush ceiling light, perfectly centered above a stair turn. For weeks, you wonder why one riser at the edge stays murky no matter how strong the bulb. Only after returning, loosening every anchor, and retightening slowly in a criss-cross—one screw, then its diagonal twin—does the base finally flatten. That night, the shadow fades away. You walk downstairs watching your step less and trusting the space more.

    How Repeated Use Reveals Subtle Lighting Flaws

    The flaws only appear with use— not on the ladder, but days later in ordinary movement:

    • Shaving or doing makeup becomes a guessing game, since the wrong side is always lost in dimness.
    • Hallways that looked “even” at first suddenly feel crowded by patchy light at the edges, especially at dusk.
    • Laundry corners you lean into just to see what you’re folding—half bright, half shadow, always a compromise.

    Mistakes at the mounting plate don’t disappear. They tilt the emitting surface, slip the shadow lines out of place, and quietly drain confidence or ease from each routine. Your brain adapts, but frustration builds all the same.

    The Practical Fix: Cross-Pattern Tightening in Action

    Cross-pattern tightening is fast, but it’s what keeps routine frustration away:

    1. Set all anchors hand-tight, with plenty of play—just enough to support the weight.
    2. Tighten one screw, then its immediate diagonal opposite. Never keep circling in the same direction.
    3. Work back and forth, side to side and diagonally, drawing the fixture gently into position. Only after each is nearly flush do you finally finish the last turns.

    This stepwise approach lets the fixture adjust minute by minute, finds its own level against bumps or warps, and prevents pulling the whole unit off axis. You’ll feel it: a small, final give where the plate finally meets ceiling or wall.

    Check your work while the room looks “done.” Move from one end to the other, testing shadow lines, scanning for dark corners or glare along mirrors. If brightness looks even but the routines feel smoother—feet sure on stairs, hands finding edges, no face lost in half-shadow—that’s the difference that matters.

    Where It Matters Most

    Some fixtures are more forgiving, but anywhere you move, work, or see your reflection day after day—bathrooms, hallways, kitchens, stairs—misalignment shows fast. If walls are crooked, surfaces uneven, or the room never seems to light up right, pressure imbalances show up loudest in:

    • Mirrors and vanities, where even light prevents routine confusion—no side left guessing which version of your face is the real one.
    • Hallways and stairwells, where clear visibility holds confidence—no more stepping through “safe” rooms with hesitant feet.
    • Work counters or cabinet runs, where practical task light beats raw appearance—a surface is either usable or it’s not.

    The Everyday Payoff: Lighting That Works with You

    Good lighting isn’t “invisible”—it makes the space work, skip after skip, shower after shower, crossing after crossing. Flush, semi-flush, wall, under-cabinet, and vanity lights truly perform only when the mounting is right:

    • Paths are visible, not just lit
    • Work areas stay useful from corner to corner
    • Glare drops off, shadow lines shrink, distraction fades
    • The fixture finally does its job, letting you use the room as you planned, not as you’re forced to

    Real lighting reliability shows itself the next day, and the day after, when the space just works—because small installation choices rippled into every movement and task.

    To see more solutions designed for everyday routines and the challenges of real rooms, visit LightHelper.

  • How Wall Lighting Transforms Dim Corners Into Functional Spaces

    Most “finished” lighting setups ignore the one thing that costs you every single day: hidden corners and dim edges where clutter builds and routines break down. You step back after installing a ceiling light or desk lamp—everything looks resolved from a distance. But by Wednesday, the far side of a desk starts collecting charging cables and lost adapters. Pens and receipts vanish behind shadowed dividers. The further you reach, the more you bump into the weak spots: edges nobody really sees, but everyone ends up fighting. If your lighting only shines from above or from a single direction, these frustrating dead zones become part of your daily setup whether you realize it or not.

    When overhead light isn’t enough: edges slip out of sight

    Desk edges and room corners hide the first symptoms. Overhead lighting pours brightness onto the middle of the space, making the overall room look clear—until you have to plug in a charger or spot a cord that’s halfway behind a monitor stand. The back edge of a desk or a wall-meets-surface gap gets just dim enough to blend cables, power adapters, and misplaced notes into a single untraceable zone. Instead of sorting, most people end up shoving what they’re not using closer to the hidden side, reserving the visible spot for whatever’s urgent. In busy setups, these “blind spots” take over faster than you’d ever admit.

    Clutter builds where light does not reach

    That freshly cleared corner turns into a dumping ground by Thursday—not from neglect, but from lighting structure. If seeing what’s there means bending sideways or dragging the whole lamp across your workspace, most small things just stay out of sight, compounding the next day’s frustration. The more people use a room, the more the “out of sight” edge becomes a communal dead zone nobody really claims. A so-called tidy space quickly crumbles under the pressure of everything that’s too annoying to deal with after dark.

    Wall and bracket lights: making corners actually usable

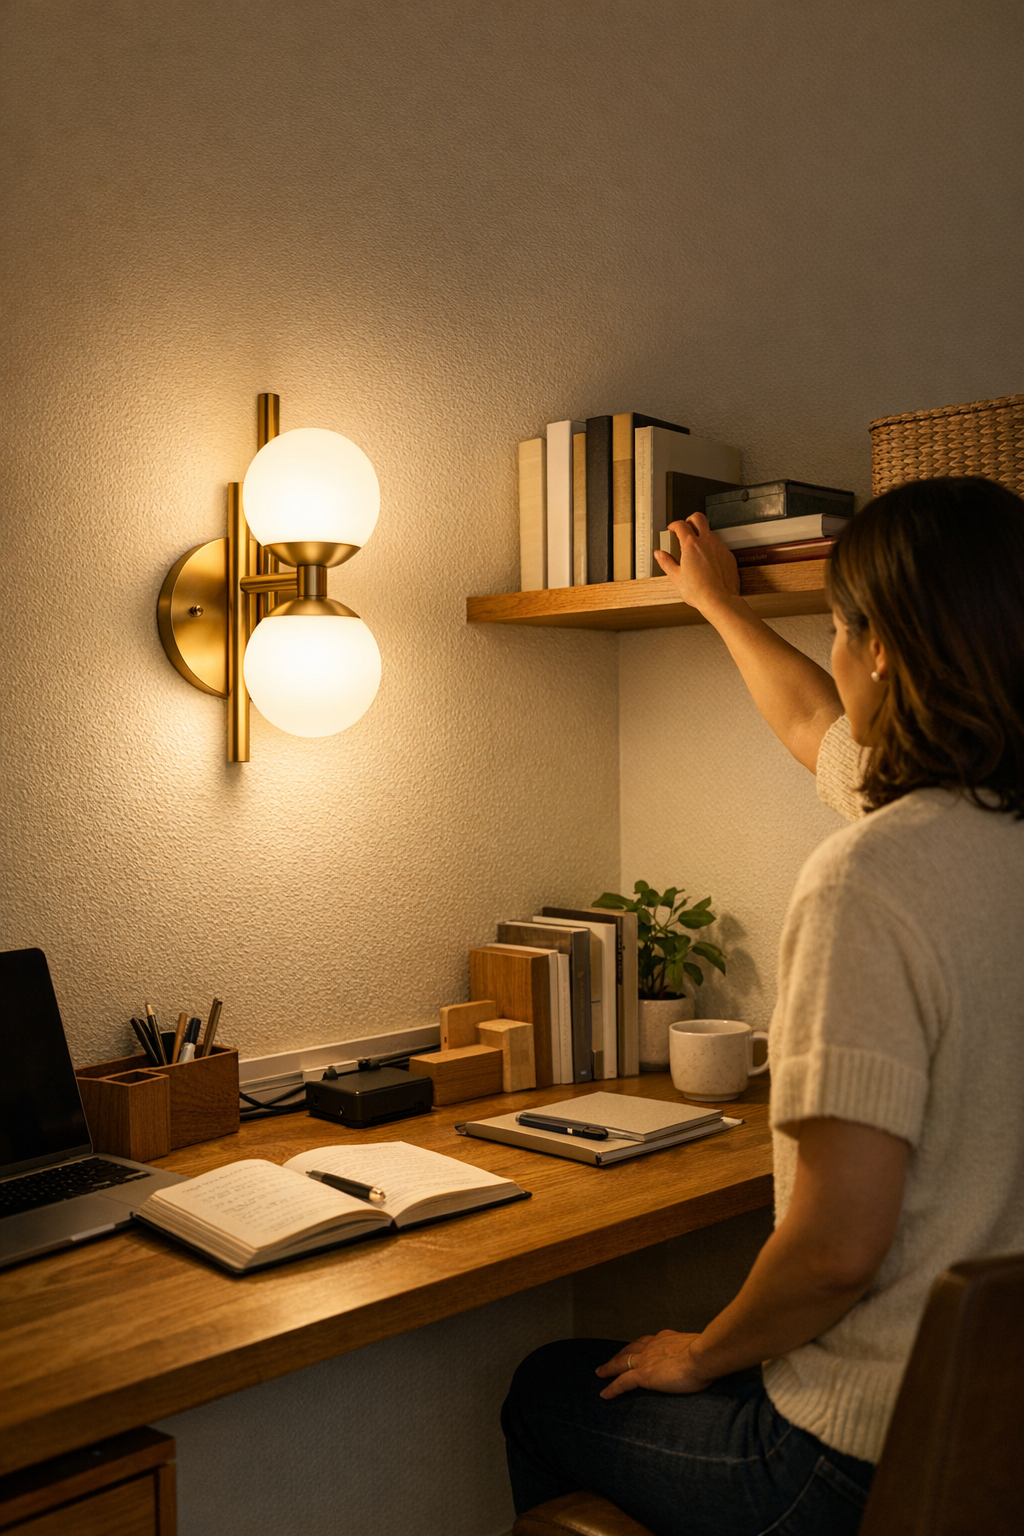
    Lighting that cuts across a surface from the side does what top-down fixtures can’t: it puts the problem area directly in view. Well-placed wall or bracketed lights break up the shadows left by ceiling fixtures and reach into the exact zones that pile up clutter. Now, the back third of a desk—the spot where books lean, cables rest, or devices charge—becomes part of your usable workspace. The difference is instant: the same shelf that used to eat phone chargers now holds them in plain sight. It’s not about brightness alone, but about lighting the actual edge where the trouble happens.

    Seeing the difference in daily routines

    The real test for a corner light isn’t its effect in the first hour—it’s what you stop tripping over after a week. You notice the change the moment you plug a cord in without shifting your chair, or snag that stylus that would’ve disappeared under a shallow shadow the day before. Kitchens with “looks-minimal” under-cabinet lights may still leave coffee mugs or power strips in dim twilight if the angle is wrong. Workspaces with mismatched lamp heights force you to play a daily game of “avoid the glare” or “where is that cable again?” The best-placed wall fixture, aimed to sweep just over the needed edge and low enough to cut through the gloom, solves the right problem without being showy.

    Common setup misses: flush looks, hidden problems

    Sleek ceiling panels and ultra-flush cabinet lights sell the promise of a spotless edge, but their pooled light fades right where clutter and cables take over. Even a nice sconce, unthinkingly pushed too high, just joins the ambient brightness without actually helping at eye-level. Total disregard for cable runs brings a new layer of visual drag—lines breaking the wall, cords looping across pathways, or chargers drooping off a work edge, all under the spotlight of your latest “upgrade.”

    It’s the missed trouble spots—where wall meets counter, or where bracket arms block tidy cable drops—that sabotage what looked perfect in the install photos. For example: you clip a new task lamp under a shelf, loving the even wash—until you reach for a device on the edge and realize your own hand casts a shadow, moving the problem but never erasing it.

    Small shifts, big changes: getting the setup right

    The simplest win? Mount an adjustable wall light about 35 centimeters out from a room corner, angled just enough to skim both wall and work surface. Suddenly the “clutter edge” stays visible instead of dissolving into the background. Cable channels, color-matched to your wall or light base and running tight alongside, keep every cord calm and in check—so you’re no longer stuck dragging plugs in and out, or wincing at mismatched cable clutter every morning. Even low-use corners start taking on the everyday load: sorting, charging, stashing, cleaning. The right light keeps function sticking longer than any initial attempt at tidiness ever could.

    Don’t ignore cable management

    The quickest way to ruin a good lighting upgrade is to skip cable structure. Loose, tangled, or mismatched cables turn a $100 wall light into a new annoyance within a week: cords run across walkways, snarl under desks, or make plug-in swaps a multi-step chore. A simple slim-profile channel, matched to the wall or bracket, keeps cords both visible enough for safety and invisible enough for calm, breaking the usual cycle of “move this cord again” and letting the new setup actually last.

    Recognizing real improvement: form versus function

    Looks finished isn’t the same as lives finished. Any lighting change feels like an upgrade on installation day—glossy surfaces, tucked wires, every bulb on for the after shot. But reality shows up next week: the one usable patch is still dead center, while all the edges remain places to avoid. Real progress shows when routines get easier—less reaching to find that lost charger, fewer near-unplugs of your laptop, less time untangling beneath the surface. The right support isn’t just sharp for guests; it makes your daily movements waste less brain power and motion every time you return.

    One small tip: audit corners after a week

    Shut off all but the newest light, and actually use the space. Are there things you still can’t see? Cords that snag your feet, objects that hide along the back row of a desk, positions you have to twist to use? This is the signal to adjust—shift a bracket, re-run a cable, or drop a light slightly. Fix the pain points once, and your setup will finally serve what you do every day, not just look better in the evening.

    Choosing lighting setups that support daily life, not just appearances

    In the end, the right angled fixture or slim cable bracket isn’t about showing off—it’s about making every edge stay visible, every work line useable, and every cord less of a future mess. That’s less wasted energy, less daily cleanup, and fewer little annoyances stacking up until the room feels unworkable. Good lighting support fades into the background only because it’s done its job: real, repeatable function that never takes days off or forces you to think about what’s missing next.

    Find practical lighting, smart cable solutions, and real setup support at LightSupport.

  • How Organized Outlet Placement Enhances Focus and Workflow Efficiency

    Sit down at a perfectly organized desk and try plugging in your phone—yet again, you’re tracing a cable behind your monitor, shifting a notebook, or bending awkwardly just to find a free outlet. Clean surfaces promise order, but the reality is often a daily loop of minor hassles: cables that drift into arm’s reach, outlets just out of the comfortable zone, and one more power brick jammed between drawers or cable boxes. Even when your workspace appears clear, the friction keeps returning—whether you’re moving from keyboard to sketchbook, dragging a cord across crowded desk depth, or feeling your workflow snag on a strangely persistent physical gap. In the world of workstations, surface tidiness means nothing if getting power or data in and out still breaks your stride.

    When Hiding Cables Isn’t Enough

    Order and function rarely line up by accident. Tucking cords away—cable trays, sleeves, boxes—cleans up appearances fast, or at least hides evidence of the last cable scramble. But the shortcut unravels after a week of real use. Needing to reset a device, you’re back on the floor untangling, digging behind a drawer unit, or threading a cable through an out-of-sight hole. The setup is photo-ready, but each repeat breaks posture, slices seconds from focus, and splits your attention every time a device joins or leaves the party.

    In fast-paced work—think two laptops, a phone, headphones, drawing tools, tablets—the costs stack up. That “clean” cable channel rarely holds under real switching: a charging cord falls out of reach, tension drags a plug just enough to disconnect, a sleeve bunches up behind the monitor riser. No single hiccup ruins the workflow—yet after a dozen small interruptions, momentum fades and clarity drains from the day.

    The Subtle Toll of Bad Outlet Access

    Small or compact desks and tidy cable trays should make for smoother work. But in practice, you discover the choke points through repetition. Mid-morning, a device battery hits red—charger’s missing, or the outlet is buried under paperwork, blocked by a drawer, or hidden against the wall. Maybe you have to slide your chair left to get enough elbow clearance, or scoot a drawer unit that fills the under-desk space. Resetting your posture, the thought is gone and the interruption has done its job: slow erosion, not obvious clutter, but a disruption that compounds with every cycle.

    This isn’t like the screech of a bad chair or glare from a harsh lamp—it doesn’t demand an immediate fix and so rarely gets one. Instead, weeks pass with you adjusting the setup: rising to plug in, twisting to unjam a cable, or reorganizing after each work session. Yet the symptom remains—resetting still takes too long, and the tidy look barely compensates for the time and effort lost in hidden workarounds.

    Recognizing the ‘Looks Clean, Feels Messy’ Trap

    If you sweep every cable out of view yet still reach behind storage every time something needs charging, “organized” becomes a shell game. The first day’s relief fades when, by Friday, you’re tracing that same cable path or twisting to reach an outlet under the drawer again. Each awkward motion slips under your radar, but over a week, focus grinds down, and the quick flow you wanted gets replaced by interrupted, distracted movement—the desk becomes another source of slow-down.

    Resets That Don’t Interrupt Momentum

    The real shift isn’t perfect concealment—it’s effortless access where you actually work. Move from a deep cable box to a clamp-on or edge-mounted outlet and feel the difference instantly. Unplugging, swapping, or adding a device becomes a one-handed move, never requiring a chair shift, a crouch, or a search under paperwork. The workstation serves the routine, not the other way around: you reset gear without breaking posture, session, or train of thought.

    That means plugging in becomes background, not a pause. Good outlet placement sits at the edge of reach—out of sight yet always available—never in the way but never buried. You don’t have to untangle, crawl, or worry about kicking out a charger with your knees. Each device shift is handled without visible effort, the setup remaining ready even as your gear cycle changes, especially on a busy day.

    What Changes With the Right Placement?

    The shift shows up in the margins: you avoid knocking over pens while chasing cables, don’t drag contents across limited desk depth, and find the daily “reset” doesn’t require a mental step or a physical compromise. By late week, you aren’t repeating the same hunting motion or nudging a chair back just to reach the charging port. The desk’s order matches its utility—when you stop noticing your workflow being interrupted by access, the workstation is working for you, not just looking tidy.

    Practical Signs It’s Time to Rethink Power Access

    • Are you shifting your chair, or moving under-desk units, just to reach an outlet? That’s a sign the layout is designed for show, not speed.
    • Are cables always sliding back into the work area or tensioning as you move? Every bit of drag, tangle, or resistance slows repeated actions.
    • Do you notice even a slight hesitation before charging or plugging in? If there’s a pause—mental or physical—the structure is working against your routine, not with it.

    What Actually Works in Busy, Real-World Setups

    Desks with edge-mounted, clamp-on, or tray-level power access outperform hidden setups for repeated use, not just initial appearances. Cable boxes or deep trays might look immaculate in a photo, but after one device swap—the friction returns. True test: does the setup let you finish a dense day without repeated fidgeting, reaching, or reorganizing?

    The best workspaces keep resets fast and transitions minimal. Reachable power, clear cable control, and adjustable outlets stop minor interruptions before they can build up. Less time spent on desk maintenance means more momentum carried from one task to the next—even as your workload or devices shift mid-session.

    Real Change Means Reliable Reach, Not Just a Clean Look

    Desk friction rarely comes from one big mistake, but from small, repeated obstacles—a loose plug, a cramped charger, a cable that slides into a writing area or gets snagged behind stationery. Reliable access—an outlet you reach without clearing a path, a cable that stays where it’s put, hidden but easy to grab—means your work cycles don’t hollow out over time. Don’t buy systems that hide evidence; invest in a structure that supports the way you actually move, switch, plug, and reset.

    Explore the full WorkBasic collection

  • Why Manual Screwdrivers Ensure Lasting Indoor Light Fixture Stability

    A light can look finished the day it’s installed—fitted flush, trim pressed flat, not a gap in sight. But fast-forward a month, and suddenly that ceiling or wall fixture reads differently: a crescent shadow appears at one edge, dust lines form in seams that were once invisible, or the fixture feels loose after a single bulb change. Most of these problems don’t trace back to faulty fixtures. They begin with one decision—the final over-tightening turn, usually done with a power tool, that feels secure but quietly warps, compresses, or strains the installation. That last twist changes how the fixture stands up to daily routines in real rooms, from hallway to bathroom to stairway, risking the friction and imbalance that turn lighting from reliable to irritating.

    Why “Too Tight” on Day One Turns Into Trouble Months Later

    No one spots the damage on install day. A powered driver gets the light up quickly, flush to the ceiling, apparently perfect. The catch: tightening too hard with power tools subtly deforms gaskets, distorts frames, or strips threads, leaving the fixture quietly vulnerable. A flush mount in a busy hallway might hold steady for a few weeks, but then a crescent shadow starts tracing one edge. In a bathroom after several humid mornings, a faint ring darkens around a compressed gasket—no amount of wiping removes it. The utility room fixture begins to rock slightly with every door slam or basket nudge. Each sign isn’t just cosmetic—it signals a gap, tilt, or seam that gets worse each time the room is used.

    • Hallway flush-mounts cast uneven shadows, especially as doors open and foot traffic shuffles past.
    • Bathroom fixtures collect condensation and dust along over-compressed seams, making fast wipe-downs nearly impossible.
    • Utility room lights loosen after minor bumps, leaving them out of true and distracting every time you look up or walk past.

    Manual Finishing: The Small Step With Real-World Payoff

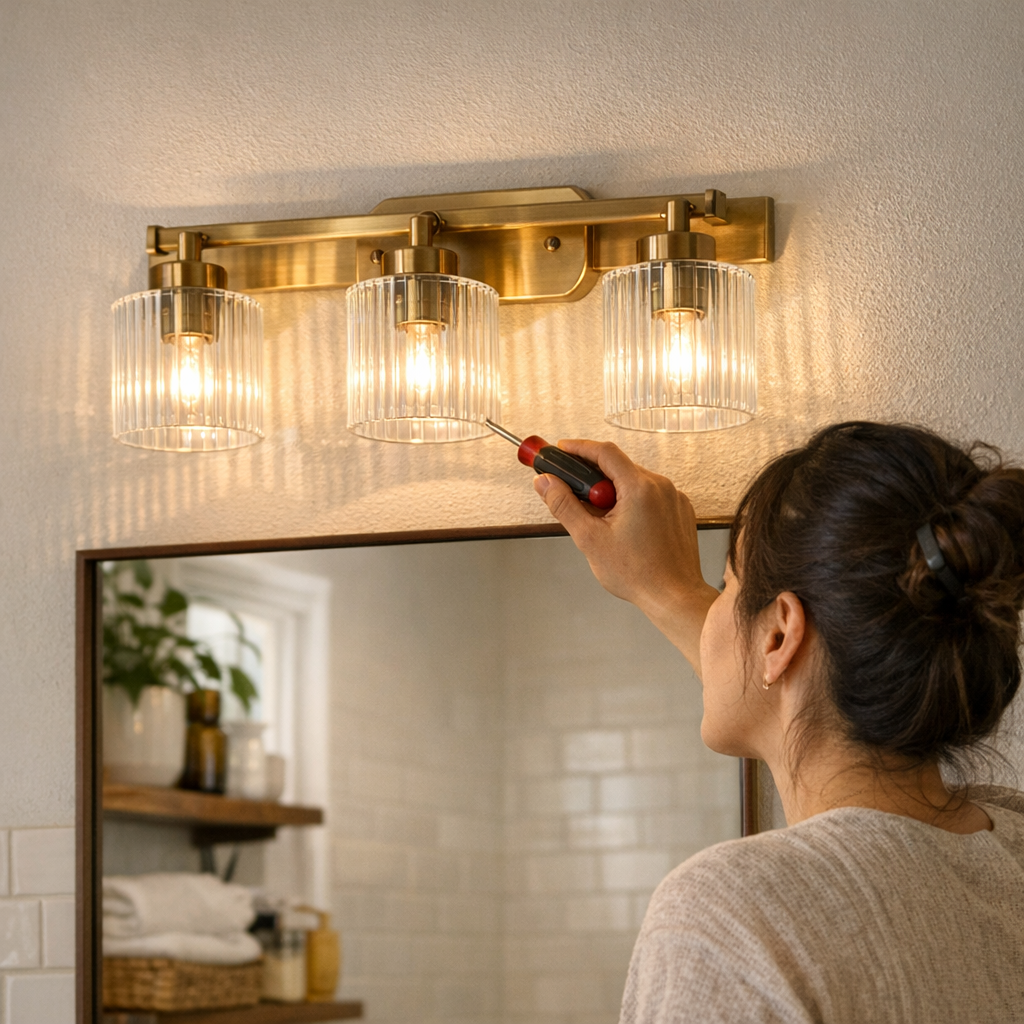
    Precision matters more than speed when it comes to lighting that endures. Swapping a power driver for a manual screwdriver on the final turns lets you gauge resistance—stopping as soon as the base holds steady, before the trim distorts or the gasket crushes out of shape. Hand finishing builds lasting alignment and a fit that stands up to vapor, vibration, and movement. Repeated frustration usually flares up in:

    • Hallways and corridors: Small misalignments grow obvious as shadows pull unevenly along walls or ceiling edges.
    • Bathrooms: Steam finds the weak point at warped seals, leading to a faint but persistent ring along the trim.
    • Utility corners and stair landings: Dust, grit, and humidity turn small gaps into stubborn cleaning problems.

    From Install Day to the Hundredth Use: How Small Mistakes Multiply

    Picture a stairway at midnight—the panel light overhead is supposed to edge every step with clarity. After a power-tool overtighten, the fixture edge creeps loose over time. The light’s beam shifts left or right, sending a wedge of darkness across the treads. Each trip down you sense the risk—no matter how bright the fixture, the edge of the stairs now fades into shadow, and the balance of the space seems off. In a bathroom, a seam compressed by a rushed install turns into a grime-magnet line that scrubbing never quite clears. The initial mistake rarely seems important until it multiplies with every flip of the switch or weekly cleaning.

    Bathroom Gaps and the Annoyance of the Shadow Seam

    In bathroom zones, humidity reveals flaws fast. The smallest overtightened seam draws in water and dust, leaving a visible gray line that breaks the edge of the fixture. Suddenly, a light that looked tightly finished feels like a maintenance chore—the difference between one swipe to clean and a slow, finger-tracing scrub along the trim that never feels quite done.

    Utility Room Lights: The Case of the Slowly Spinning Base

    In utility spaces, door swings and passing baskets put real, repeated strain on ceiling fixtures. If the bracket isn’t finished by hand, the base gradually rotates, threads loosen, and the fixture won’t stay square—resulting in off-kilter light and an endless urge to adjust. The payoff of manual finishing is control: you feel the screw seat, the bracket snug into drywall, and you know the fixture will withstand dozens of minor hits without twisting out of line or cracking the ceiling.

    How Lighting Performance Breaks Down in Real Routines

    When first powered on, even an overtightened fixture looks fine—light spills out evenly, and the room appears “done.” A few weeks in, reality reasserts itself. Every attempt to change a bulb leaves the fixture wobbly. Shadow edges ring the base and—no matter how you try—won’t wipe away. The light may still be bright, but usable visibility disappears in corners and on working surfaces. The daily difference is sharp: a fixture that’s over-tightened simply doesn’t hold its lines, its seal, or its ease of cleaning.

    • Bulb changes become a risky negotiation—will the fixture shift, tilt, or crack if you touch it?
    • The trim starts to collect dust and grime along the compressed, uneven seams.
    • The room feels lit yet somehow harder to use: counters half-shadowed, mirrors ringed, movement paths uneven.

    Proper manual finishing lets you stop at “just right”—the fixture snug, edges even, trim flush, and nothing over-stressed. This isn’t just a fussy install detail—it’s how lighting remains usable and frustration-free after dozens of uses and cleanings.

    Real Tips for Repeat Success (and Less Cleanup)

    • Finish by hand. Use a manual screwdriver for the last turn or two; power drivers get you close, but hand control prevents over-compression and preserves the seal.
    • Inspect edges before the final snug. If one side pulls away, don’t torque the opposite edge—reset gently and apply even pressure.
    • Watch the gasket: If it buckles, loosens, or disappears under the trim, back off and reseat the fixture for a flush, uncrushed fit.
    • Test stability: Press gently on different corners. If you feel a shift, reset immediately—don’t settle for “almost tight enough.”

    Not Just a One-Time Fix: The Daily Advantage

    Manual finishing is a long-game discipline. It’s the difference between a light that looks right for a week and one that stays tight, flush, and fuss-free after a hundred switch flips or cleans. The payoff is concrete:

    • Bathroom mirrors stay streak-free—no ring of dust or water to scrub out after every shower.
    • Hallway and entryway fixtures remain square, making cleaning and routine use frictionless instead of becoming a mild annoyance that distracts every time you pass.
    • Under-cabinet and kitchen lights maintain their angle, so counters stay fully visible, without shadowed edges or lost corners.

    The habit of hand-finishing every install means less realignment, less cleaning fatigue, fewer loose bases, and a more resilient seal against dust and moisture. It’s a small step that decides whether your lighting stays straightforward—lining up with your routines—or slowly turns into another source of daily disruption and cleaning work. Consistently tight, flush, and sealed, fixtures do more than illuminate: they let you use every corner of the room without pause or workaround.

    LightHelper — Practical indoor lighting, selected for rooms you actually use.