Category: Tools & Workshop

  • Why Airflow Control Defines Precision Heat Guns for Indoor Projects

    There’s a familiar aggravation that shows up fast when you’re in the middle of fine detail work—stripping tight window muntins, cleaning stubborn paint from intricate trim, or peeling old finish off shelves wedged between cabinets. You haul out a so-called “precision” heat gun, expecting sharp control, and wind up fighting it instead. Blistered corners flare up. Paint lifts past the masking. Edges that were supposed to stay untouched end up scorched and uneven. If you’ve ever spent two hours prepping, only to have a few seconds of sloppily directed heat undo it all, you know the gut-drop. And you know how the wrong airflow, not just the wrong temperature, can sabotage the entire job.

    Airflow vs. Wattage: What Really Matters Indoors

    No one does delicate finish work in a showroom. You’re contorted under a stair tread, at a cluttered bench, or balancing in cramped trim alcoves. In these real-world corners, what decides whether your project ends up crisp or riddled with touch-ups isn’t the power rating on the box—it’s how controllable that stream of heat actually is. Two heat guns might look identical, both branded “precision,” but once you start working tight putty lines or detailed moldings, massive differences show fast.

    Picture softening old glazing alongside a painted sash. One gun delivers a laser-tight column, letting you direct every bit of heat right where it’s needed. Another diffuses warmth across a three-inch swath, softening what you want—and what you absolutely didn’t. There’s no elegant recovery once a broad spray curls up the paint you taped off. Even the steadiest hand can’t wrestle back a finish after heat’s seeped under tape and behind the detail. Every inspection you do later will show the ghost of that misfire.

    How Repetition Turns Small Errors into Big Headaches

    The first pass is rarely the disaster. Start stripping lacquer from a veneered kitchen cabinet, and both your “fine” and generic heat guns seem workable. But as you repeat—panel by panel, feature by feature—edges start to fail. The tape isn’t enough. Lacquer flakes in weird places. Paint fuzzes up outside your lines. You sand back the error, but every session leaves borders slightly rougher, and those “quick fixes” start eating the clock.

    This is the hidden toll of a tool that won’t respect the line you’ve drawn. Any carpenter, finisher, or even weekend rehabber recognizes the pattern—what’s a minor nuisance at first gradually becomes a half-day’s overtime doing touchups. Precision isn’t a luxury when you have batch work to get through. It’s the difference between keeping pace and constantly doubling back.

    The Payoff from Upgrading: What a Reduction Nozzle Actually Does

    Some upgrades aren’t hype—they’re relief you can measure in your workflow. Swap your standard attachment for a 13mm reduction nozzle and suddenly the difference jumps out. Now the heat hugs the edge. You can keep the gun focused for ten seconds on a corner profile—no scorch lines, no glue bubbling across the joint, no accidental lifts along the meticulously masked tape. Face frames, veneered patch repairs, and delicate adhesive strips all become calmer work. The change doesn’t just live in theory: over a dozen doors, or a week of shop batches, you’re saving real minutes, reducing tedium, and handing over work that doesn’t need apologetic “blending” later.

    It’s not a magic fix—but it’s the difference between reworking the same spot for the third time and moving confidently to the next piece.

    Are You Fighting Your Own Tool?

    Spot these nagging symptoms and you’ll know your setup’s working against you:

    • Subtle bubbles or odd shine popping up past your protected strip
    • Edge fuzz or scorch patterns that always need “just a little more” sanding
    • Messy results on repeat details, profiles, or corners where heat should have been contained

    Techniques will only get you so far if the heat won’t stay put. Those little errors build up fast when you’re running batch jobs or elaborate trim runs.

    More Power Rarely Solves the Problem—Control Does

    It’s easy to assume a bigger heat gun will chew through jobs quicker. But inside delicate built-ins or working around finished surfaces, force isn’t your friend. All that extra wattage simply pushes damaging heat into places you don’t want it—making warping, peeled paint, and melted adhesives a near certainty. Suddenly, a half-hour touch-up is a half-day correction.

    Consistent, containable airflow pins down only the spot you choose. The “invisible” qualities—patterned nozzles that actually match the work, smooth output, and real adjustability—do more than any number stuck on the label. That’s what makes a tool something you trust rather than resent.

    Where the Numbers Show: Long Pieces, Tight Spaces, Batch Work

    The gains from real precision show up most during repetition—stripping twenty door frames, finessing endless feet of shoe molding, doing lineup after lineup of cabinetry seams. Small mistakes don’t stay small—they multiply. What’s one ruined edge in isolation becomes hour after hour lost to repair when you scale up. Suddenly, your pace is dictated by how often you pause to sand, patch, or retape—not by the work itself.

    Shelf models can seem identical until you rely on them, day after day. The barely-noticed curl of a nozzle, the steadiness of airflow, the way an accessory fits—these define your results as much as your touch ever will. The people who notice? Anyone expecting the job to look finished, not just “not ruined.”

    Bench-Tested Habits for Cleaner Results

    • Dial in with test scraps: Before raising the gun near real trim, blast a cutoff for five seconds. You’ll see instantly whether your heat creeps or stays sharp. If the warmth hits where you didn’t mean, rethink the nozzle or setting.
    • Section off every stage: Don’t trust exposed edges to luck. Divide big runs into smaller, protected zones, and always keep a strip of metal or even folded foil as a barrier when softening finishes near corners.

    The Takeaway: Precision Directs the Work—Not Just the Heat

    Fine indoor detail jobs demand more than steady hands. They require tools that deliver on intent—not excess, not almost. When heat lands only where you send it, your pace picks up, your anxiety drops, and your finish finally matches your setup time. If you’re fixing the same errors, or find your brushwork stalling to chase after a heat gun’s mistakes, it’s time to question what’s guiding your hand. Reliable airflow control and well-designed accessories won’t solve every problem, but they save you enough hours over a season to justify the shift—job after job, batch after batch.

    Explore work-proven heat guns and accessories at Gumboll

  • Why Defining Boundaries Transforms Garage Storage Efficiency

    Any garage or workshop can look “organized” for a few hours—rows of matching bins, everything lined up, floors swept. But there’s a familiar moment, usually by the end of a busy week, when you start to realize: it’s not working. You’re nudging a rolling cart for the third time in the same afternoon just to get to the outlet. A hose is pinched behind a bin that wasn’t there yesterday. The corner that should be empty has quietly become a dumping ground for overflow, and every routine involves a few extra, unnecessary steps.

    Why More Storage Doesn’t Mean More Usability

    The first instinct is to add containers—a new stackable bin, a bigger tote, maybe a taller shelf. On install day, it looks great. A single row of containers along the floor, all perfectly matched, seems like the answer.

    But in practice, that order is fragile. You reach for something at the bottom of the pile, and suddenly bins are poking into walkways. The cart that’s supposed to help winds up blocking access to the very tools you use the most. That seasonal box—never quite empty at the right time—wanders further from its zone every time it’s pulled down, eventually occupying the only stretch of wall where you could actually move around.

    The real problem: more storage doesn’t solve the constant low-level disruption of a space that can’t keep itself in line. Each extra container delays mess but also spreads it.

    Unanchored Containers: The Enemy of Open Flow

    Loose bins and gear on the floor don’t know their place. The “tidy” footprint drifts: containers inch into traffic lanes, blocking that one spot you use to turn with a full armload. The empty-for-now tote quietly migrates to the center of the room. What was a clear corner becomes a tangle where nothing is immediately accessible. Floorspace that feels open one day becomes a minefield the next.

    The repetition is relentless: three moves just to put back a wrench, every cleanup session a mini Tetris marathon. A mobile chest finds its way into the path every single Saturday—you move it, mutter, and think about doing a real reset… but know it’ll happen again. Unanchored storage never stays put, and the gap between “organized” and “quickly usable” gets wider every week.

    Overflow: The Unseen Clog

    Overflow isn’t a dramatic avalanche—it’s silent, slow, and steady. An awkward lamp, a leftover bag of potting soil, or a single unfamiliar tool slips into the system and the regular bins start drifting. Suddenly, the path to the back wall takes a detour. The corner under the window feels permanently blocked. Outlet access, once simple, now means awkward reaching or hauling containers aside—not just once, but every single use.

    The daily impact is small but cumulative. Every reset takes longer. That little resistance—annoyance here, a few extra seconds there—turns into wasted time and mounting frustration. The space looks “neat enough,” but it can’t keep up with the way you actually work.

    Anchoring Order: What Physical Boundaries Actually Do

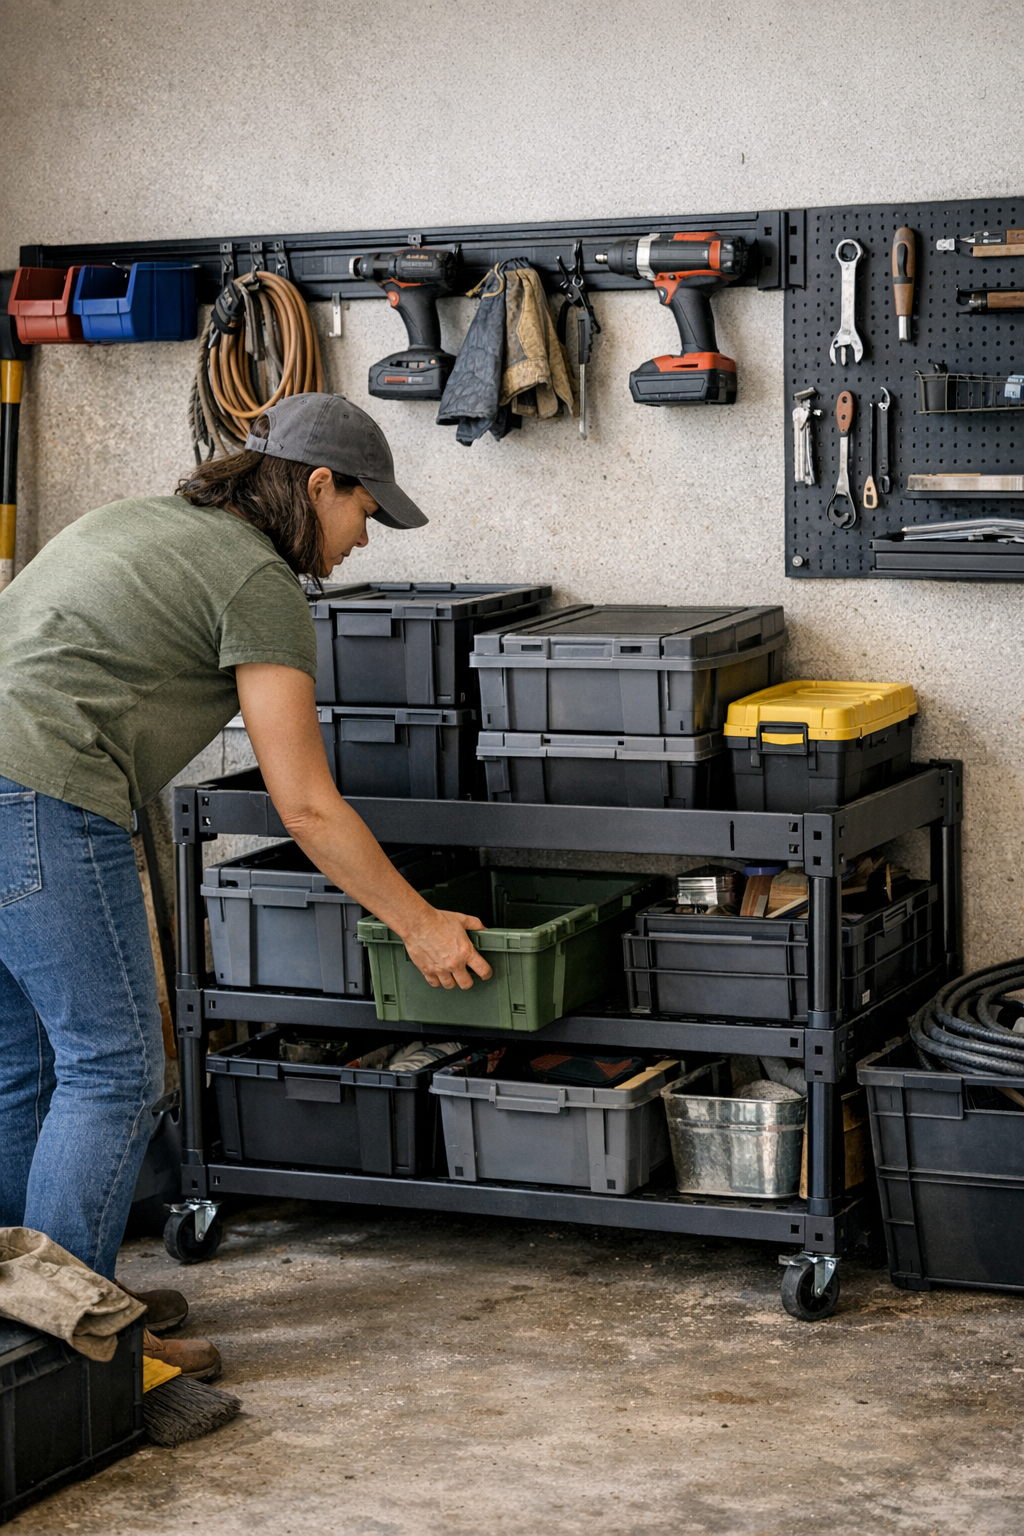
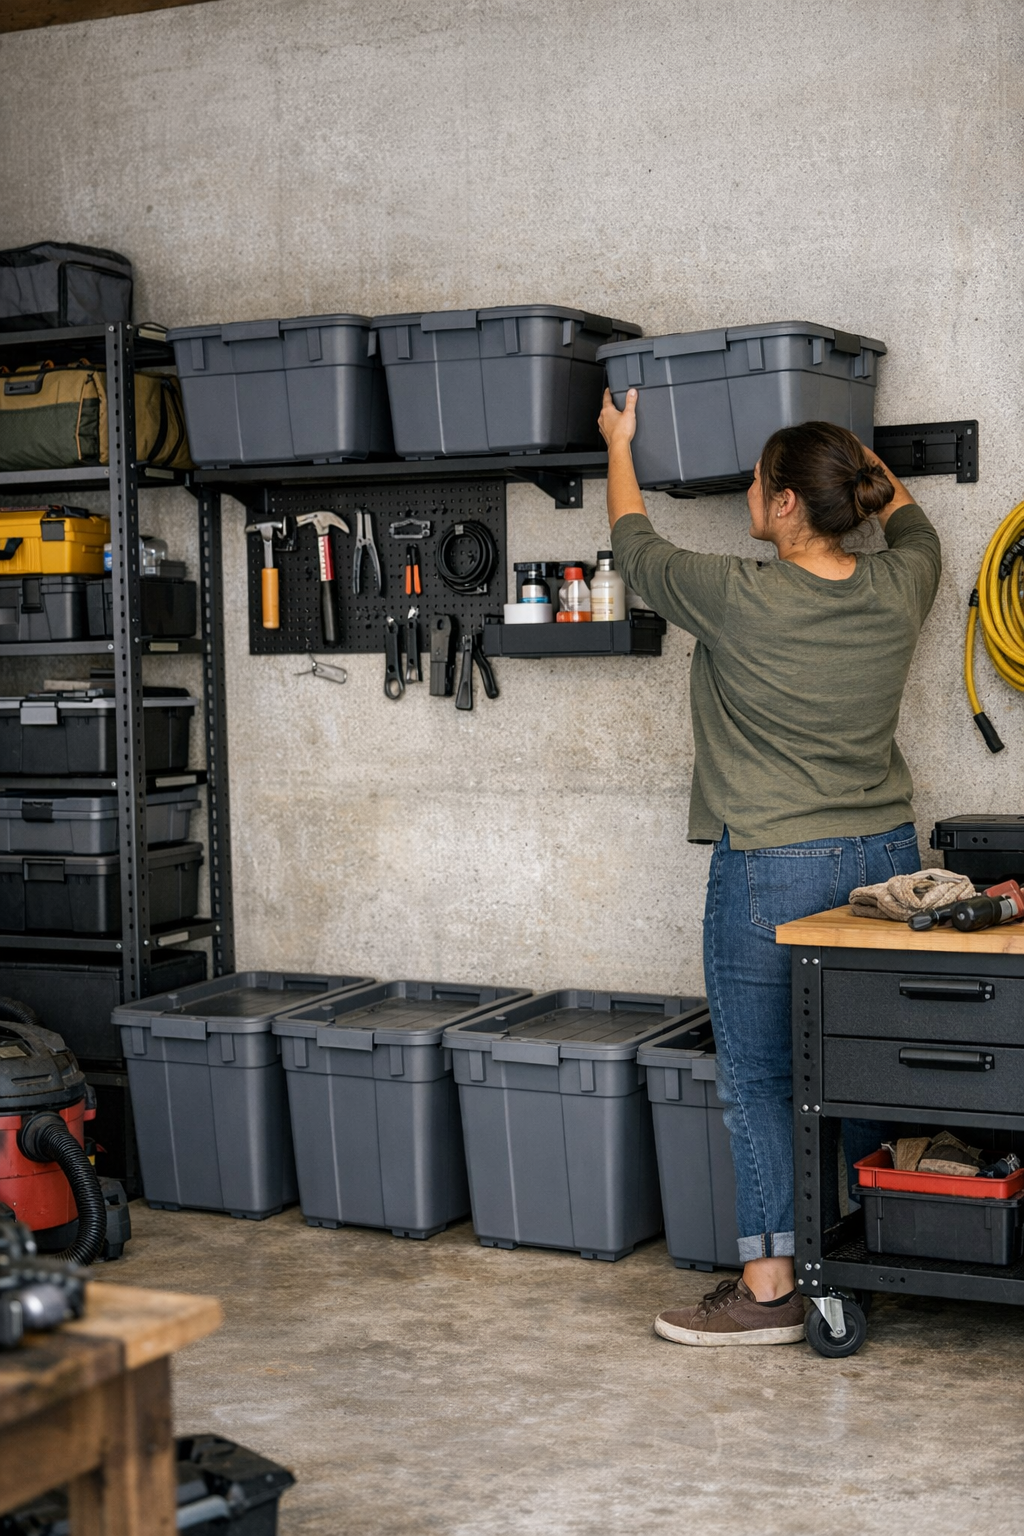
    Boundaries transform storage from cosmetic to functional. Wall rails, anchored shelves, and modular panels force the layout to obey real limits. A boundary isn’t just about keeping bins from sliding; it’s a hard rule for where gear belongs, how much will fit, and—crucially—where routines don’t get blocked by drift. Even with messy use, things can’t wander far from their rightful spot.

    Try swapping out a third of your floor bins for truly wall-mounted options. Overnight, the main path stays clear. Returning a power tool stops being a three-step shuffle. You know exactly where the overflow can and can’t go. Seasonal containers can live overhead or inside a defined bay, not wherever gravity lands them. Cabinets stop jutting into walkways, and the area once clogged by “temporarily” parked gear finally stays open.

    Reset Speed: The Unseen Value

    What’s most striking after creating real boundaries? Reset routines shrink. Instead of shoving rogue bins aside or reverse-engineering your original layout, you put the item back and move on—done. Spotting an out-of-place tool becomes so obvious you fix it without thought. There’s no wrestling the same rolling cart back into line, no detouring around congestion points. On even the busiest days, order survives. Cleanup stops being a project and becomes a single, automatic motion.

    With boundaries, overflow can’t quietly colonize new ground. You see clutter instantly. The system stops needed policing, and you start actually using the area the way you intended: more making, less rearranging.

    Why “Looking Organized” Still Disrupts Real Routines

    Walls of labeled, evenly measured bins look good at a glance, but they fool you. Every week, the same old pattern returns: one cabinet always off the wall by a few inches, one corner with a mystery pile that never moves, and that one spot by the door that collects everything that doesn’t quite fit anywhere else.

    If it feels like every project ends with a pile of “to deal with later,” you’re not alone—it’s a sign your storage system can’t withstand real life. The difference shows up in the lost seconds and the low-key annoyance of constantly nudging, shifting, or hunting for what should be two steps away. Weak boundaries are invisible thieves of time and energy, making every return-to-order more tiresome than it needs to be.

    Setting Your Own Boundaries: Practical Tweaks That Work

    Target your bottlenecks, not your bins. Is the path to your workbench always a zigzag? Does gear constantly pile up near the back door or the outlet wall? That’s where a rail, sturdy panel, or defined shelf should live—not just “more storage,” but something with a clear limit.

    Give your setup a reality check: after a regular task, time your reset. How many times do you move something just to put another thing away? Where do you have to reach awkwardly—every time? Those are signals your layout needs a real boundary, not another container.

    Try simple tests—assign a slot for each bin using a modular wall, or mark a “home base” spot for a tool chest. Watch whether it holds its ground after several days, or if things drift back into chaos. The right experiment is the one that makes cleaning up as automatic as the mess itself.

    The Everyday Test: Will It Work Next Week, Too?

    Truly functional garage setups aren’t just about the install—they show up in the way you use the space at actual speed. Are walkways still open, or is access shrinking every week? Do you have to reshuffle four things to get to your main supplies? When the day ends, does reset happen quickly—or does a “quick cleanup” turn into a frustrating rearrangement?

    The best boundary-driven setups take a stand: movement stays clear, overflow is contained, and routines stay direct even after heavy use. The proof isn’t in perfect labels or matching colors—it’s whether the space helps you keep moving, hands full, without dreading the return. If your system can survive three messy Saturdays without collapsing, you’ve set up more than storage. You’ve given yourself a workspace that works—today, next week, and far beyond install day.

    http://stacknest.myshopify.com

  • Why Labeling Alone Fails to Keep Your Storage Organized Over Time

    Labels Are Not a Cure—They’re Symptom Management

    Walk into nearly any hallway closet, pantry, or bedroom storage wall and you’ll spot them: the ambitious row of sticky-backed labels, the perfect handwriting on baskets, the hopeful arrows pointing to “Towels,” “Snacks,” “Seasonal.” We chase that first satisfying click of order—the sense that if everything is labeled, disorder will finally loosen its grip. Yet by the end of the week, the familiar patterns creep back in. Labels are suddenly wrong, ignored, or so specific they don’t match the real contents. That earlier surge of control? Replaced by the quiet suspicion that you’re no longer keeping organized—you’re just managing a game of label-and-relabel.

    When Labels Only Add More Work

    The breakdown isn’t theoretical. It’s what you feel in the rush of living. Midweek, you open a bin marked “Sheets” and find a tangle of socks and nightshirts. You lift every basket looking for a missing pillowcase, or stop and squint at a fading “Snacks” label before realizing the bin holds oatmeal and canned beans now. Instead of quick access, you’re in maintenance mode: editing categories, rotating items, peeling off labels to make room for new ones—just to stay afloat.

    This frustration spikes in the spaces that see real action. In the hallway closet, everyone dumps towels wherever there’s space. In the pantry, groceries fill and empty unevenly, so the “Breakfast” shelf ends up mixed with crackers or soup. Even the front door cubby, meant to keep shoes and bags apart, descends into a heap by Friday. The problem isn’t that you lack discipline. The problem is a system that demands you work for it, not with it—rigid bins, labels for things that change daily, corners no one can reach without crawling.

    The False Promise of Perfect Order

    Those first few days, a new labeling scheme looks unbreakable—baskets lined up like a catalog photo, every item in its painted lane. But real life erodes surface order quickly. The “Towels” stack bulges sideways, blocking the next bin. The “Seasonal” basket starts hiding birthday candles with garden gloves. Miscellaneous clutter finds its way into every available gap, regardless of what the label says. Soon, frustration becomes routine—reaching behind crumpled stacks, stacking baskets on the floor, bulldozing through one bin to reach something in another.

    Watch what actually happens: the “Snacks” box drifts toward baking supplies after one grocery run; folded towels uncoil past their boundary into another category; the label for “Misc” slides out of reach behind a pile of winter hats. You realize the container isn’t the problem—the daily realities never matched the label’s tidy fantasy.

    Shared Spaces Create Label Blindness

    Add a second set of hands (or five) and the system degrades even faster. In the bathroom, “Guest” bins fill with everyone’s contact solution and razors. Laundry zones labeled “Delicates” and “Whites” collapse into one after a hurried wash. Labels become hopeful reminders, not actual guides. After a few days, nobody trusts them. Everyone navigates by memory or guesswork, shoving items wherever they’ll fit.

    Where Storage Systems Fail—And Why

    Picture the reset after laundry day. “Sheets,” “Towels,” and “Cleaning” bins are theoretically separated. But the shelves are just deep enough that extras spill into the nearest bin. Pillowcases land atop towels. Searching for one set, someone pushes other contents forward, unseating the stacks. By week’s end, the categories are shot—a haphazard blend of items requiring a full scan and multiple basket-pulls to find anything.

    Half the battle isn’t about tidiness, but about the design itself. Too-deep bins swallow things out of sight. Overly narrow baskets overflow while bulky “storage” bins sit empty. Shelves set at awkward heights mean stacks quickly collapse, sliding into neighboring spaces. Vertical room is wasted above, while horizontal zones self-destruct under pressure. Almost every retrieval turns into a slow-motion excavation.

    Reset Speed: The Real Test of Your System

    The truest measure? How quickly can you restore order after a normal, hectic day—not a staged cleaning session. If your system only looks organized in photos but becomes a puzzle to reset, you burn time and energy every time you restock. Do you have to drag out half the closet to sweep up stray socks? Are you re-labeling or shuffling bins with every change of season or new bulk buy? If your shoes and hats keep creeping into the entryway—or if the kitchen’s “Overflow” bin is perpetually a mix of everything—chances are, your categories are fighting your habits.

    The most livable storage setups aren’t strict—they’re forgiving. They create “good enough” boundaries you can refill in seconds, not with a checklist and a label maker.

    Lean Into Flexibility: Improvements that Actually Last

    If your resets keep getting slower or more complex, it’s time to look at how your storage set up, not just what the label says. Are your bins the right size for the real amount of stuff—are you always cramming extras on top? Can you reach what you need without moving other baskets? Do your categories reflect how you actually use the space, or how you wish things would work?

    Try this: swap out universal labels and mismatched bins for simple, open shelving—just define a visual rule, like “don’t stack above the second shelf.” When items are visible and distances are short, you reset faster. No digging, no guessing, no rearranging every time someone tosses in a backpack or seasonal coat. Clarity improves, and minor everyday clutter never snowballs into a full afternoon of re-sorting.

    If you want to keep labels, be ruthless about their purpose. Only label what must truly be separated (“First Aid,” “Holiday Decorations”), and use adjustable tags or wipeable markers. When routines shift, so can your categories—no peeling, no guilt, no system overhaul required.

    Storage Should Disappear Into Your Day

    By the end of a long Tuesday: the last towel is hung, the backpacks are dropped just inside the door, the weekly groceries are shifted into reach. If your system fades into the background—if you can reset it in under a minute, without a sigh or a scavenger hunt—you’ve found something functional, not just photogenic.

    Don’t ditch labeling entirely—just recognize its limits. The best storage fits your actual rhythms, not showroom rules.

    Discover storage options built for real life—messy, busy, imperfect—at ClosetWorks.

  • Why Heat Guns Overheat During Paint Removal and How to Avoid It

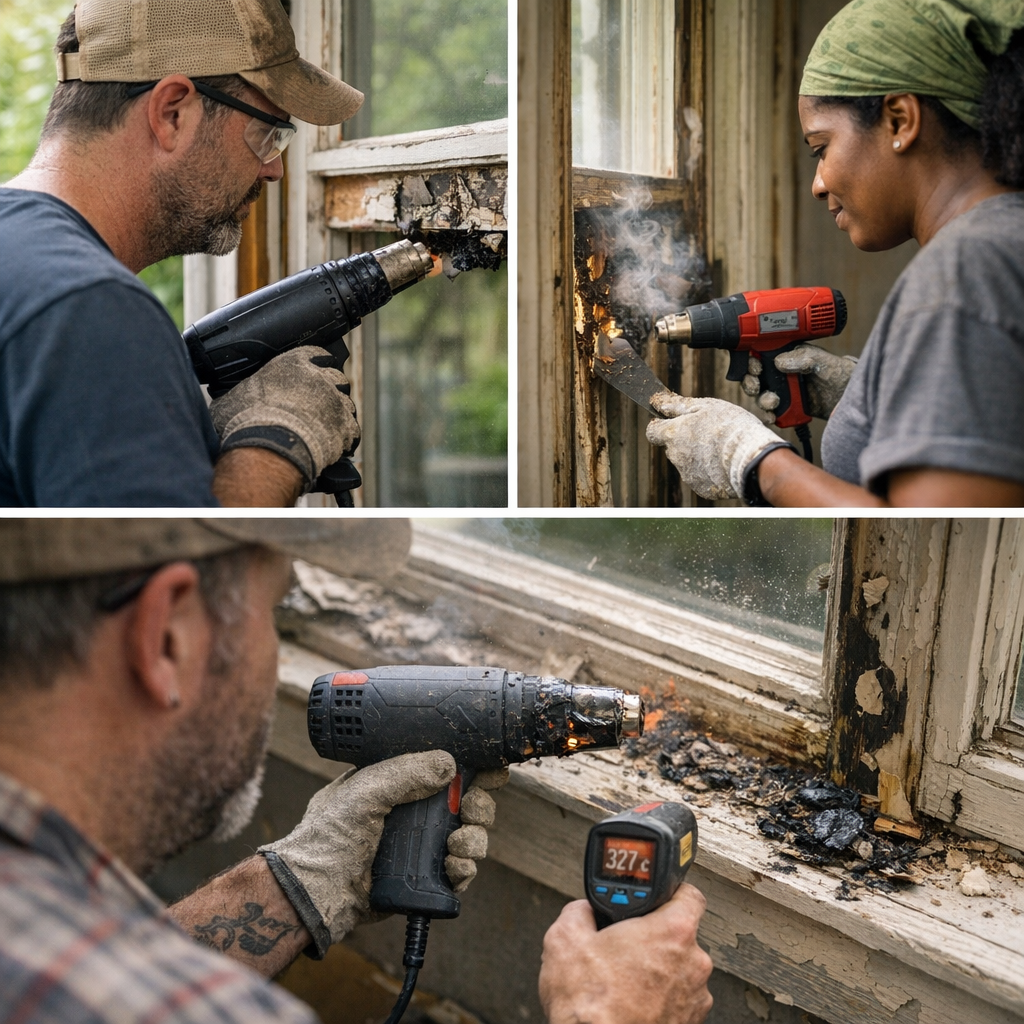
    The truth about heat guns is this: the real differences emerge long after the first layer of paint curls away. Stripping one window frame can make any budget tool feel identical—but stack up a dozen sashes, spend a Saturday battling stubborn casement grooves, and the illusions fall apart. On the surface, every heat gun looks the same in the aisle: similar power, comfortable grip, maybe a few nozzles rattling in the box. But when you’re still on your knees, five hours deep and the paint is barely lifting, you realize it’s the invisible choices—insulation, endurance, airflow—that decide whether you end the day ahead or with a headache and scorch marks everywhere you look.

    Where Real-World Pressure Reveals Weakness

    Paint-stripping isn’t a test you do in a vacuum. The jobs that push you—cramped ledges, endless trim, old house quirks—pile up fast. You knock out one section just to reveal four more, each one rougher than the last. In the beginning, almost any heat gun feels up for the challenge. But when you’re chasing detail after detail and pushing through whole rooms, small flaws quickly become mission failures:

    • Uneven airflow stalling your workflow. What started as a steady, predictable stream becomes erratic mid-task. You press the trigger and instead of that easy, skin-lifting peel, you get cold patches and stubborn stripes that demand extra scraping—and kill your rhythm.
    • That sharp, plasticky stench isn’t nostalgia—it’s meltdown. The moment insulation falters, a whiff of burnt plastic hangs over the job. It’s the canary in the coal mine for tool failure: by the time you spot deformation, you’ve already scalded paint—or worse, the underlying wood.
    • Nozzle warps before your eyes. Extended sessions expose which guns substitute bargain plastics for quality. Overheated, the nozzle necks down, narrowing the airflow, so you linger in one spot, extending scorch risks and draining energy.

    This isn’t rare. Every overworked heat gun eventually exposes its shortcuts. What’s “good enough” on the first test run often becomes the friction that kills your momentum across a job, stretching hours into days, and forcing you to mask charred seams with extra sanding or primer later.

    Spec Sheets Don’t Measure Fatigue—or Failure

    The sales copy won’t save you when the job drags on. Power ratings and temperature stats sound solid, but in real workshops, tool survival lasts longer than any printed number. You don’t notice the difference on a quick demo, but move window to window, day after day, and the fakes start to falter:

    • Can it keep heat at the nozzle, panel after panel? What sounds like “2000W” is meaningless if you’re hovering, waiting for the tool to recover, re-soften, reheat—over and over.
    • Does the grip stay cool or cook your hand? With junk insulation, the tool becomes hot and clumsy, increasing fatigue and making precise scraping difficult fast.
    • Is airflow reliable or sputtering? Consistency directly affects your control and speed; surges and stalls make clean removal near impossible.

    I gambled on a popular “workhorse” once—on paper, it matched the ceramic-insulated leader watt-for-watt. Three hours later, thermal cutout, paint half-bubbled, I was forced to stand there and wait. Swapping to the better-insulated gun let me finish not just that sash, but room after room, with working temps below 290°C and zero interruptions. The stats were the same—but only one performed beyond a quick demo.

    Fatigue Sets In When Tools Falter

    Short tests tell you nothing about cumulative stress. Any heat gun will peel a sample patch, but full-house stripping exposes the weak spots. Common failure points you’ll run into:

    • Paint that crumbles instead of cleanly lifting, creating a mess you sand for hours.
    • Handles so hot you can’t grip them, forcing unplanned breaks or awkward gloves.
    • Edges and corners that char, especially as airflow grows unpredictable, demanding multiple passes and careful sanding just to save the wood underneath.

    The right gun keeps you working—steady, predictable, and less physically spent. The wrong one weighs your hand down, bloats cleanup time, and kills your focus at exactly the moment you need control.

    From Frustration to Flow: Two Guns, One Jobsite

    Picture the start of a long restoration day—sashes lined by the bench, tools at the ready. Both heat guns, fresh from the box, promise the same performance. After an hour, only one is holding up: the first staggers as heat cycles wear it down, airflow gets choked, and you waste minutes rehitting stubborn spots. Your sanding block never leaves reach. The other, its nozzle still shape-true and grip manageable, keeps a strong, even peel, so you spend the end of the day actually finishing, not just fixing.

    What Really Drags Down Tools—And How Insulation Makes or Breaks the Job

    The biggest culprit in real failure: bad insulation and bargain plastics. A heat gun that cuts corners here rapidly becomes a liability for jobs with any scale or repetition.

    • Spiking nozzle temperatures. Subpar insulation can’t keep temps stable—jumping past usable 290°C ranges and surging up over 330°C. Suddenly you’re juggling not just failing paint lift, but scorched wood and deformed nozzles as well.
    • Heat-fatigued internals. The plastic and wiring inside a cheap gun can’t handle repeated cycles. Expect mid-job thermal shutdowns, dropouts in airflow, or worse—a dead tool when you need it most.

    Switching to a well-insulated, ceramic-nozzle model is less about numbers, more about maintaining pace. There’s a rhythm to paint removal: check, heat, scrape, rotate, repeat. Flimsy guns drop out, strong guns let you keep moving, scraping, sanding, and painting with fewer tool-caused delays.

    Practical Shop Wisdom: Don’t Ignore Cooling Intervals

    Even the right tool benefits from respect for the process. Every 60 minutes or so, give your gun a break while you sweep up or prep your next sash. If you sense pulsing airflow, pause and eyeball the nozzle—slight warping is a warning to avoid pushing further. Upgrading to ceramic insulation and rated duty cycles doesn’t replace common sense, but it does mean your stops are about the job, not saving the tool from itself.

    What Survives the Job—Choosing for Endurance, Not Hype

    Gimmicks and specs fade under real workload; only build quality endures. Across workshops, attics, or hundred-year-old porches, it’s the hidden insulation and reliability that quietly cut fatigue and let you end a project a day sooner. Bargain models might limp through a test strip but will double your cleanup and sanding once the flaws show up on the third or fourth frame.

    If you’re staring down room after room, detail after detail, it pays to choose tools with ceramic-insulated nozzles and actual duty cycles—not hobby-grade promises. The end result? Fewer accidental burns, less wasted sanding, and a workflow that keeps you active, focused, and ready to move on instead of stuck fighting the tool.

    http://gumboll.myshopify.com

  • How Clear Boundaries Keep Modular Storage Systems Organized Over Time

    The first hours with a new storage setup in the garage or workshop always feel optimistic. Shelves stand empty, bins line up, tools hang in shining rows—all the surfaces open, every aisle clear. The real verdict comes later: nine days in, after half a dozen projects and normal traffic, the system’s shine starts to fade. The problem isn’t with the organizers themselves. It’s with the invisible lines—the boundaries that either hold or quietly give way each time you put something back “just for now.” What looks like control on day one quickly becomes friction on day ten, and that’s where the real difference between setups is exposed.

    What Looks Organized Isn’t Always Useful

    The relief of getting clutter off the floor is real. Hanging tools on a new rail or sealing paint cans behind a cabinet door feels genuinely satisfying. The buzz lasts—right up until you need a wrench in a hurry, or you come back from the yard with two muddy bins. That’s when the cracks start to show. The cart you rolled to the corner yesterday is blocking today’s walking path. The wall-mounted hooks free up bench space, but now you find yourself reaching awkwardly around a sharply angled cabinet—again—to get to the back wall. Order exists, but movement gets awkward.

    • Pushing a mobile cart six inches over, just to squeeze past with your hands full
    • Stubbing a toe on a shelf that’s slowly migrated into the traffic zone
    • Noticing “organized” wall space that still means detouring or ducking every time you need something fast

    It’s these workarounds—the little detours and shuffles—that reveal the real cost of a setup that fits the space, but not the way you actually use it. Surface neatness hides silent inefficiency beneath.

    Thin Boundaries, Sprawling Problems

    As days go by, functional boundaries start to slip. What’s supposed to be a single row of bins on a rack quietly multiplies: one extra box, a stray bag propped against a shelf. Hooks that felt spacious begin to sag with that “just one more” shovel or hose. No outright mess appears—just incremental sprawl:

    • That clear rail now takes a jacket or backpack, leaving actual tools crammed
    • Buckets for compost or soil get stacked in the “open” corner, and soon there’s no easy turnaround
    • Reaching for a drill bag means moving two others first

    Worse, these small compromises don’t reset themselves. Each “temporary” overflow becomes routine. Resetting isn’t just dropping something on a hook—it’s a mental negotiation: Where does it fit now? Do I move this first or just wedge it in? The tight setup is slowly diluted by stuff sneaking past its original edges and spreading out.

    Overflow’s Slow Creep: How Zones Blur

    Every garage has that “flex” area—a shelf by the door, a patch of floor under a workbench—that begins as a buffer, then becomes the home for everything without a permanent spot. Left unchecked, this overflow zone creeps outward. A floor rack that’s efficient on paper turns into a small obstacle course. You find yourself doing a shuffle-step to clear the lane or balancing a box on top of a cart’s wheels just to park your bike.

    The real loss isn’t neatness; it’s clarity. You start asking, “Is there any actual floor left to use?” Routines drag. You can’t return tools fast; instead, you stack or pile. The edge between your zones—where garden gloves end and cleaning supplies start—blurs, and the urge to reshuffle “for now” becomes a predictable, weekly disruption.

    How Little Disruptions Break the Flow

    It only takes a few routine returns to erode even the best-designed system. Say you’re putting a saw back. The ideal spot is right on the rail—but there’s a paint tray in the way, so you nudge the tray, then need to move the shelf to line things up again. Before long, every retrieval or return means extra steps:

    • Sidestepping a loose bin that wasn’t there last week
    • Sliding shelves back into alignment instead of just using them
    • Pausing, every reset, to wonder where overflow landed this time

    No disaster—just a mounting, invisible tax on your routine. The setup isn’t failing; it’s just never truly resetting. A space that looks organized now slows down actual work, demanding decisions for what should be automatic.

    Drawing the Line—Why a Firm End Matters

    Resisting sprawl takes more than discipline—it needs clear, uncompromising boundaries. A hard stop—whether it’s a cap at the end of a rail, fluorescent tape at a shelf edge, or a bin purpose-marked for overflow—transforms the routine. There’s no room for negotiation: if the wall can’t take another item, the next thing must go to overflow. Period.

    It’s a minor adjustment with major payoff. Resetting becomes mindless again. You aren’t sidestepping stray objects or tracking what you need to deal with later. Instead, walking paths stay open, walls stay functional, and returns become fast enough that you stop dreading cleanup. Over weeks, those skipped detours and delays restore the predictability you set out for in the first place.

    Three Simple Moves to Anchor Your Setup

    Upgrading from “neat enough” to actually usable doesn’t require a complete overhaul. The right small habits make all the difference:

    • Cap every rail or shelf—visibly. Use a bracket, tape, or even paint to mark where storage ends. Once that edge is reached, stop. No leeway, no “just this once.” This single line keeps shelves from drifting and rails from crowding.
    • Designate one overflow bin and stick to it. If anything doesn’t fit, it goes there—never on the floor, never soft-stashed somewhere else. It’s a trade-in: overflow gets dealt with regularly, and the rest of the zone stays clear.
    • Lock rolling units after every use. Don’t let carts or shelves “wander” down a wall or into a lane. Each inch they travel erodes your movement space and resets nothing.

    These aren’t hard limits—they’re structural anchors. They force the setup to perform under normal, imperfect routines rather than ideal ones. Instead of adjusting to the mess, the mess adapts to your lines.

    If It Works After a Month, It Works

    A setup that passes the real test isn’t the one that impresses on day one, but the one that stands up to a few months of life: kids grabbing skates, muddy boots piling up, bikes moved and moved again. Strong, visible boundaries—not just flexible bins—let your zone absorb use without collapsing into another cycle of reshuffling. The goal isn’t military order. It’s predictable, fast resets and movement paths that don’t get blocked or confusing. Practical organization is about setup that works with your habits, even when you cut corners—because your system doesn’t.

    Find modular storage, wall systems, mobile organizers, and more at StackNest.

  • Why Shelf-Edge Labels Only Work When Bins Can Move Freely

    You can line up bins, print perfect labels, and start the day with a shelf that looks flawless. But by evening, the system’s already faltering—a glove lost behind rain boots, a tangle of hats jammed in the wrong slot, and a quiet sprawl of clutter leaking onto the nearest chair. Closets, mudrooms, and utility shelves all entice us with the dream of instant order, but the truth surfaces once real life kicks in. If every bin is wedged tight—no clearance, no give—that “organized” look is just a snapshot. The minute you need to grab, slide, or swap anything, friction creeps in.

    When “Tidy” Means Trouble

    In busy homes, storage is never static. Mornings mean rifling for one glove while rushing out the door. Afternoons bring damp hats and surprise school projects needing a home, fast. A shelf lined with bins might look sharp, but if each container fits like a puzzle piece, choices evaporate. One stuck bin and the whole routine detours.

    Order unravels fast: bins put back out of sequence, kids tossing random items into whatever’s closest. Label logic fades as you grab for one thing and find three other categories caught up in the mix—leashes lost among scarves, winter gear squeezed into gaps meant for shoes. Soon, the floor is picking up what the shelf can’t keep contained.

    Shelf-Edge Labels: Smart—If the System Can Breathe

    Shelf-edge labels are unbeatable for fast pivots—if you build in room to actually move things. That flexibility makes sense in places under daily siege, like entryways: one week, raincoats and umbrellas; the next, soccer cleats and sunglasses. When each bin glides out with minimal effort, old labels peel off, new ones snap into place, and the whole shelf keeps up with shifting demand.

    Lose that slim buffer, though, and you lose momentum. Too many bins crammed in, and basic adjustments become wrestling matches—two hands bracing, sides scraping each other, and categories stuck in yesterday’s order. Good intentions get postponed. Labels make less sense. Gear starts piling up in makeshift stacks, while bins stubbornly refuse to budge.

    Can Your Setup Survive Mudroom Mornings?

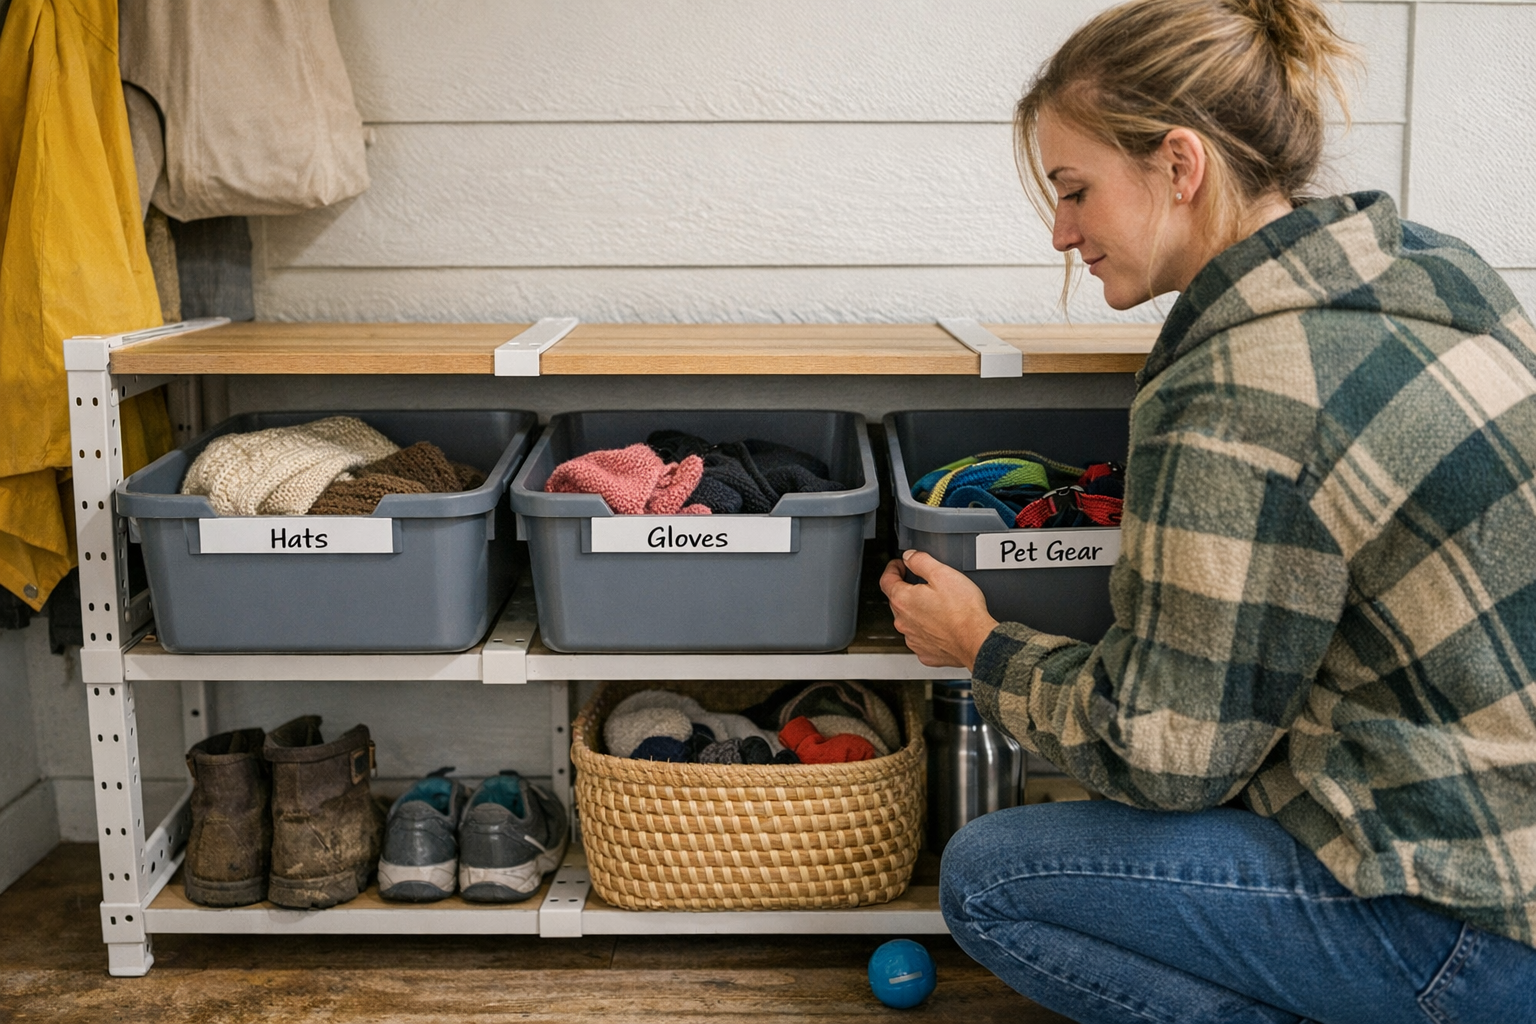
    Picture the chaos before school: baskets labeled for hats, gloves, pet leashes, all lined up beneath tidy shelf-edge tags. In reality, kids jam mismatched mittens wherever there’s space, busy hands shove the leash into the closest bin, and now you’re juggling containers just to restore order. If bins are jammed against each other, you give up fast—the “put back” step becomes a balancing act, leaving items stranded until the next overdue reset.

    How Overfilling Backfires—And Clutter Creeps In

    It feels natural to max out every inch and create tight, perfect rows. But that’s when storage goes from efficient to exhausting:

    • You fight to extract one bin, taking two more with it—or tipping a full stack
    • Labels get ignored; things land wherever there’s open space
    • Now you’re hunting, not finding—gloves in with scarves, stray keys buried at the back
    • Overflow zones appear: scarves balled up on the side, shoes gathering in the hallway, the shelf’s boundaries broken

    What once looked under control has devolved into a shuffling game—resetting takes longer, and every “quick clean” just smears stuff from surface to surface.

    The Quarter-Inch Rule: Breathing Room Beats Perfection

    The easiest upgrade? Leave at least a quarter-inch gap between every bin. Just enough for a clean, one-handed slide—not enough to waste precious space, but plenty for smooth access and easy resets. That tiny margin lets bins glide out, labels update in seconds, and new categories shuffle into place without upending the whole line.

    Now, when you switch hats for sandals or winter for spring gear, your shelf keeps up. Instead of wrestling half the row, you adjust one container and go. Categories stay clear. Bins return to their places without a fight. Resets become a 30-second spot check, not an hour-long overhaul.

    When Bin Labels Win Over Shelf Labels

    Shelf-edge labels aren’t magic for every context. If you have deep storage—linen closets, garage shelves, or those back-of-the-pantry tubs that rarely move—a label stuck right on the bin works better. Less swapping, less fuss, and category stability make the whole system more straightforward. But wherever categories keep changing and bins move weekly, shelf-edge labels with built-in space always handle the churn best.

    Small Habits, Big Difference

    Even the best shelf spacing needs a nudge. Once a week, pull bins forward, skim through contents, and reset anything sliding off course. That quarter-inch clearance turns this into a quick routine—no wrestling, no digging, just a fast realignment that resets the space before clutter returns. Labels stay meaningful, visibility stays high, and finding what you need takes seconds, not searching.

    Ready For Daily Change—Not Perpetual Reset

    Real organization doesn’t mean frozen perfection. It means shelves designed to welcome swaps, not punish them. Leave space for bins to move, pick a labeling system that fits your reality, and keep routines light and flexible. That’s how you keep closets, mudrooms, and utility shelves working—ready for everyday shifts, instead of slipping into slow-motion chaos.

    If your bins strain to move, your labels don’t guide, and your gear ends up everywhere, the fix is usually simple: a tiny bit more space, and labels that match the pace of real life. Let your storage breathe, and it will work with you, not against you.

    Shop ClosetWorks

  • Why Following the Right Cutting Order Improves Safety on Demolition Sites

    Ask anyone who’s lost rhythm on a job: demolition isn’t about swinging harder—it’s about making the right cut, at the right moment, every single time. But there’s nothing like that sudden stall: your reciprocating saw lurches and jams in mid-swing, all because you chased what was fastest, not what was smartest. Miss the correct sequence and it snowballs—blades dulled early, wires clipped blind, extra trips for fresh batteries. That ripple of slowdowns is the real drag on every shift.

    Cut Order Mistakes: Where the Day Starts to Unravel

    You feel the friction right away. The saw chatters, your blade binds against unseen metal, visibility disappears under piles of insulation fluff. Dive into framing out of impatience, hit a hidden flex line, and suddenly you’re mopping up leaks or swapping out blades while the rest of the crew waits. Get the sequence wrong, and demolition turns into a stop-start slog—always five minutes behind, always reaching for another tool.

    It’s a familiar pattern: the temptation is real—tackle the exposed pipe, buzz through that loose framing. But five minutes in, the saw kicks sideways as it snags something unseen. You squint through dust to find what you missed: a twisted wire, a hidden run of conduit, or insulation blown straight into your face. There’s always an easier way, but you have to set it up from the start.

    Reading the Wall: Why One Layer Hides a Dozen Surprises

    Walls are never as straightforward as they look. That tidy diagram in your head? Forget it—real walls are a mess of crisscrossed lines, oddball repairs, and layered materials dating back decades. Rushing to attack the “biggest” piece first—whether it’s framing or plumbing—usually means dealing with headaches you can’t see:

    • Hidden wiring may slip behind framing, looping where you’d least expect.
    • Stacked materials throw off your blade, turning a clean cut into a battle with embedded grit, stubborn metal, and unpredictable resistance.
    • Skipping drywall removal means guessing what’s behind—and when your blade finds something it shouldn’t, you’re left retracing steps, clearing debris before you can continue.

    How Experienced Crews Choose Their First Cut

    The rule you hear onsite again and again: don’t go for the meat until you clear the skin. That means outer panels and drywall come off first—always. Why?

    • Actual visibility: Removing the surface lets you spot the real hazards: abandoned BX runs, rogue Romex, or that trickle of water from a line nobody mapped.
    • Controlled progress: With hidden risks flagged, the saw runs smoother, vibration drops, and blade life stretches. You’re not fighting to control a saw bouncing off mystery metal.
    • Cleaner workflow: Debris drops where you expect—never clogging an outlet or soaking the floor below the cut.

    This isn’t just tradition. It keeps the work steady—cuts stay deliberate, tool fatigue is lower, and you aren’t stuck improvising fixes after surprise messes. On churn-and-burn jobs where every wall is different, this sequence is pure insurance.

    Onsite: Uncovering Trouble Before It Finds You

    You’re in a cramped shop, demoing the old drop ceiling. Framing is patched, pipes swerve between every stud, and the wiring is any year but recent. Instead of chasing the jumble behind, you start by slicing the drywall—carefully, not rushed. As the board drops, you reach for the laser and run a line at 48 inches; suddenly two electrical cables jump into view, running a course that would’ve intersected your first cut if you’d gone for the pipe.

    That’s the moment you remember why you don’t cut blind. If you’d gone for speed, metal and drywall dust would be showering down onto hot wires—and you’d be hoping nothing shorts before break. Because you exposed the layers first, you sidestep the hidden hazards entirely. It’s not just about safety; it means you stay in control, adjusting your plan as soon as new lines pop up. Workflow smooths out. You actually get ahead instead of constantly pausing to play detective.

    What Blind Cuts Actually Cost

    Ignore the sequence, and you pay for it. Not just in ruined blades—though you’ll burn through a box—but in the way fatigue creeps into your hands, in wasted trips back for new bits or batteries, in sudden slowdowns as every cut turns into a gamble:

    • Blades wear out at triple speed scraping unseen nails or hissing through sand-caked wood.
    • Precision collapses; the saw kicks, lines wander, and you spend more time making “fix-up” cuts than actual progress.
    • Risk ramps up fast—a wrong slice into a live wire or wet pipe, and everyone’s off task again patching problems that could’ve been predicted.

    Smarter Habits: Laser, Mark, Sequence

    If there’s a single habit that saves time and sweat: Before going structural, grab the laser level. Snap it at 48 inches—a line everyone knows, nobody forgets. Use that baseline to flag wires, pipes, and mystery lines. From there, you always peel back outer layers first, working inward, never skipping steps. That minute spent paying attention means your blade sees a full shift, and you set the job’s pace instead of rushing through avoidable jams.

    Hazards marked, sequence locked in, you don’t just cut—you glide. The mess is routine, the saw feels lighter, and the workspace stays manageable instead of spiraling into chaos. End of day, clean-up is a breeze instead of another long chore.

    The Most Frequent Pitfalls—And How Pros Bypass Them

    Under the gun, even experienced crews can slip. The biggest fumbles?

    • Cutting blind into concealed pipes or wires—water damage and lost breakers as the all-too-common prize.
    • Skipping visual checks—ignoring the laser line, letting hidden lines creep into your demo zone and costing hours later in patchwork.
    • Forcing a worn blade—because “just one more cut” can’t hurt, until it jams, shreds, or chews a ragged edge you’ll have to recut and re-clean.

    If the saw kicks harder or emits that scorched-smell warning, don’t muscle through. Swap blades, reset, and stay ahead of trouble—it’s faster than pretending the problem will fix itself.

    Kit That Keeps the Pace

    Fresh blades, a sensible laser, and a trusty marker—these aren’t nice-to-haves, they’re how you actually make progress. The real secret? Building a work rhythm: mark, check, sequence, then cut. Bring the crew in on that formula and the wall comes down faster, cleaner, and with less fatigue at the end of every day.

    Find jobsite-tested power tools, blade packs, laser levels, and more at Gumboll.

  • How Defining Boundaries Transforms Your Garage Storage Efficiency

    Every storage project starts with hope—a cleared garage, a new set of shelves, bins stacked neatly, and carts lined up along the wall. It looks finished, organized, maybe even photo-ready. But fast-forward a month, and the friction quietly returns: carts parked at awkward angles, tools stashed in dead-end corners, pathways narrowing with every project. The system didn’t collapse, but it didn’t stay out of your way either. It’s clear—what seemed like an upgrade is now just another obstacle to work around.

    Why Clutter Creeps Back: Boundaries Beat Layout

    The illusion of order comes easy, especially with a full run of shelves and modular racks. But what really tests a system is the churn—how it handles returns, overflow, and all the micro-decisions after a messy Saturday. Most setups fail not because they lack capacity, but because they lack boundaries. Every unclaimed gap, every edge without a stop, becomes a target for whatever you don’t know where to put. Tools slide under carts, gardening gloves settle into random bins, and that awkward wedge behind a stand becomes a black hole.

    Modularity without limits quietly expands chaos. Without real boundaries, even the best-designed system gets blurry: bins get shuffled, carts creep into walkways, and shelves swallow stray screws, zip ties, and the odds-and-ends you plan to “sort later.” Order gives way by inches, not by disaster.

    Where It Happens: Friction in Everyday Flow

    Picture the cycle: Saturday starts clean, but by noon, tools cluster near the job, soil bags crowd the garden shed door, and carts drift—never quite back to where they started. By week two, that shelf run you carefully spaced is now blocked by a diagonal cart, and the far end collects broken planter pots and hardware you don’t want to deal with. The short route from bench to door is gone; now it’s a dance over extension cords and a sidestep past bins that don’t stack quite right anymore.

    Finishing up takes longer than the work itself—bend under the rack for the lost trowel, scoop up random fasteners from the floor, and make one last trip to clear the path so you can finally call it done. Even when it looks tidy at a glance, the effort of putting things away multiplies. The cause? Boundaries that never get enforced—or never existed in the first place.

    Overflow Finds a Home—Unless You Decide Where

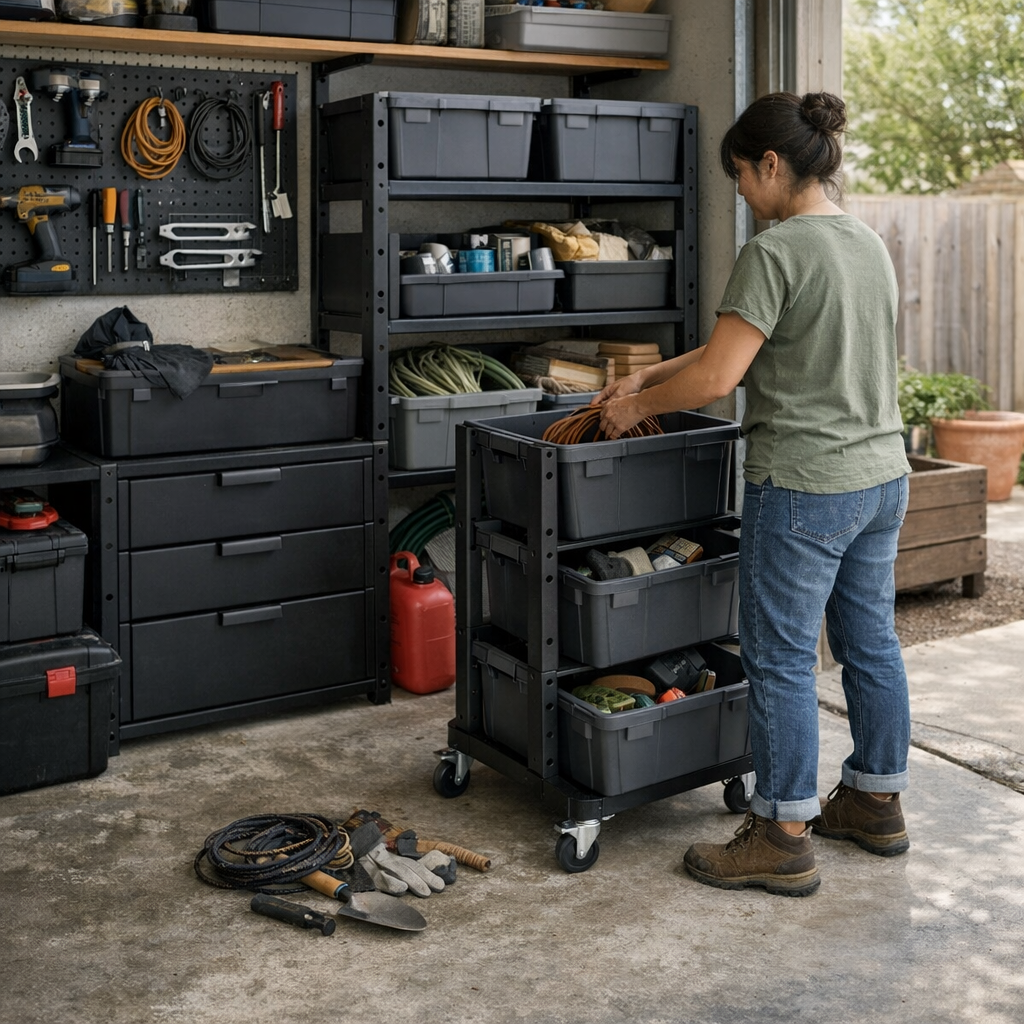
    The weakest point of modular storage is the blank space between the bins. Give overflow no clear destination and it will find the least convenient spot—on the path, in the corner, blocking cabinets. The setup that looked so spacious loses its function as countless items nestle in the easiest empty zone. Your tools aren’t lost, but every reset means more reshuffling, less movement, and growing irritation.

    A loosely organized area doesn’t collapse overnight. Instead, it clogs the routes you use most. That mobile chest you roll out for projects? Two weeks later, it’s marooned across the walkway. The last shelf acts like a sponge: bits you don’t use often gather at the end, making the rest harder to reach. Nobody set out to make cleanup harder—but the setup keeps inviting mess in, with no signal for when enough is enough.

    Scenes That Repeat (Too Often)

    • Carts never line up— Each time you need room, you slide a cart just to get by. Now it’s blocking something else entirely.
    • Shelf ends become junk drawers— No end cap means the last bin is where every “miscellaneous” part goes, until you can’t find what you need two bins deep.
    • Corner black holes— Behind the cabinet sits a permanent pile of delay: spare hoses, rags, broken bits, and projects you lost interest in weeks ago.
    • Endless reshuffling— The reset routine is just moving things around, not actually putting them back. Time drifts away, and nothing really improves.

    These aren’t failures of storage volume—they’re failures of return flow and boundary. Order is subverted in slow motion, until what was clean is just polished chaos.

    Setting Boundaries: Small Shifts, Real Payoff

    The practical fix isn’t more shelving—it’s sharper lines. The difference: real, physical limits that let you control where overflow collects and how resets happen. Add a set of end panels; suddenly, every shelf has a hard stop, and bins can’t drift into infinity. Commit one cart as the “landing zone” for extras; now every stray item piles up in one spot, not scattered over four zones.

    Making these tweaks, you’ll feel the effect instantly:

    • Resets speed up— Anything out of place gets herded to one point, not left for a wandering cleanup.
    • Walkways stay clear— Because carts return to a single, marked spot and bins don’t inch off the shelves.
    • Clarity replaces guessing— Everyone knows what belongs where, and clutter that used to migrate just stops moving.

    Why Open Layouts Miss the Mark

    Open shelves seem flexible, but without stops or markers, they become the last stop for what nobody wants to deal with. Stackable bins become useless if they’re stranded across the room from where you unload or work. Just because you have floor racks and mobile chests doesn’t mean they help—unless each unit has a real home, their footprint grows every time you pivot around them. “Modular” can just mean “mess that moves.”

    Functional Beats Finished: Storage That Handles Real Days

    The real test comes on your busiest, messiest day—not at setup, but at reset. Smart setups act like a funnel: everything extra finds its way to one place, and the space stays clear for the next round of work. The best systems aren’t those that use every inch—they leave breathing room, cut down on extra steps, and never force you to reshuffle the same mess week after week.

    If your cart, rack, and bins all have homes that work with your habits, resets shrink to five minutes—and the floor stays clear. If every corner feels busy and every shelf is overloaded, you’re just storing the mess, not solving it.

    Micro-Adjustments for Real Setup Performance

    • Assign a single cart or bin as the “catch-all.” Funnel every stray or overflow item here instead of letting clutter sprawl; deal with it during one tidy-up, not every time you need space.
    • Install end stops or boundary panels. Even a simple edge keeps bins in line and stops overflow from bleeding into access areas.
    • Mark parking spaces for mobile units. Tape lines or painted spots make it obvious—move the cart, then put it back. The rest of the space stays fixed and usable.

    And above all, leave space where you can. The room to move, pivot, and put things away quickly is the true sign of a setup that serves you—not the other way around.

    Find practical modular storage systems for garage, workshop, and outdoor spaces at StackNest.

  • Why Visible Storage Beats Labeling for Faster Daily Organization

    Every closet looks organized when you stack up matching bins or line up containers with those tidy little labels. But the difference between a system that just looks finished and one that actually keeps up with life? It comes down to what you can—and can’t—see when you open the door. If you need to move containers just to find the right hat, or dig through a stack to fish out today’s scarf, you’re bumping into the hidden cost of a closed-off system. Organization that hides your stuff behind opaque plastic or endless labels might promise neatness, but in daily use, it quietly adds a dozen small delays and a steady drip of frustration—especially when multiple people share the same shelves.

    When “Organized” Storage Feels Cumbersome

    The illusion starts strong: those bins with crisp labels seem to promise both order and efficiency. But fast-forward to rush hour on a Tuesday morning. You’re already juggling a bag and coffee, and you need that one pair of gloves. Do you remember which bin they’re in—“Winter”, “Accessories”, or “Miscellaneous”? Can you even see it if it’s buried in the back? The process is rarely smooth: lift, check, close, repeat. Suddenly the whole stack wobbles, and all that careful arranging unravels for one missing item.

    In real life, opaque storage doesn’t just hide your things—it hides creeping chaos. Categories blur. The “scarves” bin collects sunglasses, the “hats” bin swallows socks and extra shoelaces. By the end of the week, your simple reset turns into a guessing game and a full-scale reshuffle. The closet may look calm, but under the lid, it’s falling apart—one forgotten accessory at a time.

    Why Visibility Wins: Fewer Steps, Fewer Surprises

    Switching to visible storage—open shelves, clear bins, drawers with see-through fronts—immediately removes unnecessary steps. Instant access changes the rhythm of your day: look, grab, go. Need the blue scarf? You spot it without lifting a finger. Want those sneakers at the bottom? No more guessing which bin to check first, no more digging through layers.

    The power of visibility goes beyond speed. When shirts or sweats are stacked visibly (not hidden in boxes), you spot when piles tilt, bulge, or threaten to collapse. You can nudge things back into place before the mess gets out of hand. But with covered bins, you miss the warning signs. By the time you finally open the lid, overflow has merged with the next stack, and your once-neat system has quietly dissolved.

    Real-Life Clutter Traps Hiding in Plain Sight

    Most closets and entryways fall into the same daily traps:

    • Reaching behind one box to grab a beanie topples two other containers—suddenly, clutter overtakes “order.”
    • Family members toss things into the nearest bin just to be done, especially when the label doesn’t match their idea of where something belongs.
    • Folded shirts behind closed doors slump out of stacks and get wrinkled as everyone hunts through piles they can’t actually see.
    • The entryway shelf starts to collect stray bags and shoes because the “right bin” looks full—or no one remembers what’s inside anyway.

    The core problem isn’t carelessness. It’s the ramp-up of tiny frictions. If every retrieval or put-back is a five-step process, things inevitably pile up. The more friction, the faster order collapses—until you’re stuck rearranging the same shelves week after week, just to keep up.

    Where Labels Work—and Where They Slow You Down

    Labels are useful in the right context but are no match for direct visibility. They help in pantries with big, stable categories—flour, snacks, pasta—or in rooms kids use, where “remind me where this belongs” is half the battle. Labels also help anchor fast-changing contents and keep drift in check when everyone’s grabbing from the same shelf.

    But the minute you start opening boxes just to remind yourself what you put inside, the label’s become a hurdle. That extra moment—lifting a lid, shuffling bins—repeats every time you need something. When the same two steps slow you down daily, the system is working against you, not for you.

    Finding the Sweet Spot: Selective Labels and Clear Storage

    For busy shared spaces or closets with rapidly shifting categories, pairing compact, practical labels with see-through storage works best. Clear bins plus subtle, specific labels let you check categories at a glance—and confirm contents with one quick look, not a guessing game. Kids and adults find what they need without asking, and midweek tweaks (like shifting a stack or refolding a pile) become quick tune-ups instead of dramatic interventions.

    Storage That Keeps Up—Not Just Catches Up

    The only storage “solution” that’s worth the name is one you never have to overhaul. Daily life tests every system: can you find what you’re looking for in five seconds, not five minutes? Can you reset a lopsided shelf with one hand? Or does every search or cleanup turn into a minor ordeal?

    Visible storage tools—open racks, transparent drawers, even low-profile shelf dividers—let you manage small messes before they snowball. You catch the stray mitten or the laundry flood on Tuesday, not Sunday. Out-of-place items are obvious before they take over. Instead of putting off resets until the weekend, you keep pace with life as you go.

    Tiny Habits that Prevent Closet Meltdown

    Spend ten seconds glancing at your most-used shelves as part of another chore—while hanging up a coat, stowing groceries, or switching shoes. If you see a stack leaning or a group of bins creeping out of line, fix it on the spot. This habit prevents clutter from gaining ground and means your “reset” is more nudge than overhaul, even in busy homes.

    Stop Measuring Storage by the Showroom

    A closet might look perfect for photos, but if you reach for something twice and still can’t find it, it’s not really working. Function beats first impressions every time.

    Prioritizing visibility means you deal with less decision fatigue: you don’t waste time debating which bin, or tinkering with stacks. Shelves actually perform—categories stay separate, vertical space gets used, and daily put-back routines stop feeling like chores. Forget trying to impress guests who open the closet door. The goal is a storage setup that stands up to real daily use, quietly making life simpler and cutting down on those “Why is this always such a mess?” moments week after week.

    See more practical closet solutions at ClosetWorks.

  • Why Your Reciprocating Saw Blades Wear Out Quickly and How to Fix It

    It’s a familiar workshop slog: You’re halfway through an awkward cut with your reciprocating saw—hands edging numb, sweat starting on your brow—when the tool slows, the blade jitters, and every inch of progress starts to demand double the effort. This is not the dramatic burn-out of busted teeth or snapped steel. It’s the insidious wear that creeps up fast: vibration climbs, your cut line snakes, sawdust thickens in the air, and the simple job you started has quietly become a fight. What’s changed? Usually, only the blade.

    The Real Headache of Using the Wrong Blade

    Most mistakes in the shop aren’t blatant. The job begins with a reach into the tool bag—a handful of random blades, some labeled “universal,” all thrown together from projects past. In the rush, you settle: “Close enough.” At first, the saw bites the wood or pipe like it should. But soon, small problems pile up. The cut stalls, edges splinter, and you feel the saw start to argue back.

    This isn’t just about tooth count or marketing terms. The wrong blade quietly torpedoes your momentum. Frayed edges mean more sanding, crooked cuts demand rerouting, and alignment checks slow your rhythm. The “all-purpose” blade that was supposed to simplify things leaves you untangling each mistake, hour after hour.

    What TPI Really Means in Actual Work

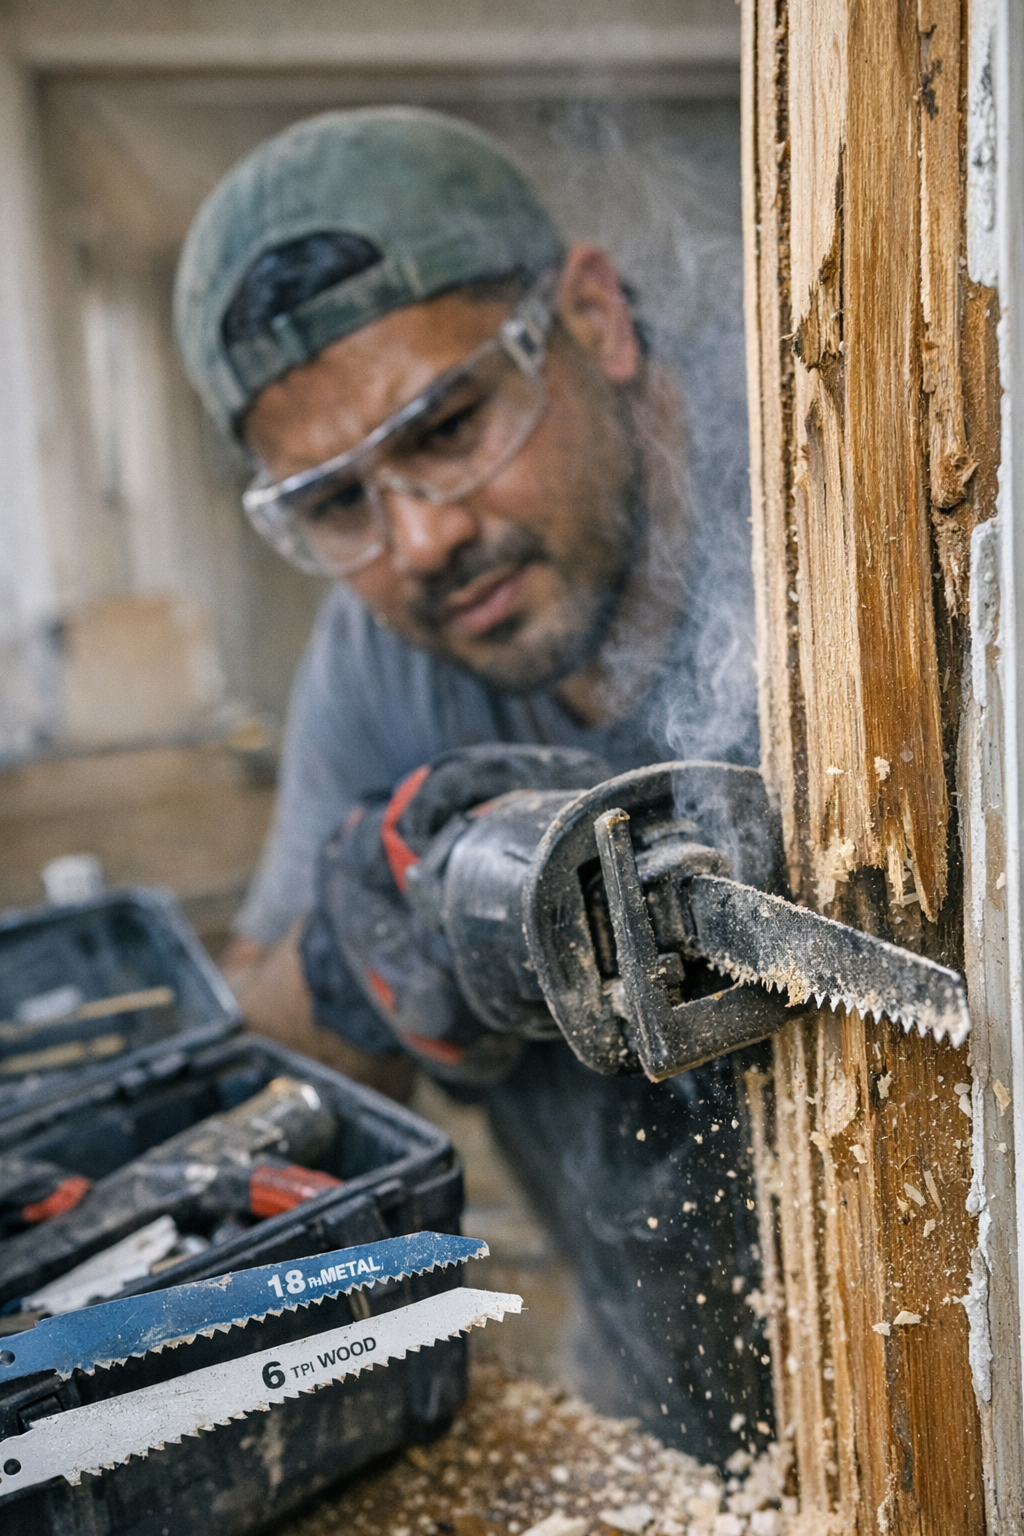
    Teeth per inch (TPI) isn’t just an afterthought—it’s the difference between cruising and grinding. High TPI (14, 18+) slices through metal cleanly but will bog and burn in wood. Coarse teeth (6–8 TPI) make quick work of studs but chew up hardware and snap on nails. The theory is simple; the reality is you’re switching from soft studs to a rusty hinge, or from plywood to embedded screws, dozens of times in a tear-down.

    Try running a fine metal blade into a softwood jamb. Three cuts in, the teeth gum up with pitch, progress drags, smoke signals trouble, and suddenly you’re muscling the saw, hoping you don’t veer off into territory that needs patching. The myth of one blade for all jobs dies fast—usually somewhere in a haze of wood dust and frustration.

    The Door Frame Test: Wrong Blade, Real Drag

    Pry out an old door frame—painted pine, cheap plywood, hidden nails. You start easy, cut the trim, flush out some supports. If you grab last week’s all-material blade, expect the fate that follows: first pass is okay, but the blade warms up, resistance ramps, shreds of paint and wood slough off rough. By the time you hit metal, your blade’s shrieking, the cut is jagged, and you’re mentally adding hours at the sanding bench for cleanup.

    The Difference When You Change Blades (And Why It Matters)

    Switch to the right TPI, and the job transforms—visibly and physically. Drop in a 6 TPI blade, and the wood gives; the saw glides instead of chattering. Edges hold crisp, dust stays down, and you find your rhythm with less push. Swapping to an 18 TPI when encountering a nail or bracket, the feel shifts—slower, but the blade tracks straight, and you’re far less likely to scorch or jam it. It’s not about magic; it’s about finishing cuts you don’t have to revisit.

    The payoff is cumulative. A properly matched blade gets you triple the clean cuts before dulling. Rough seams become rare, the extra sanding becomes an exception, and—crucially—your arm doesn’t feel punished before lunch. Every swap is a trade: one minute of patience for an afternoon of smoother progress.

    Reading the Signs—When It’s Time to Swap Blades

    No one wants to halt a workflow for another trip to the tool chest. But the work itself lets you know. Watch for:

    • The saw jumping or fighting for every inch
    • Edges start coming out ragged or splintered
    • Burn marks or the acrid smell of smoking wood
    • A blade that’s hot or packed with debris after each pass

    Heed those signals. A swift swap for the right blade is time reclaimed, not wasted. Control returns to the cut itself—and you spend less time patching mistakes created by a saw on the wrong footing.

    Why Small Swaps Save Big Hassles

    Muscling through with the wrong blade almost always leads to double work—backtracking, endless sanding, or even buying new material. Instead, feel for resistance and adjust on the fly. The right blade on the first cut means fewer mistakes to mask, less fatigue in the wrist, and a cleaner, faster finish every time. Swap at the first sign of drag—don’t let stubbornness undo your morning’s progress.

    The Details Nobody Mentions—but Everyone Feels

    Blades and bits don’t have star billing in the tool catalog. They get buried in drawers, shuffled between jobs, or left on magnets to collect dust—until, inevitably, a stubborn fit stalls things out. Yet anyone who’s rebuilt, demoed, or sanded their way through a marathon project knows: these tiny adjustments are what keep the job moving—or bog it down in undoing small disasters.

    The right blade won’t make demolition glamorous. But it cuts down the quiet spiral of frustration—less waste, fewer noisy slips, less ache in your wrist after an afternoon of grind. What gets lost in the shuffle of bits and blades is found again in the pace you keep and the fatigue you skip.

    Smart Prep: Stage Your Blades, Stop the Grind

    Don’t ask one blade to be a hero. Keep a handful of TPI varieties staged—grouped by wood, metal, mixed-use, even color-coded if it helps. When the saw stalls or your line drifts, pause and check your blade, not just your arms. That extra minute setting up pays back every hour you would have spent fighting the tool—or fixing what it broke.

    Every project leaves behind dust and a little fatigue. But with the right blade at each stage, that wear shows up on the job, not on you. It’s the quiet difference that makes each cut count—and each day in the shop less of a slog.

    See more from Gumboll’s lineup of jobsite-ready blades and accessories.