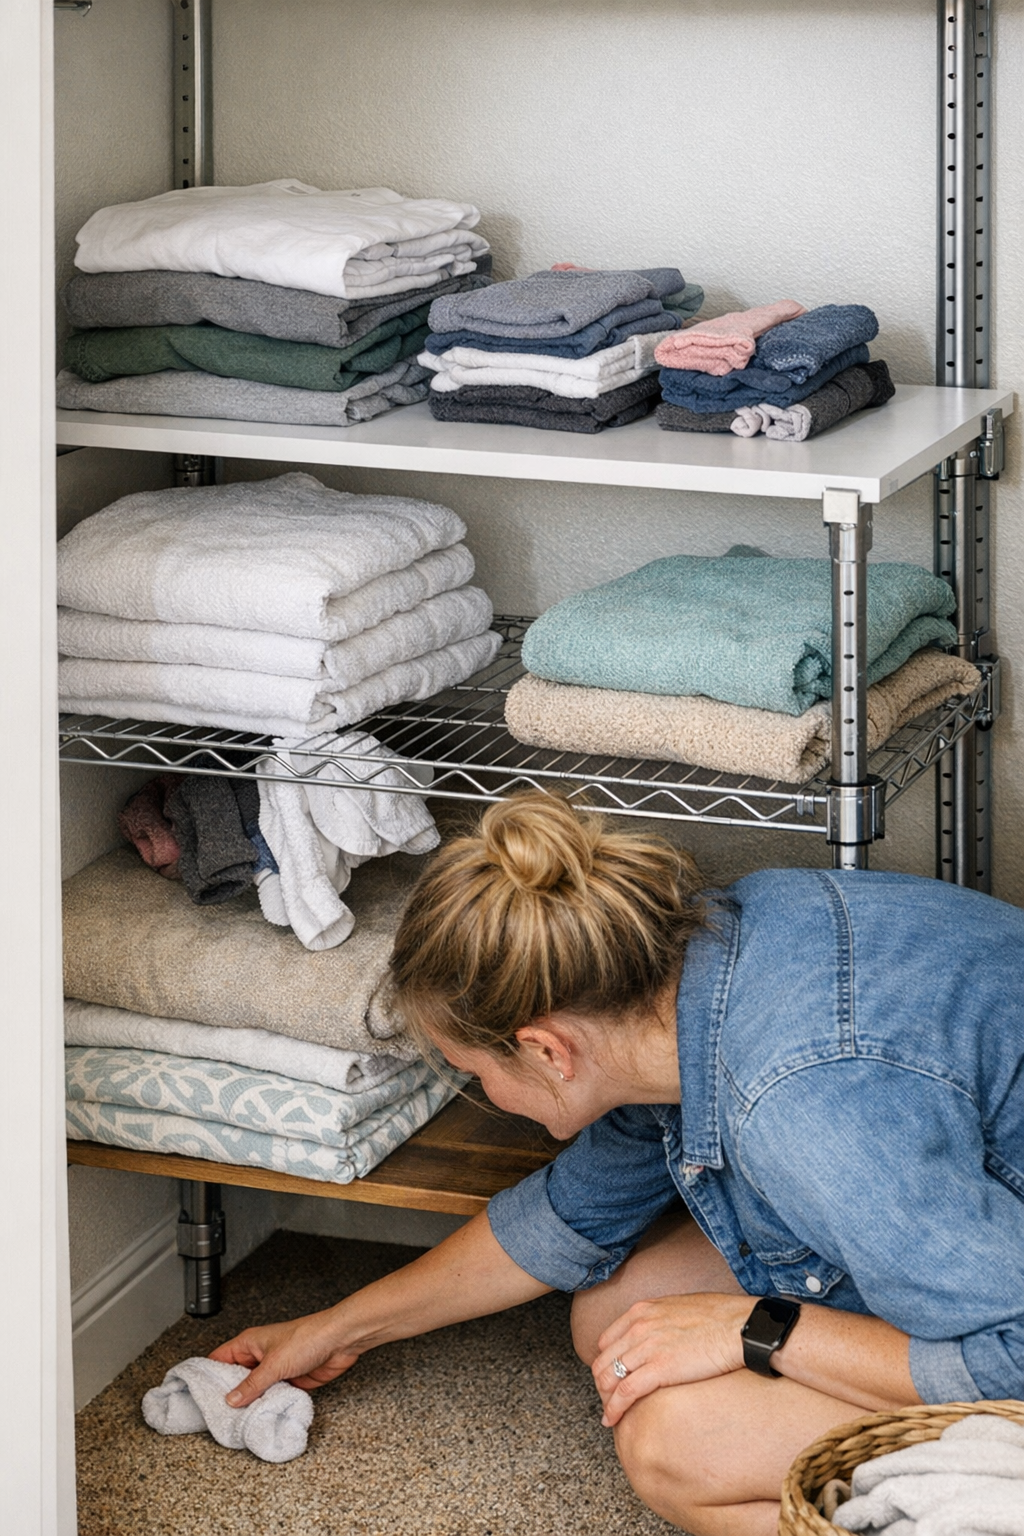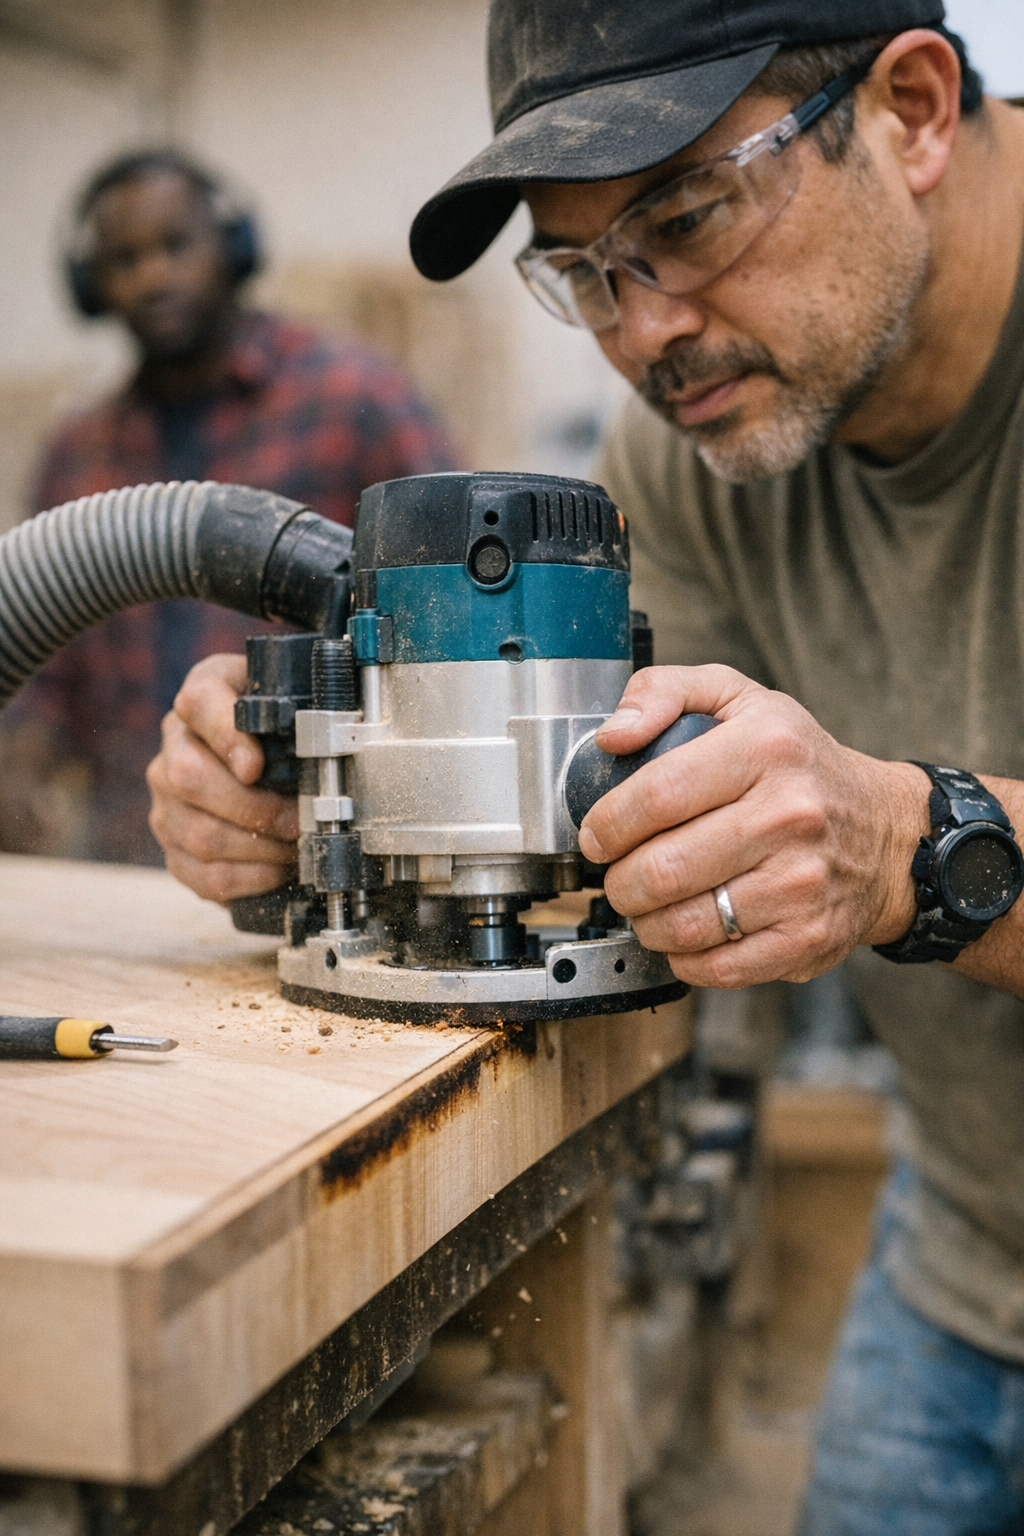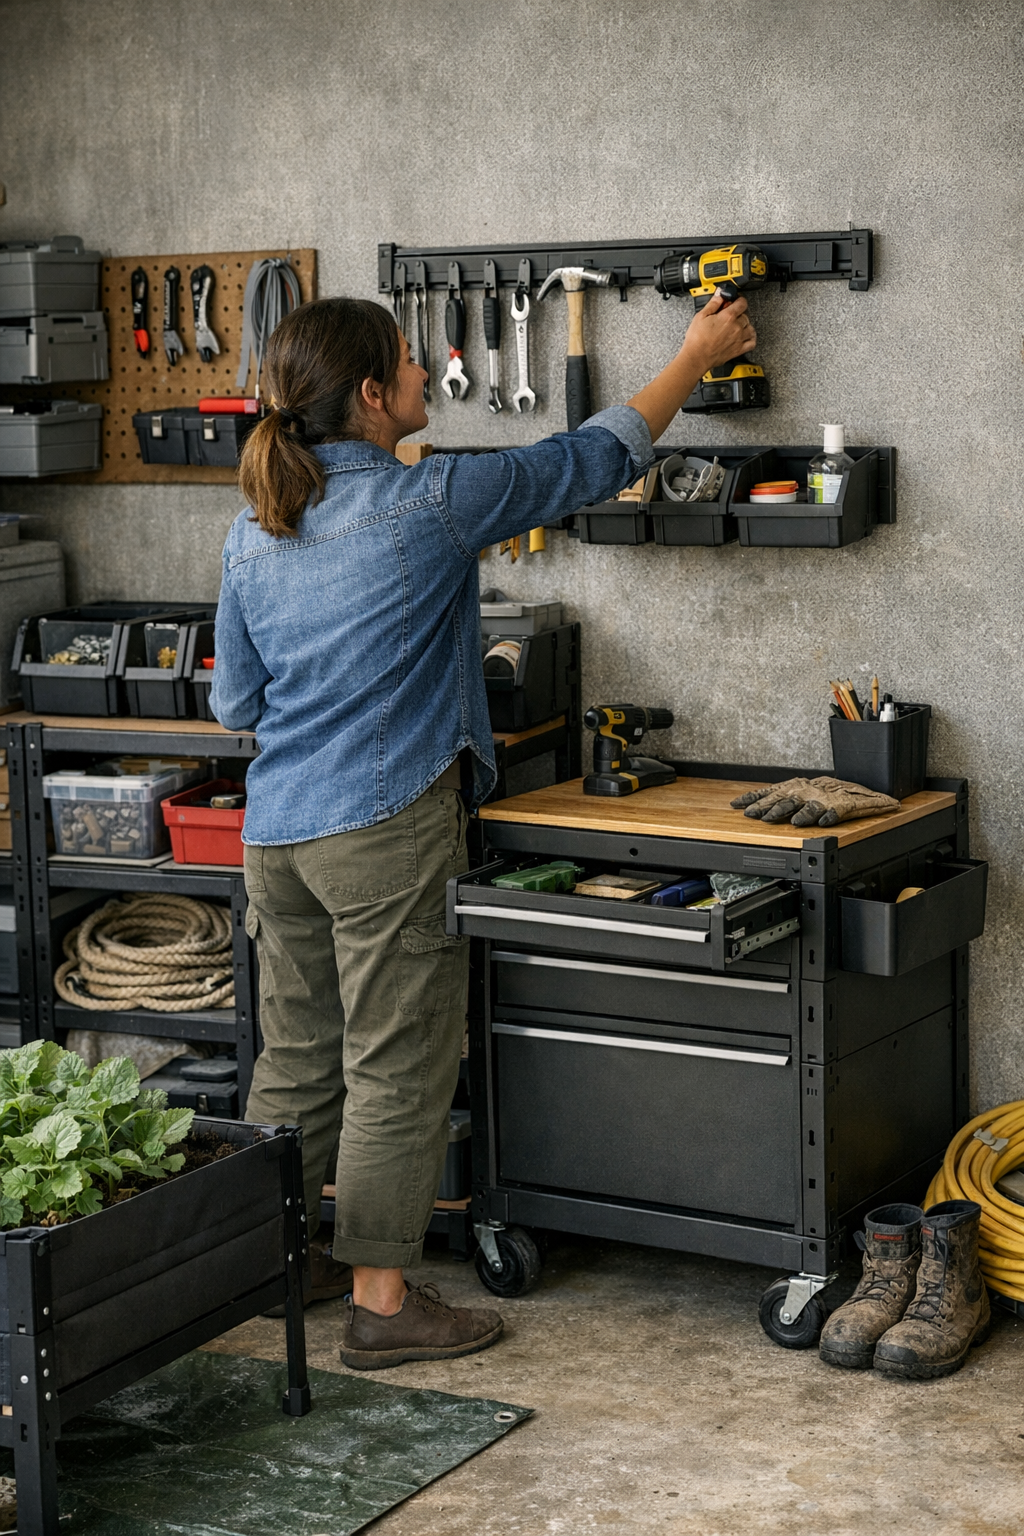
Category: Tools & Workshop

  • Why Adding More Storage Can Complicate Your Closet Organization

    There’s a hidden snag in the classic fix for clutter: just adding more shelves and bins doesn’t guarantee real order. It often swaps visible mess for invisible hassle. On day one, more storage feels like relief—coats slide easily onto a fresh row, baskets line up, and everything has an official spot. But a few days in, friction creeps back. After a late night, you hesitate with the laundry basket, no longer sure which bin handles overflow socks. You reach behind a stack of scarves to pull out one hat. Folded shirts topple as you dig for a favorite tee. Instead of streamlining tidying, extra storage quietly multiplies tiny storage decisions and makes daily resets slower than before.

    When More Storage Means More Sorting—and Less Flow

    Expanding a closet or utility space can feel like you’ve upgraded your life. At first, every accessory has a dedicated bin, every shelf line is clean, and overflow is gone. But real routines are messy—gloves migrate from their bin, sweaters settle wherever there’s space, and snack boxes inch across pantry shelves. That “reset button” sensation fades as bins fill unpredictably and shelves crowd faster than you planned. The line between organized and chaotic blurs every time you rush to put something away or grab something in a hurry.

    Small Choices, Big Slowdowns: The Trouble with Too Many Options

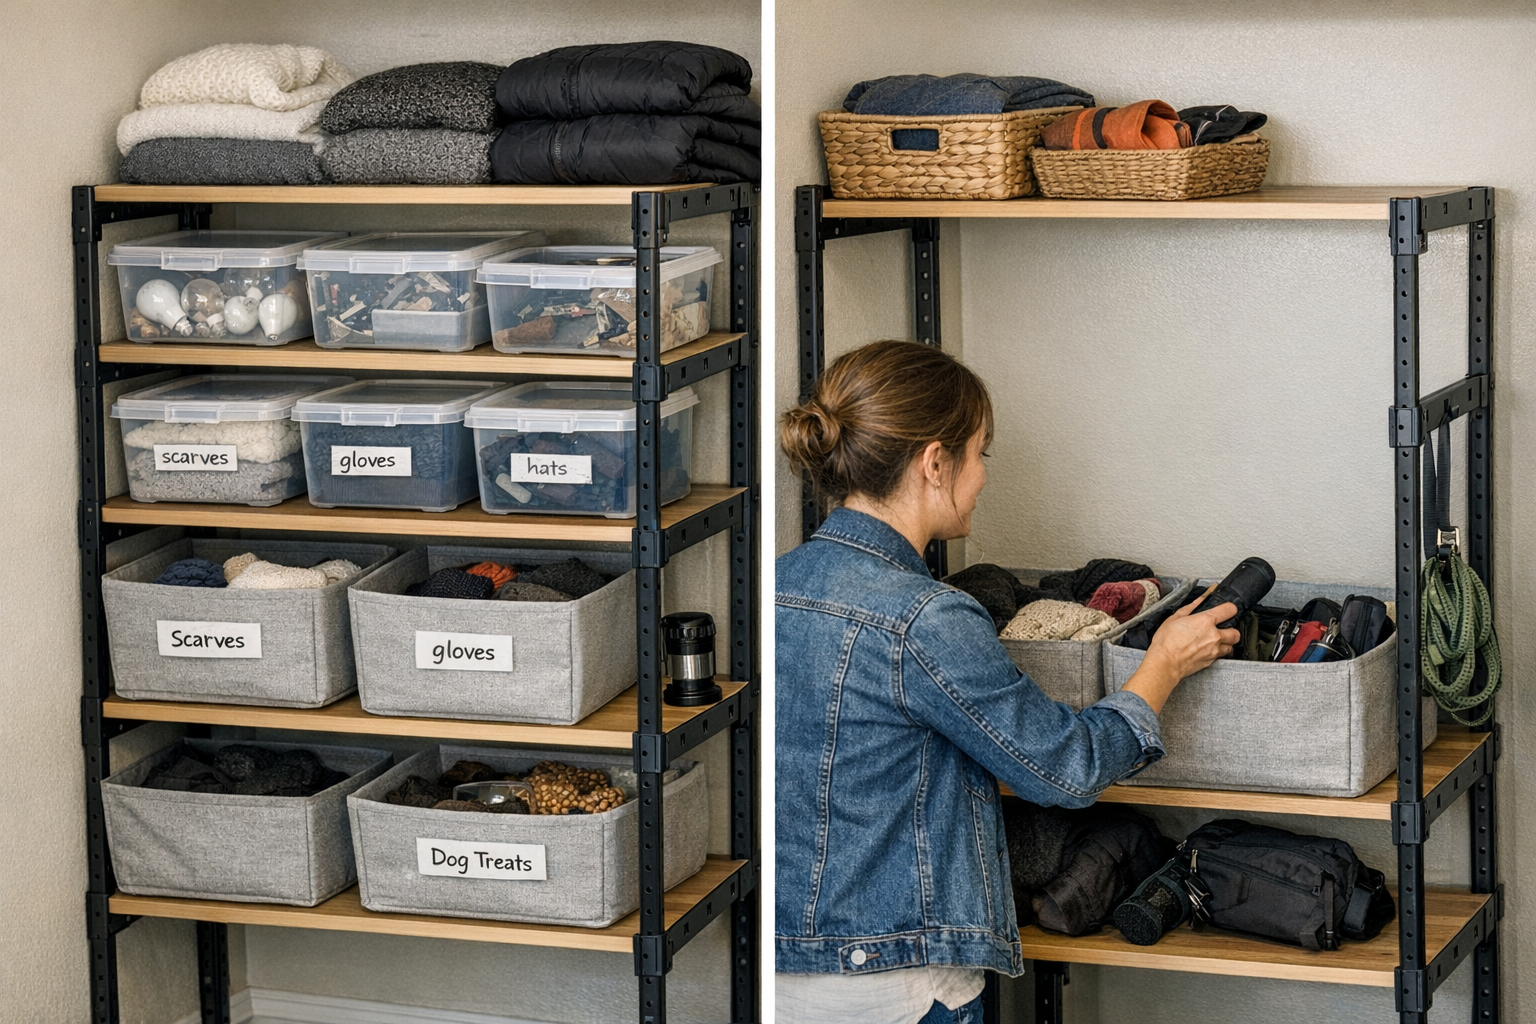
    Every shelf and bin you add opens a new possibility—and a new place to lose things. The friction isn’t container count but constant micro-decisions: where does this go, will it fit, is this the right spot? Think about those matching baskets labeled “scarves,” “hats,” and “extras.” After the Monday morning scramble, those clear lines dissolve. By Friday, the “hats” basket holds loose mittens, the “scarves” pile is buried under headphones, and you’re rifling through all three to find what you need. The system that looked tight on setup day now feels vague, and you spend more time scanning, guessing, and reshuffling.

    Most people spot the real trouble when it’s time for a quick tidy—before a guest arrives or just to reclaim counter space after a week. If you’re pausing at the closet door, basket in hand, trying to remember your own setup, that’s storage friction making itself known.

    The Real Limit Isn’t Space—It’s Access

    Vertical space is tempting. Stacking bins high or layering shelves feels efficient, but in practice, only what’s in easy reach gets daily use. Eye-level baskets fill up immediately. Anything above shoulder-height becomes “later storage”—the spot for off-season gear or things you half-forget you even own. The higher or deeper an item is tucked away, the less likely you’ll use or reset it fast. That’s when lost gloves surface months after winter, and neglected bins turn into vague catch-alls nobody wants to sort through.

    Shallow vs. Deep: Why Some Containers Actually Slow You Down

    Contrast a giant laundry basket—grab, toss, done—with three mini-bins for socks, lights, and darks. Suddenly each load needs sorting twice, and there’s a decision every single time. Multiple shallow bins mean multiplying your mental effort: does this go with t-shirts or in that odd “workout gear” basket? Over a week, routines stall. Instead of effortless resets, you’re left reshuffling categories and picking up little piles that never seem to stay put.

    Where Storage Friction Hides in Everyday Life

    Real storage struggles show up in all kinds of small, recognizable ways: Entryway shelves that can’t handle a mud-soaked pair of boots, home offices where paper stacks won’t stay separated, closet zones that start off clear but blur into one big jumble by midweek. You might catch yourself moving the same pile of grocery bags from shelf to shelf, or wrestling with an unstable stack of folded towels every time you need just one. These are not dramatic failures, just the subtle signs your system requires too much maintenance.

    When Tidying Up Feels Like a Reset That Never Ends

    If your quickest cleanups get slower and you find yourself in endless “mini-organizing” sessions—a few shirts restacked here, a pair of shoes consolidated there—the storage setup isn’t supporting real life. Instead of routines becoming second nature over time, they feel more like recurring chores. The system’s failing if you’re always a step behind, no matter how much storage you added.

    Small Shifts, Real Gains: Making Your Storage Actually Work

    Sometimes the biggest improvement is not more storage, but less—used better. In our hall closet, swapping five stacked bins for just three at chest level changed everything. Suddenly nothing was teetering above head height, nothing required crouching or reaching blind. Everything was a glance or a grab away. The usual after-work reset—bags, scarves, keys—went from a ten-minute battle to a quick, thoughtless sweep. The system became not only more usable, but visibly less prone to new clutter sneaking in overnight.

    Tip: Instead of adding more containers, try removing whatever’s hardest to reach or least used. Watch if your daily resets speed up and your surfaces stay clearer longer. Real organization comes from effortless, repeatable motion—not just pretty labels or maximum capacity.

    Test Your Setup: Is It Sturdy or Just Styled?

    The most telling measure of storage success isn’t how put-together it looks right after cleaning. It’s how quickly you can return a stray item, find what you need without second-guessing, and keep categories from melting together. If you’re tripping over bins to access basics, or the shelf lines that once looked crisp are now caving under mixed piles, it’s a system that needs rethinking.

    When every item has a clear, reachable zone and resets are so automatic you barely notice them, you’ve landed on a setup that matches your life. It stays ready for action, not just ready for photos. The real win isn’t walls lined with storage—it’s a closet, entryway, or shelf that stays organized because it fits the way you actually live, not just the way you wish you did.

    Explore practical closet and utility storage solutions at ClosetWorks.
  • Why Oscillating Multitools Slip During Detailed Cuts and How to Fix It

    In finish carpentry, there’s no buffer for mistakes. You’re midway through a flush trim or slicing an exact opening, and suddenly every slip matters—because you can’t hide crooked seams or frayed edges behind caulk forever. This is where tool choice doesn’t just matter—it decides whether the end of your shift is clean-up or touch-up. For every remodeler or pro trying to keep lines straight, the familiar heartbreak kicks in when the oscillating multitool starts wandering, even as you focus harder.

    When Multitools Demand Too Much Rescue Work

    You gear up for a delicate trim cut—a bit of quarter round, that last length of shoe molding against an out-of-square wall. The multitool seems like the fastest route. At first, you’re in control. But as you dig in, the blade jitters side-to-side, leaving ragged grain and a slight curve where you wanted dead straight. That wavy edge isn’t just cosmetic—a paint line won’t sit right, and you’ll be back with filler or a tiny sander, erasing the mistake in fifteen painful-minute stretches.

    This is every finish worker’s recurring headache. The multitool offers a fast start but wobbles when the pressure’s on: uneven gaps, fuzzy corners, and endless correction after the cut. What you saved in setup you pay for in recovery.

    Why Multitools Let You Down on Finish Cuts

    Oscillating multitools are built for access, not absolute control. Their quick, side-to-side motion helps when you’re notching inside a cabinet or slicing through grout, but that agility transforms into flex and chatter when you push for long, clean lines. Thin blades heat up and bend—especially on dense material like oak, MDF, or plastic laminate. With each pass, vibration creeps up your wrist, and any hesitance or uneven pressure shows up as divots and chatter marks in your finish.

    Fatigue builds up fast, too. You’re trying to hold a vibrating body steady, easing through the cut, but one distraction sends the blade drifting. Worse, the multitool’s sweet spot is fleeting: push too fast, and the blade scorches; too slow, and it melts plastic or fibers instead of slicing them.

    When the Reciprocating Saw Takes Over

    Reciprocating saws come into their own the moment the cut demands consistency. Their longer blade offers predictable tracking—you can guide it firmly against a shoe, anchor it to your working line, and keep the cut true. Instead of fighting the tool, you work with it: the blade rides the mark, the handle absorbs vibration, and each stroke follows your lead.

    The payoff is visible on every finish pass. Run a reciprocating saw—with a 10–14 TPI blade, not a demolition monster—down the edge of hardwood trim or through laminate flooring, and the result is startling: pencil lines matched, minimal cleanup, surfaces ready for paint after a quick sand. No chasing missed spots, no hiding chattered edges.

    Jobsite Example: The Laminate Floor Cutback

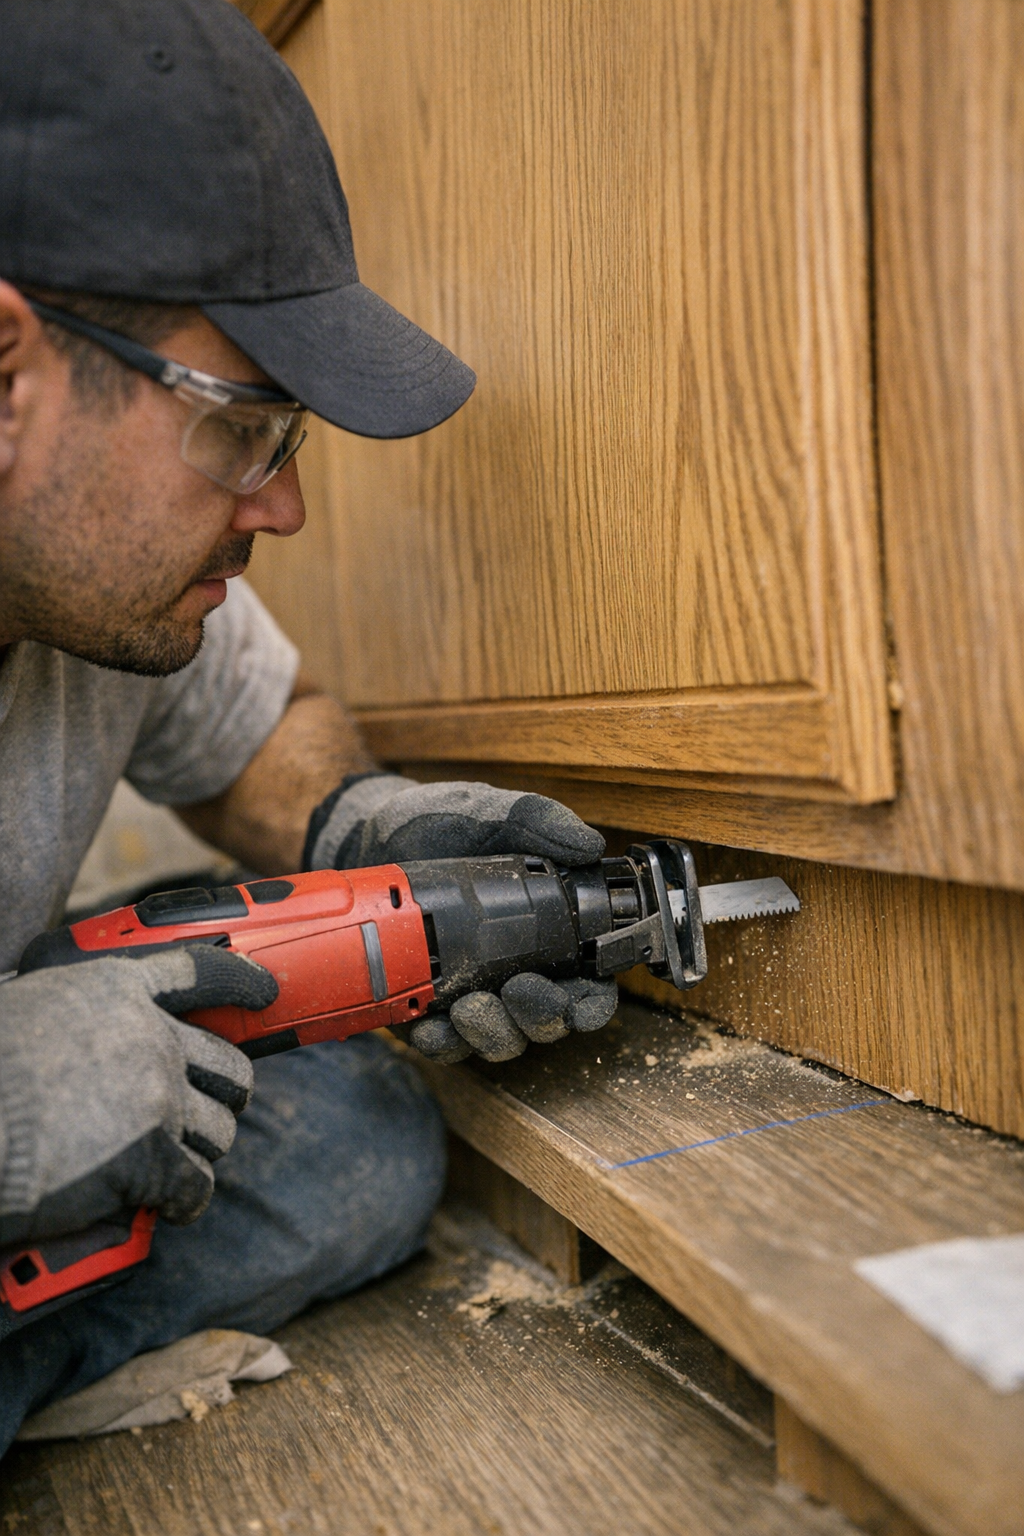
    Picture a common job—trimming back laminate under a fixed kitchen cabinet. Space is tight. Grab the multitool, and you’ll probably get 70% through before the vibrations eat the teeth and leave a melted, messier line than you started with. What looked like a “quick” tool fix leaves you bailing out with a belt sander, trying to force that seam tight against baseboard that refuses to sit flush.

    Now, go at the same floor with a reciprocating saw—short, new 10–14 TPI blade locked in, speed dialed down, shoe pressed flat. The blade slices clean, following the chalk. The edge is crisp, the blade runs cool, and the finish is ready almost immediately. The difference? The time you’d spend fixing mistakes is now yours again.

    Sharpening Your Blade and Your Approach

    Finish work isn’t just about choosing tools—it’s about the setup. Reciprocating saws let you fine-tune by blade length, tooth count, and, crucially, speed control. Under six inches and higher TPI is the magic formula for detail—not brute force. A good blade makes control natural; a sloppy or worn blade puts every flaw on display. Stop and swap before the blade burns out. Multitools, meanwhile, punish dullness with every pass, often turning one slip into five new flaws.

    Pro tip: When the line must be perfect, install a fresh, fine-tooth blade and slow down the stroke. Two steady, overlapping passes beat one hurried attempt that spirals into patch-work every time.

    Multitools: Great for Corners—Not for Finish Runs

    Resist the habit of forcing multitools into the wrong role. They’re unmatched when you’re boxed in—nibbling a notch inside a shelf, trimming inside a case, ducking behind a sink. That’s their lane. But on a long cut where appearance matters most, what feels nimble up front rarely looks sharp at the finish. Reciprocating saws aren’t just a workaround—they’re the answer for straight, ready-to-finish lines, with less sanding, less patching, less cursing the last tool you grabbed.

    Choose the tool for the outcome, not just for convenience. The minutes saved avoiding a blade swap or setup can add up to hours of unforgiving fix-up work later. Good finish work is a habit—don’t let impatience turn your details rough.

    Catching Problems Before They Snowball

    You know trouble is coming the second it starts: vibration rattling through your grip, a cut line that looks frayed instead of clean, the motor bogging down and teeth smoking. Don’t push past those signals—otherwise, you’re signing up for a cycle of patch, sand, and never-quite-right. Watch your technique as much as the tool: if the line’s going wonky or the work goes from precise to strenuous, hit pause. Change the blade or change the saw before the problem multiplies.

    Want tools and blades that don’t leave you stranded in the middle of the job? Visit Gumboll.

  • Optimizing Wall Storage by Removing Rarely Used Items for Efficiency

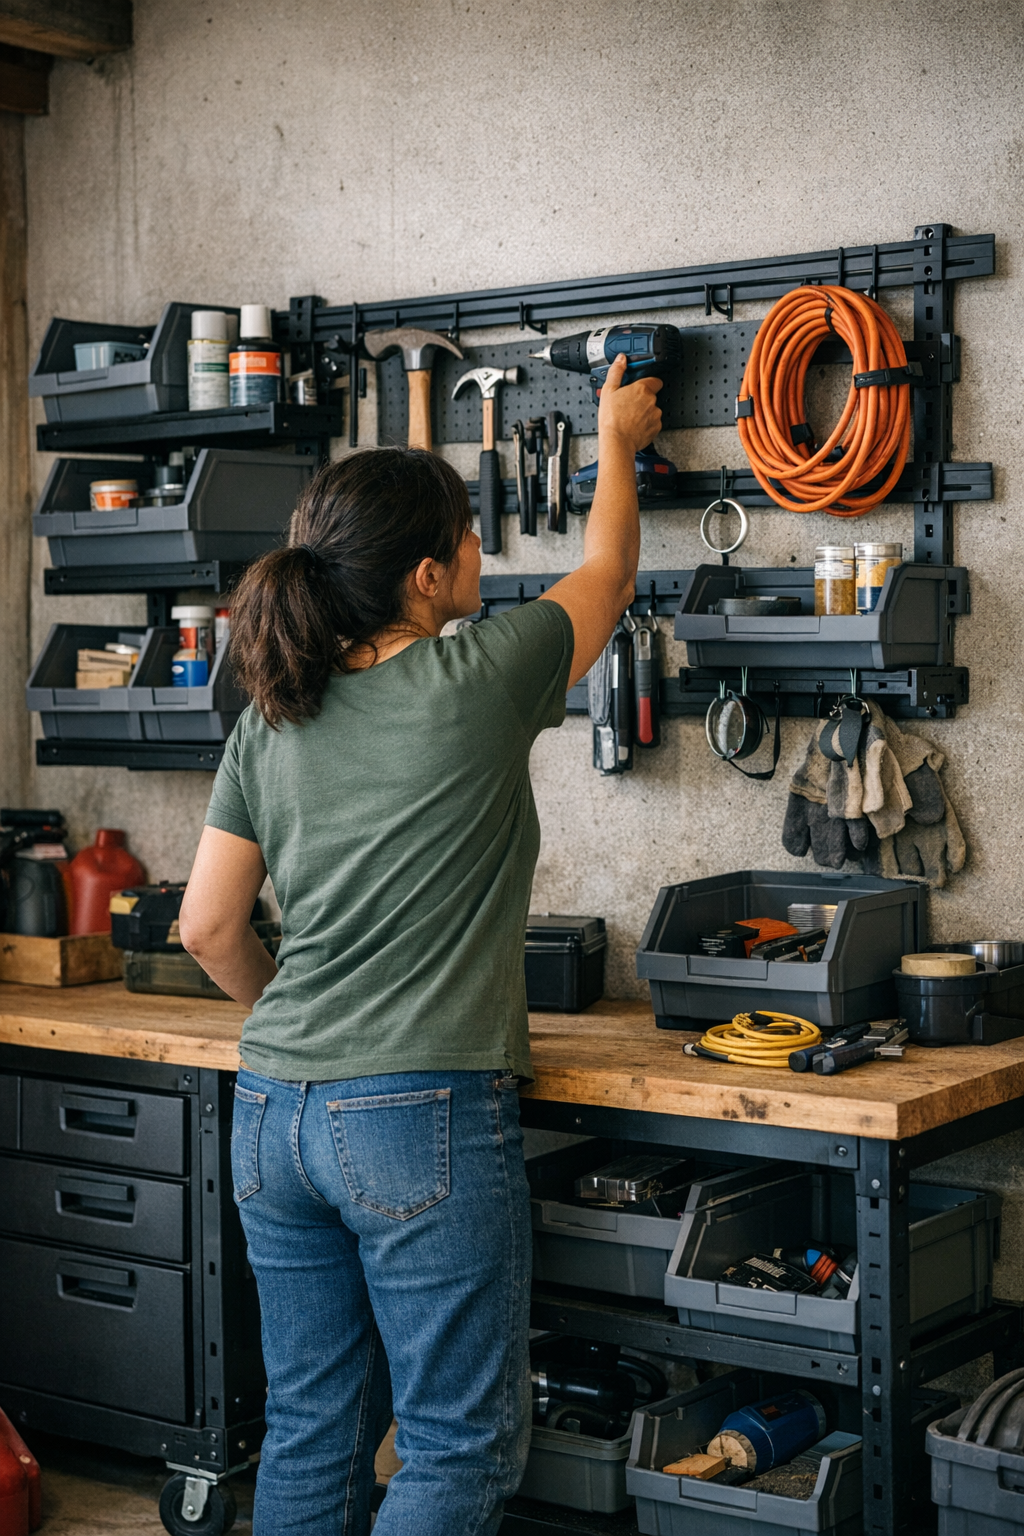
    Hang up the last basket, step back, and savor that clean, modular wall of storage—until real life sneaks in. By the third hectic Saturday in your garage or workshop, that perfectly lined-up wall starts to resist you: the system that was meant to clear space now forces you to pause, shift, and sidestep. Order wasn’t supposed to slow you down, but now every return trip or new project exposes the friction. Welcome to the gap between a storage setup that looks organized and one that actually works for you.

    When “Organized” Turns into Ongoing Friction

    There’s an urge to fill every possible slot, hook, and basket—especially when you finally get tools off the floor. It’s tempting to cover every inch, convinced this is maximum efficiency. But as the weeks go by, the wall you were proud of slowly builds hidden obstacles. The tools you reach for every session are blocked by bins you only touch twice a year. That stretch to hook up the drill becomes a delicate dance around bags or boxes stacked for “just in case.”

    Real Use Snapshot: The Blocked Bench Zone

    The scene’s familiar: you start a few routine projects on a weekend. By mid-afternoon, your bench is busy, and at the end, you try to hang everything up—except now you have to set down a rolling cart “just for a second” to make room. An extension cord is squeezed behind a shelf, and the return of the hammer means shifting three other items into awkward new territory. Row upon row of tightly packed organizers look ordered, but each gets in the way of the next step. It’s only when you’re trying to reset—while tired, late, and ready to be done—that the setup reveals just how unhelpful too much “organization” can be.

    More Storage, Less Flow: Where the Promise Breaks Down

    Packing in more doesn’t guarantee better access. When every rail or shelf is claimed, there’s no room for decisions on the fly. You lose:

    • Quick grabs for everyday tools—because first you hunt under or behind less-used items
    • Flexibility to shift gear mid-project, since every platform is already spoken for
    • Uncluttered returns at the end of the day; instead, you’re forced into a game of “where can this even go?”
    • Clear movement through the zone—every pass means squeezing past overflow or avoiding that one bin jutting out

    What started as a visual solution quietly becomes a recurring speed bump. The space isn’t working for the way you actually move through it. Hidden dead corners don’t get better—they just collect more overflow.

    Streamlining the Wall: Subtract First, Then Adjust

    The secret isn’t more accessories, but less clutter in prime spots. The first time I took a hard look at my main wall, I noticed half the lineup went untouched between seasonal projects. Moving anything not in constant rotation to a lower shelf, an out-of-the-way bin, or even a side cabinet, made the zone above my bench instantly lighter to use. My favorite wrench could finally hang on its hook without bumping into a row of clamps I only use once in spring, and the rail that used to snag cords stayed open for tools I actually put back each week.

    The High-Use Zone: Reserve It for Your True Essentials

    The biggest breakthrough comes here: Save wall space for gear you grab or store weekly—nothing else. Track your routines for a few busy weeks. You’ll see: there are things you instinctively reach for each time, and others that linger, untouched, just out of habit. Clearing the latter out doesn’t make the wall sparse—it makes movement clean and predictable, especially at crowded moments above your main bench or work surface. No more bumping into seasonal gear; your flow is no longer interrupted by tools you barely remember adding.

    Practical Drill: Audit After Real Routine, Not Just Setup

    Don’t decide what gets wall space just by the first night’s arrangement. Run the space through normal, even messy use—multiple sessions, real resets, full clutter. Which bins or tools never move? That’s your cue: shift those off the wall. Give prime placement only to what’s proven to demand it. When the wall breathes, resets happen quickly. Overstuffed zones no longer become the bottleneck at the end of a long day.

    What Happens When You Clear Too Much?

    Balance matters. Clearing the wall doesn’t mean creating a vacuum. If only two screwdrivers remain, you’re likely to start hunting for essentials buried somewhere else. The trick is to set up rails and hooks for daily (or nearly daily) tools, then stage occasional or oversized gear on a side shelf or in a mobile organizer—always within reach, never crowding out core flow. The goal isn’t empty space, but a layout that feels intentional, not overstuffed or makeshift.

    How the Right Setup Changes the Zone

    Suddenly, movement isn’t blocked. Cleaning up after work doesn’t require constant reshuffling. You lose the habit of propping carts in walkways just to unload the bench. Heavy-use tools have a home you don’t have to think about—returns become automatic. Overflow stops piling up in awkward corners or creeping back onto the floor. The visual calm matches the ease of movement. Your wall is finally tuned for your routine—not just for show.

    End on Real Use, Not Just the Look

    Let repetition guide you: You’ll know which setup works by how often you have to break your own flow. If the wall demands you pause, reposition, or makes you second-guess what belongs, it’s worth another adjustment. Choose clarity in your routes, not just tidy lines on the wall. When your space matches the way you actually use it—through mess, rush, and reset—it feels right week after week.

    Explore more practical modular storage ideas at StackNest

  • Simplify Storage by Reducing Categories for Easier Daily Use

    Most storage systems look tidy on day one—until you actually start using them. Walk into any closet, entryway, or storage wall after a few weeks of real life, and you’ll often find a familiar slowdown: you’re reaching over bins, digging behind baskets, and pausing to squint at a label that no longer matches what’s inside. The shelf that looked so ordered now feels crowded at the edge; quick grabs turn into careful reshuffling. It’s this subtle, daily friction—not chaos, just relentless inconvenience—that makes staying organized feel harder than it should be.

    When Storage Starts Working Against You

    The difference between a space that just looks organized and one that actually works for you shows up fast. Maybe you set out bins for every category: gloves here, scarves there, chargers in their own box. Inevitably—especially in rush hour moments—items stray. The “rain” umbrella ends up under a tangle of leashes. Last night’s hat vanishes behind a stack of folded bags. Each time you need something, it’s suddenly never at the front; you start pulling out one container only to move two others first.

    This isn’t just clutter—it’s a slow drain on momentum. Over time, the setup that was supposed to simplify your routines now creates extra steps. Instead of spending Saturday putting everything back, you relabel bins, freshen up the stacks, and promise yourself next week will run smoother.

    Why More Categories Create Real-World Complications

    The urge to fix these problems with extra bins and labels is strong. More categories should mean more order, right? In practice, real life refuses to stay within those careful boundaries:

    • The “miscellaneous chargers” box attracts batteries, random earbuds, and manuals nobody will need.
    • Sock bins catch stray mittens after laundry day gets hectic.
    • Tightly packed bins block access, forcing you to juggle stacks just to get to basics like a scarf or reusable bag.

    What results is an ordered look that doesn’t translate to daily ease. Everything fits—until it doesn’t. Categories blend, edges bulge, and the act of grabbing a single item can unravel a shelf.

    Closet Fatigue: When the System Can’t Keep Up

    Picture your hallway closet during a real week: hats, scarves, dog leashes, an umbrella for the first storm of the season, a bag of light bulbs meant for the garage. Someone hurries in with wet shoes, drops an umbrella onto the nearest pile, and leaves a glove in the bag bin “just for now.” The result? You open the closet in the morning and the edge of the shelf is wobbly, now crowded with objects trying to escape their slots. Bins lose their structure. Categories bleed. Each reset becomes less about restoring clarity and more about desperately hiding evidence behind the door.

    This is the slow failure most storage systems aren’t designed for. Good intentions get overwhelmed by quick decisions, family routines, and the simple fact that nobody reaches for storage when they have time to put things back perfectly.

    How Fewer, Broader Bins Speed Up Recovery

    The real breakthrough happens when you cut the number of bins. Take that same hallway closet and forget the fine-tuned categories—go from five or six down to just two broad zones:

    • Wearables: all gloves, hats, scarves, even sunglasses, in one open bin.
    • Grab-and-go gear: bags, umbrellas, leashes, shoe covers, all lumped together in a second.

    Instantly, access improves. You stop wrestling with tightly stacked boxes. The shelf edge holds steady, even after a chaotic week. Items land where they’re dropped—close enough to find, loose enough to suit unrehearsed mornings. Instead of a full-scale weekend overhaul, it takes ten seconds to lift and shake out a pile, realign the bins, and move on. The reset shrinks to a flick of the wrist.

    The Day-to-Day Difference

    The shift isn’t cosmetic—it’s practical. Messy afternoons don’t end with new “temporary” piles leaning against the door. Lost-and-found hunts fade out. Family members don’t pause, wondering where that random glove belongs; they drop it in the wearables bin and keep moving. Organization survives the week, not because everyone’s perfectly tidy, but because the system doesn’t demand perfection.

    How to Tell If You’re Stuck With Too Many Categories

    Watch for these warning signs that your storage system is slowing you down:

    • Shelves feel crowded long before they’re full—vertical space goes unused as bins stack and topple.
    • Labels get ignored, or containers lose track of their original purpose.
    • Baskets become a jumble: what started as “just socks” ends up mixing in dog toys and keys.
    • Weekend resets aren’t quick—they’re repeat performances of the same tedious sort-and-stack.

    If you spend more time maintaining your storage setup than actually using it, that’s the system breaking down, not your habits.

    Striking a Realistic Balance in Everyday Spaces

    Every house and routine has its own demands. Some high-traffic drop zones—think muddy boots and soccer gear—need a handful of divisions to keep things in check. But if you find yourself regularly reshuffling boxes or struggling to find anything quickly, it’s time to zoom out. The sweet spot is simple: a few big categories, loose enough to fit real habits, structured enough that bins never disappear under piles.

    Organization isn’t about how clean your closet looks on a good day—it’s whether everything still has a place when Monday gets messy, errands pile up, and nobody has time for perfection.

    Try This: The One-Month Category Reset

    Not sure how to start? Let your space show you. Spend a week using your closet or entry area as usual. Notice which bins always run empty, which ones overflow, and where items keep migrating. Merge the ones that swap contents. Make categories a little wider than feels “correct”—then leave it for a month. If you find yourself grabbing what you need faster and spending less time rearranging, you’ve landed on a system that actually fits the way you live.

    Simpler storage isn’t the absence of clutter—it’s making sure the clutter that does appear is quick to sort, quick to clear, and never slows you down. The right system keeps up with daily life, not just with a perfect photo on move-in day.

    Shop ClosetWorks for practical storage solutions that fit real daily routines.

  • Achieving Flawless Cabinet Edges with Precise Router Setup Techniques

    Every woodworker who’s put serious time behind a router table knows how thin the line is between “that’ll do” and truly clean edge work. It’s easy to convince yourself the setup’s close enough—a bit that’s almost dialed in, a fence you trust but haven’t checked in an hour, a table that feels just steady enough for one more pass. But by the time you’re stacking a dozen cabinet doors or drawer fronts, the little slips you thought you’d gotten away with start surfacing everywhere. Suddenly, you’re chasing down chipped laminate corners, burn marks that bloom from a moment’s hesitation, and sanding out tiny divots you swore you’d catch next time. What felt like a barely-noticeable shortcut has eaten your afternoon and dulled your confidence in the stack.

    How “Almost Right” Setups Cost You

    Edge routing—especially batch work—amplifies every oversight. Start with the fence a hair loose or the bit a half turn high, and sure, the first few panels come out looking passable. But by panel twelve, chip-outs creep in, and fine dust swirls up as you sand and sand to erase damage that wouldn’t be there with a crisp cut. Catching your mistake rarely happens when you’re fresh; it shows up in hour three, with a dozen panels lined up and every “good enough for now” adjustment glaring back from the woodgrain.

    Where the Setup Fails—and Why It Matters

    Run composite or veneer through the router in the morning and it feels fine—sharp edge, barely any fuzz. But as the cutter warms, the fence gets nudged, or the bit loosens in the collet, suddenly you’re fighting splintering at the corners and faint burn lines that only get worse if you try a quick re-pass. Ignore it for a couple of pieces and you may get by, but on real jobs—full sets, multiple doors, wide panels—those little errors multiply until you’re sanding through surface layers or, worse, scrapping parts that never had a chance.

    Router Differences that Show Up in Real Work

    On the shelf, routers look interchangeable—solid grip, decent fence, fresh bit. But on the bench, small details matter: Some vibrate just enough to crawl across the guide line when tackling a stubborn hardwood. Others deaden your hand fatigue so you can keep control on pass thirty—not just the first. The best ones forgive a slight angled push, correcting the wobble instead of carving it into the edge. And dust collection? If it’s bad, you’re blinded by shavings and miss when burn marks start. If it’s good, you reach the end of the run and still see the bit’s profile cleanly, no guesswork.

    The Slow Drift That Kills Consistency

    Even a careful hand can’t rescue a router that wants to wander. By door fifteen, you’ll sense it: fence flex, a base that rocks on a dust clump, a bit that’s loosened just enough to eat deeper into the last panel. It’s rarely a dramatic blowout—just a slow creep away from flush edges and tight reveals. The minutes lost aren’t all in sanding; some get burned fixing alignment in assembly, realizing one loose pass has snowballed into a cabinet stack that doesn’t sit right.

    When Fatigue Becomes a Hidden Flaw

    The longer your batch, the more your body and your setup betray you. Start with a dozen maple panels: in the first hour, you’re sharp—measure, lock down, double-check. By lunchtime, grip slackens, arms tire, the base tips slightly against a clamp scar. Maybe you press a little harder to keep things flat, and the bit height has slipped a hair before you notice. It all seems invisible—until you flip the stack and see uneven reveals and that shadow of burnt grain you’ll be sanding out again. Suddenly what should’ve been finish work turns into rework you can’t bill for.

    Tool Fatigue: Beyond Your Hands

    Fatigue travels beyond the body. A fence lock that’s not truly tight or a bit depth that creeps as vibration sets in are mistakes that multiply with every repetitive cut. And in real shop conditions—tight deadlines, batch runs, back-and-forth between tools—any setup that can’t be quickly checked and locked down turns small lapses into workflow headaches: more touch-up, more sanding, more lost time. Those little frictions are what separate a smooth assembly from a day that drags deep into overtime.

    Setting Up for Results You Can Count On

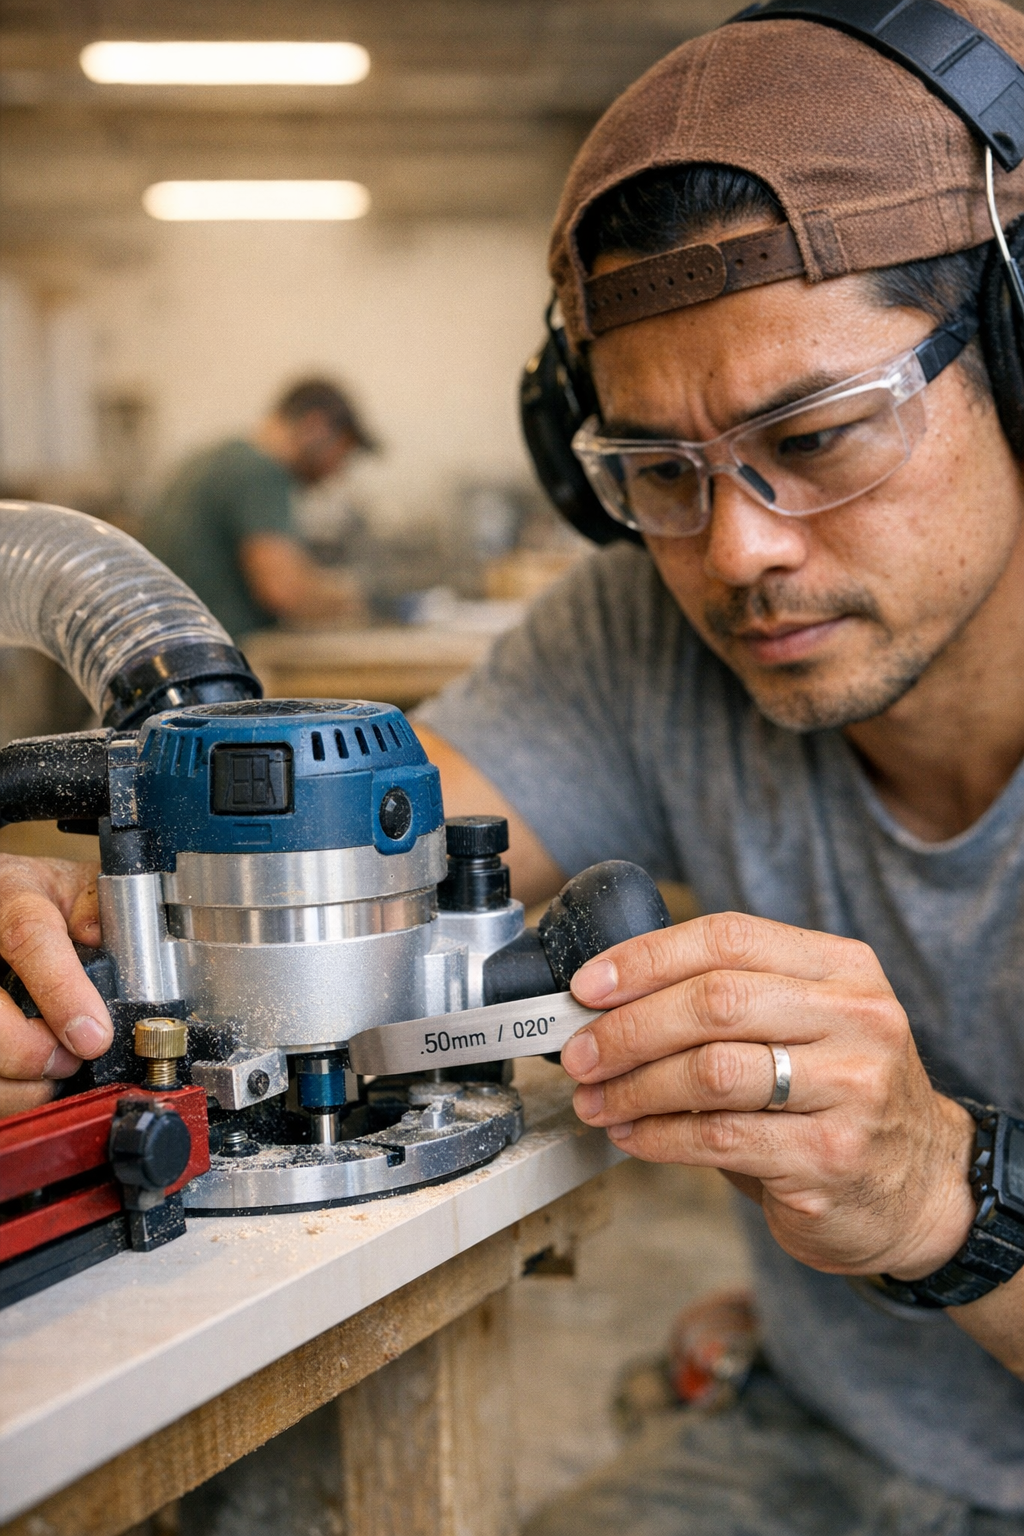
    After enough flawed panels, you start respecting setup more than speed. Gone were the days of setting bit depth by glance or feel; the feeler gauge became a non-negotiable step. Locking in a repeatable 0.5mm gap turned “looks about right” into something you could trust across every run. Extra fence locks—one at each end, not just the nearest—stopped flex that ruined clean lines on unruly plywood. With those changes, the difference became more concrete than expected: sanding time per panel dropped, tiny nicks nearly vanished, and late-day mistakes travelled way down the list of worries.

    Seeing Real Gains—in Any Shop

    The difference isn’t about slowing down to perfection—it’s about building a routine that makes precision automatic, even when you’re in a hurry. Rigid setups absorb everyday bumps and bad grain. Consistent measurements and full-width fence pressure mean less wandering and less “just one more check” between parts. Those upgrades keep your work tight and your confidence high—even when you’re cranking through long batch after batch.

    Finding—and Fixing—Small Problems Early

    Catch drift before it costs you. Bit height slip or fence misalignment will always show themselves—first as chipped edges or tiny burns, then as broader flaws that demand serious repair. On veneered or composite stock, a single off pass can sink an entire panel. Make the habit of setting bit depth with a gauge, walking the fence the full panel width before you tighten it down, and giving everything a re-check before each batch shift. Taking two minutes at setup means you won’t lose two hours to rework at the end of the day.

    Dust: The Small Thing That Ruins Precision

    Even a thin layer of dust under the base plate throws off level, leading to pressure points that vibrate the bit and scar your work. Reliable dust extraction serves more than health—it’s your best ally for keeping cuts true and visible. Work clean, and your chances of last-second “one more pass” fixes shrink fast. A scratched base or unseen chip-out is ten times harder to recover from than a quick vacuum pass between panels.

    Routine Consistency: The Real Payoff

    You won’t see instant perfection, but you’ll feel the difference in panels that actually align, in sanding taking minutes not hours, and in the way each batch lands ready for assembly—not destined for a pile of touch-up work. With measured setups, true fence pressure, dust kept away, and bit heights that stay put, your workflow finally starts to flow. Not every job will be flawless, but the headaches get rarer, and your final product becomes something you trust.

    Real improvement is built into the daily routine—steady, detailed setups and equipment that helps you lock down control, not just speed. When the deadline looms and the panels keep coming, that’s what keeps you from falling into the “good enough” rut—and makes the difference between crossing your fingers and handing over work that stands up, batch after batch.

    http://gumboll.myshopify.com

  • Transform Your Modular Wall with a Weekly Use Only Strategy

    We all buy into the modular wall storage promise: take back the floor, keep your go-to tools visible, and make cleanups as quick as they should be. But here’s what sneaks up on you: it’s shockingly easy to build a wall that looks perfectly sorted—until the next job. Suddenly, you’re squeezing past a rolling cart again, reaching blindly behind a storage bin, or retracing the same clumsy steps just to put a wrench away. Most wall systems are built for appearance, not for the grind of real, repeated setups—and that’s where so many “organized” spaces fall apart.

    When Tidiness Masks Everyday Hang-Ups

    That first setup always feels satisfying. Hooks line the wall, bins pop into place, and every hammer, cable, and measuring tape stands ready for action. But by week three, the visual order slips: the wall that should save time becomes a barrier course. That screwdriver you grab twice a week? Wedged behind a snow shovel, blocked by a pail. Need to open a cabinet by the wall? Not without shifting a rolling chest—again. The difference between what looks organized and what actually works is revealed every time you’re juggling three things to get the one you need.

    Resets that should be automatic get slower: bins start to overflow, hooks pile up with backup gear, and narrow corners gather everything that doesn’t have a real home. Sliding aside the same storage crate for the fourth time, you realize—visual tidiness alone can’t keep up with real work. Every supposed time-saver adds another shuffle, another reach, another minute lost to routine friction.

    Overflow: The Cost of “Just Hang It Anywhere”

    The empty wall invites you to fill it. Anything with a hook, anything with a handle, anything that will balance for now—it’s all fair game. Off-season hoses, bags of potting soil, backup coolant, the rake you use once a month: up they go. It feels efficient, until you’re digging under last spring’s cleanup supplies just to reach your pliers. Slowly, the wall morphs into an “overflow zone” where the things you count on most are always blocked by things you rarely touch.

    What should speed you up now just stands in the way: hooks meant to clear the floor become buried, pathways between benches get narrower, and the “temporary” jumble of seldom-used gear becomes a permanent half-obstacle. It’s always one extra step, one re-stack, one more bump with your knee just to get a routine task done.

    Organization Isn’t About Capacity—It’s About Flow

    The real test: how quickly can you put your essential tools away, with no second-guessing, no moving a bin “just for a second”? If the answer is always, “well, after I clear this out of the way,” the wall isn’t organizing anything—it’s just making the shuffle look neater. The wall should be your shortcut, not your new bottleneck. Every time you lift, slide, or dodge one item to get to another, you’re trading visual order for everyday awkwardness—especially when you’re tired, rushed, or trying to squeeze a project into borrowed time.

    How One Overloaded Zone Slows Down the Entire Setup

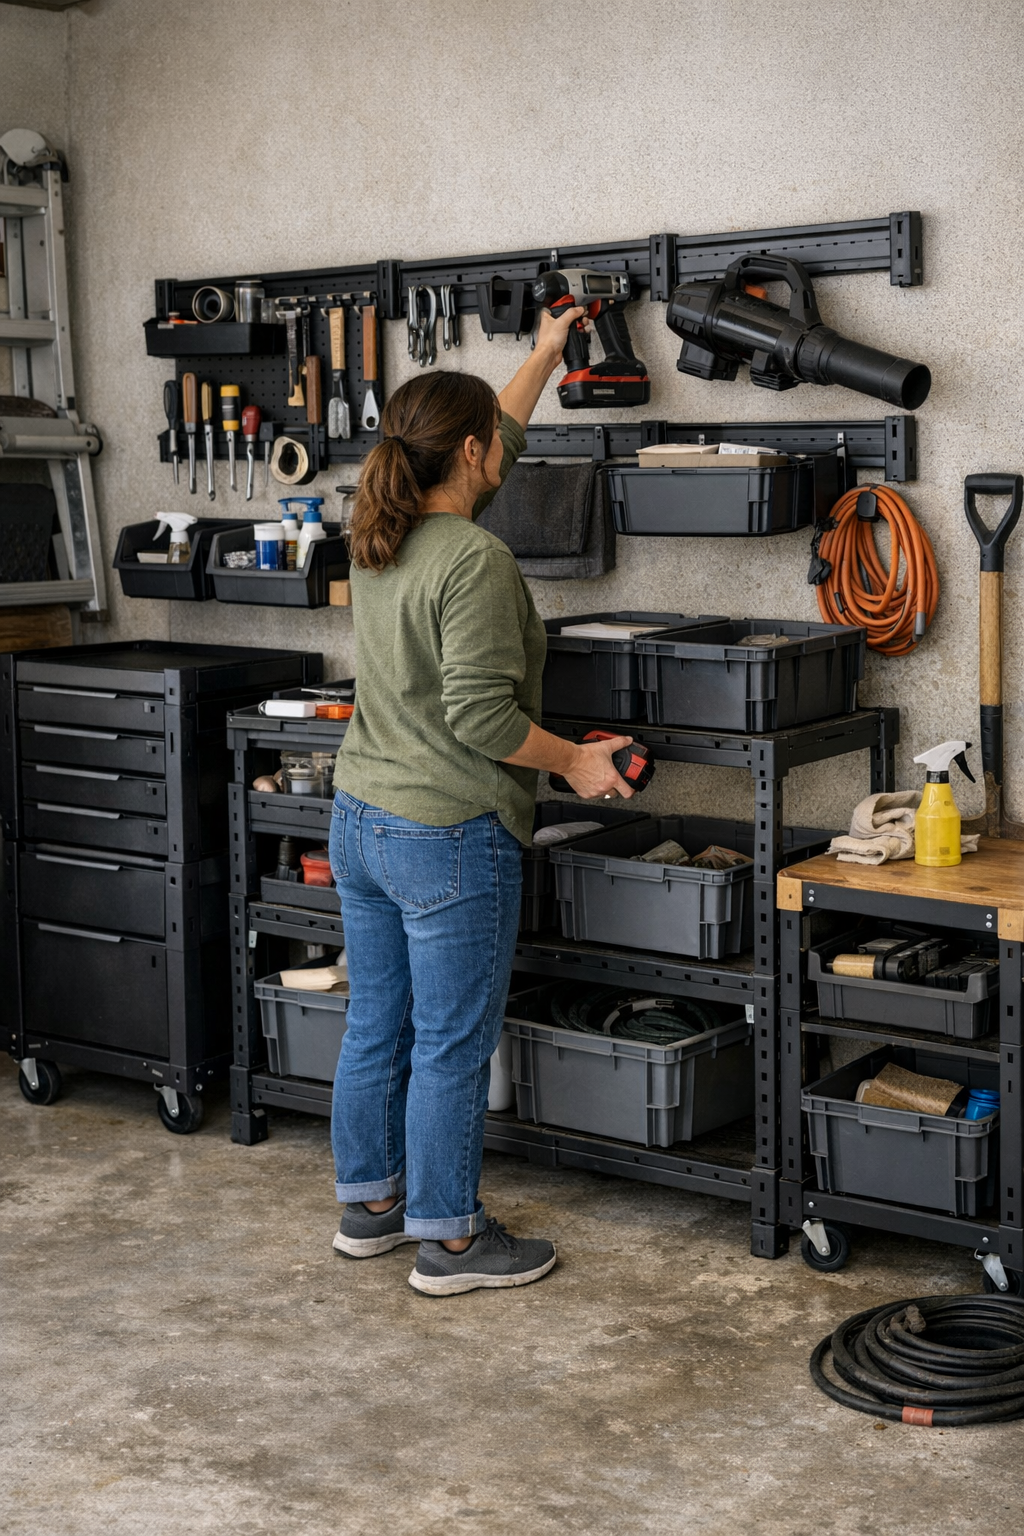
    Things don’t break down all at once. It starts in one corner: maybe the step ladder pushed into the only open stretch, or a pile of gloves accumulating where the rotohammer is supposed to live. There’s always a tipping point. For me, it was needing the leaf blower before dark—and discovering it jammed behind winter gear, pinned against two boxes, and tangled in an old bike lock. Instead of a ten-second grab, it turned into a five-minute scramble. Gloves hit the floor, boxes got shifted, and the urge to just leave the mess “for tomorrow” nearly won.

    That’s how wall zones go from helpful to headache. What was a fast-reset area transforms into a dumping ground for every “I’ll just stash this here for now.” Quickly, the system you trusted to keep clutter off the floor just rearranges the clutter at eye level—and the struggle repeats, day after day.

    Who Really Deserves Space? Resetting the Standard

    The fix wasn’t another organizer, but a hard boundary: only tools used weekly or more gained prime wall space. Anything else (seasonal, “might need it later,” or lost in last month’s project) got reassigned—to drawers, basement shelves, or low-profile bins tucked under the bench. The results were dramatic in real use:

    • Essential hooks stayed open, every time.
    • Bulkier items stopped clogging grab-and-go lanes.
    • Cleanup after even a long day felt automatic—no more zoning out, dreading resets.

    Now, the routine changed: finishing a job doesn’t mean recalibrating the wall. Tools find their places in seconds without mid-reset detours. The space isn’t just tidy—it finally matches the patterns of real work, where speed and simplicity matter more than a fully occupied rack.

    Let Habit—and Friction—Point to What Needs Clearing

    The wall either helps you move or it makes you slow down. Does the layout let you reach, return, and reset with a single motion? Or are you caught sidestepping bins, wrestling with stacked gear, or having to open a cabinet around yet another stray cart? Even the perfect modular system won’t fix what’s overloaded or mismatched to your routines. What you really need is a zone that can absorb repeated use—without becoming an obstacle course three weeks later.

    Action step: Next time you hesitate at the wall—if you feel yourself mentally pushing back (“there’s nowhere clear for this drill,” or “I’ll just leave this for now”)—pause and strip the zone down to the true essentials. Clear the rest, even if it means a pile on the floor for five minutes. The difference is immediate: fewer blocked hooks, smoother movement, resets that don’t drag. You’ll actually use the wall, not just stare at it.

    Don’t wait for one more frustrating morning or an overflowing bin to trigger a big fix. Small, honest resets—driven by what you actually touch every week—tend to last, and the wall finally begins to work for you instead of the other way around.

    For more storage solutions that hold up to real routines, visit StackNest.

  • Choosing Between Wire and Solid Shelving for Everyday Closet Use

    You don’t notice your closet’s setup when you’re calmly picking out clothes on a Sunday afternoon. You notice it when you’re running five minutes late, rooting for that one black T-shirt, juggling falling stacks, and promising yourself you’ll reorganize—but never quite getting there. The choice between wire shelving and solid shelving isn’t a matter of taste; it’s the difference between quick retrieval and everyday friction. What you install shapes whether your closet stays functional—or becomes another headache waiting behind a closed door.

    Why “Organized” Shelves Fall Apart in Real Life

    At first glance, almost any shelf can feel like an upgrade. They’re level, lined up, and empty—impossibly tidy. But after the first round of midweek chaos, stacks that started straight wilt and lopsided piles begin invading neighboring territory. Small things disappear regardless of how perfectly you folded them on day one.

    True organization reveals itself under pressure. You open the closet, see neatness, but half the time you’re reaching behind two sweaters to yank out a shirt or sliding a bin forward only to realize the bin is now a disorganized mix of socks, random cords, and last winter’s gloves.

    Wire Shelves: Clean Air, Chaotic Details

    Wire shelving feels light and fresh from the start—great for keeping airflow moving, perfect for towels or guest linens that quickly dry out between uses. You get instant visibility; you can scan the shelf and see what’s stashed two levels down. The minute you add smaller or slippery items, though, the rules change.

    Socks escape through gaps, underwear droops between the grids, and folded shirts find new escape routes to the floor. That clean, graphic line you installed turns into a daily game of “find the missing tee.” And every pull threatens to collapse a pile or send something airborne to the shelf below.

    Wire Shelves: Where the Friction Builds

    • Small items don’t stay put. Socks, washcloths, scarves—anything not perfectly stacked risks slipping, drooping, or vanishing out of sight.
    • Dust and lint ride the open grid, falling onto whatever’s underneath—turning the lower shelves into accidental catch-alls for debris and dust bunnies.
    • Slippery or round items rarely last a week on top of the wires before needing a complete reset.

    Adding bins and baskets sounds like a fix, but over time they become “everything bins.” That original plan for separating types—just socks here, only tank tops there—deteriorates as things get tossed in a hurry until you’re pawing through the chaos for what you need. Visibility is lost, and the shelf becomes a dreaded stop in your daily routine.

    Solid Shelves: Steady Stacks, Hidden Clutter

    A solid shelf makes everyday stacks doable. Sweaters, tees, and jeans line up, and you can shuffle, slide, and restock without a single item escaping. Slide out the middle shirt and the rest remain standing—a small detail that saves the morning rush from unraveling a week’s worth of effort. But the surface that keeps the front orderly can turn the back into a graveyard of out-of-rotation clothes.

    With less airflow, damp towels or overstuffed clothing become a breeding ground for musty smells. Deep shelves invite you to build higher, but the temptation to stack eight towels deep means only the front two get used—and the thing you need always seems to be in the unreachable back row. That quick grab often jostles the whole pile, and what once looked organized from the front devolves into a shifting mound by week’s end.

    The Flip Side of Solid Storage

    • The backs of shelves become blind spots—unused, forgotten, and hard to reach without upheaval.
    • Poor ventilation means damp or rarely used items take on a stale scent that spreads to everything else.
    • Extra-deep shelves ask for trouble; you dig for one piece and end up dragging half the stack forward or letting the whole column tip sideways.

    The real story plays out in moments: fishing for a fitted sheet and disturbing a careful stack, or reaching blindly only to realize you haven’t used anything from the back in months. Every “quick fix” becomes another invitation for clutter to hide behind something else.

    How Shelves Change the Morning Rush

    Imagine the Monday morning sequence: multiple hands in the closet, towels in demand, shirts needed, everyone in a hurry. Wire shelves let air flow, but clothes and washcloths slip right through the cracks. A stack that looked neat at 7 a.m. is a jumble by the afternoon. Cleaning up is a cycle of picking up what’s slipped between, then refolding what’s sagged off the side.

    With solid shelves, at least everything stays where you left it—unless you let the stacks get too high. Then, the deserving winner is whoever gets there first; the unlucky one is left piecing together whatever’s toppled to the back. The longer the shelf, the more likely folded stacks start merging or leaning, making resets slower and taking up precious minutes on mornings when time is tight.

    Trying a Hybrid: Mixing Shelves to Match Real Life

    Living with both types side by side clarifies the trade-offs fast. Swapping just the top wire shelf for a solid one made the difference between lost shirts on the floor and predictable, steady stacks. Mornings stopped involving a scavenger hunt under the closet. But solid shelves alone didn’t solve everything; summer humidity and stagnant air snuck in until a small gap was left at the back—barely enough to keep clothes aired out, but just enough.

    Using solid shelves for stack-heavy areas—T-shirts, sweaters, or bins with clear contents—kept everyday basics where they belonged. Below, wire shelves in linen and towel zones let things breathe and dried quickly after laundry day. The closet still needed resets eventually (no shelving system is perfect), but instead of unraveling every few days, the space held together for weeks before needing a true overhaul.

    What To Notice Before Installing Shelves

    Before making your choice, watch how your current setup slows you down. Are you chasing socks that drop out of sight? Are certain stacks constantly leaning, collapsing, or spreading out? Do you move three things to reach one—and, after a week, are your bins still sorted or muddled?

    • If you want faster mornings and less reshuffling: Solid shelves usually make daily handling easier—just watch for clutter drift to the back.
    • If humidity’s an issue or you wash linens weekly: Keep some wire shelving for airflow, but be ready for the occasional drop-through and the need to dust the open grid below.
    • If your setup keeps failing: Split your shelving—solids for clothing, wire for linens—or try simple dividers to hold stacks upright and avoid bin sprawl.

    You’re not searching for showroom perfection. You’re aiming for a closet that’s predictable, quick, and forgiving when life gets hectic. When your routine speeds up and the closet doesn’t fall apart, that’s how you know the system actually fits daily use.

    Find more storage solutions designed for real daily life at ClosetWorks.

  • Preventing Router Burn Marks on Wood with Proper Maintenance Tips

    Burn marks aren’t just ugly—they signal a break in the flow of real work. If you spend time routing hardwood—be it dressing edges on custom panels or running grooves for cabinetry—you know the letdown that creeps in. Everything is dialed: sharp bit, steady grip, board clamped tight. Then halfway through, the bit starts dragging, you smell scorched wood, and brown streaks start to track your every move. Suddenly the rhythm is gone. Instead of crisp edges and clean reveals, you inherit hours of tedious hand sanding, hoping the burns haven’t sunk too deep or blurred your profiles for good. Edge detail you worked hard to keep is now on borrowed time—and it happens even to careful hands. The friction is very real: burns slow progress, threaten finish quality, and knock confidence in both your process and your tools.

    When a Good Pass Starts to Go South

    There’s a sweet spot to routing: smooth feed, controlled sound, a clear edge following the bit’s path. But it doesn’t always last. All it takes is a slightly dulled cutter or grit built up between passes and your glide stalls into resistance. At first, it’s subtle—a streak here, a snatch in the feed there. Maybe you ignore it and push through. Soon, each pass goes from giving clean definition to demanding aggressive sanding. Now, every correction eats into the profile you wanted to keep sharp. What looked like a minor blemish at the bench turns into a stubborn flaw when the finish goes on—deeper, darker, impossible to hide without reworking the entire piece. That’s the expensive flip-side of one overlooked sign.

    The real punch? By the time you’re smoothing or fitting parts, a single burn can undo hours of fitting, measuring, or grain-matching—especially on dense woods that showcase every flaw.

    Why the Burns Happen: A Closer Look at the Culprit

    This isn’t a rookie mistake. Shops crowded with matched sets of routers, bits, and blades aren’t immune—results drift as sharp edges fade and dust builds up. With a new bit, the router almost floats: it cuts clean, edges pop, and feedback is precise. But catch the hint of drag or a whiff of burnt wood, and you’re suddenly working harder just to get the same result. Dullness is a slow thief, and in hardwood, mere minutes can be enough before streaks turn obvious.

    The real enemy is friction. Dust, resin, and pitch collect invisibly on the cutter with every pass, piling on heat and slowing the spin until burn marks become almost inevitable. Often, your hands detect the growing resistance before you even spot the marks. Ignore that, and you pile up trouble with every next board. “Sharp enough” is rarely good enough when the debris is working against you.

    Shop Floor Reality: What Trouble Feels Like

    Visualize running decorative profiles on a stack of maple rails: the first three boards are smooth as silk, the fourth pushes back a little, the fifth comes with a faint sweet-bitter scent. Nothing has changed on the machine, but you’re instinctively pressing harder just to maintain flow. That’s the turning point most shops know well—but too often override. You’ll grind out the last few pieces, only to find that the brown lines baked in aren’t coming out with sandpaper. At best, you compromise edge detail. At worst, you scrap the part and the schedule slips.

    Ignore that resistance and suddenly, a single burnt edge can force you to strip, fill, or entirely remake a visible piece. Time lost here is rarely recouped later.

    The Fixes That Actually Hold Up Over Time

    The winning formula isn’t magic—it’s discipline and routine, not silver bullets. Wipe down router bits after every few panels with solvent and a rag to dissolve pitch before it bakes on. Inspect cutters visually: any sign of buildup is your cue to clean, not just for the sake of the tool but because every fleck means extra friction. Set a routine—every 30 feet or so of hardwood, pause for a quick cleaning and check for sharpness. What’s two minutes at the bench saves half an hour of coarse sanding or profile touch-up once the work is done. That kind of maintenance pays for itself—sharper cuts, cleaner edges, fewer re-dos, and a sweatier shirt for the right reasons.

    Practical upgrade: Keep an old toothbrush and solvent at your routing station. Fast, frequent brush-offs keep resin from welding onto the bit. It’s more effective than tuning the router’s speed or amping up your feed rate. Marry this with a steady hand—don’t press through resistance or let impatience override feedback. Pause, clean, resume. You’ll come to rely less on blind passes and more on responsive, precise work.

    Feed Rate vs. Bit Life: Find the Real Balance

    Accelerating your pass isn’t a cheat code. Move too fast and the bit can chatter, catching or tearing the wood—sometimes worse than any scorch mark. Move too slow, and heat overloads the workpiece. The trick is to listen: a sharp, even note in the cut signals good progress; a strained or howling pitch means trouble. Adjust pressure to what the wood and bit can handle, not what the clock demands.

    Burning Questions from Real Benches

    Why does burning happen even at low router speeds?
    Because friction isn’t just about speed. Dull or dirty bits—especially on tight corners or dense wood—generate heat fast. Staying in one spot, even for a moment, can scorch a panel or rail before you know it.

    If I feed faster, can I sidestep burns?
    Not in practice. Too fast and you get rough surfaces or tearout. Too slow and you burn. Watch for pushback and off-smells—those are cues to stop and check rather than bully through.

    Is dust collection worth the hassle?
    Absolutely. Dust and chips left to build up around the bit choke off air, increase friction, and dull edges at a shocking rate. Even a shop vac at a routing table pays for itself in less bit maintenance and smoother results. Attention here means less downtime later.

    Reading the Work—Staying One Step Ahead

    No universal chart will spare you burns on the router table. Every shop run is a series of audible cues, hints of resistance, or sticky drag under the hands. Build habits that fit your workflow: clean and check bits, set reminders for sharpening, and never tune out the subtle signs—those are worth more than any settings guide.

    In most cases, the burn begins long before it’s obvious—a faint sound, a change in the feel, a little heat in the hands. Stay proactive, and repetitive sanding and rework fade into the background. What you get instead: smoother workflow, sharper edges, a shorter sanding list, and the confidence that your tool is working with you, not against you.

    http://gumboll.myshopify.com

  • Why Smart Storage Choices Matter More Than Extra Space in Your Workshop

    The real truth about workspace setup? It doesn’t reveal itself until the next time you need to get something done fast. That reorganized garage or workshop always looks brilliant right after you install the new rail, slide the fresh cabinets into place, or set up a rolling cart. But as soon as you’re halfway through a weekend project, reality creeps in—access is awkward, your main walking path is blocked, and your most-used tools vanish behind the very systems meant to make things easier. The difference between “organized” and actually functional only shows up when your real routine puts the new setup to the test.

    When “Setup Day” Satisfaction Fades

    Crisp cabinets, a gleaming open floor, every bin in its place—the first hour after revamping your space feels flawless. Give it a week. Suddenly, that rolling cart—once so easy to move—gets wedged right in front of wherever you need to stand. A bulky box of screws or winter gear pushes forward, shoving your everyday tools into the least accessible corners. You end up swinging a cabinet door just to squeeze past, or nudging the cart aside again and again just to leave the room. What felt like solved clutter becomes a new web of friction—just painted over with “organization.”

    Spotting Storage That Adds Work, Not Ease

    The warning sign is unmistakable: When do you find yourself pausing, shuffling, or sidestepping? If you need to move three things just to grab one, or if returning a tool means restacking a tower of bins, you’re working around your storage—not with it. And those moments add up: the late-night reset turns into restacking, untangling, even procrastinating because the system just feels heavy. The setup meant to save time drags the process out instead.

    Busting the “Everything Has a Place” Illusion

    Assigning every item to a home grabs neat before-and-after photos. But labeling a spot isn’t the same as making daily work flow. Wall baskets look orderly on install day, but the things you reach for constantly always seem to creep out of reach. Tape measures end up over head height, the screws you burn through each week fall to the back of the pile, and your “organized” system quietly forces new detours into each task. If a “place” is just where clutter collects, repetition and speed go out the window.

    The Rolling Chest Trap: A Real Setup Stumble

    Take the classic rolling drawer chest—ideal, until you use it. Sure, you can wheel it over. But when you actually need that clamp: brakes off, navigate around the car (again), open a deep, awkward drawer, extract one tool, then reverse the dance. Now the chest blocks your main route—there’s no good place to leave it except “in the way.” This is how a single tool turns a whole routine into a puzzle. What should have opened up space instead claims more of it, and every attempt to work faster only piles on new interruptions.

    Meanwhile, dead corners don’t disappear—they just inherit overflow. Wall racks morph into visual catch-alls if you’re not careful, layering fresh visual clutter over what used to be empty space. With each routine reset, you ask: Why hasn’t this gotten any smoother?

    Open Wall Storage: Potential and Pitfalls

    Upgrading from a floor chest to a wall rail system with open bins seems like a quick, sensible move. Sometimes, it is. But a rail only works if every section serves a clear purpose. Your daily pliers and screwdrivers: right at eye level and within arm’s reach. Out-of-season gear or overflow: high and out of the way. As soon as “junk overflow” lands on the rail, it mimics the old floor clutter—only now it’s on display. A wall jammed with randomness just introduces new places to stall or search for basics.

    From repeated use: One setup swap—a wall rail for the chest—opened the core work zone. No more bumping past a chest on wheels, no piles collecting on aisles. The main bench and floor lanes cleared, resets at the end of a long project shrank to a few seconds. Occasional-use items moved out of the process path. Nothing was perfect, but the difference was clear in the absence of friction—one less excuse to delay, one less thing to trip over, nothing shifting after each use.

    Everyday Clues Your Setup Isn’t Actually Working

    The signs rarely scream—they creep in. You’re always moving bins to get at something in back, or tiptoeing around a side cabinet that’s permanently “sort-of” blocking the aisle. Maybe that cart, parked “out of the way,” forces you to awkwardly swerve around it every time you carry something through. Efficiency isn’t about maximum storage—it’s about clear movement and frictionless resets.

    • Are you shifting or digging for things more often than you use them?
    • Find yourself hesitating—“Should I even bother putting this back?”
    • Is there always a block somewhere between one station and the next?
    • Does overflow collect in one spot, no matter how hard you try to clear it?
    • Are “routine” tasks always stretched by micro-obstacles or constant reorganization?

    Putting Routine Flow at the Center of Storage

    The only measure that matters: Does the space still work for you on the fifth, fiftieth, hundredth use? The setups that last declutter, yes—but more importantly, they shape themselves to habit. If you return a wrench without breaking your stride, if your go-to bits and clamps don’t require detours or reshuffling, if the daily reset fits your rhythm instead of stalling it, that’s the shift you’re after.

    That might mean pruning shelves instead of filling every one, or admitting that certain tools deserve “prime real estate” while the rest can live further down the accessibility scale. Sometimes just siding a rolling cart over to a wall-mounted zone, clearly marking a walking path, or grouping like-items in open bins ends up making the difference between “tidy” and genuinely effortless use. You’re not chasing showroom perfection—just less friction, more flow.

    Sharpening Zones: One Focused Change at a Time

    The most stubborn clutter magnet? Any zone without intent. Wall rails overloaded with odds and ends become a sideways junk pile. Reduce the sprawl—give each rail or shelf a job: high-frequency tools front and center, secondary gear stored where it’s present but not blocking the main event. The discipline of single-category zones eliminates extra shifting, protects your reset speed, and keeps your main routes open—no matter how hectic your project pace or storage needs change over time.

    Each practical tweak pays off when you walk through, grab what you need, and finish up without a tangle of extra steps or the urge to shove things aside—giving you a space that feels ready and responsive, not just “organized.”

    Explore more practical, modular storage solutions at StackNest.

  • Choosing Between Adjustable and Fixed Closet Shelves for Daily Use

    You don’t discover the true difference between adjustable and fixed closet shelves until you’ve lived with them through busy mornings, rushed evenings, and endless laundry loads. On paper, it’s a simple choice: flexibility versus stability. But in real closets, where habits and clutter collide, the stakes rise fast. That shelf you set on day one? It decides whether your routines feel smooth—or you spend every week battling fresh friction.

    That First Week: Everything Fits—Until It Doesn’t

    The early days fool you. Install new shelves, line up the bins, arrange the shoes—everything looks sharp and orderly. For a short stretch, you’re convinced you’ve defeated closet chaos: every shirt in its slot, every basket labeled, even the awkward purse tucked neatly away.

    But then reality peels back that tidy surface. A new winter coat lands in the mix, or someone swaps sneakers for boots. Suddenly, the shelf holding hats now hosts a half-unzipped duffel. Baskets fill and start to spill—first a scarf peeking out, then gloves tumbling to the floor. Within a week, you’re already stacking, squeezing, and bending the rules of your own setup. Friction creeps back—one grab at a time.

    Adjustable Shelves: Flexible but Not Automatic

    On paper, adjustable shelves promise to solve these moving targets. Need to fit that pair of knee-high boots? Move a shelf. A big new storage bin? Lower another just a notch. When used, the flexibility is real—if you choose to pause, empty a section, and physically reset the shelf height.

    The hard truth: busy routines rarely leave space for this reset. Instead, most of us squeeze that new item in, tilting boxes or burying smaller things behind whatever fits. The shelf might be adjustable, but our habits turn it into a fixed surface until the next rare overhaul. Suddenly, you’re reaching behind a row of mismatched shoes to grab one pair, or restacking sweaters because a storage bin doesn’t quite slide in like it used to. Flexibility fades when every adjustment requires a mini project.

    One Measurable Reset: Real-World Payoff

    Yet when you invest five minutes to adjust that shelf—raising it just enough to let coats hang freely, or lowering to fit a box without crushing the container—the effect is outsized. Boots finally stand up. The bin slides out smoothly instead of snagging. It’s not a dramatic visual transformation. What changes is the daily current: no more nudging baskets around or pulling sweaters from the middle of a listing pile. Less time rescuing toppled stacks. More likelihood you actually put things away, rather than letting them sprawl on the floor out of frustration.

    Fixed Shelves: Relentless Stability, Real-World Limits

    Fixed shelves, on the other hand, never budge. Their strength is literal—no wobbling under heavy bins, no risk of a sagging surface midway through the season. They’re ideal for massive detergent bottles, stacks of towels, or out-of-season gear housed in weighty bins. Order feels bulletproof.

    But only as long as nothing changes. Sneak in a taller item and you’re out of luck: the new bin gets jammed sideways, or a stack of T-shirts climbs higher than the shelf allows and eventually flops, spreading across the shelf below. That crisp visual order starts to break down as you rearrange, combine bins, and create layered piles just for things to fit.

    Beyond Closets: When Fixed Means Friction

    The struggle isn’t limited to bedroom closets. Entryway shelves, fixed at backpack height, soon clash with boots or helmet collections. Items overflow onto doormats. Bathroom shelves, perfect for towels, get crowded with stray products and half-used toiletries. You end up with dead vertical space above low-slung baskets, and nowhere to go when you bring home something new. The “organized” look becomes a mirage—a thin shield over a growing undercurrent of shuffling and stalling.

    Looking Organized vs. Living Organized

    Photos can’t tell you what daily use reveals. After a deep clean, any system appears neat. But the reality test comes week after week: Are you shifting stacks to get a single t-shirt? Digging behind a basket to find your hat? Or finding yesterday’s organizing effort undone because piles don’t hold their shape?

    Adjustable shelves only deliver if you commit to resizing as life shifts. Leave them alone too long and the entire system hardens; sudddenly, you’re back to awkward workarounds. Fixed shelves, for all their ruggedness, eventually force you to double-stack bins or resign yourself to perma-clutter as the categories blur and pile up in unused corners. Every day, you pay in extra movement—an invisible tax on speed and clarity.

    Daily Storage: Which Friction Can You Live With?

    Every routine is a different test case. Ask yourself:

    • Does your closet’s inventory rotate with the seasons, or do you mostly keep the same things in the same place?
    • Are you a regular shopper, bringing in new bag sizes and odd-shaped items?
    • Do you have the energy (and patience) to occasionally take five minutes, empty a section, and lift or lower a shelf?
    • Are you storing real bulk—cases of soda, stacks of books, paint cans—that demand unwavering strength?

    Too much constant tweaking is unsustainable. But so is enduring a setup that forces you to constantly reshuffle, restack, or leave items homeless. Clutter builds slowly, bin categories bleed together, and the closet that once felt generous now feels cramped—not because you own more, but because storage can’t keep up with your life.

    Stronger Setups, Smoother Days

    Build in margin for the unexpected. The best storage systems start with accurate sizing—measure your tallest boots, largest bags, and bulkiest baskets before fixing shelf heights. Assign everyday items to the “easy zone”—at chest level, for quickest access. Relegate off-season or once-a-month pieces higher or lower, out of daily circulation.

    If you rely on fixed shelves, add vertical dividers between stacks and bins. It stops categories from bleeding into one another and helps keep piles upright longer. For adjustable shelves, a reset once or twice a year—triggered when you first notice grabs getting messy—can buy months of smoother living.

    Pay attention to your routine’s pinch points. If you’re regularly digging, lifting, or unstacking to reach the same few things, don’t ignore the signal. Even a small shelf adjustment can streamline access and keep clutter from seeping beyond the closet and into everyday living spaces.

    The Shelf Choice That Actually Pays Off

    There’s no single best answer. If your storage rarely changes, fixed shelves have an appeal you never have to think about. But if your routine involves frequent swaps, seasonal items, or gear with growing needs, adjustable shelves become a low-effort way to keep pace—so long as you use their flexibility before frustration takes root.

    The payoff isn’t a magazine-perfect closet. It’s opening the door every day and finding what you need in one try, not five. A few minutes spent adjusting today can mean weeks of order—and far fewer reasons to dread the next closet shuffle.

    See more practical storage ideas at ClosetWorks.