Blog

  • Why Carry-On Bags Become Harder to Use After Packing for Travel

    The gap between a “picture-perfect” carry-on and a carry-on that actually keeps up with you in an airport shows up harshly the first time you need something fast and everything you packed seems to block your hand. Neatly zipped pouches and carefully stacked organizers look controlled at home, but at the gate, one awkward retrieval can make your whole setup feel slow and resistant. The real weakness isn’t how “finished” the bag felt after packing—it’s how fast the order breaks down when you need quick, repeated access under pressure.

    Where Order Fails: The Unseen Weak Points That Appear in Transit

    Airport movement exposes problems that never appear when you’re packing at home. Layers that stayed put on the living room floor shift and migrate—pouches slip, compartments overlap, and outside pockets go from “easy-access” to clutter traps once you add boarding passes, receipts, or a last-minute charging cable. Crowds force your bag to tilt and compress, so now you’re struggling against your own setup. What felt logical now requires unstacking two zipped compartments just to find a document. Every time you reach in, the sequence gets messier, the retrieval gets slower, and each repack grows less predictable as your travel flow breaks down with ordinary use.

    Real-World Carry-On Moments: Where the Friction Builds

    The right setup holds up through real pressure points—not just the initial pack, but the repetitive moments that test a carry-on most:

    1. Security Tray Surprises

    That tech pouch you set “near the top” is buried after a jostled walk to security. Under the officer’s eye, you’re forced to dig through a tangle of toiletry bags and sliding sleeves to fish out your passport. Those seconds stall you while trays jam up behind you—every retrace costs more than planned.

    2. Boarding Backups

    Headphones needed before takeoff are now locked beneath two other pouches, each requiring a different zipper path. The line compresses, impatient eyes on your fumble. Suddenly, a detail that worked packed flat is failing with an audience and a cutoff to move forward.

    3. Seat Entry Squeeze

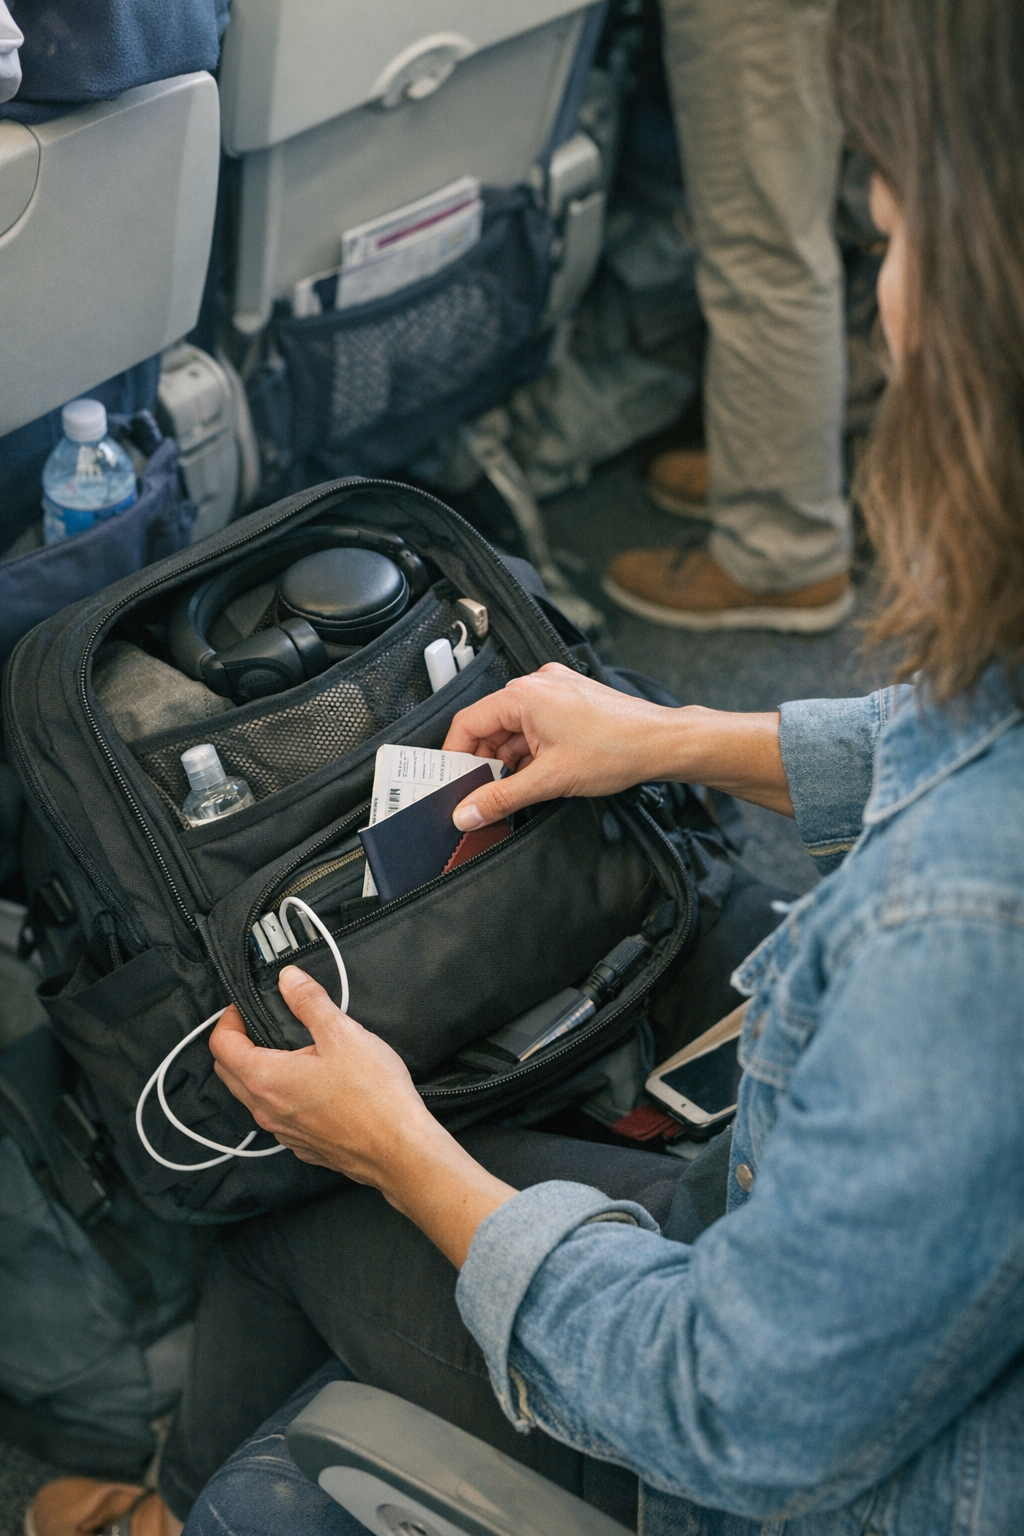
    A crowded row means you can barely wedge the bag between your legs. The outer pocket, once “quick access,” is now crammed tight with scattered boarding passes, tangled receipts, and stray pens. Your hand can’t slip inside—retrieving sanitizer or a cable becomes a frustrating mini-struggle, each time making you question your choice of pocket layout.

    4. Overhead Bin Repack

    When your essentials shift mid-flight, that neat pouch stack doesn’t return. Digging through a compressed main compartment to grab a medication or document now means a partial unpack in the aisle, while a line forms behind you and every second feels exposed. A structure that looked in control at home now asks for more from you each cycle.

    The False Sense of Order: When “Looking Tidy” Isn’t Enough

    A carry-on arranged for a photo doesn’t guarantee real-world performance. Lined-up organizers and squared-off pouches satisfy before the trip, but constant movement is where setups separate. Cosmetic order often conceals friction points—hidden paths, blocked essentials, or layers that “look clean” but add work each time you access them.

    How Tidy Structures Break Down in Repeated Use

    • Essentials buried: Items placed with care disappear behind bulk or zippers, requiring repeated shuffling for basics like a passport or phone.
    • Nested pouch traps: Sub-organizers collapse into each other, making a simple retrieval unreasonably layered and slow.
    • Slipped alignment: Every lift, tilt, or squeeze shifts your system—what was topmost now blocks or jams an access route you thought was clear.
    • Zip-path blockades: The “tidy” pouch placement forces you to maneuver around your own setup, turning fast retrievals into repeated puzzles.

    Repeated Access Is Where Most Setups Fail

    Every fast access—at security, during boarding, after landing—tests your structure again. Each disruption on the way stacks up: more hesitation, more repacking, more mental drag. A carry-on that felt efficient on your first try starts slowing you down by the second or third round of reach-in-and-repack. By the time your trip is half over, what looked organized becomes a source of regret you can’t ignore every time you need something basic.

    How Movement-First Structure Makes a Visible Difference

    Real improvement comes from designing your structure for movement: minimizing overlap, reducing single-compartment stacking, and protecting a direct zone for top-use essentials. That means your passport, sanitizer, and main charger aren’t buried—they’re in one motion’s reach, even in a squeeze. CarryOnSupply layouts make this visible by making “one-handed access” possible in a crowded row or a moving line; retrievals feel lighter, and the repeated repacking spiral is cut off before it starts sapping your pace for the rest of your trip.

    Why More Organizers Often Mean More Friction

    Stacking on more pouches or clever containers rarely leads to better flow—it’s more to unzip, more layers to move past, more that can slip out of reach when you’re under pressure. Over-organization looks tidy on the floor but becomes a series of barriers in real travel. In repeated use, a single, shallow-access outer pocket outperforms a multi-layered system every time you move.

    Building for Real Use: Reset Your Packing Priorities

    Packing for the “moment of retrieval”—not just the packing photo—means training your structure to support fast, predictable access at each pinch point: security trays, gate checks, seat entry. Structure your carry-on by:

    • Refusing deep stacks—keep quick-grab items always one reach away.
    • Assigning one shallow outer pocket designed not to distort or create a dump zone.
    • Making sure every everyday essential remains visible and reachable, even at odd angles or when the bag is upright and crammed.
    • Using less—just the right organizers in the right places—so nothing gets blocked or lost mid-trip.

    The Real Test Is in the Rhythm of Arrival and Repack

    The only organization that matters is the one that holds up after you’ve reached, retrieved, and had to put it all back—quickly, repeatedly, and usually with someone waiting. The real question isn’t how tidy your carry-on looks at home, but how little it interrupts you every time you need something while moving. If every access doesn’t return your structure to order for the next round, small delays pile up.

    Tune your setup for your actual travel rhythm: the tray pull, the seat squeeze, the overhead fumble. A carry-on that resets easily and keeps friction down—trip after trip—means fewer slowdowns and less time spent fixing order that didn’t survive the real world in the first place.


    CarryOnSupply

  • Why Closet Organization Fails Without Practical Storage Solutions

    It’s not Sunday resets that reveal the real state of your closet—it’s Wednesday mornings at 7:32 a.m., standing in front of tidy-looking shelves that have already started to betray you. The piles that stood tall on the weekend now blur into each other. That basket you labeled “gloves” is suddenly housing socks, receipts, and a stray t-shirt. In these rushed, everyday moments, the true friction of a closet’s weak spots shows itself—and small flaws start to multiply.

    Why “Looking Organized” Fails in Real Life

    On day one, everything feels hopeful: shelves neat, shirts stacked, baskets aligned. But the order fades fast. The daily cycle is what tests your setup. Grab one shirt from the bottom of a pile and the whole stack wobbles. Put something away in a hurry, and the bin swallows it whole—along with other “categorized” items that don’t quite fit their intended home.

    What undoes most “organized” closets isn’t a lack of effort; it’s the quiet, repetitive wear of daily life. Shelves that are too deep swallow small items until they migrate to the back, out of sight. Bins just slightly too big or vague become magnets for catchall chaos. Over a couple of laundry cycles, what started as distinct sections—sweater stacks, sock bins, accessory trays—become blurry, slow, and impossible to reset without a minor project. Each quick fix adds to the slow drift toward clutter.

    Real-World Friction: What Actually Goes Wrong

    The Vanishing Stack

    The morning rush exposes every flaw: You reach for a specific tee, but as you slide it out, the pile collapses sideways. A classic domino effect—by Friday, shirts and shorts have blurred into one sagging heap. Now, getting dressed means untangling piles, shoving one stack aside to reach another, and promising yourself a “deep reset” on the weekend.

    Baskets that Hide as Much as They Hold

    Baskets and bins seem like shortcuts to tidiness, but the wrong fit invites clutter. Toss in a hat, a scarf, or a pair of running gloves “just for now,” and soon you’re rummaging blind. If the basket’s too deep, smaller items vanish underneath bulkier ones; if it’s too open, categories bleed together. Retrieval takes longer, and you start to avoid using the bin at all—even though it’s technically right there.

    Dividers: The Quiet Fix Most Closets Lack

    No item creates order like a good divider. Without a clear edge, even the best-folded stacks devolve. Shirts wander into sweaters; towels melt into the jean pile. Eventually, your shelving becomes a single, confusing landscape. Every time you “put things back,” you’re actually pushing against a system with no boundaries—dooming yourself to repeat the same reset every week.

    Structural Details That Actually Matter

    Closet performance comes down to how a space absorbs everyday mess. How far do you reach just to find a small item? If a shelf forces you to move everything up front just to access the back, it’s too deep for daily use. Bins that don’t match what you own—either swallowing too much or spreading items too thin—slow you down and encourage mix-ups. Without the right boundaries, vertical space goes to waste and every “zone” eventually merges into the next.

    A closet isn’t made by one big storage buy. It’s tuned by the dozens of small, everyday decisions—where items land, which piles tip over, which sections become reshuffling traps. Miss the details, and you’ll always be one laundry load away from a new mess.

    Practical Tweaks That Actually Stick

    Small changes make mornings smoother. Adding dividers—even just every foot—can transform a shelf’s usefulness overnight. Suddenly each stack stays in its lane; you can pull out a pair of jeans without dismantling four other piles. Consider swapping a catchall bin for an open tray, so you can actually see and grab accessories instead of digging for them blind. Right-size your containers: shallow bins for socks, taller ones for sweaters, open baskets for daily gear.

    Next time you speed-tidy midweek, stop and notice: Which items always seem out of place? Which shelves collect mysterious buildup? Would one or two more dividers keep categories from mingling? Does a bin hide more than it helps? Mirror the closet to your routine, not to the label on a container.

    How to Tell if Your Closet Setup Works

    A closet that really works doesn’t demand a reset every time you do laundry. Good storage keeps shape after dozens of uses. Each category stays obvious and quick to reach. When a section consistently collapses or a bin always feels like a grab-bag, that’s the sign your structure isn’t matching your habits. Resets become less frequent and less dramatic; you spend less time fixing, and more time simply finding what you need—without moving half the closet in the process.

    Daily Durability: The Hidden Standard

    Real organization isn’t what survives a staged photo—it’s what lasts through skipped cleaning days and rushed mornings. The strongest systems keep categories from collapsing into each other and make even your most-used shelves feel intuitive. They withstand imperfect habits and carry you through busy weeks, not just tidy weekends. If clutter returns before Friday, it’s not failure—it’s a sign you need tweaks tailored for your everyday routine.

    The details don’t just make the closet look better—they make daily life easier and dramatically reduce the time spent redoing work you already did. Adjust your setup until finding things is effortless, not a mini treasure hunt.

    Shop practical closet organization at ClosetWorks

  • Maintaining Steady Air Compressor Pressure for Flawless Jigsaw Cuts

    The first cut always feels easy. Fresh blade, your grip steady, jigsaw humming as it glides along clean panel stock—lines true, no second guessing. But as the stack of cuts grows and sawdust piles up, you feel it: the jigsaw grips the material just a little tighter, edges start to splinter, and suddenly, each pass asks for more muscle than the last. Tool control slips by inches, not all at once. The culprit? Not your hands, nor a dull blade—it’s the air supply trailing behind, your compressor quietly falling short exactly when you need consistency most.

    The Real Cost of Compressor Fatigue

    Anyone who’s spent an afternoon knocking out cabinet carcasses or running cutouts for flooring knows the routine. Early on, the jigsaw sings—crisp pitch, predictable movement, dust neatly falling off the edge. The jigsaw’s power stays sharp, and each new section lands you closer to finish work.

    But by the third or fourth board, signs of strain slide in. The jigsaw’s motor pitch sags for a fleeting second, dust clouds linger longer, and sharp edges turn fuzzy. Cuts that started out clean now want correction with sandpaper or, worse, a redo with a fresh panel. It never shouts for your attention—the shift is a quiet frustration that stacks into hours lost and hands sore by end of shift.

    Where It Shows Up—in the Details

    Fastening misalignment. Out-of-square corners creeping in around the third cutout. Extra sanding eating into build time, or a drill bit binding halfway through a plunge because pressure dipped at the wrong moment. The more you demand from your compressor, the more each small deficit multiplies across the job—until “minor” cut quality issues start to define the day.

    Why Spec Sheets Don’t Tell the Whole Story

    Two compressors can look identical on paper—but only one stays reliable when the job drags on. Same tank, same PSI, same cues for when to recharge: on short runs, both seem capable. But when the real work begins—repeated cycles, back-to-back drilling, scalloped curves around pipes, or field cuts on trim—the slow performer can’t keep pace. Your jigsaw stalls on curves, drill bits smoke, sanders drop RPMs mid-pass, and suddenly you’re correcting, not building.

    The difference rarely jumps out in your first ten minutes. It’s the back-half of a project, as compressors get warm and air tools start to bleed pressure, that true reliability shows up—or doesn’t. Boards that started flush now edge apart under uneven fastening, gaps open at seams, and the “just one more cut” attitude turns into an hour of patchwork fixes.

    On the Floor: A Workday’s End

    Imagine kneeling for a late-day countertop install—alignment critical, tolerance tight, client in the next room. The compressor pulses slower behind you. The jigsaw stutters down a straight, blade kicks awkwardly at the turn, chips fly just enough to cost you a perfect fit. Sandpaper comes out, assembly slows, and now fatigue—not just in your arms, but in your schedule—threatens to undo the sharp line you started with. You’re not just wrestling the cut, you’re wrestling time lost to a tool support system that’s running out of steam.

    Red Flags: Spotting Compressor Drag Before It Costs You

    • Your jigsaw’s motor tone wavers or dips—just enough to break your confidence on tricky edges.
    • Fine dust accumulates quickly, signal of tools working harder and slipping out of tune.
    • Cuts start to feather or chip, no matter how careful the feed rate or blade choice.
    • You’re guiding the tool defensively: pausing mid-line, correcting, even pulling up short for fear of blowout.

    Ignore these signals and small mistakes pile up; before you know it, assembly turns into rework, and a half-day job stretches until the lights go out.

    Breathe Easier: Adjusting Cut-In Pressure for Real Consistency

    There’s no magic involved here—just a simple adjustment that gets overlooked. Raise your compressor’s cut-in pressure above stock settings. Bumping from a typical 90 PSI up to 110 PSI seems minor in theory. But on the workbench, that tweak keeps air flowing steady through every repeated cycle. Over a dozen back-to-back cabinet or flooring cuts, the difference is clear: fewer blade stalls, sweeps that hold course, less cleanup after the fact. It brakes that stop-and-go rhythm that wears you down and lets you keep focus where it belongs—on the precision of your line, not how far you can stretch one more cut.

    Staying Ahead of the Small Stuff

    Running tools hard in warm shops? Internal compressor moisture rises, quietly shortening how much usable work you’ll get before pressure stutters. That moisture build-up also brings pressure drops earlier than you think. Make it routine, mid-task, to bleed off tanks and check gauges—catching issues before they’re visible in your finish saves wasted panels and frustration.

    Shop-Smart Habits for Cleaner Results

    • Listen from the start: Inconsistencies show up after a handful of cycles—don’t wait for the cut to stall, tune in for subtle shifts in tool response after the first few boards.
    • Check your edges, not just your blade: Early feathering or chip-out signals air loss, not always dull hardware. Letting the compressor rest, or checking for leaks, buys you more use from every bit and blade.
    • Go beyond the tank specs: If you routinely run long lines—panels, installs, repetitive fastenings—choose compressors with superior recovery rates and proven duty cycles. Headline PSI numbers don’t make up for slow bounce-back after prolonged use.

    Time for an Upgrade?

    If you find yourself fighting for a clean finish with every pass, chances are your compressor is setting your limit—not just your jigsaw or blade. Productivity, safety, and the quality of the fit all hinge on the reliability of that air supply, especially deep into the workday. Don’t judge a tool setup by the first five minutes—judge it by how much correction and fatigue you’re left with at the very end.

    Find workshop-ready compressors, tool accessories, and more at Gumboll.

  • Why Proper Lighting Design Matters for Safer, Clearer Workspaces

    Poor lighting isn’t just an inconvenience—it’s a safety risk that shows up exactly where you need clarity most. If you’ve ever paused at a staircase landing, felt your eyes strain at a dim laundry counter, or dragged a lamp into a dull hallway to see what you’re reaching for, you’ve already noticed the problem. The wrong indoor lighting choices quietly turn simple routines—like sorting laundry, stepping downstairs, or reading a label—into awkward, stop-and-go tasks. Glare from overhead lights bounces harshly off shiny surfaces. Shadows collect along cabinet runs or at the edge of a stair, making movement uncertain and breaking up the smooth flow you’re supposed to have in your own space. What looks “bright enough” on paper leaves you compensating, time after time, in the places that matter.

    Where Lighting Friction Actually Disrupts Your Routine

    Bad lighting rarely shouts in the first few moments. Switch on the main light, and the room appears fine—until you’re actually working in it. You lean over the washing machine and notice the cabinet edge is lost in shadow. You start downstairs and feel your feet slow at a half-lit stair turn you can’t judge clearly. The bright ceiling fixture misses the counter where you’re pouring detergent, so you shift, bend, or grab a flashlight. Every workaround stacks up: the space supposedly checks the “well-lit” box, but you’re still forced to move awkwardly or second-guess every step.

    The Stair Turn: Where Uncertainty Lingers

    Picture a stairway lit by a centered ceiling fixture. The main run seems visible, but as you hit the landing or change direction, shadows thicken and the step edge blurs. At night, that pause isn’t just caution—it’s lost momentum, and sometimes, a risky misstep. Adding another fixture or a directional wall sconce near the turn changes the entire experience: suddenly the steps are clearly defined, movement feels automatic, and the mental friction of “will I miss the edge?” disappears. Lighting here isn’t about overpowering the space, but letting you see exactly where your routine turns vulnerable.

    Laundry and Utility: The Shadow Trap

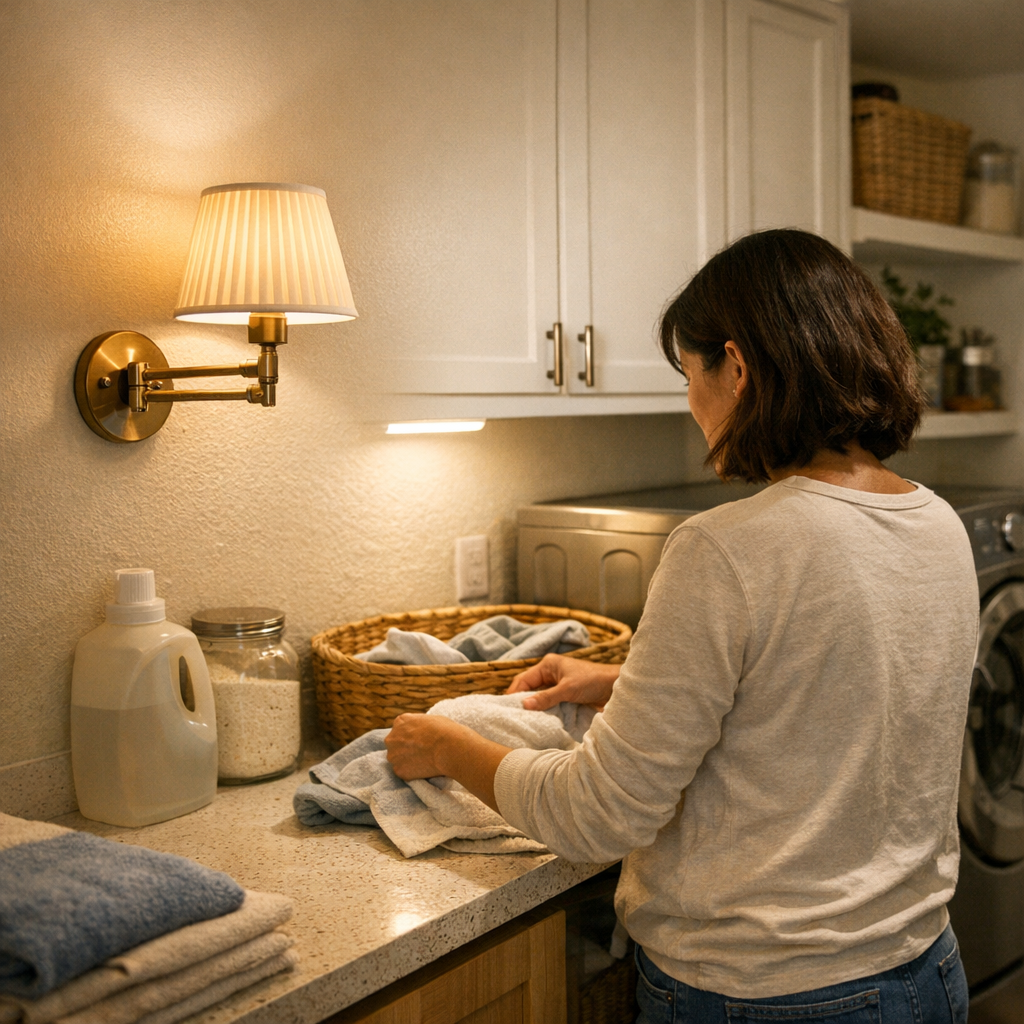
    Walk into a laundry room brightened by a single flush-mount fixture and it feels fine—right up until you start the job. When you reach for socks in the basket, the zone behind the appliances stays murky. Measuring detergent means tilting the cup, chasing the angle, or leaning in uncomfortably just to see lines or colors. These aren’t just annoyances; they’re signs the lighting structure misses the work surfaces. It’s not that you need more brightness—the issue is lighting failing to reach where focus is needed, turning every ordinary task into a slow, stop-gap process.

    Why “Bright Looking” Lighting Fails in Real Use

    Room-wide brightness doesn’t guarantee safe, smooth function. Most flush-mount ceiling lights scatter light broadly but rarely address shadowed edges, glare streaking across shiny counters, or the dim under-cabinet zones where hands and eyes concentrate. The mismatch emerges at key friction points:

    • Folding laundry at dusk: The overhead glows, but try sorting by color and you have to squint or drag clothes into the one well-lit corner.
    • Night stair turn: Center lighting leaves a landing edge half-lit—enough to catch your eye, not enough to move confidently.
    • Measuring on a reflective counter: Light glances off the surface, but the actual numbers disappear behind glare, pushing you to reposition the cup or switch sides.

    Lighting that appears sufficient from a distance often breaks down under real-use pressure. Instead of supporting effortless, repeatable motion, every session becomes a hunt for the right angle or a compromise with unwanted shadow and distraction.

    How to Make Fixtures Do the Actual Work

    Brightening the same room with “more lumens” or a bigger overhead fixture rarely solves these nagging issues. The real fix involves the right light type in the right spot—targeting the specific shadow lines and friction points where daily life breaks down.

    • Flush and semi-flush ceiling lights set up general brightness, but can leave side counters, stair turns, and cabinet bottoms under-illuminated.
    • Linear or panel lights—especially damp-rated versions—run directly above or along the main work area to erase shadow bars and keep all working planes visible.
    • Wall sconces, under-cabinet strips, or fixed wall lights bring the light forward and lower it to hand or eye level, directly addressing missed surfaces and ruining the old habit of leaning, squinting, or improvising with flashlights.

    One Change That Breaks the Bad Pattern

    Swapping out a lone ceiling bulb for a damp-rated wall fixture a foot above the counter can be enough to wipe out the chronic shadow that used to slow every task. Suddenly, you aren’t standing on tiptoe, moving a lamp, or stretching awkwardly to get basic visibility. The awkward, repetitive compensation stops. You get into the task flow and out again—nothing slowed, nothing fumbled, nothing hidden in the gloom where the light never used to reach. The cumulative frustration of “good enough” lighting finally gives way to an everyday setup that actually works for you, not against you.

    Pinpoint the Trouble Spots: Smarter, Safer Lighting Moves

    The worst lighting problems cluster in predictable spots. Spotting them in advance turns slow, awkward routines into safe, efficient ones.

    • Cabinet and counter shadows: Ordinary ceiling fixtures rarely reach the front edge—use under-cabinet strips or wall lights to erase hidden gaps and keep every task zone visible without acrobatics.
    • Stair landings and turns: Aim a fixture not just overhead but toward the landing or step path, ending the blind pause and clarifying movement at every direction change.
    • Humid or moisture-prone rooms: Dry-rated fixtures in bathrooms or laundry areas lose performance and safety fast—use damp-rated lights to avoid flicker, corrosion, or early breakdown along the cabinets and appliances.

    Pro tip: Two focused lights beat one generic “bright” fixture every time—split illumination prevents shadow traps and stops you from having to shift your position or fight for task visibility.

    Good Lighting Structure Makes the Whole Room Work

    Lighting isn’t about how a fixture looks as you enter—it’s about how the room supports every movement, every detail, every task, every time. When the structure fits the routine, motion feels automatic and surfaces stay reliably visible. Missed edges, foot hesitations, or workaround habits signal a deeper mismatch in fixture type and placement. The moment you flip the switch and every movement flows—no half-lit corners, no dangerous pauses, no daylight workarounds—you know you’ve solved what truly matters in day-to-day lighting.

    Find dependable, practical indoor-lighting solutions for real daily use at LightHelper.

  • Streamlining Your Cat’s Entry Routine to Cut Daily Clutter and Delays

    Most indoor cat care breakdowns aren’t about getting “nicer” containers or organizing shelves for appearances—they start the moment your routine stutters. If you’ve ever tried to feed your cat or do a quick wipe-down, only to fumble for a missing bowl or the wipes trapped behind a stack of deliveries, you know the gap: a calm-looking corner that falls apart under real pressure. What looks tidy quickly turns inconvenient when you’re forced to pause, hunt, or reshuffle—especially around entryways or wherever your cat’s daily needs collide with your own comings and goings. This is where CalmPetSupply’s practical daily-care world actually lives—in setups that either survive the repeat or quietly unravel with every missing piece.

    Spotting Where Your Routine Stalls

    Most people spot scattered toys or open bins first, but the real frustration is the routine snag: the moments your process stops cold. Quick examples:

    • You reach for the food bowl—blocked by yesterday’s shoes or a tote bag left by the door.
    • Refilling water means unlocking a cabinet, dodging a pile of flyers, or realizing the jug is still in the kitchen.
    • Cleanup wipes are “put away,” but grabbing them means another trip or clearing out other items first.
    • Grooming brushes end up on a random shelf again, never close by when the after-walk routine actually needs them.

    It’s not a one-off. These stalls repeat on the busiest evenings—after work, after errands, or in a half-asleep blur before bed—stacking up until small steps feel heavier than they should.

    When Tidy Isn’t Functional

    You can stage the entry to look spotless on Sunday, but real life tests every shortcut. After a few days, the entry zone you “decluttered” becomes an obstacle course: the food bowl shoved beside boots, towels for muddy paws balled up under the bench, the brush missing yet again. Every small detour means one more trip—for a refill, a wipe, or a tool. An entryway that seemed “managed” now forces you to backtrack or improvise, and simple daily care stretches into a series of slow resets.

    Picture it: keys in hand, your cat weaving around your ankle, and nothing where you need it. The food bowl is wedged behind delivery boxes, wipes buried in a drawer, brush nowhere in sight. Instead of one smooth handoff, you circle through the entry, raid the utility drawer, then double back to clean up paw prints. You lose not just time but any rhythm—turning a quick welcome into a slow, friction-packed routine.

    Symptoms of a Weak Entry Setup

    If you’re shuffling pet gear back and forth, chasing down tools, or clearing shared space every time you start a routine, your setup isn’t holding up to repeated real use—even if it looked functional day one. Watch for symptoms like:

    • Opening a bin takes two hands because something else always ends up stacked on top.
    • You have a “spot” for the brush, but never the same place twice—no muscle memory forms.
    • The litter scoop migrates to other rooms after every quick cleanup and isn’t back when the next mess hits.
    • The water bowl stays clean, but you’re always missing the jug or have to abandon the spot to fetch it.

    What Causes the Gap?

    Most pet stations are staged for their first use or showroom neatness—not the distracted, unpredictable rhythm of real living. The moment a setup requires too many extra steps, you’ll start to shortcut. Tools wander, messes multiply invisibly, and any small barrier—missing wipe pack, blocked access, a basic item in the wrong spot—turns a routine reset into another circuit around the house. The system that looked “easy” becomes the repeat slow spot.

    Resetting Daily Care for Less Friction

    The setups that actually work have one thing in common: you can do the next step right where you are. Place sealed food bins and easy-grab wipes at the door, add a hook or tray for essentials, and keep one backup water bottle with basics. Real improvement isn’t about making things “perfect”—it’s about saving steps in stress moments. Ask yourself:

    • Do you need to leave your entry zone for food or water refills, or can you handle everything in one move?
    • Can you grab cleanup supplies with one hand, without opening extra cabinets or containers?
    • Does each tool have a real habit spot—one it returns to without thinking, after every use?

    Any step that slows you down week after week—that’s the weak link exposed by repetition.

    What Really Works for Everyday Use

    Small, lived-in changes have outsized impact: a towel always stacked by the door, a food bin that actually opens with one hand, every tool landing in a visible spot. The goal isn’t rigid organization, but removing slow points—so care, cleanup, and feeding reset instantly, no detours. When your brush, wipes, and bowls fall to hand right at the threshold, clutter recedes and routines finish in the time they should, not a minute longer.

    Conclusion: Less Steps, Less Stress

    The real test of your pet-care setup isn’t how calm it looks, but how it absorbs a run of chaotic mornings or stacked-together late nights. If one small flaw—like a missing bowl or hidden wipes—breaks the chain, your system will double your effort when you’re least able to spare it. An entry that truly works keeps the right tool visible and the next action effortless, no matter how distracted you are. Everything else is just surface order.

    For more daily-use ideas and real-world solutions, visit CalmPetSupply.

  • How Small Car Organizer Choices Impact Daily Driving Convenience

    It only takes one drive for “organized” to become “awkward” again. A car can look under control, yet every entry, grab, or turn reveals what’s still not working: the charger cord that snakes out of easy reach, the wipes pouch that slips under the seat, or the bin that slides every time you brake. It’s not about a visible mess. It’s the daily drag—the minor, steady interruptions that slow down even your simplest routines. If you find yourself shifting items aside, re-adjusting after every drive, or chasing down cables before every quick errand, something in the setup is leaving friction where there should be flow. That’s the real difference DriveWellSupply exists to solve.

    The Quiet Return of Car-Use Frustrations

    Surface neatness fades fast once real driving starts. You slide in with a laptop bag, and now the “universal” organizer blocks the charger. Your passenger steps in, and the phone cable vanishes behind a seat seam. The trunk looks sorted—until a single stop sends everything drifting out of reach. These are the pressure points that tidy setups can’t hide. After three days of errands and kid pickups, you notice your car looks “organized” but your reach, access, and re-entry are all slower than they should be.

    Everyday Interruptions Stack Up

    The friction isn’t dramatic; it’s relentless. The pen never stays in the same spot. The charger tangles in the footwell again, just as you load up for soccer drop-off. The cleaning wipes roll a few inches deeper under the seat every day, until you’re half-kneeling to retrieve them. Quick tasks—like charging mid-drive or tossing gym clothes in the back—turn into stop-and-adjust rituals. Every pileup of small delays reminds you: good looks don’t equal real efficiency.

    When “Good Enough” Organization Slows You Down

    A setup that seems fine on day one can turn into a slow leak of time and patience by week’s end. Pouches with open tops dump chapstick or coins onto the floor with every lane change. Floor covers keep dirt off one surface, but leave scuff marks right where boots hit the exposed seat edge. Cargo bins without anchoring just drift and scatter when you brake. If every drive means resetting, untangling, or crawling for something that “should have stayed put,” you’re not organized—you’re just redoing the same work, quietly, every day.

    The Lived-In Contrast: Looks Versus Use

    Real driving exposes every gap. Seat covers that lack overlap along the edge collect grime where you can’t clean without pulling them off. Cables routed for looks end up tangled again once passengers use the outlet. Trunk bins that seem perfect—until a full grocery load shows the sides collapse. It’s not the lack of organizers that slows down your routines; it’s setups that fight back the moment conditions get real: rainy days, quick handoffs, backseat shoe marks, and every bump that sends loose items rolling out of arm’s reach.

    Recognizing Signs of Slow-Down in Daily Driving

    If you notice these signals repeatedly, your setup isn’t holding up to real use:

    • Retrieving items that drift to the passenger footwell or under seats after every turn.
    • Searching for chargers or ports hidden under covers, seat edges, or organizer sleeves.
    • Seeing new shoe scuffs in the same spot, even though covers are supposedly “protecting” the seat.
    • Needing to pause to clear a path or re-set storage before each drive, despite a tidy appearance.

    These aren’t small quirks. They’re repeated signals: your car looks clean but interrupts your habits every day.

    The Real Cost: Repeated Cleanup and Reset Moves

    Every “small” fix adds up. When wipes, chargers, or cargo bins don’t stay put, cleaning stops feeling optional—it becomes routine. Your attention splits between the drive and the constant mental checklist of what you’ll need to reset at the next stop. Routine use should get easier, but here it quietly gets harder, drive after drive.

    From Distraction to Routine Ease: What Lasts in Daily Car Use?

    Real, lasting convenience comes from setups that survive repeat cycles—school runs, commutes, dog walks, quick trades with a family member. Consider the visible difference:

    • A seat cover designed with true edge overlap actually blocks muddy marks during side entry, saving you from scrubbing after each rainy pickup.
    • Cables routed out of foot traffic stay where you need them, stopping the cycle of fishing under seats or moving gym bags just to plug in.
    • Organizers with structure and grip keep pens and wipes within arm’s reach, even on sharp turns—no more crawling around or scavenging for scattered items.

    The real benefit appears after days—not just minutes—of repeated use: you exit and return without cleanup, and nothing slides, bunches, or blocks your next move.

    A Trade-off Worth Making

    You won’t always pick the prettiest setup—but you’ll save time, sanity, and movement every time you skip a reset. The best solutions are the ones you touch less and trust more, week in and week out. Less time untangling wires or chasing drifting organizers means more actual momentum to your routines—even if it doesn’t look like a magazine spread.

    Better Car Organization Is Measured in Less Friction, Not Flash

    This isn’t about showroom gloss. It’s about the car that quietly supports you through rain, clutter, and tight turns—where organization means no more surprises, no more repeated work, and setups that keep pace with your driving life.
    If your interior keeps making you slow down, look for the structure that lasts without fuss—solutions that stop hidden friction from creeping back in. That’s the upgrade that matters, drive after drive.

    Shop DriveWellSupply for car-use solutions that stand up to repeated, real-world routines.

  • Why Open Cubby Storage Benches Outperform Closed Lids in Busy Entryways

    That entryway bench looks sorted—until it isn’t. You set one up to keep bags and coats off the floor, but within days, the illusion cracks: the lid is blocked by junk mail, backpacks, and a tangle of jackets. Swapping shoes becomes a shuffle. Family members, aiming for speed, toss their gear wherever there’s space—often right on top of the bench or straight onto the floor beside it. The so-called “landing zone” turns into a slow-motion pileup, and the very system meant to anchor your entryway ends up ignored, its surface crowded and its storage hidden behind a barrier you rarely bother to clear. The problem isn’t lack of effort. It’s a storage setup that mismatches the way people actually move in and out of the house.

    When “Storage” Collides with Real Movement

    Every week brings the same pinch. You reach for your bag, but it’s buried under outerwear or wedged behind a heaped shoe pile. That storage bench, meant to streamline entry and exit, becomes yet another obstacle. Resetting the space—clearing the top, restoring order—slowly turns into a recurring project rather than a quick habit. By midweek, the floor is scattered again, “order” has drifted, and every retrieval asks for extra steps. The bench may be substantial, but it isn’t working with your movements; it’s slowing them down.

    Closed Benches: Why the Surface Always Fills Up

    Closed-lid benches promise instant order and a clean top. But inside access relies on a routine few actually follow. In daily use, the flat lid becomes a target for drop-offs—a school bag, today’s grocery tote, whatever didn’t make it to its real home. Need to retrieve something stored inside? You first clear the surface or juggle bags in one hand while opening the lid with the other. That tiny friction adds up: bags and coats return to the floor, and the “hidden” storage is hidden in the sense that it’s too much work to access routinely. What’s left is a bench that looks organized only before breakfast—then becomes a bottleneck for everyone.

    Open Cubby Benches: Every Bag Visible, Every Move Quicker

    Contrast that with open cubby benches. Each item has a clear slot—nothing sits on the lid, because there isn’t one. The exposed structure may sacrifice a little polish, but it delivers on everyday usability: step in, drop a bag in its cubby, slide shoes in below, and move on. There’s no confusion over where things go, and nothing blocks quick retrieval during peak hours. Even more, the presence of open slots discourages random stack-ups; school bags land in a defined place, not wherever there’s room. The “reset” becomes automatic—each return is just another step in the flow, not a separate chore.

    The friction vanishes: grab-and-go takes one step, not two or three. Reclaiming the baseline order isn’t a weekday project; it’s embedded in the way the space is used, so there’s nothing extra to maintain mid-chaos.

    Real Costs of a Mismatched Setup: Slowdowns, Overflow, and Clogged Paths

    Multiply this across a household, and the effect compounds. Mornings turn into small traffic jams: someone’s duffel is half-blocking the bench, another’s basketball leaves only a corner for seating, and to get your own things you displace a small avalanche or sidestep into the hall. Blocked access means lines form, people dodge around each other, and overflow migrates—first to the nearest open patch, then to secondary “temporary” drop zones down the corridor. Instead of solving clutter, the wrong bench scatters it further and erodes the entryway’s role as a usable hub.

    What Actually Keeps an Entryway Bench Working?

    The only systems that outlast the first few days are those that align directly with lived patterns. Benches with divided open cubbies for each person or bag keep flow visible and eliminate the need to “clear the lid.” No hidden layers means no one wastes time searching or re-stacking. Unlike a closed box, cubby layouts reinforce where things go—making it harder for rogue items to land off-target. Retrieval and return become the same simple motion, and the habit sticks because it matches what’s already happening. When categories blur and floor space fills up again, it’s a clear sign the structure—or the placement—is out of sync.

    A flat lid, on the other hand, always demands discipline: surfaces attract stuff, categories blend, and resets start taking longer. In most homes, visible cubbies win not just on accessibility, but on staying power during rushes, resets, and everything in between.

    Placement: Where Setup Fails Even When the Bench is Right

    Even the best design loses impact if the bench itself is trapped behind a swing door, wedged into a wall corner, or sitting where laundry baskets and pet beds choke off the main access path. For friction-free use, the entry bench must line up with the natural route from door to room—so each slot is easily reachable, no awkward side-stepping required. If a rug buckles underfoot or a side table always gets in the way, they become silent friction points. Often, the fix is moving a single piece or clearing a walkthrough, not buying something new. Because if using the bench isn’t easier than the next-nearest floor patch, it will just be ignored.

    Practical Use: Track Your Routine, Not Your Plan

    Start by watching: after the first week, is the bench filling as you imagined, or is overflow piling up in new places? Are you reaching twice for the same bag, or sidestepping obstacles that “shouldn’t” be there? A storage setup that nudges people to invent workarounds is already giving you feedback on what needs to change—ignore that, and you’re only buying time before chaos resets itself. The real test isn’t how it looks on day one, but what happens after repeated school runs, grocery loads, and weekend dumps. Fix what fails in use, not on paper.

    Beyond “Looks Organized”: Storage That Actually Supports the Rush

    You can see the difference in a lived-in entryway:

    • No wasted seconds fishing for bags under extra layers.
    • One-step grab-and-go access, even with everyone moving at once.
    • Resets that finish themselves, not projects you put off.
    • Floor stays clear because the system absorbs returns at speed.
    • No more lost gear under lids or behind a pile of “temporary” items.

    That happens when the bench, zones, and traffic paths match the reality—not the ideal—of daily use. Most households get further with open cubby benches because they keep anchor categories visible, speed up return flows, and absorb movement instead of slowing it. The proof isn’t in the first photo, it’s in the second or third week: less spillover, fewer blocked steps, and an area that holds its shape under real pressure. If you want an entryway storage system that actually keeps up, build for the motions you repeat, not just the appearance you set at the start.

    Find more practical inside-storage systems at Gridry

  • How a Floating Shelf Transforms Entryway Clutter into Calm Order

    The entryway is a pressure zone, not neutral ground. Each time you step inside, hands full or arms loaded, whatever you’re carrying lands on the first available surface. One day it’s the bench corner, next day it’s a shoe rack edge, or the sliver of space left on a crowded side table. The setup you trust to “catch the drop” quickly turns uncertain: miss the right drop zone, and by midweek you’re wading through scattered keys, stray mail, and half-sorted gear. What felt controlled on Sunday is already slipping—resetting turns into a repeat search, and walking through the threshold feels more like dodging obstacles than coming home. One misplaced item grows into a pile that blocks the way and slows your return to order.

    When Every Surface Is a Landing Zone, Clutter Follows

    The logic is almost automatic: drop whatever you’re holding, keep moving. But when any free spot becomes the default landing pad, you don’t just drop your keys—you set off a chain reaction. By midweek, keys share space with pocket change and sunglasses, while the bench hosts yesterday’s bag and today’s mail. The path narrows as every “just for now” item lingers, and resetting the entry feels like tipping over a slow domino run of misplaced and multiplying things.

    The shoe row tells the whole story: heels drift, boots fan outward, and in a few days what was a slim walkway becomes a maze. Your mail-and-key console transforms into a catchall tower: coasters, stray masks, folded bills all staking claim until the original purpose—the quick grab, the clear reset—gets buried with each new loop. The time lost and the small irritations add up, not just for you, but for anyone sharing the threshold.

    The Floating Shelf: Designated Drop, Not Decorative Display

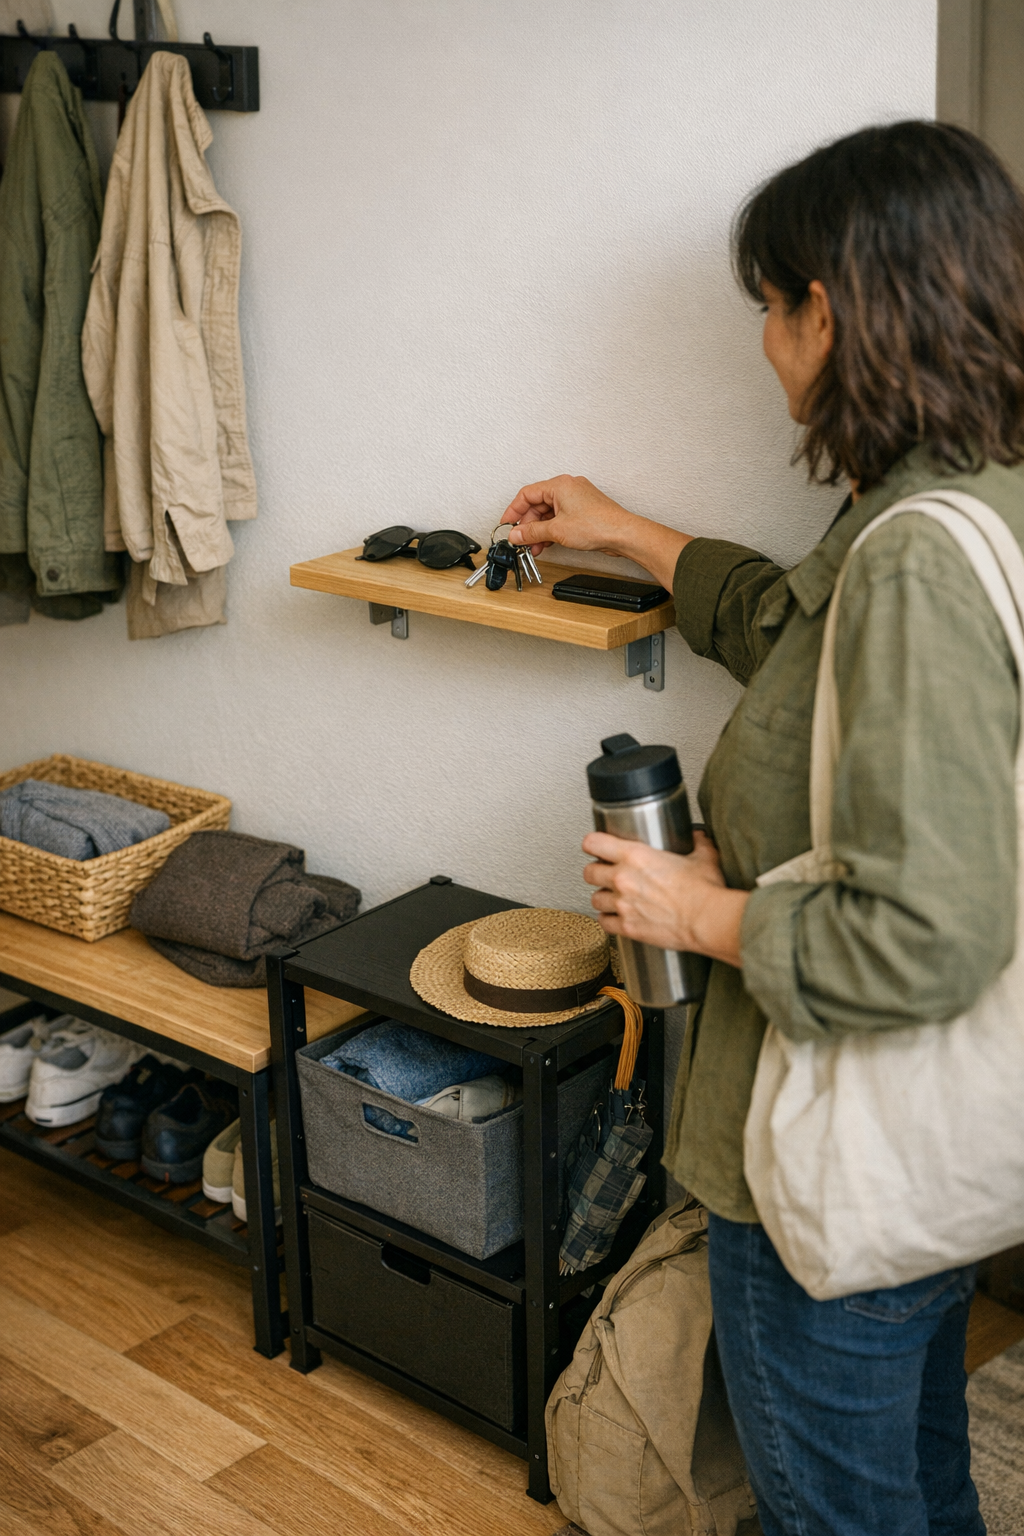
    The floating shelf isn’t about looking tidy—it’s about breaking the cycle of diffuse landing and semi-permanent mess. Visually, it fades in; functionally, it stands out by forcing a new habit. Placed above bench chaos and below shoulder reach, the shelf becomes a target: every key, card, or daily essential finds its place before it disappears into clutter’s sprawl.

    That separation is what makes the difference in real pressure zones—narrow hallways, tight corners, busy doors where two people and three bags barely squeeze through together. Overflow—snow-damp jackets, extra shoes, or unclaimed parcels—spreads along the floor, piling up fast. The floating shelf escapes that crush: it doesn’t get buried by coats or swamped by bag drop drift. Instead of becoming another cluttered horizontal, it creates a “no-mix” zone where essentials resist the gravitational pull of daily buildup.

    Not All Shelves Work in Real Use

    This isn’t about putting up any shelf and calling it a win. A poorly placed shelf—up too high above an already crowded cabinet, or tucked outside the main pass-through—answers the wrong problem. If it’s outside the default re-entry path, it gets ignored. If it’s too wide, it turns into a mail mountain; too stingy, it’s useless after the second item. The honest test: at week’s end, is the shelf still cleanly holding the essentials, or has it disappeared under piles, fading back into the background noise of entryway clutter?

    Entry Benches, Overflow, and the Downward Slide

    The “catchall” is never just theory—most homes try it. Maybe it starts with a tidy bowl or tray on the console, and for a day or two, surfaces look clear. But then real patterns reassert:

    • The collection bin quietly overflows
    • Bench seats become lost to gloves, grocery bags, and half-remembered mail
    • The bench’s entire top turns into a stacked buffer zone—where you’re supposed to sit is now another surface you have to clear just to use

    Floating shelves sidestep this ground-level crowding. By pulling keys and main essentials up and away, they reassign benches and racks back to their real jobs: shoes, gear staging, loading for the door. You spend less time shifting loose items just to find somewhere to sit or set down a bag, and the bench survives as useful seating rather than overflow storage.

    The shelf’s benefit appears subtly at first, but becomes obvious as the week cycles: where trays and bowls become indistinguishable from their contents, the floating shelf interrupts this slow-slide before it gains momentum. The clear drop point disrupts the pileup, sparing you from the endless shuffle of clearing, re-clearing, and crowding out your own entry.

    Real Use: Threshold Pressure and Easy Resets

    The advantage sharpens in the messiest moments: a grocery haul lands, or muddy shoes plus umbrellas eat up all the bench space in seconds. The usual reflex—to toss keys onto any open patch—leads right back to chaotic spread, and before long, tracking a single item means reshuffling half the entry.

    Add a floating shelf, and the process splits:

    • Keys, lanyards, and cards ride above the churn, untouched by bags, jackets, or boot clusters
    • Mail, packages, and shoes may still amass below—but what you need to leave stays reliably in reach, unmixed and unburied
    • Every reset gets easier: lifting a pile to grab keys stops being a daily routine

    After a few weeks of use, the friction falls away. The shelf remains steady—one spot you never have to dig for, even when the rest of the space is pulled into overflow and reset loops by rushed mornings or high-traffic evenings.

    Placement Details That Matter

    Exactly where you install the shelf reshapes how long its benefits stick. Shift it just above the usual bag drop zone—and still within arms’ reach on your direct path—and the routine transforms. In one everyday fix, this single adjustment stopped morning key hunts. The shelf stayed visible and open, never hidden behind coats or half-sat bags, and reset friction dropped because the entry’s main access path stayed clear. The shelf wasn’t just present; it stayed functional, holding the line even when the threshold was tested at its busiest.

    Threshold Storage That Works With You, Not Against You

    There’s no magic trick—no floating shelf resets a cluttered room by itself. But it does collapse the micro-delays and daily reshuffles that frustrate entryway routines. Instead of multiplying flat spots that only collect more clutter, the shelf sharpens the transition: one purposeful drop, one easy reset, one predictable flow in and out.

    For homes that want transition spaces to back up their routines—not get in the way—a floating shelf brings a visible advantage. It turns the regular return from “looks organized” to “stays usable,” showing where structure decisions really pay off after repeated, imperfect days. Every time you cross the threshold, you get one moment of function that doesn’t vanish the first time life gets chaotic again.

    Shop Betweenry transition-space storage

  • Streamline Pet Travel with Easy-Access Essentials for Stress-Free Trips

    The gap between a bag that looks organized and one that actually works at the curb shows up fast—usually during the first rushed stop with your pet straining at the leash. The travel setup that felt neatly zipped in your driveway quickly turns frustrating the moment real motion starts. If you’ve ever tried to grab a wipe only to find it trapped under tangled blankets, or found your bowl wedged beneath spare clothes while your dog circles impatiently, you know how “organized” can dissolve into a five-minute scramble just to get moving again. That’s where the PawGoTravel world starts—at the point where routine breaks, not just at the packing checklist.

    Travel Setups That Look Ready, But Don’t Work Under Pressure

    Packing is easy in theory: treats pocketed, bowl collapsed, waste bags tucked, leash rolled, wallet zipped away. But no trip plays out in perfect order. The real test comes when your stop is unplanned—at a rest area, the side of a busy road, a city curb—and your pet’s energy flips your “system” into an instant mess. Suddenly, the leash is tangled in snack pouches, wipes are buried two layers deep, you’re holding back a restless pet with one hand while digging through pockets you can’t see. Every stop starts to feel like a puzzle where you’re always one move behind.

    This friction repeats itself. Reach for the leash, and a sweater shifts. Try for wipes, and you knock loose a bowl. What looked like practical prep forces you into constant reshuffling, repacking, and the feeling you’re always restarting the trip instead of moving forward. An “organized” pet travel bag can actually trap you into more stops and longer transitions—and you notice it most with every unscheduled pause.

    Where Quick Access Makes or Breaks the Trip

    The real difference between a workable setup and a frustrating one isn’t capacity or looks—it’s whether you can grab what you need without searching. On the road, reach matters more than how tidy something stays. Wipes, leash clips, bowls: you need these fast for muddy paws or quick water breaks. If they’re stuffed in the same pocket as backup supplies, even routine stops drag out. Nothing breaks momentum faster than struggling with a bag while your pet pulls or whines.

    Instead of one-off hassle, these slowdowns layer up: city errands, road trips with repeated stops, even a day of park runs. Every moment you spend digging adds tension, tests your grip, and strains both your patience and your dog’s calm. Real access—what you can grab immediately, not after reshuffling—draws the line between smooth travel and a loop of small, preventable headaches.

    Real-Life Scenes: A Routine Complicated By A Bad Setup

    An hour into the drive, your dog gets jittery. You pull over: water break, quick walk. The layout that looked organized now unravels. The bowl is crushed below a hoodie, wipes are stuck in a half-zipped mesh. Holding the leash with one hand, you use the other to fish for whatever’s at the bottom. Meanwhile, leash clips snag on zippers, and your “quick” stop grows noisy and slow. The struggle isn’t rare—by the second or third pause, you start dreading every reach into the bag.

    These small breakdowns accumulate. Each time you’re forced to unpack or redo your setup for a basic task, you lose more time than you realize—and your pet’s restlessness spreads. A bag that seemed ready actually becomes the biggest barrier to a calm routine, making every trip feel disjointed, never truly settled, no matter how much you pack in advance.

    The Overlapping Spaces Problem

    The most common snag: owner and pet items packed into the same main space. Wallet next to leash, phone sliding behind wipes, backup snacks tangled with cleanup packs. At home it seems tidy, but repeat stops expose the flaw—pull for a snack, and you’ll unspool the leash or bury the wipes again. The more items rub together in a single pocket, the more access turns into interruption. You’re not battling mess; you’re battling the way structure works against rhythm.

    The real disruption isn’t visual clutter but constant loss of momentum. Even a bag that looks clean on the outside can slow you down if it forces you to pause, fumble, or redo your routine at every reach-point. Order doesn’t help if it ignores the actual pattern of stops, grabs, and restarts that shape travel with a dog.

    A Practical Fix: Seat-Side Access for Essentials

    The most fixable weak spot? Essentials—collapsible bowl, leash, wipes—must get their own exterior, seat-side compartment. When these items aren’t buried or overlapping, every stop shifts: your hand lands right on what you need, and the scramble disappears. Stopping turns from a mini-crisis to a 30-second reset.

    This isn’t about looking more prepared or owning “smarter” gear. It’s about physically changing where critical supplies sit—so that one repeat reach lands on a ready solution instead of a blend of everything. Once a bag’s structure gives you arm-level, seat-facing access to your highest-use items, your trip’s entire pace improves. The moments you spend stuck, digging, or juggling—gone. The routine, for both you and your pet, smooths out without any new tricks to memorize.

    What to Look For In a Pet Travel Setup

    The bags and organizers that work aren’t necessarily the prettiest or most compartment-heavy. The test is simple: can you get the leash, bowl, and wipes from a single, outer-access pocket, every time, without unpacking half your gear? Avoid any setup where frequent-use items are layered with backups or comfort extras. A smart, clean access sleeve outperforms segmented bags with too many hidden zips. If you’re moving blankets to reach wipes, or sliding your wallet to get a bowl, your setup is failing where it matters most—in motion.

    Real support means your bag adapts to your movement, not the other way around. Structure—seat-side, top-of-hand, quick-open pockets—matters more than how it scans at a glance. You’ll feel the improvement not in how it looks in your trunk, but in how little you have to think about it at every stop.

    Travel Routines Test Every Setup—Even the “Organized” Ones

    Whatever you tolerate at home—extra shuffling, hidden wipes, overlapping pockets—turns into a repeated headache on the road. The more stops you make, the clearer the difference between styled organization and real-world flow. Instead of fighting the same access bottlenecks and repeated slowdowns, swapping in a seat-side, quick-grab setup makes every transition smoother. What matters in practice is not the outer neatness, but whether your bag keeps pace with how you and your pet really travel—stop, access, restart, repeat.

    Explore practical travel setups at PawGoTravel

  • How Linear and Panel Ceiling Lights Transform Corridor Lighting Experience

    Most hallway lighting setups fail for a reason you notice only after repeated use: the path itself stays uneven, with shadow breaks at every threshold and corner. Take a week of late-night cross-room trips—arms full, zero spare hand for a switch—and you’ll realize a single ceiling fixture might look tidy, but it leaves gaps where you need light to work, not just appear. The surface underfoot picks up pools and edges of dimness, especially near doorways. Corners dull out, familiar objects get lost in low patches, and suddenly the “minimal” lighting choice feels like a source of daily drag instead of a solved problem. You can promise yourself you know the layout, but stepping blind over a misplaced cord or squinting for keys that fade into a shadow strip is friction you repeat, night after night. Hallway lighting reveals its quality not at a glance, but in every imperfect crossing after dusk—when you rely on clarity, not just brightness.

    Recognizing Where Single Fixtures Fall Short—A Routine Test

    A centered ceiling light is sold as the simplest answer, but actual movement reveals where it breaks down. As you pass from the fixture’s direct zone, shadow lines gather at walls and doorframes—the exact points you pause, step wide, or slow down to check a surface for clutter. You only need one awkward reach to spot whether the floor is hiding stray mail or a child’s shoe. Most schemes give the illusion of coverage, but only if you never leave the center of the beam.

    This is really about usable reach, not total wattage. Coverage means you see the lines you walk, the zones where shoes collect, the thresholds you’re crossing, and don’t have to guess what fades away after dusk. Once daylight vanishes, any interruption—every missed spot or lingering patch—means wasted seconds, extra hesitations, or retracing steps for dropped items. It’s cumulative friction, not just a dark patch—something you only notice through repeated trips, not first impressions.

    Linear and Panel Lights: Building Steady Corridor Coverage

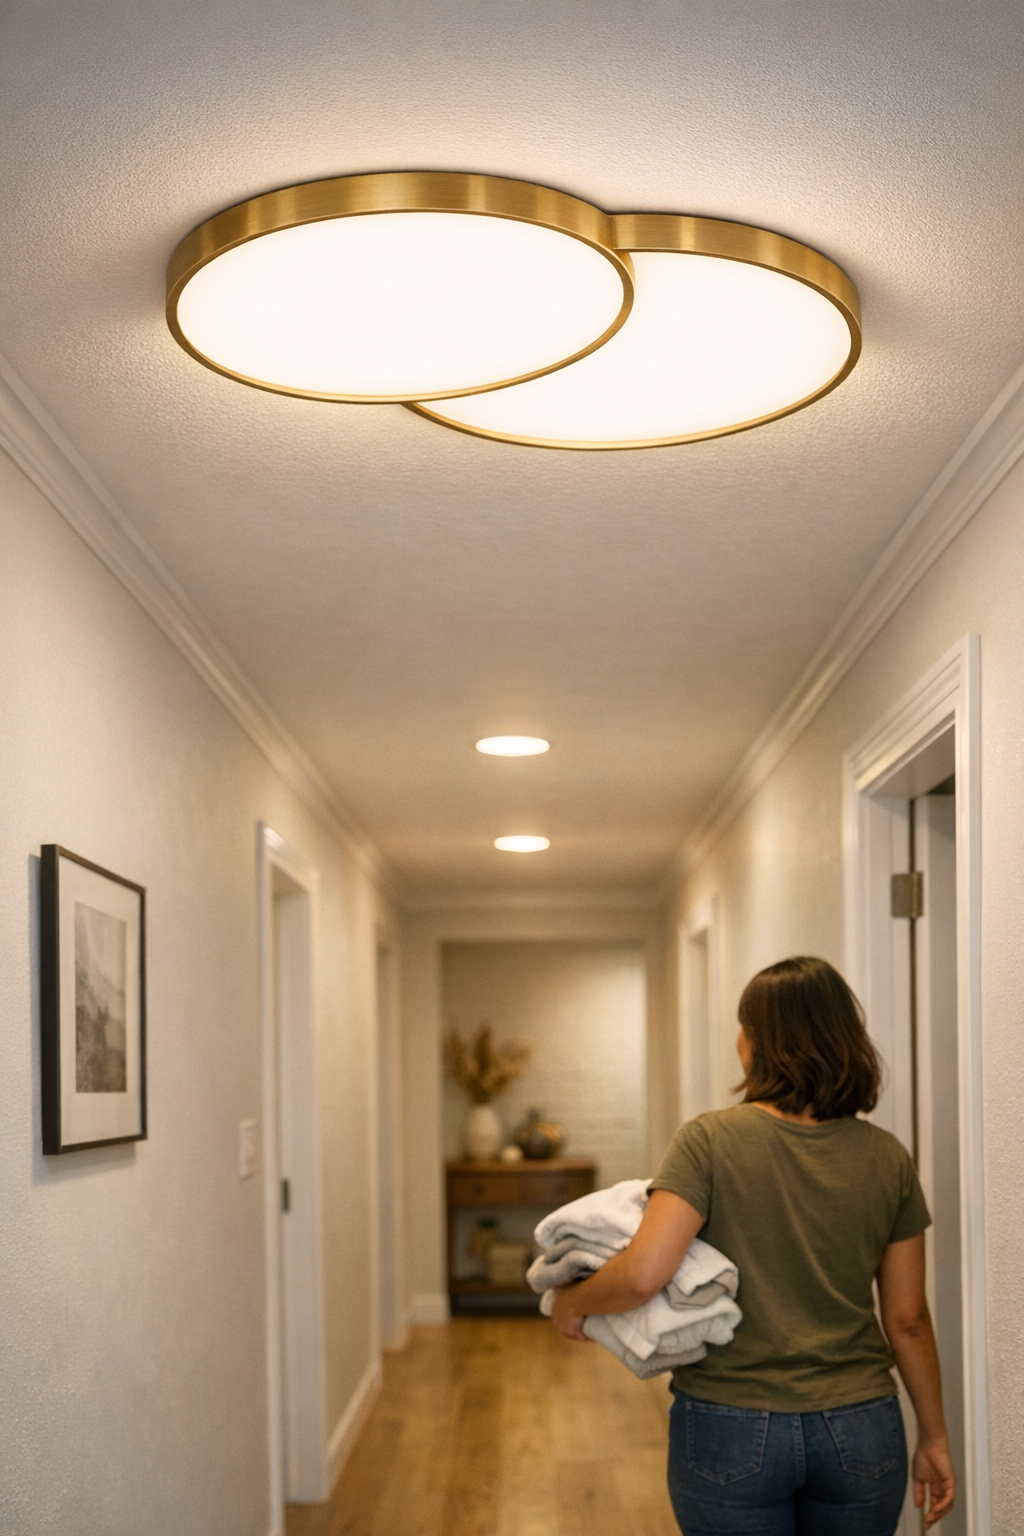
    Linear or low-profile panel ceiling lights disrupt the old pattern. Instead of spotlighting the middle and abandoning the edges, a run of panels pushes an even wash end-to-end, making the whole walk—from main room to far bedroom, through each doorway—a single readable path. There’s no broken sequence of bright/dim/bright, no need to track your own steps for safety. Placement, not just product, makes the difference.

    Where it’s impossible to ignore: windowless or narrow halls, or older layouts where doors cluster unevenly. Even in new homes, a corridor used as storage or laundry pass-through will quickly show the weak spots. The tension isn’t over-lighting but removing invisible obstacles—making each movement predictable, letting you spot clutter or surface changes instantly, no matter the hour or traffic.

    Where Most Setups Still Slip: The Gaps Between Fixtures

    Too many solutions fail by spacing fixtures flush or too far apart—no overlap, just exposed seams between “zones.” Walk the same hall at night: you spot foot-wide stripes where light weakens, feel the drag as you slow for uncertain footing, or sense guests side-stepping a semi-lit step. It doesn’t matter how sleek the panels look; a single miscalculated gap turns a decorative upgrade into a patchwork of hesitation zones.

    This isn’t subtle once you notice it. The so-called finished job still asks the same routine questions—should you watch for a trip hazard, should you flip another switch, should you grab your phone’s flashlight? The actual fix is measurable: intentionally overlap each panel’s coverage zone by 30 to 50 cm. This is what blends surface visibility and keeps the walk continuous. Ignore this, and the setup visually resolves but leaves daily use unresolved—a premium surface with low-grade results.

    Everyday Consequences: What Repeated Use Actually Shows

    Lighting that “looks good” often disguises weak surface logic. In a regular week:

    • You keep shifting your walk to dodge a dim strip at the wall, even when you know the route is clear.
    • You reach for dropped keys or check for shoes, only to have them slip into low-contrast shadow bands by the door.
    • Visitors stall at the stair landing or darkened corners, unsure if the floor is safe past the last bit of light.
    • Mail and bags linger unseen by the baseboard, missed until the whole main room fills with light.

    Every time you slow, scan, or sidestep, minor lag piles up—especially with kids, older adults, or arms full of laundry after lights-out. Efficient movement exposes lighting’s true function: not looking resolved, but letting you navigate without question.

    Not Just for Narrow Halls—But Especially Needed Where Light Doesn’t Reach

    Wide or open corridors soften the difference, but long, narrow, or windowless runs betray every skipped detail. Unblended sections lose clarity exactly when routine needs it. Even a flawless ceiling line is empty credit if memory, not vision, is doing most of the work. If you find yourself assuming, not seeing, what’s in the next step, it’s a sign your lighting favors decorative order over functional safety.

    For these problem zones, 30 to 50 cm overlap between panels is not theory—it’s an everyday defense against uncertainty. The best sign you’ve fixed it: you quit pausing, you never sidestep clutter, and guests move naturally through every doorway, at any hour. The moment hesitation disappears, you’ll know the coverage finally matches the corridor’s needs.

    Making Small Adjustments That Fix Daily Friction

    You rarely need a full overhaul. Often, swapping a single central fixture for two slim, overlapping panels right where you hesitate—at the busiest entry or underused corner—fixes months of unnoticed frustration. Post-adjustment, the entire length is readable, even after sundown. Missed piles by the wall, awkward threshold shadows, the quick “is anything there?” check—gone. This is clarity designed to match movement, not just appearance.

    Targeted, practical corrections include:

    • Mapping and lighting the precise transitions—putting panel overlap precisely where steps and sightlines stall, not just centering lights for symmetry.
    • Verifying overlap rather than installing panels edge-to-edge—no blind seams or dim stripes left for routine to expose.
    • Tracking the setup across a week: if you’re still pausing, if new shadows emerge, reconsider fixture position before declaring the job done.
    • If support hardware—cables, brackets—spring into view or disrupt the ceiling line, refine the mounting choice, not just the fixture, so tidiness and usable light support each other.

    Only repeated passage, not a single walkthrough, will confirm what works. Corridor setups that prioritize overlapping, real-use zones—over default placement or visual emptiness—quietly strip away hassle and expose whether the upgrade is actually working for everyday movement.

    When Appearance Outweighs Use—And How to Spot the Difference

    The drive for minimalism often blindsides actual function: a solitary fixture, an unbroken paint line, and the finished look that satisfies only until darkness multiplies your hesitations. With weeks of living, the test isn’t how seamless the ceiling seems—it’s how often you still slow, detour, or resort to your phone’s light. “Clean” ceilings that leave you compensating with extra switches or cautious movement are uncompromising in appearance but weak in routine use.

    Real hallway lighting ends the guesswork and reroutes of daily life: no habitual sidestep, no double-check for each step, no invisible piles by the edge when moving at night. Achieving this doesn’t mean packing the ceiling with fixtures; it means recognizing which spots your habits keep exposing, then intentionally resolving those missing lines with practical coverage—not just presumed design simplicity.

    Summary: Corridor Lighting Built for Routine, Not Just Show

    Across weeks of use, the costs of incomplete lighting quietly accumulate—minor delays, missed items, and transitional slowdowns. Switching to continuous, intentionally overlapped panel or linear lights isn’t just about brightness—it’s about erasing the practical gaps that trip up daily movement and decision. A good corridor setup disappears in use: no forced pauses, no blind merges, just a well-lit, frictionless path at every hour. When overlap, distance, and finish all support real-world habits, hallway lighting finally solves more than it shows. For setups that actually handle repeated routines, not just empty rooms, clarity is the upgrade that matters.

    http://www.lightsupport.myshopify.com