Author: jaesoon_admin

  • Why Return Flights Feel Heavier: The Hidden Strain of Carry-On Bags

    The hidden friction of your return flight isn’t chaos—it’s the slow breakdown of carry-on order, revealed through real, repeated movement. What seemed perfectly sorted when you left home starts to betray you by the time you’re threading through airport security or inching down the boarding aisle. You notice it in tiny stalling moments: the charger that’s migrated deep into a snack pouch, the passport that now clings to receipts, the “quick-access” pocket that suddenly requires two zips and a blind hunt.

    This isn’t a dramatic collapse. It’s the incremental drag of a system that deteriorates silently—one awkward document retrieval, one tangled cable, one tray transfer at a time. Outbound, your structure held. On the return, the cost shows up with every small interruption. The more you dig, the clearer it gets: a bag can look tidy but feel unworkable when the flow of actual travel starts testing each pocket, pouch, and packing routine.

    When Organized Isn’t Enough: Where Friction Takes Hold

    Every seasoned traveler knows the feeling: the trip begins with chargers, snacks, and travel documents each in their mapped spot, and outer pockets prepped for quick grabs. But delay creeps in once you’re back in the churn—security queues, check-in counters, crowded gates. What started as order fades as charger cables drift into snack kits, boarding passes get sandwiched with crumpled receipts, and fast-access pouches turn into catch-alls.

    The bag still looks structured, but your motions stall. You reach for a passport, hesitate. The right item means tracing multiple zippers instead of one. At security, you fumble to separate tech from snacks, losing tempo as the line moves on. There’s no mess—only a slow, compounding loss of speed in moments that once felt automatic.

    Specific Travel Points Where Carry-On Structure Breaks

    Check-In: The Disappearing “Safe” Pocket

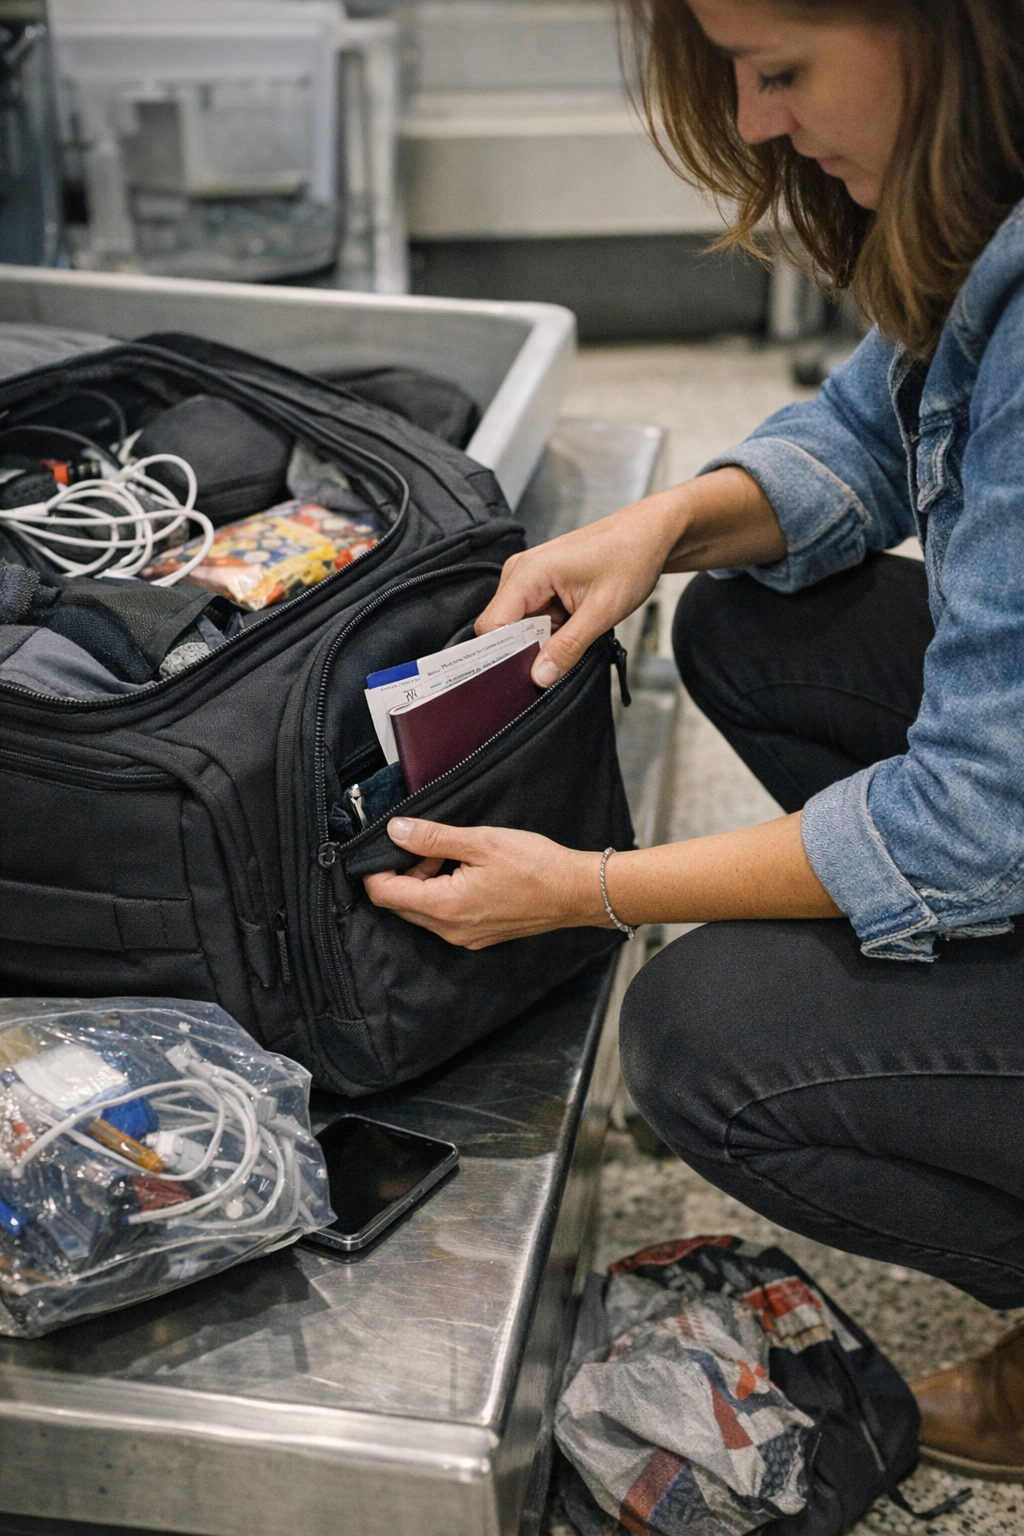
    It’s never at the hotel where things go wrong; it’s at the check-in counter, people on all sides, hands full, trying not to hold up the queue. You go to grab your passport, but it’s wedged against postcards or snack wrappers, no longer in easy reach. What should be a swift handoff becomes a hand-deep search and that awkward moment shuffling items while staff and other travelers watch. Not lost, not scattered—just resistant, just slow.

    Security: Scramble at the Tray

    Security unpacks the problem. Your laptop is in one pocket, but the charger—you discover—is tucked with travel snacks, “just for now.” Headphones, pen, cables: each piece clings to something it shouldn’t. Items cross over, pockets lose discipline, and you’re pausing to untangle the intended from the extras as bins fill up. When it’s time to reload, the neat pack resists reassembly—it’s become looser, less reliable, and you feel exposed, not prepared.

    Boarding & Bins: Order Becomes a Puzzle

    You reach the boarding tunnel and face the overhead bin. That slim, compartmentalized bag you were proud of now demands multiple unzips to reach a boarding pass or headphones. You edge down the aisle, aware of people waiting behind you, as you work through a tangle that was never meant to be this tangled. Each attempted shortcut—outer pocket, side zip—reveals another small barrier.

    Gate Lines: The Repeat-Check Rut

    In the final queue before boarding, you start double-checking essentials—again. Instead of a confident “here it is,” you’re fishing through three pockets, feeling for familiar shapes, scanning for documents. Every extra second matters in the slow-moving crush, and a bag that should follow your rhythm instead demands attention, making retrieval a minor hassle every single time.

    Why “Good Packing” Cracks Under Real Repeated Use

    This isn’t just about overstuffing or laziness. The real culprit is the slow breakdown of your access logic as repeated transitions force items into “just for now” slots. What began as compartmentalization erodes as pouches overlap roles. A tech organizer ends up swallowing old stubs. The bathroom kit swallows loose travel snacks. Even a well-planned layout gives way under pressure from security, gate changes, and last-minute adds. The decline is easy to ignore until it makes itself felt at the worst time—when movement and speed matter.

    So, if your efficient outbound setup is losing shape by the return, you’re not alone. Packing isn’t a one-time mastery; it needs to hold against the drag of real movement and real repetition.

    Real Signs Your Carry-On System is Slipping

    • You now dig through two or more pockets to get a travel document you used to reach in one
    • Chargers, snacks, and cables end up in the same compartment, slowing retrieval at every checkpoint
    • Security “quick-access” zips are stuffed with extras, turning a 2-second check into a drawn-out fumble
    • Repacking after each checkpoint requires placing your bag down for a mini-sort, not just a quick slide
    • The feeling of “control” is replaced by low-grade tension each time you need something on the fly

    You don’t need mess for a failed system—a bag that hesitates, delays, or stalls on demand is already costing you.

    How to Restore True Order: Single-Purpose Quick-Access Zones

    Packing again at the hotel won’t save you. Resorting to endless re-zipping rarely helps once the structure’s gone soft. Instead: assign a single pocket for mission-critical items only—passport, boarding pass, pen. Set this zone aside before travel, not improvising mid-route. Don’t let snacks, tech, or last-minute extras invade this space. Delegate each type of item—tech, snacks, receipts—to its own pocket or pouch, even at the cost of visual neatness. When a single-use pocket is preserved, stress drops: retrievals become automatic, motion stays smooth, and the rest of the bag—however jostled—never blocks what matters most.

    This reset pays off at every checkpoint: you move without searching, you board without pausing, you sidestep the classic pile-up at tray returns. Not every inch of your bag stays pristine, but your flow does.

    How to Keep Your Carry-On Functional Through Every Transition

    Give Each Pocket a Non-Negotiable Role

    Don’t compromise: If a pocket is for documents, only documents go there—always. If it’s for tech, keep it hands-off for snacks or souvenirs, no matter how tempting. Structure that survives friction needs fewer zones, but sharper boundaries. The outside can be a little messy if the core logic never softens.

    Stop Tucking “For Now”—It Never Stays Temporary

    Last-minute receipts, wrappers, or pens will tempt you to just tuck them where there’s space. Don’t. Each “harmless” add-in fills the retrieval path you’ll need later. Instead, stop after major checkpoints: restore each compartment to its role, reassign floaters, and clear out catch-alls before the next move. Letting your essentials migrate opens the door to later headaches at exactly the wrong moment.

    Test the Setup in Real Sequence, Not Just at Rest

    It should take one motion to get a passport, no looking down. You should be able to pull a charger mid-queue with the bag on your shoulder—not with the bag spread out on a chair or floor. If any core retrieval takes more than a few seconds in the real flow—boarding, security, gate—adjust now. Surface neatness never compensates for friction that repeats dozens of times between start and finish.

    Real Performance: Built for Movement, Not Just Looks

    A carry-on doesn’t prove itself by leaving home organized. You see its real value at the fourth checkpoint, the second gate change, the late-night seat entry when pressure is up and time is short. Set up your structure for the actual grind of travel—repeated access, standing surges, repackings on the fly—not the controlled calm of pre-departure packing.

    That’s what keeps a carry-on working for you, not against you: less visual perfection, more access logic that doesn’t crack under pressure. The real advantage isn’t just less mess, but the missing drag, the recovery of rhythm—so you can focus on moving forward, not on searching for what used to be organized.
    Shop CarryOnSupply for better carry-on travel tools.

  • Choosing Window Seat Storage Benches for Easy Seasonal Throw Rotation

    Window seat storage benches promise calm, but in real homes, their convenience can collapse fast. The same bench that hides bedding and throws so cleanly on day one often turns into a deep, semi-chaotic vault by week six—each blanket pulled from below the pile means a full, awkward reshuffle just to get what you need. “Out of sight” turns into “buried somewhere”—and the space designed to contain clutter ends up generating its own low-level mess. You notice the shift as seasons change or guests visit: what felt organized at first is suddenly three steps away from useful, with blankets camped on chair backs and essentials trapped at the very bottom.

    Where Good Intentions Fall Apart: Inside the Everyday Bench Routine

    The first setup—fold, stack, close—works until the first real weather swing or the first hurried grab. Heavy throw on the bottom, light blanket on top: the order makes sense, until you reach for that heavier throw in a hurry and find yourself pulling everything out, scraping across the inside finish, and balancing an unstable pile on the window sill. Every time you return things, the neat line slides further out of order. A few throws never quite make it back in, instead floating onto nearby furniture as “in easy reach” leftovers.

    This isn’t a once-in-a-while hassle—it’s what single-cavity benches guarantee in actual use. Each layer added or removed scrambles the whole pile, and the simple act of grabbing what you need quietly creates a new project: a pile to re-sort, a lid half-open and blocking the seat, and a routine reset that takes twice as long as planned. Hidden storage, misapplied, actively creates the friction it was supposed to erase.

    Hidden Storage: Calming or Complicating Your Space?

    The line between looking organized and staying organized shows up after just a few uses. Deep, undivided benches force a game of category roulette—throws filtered by last use, not actual need. You realize you’re storing by accident: forgotten items pressed flat at the bottom, daily-use blankets migrating outside the bench, no clear plan surviving real-life pace. Suddenly, the bench is never closed with true order inside—just closed enough not to see the drift.

    In shared spaces, quick resets become slow chores, especially when others toss things in without thinking about zones. One hasty return scrambles tidy piles; the bench becomes a permanent “almost-organized” buffer, technically hiding clutter but quietly leaking items to ledges, nearby baskets, and any other open surface in range. “Just toss it in” becomes a shortcut to semi-permanent chaos.

    The Slow Creep of Overflow

    Overflow announces itself: two seats, but only one clear, the rest lined with stray throws and half-folded extras. The zone next to the bench becomes a holding pen for delayed decisions—items too frustrating to return properly, now blocking passage or crowding the foot traffic line. Each reset skipped means floor space tightens; the original bench is just a backdrop for the overwhelm it was built to fix.

    Dividers, Split Lids, and Practical Sectioning: Small Changes, Big Impact

    Shifting to a bench with built-in dividers or a split lid changes the entire routine. Now, instead of digging through a single, shifting heap, every section earns its own purpose: winter layers in one slot, summer throws in another, a skinny slice for the spare guest blanket. The act of retrieving is contained—lift half the lid, grab one throw, leave the rest perfectly undisturbed. Return-flow stays simple; you’re not refolding five things for the sake of one.

    A shallow divider or removable insert does more to kill everyday friction than any deep cavity ever could. Reset isn’t a Sunday chore—it’s two movements and the space stays reset after every use. Real structures reward repeat behavior. The energy you save not having to do damage control after each guest visit adds up, turning the storage zone from a bottleneck into a reliable, background function.

    Why Bench Depth Matters

    Even small structural details change behavior. A bench too deep means you bend, shuffle, and remove nearly everything on top to reach what’s lost at the bottom. Usable depth means you can sit on the bench, reach all the way down, and pull out a throw in one motion—no lost items, no excuses to “deal with it later.” Depth sets the upper limit for how annoying it is to reset the zone. If you avoid the bench entirely just to save time, that’s the clearest sign it’s the wrong depth for the room’s real pace.

    Room Use in Motion: When Storage Interrupts the Routine

    The real test for a storage bench isn’t capacity—it’s how fast it lets the room change modes. In a high-traffic family room or any hybrid zone, storage that demands a chain reaction (remove, dig, rearrange, replace) puts every quick switch on delay. A split-lid or divided bench supports the motion you actually need: grab a throw in seconds before a call, return it without reconstructing the closet, never block the area path or re-trigger a pileup. Keeping storage backgrounded—never demanding a “reset” meeting—keeps the room genuinely ready for what’s next.

    If you notice throws or pillows starting to pile outside the bench, that’s the domino pattern in motion. Each missed reset spreads, making the tidy zone less likely to recover (“I’ll just grab one from the chair instead”). The intended storage becomes an afterthought, and reclaiming the original system becomes harder with every extra item left on the edge or migrated to secondary furniture.

    Mixed Storage: A Recipe for Returning Chaos

    Every soft thing in the house wants to end up in a bench—pillows, toys, sheets, throws. But real order only lasts if categories are enforced by physical zone, not just intention. Even a simple summer/winter divide raises the odds that a quick return means a real reset. Without this, every “just for now” toss becomes a category spill; reset times balloon, no one remembers where anything goes, and the bench drifts away from its original promise dimensionalized by lived-in mess.

    Long-Term Order: Low–Effort Reset and Setup That Lasts

    Enduring order is built on clear sectioning and direct access—not box volume or aesthetic first impressions. A bench with integrated or modular dividers keeps pathways obvious, routines light, and return flow frictionless. The extra effort to structure compartments pays off by making reset the smallest part of the routine, not an avoided chore.

    In any real-world shared space or high-movement zone, these small changes spare you the multiplying aftermath: spillover vanishes, retrieval stays direct, and “where did that blanket go?” vanishes from daily life. Anyone can return things to the right zone, resets happen on the fly, and if clutter starts to creep back to the floor, it’s a visible cue the setup is ready for another tweak—not a reason to give up on the storage completely.

    The signal is in your actions: Do you avoid using the bench just to spare the collapse of order? If so, it’s the bench structure—not your habits—that needs reworking. Window seat storage isn’t about “hiding” so much as keeping storage in the background—unseen, unfussy, and still working every day, even as routines and seasons shift.

    http://www.gridry.myshopify.com

  • Why Waiting to Install Bathroom Lights Prevents Fog and Corrosion

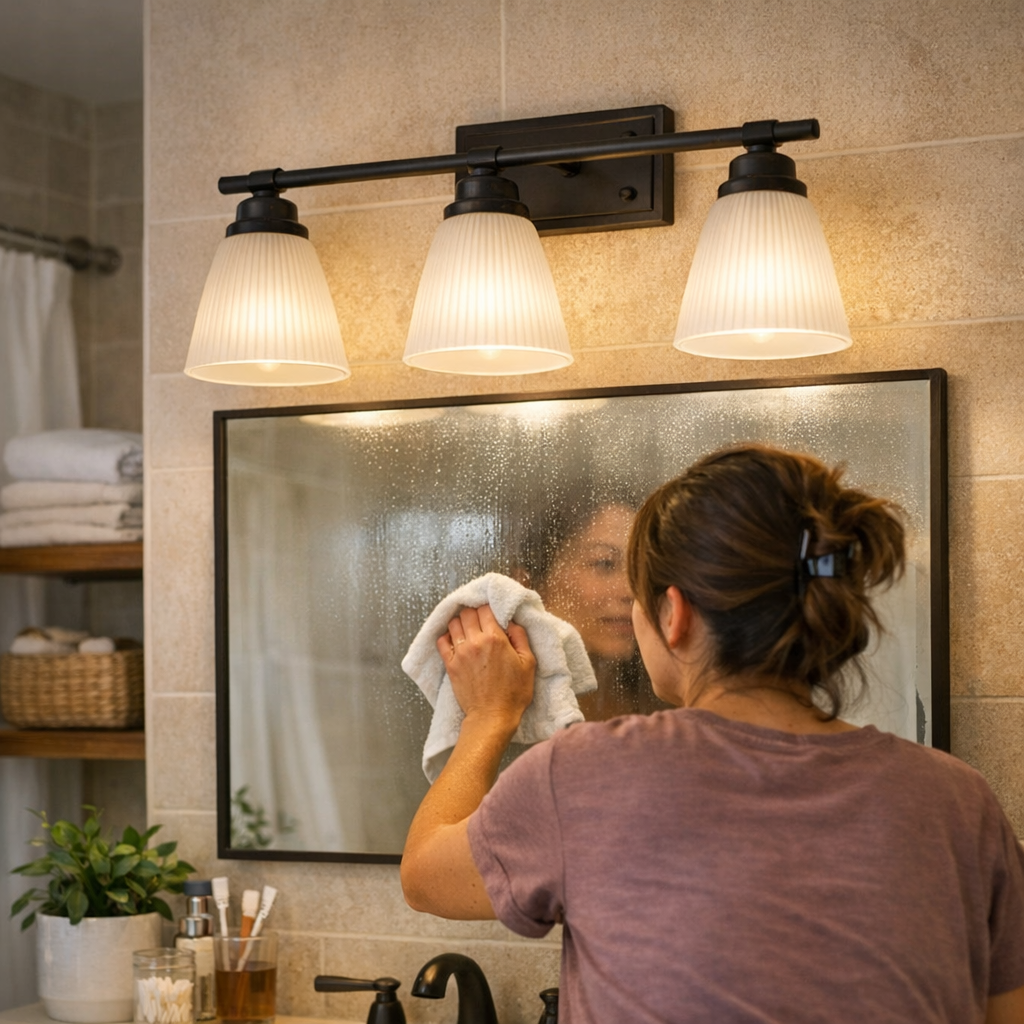
    Install a bathroom or laundry fixture in a room still holding moisture and you set yourself up for daily lighting trouble: streaky mirrors that never wipe clear, soft haze trapped behind the lens, and corners that fade into shadow no matter how new the bulb. The enemy is less the fixture choice, more the timing—moisture seeps into damp-rated and standard lights alike if you rush the install and seal in humidity. If you’ve ever stood on a stool to swap a flush mount right after a steam-heavy laundry cycle, or struggled with persistent fog in the morning mirror, you’ve felt this slow-burn mistake subtracting from every routine.

    Why Steamy Installs Sabotage Reliable Lighting

    Rushing installation is common the minute a room feels “clean enough.” But putting up a light when steam still lingers after a shower or a load of laundry means moisture gets trapped behind the cover—exactly where you can’t reach. Even a damp-rated fixture is built for constant humidity, not the sudden cloud that soaks in during an impatient install. The moment the lens seals against a foggy tile or a mirror with beads clinging to the edge, you’re writing haze and shadow into the future performance of that light.

    This kind of mistake doesn’t announce itself early. Instead, light that felt open and crisp slowly turns unfocused. Inside edges cloud up. Shadows become noticeable in spots you used to trust, especially at the sink or the end of a corridor. Mirror reflections warp at the edges; what should be an easy shave or skincare check becomes about maneuvering under uneven brightness. The struggle is rarely dramatic, but it repeats: wipe after wipe, you never get back to day-one clarity.

    The Problem Builds With Every Routine

    Lighting failures in moisture-prone rooms aren’t one-off annoyances—they wear you down. Post-shower mirror checks turn into awkward squinting, and laundry surfaces stay stuck in a partial gloom no matter how strong the “overall” light output seems. Stairs take on new risk, as the landing fades into an uneven gloom, or glare blooms exactly where you need safe footing.

    This isn’t superficial. Every incomplete wipe, every misjudged drop of detergent, every missed step comes from one basic error: letting humidity get sealed into the lighting from the outset. Tall claims about fixture durability don’t overwrite the truth that a damp install means ongoing maintenance, persistent cleaning, and slow loss of visibility.

    First-Day Brightness: Why It’s a False Signal

    On installation day, every fixture looks clean and definitive. A new flush mount glows broadly in the bathroom; a revamped vanity mirror reflects even light. But if that fixture was put up in a humid rush, give it a few weeks—the lens dulls at the margins, the shadow line creeps higher, colors start to flatten, and easier routines now require extra steps. Compare two bath lights months later: one installed bone-dry, one rushed into a steamy room. The dry mount delivers even, usable light across tiles, mirrors, and sinks; the other throws cold bands, shadowed pockets, or a haze that just will not wipe out.

    Scenes from Real Spaces: How the Problem Shows Up

    Bathroom Mirrors That Won’t Stay Clear

    The daily fight: two identical lights above the mirror, but one clouds up at the edges no matter how much you clean. The culprit isn’t the cleaning product—it’s the fog caught behind the lens during installation. Clarity shrinks to a central oval, and precise tasks like shaving or liner become a clumsy negotiation with semi-shadow and uneven edges. Each routine takes longer, never feeling quite right again.

    Laundry Rooms with Stubborn Clouding

    Laundry zones often get hasty installs—old fixture down, new one up after steamy wash runs. Result: stubborn lens clouding that doesn’t respond to new bulbs or more cleaning. Piles of clothes take on strange colors in this patchy, half-lit glare. Sorting whites from darks or checking stains becomes slower and more frustrating than it should be, as shadow and color distortion resist quick fixes.

    Stairways Suffering from Partial Shadows and Glare

    Replacing a stairway ceiling light after mopping or running a humidifier feels efficient, but if humidity lingers, the effect is clear within weeks: glare blooms on the first turn, safe edges at stair landings are caught in shadow, and movement slows on instinct. Lighting looks adequate—until daylight fades and you find yourself hesitating at the corner, judging shadows by the step.

    What Works: Waiting—Even When It’s Inconvenient

    The real fix is patience: never install until every surface is dry. Wait at least 60–90 minutes after steam-producing chores. Check mirrors and tile—no fog, no bead, no condensation on wires. If just breathing on the glass produces fog, you’re still too early. Rushing undoes even the best fixture rating and locks you into months of extra cleaning or shadow-battling. Sometimes a fan or open window helps, but dry means truly dry—don’t shortcut the process.

    How to Spot and Fix an Installation Done Too Soon

    If your lighting never fully clears, your mirror always seems dulled at the edge, or shadow lines keep moving no matter the bulb, installation timing may be at fault. Often, this creeps in right after an “upgrade”—the light looks finished, but clarity is never the same. Safely removing the fixture and drying it out may buy time, but permanent improvements often call for uninstalling and reinstalling in a completely dry environment. This is the only way to stop the haze from recurring.

    Lighting That Works With You, Not Against You

    Functional spaces—bathrooms, laundry corners, entryways, stairwells—call for lighting that responds to constant humidity and routine movements, not just decorative looks. A fixture installed in the right spot at the wrong time isn’t a small error—it’s repeated frustration built in: mirror fog, color distortion in sorting, hesitation at a stair landing. The cost is practicality, not just “brightness.”

    The lesson is clear, if not glamorous: wait for bone-dry conditions before installing, every time. This single habit preserves light quality for years. The best lights protect routines, not just surfaces. For proven options and practical guidance on bathroom, laundry, hallway, and damp-rated lighting setups that fit real routines, visit LightHelper.

  • Slim Rolling Laundry Cart Transforms Entryway Organization and Efficiency

    By Wednesday, most entryways expose the lie: a single laundry bin that “contains” dirty clothes has quietly become the hardest obstacle in the transit path. Shoes edge wider, bags pile on, and the hamper you hoped would organize everything slowly colonizes the space you actually need to get through. The problem isn’t just a little visual mess—it’s that every pass-through gets slower, each reset heavier, especially when the laundry corner sits right at the daily threshold. In a space already under pressure from bags, shoes, and weather, the wrong bin turns a busy entry into a repeating hassle, not a help.

    The Repeated Friction of Static Laundry Bins

    The friction builds with barely any warning. The first load lands: jeans, shirts, maybe towels—plenty of room left, or so you think. But soon, small items vanish at the bottom, socks wedge themselves where you can’t reach, and before long, there’s a skirt dangling halfway out or a hoodie propped against the bench. That “contained” pile is now half on the floor, half blocking the bench edge. On laundry day, just stepping into the drop zone means sidestepping sneakers, shifting a bag, then grunting to haul an awkward, lopsided bin. No matter how you try to line things up, something ends up blocking the path or piling up for someone else to trip over. The once-simple solution is now the main challenge resetting your flow through the door.

    Movement vs. Storage: Where Entryways Clog

    Shoes and bags always migrate—nobody expects perfection. But once your laundry storage starts swelling past its line and pulling the whole zone into chaos, the original fix backfires. In shared spaces or on wet days, grit gets dragged in and collects where the overflow lands. What used to be a bench for lacing shoes or unloading bags has become overflow central—a makeshift table for anything that doesn’t fit in the bin. “Good enough” storage blends in visually but creates a landscape that you have to rework, shuffle, or step around. Before long, the only way to keep using the area is to accept minor resets several times a week. What’s organized on paper is stubbornly inefficient on the ground.

    How a Slim Rolling Cart Changes the Transition Zone

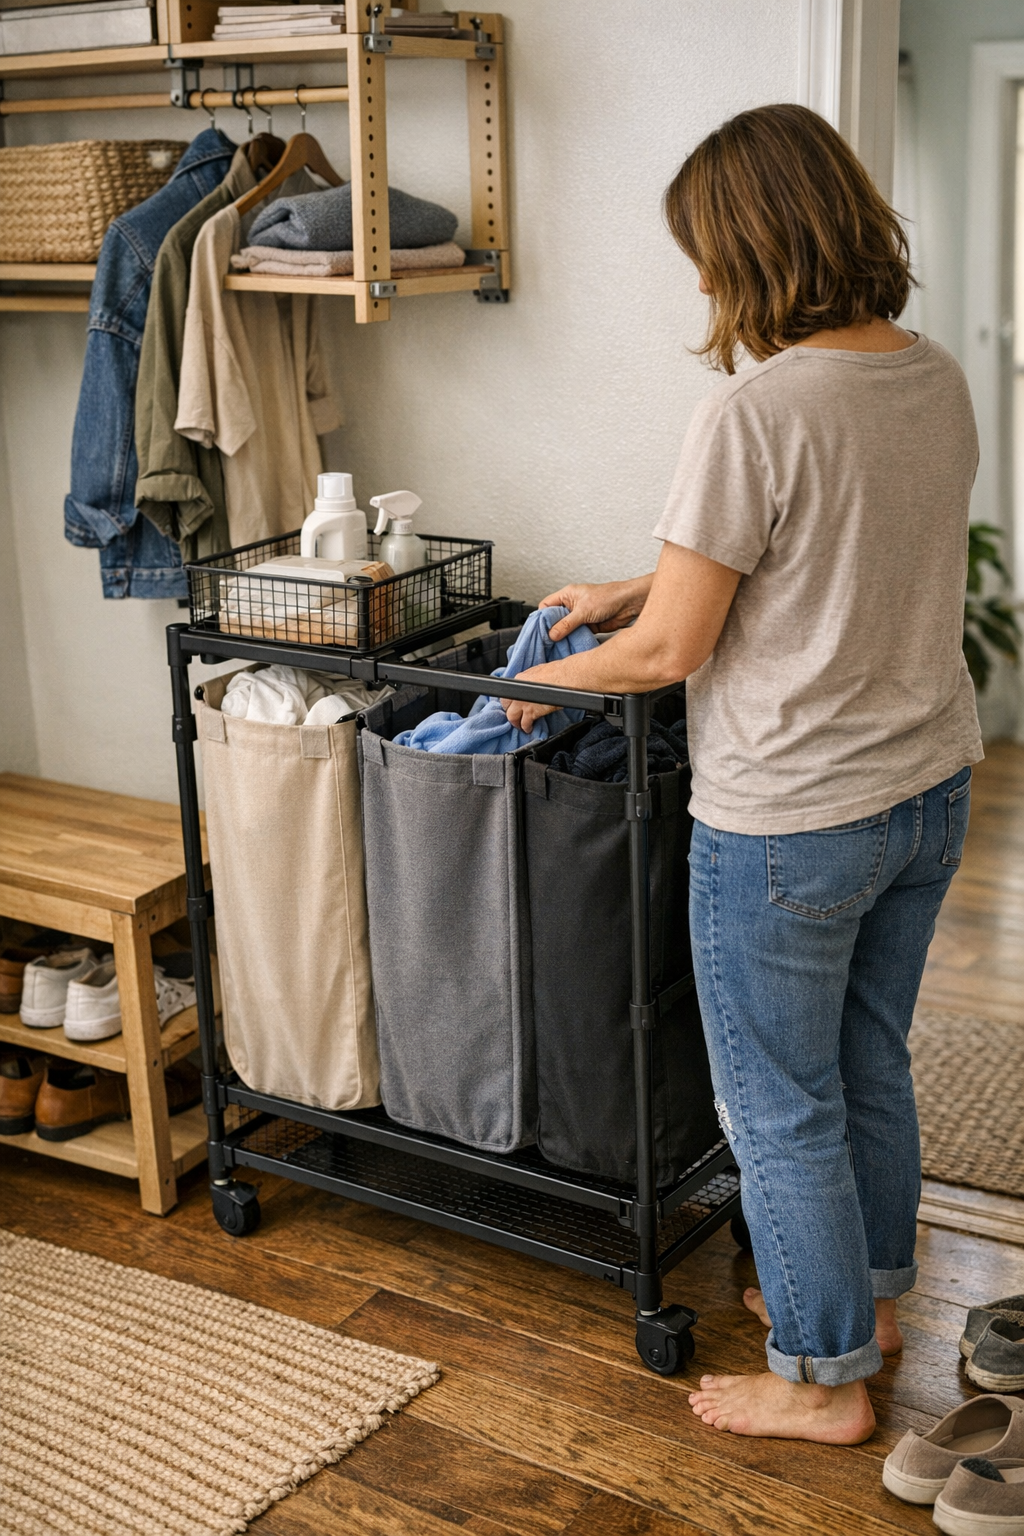
    Looks organized isn’t the same as works under pressure. Replace the usual one-piece hamper with a slim rolling cart designed for tight-through traffic, and you get immediate leverage. The cart’s upright design fits right against the bench or wall, no wider than a stationary bin, but gains power through movement and separation. Instead of mixing everything into an unstable mound, the cart keeps socks, shirts, towels, and linens in their own lanes—no crawling on the rug to rescue one pair of shorts.

    One Move, Fewer Trips

    Static bins make you work in halves—haul it out, sort in piles, then rush muddy socks and shirts down the hall in overloaded arms, risking dropped laundry and blocked access for anyone else. A rolling cart flips that habit: three sections, sorted as you go, and wheels that follow one-handed. Even during the week’s worst scramble, the cart rolls past shoes, skirts tight hall corners, and can be nudged with a knee, leaving both hands free for doors, bags, or wrangling a toddler. A process that used to take several awkward trips contracts into one clean pass. Floor stays clear, and return movement gets smoother for everyone who lives there—not just the person doing laundry.

    Setup Under Pressure: What Happens in Real Use

    Congestion at the threshold isn’t a one-off accident; it’s a loop. Sit at the bench in the morning, and you’ll catch a laundry pile pressing up against your foot, forcing you to shift and rebalance just to get your shoes on. Come in with backpacks and shopping, toss a bag quickly—and half the drop zone is crowded, with the laundry bin anchoring half the mess. A static, overstuffed bin can’t flex: one return of clean clothes or an extra guest’s jacket, and the path is squeezed to a shuffle. These friction points kill momentum, reset enthusiasm, and quickly drain the sense of order you fought for on day one.

    Separating the Drop Zone from the Bottleneck

    The rolling cart’s edge comes from its ability to stay out of the way until needed—and move easily when routines mess with the plan. Instead of laundry flowing into the drop zone, then merging with shoes and bags, the cart divides and conquers: sorted loads, quick access, and the freedom to angle it away with your foot rather than drag and lift. For families, couples, or anyone juggling schedules, even a small shift—like rolling the cart aside before breakfast—keeps traffic flowing and the reset light. The less you fight the setup, the more you trust it to support fast changes, not just look tidy once in a while.

    Practical Tips for Adapting Your Entry

    Match the cart to the pressure points, not the catalog photo. In crowded entries or narrow halls, a slim cart brings real order without adding new hazards. Too wide, and it jams the already-tight path; too small, and you’re back to awkward overflow by midweek. Prioritize models that run close to the wall or bench but give true segmenting—vertical dividers and compartments you’ll actually use. Skipping the urge for “extra capacity” is smarter here: narrow carts empty faster, which means less chance for mess to pile up and less effort required on reset days.

    Sort right at the drop, every time. With compartments ready, you solve half the week’s work in three seconds—toss whites, colors, and towels where they belong as you cast off dirty clothes. No kneeling, no panic sorting, no lost pairs. Over weeks, these tiny pre-sorts cut reset times and remove the small frustrations that clog entryways but never show up in “after” photos. It’s the multiplying effect that’s worth it: less time stuck fixing the path, more time just walking through it.

    The Lived Impact: Not Just Tidy, But Usable

    The real test is a normal week—not when you organize, but when you trek through the door three times a day. A rolling cart isn’t a miracle: shoes will still drift, bags always find the easiest resting place, and some days, overflow comes for the bench anyway. But a mobile cart narrows bottlenecks, shortens resets, and keeps the path workable even during the worst pileups. It doesn’t just hold laundry—it reshapes movement, turning what used to be a daily reset into a much smaller interruption.

    This is the difference that lasts. Easier resets mean less griping, less sidestepping, and less wasted effort on what’s supposed to get you in and out. Over months, you notice the area stays usable, not just passably neat, and the basic friction at your home’s busiest threshold gets smaller rather than disguised. It isn’t perfect, but it’s a change you feel every single day.

    For smart entryway fixes that handle the wear of real routines, explore Betweenry’s collection at Betweenry.

  • How Organized Pet Travel Gear Can Slow You Down Over Time

    The reality of pet travel usually breaks through at the first real stop—not in your living room, where your travel bag looks sorted, but curbside, when one essential hides under another, wipes can’t be reached without a search, and the “organized” setup stalls the moment you need speed. At home, your carrier or seat-side bag looks calm and compartmentalized. Pull up at the café, park, or vet and the same tidy setup starts costing extra seconds—awkward reach, shifting layers, and sudden scramble as your pet pulls forward and your patience staggers. Any sense of readiness gets tested fast, especially when your trip is just a series of smaller, stop-and-go moments.

    When Visual Order Hides Practical Friction

    A travel bag that looks ready can still break down the minute you start moving between stops. Freshly packed, a carrier or organizer seems logical—everything zipped, each item in its place. But after just two or three in-and-outs, that logic frays. Instead of single-handed access, you’re unzipping the wrong pocket or sliding blankets out of the way just to reach a leash, all while your pet tugs or shifts beside you. Suddenly, what seemed under control at home now slows every pause, and the good intentions of compartmentalization turn into a buried-toy scavenger hunt.

    Every snag matters more when you repeat the same awkward reach. Fumble for wipes twice in one hour and the initial “everything has a place” confidence starts to wear thin. Your dog picks up on your tension. Even compact, modern bags can trap you into reshuffling rather than actually moving—wasting time, draining energy, and sharpening the divide between organized looks and working travel structure.

    Recognizing the Repeated-Use Problem

    Much pet travel gear is built to contain, not to flow. Presentation takes priority over the actual returning and restarting that every errand, park run, or city walk brings. But after your second or third stop, it’s obvious: access always wins over appearance. Structure that worked on the driveway falls apart at the curb.

    Buried Items, Burdened Movement

    Picture the real moment: You reach the dog park, leash still packed. Unbuckle the carrier, push back a comfort pad, open the wrong slip—your pet already leaning out for the first sniff. A buried leash means an interrupted routine. Or maybe the wipes migrate under the snacks and spare toy—leaving you one mess behind, right when you need a fast cleanup. Instead of feeling lighter with each stop, the trip starts getting heavier, one small blockage at a time.

    The issue isn’t forgetting the gear—it’s being unable to use it on time. Good-looking order can mask physical overlap: blanket over leash, wipes swapped to the bottom, water bowl out of reach. Every grab interrupts something else. The more you dig, the less prepared you feel—no matter how pristine the setup looked an hour ago.

    Why Fast, One-Handed Access Matters

    Pet travel problems show up in seconds, not at the packing table. The real test is half a minute at a busy curb or commuter lot: can you grab a leash, wipes, water, or toy with one hand while handling your pet—without tipping the entire routine into disruption? Every second lost isn’t just inconvenience; it becomes visible tension, for both pet and owner, in small, repeated ways.

    Every Stop Reveals the Weak Point

    Back-to-back stops pull focus onto a single flaw: blocked essentials. Layers of zipped pockets or overpacked sections mean you reset and reshuffle, sometimes dropping items or triggering a spill. It’s not the clutter—it’s the blocked flow that quietly kills the benefit of “organization.” While your travel kit still looks neat to anyone peeking in, under real pressure, the system doesn’t deliver quick returns to movement—or calm handling when things get busy around you.

    The Seat-Side Organizer Switch

    The turning point for most pet owners comes after enough restarts: choosing an open, seat-edge organizer with fixed, visible pouches. Instead of hiding everything out of sight, essentials like the leash, wipes, and water bowl get their own accessible spots. No more digging; no more apologizing to your pet for fresh delays. One reach, one motion, everything where your hand expects it—movement resumes without friction, and your pet stays settled instead of caught in another shuffling pause.

    Old Habits That Creep Back During Repeated Travel

    The urge to overpack or combine “just to save space” almost always builds the next problem. Cramming wipes and leashes under toys or blankets collapses practical access into another tangled pocket. The tradeoff isn’t obvious at home, but by the third stop, you’re pulling out more items just to touch what you actually need—undoing every early space-saving gain in slow motion.

    The Overlap Dilemma: Pet and Owner Items Collide

    Running repeated errands, you learn—painfully—that bag space blends quickly. When your sunglasses, keys, and wallet float atop pet gear, every stop becomes a shared search party. Phone cords snag on leash clips; snacks shift under paperwork or a phone. Each overlap forces another pause, resetting your pace and leaving both you and your pet waiting for the bag to keep up. These small collisions chip away at travel rhythm, and after enough rounds, you’ll notice which item always gets buried at the worst moment.

    Comfort Items: Help or Hindrance?

    Plush pads, favorite blankets, heated liners: they buy calm for your pet, but cost retrieval speed. When comfort soaks up the top layer, grabbing wipes or bowls means breaking that physical barrier—pulling, rolling, or lifting fabric with each reach. It’s a subtle block that turns something intended to soothe into another source of awkwardness. Ideal setups keep comfort close without trapping essentials below, blending calm placement with access that doesn’t break the flow of the trip.

    Recognizing When Your Setup Needs Adjusting

    There’s one telling signal your pet travel structure needs a rethink: you end up digging for the same item at every stop, despite best efforts to pack smart. If each return to the car means untangling, restacking, or side-stepping an overlap just to get a needed item, your layout’s visual order is beating out practical flow. Lived routine beats packing theory—every time.

    Open Access Setups: The Real Time Saver

    Fixed outer slots and visible pouches almost always cut down lost seconds over zipped, layered “systems.” When you can reach for a leash, wipes, or treats without breaking stride—or your own rhythm—you keep movement clean, the pet secure, and the trip less prone to fluster or pause. No more frequent rummaging or silent irritation when essentials are visible and their retrieval never sets off a chain reaction.

    Putting It All Together: Designed for the Next Stop, Not Just the Start

    The best travel bag isn’t judged on how neat it looks at home, but how quickly it rebounds after every errand, park arrival, or city stop. It should put every high-frequency item in predictable reach, cutting out unnecessary resets, blocked access, and slow starts. The right setup makes five stops smoother than one—and you’ll notice the payoff not after packing, but in the tiny, silent victories of every routine return to the car.

    For repeated-stop travel—errands, curbside breaks, quick walks—the payoff isn’t the first impression. It’s snag-free access, less overlap, and a routine that matches the pace of a busy day with a pet. When your system finally fits the way you actually move, both you and your pet feel the difference—trip after trip.

    Explore practical pet travel setups, seat-side organizers, and repeated-use solutions at PawGoTravel.

  • How Indirect Lighting and Cable Management Transform Entryway Comfort

    Entryway lighting never fails in the first hour—it fails during the week’s routines. The cables you thought were out of sight start catching dust and shoes. A fixture that looked perfect washes the mat in glare or leaves you hunching to avoid direct light, turning a neat installation into a source of daily friction. Anyone who’s spent a few mornings dodging shadows, stepping over cords, or missing a bag in the dim knows there’s a sharp difference between lighting that simply looks ordered and lighting that actually stays out of your way in real use. What works on day one often becomes a fresh problem by day three.

    When Neat Installations Turn Into Daily Friction

    Install a ceiling light or sconce, clean up your cables, clear the entry floor—everything seems resolved for a moment. By the end of the first week, patterns emerge: a bracket blocks easy access, a cable that hugged the wall now attracts lint and drags against shoes, or a panel casts an awkward pool of shadow you never noticed at installation. Narrow, high-traffic entryways—especially those with shared hooks or benches—expose these irritations fastest.

    Friction builds where you notice it least at first: Ceiling panels that shone brightly during setup now dump glare straight into your eyes every time you walk in. The area behind the bench, once visible, turns murky at dusk; the mat edge blends into shadow, making small objects easy to miss and entryway dirt harder to spot. Each nagging visual interruption slows you down and makes cleaning clumsier, especially when the household is busy.

    The Real Cost of Ignoring Cable Runs and Supports

    Cables rarely bother you until they start shaping how you move. Exposed cords, clumsy covers, mismatched brackets—each becomes a snare for dust and an obstacle for feet and bags. Tight entryways give you little margin for error; what looks “fine” during installation becomes an obstruction within days, making the whole zone tighter and busier than it should be.

    Even premium hardware doesn’t solve the lived problem if cords cross open walls or cut in front of benches. A clean setup can go bad overnight: arrive home in a hurry, tangle a toe, sweep the floor, nudge a cable loose, and the supposedly tidy install becomes yet another thing to fix again. What looked like long-term neatness turns into a cycle of small practical disruptions.

    Looks “Done,” Acts Like a Distraction

    The satisfaction of “finishing” a lighting update fades fast if details go ignored. Fixtures aimed straight down burn bright spots onto the floor, revealing every missed streak and casting unnecessary shadows. Soft panels left with their edges exposed startle and distract. Even a cord suppressed by a quick trick—forced behind a basket edge or kinked at the base of a bracket—eventually wriggles free and needs fiddling. True threshold comfort isn’t about that first satisfied look. It’s about whether the entry fades out of consciousness and stops inserting new annoyances every day you use it.

    Scene: The Narrow Shared Entryway

    Think of a compact apartment entry: one wall fitted with hooks, a shelf stacked with shoes, and three people competing for hanger space. An overhead ceiling light promises full coverage but quickly shows its limits. Instead of clarity, you get shadows reaching behind coats, brightness flaring into your eyes, and a dim edge at the mat just where you need to see dirt on arrival or find keys by habit.

    Cable issues don’t stay hidden: A tidy cable run, pressed along the baseboard or shelf, works for a few days—then the pressure of cleaning, feet, and bags has it creeping loose. The cable cover that once blended in starts collecting debris. The moment you think, “I’ll have to fix that again,” you know the setup’s logic didn’t account for repeated use.

    Small Practical Changes: Indirect Wall-Mounted Lighting

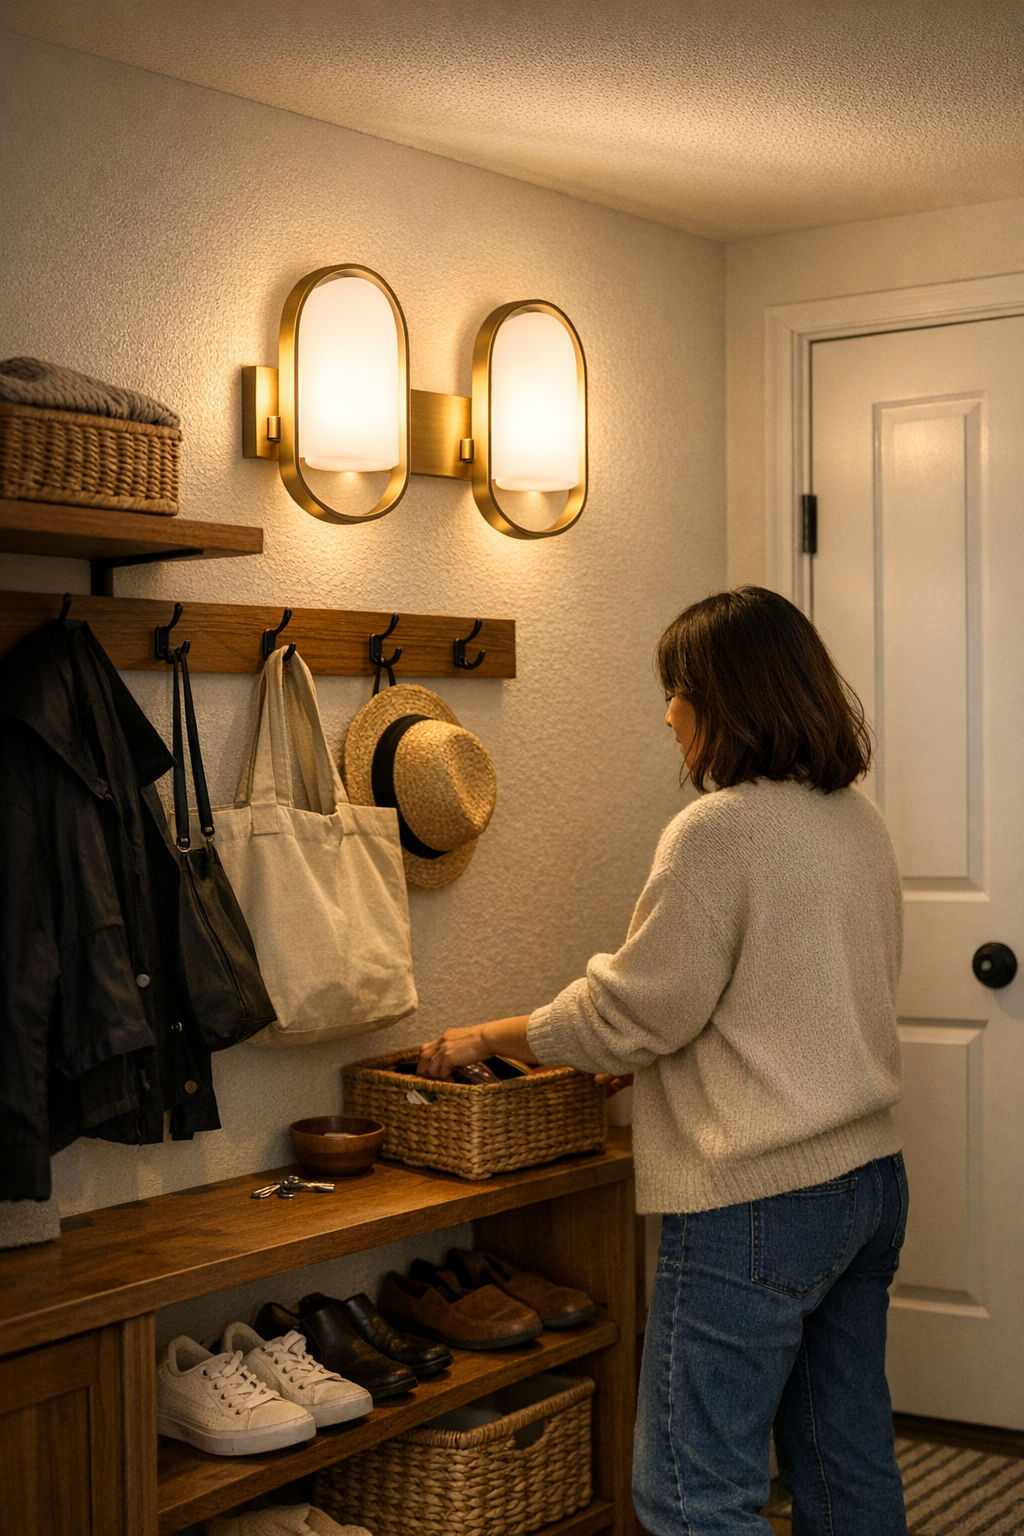
    The real shift rarely comes from brighter fixtures—it comes from changing how and where the light hits, and how the setup lets you forget about it in use. In that entry above, swapping the bright ceiling panel for low-profile wall sconces—mounted in line with the shelf, with swivel adjustment—quietly changed everything after a week. One sconce aimed across the hooks made every bag easier to spot; the other focused on the mat’s edge, highlighting dirt but never forcing you to squint. All wires vanished: routed behind the shelf, dropping into a hidden basket. No stuck-on cable covers, no need to reach or reset after every sweep.

    Visible Difference After Routine Use

    • That irritating glare at the doorway vanished—no more ducking under a “hot spot.”
    • Cables quit tripping you up, so you could sweep or dash through without obstruction.
    • The edge of the mat stayed visible, helping intercept dirt right at the door and making quick drops less risky.
    • Brackets never crossed high-traffic paths or snagged sleeves, so movement stayed fluid and cleaning stayed simple.

    Over weeks, the improvements stuck. No more hunting for keys in the dark. No ritual of straightening cables before visitors arrive. The entry felt done—not because it was flawless, but because the lighting and supports stopped being factors you had to manage every day.

    Building Entryways That Stay Comfortable to Use

    Entry lighting that holds up after installation isn’t just neat—it actually keeps the threshold clear of new annoyances. Real-world setups that work longer share a few practical patterns:

    • Keep fixtures outside direct sightlines. Sconces with indirect spread or ceiling panels set off-angle reduce strain and glare, making the area navigable even in a rush.
    • Route cables behind furniture, under shelves, or through storage components. Hiding the cable run prevents snags, keeps shoes and bins from shifting the wire, and cuts down on dust collection along open paths.
    • Use accent or directional lighting to outline the exact hooks, shelves, or surfaces you grab most. You don’t need total brightness—you need clarity in the handful of zones that matter, without amplifying clutter elsewhere.
    • Mount supports—invisible brackets or wall hardware—out of foot and hand paths. It’s not enough to look sleek; regular movement exposes any hardware that strays into active zones.

    One Practical Cable Management Fix

    Use the bulk of your existing furniture—shelves, shoe racks, storage bins—to conceal and secure cable runs. When cables stay tucked against the solid, rarely-moved edge of a bench or routed tightly behind storage, they avoid being jostled or dislodged, even with frequent cleaning. This single change often does more for long-term neatness than switching the light itself.

    Why Most Quick Fixes Don’t Hold Up

    Many entryway lighting setups fade from “fine” to frustrating not through catastrophic failure, but through accumulations: glare you notice while juggling bags, lost visibility where you actually need it, and cables that migrate back into view with every cleaning. Fixing appearance is easy—making something function invisibly week after week takes more structural judgment. Where cables travel, where brackets frame or block, and where the light actually lands are the details that separate a setup you trust from one you’re forever tidying or tolerating.

    The silent test for an entryway that works: After a full week, are you still fiddling with cords, re-aiming the light, or does the setup finally let you come and go without thinking about it? The best entry lighting blends away, staying practical and invisible beneath the routines it quietly supports.

    http://www.lightsupport.myshopify.com

  • How Guided Cable Management Speeds Up Desk Resets and Reduces Clutter

    Most cable chaos isn’t a tangled ball—it’s the hidden drag that slows down every reset. A clean workstation means little if the first device swap yanks a mouse across the desk or sends a power brick tumbling onto your foot. Even with surfaces that pass the Instagram test, a headset cord snags your chair wheel, or a charger snakes just low enough to block a quick drawer pull. Friction builds not in obvious mess, but in those split-second interruptions: a cable clinging under a drawer just as you need to move, or an adapter jammed below a monitor riser. What looks organized at first becomes a lineup of small slowdowns that chip away at every work cycle—especially when you try to clean up or swap devices in a rush.

    Where cable management shows up the most: in the middle of everything

    The weak point in any setup reveals itself when you actually move between tasks. Switching from keyboard to notebook, reaching for a charger mid-call, clearing space beside your mouse for a document—these actions decide whether your desk’s structure helps or hinders you. Cables that seemed “managed” during setup turn into tripwires when you shift your laptop dock or need quick access to a storage bin. One cable slides across the writing pad, another blocks the path to a drawer, and the illusion of order dissolves with each repeated reach. Desk utility doesn’t collapse because things look cluttered; it falters when cord paths cross your workflow at the exact moment you’re trying to move quickly.

    The subtle but real difference: trays versus boxes

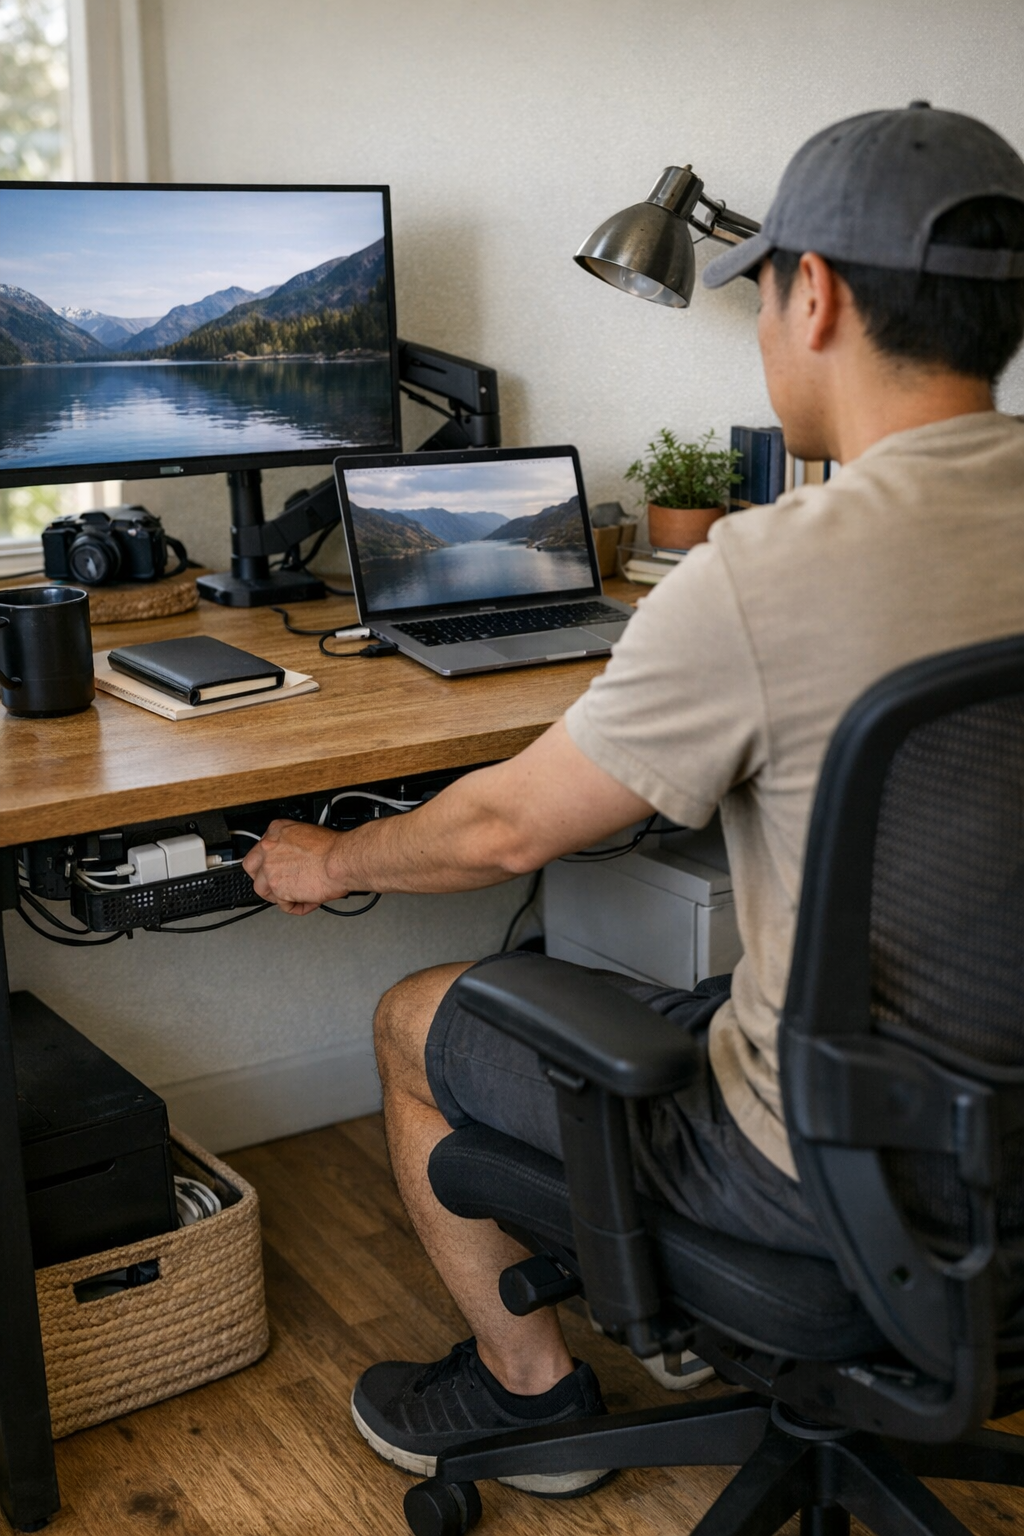
    Trays and boxes both target clutter, but only one makes your workflow faster. Under-desk cable trays keep cords on a single, reachable route—so swapping a laptop charger or disconnecting an adapter becomes a simple, one-handed motion. You feel the difference: one quick reach and back to work. Cable boxes, designed for neatness, cluster everything together behind a lid. They do hide visual mess, but demand two hands and extra time every time you need a different cable mid-task—lifting, sorting, and re-bundling everything after each change. That promising setup feel of a “clean look” fades fast when a shared workspace or frequent device resets turn the box into a pocket of randomness rather than a true system.

    Resets are where your choice gets tested. Trays mean quick, reliable access, while boxes mean you’ll be fishing for cords when you least have patience. The more frequently you switch devices—a headset in the morning, phone charging after lunch, external drive at day’s end—the more every second spent untangling or unboxing adds up. What looks controlled becomes a real distraction when every change becomes a process.

    Everyday workstation routines and where friction hides

    True slowdown doesn’t announce itself until you’re mid-reset. You end a video call, reach for headphones, only to find the cord snagged behind your side drawer—a gentle tug drags out the whole pile, disconnects a charger, and sends your storage bin askew. Five seconds here, ten seconds there, multiplied by every switch, means “quick resets” take longer and you lose the thread of focus. These interruptions don’t just slow you down once; they stack up over a week, turning brief task changes into repeated frustration.

    Cleaning is another tell. If wiping crumbs makes a cable slip off the desk edge or pulls on something under the surface, then you haven’t solved the real problem. A guided system—using under-desk trays, edge clips, or cable sleeves—keeps movements friction-free: no hidden tangles, no accidental disconnections during routine care, and no repeated shuffling just to keep working.

    What actually improved my desk: one guided path, above knee height

    Too many cable resets and accidental knee kicks finally pushed me to install a single under-desk tray along the back edge of my desk. Immediately, every cord followed a predictable route—high enough to avoid wheels and clear of my legs, low enough for one-hand access. Suddenly, no more charger trailing onto the floor, no more blocked drawers, no silent drift of cables every time I slide the chair back. The result wasn’t a cable-free zone, but a setup where device transitions matched the actual demands of my workflow: no hunting, no unintentional disconnects, no surface clutter disguised as “order.” For the first time, resets actually felt as quick as they looked on a clean desk.

    Quick answers for the messy middle of real work

    Shared desks: faster swaps or cleaner looks?

    Cable trays outperform cable boxes for active, shared desks. Trays keep each cord visible and accessible, so every user can adjust or swap out connections without opening, sorting, or risking tangles. With boxes, every new user must dig through the pile and reorganize, which is slower and increases the risk of unplugging the wrong device.

    Under-desk storage: help or hidden hassle?

    Without structured routing, cables are the quickest way to ruin useful under-desk storage. Uncontrolled drop-downs block drawers, snag on bins, and turn bins or file drawers from a help into a recurring obstacle. A routed tray or cable path above drawer height lets you use all your leg space and storage without any last-second cable rerouting.

    Most common cable mistake: hidden but unhelpful

    Never just drop loose cables into a box thinking it’s organized. The effect is short-lived. As soon as you need to swap or redirect a power or data line, you face a slow unravel—turning what should be a two-second change into a minute-long interruption. Separate, guided paths keep device routine fast and prevent accidental unplugs that trigger yet another reset.

    The right structure isn’t invisible, but it keeps you moving

    The real measure of a desk isn’t the number of cables showing—it’s how little they interfere with your flow. Guided trays, visible clips, cable sleeves: none may win a pure-mood contest, but in everyday work they mean less shuffling, faster cleaning, easier swaps, and fewer accidental disconnects. When your desk finally works at the speed you move—not just the speed it looks—then you know you’ve found a system that values repeat flow over surface show. This is how you keep minor mess from turning into the next day’s major hurdle—by making every reset feel as clean as it looks.

    Explore the full WorkBasic collection

  • Designing Outdoor Return Zones That Withstand Everyday Use and Fatigue

    Most backyard disasters don’t happen in the garden beds—they pile up at the return zone. That crucial stretch near the door, the fence, or the side yard is supposed to make routines easier. But after a full day, nothing reminds you of a weak setup faster than tripping over a bin’s spillover or doing a shuffle around a pile of gear abandoned “for now.” In places meant for smooth pass-through, organization failures aren’t just messy—they snarl up movement, block doors, and quietly dump all the reset work onto whoever snaps first. It’s rarely the fault of the tools themselves. The real breakdown: most outdoor return zones aren’t built for how tired, distracted, everyday users really come and go.

    When Setup Meets Real Foot Traffic

    Side yards, back steps, even narrow garage thresholds—they aren’t just storage traps. They’re daily routes. That wall rail might look efficient on a weekend morning, but by Wednesday afternoon, it’s a gauntlet: a bag of outgrown shoes squats under the hose, someone’s shovel blocks the path, and the “freestanding” bin has grown a fringe of overflow. What starts as easy order quickly melts once three or four rushed returns pile up. The real test isn’t the setup on day one. It’s what happens after a week of dirty shoes, rainy days, and back-to-back drop-offs. Most setups can’t keep pace: suddenly the route narrows, corners fill with backup, and the quickest return leaves the most to fix later.

    Clutter is a Delay, Not a Decoration

    Visual clutter isn’t the villain—blocked movement is. Tools propped “just for a minute,” mud-caked boots wedged into the only open spot, carts angled for easy reach but snagging the path—these aren’t just untidy. Each one is a micro-jam, forcing awkward pivots and shoulder brushes as you move through. By Thursday, crossing the yard isn’t a walk, it’s a sequence of sidesteps and toe-taps to clear a line to the door. When a return zone lingers at half-workable, every trip through shifts more clutter onto whoever gets fed up first. Reset burden always lands hardest on whoever can’t tune it out.

    How Order Cracks Under Real Use

    Every outdoor setup starts with optimism: hooks lined up along the fence, modular bins carefully squared at the edge, maybe a new wall rack promising clutter-free days. For the first 48 hours, it all feels under control. Then the real routine resumes.

    • Wall racks crammed with extra tools or set at the wrong height become a hassle. Drop off a trowel with an armful of groceries and suddenly you’re rebalancing a rake or knocking something down.
    • Bins become the “drop zone.” Wet gloves, sandy shoes, and secateurs all mashed together. Soon the bin bursts its banks, gear drifts onto walkways, and the whole zone slows to a crawl.

    These return spots don’t fail at storage—they fail at continuous use. Kids in a rush wedge things anywhere. Guests guess where stuff goes. So the logic of the setup buckles, and the “organized” zone starts camouflaging hidden clutter, blocked routes, and repeated reshuffling as everyone negotiates for space that should already be clear.

    The Anatomy of a Midweek Breakdown

    Picture this: a narrow side yard, Tuesday evening. The wall rail is at capacity. A bulky hose reel that won’t fit gets propped in the only dry patch, chewing up what’s left of the walkway. By midweek, unused rain boots dangle wherever someone found a hook. A garden fork ends up wedged behind the recycling bin. By Friday, the only passable strip is what someone cleared just enough with a foot tap. This isn’t an exception. It’s how zone friction builds up, week after week.

    Every “this can wait” return builds pressure. The moment there’s no easy place to drop something, responsibility shifts. Eventually, the return zone becomes a trap for the most organized (or least tolerant) person—who either does a frustrated overhaul or steps around the problem, letting the cycle drag out longer. The real success of a setup isn’t how it looks after a deep clean; it’s how well it survives messy, imperfect use.

    Tweaking the Flow: Small Shifts, Big Payoff

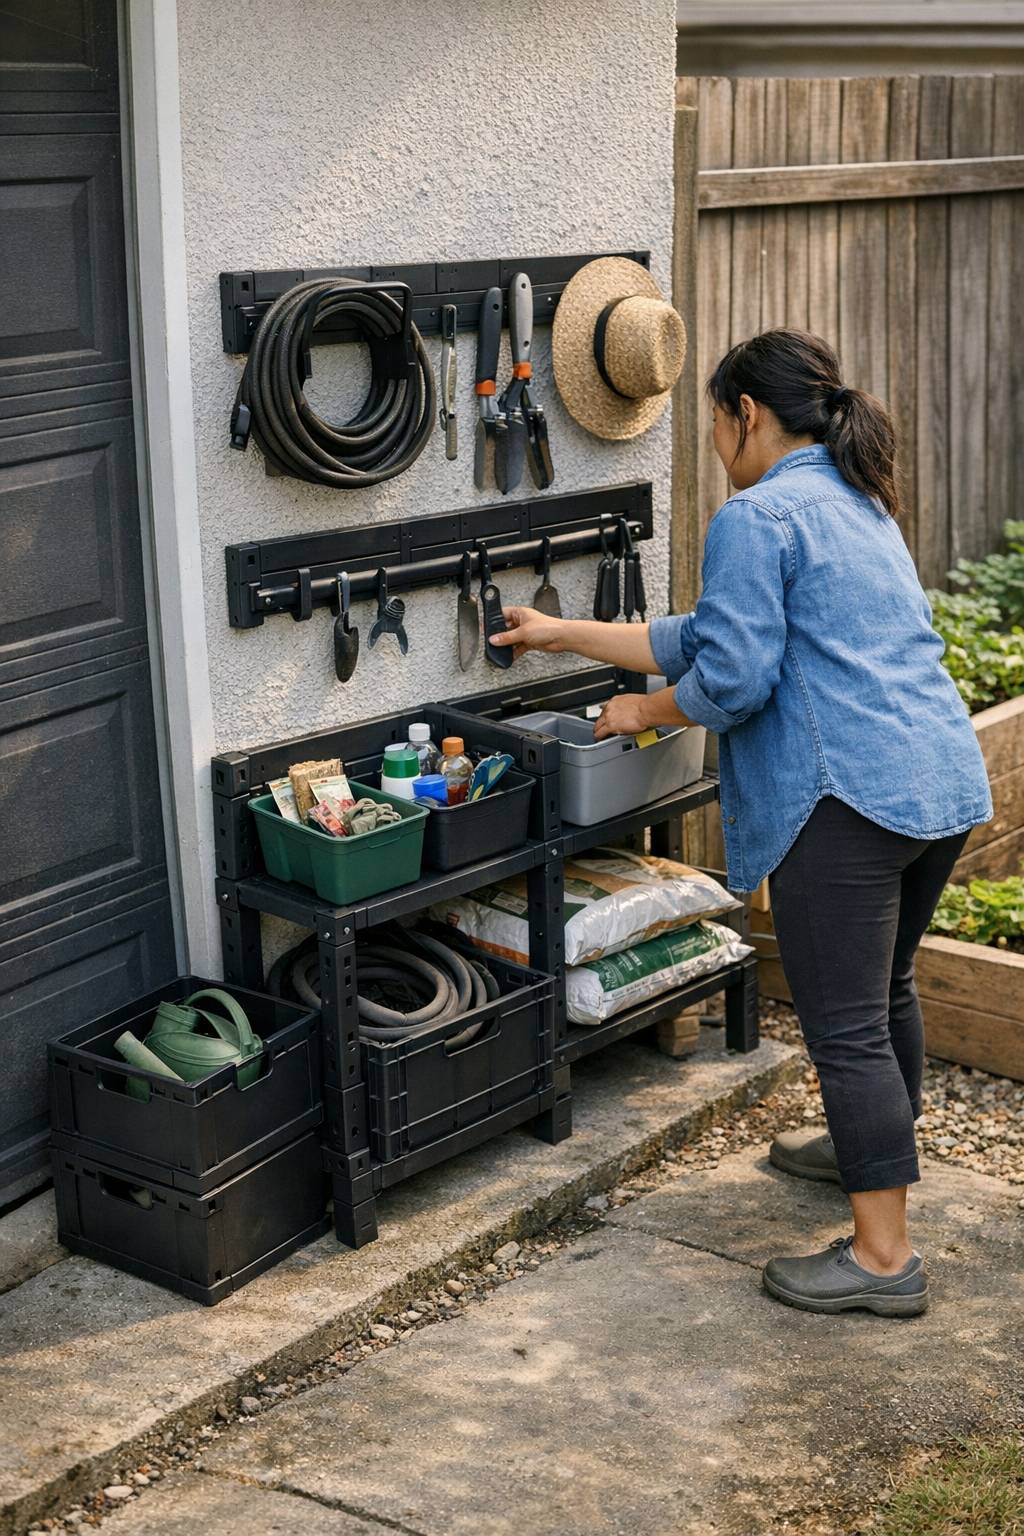
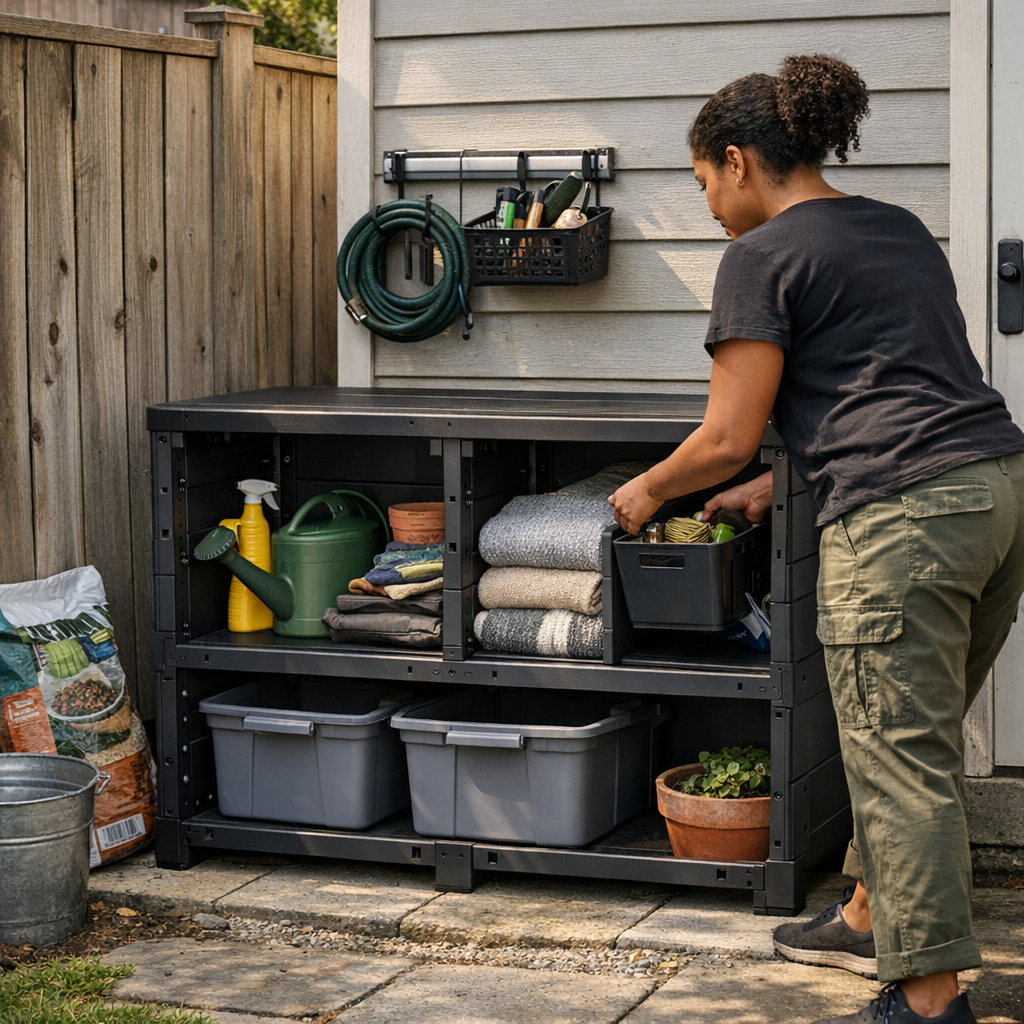
    The reset comes from changing the logic, not just the labels. After months of watching a deep bin turn into a black hole for everything, switching to two separate wall rails—a lower rail for fast-drop items, a higher one for bulky gear—changed the traffic pattern completely.

    The Dual-Rail Advantage

    With rails hugging the wall and nothing crossing into the door’s swing, walkways stayed open. No more blind spots for overflow to hide. If too much gear crept in, it instantly blocked the path—forcing a quick fix instead of letting the pile fester. Instead of pretending every return was equal, the setup let quick-use tools nest at hip height and heavier stuff go higher. Floor space stopped being a dead zone for neglected bins. Reset was lighter, returns were faster, and crowding became obvious before chaos could take root.

    This change felt immediate: the temptation to “just drop” something into the bin evaporated. The low rail was always within reach. Daily-use boots and gloves stopped blending into a pile. Overspill didn’t vanish behind a lid—it forced a visible shuffle, so repacking stayed a shared, regular task rather than a hidden crisis.

    Placement: The Real Make-or-Break Detail

    The best system on paper will fail if it sits outside actual flow. Build the main drop spot right in the main line of travel: by the door everyone uses, at a height anyone can reach one-handed, and never tucked behind another obstacle. When a return zone gets placed out of sight or above a kid’s reach, spillover just finds the next easiest spot—usually exactly where it causes the next jam.

    Fast and Slow Storage Need Their Own Paths

    Don’t let recurring returns and long-term stash zones overlap. Split quick-drop storage—wall rails, grab hooks, open baskets—from slow-storage options like sealed bins for winter gear or backup tools. One bulky item in the wrong place doubles everyone’s work. When fast and slow use zones blur, resets become overdue, foot traffic gets pinched, and the cycle of reshuffling starts again.

    Reset Speed: The Real Quality Test

    The best outdoor return zones aren’t showroom-pretty. They work when movement is constant, returns are rushed, and nobody resets perfectly. What matters: zero hidden overflow, no blocked lines, and a reset that never needs a heroic effort no matter how off-script the week goes. If a zone resists hidden buildup, keeps the walkway clear, and lets you drop and move without thinking, it actually earns its spot.

    These returns add up quietly. The ease—or pain—of a reset gets measured not in how a zone looks at its best, but by its speed on your most tired day. When the drop zone matches where people actually move and the return flow lines up with real use, organization stops being a battle and starts to feel like a relief.

    Browse more practical, real-use-focused solutions at TidyYard.

  • Why Indoor Cat Starter Kits Often Create More Daily Cleanup Than Expected

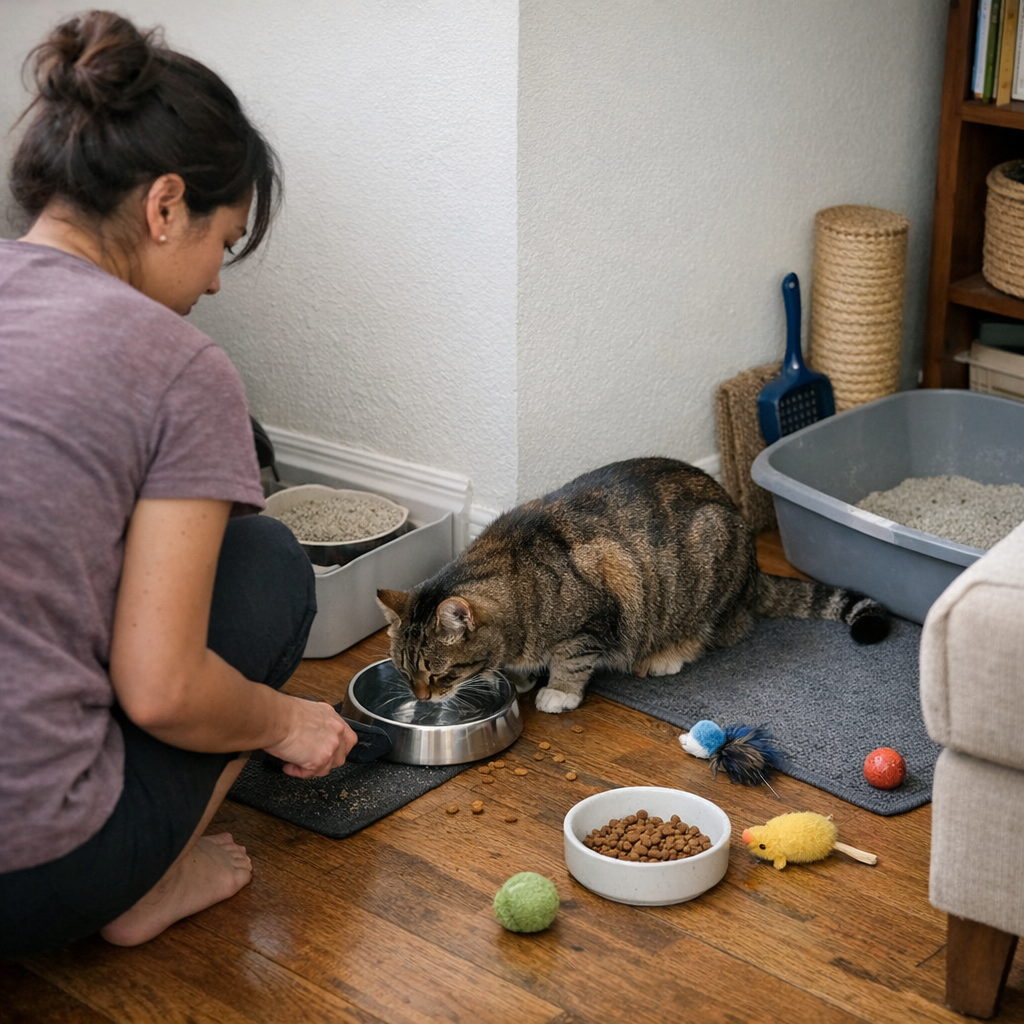
    The reality of an “all-in-one” indoor cat starter kit hits after the first couple days: the neat tray, cluster of bowls, and tidy block of toys that promised order turn into a reshuffling project you didn’t sign up for. By midweek, your food bowl is drifting into water territory, stray kibble outlines the mat edge, and that streamlined look morphs into an obstacle course as you refill, wipe, and navigate around scattered cat supplies. What felt settled quickly becomes friction: a food bowl out of place, water drops you missed earlier, and toys finding traffic lanes instead of staying in their basket. It’s not “cat chaos”—it’s the cost of too much crammed into one spot. The starter-kit shine fades fast, and the friction lands right at your feet.

    When the New-Kit Shine Fades: First Signs of Friction

    The earliest warning isn’t dramatic; it’s accidental contact between items that should cooperate but instead get in the way. The food bowl slides into splash range of the water dish. Kibble grains stick to the mat and cling under the water rim after every meal. Within five days, toys invade the path to the litter box as if the kit’s design never imagined daily movement. You notice the same sponge-ball blocking your path at night and a tangle of catnip mice lurking under the scoop just when you need quick access.

    The kit’s visual order doesn’t hold. Every refill, every mat wipe, you find yourself nudging aside one thing just to handle another. It accumulates fast—interrupted task flow, the sense of the setup quietly working against your routine, and a layer of nuisance you can’t ignore during most resets or cleanups.

    Daily Routines Expose Where Starter Kits Fall Short

    Starter kits feel efficient—until the routines start looping. At first, everything “in one place” seems practical: feeding, water, litter, scratching, play. But your living space isn’t a store display photo. Packed zones create failures that only regular use reveals: kibble drifts into water with two meals, mats shuffle loose by lunch, and toys bypass the “tidy corner” to reappear in high-traffic spots.

    Overlapping Spaces—A Recipe for Repeated Micro-Cleanups

    The first spill in the water area isn’t an anomaly—the spacing forced the mess. The convenience of combined setups turns out to be false:

    • Food and water blend zones: Crumbs migrate, water splashes, and what you thought would mean fewer cleanups just means each bowl’s mess joins the other’s chore.
    • Litter mat loses control: Packed against feeding space, tracked litter finds routes straight to your main walkway. Now you’re vacuuming not just near the box but anywhere the mat “overflows.”
    • Toys break containment fast: Even with a storage basket, balls roll out toward doorways and plushies stack up in corners, constantly underfoot or in the way of a quick litter scoop.

    Every fix—another sweep, a bowl moved an inch, an attempted reset—proves that dense setups can’t keep up with real movement. You’re stuck patching instead of solving.

    The Cycle of Reset, Clean, and Repeat-Adjustment

    Routine maintenance becomes a slow round of minor struggles. By the end of week one, you’re not just tidying—you’re pre-emptively troubleshooting a cluster of items that don’t cooperate. This isn’t a messy-cat problem; it’s the direct result of physical overlap and functional clash.

    Every Reset Reveals the Real Weak Points

    Morning refill rush? Reach for the food bowl, nudge the water, spill a few drops—same crumbs clinging to the mat as before. The wipe-down never feels complete. Each reset uncovers another small mess you missed or created by jostling the crowded arrangement. Cats loop the same routes: grains track, toys sneak under furniture, nothing stays where it should.

    The “compact” kit quietly eats your time:

    • Bending down for a refill turns into a treasure hunt—move a squishy toy out from behind, then finally reach the bowl.
    • That “accessible” scoop clip gets in the way every time you try to swap a litter liner.
    • Your paper towels are nearby—until a quick spill reveals they’re actually blocked by a mat or cluster of bowls.

    Visual Unity vs. Usability: When Looks Work Against You

    Grouping everything for a clean look—a shared tray for both bowls, a mat nudging against the litter box, toys posed around the scratcher—might impress on day one. But the denser the zone, the more you end up tripping over your own organization. Fitting the kit into a two-by-three-foot patch doesn’t mean actual routines become simpler.

    Cleanup and resets devolve into a careful chain reaction: move a bowl to wipe, reset the mat, hope the toys don’t roll out again. Often, as soon as it looks “fixed,” the next round of feeding or play scatters items all over again, sometimes within hours.

    Repeated Interruptions and the Hidden Cost of “Tidy Enough”

    There’s a persistent gap between “kit looks clean” and “kit feels effortless.” Starter kits are best at hiding the difference—until daily routines drag subtle annoyances back out, especially if you share space or need to move quickly.

    When A Setup Looks Under Control, But Still Doesn’t Feel Right

    The irritation isn’t a big catastrophe—it’s the drag of repetitive annoyances:

    • Sidestepping toys you know you just picked up this morning, scattered out again by evening.
    • Tracking stray litter to the hallway, proof your “contained” mat let grains slip past the integration point.
    • Lifting and re-placing the water bowl every time you wipe, never feeling like its position is stable for long.
    • Trying to speed through a refill, slowed down by other items blocking direct reach.

    It’s not just mess, but the daily cost of interrupted movement and small delays—always one more nudge, one more obstacle, one more “quick clean” that never quite makes the system feel under control. A kit built for show turns into a setup that wants constant attention.

    How Real Adjustments Make a Difference: Spacing for Function, Not Just Form

    What actually works is spacing out your setup based on tasks, not the original kit grid. You don’t need an entirely new collection—just a reset based on what keeps colliding or slowing you down.

    Real-World Shifts That Actually Reduce Daily Friction

    • Water bowl: one mat-width separate from food: Shift the dish to a quiet edge of the room, further from feeding crumbs and splash. Suddenly, you deal with water mess and food mess as separate jobs, not an endless two-in-one wipe.
    • Litter: runner isolated from feeding area: Place the box and mat three steps away, and most tracked litter stops at the runner’s edge. Now litter doesn’t scatter through multiple rooms, and you have a defined cleanup zone.
    • Toys: clearly away from feeding/water traffic: Keep play storage at a distance; cats will find the toys, and your routine path is no longer an obstacle course. Resetting is straightforward, not a repeated gathering mission with every pass-through.

    The impact is immediate: refill and cleaning sequences become linear and predictable. No extra detours to move stray items; no repeated frustration over the same mat or water splash. The setup might look less showroom-ready, but you gain time and lose the irritation of overlap that a “kit” can’t actually solve.

    Lessons from Imperfect Improvement: It’s About Day-to-Day Recovery

    Few indoor cat homes last a week with the starter-kit “all-in-one” look intact. The difference after a few real adjustments isn’t perfection—it’s smoother routines: each feeding, cleaning, and reset can happen without tripping over leftover scatter or blocked access. The best setups aren’t about minimal footprint; they’re about making it quick to recover from the day’s mess.

    Real setups trade a tidy look for easier living: Maybe it doesn’t photograph as a “perfect cat station,” but it lets you refill, wipe, and reset in clean steps—making repeat work almost disappear. Instead of circling the same flaws, you find the routine gets quieter and the friction shrinks, even if your space looks a little less staged. That’s the mark of a setup that fits actual indoor-cat life, not just the ad copy.

    For everyday indoor cat life, the best setup looks like one you continually tweak—not because you failed, but

    because you expect to make small changes as real routines bring out what works

  • Why Smart Storage Choices Matter More Than Extra Space in Your Workshop

    The real truth about workspace setup? It doesn’t reveal itself until the next time you need to get something done fast. That reorganized garage or workshop always looks brilliant right after you install the new rail, slide the fresh cabinets into place, or set up a rolling cart. But as soon as you’re halfway through a weekend project, reality creeps in—access is awkward, your main walking path is blocked, and your most-used tools vanish behind the very systems meant to make things easier. The difference between “organized” and actually functional only shows up when your real routine puts the new setup to the test.

    When “Setup Day” Satisfaction Fades

    Crisp cabinets, a gleaming open floor, every bin in its place—the first hour after revamping your space feels flawless. Give it a week. Suddenly, that rolling cart—once so easy to move—gets wedged right in front of wherever you need to stand. A bulky box of screws or winter gear pushes forward, shoving your everyday tools into the least accessible corners. You end up swinging a cabinet door just to squeeze past, or nudging the cart aside again and again just to leave the room. What felt like solved clutter becomes a new web of friction—just painted over with “organization.”

    Spotting Storage That Adds Work, Not Ease

    The warning sign is unmistakable: When do you find yourself pausing, shuffling, or sidestepping? If you need to move three things just to grab one, or if returning a tool means restacking a tower of bins, you’re working around your storage—not with it. And those moments add up: the late-night reset turns into restacking, untangling, even procrastinating because the system just feels heavy. The setup meant to save time drags the process out instead.

    Busting the “Everything Has a Place” Illusion

    Assigning every item to a home grabs neat before-and-after photos. But labeling a spot isn’t the same as making daily work flow. Wall baskets look orderly on install day, but the things you reach for constantly always seem to creep out of reach. Tape measures end up over head height, the screws you burn through each week fall to the back of the pile, and your “organized” system quietly forces new detours into each task. If a “place” is just where clutter collects, repetition and speed go out the window.

    The Rolling Chest Trap: A Real Setup Stumble

    Take the classic rolling drawer chest—ideal, until you use it. Sure, you can wheel it over. But when you actually need that clamp: brakes off, navigate around the car (again), open a deep, awkward drawer, extract one tool, then reverse the dance. Now the chest blocks your main route—there’s no good place to leave it except “in the way.” This is how a single tool turns a whole routine into a puzzle. What should have opened up space instead claims more of it, and every attempt to work faster only piles on new interruptions.

    Meanwhile, dead corners don’t disappear—they just inherit overflow. Wall racks morph into visual catch-alls if you’re not careful, layering fresh visual clutter over what used to be empty space. With each routine reset, you ask: Why hasn’t this gotten any smoother?

    Open Wall Storage: Potential and Pitfalls

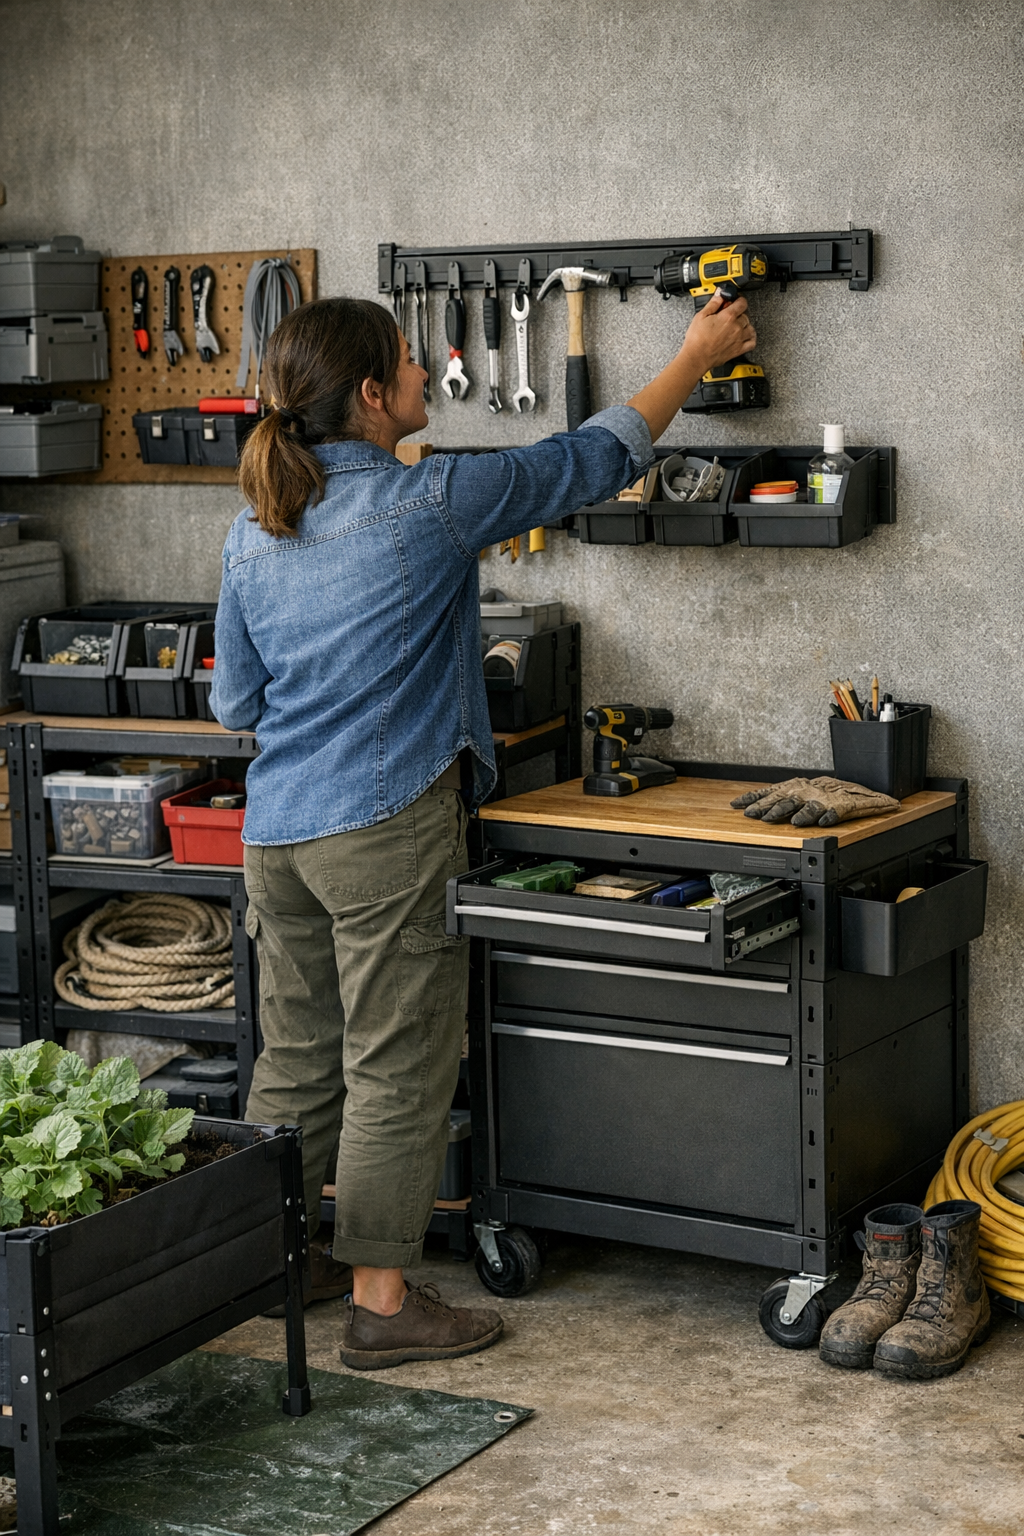
    Upgrading from a floor chest to a wall rail system with open bins seems like a quick, sensible move. Sometimes, it is. But a rail only works if every section serves a clear purpose. Your daily pliers and screwdrivers: right at eye level and within arm’s reach. Out-of-season gear or overflow: high and out of the way. As soon as “junk overflow” lands on the rail, it mimics the old floor clutter—only now it’s on display. A wall jammed with randomness just introduces new places to stall or search for basics.

    From repeated use: One setup swap—a wall rail for the chest—opened the core work zone. No more bumping past a chest on wheels, no piles collecting on aisles. The main bench and floor lanes cleared, resets at the end of a long project shrank to a few seconds. Occasional-use items moved out of the process path. Nothing was perfect, but the difference was clear in the absence of friction—one less excuse to delay, one less thing to trip over, nothing shifting after each use.

    Everyday Clues Your Setup Isn’t Actually Working

    The signs rarely scream—they creep in. You’re always moving bins to get at something in back, or tiptoeing around a side cabinet that’s permanently “sort-of” blocking the aisle. Maybe that cart, parked “out of the way,” forces you to awkwardly swerve around it every time you carry something through. Efficiency isn’t about maximum storage—it’s about clear movement and frictionless resets.

    • Are you shifting or digging for things more often than you use them?
    • Find yourself hesitating—“Should I even bother putting this back?”
    • Is there always a block somewhere between one station and the next?
    • Does overflow collect in one spot, no matter how hard you try to clear it?
    • Are “routine” tasks always stretched by micro-obstacles or constant reorganization?

    Putting Routine Flow at the Center of Storage

    The only measure that matters: Does the space still work for you on the fifth, fiftieth, hundredth use? The setups that last declutter, yes—but more importantly, they shape themselves to habit. If you return a wrench without breaking your stride, if your go-to bits and clamps don’t require detours or reshuffling, if the daily reset fits your rhythm instead of stalling it, that’s the shift you’re after.

    That might mean pruning shelves instead of filling every one, or admitting that certain tools deserve “prime real estate” while the rest can live further down the accessibility scale. Sometimes just siding a rolling cart over to a wall-mounted zone, clearly marking a walking path, or grouping like-items in open bins ends up making the difference between “tidy” and genuinely effortless use. You’re not chasing showroom perfection—just less friction, more flow.

    Sharpening Zones: One Focused Change at a Time

    The most stubborn clutter magnet? Any zone without intent. Wall rails overloaded with odds and ends become a sideways junk pile. Reduce the sprawl—give each rail or shelf a job: high-frequency tools front and center, secondary gear stored where it’s present but not blocking the main event. The discipline of single-category zones eliminates extra shifting, protects your reset speed, and keeps your main routes open—no matter how hectic your project pace or storage needs change over time.

    Each practical tweak pays off when you walk through, grab what you need, and finish up without a tangle of extra steps or the urge to shove things aside—giving you a space that feels ready and responsive, not just “organized.”

    Explore more practical, modular storage solutions at StackNest.