Author: jaesoon_admin

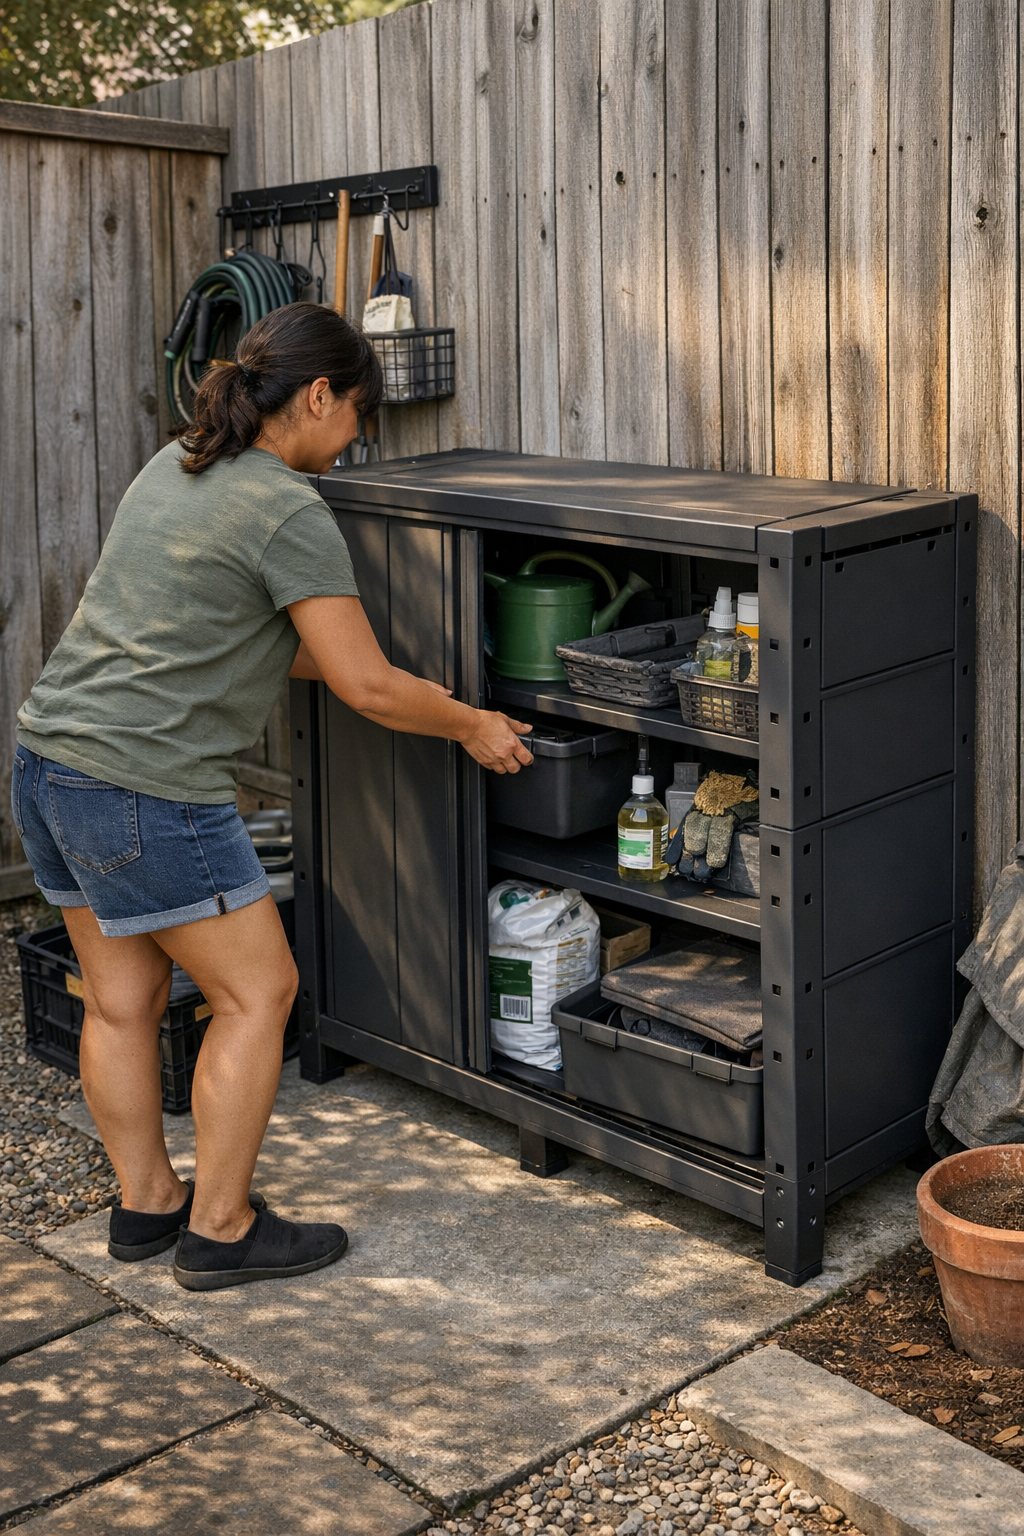
  • Smart Outdoor Storage Solutions That Keep Yard Work Quick and Easy

    Outdoor storage is rarely judged by how it looks after a weekend clean-out; it’s exposed by what happens three hurried days later. Those neat lines and empty pathways vanish the first time you rush in midweek—elbowing past a stack of gear, shoving a half-damp hose aside, or upending a box searching for pruners you just used. When setups turn every fast yard job into a sidestep-and-dodge routine, it’s clear: good storage isn’t about day-one order. It’s about surviving constant, careless, repeated use without turning into an obstacle course.

    When “Organized” Collapses Under Real Routines

    The honeymoon lasts about 48 hours. Sheds and racks look great right after installation: each tool slotted, nothing crowding the edges. But normal life doesn’t run on resets. Maybe you come home late, toss the sprayer “just for tonight,” or nudge a cooler out of the way because your hands are full. One shortcut leads to the next—a coil of rope dumped by the door, a forgotten bucket left by the mower. Suddenly, that intentional lineup becomes an awkward jumble, and resetting it means moving half the pile just to put back one thing.

    The difference shows in every rushed grab-and-go. If you can’t pull a trowel or stash shears without shifting bags or stepping over clutter, your setup is working against you. Overflow creeps outward—a bag sagging into a walkway, a tool propped against the fence, bins wedged into corners. Instead of a working zone, you’re tiptoeing through clusters of nearly-right storage, losing time and patience every lap.

    The Gap Between “Same Size” Setups

    It’s easy to think any side-yard shed or wall rack will handle the churn. But actual use tells the difference—especially when you need something buried at the bottom or need to return gear in a hurry:

    • The deep floor box: Looks generous on day one. But a week later, long-handled tools sink under coolers, sprayers wedge at odd angles, and every buried thing means a quick avalanche onto the patio. What began as organized storage gradually turns into a heap right at your feet.
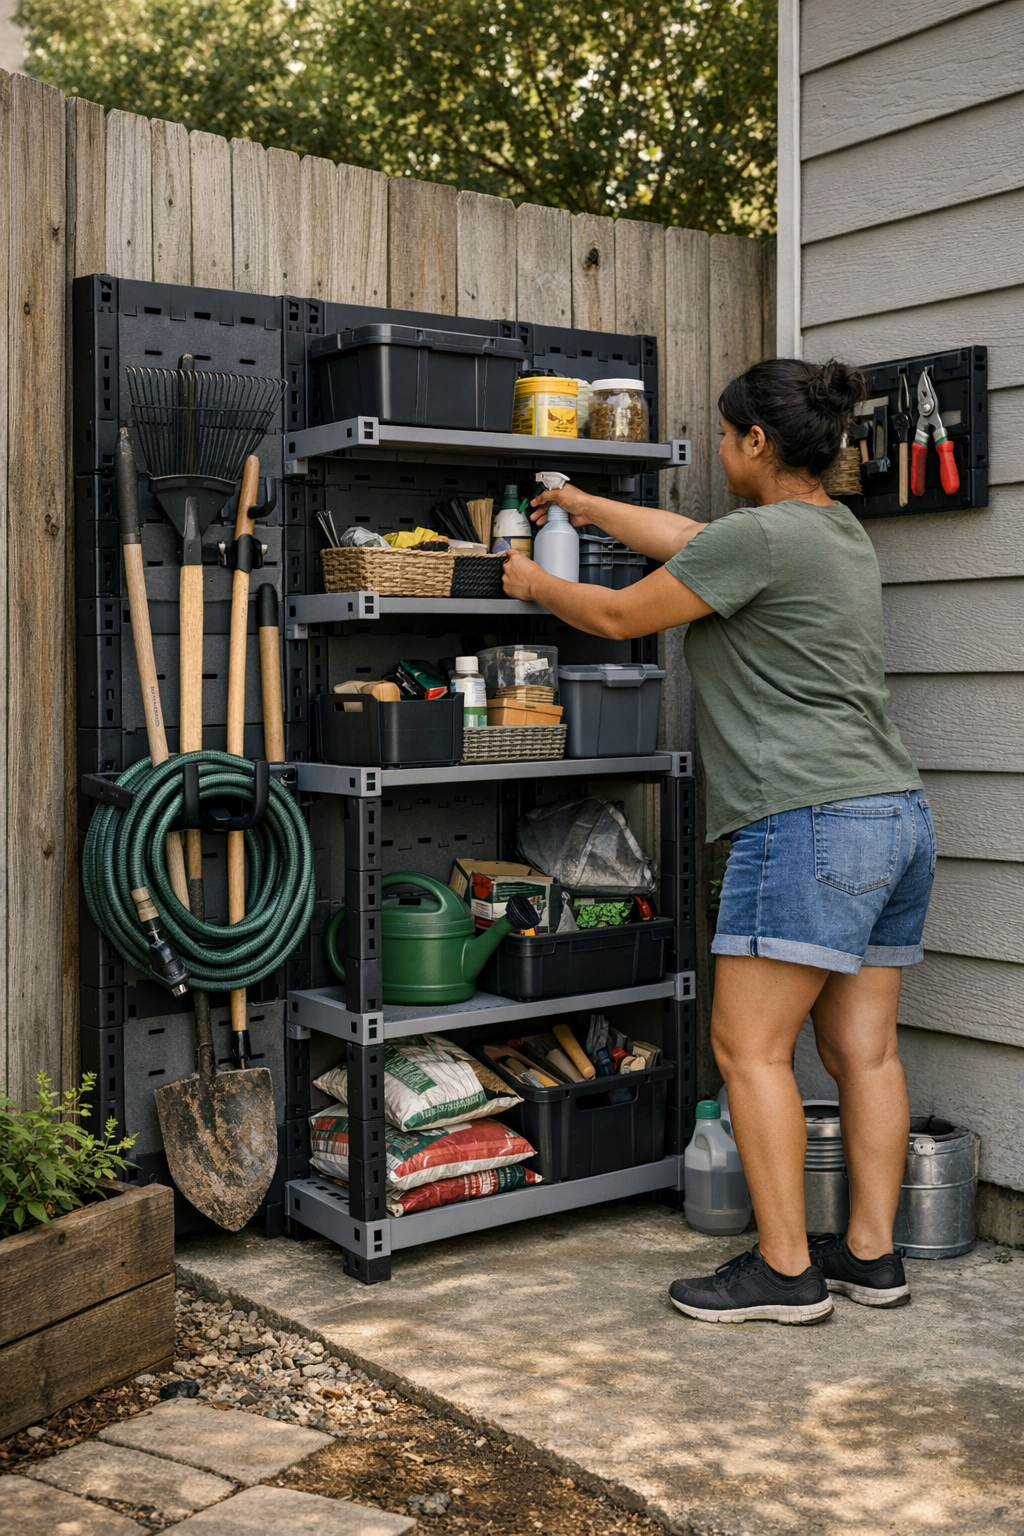
    • The zone-labeled wall panel: Each handle has a marked slot, bins hold stray gloves, and every missing rake is obvious. Nothing’s hiding. Returning or grabbing something is a one-step move, not a rummage. You spot when overflow tries to take root—catching a fallen trowel or a stray bag before the pile rebuilds. It doesn’t magically hold more. It just works harder—allowing repeated, careless returns without losing the thread of order.

    This isn’t abstract. The test shows up by week’s end: in one corner, the box margin creeps outward, tools touch your ankles, and the path narrows. In the other, things slip back into place almost by accident because there are fewer puzzles and fewer opportunities to stall out the system.

    How Narrow Zones Turn into Endless Obstacles

    Side yards and patio edges promise walkable space—right up until a stray trimmer slides from its hook or a tangled extension cord sags into your feet. That “clear path” becomes choked by one folding chair, then two, then bags and loose buckets stuck wherever an open patch appeared. At first, you move things “just for the moment.” Days pass, new gear lands, and before you know it, opening the shed involves shuffling a ladder, weaving around a propped rake, or dragging a bin out by the handle because nothing slides anymore.

    In these tight passages, storage that only maximizes capacity quickly backfires. Every new item blocks the last, and even basic movement—grabbing a mower, hauling out the hose—requires a two-step shuffle. If your gear keeps blocking your own way, the setup is “full” only in the sense that it now controls your route, not your tools.

    Incremental Fixes That Actually Stick

    Resets don’t require a full rebuild. After tripping for weeks over a box that regularly spilled tools into my only side path, I hung a segmented anchor panel three inches higher on the fence. Suddenly, rain shovels finally had vertical clearance; overflow buckets could hang above the traffic line instead of blocking it. Assigning “home stretches” for each tool—so they naturally slotted into place—reduced the quiet urge to just drop things in the closest empty corner.

    The biggest shift? I stopped dreading half-resets. Returning just one lopper mid-task took a quick hook, not a balancing act. Clutter was visible before it grew—so I could catch a problem on Tuesday instead of spending every weekend on a full reset. What changed wasn’t the storage “volume”—it was the layout’s ability to handle the churn without decaying into a mess.

    When More Space Stops Helping

    More square footage won’t save a setup that can’t manage movement. If every trip through your storage means squeezing around junk or stacking gear on the floor, a bigger shed just means a bigger mess to move each time. Floor space and wall space only work when both allow fast, direct access—no detours, no silent pile-ups. Modular panels and adjust-as-you-need hooks let you nudge zones around as seasons change, instead of locking dead corners into every layout.

    The best setups expect “routine messes”—muddy boots, rained-on gloves, supply runs that leave an extra bag behind. Real improvement comes from layouts that let you spot and clear trouble early—so your walkways stay open and your gear flows through the week without demanding a restart.

    Lessons From Messy, Real-World Use

    • Make every spot obvious—even if it means leaving wall space open. The clearest setups mark lanes or color-code hooks, so missing tools are glaring and returns need zero guesswork.
    • Defend movement space. If gear slides into your steps, lift it higher or shift it to the sides—racks should protect traffic lines, not become new obstacles.
    • Don’t let “efficient stacking” trap you. Wall storage that turns into a high-rise of handles or a jigsaw of bins just speeds up the next bottleneck. Leave air between anchors for honest single-move access.
    • Resets are inevitable. But make them a one-minute fix, not a Saturday project. The strongest layouts don’t prevent all mess—they just shrink the fallout and make the reset loop nearly automatic.

    Where Real Storage Proves Itself

    No shed or rack fails on day one—they all shine with a fresh sweep. But actual routines erode the difference between a temporary lineup and a working layout. Systems that keep walking room clear and tool returns frictionless resist collapse week after week. The setups you don’t have to think about—the ones you can use half-tired, one-handed, mid-rush—are the ones worth keeping.

    Outdoor storage that matches how you actually move, drop, and retrieve gear lets you get through any chore without the space biting back. That’s the difference between storage that looks right and storage you barely notice—because it just works.

    Discover practical outdoor storage and zone systems at TidyYard
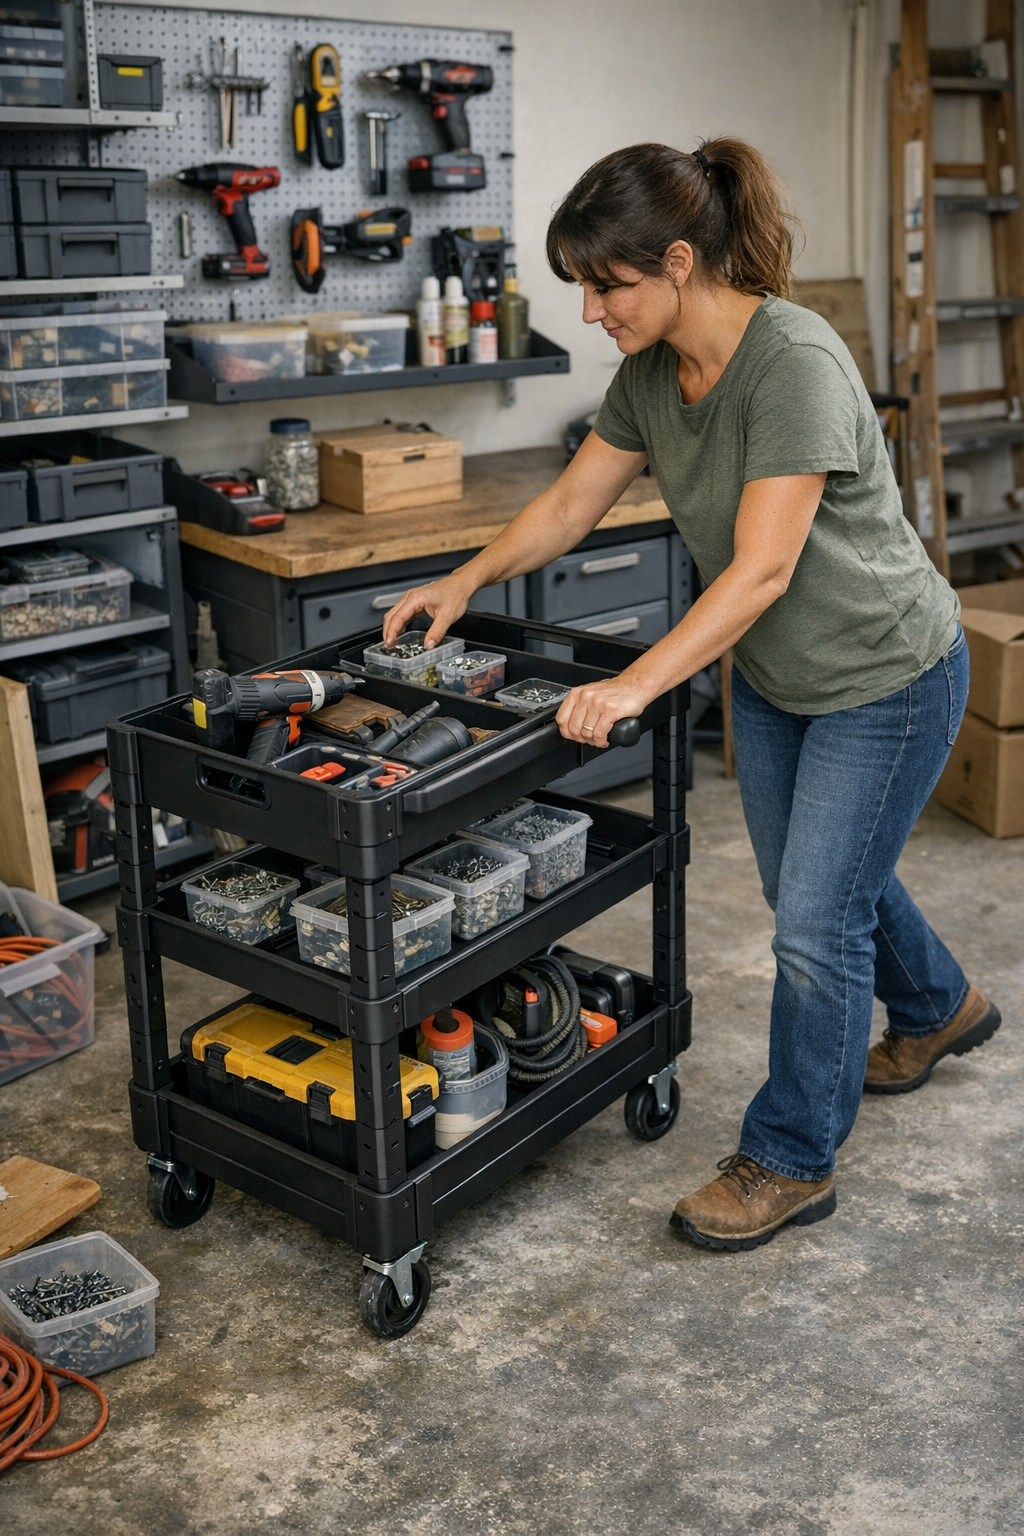
  • Why Mobile Carts Outperform Fixed Storage in Busy Workspaces

    The promise of a spotless workspace always looks good—until the friction begins. If you’ve set up a garage, workshop, or utility room with those satisfying wall shelves, crisp cabinets, or neatly stacked modular bins, you know the routine. Day one is all clear counters and smooth labels—the space radiates readiness and order. But let a normal afternoon unfold, and the cracks reveal themselves fast. The clutter that “shouldn’t” return starts creeping back, but not as chaos—this time, it’s awkward footsteps, blocked corners, and a subtle drain on your workflow every time you try to get something done.

    From Showcase to Slowdown: When “Organized” Trips You Up

    The trouble isn’t clutter—it’s how “organized” means working twice as hard just to keep the pace. On the first real project, you find yourself darting between cabinets for a drill bit, dodging the mower squeezed in for winter, then reaching around that shelf that always juts onto your path. Grab a handful of fasteners, make two trips since one never holds everything, then circle back to return what you forgot. Every extra step redraws those supposed “clean lines.” Spaces that look dialed in on day one suddenly make every movement feel boxed-in—and the overflow starts accumulating in the same tired zones every time.

    Fixed setups sell the dream of order. But after a few rounds of actual use, their real legacy is blocked walkways, double-duty movement, and corners that quietly choke up with overflow. That clear area next to the cabinet mutates into a dumping ground; the floor fills up as bins get shifted out “just for now.” Resetting after a job? Suddenly it’s a scavenger hunt, not a process—slowing you down before the next project even begins.

    The Hidden Cost of Fixed Storage: Reset After Reset

    Setup day isn’t real life—the true test is how long it takes to reset after each job. Too often, that means juggling bins to reach what matters, or abandoning tools near the door because shelving is buried behind “temporary” piles. The wall might be fully kitted out, every shelf labeled, but actually getting to what you need—and putting it away—requires constant reshuffling. You move a box to open a cabinet, nudge a bin to pull out a sander, then detour around a cart left parked in your work lane.

    Footprints get awkward and detours multiply. It’s not one big mess—it’s dozens of micro-obstacles: a half-blocked aisle, a tool left balancing on the freezer, a quick reach around a cabinet edge that you repeat for the hundredth time. What felt “efficient” at first slowly turns every 10-minute chore into an unintentional marathon—especially if two people are working at opposite ends or you suddenly have to haul larger equipment through those tight walkways.

    How a Mobile Cart Shifts Everything—Without Adding Clutter

    You don’t need more storage. You need storage that moves with the job. Roll your core tools, fasteners, and small parts onto a heavy-duty cart—and the friction that drains your setup simply stops accumulating. Instead of zigzagging across the room for each piece, you work straight through: the cart follows you, not the other way around. Wall space could look the same, but now there are no dead corners or blocked pathways, because the essentials move with you, and nothing gets parked in the way for long.

    Clutter zones start to evaporate. No more overflow quietly sprawling behind toolboxes, under benches, or beside the washer. With a mobile hub, bits and tools return to you—not to a random flat spot across the room destined for forgotten piles. Flat surfaces that were once magnets for “just for now” gear finally stay clear, because your reset can actually keep up with your workflow.

    Real Setup Scene: Getting It Done—Or Getting Stuck

    Picture a bracket installation near the garage side door. With tools locked away in fixed cabinets, you shuffle across the room for a screwdriver, realize you’re missing anchors, kneel for hardware, then stand up only to remember the drill’s back by the door. Now, one box is underfoot, your balance is off, and the job that should take 15 minutes mushrooms into a series of stop-and-go corrections. A mobile cart changes the scene: you roll up, everything stays beside you, each tool returns to the same spot, and your path never tightens. The job finishes with less back-and-forth and almost no unnecessary detour.

    Mobility Isn’t About More Stuff—it’s About Easier Returns

    The cart doesn’t just haul extras—it unravels that relentless loop between using and resetting your space. When the job’s done, everything used is already on the cart, ready for return. Start-to-finish, there’s less scatter, no forgotten piles on random shelves, and your reset is nearly automatic. The visual calm and the open movement aren’t just an illusion—they’re a real improvement you can feel at the end of the day.

    What Static Storage Still Does Well (And Where It Fails Without Backup)

    Wall cabinets still earn their keep—just not for daily flow. Stash overflow, off-season gear, and backup supplies where they’re out of the way. But if you lean on these zones for every project, cracks show fast. The system might “look finished” right after setup, yet within weeks, new piles sprout in awkward spots the layout never anticipated. Clarity starts eroding not because you lost discipline—but because static storage can’t flex with your actual work rhythm.

    Notice yourself—or anyone else—repeating the same detours: shifting a cart just to pry open a door, weaving around gear you parked “one time,” or reaching past the same cabinet edge for the third trip in a row. These repeated movements aren’t mistakes—they’re your setup signaling it’s working against you, squeezing the room tighter even when there’s technically “a place for everything.”

    Flexible Fixes: Tweaks for a Smarter, Smoother Setup

    You don’t need to ditch your shelves or rip out what works. In most setups, background storage stays—wall cabinets for backup, shelving for seasonal tools. The real shift is making your daily-use gear mobile: a cart, caddy, or rolling chest that clears the main area after every session. Even a single high-quality cart changes the flow of the whole workshop or garage, letting you put hands on what you need, right where you’re working, without crowding the floor or wall zones for good.

    Four Tweaks That Help Right Away

    • Make overflow obvious: Any bench, floor corner, or shelf that always collects extra gear? Give that stuff a mobile home, not a permanent landing pad.
    • Use your cart’s top tray for in-progress parts: Fasteners, bits, or hardware stay visible and contained—not spread across every project zone or slipping underfoot.
    • Watch your walkways: If you have to move your cart (or a bin) just to open a cabinet door or squeeze by, reconsider where things live between uses. The return route should stay as clear as your starting lane.
    • Group tools by action, not by wall: If you always grab the same drill, measuring tape, and level, keep them together on the cart—don’t split them between fixed shelves, only to cross the room every session.

    Choose Flow, Not Just “Order”—And Make Your Setup Work For You

    The best area isn’t the one that looks arranged right after a deep clean. It’s the setup that lets you work straight through, reset in moments, and keeps corners from turning into overflow traps—even when projects pile up or routines repeat. Once you’ve swapped the headache of endless return trips for the ease of open movement, the case for a mobile zone writes itself.

    For real-life setups that hold up—the kind that don’t box you in or slow you down—mobility is the missing piece. The difference isn’t abstract: it’s felt every time you avoid that repeat detour, recover precious floor space, or end a day without hunting for lost tools. Try letting your essential gear flow with your work, and see how much more usable your space becomes.

    Visit StackNest for practical storage solutions that fit the way you really work.

  • Extending Reciprocating Saw Blade Life Through Smart Choices and Care

    The moment your saw lurches and the cut goes sluggish, you feel it—the blade isn’t up to the job. On paper, every reciprocating saw blade promises “professional results,” but only real-world cuts separate smooth progress from relentless struggle. At the bench or waist-deep in demo scrap, nothing exposes blade weakness faster than a few feet of buried nails, damp wood, or dense studs. That’s where tool performance stops being theory and starts costing you—time, effort, and finish quality.

    Blade Trouble Usually Hits Mid-Project—Not on Day One

    The first plunges often fool you: fresh teeth, quick pass, everything easy. But when you’re two dozen cuts in, heat builds, dust packs into the gullets, and the job shifts. Suddenly, a blade that powered through framing boards now shudders at every nail; control slips, and you feel your shoulders tensing, trying to muscle through. Cuts veer, edges rag out, and that simple trim-out stretches into bonus cleanup. If you’ve ever had a vibrating saw leave your arms buzzing for hours, you know the difference isn’t subtle—it’s the friction you fight with every pass.

    It’s not catastrophic failure that kills productivity—it’s the slow, creeping grind. A little more vibration, just enough burning pitch, twenty more minutes chasing ugly edges with sandpaper. Ignore the warning signs and you’ll feel progress grind down with each cut: more strain, less control, and a cutline you end up fixing instead of moving on.

    Why Some Blades Quit Long Before Others

    Not all saw blades fade the same way, and the reason rarely comes down to what’s printed on the label. It’s the nagging factors under real load:

    • Material matters: Bimetal blades tough it out; brittle carbon steel flexes, then fails.
    • The workload: Are you cutting old nails and wet studs, or clean pine?
    • Your approach: Do you force every stroke, or let the saw do the work?
    • Keep it clean: Ignoring dust quickly glues sawdust onto teeth—hello, friction and heat.

    Grab the wrong blade for the job, skip cleaning, or mismatch TPI to the material, and you get trouble early: grabs in the cut, wandering lines, and teeth that dull before the blade snaps. Sometimes the blade flexes sideways after three studs, or gunk bakes on the edge, ruining any hope of a clean finish. That’s time lost—not to catastrophic breakage, but to burned out edges and hours of sanding and rework.

    How a Dull Blade Draws Out Every Task

    Picture midway through basement framing—shavings on your boots, saw humming. A solid bimetal blade lets you steer, keeps vibration steady, and the passes smooth. A bargain blade? Three studs in, it starts pulling off line, rearing up at buried nails, and the cut grows a jagged tail. Sawdust turns to paste, teeth overheat, and every next cut takes longer. You feel the control slipping every inch.

    The Real-World Difference: Side-by-Side on the Jobsite

    This isn’t just warranty talk—it’s straight off the job. On a porch tear-down laced with half-hammered screws, I drove an 8/14 TPI bimetal blade through boards and hardware for an hour—line stayed dead straight, cuts clean, only a whisper of scorch on the exit. Swapped for a big-box carbon steel blade out of thrift: instantly the cuts wandered, noise amped up, and by the seventh post, it was bent, teeth caked, and fighting every entry. It doubled my time, left splinters everywhere, and forced a cleanup that nearly beat the demo itself. A cheap blade isn’t a deal when it drags down every pass and turns one job into two.

    Tweaks That Actually Save The Day

    No magic bullet—just small shifts that pay off. On that same porch, two habits changed the whole tempo:

    • Pace the stroke: Instead of raw force, pull out after every half-foot to shake dust loose—keeps heat down, saves edge life.
    • The right blade for the material: With nail-hardened timber? Stick to that bimetal 8/14 TPI and the saw stays controllable and smooth. That blade finished 48 plunge cuts before showing real fatigue—well past what the cheapo survived before it started tearing fibers and trashing finish quality.

    Real Friction From Routine Jobs

    It’s not just on showpiece decks—blade life bites you everywhere. Trying to square off old floor joists under the house, hacking stubborn roof braces, or slicing deck rails in a deep freeze: if you hit more vibration, have to lean hard, or the blade binds mid-cut, it’s usually not your saw failing. The wrong blade, dirty blade, or worn-down teeth force you to fight every step.

    • Can’t tell why progress has slowed? Pause and check for sawdust caking or the edge running hot.
    • More vibration than last cut? Odds are good you’re running dull—or mis-matched for the material.
    • Saw feels “grabby” or fights you? Pull the blade clear, tap off debris, and reset your technique—let the tool’s action, not your biceps, do the work.

    Your Quick Field Reference: Saw Blade Life

    How do you know a blade is finished—before it snaps?

    If you feel new vibration, smell burnt pitch, or notice the saw pulling off line, pay attention. Sticky gunk building on the blade often warns you before you see rounded teeth.

    Does it help to clean the blade mid-job?

    A hundred percent. Let pitch and dust build, and you’ll trash the edge in minutes. Habitually pulling up and clearing grit during the cut means cooler runs and blades that last twice as long.

    Is there really a “one-size-fits-all” blade?

    Not in the real world. For mixed demo—hidden nails, surprise screws—stick with a variable TPI bimetal for the longest run. But shift to dense hardwoods or all-metal tasks, and specialty blades pay for themselves in both time and fewer ruined passes.

    Real Performance Comes Down to Blade Choice

    The right blade isn’t just about speed—it’s control, smoothness, and less beatdown on your hands. In the middle of a dust-choked workspace, that means cuts that run true, less sanding, fewer unplanned breaks, and actual forward progress. Small mistakes in blade selection cost you sweat and time; the cheapest option often becomes the most expensive over a day’s worth of work. Forget the claims on the box—feel the difference as your workday stacks up, and pay attention to what you’re left holding: a finished project, or a pile of wood that needs fixing.

    Shop Gumboll for blades and accessories tested where real work happens.

  • Choosing Slim Corridor Cabinets That Keep Walkways Clear and Safe

    In a narrow corridor or hallway, the wrong storage cabinet shows its flaws in days—not weeks. Even a few centimeters of extra depth or an awkwardly opening door can turn an ordinary routine into an obstacle course: bumping a corner when your arms are full, catching a bag handle on a knob, or sidestepping shoes that spill out just to keep the pathway clear. A “slim” cabinet that forces you to pause, pivot, or reset every time you pass isn’t saving you space—it’s quietly eating up time and building annoyance with every repeat trip.

    When a Cabinet Looks Slim but Acts Big

    Slick catalog photos and “compact” labels can mask how a cabinet really performs in a lived-in corridor. Spend just a week with the wrong unit, and the cracks show through: a door that swings into your path, a drawer that jams, shoes piled along the edge because the entry is tight, or bags left dangling from handles simply to avoid dealing with the cabinet’s clumsy access. The problem isn’t storage capacity—it’s the small misalignments that add daily friction.

    Routines Expose the Weak Spots

    These weak points show up exactly when you want everything to flow: heading out with groceries, stumbling in late at night, or rushing to toss a scarf inside before bed. If you have to hold a door open with your knee or try to wedge shoes inside sideways, the design’s flaw is exposed every time. Those messes at the corridor’s edge aren’t just untidiness; they signal storage that feels more demanding than helpful. The longer the minor hassle, the quicker resets get skipped—leaving the area looking organized only when it’s untouched, never in real use.

    The True Test: Nighttime and Rushed Mornings

    What looks efficient under showroom lighting often turns into a nightly pain point under real conditions. Low light, tired minds, and the need to move quickly reveal friction: a swing door that halts you mid-stride, a cabinet that juts too far into the walkway, or a handle that snags clothing. Most people don’t notice the true test until circuits repeat: midnight rummaging for slippers, sleepy armloads, or rushed exits where a cabinet slows you down or becomes a tripping hazard nobody admits to expecting.

    The Accumulation Effect

    That mismatch between what was promised and how you actually move becomes visible: shoes building up where the cabinet slightly blocks the path, random items stranded outside because putting them away takes too much effort in a half-awake state. What started as a solution is now a stutter in daily flow. After several cycles, the cabinet itself feels less like a value add and more like a silent barrier collecting evidence against it.

    Sliding Doors and Shallow Depth: Small Adjustments, Big Impact

    Sliding doors fix what swinging doors sabotage. By eliminating the need for extra clearance, you remove the physical halt and sidestep baked into every access. In a corridor, a cabinet depth matched to what you realistically use—often between 18 and 25cm—means enough storage for shoes and essentials, without slicing into vital passage space. Suddenly you can open the cabinet even when the hall is crowded, and putting things away doesn’t mean disturbing the whole setup.

    Real Example: One Change, Noticeably Fewer Piles

    Picture a cabinet near your bedroom door—25cm deep, settles shoes and daily bags. At first, everything fits. Quickly, handles knock against passing knees, doors block the walk, and shoes cluster at the threshold because entry’s awkward. Swap in a sliding-door version, and immediately, the bottleneck vanishes: you can return shoes almost blindly, bags drop in even when your hands are full, and the floor stays clear through the week. Missing clutter isn’t just neater—it’s proof the friction is gone from routine return flow.

    Staying Usable Beyond the First Week

    The real measure isn’t how much a unit stores or how the finish looks after unpacking. It’s whether the corridor remains passable and the reset doesn’t become its own chore. A cabinet with tuned depth and sliding doors meets repeated, hurried, tired use without complaint—no ankles bruised, no drawers stuck, no shoes stranding in limbo. When the storage matches how the space is truly used, clutter stops accumulating and the routine runs without a hitch in the walkway.

    Why Some Setups Keep Clogging Up

    Cabinets chosen for looks or storage volume—wide-swinging doors, deep bodies—often break down under daily routine. Overflow creeps onto the floor, resets get skipped, and you find yourself dodging around stuck drawers or planning routes around the cabinet instead of through the hall. What looks “decluttered” at first pass is simply staged; with real use, the system keeps losing ground until it’s easier to pile things nearby than return them to where they belong.

    Tips for a Corridor Storage Setup That Actually Stays Clear

    • Check every overhang and handle: Just a couple centimeters can mean an awkward pivot or unexpected bruise.
    • Simulate your path before committing: Open doors and drawers while actually walking through—feel for any snags or forced contortions.
    • Test “return flow” when tired or distracted: If putting something back isn’t effortless in a real hurry, it won’t get done, and overflow will build up in days.
    • Prioritize sliding or partial-opening designs for tight corridors: They forgive crowding and prevent traffic jams, even when multiple people share the space.
    • Forget “maximum capacity” in passageways: Comfort in daily motion beats squeezing in every item the first day. Crowded interiors only postpone the problem.

    What to Watch as Routines Evolve

    No corridor solution wins forever. More people join the routine, bags size up, or the hall shifts roles with the seasons. The best slim cabinet is the one that asks the least from you to stay clear and organized—even with barely any focus left at night or in the morning rush. Check in after a few months: is the floor genuinely clear, or does the cabinet now feel like just another thing to skirt around? If resets slow or fresh piles reappear, it’s time to adjust—maybe swap in sliding doors, reassign the zone, or rethink depth before slipups become the new normal.

    That’s the mark of corridor storage that actually works: it doesn’t demand your attention, yet its absence would immediately slow you down.

    Find practical corridor and slim-storage options designed for real living at Gridry.

  • Balancing Desk Clutter and Accessibility with Power Brick Storage Solutions

    Here’s the hidden cost of exposed power bricks: Even in a workspace that looks spotless, you’re never more than one charger swap or device handoff away from a sudden tangle. Those power adapters and trailing cables always start tucked away—but as soon as your routine shifts, they creep out: nudging past your feet, catching your chair’s wheels, blocking the legroom you need to scoot back, or making a simple unplug into a full under-desk contortion. The difference between a desk that looks organized and one that actually stays usable is most obvious at those moments—the exact point when you need to swap, charge, or shift, and your setup either gets out of the way or drags you back into annoyance. For anyone moving between notebook, laptop, charger, or monitor during a typical workday, the friction from power bricks adds up fast—and what hides the mess sometimes hides a new problem.

    When neatness hides new headaches

    The all-clear look of a cable-free desk sells itself fast. Sealed cable boxes and sleek containment promise tranquility—no adapter lights, no cords cluttering the edge. But neatness on the surface only works until you actually work. Shift from laptop to monitor, hunt for a missing charger, plug in a phone, or let a colleague use the next seat, and those “clean” setups start to resist change. Suddenly, the design you chose for tidiness becomes a slowdown: removing a panel, untangling a cable, and guessing which plug is which—all to make a minor adjustment.

    Every “tidy” enclosure multiplies steps for basic resets. You reach awkwardly below or behind, pop open a cover, interrupt your workflow tracing which adapter goes where, sometimes forced to undo cable ties just to free one plug. What started as organized now means pausing before every device swap, feeling a little sting at every slow-down, and quietly dreading the pileup as more users, accessories, or last-minute changes stack up. In shared or multi-role desk setups, every person trying to plug in turns order into confusion, and “hidden” just means out of reach when you need it most.

    Seeing “organized” for what it is: visual order versus true flow

    On a desk built for real, repeat use—especially if surface space is tight or multi-tasking is constant—the cracks in invisible cable management are immediate. Imagine trying to switch between a monitor, laptop, and phone, all running off adapters stored in a box you have to open every time. Every device change is now a hunt. Cables feel organized on the surface, but need five times the effort when you’re busy.

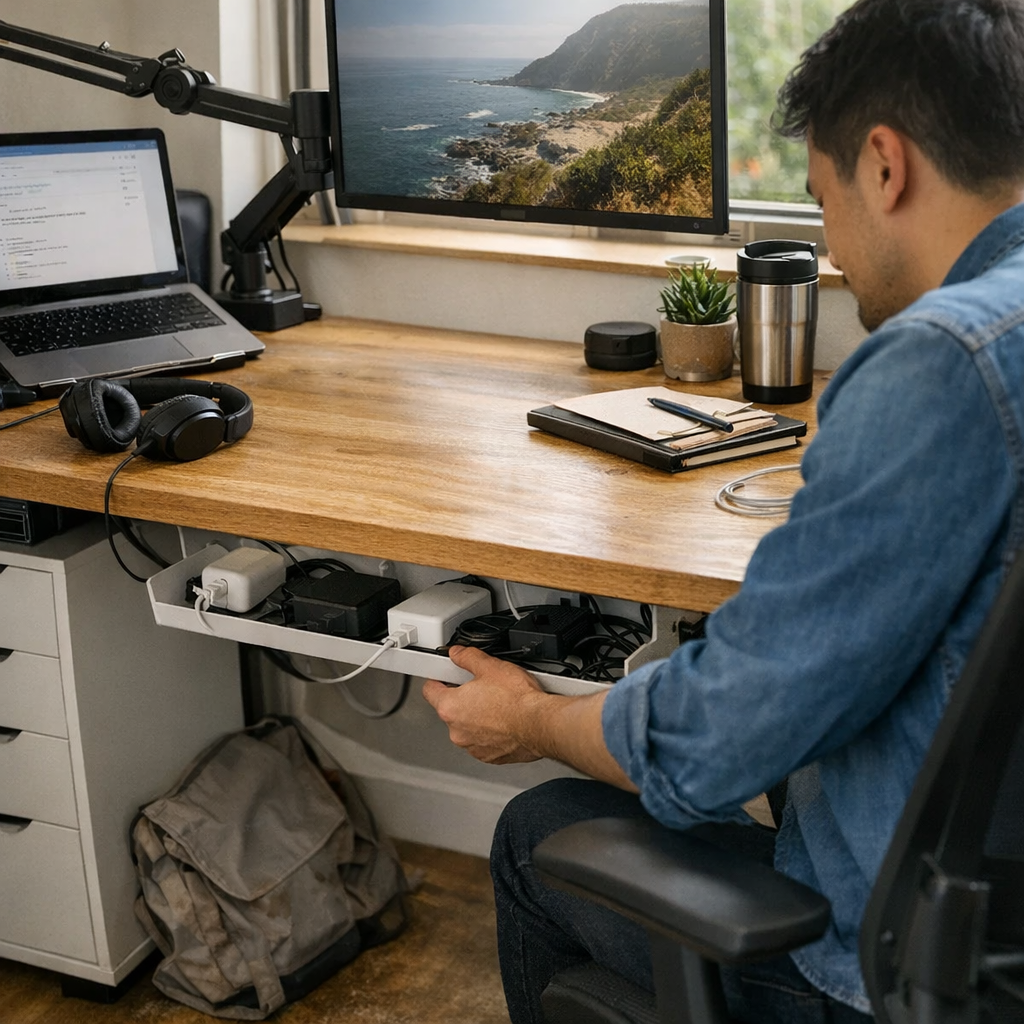
    An open under-desk tray flips the script: it keeps power bricks and cables off the working surface and out of foot range, but access is instant and unblocking any device is as direct as reaching behind you. Swapping a charger takes seconds, not a ritual of crouching and box-opening. You lose the “perfect” minimal look under the desk, but you stop breaking your workflow every time your tools need to change. Your routine resets shrink down, your desk surface doesn’t crowd so quickly, and actual switching—especially with compact workspace depths—stays fast enough to keep up with you, not slow you down.

    Real scenes: where design rigidness gets in the way

    Take a day when you’re toggling between focus mode on your drawing tablet and jumping onto a call from your laptop, or passing the workspace to someone else. With every power brick closed off in a box, each shift means crouching down, unseating the box, untangling cables, and maybe labeling each plug—hoping you don’t disconnect the wrong thing. The smooth desktop line is never the bottleneck; it’s the under-desk wrestling and reset time that burn up your minutes and patience. Multiply that interruption several times through the day, and your so-called order has cost you an hour of drag and distraction by week’s end.

    Now, swap in a slim, rear-mounted tray: bricks are up and out of sight, feet roll under easily, and a swap is one smooth reach. Tracing a cable is immediate. Charging swaps no longer knock you out of flow. For desks with limited depth, or where leg space matters, the difference is even more visceral—no more cables creeping down into your reach, no more wheels snagging the wrong wire, no more searching for spare adapters mid-cycle.

    The practical reset: how a small change paid off

    After months of “clean” cable boxes, I found myself resenting every reset. Getting under the desk to release a plug, then re-coiling everything for tidiness, turned into a loop I started avoiding, taking shortcuts that made things messier over time. A switch to a basic, open tray—a strip just wide enough for the core adapters, letting a few inches of slack hang—freed up my surface, banished bricks from foot-level, and let me swap devices without breaking step. No more cable dread, no more secret stash of spares cluttering the floor. The win wasn’t visual; it was the way I stopped thinking about cable friction and started thinking about my work again.

    Chasing a catalog-perfect look forced constant upkeep; settling for practical concealment gave me an actual routine. If clarity means forgetting your cable management even exists, this switch earns its keep every day.

    Common questions in real use

    How do you actually hide bricks yet avoid cable headaches?

    Partial concealment beats full enclosure every time. Use an open under-desk tray to collect bricks and cable loops, but leave plugs visible and grabbable from the edge or side. Avoid boxes or panels that turn a cable swap into a reset process. Instead, opt for trays or cradles at the rear desk edge: one-handed in, one-handed out.

    Why not just leave everything out for quickest access?

    Loose bricks and cables do more than look messy—they turn into hazards at your feet and obstacles for chair movement. It’s only a matter of time before you roll back and catch a cord, or give the desktop a sudden yank that kills power mid-task. Every exposed cable adds visual clutter and risk that’s hard to ignore during long days.

    What fits best with shared or high-switch workspaces?

    Open trays win. In flexible or team-shared desks, plug swaps and quick handoffs are constant. Being able to see and trace every cable without a full tidy cycle prevents conflicts, stops device “borrowing” from turning into cable scavenger hunts, and keeps both solo and collaborative work moving. A tray grants open access without giving up control or order.

    Surface order versus everyday reach: what matters more

    The structures hidden under your desk determine how much friction you actually live with—not just how neat the space seems on first look. “Organized” isn’t how well cables disappear, but how little they slow you down. Whether with a cable tray, rear cradle, or accessible mount, the point is less about hiding and more about preserving flow—especially in active work zones with daily device or seat shifts. The moment you reach for a charger or cable and forget the management system is there, you know the structure is working for you, not against you.

    The most effective workstation adapts to the real sequence of your day: frequent changes, quick switches, and a surface that stays ready for the next cycle—not dressed for a photo shoot. The less cable and brick management interrupts your flow, the easier it is to leave your desk clean and return to it eager—not dreading hidden clutter resets or inconvenient cable boxes.

    Explore the full WorkBasic collection

  • Streamlining Pet Travel: The Key to Quick Hydration and Cleanup Access

    Every pet travel bag looks ready at home—bowls packed, wipes zipped in, toys filling the gaps. But on real trips with real stops, the “organized” setup turns unsettled fast. The first break is smooth. By the second or third, water breaks turn frantic, wipes hide beneath tangled towels, and every quick need becomes a messy search. Rushed moments leave you juggling leashes, digging past collapsed toys, and steadying a restless dog while half the bag’s contents end up scattered on the car floor. The friction isn’t obvious at first. It builds, trip after trip, stop after ordinary stop, until the time lost and effort spent make a good setup feel like a burden rather than a solution. PawGoTravel lives in these details—where neat packing collides with the reality of repeated, seat-side, on-the-move use.

    The Hidden Friction in “Prepared” Pet Travel Bags

    Home packing makes it easy to trust your careful setup. Water bottle—right pocket. Collapsible bowl—next to the leash. Wipes tucked under the comfort toy. But get out on the road, and the story shifts. Organized compartments turn into obstacles the minute you need something fast—usually at a rest stop with a muddy dog and one free hand. The “everything-in-its-place” feeling fades as repeated stops reveal what’s buried and what’s actually within reach.

    Real scenario: you stop at a busy gas station, leash looped on your wrist, fumble for the water bowl, and realize it’s jammed under a crumpled towel and chew toy. Wipes? Wedged in a tight pouch beneath a bottle you can’t grip one-handed. What started as neat quickly dissolves into reshuffling, with each break adding more chaos. By mid-trip, “organized” means a surface calm hiding a bottom layer of tangled and hard-to-reach essentials. The drag creeps in—not dramatic, but steady, slowing every restart and making even short breaks feel like hurdles.

    Repeat Stops: Where Design Flaws Show Up Fast

    Stopping once may not expose the cracks. Repeated stops—typical on errands, day trips, or leg-stretching breaks—amplify every flaw:

    • Bowl under the leash or towel? You empty half the bag just to get water.
    • Wipes in a sliding pile? By the time you find them, paw prints are deepening on your seat.
    • Toys soothing your pet, but now blocking fast cleanup or hydration.
    • Human items—hand sanitizer, snacks—mixed with pet supplies so thoroughly every compartment becomes a site of crossover mess.

    Every delay feels longer under pressure: wrong zip, awkward reach, or forgetting where you stuck the wipes after last stop. Friction isn’t just the hunt. It’s the repeated reset—the way you have to pause, unpack, and repack in ways that break your travel groove and stretch even simple moments into disruptions.

    Seat-Side Access: Small Change, Big Difference

    The difference between controlled chaos and real ease often comes down to where your essentials live. A dedicated, upright seat-side pocket—just large enough for water and a bowl, nothing else—means one-hand access during any pause. Instead of opening a main bag (and risking everything spilling out), a semi-rigid side pocket lets you reach for hydration without disturbing a single toy or wipe. Hands busy with leash? No problem: the gear slides out and back in, so you can serve water and move on without wrestling your setup.

    Concrete example: three short stops in two hours, each with a restless dog and unpredictable needs. With a purposeful seat-side pocket, water breaks don’t require digging; a bowl and bottle unclip in seconds, avoiding drop-zone chaos on the car floor. Main compartment stays zipped. Essentials return to their same spot, so the next stop feels like an extension—not a total restart. The key difference: less interruption, clearer flow, and a pet who spends more time settled, less time waiting while you search the bag for the basics you thought were neatly stored.

    Packing Patterns That Interrupt Your Travel Flow

    The habits that slow you down are the ones that slip in unnoticed:

    • Bowl under toys or tangled leashes: Looks fine when packed but turns chaotic each stop—digging for the bowl topples half your kit.
    • Water gear in interior-only pouches: Keeps things tidy but blocks quick use, leaving you to unstack gear for every simple water break.
    • Cleanup and comfort items mixed together: Overlapping slows retrieval and creates confusion—wipes and toys block each other, especially after multiple stops.

    The first time, it’s tolerable. By the fourth, the repeated rearrangements and search-and-find routine start to feel like the real problem, not the pet.

    Why “Looks Organized” Isn’t the Real Test

    Visual order doesn’t guarantee efficiency on the road. Compartmentalized, color-coded, or neat-looking setups promise ease—but repeated-use reality exposes what’s actually frictionless and what’s just tidy on the surface. True test: can you get water, wipes, and comfort for your pet with one hand, in under a minute, while steadying the leash and watching the door? Dedicated pockets for critical items turn retrieval into a single motion, avoiding multi-layer unpacking and mid-trip frustration. The real gain isn’t a cleaner look; it’s not having to pause, dig, and reset after every stop.

    Small Upgrades, Noticeable Impact

    You don’t always need to swap your whole bag. Sometimes, repacking or moving your hydration kit into a seat-side pouch is enough to end the cycle of digging and delay. When your current layout still trips you after repeated use, that’s the moment to consider a new structure—upright exterior pockets, snap-in carriers, or sectioned organizers designed for quick, one-handed reach.

    Replay your last trip: Where did movement break down? Did a water break stall everything? Were the wipes lost when you actually needed them? These bottlenecks are clues—shifting your setup for separated access, reduced overlap, and single-motion retrieval can shave minutes off routine stops and keep your focus on the journey, not the shuffle.

    When Function Outpaces Form—And Why That Matters

    Travel exposes every hidden flaw—no matter how tidy your bag looks on the couch. Day trips, city errands, and multi-stop travel make the old setup honest. The setups that survive aren’t the neatest at rest; they’re the ones you can actually use on the move, with fewer drop-zones and less frantic searching. Some chaos remains, but friction shrinks: fewer slow-downs, fewer repacking battles, and a more predictable experience for both you and your pet. That’s the difference a smarter travel setup makes after the third, fourth, or eighth stop.

    Explore seat-side and quick-access travel setups designed for real movement at PawGoTravel.

  • Choosing Bathroom Lighting That Minimizes Mirror Glare and Enhances Visibility

    Most bathroom lighting fails not on the first day, but on the hundredth use. Step up to the mirror: the overhead bar looks clean, the room looks bright—not bad at a glance. But as you brush your teeth or lean in to shave, you squint against mirror glare, lose track of the sink’s far edge, and tilt your head to dodge a sharp reflection slicing straight across your line of sight. What was supposed to be better visibility is suddenly a daily obstacle. The light that promised an upgrade becomes a source of blurred outlines, awkward shifting, and searching for that one clear spot that never lasts.

    Why Glare Becomes a Daily Problem—Not Just a Bad First Impression

    The first days after swapping a fixture—maybe a flush overhead mount or a crisp LED bar—can trick you into thinking the problem is solved. The room pops, the glass gleams, and everything seems upgraded. Then real bathroom routines set in. You help a child reach the faucet and the mirror flashes a double image; you angle for a careful shave and a band of light lands right in your pupils. Instead of clarity, you inherit tangled reflections and uneven hot spots each time you move. The problem isn’t brightness, but misdirected light that creates new obstacles at every angle.

    This isn’t a one-off irritation. Week after week, you find yourself contorting posture to escape the beam, delaying tasks for better light, or simply leaving the fixture off to avoid the headache. Gradually, basic routines grow inefficient—washing, grooming, even quick rinsing stalls as friction sneaks in. The inconvenience is rarely dramatic, but it is cumulative. Weak lighting structure turns into a pattern of missed details and slowed mornings.

    Mounting and Placement: The Hidden Details That Fix (or Worsen) Glare

    It’s not just about lumens or wattage. The position and support logic of every fixture—height, spread, and angle—control whether light works with you or fights the routine. Bathroom-rated fixtures serve a technical purpose in humid zones, but that’s not the whole story. Design and placement shape the experience:

    • Fixture too close to the mirror: Your own light source becomes an enemy—reflected directly at you, it competes with the original, doubling visual noise right where focus matters most.
    • Bad mounting height or angle: Even the “right” fixture can skim across the glass, spotlighting your eyes and leaving patches of harsh, unhelpful brightness instead of true, even illumination.

    Busy mornings expose these flaws: two people crowd the sink, and suddenly everyone is angling for the “good” spot, chasing away glare instead of just using the room. The wrong placement turns quick tasks into small battles for clarity.

    Common Setups: Why Single Overhead Fixtures Fail Routines

    The streamlined promise of an overhead bar, flush ceiling mount, or centered LED seems simple: keep the sink clear, throw light across the whole worktop. But this setup breaks down the minute you try to use it for anything precise. That “crisp” new strip throws two bright streaks in the mirror, multiplying shadow doubles and drowning out the lines you actually need to see—edges of stubble, mascara, stray toothpaste drop. The more centered the bar, the worse it gets: light beams at your face, corners fall into gray, and the reflection never fully cooperates.

    Typical routines make this obvious: someone leans in to inspect a blemish and gets hit by direct glare; another person resorts to moving bottles to find lost brushes hiding in patches the light never reaches. Even the neatest install leaves cable lines trailing across a wall or bundled under a shelf—tucked away at first, but catching the eye and adding small visual friction each day.

    Living with a Subpar Bathroom Light: The Real Repeated-Cost

    Weeks in, the limitations multiply. Children stand on tiptoe, dodging shadows that will not leave their faces. Adults wipe streaks from the glass edge they never clearly saw. The illusion of “brighter” disappears: you trade one frustration for another—now with more contrast lines in the mirror and missed spots everywhere else. What passes for a resolved setup in photos falls short every time the real-life routine demands clarity, fast cleanup, or simultaneous use.

    Humidity, messy hands, and splatter only magnify every flaw. Wires once invisible slide into view near the sink, while mounting hardware draws focus instead of fading out. Not only does the space look more cluttered after a few weeks, but it also begins to feel harder to actually use—turning background support into a daily irritant.

    A Small Change That Makes a Lasting Difference: Rethinking Fixture Placement

    What finally broke the glare cycle wasn’t bumping up the bulb wattage, but changing where light meets the room. Swapping the overhead bar for a pair of wall-rated sconces, mounted about a hand’s width from the mirror edges, moved the light source out of the reflection and directly onto the face.

    The improvement was immediate and practical: the sink and counter stayed evenly lit, no more shifting to dodge a reflection, and even on rushed mornings the mirror stopped flashing stripes at eye level. Mounting cables vanished below sightlines, and the “invisible” aspects of the install—hardware, supports, brackets—all finally stayed invisible. Small layout corrections did more for clarity and comfort than endless tweaks to bulb strength or fixture design ever could.

    Real-World Tips for Better Bathroom Visibility

    • Direct light toward people, not glass: Side sconces or wall panels just outside the mirror’s edge prevent the worst of cross-reflection and keep facial details visible, especially in shared use or quick checkups.
    • Stick with support hardware made for bathrooms: Steamy rooms punish generic or makeshift setups—bathroom-specific mounts, secure cables, and protective housings last longer and reduce friction as routines repeat.
    • Audit cables and corners after a week: Install that seemed “clean” on day one might turn distracting by day seven. Revisit the run of wires and the look of brackets; if they jump out at you, they’ll slow you down tomorrow.

    Why Shadow-Free Surfaces Matter More Than “Total Brightness”

    Routines fall apart not from lack of light, but from bad lighting structure. Overhead bars and mirror-top strips almost always leave behind shadow bands, double reflections, or glare that gets progressively worse with every use. Well-placed support lighting—side bulbs, wall sconces, even under-shelf lights—fix the structure that overheads cannot: they stop shadows under the eyes, keep the sink perimeter clean, and let small details stand out. In rushed mornings, quick grooming checks, or messy cleanups, that functional clarity pays off more than any upgrade in raw brightness.

    If you’re still avoiding part of the mirror, dodging stray cables, or fighting dim corners in a bathroom that looks “done,” the lighting isn’t solving the problem—it’s just moved it to a new spot. Bathroom setups that pull their weight are built around real routines, not just surface appearance or first-day photos.

    For more setup supports, lighting solutions, and mounting ideas that bring visibility and comfort to real-world routines, visit LightSupport.

  • Why Your Carry-On Setup Slows You Down at the Airport

    The difference between a carry-on that looks organized in your living room and one that actually keeps up with you at the airport is immediately obvious the first time you fumble for your passport at a checkpoint or get blocked by a tangled charger while the line compresses behind you. Neat cubes, perfectly stacked pouches, color-coordinated pockets—none of it matters if you’re forced to unzip three sections just to find your ID under pressure. That friction isn’t theoretical. It shows up every time airport security lines surge or a boarding gate check returns out of nowhere, revealing the limits of setups that felt flawless at home.

    When an “Organized” Carry-On Slows You Down

    At home, every item feels accounted for, pouches stack precisely, and there’s comfort in seeing a clean packing grid. All of that order falls apart when airport routines demand fast, blind access. The real test comes the moment you dig for headphones as the boarding line inches forward, or you panic-scan your bag for your ID at a checkpoint.

    Layered organizers and stacked cubes feel efficient in theory, but in motion, they become speed bumps. Shared pouches—passport pressed up against device cords—mean repeated untangling. Every access asks you to break the system you hoped would keep you on pace.

    The Real Cost of Overlapping Packing Strategies

    Adding more organizers rarely solves the real problem. Visually, more layers suggest order, but travel exposes their weak points fast. Blocked zippers, tight wedge-pockets, and zippered sections that require a full unpack just to reach lip balm—every snag adds cumulative delay. Grabbing one thing means rearranging three. Under airport pressure or fatigue, each overlap turns into a new obstacle, compounding frustration instead of reducing it.

    On-the-Move Friction: What Actually Happens

    Picture this: You feel ready in the security queue—until the tray lands in front of you. Suddenly, your boarding pass is buried under a hoodie, passport jammed behind your backup battery, and your headphones hooked around a charger pouch. Three zippers now stand between you and the scanner. Structure that holds up when still collapses the moment you start moving.

    Small Delays, Multiplying Stress

    Airports don’t let you pause and reset. You pull out your e-reader in the crowd, toss it back in “for now,” and seconds later, a second security check means diving into a repacked, overstuffed pocket. The main compartment looks undisturbed—inside, you’ve started a cycle of tiny re-shuffles and lopsided cubes. “Organized” surfaces hide the reality: every small retrieval turns into a fresh mini-repack, adding micro-delays and repeating friction that builds as the trip goes on.

    The Problem with All-In-One Outer Pockets

    The slim outer pocket seems built for speed: just drop in everything you’ll need most. But once keys, charger, snacks, boarding pass, and passport start layering, it becomes a pocket of mutual blockage. The third reach-in is usually a mess—cables snag, slim documents disappear behind bulk, and even minimal contents force you to dump the pile just to find a card. Each retrieval gets slower, precision replaced by a scramble while the line waits behind you.

    Finding a Flexible Travel Rhythm

    The solution isn’t tighter cubes or prettier layouts. What consistently works is structural separation—single-purpose pockets for documents, shallow slots for critical items, organizers that let you grab by feel without visual searching or deep unzipping. Dedicate a top-access pocket to your passport and boarding pass, and repeat retrieval becomes mindless. Over a full trip, that’s minutes reclaimed—and tension sidestepped—every time a new checkpoint or gate call appears.

    Retraining Your Hands for Blind Access

    Real carry-on improvement means reaching by touch and returning items to place automatically, not stopping to check that every pouch is zipped or that nothing has collapsed. Once hands know where each essential lives—boarding pass, cable, balm—you recover time and cut stress not by packing “neater,” but by making the movement from item to item uninterrupted, even after hurried handling or turbulence resets your bag’s interior.

    How Quick Fixes Actually Play Out

    • Passport pocketed with device cords? Each document check comes with an untangling break, slowing boarding and triggering a cascade of repacking.
    • Multipurpose pouches holding both documents and comfort items? Retrieval means emptying more than intended—often onto the airport tray, with strangers watching.
    • Compression cubes for everything? Order on the outside, but every in-transit access becomes a slow unzip and repack, bottlenecking movement when you should be stepping forward.

    A Real-World Adjustment That Changed the Flow

    One practical fix: shifting passport and boarding pass from a deep side pocket to a shallow, top-access zip slot. Instantly, security and boarding drop from repeated unzips to a single motion, and hesitation nearly disappears. Items fall back into place—sometimes without even looking—so even after long hauls and gate changes, you rejoin the flow rather than fall out of step. The drag of lost seconds fades, replaced by a carry-on that quietly keeps pace with you, not against you.

    Repacking Burden: The Hidden Cost of Over-Structuring

    The “perfect” packing system is a false win if it forces full resets after every retrieval. If you’re pausing to realign a collapsed pouch or shuffle misaligned stacks just to restore order, the visual neatness is no comfort. True improvement is a setup that lets items be returned blindly—no visual check, no reset—resuming movement as soon as you’re done, not turning each retrieval into another round of forced organization.

    Practical Takeaways for Smoother Carry-On Travel

    • Designate a document-only pocket. Never pair travel ID, boarding pass, or tickets with cables or comfort items, no matter how orderly it looks.
    • Separate tech, snacks, and comfort by feel, not sight. Use pouches or slots you can access blind—that aren’t buried, blocked, or sharing space with essentials.
    • Reserve cubes and compression for bulk storage. Use them for backup clothing or one-time-access items—not for essentials you need during every transit segment.

    The Real Test: Multiple Airport Cycles

    The real worth of your packing setup isn’t its at-home photo—it’s how you move on your third or fourth airport run, when the same small obstacles start repeating. If the same delays appear every time you reach for a document or try to repack quickly, your system is waving a red flag.

    Category separation and dedicated, shallow-access pockets remove repeated stumbling blocks, replacing performance anxiety with a flow you can trust. When your carry-on lets you move, reach, and reset without interruption, it becomes an extension of your travel, not a source of constant management. Each adjustment that cuts friction turns organization from a static look into real-world function—one airport, one exit row, one tray transfer at a time.

    CarryOnSupply

  • Optimizing Home Lighting for Safe and Clear Movement Paths

    The ceiling looks lit—until you actually start moving through the space. In hallways, stairwells, or utility corners, that’s where “good enough” lighting turns into a daily source of slip-ups. A centrally mounted flush or semi-flush fixture tricks the eye into seeing clarity at a glance, but that effect collapses the moment your routine changes: hands full of laundry, a box, anything awkward. Peripheral vision swallows up shoes left at the hallway edge. Glare catches your eyes mid-turn. Edges of a staircase fade; the far wall of a laundry room stays a murky void. Every second-guessing pause—at a stair turn, by the closet door, approaching the washer—signals that what looked “bright” from the doorway actually leaves movement, safety, and routine in the shadows. The fixture’s specs promise coverage, but repeated use exposes its real gaps.

    Why “Bright” Isn’t Enough: Hallways and Stairs That Interrupt Movement

    Brightness by itself is only the surface test—easy to pass during an empty walkthrough, easy to fail during real-life routines. The actual challenge is coverage. One ceiling fixture dead center lights a hallway or stairwell enough for empty rooms, but not for crossing with both hands occupied after dusk or during a rainy afternoon. The failure point isn’t the bulb’s output; it’s where the light never lands.

    With a single fixture, shadows cluster where corners meet thresholds, closet edges, or the start of a staircase. Carrying anything bulky—basket, ladder, box—suddenly means stepping blind at one or both ends. Even a new, high-output bulb shines mostly in the center, while the periphery stays unpredictable. Glare adds a second kind of friction: a semi-flush lamp at eye height throws a harsh reflection or hot stripe across a glossy wall, making you angle your head away from where you actually need to see. Movement becomes self-conscious. You hesitate by the stairs, slow down at the turn, or squint to map a path you thought was “lit.”

    Accumulating Friction: Where Incomplete Lighting Repeats Small Failures

    Poor lighting doesn’t betray itself on installation day—it shows up the fourth, tenth, twentieth time you move through the same spot holding something larger than a phone. A staircase throws a steep shadow across the step you need; in laundry rooms, the far side of the washer sinks into gloom. Narrow hallways amplify the problem, turning your own body into an obstacle that blocks the thin beam or throws half the floor into darkness. You scan for missing shoes or an uneven step, not because the bulbs are old, but because the setup simply doesn’t reach where you live. Patterns emerge: you always pause at the upstairs turn, tilt your head around glare, fumble for an invisible light switch, or re-position laundry to see the machine controls. Over time, these aren’t minor quirks—they become the landscape of daily irritation and near-miss stumbles.

    Unlit Angles: How Gaps Turn Familiar Paths Into Risk Zones

    Every staircase and hallway has recognizably weak spots—the place where a beam stops short, a dark fringe forms by the door, or a glare zone masks the next tread. These aren’t rare; they’re embedded in the design when fixture placement or style isn’t mapped around real movement.

    • Juggling a ladder through a narrow stair? The fixture creates new shadows exactly where your sightline falls, breaking up a clear read on each step.
    • Carrying a basket through a utility hallway? The middle glows, but both ends of your route fade. The last step to the door becomes a guess in partial darkness.
    • Boxes up the stairs? Top-lighting throws your shadow right over the next tread, obscuring depth, making each climb feel riskier than it should.

    These friction points aren’t design flaws on paper—they’re failures of real-life support. The annoyance isn’t lower brightness, but the abrupt loss of usable, predictable light exactly where routines press against the limits. Each interruption chips away at the comfort and confidence you expect from your own space.

    How to Stop Lighting From Becoming the Bottleneck in Movement

    The easiest mistake is to prescribe “more light” when the problem is poorly directed or insufficiently distributed light. The practical fix: rethink placement and spread, not just wattage or lumens.

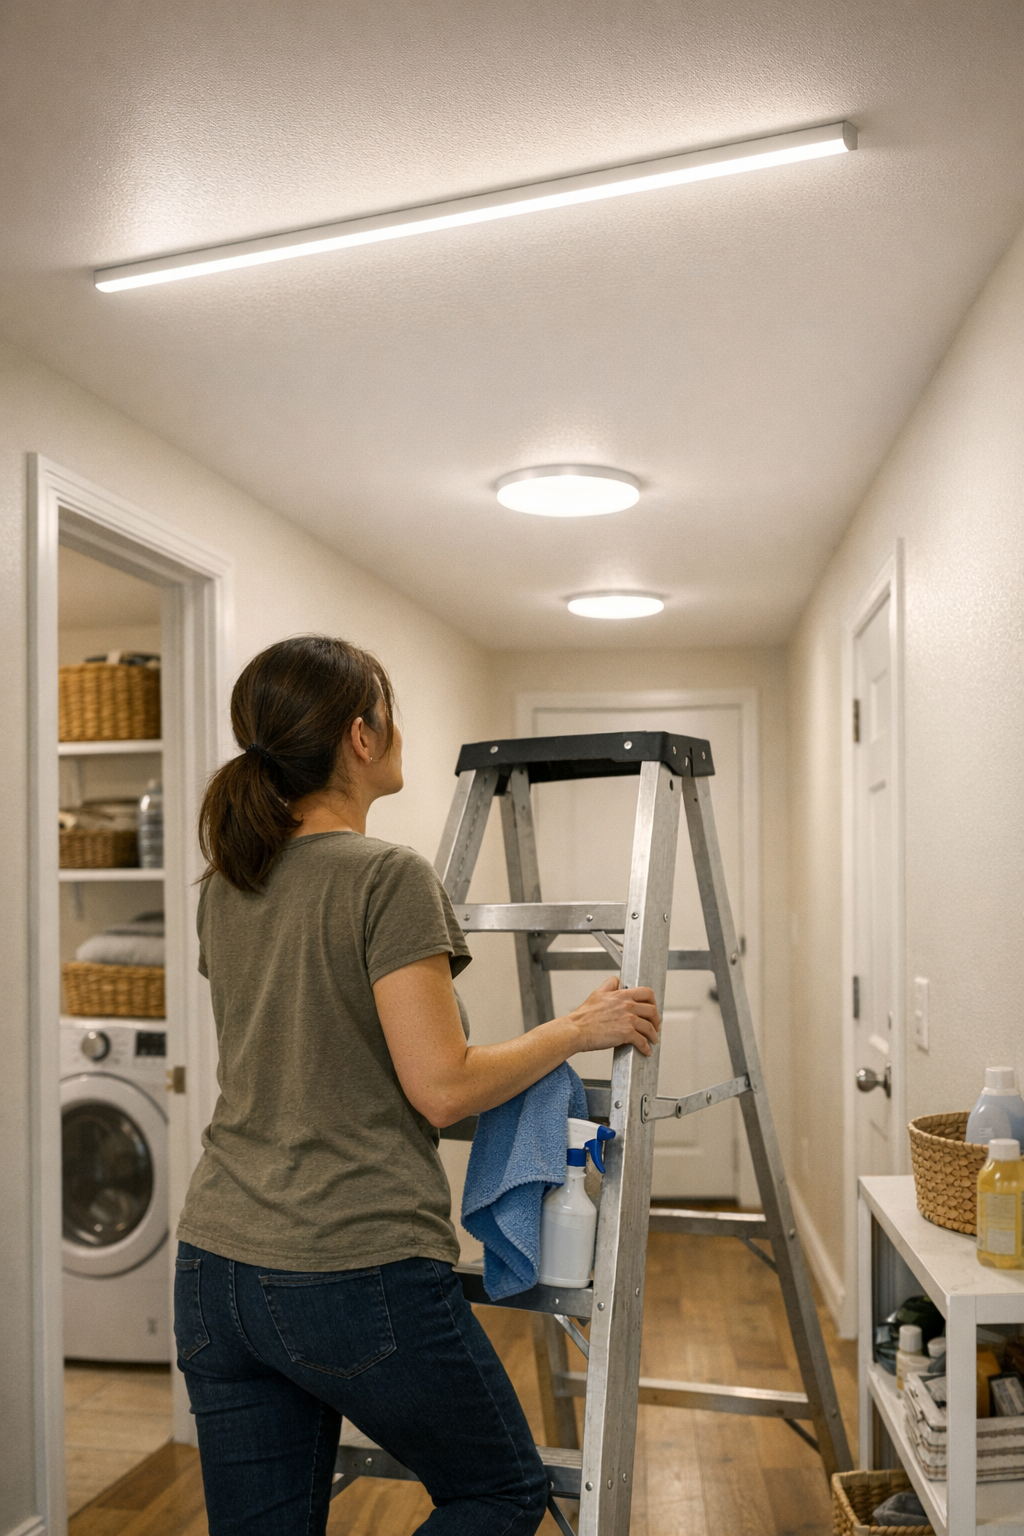
    Placement solves what output can’t: In high-traffic hallways, swapping from a single ceiling light to a pair—so each end of the run gets at least a meter of its own true coverage—rewires the entire space. Shadow lines dissolve. Turning a corner with a bulky load stops feeling like an act of faith. The edge of the utility area, the last stair, and the threshold into the laundry are all consistently readable. Corners no longer operate as trapdoors for dropped shoes or loose edges—you see what’s underfoot without conscious effort, daylight or not.

    Stairwells, angled passages, and wide laundry zones fail for the same reason: spacing that leaves the ends or turns in semi-permanent half-light. Overlap is the answer. If one fixture’s spread doesn’t quite reach, double up: ceiling panel at the far wall, secondary flush mount at the entry, or a hardwired wall light supporting at the turn. Predictable, unbroken visibility turns every motion—down the stairs, across the laundry, into the utility closet—from an uncertain maneuver into a smooth, automatic one. “More lumens” won’t protect from a shadowed riser or a darkened machine edge; a smarter spread will.

    Fixture Types: Making the Function Show Up Where It Matters

    Flush mount ceiling lights win in low ceiling or corridor environments by pushing out even light where movement happens, avoiding bulb-in-eyeline bursts of glare. Semi-flush mounts and wall sconces can fill wider or angled spaces—only if aimed so they overlap coverage without creating fresh glare or dark patches at the boundaries. In long halls, a staggered arrangement lets each unit compensate for its neighbor’s edge, especially at doorways, turns, or alcoves where shadow otherwise pools. Wall sconces or hardwired fixtures are genuinely useful only if walls aren’t blocked; otherwise, they become more style marker than real support. For most movement, ceiling mounts are the backbone—seeing the whole route, not just the decorative corners.

    Checklist: Signs Your Lighting Isn’t Keeping Up

    • You pause at stair turns or landing bends, unsure of your step, despite the room looking “done.”
    • You shield your eyes or angle away to dodge glare while walking, not just standing.
    • One end of a corridor always feels duller—noticeable with any speed or on cloudy afternoons.
    • Utility or laundry corners force you to lean or hunt for a dropped sock that’s swallowed by shadow.
    • The room cleans up nicely, but you can’t safely carry a chair or wide laundry bin from end to end without hesitating.

    These signals all point to the same constraint: lighting that checks the box for room “illumination,” but repeatedly fails at real-wayfinding, working, or cleaning. What matters isn’t how the space appears; it’s whether you move through it automatically—no head-tilt, no squinting, no second guesses on your next step.

    Simple Shifts for Real-World Lighting: Lessons From Daily Use

    • Space fixtures to erase shadow traps. Two points of light in a corridor or at a stairway landing break up longstanding gloom; the trick is to overlap their coverage, banishing both the dim edges and the harsh midline glare.
    • Target the walking surface, not just the look. Mount fixtures and aim bulbs so the light lands on the route—stairs, corridor floors, laundry room edges—rather than glowing from afar or bouncing pointlessly off crown molding.
    • Test the setup as it’s used—not just empty. Walk the hall with a laundry basket, climb the stairs with a tote, open the closet with a box in hand. Weaknesses show up fast: shadowed treads, dark closet entry, or a blinding spot no walkthrough could reveal.
    • Skip the overdecorated fixture in working zones. If “style” comes at the cost of safe, even spread—if the glow vanishes where your feet fall—the daily inconvenience will outweigh any design pop.

    The Difference You Feel: From “Lit” to Actually Usable

    A room that only looks bright is easily exposed by regular routines—the pause at the stair, the squint in the hallway, the lean to see what the main bulb misses. A lighting setup proves itself the fifth time you move a laundry basket, carry cleaning supplies, or simply walk a path after dark. Success is simple: you stop thinking about the light because every corner, step, and surface shows up. No guessing, no glare, no hesitation. That’s the difference between visible light and predictable function—what makes a setup feel finished in use, not just in photos.

    LightHelper builds lighting for these real-world movement zones.

  • Optimizing Car Flashlight Storage for Quick Access and Safety

    Most car setups fail exactly when you need them most: You’re standing outside your vehicle after a night shift, arms full of groceries, clicking for your keys—only to watch them vanish into the crack between your seats. It’s late, the parking lot is dark, and your flashlight—supposedly “conveniently” stored in your center console—is now unreachable beneath a nest of chargers, tangled cables, and expired hand wipes. This isn’t rare: consoles that look organized in daylight can turn maddening the instant you need fast access. “Clutter” isn’t just a cosmetic problem; it slows you down, raises stress, and leaves you stuck fishing for essentials under pressure. DriveWellSupply knows that real car organization isn’t about looking tidy—it’s about keeping your most important tools ready in the chaos of actual use.

    Why “Organized” Isn’t Always Usable

    Most drivers pack their console, glove box, or door pockets until every inch is filled with “must-haves.” But the difference between visible order and practical access only shows up when something slips out of reach—a wallet, a phone, or especially a flashlight at night. The very systems that look controlled tend to crumble during active use: coins slip over cables, sanitizer bottles roll around, and your flashlight sinks deeper with every errand. Organization that only calms your glance isn’t set up for real retrieval—especially after the first week of new receipts or another charging cable thrown into the mix.

    What the Dark Reveals About Your Setup

    Need a flashlight late at night? That’s when a flawed setup exposes itself. You flick on your dome light and get more shadow than help. Your hand snakes into the console, but wrappers catch, cords slide into the gap, and whatever order you had dissolves as you dig. Every second counts, but each grab triggers another mini avalanche of small gear. The problem repeats in daylight, too: hunting for a lost receipt, reaching for a charger on a crowded school pickup run, or retrieving a dropped toy from under the seat—all spotlight how easy access can vanish behind “order.” If your essentials are buried, you’ve built storage that fails at the moment of need.

    Finding the Hidden Roadblocks

    The signs are there if you look: a sigh before reaching for your flashlight, wrappers hitching a ride, or cords looping around your fingers before you even find what you need. Maybe you break a fingernail digging, or end up dumping half your contents onto the passenger seat. A setup that slows you down—even by a second or two—signals that cosmetic neatness doesn’t translate to actual readiness. If each use brings friction or dread, that’s your cue that your storage system is quietly sabotaging your routine.

    From Neatness to Real Readiness

    True car readiness means direct, unobstructed access to what actually matters under pressure. Instead of adding bins or forcing everything into a single catchall, create dedicated paths: mount your flashlight on a seat-back hook, stash it in a side mesh sleeve, or position it within arm’s reach along the driver’s door. That small change flips the real-world test: the next time night falls or your hands are full, your fingers close right around the tool you need—no cable wrestling, no accidental clutter spill, no delay. The purpose of organizing wasn’t to win Instagram; it’s to win those fast, distraction-prone moments when fumbling isn’t an option.

    Streamlining Everyday Reach and Recovery

    Dividing daily tools from random overflow makes every trip—long or short—less of a scavenger hunt. Imagine grabbing your flashlight, charger, or multitool during a last-minute loading dash, and never having to shift three things to reach it. The more your setup insulates essentials from the churn of commuter junk and loose errands, the less effort it takes to reset after a messy day. What starts as easier “emergency access” quietly becomes smoother daily operation: fewer delayed departures, fewer afterthought cleanups, and less temptation to shove everything back in a pile when you’re already tired.

    Where Most Setups Fail—And How to Patch the Gap

    The real cost isn’t just annoyance. If you’re always reorganizing the same bins and trays—stacking paperwork over tools, stuffing loose gear into covered spots—you’re patching symptoms, not structure. The most common mistakes:

    • Storing essentials under layers of “quick access” junk or hiding them in overloaded containers.
    • Letting charging cords, coins, and paper creep over your emergency kit or flashlight, blocking direct reach.
    • Focusing on visual tidiness at the expense of physical pathways, so nighttime (or just rainy-day) retrieval becomes a struggle.

    Instead, reroute the flow: mount your light or vital gear where you can grab without crossing clutter. Choose spaces that are both day-visible and night-reachable—even if that means one less perfectly blank spot. The goal is for access to beat neatness every time.

    Organizing for Actual Driving—Not Just Appearances

    The measure of a solid car setup isn’t in showroom looks, it’s in whether you can act instantly—no rearranging, no fuss—when reality interrupts: a dark lot, sudden spill, roadside issue, or simple case of dropped keys. Can you reach your essentials without making things worse? A system where you never need “recovery time” after using it—that’s the test. If your organization adds steps or leaves you cleaning up after each access, it isn’t designed for real-world pressure. Your car shouldn’t just look calm; it should work with you when the routine fails, not against you.

    Visit DriveWellSupply for practical car storage and real-world driving solutions.