Author: jaesoon_admin

  • How Short, Calm Pet Greetings Improve Daily Care Efficiency

    Why the First Pet Greeting Shapes Every Step That Follows

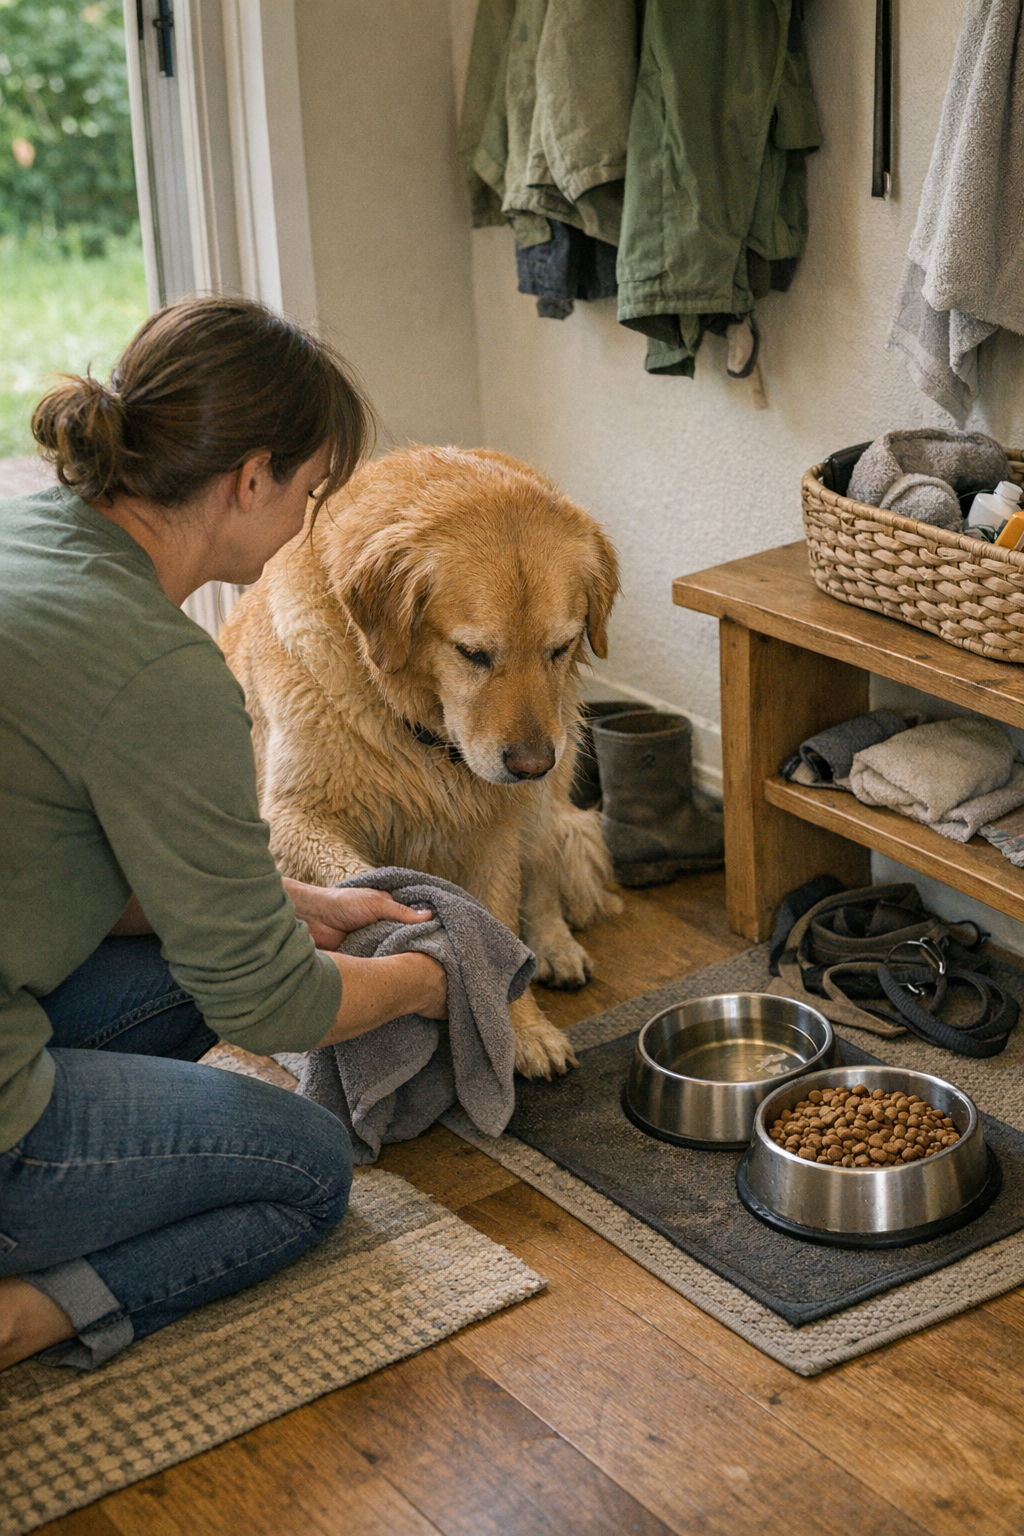
    That chaotic first moment home—dog claws on the floor, cat brushing your leg, eager faces crowding the door—does more than welcome you. It exposes every weak point in your routine. Bowls nudged sideways, water tipped onto tile, the towel for muddy paws already missing. Even five extra seconds at the door can throw off the order: feeding starts late, water bowls don’t get changed, or you’re shuffling bags just to reach the supplies that should be at hand. Over a week, these split-second delays pile up, making everyday care feel slower and harder, and turning what should be a quick reset into another fractured task. A pet supply setup that looks neat on Day 1 often breaks down exactly here: at the threshold.

    The Stacking Effect of Small Delays

    The fallout of a drawn-out greeting never hits all at once. It’s the slow grind of repeated missteps—feeding skipped by fifteen minutes, fresh water put off, paws forgotten until dirt streaks the floor. Every delay pushes the next routine out of rhythm. Owners juggling remote work or family schedules can spot the pattern: one missed cue at the door, and the rest of the day’s care never quite catches up, resetting only after several days of low-grade friction.

    Scene: Reaching for Supplies, Finding Friction

    Step in with groceries, sidestep a jumping dog or zigzagging cat, and try for the water bowl—only to bump into last night’s chew toy. The towel for dirty paws is at the far end of the hallway, not the door. The grooming brush that’s meant for quick grab-and-go has migrated into another room. A simple refill or wipe-down becomes a scavenger hunt. The supply exists, but the energy to reach it is pushed aside by clutter and misplaced tools left in the wake of one overexcited welcome. Instead of a two-minute reset, you’re stuck doubling back, then wondering why cleanup always feels one step behind.

    How Order Gets Lost in the Daily Rush

    Initial setups often pass the eye test—bowls together, wipes restocked, leashes on a hook. But come day three or four, regular greetings turn hectic and order unravels: water splashes beneath the bowls, containers slide out of place, and supplies drift further from their target spot. By the time you finish one simple feeding, you’ve already lost track of half the essentials, or are doubling back for treats and towels. What looks organized ends up working against you, with the area tidy, but the flow jammed by items being just out of reach or reset at the wrong time.

    Why a Repeatable Signal Matters

    Cutting off excitement with a harsh “no” doesn’t work. A visible, repeatable cue—a hand to the bowl, a pause at a mat, a distinct word—lets you and your pet shift from chaos to care. After just a few days, the pattern sets: entrances get shorter, supply hunts shrink, and care resets fall into place. Suddenly, it’s not about hurrying affection along, but about letting one small action become the anchor for everything that follows—feeding, water refills, post-walk wipe-downs. The door’s threshold becomes a switch, not a stumbling block.

    Real-Life Repeats: Where the Routine Slips

    Inconsistent setups give themselves away quickly. Water lingers in bowls past its best moment. Paws don’t get wiped during the rush to get dinner started. Brushes block quick access to food storage, or mats slide aside and never get fixed. Even after reorganizing, the same friction creeps back: towels too far to reach, treat jars misplaced, cleaning supplies hidden behind a stack of bags. Surface order returns, but the actual function—the ability to reset quickly after feeding or a walk—lags behind, dragged down by friction points you can’t ignore.

    Practical Adjustments for a Calmer Flow

    The adjustment isn’t complicated: rein in the greeting, use one clear cue, and pivot directly to care basics. Touch the bowl edge, say a cue word, or pause together at a visible mat every time. The signal matters more than the mood. This isn’t about shortchanging time with your pet—it’s about keeping the first minute from derailing the rest. Fast greetings prevent the snowball: feeding routines actually run on time, water bowls get refilled before you forget, and cleaning fits the flow rather than interrupting it. Consistency calms both you and your pet, and routines begin to work instead of working against you.

    The payoff is visible by day’s end: you’re not scrambling at night to catch up on resets, and your pet isn’t left waiting or confused by a pattern that changes with your energy. A well-timed, brief greeting means more time—and less mess—later.

    From Tidy to Functional: Closing the Loop

    Order isn’t just how supplies look lined up; it’s how easily you can grab that towel when paws hit the mat or refill a bowl without kicking aside toys. A setup that looks calm rarely stays that way unless the routine behind it works under pressure. The real fix is rarely dramatic: one cue, one reachable hook, one spot for the basic tools that never drifts from the entry zone. Most problems—spilled water, delayed feedings, forgotten wipes—fade when routines run on signals instead of scattered improvisation.

    Messes and interruptions still crop up, but the cycle resets faster. The difference isn’t that the home looks perfect; it’s that every care step, from post-walk wipe-down to evening feeding, folds naturally into the flow. Over time, what started as a tangle at the door becomes a pattern that makes pet care lighter, steadier, and more sustainable—no matter how many times the toys wander off or the routine takes a hit.
    For more practical solutions and tools that help your home routines stay steady, visit our shop.
  • How Organized Carry-Ons Can Slow Your Travel Flow and What to Do Instead

    There’s a gap between how your carry-on looks at home and how it actually works the second you’re forced to dig for a passport in a crowded security line. What looked organized—color-coded pouches, tight stacks, empty outer pockets—turns fumbly fast when a document vanishes under a tangle of chargers, or an ID check interrupts your “perfect” packing logic. Travel exposes packing choices that seemed smart until you watch yourself open, search, and repack the same bag—over and over—while others move past you.

    When “Neat” Doesn’t Mean Efficient: The Dilemma of the Organized-But-Slow Bag

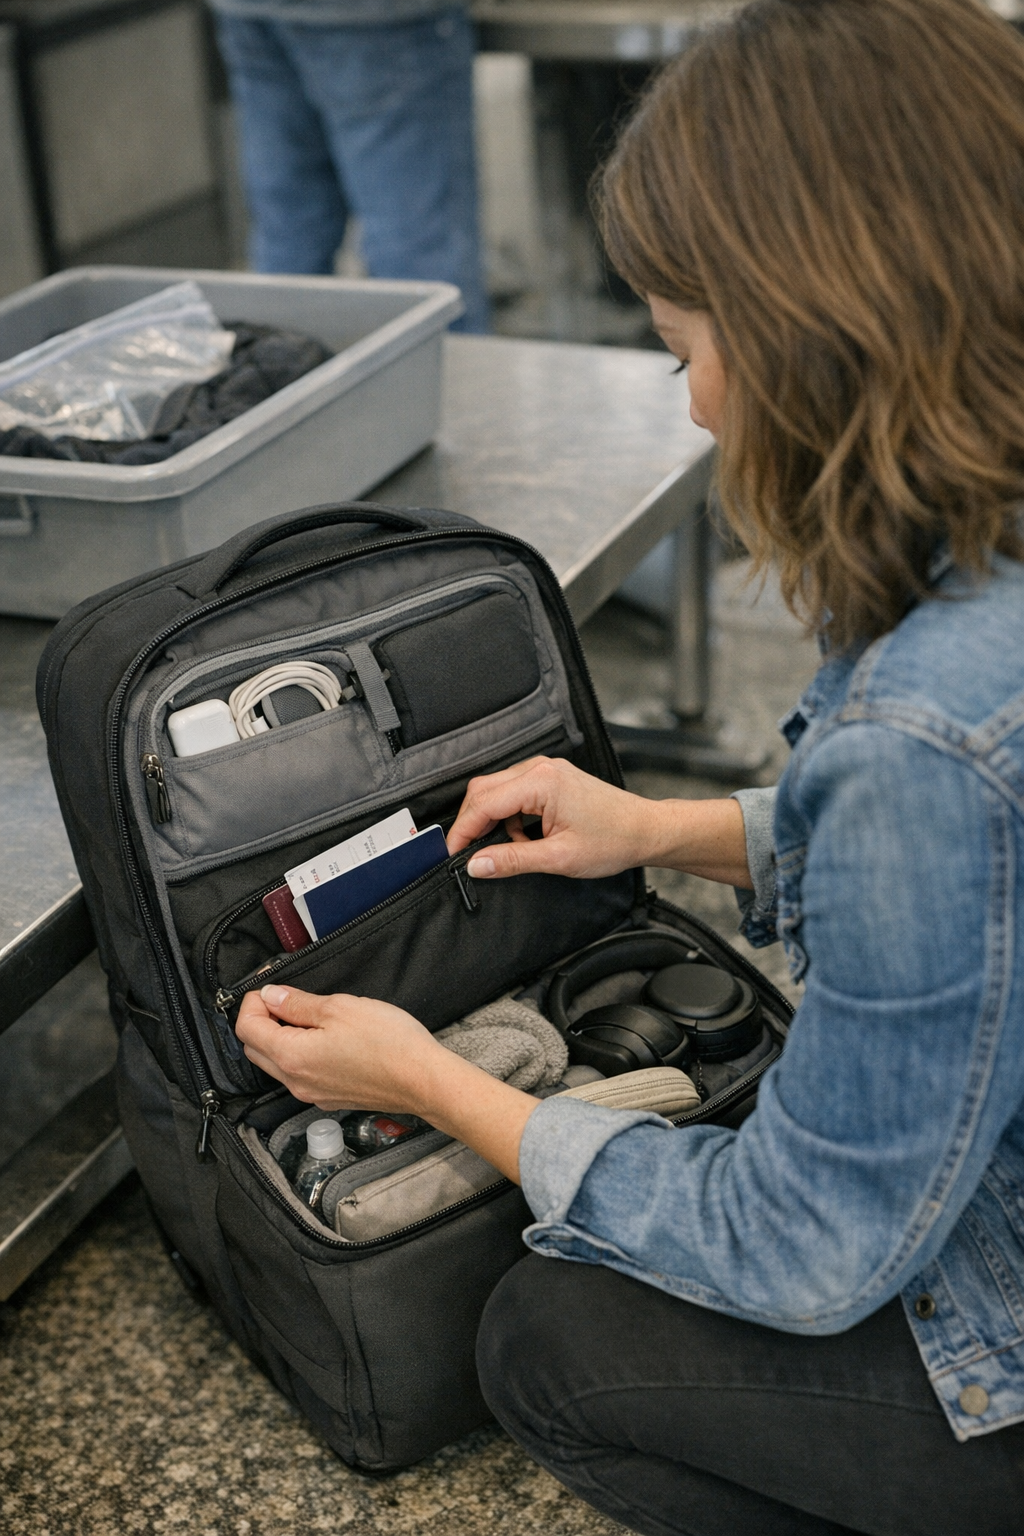
    It’s easy to believe that a lined-up, tidy carry-on guarantees a smooth airport experience. But the first time you’re up against a moving security tray, that layout cracks: a passport ends up beneath headphones, an emergency pen slides under toiletries, and pockets that looked empty overflow into confusion. Even with a neat “system,” you catch yourself unzipping, retracing, or shuffling, just to dig out what should have been instantly reachable.

    These moments aren’t big disasters, but they slice into your travel rhythm. Each pause to fish out a gate document, or each unnecessary search for a charger, eats into your speed. That invisible friction builds—soft at first, then quietly relentless.

    Travel Movement Reveals the Weak Spots: Common Repeated Friction Points

    Security lines punish poor access in seconds. Maybe you started out organized, but now your boarding pass is under two pouches. As security trays move, you’re juggling layers, pulling what you need from the bottom, then awkwardly rebuilding on the fly. One misplaced cable pouch can force you to repack right in front of strangers—shuffling your way back to “order” while the line presses on.

    Then, at the gate, your bag is half-open, revealing a puzzle of stacked cases. A boarding pass check means unzipping what made sense at home…but blocks you now. Even one wrongly buried item slows the whole line, turning your setup into a source of stress instead of speed.

    It’s not just about raw speed—travel flow breaks down when the bag forces you to reach, dig, and reset while space and time shrink around you. Enough small interruptions, and even an “organized” bag starts dragging you back.

    Stacking and Overlapping: When Order Becomes Obstacle

    The classic mistake? Stacking: chargers on top of wallets, cables beside documents, everything layered for visual neatness. At home, this compresses well. But at the airport, the stacking logic fails. The moment two essentials are in the same zone, you’re force-pulling one out, only to awkwardly repack in mid-conversation or in cramped conditions.

    Repetition exposes the flaw. The third time you go for ID, it now means: unzip, sift, extract, zip, and immediately realize you’ve missed the next item. Even a slim, orderly setup backfires when every retrieval blocks the next movement. The more items you stack, the more you disrupt your own trip.

    The bag stays tidy in theory, but the real test is how much overlap you have to undo on each reach. Perfection at home becomes friction during use.

    Small Delays Add Up: The Cumulative Drag of a Flawed Setup

    One misplaced boarding document won’t ruin your day. But the time cost isn’t obvious until you add up each small hassle: sliding out a pouch for headphones, digging past snacks to reach cables, shifting comfort items to retrieve travel paperwork. Each repeated micro-delay silently accumulates, breaking your flow with every segment, every checkpoint, every gate.

    That drag isn’t dramatic—but when your trip includes a layover, or your final connection is tight, you feel the weight grow. Even if you pull it together at the next gate, by trip’s end there’s a sense of lost rhythm—and you’re weighed down by invisible extra steps that started small but multiplied with every round.

    Repacking After Each Use: An Invisible Burden

    Ask frequent travelers about real pain points, and “repacking” comes up fast. It isn’t the initial setup—it’s the cycle that repeats: open, retrieve, reshuffle, restore, only for another checkpoint to force the sequence again. At a busy TSA checkpoint, a single out-of-place pouch becomes a tray-side repack while others crowd in, raising the pressure and pushing your flow further off balance.

    It doesn’t end at security. No traveler wants to pull three things out just to grab a snack or earbuds in a cramped aisle seat. Yet an overloaded main compartment or mismanaged outer pocket means exactly that—rummaging, re-stacking, and starting the whole retrieval cycle all over, no matter how organized you thought you were.

    Building a System Around Movement, Not Just Aesthetics

    The real breakthrough isn’t a visually flawless bag, but a system built around access in the real world: pressure, time crunch, and awkward space. That means separating what you need in motion from what can stay out of the way. Assign a “never buried, always-reachable” spot for your boarding pass. Give tech and cables their own separate pouch, not cohabiting with travel docs. Comfort gear—eye masks, balms, small snacks—live in their own section, routed for one-handed grabs instead of hidden beneath other gear.

    After running the same bag through three TSA checks, it’s obvious: only setups where every high-use item has its own ready spot keep your trip flowing. It’s not about how nice it looks packed—it’s about reaching what you need, in the moment, without breaking stride.

    Prioritize Access Over Visual Slimness

    Travelers often don’t want to “bulk up” their slim, neat carry-on by moving essentials to outer pouches. But the tiny cost of a less sleek shape pays off—no more digging for zipped-away key items while the line waits. A slightly fuller exterior is nothing compared to the hassle of invisible essentials blocked by perfect order. Faster reach means less stress, fewer zipper passes, and less visible anxiety, whether you’re squeezing into an aisle seat, shifting for overhead bin access, or standing mid-cabin with others waiting behind you.

    Practical Adjustments for Real Repeat Use

    Group only what travels together in use, not just in theme. If you genuinely grab your passport and charger at the same time every trip, fine—keep them paired. Otherwise, separate urgent-retrieval gear from comfort items, so nothing unnecessary blocks your next move. Even one less double-reach or stop-and-repack leaves you less scattered, more clear-headed, and moving through transitions instead of stumbling through them.

    Setting Up for the Real Travel Rhythm

    The right carry-on setup isn’t about “packing well”—it’s about building for actual travel rhythm: security trays, back-to-back boarding checks, in-flight moments when you need something now. Stacked, overlapped layouts look beautiful but cost more every time you move. Instead, create obvious zones for documents, tech, and comfort. Try a home test: pack your usual way, then run live quick-access drills. See what causes hesitation, where hands retrace, where order falls apart. Adjust until every frequent-use item is accessible without a puzzle, even on your third pass through security.

    The real value of your carry-on system isn’t how stress-free it seems at the start, but how much lighter and smoother it feels with every repeated use—as you loop back through the rhythms of travel again.

    CarryOnSupply — practical tools for smoother carry-on travel

  • How Smart Pet Travel Organization Eases Every Stop on the Road

    The difference between a pet-travel bag that works and one that only looks organized becomes brutally clear on your second or third stop. At the start, supplies are packed, pockets zip up, and you feel prepared. But as soon as you pull into that first parking lot and snap open the door—one hand on the leash, your knee blocking a jumpy dog—order gives way to small setbacks. The wipes you thought you’d grab in a heartbeat have vanished under a blanket. The leash, tucked “safely” just moments before, tangles with a pack of treats. Bowls for water are sideways, pressed beneath sliding pads. Each short stop doesn’t just add mess; it multiplies the little barriers you thought you’d beaten with a neat setup. If this sounds familiar, you already know looks mean little if your bag stalls you every time you try to move.

    When “Well-Organized” Turns Into Work

    It’s a classic trap: thinking a zipped-up, tidy bag is ready for travel when it’s really just “ready” at home. The first sign shows up on your first real retrieval—wipes mixed into the wrong layer, leash trapped in the wrong pocket, treats now in the deep zone. Suddenly, every “quick” reach becomes a hunt. Cleanup that should be easy now means juggling soft gear just to reach a single item. Each stop, the friction grows. You adjust, reorganize, shuffle again, but the flow breaks down: a supply for comfort blocks a supply for speed, and your “preparation” turns into a redo at every restart.

    Repeated Stops Expose the Weak Points

    The real test isn’t how your bag looks before you leave—it’s how it holds up through seat swaps and surprise stops. Weak points appear fast when you need:

    • One-handed leash release with a twisting, impatient dog
    • Quick bowl access for a drink after a dusty walk
    • Wipes or towels for muddy paws before they hit the back seat
    • Instant cleanup after a spilled treat or drool spot

    During these in-between moments, gear that once felt so contained now jams your reach. Blankets or padded inserts cushion your pet, but now block your wipes. Even essentials purposely “separated” keep shifting into the path just when you need them. Organization—if it means slow access—becomes just another obstacle between you and a calm, fast reset.

    How Friction Builds Across Movement

    Reshuffling a pad, fixing a pocket, or digging for wipes once seems minor. By the third or fourth stop, those seconds stack up. You go to grab, pause, reshuffle, then reach—again. The most ordinary step in your travel routine demands a fresh workaround, making each stop that much slower. The strain is less in the mess and more in the repeated breaks; the flow feels stuck on repeat hurdles you didn’t see on the porch.

    The Seat-Side Struggle: Ordinary Setups in Real Motion

    Picture a park lot pull-up: engine off, dog alert, one hand steering, the other ready for a leash. You’ve parked for a “quick” break, but your gear works against you. To clean a muddy paw, you wedge an arm past a rolled blanket, fish under a chew toy, and pry at a side zipper. What should be a smooth two-second reach turns clumsy, your attention split between a squirming dog and a supply that’s technically “organized” but buried. These are the moments when ordinary setups forget the chaos of repeated use—trading visual tidiness for interrupted movement, costing you both speed and actual calm.

    Comfort Items: Helpful Until They’re in the Way

    Padded pockets, collapsible bowls, and plush blankets are meant to help—until the search for wipes or a leash means moving them every time. Soft gear that keeps a dog settled can block the very supplies you’ll always need first. After one or two stops, you start dreading the next fetch: shift a pad, dig under a blanket, waste seconds just looking for basics. Every comfort built in for the pet starts to ask for a trade—less friction for your dog, but more for you.

    The margin for error tightens after a few restarts. Rush, and you drop or forget something. Go slow, and each transition drags. Either way, you’re never just moving—you’re remaking order on the fly, every time.

    The Setup That Breaks Down: Overlapping Pet and Owner Items

    Shared pockets seem smart until motion ruins the divide. Your leash winds around shopping bags, water bowls wedge with your own drink, wipes drift behind earbuds and snacks. That neat line between “pet stuff” and “your stuff” lasts about a block before it all runs together. By the third pit stop, every reach becomes another repacking moment—simple division undone by the real-world shake and squeeze of the road.

    How to Keep Essentials in True Reach

    For trips with more than one stop, nothing beats genuine edge access. Seat-side pockets, unburied shallow pouches, and top-load points turn “organization” into functional stop-and-go. The basics—leash, wipes, bowl—belong where your hand finds them first, not under layers or locked in the main compartment.

    Breaking old habits means giving up the visual prize: don’t bury quick-use items in deep stacks, don’t let the leash settle under comfort pads, and don’t accept primary storage as good enough for repeated grabs. Every return or pause, if you still have to move soft gear to get a wipe or clip a leash, you’re resetting that friction all over again.

    One shallow side pocket, easy to reach while balancing a leash or steering a dog, will outperform any well-packed inner bag. The difference shows quickly: single-handed grab, no reshuffling, and, at last, genuine pause instead of a clumsy restart.

    Fifteen Seconds Might Not Sound Like Much—Until Every Stop Counts

    After a few trips like this, watching those lost seconds disappear, the trade is clear. Each stop is shorter. There’s no “forgotten” supply buried where it can’t be reached under pressure. By the third or fourth cycle, you stop muttering and start moving—picking up the pace because your essentials actually stay where they should. Those quiet fifteen seconds at every stop add up, not just for speed, but for finally getting a break that feels like a break.

    A Better Setup Makes Every Restart Smoother

    No setup stays perfect after three or four seat-side pivots. Something will shift, and there will always be a bit of re-ordering. But after real use, your test is simple: does your bag slowly collapse into chaos, or does it keep essentials right where you expect them, again and again? Smooth pet-travel isn’t a myth—it’s a matter of where gear lands after repeated use, how fast you reset, and whether you finally stop thinking about the supply puzzle and just move.

    Shop practical pet-travel organizers, quick-access carriers, and road-ready comfort gear at PawGoTravel.

  • Ensuring Lighting Safety with Simple Wire Tug-Tests Before Installation

    The first flicker from a hallway light—or the unexpected wobble of a bathroom sconce—signals more than a minor distraction. It’s a warning that something in your lighting setup is starting to fail, quietly but inevitably. If you rely on a ceiling light to keep stairways visible at night or trust a wall fixture to keep your face clear in the mirror, that movement under a cleaning cloth or an unsteady glow after a week’s use isn’t just a flaw: it’s the start of a chain reaction that threatens the whole safety and clarity of the space.

    Why Early Flicker and Movement Mean Trouble—Right Where It Counts

    It’s tempting to write off the first twitch in a flush mount or the subtle dim zone along a corridor as just a cheap bulb. But the root cause nearly always hides behind the ceiling: a wire isn’t snug, or a connection isn’t locked in. With every vibration—each step landing in the hall, each slam of a door, or regular scrubbing against the fixture—the weakness grows. Here’s what that looks like in practice:

    • Walking down a hallway and finding one edge slipping into shadow, forcing you to slow your step
    • A sudden patch of dimness under a kitchen cabinet, making it harder to spot where the counter ends
    • A vanity light that won’t stay even, making half your mirror misleading during the morning rush
    • The sharp surprise of a fixture going out with a simple brush or tap

    These aren’t cosmetic hiccups—they turn movement, grooming, or chores into sources of hesitation and irritation. Letting these signals go unchecked turns minor hassle into risky unpredictability.

    The Tug-Test: The Overlooked Step That Holds Lighting Together

    Seconds before you close up a fixture—whether it’s a new flush-mount in a narrow hallway or a semi-flush above a stair turn—a basic check makes the difference: grab each electrical wire and give it a gentle tug. If it pulls free or shifts, it’s not ready. Retighten, retest, then finish the install. This “tug-test” is the invisible insurance that stops a fixture from slowly working itself loose, especially where shaking, vibration, or repeated handling are part of daily life.

    Why Looking Isn’t Enough—The Gap Between Perception and Reality

    A wiring job can look solid, but daily routines are a different test than a static visual check. Over time, it’s the hidden, repeated stress—appliance vibration in laundry corners, steam in the bathroom, the thud of shoes on a hallway floor—that exposes weak points. Unless each wire grip is secured with a tug, even a “tight” install is at risk for slow, unpredictable failure.

    Real Scenes: Where Tug-Test Misses Translate into Visible Annoyance

    The Hallway: Imperceptible Instability That Turns into Hesitation

    In a typical corridor with a flush mount or low-profile ceiling light, the fixture looks perfect on day one. But small, repeated tremors from footsteps start to loosen what wasn’t checked fully. Over time, the far end of the hall fades earlier at dusk, or patches near doorways flicker, breaking the sense of safety during nighttime crossings. One weak connection can make a familiar, straightforward space suddenly unreliable—especially at the stair turn, where hesitation is most dangerous.

    A semi-flush landing light may appear steady after install, but a telltale flicker returns each evening as the family climbs the stairs. It’s not a burnt bulb; it’s a connection ready to fail in the spot that matters most. Fixing the real issue isn’t about replacing the fixture—it’s reopening, tug-testing every wire, and listening for that small slip that tells you what really needed attention.

    Bathrooms and Mirrors: When Lighting Compromises Hide in Plain Sight

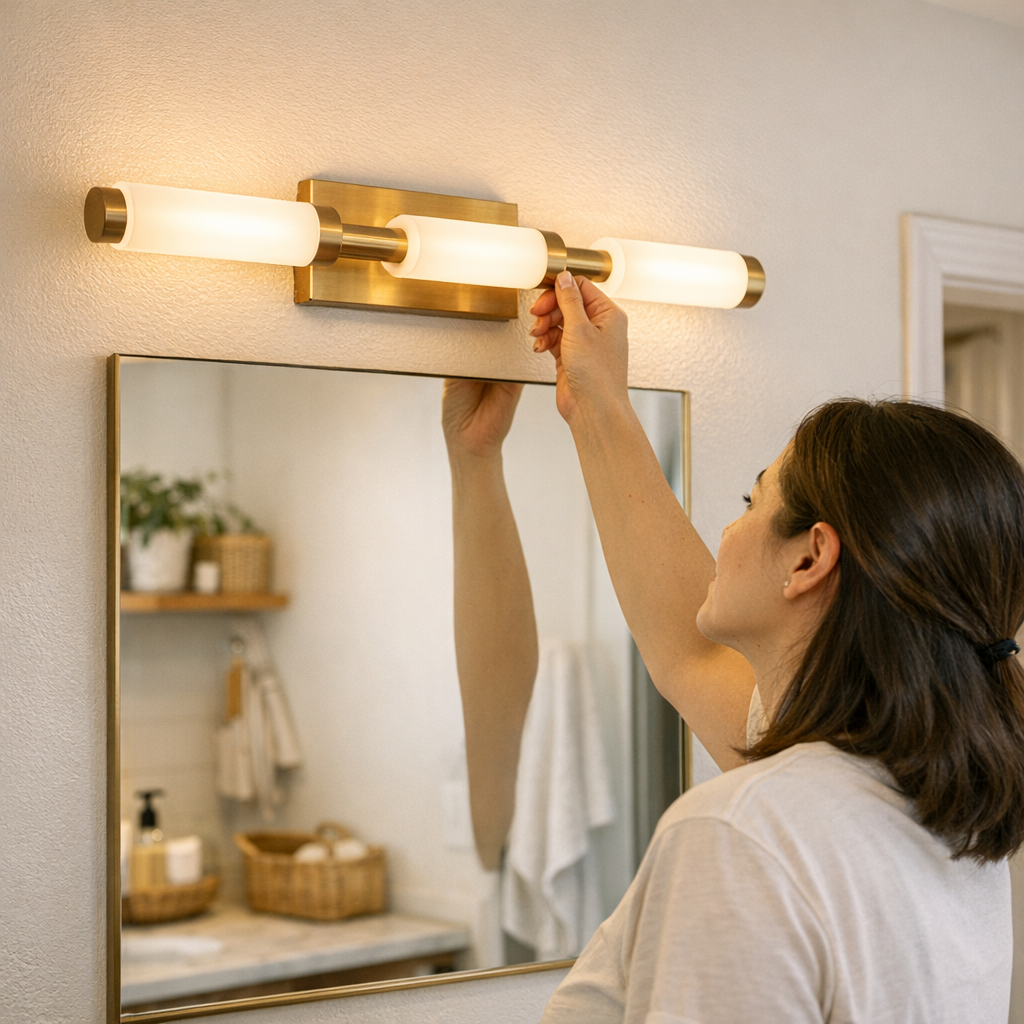
    Bathroom sconces or vanity lights can seem fine—until you lean toward the mirror and notice one side throws unexpected shadow, making simple routines harder. Repeated cleaning, a bump in the morning rush, or steam from showers gradually nudge a wire out of its connection. The problem isn’t always immediate: often, the first sign is an uneven glow that throws off precision tasks—shaving, makeup, even just checking your face. Only a tug-test after each cleaning or adjustment reveals which connection is quietly eroding the fixture’s reliability.

    Laundry Rooms: Small Movement, Big Consequences

    Laundry and utility lighting are often forgotten once mounted—yet these are some of the toughest zones for hidden weakness. Appliances rumble, the floor shakes, moisture circulates. It’s common for a linear ceiling panel to look flawless, but then flicker or dim the moment the dryer hits full spin or a shelf is shifted. The inconvenience isn’t only in the light fading: it’s in the moment you fumble, trying to spot a dark sock or fold laundry under unreliable illumination. A quick wire tug with every serious cleaning or appliance shift spots trouble early, instead of discovering it during a surge of activity with hands full.

    The Real Cost of Skipping the Tug-Test

    When a fixture’s wiring is left unchecked—relying on appearances rather than active testing—the drop-off comes gradually. The hallway that once felt safe starts concealing its boundaries; the bathroom fixture sags after each deep clean, leaving routines off balance. Slow shadow creep or unexpected outages don’t just weaken a room’s usefulness—they shift it from a support to a new source of stress, with each repeated annoyance multiplying the urge to avoid or replace the light entirely.

    High-Use Zones: How Small Failures Get Exposed Fast

    Busy household areas—entryways, stairs, bathroom vanities, laundry nooks—reveal wiring weaknesses first. Repeated vibration, humidity, or even basic cleaning exposes a connection that wasn’t fully tested. Rather than a dramatic failure, it’s steady inconvenience: the light you now have to work around, not with. A fixture meant to support nightly chores or safe movement instead becomes the reason you hesitate or make do in the dark.

    Making the Tug-Test Second Nature: Lasting Reliability Without Guesswork

    For anyone installing or maintaining lighting—whether as a homeowner tackling a new fixture or a pro moving through a punch list—the tug-test isn’t optional add-on, but the most practical safeguard. Its impact is straightforward: solid lighting performance across countless routines, from a midnight hallway trip to a bathroom mirror check on a steamy morning, or sorting through a shadow-free laundry counter mid-cycle.

    Lasting performance doesn’t depend on the fanciest fixture or the most expensive bulb—it’s about the confidence that every wire connection will hold steady, even after months of real-world use and strain.

    When the Tug-Test Can Change Everything: Key Signals

    Pay attention to these red flags, especially if they return after superficial fixes:

    • Persistent flicker no bulb swap can solve
    • Fixtures that start to sag or twist after repeated use
    • Light that dims or shifts position at the slightest touch
    • Shadow or uneven illumination that disrupts daily routines, especially near mirrors, counters, or paths

    These aren’t just flukes—they consistently point to a connection that’s become vulnerable. The simple act of tug-testing wires after any install or adjustment uncovers these weak spots, restoring reliability you can trust instead of hope for.

    The Small Habit That Changes Everything About Lighting Reliability

    Dependable lighting supports safe movement, clear vision, and less hesitation everywhere from hallways to stairwells to work counters. The difference between a background fixture and a daily frustration isn’t dramatic failure, but the quiet decline that follows unchecked, poorly secured wiring. The tug-test is the low-effort, high-impact step that keeps light working for you—not unexpectedly against you.

    Find more practical indoor lighting fixtures, ideas, and solutions at LightHelper.

  • Why Leaving Slack in Desk Cables Boosts Everyday Workspace Efficiency

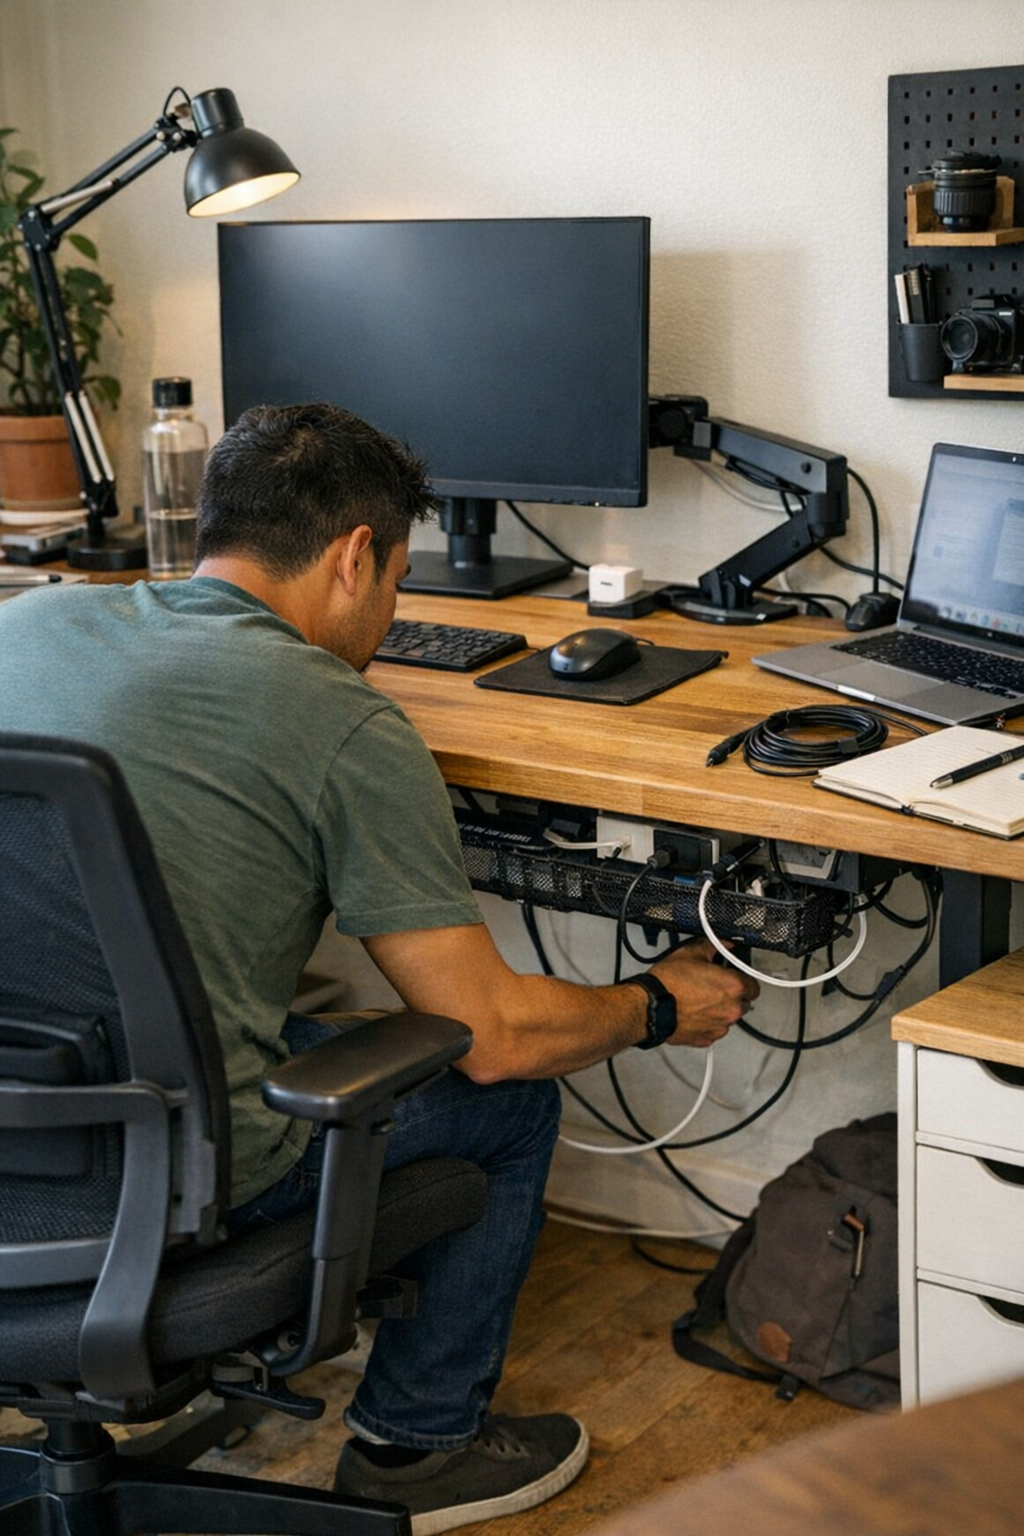
    If your desk looks flawless but keeps tripping you up, it’s probably the cables. You pin every wire flat, fit sleek cable trays under your desktop, and tuck chargers out of sight—yet daily work reveals the cracks immediately. The first time you pull your laptop an inch forward, a tightly clipped cord yanks its mount. Headphones snag under the desk, a notebook shift tugs at a USB line, and what should be a smooth swap forces a minor cable fight. By Wednesday, “perfect cable management” is just a new source of micro-irritation. Each reset takes longer. Swapping out a device can mean untangling half your setup—or reattaching a tray that’s half pulled off its screws.

    When a desk looks organized but breaks down in real use

    Clutter-free cable runs and hidden trays sell the promise of an efficient surface, but test them through a regular workweek and problems multiply. You reach across for your notebook, and the charging cord catches, yanking the laptop toward the edge. Slide your chair back and the headset cable—cinched too tight—jams around an armrest or drags your mouse to the floor. Mouse to notebook, monitor to keyboard, device to charger: each ordinary pivot exposes more friction. In multi-device setups or shared home desks, this gets worse—one person’s “clean” path blocks another’s routine. The surface looks calm but doesn’t adapt when the work actually shifts.

    The tighter the layout, the stiffer the workflow becomes. Tidy cable paths trap you in old patterns. By Friday, you’re unclipping, loosening, scooping cables out of trays mid-routine just to finish a new task, undermining the order you built.

    How rigid cable setups slow you down—scene by scene

    Most cable slowdowns hide until they trigger real interruptions in workflow—not during setup, but when you finally try to move.

    • Disconnecting a laptop: A cord with no slack rips the adapter out of the wall or forces you to wrench an under-desk tray aside just to unplug.
    • Adding a monitor: HDMI just barely reaches; as you pull it, the tray sags or dumps a knot of power bricks onto the floor.
    • Rolling your chair back: Your headset cord barely clears the armrest—until one quick move mid-call yanks it out or wraps it tight enough to cut the sound.
    • Cleaning under the desk: Bundled cables with zero give mean a quick vacuum or dust knocks an adhesive clip off, letting half the cable mess droop into your leg space.

    These incidents start small, but as the routine wears on, the loss adds up: plugging in, note-taking beside the keyboard, shifting a monitor for video calls, cleaning up at the end of the day—none of it should be slow. Tightly secured trays and sleeves turn minor moves into micro-reset cycles. The promise of “visible order” comes at the price of adaptability—especially once cables double back on themselves after a new device or every family member’s swap.

    What actually fixes it: space that flexes where you work

    After weeks of constant re-clipping, I stopped chasing the perfectly pressed cable. The fix wasn’t more equipment—it was controlled slack. Leaving a hand’s width (three to five inches) of play behind key devices—monitor, laptop power, clamp lamp, desk drawer—let everything move with real work. Headphones no longer snagged when shifting notebooks. A shared USB hub could shift right or left depending on who was using the desk that day. The next time I disconnected the laptop, the charger slipped free without prying at the cable tray or knocking a storage unit apart. The “invisible drag” of cable management was gone, replaced by a surface that followed movements, not the other way around.

    Cleaning didn’t set off a chain reaction. Shifting trays, dusting beneath, or dragging a chair back left cable guides and under-desk boxes where they belonged—not halfway across the floor.

    How to check for flexible enough cable management

    What’s the test? If your laptop, lamp, or commonly moved device can slide its regular range (two to four inches, depending on your desk) with zero wire resistance, you’ve dialed in the slack. If every movement tugs at a tray or pulls tension instantly, you’re too tight. Under-desk trays hold up better with a gentle “sag” or flexible mounting; rigid cable runs break down first. Use clips to define routes near edge lines and sleeves for groups that actually shift. Permanent power lines can be locked in, but anything you touch weekly (or daily) should have some freedom to move.

    FAQ: The lived realities of cable control (and its limits)

    How much slack is actually right?

    A rough guide is a hand’s width—three to five inches—where you disconnect or move devices. More for high-use connections, less for static power rails or riser-mounted monitors.

    Does giving cables room make a surface look sloppy?

    Managed well, barely. If the slack lines are tucked behind screens, below desktop risers, or out of your direct sightline, no one will see them. Blend clips, sleeves, and trays at the right spots: keep the tidy outline but let the core parts move where real work happens.

    Why do cable trays keep coming loose—even after careful install?

    Usually it’s not adhesive but tension. If every laptop disconnect pulls at a tray-mount screw, or a rolling drawer shoves a bundle sideways, the whole layout weakens. Slight extra slack at device points cuts down the stress and keeps trays in place for months instead of weeks.

    What should I actually use for adaptable cable management?

    There isn’t “one” best tool. Use clips for route control at static edges, sleeves for moving groups, and trays for bulk or power lines. Test what gets moved versus what stays anchored and build around repeated use, not just a pristine first setup.

    What a workstation that ‘moves with you’ looks—and feels—like

    After giving up on rigid cable control, I stopped having to chase dropped adapters or jammed cords. Device swaps, notebook shifts, and daily cleans blended into the background instead of adding steps. Instead of starring in an endless routine of fallen cable clips and tray readjustments, I spent more time actually working—and less on invisible maintenance. The desk finally matched the way I moved, not just the way I wanted it to look. Order stayed visible, but the surface was quicker to reset and less prone to breakdown.

    Explore the full WorkBasic collection

  • How Small Changes in Dog Bed Placement Can Ease Evening Restlessness

    You finish the last walk, hoping for a quiet wind-down—but the next half hour keeps snagging on small but relentless friction points. You reach for the leash bin and knock over a towel tangled with toys. The bed looks comfortable in the corner, but your dog is pacing the gap between the hallway and living room, circling as if waiting for your next move. The routine is supposed to be done, but it keeps leaking out: repeated pacing, toy cleanup bleeding into your path, another trip back for a wipe that wasn’t in reach when dirt hit the floor. In too many homes, these minor breakdowns keep the evening from settling—no matter how neat the setup looks at first glance. DogPile’s product world exists for exactly this zone: where ordinary structure falls apart in daily dog-life reset.

    When the Calm Hour Stutters: The Subtle, Repeated Friction

    The evening slide from activity to rest doesn’t fail with a bang—it unravels in the edges. Your dog does one last loop down the hall. You settle on the couch, only to find her alert at the door, nails clicking on tile. You pause to return toys that migrated toward the exit, then notice another water spill by the bowl. Instead of winding down, you’re pulled back by micro-delays:

    • Dog makes another restless lap as you turn out the lights.
    • Just as you sit, she’s standing near the door, hoping for one more out.
    • The supposed “rest corner” is where foot traffic keeps stirring her up.

    Each individual moment feels small—a missed cue, a shift in position, a toy in the way. Stack them, and your quiet hour becomes a series of stop-starts, crowding out true rest. Most don’t see the buildup until the friction starts eating into the same part of every night. That’s the structural weakness: setups that repeat the same drag, silently trading comfort for routine interruption.

    Why Tiny Routine Gaps Matter More Than You Think

    That last loop across the floor isn’t idle; it’s your signal that the transition isn’t really done. Setups with no definite end point—bed half in the walkway, wires of leash and wipes out of reach, closing cues missed—pull your dog back into movement. Minor tension lingers: a whine at the door, a second toy pickup, a late-night round of paw wipes because supplies were buried. The mess isn’t chaos, it’s repetition—each incomplete pass stretching the “close” of the day an extra ten or fifteen minutes over the week.

    These problems grow quietly—not from big disruptions, but from routine clutter that never really gets boxed in.

    The Unseen Difference in Daily Use

    What feels organized at noon breaks down at night. At 8pm, maybe the bowls sit close by—but the dog bed sits where you need to cross the room, so every snack run stirs your dog awake. You drop the settle signal too late, and now she’s hovering between door and bed, unsure where to land. The setup is tidy but inflexible; it looks fine, but in real evenings, it still asks for reshuffling or owner-side correction.

    Anchoring the Rest Zone: A Small Change That Alters the Flow

    Across homes, the same loop repeats: the dog takes her lap, holds at the decision point, and either settles—or keeps pacing if the environment pushes her on. Changing two things is what makes the structure “stick” under pressure:

    • Shift the bed just out of the walk-through lane. Even one foot matters; if it sits where human traffic passes, your dog keeps responding to every movement.
    • Make the settle cue direct and early—guide your dog with a clear phrase and an anchor hand, as she finishes her expected lap. “Bed,” with a calm point, beats the vague “Settle down” said after she’s already circling.
    • When your dog hesitates at the threshold, gently steer—don’t wait for the wrong move to repeat. A small redirect at the friction spot saves 10 minutes of pacing later.

    No system makes friction disappear, but these tweaks block familiar weak points. Once you nail placement and timing, most dogs slot themselves into the calmer flow—not perfectly, but often enough that the next night isn’t a rerun of last night’s patchwork delay.

    Scene in Action: The Difference Between “Neat” and “Workable”

    Evening, real version:

    • You both come in from the last walk. The towel is balanced on a chair instead of a hook, and you fumble for wipes hidden under keys. The bed sits inches from the fridge path. After the “dry-off,” your dog sits, then drifts back toward the hallway. You’re still sorting the leash, already a half-step behind.
    • Water bowl is within arm’s reach, but each refill prompts a sidestep—dog and owner in the same blind spot. Toys left beside the threshold draw a second round of pickup before rest is possible.
    • The settle cue drops as your dog is already halfway elsewhere. She paces again; the end of routine stays out of reach.

    Now, revise the setup:

    • Bed slides barely out of the lane, so when you point and give the cue, your dog’s lap ends where you want, not at the exit.
    • Towel and cleanup items are on a reachable hook or bin by the door. You handle mud and water in one pass—no late returns for wipes.
    • With cleanup done and cues delivered as your dog circles once, both of you get a true “close” to the evening. The pacing stops before it starts; your own movement causes less repeated interruption.

    The difference isn’t how things look, but whether they actually let the routine resolve—or just keep it bouncing back into your lap.

    How the Evening Routine Falls Apart (and How to Cut it Short)

    You don’t notice the small failures until you’re repeating the same inefficient fixes:

    • You slide the bed over, but your dog stays glued to the door, waiting for something new to happen.
    • The living room looks better, but toys trickle back into walking lanes every other night, stealing time and attention.
    • A soft bed helps until a late-night snack triggers a second cleanup—midway through, your dog’s rest window disappears and you’re back to coaxing her to settle.

    Ignore these leaks, and you inherit the same restless routine all week. Clearer setups don’t hunt perfection—they stop the “reset” from dragging on by making that last zone easier to access and close. Relocate the bed, align the settle cue with the decisive moment, and let simple structure do the work of signaling “done.”

    The Feedback Loop: Repeated Friction, Repeated Fixes?

    Each day, an open-ended routine guarantees tomorrow’s reset takes longer. With no definite anchor—bed near door, cues too late—your dog keeps filling in the blanks, circling and delaying as much as you. Fixing structure (on both sides of the leash) isn’t about impressing visitors; it’s about breaking the loop that costs you another 15 minutes when you just want sleep.

    Most background tension fades the moment placement, signal, and owner access are finally in sync. It won’t make evenings flawless, but it will let both sides quit chasing that elusive “finally settled” moment night after night.

    Real-World Tweaks: Small Adjustments, Noticeable Ease

    No one expects a miracle—what you want is fewer snags across the finish line. Over a week, little changes add up:

    • Dog takes the bed on her cue four nights out of five, no extra patrol along the door.
    • The last 30 minutes flow more cleanly—less looping back; toys and wipes are right when needed.
    • You stop weaving through scattered clutter or dodging a pacing dog on the way to your own rest.
    • Routine feels solid enough to handle sudden interruptions—instead of crumbling at the first stray sock or late visitor.

    It’s not about appearances. True improvement is when structure finally pulls its weight: fewer reminders, quicker resets, one less distraction at the edge of every day.

    Spotting the Routine vs. Real Distress

    Most dogs benefit from a closing lap or two. A little hesitation is normal. But if you keep hearing nails on tile, see her staring at the exit after every transition, or hit that familiar loop of whines and pacing when you thought the day was done, that’s the flag. Nearly always, a bed shift or better-timed cue interrupts the spiral—often more reliably than trying to “out-wait” her. The goal isn’t over-control, just the kind of structure that stops friction from stacking up.

    Everyday Setup, Everyday Payoff (and Where Smoothness Comes from)

    Even the smallest

  • How Anchored Trunk Organizers Simplify Repeated Errands and Reduce Clutter

    A trunk that looks dialed in on Sunday night can spit chaos back at you by Tuesday morning. The neat lineup—bags wedged, bins pressed flat, cables tucked—rarely survives a week’s real errands: sudden stops, parking-lot pivots, half-hour grocery loops. Fast-forward three days, and you’re prying a shoe out from under collapsing boxes or tracing a charging line snagged under the spare tire. If your trunk looks clean but feels like work every time you reach in, you’re not alone. This is where “good enough” setups are exposed—every missed cable, tipped bag, or drifting emergency kit just proof that appearance and actual utility live further apart than most give credit.

    When “Organized” Isn’t Enough: The False Promise of Visual Order

    The illusion starts as soon as you pull out of the driveway. Organization that photographs well unravels quickly on a real commute—one short stop, a rough turn, and the flaws start surfacing. The open bin nudges a couple inches. The cable you wound up slides under a case of water. The umbrella you set handily upright two drives ago tumbles sideways, wedging where you least expect it.

    Every re-entry brings a signal: something’s always just a little off. You pick up a frozen bottle, find a roadside kit half-buried, or waste minutes untangling cords before plugging in your phone. Early on, it’s a small annoyance. After the third or fourth repeat, you’re resetting as often as organizing. The pattern’s hard to ignore: setups that only look organized start sliding, literally and metaphorically, the moment you use your car like a working tool and not a showroom.

    Real-World Friction: How Weak Setups Get Exposed

    Try running three errands—groceries, supply shop, quick stop at recycling. If your trunk is just loose bins, soft mats, or a pile of reusable bags, the illusion of order breaks down fast. Removing a single bag lets the system go slack. Dividers tilt, light items roll into uncovered patches, and the charging cable that started out clear of everything drifts under a shifting suitcase. Corner hard once, or hit the brakes for someone backing out, and the well-planned trunk turns into a mixed pile by the second stop.

    The main trap: mistaking tidy for functional. When a packed trunk holds its shape, it feels like the problem is solved—but one removed basket or dog kit creates empty floor sections where bottles and cables slide into new tangles. Two stops later, you’re elbow-deep digging out a first-aid kit, or chasing an umbrella that’s slipped under the rear seat, instead of just grabbing and going.

    This mess doesn’t wait until the weekend to stack up. For anyone driving daily—errands, gym, drop-off, supply run—the breakdown is fast: small failures multiply, time spent rearranging cuts into any feeling of routine.

    Why Anchored Structure Outperforms Loose Bins

    The problem isn’t solved by more baskets or one big “cargo mat.” It’s solved by rigid structure that adapts as the trunk fills and empties across daily use. Anchored organizers—think separators fastened near wheel wells or sturdy Velcro-backed dividers—hold gear steady through stops, turns, and even quick reloading. A solid divider at the right edge blocks sideways migration. Fixed points at trunk corners mean your emergency kit, charger cables, and tool bag don’t swap places every other trip.

    This is about more than just keeping stuff in one spot. Prioritizing layout—sectioning out quick-access items (charger lines, poncho, small groceries) from heavier or sometimes-used gear—means in real use, especially open-trunk-in-the-rain moments or quick reloads at night, you’re not pawing through layers to find what matters. Instead of guessing where the fire extinguisher migrated, it waits at its anchor point, regardless of who else shared the trunk that afternoon.

    And tiny improvements count: clipping charger cables to an anchored sleeve along the trunk edge keeps them out from under a shifting ice scraper, stopping the usual cycle of cords yanked, pinched, or buried. When everything has a fixed spot—especially things that get used often or need to stay instantly accessible—the trunk isn’t just tidier, it’s ready for real-world chaos and recovery.

    Frequent Re-Entry: The Real Test of Your Trunk Layout

    The real breakdown doesn’t happen during setup—it happens when you return to the car, open the trunk, and realize that every trip means fixing yesterday’s mess. If you’re restacking groceries, digging for collapsed tote bags, or fishing lost cables from dark corners, you’re spending more time correcting than actually using the space. These moments repeat: post-work groceries, midday gym runs, last-minute store swings. Weak structure makes every interruption a reset on your own system.

    Shared cars amplify the friction. One person reorganizing for a stroller or pet gear leaves the next trip starting at a disadvantage. Only a trunk with clear anchor points, repeatable sectioning, and visible cable management lets multiple drivers recover quickly. If your setup falls apart with every new hand, it isn’t just less convenient—it costs real time and patience weekly.

    From Looks Good to Works Well: Designing for Real Routines

    A trunk that lasts past the first big errand loop isn’t built on surface order—it’s anchored by stable points, adjustable dividers, and cable routes that hold up through daily churn. Place organizers at the natural shift points—where bags always slide when the trunk’s half full, beside the wheel arch, or across the back when a box is removed. A solid divider in high-traffic zones blocks knock-on drift. Anchored bands or clips on the edge stop cables from getting underfoot or knotted after three reloads.

    The result isn’t just a prettier space. It’s a trunk where flipping open the hatch after a downpour or late-night run means everything’s still where you need it—no scramble, no wasted reach, no surprise tangles. On rushed schedules, in low light, and especially with gear that rotates out weekly, structure beats surface order every time. Even imperfect routines get easier, because the system expects the churn and recovers faster after each disruption.

    One adjustment, real relief

    Sometimes the difference is just one anchored divider, one routed cable sleeve, one moment of friction finally removed. Separating weighty gear from quick-grab essentials, clipping down the constant cable offender, and giving each kit a “home” at a tied-off corner all chip away at the wasted minutes and repeated fixes. You start noticing less chaos—and fewer reflexive resets—proving your trunk is more than just “organized.” It’s use-ready, no matter how many loops, hand-offs, or speed bumps your week delivers.

    If you’re ready to set up your trunk so that it finally holds up to actual errands, see the practical options at DriveWellSupply.

  • How Proper Ceiling Light Support Eliminates Eye Strain and Uneven Coverage

    You see it fast: the awkward gray strip at your desk edge, the dimmed chair nobody stays in, or the ceiling fixture that looks right but leaves you dragging a lamp to the same tired spot night after night. Ceiling lighting that looks finished often creates a daily drag—glare where you work, tired eyes by afternoon, a surface that looks resolved but leaves half its space barely usable. What controls that discomfort often isn’t the power of the light, but the way the bracket, cable, or support routes light and shadow into your routines. How it’s mounted, where wires run, and which surfaces get hit first quietly decide whether your room feels easy to move through or stuck in a cycle of makeshift fixes.

    Why “Looks Finished” Still Feels Wrong: The Confused Comfort of Clean Ceiling Light

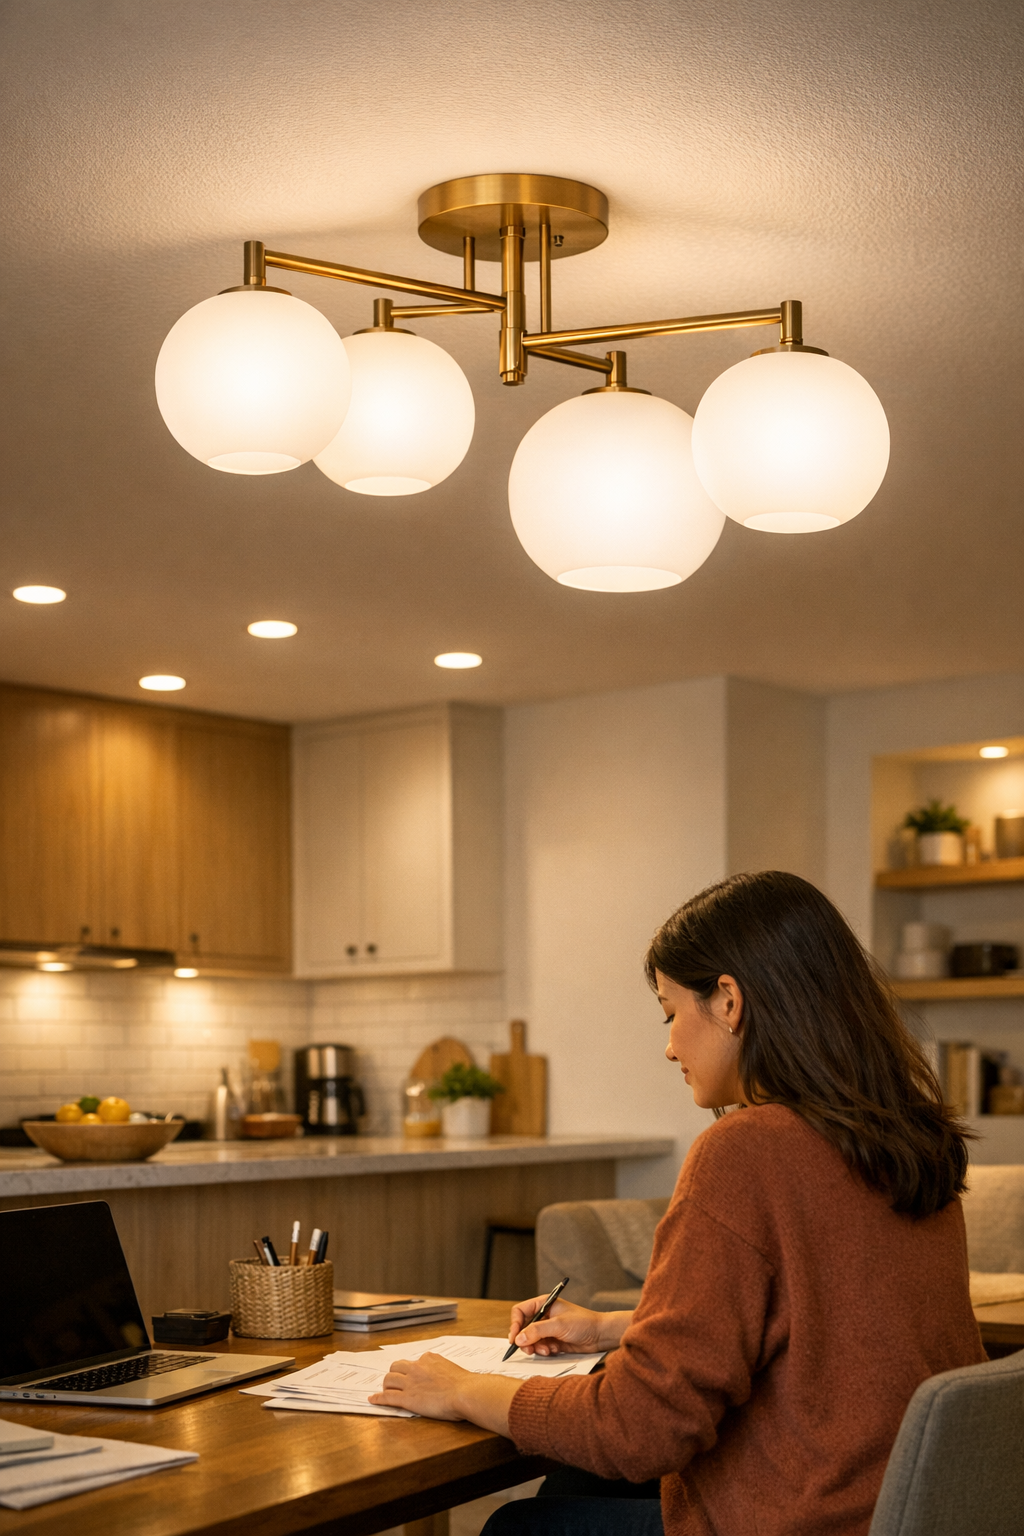
    A flush-mount panel with cables hidden and lines clean promises a resolved look at installation. But watch what happens after a week: you bounce from working at your desk, to answering messages from a corner, to a quick meal under the main fixture. Light falls just short along one bench, or you end up avoiding a part of the table because dusk turns it murky. Each time you switch spots, the “finished” setup stops feeling finished—surface light runs out at the edge, so you reach for a portable lamp or nudge a chair into a better patch, repeating the same shuffle every evening.

    The core issue rarely lies in the bulb’s output—it’s about how the support hardware shapes the spread and placement. Poor bracket positioning shifts the whole beam off-center or leaves cables as a constant visual interruption. A fixture can say “minimal,” but if it creates practical dead zones, the daily setup quickly turns into a lineup of temporary workarounds.

    When Routine Makes the Real Weakness Clear

    The flaws don’t show up on a product sheet—they show up the third time you dodge monitor glare, or shuffle a pile to the only well-lit end of the desk. Kitchen prep repeats the same pattern: the overhead fixture says “bright,” but shadow lands right across the cutting board. Swapping bulbs or moving desk accessories works for a day, then the shadows, squinting, or cable mess reappear. A clean ceiling look solves the visible wiring but leaves your main surface just as split and reluctant in real use.

    Isolated Trouble Spots: Reading Corners and Edges That Disappear

    Edges call out the limits fast. That reading chair sparkles at 8 a.m., but slips into shadow after sunset because the ceiling mount throws all its reach toward the room center. A long workbench glows at one end and fades at the other—prompting an endless rotation of desk lights or a subtle reshuffling of how you use the space. You start to avoid certain tasks or shift awkwardly to follow a patchy beam, giving up on the spots that never quite feel lit or comfortable.

    Supporting Light Where It’s Needed—Not Just Where It Looks Good

    Function starts when brackets, arms, and cable paths are positioned for real usage—not just interior appearance. The most effective light comes from support hardware chosen for task spread, with mounting points that align the beam with your routines: brackets spaced to reach the room’s edge, cables brought across to meet the corner where you actually read or prep, not simply where construction left space. Sometimes a cable run that’s partly exposed, or an articulated arm that shifts, delivers reliable surface light where no flush-mount ever could.

    “Better” often means visible support, not perfection at a glance. An arm out from the wall, a guided cable route across the ceiling—these can press the beam’s reach to both sides of a table or workstation. The point isn’t visual minimalism; it’s a room where every desk edge and seat stays fully useful, without a daily routine of repositioning, re-aiming, or apologizing for dim patches and glare points.

    Real World Example: An Adjustment That Changed the Routine

    Take a desk that doubled as a reading nook and workspace. The central ceiling fixture kept one side dim enough that a clip-on lamp became a crutch—moved back and forth depending on task or time of day. A small extension arm, anchored to a solid ceiling joist and paired with a clean cable path, let the main light finally cover both desk ends. Suddenly, every surface became easy to use, papers could be spread edge to edge, and the annoying lamp found permanent retirement. The visible support arm isn’t the highlight of the room—but the daily relief from glare and forgotten corners is something you stop noticing only because the setup just works, every time.

    Visible Impact: Where Supports and Cables Outperform Appearance Alone

    Setting up lighting support for true use can mean living with exposed hardware or planned cable paths. Yet, the results are real: no more plugging in emergency lamps, no more accepting glare lines as an unfixable part of the room, no more sidestepping cables that could have been routed differently.

    • Whole worktops finally bright along every edge—not just down the middle
    • Cable lines that hang where they help, never trailing to distract or interrupt movement
    • Shared tables that stay open for any seat, all seats equal—no side quietly sidestepped anymore
    • Fixtures and support that carry through as daily habits and routines shift, instead of breaking down with every new need

    Simple Tweaks, Noticeable Results

    If you keep shifting items to the spot with the least glare, or use the same backup lamp every day, the cause isn’t always an underpowered light. The more frequent fix is better support—rerouted cables, a bracket repositioned to sharpen spread, or swapping a fixed mount for something that pivots. Sometimes it comes down to sliding a bracket over by a few inches, or adding a guide that steers the cable along your movement path instead of straight for the shortest run.

    Practical tip: Map your routines across the surfaces and see where light runs short or glare interrupts most. Before defaulting to another upgrade, try changing bracket placements or adding cable guides to match the lines you actually follow, not the ones that seem neat on a plan.

    The Difference Between “Cleaner” and “Easier to Live With”

    It’s easy to call a setup finished when wires are hidden and fixtures sit flush—but in daily routines, “done” on installation rarely matches comfort in use. The overlooked bracket, cable path, and point of light’s spread either enable your real work and habits, or quietly stall them with persistent friction that never shows up in before-and-after photos.

    Finishing a lighting setup for daily function doesn’t demand designer minimalism or an extra-bright bulb. Real comfort starts with hardware and support that hit the right spot for what you do and where you move—even when that means a bracket or arm in plain sight. A surface that stays genuinely usable at every edge and a room that feels finished not just in photos, but in repeated, easy routines—that’s when lighting finally shows its full worth.

    For practical lighting support, mounting, and accessories designed for real daily improvement, visit LightSupport.

  • Why Adhesive Mounts Fail in Humid Entryways and What Works Better

    Every entryway claims to be organized until it faces daily use. Hooks line the wall, shoes start in neat rows, and for one quiet moment, control seems possible. But by midweek: shoes overflow into walkways, bags inch into door swings, and every “quick drop-off” leaves a bit more chaos piled at the threshold. The real test isn’t how door-side storage looks after a Sunday reset—it’s how it holds up when three people, wet boots, and unpredictable routines all collide in the same 40-inch zone. That’s where most surface fixes quietly break down, and where the difference between temporary stick-on storage and anchored setups becomes obvious—usually right underfoot, when even crossing the entry takes an awkward sidestep.

    Why Adhesive Mounts Seem Like a Good Entry Fix—Until Real Life Hits

    Adhesive-mounted racks and hooks are tempting for quick entryway upgrades—no tools, no drilling, just press-and-go vertical storage. In a guest hallway or under-light loads, they might even hold for a season. But once the entry turns into an actual re-entry zone—wet jackets thumping after a storm, backpacks tossed after a long day, shoes hitting the rack damp—the limits show fast. Moisture, temperature changes, and the daily repetition of returns quietly work loose the adhesive. Every swing of a weighted bag or splash from muddy shoes puts new stress on the strips. The “easy” fix that saved time on install starts demanding time every reset, as panels shift, hooks sag, and the path narrows again after each busy outing.

    The Scene: When Storage That Looks Neat Starts to Fail

    Picture a high-traffic entry barely wide enough for three pairs of boots side by side. At week’s start, adhesive hooks keep coats off the floor; the shoe rack manages a single row. But on Tuesday—rain. Someone boots in, coat drips, backpack lands hard on a hook, and suddenly the adhesive shifts. Shoes slip into the walkway, the hooks angle out, and the whole setup sags. Two days later, another reset: press the hooks, realign the rack, shove the shoes back. But the strips peel quicker each time. Instead of a clean entry, the threshold clogs with overflow: stray shoes block the door; bags clog the pinch-point; every pass-through means picking your way over yesterday’s mess. Quickly, the storage system becomes just as much friction as the clutter it was meant to solve.

    Now, the entry transforms from passage to obstacle course. Each drop-off that was supposed to be frictionless instead triggers a mini-reset, and anyone trying to cross the zone shoulders a little extra frustration. Reset fatigue sets in; what started as hidden clutter just becomes visible irritant.

    Hidden Breakdown: What Actually Goes Wrong with Adhesive Mounts

    Real entry use isn’t kind to adhesive storage. Here’s how repeated transitions expose the cracks:

    • Sagging hooks: Single heavy drops or soaked coats nudge hooks downward—at first barely visible, then unmistakable as tilt adds up day by day.
    • Creeping clutter: As hooks lose their angle, items slip free, sliding bags and coats right back onto the bench or floor. Shoe rows break rank and spread, reclaiming floor space meant for passage.
    • Blocked movement: Overflow starts at the edge: shoes across the threshold, bags teetering half-on, half-off the rack, every path narrowed until someone finally clears it—or detours around it.
    • Resets get shorter—and less effective: Each attempt to stick, press, or nudge hooks back is a little less successful, while adhesive residue and wall wear collect quietly behind the scenes.

    The promise of “low effort” dissolves into a routine of micro-fixes, each one achieving less. The entry doesn’t get easier; it just asks for more attention in smaller, more frequent bursts.

    Anchored Hardware: Holding Up Against Real-World Routine

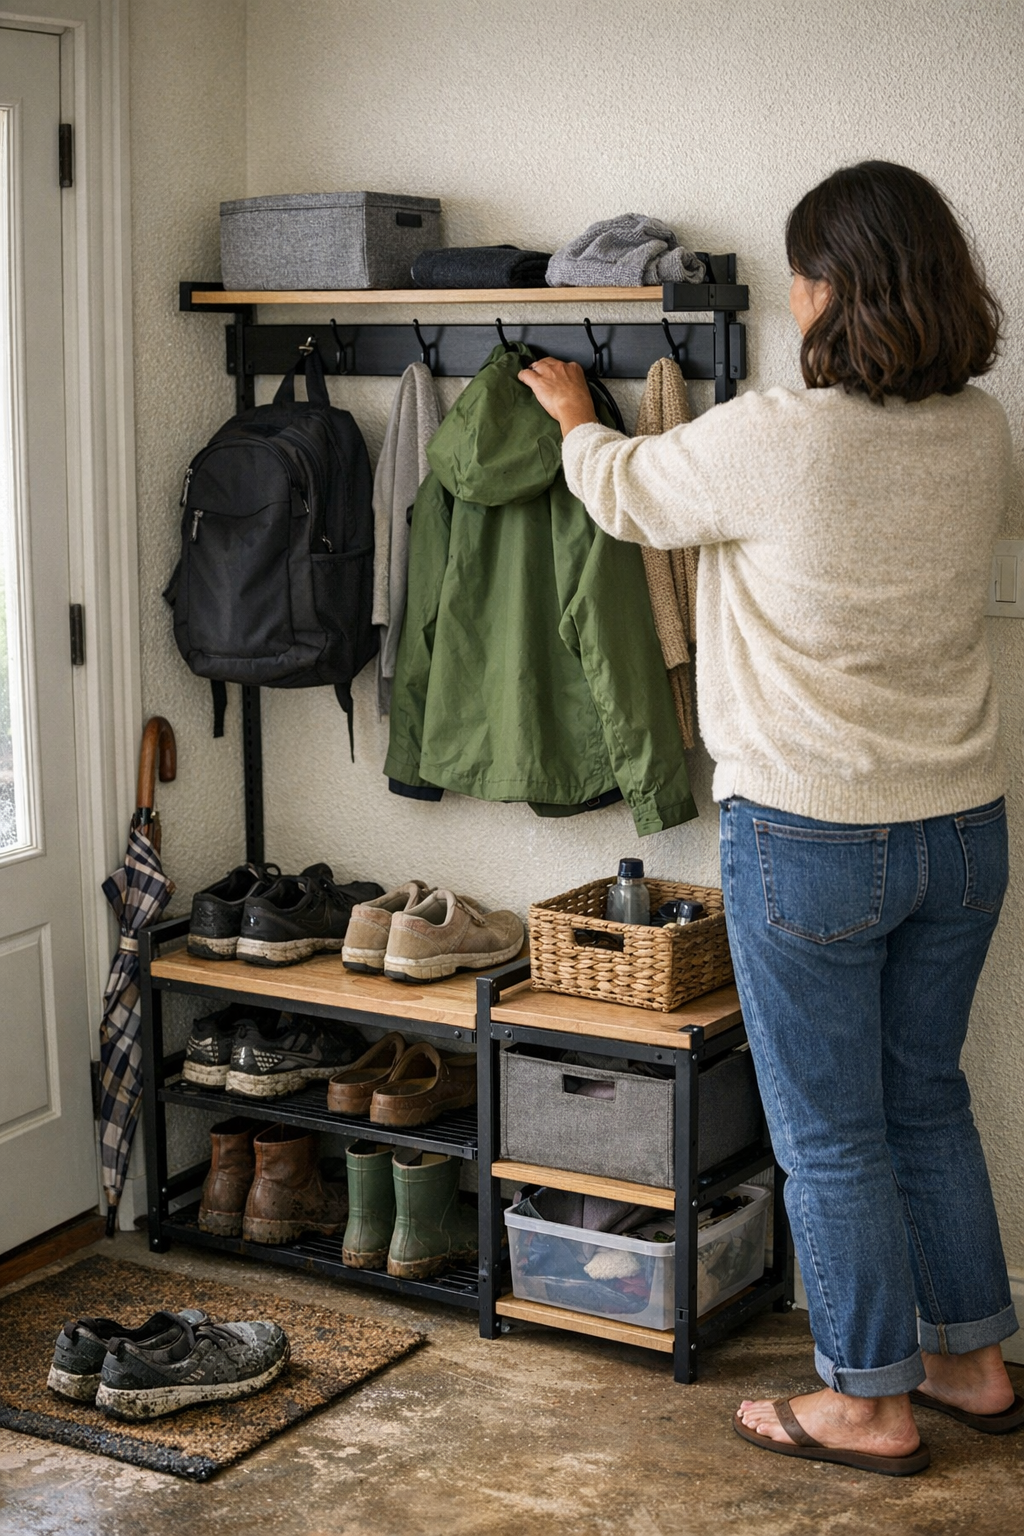
    Anchored racks—screwed into studs, designed for repeat impact—are built for messy, high-traffic entries. The difference appears quickly: no creeping lean after a wet week, no rack slipping off the wall when a backpack is tossed a bit too hard. Hardware mounting turns the drop zone into a true reset zone—hooks remain level, storage stays in place, and shoes slide back out of the walkway instead of flooding it again. It’s not pretty for the sake of order—it’s stable for the sake of movement: daily pickups become automatic and resets happen in seconds, not out of obligation, but as a byproduct of a zone that works as intended.

    One real-world shift: After swapping adhesive hooks for anchored racks in a cramped entry shared by three, the door swings clear each time, bags land and hang with no sag, and wet weeks no longer devour the whole system. Reset means moving items, not reattaching the storage itself. For once, the threshold relieves pressure—it doesn’t add to it.

    Signs Your Drop Zone Needs a Stronger Solution

    If your daily flow meets these symptoms, your storage setup is starting to surrender:

    • Hooks tilt or peel the morning after humidity spikes or wet jackets hang all night.
    • Shoes and bags migrate into walking routes, forcing detours at the door or around the bench.
    • Reset means re-sticking or realigning panels more than once a week—and never quite solving the drift.
    • You recognize your system by how often you prop it up, not by how smoothly it works.

    Spot-check: If you see panel corners lifting, sticky residue spreading, or stray items piling up at the edge of the zone, the real friction isn’t your routine—it’s the setup that can’t keep pace.

    Beyond Visual Order: Making Thresholds Work for Everyday Living

    True threshold storage has to withstand impact, weather, and back-to-back returns. Looking tidy isn’t enough—if the drop zone blocks movement, demands daily rescue, or only works under ideal conditions, it’s not serving real-life needs. Hardware-mounted options—anchored racks, stable benches, vertical wall setups—aren’t just more “permanent.” They actually reset the friction: less overflow at the path edge, fewer rescue missions, less stress every time someone rushes the door. The real signal of a working setup isn’t perfectly lined hooks—it’s the moment you forget about the entry and just get through it.

    If your drop zone is asking for constant repair, fighting seasonal changes, or scattering storage back into the daily path, adhesive may have done its job once—but it’s time for something that handles the pressure, not just hides it. That’s the shift from holding on to holding up—one that reclaims your entry flow for good.

    Find transition-space storage solutions that hold up, not just hold on, at Betweenry.

  • Why Underfilled Bins Transform Daily Storage and Reduce Clutter

    When “Maximizing Space” Makes Storage Harder, Not Better

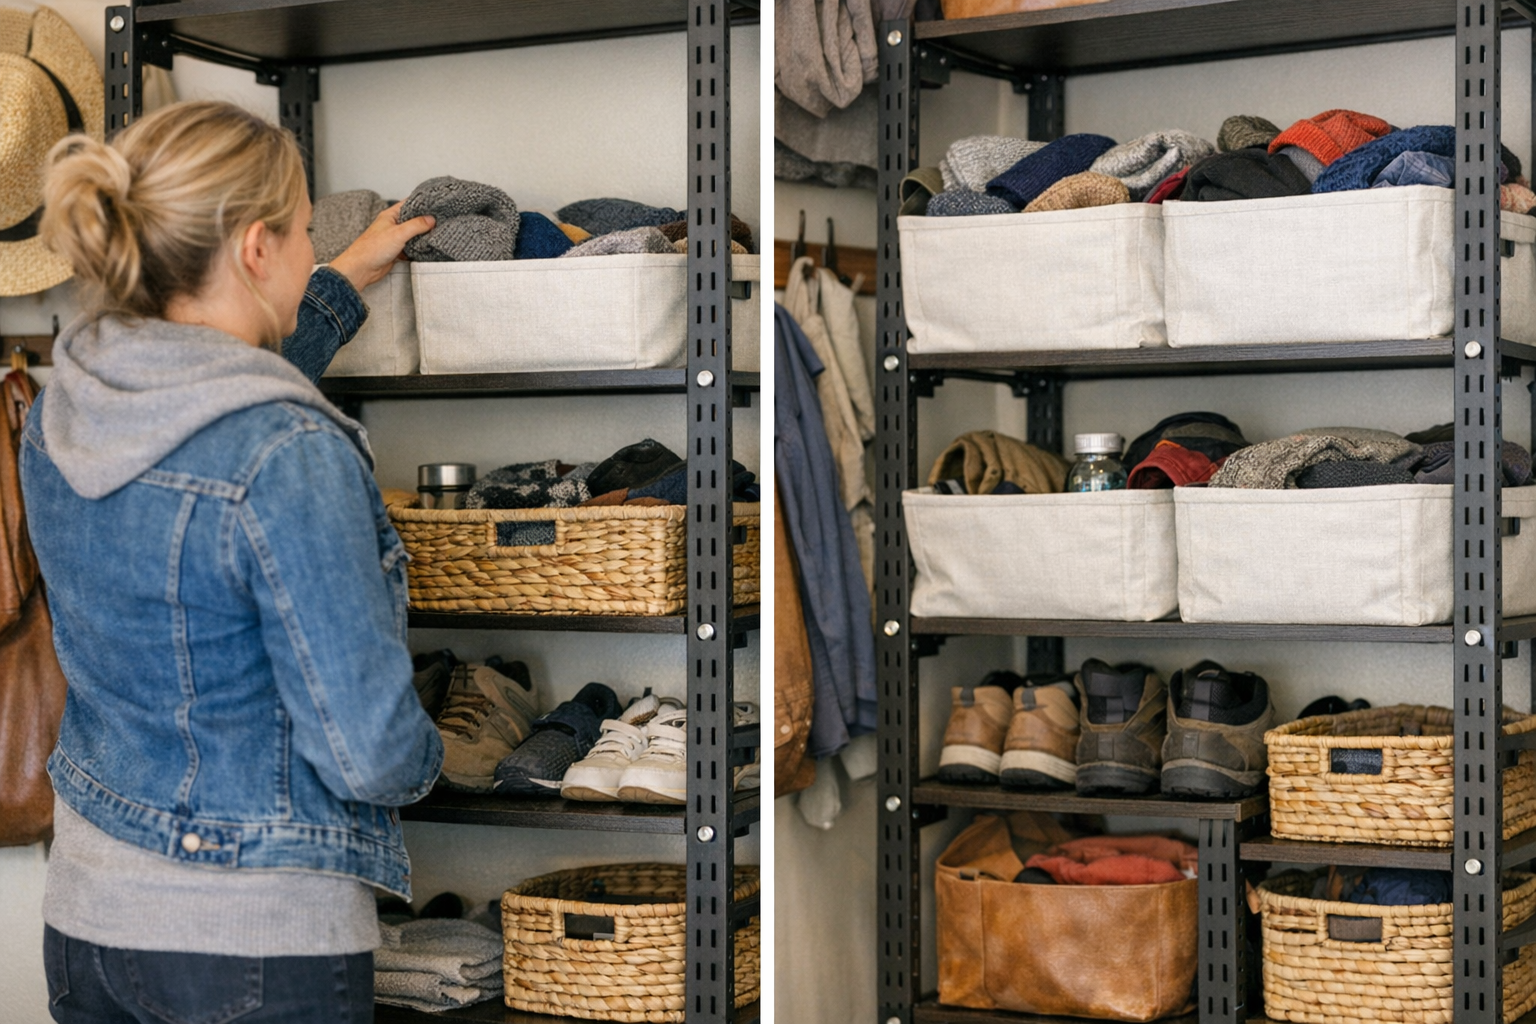
    Open any closet or mudroom in a lived-in house, and you’ll spot the same frustration: bins packed to the brim, shelves lined with containers flush to the edge, everything looking “in order”—at first. That satisfaction fades fast. A few days later, you’re fishing for a missing glove, wedging in an extra towel, or shifting an entire stack just to put away a single sweatshirt. The logic seemed sound—use every square inch!—but now the system resists you. Instead of helping, every “just one more thing” becomes a moment of real friction. Before long, jackets land on chairs, socks gather on the floor, and bins meant to declutter quietly add new hassles to daily life.

    When Storage Order Starts Working Against You

    Packed bins and full shelves don’t just look orderly—they demand constant negotiation. Families cycling shoes in and out, tossing sports gear on the run, or restocking lunch containers don’t have time for delicate stacking. In theory, stuffing each bin means no wasted space. In reality, a week later you’re performing acrobatics every time you return something. Reach for a hat, and a folded stack flops sideways. Try to put gloves back after school, and you spare your future self the hassle by abandoning them by the door.

    The real friction piles up unnoticed: the pause before opening an overfilled bin, the hesitation before cramming another piece in, the quiet decision to leave things out “just for now.” By the weekend, there’s a new mess—not because the system failed, but because it asked too much for real routines.

    How Real Routines Reveal Storage Flaws

    Imagine an evening in your entryway: muddy boots off, wet scarves flung in a hurry, hats dropped wherever they’ll fit. The storage “system” looks fine from a distance—everything snapped shut, nothing visible—until you actually use it. The scarf that didn’t quite fit last time is now hanging off a hook. The bin set aside for hats is overflowing, so you tuck today’s on top of the stack, half in, half out. A ball migrates from its cubby to roll under the bench. Folded sweatshirts begin perching on bin lids because breaking the packed stack inside feels like a hassle.

    It’s not laziness. It’s the price of density. Storage that requires effort for every return quietly invites clutter to spread, one shortcut at a time.

    Underfilled Bins: The Room Your Routine Actually Needs

    The fix isn’t more bins or better labels—it’s margin. Leave room at the top: not a token gap, but a hand’s width of open space, enough to drop, adjust, and move on. Leaving bins about a quarter empty creates just enough slack for daily life to flow uninterrupted.

    Why That Visible Gap Pays Off

    It feels counterproductive, but that empty zone isn’t wasted. You immediately see if there’s space before you return a beanie or a flashlight. If the bin isn’t crammed, you reach in and put something away, not strategize about the reshuffling required. Even a hurried hand can drop items without upending stacks or playing Tetris with socks. Before long, the area stays clearer because items actually return to their spots—and the bins inside don’t devolve into a jumbled mess.

    Day by day, you notice something rare: fewer “for now” piles, less backup clogging the outside of the bin, and a smoother rhythm after inevitable family rushes. Resetting the space becomes an instinct, not a chore.

    Scenes from Real Life: The Impact of Breathing Room

    Less Digging, More Dropping

    Picture a rainy day in the mudroom. The kids dump wet towels into a bin as they run past. If the bin’s full, you hesitate: try to squeeze it, or start another pile? With breathing room, it’s a quick toss. Tomorrow, nothing is left dangling off the bench or jumbled at your feet.

    Bedroom Shelves That Don’t Collapse

    Closet bins packed edge-to-edge unravel quickly. After laundry, the new shirts topple the pile, socks mingle, and you start parking “temporary” items in front of bins instead of inside. But with a hand-width of space up top, things change: you slide folded clothes in without unbalancing the contents, spot the pair you need immediately, and singles don’t topple over stacks. Visibility and access go up, mess goes down.

    Smoother Mornings, Fewer Interruptions

    Especially for kids’ gear and seasonal extras, margin makes all the difference. Scarves and mittens come and go with each weather swing, but a loosely packed bin means no avalanche when you grab one item. No minutes wasted re-tucking after a quick grab, just easy in-and-out—real convenience, not just the look of order.

    Try It in Your Own Space—And Watch What Changes

    The simple test: pick a high-traffic bin or two and pull everything out. Put back only what fills the bin about three-quarters full—the rest, store elsewhere or let go. Live with it for a week. Notice how often you return things smoothly, how few times you leave things out “for now,” and how the shelf itself stays steadier. The gain isn’t just visual—it’s how quickly you can finish the reset and move on.

    Practical tip: If you resist trimming the contents, ask yourself: when was the last time you needed what’s buried at the very bottom? Keeping less visible, less-used items in secondary storage and prioritizing quick-return favorites up top preserves both calm and clarity.

    The Difference Between “Looks Organized” and “Feels Organized”

    Shelving, bins, baskets—they’re only as good as their ability to keep up with the real rhythm of your day. Underfilling isn’t about leaving space “unused,” but about preventing slow drifts toward frustration and surface clutter. When bins reset themselves with almost no thought, the area supports your life, not just your idea of tidy. A system that feels effortless to use—one-handed returns, no daily shuffling, no delayed clean-up—lasts much longer than one that just photographs well on day one. The real test is whether it still works next week, and the week after.

    See storage solutions designed with real-life routines in mind at ClosetWorks.