Author: jaesoon_admin

  • Smart Charging Habits to Preserve Power Tool Battery Life Longer

    Every trade has a moment when a job stalls for one simple reason: the battery is dead. The tool’s still in your hand, the board half-cut, or your last anchor only halfway in the hole. In that half-minute pause, you realize—battery reliability isn’t just a background detail. It’s the line between a workday that flows and a morning spent scrambling for a fix.

    You don’t notice battery habits when everything runs right—drill spinning clean, sander gliding smooth, drivers snapping home fastener after fastener. But months in, if runtime drops or tools choke halfway through a sheet of drywall, the real root cause usually traces back to quiet, daily lapses in charging discipline. One unthinking shortcut becomes the recurring headache that slows the whole crew.

    The Hidden Cost of Bad Charging: When Power Fades Mid-Job

    Battery decline creeps up. The early signs—overcharging packs, defaulting to fast charging “just this once,” or grabbing whichever charger’s closest—don’t show up on day one. It might take sixty or a hundred cycles before you see it. Suddenly your rotary hammer pulls up short on the third hole, your multi-tool sputters through only half a window cut, and swapping to your backup reveals both packs are limping.

    The interruption isn’t subtle. Tools stall in the middle of drilling tapcons into concrete. The circular saw won’t finish a crosscut before bogging down. Fatigue sets in: you grip tighter, make slower passes, and fight for precision as voltage flags. Each unwanted stop means a walk back to the bench, a break in rhythm, or settling for a corded tool that puts you out of position—especially when you’re perched two stories up or buried deep in a crawlspace.

    Workday Reality: Where Weak Charging Habits Show Up

    Picture the scene: mid-morning in a gutted kitchen, wall cavities exposed, your compact drill chewing through studs with a fresh bit. You reach for an 18V battery that’s been left charging overnight—a habit almost everyone’s tried. It slides into place, still warm. Midway through installing boxes, power slumps. The tool loses its edge. By the next fastener, it’s dead weight in your palm—battery warm to the touch, charge evaporated.

    Contrast that with a well-managed pack. You grab another battery—a pack never left to roast overnight, always unplugged at full. It’s cool, clicks home, and delivers a runtime that actually matches what the label promised on day one. Nothing awkward, no stops, just smooth drilling and cleaner holes—with less wrist fatigue fighting tool slowdown. That’s the day-to-day gap between mindless charging and small, daily attentiveness.

    Smart Charging: What Actually Works on Real Jobs

    It’s not complicated science—just habit. Always unplug lithium-ion batteries when they hit full. Save fast charging for emergencies, not your default. Stick with the charger that was made for your battery chemistry and voltage. That discipline—small, repeated, nearly invisible—means batteries stay cooler, deliver steadier power, and let you sand, cut, or fasten full stretches without losing control halfway through.

    Shops running piles of drills, vacuums, and wood saws know how routine trumps intention. Let bad habits settle in, and even two “identical” batteries will start to drift—one suddenly struggling to hold a charge, the other still running close to spec. Heat and chronic overcharge leave lasting scars. That doesn’t just mean swapping batteries more. It means interruptions when accuracy and pace are what count most.

    Timer Plugs: The Smallest Upgrade No One Regrets

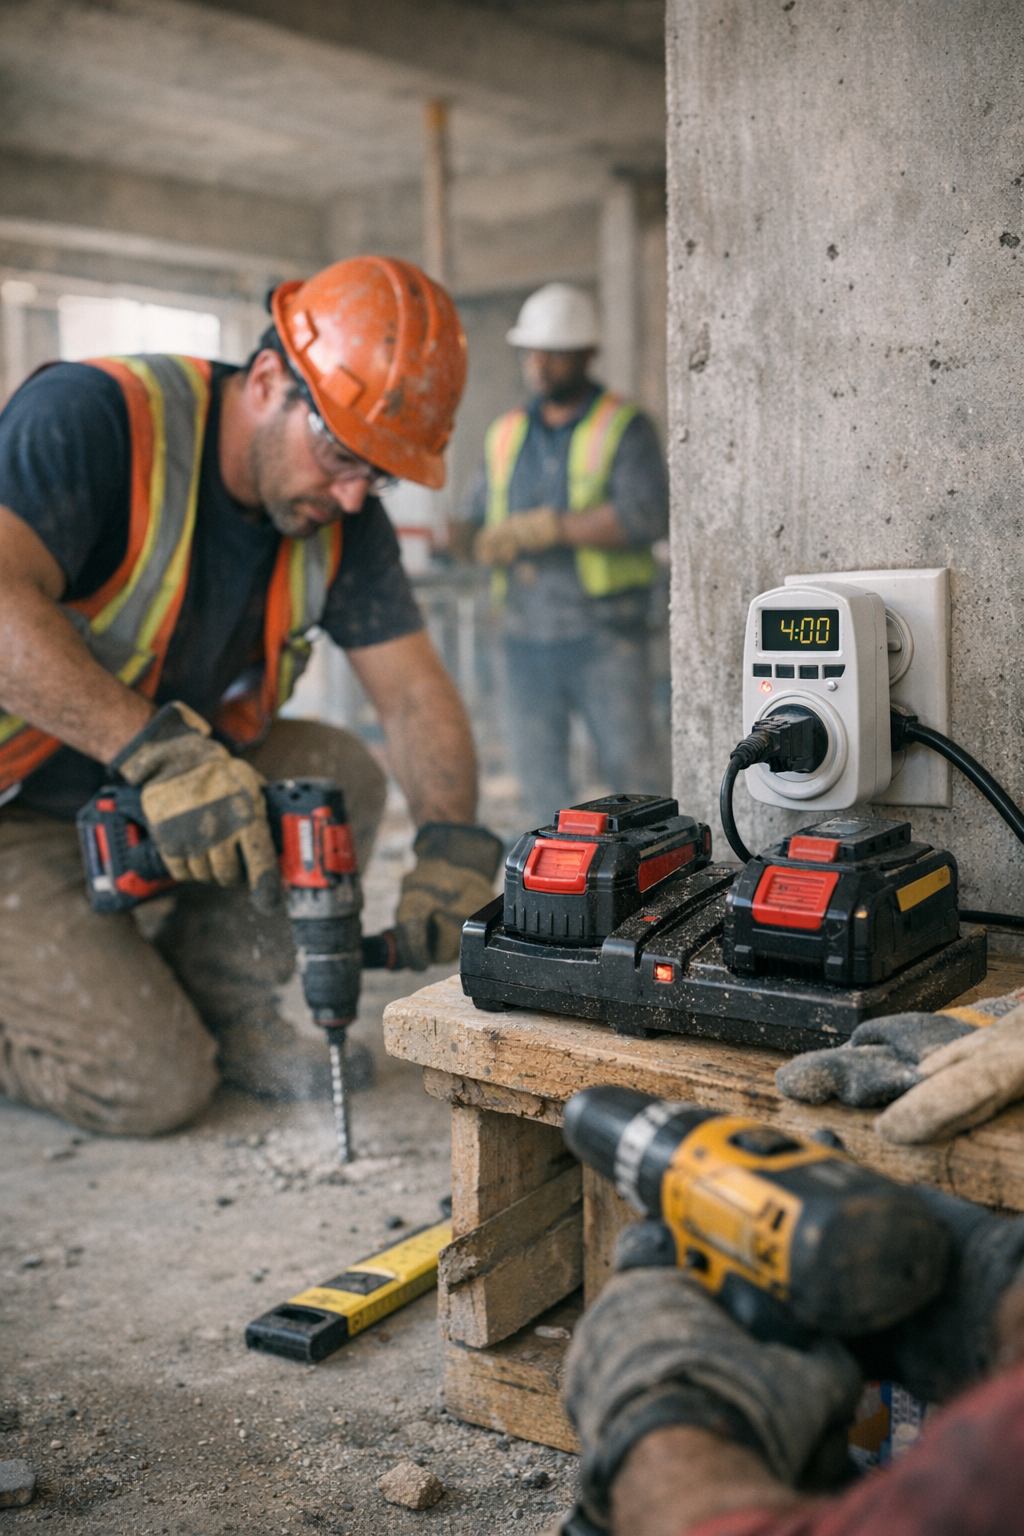
    Here’s one change that sticks: plug your chargers into a timer and set it for four hours—a sweet spot for most lithium-ion tool packs. That’s how you prevent batteries from slow-cooking on charge through a weekend, or from sitting at max voltage all night after a late finish. The shift is instant: cooler packs, more predictable output, gear that goes end-to-end on most tasks without shuffling batteries or changing technique.

    In our own workshop, this one tweak cut out the mid-cut “battery surprise” and meant less tool slowdown—especially on jobs where control and steady torque matter as much as speed.

    Real Warning Signs: When Your Charging Routine Is Losing You Power

    • Batteries overheating after charging or fading early—even through gloves—usually mean chronic overcharge or missed cool-downs.
    • Unexpected tool cutouts right before the finish, or voltage sag when hammer drilling or plunge cutting, hint your packs aren’t holding up under stress.
    • Job after job, runtime shrinking—particularly after leaving packs on charge all night—means your workflow is fighting itself.
    • Packs swelling or no longer fitting flush are red flags of months of fast or careless charging cycles. At that point, there’s no getting the lost performance back.

    No site escapes this completely. All it takes is watching one job get jammed up by dying batteries because “everyone does it this way” and the better habit starts making sense. Watch charging intervals, keep packs cool, and you’ll get more done with fewer breakdowns—not perfect, but enough to keep pace no matter where the next problem pops up.

    Charging Discipline: The Invisible Edge

    No battery lasts forever. But it’s the habits—how and when you charge, whether you break the cycle of convenience—that outlast the sticker on your tools. Pricey gear won’t save a careless routine. But a few disciplined charging habits outlast the tools themselves. You notice it in the quiet moments: when you’re able to complete a long rip cut in a single stretch, drill six anchor holes without voltage drop, or keep your sander running until the fine finish pass—less time scrambling, more time pushing the job ahead.

    Smart charging isn’t dramatic. It’s the background work that lets you focus on skill, not just on swapping packs. That’s what keeps the real job moving—day after day, pack after pack.

    http://gumboll.myshopify.com

  • Why Screw-Mounted Entry Storage Outlasts Rental-Friendly Alternatives

    The entryway is where order lasts exactly until the first real-life return. One bag slung down, and that clean path you set up is already fractured. Shoes, lined up with hope, start splaying sideways by Wednesday. A bench that looked disciplined at move-in drifts two inches every time someone swings a bag past. Not one big mess—just the steady breakdown that happens when storage solutions meet actual daily use. Entryways don’t fail all at once; clutter spreads from the first week, reset after reset failing to hold the line against backpacks, damp jackets, and everyone rushing through the same narrow zone.

    Permanent Mounts vs. Renter-Friendly Storage: The Immediate Divide

    If your security deposit is on your mind, the line is clear: Wall-mounted storage anchored with screws doesn’t care about rental agreements—it stays put, even after winter boots crash through or bags stack up at rush hour. Renters, stuck with rules, go for adhesive hooks, tension rods, and benches that won’t mark the wall. Day one: it looks just fine—a “no-drill” setup holding its pose. But by the second week, the signals start: a crooked hook, a sliding bench you have to toe back, shoe bins edging into the walkway. Lease-friendly storage buys you safety from landlords, but lets daily habits erode your setup one wobble at a time.

    Where Small Shifts Become Big Everyday Hassles

    This isn’t a dramatic collapse. It’s the quiet grind: the rack isn’t where you left it, shoes spill into the path, bags droop lower every day, and the threshold shrinks. Each re-entry nudges storage out of line—by Thursday, what started as an organized “zone” is now a spread of bins and shoes chewing up your walking space. Kids double the drift; a bench for sitting becomes overflow; what was a clear path now forces you into sidesteps and shuffles just to get past. The setup that looked good for a photo never matches the mess of Tuesday night returns.

    Scenes from the Threshold: Ordinary Use, Reluctant Storage

    The friction is quiet but relentless. Shoes quit following their row. Drop a gym bag, come back from groceries, and the bench has prowled closer to the walkway. Hooks set at perfect angles tilt half-down as adhesives soften. What should be a straight divide between “gear” and “walkway” blurs out. Every time you set down one item, you’re nudging three others back into formation: a bench, a bin, the spread of shoes drifting for the door. Catastrophe never comes, but the space asks you to reset it again every single evening.

    Renter’s Dilemma: Protect the Wall, Pay with Constant Rework

    Most leases mean no permanent holes—so renters avoid drills and screws, but the cost hits on the return. Temporary storage starts drifting under real loads: hang up a coat, toss a backpack, and the adhesive rack shifts just enough to throw off the line. The result is a clutter-prone zone that needs correcting after every arrival. Benches back too close to the door, shoe racks drift off-center, hooks hang but don’t absorb any rough use. The “temporary fix” becomes a permanent inconvenience—safe for the walls, but always one step from disarray.

    How Screw Fixes Change Daily Pressure

    Screw-mounted setups stand their ground—literally. Racks hung with anchors stay straight, hooks don’t sag, and a bench stays lined up no matter how fast kids barrel through or how heavy the gear gets. It’s not about brute strength—it’s the way permanent fixes soak up routine impact, stopping the slow creep that sabotages renter setups. Rows stay aligned, and “reset” means a 30-second tidy, not a reshuffling marathon. In practice, a screw-fixed rack above a bench can hold shape for months, handling dozens of weekday returns without a single adjustment.

    The Real-Time Cost of Renter Alternatives

    Put that against the real-world renter setup: a sliding bench, adhesive hooks that unpeel in humidity, bins that drift until the door barely opens. Drop zone order dissolves fast—ten quick returns and you’re dodging the bench edge, the bag caddy has leaned off-square, and shoes now live in the center track. The “flexible” setup you picked to protect the lease demands a nightly correction just to restore any sense of order. Every trip inside is another round of minor, necessary repairs.

    Containment Strategies: Making Renter Setups Work (or Work Enough)

    If you can’t bolt anything down, you have to buy time, not permanence. Heavy rubber pads under benches, non-slip mats, or wedging storage into corner nooks can slow the migration. Even tension rods or discreet brackets can fence in movement for several days. These improvisations aren’t flawless, but they can hold the drift to a couple inches, buying enough stability that a single reset lasts a week, not a day. It’s about blunt resistance, not beauty—keeping the bench from walking and bins from sliding until you get a full week of clear passage before the next shove back into line.

    Small Fixes, Noticeable Gains

    The clue is always in the minor failures: one shoe nosing for the hallway, a bench now living half in the walking zone, hooks that twist under a new bag’s weight. Spot these signs early and blunt the movement with physical fixes—extra friction, modest repositioning—before your entry dissolves into regular chaos. Don’t wait for total collapse: temporary setups only survive repeated use if you actively reinforce them. Stop one drift and you might avoid a dozen resets.

    What Actually Works for Real Entryways?

    No universal answer exists. If permanent anchoring is on the table, routine friction nearly disappears—wall mounts and screw-fixed benches shrug off daily impact. In “no-drill” homes, look for storage with wide bases, low centers of gravity, and natural corner leverage. Plan to add friction—rubber, weight, resistance. If you find yourself moving storage pieces three times a week, your setup is losing the entryway battle, one small drift at a time.

    Entryway Storage Is About Pressure, Not Just Volume

    Don’t count hooks; count resets. The best setup isn’t defined by how much it can hold, but by how well it holds up to repeated cycles of drop, store, grab, and go. Permanent fixes erase drift. Renter-friendly options bend—sometimes literally—under daily pressure, and the flexibility that saves your wall becomes a slow-motion undoing for order. Still, with some simple physical tweaks and attention to early warning signs, you can get most of the stability you need—long enough for the entryway to feel use-ready rather than just photo-ready. But every renter has lived this truth: only a system that actually holds its ground gives you a threshold that isn’t always on the verge of collapse.

    Find storage solutions built for real entry and exit at Betweenry.

  • Creating a Low-Maintenance Indoor Cat Space That Stays Organized

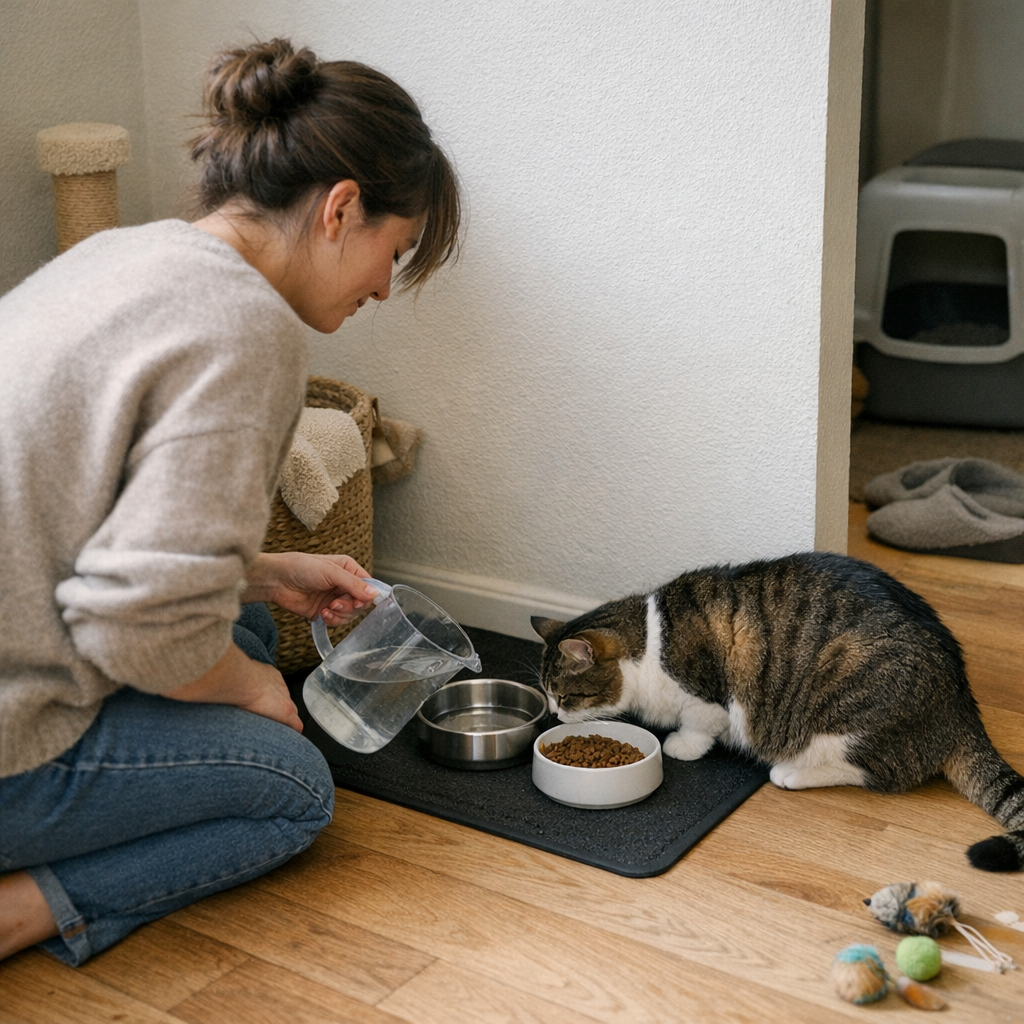
    That feeding bowl always finds its way back into your path, the mat edges are never where you left them, and the floor under the water bowl stays freshly ringed—these are the friction points that don’t go away on their own in an indoor cat household. A new setup might promise order for a few days. It’s only after you settle into your routine—first refill, first real cleanup, first time you try to grab the bowl during a morning rush—that the so-called “organized” solution starts sliding. You wake up to dry kibble scattered just far enough to avoid easy sweeping. The mat, no matter how many times you line it up, folds or bunches by the end of the day. Water bowls refuse to hold their ground, smuggling fresh marks to the edge of whatever tile or wood sits below them. These small breakdowns repeat, creating a loop: smooth start in the morning, slow unravel by night, reset and repeat. With every nudge, sweep, or unplanned wipe-down, “tidy” turns into one more invisible, daily drain—and that’s the real cost most indoor cat setups hide.

    When “Organized” Stops Working: How Everyday Friction Builds

    What looks calm after a reset soon demands extra steps—interruptions your routine can’t afford. Indoor cat spaces aren’t static: a bowl slides during the breakfast shuffle, a toy blocks your refill hand, a mat curls under a chair leg. Appearances hold only as long as no one moves and no cat plays. Each pause to wipe water, chase down litter, or fish a toy from under the cabinet slices into your momentum. Instead of actual order, you get an ongoing series of micro-fixes that eat into your real morning or evening flow, sometimes turning a five-minute task into eight or more.

    Hands Full, Flow Blocked

    Morning: you scoop to refill, but find your wrist catching on the crumpled mat—a quick job slowed by a simple barrier. A stray toy jams the side of your food setup so you can’t sweep crumbs in one pass. Nearly every “organized” zone works until you need two hands free and—right then—need to nudge or reset something before you can reach what matters. The setup that felt practical on day one has quietly added extra steps to each daily loop.

    Hidden Costs of Keeping Up Appearances

    Even after you reset everything in the morning, the odds are high: by nightfall, crumbs return, water edges reappear, and those invisible tasks accumulate. With each stop to flatten the mat, dry a patch, or hunt the scoop, you realize you’ve repeated the same movements more than you notice. The effect isn’t a mess—it’s the friction of effort spent on what was supposed to be a background task. Over a week, untangling these little complications becomes routine in itself.

    Real-World Scenes: Recognizing Repeat Trouble Spots

    Most indoor-cat “fixes” fail by degrees, not in dramatic breaks. You feel it as the same corrections return: mat realignment at lunch, water wiped up mid-afternoon, scratch of litter tracked back across a hallway. These aren’t headline failures—they’re slow reveals of where your setup resists you, day after day, in multiple rooms and flows.

    The Bunched Mat That Never Stays Flat

    Consider the feeding mat: light enough to move when kicked, heavy enough to block a quick sweep. Edge tucked beneath a table leg in the morning, out in the walkway by dinner. Each nudge seems harmless, but the repeated interruption—pause, bend, fix, resume—breaks the illusion of a “done” space.

    Water Bowls That Don’t Hold Their Ground

    Some water bowls seem programmed to skate. Your cat drinks, the bowl shifts, and by week’s end you’re scrubbing a familiar crescent-shaped water mark you just removed days before. What should have been a once-and-done refill becomes a multistep mop-and-placement mission. Not a failure—just a time drain that loops back into your daily routine.

    The Escalating Litter Experiment

    A bathroom or corner litter setup may look strategic, but a thin or slick mat never truly boxes in drifting granules. Dust and litter expand their territory—by the end of the week, you’re sweeping not just around the box but across unrelated floor space. Every placement looks right until the border creeps out, demanding bigger and more regular cleanup.

    The Subtle Difference: Looks Tidy vs. Feels Easy

    The slickest setups fool you the longest. Right after a reset, the scene suggests hands-off calm. But if you’re revisiting, retouching, or resetting one spot more than once per day, that’s a friction warning. The difference between “looks tidy” and “functions smoothly” isn’t in how things appear—it’s in how few repeated actions they force on you.

    When Maintenance Becomes the Routine

    A setup that actually helps drops out of your conscious list. Mats and bowls that stay in place mean refills and wipes flow without adjustment. If you’re touching the same object—be it a mat edge, bowl, or scoop—five, six, or ten times a week just to realign or retrieve, the pattern is quietly stealing time and ease. You notice it when one corner requires a fix almost every time you walk by—signaling it asks more of you than the cats.

    Small Improvements, Noticeable Results

    Sometimes the fix is physical: a mat that stays still, or orienting a bowl into a room corner rather than the open floor. One change—like trading a lightweight pad for a rubber-backed version—can mean the difference between a mat bunched twice per day and one that sits solid through a week. The benefit isn’t dramatic, but it reduces repeated tension, letting you move past the same spot without being drawn into correction every time.

    Feeding, Water, and Litter: Core Points Where Setup Matters

    Cats need few things; setups control your effort. These three friction points anchor most problems seen after the routine sets in:

    Feeding Spots That Creep

    Without grip or weight, any bowl or mat on bare floor is an invitation for items to drift. Cat nudges, a quick push with your foot, or a brisk sweep—and suddenly, feeding gear is not where you left it. Each migration becomes a new pause or quick clean-up, especially when bowls settle into shared space or disrupt foot traffic.

    Litter Scatter That Won’t Stay Contained

    A thin, decor-driven mat won’t block litter for more than a day or two. Every week, the “cat zone” boundary blurs as dust and granules creep outward. The repeated shuffle of mat, bin, and cleaning tools expands your maintenance territory, forcing extra sweeps and more divided room use.

    Water and Food Crossing Boundaries

    Persistent water marks—those that return after every typical refill—signal a weak spot. If you’re grabbing a towel or wipe for the same spot multiple times per week, the bowl or underlay needs a rethink. These are not occasional accidents, but signs your structure makes cleanup perpetual instead of rare.

    Making Seamless Setups That Don’t Call Attention to Themselves

    The best setup disappears into your day. The right structure means a bowl or mat stays where it belongs; you refill, clean, and move on, not double back. Zones keep their limits. Mess stays contained, and routines feel less like a checklist and more like background motion—because you’re not reminded by the same corner waiting for correction.

    Practical Moves That Actually Change the Routine

    • Heavier, Grippy Mats: Choose mats that anchor themselves, so you stop nudging edges and spend less time untangling the floor after meals or litter box use.
    • Bowl Placement: Place food and water bowls against a wall or in a sheltered nook to prevent consistent drift—eliminating mid-walk interruptions and spilled zones in common paths.
    • Litter Zone Edges: Prefer mats with real thickness at the transition. A defined edge traps scatter before it escapes, tightening the cleanup zone from the start.
    • Consolidated Cleanup Items: Store cleaning wipes, scoops, or scrubbers close enough to grab in one reach—without letting them drift into the daily mess or block routine access.
    • Testing Changes: Shift one item or placement at a time, tracking if the usual hassle actually drops. A feeding nook that demands half as many fixes this week is a true improvement—even if it’s just a single mat swapped in.

    Shared Home Space: When Cat Setups Meet Human Flow

    There’s no “cat-only” zone in a real apartment or house. The hallway becomes both a play strip and a throughway; kitchen corners hold both food gear and foot traffic. Every placement competes with your own movement. A setup that looked invisible on day one may block a drawer, force detours, or slow daily routines over time. If picking up a mat or turning a bowl is needed to open a door or put away groceries, the setup intrudes, no matter how

  • How Modular Closet Systems Solve Everyday Hang and Fold Challenges

    Closet frustration almost never hits in a single wave—it builds, shelf by shelf, hanger by hanger, until the system you once trusted quietly betrays you. Shirts jam together until it’s impossible to pull one without dislodging three. Folded stacks, so crisp on setup day, lean forward or collapse sideways. Boxes pressed into “dead space” now block the only clear path. Suddenly, daily use feels like a series of small setbacks: a sleeve caught under a bin, shoes buried under bags, and the idea of resetting the system tonight already feels like too much. If your closet stores everything but lets little work smoothly, the real issue is buried in the setup’s logic, not in everyday messiness.

    Why the Hang vs. Fold Balance Matters More Than It Looks

    Most modular closet setups begin with hopes of order—shirts sorted, jeans stacked, shelves clean-lined. But once you live with it, weak boundaries reveal themselves fast: tightly-packed hangers next to a shelf where stacks spread sideways. If you’re squeezing hangers just to pull out one shirt, or folded piles begin sliding into each other after a week, your system is working against your routine, not with it.

    Notice where the daily flow stalls: grabbing a sweater only to drag out a pile of jeans, hunting for shoes in a two-high stack, or returning items to any open surface because your “home” zone is blocked. Each micro-delay costs you: mornings run tighter, returns get lazier, and a structure that looked organized on Sunday feels unworkable by Thursday.

    Surface Order vs. Functional Flow: The Hidden Fault Lines

    A photo-ready closet can still fail every weekday morning. Two closets can look equally sorted, but if one lets you pull, return, and move without shuffling, it will always outperform a setup where stacks overrun their borders and hangers tangle every time you reach in. Shelves with no dividers invite slow collapse—pile edges bleed together, shirts merge into pants, clean lines blur into a single hard-to-sort heap. Hang bars that end too soon force you to drop clothes onto any nearby ledge, which means even the tidiest reset is fragile. Functional flow cracks wherever category lines are easily crossed, and every “quick fix” makes the next disruption come faster.

    Clutter Creep and the Disappearing Boundary

    The real cost of inefficient storage is in the drip of daily friction. Reach for jeans and tug out a tangled sleeve; open a shoe drawer only to find gym clothes crowding the rails. Each snag takes seconds, but the routine becomes heavier with every repeated interruption. As boundaries blur—folds shifting zones, shoes landing wherever there’s a gap—returns become half-hearted, and temporary piles turn permanent. In tight spaces or shared storage, this creep eats away at access paths until even grabbing one item means moving three others.

    Simple Interventions: How Small Adjustments Transform Everyday Use

    When friction builds, small structure shifts make outsized impact. Swap an open shelf for a divided cubby, and categories stop sliding into each other overnight. Keeping folded clothes at or below eye level cuts out-of-sight overflow and pulls daily use back into view—no more rummaging through shadowed stacks. Adding a modular divider stabilizes piles, keeps different types separated, and nudges everyone to return things to the right zone, not just the nearest surface. These micro-adjustments reduce pileups and slow the cycle of constant reshuffling, especially when time’s already tight.

    Recognizing When Your Setup Isn’t Working for You

    If returns stack up on the wrong shelf or you stop using half the closet to avoid backtracking, the issue isn’t untidiness—it’s a mismatch between your habits and your zone breakdown. Signs your current setup is sliding:

    • Hangers pressed too close together to slide out smoothly
    • Stacked items tipping or spreading beyond their assigned space
    • Walkways or open spots blocked by shoes, bins, or overflow piles
    • Needing to clear several things just to reach one

    Most of these issues snowball when certain shelves become “catch-alls” as adjacent areas overflow. Modular closet systems help—like slotting in extra cubbies or adding a shelf at reach level—but the upgrade only works if you adjust for repeated, real-world use, not a once-a-year reset.

    Functional Organization Isn’t Set-and-Forget

    It’s easy to assign roles to every shelf and bar at setup, but daily reality almost always shifts those plans. If you keep layering trouble zones with temporary fixes—stashing loose items on whatever edge stays open, reaching over one pile to drop another—you’re just rehearsing the next clutter cycle. Physical dividers, bins, or split shelves act as gentle barriers, stopping category drift where it usually begins.

    There’s the hidden drain: the endless reset. Whenever you spend more effort reordering the closet than actually using it, the layout is working against you. Sometimes the fix is as basic as a divider for shirts, or boxing away off-season gear to clear prime real estate for what’s always in motion. The flexibility of modular systems only pays off if you notice and adapt to the specific patterns derailing your routine, not just the original blueprint.

    The Real Difference: Looks Sorted vs. Feels Usable

    A modular system only succeeds if it holds up under everyday pressure. After a week, the right structure makes retrieval instant—a single reach, not a sequence of re-stacking or clearing. Returns become simple instead of another task to avoid. Even when a day goes sideways, categories stay tethered to their zones and resets don’t swallow your evening. The signals are subtle but clear: fewer ad-hoc piles along the edge, boundaries that actually keep categories apart, and no more delays caused by drift or spillover.

    The measure isn’t shelf aesthetics but repeated movement: watch for pathways tightening, categories leaking into each other, or the space that’s organized for show but stalls in real use. When each part of the system actually fits the way you reach, return, and reset, you fight less with small routines and spend less time on upkeep—and your closet works harder for you with every cycle.

    See how inside-storage systems can match the way you actually use your space at Gridry.

  • How a Buffer Bin Transforms Everyday Clutter into Organized Spaces

    Most storage setups look perfect—right up until they meet your actual routine. Open the closet or step into the entryway on day one and everything feels ready: shelves lined up, baskets crisp, every bin promising that this time, things will stay in place. But fast-forward three days. One rainy morning, shoes pile up near the door. The mail ends up marooned on the bench. Grocery bags hitch a ride with jackets, and folded stacks begin to lean, already losing shape. The plan for “everything in its spot” gets outpaced by the churn of daily life—and the friction starts to show up everywhere you look.

    When Order Starts to Slip: The First Signs of Storage Breakdown

    That slippery slope from organized to “almost organized” often starts small. You promise you’ll file the mail soon, but the envelopes edge out from the counter anyway. Shoes multiply right where you want open floor. A gym bag lands in the ‘wrong’ cubby, and now jackets, backpacks, and random books start to blur the original categories. Even thoughtfully labeled bins become catch-alls. Each item not easy to slot finds the nearest flat surface—whether or not it fits the system.

    Without fail, shelves fill up too quickly, folded stacks collapse, and corners become limbo for forgotten things. The room still looks decent for a while, but that reset you used to do in seconds now takes a full sweep and some second-guessing. You spend more time shuffling items than actually using them.

    Where Most Systems Fall Short: The Need for a True Buffer Zone

    Storage solutions tend to assume objects fit tidy categories—but real life rarely agrees. This is where a buffer bin makes a difference: it is a dedicated, visible landing zone for what’s “in between.” Unsorted mail, shoes drying off, a bag without a home for an afternoon—these don’t get mixed into permanent storage, but they aren’t left to wander. A buffer bin keeps these “mid-task” items from taking over surfaces or causing endless reshuffling.

    Without this buffer, the divide between what belongs and what’s just visiting disappears. Baskets that start for hats become a pile of everything. Counters are suddenly half mail, half chargers. The difference isn’t just visual—resetting the space slows down, and the house feels like it’s always “in progress,” never clear.

    Real Example: The Entryway Juggle

    Imagine the usual rush—raincoat dripping, mail in one hand, a leash in the other. Hooks are tucked behind coats, shelves are full with shoes that haven’t dried yet, so you improvise. The umbrella sprawls to dry by the door, mail stacks up on the closest surface, and the leash gets tossed somewhere you’ll have to search for it later.

    With a buffer bin right by the door, the routine shifts: it becomes second nature to drop those damp shoes and stray mail in one container, just for now. It’s contained, in sight, but not “put away” until you’re ready. Resetting takes a quick pass at day’s end—not a scavenger hunt.

    How Buffer Bins Change Storage Performance

    The right buffer bin turns repeat friction into a single, manageable stop. No more reaching around a pile of shoes to grab your bag or moving three stacks to find a jacket. The bin contains overflow, keeps categories clearer, and trims down the mental drag of “where does this go?”

    Here’s what a buffer bin routinely prevents:

    • Mail towers crowding surfaces you actually use
    • Shoes creeping across the walkway to the stairs
    • Chairs moonlighting as storage hooks
    • Bins becoming a guessing game instead of a shortcut
    • Shelves losing vertical space to “temporary” piles

    On the days where everything runs late, the buffer bin is a safety net. It keeps stuff visible but out of the way, making resets faster and helping every category keep its shape. You stop reorganizing on the fly and spend less time fixing yesterday’s clutter before you can start today.

    Choosing the Right Buffer Bin: Size, Shape, Placement

    Too big, and the buffer bin will quietly become a black hole for odds and ends. Too small, and overflow just starts up again outside it. The sweet spot? About a foot wide—just enough room for a couple of pairs of shoes or a day’s mail and keys, but not so much that things get buried.

    Open-topped bins pull their weight here. You see what’s inside at a glance, and access is instant—key for quick drop-offs when your hands are full. Try putting one on a low shelf near the closet door, or right under the hall bench. In my own routine, I dedicated a lower closet shelf: shoes, mail, water bottles—a day or two’s worth of “between” items, all in one spot. No more hunting lost gloves behind other bins or refolding piles toppled by a bag in the wrong place.

    Keeping the Buffer Bin Useful—Not Just Another Junk Drawer

    A buffer bin’s power is in its regular use, not its capacity. If it’s becoming a permanent hiding spot, it’s lost the plot. Try this approach:

    • Use only for items that are truly “in transition”—the stuff you know you’ll touch again soon.
    • Commit to emptying or sorting it every day—or every other day at most. It should never feel like its own category.
    • If it’s getting tight, don’t upgrade the bin—treat that as your signal to reset, not to accommodate more overflow.

    A smooth habit loop—drop, then resolve—makes tidying less of an ordeal and cuts down on unfinished “piles.” When everyone in the house makes the buffer bin a pause point, there’s less nagging and less friction around who’s responsible for the spreading mess.

    Habit Builder: Pair It With an Existing Routine

    Tie a quick buffer bin check-in to something you already do. Maybe it’s when you hang up your jacket, or the moment you swap work shoes for slippers. By linking it to a built-in trigger, the buffer becomes part of the rhythm: a rinse and reset instead of a looming chore.

    The Practical Payoff: Resets That Actually Stick

    No storage hack erases the chaos of real life, but a buffer bin makes order a repeatable outcome, not a one-off illusion. Instead of a constant battle to keep surfaces clear and shelves behaving, there’s a predictable spot for “not yet sorted” stuff. Overflow doesn’t leak onto every surface. Categories stay more separate. Resetting takes seconds, not an evening.

    The result isn’t perfection—it’s steadier footing. Less hunting, less shuffling, and quicker recoveries from life’s everyday bumps. You might still have a wet shoe or stray envelope, but you won’t lose the plot before the end of the week.

    Shop ClosetWorks for more practical storage solutions

  • Streamlining Daily Cat Care: How Organized Setups Reduce Routine Interruptions

    Daily Pet-Care Routines: Where Small Friction Becomes the Real Challenge

    If your cat circles at your feet every morning, you already know the routine rarely breaks down because of what you forget—it’s because of what you can’t reach or reset fast enough. You reach for the refill bottle and it’s blocked by last night’s dishes. The brush is on the wrong counter. Food bowls look clean, but sticky edges hang around because the wipe or towel was somewhere else when needed. Clean counters and tidy storage only solve half the problem; the real drag comes from simple, repeated interruptions that slow down basic care and turn “just a minute” into three or four. This is the pressure point CalmPetSupply products aim to relieve: setups that let you finish the routine before your pet gets restless—or before that minor inconvenience becomes a daily repeat.

    How Minor Delays Compound During Real Use

    A normal morning routine rarely goes as planned for long. You move to feed your cat, but a stack of mail crowds the food bowl’s usual spot. The water refill bottle didn’t return to the feeding area after the last use—so now it’s a detour to the other side of the kitchen. You remember the brush just as your cat jumps onto the table, only to find it left in the bathroom. Each minor delay creates an endless loop of micro-detours. Cleaning wipes left “handy” by the sink turn out to be just out of reach at the wrong moment. Wet food residue dries onto the bowl when you expect it to be a quick-clean task. Tools misplaced or absorbed into general home clutter add seconds, then minutes, and the routine grows heavier the more the system is forced to stretch.

    Visible Steps Expose Weak Points

    Every step your cat observes is a chance for you to notice a gap: a grooming brush buried under a kitchen towel; the cloth for a fast wipe-down trapped in a jumble of unrelated supplies. Skip the wipe and you pay for it later, with stickier messes and longer resets. Feeding feels complete until you realize the next meal starts with more leftover mess than before. Care routines that look tidy in the morning often fragment by evening as the tools you need wander, busy surfaces fill up, and the area’s original order quietly unravels. Real efficiency isn’t just about visible tidiness—it’s about having every essential ready, right where and when you need it.

    The Disruption of Everyday Clutter

    Pet tools are experts at drifting into shared space: wipes end up next to coffee mugs, a food scoop hides in the back of a utensil drawer, refill jugs end up behind laundry baskets. The first week after any deep clean feels smooth, but routines grind again as quick access is interrupted and supplies spread out. Clutter isn’t the only signal—delayed resets, bowls soaking next to pans, and ignored messes all signal that a supposedly “organized” layout can still interrupt the flow of care. The setup that looked good after cleaning starts introducing friction every time you try to repeat the simple basics.

    Repeated Reshuffling and the Illusion of Order

    Order fades faster than anyone expects. After a reset, the feeding area appears ready. But the same weak spots reappear—a refill bottle that always migrates away, a brush that never stays near the food, scoops lost after one round of kitchen chores. Makeshift solutions like tossing wipes on the counter help one day, then become clutter the next. A spill mat simplifies feeding but creates awkward edges that block quick sweeping or trap crumbs along its border. Convenience in one place breeds inconvenience somewhere else, and every patch solution puts off the next small disruption, not ends it.

    The Real Test: When the Routine Meets Real Life

    Most routines look fine until one item isn’t where it’s supposed to be. Reaching for a wipe-down cloth and finding it in the laundry means you skim past cleanup now and make extra work for yourself later. Litter stays unscooped a bit too long because the spare bags disappeared from their shelf. Water bowls get reset late because something else blocked your quick route to the sink. These aren’t big mistakes—just routine care where every missing basic demands a longer detour, interrupts the flow, and stacks up extra steps the next time around. The most frustrating part is how quietly these small gaps multiply, especially when your cat is counting on the routine to stay smooth.

    Setup That Looks Tidy, But Interrupts

    Surfaces clear, supplies tucked away, floor looks spotless—yet care gets slower, not easier. Quick “out of sight” storage often means the brush is never where you actually use it, the refills are always on the wrong shelf, or the wipes are stored just far enough away to forget. You find yourself rearranging the “pet zone” every few days, but the problem isn’t how it looks; it’s the missing basics at the one moment they matter. Skipped grooming, lingering odors, or tracked litter are all signals that hiding supplies does nothing for true flow. Real order is the setup that actually makes you faster and less likely to break the rhythm of care.

    Restoring Flow: Practical Adjustments Make the Difference

    The fastest way to cut this daily drag is practical rethinking, not reinventing every step. Place the refill bottle at the feeding zone—not wherever is “out of the way.” Hang the brush where you always use it. Keep wipes and scoops within grab-range, even if that means giving up a little counter space. Every friction point—whether it’s tools wandering into other rooms, messes waiting until later, or supplies drifting out of the core area—signals one adjustment that can end a recurring hassle. It’s not about perfection: it’s the right basics being simply within reach, resetting quickly, and reducing both visible mess and hidden stress with every round.

    When the smallest obstacles keep repeating, the difference between “looks fine” and “actually works” matters most. Practical setups—like those built around CalmPetSupply basics—keep routines flowing, keep cats and humans from circling the same problems, and let real daily care get just a bit easier every time.

    Find practical setups for low-friction pet care at CalmPetSupply.

  • Why Carry-On Organization Should Prioritize Quick Access Over Perfect Order

    The real airport test isn’t how neat your bag looks at home—it’s how fast you can pull a passport when the line behind you starts shifting. You close your carry-on in your living room, everything perfectly sectioned into pouches and zipped away, but that control dissolves the first time a gate agent asks for your ID and you’re bent, awkward, peeling back layers you packed just an hour ago. Travel friction isn’t the mess you see; it’s the seconds lost fumbling with order that only holds up when you’re standing still. That’s the core challenge: the tidy structure that made you feel ready at home becomes a liability as soon as you need fast, single-motion access—exactly when every other traveler on your route is crowding closer, watching you unpack and repack what you thought was “organized.” CarryOnSupply lives at that intersection: where something looks under control, but the real difference is how smoothly it works when you actually have to move, retrieve, and reset, again and again, in real airport time.

    Order Isn’t Access: When Tidy Packing Becomes a Trap

    The zipped pouches, wrapped cables, and stacked organizers promise order—but every layer adds a step between you and what you actually need in motion. That “everything has its place” system breaks down with your second retrieval: you open the main compartment, unzip a small pouch, and still have to fish past other organizers to get your charger. Meanwhile, you’re blocking half the security tray, and what looked streamlined this morning now feels like a slow-motion rerun of the same struggle, repack after repack.

    The friction isn’t random: Travel isn’t about losing items, it’s about repeated friction points stacking up—dragging over zippers, pulling pouches, making each retrieval feel slower and more public the more you repeat it. Grab your boarding pass at security, ID at the gate, headphones at the next layover—every motion exposes how “packed right” gives way to “packed away.”

    Multiplying Slowdowns: Stacked Calm Turns into Sequential Delay

    If your setup depends on everything staying in its precise spot, small problems multiply. Three-layer pouch logic means every urgent document check forces a main-compartment unzip and pit-stop repack, no matter how short the line. When pressure builds—like at a fast-moving security line or busy terminal checkpoint—the difference between visual calm and access fatigue isn’t theory. You only need to dig for a buried cable or a wayward passport once for the tension to spike: you’re either holding up the queue or sacrificing order for speed, every time you reach in and don’t immediately come out with what you need.

    Security Trays: Where Setup Weakness Shows Fast

    Think of the tray transfer: your laptop is up top, but your ID just got nudged below another pouch. Suddenly, “main compartment tidy” means your essentials are deeply nested, and every extra retrieval adds up—items shift, organizers bunch, and your bag’s control system works against you instead of with you. Everyone behind you can feel it: you repack hastily or, worse, shove everything in and lose the structure altogether for the rest of the trip segment.

    Main Compartment vs. Outer Pocket: The Practical Shift

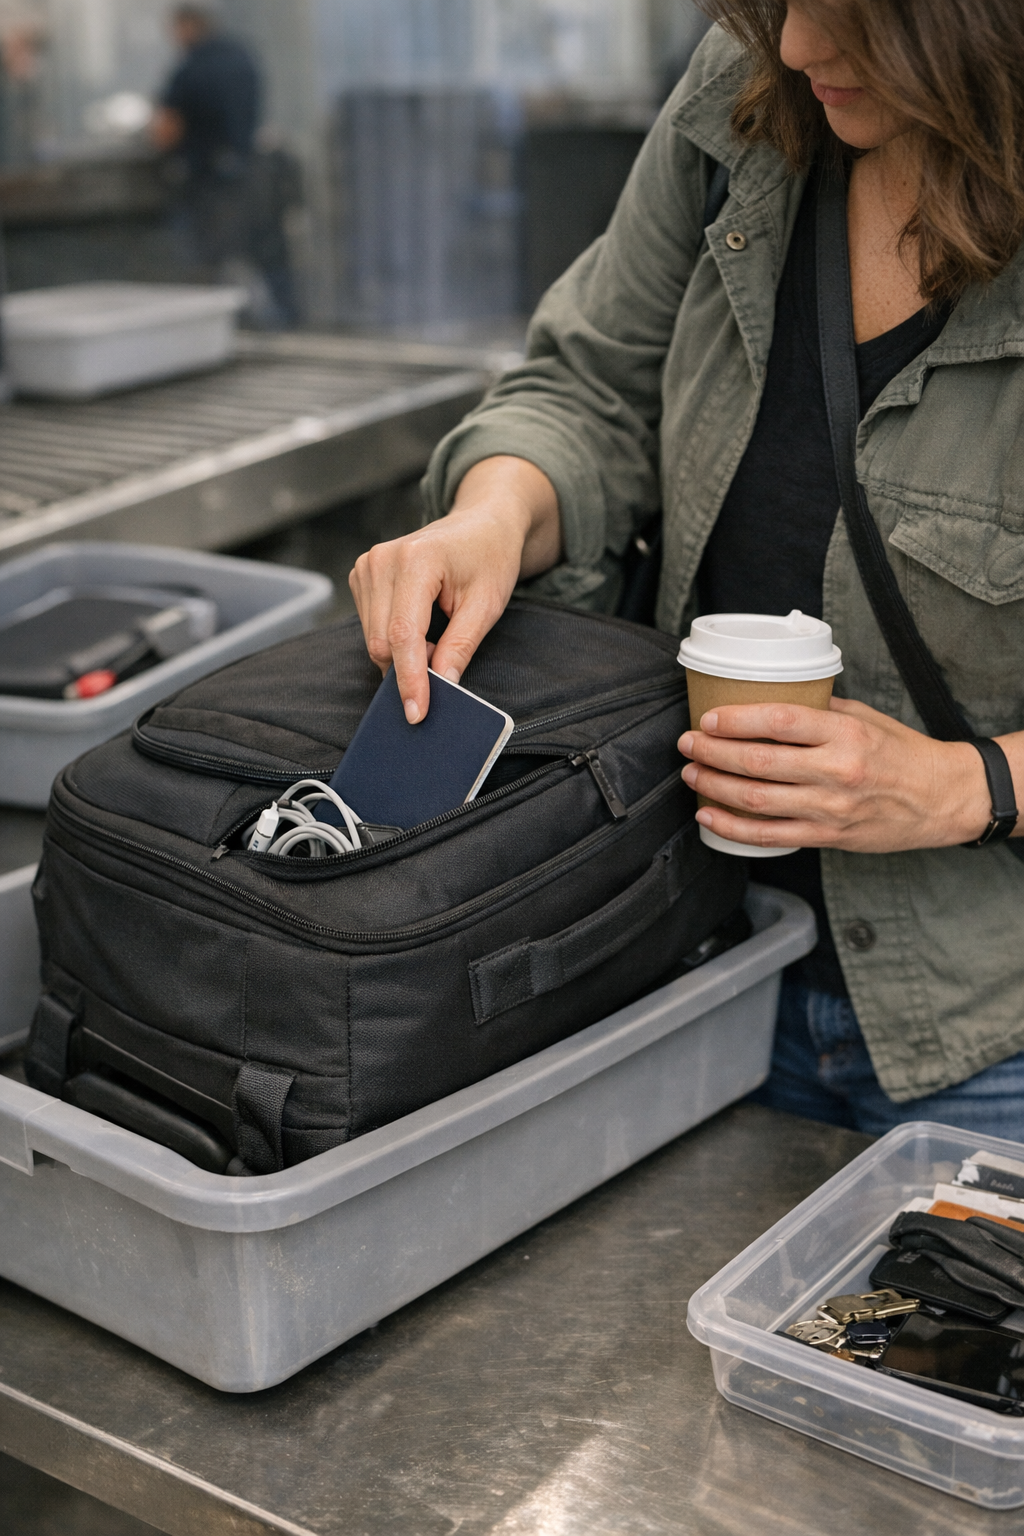
    The biggest upgrade is often the simplest one: a wide, interruption-free outer zip pocket at arm’s reach. Shifting the critical items—passport, ID, charging cable, small tech—from main compartment to an edge position means you’re no longer undoing layers just to survive an ordinary checkpoint. From above, it might look more “in use” than “on display”—but that’s honest: three retrievals in thirty minutes shows you which design is slowing you down and which is letting you keep pace, especially when the line moves or a sudden call for documents drops in mid-queue.

    What matters isn’t how “clean” your packing looks after the first leg; it’s how quickly you can move without breaking your system. A dedicated outer pocket makes routine retrieval—boarding pass, ID, headphones—a two-second motion, not a production. Those small time savings stack up, especially when you’re boarding, transferring, or sidestepping in a crowded terminal with only one free hand. On a second or third trip, you don’t just remember the convenience—you rely on it, and you stop dreading every required check.

    Hidden Friction Reveals Itself Over Every Segment

    Every airport checkpoint is another chance for perfectly arranged packing to become a nuisance. Each retrieval—passport, charger, headphones—is a repeat test. A pouch system with too many nested layers promises security but delivers inefficiency. The illusion of order fades as soon as your bag has to move repeatedly, or when you’re forced to expose and rearrange three sections just for a single document. The longer the trip, the more this friction becomes obvious; every time you have to pull or re-layer, you’re burning time, focus, and patience. What looked “secure” on the rug becomes pure drag when you’re called to show a boarding pass with one hand while the other holds your coffee or flight snack.

    Boarding, Seat Entry, and Micro-Delays That Stack Up

    See the usual failure point: You’re in the boarding line, bag on your shoulder, cup in hand, and the gate agent calls for boarding passes right now. Your main compartment is zipped, your order intact—until you have to slide the whole bag off, unzip, sift past two organizers, and pull what you need from inside. You either hold up the line for an awkward second or do a sloppy grab-and-stash, immediately disrupting the organization you spent time building. Meanwhile, the traveler beside you, with passport and pass in a slip pocket, just steps forward—no pause, no reshuffling. Revisiting this problem on short, crowded flights is where the gap between “visually organized” and “actually usable in motion” widens with every segment and every micro-delay.

    Making Carry-On Structure Match Real-World Movement

    Moving must-grab items—documents, phone, headphones—from deep layers into a clean, always-accessible outer pocket isn’t just a cosmetic change; it fundamentally shifts how often your bag structure fails or holds up. A wide, side-panel zip; a shallow tech zone; a direct-slip passport pocket: these design choices mean you can retrieve what matters most in seconds, even after multiple uses. The main compartment stays almost untouched, your system doesn’t collapse after five retrievals, and on your fourth gate of the day you’re not rebuilding from scratch.

    Main-portion order survives, while outer pocket activity absorbs the friction of repeated access. After five flights or thirty retrievals, the setup that trades a bit of “packing symmetry” for ongoing function consistently comes out ahead—not just in time saved, but in the energy you don’t spend managing your carry-on’s order between segments, lines, and unexpected delays.

    Will Your Setup Survive Real Travel? The Fifth-Trip Test

    Packing “for looks” and packing for repetition will produce completely different outcomes by trip number five. True, it’s satisfying to stack pouches and wrap every cord, but those setups struggle the most when quick access is forced under pressure. Over time, even one slow document retrieval or poorly placed slip pocket can make you question the whole system. The best test isn’t the first journey, but the one where you’ve run your bag through thirty segmented uses, ten repacks, and several moments where order needed to be rebuilt—not just preserved. The structure you trust is the one that stays low-friction, usable, and intuitive move after move, even as conditions change and patience thins. If your carry-on makes those retrievals disappear into routine, not friction, then it’s doing the real work—not just looking organized on your bedroom floor, but performing in every travel moment that counts.

    Find practical carry-on solutions at CarryOnSupply.

  • Simplify Your Pet Travel Setup for Faster, Stress-Free Trips

    Why “Organized” Pet-Travel Bags Slow You Down When It Matters

    The promise of an organized pet-travel bag fades the instant you hit real-world chaos. You grab your kit, confident it’s all set—treats, wipes, waste bags, even a comfort blanket. But the moment your dog lunges at the leash near traffic or you’re juggling keys in a busy lot, that sense of order cracks. Instead of quick access, you’re fighting through overlapping pockets, shifting pouches, and blocked zippers—trying to find one wipe while your dog twists and the car door lets in cold air. Preparedness turns messy, not because you packed wrong, but because your bag’s very structure works against you in motion. This isn’t an occasional hiccup; it’s a repeat friction anyone who travels with pets recognizes, especially once stops and movement start stacking up. PawGoTravel exists for pet owners who have outgrown setups that only look neat at home.

    When Extra Features Turn Into Everyday Friction

    Adding more compartments, pouches, and clever pockets seems smart until you’re on your third roadside break and realize you’re always opening the wrong section first. Treats now wedge under a folded mat; the leash knots in a layered pocket; wipes fall behind a travel bowl. Each “just in case” section costs you time just when patience runs thin—yours and your dog’s. What felt organized in your living room actually slows down every grab-and-go during travel. Real problems start small: one extra zipper, one pouch too deep, and you’re left shifting aside comfort items just to reach the cleanup gear you actually need. In stressful moments—muddy paws, sticky accidents, anxious dogs waiting with clipped leashes—over-organization becomes its own obstacle.

    Gradually, you feel it: every minute spent fishing for a wipe or digging out waste bags is a minute your pet grows restless and your car seat grows messier. Your repeated stop-and-go rhythm now comes attached to repeated bag reshuffling, turning short pauses into preventable headaches.

    Over-Organization’s Real Cost: Lost Seconds, Visible Stress

    Pet travel isn’t built around perfect conditions. You face messy weather, a restless pet, a rushed snack, or an awkward refueling stop. Need a wipe? It’s slipped beneath the treats again. Waste bags? Buried under something you didn’t use last time. These blocked moments don’t just slow you—they break your travel flow, multiplying stress both for you and your pets.

    You don’t notice the real problem at home when you’re calm and everything’s in its place. It becomes obvious the third time you fumble for a leash clip with a squirming dog and realize the only way to get to it involves unzipping, shifting, or unpacking other things first. The “prepared” kit turns into a seat-side scramble, every time.

    Cleanup Isn’t Optional—and Organization Can Get In the Way

    Most cleanup moments leave you zero time for fumbling. Muddy paws, quick accidents, leftover food stuck to fur—these demand instant wipes and bags right where your hand goes first, not nested under another pouch or zipped behind something else. Every extra motion means muddy pawprints climb further into your seat, or a restless pet grows harder to control. The wrong bag layout leaves you managing pouches and mess with traffic moving, doors open, and stress rising.

    Direct Access: The Real-World Advantage

    A setup that looks streamlined on your home bench often buckles under the pressure of repeated movement. The real test? Can you grab your wipes or bags in one motion, without shifting other items aside? Direct-access setups—single-layer pockets, open at the seat edge, facing out every time—cut down delay to nearly zero. No double-zipper interference. No detour through a treat bag to reach the essentials. You go from “where did it go?” to “done” in one grab, even as your dog tugs and your hands are cold or full.

    This is the difference: neatness that means nothing in repeated real use versus a bag whose structure actually keeps up when you can’t slow down. If you’ve ever restuffed and reorganized the same bag twice in an hour, you know exactly how much smoother direct access feels.

    Ordinary Stops—Consistent Weak Links

    Most pet-travel stress isn’t about rare emergencies. It’s quick stops—stretching legs at a gas station, a bathroom break, a roadside snack when the dog is restless. In these ordinary scenarios, layered organization becomes the silent tripwire. Bowls wedge beside treats. Wipes slip behind blankets. Even a “just in case” pouch becomes the section you dread opening. The friction is real and predictable: small delays, small messes, and the same minor reset after every use.

    Multiply these by three stops, five restarts, and a drive that’s already running long, and the frustration leaks into the rest of your trip. Each mishandled pocket isn’t just a moment lost—it’s a bit more fatigue, a bit less readiness for the next step.

    When Less Actually Means Faster and Calmer

    Once you remove the extra layers—nested pouches, triple zippers, pockets-within-pockets—you finally see the benefit of “just enough.” With the few essentials—wipes, bags, treats—lined up in a simple, open outer pocket, you reach what you need the first time. No shuffling. No blind search. Even with one hand managing a leash and a dog bouncing halfway into the front seat, your cleanup or reward takes seconds, not minutes.

    The result is hard to ignore: stops don’t lag, tension drops, repeated reshuffling disappears, and you don’t come home frustrated by the kit you thought would help. What remains are only the essentials you now trust, always where you need them, ready even on the messiest days. It’s the real difference between travel that looks organized—and travel that actually flows.

    See more practical pet-travel solutions at PawGoTravel

  • Why Ground-Level Lighting Transforms Safety and Usability Indoors

    A room can look bright on day one and still work against you a week later. Ceilings fixtures easily trick the eye: hallways seem clear, but each sweep for dropped keys or lost socks exposes dark corners. Stair treads dissolve at the edges; a shallow step blends into the landing, and routine becomes uncertain. In laundry rooms, new overhead lights still leave machine bases and cabinet edges shadowed—so you end up scanning on hands and knees, searching by feel instead of sight. The most common indoor-lighting flaw isn’t “not enough light,” but misdirected light—overhead pools where you don’t need them and shadow wherever you do.

    Why “Grounding” Your Lighting Matters Most

    In every real routine—reaching for towels, carrying baskets up stairs, crossing a corridor in bare feet—lighting either reinforces your confidence or subtracts from it. Relying solely on ceiling fixtures, even with plenty of wattage, builds a false sense of visibility. Overhead pools leave sides and edges in darkness, so floors turn uncertain as your eye hunts for boundaries it can’t read. The most persistent mistake? Ignoring ground-level and work-surface lighting. Over days, these missing layers turn a room from “looks fine” to “missed step, squint, lost earring—again.”

    Daily Friction: When Visibility Lags Behind Looks

    Repeated friction is both small and constant. You hesitate at a stair turn. You watch a cap or sock fall, only to realize it’s vanished under the cabinet edge. You clean along baseboards you don’t fully see, trusting touch over light. Laundry work slows as you retrieve random buttons from floor shadows. Hallway crossings turn into quick glances over your shoulder as one half of the passage disappears into murk, despite a confident glow overhead. Friction adds up: every micro-delay or small risk is a direct result of missing, poorly directed light.

    Catching the Invisible Corners: Real Scenes in Everyday Spaces

    Stairways and Landings: Where Shadows Catch You

    Stair setups betray their gaps in the rhythm of use. Near the bottom, steps flatten together as dusk falls, and that ankle-pause becomes unconscious—especially with arms full. At turns and landings, you half-guess the newel post or edge, moving slower than the space “should” require. This isn’t a style issue: mounts at low wall height or discreet LEDs at stair bases “set the line” clearly. One glance, even in a rush, and your footing is sure. You notice the absence of this clarity most when hurried—when one dim stair nearly undoes the whole routine.

    Vanity and Mirror Zones: The Glare/Squint Cycle

    Mirror lighting is often chosen for appearance, but placement rules the outcome. Fixtures set high or chosen for shape, not spread, throw harsh stripes across your face. You lean closer, chasing usable reflection, but the work surface below still sinks into shadow. Every early morning brings the same glare-squint-repeat; your jawline vanishes behind bright patches, and counter edges blur. Lower, better-aimed task or wall lighting slices through this pattern—stopping the squint and bringing detail back. Weeks later, you realize forgotten habits have faded: no more leaning in, no more hunting for stray objects in the dark.

    Laundry and Utility: When Small Lights Solve Large Problems

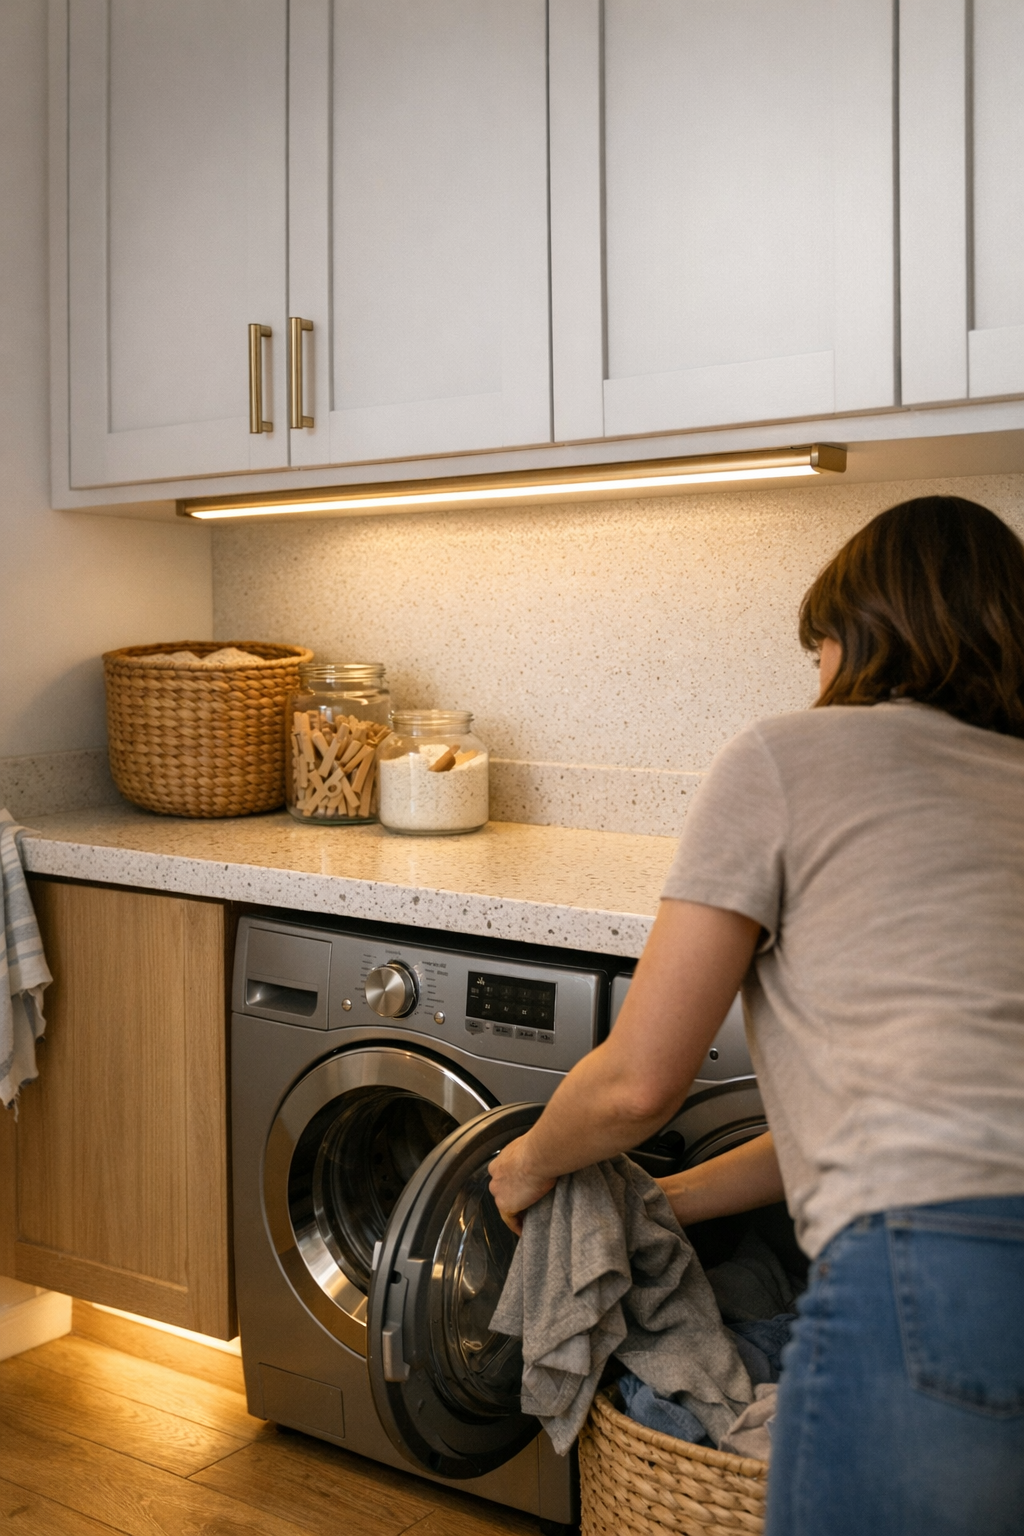
    The usual laundry nook “upgrade”—a flush or semi-flush ceiling mount—creates even, central light but allows every edge to sink into shadow. The difference comes with one targeted change: an under-cabinet LED strip, maybe 18 inches, set at toe-kick height. Suddenly the base of every appliance is plain, the floor stays readable, and socks can’t vanish into gloom. Instead of unnecessary detours and dropped items, the routine tightens up—movement feels direct, and cleanup doesn’t miss anything hidden.

    How Lighting Setups Fall Short During Real Use

    The letdown isn’t visible during install. After a ceiling fixture goes up, or a builder’s allowance of layers is ticked off, spaces look “lit” for photos. But as the week plays out, familiar strains return:

    • Patches of glare make you shield your eyes and change direction.
    • Mismatched vanity or mirror light leaves stray hairs and lost outlines.
    • Fuzzy baseboards, stair treads, and storage edges mean more scanning, slower steps, and constant retrievals.

    These aren’t abstract defects—they point directly at light that lands wrong, or simply never lands where your routine actually happens.

    It’s Not Just About Output—It’s Where the Light Lands

    Brighter isn’t always better—just more misleading. Increasing ceiling wattage pumps up overhead glare and deepens floor shadows. Most “visibility” gains here are illusory. A single small wall sconce or under-cabinet run often delivers more movement confidence than a full upgrade to the primary fixture. The key: place light where you look, step, and use your hands, not just where the wiring is easiest. “Grounding” means visible, workable light in the lanes and surfaces you actually touch—nothing more technical, just that direct.

    Quick Real-World Tips: Lighting That Grows More Useful With Time

    Choose Task Over Decoration—At Least First

    If you find yourself pausing, hunting for objects at floor or counter level, or stepping wide to avoid darker zones, you need fixtures designed for direct, usable output. Start with task and directional lighting; add decorative or accent pieces only when your movement routes feel obvious and clear.

    Don’t Ignore the Edges

    Persistent dimness along stair edges, hall corners, or cabinet bases is a clear signal: the perimeter needs its own layer. Cheap or compact toe-kick LEDs, wall-wash strips, or nearly invisible sconces do what overhead lights never can—break up edge shadows and provide side-to-side visibility you feel with every step.

    Bathroom and Laundry: Pick the Right Rating for Dampness

    Laundry alcoves, near showers, or basement halls attract moisture, which quietly breaks or stains ordinary lighting over time. Always look for “damp-rated” fixtures for these spots—one swap now saves you from corrosion, dimming, and slow fixture failure later, and keeps the routine uninterrupted.

    When a Room Looks Ready, But Still Fights Routine

    A room is “done”—until real use exposes the cracks. If the first week after install includes:

    • Missing or hesitating on stair treads—especially in a rush
    • Squinting at edge details or at the vanity
    • Constantly losing objects to low dark corners
    • Your own footfalls feeling uncertain before dawn or after dusk

    —your foundational lighting wasn’t built for movement, search, and use. Adding a toe-kick LED, a wall sconce near the floor, or a true task fixture near work points often undoes years of annoyance. The change is immediate and practical; “finish” becomes about function, not appearance.

    The Real Impact: Routines Become Smoother, Safer, Less Frustrating

    Lighting isn’t done when a space looks bright—it’s only done when routine movement feels unforced and everything you touch, step on, or search for looks exactly as visible as needed. Lighting that’s grounded—layered to match your real paths and points of use—removes awkward corners from daily life. Fewer dropped objects go missing. Movement feels direct, not interrupted. There’s no generic template: the right fixture always fits your space’s structure and your routine’s friction points, not a decorator’s scheme.

    For more practical ideas and proven lighting options, visit LightHelper.

  • Why Controlled Cable Slack Transforms Your Workstation Efficiency

    From across the room, a desk can look dialed-in: cables hidden, surfaces cleared, an organizer lined up just so. But sit down and start a real work session—slide your notebook to take new notes, nudge your monitor to switch to a call, reach for a pen—and you find out which details were only surface-deep. Suddenly, something tugs back. That supposedly “managed” cable path yanks the monitor out of alignment. The mouse cord catches as you reach across for a drive. A cable tray that seemed tidy at first now makes you dig for slack every time you dock your laptop. With every shift, friction returns. The surface looks organized, but the desk slows you down in ways that aren’t visible until you work.

    The Illusion of Order: When Tidy Turns Into Tripwire

    Most “clean” desk setups prioritize a visible sense of order: cables pinned straight, tightly corralled under trays, every line crisp. It’s the kind of control that photographs well, but the moment you need to angle a monitor or switch a device, those tight cable routes become rigid. Each perfectly cinched cable is a new point of resistance—your desk turns into a system that pushes back. Inflexible runs mean a simple monitor pivot now drags the entire assembly. A tightly clipped charging cable pulls free just as you settle into a call. Subtle, but if your workflow depends on frequent position resets or device swaps, each “tidy” cable can become another barrier—especially when you rely on drawer units, monitor arms, or under-desk storage that should move with you.

    On a smaller workstation with dual monitors, the symptoms show up quickly. Try to adjust a second screen: you meet a hard stop. Shift your notebook for more space—the keyboard cable tightens, forcing you to rearrange. Over a day of work, the pattern repeats: the mouse cable drags awkwardly when you reach for something beside the keyboard; a power cord catches your leg as you move a chair; under-desk storage helps with clutter but starts blocking every natural reach path. These aren’t dramatic failures, but they stack up. In a routine that mixes sitting and standing, note-taking, and frequent device changes, every slowdown gets magnified.

    Why Slack Loops Change the Feel of the Desk

    A usable workstation isn’t just free of visible chaos—it’s one where devices, lighting, and drawer units move when you do, not in opposition. That’s only possible when cable management admits a controlled amount of slack. The best cable trays, sleeves, and organizers don’t aim for zero movement. They’re built for flex: a gentle loop below the desk edge, or a curved path behind your riser, is often the difference between a smooth monitor adjustment and a desk that needs two hands for every shift. One palm-width bend—hidden but earned through use—absorbs daily movement instead of passing tension on to plugs, ports, or even your wrists.

    Compare this with a desk where every cable gets cinched to its flattest possible line. The result: desk lamps that refuse to pivot to the work you’re doing, monitor arms stiff with cable drag, drawers that break their glide as a USB hub strains against a fixed path. Try repositioning a speaker or charging cable, and you wind up unclipping half your setup. The fight against clutter can go too far—leaving you locked into desk positions that never quite fit real tasks.

    The Right Kind of Give

    What works isn’t guesswork. For most modern desks, the functional minimum is a palm-wide slack loop just beneath or behind your main device cluster. If you shift your monitor from centered to angled repeatedly, or work on a surface where the keyboard and notebook compete for depth, you see the value immediately. Well-placed slack lets you reset your whole setup mid-day without interruption. Move a drawer unit over, undock a laptop, or pull a cable box out of the way—everything flexes rather than sticking you with that “not quite enough” reach that quietly undermines every workflow.

    But uncontained slack introduces its own problems. If cables sprawl around leg space or pile below drawers, you create fresh snags—rolling chairs and stray feet find what the eye didn’t. The goal isn’t more mess, but a flexible arc set just beyond daily movement, making friction vanish without letting real clutter creep back in.

    Everyday Moments That Reveal the Real Problem

    Desk issues rarely announce themselves with a dramatic tangle. Instead, they show up in the repetition:

    • Returning from a reset—Slide back in after a break and your shoe hooks a stiff under-desk cable. That small delay adds up—especially when you move between perch seats and task chairs over a day.
    • Switching devices—The phone charger just barely reaches your primary zone. You pull, and the cable box tugs every other connection off balance, demanding a full reset just to plug in.
    • Drawer access—Open a storage unit to grab notes, only to feel a power adapter resisting the slide. Some days, the fix means unplugging mid-task or leaving things half-opened to avoid another snag.

    Over a week, these cost more attention than you realize—halting quick switches from notebook to keyboard or slowing posture changes. The cause is rarely obvious at first. Even when the surface looks controlled, persistent little jams signal that the route for cable slack was an afterthought, not part of the desk’s structure.

    How a Small Change Unlocked Daily Flow

    Adding a single, palm-wide loop at the desk’s rear shifted everything: monitor pivots needed one hand, not two; plugging a drive moved from “which cable do I need to reroute?” to a simple reach; sliding out a notebook from beside the keyboard no longer dragged other cables along. Even power adapters stashed under risers became instantly accessible. The look of the desk didn’t change—surface order held—but daily micro-adjustments lost their resistance. Desk organizers and cable trays stopped freezing the setup in place; activities that used to provoke minor cable fights simply disappeared. It wasn’t about how things looked, but how quickly the workstation could reset after each work cycle and how rarely plugs or ports ended up stressed or strained.

    How Much Slack Is Enough?

    There’s no single measurement, but “enough to handle your routine moves” wins every time. If your monitor arm swings, the slack loop needs to match that arc. If you constantly move between keyboard notes and pulling a notebook forward, keep just enough flex in the cable run so nothing grabs or unplugs. A palm-width curve under the top panel clears typical drawer openings and stays clear of leg zones—enough to move freely, not enough to wander.

    FAQ: Facing Down the Most Common Cable Questions

    How much slack should I leave in my cables?
    Give yourself just enough slack so that every device—monitor, lamp, charger, or peripheral—can move or pivot naturally without yanking on a plug or shifting other cables out of place. For most setups, that translates to a curve or loop no bigger than your open hand, tucked away under or behind your workspace where it never gets in the way but always absorbs a shift.

    Are tight cable trays always a mistake?
    They’re not inherently wrong, but maximizing tension removes the setup’s ability to flex. Over-tightened trays and box runs pass movement stress to device connectors, disconnecting or partially unplugging cables as you go about normal tasks. Thoughtful slack supports order—and movement.

    What if I use too much slack?
    Overflow slack isn’t a substitute for real management. Too much loops into legroom, stacks under storage, and invites tangles—especially with rolling chairs or shared workspaces. Controlled, contained arcs are key: flex where needed, no heap where you work or move.

    Workstation Structure Beats Surface Order

    A visually clean desk isn’t enough. The real test is whether the structure—monitor arms, cable trays, shelf risers, drawer units—supports quick resets, fluid reaches, and position changes throughout the day. Best-in-class cable paths make repeated use easier, not just more photogenic. If your actual workflow involves frequent screen moves, device swaps, or switching between sitting and perching, friction always finds the weak point. Clamp lamps that don’t angle, tray drawers that bind, or organizer bins that interrupt reach—all trace back to a structure that emphasized appearance over practical motion. The best-managed slack, almost invisible, lets your habits shape the desk instead of the reverse.

    In every routine—resetting after a call, moving from keyboard to notes, widening the desk for collaboration—it shows. Desk products that only fight clutter aren’t enough; the difference is the structure that absorbs daily motion, helping friction disappear and making every hour a little smoother for real work.

    Explore the full WorkBasic collection