Author: jaesoon_admin

  • How Adjusting Your Cat’s Rest Corner Can Reduce Stress and Mess

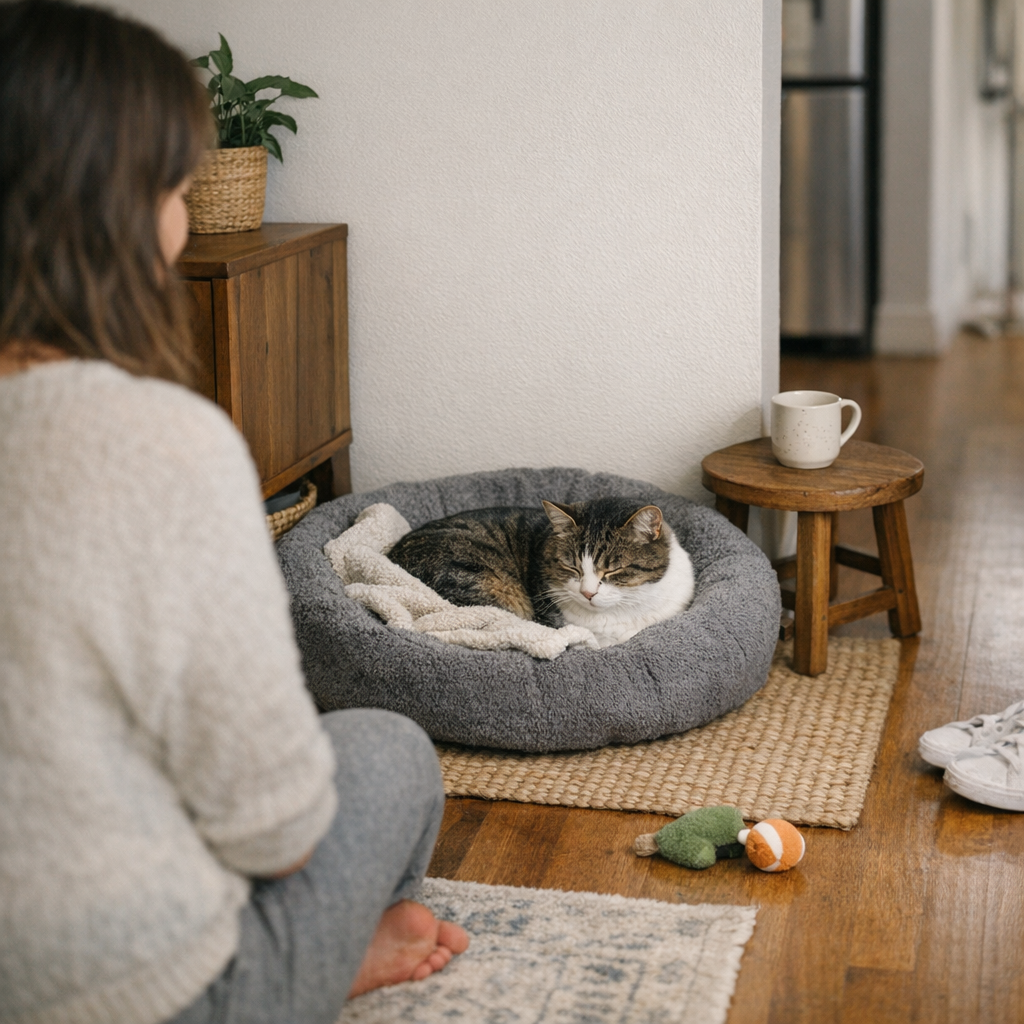
    The so-called “quiet cat corner” rarely survives the first week of real use. You might set up a neat bed, a folded blanket, maybe a soft mat, thinking you’ve given your cat a peaceful nook—only to watch that space become the most interrupted spot in your whole home. The minute you fall into your real routine, what looked calm morphs into a crossroads for foot traffic, stray shoes, dropped toys, and the simple fact that your cat keeps shifting position or trailing debris into shared space, turning order into constant friction.

    On setup day, the corner looks serene. But by day three, cat fur stretches into walkways, toys migrate across the floor, and your supposedly restful setup demands constant fixing. Not because the arrangement is “wrong” on paper—but because the real-world flow of home life presses in, revealing where things don’t hold up. A cat rest area that seems tucked away quickly gets exposed by shoe drops, bowl refills, or every time you reach for a cleaning wipe, only to disturb the cat you meant to settle. The split between a corner that just looks peaceful and one that actually stays undisturbed shows up the moment routines collide with your setup.

    Why So Many Cat Rest Corners Don’t Stay Quiet

    The illusion of a calm cat corner ends at the first repeated errand. That Pinterest-perfect nook almost always ends up bordering the busiest path in the house, crammed under a table full of “overflow” items, or right beside a tumbling pile of toys and loose shoes. Once real life resumes, each trip to refill a water bowl, fetch the broom, or retrieve a lost sock means stepping across, or around, your cat’s supposed rest zone—breaking the spell for everyone.

    Your cat’s increased alertness is often the first red flag. What looks like simple curiosity quickly becomes a routine head-lift, eye-scanning each time someone moves. That’s not just “interested watching”—it’s disturbance stress. You turn a five-second refill into a series of micro-interruptions: your footsteps send your cat into vigilance, naps fragment, and suddenly that settled area feels continuously exposed.

    Maintenance Pileup: When “Calm” Equals Extra Work

    As soon as the cat’s corner overlaps with day-to-day pathways or becomes a shared zone for errands, the upkeep quietly multiplies. What starts as a single stray toy becomes a morning pattern: clumps of fur dotting the floor, a bed ignored, or an inconvenient pause just to keep it “presentable.” Once you realize your vacuuming has doubled and your cat is sleeping halfway across the room instead, it’s obvious—a neat corner with the wrong placement becomes a small but constant maintenance drain, not a real cat retreat.

    Everyday Scenes of Rest Interrupted

    Picture this: it’s late and you’re navigating between kitchen and hallway, only to freeze mid-step—your cat’s bed lies right in your path. Pause and sidestep? Shift the mat? Or tiptoe through and risk rousing your cat yet again?

    Or: you drop off groceries and slide off your shoes, inadvertently scattering a cat toy under a side table. Now you’re half-crawling to retrieve it, kicks of fur trailing in your wake, your cat jolted out of relaxation to follow the commotion. The day’s small routines—shoe sheds, quick pick-ups, passing refills—turn the so-called “quiet” area into the busiest, most unsettled patch in the room. And by week’s end, you’re not just straightening a blanket—you’re constantly re-clearing, re-wiping, and reshuffling as the “rest zone” becomes just another busy corner for both cat and owner.

    The Ripple Effect: How Placement Shapes Everyone’s Routine

    A cat rest area isn’t just about feline comfort. Where you put it changes the rhythm of your whole home. In compact apartments or multi-use rooms, that “unused” corner might become a bottleneck, upending the daily flow. Every bowl refill, shoe grab, or quick cleaning supplies run gets complicated by the awkward placement. Your smooth shortcut turns into a circuit—detours, pauses, hyper-awareness of something underfoot. And every time this happens, your cat’s rest shatters into wakefulness, then watchful pauses. The result? No one gets a reliable spot: you’re resetting, and your cat’s rest is a series of interruptions, not a stretch of downtime.

    The Tell-Tale Signs Your Cat’s Corner Needs a Rethink

    Find yourself picking up fur, toys, and random clutter from the “quiet” area again and again? That’s your real warning sign. It’s not the occasional mess—it’s the frequency of interruptions, the time lost to resets, and how often you and your cat have to navigate out of your own way. If you’re reaching for wipes or adjusting the blanket several times a day, or if that area keeps attracting everything but rest, the setup isn’t holding up. Even more revealing: your cat lingers on alert, not actually relaxing. If the space doubles as a collection point for laundry, bags—or just ends up being a spillover zone—you’re living with a structure that’s visually tidy but structurally flimsy under real conditions.

    Practical Fix: Small Shifts, Big Returns

    The difference often comes down to inches, not broad redesigns. Moving your cat’s bed even two feet out of the direct traffic flow can dismantle the daily cycle of mess and micro-interruptions. What matters most: a definite but unobtrusive mat, side-cube, or low barrier to mark out the space—not as a fence, but as a signal, so objects and people slow before crossing into the zone. This tiny shift brings real, visible improvements: naps go longer, cats scan the room less, and scattered toys don’t spill back into the main living area.

    Maintenance lightens up fast. Cleanup becomes a single late-day sweep, not a scattered handful of spot wipes. Instead of tiptoeing, re-clearing, or grabbing for hidden tools in a rush, you reset once, on your terms. And with better physical cues, there’s less “oops” stepping on the edge or rousing the cat in the middle of your own errand. The payoff is a rest area that fits in—rather than fights—with actual daily movement.

    Examples from Real Cat Life

    • The blocked path: Cat bed wedged between living room and kitchen. A week later: fur patches, toy tails, daily sidesteps, and both you and your cat avoiding the zone. Move the setup out of the path—walkways clear, bed actually used, less daily debris.
    • The double-duty dead end: Blanket tucked under a table, but every morning you’re down on hands and knees fishing out toys or sweeping stray hair. A quick switch to a side mat away from routine errands cuts down the fuss and invites the cat back in.
    • The “clean, but slow” corner: Space looks calm after cleaning, but within hours, clutter drifts back and your cat paces or leaves. Placement adjusted just outside major traffic, and suddenly movement normalizes—less owner intervention and faster cleanup.

    When Comfort Helps and Hurts at the Same Time

    A soft bed means little if every comfort feature adds reset work. Layering up with plusher mats or thicker blankets may look indulgent, but it complicates quick wipe-downs and toy retrieval. You stash cleaning supplies—lint roller, wipes—within reach, but if you have to reach around or over the rest area, you’re guaranteed to wake the cat, shaking up the calm each time. Every attempt to boost comfort through added softness or amenities can undermine your own routine if it overlooks the physical flow: a cozy corner can still be slow-to-use and hassle-prone if the placement forces clumsy workarounds for even basic upkeep. The tradeoff—comfort for the cat, extra chore for you—shows up every time a “nice” setup turns routine tasks into minor obstacles.

    How to Set Up a Real-World Quiet Cat Corner

    1. Map your real movement. Watch the true daily flow—where feet, bags, and errands go most in every room. Never set a rest zone in these paths, however empty they look when planning.
    2. Shift away from overlap. If your current spot collects shoes, laundry, or random storage, move the setup out—close to a wall, but with sightlines for your cat, so they can monitor the room without being underfoot or in the way.
    3. Add a visible signal. A mat, side-bench, or short divider, even if minimal, works better than invisible “boundaries.” It prevents casual stroll-throughs and keeps both people and objects from blurring the zone’s edges over time.
    4. Keep cleanup tools accessible, not intrusive. Stash lint rollers or wipes just out of immediate rest reach—in a bin nearby, not right next to the bed. You want cleanup to be fast and undisturbing, never another source of alertness or fur scatter.

    Reliable Function Beats Visible Tidiness

    For real

  • Why Regular Battery Health Checks Prevent Downtime in Tool Fleets

    It hits in the middle of a job: you’re halfway through slicing laminate trim, sawdust in the air, when the multitool stutters, coughs, and leaves a ragged line across the workpiece. There’s a flicker of irritation every operator recognizes—not another pile-up from a dying battery. The blade is sharp, your movement steady, but the cut feels gutless. Tool precision slips, work slows, and suddenly a routine pass drags into another repair. In most jobsite toolboxes, it’s the battery—not the tool head—that quietly decides whether today’s work runs smooth or sideways.

    When Batteries Turn Fast Jobs Into Friction

    Pull two packs from the same set and they seem equal: both light up “ready,” both slot into a charger, both look new. Yet, as the day unfolds—tools bouncing from bench to truss, three or four hands in the mix—the real difference snaps into focus. One multitool melts through drywall and leaves crisp edges behind. The next starts strong, then loses its bite, vibration turning jittery. Cuts that should slide straight stall mid-panel, and sanding passes start skipping—precision slips as battery strength quietly fades away.

    The cost shows up everywhere. Teams swap spent batteries chasing just enough juice for one more screw or plunge cut. The pace gets choppy as focus breaks to check indicator lights or rummage for a pack that isn’t running on fumes. Each stutter adds seconds to every task, and suddenly the far end of that MDF panel looks a lot further away.

    The Quiet Drop-Off: How Underperforming Batteries Sabotage Workflow

    Green indicators lie. A pack that claims “full” before the shift can choke as soon as it bites into cement board or thick plywood. Under pressure—cutting fasteners, sinking blades, running sanding pads through paint—the cracks show. Reliable batteries hold voltage and keep the work rolling. Weak ones sag early: oscillations lose force, the tool body gets hotter, the vibrations turn harsh and unpredictable.

    It often starts subtly—an extra second stuck in a knot, deeper saw marks on a cut meant to be clean, the sanding head leaving behind stubborn ridges. Not disastrous—at first. But the longer you ignore it, the more precise work turns into chasing flaws. One weak battery gums things up for the next operator. You end up finishing by hand, timelines stretching, finish quality dipping. The frustration isn’t theoretical—it’s in the physical drag across every repetitive cut, every awkward stop to swap packs, every time a crew member mutters about “that dead battery again.”

    On the Ground: Battery Failure in Real Jobsite Flow

    Picture a renovation morning. Three people rotate tools: one cutting panel reveals, another grinding out grout, the third sanding back edges for paint. By lunch, the rotation is smooth—batteries fresh, work passes steady. But late afternoon tells a different story. Midway through a dense fiber cement cut, the oscillating tool whines and stops cold. Its battery, which flashed green earlier, now quits 60% through the cut. Suddenly, everyone’s hunting for backup packs—some only half-charged from rushed top-offs between coffees. Each failed swap doubles downtime. By day’s end, thirty minutes are gone to troubleshooting, with a growing pile of messy cut ends to tidy up by hand.

    This isn’t rare on a big job or even in a home woodshop where tools move person to person. One overlooked battery turns into a chain of stalling, repeat swapping, lost minutes, and a noticeable drop in finish. The ripple effect is real—one slip turns a smooth build into stop-and-go frustration for the whole crew.

    From Luck to Process: Building Battery Checks Into the Routine

    This headache gets fixed not by working harder, but by working smarter—cutting out the gamble. Don’t just trust the “full” light. Build a quick, deliberate battery test into every shift. Before tools change hands or anyone starts cutting, clamp the multitool, attach a fresh blade or sanding pad, and run it under load for five minutes. Then grab a voltage meter—see what the pack’s really delivering under stress, not on the shelf.

    Batteries showing less than 18V under real load? Pull them from rotation. These are the troublemakers: they’ll fade fast, stall during detail work, overheat, and turn your precise multitool into a guessing game. Flag them for reconditioning or recycling. Don’t let “maybe it’s fine” float into tomorrow’s schedule.

    Simple Work Habits That Eliminate Guesswork

    • Watch how the tool feels and sounds, not just what the indicator says. If you sense the tool getting choppy or losing speed mid-task—change the pack before the cut is ruined.
    • Rotate your strongest batteries to the hardest work. Save older packs for sanding, screws, or lighter cuts. Use fresh packs for long, demanding sections where stalls cost the most time.
    • Mark the month and year on each battery when it joins the fleet. You’ll spot underperformers quickly before they start making more trouble than they’re worth.

    Just a few habit changes make a visible difference. Sudden stalls drop off, sanding becomes smooth and controlled, long blades stop binding mid-beam, and no one is left asking who swapped in “the dead one” before a critical panel cut.

    Why It’s Worth It: The Payoff of Smarter Battery Care

    The change isn’t subtle—it’s all over the workflow. By end of week, you’ll notice fewer slowdowns, snappier tool response, and cuts that stay clean all the way across. Less time disappears into swapping packs, fiddling with chargers, or smoothing out gouged edges with hand tools. When batteries are managed deliberately—not by wishful thinking—crews regain confidence: switch pulls always bring full power, momentum builds through projects, and the jobsite feels reliably in sync again.

    Bottom line: Battery health isn’t busywork. It’s the backbone that keeps precision, pace, and finish quality consistent, especially when the day runs long and delays pile up. Lose track of creeping battery failure, and a single “it’ll be fine” pack can jam up everyone’s progress for hours.

    If you run more than one multitool—at home, in a workshop, or across a team—don’t leave battery performance to chance. Fold in consistent, real-world checks. It’s how the best jobsites keep cuts straight, sanders even, and teams moving at full speed.

    http://gumboll.myshopify.com

  • Streamlining Cat Care: How a Simple Setup Boosts Daily Feeding Efficiency

    A calm cat doesn’t cancel out a clumsy setup. At first, you think a peaceful pet makes daily care simple—your cat sits quietly while you scoop kibble, swap the water, or wipe the mat. But by day three, you’re sliding a bowl to clear space, pausing to hunt for a towel that’s not nearby, or realizing the cleaning cloth is always in another room. It’s easy to miss the friction until the clutter reappears: debris collects around the bowls, a stubborn ring forms under the water dish, and “quick” cleanup gets stretched into a series of minor errands. What feels manageable one time quietly turns messy and slow the more you repeat it. This is the daily trap CalmPetSupply’s setups are built to avoid—removing the routine drag where most home care still gets stuck.

    When Stillness Creates Its Own Problems

    A calm cat doesn’t dodge the mop or bolt at the sight of the brush, but stillness alone doesn’t streamline routine care. The hidden hassle is in what’s missing within arm’s reach—your scoop, the right towel, basic wipes. Over a few cycles, gaps pile up: wiping spills with napkins because your actual cloth is down the hall, empty-handed walks to the cabinet for a brush you assumed was beside the mat. The cat barely blinks, but your “routine” becomes a loop of micro-detours and improvised fixes masquerading as calm.

    Everyday Friction in Real Time

    Consider what really happens: you go to lift the food bowl, only to edge past the refill bottle that’s blocking the space. You reach for a spilled bit of kibble, then realize getting a rag means leaving the spot again. The interruption is small, but it repeats—each time adding a delay or turning “one-wipe” into “come back later.” Most supplies are somewhere, just not anchored to where you stand each morning and night. The pet care space can look neat but quickly turns inefficient if each tool drifts just out of reach.

    Supplies That Are Present, But Not at Hand

    Stashing all pet-care gear in one spot feels organized—until real life intervenes. Wipes pile under the sink, scoops go missing from the feeding zone, towels migrate to the bathroom, and grooming brushes end up wherever last used. In repeated use, these gaps show up as:

    • Reaching for a towel, only to find the hook empty (again).
    • Refilling a bowl blocked by stacked gear or stray toys halfway on the mat.
    • The brush is two rooms away; fur stays until the next pass because you won’t double back.
    • Late-night messes noticed during a check-in—dried now, harder to clean, easy to skip entirely.

    Routines that “look” covered on paper reveal new snags each cycle.

    How “Almost Ready” Becomes a Routine Slowdown

    When the basics aren’t anchored to the right spot, every routine stretches out. You start with the food, walk away to grab a scoop, dodge your cat and an upturned bowl, then loop back for cleaning wipes. This isn’t a rare hassle—it’s the standard pattern once storage is just out of place. What should take a minute now absorbs time in split batches, broken up by side trips and backtracks. Soon, small cleans go undone: bits by the mat linger, spill stains get overlooked, and the care area falls out of rhythm with real use.

    Small Adjustments, Permanent Relief

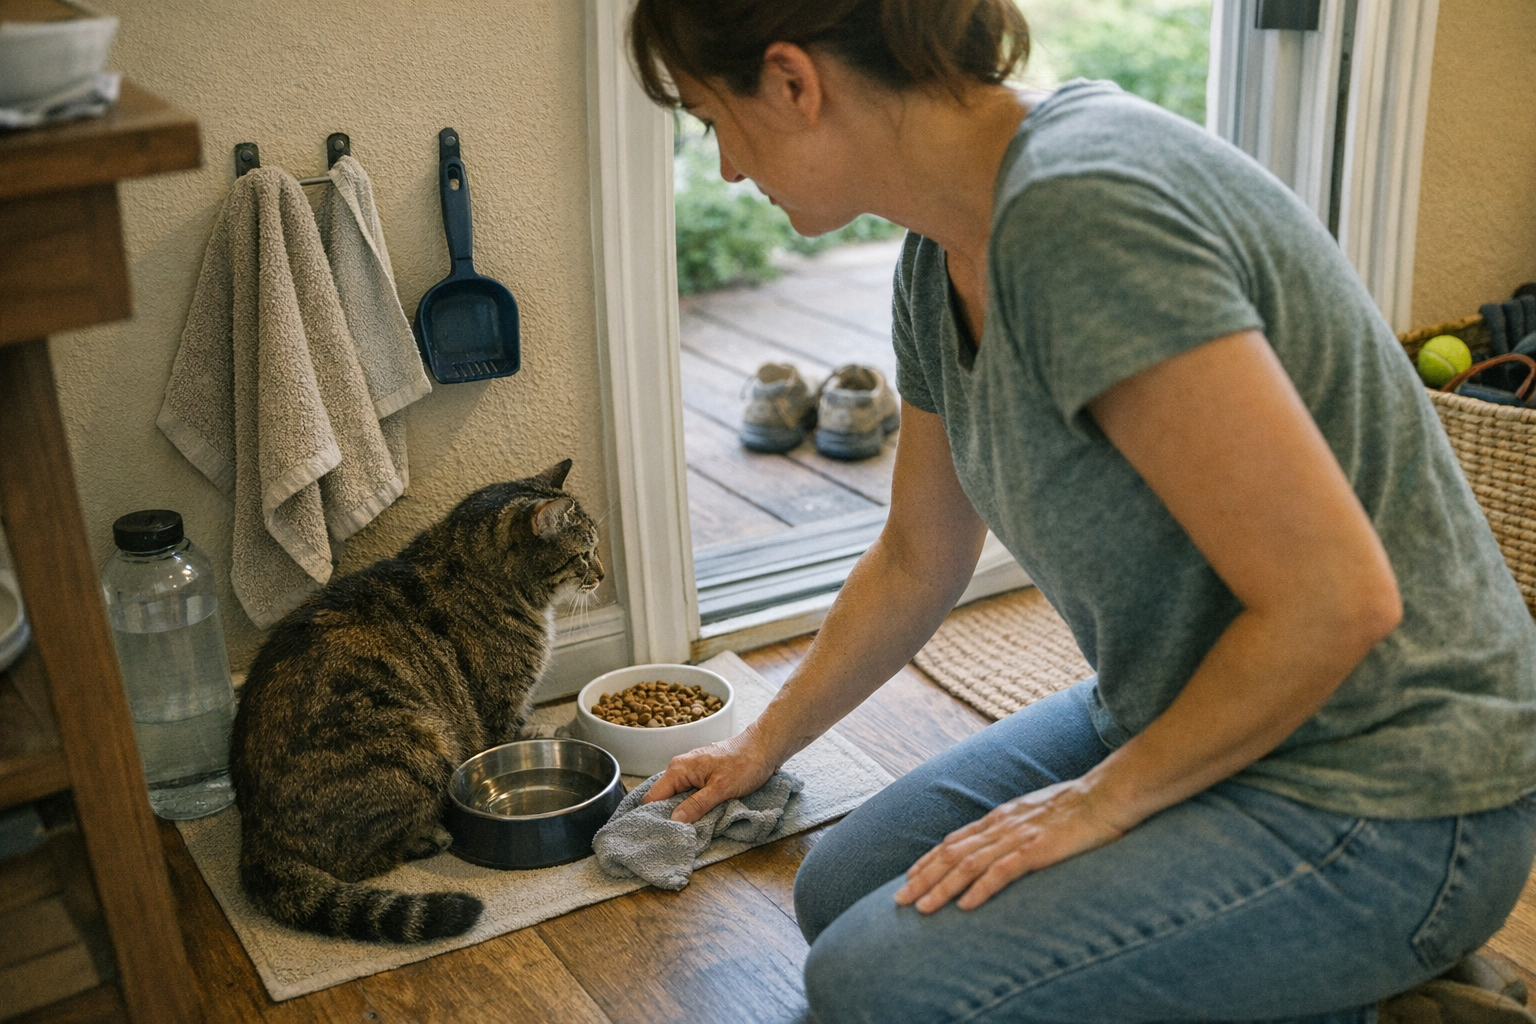
    True relief isn’t more gear, but the right supplies anchored right where the care happens. Place a wiping cloth on a hook or a towel in a bin beside the feeding mat—this single shift turns wipe-downs from a hunt to a reflex. Water spills vanish in the moment; after-meal messes are tackled before they dry. The transformation isn’t flashy or perfect—it simply removes the loop of searching, forgetting, and belated cleaning. Within a week, debris doesn’t stack up, cleanup blends into care, and your pace stops lagging behind your intentions.

    Barriers Outside the Cat Area

    Routine drag sneaks beyond the feeding corner. Pet toys land on living room cushions, brushes on side tables, clean bowls air-drying on the wrong end of the house. Every quick-groom, porch transition, or night reset is slowed by blocked access or missing tools. The visual order means little when every return to the spot reveals a new item missing. Repeated fixes—reshuffling storage, moving bins again—don’t hold if one basic item is still out of place. The slowest link quietly reshapes the whole pattern.

    What Works: Keep Key Items Right Where Action Happens

    Move basic tools to arm’s reach at the real care station. A single hook for a quick-dry towel, a bin tucked behind the feeding mat, a scoop always in its own basket—these changes erase the detour steps. Now, wipes and refills are always next to the mess or the bowl, not an excuse to delay or forget. The space doesn’t just look neater: it starts working at your natural pace, matching the way resets and cleanups actually happen. Small friction is cut off before it breaks your flow.

    Conclusion: Small Reach, Big Impact

    A real-world routine hinges less on a calm pet and more on setup that actually matches care in motion. Shift just one item—move the cloth, keep the scoop right by the bowls—and you’ll feel the lag disappear. Instead of circling back or skipping steps, daily resets flatten out, clutter fades, and mornings stop stalling before they start. Calm spaces aren’t about looking peaceful; they’re about working with your repeated patterns, not against them. For a care setup that holds up on real mornings and late-night checks, get what works ready at arm’s reach.

    Explore CalmPetSupply setups

  • How Carry-On Organization Shapes Your Travel Efficiency and Time Management

    The real test for any carry-on isn’t at home—it starts the moment you hit your first airport checkpoint. That perfectly arranged bag, zipped and stacked with organizers, falls apart at the first sign of real movement. What looks ordered on your bedroom floor starts showing invisible traps in the churn of security trays, boarding calls, and cramped seat rows. Suddenly, “organized” means rifling through nested pouches and doubling back for a travel document that slipped under tech gear. In travel, the friction builds with every reach, every awkward unzip, every time you realize the clean setup at home doesn’t cut it when you’re pressed against the boarding line or rushed at the security conveyor. The CarryOnSupply world is full of gear built to solve these specific failures: what actually works is setup that survives the test of repeated access.

    Packed to Perfection—Until the First Security Check

    A bag that feels dialed in at home is usually at its best when untouched. The illusion breaks almost instantly once the airport routine starts. That passport—neatly pocketed minutes ago—now hides behind a tech pouch. Chargers and headphones mix after one random repack. Small mistakes compound every time you’re forced to open just one layer too many or dig past a pouch you thought you’d always keep on top. Organization only counts if it works in motion.

    Security: The Real Reveal

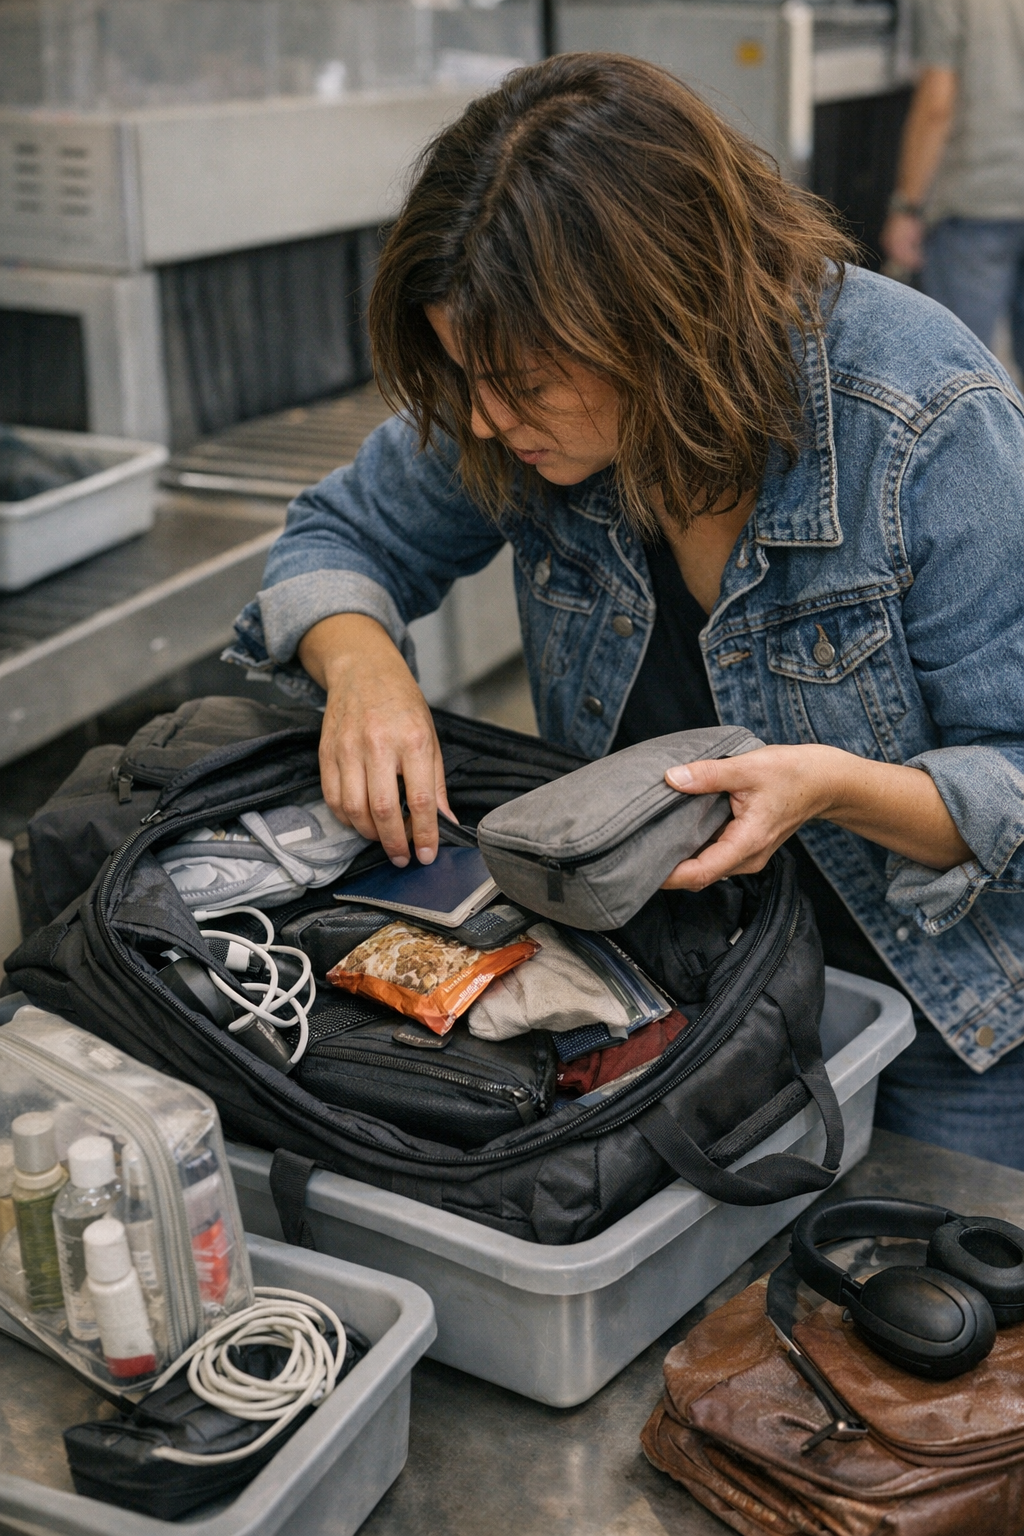
    The security tray makes packing mistakes obvious. Urgency forces you to move backwards through your logic, yanking out a cable pouch to get at the liquids bag buried underneath. At home, the stack looked smart; now, pulling one piece means rearranging everything else—while a growing line watches. Each second lost isn’t just frustrating, it signals a setup made for standing still, not real travel flow.

    The Routines Where Friction Grows

    Next-level inconvenience appears in routine use—never in a static checklist. These familiar scenes expose what the wrong structure actually costs:

    • Boarding line scramble: Movement starts, you need your boarding pass, but it’s buried behind papers or stuck under a notebook—again. Quick access becomes a repeat annoyance.
    • Overhead bin shuffle: You’re in the aisle, everyone’s watching, and your seat-side essentials are two pouches deep. Getting them blocks others, slows you down, and disrupts the flow.
    • Arrival repack drag: Post-flight, you reach for a charger and find it wrenched around toiletries. The quick repack at security now means extra time unraveling cables at your hotel.

    Hidden Costs of “Efficient” Packing

    “Tight” setups feel controlled but backfire in daily use. Stacked organizers and nested pouches look efficient but make every retrieval a hassle if you’re constantly interrupting one setup to get to another. The end result: slowed-down routines and repeated micro-frustrations every time an airport task asks for a “quick” grab.

    It’s not the first try that matters, it’s the inevitable repetition. The more you search, unzip, and reshuffle in transit, the more those little problems add up—especially on days with layovers, multi-segment flights, or just the cumulative drag of reaching for the same item out of order several times before landing.

    When Visual Order Masks Real Movement

    Order, when it’s only visual, is a setup waiting to fail under pressure. The bag feels “set,” but real travel sets off invisible dominoes:

    • Pouches snag or overlap; pulling one snags the next, causing resets.
    • Mixing quick-access with back-up gear means every security check becomes a mini repacking session—forcing you to rearrange what doesn’t need moving.
    • Documents slip under small accessories, so every routine check requires a frustrating search, not a simple grab.

    Visually “tight” packing may impress until a real-world interruption exposes how easily flow collapses—especially at security, on the plane, or while transfering through crowded terminals.

    The “One-Movement” Principle: Simplifying Access

    Actual improvement is not about inventing a complex, multi-layered system—but choosing placement rules that survive airport logic. Essentials must live in the outermost, easiest-to-hit spot—always. Commit one pocket or sleeve purely to documents and tickets; never mix with chargers or pens. Dedicate a single pouch for seat-side necessities (headphones, e-reader, gum), pack it near the zipper, and don’t bury it under anything that delays a one-move grab—even in cramped aisle space. You’ll see the change instantly: fewer accidental pulls, less aisle-blocking, no more double-handling the same pouch every time you stand up or sit down.

    Work with your carry-on’s built-in structure. Most bags are made with some logic for outer, middle, and inner zones. Don’t fight that; instead, assign items by frequency of access and transit moment. This reduces fumble-time and keeps every routine smoother—even on the third flight of the day.

    Practical Moves for Real Trips

    • Lock documents into a standalone front pocket—nothing else shares the space.
    • Reserve a secondary (but separate) pouch for daily-use tech. Don’t obscure fast-access items with things you’ll need to sit down to use.
    • Move anything truly secondary (like spare cables or non-urgent supplies) deeper, so flow items always stay interruption-free and at hand during transitions.

    Feeling Progress, Not Just Control

    Every time you fumble, pause, or trace the same item—especially in the third leg of a trip—you feel the weight of your setup’s weak link. The smallest tweaks—like splitting security-tray items from mid-flight pouches or creating a truly solo quick-grab zone—can shift your whole travel experience from reactive to routine. You won’t eliminate all friction, but you’ll decide where the interruptions happen: no more losing time to unnecessary resets or stopping flow to fix what “looked” perfect.

    Real structure means a bag that moves as you do: choices, not layers; a packing order that matches real access, not just a tidy visual. In the end, the best carry-on is the setup you barely notice—because the right piece is always at hand, and the friction fades with every trip.

    Visit CarryOnSupply for real-world carry-on essentials

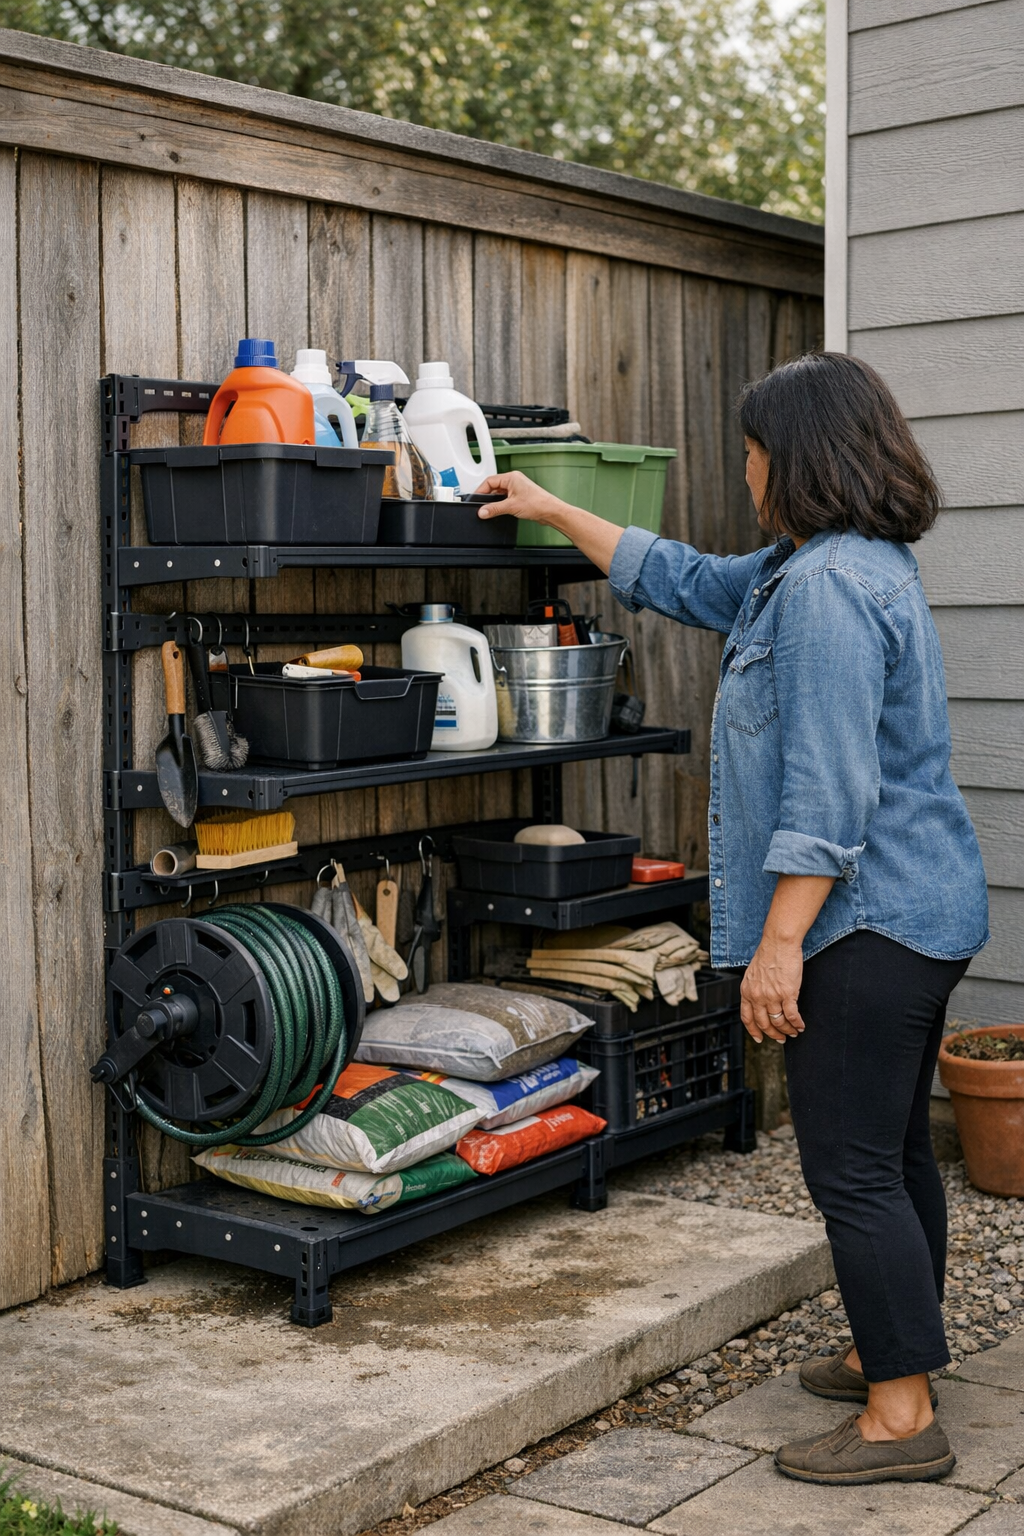
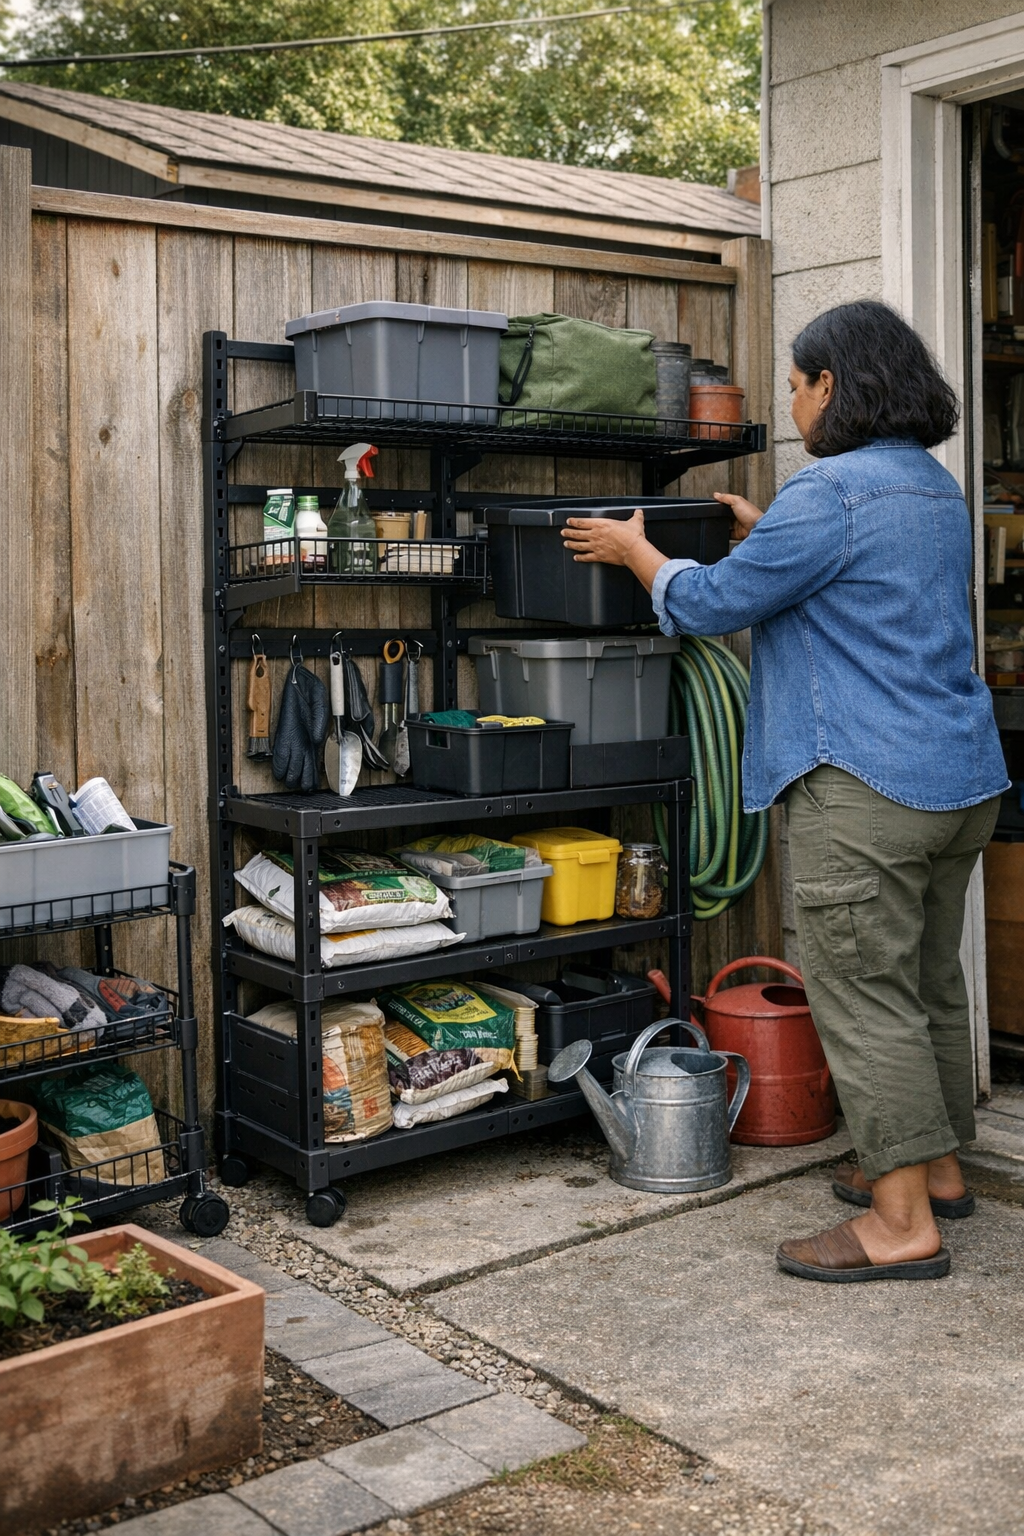
  • Why Wall-Mounted Laundry Shelves Transform Your Storage and Cleanup Routine

    Laundry rooms fail when floor-level storage quietly breaks down the routine. The first day, you stack detergent, softener, and stain remover in a neat row on the floor—an easy grab, no setup. By midweek, that “convenience” has slipped: bottles drift, powder boxes wedge in back, and single-purpose containers block the cleaning path. You go to mop, but now you’re shifting supplies to chase a runaway drip. Each time you crouch down (again) to find the cap, reach around the laundry basket, or realign a powder box that’s crept into the walkway, the floor setup that looked sensible is clearly working against you. What looks orderly after a reset quickly becomes awkward clutter, and the friction grows with every load.

    How Floor Storage Gradually Breaks Down the Routine

    Floor-level laundry storage might seem practical—everything’s visible, theoretically within reach. Yet in daily use, this system loses shape fast. Most loads require you to nudge, reach around, or even move multiple bottles just to get to the item you need. Small containers vanish behind larger ones, and powder boxes press against wall edges or slide into corners—setups that look neat for a day but erode each time you reach in. Basket traffic makes it worse: every basket dropped for sorting, every cabinet opened for supplies, every footstep across a crowded lineup. Items collect at the baseboard and pile into messy clusters, turning intended grab-and-go zones into minor obstacle courses.

    Resetting doesn’t just take longer; it becomes a chore that creeps into every cleaning session. Before mopping or wiping down the floor, everything must be picked up and sorted—sometimes more than once in a single week. Spilled powder disappears under containers, and leaky bottles form sticky spots that go unnoticed until they’re stepped in. Especially in tight alcoves or shared utility corners, every stray bottle shrinks the usable path, and each week ends with more drift and more time spent putting things back in order.

    Wall Shelves: Not Just Prettier, Actually Smoother

    Raised shelves above floor level do more than make the room look less crowded—they reorder how you move through laundry tasks. Change is subtle on day one, but over several loads, the advantages become obvious:

    • No more crouching or hunting behind the basket—detergent is always at chest level, never blocked by laundry in progress.
    • Bottles and boxes stay fixed in a visual row. No more sliding apart or toppling forward—motion stays clean, order stays visible.
    • Leaks and spills are detected instantly—you see the cap, you see the drip, you address it before it turns into sticky buildup.
    • Cleaning paths stay open. You can sweep or mop underneath with nothing to move and no lineup to disrupt.

    This format lets reach become routine. With everything visible and within arm’s reach, you re-shelve a bottle in one motion (even with a towel pile in the other hand). There’s no test for balance, no domino effect. The difference isn’t just less bending—it’s less wasted movement, less risk of knock-over, and a space that stays clear without repeated interventions.

    Repeated Use Reveals the Real Difference

    Where floor setups demand constant realignment, wall shelves quietly resist drift. Over a week of use, the hidden time wasted on resets disappears—you aren’t pulling lost boxes from behind a bottle, or searching the floor for the stain stick that slipped out of sight. After several loads, resetting is almost instant: sweep your hand across the shelf to square it up, spot-check for leaks, move on. Nothing needs to be shifted to see what’s low or out. Shelves act as stable tracks—each item returns to its home, and the zone doesn’t flood with overflow or creeping powder trails.

    Contrast that with the floor, where crowding and lost items slow you down at every step. You start each cycle fixing last cycle’s mess, and in shared spaces, the problem compounds. A week later, the difference is clear: one setup asks for daily discipline, the other quietly maintains itself with less effort.

    “Easy on the Eyes” Isn’t the Same as “Easy to Use”

    Floor storage may look organized after a cleanup, but every adjustment (bend, reach, shuffle) is a friction point waiting to return. The true wear shows up in hidden leaks, spreading powder, or the gradual crowding of containers that forces slow-down at the worst moment. In real laundry rooms, appearance alone means nothing if categories blend together, paths narrow, or every cleaning day starts by resetting storage that can’t hold its shape in use.

    Wall shelves avoid this silent decay. A lip up front keeps boxes from drifting or falling. Open sides make it impossible for items to disappear behind an accidental stack. Each supply stays visible, and you’re not troubleshooting “which bottle leaked” at floor level. The small design choices become big time saves after dozens of cycles—and the room finally matches the way you actually use it, not just how you want it to look for a day.

    Real Setup, Real Life: One Small Shift, Many Payoffs

    Upgrading to a double-depth utility shelf about three feet from the floor, the payoff showed up almost immediately:

    • I stopped having to crouch or reach around baskets; detergent was always where my hand expected.
    • Containers no longer edged outward or toppled—the shelf’s front lip corralled every box and bottle after use.
    • End-of-week resets became one-handed: quick lineups, leaks checked without any heavy shifting, and straight to the next load with no wasted steps.

    That ripple effect matters. The floor never became a spill zone, and nothing overflowed out of view. Any drip was spotted and wiped up before it ground in. Shelving between 36 and 48 inches high keeps supplies out of the path but doesn’t force awkward stretching or added steps. Skip portable racks that wander, wobble, or invade the walkway—these only trade one kind of drift for another and pressure the floor even more as items pile on.

    Why Return Flow and Reset Speed Matter

    The success of any laundry setup isn’t judged by how calm or photogenic it looks after a reset. True value shows up in the return flow—the ease of putting things back mid-cycle, the absence of hidden cleanup tasks—and in how quickly the area is ready for the next load. If you’re double-handling items, clearing a path before every job, or losing track of essentials each week, you’re paying for a storage decision that doesn’t match real use. Wall-mounted utility shelves don’t just hold supplies; they hold the system together, resist creep, and open up the floor you actually need.

    The ultimate difference isn’t surface order; it’s a setup that works without nagging resets or chronic “where did that go?” moments. With the right-height shelf, the laundry zone becomes reliably functional, no matter how busy your week gets or how many hands use the space. You’ll spot what’s running low before it becomes a supply emergency—and every sweep, mop, or reset takes less time, not more. For homes where even a small zone needs to keep up with real routines, a better storage structure changes everything about how livable that area feels.

    See practical wall systems, utility shelving, and organization options for every inside zone at Gridry.

  • Prevent Cable Damage and Improve Workflow with Desk Edge Protection

    Desk cables don’t announce a problem—they just fail in ways you only notice when it disrupts your flow. At a small or crowded workstation, the fight isn’t just with clutter on top. Under the desk, charging cords get pinched in a drawer unit, USB lines subtlety fray along a raw edge, and the cable that seemed fine delivers a sudden glitch when you’re deep in a project. By midweek, the “organized” layout starts betraying you: a faint click from a cable being stressed against a tray, or a persistent drag when you pull your notebook from beside the keyboard. Small hesitations add up fast—each snag is a sign your setup isn’t just untidy, it’s wearing out where you don’t see it.

    The silent sabotage of a cable-unfriendly desk edge

    Lost productivity rarely begins with chaos on the desk surface—it builds from those overlooked, friction-heavy moments under the desk where cables contort around sharp panel cuts or squeeze behind a too-close drawer. Cable ties and cable boxes promise tidy lines but do nothing for the real wear: a cable pressed into a desktop edge might look “clean”, but by Friday the insulation is scraped, and plugs begin to loosen right where they flex most. If a charging lead has to drop straight down, watch for scuffs where it lands against hardware you barely notice.

    Device failures usually start here. A wireless mouse suddenly disappears, or your charger disconnects with the slightest nudge. It’s easy to blame the device or the port. But often, it’s cable fatigue concentrating at that one unseen friction point—the spot that gets flexed and pinched whenever you adjust your chair or switch out a device. Movement, not mess, is what breaks things in repeated real use.

    Organized is not always functional: the hidden wear beneath tidy setups

    Multiple organizers and a “clear” surface can make you feel in control, but functional loss creeps in wherever cables are forced to rub against hard edges or take sharp turns hidden below. If you regularly shift between screens and notebooks or swap devices during creative work, even neat cable paths quickly gather micro-bends and wear.

    The “minimal” setup trap: Thin desktops or crowded under-desk storage mean there’s less room for cable paths—so cords press directly against metal, wood, or drawer fronts. Shared desks only multiply this risk, as new users reposition cables for their reach, introducing fresh rub points. The result: a tidy appearance, but a weak workflow that grinds down gear and delays the next task.

    Underneath, cracks show: more effort needed to connect a device, hesitation before unplugging, and cables that catch or tangle differently every cycle. A desk can “look” clean but still trip you up. The line between organized and efficient is visible in these routine micro-failures.

    Small guidance changes that actually break the wear cycle

    After breaking one too many chargers on a desk that looked fine from above, I stopped rearranging and started adding physical cable guidance at trouble spots—sliding a foam-backed sleeve onto the main desk edge right where the charging cable rounds into a drawer-mounted power strip.

    The shift was immediate: reduced strain, smoother reset. Instead of cables biting into the desk or jamming under a monitor riser, cords now traced a steady, repeatable path. Week after week—plug in, unplug, shift devices—the cable moved without resistance or stress. No creak, no insulation fatigue. The cable route was reliable whether I switched devices twice a day or ten. The desk felt ready, not delicate.

    Here’s what works: absorb the impact at the risk points. Adhesive cable clips at the entry; under-desk trays that keep cords high and away from legs; sleeves for every edge where a cable flexes. The structure becomes responsible for wear—not the cable itself. Faster reset, fewer slow failures, and a real sense that the desk helps instead of hinders.

    Where you notice better cable control most: scenes from a busy desk

    Reaching for a notebook, not a knot

    Picture a desk at midday: laptop at an angle, pen hunting for space, notebook knocking the mouse cable. When cables drag across the edge with every reach, you’re forced to work around the layout—bending connectors, dragging a stool back, nudging a tray out of knee space. Smooth cable routes mean all you feel is movement between tools, not the cables resisting or threatening to unseat a plug while you swap tasks.

    After the cleanup: real smoothness, not just out-of-sight organization

    Cable trays and sleeves aren’t about initial neatness—they reveal their value after a few reset cycles. If you’ve ever moved a chair, swapped a keyboard, or angled a task lamp for better visibility, you know the routine: check that a cable isn’t about to snag or lose contact. With proper guidance, cables stop wandering. You spend less time double-checking for device dropouts and almost never run late replacing a frayed lead. The habit of resetting—clear notebook, slide lamp, adjust monitor—is smooth, not tense.

    Quick, field-tested cable guidance tips

    • Protect the edge first. Where a cable transitions from below to above the desk, a soft sleeve or edge protector shields against slow wear that quietly ruins charging and data connections.
    • Shared or reset-heavy desks need explicit guidance. Every user and every device shift is a new opportunity for unintentional cable abuse—anchor frequently-moved cables with clips or trays to keep risk areas stable.
    • Minimal setups benefit from super-flexible clips. Where under-desk space is precious, stick-on clips near each device anchor cables securely without blocking legs or crushing access.

    FAQ: Outwitting the desk edge, one cable at a time

    How do I stop cables from wearing out on my desk?

    Place a soft sleeve or stick-on clip exactly where each cable meets a surface edge—don’t just tie things up and hope. A two-inch buffer at each transition shields cables and device ports.

    Does this matter if my desk is messy or shared?

    Yes. More clutter or more users means more cable movement, more rub points, and more failures. A few well-placed guides cut hours lost to troubleshooting and hunting for replacements, even at a desk that never looks “done.”

    What’s the fastest low-profile fix?

    Adhesive cable clips right at each desk entry: they protect cables at the highest stress points, won’t eat up workspace, and don’t interfere with under-desk storage or legroom.

    The return-on-investment: smoother work, less anxiety

    Cable damage is a design risk hiding under organized surfaces. Ignoring it means shorter device life, more downtime, and getting trapped in slow cycles of replacement and reset. When cable routes are managed with sleeves, trays, and edge protection, your station supports you—instead of keeping you on alert for the next silent failure.

    Set up right, cable guidance is almost forgettable: device swaps are faster, routine resets easier, work friction drops, and anxiety over that next sudden disconnect disappears. It’s not about reaching perfect order—it’s about a workstation that delivers, cycle after cycle, with no silent breakdowns waiting to trip you up.

    Explore the full WorkBasic collection

  • Why Your Pet Travel Bag Setup Can Make or Break Every Walk

    If you’ve ever paused mid-walk, leash tense in one hand, fumbling through your bag for a wipe or cleanup bag while your dog loses patience, you already know: the difference between “packed” and “actually ready” for pet travel exposes itself fast. What looks organized on your doorstep—everything stacked, zipped, sorted—feels totally different three stops in, with your dog shifting, your bag sagging, and your hands juggling too much at once. The real friction isn’t just the pet’s unpredictable pauses: it’s being slowed down by gear that hides essentials behind layers, traps cleanup under comfort, or makes every sidewalk stop a messy scramble. PawGoTravel is made for these pressure points—where the real routine breaks discipline.

    When “Organized” Isn’t Really Ready: The Classic Pet Travel Setup Trap

    At home, a pet-travel tote looks set: wipes lined up, treats visible, leash and water bottle easy to spot. But the first curb stop on a busy street turns this neat prep into a slow-motion tangle. Instead of cleanly grabbing what you need, you’re reaching past a blanket to snag a baggie, sliding wipes out from under bowls, or unhooking a leash buried in the bottom. What felt tidied-up in your living room quickly turns awkward when rapid access—not appearance—matters most.

    This isn’t a rare meltdown; it’s the standard pattern on real city walks or car trips with three or more “quick” stops. Organized layers collapse into overlap: waste bags slip behind other pouches, snacks get trapped under a comfort item, and even a well-packed setup can force awkward reshuffles. You want a fast grab, but the bag structure works against your movement, so both you and your dog end up waiting out each pause instead of moving forward smoothly.

    Real Life Repeats: How Overlapping Compartments Slow You Down

    The problem gets more obvious with every stop. After the second interruption—dog pulls left, you grab the leash, try to reach for wipes—you’re not just slowed by the pet, but by your own bag design. The cleanup pouch you placed on top is now under a half-loosened snack bag or water bowl that’s shifted. Sometimes even dedicated pockets don’t prevent items from slipping, especially if the tote is soft-sided or built as one big compartment with loose dividers. Each attempt to speed up instead means an extra pause, a quick mini-restack, or a hunt for one needed item lost in the mix.

    There’s a visible cause: compartments overlap and shift under movement; “all-in-one” sounds efficient until you watch how one item constantly blocks, covers, or trips another when you hit real use. It’s not only unpleasant; each delay stacks on the last, adding drag and missed beat after every curb stop, water break, or nervous-dog comfort attempt. The gear that promised less stress ends up interrupting the trip over and over.

    The Hidden Cost of the All-In-One Bag

    Big-pocket totes and “multi-purpose” pet organizers pitch flexibility and tidy looks before you leave, but they reveal their limits after a couple of stops. The flexibility feels like freedom in a demo, yet becomes chaos soon as bowls, waste bags, and personal stuff start swapping places or sliding deeper into pockets mid-walk. The lesson hits fast: surface neatness rarely survives repeated access, and the more you’re forced to dig or reorganize, the more frustrated you—and your dog—become.

    The Chain Reaction: What Keeps Interrupting the Flow?

    The interruptions aren’t dramatic, but they’re constant. Each slowed reach, blocked pocket, or item overlap doesn’t just irritate—it quietly drains the flow from your trip. Instead of moving on after one quick action, you’re stuck juggling leash and bag, pet tugging while you rethink which pocket you stuffed the wipes into or where the snack pouch landed after last time. These micro-delays accumulate, making even an easy schedule end in scattered nerves and a dog that’s become twitchier from every unplanned wait.

    Picture this: by the third pit stop, you’re sure you packed plenty of cleanup bags, but now they’re wedged behind a bowl, or wedged next to the treats you added on the way out. Each reach becomes a quick search, bottle tips, treat pouch slips—just enough hassle to turn “organized” into “off-balance.” It’s not a setup failure, just death by small, repeated interruptions—none dramatic, all adding up, all stealing from the rhythm you expected.

    Comfort Items Can Slow Down the Whole Routine

    Even items meant to smooth the ride—blankets, sprays, chews—can turn into friction. A comfort blanket is great in theory, but in the wrong place, it covers or shifts other essentials just as you need them, so every calming move creates new fumbles. The effect multiplies if your dog gets anxious or distracted, forcing you to break stride again and again. Even with a “better packed” bag, this kind of spillover can keep sabotaging trips, no matter your preparation level.

    Small Changes, Noticeable Payoff: Rebuilding Seat-Side Access

    Fixing this routine tangle isn’t about adding gear—it’s about where items stay and how they come to hand after every movement. Relief comes from isolating what matters most: pulling high-use gear—cleanup pouches, bowls, wipes—into seat-side or door-pocket organizers. Instead of main-tote chaos, the stuff you reach for the most is always at hand, knee-level, with no zips or reshuffles. One-handed, on-the-move grabs become the norm rather than the exception.

    The shift is visible: the usual untangling, dug-in searching, and awkward restacks just… stop. Cleanup gear, water bowls, treats all stay exactly in place, ready to use as you pause—no hidden pockets, no rolling under blankets, no leash dropped while you dig. It frees your attention for your pet, not your bag, and makes every restart feel less like an ordeal and more like continuous motion—the single biggest difference in how a travel setup feels over the course of a real outing.

    Why the Difference Lasts—And Where Setups Still Break

    The goal isn’t perfection but reliable friction reduction under repeated use. Even the best seat-side setup doesn’t erase every awkward moment—mis-packing can still sneak in interruptions. But by separating your most-used pet, cleanup, and comfort gear into clear, always-accessible spots, the main rhythm of your out-and-back walk genuinely shifts: less clutter, fewer forced pauses, far less of the shuffle-and-repack routine. Instead of making changes mid-movement, your setup lets you move, stop, and restart without a second thought—and you stop avoiding trips that used to feel like a hassle.

    After a week of repeat trips, you notice the change: cleanup isn’t a search, snacks don’t go missing, and the pause-to-pace ratio finally tips in your favor. Calm looks visible, but it’s structural—your setup now works to keep the day moving, not to slow it down. That’s the difference between looking ready and actually traveling ready, and it’s where the real value in the right setup shows up, day after day.

    Find practical pet-travel gear designed for repeated, real-world movement and faster, less frustrating stops at PawGoTravel.

  • How Small Pauses at Neighborhood Corners Improve Dog Walks and Routine Flow

    When your dog stalls at the same corner every single walk, it’s not just another sniff—it’s a routine-level problem you can feel in your hands and patience. Suddenly, that daily loop you expect to finish in twenty minutes crawls—leash tight, your energy dropping, your dog less focused and more stubborn each day. The early signs: feet planted, repeated detours around last night’s tangled leash, cleanup wipes missing until the hallway’s already streaked with paw prints. The cost of ignoring these frictions isn’t theoretical. It creeps into your day as slowdowns, repeated stops, longer resets, and a routine that quietly gets heavier with every pass.

    When an Everyday Walk Turns Sticky

    Most dog owners notice the shift in feel before they spot the pattern: walks that once zipped by now stall, each block taking more time and energy. The leash rarely goes slack, your dog’s pull turns unpredictable, and the straightforward loop mutates into a slog you find yourself dreading—not for any one dramatic reason, but because the friction multiplies. You start negotiating with the route, not enjoying it.

    This isn’t behavior to correct or quirks to shrug off. These friction points are the routine’s exposed seams. Left alone, they wrap around your process and quietly overwhelm the “simple” walk you thought was locked in.

    Spotting the Real Friction Point: The Street Corner Pause

    Here’s where it starts stacking: You grab the leash at the door and fumble around backup collars or a dog toy sprawled in the entryway. Your dog’s bouncing to get started, but your first step is a shuffle through misplaced gear. By block three, the familiar snag hits—your dog brakes at the same lamp post, sniffs so long you eye the clock. Any time you try to rush past, the leash tangles, your dog lags behind, and forward movement stutters the rest of the way.

    This delay isn’t random—your dog is stamping their mental map, re-centering in the only way they know to keep the world familiar. For you, it’s a routine snag visible only because it repeats. Miss the signal, and you’ll keep battling the same pause every walk, same as you keep tripping over last night’s gear on your way out.

    Misreading vs. Noticing: Why Repeated Pauses Matter

    Push your dog past these checkpoints, and you don’t save time—you lose it further down the block. The leash snaps taut, your dog protests with backward glances, and the walk’s rhythm never recovers. But shift your handling—pause for a counted five at that spot, let your dog finish their check-in—and suddenly the leash softens, the stride smooths, and the rest of the walk realigns with far less effort. Ignoring friction points extends the struggle; noticing and adjusting dissolves them before they can stack up.

    Patterns That Sneak Up on You: Everyday Resets We Miss

    The pause and restart problem isn’t just out on the sidewalk. It moves back inside with you: post-walk, you reach for paw wipes only to find them buried under mail or left in the wrong room. Your dog, already antsy, plants muddy tracks through the hallway—now cleanup drags on too long, and your quick reset is anything but. Dog bowls may look lined up, but if you’re blocked by a stray toy or the food scoop is buried under yesterday’s receipts, the tidy setup costs time with every repeat.

    These aren’t disasters—just small access issues, stacking through each process. The more often you run the routine, the more these frictions turn into a handling drag, stealing minutes and mental energy in ways that rarely show up in the “picture perfect” version of your space.

    Real Signs Your Walk Routine Isn’t Working as Smoothly as It Looks

    • You find yourself rerouting to dodge a certain block. Not because you like the other street, but because you’re subconsciously avoiding the struggle of your dog’s repetitive pause.
    • Your dog pulls more, lags more, or refuses the leash after you force a pass. One sticky slow spot begins to drag down the rest of the outing.
    • Resetting after walks keeps getting slower. Leash adjustments, forgotten wipes, entryway detours—every step feels like it takes one beat longer than it should, every time.

    When these signs show up, you’re not just looking at an “untidy” day—you’re watching a routine losing its practical snap, turning the daily walk from a quick refresh into a cycle you want to cut short.

    Why Dogs Pause: More Than Just Scents

    This isn’t stubbornness; it’s dog logic. Your dog maps their world by locking in the familiar and double-checking boundaries—always at the same corners, posts, or curbs. A repeated pause is their way of managing territory and comfort, not a fluke. Forcing through only piles on resistance. Letting the check-in happen, on your terms, often quiets the restlessness that leaks into every other part of the outing.

    Skip their pause and expect more leash tension, reluctance, and less interest in what should be a routine pleasure. Give them those moments, and friction shrinks—not just on that block, but through the next reset and reentry at home.

    What Actually Changes When You Slow Down

    Try this tomorrow:

    • At the normal slowdown spot, stop and count to five. Let your dog do their check—instead of yanking ahead.
    • Watch for leash slack after: are you walking or dragging?
    • Notice whether your trip home and cleanup reset step down in strain—or if it all still feels like a series of hurdles.

    Within a few walks, many owners see the routine flow shift—fewer tangles, a more even tempo, and their dog settling faster at home. The setup hardly looks changed, but the pressure point—the “why does this always happen here?”—is getting handled, not ignored.

    When a Tidy Setup Isn’t Enough

    A space that looks organized isn’t the same as one that runs smoothly. You can have a leash rack by the door and a bin for toys, but if everyday flow means shuffling gear out of the way, reaching around hats to grab the leash, or tripping over shoes on the way out, you’re adding tiny delays each time. Likewise, a rest corner that looks plush can catch crumbs and hair, slowing the refresh you promised yourself would be quick. Bowls placed for “tidiness” may end up crowding the kitchen entry, blocking feet and drawing out reset with every bump and spill.

    The trap: a setup that passes the neatness test but costs you time and momentum every single repeat. These weak points aren’t fixed by making things look better—they’re solved by changing the way things actually work in repeated everyday use.

    It’s Not About Perfection—It’s About Repeated Use

    No one’s routine is friction-free. Even the best setup can’t keep surprises out. But if the same slowdown keeps creeping in—at the door, on a familiar block, resetting after a walk, or at the food bowls—the message isn’t subtle. These friction signals are invitations: rearrange the leash spot, stash wipes at the true point of need, shift the bowl out of the constant crosswalk. Sometimes the fix is physical, sometimes it’s just patience for the pause. Both matter more than keeping up appearances.

    Small Pauses, Big Payoffs: The Real Value of Adjusting Routine

    The routines that work best aren’t the fastest—they’re the ones that build in space at the right moment. A planned pause at the sticky spot outside, wipes waiting at the actual reentry (not across the room), or moving bowls out of the busiest kitchen lane all cut friction before it multiplies. New gear helps, but only if it lands in the path you actually take—not just filling a shelf.

    The real hack? Watch for the places you keep tripping, rerouting, or resetting and treat those as the center of your system, not an afterthought. The routine gets lighter, flow picks up, and the annoying drag stops building up day after day.

    If the sticking point keeps coming back, you’re not missing a secret. You’re spotting exactly what can change for smoother flow: reorganizing the leash zone, upgrading wipe access, or trading a forced rush for a controlled pause—exactly where your routine shows you it needs it.

    For more ideas on smoothing out your daily dog routines or to see helpful tools that make repeated resets less frustrating, visit DogPile.

  • Why Lighting Comfort Depends on Fixture Placement, Not Brightness Alone

    Why Bright Lighting Still Leaves You Struggling

    Hit your hallway or laundry room at night and the disconnect is immediate: the ceiling is washed in harsh brightness, yet your feet land in shadow, your basket’s edge blurs into the wall, and the steps ahead aren’t fully visible. The fixture overhead claims full coverage—yet corners fade, the mirror splits your face in half, and tasks still force you to squint or shift. This is the problem you notice not on paper, but in actual, repeated routines: lighting that seems “enough” but leaves you compensating every single day.

    How Room Lighting Becomes an Annoyance—Fast

    What feels usable in a showroom becomes a nuisance after a week of everyday use. Glare stabs from exposed bulbs. A bright spot floods the middle of the space, but side benches vanish into shadow, and folding counters beg for extra light you can’t find. Day after day, friction builds: missing the bench edge in the hallway, always shuffling laundry under tired eyes, or leaning at the mirror and finding one side lost to uneven shadows no matter how you reposition. It’s rarely about not having “enough” lumens—it’s about light aimed wrong, pooled only in the center, or failing to reach where you actually work and move.

    When Spec Sheets Hide Real-World Failures

    Plenty of ceiling fixtures promise high output, but numbers mean little if you’re ducking glare at the counter or tripping at a dark stair turn. A concentrated flush mount can glare off tile, casting the entryway bench or corridor edge into gloom. “Bright” can become a blinding patch that makes you avoid certain corners or switch angles just to see. In the bathroom, a single ceiling fixture lights the room—but the mirror is sliced in half with shadow, and grooming requires unnatural twists. These failures aren’t aesthetic; they’re real interruptions that sap confidence in your space every time you need its routine to feel seamless.

    Why Circulation Spaces Need Smarter, Not Just Stronger, Light

    Walk a hallway at midnight with a lone fixture blasting the ceiling, and you’ll still step into uncertainty along the edge. Truly functional lighting doesn’t just chase away darkness; it shapes usable visibility—flattening awkward shadows, highlighting steps, and keeping every zone in view without glare. In laundry or utility spaces, a fixture that blinds as you cross the room makes sock sorting or detergent pouring more effort than it needs to be. Over-lighting often brings more strain, not less clarity, if the spread is wrong or the edges are left unlit. That daily pinch isn’t solved with a brighter bulb—it’s the persistent cost of poor fixture positioning and design.

    Bathroom Mirrors: Where Single Fixtures Fail and Shadows Stay

    Grooming at a mirror becomes a guessing game when the only light comes straight down from above—a scenario where faces always appear uneven and tasks never quite feel finished. If the first thing you do is lean or shift to dodge a shadow, no wattage will fix it. Side-mounted or broad, diffuse wall lights turn that routine around, removing cross-shadows and making faces visible at every angle—even when steam or weak daylight mess with the scene. The difference? A smooth start to your day versus constant compensation.

    Immediate Wins from Small Lighting Tweaks

    Blasting a room with more wattage rarely makes the real difference. Instead, practical gains happen fast when spread, diffusion, and placement are fixed. Move a flush mount a foot toward the wall and the troublesome shadow behind the shoe rack disappears—no new fixture required. In a tight laundry room, trading a bare ceiling panel for a semi-flush light with a diffuser eliminated blinding surface glare and uncovered the back shelf, making daily sorting straightforward. The spec numbers barely moved. Every routine felt lighter after.

    Essential Steps for Reliable, Comfortable Lighting

    • Simplify hallways and corridors by managing glare and edge darkness: Instead of amping up brightness, look for ceiling or wall lighting that targets persistent shadows along baseboards and walls, making every movement path safely visible, especially on uneven nights or with tired eyes.
    • Make mirrors functional by flanking, not flooding: Add side sconces or wide, diffuse fixtures at face level so grooming no longer means shifting for visibility. This evens out facial features and removes shadow guessing, no matter the natural light or time of day.
    • Pick fixtures that blend spread and softness for laundry and task spaces: Use lens-diffused or broad panel lights to erase sharp shadow lines on countertops and shelves. This keeps every surface visible for folding, sorting, and reading labels, even in small utility rooms.

    The Everyday Gain: Visibility That Matches Movement

    The biggest shift isn’t in how “lit” a room appears but in how rarely you pause, squint, or shift around problem spots while moving through your space. Fixtures chosen for how and where you move remove the stress of unseen steps, missing items, and awkward glances at mirrors or counters. Instead of performing routines around your lighting’s flaws, you work and walk directly—benches show up in peripheral vision, laundry items stop hiding, and mirror moments feel clear despite moisture or low natural light. Over time, the low-level irritation of compensating for bad light vanishes. The right fixture placement and diffusion makes the difference between a room that’s only technically illuminated and one that’s reliably easy.

    Find practical indoor lighting that makes daily routines easier at LightHelper.

  • How Anchoring Car Accessories Reduces Daily Driving Interruptions

    A neat car interior doesn’t always translate to easier driving. It’s the repeat interruptions—like pushing aside a charger cable for the third time this morning, or readjusting a floor mat that exposes grit onto your shoes after every errand—that sap momentum. The illusion of “organized” quickly breaks down when the same cable bunches under your heel, loose mats shift as you hurry back in, or side pockets become holding pens for whatever you don’t actually want in your way. The real difference—and repeated friction—shows up not in how your car looks at rest, but in how every piece withstands actual use under pressure: fast re-entries, quick stops, back-to-back errands. This is where most setups reveal how temporary their “order” really is, and where DriveWellSupply’s real-world car gear actually earns its keep.

    The Subtle Drag of Repeat Friction

    Car organization fails you in the tiny ways you never plan for: cables slinking underfoot, mats opening just enough for debris, organizers turning into shifting piles. By Wednesday, the pattern is predictable: every shortcut—leaving a cable loose, skipping a mat anchor—shows up in extra steps you didn’t budget for. You slip behind the wheel, grab for your phone, and pause: cable out of reach, floor mat curled at the edge, a small cargo runaway wedged by the seat. This isn’t outright chaos, but a constant series of low-level corrections that slow you down whenever you need quick flow: after work, mid-errand, during the fast coffee stop when you’re already half-late.

    No one loses time to overt mess. Instead, it’s the handful of seconds spent fixing what didn’t hold—the charger fishing expedition under the seat, the mat pushed forward by a careless passenger—that stack up. Not enough to call it a problem, but enough to remind you, yet again, the setup isn’t built for how you actually move through the car.

    When “Looking Clean” Isn’t Enough

    Most car interior solutions create order by appearance, not by staying power—they solve visual clutter without addressing the everyday jolts and resets your routine throws at them. That sleek charger? It’s fine until its cable loops into the footspace, demanding another reach. Mats that look locked in become liabilities the minute you hustle in after groceries, and one unanchored edge means that Monday’s vacuum is gone by Wednesday’s commute. Pockets start neat and intentionally empty, then fill with items bumped from elsewhere—old charging blocks, receipts, restless hand sanitizer—until they’re just obstacles to dig through every time you reach for what matters.

    Most “hidden” sources of snag reveal themselves right as you need to move fast. A dangling charging cord gets trapped on the seat track, a misaligned mat blocks a clean step, or a cluttered pocket slows you down at the carwash bay. Visual order doesn’t survive real routine; it collapses at the first sign of stacking errands or shared-driver turnover.

    Anchoring Down Everyday Gear: What Actually Works?

    Real peace-of-mind isn’t about how tidy things sit at the start of the week—it’s about whether your anchors hold on Thursday afternoon. The smallest, toughest fixes: secure the cable every time, press the driver’s mat fully back after each re-entry, and keep organizer zones uncluttered, not just when cleaning, but right after stressful stops.

    Specifics matter: a charger routed through a solid guide near the seat means it doesn’t tangle or get kicked aside. A mat with aggressive grip along the entry edge prevents the slow trickle of beach sand or parking-lot gravel that accumulates when tiles drift. Lean organizers that keep only your must-haves beside you mean fewer shifting piles, less seat-edge bunching, and no last-second fishing for keys or sanitizer in a maze of random storage spaces.

    Real Moments: Where Weak Setups Reveal Themselves

    • Pulling into a store at dusk with armfuls of takeout, and realizing your charger cable hasn’t disappeared under the center stack—you start the car without the usual hunt.
    • After a full day of pick-ups and drop-offs, all four mats still sit flush against the sills—no extra sweep needed, no rogue grit wearing into the carpet.
    • The curved slot on your seat organizer means your phone and wallet stay locked in place even when the car’s packed and you’re squeezing through the door on a rainy night.

    A stable setup keeps small messes and last-minute adjustments out of your drive—your routine doesn’t come with built-in time penalties or repeated, fiddly corrections.

    The Cost of Quick Fixes: Hidden Cleanup Burden

    Most quick fixes look efficient but cheap out on repeat performance. When you skip install steps or settle for makeshift “solutions,” you don’t notice the lost time in one big event, but in micro-interruptions—snagged shoes, bunched mats, tangles that turn into afterthought sweeps and five-second delays. Multiply by a week, and you’ll discover you’re vacuuming or “just fixing” the same spots over and over, because nothing held where daily stress lines up: floor corners, seat space, reach zones, charger lines.

    After a week with a weak setup, the cleaning session feels familiar for all the wrong reasons—you know exactly which mat slid, where the cord got ground-in dust, which organizer slot became a dumping ground. These aren’t just cosmetic annoyances, but recurring signals your setup isn’t absorbing the friction your daily life delivers.

    The Real Test: Back-to-Back Drives

    When your schedule compresses—errands, carpools, unplanned stops, and tight parking flows—every interrupted motion reveals the limits of your car’s structure. If organization isn’t reducing the moves you repeat, it’s not a real upgrade. A week of returning to the car, gear always where you left it and footwell always clear, tells you the setup isn’t just tidy—it’s working. Your measure isn’t how sharp it looks midweek, but how rarely you pause, reach down, or nudge something back into place while climbing in or out, loading or unloading, or doing pickups on the fly.

    Making the Switch: Small Upgrades, Tangible Difference

    Swap a sliding mat for one truly anchored—especially at the driver’s edge. Secure charger cables where they land every time, not where they drift after three stops. Small structural upgrades, especially at stress points, close the gap between “acceptable clutter” and true ease. That means less restaging, fewer awkward pickups, and a real drop in frustration as the week builds up—because your setup holds up.

    Instead of cosmetic resets, you get routine that’s built for repeated movement—short trips, pack-and-go, return entries at night—and a car that finally helps the day run, instead of cropping up as the hidden source of delay. For car gear that actually stands up to real use, visit DriveWellSupply.