Blog

  • How Cold Weather Reveals Hidden Flaws in Car Organization and Charging Setup

    Cold mornings reveal where your car’s “organization” falls short. A trunk that looked tidy last month now hides your gloves under grocery bags and buries your charging cable beneath a stiff console bin. Reaching for anything with half-frozen hands becomes an exercise in frustration—not just slower, but physically harder—because small, neat tricks turn into barriers when you’re layered up and running late. That’s when the cost shows: a car that appears organized, but keeps slowing you down with every stop, reach, and fumbled grab. In real winter use, appearance is nothing without access—and that’s the line DriveWellSupply draws every season.

    When Tidy Looks Fail the Real-World Cold Test

    Winter shortens every margin for error. You step into your car, already behind schedule, and every seemingly “clever” stow spot turns stubborn. That line between “looks sharp” and “actually works” gets harshly underlined—especially when a charging cable disappears behind a seat bin or a must-have item drops just out of reach.

    Picture jamming your gloved hand between a stiff organizer and a sliding backpack, hunting for a charger that—you remember too late—is looped out of sight. The cold leaks in, your phone’s almost dead, and every second costs. Those same “clean” cable routes, chosen during warm-weather optimism, now turn into small daily standoffs between what looked right and what works cold.

    Little setup mistakes compound fast. A floor mat that once stayed put now bunches under your boots. A high-sided bin that held odds and ends now traps essentials just out of grasp, forcing you to dig and drop things when you’ve got three stops in the next half hour. January’s rush exposes every choice you made for looks over reach.

    Why Winter Multiplies Small Setup Mistakes

    When speed matters, long cuts and buried items cost you. On mild days, you don’t notice how many steps it really takes to find your charger, wipes, or spare gloves. But winter magnifies every reach and every layer in the way. Slush tracks inside, liners shift under wet boots, and shiny organizers start getting in the way of what you actually need to grab.

    The problem isn’t aesthetics—it’s routine failures. Deep bins block quick access. Overlapping mats slide and pool water. What looked “finished” in October becomes, three months later, the reason you’re stalling in the driveway, re-adjusting containers and peeling up sticky cables that never seem to land where you left them.

    Repeated Use: Where Theory Collides with Daily Friction

    The difference isn’t obvious after one drive. It’s four workday mornings in, when your hands are numb and each time you grab for something, it’s shifted, buried, or blocked. Charge cables that used to be “out of sight” now wedge themselves under floor items. Phone mounts sag when you need navigation now. Open trays hold everything except what’s tumbled underneath—a stray glove, a payment card, the charger’s tangled end you keep chasing around spills in the cupholder well.

    That’s how “clutter” sneaks back in: not as a mess, but as things drifting from setup to setup, always out of reach. A car can look under control but force you through the same slowdowns—cold-handed fumbles, awkward seat-bucket fishing, stopping to dry off what slid into melted ice—day after day.

    Everyday Scenes: Friction in Ordinary Cold-Weather Routines

    Blocked Fast Access at the Worst Times

    Seven in the morning, frost on the windshield, keys in one hand—your cable is nowhere in sight. It’s squashed behind a deep-sided bin, hidden until you dig and catch a zipper on the edge. The same drama plays out after every store run: dropped cable, short patience, scraped knuckles. Each trip replays the same costly friction, proving that “out of sight” can mean out of reach when you most need it.

    Floor Protection—Help or Hindrance?

    New floor liners are supposed to shield your car from winter filth, but if they slide every morning, you’re left fixing gaps and drying up slush that sneaks under shifting corners. What starts as protection easily becomes one more distraction—another step before you can even pull away.

    Gloves and Essentials on the Move

    Bins slide. Trays tip. The gloves you left handy end up wet on the back floor. The wipes are pressed under a leaky ice scraper. Instead of a system ready for winter, you’re cycling through pick-up-and-replace loops before even starting the engine.

    How Real-World Adjustments Make Winter Smoother

    The fix isn’t more bins or more rules—it’s honest, repeatable access. After enough cold starts, what works makes itself obvious:

    • Route chargers along visible, reachable spots—across the centerline or passenger seat edge—so you don’t lose time (or fingers) digging blind.
    • Swap tall, closed bins for low trays and open dividers where you actually grab things. A shallow caddy behind the armrest keeps gloves upright and dry, wipes in play, and cables within a gloved grasp.
    • Drop the pursuit of the perfect “clean look.” Keep essentials visible and within a single move from seat to door so you reset your setup without a full unpack every night.

    The effect isn’t dramatic on Day 1, but within two weeks: routine starts speed up, glove hunts stop, and cable access isn’t another source of morning stress. Appearance takes a back seat to the one thing you actually notice after repeated use—effort saved with every cold drive and every return trip in the dark.

    When Winter Routines Demand More Than Just Looks

    You won’t find a perfect, forever setup. Some friction returns, some habits reset under new routines. But a practical approach—systems that favor repeated, gloved, distracted reach—means winter aggravation doesn’t pile up unseen. Rig your car for moves, not just for looks, and let the small wins stack up: one less item lost, five seconds saved, no repeat cable hunt tomorrow.

    If you want practical, field-tested car setups and accessories built to handle daily winter use, visit DriveWellSupply.

  • Why Separating Cat Feeding and Play Areas Reduces Household Mess

    Every indoor cat routine breaks down faster than it looks: you reset the calm after a meal—bowls lined up, water topped, mat neat—then you blink and the order is gone. Now you’re nudging a bowl that slid halfway across the tile, sweeping stubborn crumbs out of walkway corners, and sidestepping stray toys that weren’t there ten minutes ago. What’s actually wearing you out is never just your cat’s energy—it’s the friction from feeding, play, and rest constantly overlapping the same patch of floor. When your setup looks “settled” but you keep redoing the same cleanups, the underlying structure isn’t working with you. You need a setup built for routines that never stay neat for long—a StillWhisker home recognizes this cycle isn’t just normal, it’s a design problem you can see and fix.

    Invisible Boundaries: Why Feeding and Play So Easily Collide

    Combining feeding, water, and toys in a clean corner always seems efficient—until repeated use proves it’s wishful thinking. That tidy post-breakfast lineup unravels the second a ball ricochets under the feeding mat or stray kibble gets kicked behind the water bowl. The mess isn’t loud, but you notice the aftershocks: crumbs catching bare feet at night, water pooling where a toy blocked the bowl, and feeding setups mysteriously migrating into walkways you meant to keep clear.

    Shared zones invite quiet mess that keeps coming back. Every “almost-fits” arrangement slowly leaks—feeding cycles spill into play, play encroaches on nap mats, lines blur. Instead of a cleanup, you end up retracing your steps, finding the same toy tangled near the bowl, or realigning the same mat at midday because the reset won’t hold under actual use. The space can look organized; living with it tells a different story.

    Scenes from a Real Day: Where Cat Calm Turns into Hidden Upkeep

    The Feeding Area That Won’t Stay Still

    Morning: your setup’s in line—bowl against the wall, mat flat, water level just right. Then, that all-too-familiar scramble: a quick dash and the mat glides half a foot, bowl tips sideways, crumbs forced into new territory. By lunch, a single play burst forces you to sweep, pick up, and reposition what should have stayed put. When the “reset” feels like three jobs instead of one, your arrangement is doubling your work.

    Play Zones That Don’t Stay Contained

    Toys rarely respect their boundaries. A mouse from the living room ends up under the food dish. Crinkle balls wedge near the litter box or surface under kitchen chairs. You spot food-dusted toys peeking from under sofas, and discover the so-called “play zone” is now a landing pad for splashes from the water bowl. Moving through the room means navigating not just obstacles but fragments of every routine—barely noticing until the vacuum jams or a foot catches a ball.

    Cleanup Supplies Never Where You Need Them

    You stashed wipes and the broom in a “handy” drawer, out of sight. But as soon as the water bowl slides or crumbs scatter after play, you’re walking across the room for supplies instead of grabbing what you need where the mess begins. The cleaning itself isn’t always hard but gets fractured: each spill waits, growing until you’re forced into a full-area sweep, right when you least want to.

    Looking Tidy Isn’t the Same as Working Smoothly

    Non-skid mats, weighted bowls, favorite toys nearby—these look like sensible upgrades. But under real routines, items drift even when upgrades are in place. At noon everything lines up; by afternoon, you discover the mess has quietly spread its borders—crumbs in the walkway, toys among feeding gear, mats out of step with the rest of the room.

    The headache grows concrete: you reach to refill the water, only to move two toys first; you plan a quick mat wipe but have to clear extra debris from a shared path; a rest mat, meant to comfort, edges too close to feeding, sowing the next round of scattered kibble. Visual order hides a persistent maintenance problem—once even one item shifts, routines tangle back together quickly.

    The Real Cost of Overlapping Routines: Time, Attention, and Reset Fatigue

    Let a few inches slide between feeding and play and the cycle gets relentless: toys drag crumbs, water travels with paws, mats snag or overlap, and before long yesterday’s small spill is today’s underfoot obstruction. The mess is easy to dismiss until it becomes another round of pickups that chop up your day, especially during busy mornings or before guests arrive. You were aiming for a ten-second reset; instead, invisible overlap forces you back for double or triple work.

    The clear sign your structure needs help: fixing the same failure point—feeder inching into play, mat bunching up, toys blocking refill—over and over no matter how “organized” the area looks. Letting feeding and play blend “just for now” only locks in that cycle, making one fix the trigger for the next mess.

    One Simple Fix: Physical Separation That Lasts

    Physically split your cat’s feeding and play space—even if all you can manage is a mat’s length or a furniture edge. Most indoor cat owners underestimate what a few feet, a chair leg, or a storage bin can do. Once even a minimal boundary goes in, spills no longer fuse with toy debris, bowls stay put, and each routine stops disrupting the others. The result isn’t perfect, but you’ll notice fewer double-messes—and when you need to reset, jobs stop bleeding into one another.

    What a “Separated” Setup Really Feels Like

    • Feeding mats keep crumbs contained—no longer dueling with stray toys for the same territory.
    • Water bowls stay out of play’s collision path, reducing surprise puddles or forced resets.
    • Toys wait in their actual corner, so debris and cleanups collect where you expect, not all over the house.
    • Reset time drops: wipe, refill, and pickup become single-purpose actions, not an all-area sweep.

    What Counts as a “Boundary”

    No major remodel needed. Try:

    • Placing the feeding mat behind a chair, with play gear anchored elsewhere.
    • Positioning a storage bench or shelf to break up the routine overlap.
    • Spacing a bowl and play area the distance of a second mat—often enough to block most encroachment.

    Even a modest gap forces routines to show you where they overlap, making it clear what needs containment and what finally stays manageable without constant correction.

    Why This Works Over Weeks—Not Just the First Day

    Mess creeps, resets drag out more than you expect. The crucial difference between a home that stays settled and one that doesn’t is how often you’re interrupted by the same friction. Owners using physical boundaries—rigid or soft—consistently find that areas “hold a reset” days longer. Fewer spot cleans, briefer midday nudges, less chasing the same bowl for the third time. The energy you used to spend doubling back goes back to actual routines, not perpetual re-tidying.

    Added bonus: cats often nap in the last place they played. When play and feeding zones stay distinct, it’s less likely the rest mat creeps into a bowl, or water gravitates toward a tangle of plush toys. Boundaries shape behavior by reducing the crossover that kicks off the next cleaning spiral.

    Calm Isn’t Just Appearance—It’s a Setup Designed to Hold

    If you’re resetting the same floor patch twice daily, or your feeding mat has drifted into walking space by dinner, your setup isn’t matching your cat’s cycles—it’s quietly adding more work. True calm isn’t about chasing after crumbs; it’s about a structure that keeps each routine in check. If you keep finding owner interruptions, not just visual clutter, try moving a boundary, not just another bowl. You’ll know difference not by a perfect look, but by which jobs finally stop repeating—meal after meal, reset after reset.

    For more practical structures and solutions built for real indoor cat life, visit StillWhisker.

  • Ensuring Precise Rivet Head Alignment During Extended Use

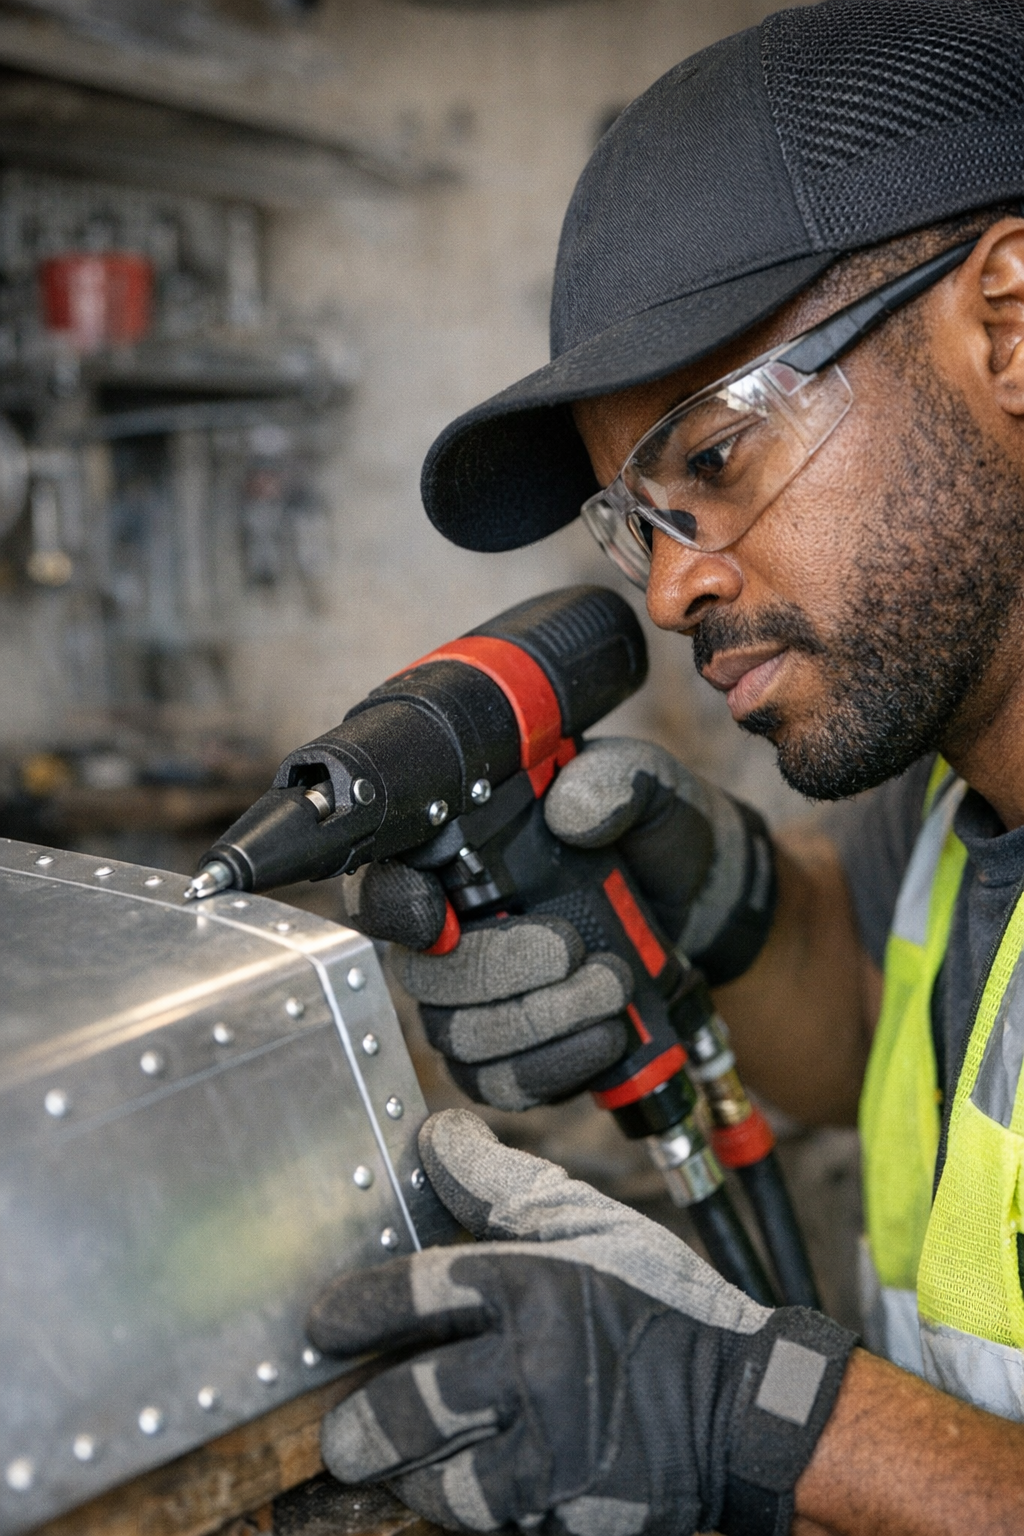
    By the third row of rivets, that creeping frustration isn’t just in your forearm—it’s running along every seam you check. Misaligned rivet heads don’t scream for attention at first, but they build up fast, especially if your rivet gun is working against you instead of with you. In any real shop, getting into a flow with repetitive fastening feels effortless—at first. You’re focused, the placement looks tight, and each pop echoes progress. But as fatigue rolls in and sawdust settles on the bench lights, what starts as a small drift in alignment turns into a bigger, more stubborn mess. Suddenly, sanding and re-drilling replace forward motion. This isn’t just about putting in rivets; it’s about not having to clean up after your own tools.

    How Minor Rivet Drift Turns Into Major Shop Friction

    No one loses time on their first five rivets. The real trouble sneaks up over the next fifty. Back in a cluttered corner, working a long panel, you check your line and realize the seam is rough—full of bumps and tiny chips you’ll have to sand out later. Keep using a gun that hides your sightline or slips under repeated use, and you find the same story: crooked rows, uneven gaps, and unfinished business that drags out your shift. The costs aren’t just in materials—they’re in lost patience and extra runs with the sander when the job should be out the door.

    Most alignment issues aren’t dramatic—they’re sneaky. The rivet head might be off by a hair, the seating just a touch crooked, that momentary wobble magnified when you’re holding a panel just-so. Hour by hour, what feels minor multiplies—until your “quick job” becomes a rework marathon.

    Sightlines and Consistency: Why Some Guns Make the Grade and Others Fail the Shift

    Spec sheets always promise ergonomic balance and heavy-duty credentials. But in the actual rhythm of drilling, fastening, and scrambling to finish overhead or sideways installs, it’s visibility and control that set the real winners apart. In the morning, it all feels under control—every hole lines up and every rivet sits flat. By late afternoon, your stance is off, your back aches, and the gun that seemed balanced now blocks your view just when you need clarity the most.

    When the trigger sticks out too far or the nosepiece is bulky, you can’t see the rivet head seat. A glance turns into a squint. If you’re working between beams, or stretching one-handed to catch the last rivet behind a bracket, every blocked sightline adds risk of tilt or misfire. Quick fixes become new chores—undoing what should’ve taken five seconds each.

    Ergonomics Aren’t Enough When the Job Gets Awkward

    It’s not enough for a tool to “feel good” when you pick it up. After twenty round after round—shoulder high, upside down, in a cabinet corner—you notice whether a gun lets you see your target.That critical moment before the pop: Is the rivet flush, or is your hand guessing? Bad design blocks you at the worst second and turns a precise job into a guessing game. Less guessing means fewer ruined rivets, less dusting, and a faster move to the next phase—whether that means cutting, sanding, or loading out.

    On the Floor: Small Misalignments That Dominate the Day

    Mid-way through a sheet metal install, you swap between overhead and side panels. Non-dominant hand locks in a rail, main hand tries to steady the gun—but the nose is clunky, and you lose angle just as you squeeze the trigger. Six, seven placements in, and you check: several heads off mark by three, four millimeters. Now comes the extra sanding, reaming out mismatched holes, and sweeping debris into a pile that just grows as the hours pass. Every small drift feels bigger as your patience thins.

    These aren’t rookie mistakes—they’re tool-induced. Each pause to correct alignment, each squat to clear metal shavings, steals momentum from the day. With the wrong gun, you don’t just lose a few seconds per rivet. You lose flow, rhythm, and the satisfaction of seeing clean rows run long and true.

    The Value of Actually Seeing Every Rivet

    After too many days chasing down subtle misalignments, swapping to a gun with a cutout around the die and a tapered, narrow nose changed everything. Suddenly, the seat was visible—even at weird angles, under lights, or with gloves in the way. Being able to confirm every rivet, before and after the pull, meant no more second-guessing or retracing. I adjusted my grip slightly forward for better tip control, and the drift dropped off. Seams looked crisp, jobs finished faster, and I wasn’t dragging the sander out nearly as often. Crucially, precision held steady deep into longer shifts, not just the first twenty minutes after lunch.

    How Fatigue and Tool Drift Quietly Kill Productivity

    All the high-torque numbers and “all metal” labels in the world don’t matter when, after three hours, your arms are tired and your line of sight is gone. That’s when rough edges, unwanted gaps, and accidental skews start piling up. If the rivet head is hard to see, or the tool vibrates with each cycle, you’ll end up fixing problems the tool created.

    Patterns to watch for: Are your seams sloppier after lunch? Do errors pile up as you rush to the finish? Mistakes that multiply with fatigue are usually about visibility and control, not skill or supply. The tool is losing its edge right when you need it most.

    Keeping Alignment Reliable: Practical Habits for Long Jobs

    Over a long day, a few non-negotiables separate a rushed fix from a satisfying finish:

    • Clear sightlines, always: Pick a slim, tapered nosepiece with enough cutaway to verify placement from your real working angle—nobody works straight-on for every rivet.
    • Steady balance, all shift: A gun that resists vibration and stays balanced when you’re working flat, vertical, or at arms’ length preserves accuracy, even late in the day.
    • Grip that adapts: When fatigue sets in or angles get awkward, edge your grip forward to manage tip drift and keep each pull controlled.

    Don’t judge your fastening tools by the catalog spec or those first clean placements. Ask yourself: When I’m tired and rushing, how much can I actually see? How steady is my repeat motion after fifty pulls? Those details don’t just save time—they save the whole seam from extra sanding, touch-ups, and lost hours you’ll never get back.

    http://gumboll.myshopify.com

  • Entryway Storage Showdown: Bins or Baskets for Lasting Order

    The truth about entryway storage: the right container is the difference between a reset that sticks and a system that collapses by Thursday. It’s tempting to think organization comes down to picking bins that match or baskets that look great in a photo. But step into most front halls at 6 p.m.—after the backpacks drop, the muddy sneakers scatter, keys go missing, and mail piles up—and it’s obvious: what you chose for those few feet inside the door decides whether you regain control or fight mess on repeat.

    The Honeymoon Phase—And What Happens Next

    Fresh bins or baskets give that satisfying “after” shot. The floor empties, gear vanishes, and the bin lids fit—at least until life reloads the entry. By day three, the system is already stressed: kids drop shoes on top of yesterday’s jacket, that hat you need tomorrow is buried two layers deep, and whatever’s in the bottom of each bin stays untouched (and possibly unseen) until you’re desperate enough to dig.

    Baskets are friendlier for grabbing items on the go—but they also put clutter in full view. Scarves slip off stacks. Mail tumbles onto mittens. What began as an organized row turns into a jumble in plain sight. Bins keep chaos sealed up, but with every new “just for now” addition, visibility and order slip away. The difference between quick access and a chore comes down to what lives inside the container.

    Where Organization Breaks Down

    It’s not about hiding the mess. It’s about handling the mix that builds up day after day. Picture Friday morning after a busy week: you’re late, searching for your gloves. In a basket, yesterday’s bills and a tangle of headbands are in the way. In a bin, you’re fishing elbow-deep through shoes, a dog leash, and last season’s mask. Small items get swallowed by the pile—or worse, get put back anywhere space appears in the rush out the door. Each round of “fixing” ends up as shuffling, not sorting.

    Most bins and baskets fail the second they become general storage. What started as a hat basket becomes home to homework packets, snack wrappers, and sunglasses. A deep bin meant for shoes ends up with lunchboxes on top, or a lone flip-flop pressed somewhere under winter boots. The result isn’t just slower access—it’s family members asking “where’s my stuff?” and putting things down one room too far from where they belong.

    Why Category Separation Matters—Not Container Type

    What actually works in the long run? It’s rarely the bin or basket itself, but the boundaries inside it. Dump too many unrelated items together, and you get a mixed bag whose contents only get messier with every grab. When containers separate roles—by category, family member, or routine—the system stays usable long after the initial clean-out.

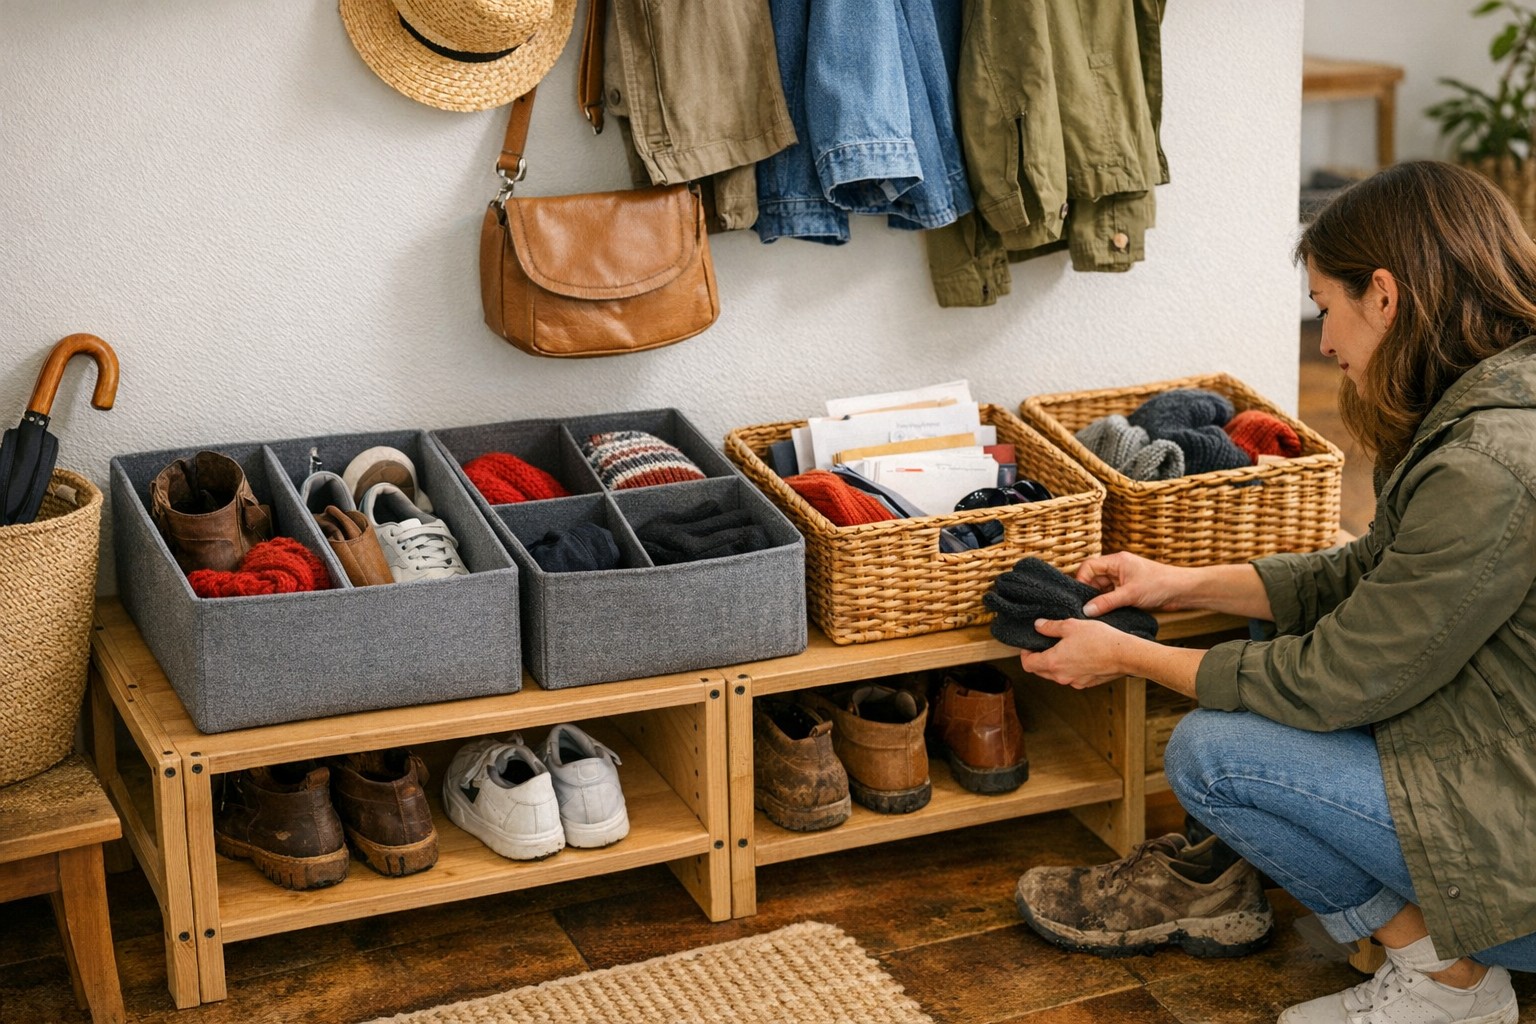
    Dividers change everything. Suddenly, there’s a narrow slot just for hats, a section for this season’s gloves, and a spot for each person’s shoes. One person’s muddy cleats can’t bury another’s ballet flats. No elaborate stacking or folding needed—just defined drop zones. Overstuffed bins become manageable again. In the chaos of daily comings and goings, a divider saves everyone from digging, guessing, or dumping out a pile to reset.

    Real Tactics That Survive Real Life

    Define Zones, Even in Small Spaces

    Oversized bins and baskets lure you into one-size-fits-all thinking. But smaller, purpose-specific containers—one for hats, one for keys, a narrow one for gloves—force separation and discourage mixed piles. A bin holding “whatever’s loose” becomes unmanageable fast; containers with a focused purpose make clutter harder to hide, easier to control.

    Use Dividers and Labels—even Makeshift Ones

    You don’t need custom organizers. Cardboard or thin wood creates instant sections in a deep bin. A strip of tape and a black marker signal “this half is for shoes, that half for mittens.” Labels on the front of baskets or bins help everyone—from family to guests—get things back in the right spot and avoid the every-morning treasure hunt.

    Don’t Settle for Out-of-Sight—Make Rules for What Goes In

    Just hiding mess isn’t enough. Every bin and basket in the entryway needs a clear rule—and a limited set of roles. “One item type per container” is a real test: if you reach for a hat and pull out last week’s paperwork, the system needs tightening. When items are truly isolated, resets go fast and you spot problems before they spread into the next room.

    Why Entryway Storage Decisions Echo Everywhere Else

    A good storage system at the front door isn’t cosmetic. It shapes how clutter—or clarity—spreads through the entire house. If you spend every week re-sorting, backtracking for keys, or snapping at kids to find their own shoes, the likely culprit isn’t family effort—it’s a container failing to set boundaries and keep categories clear.

    Switching to smaller bins, adding dividers, and labeling sections prevent constant reshuffling. Your entryway can survive changing seasons and active routines—without the rest of the house absorbing the overflow. Less time redoing the system means more hours where things stay found, and clutter actually remains at the door, not in the kitchen or living room.

    Let Your Entryway Work as Hard as Your Routine

    The right bins, dividers, and purposeful separation aren’t just organizing tools—they’re what keep that small square of floorspace from becoming a never-ending reset zone. Make each container earn its keep by making access simple, keeping roles clear, and isolating the mess before it multiplies. The reward isn’t a perfect photo, but a routine that moves forward, not backward, every time you open the door.

    Find practical dividers, bins, and category-focused entryway storage at ClosetWorks.

  • How Strategic Storage Design Keeps Your Yard Walkway Clear and Functional

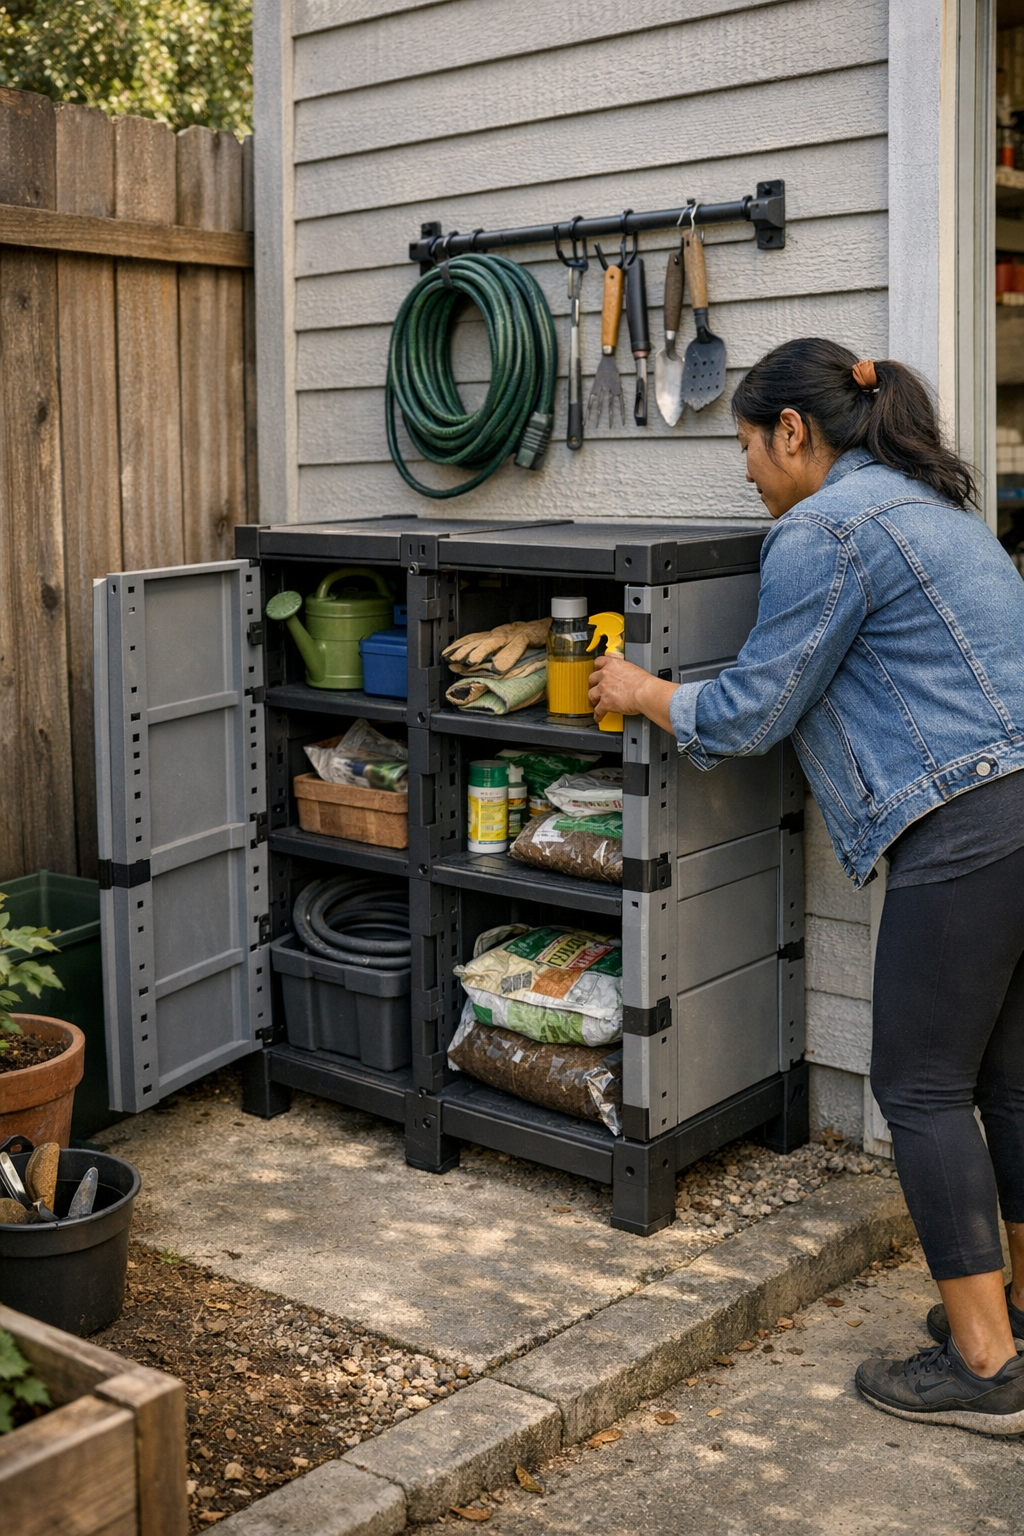
    The first time you clear a cluttered walkway with a new set of outdoor storage units, the difference nearly smacks you in the shins: suddenly, you’re not hopping over rakes or catching your foot in garden hoses just to cross from the back door to open yard. The path is clear, the mess swallowed by a neat wall of bins and racks lined up along the garage or side fence—and it feels like a win. But the relief is short-lived. Over a few busy weeks, a different pattern takes over. Bins bulge, tools wedge together, random bags get balanced until the order is fragile at best. The footprints may be streamlined, but the routine is still jammed. You find yourself circling storage edges, stepping around new piles, and bracing every time you need a tool at the back.

    When Clearing the Path Just Shifts the Friction

    Shoving clutter to the edge isn’t the same as solving it. Most of us—eager for quick progress—push what’s loose to the far fence, garage wall, or shed corner. It looks clean, for a weekend. Lines are straight, the ground is open, and there’s nothing ankle-high to trip you up. But almost immediately, the routine hits resistance. Every retrieval adds another item that can’t quite go back where it started. Bin lids stop closing. Tools go back out of order. Soon, instead of an open walkway, you’re navigating a wall of compressed stuff that slows every reset and multiplies new messes where space is tightest.

    Real use reveals the flaw. You roll the mower out, but block the step ladder. You drop garden forks into the nearest bin—then wedge in muddy gloves because you’ll “deal with it later.” School bags end up balanced on empty planters, and every new return blocks something else you know you’ll need before week’s end. The surface order collapses as fast as routines demand access, and what’s “out of the way” becomes the main place you get stuck.

    Edge Compression: The Slowdown You Stop Noticing

    If you’ve ever found yourself digging for a trowel behind soccer balls or dragging winter boots off a shelf just to reach a hose, you know “order by compression” only lasts on camera. As each day piles up, access gets slower. The temptation to drop things “just for now” grows—and it becomes genuinely harder to put anything away right, since the whole edge is full of misplaced returns.

    The routine grinds. You’re rushing to water plants before dinner, but need the hose head buried behind folded chairs and a stack of bins that never got closed. After a rushed grab, you stuff everything back, but the arrangement is now worse than before. The setup’s real failure isn’t the first clean—it’s how little it absorbs real habits without falling apart.

    Overflow Moves—It Doesn’t Disappear

    Walk the storage line a week later and you’ll spot the shift: gardening gloves between boxes, low corners stuffed with balls, half-dead planters back where boots should go. The places that stay just out of direct sight become quick drop zones. What looks organized in a snapshot gradually blocks daily flow and movement, until the path is less practical than when you started.

    The Difference Between Looking Organized and Working Clean

    Shoulder-to-shoulder storage walls may impress guests, but they become catch-basins for lost-and-found and overflow. Sharp visual lines mask the chaos underneath: a neatly stacked edge where every trip to retrieve the hedge trimmer means tugging out three tarps and a camp chair. Each “just for now” return makes proper resets less likely, and after a few busy weeks, no one wants to tackle the repair. Actual routine suffers most—simple jobs turn into tedious shuffling, and nobody wants to be the one to fix yesterday’s shortcut.

    The Tuesday Test

    Picture a Tuesday evening: you just want the hand spade, but a collapsed pile of sports gear is blocking it. You move a tote, juggle two buckets, and finally pull the spade from the back—knowing the stack you leave is teetering. The reset gets skipped again. By Friday, the edge is so crammed that returning one thing means moving three just to finish. So the area stays blocked, and slow resets become the new baseline.

    Physical Gaps: Breaking the Wall That Blocks You

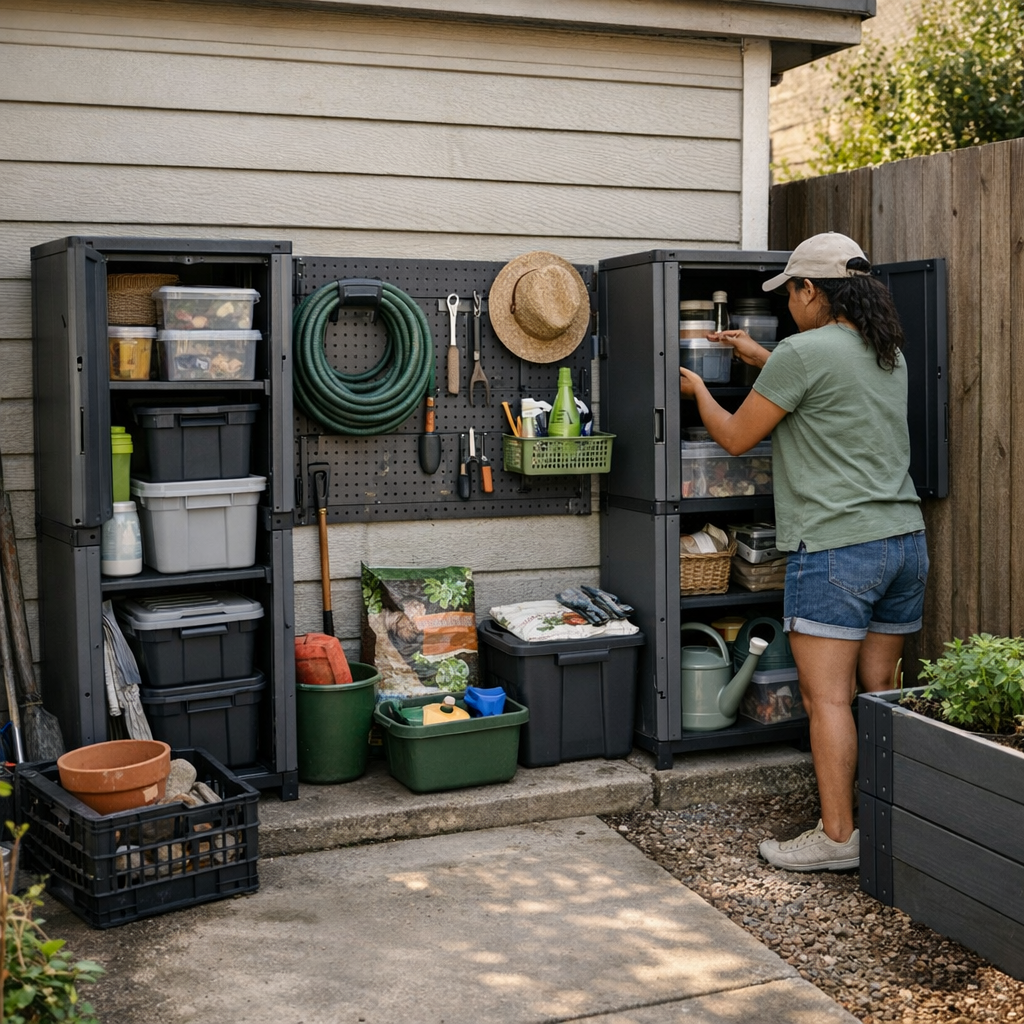
    The practical fix isn’t intuitive, but it works: don’t fill every inch of the wall or fence. Gap your storage deliberately. Leave open spaces—just the width of a shelf or a bin—between major pieces. These “pressure valves” aren’t wasted space. Instead, they give overflow a visible landing zone, so new piles don’t jam the main storage. The mess is in the open, easy to spot, and—critically—doesn’t block everything else.

    I gave this a try along my own garage wall: two mid-sized cabinets, a shelf apart. Suddenly, after a soccer practice or a garden cleanup, temp items landed in the buffer. I could grab what I needed from either cabinet without moving a single pile. That gap became a blinking warning light—anything left there needed a real home, so nothing hid and nothing blocked the routine. Instead of returning things to the nearest squeeze, I returned them cleanly or left them where fixing was visible and easy that weekend.

    Why Short Breaks Beat Maxed-Out Storage

    Small, clear breaks made resets almost automatic. After a messy Saturday, I’d deal only with what overflowed into the gap—not an entire compressed wall. Five minutes fixed the flow instead of losing a whole morning pulling out avalanche piles. The rest of the week, movement was easy: access always clear, nothing pushed deep enough to be forgotten. The space stayed useful after real use, not just after a deep clean.

    Setup Tweaks That Actually Hold Up

    Create clear overflow zones—short gaps, visible drop spots, or a few inches of open floor where temporary items obviously belong. Whether between racks or beneath a shelf, these small “dead spaces” actually preserve usable area by keeping chaos in check. Refresh the gap once a week, and you’ll spot what’s out of place before things snowball.

    Another adjustment that pays for itself: keep high-use items toward the front, with their own access buffer. Put garden gloves, leashes, or the kids’ balls where they can be grabbed without obstacle courses. If two items keep blocking each other, split them up before “just for today” becomes the default—and makes resets drag out even longer.

    Getting Beyond the Showroom Setup

    The setups that hold up for months—not just a photo day—aren’t crammed to max capacity and don’t treat every inch of wall like prime storage. A real-world layout gives back circulation: you can move through the corner, grab gear, and put it back without reshuffling the lineup. The “right” footprint is the one that keeps movement simple and overflow obvious—and minimizes hidden friction that turns every reset into another round of shoving, balancing, and hoping nothing tumbles down.

    If your side yard, utility corner, or fence line feels stuck in permanent half-order, look for which zones never stay clear. Breaking up a solid row—by a foot, a bin, or even a bare patch—can flip the space from always blocked to surprisingly easy. The setups that save you time aren’t just organized; they work with real habits, stay open between uses, and leave you less to juggle at the end of the week—regardless of how much clutter you started with.

    Find practical outdoor storage solutions at TidyYard.

  • How Dedicated Carry-On Zones Improve Travel Comfort and Efficiency

    Your carry-on can look flawless when you zip it up at home. But the first airport checkpoint, boarding call, or in-flight rummage usually exposes the gaps in your packing plan. The tidy interior unravels the moment you have to grab your passport mid-queue, pull out headphones with one hand while standing, or race through another hurried document check—the bag resists, slows you down, blocks quick access in the exact moments you need to move fastest.

    This gap—between looking organized and actually functioning on the move—turns into a grind you feel in every airport line and aisle. Stacking pouches and documents neatly is simple in a calm room, but as soon as you need your gate pass or painkillers, layers tangle, pockets overlap, and each retrieval becomes a minor disruption. You end up hunting through a main compartment and outer pockets, bumping seatmates, even holding up others—just to grab one thing.

    When Visual Order Doesn’t Mean Quick Access

    The illusion of control doesn’t last. That perfect packing moment evaporates the second you reach for your boarding pass trapped behind a pouch of chargers, or your sleep mask buried under snacks and cables. These aren’t dramatic breakdowns; each instance is a quick loss of flow. The real cost is in time and focus—shuffling stacks while your place in line inches forward, elbowing your way to a tray, or fumbling for yet another zipper as other travelers squeeze past.

    Carry-ons that “look” organized at rest rarely stay efficient at speed. Every minor retrieval is slowed by decisions: which zipper next, which pouch to shift, what got buried since the last grab? At home, these interruptions barely register. In the fast blur of airport movement, hesitation multiplies—and the intended order quickly becomes its own obstacle.

    The Repeated-Access Problem: Every Movement Counts

    Every new phase—gate change, security, aisle shuffle—puts your carry-on setup to the test. The “all-in-one” compartment that seemed tidy at the start quickly collapses into a slow crawl: charger wraps around passport, rest kit buries travel docs, snacks pile onto headphones. Delay one retrieval and the next is even messier. The outside still looks fine—inside, you’re one grab away from another item spill, pouch shuffle, or missed slot that now blocks the thing you actually need.

    Picture the most basic problem: during a gate wait, you want earbuds and a snack, but both share space with a neck pillow and your important documents. Every time you reach in, one pouch pushes behind another. When a critical item rolls under your seat, or you have to crouch and hunt through the bag again, you feel it—the outer order hides inner chaos that quickly builds with every use.

    Real Friction in Everyday Carry-On Use

    It’s not about spectacular failure. It’s the grind of cumulative, ordinary frictions:

    • Unzipping one section and watching a stack of travel papers loosen and scatter
    • Hauling the whole bag down from the bin for meds, only for cables or a snack wrapper to tumble out
    • Balancing in the aisle, desperately digging for a sleep mask, knowing each item touched makes the next reset harder

    None of these is a trip-ruiner, but with each round, resistance grows—and you start opening your bag with silent reluctance, just to avoid the next micro-mess.

    Why Overlapping Storage Fails in Real Movement

    The root drag is forced overlap. Packing rest, tech, snacks, and documents into shared spaces means every reach interrupts something else. Each grab is a low-level risk—not for losing the item you want, but for scattering the order you thought you controlled. It’s the difference between a bag that survives a layover grab and one that pulls half its contents with a Kindle, leaving you frantically tucking things back before your group gets called.

    On a crowded flight, digging for one small thing—gum, antihistamine, tissue—too often means unpacking cables, flipping passports, and cluttering your own seat space. Attempts to “keep it neat” only highlight how little real order survives repeated access.

    The Subtle Burden of Constant Repacking

    The slowest problem of all? The ongoing need to reset your carry-on. True practical order means you can close up easily, with one move, after every access. Most setups fail the real travel test—one reach triggers a repack, one grab leads to a silent checklist: “Did I lose my doc stack? Is my cord pouch back in place?” Friction rises, small risks accumulate, and before long, you’re second-guessing simple retrievals or triple-checking you haven’t left essentials behind.

    The Difference a Dedicated Access Zone Makes

    The moment you separate your main in-transit essentials—rest gear, earbuds, tissues—into a single, distinct outer pocket or zone, the whole pattern shifts. Not just less chaos, but less worry each time you unzip. If that top-access section is used for only the items you need while moving—without layering over travel docs or tech—each retrieval is clean, and nothing behind gets disturbed.

    Over a few cycles, the upgrade is clear: you stop pausing to recalculate pocket risk, repacks shrink to nothing, and you can move through boarding or security with smoother confidence. The difference isn’t about a picture-perfect bag—it’s about not having to dread or manage the next access moment, even when the airport is at its busiest.

    The “Looks-Right” Setup vs. the “Works-Right” Setup

    The ultimate difference shows up in repetition. A carry-on that “looks right” lined up at home rarely survives three in-transit resets. It’s the setup that lets you return each category—rest, docs, tech—into its own, non-overlapping spot that wins in real travel conditions. If you can get to what you need, swap it, and zip up all in one step—without collateral spill—you’ve moved from planned order to functional flow.

    Practical Tip: Create Your Own No-Overlap Zone

    Draw a line: assign your outer, fastest-access pocket for just one in-transit category, and keep it strict. If that pocket is the “rest zone”—mask, pillow, earbuds—leave docs and tech elsewhere. If you always grab a charger on the move, give it its own place at hand so it never tangles with pouches or gets buried under snacks. The real benefit is speed and certainty—not maximal “organization,” but minimal drag.

    Result: retrievals become reflex, resets are single-move, and your carry-on starts to work for all the sub-tasks—boarding, seat squeeze, tray transfer, quick terminal walks—without constant interruption. It’s not about getting admired for neat pouches, but about ending that low-level dread every time you reach for something while the world moves around you.

    For practical, tested carry-on tools and organizers tailored for repeat travel, visit CarryOnSupply.

  • How Accessories Transform Your Workspace Lighting for Daily Reliability

    A lighting setup can look clean—cables hidden, brackets tight, desk surface bare—but as soon as you start working, flaws show themselves fast. You shift a lamp just once, and suddenly the cord slips back into view, dragging across the keyboard. After a morning of switching devices or sharing a table, one bracket loses tension, the lamp drifts sideways, and the “neat” arrangement starts breaking your focus with every fix. The promise of a tidy space collapses under real use: exposed wires reappear, arms sag, glare returns, and your attention divides between your work and the setup that was supposed to disappear into the background. This is where lighting that looked finished starts to fail, not because of how it appears, but because of how it holds up to daily adjustment, device swaps, and the pressure of shared or changing surfaces.

    When Neat Becomes Nuisance: The Reality of Everyday Use

    An out-of-the-box setup always looks resolved. But a desk that runs all day—papers moving, devices plugging in, two people sharing—quickly exposes hidden weaknesses. That cable you tucked out of sight one morning is sliding over papers by lunch. A lamp’s adjustable arm, solid at first, now drifts out of position, its beam skipping past your notes and onto the closed laptop. Instead of “set and forget,” you end up repeating the same corrections: fishing for cords, recentering brackets, shifting under-shelf lights that miss the work edge. The pain point isn’t a single failure. It’s the steady, daily drag of tiny distractions that pile up and break your routine again and again.

    Everyday Distractions: The Small Setup Fails That Add Up

    What should take no thought—adjusting for focus, moving a lamp, plugging in a device—turns into low-level friction:

    • Cable creep: Slide a lamp once and its cord gradually covers the work area, coiling where your wrist needs to move.
    • Drifting angles: A tired bracket fails, and light shifts off your reading zone, leaving the brightest spot shining on empty surface.
    • Direct glare: An unshielded fixture hits your eye line instead of illuminating the desk, forcing you to squint or move.
    • Shared desk chaos: Two users, one long surface: overlapping cables, lamps colliding, every device swap demanding five minutes of cable rescue and resetting angles.

    The Real Difference: Support Accessories that Hold Up

    The downfall of most setups isn’t inadequate lighting power or bad style—it’s flimsy support. The overlooked part of any layout is how well brackets hold position, cable guides stay fixed, and adapters fit without straining the system. Well-matched accessories set the line between a workspace that flows and one that pulls you out to fix it, every hour.

    Cable Guides and Channels: Calm at the Desk’s Edge

    Take two identical setups: one with cables loose, the other with a slim channel holding them to the desk’s edge. Without a guide, any lamp adjustment sends the cord snaking toward your keyboard or coiling across notepads—constant annoyance, always visible, always in the way. With a cable channel pinning the line out of reach, you adjust lights all day and never see the cord, never knock it with your wrist, never unplug the lamp by mistake. The effect is barely visible, but every motion is cleaner.

    Brackets that Stay Where You Left Them

    Most people tolerate a bracket that slowly sags or shifts after each use. Only with a proper, tensioned bracket does the difference stand out—a lamp placed for reading stays steady for hours. No re-aiming, no repeated leaning. Only when a wobbly arm goes back into service do you realize how much it disrupted your day before.

    Real World Scenes: Shared Tables, Busy Surfaces, and Device Juggling

    Picture two people carving out space on a shared table. One plugs in a monitor, another sketches. Halfway through the afternoon, extra plugs fight for one adapter. A bracket that loosens sends a lamp beaming across both workspaces, or cables droop into reference books below. When the support is weak, someone winds up managing chaos instead of making progress—untangling, moving lamps, even blocking out glare with a notebook just to keep going.

    Swap in solid brackets and cable guides, and the dynamic changes. Cables hug the edge instead of claiming working space. Lamps serve one spot, then move for the next person without dragging wires through the middle. The distinction is clear—lighting stops being a daily project, and the entire setup reverts to what it should be: invisible and stable, letting work take front stage.

    Repeat Annoyance: The Cost of Skipping Structural Support

    Many accept minor clutter as the price of a clean setup. But if you ever move a lamp, share a desk, or swap cords, the mess builds relentlessly:

    • Extension cords sneak across walkways and block quick movement.
    • Power adapters overload a single shelf—just charging a device jams the whole arrangement.
    • Under-shelf lighting slides, and now the reading edge is shadowed instead of bright.

    These aren’t headline failures, but they chip away at focus and comfort: minutes lost rerouting cables, awkward stretches to get light where it’s needed, and the pressure to keep adjusting what should simply work.

    One Small Fix, Lasting Improvement

    For weeks, an extension cord dangled under my reading shelf, always slipping into view. Swapping in a slim cable channel and a bracket that actually held its angle, everything shifted—lamp where I wanted, no wires to adjust, glare finally gone. I could work without pause, the setup staying put whether I switched books or devices, so the friction of “tidying up the lighting” vanished. The gain isn’t only visual. The space felt faster, less fragile, and finally resolved in real daily use.

    How to Tell When Your Setup Needs Help

    Looks can deceive. If these patterns show up, it’s the structural support—not the fixture—that falls short:

    • Frequent cord shifting or needing to move objects just to adjust a lamp.
    • Surprise glare at certain hours, even after “fixing” the layout.
    • Dim main work edges or tangled cables growing harder to ignore midday.
    • Noticing brackets and wires more than the light itself.

    If any of these are familiar, your setup isn’t matching the way you actually use the space. Small, silent upgrades—brackets that hold, guides that anchor, adapters that fit—turn daily interruptions into routines that run smooth in the background, not the foreground.

    Why Subtle Structural Help Matters

    The best lighting and support don’t call attention to themselves. When brackets, channels, and guides are matched to your actual workflow, you notice the work—not the lamp moving, not the cable clutter, not the daily feeling that something’s just off. It’s the invisible support that separates setups that look finished from those you can actually live with, adapt, and trust not to break your flow.

    In spaces where surfaces get busy, gear moves, or people share a zone, the right supports aren’t extras—they’re the baseline for lighting that really works, every time you sit down.

    http://www.lightsupport.myshopify.com

  • Managing Cat Care Challenges When Visitors Are Around Your Home

    Feeding your cat should be as simple as refill, wipe, and move on. But as soon as the day gets crowded—or a guest steps inside—routine shortcuts start showing their cracks. The bowl that was easy to nudge aside alone is now blocking foot traffic. A grooming brush, left halfway between rooms, vanishes just when you need it. And the water jug? It’s been nudged behind a bag of litter that wandered out during last night’s rushed clean-up. The same setup that looked “fine” on a quiet night becomes a source of near-constant interruptions the minute routines stack up, or your cat decides to camp out in plain view.

    When Routine Shortcuts Become Roadblocks

    It’s easy to leave the water bowl by the doorway, or the food bin half-shut, when home is empty and pace is slow. But those habits snap into focus as soon as your cat lingers by the entry or a visitor starts a conversation within sight of the setup. Routine movements—grabbing the scoop, topping off water—bring unexpected snags: a foot kicks a misplaced bowl, a drawer jams because the brush migrated, or you scramble for cleaning wipes that wound up under a tangle of bags. The small-time wins that made solo care faster turn into real blocks when you have to keep pace with more eyes and a less predictable cat.

    Here’s what that actually looks like: stretching to refill a dry water bowl, only to realize it’s shoved under the edge of a shoe rack. The refill spout, left open for a “quick return,” is now seeping near the back tile. You spot crumbs from yesterday’s meal under a side chair and reach for a cleaning cloth, but it’s buried—again—below a pile of cat toys and unopened litter. Every step adds another detour, and the reset you used to squeeze in quietly turns into a public scramble.

    The Subtle Cost of Deferred Tidying

    Skipping a post-meal wipe or closing bins halfway barely registers—until you look for the brush at feeding time and it’s missing, or find food scattered along the floor from a rushed scoop yesterday. The next routine starts with clearing leftover messes before real care can even begin. The gaps multiply: what “worked” for one person now means shuffling bowls, picking up stray tools, and explaining to anyone in the room why the system lags. Instead of smooth resets, you’re now doubling back, and even your cat starts pacing around the clutter.

    Wiping after the fact or improvising with the wrong towel drags out the process. If the care spray is uncapped or hidden behind clutter, cleanup becomes two jobs, not one. These delays don’t just mean a messier routine—they build stress that eats into whatever calm you hoped setup would bring. The more corners you cut, the less reliable each reset gets.

    Routine Friction: More Than Just a Mess

    Routine friction isn’t about what the area looks like—it’s about function breaking down. If the scoop’s wedged behind paper mail, or water refills mean dodging a stack of bags, actual feeding gets stalled. Your cat waits, sometimes loudly. You lose time reshuffling the same items you hoped were already handled. Essentials drift into other parts of the house, forcing you to cross rooms for a brush or navigate a feeding zone that clutters normal walkways. A “tidy” space still interrupts you if every use comes with a micro-obstacle course.

    Over time, incomplete resets mean every bowl swap requires clearing yesterday’s drying mat, and a grooming detour means searching for a comb that didn’t make it back to its hook. You start doing more work to keep the area acceptable, but every shortcut creates one more step to remember before the next routine can begin. Instead of calm, daily care feels like it needs a notepad.

    Hidden Work in “Tidy Enough” Spaces

    It’s easy to line up bowls, toss toys into a basket, or sweep supplies into one corner and feel organized—for a minute. But if the bin won’t close, the scoop isn’t actually within reach, or the spray bottle keeps popping up outside the feeding area, the difference between looking ready and working smoothly becomes clear after three or four rounds of repeated care. Every missed reset returns as a delay: feeding pauses while you hunt for liner bags, the broom for a quick sweep is now in the hall, and frustration spikes as the system keeps interrupting itself.

    Think about a late-night check: you go to tidy up, reach for the last litter liner—then realize the cleaning spray is sitting in the wrong room and the broom’s gone missing, again. You lose minutes hunting for basics. The space looks fine at a glance, but nothing is ready when you need it, and every shift in routine just re-exposes the same weak points.

    Improving Care Rhythm Through Placement and Consistency

    Fixing these weak points doesn’t mean color-coding the house. It’s more about changing what lands where, and why. Use only bins that close completely so you don’t leave covers half-off. Hang brushes on hooks at the end of the reset route. Put water jugs and feeding tools just out of high-traffic areas but close enough for a one-handed grab. These aren’t organizing hacks; they’re friction-busters. Each small switch shrinks the odds of having to double back, clearing the route for a care routine you can repeat even if the room is full or the schedule is tight.

    The payoff isn’t just tidiness—it’s being able to reset the area in one motion so you don’t have to scramble when something changes. Bowls that don’t block walkways, wipes at arm’s reach, bins that always close, and used items returned to a default spot: these are the differences that hold up when the cat stays underfoot or company turns up early. Even surprise interruptions don’t send you hunting for tools or trying to explain why the brush is in the bathroom again.

    Maintaining Calm, Even as Routines Shift

    The right layout acts like insurance for unpredictable days. Block routine clutter from drifting, keep reset points visible but unobtrusive, and set up care zones to support repeat use instead of just looking good for drop-in guests. Skip last-second scrambles by staying slightly ahead—reset after each use, not before company arrives.

    As your cat grows more confident spending time around you or in shared spaces, the payoff of a functional setup isn’t just less noise. Both you and your cat settle into patterns that stay reliable even when the pace changes. A routine built for repeated resets means fewer stumbles, less waiting, and a system that works on real days, not just good ones.

    Routine cat care isn’t about achieving perfect order—it’s about closing off small, repeated sources of frustration, so the feeding, filling, and quick cleanups stay easy even when the day stacks up and your cat chooses to stick around.

    For more solutions and ideas adapted to real-life pet care, visit CalmPetSupply.

  • Why Reducing Items Improves Movement in Garage Storage Systems

    The promise of a fresh storage system in your workshop or garage always feels bigger than the sum of its bins and shelves. You break open boxes, snap together racks, and—suddenly—everything finally has a place. For a day or two, it’s close to perfect. But real projects don’t stay clean. Give it a few work sessions, a few rushed cleanups, and a different friction creeps in: bins aren’t as accessible as you’d hoped, movement through your own space feels tighter, and tools land in new clutter traps you didn’t see coming. The difference between simply “holding more things” and actually making your routine faster becomes obvious the moment you try to grab, reset, or move—again and again.

    When “More Storage” Starts Creating New Problems

    Every new setup looks ideal in the first light: racks lined up flush, mobile carts stowed away, wall space covered in hooks and bins. But fast-forward to a Sunday project or that late-night repair. Suddenly the system you designed starts pushing back: you’re nudging a rolling chest out of the walkway for the third time, digging awkwardly behind corner bins, and stacking half-finished hardware on top of what used to be an “overflow” shelf because it’s easier than doing the shuffle yet again.

    What seems like efficiency on the surface—cramming more into every square foot—quickly exposes the spots where your routine actually breaks down. You know it’s happening when:

    • You’re reaching around carts more than you’re working on your project.
    • Simple grabs turn into two-step dances with edge bins or tucked-away racks.
    • The leftmost shelf, always in your line of sight, ends up piled with loose screws and tape rolls you can’t really return to their slot without a reset.
    • The floor closes in: one dropped bolt away from a trip hazard, just trying to keep tools off the surface.

    Adding storage space doesn’t fix the underlying problem if it slows down your resets or interrupts real movement. The sign you’re in trouble isn’t how much you can fit—it’s how easily you use what’s there, day after day.

    Why Edges and Corners Always Fill Up First

    Watch what happens in the edge zones and corners after just a week of “real use.” The wall-mounted rail that looks great in the catalog—the one with five bins spaced just so—turns problematic when you actually use it. Three bins let you reach and return without thinking. Add any more, and you’re dragging out a whole row just to grab a tape measure or utility blade. That extra shuffle drains time and chips away at the seamless movement you need when your hands are full.

    Corner shelves? They lure you in with “hidden” space. But by day three, they collect every oddball item, every “set it here for now” part, and every hardware pack you don’t quite know where else to put. The corner that started clear turns into a graveyard: tools collect, resets slow, and it becomes a spot you dread untangling at the end of any busy session. This slow-motion clutter is rarely loud until—suddenly—the main work area feels boxed in all over again.

    Storage Friction: It’s About Flow, Not Size

    Every trouble spot comes down to flow. If picking up your drill means inching around a chest of drawers, or if sliding out a bin disturbs everything around it, your storage is working against you. The real gap isn’t how much volume you have—it’s how much effort it takes to reach, return, and reset, especially when you’re moving quickly or cleaning up in a rush.

    During project sprints, nobody wants to restack bins or re-nest tool trays to reclaim space. It doesn’t matter if the system looks tidy; if you’re making extra moves, storage is failing its one true job: making routine use as close to automatic as possible.

    Spotting the Real Red Flags in Your Routine

    After a cycle or two through your full routine, these signals start popping up:

    • Shelves at shoulder or hip height that force you to pause—just to avoid knocking something else loose.
    • Carts or mobile chests parked in your path because there’s no slot for them that doesn’t block return flow.
    • Corners or ledges constantly catching hand tools and hardware that don’t quite “belong”—but never make it back to their home.
    • Cleanup stretching into a multi-step shuffle, with each reset taking longer every week.

    Every time you’re forced to move something extra just to tidy up or start your next task, it’s a sign: the system isn’t built for your real-life rhythm. Even wide-open wall panels or unused cubbies mean nothing if you’re fighting the same friction points every time you step in the door.

    A Small Reduction That Changes the Whole Flow

    It rarely takes a full overhaul to shift the setup—just the willingness to trim back. Real improvement comes from choices like yanking two bins off a shelf and leaving that spot open. Suddenly, the grab point you once struggled with is clean: one sweep of the arm, no awkward nudging or tangled sleeves. Clean up becomes muscle memory again. Over a week, you feel the difference as movement smooths out, resets get sharper, and the whole layout actually supports your pace instead of tripping you up.

    Practical move: If an area always gums up your flow—even if it looks organized—pull a bin or a shelf out for a few days. Run your normal routine and feel whether movement improves. Most of the time, less “stuff” in the edge means more clarity and less hesitation at every step.

    Smart Organizers Can Still Clog the Process

    The temptation is always to add another tier, insert, or micro-organizer for every category. But each extra piece can chew up precious flow if it blocks quick returns or forces you to shift containers just to reach the basics. Doubling up with dividers in mobile chests or hanging racks can make you work twice as hard for the same result. The only organizers that earn their keep are those that actually make the reset easier, not simply maximize the number of small objects a shelf can hold.

    Wall vs. Mobile: Where the Real Limits Show Up

    In theory, wall-mounted rails and mobile carts both extend your storage. In practice, their strengths turn into weaknesses if you overload or misplace them:

    • Wall systems: Free up your floor and create open sight lines—all good, unless you cram them so full that you’re stacking tools in front of tools. The second you have to reach past or pull out a row to get anything, you’re losing efficiency.
    • Mobile chests and carts: Let you bring essentials closer, only if their “docking” spot doesn’t clog your most natural path. Even a half-inch of wheel sticking out in the wrong place is an invitation to slow down or sidestep, especially after a rushed cleanup.

    Best outcome: keep the mobility and wall space, but veto anything that creates a dead zone, snags your motion, or adds friction to the simplest reset.

    Is Your Storage Working with You—or Against You?

    Check your space: if you’re always making multiple moves just to tuck things away, if you have to stop and think each time you walk through, or if you keep stashing overflow in the same tired corner, the pattern’s clear. Your storage system is technically organized—but functionally in the way.

    Most frustrations are not about too few bins or racks—they’re about too much content crammed into the same routine. The storage that truly makes a difference is the one that lets your workflow stay automatic, that clears the path for the way you actually move, and that needs very little extra effort to reset. Find the chronic blockages. Remove what you can from the pressure points. Watch how quickly the space feels usable again—back in sync with how you really work, not just how you thought you might use it when everything was brand new.

    When you no longer notice the storage system—when resets happen in a single motion without fumbles or re-stacking—you know the setup is finally supporting you, not the other way around.

    Explore more practical storage setups and solutions at StackNest.

  • Narrow Vertical Towers Transform Entryway Storage Without Crowding Space

    Clutter pressure starts right at your door. Even a tidy entryway turns unpredictable fast—one drop of a bag, one extra pair of shoes edging out, and suddenly the supposed “organized zone” collapses. If you know the pattern—bags slumping by the wall, shoes spreading beyond the mat, baskets filling up before the end of the week—you’re in the same cycle that frustrates nearly everyone with a busy threshold. The real problem isn’t just mess; it’s a system that can’t keep up with daily traffic. Most wide storage setups—big benches, sprawling racks, overstuffed bins—look controlled for a day, then start breaking down as soon as the real routine returns. Instead of controlling the chaos, they just shift it from one end of the entry to the other, forcing you into constant mini-resets just to keep the path open.

    Why Wide Storage Breaks Down So Fast

    Looking organized isn’t the same as working in real time. Wide benches invite a line of shoes, but that line doesn’t hold. By Wednesday, boots drift out; the bench turns into a lost-and-found where the last item pushed underneath becomes invisible. Mail collects on any flat tray until the original stack is hidden two layers deep. With each return, you don’t get a reset—you just layer more on top or nudge another bag into the only remaining corner. Add in wet weather and now shoes leave tracks, umbrellas lean against bags that slouched off the bench, and the small effort it takes to find your own gear multiplies into a daily bottleneck. Every time someone enters or leaves, you’re reminded: this isn’t just visual clutter. It slows you down and tightens the space with every use cycle.

    When storage sprawls sideways, the “bus route” through the entry contracts. Shoes push past the mat, bags slip into the travel lane, and each new drop chokes off more walkable space. You’re not short on storage—you’re battling a setup that encourages drift, not return. Getting control means handling the same pile twice before you even get your shoes off. Most wide solutions give you one organized photo, but no resilience when everyone comes home within ten minutes of each other. Resets pile up, pressure increases, and eventually the only way through is by detouring around the overflow.

    The Shift: A Slim Vertical Tower in the Entry Zone

    Changing from horizontal spread to vertical storage flips the entryway logic. Instead of gear fanning out low and wide, it stacks up—off the floor, clearly slotted. Each shoe, bag, or helmet gets a single spot: no digging, no interleaving, no collapsed rows. The risk of losing control drops because every open cubby or shelf is visible on approach. Even with back-to-back arrivals, finding an open spot or seeing what’s overflowing becomes instant. There’s no confusion where gear belongs, and the moment a cubby can’t take more, that signal is obvious; stash overflow, and you’re caught in the act.

    How a Tower Tackles the Spillover Problem

    See it in action: it’s evening, three people dump bags and gear in quick sequence. The flat bench is exhausted after the first round—shoes spill out, jackets drop wherever, and the path shrinks minute by minute. The next person shuffles through to find no clear landing zone, so whatever they’re holding lands wherever it fits. Even if you reset as a ritual, wide storage can’t process arrivals this quickly; the mess snaps back overnight.

    Shift to a vertical tower: as people walk in, boots land in standing cubbies, bikes helmets stack up—not in a pile, but in a single stack. The tower contains gear upright, so even late arrivals can spot usable slots. The walk path stays wide because nothing drifts into the flow zone; everything is either in the tower or obviously out of bounds. At the end of the day, the reset isn’t a big job. If someone tries to park a bag outside the system, it’s immediately visible—less temptation to “just drop it for now.”

    What Changes With Daily Use?

    The search-and-reset job shrinks. In a wide spread, the urge to drop-and-dash grows: benches soak up overflow, mail coats every tray, so every surface ends up competing for room. Vertical, standing-height storage rewrites the script: full cubby? It’s dealt with now, not “one day soon.” Lost item? It’s either there or it isn’t—no invisible pileups. The reset becomes self-policing: the space reveals what’s working and what’s failing with no guesswork required.

    Movement in and out improves, too. Narrow vertical towers mean the entrance doesn’t choke up when two people squeeze past each other. You’re spared the shuffle around shoes or last night’s rain gear—and you don’t have to wedge bags out of the way by hand. The visual rhythm is clearer: compact columns, clean walkpath, no decentralized sprawl angling for your attention after every use.

    Entry Spaces That Actually Work—Not Just Look Neat

    Towers aren’t magic— they just create friction in the right place. If everyone’s habit is to ditch gear right inside the door or build up a shoe wall until you’re stuck, look at exactly where overflow escapes. The right tower only works if it’s within reach, sized to your actual use, and physically interrupts the old drop zones. Bad height, wrong location, or hidden behind the first obstacle? The old mess returns on day two. When it lines up with your home’s entry flow, congestion eases quickly—not because people transformed their habits, but because the structure finally matches the path they actually use.

    This isn’t about strict order; it’s about storage that forces a split-second decision. If you can’t fit one more in the tower, you see it—no silent pile-ups. The best setups reveal their own limits without demanding major effort or strict chore charts. Once storage is truly visible and usable as part of walking in and out—no extra policing, no endless workarounds—movement stays smooth and you avoid the slow creep back to full-on clutter.

    Real-World Tip: Let Repeated Friction Guide Setup

    Start by watching what goes wrong, not by planning the ideal look. Are shoes always shoving past the edge? Are bags stacked on the bench and never making it to a hook? Does one hook or ledge draw too much overflow? Place a vertical tower exactly where your routine causes the most friction. If it’s not in the path of return, it will just become another underused solution sitting off to the side. After one week, notice: is gear actually staying put, or drifting right past the tower again? Adjust cubby size or shift the location before the routine fossilizes around the new system’s limits.

    From Control to Convenience: Reset Becomes Quick and Obvious

    Contrast just one week of living with these systems side by side. The horizontal bench or spread rack means a full tidy-up: stacking shoes, hunting loose bags, separating mail, and repositioning everything just to clear a path. With a slim tower, the small daily resets happen almost automatically—each slot reveals its state, and there’s nothing to rearrange beneath or behind. The walk path stays usable, frustration recedes, and you don’t face the sigh-inducing “where do I even start?” after each busy evening.

    The gain isn’t perfection—it’s actually functional movement through your home’s friction zone. Open threshold, clear signals, and resets that are so much smaller you might finally stop dreading arrivals. The goal isn’t magazine-tidy: it’s an entry that stops demanding your attention at every turn—and doesn’t slow you down just to get inside or out the door.

    Explore practical, vertical, and modular transition storage that fits real routines at Betweenry.