Blog

  • How Linear and Panel Ceiling Lights Restore Room Boundaries and Clarity

    The light looks clean, but the edges keep messing with your routine. You swap in a flush-mount ceiling fixture, check every corner for shadows, and step back—everything seems even, the room brighter, setup “complete.” But the relief fades the next time you reach behind your desk: the outlet is there, but its edge is lost in a shadow the fixture never touches. Try grabbing a charger or notebook from the back of a shelf—suddenly you’re squinting, sliding your hand along a blurry line, second-guessing whether the end is there at all. The surface may look organized, but the cues you rely on—clear edges, visible boundaries—keep falling into a low-contrast haze. In every shared space or compact work zone, it’s the difference between a room that works and a room that quietly trips you up.

    The Subtle Problem with “Clean” Ceiling Lighting

    Wide flush-mounts, LED discs, and domes are designed to tidy ceilings and create a seamless flood of brightness. The appeal is real: minimal clutter, uniform glow, fewer visual distractions. But the tradeoff sneaks up fast. These fixtures flatten the room’s logic: shelf edges dissolve into nothing, charging cables run unseen across the floor, and organizers slip into the same soft field where nothing pops out. Step into a space “finished” by overhead diffusion, and you’ll spot the pattern—looks neat, but daily tasks start dragging. You spend extra seconds poking through a shadowed tray, inch a chair closer to see what’s tucked behind your monitor, or reach toward a lost USB cable thinking it’s still there. The more you use the room, the more little slip-ups add up. A setup that looked resolved interrupts you again and again.

    Why Lighting Boundaries Matter for Real-World Use

    Most people don’t discover lighting failure until daily movement exposes it. The real issue isn’t “is the room bright?”—it’s “can I see what matters, right where I use it?” Workspaces and shared rooms rely on visible cues created by light and shadow. Without them, you fumble the edge behind a monitor, miss a box sticking out under a shelf, or fail to see the gap where a dropped pen rolled away. Standard diffused ceilings swallow these edges whole. Everything glows, but the surfaces blend. In spaces that shift roles—work then craft, conversation then cleanup—losing that surface definition means losing speed and certainty. The desk that once felt clear now forces you to hunt for its outline; a shelf becomes a gray plateau instead of a usable divider.

    Everyday Friction: A Lighting Scenario

    Take a multipurpose family room: work zone, play zone, storage, all under one ceiling light. The glowing flush-mount makes the whole area look composed, but real use tells another story. Chargers vanish into the shadow under a bench, toys drift to the floor’s vague boundary, and you find yourself bent low, checking whether the remote’s tucked against the skirting or simply lost. Quick tasks stall out, and “resetting” the room turns into a loop of double-checking and frustration. The visual map you need—the sharp corners, shelf ends, bin margins—gets washed out, leaving decision fatigue just beneath the surface.

    Linear and Panel Lights: Restoring Useful Edges

    Upgrading a plain overhead fixture to a linear or panel ceiling light is less about how the room looks and more about whether the space works. Install a linear panel (say, 120 cm) above a desk or shelf in place of a dome, and the result is direct: desk and wall edges become visible; notebooks and cables no longer hide. The space regains orientation. Boundaries and structure reappear—not because the room is brighter, but because the light runs along the working edge rather than puddling at the center.

    What flips the script is directional spread. Linear and panel fixtures, when mounted parallel to a key surface or zone, don’t flood everything equally. Instead, they define the long run of a shelf, the border of a desk, the back line of a shared table, without the glare or hot-spots of old strip lights. Now, the high-use areas are readable without bending or guesswork. You sweep a surface and spot stray items before cleaning becomes a hunt. The space functions—the setup starts to cooperate instead of quietly resisting routine use.

    Support and Placement: Making the Fix Hold

    The fixture matters, but so does the support. The biggest win is stolen by a simple miss: bad cable paths and bracket placement distract from the gain. Ceiling-hugging brackets and thoughtful routing—tucked along a wall, kept tight against trim—keep the fixture low-profile and out of mind. Leave a cable to snake across the open field, or mount hardware that projects awkwardly, and you’ve traded one distraction for another. The goal isn’t just a sharper surface but a room that doesn’t keep reminding you of its patchwork fixes.

    Tip: Choose frosted covers for your linear or panel lights—diffusion matters. This avoids harsh contrast, but still carves out the lines and surfaces you need to see. Particularly useful in zones that flex, where routines overlap or you share space day after day.

    Living with the Difference: Looks Polished vs. Feels Resolved

    For most, the shift isn’t instant; it’s day-to-day relief. Swap to a linear or panel fixture and the subtle drag eases. Small items stay visible, chargers don’t slip out of sight, and the time lost “resetting” surfaces shrinks. Clear desk edges, shelf lines, and bin margins let you check what matters and move on. In contrast, rooms with old domes or globes demand workarounds: dragging a lamp close, nudging a chair for a better angle, or endlessly tidying because clutter never actually leaves—just slips beyond the general glow. The difference? It’s not what you see in a photo, it’s what you stop repeating every day.

    Real-World Fixes for Common Lighting Setbacks

    • If you keep shifting the main light: Pause and check what’s missing—surface and edge clarity, not just brightness. The wrong fixture forces you to move, tense, or reposition just to see your own workspace.
    • Cable and bracket headaches: Use the lowest-profile hardware you can fit, run cords along walls or behind trim, and avoid stretching lines across visible ceilings. Good support keeps new clutter out of view and lets lighting do its job.
    • Still losing track of small items: Mount linear fixtures parallel to desks, benches, or shelf runs—not across them. This casts gentle, readable contrast right where items most often go missing.

    Worth the Swap: From Subtle Frustrations to Surfaces That Work

    A standard ceiling fix always looks fine on day one. But under real routines—shared work, storage, play—the hidden cost builds. Edges blur, searching eats into your focus, and small chores become repeat annoyances. A basic dome substituted for a well-supported linear or panel light changes the logic of the room—especially if you solved for cable clutter and mounting from the start. The payoff isn’t a staged “after” photo; it’s less drag, fewer small frustrations, and a space that finally lets you move on without a second thought.

    http://www.lightsupport.myshopify.com

  • Why Your Storage Setup Looks Good but Slows You Down Over Time

    The day after you finish organizing a garage, workshop, or backroom, it feels like you’ve finally cracked the code: bins stacked neat, carts pushed flush, cabinets squared to the wall, nothing out of place. But give it one real week. Suddenly, the cart that’s supposed to tuck neatly under the bench always juts out just enough to block your stride, the edge of a cabinet becomes a repeat bruise on your hip, and a supposedly “clear” floor sprouts clusters of gear—stuff marooned in limbo because there’s no fast, obvious place for it. In the rush of real use, the optimism of an “organized” space collides with the friction points you didn’t see until you actually lived with them.

    Looks Right, But Works Wrong: The Setup Disconnect

    Most storage plans impress in the planning phase or that first fresh photo. Labeled zones. Uniform rows. All the standard “rules” apparently followed. But reality rewrites those rules by the third full round of unloading groceries, digging for a missing tool, or cleaning up after a weekend project. What was a “logical” arrangement on paper starts to show its flaws in the flow:

    • You roll out the tool chest for access, then sidestep it again in the middle of the lane because it never quite slots back without effort.
    • That deep cabinet alongside the doorway—great for storage, but you keep catching the handle every time you swing past with an armful.
    • Bins are stacked to save space, but once they’re two-high, the bottom one rarely gets put away properly. “I’ll fix it later,” you promise—again.
    • The back corner by the utility shelf becomes the designated overflow, with stray bags or boxes collecting until you force yourself to clear it out.

    Organization isn’t a one-time act—it’s a living system. If you find yourself hesitating, slowing down, or skirting obstacles more as the week goes on, it’s a signal: your layout doesn’t match your actual patterns of movement and return.

    The Nagging Friction of Everyday Reset

    In real setups, tiny barriers add up quickly. Each moment you nudge a cart, slide a bin aside, or juggle two tools just to reach the third, the “organized” feel gives way to a cluttered routine:

    • Oversized carts or mobile units that sounded versatile in theory, but in practice always seem to land where you need to walk, or block a door’s full swing. You start walking the long way—just to avoid another micro-battle with a misplaced handle.
    • Wall panels crowded with hooks seem space-efficient, but grabbing that one wrench always means untangling a couple of hammers, or risking a rattle-and-crash as handles snag each other.
    • Baskets and modular bins, bought to tidy up, become unstable piles—the top layer gets emptied easily, but the lower bin becomes a black hole for half-finished jobs.

    Clutter never comes in as a tidal wave—it creeps in, the sum of daily detours and delayed returns. By Friday, the quick reset you promised yourself takes twice as long, and “for now” piles start to claim permanent territory.

    When “Organized” Layouts Get in the Way

    There’s a difference between “looks organized” and “actually fuels the routine.” It becomes clear after any burst of real work:

    • The chest you aligned tightly on install now floats an inch out from the wall—always in just the wrong spot, always getting nudged but never really fixed.
    • Baskets positioned for efficiency collect overflow when their groupings stop matching project realities. Their system stays pristine in theory but fails in rhythm.
    • The deep utility shelf’s back edge becomes a blind spot that collects gear nobody remembers until the season changes.

    Any time you’re juggling two objects to put one away, or go through the same awkward shuffle just to clear a walking path, it’s clear: the layout isn’t failing because it’s messy, but because it puts friction where your actual flow demands clarity.

    Subtle Tweaks, Genuine Improvements

    The best upgrades often aren’t dramatic—they’re surgical. Swapping a too-wide cart for a narrower one instantly frees up the main lane. Shifting a pegboard just six inches can eliminate the unnecessary corner-turn that made every reset awkward. Breaking up an overloaded bin cluster into visible, easily grabbed groupings can keep the return routine almost automatic, no second thoughts or extra shuffling required.

    If you find yourself always pushing something aside or working around the same obstruction, identify it and try a small, focused change. You don’t usually need more storage; you need storage that stays out of your way—letting you move fast, put things back as you move, and avoid “for now” piles altogether.

    Test Before You Commit: The Real-World Litmus

    Before settling on a new position or layout, run through your typical end-of-day reset. If anything—even by a single step—interrupts your flow, nudge the unit or reposition the panel and try again. Over a month, each tiny reduction in friction compounds, making it less likely for clutter to sneak back in and far easier to keep the whole area genuinely usable, week after week.

    When “Finished” Actually Means “Effortless”

    In the end, the storage system that works isn’t the one you admire; it’s the one you never really notice. If resetting, clearing a pathway, or grabbing the gear you need fades into background habit—no shuffling, no detours, no second thoughts—that’s when your arrangement has clicked. The payoff isn’t just a neater space. It’s reclaiming your workflow, project after project, with less setup and less cleanup slowing you down.

    The systems you stop thinking about are the ones that work best. Give your setup a few weeks. If your mind is on the work—not the storage—you’ll know you’ve crossed that line from “organized” to genuinely functional.

    Find practical, real-world storage solutions at StackNest.

  • How Smart Pet Travel Gear Keeps Your Gate Seat Organized and Stress-Free

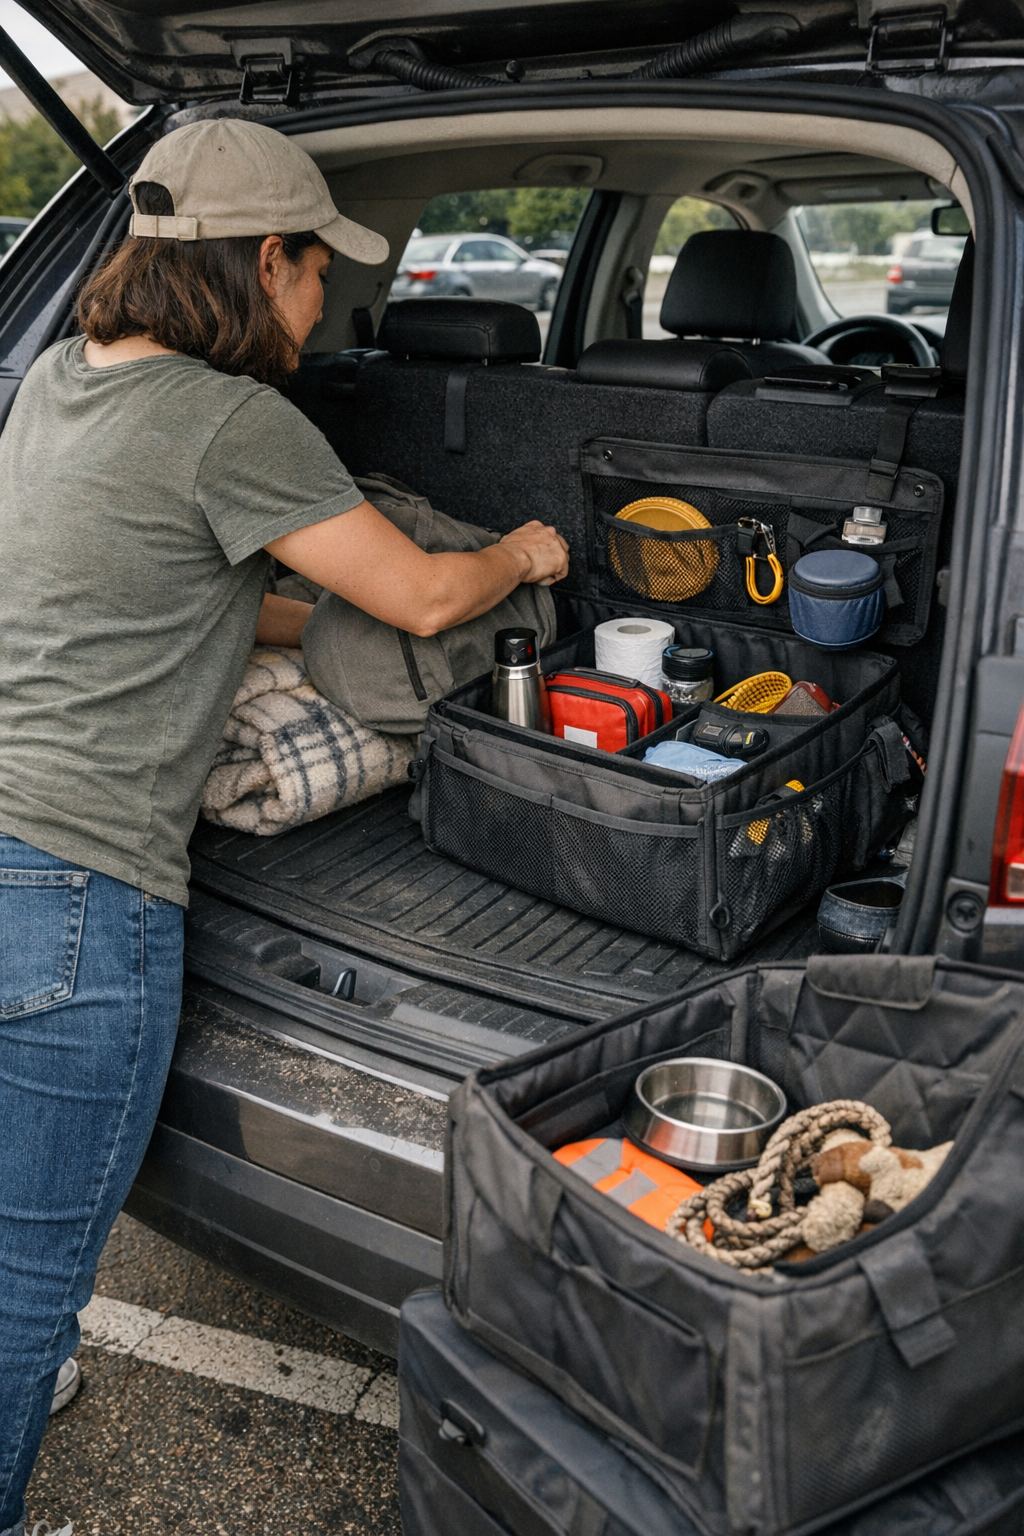
    Most pet travel bags never fail at first glance—it’s after your second or third stop that the frustration starts showing: wipes buried beneath the leash, bowls sliding under blankets, toys fusing into one clump at the bottom. At the curb, everything looks “ready”; but the moment you need access in hurry—reaching from your seat at the gate or during a quick pause—it’s a forced shuffle. You aren’t tripping over drama, just a repeated loop of blockages, hidden essentials, and one more repack because the item you need is never in hand when you need it. A pet carrier or travel bag that stays neat during the first ten minutes almost always unravels after a few seat cycles. The weakness isn’t mess—it’s how small delays stack into distraction right when timing matters most. The PawGoTravel world starts where the real friction begins.

    From Neat Start to Real-World Friction

    The smooth, organized setup at home doesn’t survive the first layover. Bowls migrate beneath the blanket after one jostle. Wipes wedge under a spare leash. You reach for the leash, but it drags half the setup with it—a toy in tow, bowl off-balance, wipes lost. Every trip back to your bag feels less like travel flow and more like damage control. It’s not about dramatic errors, just an ongoing bleed of seconds and energy that repeats at every pause. Each shuffle under a seat, each dig through intersecting items, is time stripped away from the confidence your carrier or bag promised at the start.

    Every Reach Adds Up

    It’s rarely your first reach that slows you—it’s every reach after. Once, twice, then the routine bites: wrong pocket, wipes out of easy line-of-sight, bowl under layers, a comfort toy blocking the quickest grab. These tiny slowdowns crowd the routine until searching, re-folding, and deep digging become normal. Suddenly, the travel bag’s tidy looks give way to the real test: how many seconds you lose the fourth time through. If you notice your focus drifting from your actual trip to fighting with structure, shutdowns aren’t far behind—especially with a moving boarding line or a pet that senses your frustration.

    The Anatomy of Seat-Side Slowdown

    Gate waits and seat-side sprints rarely break down all at once—they erode through repeat friction. A bag with “enough” pockets doesn’t mean what you need is where your hand expects. Common diagnostic signals appear within minutes:

    • Bullseye: reaching for a treat or chew, but first untangling it from wipes and leashes
    • Going for the water bowl, only to uncover it from under calming toys or a spare blanket
    • Creating a spill by over-digging for wipes at the bottom layer
    • Rush cleanup—only to be slowed by pocket order when boarding is called

    The stress is cumulative: every restart, every shuffle, every forced search exposes which parts of the bag’s design make your travel slower and less predictable as time goes on.

    Visual Order vs. Functional Access

    A travel bag that “looks” ready on departure betrays you when the cycle turns: hiding essentials deep behind zipped dividers or nesting high-use items in show-off pockets makes every repeated grab heavier. The flaw is sneaky—the separation you set up at home collapses when you actually move. After three or four cycles, all the clean edges vanish and the routine defaults to digging, re-packing, and re-aligning. The visible test comes not from first impressions but from the fifth actual reach. If the structure can’t keep wipes, bowls, or treats accessible under pressure, the display order is worthless, and the cost hits your pace every single time you stop, start, and try again.

    The Gate Wait: Real Noise, Real Repetition

    Typical scenario: you’re at your gate, pet anxious, bag beside you. First break? No sweat—everything’s primed. Second and third? The wipes and leash tangle, the blanket swallows the bowl, and every attempt to correct makes things less streamlined. When boarding ramps up, the “just-in-case” order you built falls apart mid-motion. Real movement—pet squirming, your hand searching—forces items to overlap, slip, or jam together. Attempting a fast cleanup or grabbing a chew means negotiating a crowd of your own supplies instead of a clean handoff. Every attempt to restore control is another tiny reset—and after a few rounds, you’re battling your setup more than the travel itself.

    Simple Interruptions Multiply

    The true cost of a flat-structured or generic organizer isn’t mess, but repeated drag: leash blocks wipes, snacks block leash, and comfort items migrate to the furthest corner every time you fumble. There’s rarely a crisis—but a genuine cycle of annoyance, especially once you need both hands or quick decision speed, and your gear throws up a new block each time you try to catch back up to the routine. If the setup can’t deliver fast access under basic seat-side pressure, even calm moments can turn tense and distract from the travel experience itself.

    Choices That Reveal Their Value—After the Fifth Reach

    Some pet travel bags look perfect at rest, but their real value—or failure—shows only after repeated, live use. What sets apart the setups that survive multiple cycles from those that break down?

    Why Lateral Pockets Change the Routine

    Flatter, exterior side pockets won’t win a display contest, but grabbing a bowl or wipes shouldn’t require a wrestling match with the entire bag. After real movement, you want items that can be pulled in a single motion. Side-access for wipes means you’ll actually clean up right when you need to; bowls that slide in and out externally don’t end up trapped under everything else. The advantage: you get to act, not pause, even as the rest of the kit keeps shifting with movement.

    External Loops and Real-World Flow

    Leashes run wild when left inside the main bag, tangling around toys and blankets. Moving the leash to an outer loop or clip pares down the repeated drama; the bag looks less zipped-up, but with tension gone, resetting becomes a simple, single movement—not another tangle to undo. These small, external features do more than organize—they disrupt the cycle that usually grinds down your routine.

    How Small Changes Defuse Repeated Stress

    Upgrading from a generic bag to one with actual outside access for wipes and waste bags flips the cleanup routine: no more full unzips, just a quick hand pull. A bowl pocket right at your seat means water is always a second away, no awkward extraction required. Tie-on toys or clipped comfort items finally keep your pet calm without requiring a teardown of your whole setup. Each structural fix isn’t a one-off—they reduce the repeated, stacking stresses that strip minutes from every delay, gate wait, or boarding reset.

    It’s About Handling, Not Just Holding

    A week of travel quickly proves: you don’t need more pockets, you need pockets that survive repeated demands. The right structural detail keeps high-use items ready after four reach-reset cycles, not just at the start of the trip. The result: your seat-side spot remains operational rather than ornamental, with less reshuffling and more immediate action. The difference is visible—a setup built for handling, not displaying, will outlast every minor crisis and keep you and your pet on pace no matter how often routines restart before boarding actually begins.

    What Keeps a Seat-Side Spot Usable?

    The real standard for a functional pet-travel setup isn’t how much it can pack, but whether you can reliably grab your essentials—wipes, bowl, calming chews—after a half-dozen interruptions. Look for organizers with multiple, truly external access points for in-and-out items. Keep high-churn supplies clipped or pocketed outside, saving deep storage for things rarely needed. A dedicated wipe or waste-bag sleeve right at hand is the single most effective way to avoid stop-down chaos. With these changes, restarts shrink from events to non-issues, and the stress of every wait or seat-shift drops noticeably.

    The difference between a seat that stays yours and a setup that keeps betraying you is structure built for real cycles—not just a tidy loadout. A few well-placed access points and a layout designed for live handling—not pretty order—change every airport wait, seat shift, and on-the-go repack into something that works. When your most-used items remain easy to reach through four, five, even six cycles, your travel routine keeps moving, the pressure eases, and travel with your pet stops feeling like a slow leak of seconds you never get back.

    Shop all practical pet-travel arrangements and gear at PawGoTravel

  • Slim Wall Cabinets That Keep Hallways Clear and Functional Daily

    The pain of hallway storage isn’t the big mess—it’s the slow creep that turns order into a traffic jam by Wednesday. A hallway that seemed sorted on move-in day becomes a gauntlet of ricocheting shoes, bags that settle wherever there’s a flat spot, and surfaces collecting things meant for “just a minute.” The real problem isn’t a lack of bins or shelves. It’s a setup that doesn’t match how the hallway gets used: too much floor storage swallows walking room, while every open surface turns into overflow for groceries, keys, and everything that didn’t land where it belonged the first time. The result? You’re sidestepping piles, reaching past repeat clutter, and performing a morning shuffle—because what worked on day one collapses under daily habits.

    The Trouble with Floor-Based Storage in Real Hallways

    When storage pushes onto the floor, the hallway fights back. Floor-bound cabinets and benches start out promising: lots of space, defined spots for shoes, somewhere to stash bags. But within days, the top surface becomes a catchall—every lanyard, mail slip, or grocery tote gets parked there, blocking return flow. Shoes intended for inside the cabinet cluster in front; the intended walkway now requires navigation, not just movement. Trying to stow or retrieve something means shifting piles, bending awkwardly, or retracing steps to clear space—turning a simple hallway into a reset zone that never quite empties out.

    A shoe cabinet that claims to “contain” soon acts as a magnet for the week’s debris. The deeper the footprint, the quicker the corridor narrows. If you need to slide a heavy bench aside just to reclaim space—especially on rushed mornings—you’re living in a fix that betrays its promise. Not because you lack storage, but because the way it claims the floor turns every retrieval into a small negotiation with everything else left behind.

    Why Walkways Get Crowded (and Don’t Reset)

    Any hallway unit that projects more than eight to ten inches from the wall eventually turns “put it away” into wishful thinking. A single bag left askew triggers a chain reaction: shoes get nudged aside, open drawers become blocked, and the next person either piles on or finds a workaround. Reset routines become frantic sprints that barely suppress clutter until the cycle repeats—a hallway designed for storage now interrupts every pass-through.

    What Wall-Hugging Slim Cabinets Actually Change

    Slim wall units don’t hold more, but they control what happens in the open. With no flat top for stacking, a wall-hugging cabinet blocks the drop-zone habit before it starts. Shoes, keys, and mail stay behind closed doors, accessible but not in the walkway or on permanent display. Because the depth is minimal—six to eight inches—these cabinets add almost no floor-pressure, keeping the corridor open even when the day is busy and hands are full.

    Structure That Stops Sprawl

    A slim cabinet, fixed flush to the wall, refuses the role of overflow convenience. If a delivery bag won’t fit, it can’t linger. No balancing acts, no extra surface to accumulate packages or swerve around. Instead, the only overflow becomes instantly visible—forcing a quick decision or re-route, not an invisible backlog. This “strict boundary” approach feels rigid at first but quickly converts chaos into a pattern: what doesn’t belong gets dealt with, not hidden, and everyone in the home interacts with a setup that quietly enforces discipline without announcements or reminders.

    In heavy-use entryways, the difference is immediate. The absence of a pileable top means no more keys vanishing under flyers, no more shoes stacked in clusters, no slow spiral back toward blocked walkways. If there’s nowhere to balance an incoming parcel, the cabinet does the work of resisting backup—keeping daily foot-traffic smooth and resets minimal.

    Hallway Flow Before and After—A Real Scene

    Movement gives away which system really works. With a deep, floor-based unit, quick cleanups become complicated: you edge shoes back in with your foot, struggle to slide a drawer open without catching a bag, or retrieve mail from under the last grocery run. Most attempts to “reset” slide back within hours—if not sooner—because the setup silently invites clutter right at the access point.

    A wall-hugging system flips the script. Retrieval is a single open-and-close—a pair of shoes, keys, or today’s mail moves in or out without piles to dodge or surfaces to clear. The floor stays visible; the walking zone remains intact; and resets shrink to a moment’s check, not an after-dinner project. The design does the enforcement, cutting off the most common paths for mess to return. Instead of playing catch-up, you notice when things land outside the system and deal with them before they multiply.

    How the Right Depth Makes or Breaks a Setup

    The depth line isn’t a style choice—it’s the difference between flow and frustration. When a hallway cabinet stands six to eight inches out from the wall, shoes and key clutter stay contained, but the path itself stays open. Go any deeper and old problems reappear: sidestepping around drawers, returning to a narrowed squeeze point, and finding that what started as a solution added a new source of tension—blocked movement and slow returns.

    But there’s a threat no cabinet can fully erase: category drift. Hallways see every kind of surprise—guests with extra shoes, last-minute mail, things “for now” that become permanent. When you start jamming new categories inside a system built for essentials, the function erodes. Shelves meant for shoes fill with outerwear, overflow mail lands behind doors, and soon the hallway is one stuck drawer away from chaos. The structure only holds if you police the boundaries—what fits goes in, everything else triggers a different solution.

    What Happens When Categories Blur

    As soon as unrelated gear creeps into a slim cabinet, the clarity dissolves. Shoes hide under scarves, small accessories jam the edges, and the ritual of retrieval slows. Within days, a “hidden” mess emerges—out of sight, but not out of routine. Now you’re back to searching, bumping, and reordering, and resets turn unpredictable. If the category line isn’t held, the system feeds the same scatter it was designed to avoid.

    Sustaining Order Through Interruptions and Sharing

    Hallways take hits: guests, delivery runs, surge periods—all test the system’s real value. When a surface is available, overflow will always appear somewhere. But a slim, wall-mounted cabinet keeps pressure contained: with no easy drop-off spot, clutter doesn’t spread. Instead of an occasional, heroic cleanup, the fix is baked in—quick micro-resets that require zero drama or heavy lifts. The system trains everyone, not just the person in charge of resets.

    It’s not a promise of perfect order. Shoes will still land haphazardly if someone’s in a rush, and a key may go missing for an hour. But because the floor stays open, congestion doesn’t spiral. Restoring normal takes a minute or two—a light sweep, a door close, and the hallway is back. The stability is less about tidiness and more about making breakdowns small, quickly reversible, and never sprawling into the living space beyond.

    Small Shifts, Big Payoff: Tips for Hallway Storage that Holds Up

    1. Keep categories explicit and tight. Assign specific places for shoes, keys, mail, and don’t let urgency redraw those boundaries. Mixing in extras sets up the next hidden mess.

    2. Track new overflow points. When piles start on the floor or by the door, don’t blame habits—tweak the setup. This might mean a hook for guest bags or a wall pocket for mail that’s not addressed by the cabinet’s current layout.

    3. Make micro-resets routine. A nightly 30-second door-sweep stops drift cold. These fast resets keep you out of “weekend project” territory and put hallway chaos on a short leash.

    Why the Real Payoff Is in Movement, Not Just Looks

    The point of a slimmer, wall-hugging setup isn’t simply a neater surface. It’s about movement—keeping the passageway clear even when the routines go sideways. The real value is the near disappearance of friction: no more recurring detours, no stuck drawers or missing shoes, and no slow pileups to unravel. Once the daily reset becomes a two-step habit, hallway storage stops feeling like a problem you’re always about to solve—and instead becomes the structure that quietly gets out of your way.

    Visit Gridry for more practical storage and organization solutions.

  • Why Proper Lighting Placement Transforms Stair and Laundry Safety

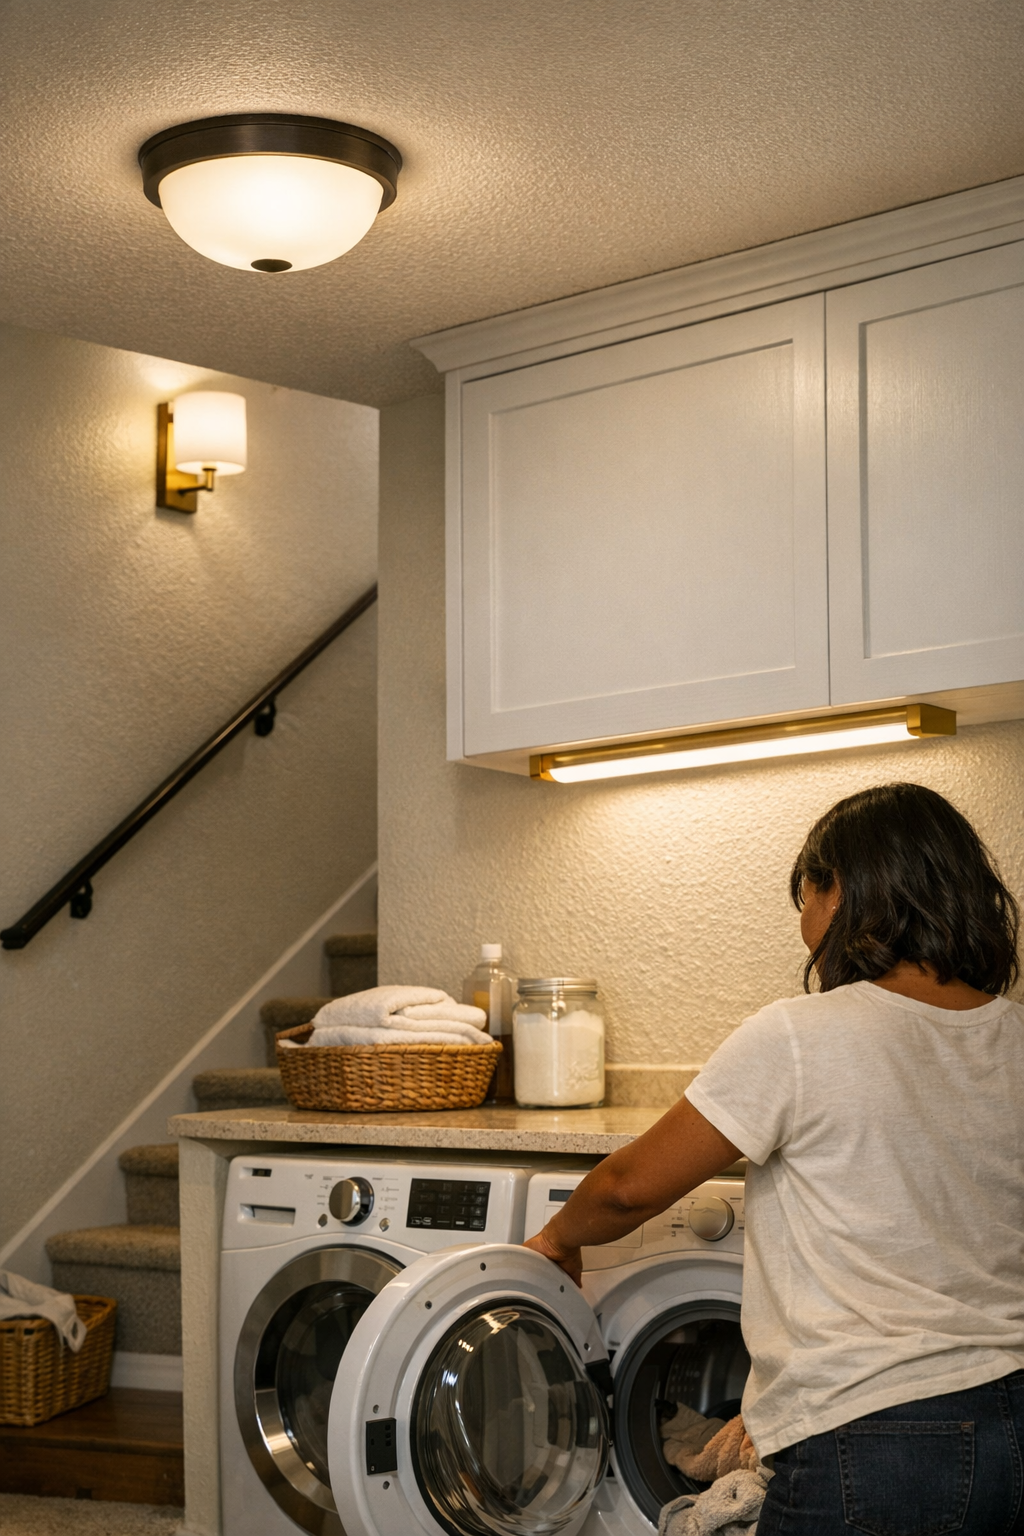
    Where lighting quietly betrays you: The stairwell looks fine at noon, and the laundry nook seems bright enough when you move in. Two days later, the difference shows itself—a sharp shadow on the stair turn makes your foot hesitate. Socks and cleaning supplies vanish behind appliances, and what passed for “well-lit” now trips you up or stalls the routine. Without warning, simple habits become a daily obstacle course, thanks to shadows and glare that the basic fixture didn’t warn you about.

    Where “Bright Enough” Fails in Real Spaces

    Ceiling lights promise total coverage, but routines prove otherwise. Grab laundry on a late night: the back edge behind the dryer is still a black hole, making you kneel and grope for missing socks. Take stairs before sunrise: a centered flush mount slices neat shadows across every step just where your foot lands, forcing you to slow and check each tread. The room glows overhead, but the pathway itself remains uncertain—your instincts hesitate where light never quite reaches.

    It’s not brightness—it’s about how light lands and where it falls short. Most “all-purpose” lighting passes on first inspection but breaks down the instant movement matters. Places like stairways, hallways, and laundry corners punish lazy lighting, exposing every missing beam at turning points, hidden shelves, and uncertain landings. When you use a room for more than standing still, the flaws stack up fast.

    Common Pitfalls: How Typical Fixtures Let You Down

    Ceiling Lights—Good on Paper, Risky in Practice

    Flush and semi-flush ceiling fixtures seem to check the box. In stairwells, though, they create a lopsided spread. Center a light overhead and the lower half of the stairs gets murky—especially when the fixture sits above your line of sight. You spot the next step a half second late or shuffle for the rail because your eyes can’t trust the shadowy outline at the turn.

    Wall Sconces—Stylish, but Isolated Illumination

    Sconces favor symmetry, not safety. If they’re spaced for looks instead of reach, pockets of shadow blink into existence behind cabinets or along the wall beside the laundry. You end up swinging a basket side-to-side to catch any last shirt, or pausing mid-step to squint at the floor’s edge—places that invite mistakes when you’re distracted or tired.

    “High Output” Still Leaves Blind Spots

    A brighter bulb ups the lumens but not the coverage. Glare bouncing off tile or glass can blind you just as much as darkness does, especially when you’re searching for a stair edge or pulling supplies from a recessed shelf. Even with high output, the corners left untouched stay stubbornly dim as you circle and double-check the space.

    The Real-World Friction Points: Overlooked but Constant

    The first sign of weak lighting isn’t eye strain—it’s how your routine slows down: Now, hunting for socks at the back of the laundry or hesitating at the stair’s mid-flight becomes normal. Movement gets interrupted, footsteps pause for a beat, and the flow you took for granted has turned into a series of minor checks and recalibrations. The “good enough” setup unravels every time you cross a dark patch or miss the zone that needs to be clearly seen.

    • Stair mid-flights and turns feel risky after dark, with shadows pooling where steps change direction.
    • Small essentials vanish behind a utility cabinet, despite the ceiling light claiming total room coverage.
    • Hallway corners become places to shuffle, not stride—one side of your movement path falling away in dimness.
    • Early morning or post-dusk routines reveal weak spots—always the task zones, edges, or surfaces that matter most.

    The truth: What looks “lit” isn’t truly usable. Safety and confidence only show up when every angle, turn, and reach point lands in reliable, overlapping coverage—not just center stage or wherever the blueprint says a fixture should go.

    Targeted Fixes: Where Structure Beats Sheer Output

    The breakthrough isn’t about flooding the area with more wattage. It’s about strategic source placement: a second damp-rated flush mount at the stair landing, a dedicated fixture over the laundry’s cabinet run. Instead of chasing lost socks into the shadows or guessing at steps, these tweaks close the gaps. Shadow edges retreat, movement flows naturally, and every inch finally matches the routines that expose the setup’s weak points.

    What Changed After the Setup Shift?

    The pacing shifted, and the stops vanished. Gathering laundry stopped being a crouch-and-search routine. Every stair, even one-handed or half-awake, revealed itself clearly—no need to hug the wall or guess in the gloom. The light began to serve the routine, following the action instead of just decorating the ceiling.

    Practical Tips for Daily Lighting Relief

    • Layer ceiling and wall lights for real coverage—ceiling mounts give general fill, but wall or directional fixtures erase shadowed edges exposed by footsteps, baskets, or cleaning tasks.
    • Let activity—not drawings—dictate placement. Put fixtures at stair turns, above reach zones, and in the corners where hands, eyes, or small items go missing.
    • Use damp-rated fixtures without hesitation in spaces prone to humidity or moisture. A standard fixture in a laundry or utility space isn’t just a short-term fix—it’s a future dark spot once humidity takes its toll.

    Questions People Ask Once Friction Sets In

    Should I use a ceiling light or wall light for better stair or laundry visibility?

    Both—never one alone for problematic zones. Ceiling fixtures fill the air, but wall lights chase away recurring step and edge shadows. The combination is what finally stops the guessing.

    Is it more important to choose a bright fixture, or to think about placement?

    Placement, every time. Over-bright, poorly placed lights cause glare or leave dead spots. A moderate, smartly located fixture lets you see and move with certainty. Real-world use exposes errors in placement—not just weak wattage.

    What if I use a standard fixture in a utility or laundry area?

    Humidity and routine are relentless. Non-rated fixtures lose ground to steam and moisture, failing early and leaving your most-used surfaces in shadow. The cost is more than a bad bulb—it’s years of dropped items, second-guessing steps, or slips in dark, damp corners.

    From “Good Enough” to Truly Usable Lighting

    The difference is obvious during the small, repeated moments: safe at the stair’s turn instead of tentative; no more squinting behind the washer; never losing your step mid-hallway. What looks “lit” is often just the absence of darkness, while functional lighting is about every daily move feeling smooth, unhesitating, and safe.

    The real question isn’t “Is it bright?” but “Does every step and reach feel clear?” In hard-use indoor zones, lasting improvement requires coverage that fits the actual routine—flush or semi-flush for area fill, wall or task lights for shadow-prone spots, and always a moisture-safe fixture where needed. Zones with recurring strain should dictate your setup, not just plans on paper. Lighting built for movement and daily retrieval keeps those trouble spots from stacking up over time.

    See lighting that’s mapped to real movement and true coverage at LightHelper.

  • Ensuring Precise Drill Bit Alignment for Accurate Straight Holes

    Anyone who’s drilled more than a few holes knows the moment when things start to slip: chips spit sideways, the bit wobbles in your grip, or a line of holes starts out straight but veers off—just enough to throw the whole thing out of whack. Misalignment sneaks up fast. A millimeter off at the start, and by the end, assembly feels more like covering up mistakes than building something real.

    How Slight Misalignment Derails Real-World Work

    Whether you’re laying out shelf pins along a kitchen wall, sinking fasteners through plywood, or adding joinery to a stubborn hardwood frame, the pressure is always there—get the hole right, or get ready to fix it later. Rushing setup to save time feels natural. Trust your hands, sight a rough mark, and go. But every missed alignment costs you more down the line. That tiny first slip leads to the next hole drifting; the project starts folding in on itself with each new pass.

    Each mistake gets harder to hide. Suddenly you’re spending as much time patching holes and shaving edges as you are drilling. Hardware resists. Pins snag or rattle. A clean row becomes a headache, and work that should be dialed-in now feels clumsy and slow. Alignment isn’t cosmetic—it shapes how the whole assembly feels under your hands.

    “Looks Fine” Is a Trap: Why Quick Visual Checks Fail

    Glancing over bits on the workbench, they all seem the same—sharp, clean, ready. You line up out of habit, squeeze the trigger, and expect the best. But the bit tells the truth. When aligned, it cuts forward with a steady hum—no hop, no roughness. Let the angle wander? You’ll know it: the drill chatters, the surface fights back, dust clouds up unevenly, and the tool seems to veer on its own. Veneer lifts, the face chips, and you can literally feel the bit strain against the wood.

    Every weird vibration or lopsided chip is a warning. That’s the signal things are off and the row you’re drilling is about to cost you. Ignore it, and no clamp or filler will make up for it at assembly. The line between crisp work and a patch job is often decided long before sanding or finishing—sometimes in the first ten seconds at the drill press.

    When Alignment Costs You: Scenes From Real Work

    Think about mounting shelving in a cramped alcove or retrofitting cabinets for new hardware. You hit the first hole just a hair off—doesn’t matter until the third or fourth, when pilot dimples no longer line up. Then the problems multiply: shelves tip, doors bind, fasteners only half-engage, brackets sit proud or float. Suddenly, nothing fits together without backtracking—more drilling, more sanding, more filler smeared everywhere. The effort spent fixing easily overshadows the time “saved” by skipping careful alignment.

    Across a real jobsite, you see the difference. One worker rushes, chasing measurements and fighting materials. Another builds in slow, precise steps: holes align, hardware drops flush, finished product looks intentional. The contrast is plain. Cutting corners early doesn’t save time—it leaves scars the customer, or even just your own hands, will always feel.

    Pilot Dimples: The Quiet Fix That Changes Everything

    The small act of making a real, visible pilot dimple—something deep enough to actually seat the bit—turns rough work into something repeatable. It’s not a pencil flick or a dent with a nail, but an actual punch, 1.5 mm or deeper. With a solid guide, the bit anchors instead of skating, and your control shoots up. Set the drill to speed before it touches the work: the initial bite is crisp, the exit clean. You’re not fighting tear-out or side drift—just making steady, reliable progress.

    A shallow dimple is a wasted step. Bits bounce, find the grain, or slide on tough faces—leading to torn edges and a creeping sense of sloppiness. Go a little deeper, and each start is consistent—even late on a twelve-hole row or across tough end grain. It’s a small habit, but it stacks up: cleaner surfaces, less tool wandering, and a smoother build from start to finish.

    A Routine That Actually Works: Lining Up for Success

    Level Your Eyes, Level the Work

    Forget “good enough.” The pros get their eyes right to the plane—checking left-right, up-down, and every possible slant before committing. Hunters for invisible tilt, they don’t press in until the bit sits laser-straight in that pilot mark. It feels deliberate because it is. This isn’t perfectionism for the sake of show; it’s the only way to avoid chasing misalignment through the rest of the project.

    Read Your Tools as You Drill

    Your drill broadcasts every detail: when the pitch shifts, resistance spikes, or chips fly uneven, that’s the clue something’s wrong. Pros stop—not push. They reset instead of muscling through, because filling or enlarging a gone-wrong hole means a softer grip, wasted parts, and a mess. Pausing to reset isn’t lost time; it’s earned precision and half the finish work later.

    Why Repairs Never Add Up to a Clean Build

    A misaligned hole can sometimes be rescued: dowel, filler, or oversize hardware. But it never feels right. The grip isn’t as solid, fasteners give under pressure, and visible patchwork becomes the calling card of every rushed job. The regret is immediate—wishing you’d taken a moment to double-check before drilling. Real shops solve these issues ahead, not after. In practice, prevention saves aggravation, time, and the sharpness of every next step.

    Reliable Drill Bit Alignment: Habits That Stick

    Never skip the mark. Awls, self-centering punches, marking gauges—any method that gives you a solid, visible pilot is non-negotiable. For every repeated hole, a drill guide or simple jig saves sanity. If you feel the drill labor or notice a tighter grip, stop and check the bit itself—dull or chipped bits magnify the risk of drifting off track before you ever touch wood.

    Keep that charger out: low batteries mean dropping torque, and that’s when misalignment goes wild, especially in thicker or denser stock. And every so often, check your chuck tension—if the bit shifts in the grip, no marking can save you. Cutting, sanding, even driving screws—every high-torque task starts with the small, deliberate choices that make the rest of the day easier.

    Alignment Isn’t Glamorous, But It Decides the Outcome

    Alignment doesn’t make a tool flashier or the build faster. But it’s the difference between final assembly that drops together in minutes and endless half-solutions: shimming, shaving, or wondering why that hardware just won’t sit flush. Precision comes from those quiet, routine moments—checking, anchoring, adjusting before you commit. Over the lifetime of a project, those seconds turn into smoother assembly, less fatigue, and a build that holds up in the real world.

    Discover power tools, sharp bits, and work accessories built for shop realities—not just showroom perfection—at Gumboll.

  • Eliminating Everyday Car Clutter to Boost Driving Efficiency

    Most people don’t notice the real source of in-car frustration until it’s right in the way: a charger knotting around the gearshift as you drive, a wipe pack wedged halfway under a seat by day three, an organizer that blocks the only useful port, floor mats that look stable but drift after one errand circuit. These aren’t just clutter problems—they’re signals your setup is slowing you down, even if everything looks “organized” on the surface. Instead of smoothing your drive, the wrong gear arrangement quietly stacks up wasted movements, interruptions, and reach-arounds you can’t ignore.

    When the Car Looks Organized but Still Feels Slow

    It’s easy to think that adding clever organizers, fresh mats, or a phone mount will erase daily annoyances. And for a day, the car snaps into place—cables tamed, compartments filled, floors covered. But as soon as the week kicks in, things shift. A mount an inch too high pulls your attention off the road. A “catch-all” tray pins down the one charging port you actually need. You start detouring around your own gear, realizing the setup isn’t designed for how you drive—it’s just decorated to look neater.

    Repeated Reach-Arounds: The Hidden Time Sink

    The real test is how often you find yourself reaching, pausing, or nudging something aside. That Monday phone charge turns into a morning routine of untangling a cord that doesn’t want to stay in place. By Thursday, you’re tracing the same cable detour, sidestepping a bin every time you plug in. Your problem isn’t missing equipment—it’s structure working against your habits, not with them.

    Micro-Frustrations Compound Quickly

    An interior that looks controlled can still grind against your routine. Maybe wipes slip into a crevice after a sharp turn, or you’ve got to unplug a charger just to move a console caddy out of the way. Floor mats that look tailor-fit drift sideways, exposing damp edges after a single rainy grocery run—forcing cleanup before the car smells musty. None of these are disasters, but together they pull your time and patience every time you return to the driver’s seat.

    A few cycles—workday commutes, errand stops, school pickups—multiply these inefficiencies. Protection and organization become chores to maintain. A “ready” car quietly asks for more adjustment, more resets, just to stay useable.

    Real Use Exposes Weak Points Quickly

    Setup flaws don’t show up in static photos. They emerge in motion, when routines collide with design. Consider:

    • Workday, phone on 2% battery: The charging cord vanishes behind a shifting organizer. You fumble and bend for it at every stoplight.
    • Door cupholder: maxed out with a winter bottle or a coffee means your wipes get shunted under lower-priority junk. First spill? You’re digging blind with one hand.
    • Bags migrate into the footwell, bumping out anything small—even safety tools—so the next driver has to scramble just to make space for their feet.
    • Floor mats “fit” only at rest, but after a week, corners lift and dirt pools along exposed seams—leaving you scrubbing after nearly every errand instead of letting protection do its job.

    The Difference Between Looking Settled and Feeling Settled

    What passes for organization at a glance often trades action for aesthetics. Overstuffed consoles and “custom-fit” trays clog the core spaces you actually touch—charging zone, door edge, cargo floor. Instead of intuitive grabs, you adapt with micro-workarounds: unplugging, jostling, reseating, shifting items just to charge, clean, or load. Every trip is an interrupted flow—two steps for what ought to take one.

    Small Tweaks That Change the Whole Flow

    Fixing these routines isn’t about adding more gear, but about clearing what gets in your way:

    • Scaled-back console organizers leave room for cables to run naturally—one cord sits ready, nothing tangled, charging becomes grab-and-go.
    • Swapping to a flat wipe pack in the door means cleanup happens in a second—not with a rummage, not from the floor, not after you’ve driven a mile with sticky hands.
    • Fewer tools, but smarter placement means nothing upends or escapes during a sharp stop; less daily shifting, less mess when you climb back in.

    The payoff isn’t dramatic—it’s the absence of friction. Instead of a car that just photographs well, you get one that feels invisible until you need something. You act, and the setup never pulls you sideways.

    Not All “Protection” Helps in Real Conditions

    Mats or seat covers that promise coverage but slide after a morning of errands betray you in the smallest ways. Door-edge dirt, uncovered corners, covers bunched after a single seat-slide—every “adjustment” is another demand on your focus. If “protection” means resetting gear before and after routine drives, it’s just shifting the cleaning burden to a daily task instead of erasing it.

    Are You Working With or Against Your Setup?

    A telltale sign your layout needs fixing: your hand pauses, your body repositions, or an extra step sneaks in before you can charge, clean, exit, or load. If the very gear meant to prevent problems becomes the reason for daily blockages—cables kinked, ports covered, trays catching cargo—your car isn’t really ready. Packing for every “what-if” means little if it sabotages the basics you use every drive.

    Building a Car Routine That Actually Works

    The best setups don’t call attention to themselves. Real “readiness” is proven by how little you notice your gear doing its job as your week moves—from quick stops, to muddy errands, to a full car on a rainy day. When you get in, plug in, clean up, and reload all in a straight line with no detours, you know the friction’s gone—and your car is finally on your side, not in your way.

    Ready to equip your car for actual everyday flow? Browse practical solutions at DriveWellSupply.

  • Why Your Dog’s Night Wakings Persist Despite a Set Evening Routine

    The evening routine hits all the marks: dinner finished, last walk done, lights down—everything in place for a quiet night. But at 2:17am, your dog stirs, padding over hardwood, maybe circling the mat, nudging the bowl, or scratching at the door. The signal is clear: a step is off. It isn’t chaos, but it isn’t rest either. Every night, small frictions—bowl too close, toys half-stashed, mat bunched, wipes blocking the threshold—erode real calm and pull you out of sleep. The setup on paper makes sense, yet when every routine flows through the same space, the difference between “looks right” and “actually works” shows up in the dark. If your nights keep skidding on the same invisible bumps, you’re living the gap between tidy routine and dog-life reality. This is where DogPile starts paying off—not by making things pretty, but by fixing what breaks under real, repeated use.

    Why “Routine” Isn’t Always the Solution

    Evenings planned to the minute don’t save you if the details reset against you before dawn. The belief that predictability alone prevents chaos evaporates by night three of broken sleep. Most routines hide small mismatches: a water bowl close enough for sipping out of habit, a leash looped over the bedpost to be “ready” but now crowding your hand, a mat that always ends up crumpled by your dog’s feet. These aren’t outright mistakes, but each one slowly ramps friction.

    Patterns develop. You catch your dog looping the bed, interrupting the settling you assumed was locked in. A last-minute water run, late toy hunt, or surprise request to go outside—all cracks in the “settled” routine. The problem isn’t that you lack routine, but that familiar details let small gaps persist, making “almost calm” the new normal.

    Visual Calm vs. Real Calm: What’s Hiding in Plain Sight

    Rooms arranged for visual order mean little if the micro-details don’t hold up under dog pressure. A tidy look can disguise routine disruptions:

    • Water bowl next to the rest spot: solves spills, but makes midnight drinking—out of boredom, not thirst—too easy. Each visit triggers a restart for everyone’s rest.
    • Toys kept close: convenient for tomorrow’s walk, but a signal that play is never fully put away. Energy lingers just when you want it to drop.
    • Mats and beds: chosen for comfort but still sliding, bunching, or folding as your dog circles. The night becomes a patchwork of restless re-settling.
    • Extra leashes, wipes, and towels “on hand”: crowd the door zone, jam up morning flow, stall the before-bed wind-down, and invite stumbling in the half-light.

    The friction isn’t about clutter; it’s about timing and reach. Night after night, what’s “organized” proves just a step off from actually usable. The setup looks like it should work, but it stumbles at the same points again and again.

    Repeated Wakeups: Patterns That Reveal Real Weak Points

    After just a week, you stop blaming luck. Specific patterns expose which setup details don’t hold:

    • Dog wakes up, drinks, and then paces or shifts—the water’s too close, the mat slides, nothing helps him really settle.
    • Stepping into the morning: your first move is tripping over a towel, or nudging last night’s leash/searching for a wipe in a “convenient” but impossible spot in the dark.
    • Cleanup must-haves are “right there,” except when you’re desperate not to wake anyone at 2AM, and the arrangement forces a noisy search.

    Nighttime friction creeps into morning. Your dog stalls at the threshold, waiting while you dig past clutter. The first meal is delayed by a groggy search for that particular bowl. Resetting for the next night is never just a clean sweep—each object finds a new way to slide out of place.

    • Rest area is never quite clear—shoes, leashes, and wipes migrate right where you need bare floor.
    • Dog wanders for water while you’re still untying your shoes.
    • The “calm look” of the room doesn’t match the friction lived through every morning and night.

    The repeated friction isn’t random. When setup details fail at the same moments, the problem is structural—buried in how routines use real space, not just how the space looks once.

    The Right Adjustments: Subtle, Practical, Night-After-Night

    Real improvement is subtle. The strongest improvements don’t come from a perfectly staged corner, but from details changed in response to friction you’re forced to feel—night after night.

    Move the Water Bowl (but Not Too Far)

    Relocate the water bowl just enough—say, two meters from the sleeping zone—for nightly “just because” sips to drop off, while your dog still gets a needed drink before actually settling. You’ll notice fewer wet pawprints by dawn, less pacing, and a slot of real quiet returning to the routine.

    Downshift Energy Before Bedtime

    If toys, wipes, or brushes are visible or handled too late, the energy never drops. Wind down with slow, low-stimulation steps. Stash toys out of the sleeping area entirely before final lights out. Don’t just let the routine “fade”—signal a true end to dog activity.

    Keep Sleeping Corners Truly Clear

    Get ruthless—any chew, spare leash, or wipe in the rest spot risks calling your dog back to “almost active.” Actually move these items out of sight and reach just before bed. The empty space cues rest more reliably than a neatly trimmed pile of supplies by the mat.

    Spot Rituals That Signal Unfinished Business

    If your dog circles, paws, or resettles four times in ten minutes, or if the mat slides every night, something’s off. Watch the pattern—does moving the mat, adding traction, or shifting the bed help him stay down longer? Tweak the setup each night until repeat motion drops off.

    Handling Morning Cross-Talk

    How the setup is left overnight governs the next morning’s friction. Wipes in the wrong spot, leashes tangled with towels, toys creeping back underfoot all delay the first reset. The right structure means you use less energy fixing, and more seeing what needs actual attention. Fewer hesitations—by both you and your dog—means the routine’s friction points finally fade.

    Examples from Real Evenings: Where Theory Meets Practice

    You reach for the leash, but your hand snags a towel left to dry after the last walk. It falls, your dog perks up, and now water’s on his mind instead of bed. Or you re-enter after closing up, only to find the bowl right in the walkway—and the night’s quiet broken by one more round of lapping and circling. On Saturday, the mat fit—the next day it folds under the chair, forcing a noisy fix that wakes both dog and partner.

    Individually the issues seem minor, but they multiply when repeated. The difference is clear: setups that just “look right” do little for the third night in a row when the dog and owner keep repeating the same wrong dance. Practical dog-life means looking for what keeps snagging and shifting it for real—not just arranging, but actually resetting the routine weak points.

    Questions from the Real Routine

    Why does my dog wake up at the same times every night?

    Most repeat wakeups aren’t random. They track with specific triggers—water too available, leftover stimulation, toys in reach, or an awkwardly placed mat. If your dog is up at nearly the same time, check for these consistent invitation spots right by his rest zone.

    Will adjusting food or walk times affect my dog’s sleep?

    It usually does. Squeezing walks, dinner, and bedtime too close together leaves both you and your dog too “on.” Even quick changes in the schedule can create tension that leaks through the night. Give some space for activity to wind down before lights-out; otherwise, you’ll see the cost on both sides of the morning routine.

    If your setup keeps asking you to adjust in the middle of the night or forces morning delays, it’s time to rework not just the look but the everyday function. See what holds up after a week of real use—and what still needs resetting. The difference between another night of micro-interruptions and real rest usually comes down to a handful of details, not a sweeping overhaul. For setups tuned to everyday dog-life friction, see what fits at DogPile.

  • Managing Pet Care When Your Cat Claims the Living Room Sofa

    The Subtle Shift When Your Cat Moves Into Shared Space

    When your indoor cat suddenly starts spending her days in the main living area—not hidden under the bed, but stretched out across the best spot on the sofa—you notice the difference almost instantly. Cat care jobs that once stayed on the edge of your vision now land in the center of your routine. You don’t just brush, wipe, or grab stray toys in passing; now, every out-of-place item or tuft of fur is in the path of your day, breaking up the room’s calm and breaking your flow every time you sit down.

    The comfort of having your cat nearby is real, but her routine blends into yours—and so do the little burdens. Cat toys drift into shared footpaths. Lint rollers and brushes surface where you need a spot to rest a coffee cup. Suddenly, the invisible boundary between pet zone and living space is gone, and all the friction of inside-the-bedroom habits is now multiplied across your main space. These aren’t big messes, but repeat interruptions that turn five-second chores into repeat reshuffling.

    Routine Tasks Go From Optional to Immediate

    Once your cat claims a place on the sofa, you lose the old “I’ll do this later” buffer for grooming, tidying, and resets. Fur on the cushion isn’t hidden; it’s exactly where you sit, and skipping a brushing means you’ll feel it tomorrow, probably on your clothes. Leave a crinkle ball out, and you’re the one kicking it away by evening. The pace of care changes—the price for skipping a task is an immediate, visible mark against the room’s calm.

    Over days, this creeps up: the brush that used to “wait for weekend cleaning” is suddenly always missing when you need it. Empty bowls, scattered toys, and hair on furniture that later shows up on your work pants—all are signs that each delayed reset stacks up, not just for your cat, but for the way you move through the shared space. Deferred chores don’t disappear—they resurface when you least have time, making the whole setup feel just behind.

    Repeated Friction in Real-World Scenarios

    Nighttime, quiet room: your cat stretched across the sofa, fur standing out against the cushions. You spot it—but the brush is across the apartment, last left by the back door. You weigh: get up now, or put it off again? Delay it, and soon the fur works into the fabric, no longer liftable in seconds. Cleaning goes from fast swipe to an involved project, all from one skipped step that keeps returning.

    Or you reach for the water bowl now parked by the sofa for your cat’s convenience, only to find it blocked behind a tote bag or magazines. You end up shifting a stack or nudging around clutter every time you refill. A trivial task expands: more drips, more second-round wipe-ups, and the bowl needing cleaning sooner because it sits in high-traffic reach—good for your cat, but harder for you to maintain without pausing your routine each time.

    Toys multiply quietly. What starts as one mouse and a ball becomes five pieces in a sprawl: a fuzzy thing at your feet, a teaser handle poking out from under the armchair, another toy lost behind the TV stand. You end up gathering for five minutes every night—or you don’t, and the drift grows. Weekend resets no longer cut it. Each skipped pickup pulls your space further from actually being usable, even if it looks “lived-in tidy” for guests.

    Setup That Looks Tidy but Doesn’t Flow

    The classic fix—sweep, stash toys in a basket, nest the brush on a side table—can make a room look tidy for a day. But if your lint roller is always one drawer too far, or the toy box lid is heavy or sticky, your routine starts breaking down again. “Return to storage” turns into “set it down for now.” Chores are postponed not from laziness, but from setups that force micro-interruptions—adding friction right where you want the process smoothed out.

    Convenience isn’t appearance. Wipes hidden behind stacked books do little good when fur tracks across the slipcover. Cleaning that should take thirty seconds stretches to two minutes because the tools aren’t at arm’s reach. For every extra second of hunting or reshuffling, the urge to skip builds—until visible mess is back and you’re again chasing an orderly look, not a low-pressure flow.

    Small Adjustments Make Lasting Difference

    The least disruptive fix is often the most effective: place a basket or bin right by your main seat, stocking it with a brush, lint roller, and wipes so each is usable without leaving the area. If toy corral works best beside the spot where play ends, use an open lidded box, not a tricky container that’s easy to avoid. Resetting becomes a background move—thirty seconds as you get up, not another delayed task piling on tomorrow’s list.

    A washable throw on the sofa lets you catch fur early—just shake or brush nightly. Keep the water bowl within true reach, but clear a small, dedicated patch so you’re not navigating bags and books with every refill. These aren’t magic fixes, just small anchor points that keep you handling care where it happens, not creating circuit-trips around your own living room. You won’t eliminate maintenance. But now it happens on your terms, not as a buildup waiting for a free hour.

    The Everyday Difference: Working with the Real Flow

    The real challenge is never a single missed step—it’s the way small skips turn into slow drag. The moment your cat lives in shared space, your care setup starts showing its true weak spots: the absent brush, the stash basket that’s hard to use, the cleaning supplies that migrate just out of reach, the toys sliding out in every direction. What worked for “occasional resets” fails in the thick of daily repetition.

    Your setup needs to adapt to the real route of your living area and your cat’s patterns. Reset supplies to the places you actually pause: after grooming, after a play break, after topping up water—not at the edge of the room, not stored for “later.” When your space fits the flow, you reset on the spot—less buildup, less clutter sneaking back. Good appearance isn’t just about a tidy look; it’s about routines that don’t trip you up again tomorrow.

    Over a few weeks, whether your space stays steady or slips depends on where you put the basics, how easy they are to grab, and whether resets are built into your daily path. Most gaps aren’t about missing effort—they’re about setups that quietly work against the pace of indoor cat care, turning calm rooms into zones of low-key friction. Noticing and fixing those points is what keeps the shared living space truly manageable.

    See everyday setups that match real pet care at CalmPetSupply.

  • Why Carry-On Organization Often Fails During Real Travel Moments

    Perfectly packed at home, slow and clumsy under real pressure—this is the airport test for any carry-on “organization.” In your bedroom, every charger, passport, and wallet is slotted just so, zipped into crisp order. But the moment you hit security, that neat structure turns against you. Reaching for your ID means rooting beneath pouches you thought would help. The line moves. Your hand stalls. Suddenly, the system that looked efficient on your floor becomes a bottleneck—document checks, charger retrievals, and last-minute repacks now trigger friction, not flow. Carry-on order isn’t decided by appearance; it’s exposed (or unraveled) by real airport movement, repeated small demands, and every grab along the way. This is where the real cost of a “perfect” setup shows up.

    The Hidden Challenge of “Organized” Carry-On Bags

    Organization on paper rarely matches the reality of airport use. The route from visual order to actually smooth movement is lined with invisible snags. Unzip, pause—your passport’s buried under the headphones again. Charger? Two compartments away because it looked tidier there. Each friction point—wrist twist at boarding, document dig at security—doesn’t ruin your trip but interrupts momentum, multiplying into a low-level frustration you feel at every routine checkpoint.

    This isn’t about travel stress, but structure-induced friction: The “missed” outer pocket, the moment you repack something incorrectly mid-trip, the nagging pause when you realize your layout creates a new reach obstacle instead of reducing mess. The outside of your bag still looks sharp. Inside, it’s a pattern of micro-stalls: a misaligned arrangement that adds seconds and discomfort, segment by segment, as your trip flows from line to gate to seat.

    When Aesthetic Order Collides with Travel Reality

    A “tidy” compartment layout often falls apart the moment routines start to repeat. At security, you intend to slide out a slim tech organizer, but it’s trapped under a pouch and tangled headphones. In the boarding rush, your boarding pass is sealed off behind zip-on toiletries that never left the spot they occupied at home. Every transfer exposes another overlooked block—the stacking that once felt organized now means three layers to move for one fast retrieval. No single choice derails you, but every extra unzip or awkward shuffle tells you: the order isn’t matching the actual travel flow you’re stuck repeating.

    What causes this? Mismatched flow—arrangement made for visual comfort instead of the rhythm of movement. Hiding your passport under accessories, relying on main compartments for quick-grab items, or using layered organizers that bury travel tools you’re forced to access over and over. The pain isn’t a messy bag; it’s an arrangement that drags at every step, not once, but every boarding, every gate, every time you need the same object on the move.

    Snapshot: The Repeated Reach

    Airport connection. Crowded terminal. You need your ID. You know you packed it “correctly”—right zipper, bottom pouch. Yet, now it’s locked under a neck pillow and water bottle. The main compartment’s packed tight, forcing you to kneel or block the aisle as you dig. The line behind you compresses. This isn’t a random failure—it’s the product of a layout that always asks for extra steps at the exact moment friction returns. The same search, every time that checklist item is called for.

    Small Delays That Add Up

    Every delay takes a toll over time. Unzipping twice for the charger, re-layering pouches as boarding groups are called, fumbling for the right slot mid-aisle—these inefficiencies repeat with every leg. You might notice them shifting trays at security: tech pouch blocks easy access, or passport demands a two-handed reach atop a crowded bin. Across a whole trip, these moments stack: minutes lost, nerves frayed, missed rhythm.

    This isn’t about missing a flight, but about carrying the weight of layered interruptions through every segment—tight layovers, shoulder-to-shoulder gates, restless boarding lines. Each time you tell yourself, “I’ll move that after this leg,” the cycle restarts. Visual order alone can’t unlock flow if the next routine move is always hidden behind a zipper-path or pouch pile.

    Real Movement Tests the Setup—Not the Visual

    At home, your setup checks every box—chargers zipped, passport sleeved, clean separation between tech and documents. But repeated travel is not a single test; it’s the same item accessed over and over, in different spaces, from standing airport lines to cramped seats. That clever hidden slot for your boarding pass turns into a delay. That compact, color-coded tech pouch proves hard to re-pack when you need your headphones mid-flight.

    If your bag makes you hesitate before each retrieval—if you’re replaying the last time you nearly lost a document in the shuffle, or dreading the layered dig for a charger after a layover—your organization isn’t keeping up with your travel reality. The difference between looking orderly and actually moving smoothly is clear in the repeated moments your setup interrupts a basic action.

    Example: Swapping Layers for Access

    After struggling through security lines and missed calls to board, many travelers swap a multi-layered document holder for a single, top-zip pouch. From then on, documents are out in one motion—no sliding under accessories, no re-stacking pouches on the tray, no searching for that one piece of paper while people wait. The change doesn’t show from the outside, but it transforms the sequence: fewer errors, faster repack, noticeably less stress where it counts.

    Recognizing Where Carry-On Friction Hides

    Most friction hides in small design decisions you never notice until real use:

    • Deep document slots: Unnatural wrist bends and forced reaches at every checkpoint.
    • Overlapping pouches: Slow you down during security’s X-ray shuffle, forcing partial unpacking just to reach a cable or ID.
    • Layered zippers: Create cascading time-loss; every retrieval means more zips, more missed timing.
    • Tidy tech organizers: Look efficient, but if your most-used item is always on the bottom, neatness has become its own hassle.

    These aren’t hypothetical problems. They’re repeat offenders—small, repeated blocks that pile up through every movement: walking between gates, clearing trays, or shifting seats in-flight. Micro-delays don’t hit once; they become the rhythm of travel with the wrong structure in place.

    Packing for Access, Not Just Order

    The real carry-on upgrade: Zero in on which items must be reachable in one move. Place them in outer pouches or top zippers—where you never have to move something else first. Avoid letting your best attempt at tidy packing turn into a tangle that costs you every time speed matters—even if that means going against your usual color-code or symmetry habit. A small visible mess beats a prolonged document search every time a gate agent’s hand is out.

    Effective setups don’t add more compartments; they rearrange for flow. Position items for the actual movement sequence—airport checks, seating, tray pulls—not a static still life on your bedroom floor. You want to grab, use, and replace in one unbroken motion—not second-guessing which pocket or layer you’ve buried the essential in.

    Paying Attention to Repeated Annoyance

    The carry-on that keeps frustrating you—same access fumble, same document pause—is telling you something. When a routine repack or retrieval slows you down on every trip, it’s not a personal quirk. It’s a structure problem. The persistent memory of a half-blocked zipper or awkward seat entry is evidence: the layout doesn’t fit your repeated-use rhythm. And that’s worth changing.

    Making Small Changes for Smoother Movement

    Test a tiny shift: put your ID or boarding pass in the spot you can hit without moving the bag itself. Reduce leftover pouch overlap near your most-used slots. Try running through an actual “in-motion” cycle—stand in a hallway, walk through your routine, and note when you have to stop or repack. Most limitations in the flow appear when you mimic real airport conditions—not when nothing’s on the line.

    The point isn’t creating a bag that wows at a packing contest. It’s about beating the grind of interruption. Any move toward faster, more direct access—especially for documents, tech, and things grabbed on the go—means less stress, less seat-edge juggling, smoother boardings and bin lifts, and a bag that quietly improves, rather than repeatedly blocks, your every move.

    Shop all carry-on tools at CarryOnSupply