Blog

  • How Easy-to-Assemble Racks Improve Pantry Visibility and Cut Waste

    Most shelves look organized the day you stack them—but real life tests how well that order stands up. Walk into any pantry, closet, or laundry corner and you’ll spot the early hope: bins lined up, labels straight, supplies stacked just so. But routines crash into those good intentions fast. Within days, one crowded shelf forces you to reach awkwardly past boxes or shift a pile just to grab cereal. Bins meant for “snacks” swallow everything from juice pouches to condiment packets. Instead of order, you’re met with surprise stacks, hidden items, and the slow drift of clutter that chases efficiency out of the room.

    Where the Illusion of Organization Breaks Down

    It’s not tidiness you’re fighting—it’s the slow creep of disarray every time you actually use the space. Think of fishing through the pantry for oatmeal, only to upend bags and cans revealing three forgotten bottles of olive oil at the back. Or a hallway closet where “winter gear” lands behind last summer’s shoes, with scarves slipping out of sight beneath a heap of hats. What started as order quickly morphs into a maze, where finding one thing means disturbing five others.

    It’s not a lack of effort. Your rack or shelf—its depth, spacing, and visibility—quietly defines how fighting clutter plays out. When you can’t see what’s stored, you buy extras you don’t need or waste minutes hunting for simple supplies. The result: resets slow down and mess seeps into routines you want to keep easy.

    When “Neat on Paper” Shelving Fails in Practice

    Closed bins and fixed shelving can trick you with surface order. Stack containers and the shelf looks under control—until reality sets in. That bin marked “snacks” ends up holding tea bags, batteries, and sticky condiment pouches. Opaque bins high on a shelf become a guessing game, swallowing out-of-season boots or half-used cleaning sprays you’ll rediscover—too late—months from now.

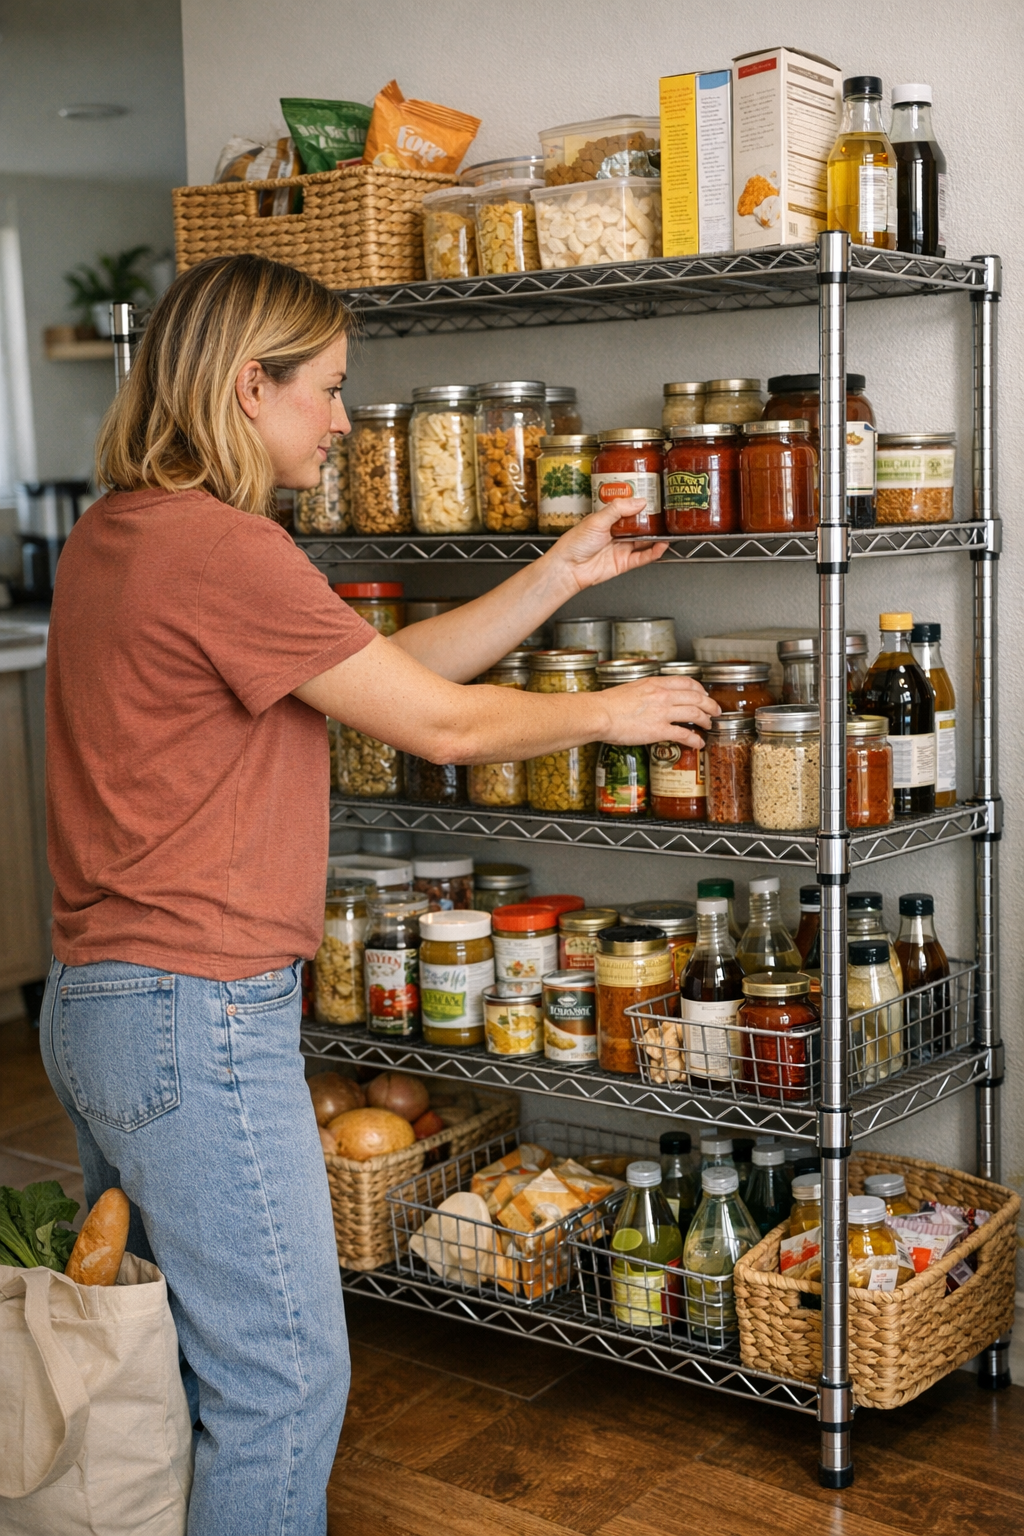
    With an open, adjustable rack, every item claims a visible spot. No playing hide-and-seek with pantry staples. No lost accessories in “junk” bins. Stand back, look, and know what’s in stock—instantly. There’s no discipline barrier, no choreography to restock. Just honest visibility that prevents bins from blurring their roles and keeps everyday items at the ready, not out of sight and out of mind.

    Friction That Goes Unnoticed—Until It Costs You

    Storage friction is real—but so normalized it’s easy to ignore. If putting away groceries means a domino effect of moving jars to reach bagged snacks, or folding laundry stalls because you’re shuffling clothes between uneven stacks, you’re paying a daily penalty in time and patience. Restocking the bathroom turns into an excavation of half-empty bottles, and soon the neat closet turns vague as catch-all bins fill with keys, wrappers, and receipts that have nothing to do with their original label.

    Every slow search, every messy reset, quietly signals: it’s not your habits, it’s the setup. The problem isn’t owning too much—it’s shelves and bins designed for appearances, not for the way you actually move in and out of the space.

    The Power of Reworking the Rack—Not Just Rearranging

    Swapping “deep-and-distant” storage for a well-placed open rack does more than skip assembly headaches. Imagine unloading groceries and every jar, can, and snack lands on shelves where nothing hides in back, every category is clear, and you already see what needs restocking. The daily reset gets faster. You don’t have to argue with yourself about where the pasta goes each time. There’s no five-minute hunt for the last packet of rice buried behind boxes, and the false sense of “out of space” fades away—a few small shifts and you reclaim minutes (and sanity) every week.

    It’s not about the shelf looking nice on day one. It’s about a quick, easy return to order—every day after.

    How Overcrowded Shelves and Tall Bins Work Against You

    Trying to maximize space by packing every inch or stacking up bins quickly backfires. Small items “disappear” under bulk buys. Cans crowd front to back, turning basic meal prep into a balancing act. Instead of smooth routines, you’re forced to take out whole rows just to find what you actually need. Shelf spacing that’s too tight, or bins that block sightlines, only increase the odds of duplicate purchases and “mystery” stockpiles.

    If organization requires constant shifting and rearranging, the system is failing you. Even a little more vertical space per shelf, or an extra row with open access, keeps staples and accessories visible and ready—so sections keep their purpose and items don’t quietly vanish.

    Real-World Adjustments That Actually Work

    Schedule a “week-later” check—not just a move-in photo but a lived-in inspection. Notice which shelf sections have melted into junk drawers, which bins swallow unrelated odds and ends, and where stacked piles collapse before the week’s through. Often, it’s tighter shelving and concealed containers quietly working against you, not your organizing willpower.

    Try switching one deep bin to open rows in the entryway—watch how shoes, umbrellas, or bags sort themselves by use and stay findable. In closets, space out racks so folded clothes keep their shape longer and towers of T-shirts don’t tip. The best rack isn’t the one with the most labels. It’s the one where every item claims its own clear, visible spot—again and again.

    The Value of Storage Systems That Stay Honest

    The real reward of assembling the right rack isn’t pride when the shelf is pristine. It’s the payoff two weeks in, when you grab exactly what you need without digging, buy what’s missing (not what’s forgotten at the back), and recover your time from fighting clutter you never intended. The best storage offers steady, reliable access—so resets are a habit, not a hassle, and order keeps pace with the rhythm of actual life.

    Organization that stays visible and functional isn’t luck—it’s the product of choosing racks that let the routines, not the mess, set the pace.

    Shop ClosetWorks

  • How Vertical Storage Transforms Entryway Clutter Into Clear Space

    The entryway begins as a controlled crossing—clear path, shoes arranged, bench ready—but that order breaks down fast. One muddy boot, a loose drawer pull, or a busted umbrella lands by the door “just for now.” Soon enough, a catchall repair bin installs itself at the threshold. Meant as a temporary fix, it swallows loose ends and floor hazards—until it drifts from solution to stumbling block. This is how the zone that should absorb daily in-and-out ends up crowding every exit and return.

    How the “Temporary” Repair Box Quietly Grows Roots

    The repair bin feels only temporary at first—a spot for quick fixes, not a lasting fixture. But its presence invites creep. Sports gear goes in “just until Saturday.” Outgrown gloves and bags with mystery contents find a home. The bin spreads sideways, pulling in whatever is awkward to store or “on the list.” Now, grabbing your everyday shoes or dropping bags turns into a shuffle: move the bin, rebalance what’s stacked, hope nothing blocks the path. What should be a reset point at the entry becomes a bottleneck that slows every routine, with small items lingering for weeks and the weekday flow grinding against accumulated odds and ends.

    Each pass through the entryway becomes a negotiation. The bin sits, a reminder and an obstacle at once—its bulk absorbs clutter, but also disguises how much backs up. Missed repairs layer with things you meant to move last week. Soon, rerouting yourself or nudging the container aside feels like part of the routine. The “quick fix” station becomes the main reason resets get skipped.

    From Floor Calm to Daily Friction: Where Bins Break Down

    Large containers promise control but breed hidden chaos. A rugged bin seems like a quick solve—sweep small parts in, lid down, problem gone. But unlike a sectioned wall rack, that big box turns into a mix of priorities: today’s broken umbrella, last month’s skate, a stray glove stuffed beneath. Every retrieval becomes a tangle—bend, dig, balance, and hope you don’t spill odd shapes or fine grit across the entry. The bin is no longer relief; it’s friction disguised as storage.

    This friction accumulates in details: a shoe row nudged out of line, the bench edge re-claimed as overflow, blocked access to a hook or the pathway narrowing under a slow press of clutter. Even one return trip after work can mean swapping bags, shifting repairs, and feeling the reset get heavier every week. The illusion of order erodes as fast as you can fill a “temporary” container.

    Real Use, Real Clutter: Recognizing the Signs

    Most entryway backlogs show up without warning—and stay visible if you look closely:

    • Blocked movement: If pulling shoes or dropping bags gets tangled with shifting bins, your entry’s flow is already suffering.
    • Overflow turns semi-permanent: Forgotten repairs and off-season gear now mingle; last week’s projects have faded into the background.
    • Heavier resets: What started as quick maintenance means excavating a pile, not a simple step. Retrieval drags; the space feels more closed off with each day.

    It’s easy to catch yourself dropping a screwdriver “for now.” A week later, it’s wedged beneath boots from a forgotten season, and the bench has transformed into an overflow ledge. Everyday use chips away the utility of your transition space until it stores things well but supports movement poorly.

    Why Slim and Sectioned Storage Changes the Game

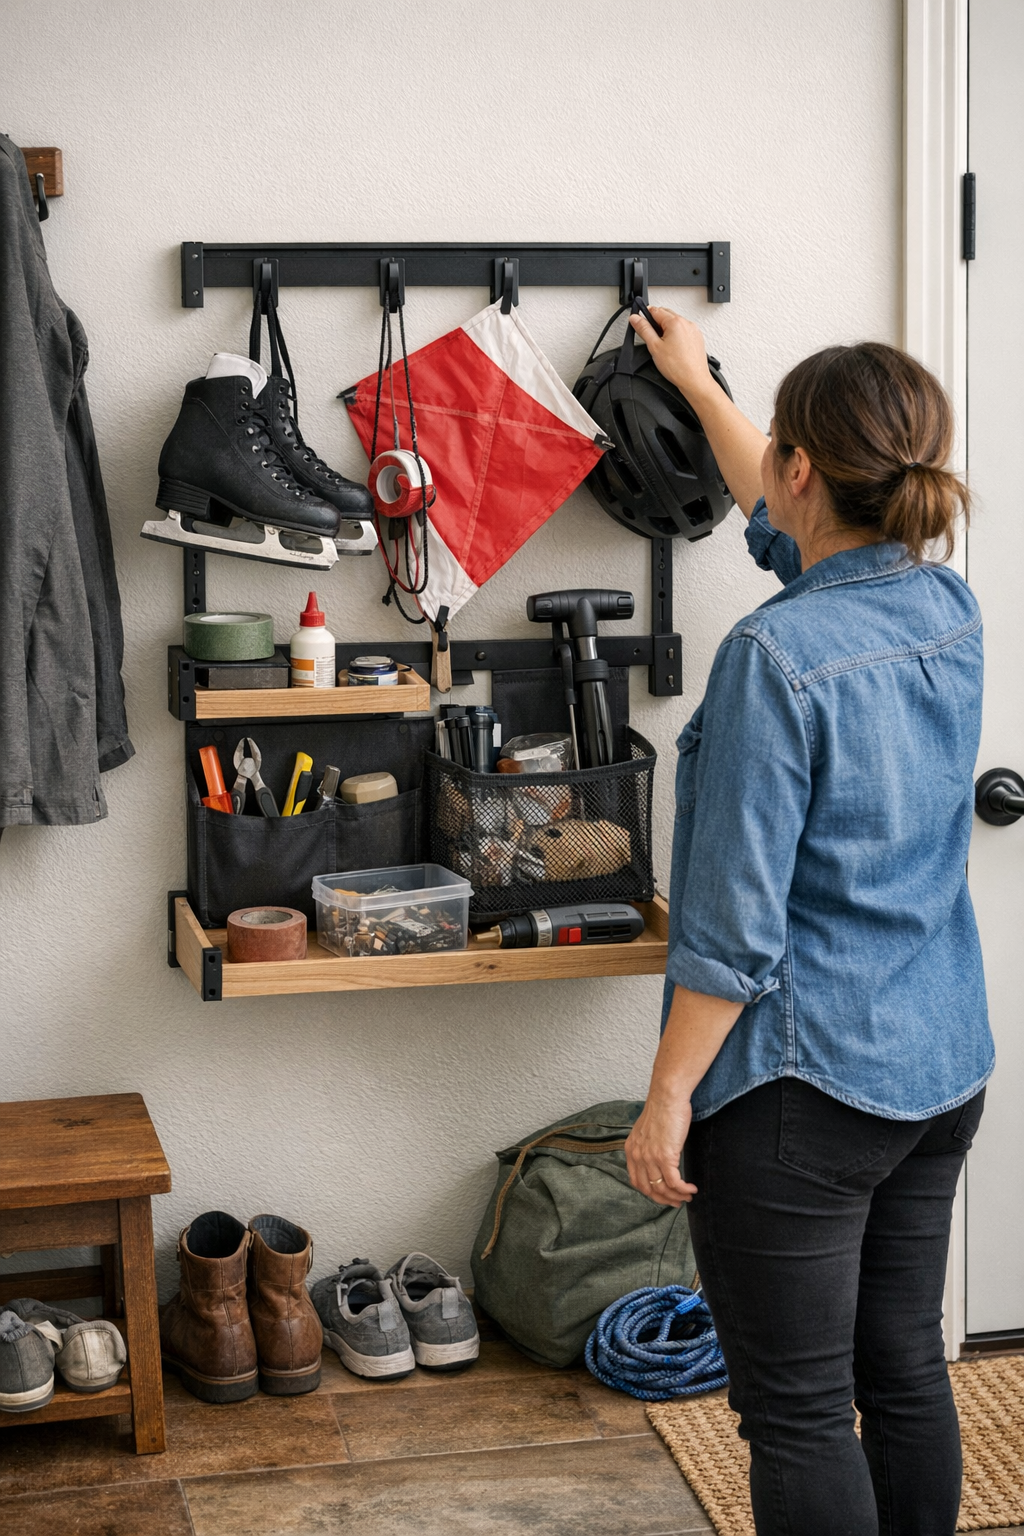
    Separation creates movement. Swapping a single large bin for an array—hooks for repairs, a slim wall pouch for small fixes—forces both visibility and action. Imagine a narrow entry: one wall, a bench, space for a quick change of shoes. Now, every pending “to-do” demands its own place. The broken cabinet handle hangs in sight until fixed, not buried. The loose skate sits on a dedicated hook, not blocking the shoe row. No more hunting; no more hiding backlog with a lid.

    Limiting clutter to small, named spaces cuts the urge to blend categories or stuff new problems into old containers. Everyday items can return to their place without navigating a catchall zone. The entryway returns to what it should be: a pass-through, not a backlogged side project or stalled reset area.

    Practical Tips for Beating Entryway Backlog

    • Enforce a visible limit. Use only as many hooks, slim racks, or pockets as match your normal repair rhythm. If you rarely tackle more than two fixes at once, don’t install more storage than you’ll actually use.
    • Keep clear divisions. Store off-season or non-urgent gear elsewhere. Let repairs live separately—the more visible, the less likely they’ll stall into long-term clutter.
    • Design the flow, not just the storage. Every addition to the entry should feel lighter to retrieve than to ignore. Hanging or stashing a project should support coming and going, not add another step or pile.

    The difference isn’t just aesthetics—it’s how easily you can spot what needs action and how quickly you can clear a reset without rediscovering neglected clutter. When every item claims a precise space, overflow can’t build. Your entry remains a route, not a dead zone.

    Troubleshooting: Is Your Entry Storage Quietly Working Against You?

    • Do resets keep getting slower as you relocate bins to open a path?
    • Does your container conceal overdue fixes—masking problems instead of sorting them?
    • Are you stepping over the same obstacles long after the “quick fix” was meant to be cleared out?

    If so, your setup isn’t just storing objects—it’s storing delay. The difference shows up in lost time and daily frustration, even if the mess stays hidden until you have to move something in a hurry.

    Restoring Real Entryway Flow

    A transition space that works in real life isn’t about impressing guests or showing off neatness; it’s about how the area supports—and recovers from—every day’s cycle of arrivals and exits. Don’t let the temporary box dictate movement. Choose slim, split, or vertical storage that matches your actual use: every repair or “to-do” gets its own clear spot, so resets don’t stack up out of sight or spill into the path. Flow stays functional; reset pressure lifts.

    http://www.betweenry.myshopify.com

  • Why Modular Storage Systems Only Prove Their Worth Over Time

    The day you install a modular wall storage system, everything feels possible. The chaos of random piles and misplaced tools gives way—at least briefly—to crisp lines and clear floors. You rake in that first rush of satisfaction, walking a path that didn’t exist before. But what the new setup looks like on day one and how it works by week two? That’s where the real test begins. What feels orderly now can quietly slide back into friction: a bin that blocks your reach, a cart that always seems parked in the way, corners that become dumping grounds just out of habit.

    That “Fresh Setup” Feeling—And How It Fades

    The first day, you admire how the rails align, how every hook and bin looks like it was made for the wall. You stand back, floor clear, the bench visible for the first time in months. But daily use quickly chips away at the honeymoon. You find yourself swinging wide around a cart that used to sit neatly out of the way—or contorting to reach past a cabinet edge, again. That last rail, full of hope and space, morphs into a landing pad for odds and ends you can’t be bothered to sort.

    It’s never one big issue—just a steady return of small workarounds: awkward reaches, bins with no true home, shuffling gear from spot to spot just to get through the day. The “order” isn’t gone, but it’s leaking at the seams.

    When the System Begins to Resist

    You start a project, hauling out parts and tools, and suddenly find yourself detouring around a floor cart that’s wandered into your main route. A corner section designed to keep gear up and out of the way slowly turns into a blocked zone, or worse, a no-go zone. Those cleverly mapped wall rails sometimes force you to stretch or sidestep, making you realize: fitting everything on the wall is not the same as making the room work.

    This is where even “modular” becomes misleading. Storage that looks good standing still can oppose your habits in motion.

    Everyday Friction Has a Cost

    A scattered moment here, a pause there—these add up fast. A container set a bit too high becomes a chore every time you need that tool. Old paintbrushes and zip ties crowd a corner you meant to keep clear. Meanwhile, the hand tools you use daily start creeping back onto the bench because it’s faster than crossing the room to fetch them. You find yourself losing seconds—then minutes—to needless shifting and repeated shuffling. The real drain isn’t dramatic, but it’s permanent: resets take longer, and your “organized” system starts feeling like just another thing to manage.

    The Invisible System—Storage That Stops Being Work

    What separates a setup that lasts from one that just looks good for a photo? The best storage nearly vanishes in practice. You grab the wrench off the wall without pause. The floor stays open, not because you’re guarding it, but because your flows naturally keep it clear. After a day at the bench, reset means a handful of movements, not a full-scale re-sort. Everything you actually use lives in arms’ reach, not exiled to a rail across the shop because that’s where space was left.

    True modular efficiency comes from listening to use, not measuring shelf space. Choke points, awkward clusters, and overflow zones stand out fast if you pay attention. The real test isn’t day one’s tidy look—it’s whether your space stays easy weeks later, even as projects change and routines get messy.

    Real Friction: Scenes You’ll Recognize

    When Mobility Becomes Inertia

    Picture this: A rolling cart, meant to make things easier, sits next to your main workspace. It’s loaded with drills and cables, maybe half a toolbox perched on top. For a few days, the arrangement works—until you notice you’re always nudging the cart aside just to get by. Sometimes, you return from the other end of the bench and the only path is blockaded. What was a “flexible zone” is now an obstacle, demanding extra steps every single time. Movement through the room breaks down—slowly but always at the worst moment.

    Dead Corners: Where Good Intentions Go to Die

    That corner section you installed “just in case”—far enough from the daily action—soon becomes the exile for gear with no clear home. It’s where masking tape, leftover hardware, paint roller sleeves, and the odd single-use clamps wind up. At first, you ignore it. Give it a month, though, and that overflow eats up prime wall real estate and muddies the system. Even disciplined setups bleed efficiency here. The tell: you find yourself reshuffling the same pile, over and over, to free up barely a hand’s width more space elsewhere.

    How Small Tweaks Unlock Big Improvements

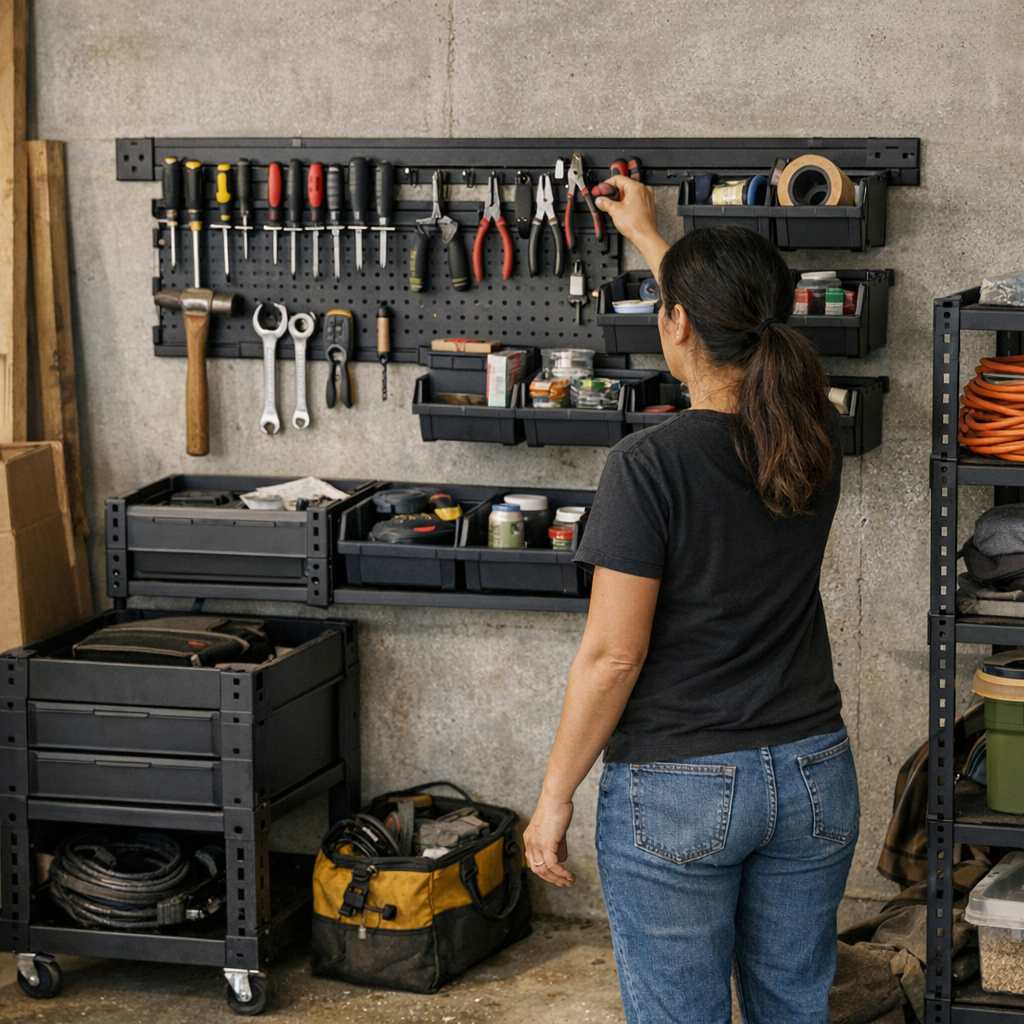
    The fix rarely means tearing up your whole system. Spot the recurring friction—where motion stalls, where bins stay empty or useless, where carts keep getting in the way. In one real shift, simply moving daily-use drivers and pliers off a mobile cart and onto a mid-wall rail cut several minutes from setup and shutdown. The “problem cart” was sent to a utility corner for long-term storage, restoring clear access to half the workshop and ending the ritual of reshuffling. As a result, cleaning up at the end of the day turned from a 15-minute sweep into a two-minute glide.

    Here’s a simple rule: Your layout should respond to your routine—not the other way around. Spend a week noticing the actions that feel clumsy. Shift the bin, swap the hanger, drop the shelf to a more comfortable height. These adjustments rarely require more than a screwdriver or a level, but the payoff keeps growing—less clutter returned, more flow gained.

    The Real Mark of a Working System

    An organized space means nothing if you keep tripping over “solutions.” The true win isn’t in pictures or diagrams—it’s a space you stop thinking about because it simply works: flows remain open, access is clear, nobody’s bottlenecked by a rolling cart with nowhere to park. Every time a reset is quick and you don’t have to reshuffle or rethink, your system has proven itself in real use.

    Every space reveals its own flaws and fixes only after repeated use. Instead of chasing the perfect layout, aim for one that quietly fits your actual habits. Tune, nudge, shift—until order feels lived-in, not just installed.

    Visit StackNest for practical modular storage solutions that fit real work, not just the plan.

  • Why Positioning Storage Near Task Endings Transforms Outdoor Organization

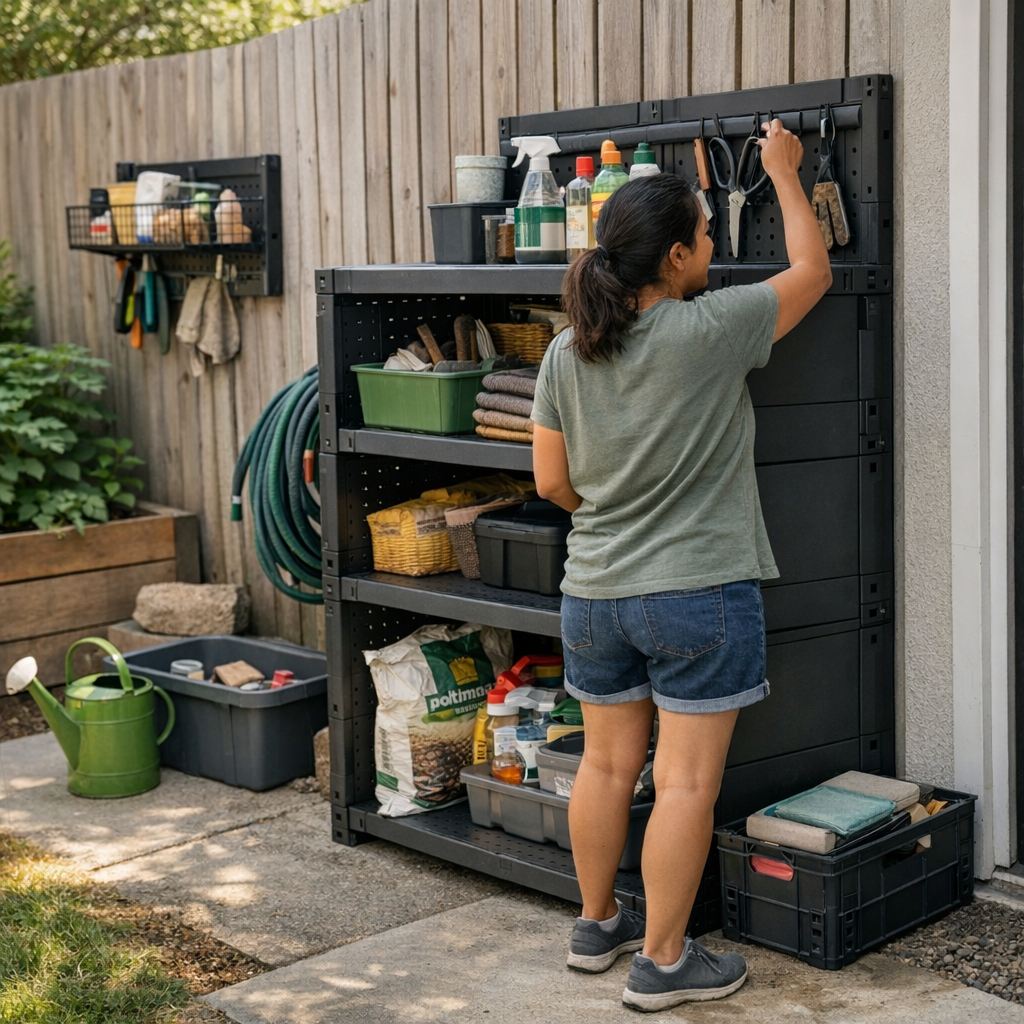
    Anyone who uses a backyard, side path, or patio knows the drill: things look organized at noon, but by sundown, the order slips. You sweep, reset, and tuck gear away, only to watch stray tools, garden shoes, and kid toys wander back into your walkways. It’s not that you don’t have enough storage—it’s that every return trip is just awkward enough, every bin just far enough out of the way, that clutter reclaims the space between resets. A patio can look perfect for a minute, but the constant flow of drop-offs, shortcuts, and “I’ll get it later” piles keep blocking your movement and stretching each reset into a minor battle. If your outdoor setup falls apart as soon as people get moving, this isn’t a storage problem—it’s a flow problem, and it shows up most clearly where your routine keeps getting interrupted.

    Why Setup Placement Decides If You Stay Organized

    It’s easy to celebrate the arrival of any new outdoor cabinet, bench, or box as “the solution.” But after the first week, the real test is visible: does junk still stack up where you step out, or does it finally make it to a proper home? Placement wins over size almost every time. Durable bins and wall racks mean nothing if they’re past a barrier, wedged behind something heavy, or out of direct line with your path. Watch what happens at the end of a task. If tools and toys land on steps or get parked in corners anyway, that’s your signal—your storage spot doesn’t match where your routine ends.

    Picture this: you toss your mower gloves onto whatever’s nearest after you’re done, even if you bought a special weatherproof box for them. Maybe the storage bin “fits” on the far side of the patio, but are you really going to detour past a row of chairs? Or do the gloves end up on the door handle again, until the pile quietly grows into a mess no storage bin ever seems to fix?

    How Overlapping Outdoor Zones Turn Convenience into Chaos

    Real outdoor spaces ignore single-use logic. The hose sits by the play area, the garden trowel follows you up and down the fence, and the gate’s both a shortcut and a traffic jam. Where these zones jostle together, small frictions multiply. A wall hook that’s right by the exit? Used every time. A shelving unit tucked behind your grill? It turns invisible. A storage bin hidden behind a planter becomes another thing to move—so the stuff that should live inside it just stops nearby, again and again.

    Good intentions fall flat the moment your setup blocks your own movements. Shuffle around a bulky pot just to reach the bin; squeeze behind folding chairs to get to the boot rack; slide a trash can out of the way just to hang up a rake. The longer the route, the more stuff collects “for now”—at the back door, on the step, along the fence—and the more each area becomes a holding zone for things that never quite make it home until your next full reset. Eventually, the “organized” corner is always almost full, but never actually clear.

    Real Scenes: Where Things Fall Apart (Or Finally Fall into Place)

    The Almost-There Storage Drop Spot

    Imagine Saturday afternoon: you’ve cleaned out the beds, tools in hand, sweat on your brow. Your heavy-duty storage box is three patio stones beyond the table. But with your hands full and the grill blocking the route, you drop your trowel and gloves onto the nearest open chair. Later, garden twine, bags, and shears join them. By the end of the week, the seat is a clutter monument, and the real storage stays empty—again. The chair isn’t “storage,” but that’s where your routine actually lands.

    One Good Setup Shift Changes Everything

    Then comes the shift: after too many resets and too much lost porch space, you move your rack from its “out of the way” spot behind the mower to right beside the patio exit. Now, the routine meets the storage, not the other way around. There’s no need to sidestep, shift, or backtrack. Suddenly, tools land on hooks, gloves don’t migrate, and clutter shrinks without an extra thought. It looks less curated, maybe, but the yard actually works the way real people move through it.

    Spotlight: Efficiency Is About Movement, Not Just Space

    Photos of “organized” patios miss the mess after one actual weekend. The true test isn’t how it looks once—it’s what happens right after any day of use. If keeping things tidy means stepping over a hose, pushing aside a planter, or opening a sticky cabinet, you’ll end up with catchall corners that just recycle the clutter each week. Movement matters much more than capacity.

    This isn’t about fewer possessions or fancy new models. It’s about matching your return path to your storage location. If your route to the trash bins becomes the natural place to drop off gloves or tools, set up there—even if it throws off “the look.” Routines always beat intentions. The right setup shortens every reset, keeps things off the floor, and prevents the hidden overflow from circling right back to your main walkways.

    Simple, Real Tips for Reducing Setup Friction Outdoors

    Test with your actual routine—don’t guess. Walk the path from yard to step with your hands full. What do you drop, and where? Place storage right there, not just where it’s hidden or pretty.

    Put grab-and-go basics where you always walk. If a tool or shoe gets carried through the side yard every time, store it on that path—even if it means a hook on the fence or a small caddy on the gate post. Convenience always wins over appearance in daily use.

    Don’t count on awkward corners to cure clutter. Gaps behind trash bins or the squeezed space between the shed and the fence will suck in overflow that you never want to return to. If you wouldn’t go out of your way to use that nook, don’t expect anyone else to either. Target the natural pause points instead, even if they aren’t where you wanted your “nice” setup to land.

    Matching Structure to Your Real Routine Keeps Clutter Away

    Forget the fantasy of one huge wall unit or an engineered system that never gets in your way. The best setup is the one you’ll actually use without thinking. This matters every week: less reshuffling, fewer items stranded where you trip over them, and a clear exit path even after a busy weekend. A good outdoor organization system shouldn’t ask you to work around it—it should fade into the background, reducing effort and shortening every reset, not stretching them out.

    For outdoor storage, wall systems, and practical modular setups built for move-through, not just move-around, see what fits your real habits at TidyYard.

  • How Intentional Treat Placement Transforms Cat Carrier Use at Home

    The plan: leave the carrier out, toss in a few treats, and soon it’ll just be part of the furniture—no battle at vet day. What actually happens: the treats sit untouched, crumbs harden along the carrier grooves, fur gathers in the corner, and by the next week the only thing “normalized” is the new pocket of mess. For indoor cat owners, a carrier isn’t a neutral box; it’s a constant fixture tripping up daily flow, changing how you refill, wipe down, or even just pass through a room. The real test isn’t whether the carrier looks settled—it’s whether it keeps grinding up routines or finally fits the stop-and-start of real home upkeep. StillWhisker homes notice these frictions early.

    When a Carrier Just Sits There—The Hidden Friction

    Most indoor cats treat carriers as a threat, not a hangout. Owners hope to break the cycle by “normalizing” the carrier: leave it open, scatter a treat, walk away. But in actual living rooms and hallways, an unused carrier picks up more trouble than trust. The open door nudges into the walking path. Laundry baskets bump hard edges. Toys ricochet underneath and stay lost until the next deep clean. Meanwhile, cat fur and grit pile up wherever the carrier sits, all while you sidestep one extra obstacle on the way to refill a water bowl or fetch the scoop from the closet.

    The deeper problem creeps in over repeated routines. At first, the carrier looks harmless—a corner placeholder. But each day, the overlap increases: you bend around the carrier to refresh food, trip on toys wedged below, and realize you’ve skipped the wipe-down yet again. The carrier’s original purpose—to calm—gives way to a new burden nobody really tracked until now: perpetual slowdowns, small room bottlenecks, one more sideline hassle wherever routines run tight.

    The Trap of Casual Treat Placement

    Dropping treats in the carrier is the classic “good enough” move for easing feline nerves. It works the first day—curiosity wins, crumbs disappear. After that, the cycle shifts. Treat dust grinds into the mat. Unclaimed bits get kicked out or stuck inside the carrier’s grooves, where they trap fur and dirt every time a cat brushes past. The area around the carrier gets visually worse, not neutralized—now every step through the area sends dust or flakes wider, sticking to paws and trailing across the floor.

    This is not like maintaining a food or water setup. Bowls anchor themselves: the mess is predictable, the reset simple. But the carrier resists easy integration. It never quite lines up with traffic flow, and every “normalizing” attempt creates extra, awkward cleanup work. Each time you miss sweeping up after a treat session, the aggravation carries into the next day, turning encouragement into a repetitive cleanup hole.

    Cluttered Access, Slower Routines, and Shared-Space Spillover

    Letting the carrier park in a shared room links its problems across routines. Suddenly, plugging in a vacuum means twisting around its edge, and quick sweeps drag on as you angle around the base. Litter supplies are just over there—but the carrier blocks the best route, its open gate swinging at shin or knee height. Toys, once visible, vanish under the rim and only get pulled free on the fourth reminder, not the first. End-of-day resets now always include a carrier-and-mat detour you never intended.

    Residue and fur tell you what’s spreading. After a few cleaning delays, a greasy patch appears along the carrier’s base—a warning that mess, once hidden, has migrated into shared living space. Unlike a rest bed you can shake clean in seconds, the carrier is heavy, awkward, and if it sits directly on bare floor, the grime boundary steadily creeps outward. Each missed reset makes next time slower; the “contained” clutter isn’t really contained at all.

    The silent trap: A carrier that blends into the corner at first slowly destabilizes the room. The gap between tidy-looking and easy-to-live-with only grows—until daily movement exposes every skipped reset and every corner now out of sync with the rest of your setup.

    How an Anchored Carrier Makes Cleanup and Flow Easier

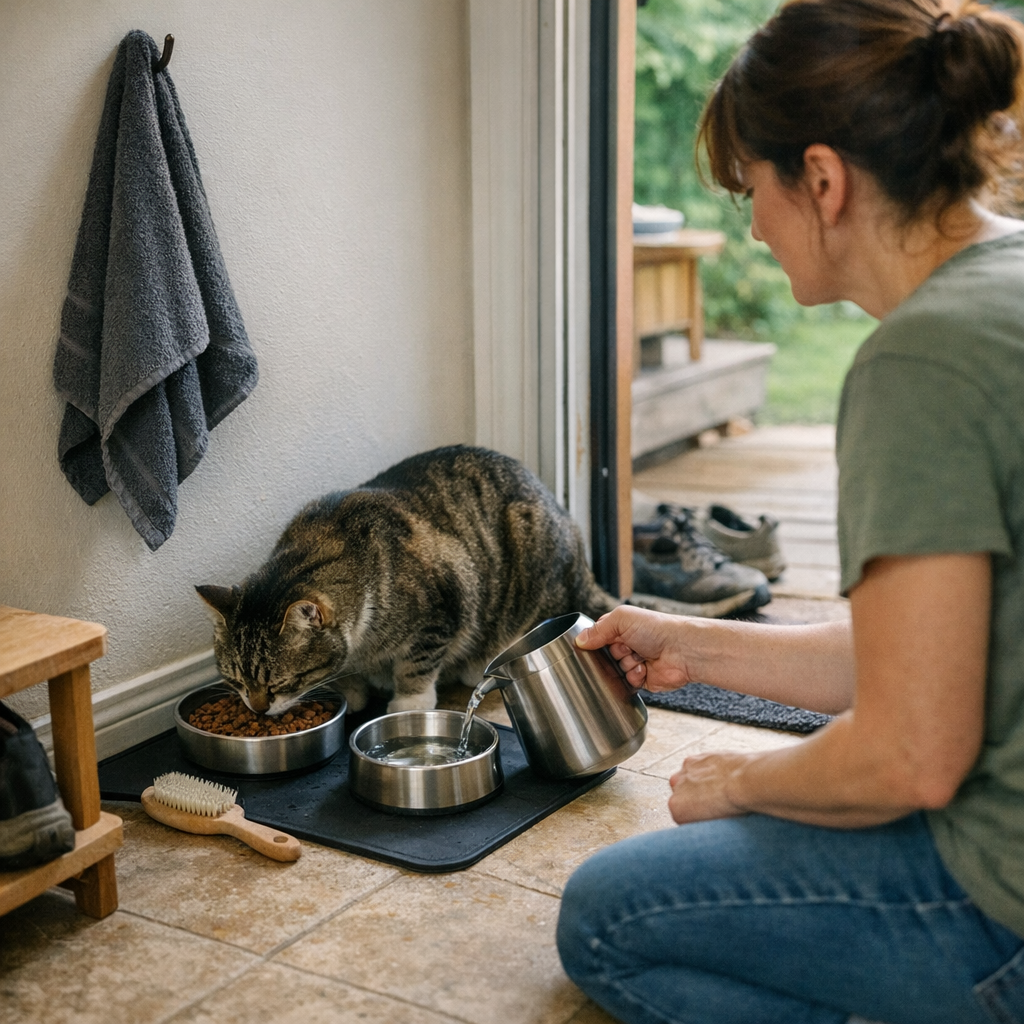
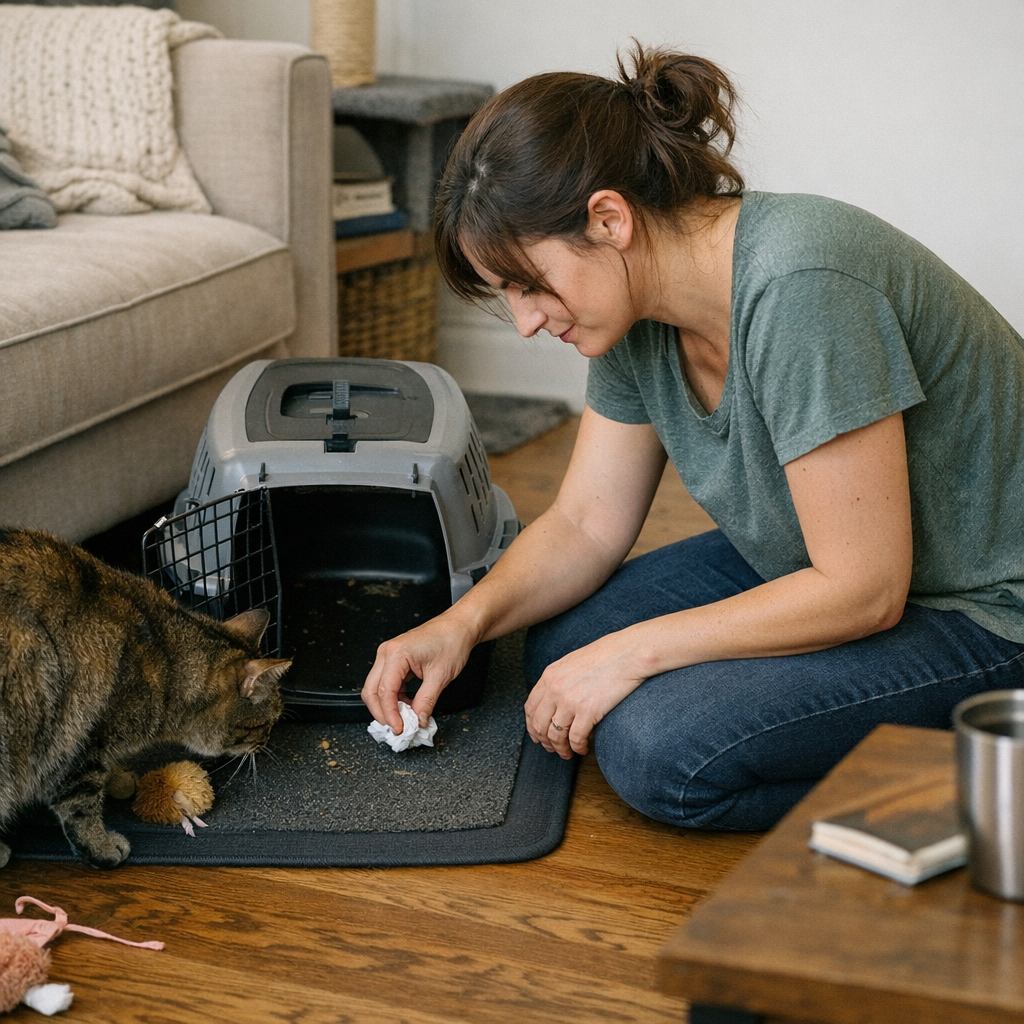
    Solving this isn’t just a matter of “trying harder.” Structure changes everything. Assign the carrier a defined place on a washable mat—with a noticeable edge—and keep it near, but not in, main walking paths. Now there’s a cleanup boundary: crumbs and fur hit the mat, and don’t drift across the room. Treats go on the mat, not loose in the carrier, so you can vacuum or sweep up messes in one go. The carrier doesn’t slide around unpredictably, so neither does your cleaning routine.

    • Reduced spread: The mat contains the mess. The rest of the floor stays in better shape for longer stretches.
    • No more toy limbo: Balls and plush mice stop rolling under the carrier and re-emerge at reset time. No more accidental toy graveyard.

    The biggest difference: the carrier becomes part of your daily rhythm. The mat’s edge marks a clear, predictable stop for your sweep or quick vacuum. Wipe downs happen without delay because the carrier spot is contained—no need for an extra cleanup circuit, no unplanned pause in the flow as you jump from litter box to water bowl to reset.

    Resetting the Flow: Daily Upkeep That Doesn’t Slow You Down

    With a carrier on a proper mat, the benefits aren’t theoretical. After a few days, the pattern is obvious. End-of-night cleaning means a single loop: sweep over the mat, shake it out, grab toys at the edge, quick wipe along the carrier, and move on. Instead of hunting stray dust or crawling after lost objects, the maintenance zone shrinks and resets blend into your actual habits. The area no longer blocks the room’s reset pace; it keeps up.

    But this system isn’t effortless. Consistency still matters. Ignore a day’s sweep, let crumbs settle into the mat line, and the creep returns. The difference: cleanup is now easier to stick to and fold into ordinary tasks. Instead of dreading an extra step, you handle it in real time—right after water refills, on your path back from the litter edge—before buildup reclaims its ground.

    The Little Tension Points—And Why They Return

    However neat it looks, the carrier area develops routine annoyances. Sometimes the door won’t stay at the angle you want; sometimes it swings open at the worst moment. Morning sprints mean blankets get jostled or mats slide off-center, putting the obstacle right back in a bad spot. Crumb piles slip under the edge and get spotted later, not sooner. Each awkward step or shifted mat edge is the system reminding you: arrangement alone never fixes everything—illicit buildup and repeated detours don’t disappear, they just return in new forms.

    The goal isn’t to win total order, just to outpace slow leaks into your daily reset. Regular sweeps, mat checks, toy grabs—these steps, built into the reset pattern, keep the carrier from mutating back into a disruption. The moment setup starts blocking more routines than it saves, it’s your cue: shift, scan, and anchor before the friction multiplies again.

    Integrating for Both Cat Comfort and Human Routine

    Leaving the carrier open with a treat may make travel day less traumatic, but the bigger benefit is for the daily keeper of the room. An anchored carrier, defined by a mat, does more than look intentional—it resists clutter buildup, avoids turning into a mess factory, and streamlines the flow between feeding, play, and cleanup.

    • Clear placement: Consistent, mat-bounded, not drifting through the house with every errand.
    • Planned treat use: Only what’s easy to sweep—never left to crust or scatter.
    • Built-in maintenance: The mat and carrier get a scan and spot clean as part of your existing room reset, not as a separate, frustrating chore.

    The carrier stops being a lurking obstacle and becomes part of the furniture you actually use—without stealing time from all the other upkeep you’re already doing for feeding, water, litter, and rest.

    Room Function vs. Looks: Beyond the First Glance

    It’s not about picture-perfect order on day one—it’s whether the area works after regular life happens. A carrier on a mat stands up to real routines: everything lands where one quick pass collects the loose ends, and the cleanup fits the way you already move through the room. Real improvement isn’t spotless; it’s a reset that holds after busy days and rushed nights, no matter how many times you walk by.

    For realistic, practical structural help—feeding, water, litter, rest, and more—visit StillWhisker.

  • How High-Quality Drill Bits Reduce Motor Strain and Improve Finish

    The gap between “fast” and “frustrating” appears after just a few holes. If you’ve ever marked out pilot holes across a run of shelves or knocked out pocket screws across a hardwood face frame, the rhythm is familiar—and the slowdown even more so. The early holes are crisp; you’re in control, bits bite easy. But by hole seven or eight, something shifts: resistance builds, the drill pitches higher, your wrist aches a little more. Next thing you know, progress drags and clean work turns messy, all because the bit isn’t keeping up.

    The Bit Choice That Sneaks Up on You

    When you’re standing in front of your toolbox, drill bits all lined up, every one of them can look ready for action—shiny edges, sharp spirals, slick with a new-coat shine. But that sameness disappears in real use. A junk-drawer bit and a truly good one only show their difference after repeated jobs: precision holes versus ragged tear-out, steady hands versus fatigue, real momentum versus forced stops just to shake out gummed-up flutes.

    Friction Builds—And So Does Every Hassle

    Your hands know when a bit is failing, even before your eyes do. Every extra ounce of pressure, every little shudder in the trigger hand—it’s the bit fighting the material, not cutting it. As a dull or low-grade bit overheats against hardwood or MDF, noise shifts up, the motor labors, and your grip gets tighter just to control wandering. Workpieces tell the truth: fuzzy-edged holes, singed rims, dust clinging to the flutes, bits too hot to pocket. The fix? More sanding, more cleanup, more stops than intended.

    When Repetition Exposes Weakness

    Nothing stresses a bit like real volume work. Drilling a dozen shelf pin holes, zipping fasteners through deck frames, or batch-joining casework—this is where a mediocre bit crumbles. By hole six, resistance mounts; by hole ten, you’re compensating for the tool:

    • Edge tear-out and chipped holes that eat up finishing hours
    • Drill strain—sometimes tripping safety cutoffs if you push through
    • Forearm and wrist fatigue as you muscle the bit to finish the job
    • Uneven cut, reduced controllability, and more battery draw

    The cycle is predictable: work slows, mistakes creep in, you use time fixing what a sharper bit could have avoided. All the while, the sense of control—the most important thing—slips away.

    That Moment You Swap—What Actually Changes

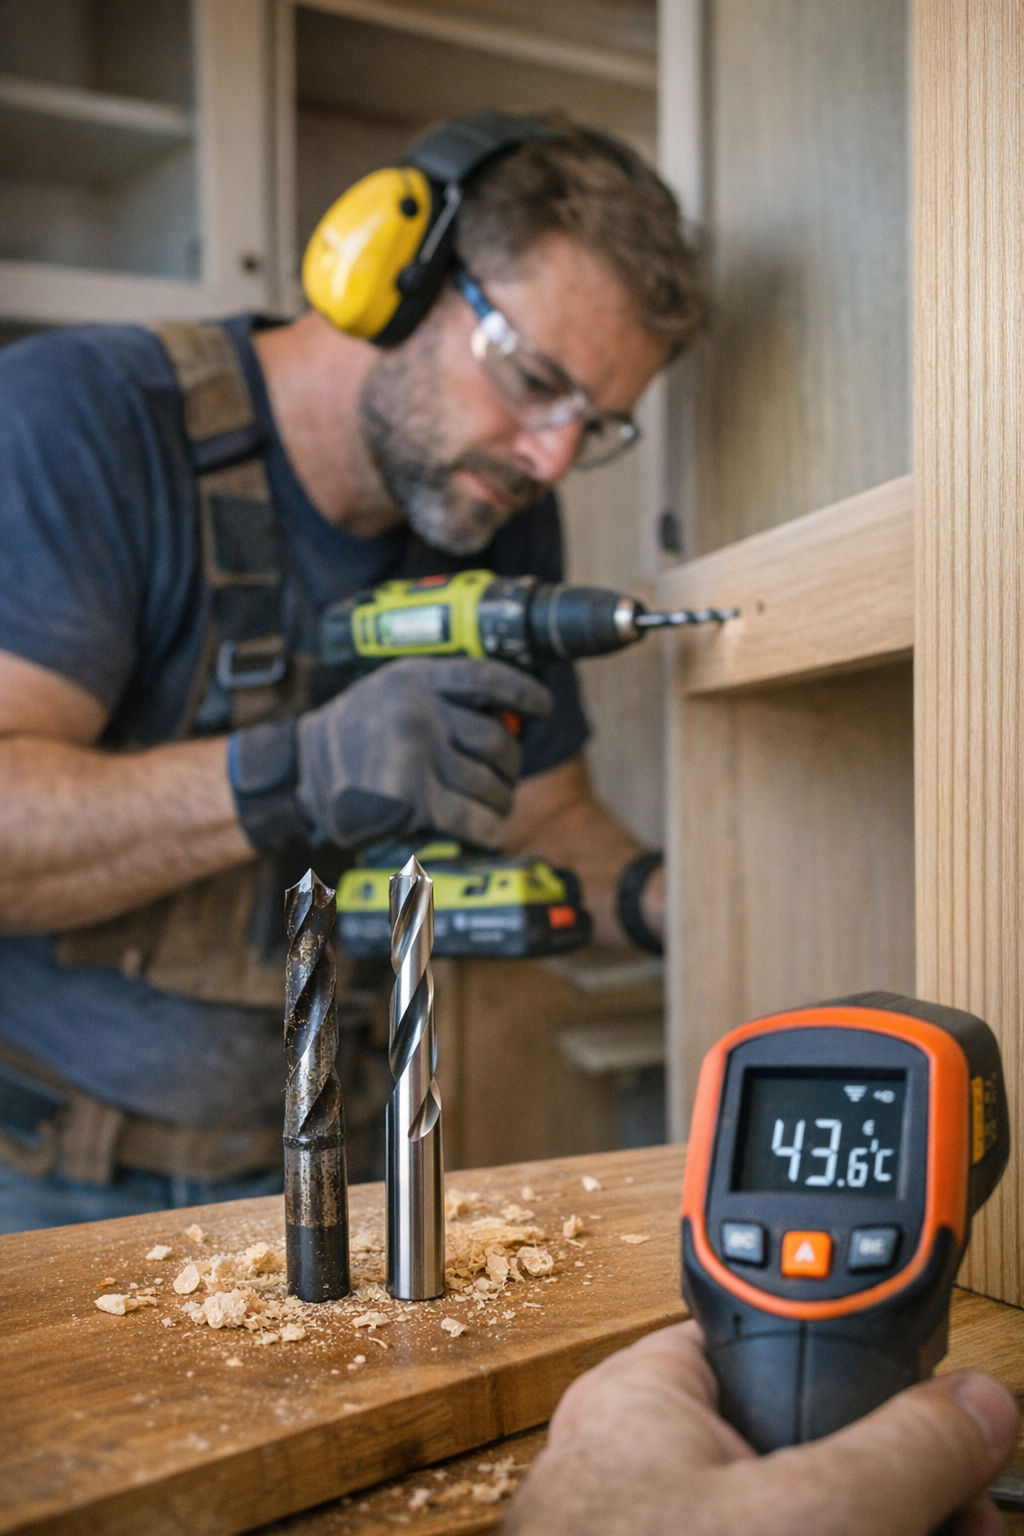
    There’s relief in reaching for a pro-grade, low-friction bit after you’ve battled through with a basic one. A real world run—drilling ten holes in kiln-dried maple—makes the difference plain. With a sharp, coated bit, the holes run cool (under 45°C checked by infrared), your drill stays steady, vibration is barely there. More importantly, you’re not chasing burnt edges or scraping battery packs before lunch. Each hole is as clean and accurate as the first, and your hands can focus on placement, not just forcing progress.

    Right Bit, Right Moment

    There’s a temptation to use one bit for every material, but anyone who’s chewed through plywood with a hardwood bit knows better. The feel changes: feed rate slows, dust clogs up, and the tool’s control drops off. Swapping in a bit specific to the wood at hand—maple, pine, or ply—lets the drill maintain speed, cuts remain sharp, and you get more holes per battery. It’s the difference between staying in flow or watching your tempo die out halfway through the project.

    Listen for the Signals Mid-Task

    A good bit going bad doesn’t always announce itself, but the sharp operator notices:

    • Heat and smell: The tip is hot to the touch and the faint bite of burnt wood hits your nose
    • Rising vibration: The tool starts to chatter and shake, grip becomes tense
    • Annoying noise: Drill noise ramps up, getting shriller with every hole
    • Messy results: Charred edges, chipped surfaces, even holes that refuse to stay round

    Any one is a warning: keep pushing, and you’re not just working harder—you’re wasting tool life and, worse, your own energy. Ignoring these cues costs time you’ll never get back.

    Quick Habit: The 30-Second Pre-Flight Bit Test

    Don’t let a cheap bit dictate your day. Just before kicking off repetitive drilling, take a half-minute:

    • Spin the bit—does it glide between your fingers or drag over a nick?
    • Test on a scrap—does it bite cleanly or skate and burn?
    • If there’s any hesitation, switch in a fresh one before it winds up costing you double in rework

    That habit deflects the most aggravating work—fixing holes that shouldn’t have gone wrong in the first place.

    Bit Quality Pays Off—Especially on Long Runs

    Over an afternoon, or a week, the differences stack up. With a truly sharp, well-matched bit, every step of the build gets easier: fewer slowdowns, less muscle strain, fewer surprise changeouts, smoother control as the job goes on. You start responding to slight shifts—more vibration, rougher edges—before they derail the task. It’s rarely about instant perfection or showroom results. It’s about less wasted motion, straighter holes, a finish that doesn’t need disguising. When you’re powering through real jobs—fitting shelves, building out a benchtop, hanging cabinets—the right bit feels less like an upgrade and more like the baseline you deserved all along.

    http://gumboll.myshopify.com

  • How Interior Design Transforms Narrow Lockers Into Clutter-Free Storage

    Most narrow storage lockers look like a quick fix: umbrellas vanish, grocery bags disappear, tools stay off the walkway, and the entry zone finally looks open. But looks alone don’t hold up. Within a week—or after the first scramble for a missing glove—any locker with just one tall, empty compartment reveals its flaw: chaos hiding behind a closed door. Handles get jammed under spray bottles. Bags collapse and wedge against corners. The next time you try to grab an umbrella in a hurry, you’re not picking it up, you’re unearthing it. That fast, the setup that looked organized becomes exactly what clutters your day.

    When Hidden Storage Turns Into a Daily Tangle

    The trouble isn’t obvious at first. A single big compartment gives that quick “clean” feeling, but it can’t control the slide. The week piles on—groceries, wet gear, whatever just got dropped during cleanup—and you open the locker only to find umbrellas tangling with rolled-up totes, bottles jammed behind whatever was crammed in last. Retrieval turns into a careful game of extraction. Pull out a bag, disturb three other things. Slide in a tool at night, then dig for it again on Saturday because it’s slipped behind everything else. That clear locker floor turns into a dumping ground—a zone that was built for order but absorbs overflow instead.

    After just a few days, these snags repeat. Need the garden trowel? You’re bending over, shuffling around full bags and umbrella handles blocked by last night’s deliveries. Routine stuff now causes new micro-hassles—each retrieval is slower, each return less likely to fit cleanly back. Eventually, the locker doesn’t encourage use; it quietly punishes it.

    The Hidden Cost of Collapsed Categories

    The problem isn’t dramatic—it’s friction you feel thirty seconds at a time. Those small delays before you reach in or the moments when reshuffling becomes the norm: after three or four rounds, return flow breaks down. That “easy storage” now interrupts your pace. You start to skip the locker. Umbrellas pile by the door instead. Hand tools drift to an exposed shelf because they’re quicker to grab, but they look like permanent clutter. What started as a storage win lines the wall with overflow you can’t put away in one move.

    That’s a sign the locker has shifted from a daily helper to a passive collector. The more you force unrelated items to share one space, the less the “system” works. Real use exposes how little one open compartment can handle before it fails your routine.

    Why Divided Zones Are Essential in Narrow Lockers

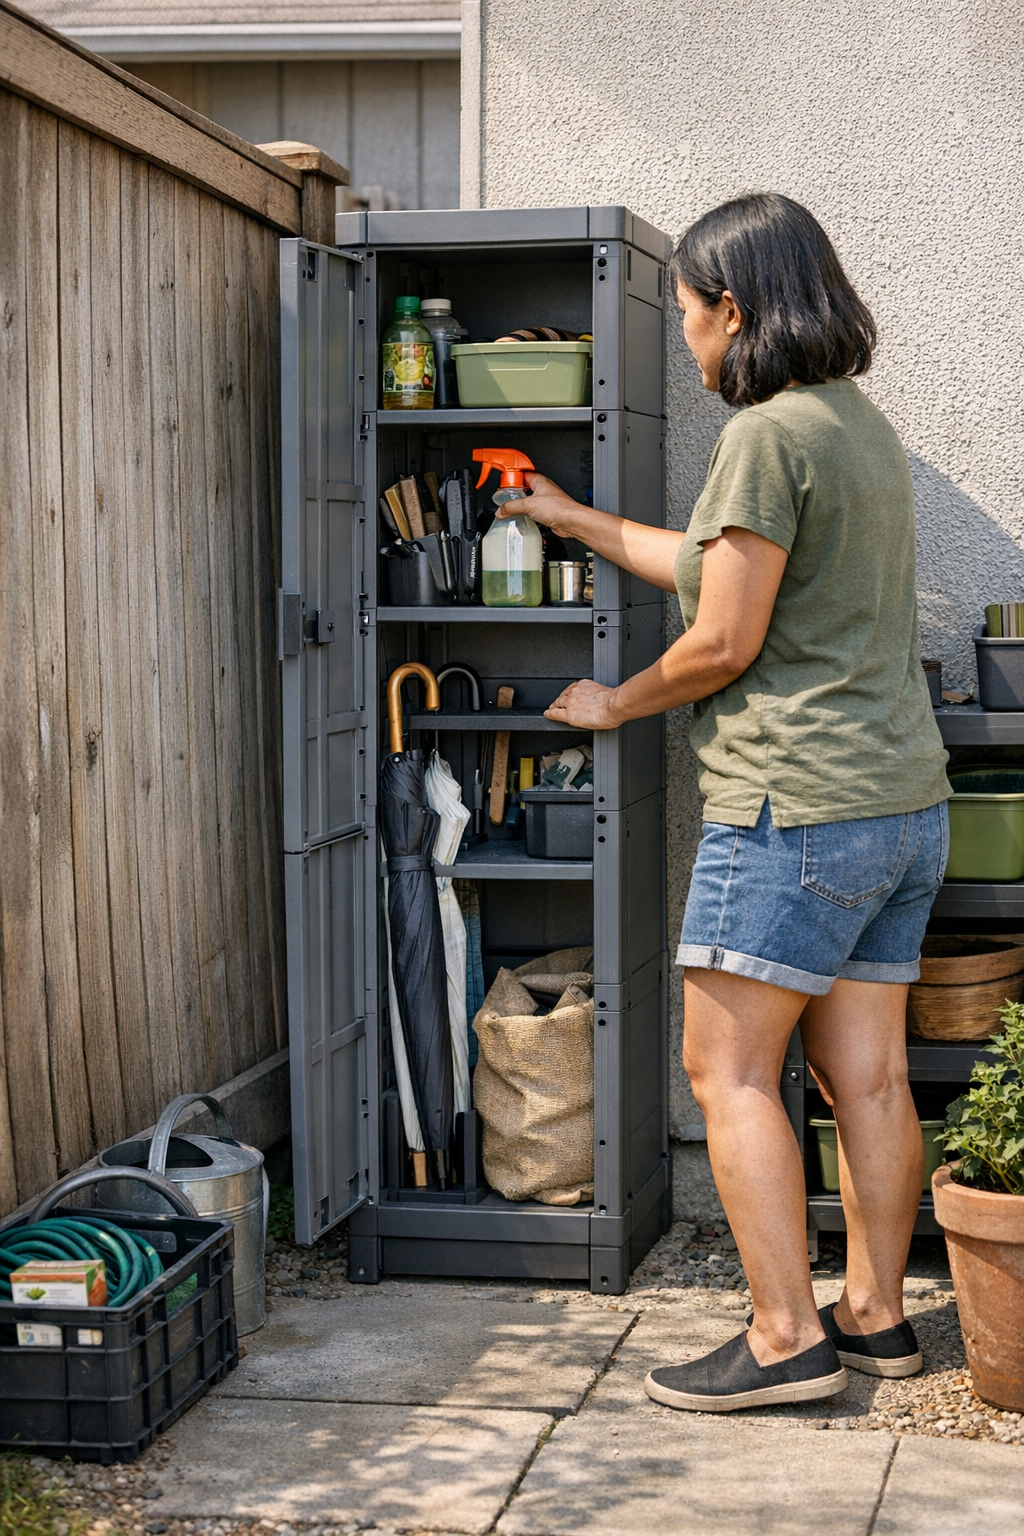
    The answer isn’t more space—it’s better zones inside the space you have. Just one real divider or a sturdy shelf transforms the experience. A shelf at knee height splits groceries from tools. A vertical channel keeps umbrellas upright, not collapsed sideways. Even a single bin at the bottom holds loose odds and ends so they stop drifting. Each separation keeps categories visible and reduces the fight for access. That’s the difference between a locker you can reset in seconds and one where you’re constantly reorganizing or just ignoring the mess accumulating inside.

    In use, separated zones mean you reach for an umbrella and actually grab just an umbrella. Tools stay where you set them, not buried and lost. Bags remain stackable, not crushed into odd corners. Visual calm in the entryway stops being just an illusion; it’s lived reality. Resetting is one movement, not five. The more your setup matches true category separation, the more it actually supports the tempo of daily life—even when that life gets hectic or messy.

    Entryway Reality Check: Where Weak Layouts Show Fastest

    Entry lockers expose design flaws fast. After a wet commute, dropping an umbrella into a crowded locker base isn’t practical; it either doesn’t fit, or it topples and jams the next thing you need. The immediate temptation? Lean it by the wall. Skip the step. Repeat. Un-separated internal zones turn “hidden storage” into slow storage, and the locker becomes another source of background mess and silent frustration—especially in spaces meant to stay clean and open for movement.

    Fixes That Actually Work in Narrow Lockers

    What solves these headaches?

    • Half-Height Shelves: Install one at knee level to elevate tools and smaller items, freeing the base for bags or boots.
    • Vertical Dividers or Channels: Drop a narrow umbrella channel in the corner; handles stay upright, and the next grab is fast, not fumbled.
    • Individual Bins: Use small crates or bins, so each type of item has a visible slot. When overflow happens, you see it immediately instead of discovering it after a spill.

    You don’t need a custom solution—just clear, repeatable zones that survive real use. Every good divider or shelf is one less reshuffle per week, one less pause in your routine, and one less pile of overflow at the edge of your entryway.

    Does Every Locker Need Zones?

    If you only store seasonal items—skis, camping gear, bins for winter or summer—a single cavity might work for months without hassle. But lockers in daily traffic areas, or those taking the mix of groceries, garden tools, bags, and rain gear, break down fast if you don’t separate inside. The visual order you achieved on day one quietly collapses—overflow isn’t a maybe, it’s what happens by default.

    Stay Ahead: Diagnose by Real Retrieval

    Test the setup by its weakest move. If you hesitate to open the locker, if putting something away throws off something else, you already have category drift—your internal zones aren’t strong enough. One check: after a normal week, open the door. If you can’t retrieve the key category you use most without shuffling anything else, it’s time to change the layout.

    One low-tech correction: fix an umbrella stand or channel to the locker base. When it rains, handles are ready; they don’t sprawl across the floor or snag everything nearby. That simple tweak is the difference between using storage and working around it—especially during crowded, weather-driven weeks.

    Lasting Calm Means Storage That Matches Real Habits

    A narrow locker fitted to your actual routine is felt within days. The difference isn’t cosmetic; it’s practical—retrieval in one move, resets that don’t drain your energy, and storage that’s ready when the pace picks up. Most systems hide mess, but a few small separations keep order visible and the chaos from returning just when you need movement most. The right structure lets narrow storage stay useful and reliable—open for the next umbrella, and never just another bottleneck behind a closed door.

    Discover Gridry storage solutions built for lasting order and daily access.

  • Balancing Cable Management for Efficient and Tidy Workstations

    A desk can look perfectly organized at 9am—and by lunchtime, you’re back untangling charger cords. Cable clutter doesn’t go away with a single clean-up. Power adapters and USB leads resurface throughout the day as meetings, charging routines, and quick device swaps disrupt yesterday’s perfect setup. The real problem isn’t choosing between “hidden” cables and visible ones; it’s whether your cable access matches how you actually work. If plugging in a phone requires getting down on one knee or sliding out a cabinet every time, those clean lines cost you time and attention. Most desks don’t fail visually—they fail when each step to connect or reset becomes a small interruption.

    When a Clean Setup Turns Awkward by Wednesday

    You can organize yourself into a corner. Fully-hidden cable trays and power strips look tidy on day one. By midweek, small frustrations are everywhere: charging your headset means reaching under the desk or wiggling open a drawer while balancing a call. Hunted ports lead to awkward stretches, and drawing a cable out from deep under the surface feels like dodging desk legs or catching your sleeve every time. Exposed cords? They’re always there, but soon creep over your notepad, block the path to your mouse, and catch on your elbow when you reach for the pen beside your keyboard. Layers of minor friction accumulate—cables shift, chargers slide just out of reach, and each reset expands into a routine detour.

    What started as “this looks organized” turns into a cycle of repeated interruptions and rushed clean-ups. You don’t just lose aesthetic points; you lose pace. Hiding too aggressively puts the essentials out of reach, while visible chaos distracts you and disrupts even basic flows by Friday afternoon.

    Power Access Versus Visual Calm: The Balance You Actually Feel

    Desks are designed for order, but work creates mess. When you tuck every cable away, the reality shows up fast: switching devices during a meeting, recharging a Bluetooth mouse, swapping in your tablet—every change pauses your rhythm if access is buried behind a drawer unit or under a monitor riser. Edge-clamp trays and accessible cable boxes behave differently. You can recharge on the fly, swap chargers by touch, and adjust positioning with a flick of the wrist. What seems minor at setup matters after three days of real use.

    Leaving all cables loose solves speed, but at a cost. Drag a chair back, and you snag a cord under the wheels. Wires drift into the middle workspace, crowding your writing pad, getting wedged under a laptop stand, or forcing you to nudge adapters aside at every notebook refill. The surface isn’t just messy—it becomes an obstacle course. So the neatest-looking desk might slow you down, while a “convenient” one quickly dissolves into tangled frustration.

    A Real-World Example: How Cable Placement Shapes the Workday

    Picture crunch mode: two laptops propped up, a phone needing a mid-shift top-up, headset always rotating. When your power strip disappears behind a metal desk leg or lives inside a rear tray, every plug-in request interrupts your flow: you’re crawling under the tabletop, tracing the right cord, bumping your knee against drawer storage—while your call window ticks down. If you relocate the strip to a shallow tray or clamp it near the front edge, something changes. Now you slide in the charger with one hand, barely looking away from your main screen. The cables are just visible enough for you, invisible to visitors. After dozens of swaps and plug-ins a week, those lost seconds reclaim momentum—and just as important, your workflow doesn’t break for a minor reset.

    Why “Hidden” Isn’t Always the Same as “Effortless”

    Reach is more important than appearance. Smooth desk photos can mislead: all cables vanished, but not a hint of how anything plugs back in. Conceal everything, and routine flexibility collapses the first time you need a new charger combination or a battery rescue before a call. If every device swap means awkward bending, arm contortions, or routing fingers through a blind corner, you’ll start delaying plug-ins or letting batteries run down “just to avoid the hassle.” Order remains, but efficiency drops—and the next real reset is closer than you think.

    The best setups aren’t absolute: slim under-desk trays you can still reach, clamp-mounted boxes on a usable edge, or simply gathering live cables with a flexible sleeve—each keeps your chargers near, not in the way. Out of direct view, not out of natural reach. Saving just a few seconds from each device swap hints at convenience, but what really changes is how often you have to reset, adjust, or fight the desk itself to keep moving.

    What Actually Changed My Workflow

    For months, I tried the standard deep tray: cords routed behind drawer units, power bricks hidden under a broad plastic shelf. At 9am it looked sharp—by noon, I was ducking below to rotate chargers, snagging my sleeve, losing sequence with two laptops and a phone. The shift: move that power strip forward, clamp it under the desk right at arm’s reach. Instantly, cables were within a natural grab, unseen from the door but visible to me. Plugging in and out stopped being an “occasion” and became background movement. Five minutes of rearranging fixed weeks of fiddling. There was even a little extra legroom. Most telling: I returned to work, didn’t just tidy it.

    Quick Cable Management Q&A

    How do I keep cables out of sight without losing easy access?

    Try slim trays or clamp-mount boxes fixed to the desk’s front or side—hidden from most views, but an arm’s reach away. This way, chargers and adapters are accessible for every mid-session swap, instead of forcing you to crawl or stretch beneath the surface.

    What’s the main drawback of sealing every cable below the desk?

    Too much concealment means every device update becomes a process—unfastening boxes, tracing hidden wires, crouching for a connection. Over days, this adds up, making you more likely to leave chargers sprawled out “just in case” and turning your permanent clean-up into recurring makeshift fixes.

    Is it better to use a clamp or adhesive for cable control?

    Clamps allow on-the-fly adjustments and routine reconfiguration—they shift as your charger locations change, or if you re-route storage to clear leg space. Adhesives are set-and-forget, locking you in; fine if your arrangement never shifts, but limiting anytime your desk habits evolve or your workstation grows.

    Summing Up: When Desk Order Translates to Real-World Ease

    A tidy desk is only an upgrade if every core action—charging, swapping, resetting—stays friction-free as your work changes. True organization isn’t about hiding everything; it’s about minimizing the resistance between your intent and your next move. When your cable management balances invisibility with reach, clutter fades as a mental drain, and the desk finally supports—not interrupts—your routine. Each tweak is one less pause, and over time, those pauses make the real difference between merely looking organized and actually working with less drag.

    Explore the full WorkBasic collection

  • How Thoughtful Pet Travel Setup Reduces Stress on Every Stop

    The weak link isn’t what you forget—it’s how many times you have to hunt for it on the move. The downside of most pet-travel setups doesn’t hit the first time you unpack—it’s exposed every time your pet tugs at the leash while you fish for wipes you know you packed “somewhere.” What slows you down isn’t missing gear, but the moments when routines break: leash clipped underneath the water bowl, wipes buried under comfort pouches, both hands full when you need one quick grab. Even a bag that looks ready in your hallway can become a stubborn obstacle in a parking lot, or with a restless pet pacing at the end of your arm. The gap between “organized” and “actually working” starts as a subtle tangle and ends with repeated awkward pauses that drag out travel instead of smoothing it. PawGoTravel’s world starts at that exact moment—when the setup’s supposed strength turns, stop after stop, into friction.

    When “Organized” Isn’t Enough: Where Pet Travel Breaks Down

    The illusion of control fades fast after the first stop. Sleek, compartment-rich bags seem designed to impress, but in real use, order doesn’t always mean access. The problem reveals itself with each motion:

    • Leash trapped under a water bowl when your pet wants out fast
    • Sanitizing wipes sandwiched between snack containers instead of ready at the top
    • Comfort blanket zipped away right when your pet needs a quick calm-down
    • Just the right pouch—locked behind a snap or zipper that costs you seconds every single time

    These aren’t one-off annoyances. With every repeated stop—errands, appointments, or simple walks—each extra motion becomes a hurdle. It’s not a missing supply list, but repeated small delays that add up, with your pet growing impatient while you juggle the same awkward access, again and again.

    Real-Life Mess: Travel Friction in Motion

    Take a typical run of three or four stops. At first, your setup feels solid. But by the second errand, wipes are stuck behind an oddly stiff divider, leash hooks catch on bowl handles, and you’re propping the car door open with your knee while trying to unearth a harness. The deeper into the routine, the more obvious it becomes: every accessory was “organized,” just not for real movement. Contents migrate. Blankets settle in the least accessible place. Critical items seem to hide when you most need them—right as your pet leans, pulls, or starts to fuss.

    Cleanup Delays Cost More Than Time

    One trip: Muddy paws. Wipes, perfectly packed but locked under a snapped flap, require you to wrestle open a stiff closure while balancing both a leash and a dog anxious to bolt. Instead of quick cleanup, you get a fumble—mud wicking up seats and tempers running thinner. The bag’s order kept things “safe,” but safety costs you in minutes lost, stress added, and cleanup made longer by each layer protecting what you can’t reach.

    The Comfort Setup Backfires

    Comfort items are supposed to settle your pet. But when a comfort blanket rides at the bottom, you scramble and repack mid-trip, trying not to spill treats everywhere or crush a toy. In theory, the setup is organized; in motion, it’s an unpacking puzzle just to calm a nervous animal. The most calming item comes last—when you need it fastest.

    Surface Order, Underlying Strain: Structure vs. Use

    “Organized” setups focus on initial packing—a satisfying, camera-ready moment that’s over as soon as you start moving. The stress test comes with repeated reach and return: quick stops, seat-side pauses, real cleanup. Does your bag try to stay beautiful, or does it keep you moving through mess and repeat interruptions? If you have to dig, unclip, or dig again—even for essentials—the structure isn’t working. With each barrier between you and a needed item, the bag goes from protector to obstacle, slowing restarts, stacking tension with every interruption.

    Designing for Real Flow, Not Just Looks

    More pockets don’t fix slowdowns—rethinking which pocket you use does. Owners who’ve felt the drag shift strategies: bowls in open side pouches, wipes no deeper than the main opening, blanket on top—always. Access frequency trumps symmetry or packing logic. The payoff shows up fast: after a puddle or muddy walk, you reach once, not three times. Mud gets wiped, the dog calms down, and you keep moving without a reset drill.

    Action-First Zones Make the Real Difference

    Where things live in your setup matters—especially seat-side, where the first seconds count. One-handed flaps, open pockets, or a dedicated “always grab” spot for water or wipes remove seconds of fumbling each time. Owners sometimes break up even a beautiful carrier’s order on purpose, just to keep two highest-need items in chaos-proof reach. It’s less about maximizing space and more about minimizing restart friction. Leaving “empty” space next to main pockets isn’t wasted; it’s an investment in faster motion—and less frustration for both traveler and pet.

    Why Problems Sneak Back: Old Habits, Slow Setups

    Even if you fix your structure once, “visual tidy” habits try to return. The Monday bag, re-optimized for real stops, feels sluggish again by Friday if every item finds its “perfect” slot but loses flow. Real progress isn’t how good your bag looks at setup—it’s whether you can finish stop four without the old fumble. Watch for these warning signs:

    • Needing to open the same pocket far too often for different essentials
    • Pet grows more restless at each pause—a signal of slow routines
    • Cleanup items hidden away so they always require two hands (never available for a quick wipe)
    • Owner keys, phones, or snacks overlapping pet supplies—each grab rearranges something else

    Practical Shifts: Rethink, Rearrange, Reduce Friction

    You don’t need a new bag—change what goes where. Begin by:

    • Pinpointing items you reach for every stop—make these move up and out
    • Keeping at least one pocket always open or hand-width accessible
    • Putting comfort and cleanup tools on top, not at the bottom, for high-urgency stops
    • Avoiding matryoshka-style nesting—no hiding top needs under infrequent ones
    • Leaving space at the main opening, so function wins over visual order

    A setup that holds up to real movement isn’t finished when the bag is zipped—it’s proven when you can handle three back-to-back stops with fewer pauses, faster resets, and less pet impatience. Every repeated use uncovers whether your “organizing” is for comfort or speed. Flow comes from action-aligned structure, not just clever packing.

    Friction vs. Flow: What Hits First, What Lasts

    The best pet-travel setup isn’t the one that photographs well after packing. It’s the one that, halfway through a messy day, actually lets you grab, clean, and reset without a multi-step reshuffle. Real improvement shows when restart time drops on the third and fourth stop—not when you first step out. Structure that works holds steady under repeat, not just in theory. That’s the difference between just containing chaos and actually keeping pace with your pet—all trip long.

    Explore real-world pet travel solutions at PawGoTravel

  • Why Bathroom Rated Lighting Outperforms Standard Fixtures in Humid Spaces

    Most bathroom lighting fails in quiet, everyday ways—and it starts sooner than anyone expects. What looks clear on move-in day turns unreliable after a few cycles of real use. Back-to-back showers? The “bright” ceiling light fogs up by noon; dim corners grow on the mirror edge. Spots form around screw caps, and a haze settles on the lens—no matter how often you wipe. These aren’t just eyesores; they chip away at basic bathroom routines. Brush, shave, or clean, and you’re always angling for better light or fighting fresh streaks that refuse to wipe away. Let humidity rule the room, and even rated fixtures that promise clarity start to reveal their limits, while standard ones become a headache fast.

    Why Standard Fixtures Fade Fast in Steamy Bathrooms

    Conventional ceiling and wall fixtures are barely designed for dusty offices, let alone steamy bathrooms loaded with repeated use. Seams, trims, and any exposed join are magnets for moisture; just one crowded morning pushes steam behind the lens and into every screw socket. Two weeks in, what once looked unremarkably bright is now patchy: the lens grows permanently overcast, rusty halos bleed around mounting points, and the beam above the sink starts to fray at the edges—all before you realize you’re squinting after every shower. Brightness drops just where you need clear, even light—at the mirror, by the shared counter, under the wall cabinet—and the fixture edges never feel completely dry, especially in the corners you reach for most during routine cleanups.

    It never fails spectacularly. Instead, discomfort grows: you find yourself re-wiping spots every few days, angling your face to dodge uneven glare, and by week’s end, the routine feels slower, less certain, more awkward. Little chores drag out. That sense of an always-ready bathroom quietly collapses.

    Where Moisture Really Collects: Edges, Mirrors, and Overlooked Spots

    Steam always settles in the worst places—behind glass trims, inside shallow ceiling fixtures, along the cold metal frame above the mirror where visibility matters most. Family bathrooms with double sinks or shelf runs get the worst of it; every rushed shower blasts more condensation into seams and trims that were never meant to seal tightly. It’s the low joints, underside edges, and just-above-eye-level surfaces that always go overlooked and start darkening first.

    The first signal: After install, all lights look clean. But wait even a month. Lens haze creeps in, mineral edges spread, and watermarks etch themselves above the vanity. These aren’t just ugly—they physically disrupt the light beam, scattering and dulling output so you’re left fighting darkness in the room’s most essential zones.

    Invisible on Day One, Obvious After Repeated Use

    Early on, it’s easy to miss the difference. Switch on the sconce or ceiling panel and the whole room seems evenly lit. But as weeks stack up, every shower leaves more film, and every cleaning wears down hardware finish. One morning, you’re forced to lean in closer for shaving or makeup, finding that familiar fog holding tight to the lens. Screws and bracket covers pick up corrosion—their heads turning the same dull color that won’t ever quite wipe away. Even if the ceiling looks fine while sitting down, the “useful” sections—tight vanity corners, shelf edges, the spot near the towel hook—always seem stuck in semi-shade.

    Bathroom-rated, fully-sealed fixtures don’t just promise better specs—they behave differently under attack: even after the worst steamy Monday, their lenses remain clear, the light spans evenly across the functional counter, and the worst corners stay lit. The difference isn’t in catalogs, it’s in the routine of never having to adjust your stance just to see what you’re doing.

    The Real Test: Mornings in a Shared Bathroom

    Picture the recurring friction: a two-shower morning, ceiling already sweating, and the fixture above the sink holding a fresh line of fog. With a non-rated light, cleanup becomes part of the routine. You wipe moisture from the trim—yet the edges of the room stubbornly stay blunted. The glass around the mirror keeps dimming, and you catch yourself moving your head or twisting to find a useable angle, especially when time is tight. Eventually, those blurred areas become accepted obstacles; every streak resists, every cleaning takes longer, and the fixture stops supporting you and becomes another thing you have to manage.

    Over time, annoyance deepens. Anyone who’s tried to touch up makeup or trim a beard with compromised lighting knows: the light is no longer a silent help, but a point of daily negotiation.

    What Changes With Bathroom-Rated Lighting?

    The real improvement comes after installation—when a fully sealed, bathroom-rated fixture shrugs off what used to be relentless buildup. Back-to-back showers? The lens remains clear; condensation slides off rather than collecting. The vanity, once sliced by shadow, stays reliably lit edge-to-edge. Corners near the mirror, which once disappeared for hours behind haze, become useable again—even right after the hottest morning rush.

    It’s the small difference that counts: that one strip beneath a shelf stays bone-dry, the area in front of the main sink never needs emergency cleaning, and the fixture itself—gasketed, with every joint protected—asks for almost no maintenance. Clarity stays routine, not another chore.

    Key Features: What to Look For in a Rated Fixture

    The only serious bathroom fixtures are labeled for “damp” or “wet location” use. Anything short of that is a compromise. Search for gasketed trims, sealed lenses, fully enclosed wiring, and tight seams, especially above the mirror, over shared sinks, or where steam lingers longest. Even on a wall that rarely takes direct spray, ordinary fixtures start to fail at their weakest visible points—the exposed screw, loose trim, or low-profile joint that collects just enough fog to ruin the finish within a few busy weeks.

    The old method—scrubbing streaks off a standard lens week after week—never stops the problem; it only chases symptoms. Properly rated lighting prevents most buildup, so you’re not stuck in an endless cleanup loop.

    When Repairs Become Replacements

    Here’s the most expensive lesson: the moment rust or haze takes hold, it’s usually permanent. Swap bulbs all you want; the beam keeps fading, the ceiling line yellows by degrees, and mounting points develop pits that don’t clean up. By the time the hardware grows loose or the lens stays cloudy for good, full replacement is the only real fix—costly, disruptive, and avoidable if the original install had been sealed from the start. The right fixture stops humidity at the source, skipping years of slow breakdown and forced cleanup.

    Everyday Upgrades Make the Difference

    The benefit of matching bathroom lighting to real, repeated use isn’t “better atmosphere.” It’s escaping daily annoyance—no more squinting, shifting, or wiping after every busy morning. Improvements become visible where you use them: fewer shadowed nooks, persistent clarity along countertop edges, and a fixture that quietly resists rot and routine mess. The change isn’t just from extra brightness, but from light that actually stays reliable, month after month, in the most punishing space in the house. Even one switch-out can transform a bathroom from obstacle course to dependable support.

    For lighting and support fixtures that stand up to real, repeated use in every space from steamy bathrooms to hard-working work surfaces, see what’s available at LightSupport.