Category: Tools & Workshop

  • Why Physical Boundaries Transform Modular Garage Storage Efficiency

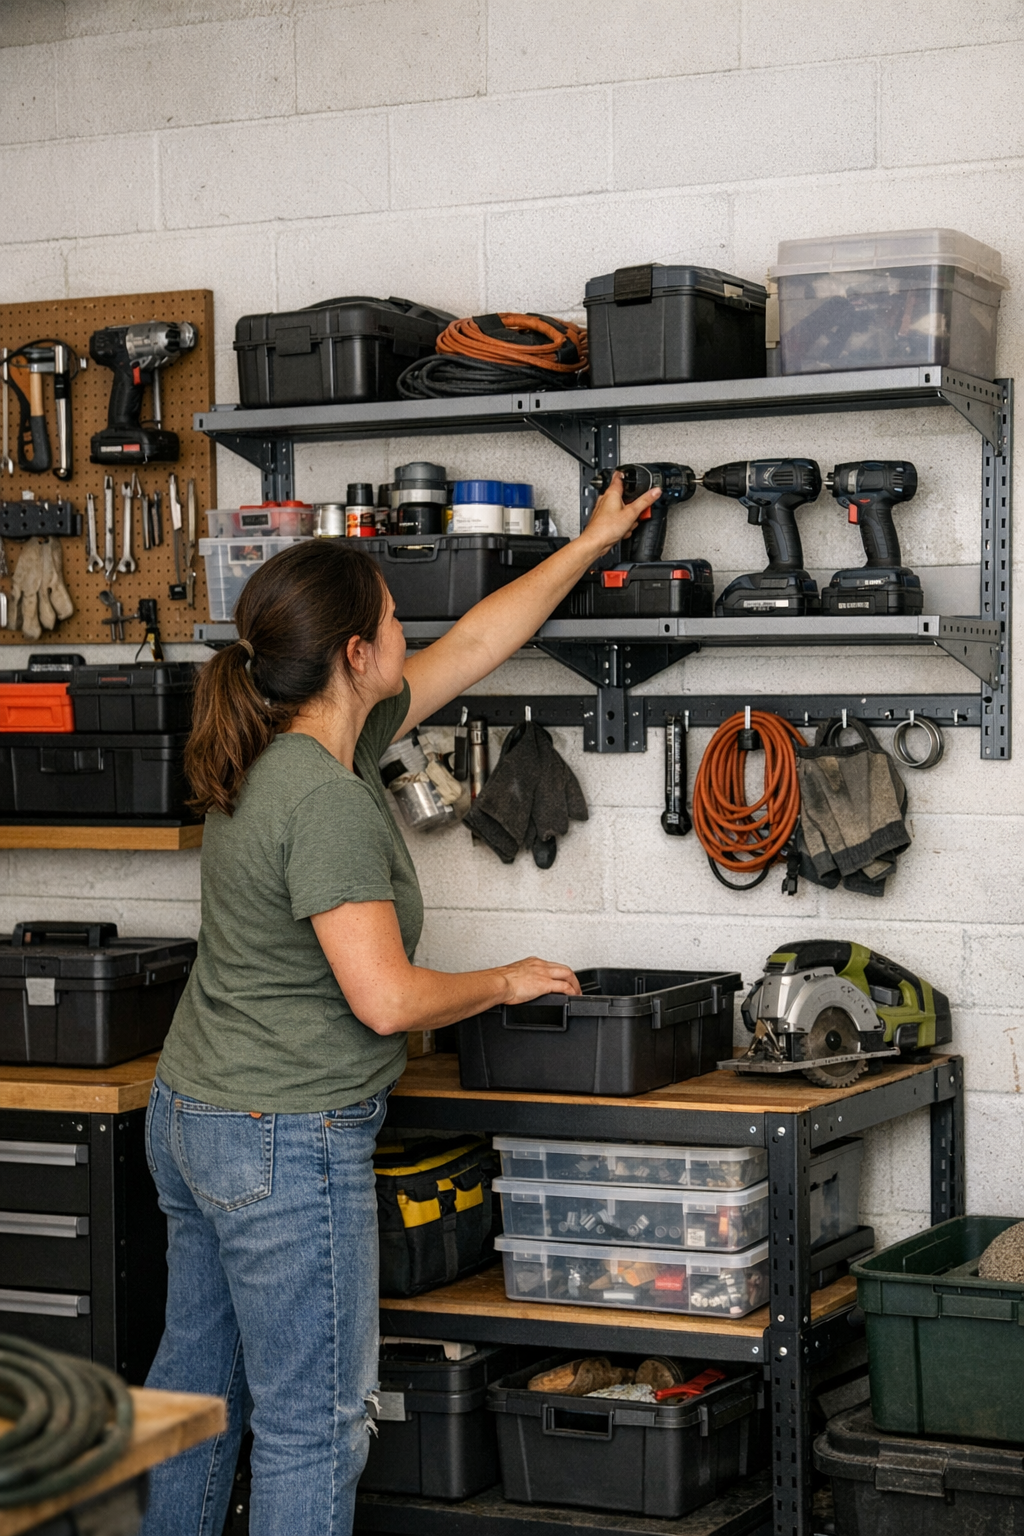
    The garage always looks organized the day you finish the setup. Matching bins lined on shelves, wall hooks hanging in crisp rows—everything poised for easy access. But two weeks in, reality seeps through: bins don’t stay sorted, cords drift across shelves, and returning tools feels like threading a maze. The system that was supposed to tame the chaos starts to trip you up at the exact moments you need it to just work. Each rushed weeknight and cluttered Saturday turns the original order into something you have to fight to maintain.

    When “Organized” Isn’t Enough: The Slow Decay of Categories

    On the surface, every new garage shelf has that satisfying grid—each bin, tray, and compartment lined up with purpose. Fast forward a few busy evenings, and the system can’t keep pace with real use. You grab for a drill in a hurry, toss a wrench back as you rush to finish, and without firm boundaries, bits and hardware are on the move. Screws mix with clamps by midweek. Drill bits—once separated—slip into the pliers tray and vanish. Extension cords snake over lids meant for something else entirely. Even grabbing a broom means digging through accidental piles that formed where there were supposed to be gaps.

    You can feel the friction every time you reset: minutes lost hunting for a lost hex key, handling the same tangle twice, resigning yourself to the small messes you intended to avoid. Over months, the cost is more than clutter—it’s routines slowed, distracted projects, and the constant nuisance of searching in a space built to be efficient. The setup that looked bulletproof starts to wear you down every time you use it.

    Return Flow Friction: Why Putting Things Back Gets Messy

    The real breakdown begins when you’re cleaning up in a rush. No obvious home for a tool? It lands wherever there’s an opening. Categories begin to dissolve around the edges: “Screwdrivers” merges with “random hand tools,” the bin for odds and ends balloons into “everything I’m not sure about,” and the spots you plotted for specific items turn into makeshift drop zones. The next time you go to put something away, there’s no clear landing—so you pile like the rest. Slowly, the walls between categories collapse, and you spend more time thinking about where to fit things than just working.

    The illusion of “efficient” storage—maximized shelves, bins stacked tight—often trades away access for density. What fits neatly together today creates choke points tomorrow. One handle poking out jams a whole row. Floor carts, packed with potential, end up wedged in odd spots because a stray tool blocks the path. Instead of rolling smooth, you nudge the cart back and forth, making room just to reach a piece you need. Wall racks that promise easy access become a clump of overfilled hooks, so grabbing the garden shears means navigating around three hammers and a level. Awkward footprints force you into repeat detours, with dead corners that trap clutter for good.

    Scenes from Real-World Garage Friction

    • Cart shuffles: Want to pull out a ladder? First you slide the rolling cart—twice—only to find a screwdriver jammed in a wheel or a tangled cable clinging underneath.
    • Blocked walls: That sleek wall-mounted rack made sense until two wrenches and a mallet shared a hook, turning a one-grab action into a three-step process every time.
    • Overflow creep: The “spare cables” bin becomes a catch-all for chargers, paint brushes, bolts, and batteries. Within weeks, it morphs into a black hole—impossible to reset, always swallowing the pieces you can’t find elsewhere.
    • Aisle squeeze: Storage that “fits the wall” still interrupts the walk from one end to another, with carts, bins, and baskets squeezing the pathway into a shuffle, not a stride.

    Real Boundaries vs. Flexible Chaos: Why Zones Win

    It’s tempting to trust labels and flexible shelving—until you see how quickly flexibility drifts into disorder. Bare bins and too-tight rows invite items to wander. Every gap you think saves space today becomes an invitation for tomorrow’s misplaced tool. Physical boundaries are what actually hold categories together.

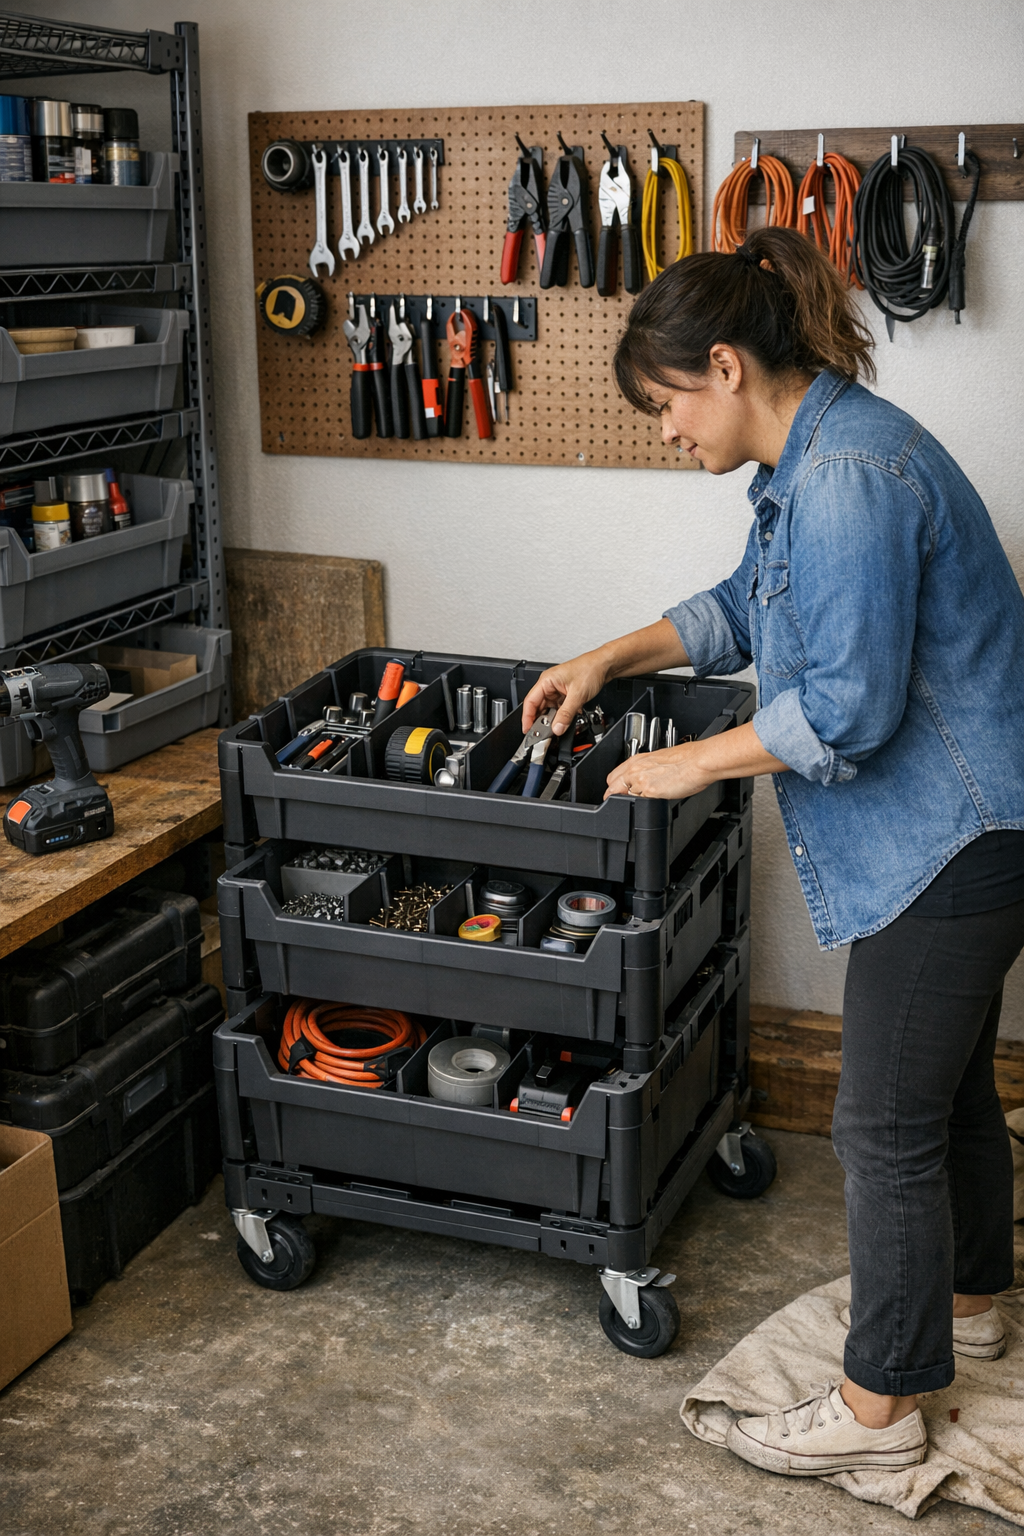
    Add a hard divider in a bin, and suddenly stray bolts don’t crash into the drill bits. Separate hooks with just a hand-width of breathing room and the hammer has nowhere to stray when you toss it back. The tiniest change—a sectioned tray, a spacer, an extra bracket—gives each tool a defined home. Now when you reset, you’re not negotiating; you just return things to their clear starting points. That’s the quiet difference between a zone that holds and one that collapses when you’re in a hurry.

    How Clear Zones Transform the Routine

    After overhauling my own garage cart—hard dividers, spaced hooks, bins marked and sectioned—the chaos slowed to a crawl. No more digging around a sander to fetch the trowel. The wheels stopped jamming, because nothing hung loose to catch them. Resetting stopped being a half-hour fix and started becoming a five-minute wrap-up. Even after three chaotic weeks of fast repairs and weekend projects, the order survived. It wasn’t flawless—but the routine shifted from endless reshuffling to nearly automatic return flow. That edge made the space useful day in, day out.

    Small Upgrades with Real Impact: Building Zones that Last

    • Add basic dividers: Even a scrap of wood or a plastic insert inside a bin turns a loose pile into clearly separated pools of hardware. One barrier keeps months of sorting from unraveling.
    • Rethink hook spacing: Stagger your mounts with enough room for each tool’s grip, even if it means trimming your wall plan to just core items. The result: no more tool “slippage” and easier, one-handed returns.
    • Reset as a user, not a designer: Walk the route you’ll use after each project. If you have to sidestep a cart or squeeze along a shelf, something needs shifting. Resets should flow, not stall at the same pinch points.
    • Defend empty spaces: Leave intentional gaps—don’t fill every inch just because you can. Air between categories is what keeps them from merging in a hurry.

    What Really Lasts: A Garage Setup That Holds Under Pressure

    The difference between “visually organized” and “actually functional” is built at the edges—where things return and where they don’t spill over. A true setup isn’t about Sunday snapshots; it’s about how smoothly you find and return gear when midweek chaos sets in. If you can reset your space in minutes, check any shelf and know what lives there, and move carts without cursing—your system is starting to work for you, not the other way around.

    Focus on boundaries that stick—a real home for each category, a little extra space where tools transition, a deliberate break between seemingly similar zones. It’s not about squeezing more in; it’s about making sure what’s already there actually works. Over the long run, you’ll reclaim more time, fewer headaches, and a garage that delivers on the promise of easy access, not just surface order.

    Visit StackNest for storage systems that help your setup work the way you do.

  • Mastering Harness Load Distribution for Improved Work Comfort and Safety

    You don’t notice harness problems when you’re checking your gear. You notice them mid-task—right when it counts. You’re crawling under a stair stringer, drill humming in your hand, trying to drive a lag bolt above your head. That’s when the harness pinches, straps creep, and your body starts compensating for every awkward load. Minutes stack up. You shift to cut standoff posts, then sand edges, but the harness keeps pulling at the wrong spot or sliding into your ribs. Fatigue creeps in faster and the tool feels heavier, every adjustment pulling you out of the job and back into wrestling with your gear.

    The Real Cost of Poor Load Distribution: Flow Breaks and Focus Drains

    Harness discomfort isn’t just about sore spots—it’s about lost control and broken rhythm. In real routines, you’re drilling above your head, crawling through joists for fastener changes, swapping sanding pads, or reaching to cut and clamp without a break. If your harness loads unevenly—all the weight dragging down from one shoulder, leg straps gnawing behind your knees—simple jobs get clumsy. You move less confidently, fighting the harness with every reach. The seconds lost to fidgeting add up, and your precision fades: wobbling a drill bit, fumbling a screw, overshooting with a saw.

    Similar at a Glance—Decidedly Different When the Work Starts

    Most harnesses on a rack look identical: same webbing, shiny D-rings, stamped hardware. Their differences only matter when the day heats up—and you’re moving fast across scattered tasks.

    The Back (Dorsal) D-ring Trap

    For standing in place or moving in a straight line, a dorsal anchor is fine. But shift laterally on a beam, squat for a low bolt, or lean to sand a stair tread, and the weight yanks you sideways, twisting your hips, tiring your back. Every edge run, every tool swap becomes a reminder: the harness is slowing you down at every angle that’s not upright.

    Why Lateral D-rings Matter for Tool Users

    If your harness has well-placed side D-rings—anchored around your hips and pelvis—the load spreads out. Reach overhead to drill, kneel to attach a bracket, cut with one knee down: the harness stays put. No biting, no sliding. Your hands stay on the tools, not yanking at the webbing, and you move in and out of position without losing momentum or control.

    How Imbalance Actually Wears on Your Day

    Harness flaws are cumulative. Kneeling to drive screws under steel stairs with only a back clip, you feel the harness ride up with every lean. The fix is always the same: sit up, readjust, tighten—interrupt your rhythm. Little breaks become habits, and your work slows. Watch someone with a harness that distributes weight smoothly: no hesitation, fewer pauses, they stay locked on the job without fiddling or readjustment—tool always in hand, not a grip on the harness strap.

    Look for the silent signs—shiny spots on harness webbing, imprints left on work pants, wear marks on the back of a shirt. These are pressure warnings, evidence of energy wasted not in the tool but in fighting gear friction with every repetition.

    The Small Tuning That Changes Everything

    Chest and side D-ring adjustments aren’t details—they’re difference makers. When the back anchor isn’t pulling you off balance, and chest tension sits just where you need it—say, a chest strap set slightly under your collarbone—the harness vanishes. Suddenly, you can twist smoothly to sand risers, drill anchor holes, or swap batteries overhead with no ride-up or shifting. Head in the job, hands on the tool. The drag disappears and the workflow sharpens up—less fidgeting, steadier lines, less tool fatigue by the final shift.

    Whether you’re running a cutoff wheel above shoulder height or ratcheting a wrench in a tight space, a properly dialed setup converts every move into actual progress, not a wrestling match between you and your harness.

    Signs It’s Time to Rework Your Harness Distribution

    • Belt or shoulder pressure that flares up 45–60 minutes into a task
    • Impulse to loosen, shift, or re-buckle mid-drilling or fastening
    • Markings on work clothes tracing exactly where the harness bites
    • Feeling wobbly on a ladder, or needing to change footing just to regain balance

    Don’t ignore these signals. Over time, poor fit quietly erodes tool control, escalates fatigue, and even chews through your gear—right when every minute and motion needs to count.

    Test Harness Moves, Not Just Fit—With Actual Tools in Hand

    Don’t fit-test your harness in front of a mirror. Strap in and run your daily moves: climb a frame, kneel under a joist, reach wide to drill or sand, swap blades or batteries on the fly. If constant tugging and tweaking follows you from stance to stance, your setup isn’t right. A few minutes of this trial is enough to make the need for better distribution obvious. The right choices on anchor points or harness style will show up in fewer interruptions, faster tool switches, less frustration over a week of real work—not just a better feel during the morning equipment check.

    Accumulated Delay: Cost You Never See Coming

    Poor harness distribution rarely leads to a single disaster. It just drags: every task a little slower, every drill job heavier, every saw pass less precise. Five minutes lost at each repetitive action—anchor shift, battery change, cleaning buildup after a harness slip—stacks into hours by week’s end. When deadlines loom or you’re juggling late-day punch-lists, that’s the drag that stings.

    Make the Harness Disappear—Dial the Workflow In

    The best harness does its job by getting out of the way. With anchor points adjusted early, movement stays sharp. You can grab plywood, drill out plates, climb to fasten a bracket, or sand risers overhead—without fighting your own equipment. Tool control, confidence, and simple forward progress return. In a setup that matches your real routines, discomfort and lost effort shrink. Every anchor, cut, and adjustment starts working for you, adding up to more actual work done with fewer stalls and far less friction by the end of the shift.

    Visit Gumboll for practical harnesses, tools, and accessories built for real jobsite routines.

  • How Visible Storage Limits Transform Everyday Organization and Clutter Control

    There’s a familiar frustration buried in even the neatest closets: the daily scramble for what you actually need. Stare at a row of matching bins or stacks of folded clothes, and everything looks under control—until you reach for one glove, or that bottom sweater, and realize you have to dig, lift, or reshuffle just to get it. Week after week, the seemingly organized zone turns into a slow-moving mess: piles slouch, categories cross, and the undercurrent of disorder seeps into your routine. The surface order is a mirage; underneath, the system quietly fails at the one thing it should make easier—grabbing what you need quickly, again and again.

    When “Tidy” Storage Turns Into Hidden Chaos

    It usually starts small. A winter scarf gets dropped on top of an overstuffed bin. A last-minute grocery tote is wedged awkwardly behind a row of folded pants. As long as you can close the closet door, it feels fine—until the next round: a second scarf, a third pair of gloves, maybe a baseball cap tossed onto what was once a neat pile. Before long, searching for a specific item means shifting, moving, or completely toppling other things out of the way. Each attempt to stretch the system’s capacity chips away at its clarity, and you lose track of where anything actually lives.

    Opaque bins and tightly packed shelves promise a calm exterior, but they’re notorious for breeding mixed categories and “out of sight, out of mind” overflow. It’s not the container’s fault—it’s that hidden clutter always finds a way to spread if nobody can see it spilling out. Small habits, like squeezing socks into the corners of an already-full basket, eventually build into a routine of reshuffling and guesswork, not true organization.

    The Real Cost of “Looks Organized”

    The problem sneaks up on almost every well-meaning storage setup. Shelves crammed to the edge and lidded bins overflowing rarely announce their issues right away. Instead, you start noticing small symptoms: it takes longer to find a clean towel, you fish around blindly for the right hat, stacks refuse to hold their shape for more than a couple of days. The reset that was supposed to take three minutes turns into a ten-minute headache every Sunday—or worse, gets skipped completely, letting clutter pile up for weeks.

    Imagine the classic family hallway closet. In November, bins for hats, gloves, and scarves look identical—neat and uniform. Fast forward to January: you’re late, hunting for a matching pair of gloves, and realize they’ve slipped under a jumble of scarves. Half the contents of each bin have wandered over to the next category. The weekly reset—dump, sort, refold, stuff—becomes a battle, not a routine. And yet, the closet still looks photo-ready when you shut the door, hiding the slow diffusion of disorder underneath.

    Why Visible Limits Put You Back in Control

    Open baskets or clear-front bins give you instant feedback on what’s happening inside your storage. These containers don’t allow quiet overflow—when something breaks the boundary, it’s obvious immediately. Slide in one extra beanie or add a fourth hoodie, and it’s impossible to ignore the pile creeping above the edge. You’re gently pushed to choose: pull something out, or make space for what just got used. The result isn’t rigid minimalism—it’s a daily nudge to keep categories intact and avoid the “buried beneath” syndrome that plagues closed bins.

    The real difference shows up during normal, rushed use. Instead of waiting for the Sunday reset, you spot trouble instantly—a scarf dumped in the wrong spot gets moved, a glove basket that’s too crowded demands a quick edit. Boundaries between hats, gloves, and scarves hold steady because overlap can’t hide for long. The reset shrinks to a glance and a nudge, not a full excavation. It’s not perfection, but it’s maintenance you don’t dread, and speed you actually notice during weekday chaos.

    Micro-Adjustments that Make Order Stick

    Swap deep, opaque bins for open, shallow baskets, and suddenly the shelf works differently. You see when the glove pile is starting to tip, not after half of it lands on the floor. An overloaded basket is instantly obvious, so you weed out a stray pair before backup starts. Forget a weekly overhaul—the fixes happen each time you return something. This little friction keeps chaos from ever building up in the first place.

    Quick improvement: Big, readable labels (“Hats,” “Gloves,” “Scarves”) at the front of each open bin make it even less tempting to dump things randomly. Even young kids (and distracted adults) are more likely to get items back in the right spot if every category is obvious at a glance.

    The Spaces Where Visibility Is a Game-Changer

    Storage friction is sharpest in zones you touch daily. Entryway shelves where shoes collapse into a pile by Tuesday, kids’ cubbies that become black holes for stray socks, linen closets where towels sink beneath teetering stacks—these are the places where open or clear storage does its best work. Each time you dig or shift to get what you need, you get a free—and immediate—alert if things are piling up.

    You’ll see it under the bathroom sink too. When baskets hide everything, extra bottles, tubes, and boxes sneak in until the drawer jams. With a shallow see-through bin or a lower-profile tray, you spot the extra toothpaste or unused bottle right away, and either use it or toss it, not shuffle it around for months. The same goes for laundry rooms: clear limits stop the “just stuff it in” approach from quietly turning utility shelves into catchalls.

    Not Everything Needs to Be on Display

    Some things simply aren’t for everyday viewing—off-season shoes, extra blankets, or emergency supplies. Closed bins still have a crucial place for dust control and less-used gear. The trick is to keep your daily rotation visible and finely limited, while letting closed storage hold only what’s truly “back stock”. If grabbing something from a lidded bin feels like opening an archeological dig, that’s a sign it’s time to prune—not just to press down and force a little more in.

    Set the Right Boundaries for Your Routine

    The goal isn’t to show off every item you own, but to make staying organized almost automatic. In high-traffic zones, reach for open bins or transparent containers that make overflow impossible to miss. Use closed bins only for items you don’t need weekly, and make those bins a last stop, not a dumping ground.

    You know you’ve found the right setup when putting things away is simple and getting them out is just as quick—no shuffling, no rebalancing, no mental inventory required. The real mark of an organized shelf isn’t the pretty surface, but how it behaves when the day is rushed and routines are strained. When weekend resets get shorter and daily pick-ups get easier, you’re not just organized—you’re genuinely in control of your space.

    Clutter creeps in quietly when you let boundaries fade. Baskets and bins with visible limits keep your system honest, making small daily corrections feel natural instead of exhausting. Let your storage show you when it’s full, and you’ll spend less time digging and more time actually using the things you keep.

    See more practical storage solutions at ClosetWorks.

  • Identifying Power Tool Battery Issues Before They Slow Your Workday

    The slowdown always hits mid-task—not with a bang, but with a drag: the saw that starts clean but bogs halfway through a sheet, the drill that lags on the last few lags, the sander that fades before the surface is glassy. You checked everything: battery charged, blade sharp, fresh bit. Still, the cut struggles, the drive stalls. Most days, it’s not your setup or your hands—it’s the unseen mismatch in batteries and chargers that look identical in the bin, but perform worlds apart once work gets serious.

    When Similar Equipment Creates Subtle Headaches

    Batteries and chargers seem interchangeable, especially when your toolbox is stacked with the same brand and voltage. Clip in, snap shut, green light—back to work. But over a week of ripping, fastening, or continuous sanding, invisible differences crawl to the surface. That’s when you spot:

    • Torque dropping inconsistently—no pop left in the drill as you chase lag bolts into hard studs
    • Saws that hit resistance mid-panel, leaving you with ragged edges and more splinters than progress
    • Batteries giving up before the last board, forcing you to swap and restart with sore hands and tighter deadlines

    These aren’t dramatic meltdowns. They’re the nagging snags and slowdowns that make everything a little bit harder. The steps get doubled: sand again, cut again, refill with fresh batteries and hope for better luck on the next pass.

    Why “Fully Charged” Doesn’t Mean Ready

    Go by the lights—charged, ready, matching shape—and it should all work smoothly. That illusion sticks around until you’re deep into real work: boring holes through dense joists, grinding awkward welds, cutting stubborn MDF. Suddenly, that “full” battery fades before the job’s done, or the charger proves it fills the battery, but not to full power.

    What’s happening? Age and repeated cycles wear batteries down, sometimes unevenly. Some fresh-from-the-box batteries underperform right away. You won’t spot a weak cell by sight or charge indicator. Only with real pressure do the cracks show—a tool that hesitates, a cut that demands extra muscle, a finish that’s dustier and rougher than it should be.

    Worksite Reality: Where the Weak Links Hide

    Imagine swapping in a “good” battery mid-job. Sander hums, then sags just two boards later—the result: streaks, patches, and extra work smoothing what should’ve been done in one pass. Or powering through grinding only to find the disc bogs and vibrates more, your forearm aching after half the run. These little failures aren’t accidents. They’re signals: a cell that’s lost its edge, a charger that leaves batteries half-hearted, invisible until the work pushes them to their limit.

    The Domino Effect of Weak Batteries

    Picture this: halfway through routing grooves on a tight framing schedule, everything’s lined and measured. Suddenly, one pass struggles, the saw’s pitch drops, motor strains. The edge comes up splintered. Not only do you have to recut—now you’re testing batteries, swapping chargers, losing flow and patience. The cost isn’t just time, but control and precision: rushed corrections, uneven fits, and the fatigue of doing the same task, twice.

    For anyone building or remodeling day after day, this scenario isn’t theory—it’s what slows down real jobs, more often than most will admit.

    The Check That Changes Everything: Output Voltage

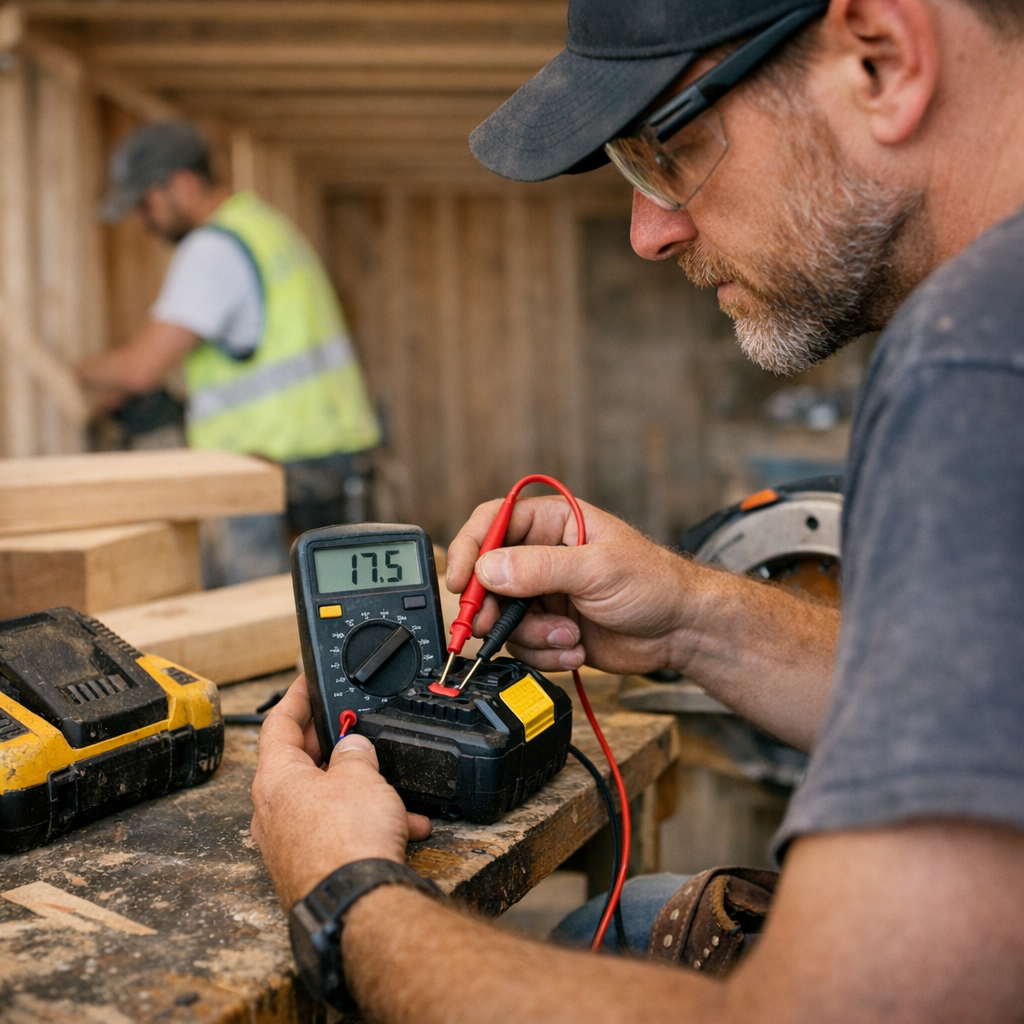
    It wasn’t more charging or swapping that caught the bad batteries in our shop—it was checking output voltage after heavy use. Any pack that fell below 17.8V after a demanding run was retired, no matter how fresh it looked. Chargers that brought batteries up to “full” while delivering less voltage made the replacement list, too. The difference? Tools held steady through each cut; boards came out clean, not burned. The rhythm of the day smoothed out, with less time wasted fighting fading packs.

    Sharper Habits—Catch Fails Before They Cost You

    • Ignore the charge lights: Focus on how your batteries actually perform under load, not just off the charger.
    • Watch for lag: If your saw drops pitch or your driver strains right after swapping, you’ve found a battery or charger holding you back.
    • Check with a meter: After a full job, use a simple voltage check. Packs outside spec are draining speed, control, and your endurance.

    You don’t need to geek out with diagnostics. You need to spot the habits—extra effort, slowdowns, chunkier finishes—that point to power slipping away, long before total failure.

    Reliable Power Pays Off—Ignore It and You Pay Twice

    Two 18V batteries, both from the same brand, can leave you worlds apart: one drives all day; the other sputters by noon, leaving rework and roughness behind. You pay for every mismatch—every time a cut goes rough, a finish needs a second pass, or a screw strips out before sinking flush.

    Those end-of-day corrections aren’t just extra steps—they’re a slow grind that wears out your focus and your finish. A single voltage check added to your shutdown routine—right after you sweep up and hang your drivers—shaves off repeat work and frustration, leaving you with cleaner edges and less fatigue across the week.

    Don’t let identical-looking batteries and chargers quietly chip away at your precision and momentum. The real return isn’t in a logo or a warranty—it’s in every tool, every cell, earning its place by delivering what your work demands, job after job.

    http://gumboll.myshopify.com

  • Why Physical Boundaries Are Essential for Lasting Closet Organization

    If you’ve ever organized a closet, only to watch it fall apart in days, this will sound painfully familiar: You spend a weekend turning chaos into order—stacks of folded jeans, sorted sweaters, shoes lined up, bags and scarves each with their own spot. For a moment, it works. But almost instantly, daily life starts to unravel it. A single reach for a shirt tips an entire pile. Shoes drift from their line. Scarves collapse into the bags’ territory. By next week, your careful categories are a vague, blended mess—slower to use, harder to reset, and quietly, endlessly annoying. Why does every “fresh start” slide back into friction so easily?

    Invisible Boundaries—The Silent Saboteur

    Every storage space without real, physical boundaries becomes vulnerable to the way we actually live. Open shelves tempt items to blend, especially when multiple people share them. Without defined edges or barriers, clothing and accessories naturally drift across lines, nudged by each quick grab or hurried put-back. Pulling a sweater out from the bottom row? Odds are you shift the jeans stack, lean a shoe, or send a scarf sliding. Days later, what once looked clear is now a teetering, shapeless mix that’s harder to sort—and slower to fix—each time you need something.

    The same pattern echoes in bedrooms and entryways. That tidy sweater stack on an open shelf? Rummage for one shirt and the pile slumps, spreading sideways. Two days of normal use, and what began as separate zones is now a jumble to dig through. The effort builds: you need two hands just to retrieve a shirt without toppling everything, and “resetting” means starting from scratch, not simply straightening what’s there.

    Scenes from the Mudroom: Where Organizing Tricks Fail

    Picture the busy mudroom shelf: hats on the left, gloves in the middle, scarves on the right, maybe a catch-all basket beneath. In the haste of a weekday morning, someone grabs a hat and nudges the neighboring scarves. On Wednesday, gloves blend into the scarf zone; by Friday, stray items spill off shelves or bury themselves in the floor basket. What started as an orderly system is now a mixed pile. The frustration isn’t the stray mittens—it’s the slow creep from “each item in its place” to “everything everywhere,” just from living normally.

    It’s never a dramatic collapse, just a steady erosion: Each reach shifts lines a little farther. By the weekend, any sense of roles or sections is erased. Resetting feels like a full reorganization, not a tidy-up—so it gets put off, and function lapses until the next major overhaul.

    What Lasts: Real Boundaries, Not Just Space

    If the problem is items seeping across invisible lines, the solution is giving each group true, physical boundaries that hold up to real use. Not more shelf inches, not another giant basket—just clearer, more visible separation.

    Something as basic as a three-inch shelf divider works wonders. Stacks hit a wall and stop; sweaters and shoes can finally share a shelf without blending after every retrieval. When you reach for a shirt or slide out a bag, you don’t spill into another zone. Shelves recover quickly from everyday use—the “reset” is a ten-second adjustment, not a five-minute excavation. The gain isn’t perfect order, it’s simple stability and obvious zones you don’t have to think about.

    When Bins Become Black Holes

    Don’t assume every container brings order. Oversized bins and deep catch-alls actually invite chaos if left open inside—especially in mudrooms and closets. Shoes and scarves begin as neighbors but end up mixed, small gloves vanish beneath boots, and finding anything means digging through the whole jumble. Even decorative baskets become mini-chaos zones if they lack sub-dividers or interior trays. The rule: If you can’t instantly see and name what’s inside—that space is primed for clutter to spread.

    Simple Tests and Smarter Boundaries

    1. Do you lose track of “where things go” by Friday?
    If your setup only makes sense in that after-clean snapshot, but you’re mentally guessing by week’s end, boundaries are missing. A closet, entryway, or shelf should “announce” what belongs where—without a label or a moment’s pause.

    2. Why does empty space get cluttered faster?
    Uncontained shelves invite items to drift, expand, and spill. It’s separation—not size—that matters. Each reach, if unchecked, blurs categories until every reset feels like starting from scratch all over again.

    3. Can you have too many dividers?
    Definitely. Micro-compartments or fiddly inserts just create new headaches. Efficient storage means clear, broad boundaries—“a section for hats,” not “slots for every color.” If you dread putting things away, or resets feel slower, you’ve over-divided. Test by living with your new boundaries; good ones will speed up resets and reduce daily friction, not create more steps.

    Making Organization Stick in Daily Life

    Design for quick resets, not showroom moments. True order survives the hectic mornings, not just the Instagram “after” photo. Dividers, trays, and sectioned bins let everyone—kids included—restore order in seconds. No instructions needed, no searching for the “right” spot, and no hesitation.

    If you keep seeing sections blur, drop in a divider. Even lightweight barriers—a vertical insert, a low-sided bin, a clear acrylic tray—stop migration and pay off fast. Check where your setup sags the most after a regular week: That’s your best place for a small, strategic upgrade.

    Beyond the Look—Holding Onto Function

    Spaces that merely “look” organized rarely hold up. The real drain is not the mess itself but the frustration of fighting entropy every week—the shirts spreading sideways, the gloves sinking to the bottom, the mystery socks on the floor again. Room doesn’t fail; boundaries do. Every time you catch yourself reshuffling categories or doing a mini-reset just to reach what you need, that’s a nudge to rethink separation, not space.

    Truly functional organization is built for the cycle of use: grab, return, repeat. A few minutes spent installing shelf dividers or sizing tray sections can save you dozens of half-hearted resets—and keep every zone more visible, accessible, and fast to fix for good. The goal is not frozen perfection, but a closet or entryway that rebounds from real life, day after day.

    Find real-world storage solutions that make a difference at ClosetWorks.

  • Why Leaving Space in Cabinets Boosts Storage Efficiency Over Time

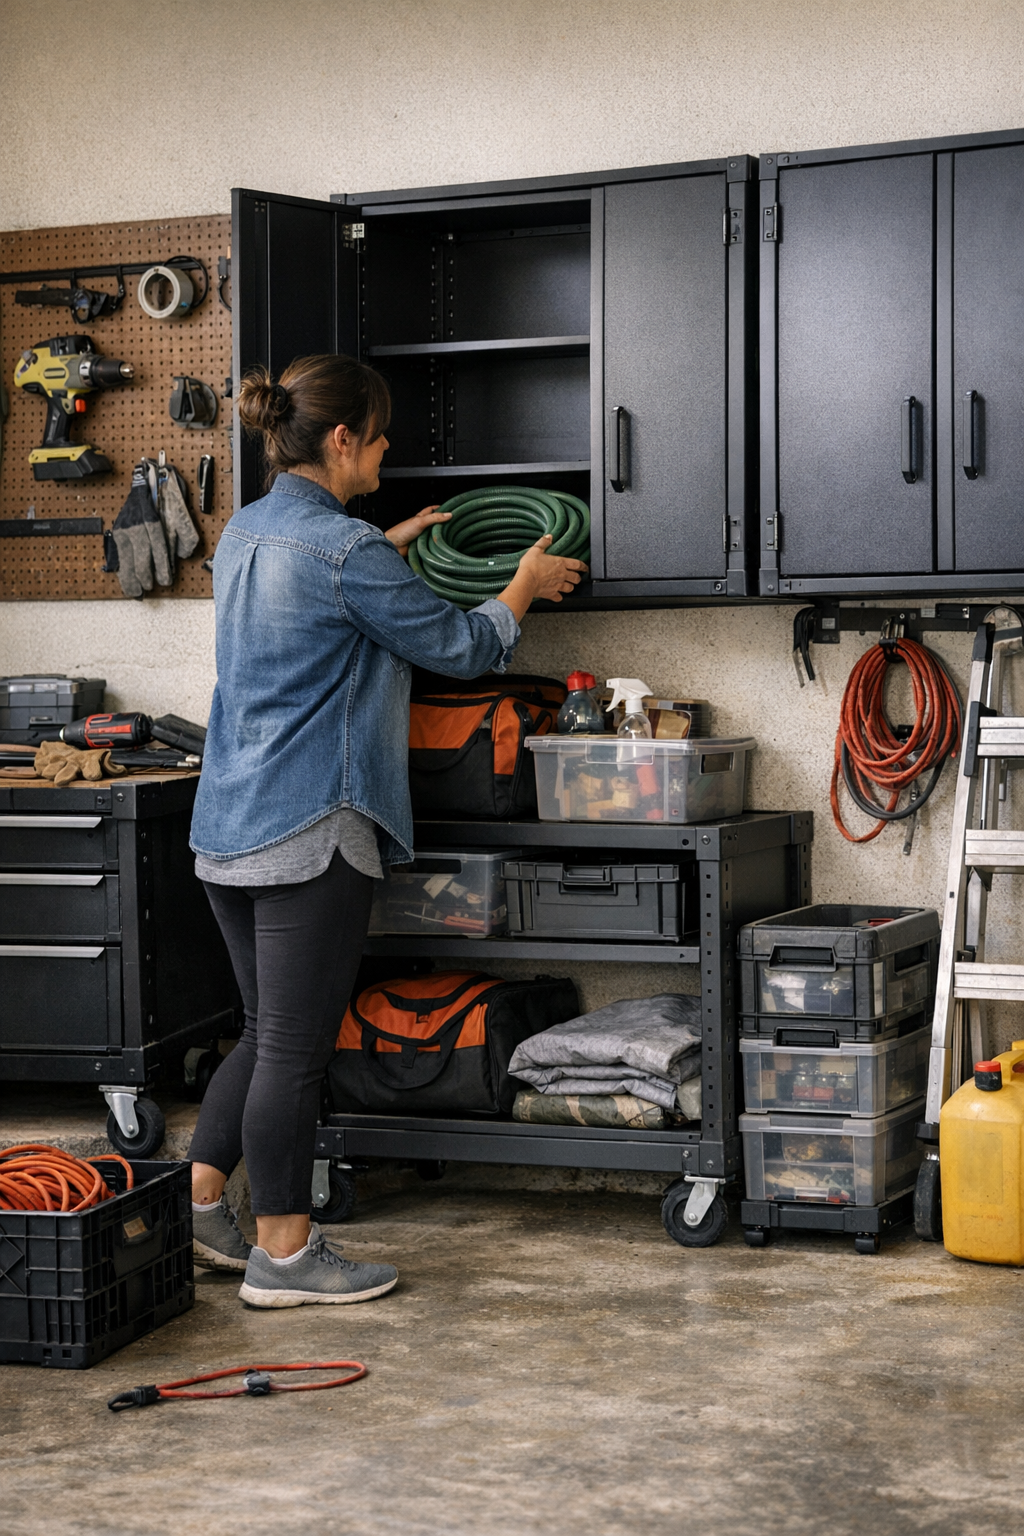
    There’s nothing like the brief high of finishing a garage or workshop overhaul—tools racked, bins labeled, every shelf filled, the whole floor wide open. For a week or two, it looks and feels like a well-oiled machine. But in real, daily use, those picture-perfect setups rarely last. By week three, small frustrations creep in, and the bright promise of a “fit-everything” system starts to dull.

    When “Fits Perfectly” Becomes a Daily Obstacle

    At first, “packed full” feels efficient: cabinets loaded edge-to-edge, wall sections covered in racks, bins nested to squeeze out every bit of air. On move-in day, the logic is clear. But as soon as routines return—hauling out the toolbox mid-week, tucking muddy gear away after a rushed yard clean-up, hunting for a power drill buried behind a season’s worth of other supplies—the tight fit demands a penalty every time.

    Suddenly, each interaction is clumsier. That cabinet you filled to the brim? Now you have to pull out an entire bin just to slide one wrench back in. You find yourself nudging the rolling cart two feet sideways just to swing a cabinet door wide. The spot behind the cart—the one you swore would keep walkways clear—now requires a lurch and a sideways reach to access what you actually need. Corners fill with items that technically “have a place,” but rarely make it all the way back in without a multi-step shuffle.

    Overflow Piles: Where Good Organization Goes to Die

    It’s rarely mess at first—just overflow. Without built-in give, things with no ready slot take over new territory. Last used hose sits coiled by the door, waiting for someone who’ll actually deal with the cramped utility shelf. Extension cords drape across the rolling cart’s handle because there’s no buffer spot left inside. A pair of bypass pruners balance on top of the garden bin “for now” but end up living there all week. None of it is a crisis, but the supposed control is leaking away with every improvisation.

    The toll is slow. Every time you put something away, you have to move something else first. Extra bins, too fat for their cubby, wait permanently in front of closed cabinet doors. The easy path from the workbench to the yard starts collecting gear that doesn’t fit anywhere but also can’t be left outside. The floor is supposed to stay clear, but now it’s a landing strip for whatever didn’t make it back home without a fight.

    Why Backing Off 100% Full Actually Improves Flow

    This is the underappreciated fix that only shows itself with real use: leaving 10–20% of your shelves or cabinet space intentionally empty keeps the rest running smoothly. On paper, it looks like wasted capacity. In reality, it’s what protects your routine.

    That extra gap means you can always return something fast, with no puzzle-solving or back-and-forth. You don’t have to reshuffle three bins just to park one stray mallet. Odd-shaped gear drops right into the cabinet, not onto whatever spot in the garage is convenient and unclaimed. Instead of rate-limiting yourself with brutal efficiency, you give every regular return a place to breathe, keeping overflow bottled up inside the system where it belongs, instead of on your floor or stacked in dead corners.

    Example: The Garage Reset That Actually Worked

    Start with a real scene: a suburban family’s garage, neatly equipped—wall-mount cabinets, tiled flooring, a rolling cart for weekend gardening. The first month? Pristine. But after two weekends of outdoor projects, the cabinet space vanished. Tools and hoses returned but found nowhere open, so they sprawled at the cabinet’s foot; bikes detoured around the clutter. The rolling cart became a junk tray “until we have time to reorganize.” It never looked disastrous. It just made everything—putting away, retrieving, even walking—slightly more annoying. There was no dramatic mess, only a slow drip of friction.

    What really broke the flow? To return a single rake, you had to first shift bins, wedge the door open against the cart, and plan your moves like stacking blocks. The whole system was airtight, and impossible to flex. The floor was meant to be open. Instead, each “return” ended as an unscheduled drop-off on whatever surface was closest to the entrance.

    The Everyday Payoff of Deliberate Underfilling

    The solution wasn’t another full reset—it was carving out emptiness on purpose. By clearing just one shelf per cabinet and resisting the urge to fit every bin, the pattern changed overnight. Suddenly, overflow had a home of its own. That random garden spade? Tossed inside, no reshuffling. Bin to switch out before dinner? Parked, door shut, job done. Movement stayed clean, the floor open, and the once-persistent slowdowns—the domino effect of too-tight storage—stopped dictating how the rest of the space functioned.

    This isn’t minimalism as virtue. It’s about keeping the area truly usable, preventing the daily shuffle, and letting the setup actually serve the chaos of real life—not just look good on move-in day. The difference won’t make a tour photo, but it’s the only way some corners ever stay clear, and some tools ever make it all the way home after a ten-minute rush.

    How to Build the Buffer Into Your Setup

    If you’re planning—or rebuilding—a garage, workbench zone, or muddy gear wall, try giving yourself the permission to keep a shelf only half-used. Accept that some bins will come and go, some days demand more space than tidy plans allow. The benefit shows up not on day one, but on day 45, after you’ve dumped, retrieved, misplaced, and rushed through every corner at least twice.

    The best setups don’t just store things—they move with you, absorb surprises, and make it easy to reset weekday chaos in minutes, not hours. That deliberate buffer is the difference between a space you admire and a space you rely on every single week.

    Find more practical storage solutions and systems at StackNest.

  • How Proper Charger Spacing Prevents Tool Downtime and Battery Damage

    Power tools don’t let you down—until the charger station does. The day starts organized: drills, drivers, and saws lined up and charged. But a couple of hours into real work, the hidden weak point appears. Suddenly, you’re staring at dead packs, tangled cords, and blinking red lights right when you’re lining up for a critical cut or driving that final screw. Productivity nosedives, and minor chaos takes over the bench.

    Where Charging Chaos Creeps In

    Spend an hour on any busy job site—drilling walls, rapid-fire fastening, ripping boards—and you’ll see it unfold. Chargers lined edge-to-edge, cables coiled tight around each other “to save space,” all looks tidy in the quiet stretch before the day heats up. But as soon as the tool cycle speeds up, the setup cracks:

    • Blocked charger vents crowd in, choking off airflow.
    • Cords spaghetti together—no one’s sure which battery belongs where.
    • Quick grabs pull on cords, half-unplugging chargers or yanking plugs just enough to interrupt the charge cycle.

    The downside hits at the worst time: halfway through a plunge cut, a drill bogs down. You reach for another pack—still blinking, still empty. Now, the scramble begins: swapping chargers, guessing which cord goes where, accidentally unplugging the sander for the finisher’s orbital. “Organized” doesn’t mean much once the real-world pace picks up.

    What Happens When the Job Gets Fast

    Crammed charging isn’t just annoying—it grinds workflow to a halt. Imagine a carpentry crew rotating three saws and a brace of drivers, everyone expecting fresh power on every cycle. When chargers cluster or cables loop over each other, it’s not just about looks. It’s about:

    Vent blockage silently overheating chargers—sometimes you don’t notice until the casing is too warm or you smell faint plastic. Over time, batteries lose capacity, tools lose torque, and your blade starts binding halfway through a long sheet of ply. Cables crossed and twisted, flexing behind benches, develop weak spots. Days or weeks later, that hidden kink leaves a battery half-charged right when you need full performance to keep the cut smooth and jam-free.

    It snowballs in the background. Missed charges, intermittent contact, time wasted tracing which cord actually powers the jig saw charger, and more tool changes than necessary only add fatigue for everyone involved.

    The Mark of a Shop That Runs Smooth

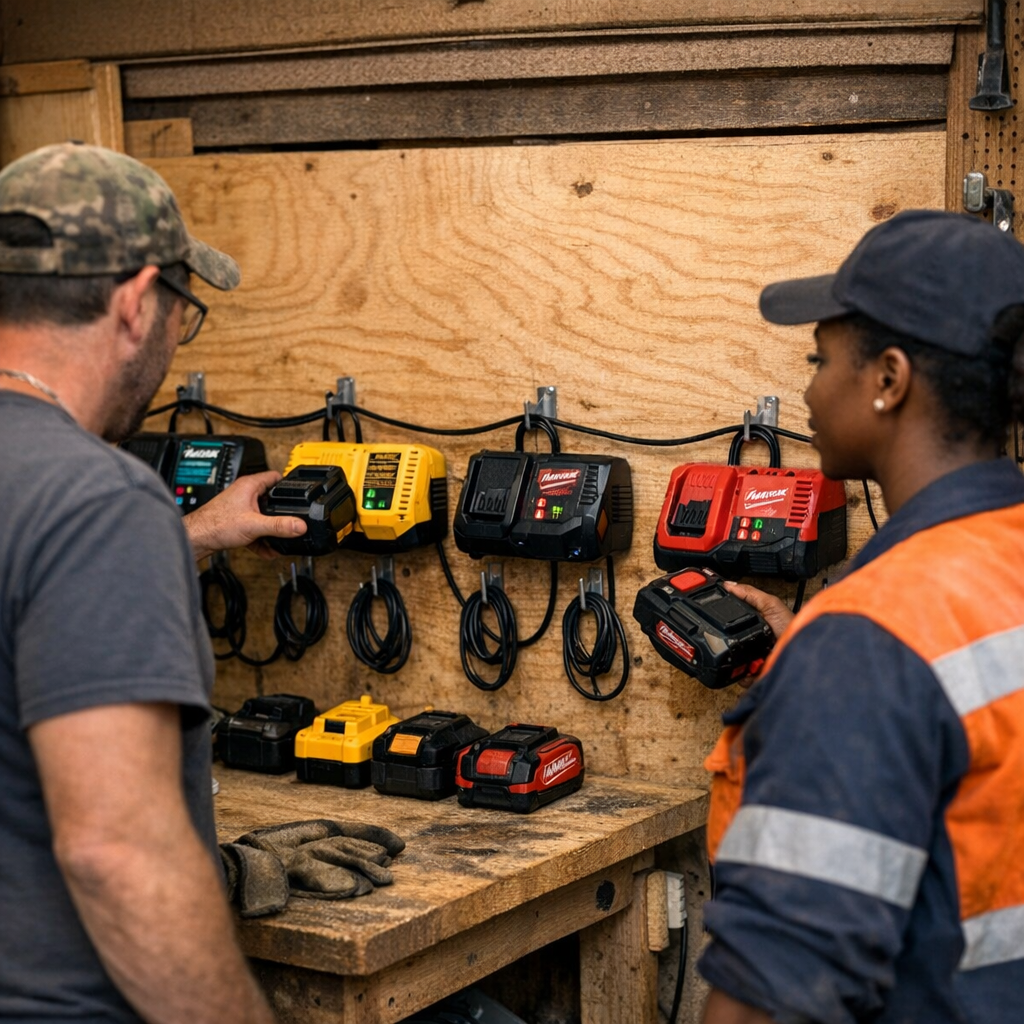
    Visit a crew that never stalls for power and you’ll see the quiet difference: chargers set at least 15 cm apart, every cord cleanly routed and visible, cables hooked—not coiled—out of the way. During the rush before lunch or the last push before close, nobody’s guessing which light means “done.” Packs swap in and out without delays, cords untouched except at the plug. The bench stays open for tools, not tangled wiring.

    Contrast that with corners where chargers are mashed together, cables twisted into piles. The consequences show up by mid-afternoon: a driver suddenly weak mid-fastening, a saw dropping RPMs midway through a board, frustration rising as the crew plays musical chairs with whatever packs look green.

    When Small Tweaks Make the Big Difference

    Giving each charger breathing room—just 15 cm—and separating every cord brings order out of chaos. When demand spikes—cutting hardwood, sanding entire runs, drilling frame after frame—chargers stay cool, charging lights stay easy to read, and batteries come off the bench ready for a full shift.

    This isn’t about spotless organization for its own sake. It’s about reducing the hiccups nobody budgets for: thirty seconds wasted here, three minutes lost there, searching for a charged battery or untangling cords. Over a week, that’s hours reclaimed—time your team can put into cleaner cuts, more precise fastening, and finishing strong rather than fighting fatigue brought on by constant tool swaps and surprise dead packs.

    Catch Trouble Early: The Warning Signs

    Small details at the charging station quickly snowball into downtime. A charger that feels a little warm. A cable with a soft spot from being pinched. Ignore these, and you start to see:

    • Flat batteries halfway through routine jobs—forcing unplanned stops.
    • Chargers that slow down, stretching out fill times just when you need speed.
    • An impossible tangle when troubleshooting: was it this plug or that cable? Why’s the finish sander flat again?

    These are early warnings: if you fix them now—before the next push—you avoid the dead air and scrambling for substitutes when the work won’t wait.

    Simple Fixes That Actually Hold Up

    This isn’t about a perfect system. It’s about daily routines that take pressure off everyone using the bench. Spacing out chargers lets heat escape and keeps batteries cycling safely, with no silent capacity drop-off. Assigning every cord a single hook or run keeps problems visible—a nicked cable stands out, ready to be fixed before it turns into a bigger hazard. You spot loose sockets, worn insulation, or odd charger sounds right away. That keeps the team working—not hunting for fixes.

    Whether you’re pushing through a Saturday in the garage or running a tight punch-list on a big site, a few seconds of care at the charging station echo through every cycle, every swap, every smooth finish with fewer pauses and more control.

    Work-Proven Habits for Fewer Headaches

    1. Inspect cables weekly—even if the system looks tidy. Bends, frayed sheaths, or dark marks show damage before it wrecks a charging cycle. Swap out tired cords so you’re not caught with a sudden short in the middle of an important run.

    2. Tag chargers and batteries—especially for rotating crews or busy shops. Colored tape, initials, anything that links packs to a charger and a tool. The benefit shows up when pressure’s on and the right battery is ready at a glance—no guessing, no mis-swaps, no lost time when the job’s moving fast.

    Bottom Line: Charging Station, Stronger Workflow

    A solid tool workflow relies on one thing more than any touchscreen or upgrade: batteries ready when and where you need them. Small layout habits—those 15 cm gaps, dedicated routes for every cable—mean drills finish the run, saws cut clean, and crews aren’t fighting surprise downtime. Your tools deliver every bit of control and power you expect—no stalls, no strings of half-charged swaps—simply because the weakest link isn’t holding everything back.

    http://gumboll.myshopify.com

  • Choosing Between Wire and Solid Shelving for Bedroom Closets That Last

    Step into a freshly installed closet, and everything looks under control—at least for now. Shirts stack into crisp rows, socks and tees fold neatly into place, and whether it’s wire or solid shelving, everything feels visible and simple. But the first week of real use—actual laundry cycles, rushed outfit changes, the half-awake scramble for “just one more sock”—reveals which setup holds its promise. The small, daily inconveniences that sneak in after that initial sense of order are what really decide whether the closet works for you or against you.

    How Tiny Storage Frustrations Multiply

    In those first days, it’s almost impossible to spot the difference. Both wire and solid shelves stand empty of clutter. But the habits that follow—tugging out last-minute undershirts, grabbing a favorite top from the middle of a stack, stuffing pajamas away when you’re late—all push your shelving system beyond its showroom calm.

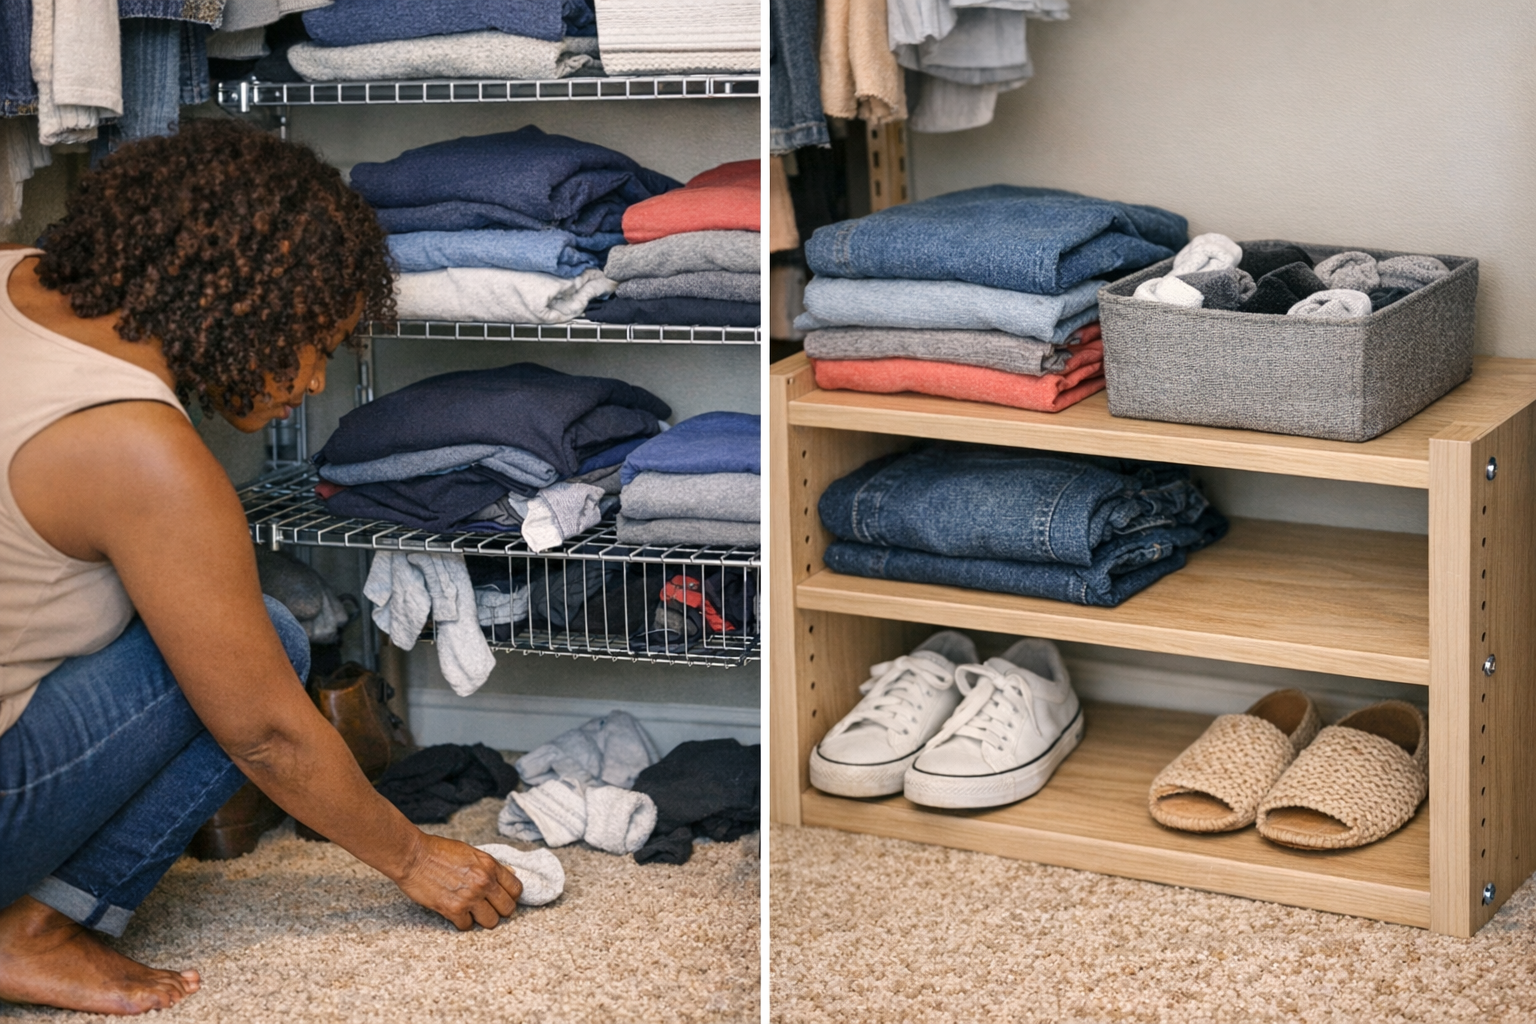
    With wire shelving, these pressures show fast. Socks nudge through the grid, sliding halfway out of sight. T-shirts, especially the soft ones, settle between the wires and make the whole pile slope and sag. The closet still looks organized at a glance, but the process is messier: reaching for one shirt topples the next, while a single sock slips through to hide beneath the lowest shelf. You end up crawling on the floor almost daily—not for a deep clean, but just to recover whatever fell overnight.

    Solid Shelves: Fewer Gaps, But New Trade-Offs

    Switch to solid shelving, and those gaps disappear. Everything from jeans to gym shorts stacks flatter, and grabbing a piece from any part of the pile doesn’t collapse what’s left. Socks and smaller items can’t disappear through the shelf, and you’re spared the routine of fishing fallen clothes out from awkward corners.

    But nobody gets a free ride. Solid shelves collect dust and lint, especially under stacks that barely move week to week. Resetting is less about tracking down wayward clothes, and more about wiping down surfaces—still a minor friction, but one that quietly accumulates if you’re a “fold and forget” type. Yet for most, this is a fair trade: it means the shelf stays reliable, even when you’re rushing through yet another Monday morning reset.

    Where Closet Routines Really Slip

    The test isn’t how organized your closet looks after a deep clean—it’s what happens as life gets busy. By the end of each week, even “perfect” stacks start to slide. Favorite shirts migrate to the front and the rest get buried. In a rush, you pull an item from the bottom—now every fold above slides out of place. On wire shelves, the problem is amplified: thinner socks vanish beneath the grid until you’re left with single strays and half-stacks, and that tidy line you reset on Sunday is scrappy by Friday.

    The cycle repeats every time you dig for something specific: a workout top at the back, a pair of thick socks for winter, a T-shirt buried under sweatshirts. Each grab risks another cascade, another stray, another moment spent putting things back rather than getting dressed.

    Real Scene: Socks and the Extraction Drama

    Picture the speed round before work: you reach for socks stored on wire shelving, and the last pair clings to the grid. As you pull, the pile shifts, a sock falls, and now you’re on the floor again, scanning under the shelf, grasping for what dropped. What should have been a two-second reach becomes a three-step rescue. If your mornings already feel rushed, this minor hassle quietly chips away at your patience.

    Now imagine the swap: On a solid shelf, you reach, lift, and nothing escapes. The rest remain steady, and you’re out the door in half the time. Over a week—the cumulative effect is obvious. If multiple people use the closet or if mornings are a blur, those seconds compound into real time reclaimed, less fluster, fewer rogue socks to puzzle over at night.

    A Simple Fix for Everyday Friction

    Some improvements take minutes to install but save hours over months. Dropping a shallow basket or bin onto a wire shelf instantly stops small items from slipping out of sight. Now socks, underwear, and delicate shirts drop into a defined space, not onto the floor. Your shelves stay visually organized, but the routine—grab and go, pile stays settled—finally matches your real-life habits. Instead of constantly resetting, you reset once, and the system quietly holds.

    Quick tip: If solid shelves aren’t an option, a set of affordable liners or stacking bins can transform wire shelving. Piles stop collapsing, small things stop escaping, and your daily reset becomes quick and predictable instead of a recurring obstacle course.

    Does Your Storage System Actually Work for You?

    Wire and solid shelving aren’t just different materials—each shapes your daily rhythm. The right setup isn’t the one that “looks” perfect on install day. It’s the one that makes your space resilient to repeated grabs, quick reshuffles, and last-minute wardrobe changes—without piling up silent annoyances.

    If you catch yourself constantly tidying, fishing for dropped items, or wondering why the space looks organized but acts like chaos, it’s a sign something needs to shift. Sometimes it’s a matter of swapping shelf types, other times it’s simply adding the right basket or liner. The real payoff: smoother mornings, less disruption, and more time doing anything but reorganizing. One small change can pull your closet back into alignment with the way you actually live.

    Explore the full ClosetWorks collection

  • Why Your Shelves Fail Under Pressure and How to Fix Them

    The first day always feels like a win. Shelves stand proud, bins line up, and the floor finally shows daylight. But by Wednesday, you start seeing the cracks: that sturdy shelf you trusted has a subtle lean, the rolling cart has migrated—again—into your walking path, and the wall rack’s perfectly ordered screwdrivers are wedged oddly as overflow gathers. Look closer and the clean install already feels less like an upgrade and more like a daily negotiation.

    First Impressions Fade—Routine Always Wins

    Any new setup can look organized on day one. It’s what happens on day eight, and day twenty, that matters. Think about the real flow: grabbing a sander mid-project, returning a heavy toolbox after a full afternoon, coiling hoses or cords back onto hooks. If your system resists sagging, wobbling, or collecting piles, you glide through each step. But when a shelf flexes as you return a drill, or you must nudge a cart sideways for the third time that week, you’re feeling the very first signs your setup is falling behind your actual use—and slowing you down without you even realizing it.

    These aren’t just minor annoyances. Over time, every awkward reach, every stutter step around a misplaced bin, is friction against your routine. A setup that looked flawless quickly becomes something you have to manage and work around, rather than one that quietly supports your workflow behind the scenes.

    The Real Test: Looks Organized vs. Works Organized

    Walk into almost any newly arranged workspace and the differences are invisible. Rows are even, levels match. But what you don’t see at a glance is how each system will hold up after dozens of cycles of use. Will those wall shelves stay rigid when loaded—and reloaded—with power tools? Does the utility cart return to a neutral spot, or does it creep until you’re boxed in every night? Does “a place for everything” mean quick access three weeks later, or do you start stacking things wherever they fit just to keep the surface clear?

    A shelf that’s anchored and supported not only looks right—it feels stable no matter what you return to it, no matter how often. You set down a heavy bin and nothing budges. But if the shelf gives even a little, you’ll unconsciously shift items to safer ground, doubling up on a more stable section and leaving the flexing edge to sag further. Over time, those little adjustments break the logic of your original zones—things migrate, corners become dumping grounds, and resets take twice as long because nothing fits back where it began.

    Catching the Real Trouble Spots Early

    The slow creep toward clutter isn’t a dramatic event—it’s small, repeated moments that build up. You notice a single spot collected with tangled extension cords, or a corner bin filling with odds and ends that don’t fit anywhere else. Maybe you wedge the rolling cart in front of a cabinet “just for now,” until it becomes a fixture you work around all week.

    Each of these is a blinking signal. When you stretch to reach a tool blocked by something that never finds a true home, or you find yourself shuffling items on a soft shelf so they don’t tip over again, your setup is fighting your routine instead of shaping it. The system isn’t failing with a bang—it’s leaking time and movement with every cycle.

    How Repeated Use Wears Down Weaknesses

    Fast forward to a busy weekend: you’re cycling between workbench tasks, swapping tools, and restocking parts on the fly. The first hour with a new system feels seamless—everything is where you want it. But as the workload builds, weak spots show themselves. A shelf sags on the end and suddenly drills and tool cases are left in a teetering pile; you hesitate to return them as intended. Instead of resetting by habit, you’re stuck improvising—a little more with each round, until you’re spending as much time managing storage as working on projects.

    That’s the gap between “looks tidy” and “stays functional.” Sometimes, the fix is simple: reinforce a shelf midpoint, re-anchor a wall bracket, or split a zone that overflows too easily. Even a minor adjustment—when aimed at the exact spot that’s tripping you up—can restore the flow enough that resets go fast and the system supports you, not the other way around. The trick is to act before today’s small workaround becomes next month’s constant friction.

    Warning Signs Your Setup Isn’t Really Working

    Is your storage system lagging behind your routine? Watch for these telltale symptoms:

    • One cart or bin always seems in the way, and you’re shifting it every time just to get through.
    • A shelf edge flexes or feels spongey as soon as you put a heavy tool back, making you avoid it for the rest of the day (or week).
    • “Temporary” piles or overflow corners are quietly becoming permanent setup features.
    • Returning items at the end of the day turns into a puzzle—pieces no longer fit, zones blur, and you’re left restacking or settling for wherever there’s room.
    • The wall is covered, but you’re still left searching for real, reliable access—because surface order hides underlying chaos.

    The Reality Check: Pressure-Test Your Setup

    Don’t wait for routine to grind your layout into frustration. Pressure-test it now: load the heaviest things where they belong, shuffle items in and out just as you’d do on your busiest day, park carts where you naturally leave them. Does the whole system keep its shape—no sagging, no accidental bottlenecks, no “junk corners” starting to form? If not, make adjustments: add support, re-space shelves, clearly define each zone, so you reset by instinct, not struggle.

    This is the difference between a setup you live with—and one that actually works as hard as you do. The goal isn’t perfection; small fixes make a world of difference if they let you move, return, and retrieve without friction piling up. The less time you spend managing the setup, the more you get out of every work session.

    Turn Daily Annoyances Into Smoother Flow

    No layout is immune to a little friction, but the right adjustments can reclaim wasted steps. Well-anchored shelves stay reliable under stress. Carts that park out of flow keep pathways clear and returns easy. Distinct wall zones block overflow from bleeding into other areas. Setups that score high on easy reset—where quick, single-motion returns are the norm—don’t just look better. They feel better, every single cycle you go through.

    The real payoff isn’t measured in how neat things look after a big clean, but in how little you think about the storage on your busiest day. Fewer stalls. Smoother movement. Zones that hold. That’s a system performing for real life—a setup that finally matches how you actually use the space, not just how you pictured it the day you installed the shelves.

    http://stacknest.myshopify.com

  • How Simple Storage Habits Prevent Rust on Oscillating Power Tools

    Your multitool is supposed to make jobs faster, not add new headaches. Yet if you’ve ever grabbed yours after weeks in “dry” storage—maybe from the cold garage or the back of a crowded van—then struggled to slot in a blade or felt a stubborn hitch changing a sanding pad, you already know the secret enemy: hidden rust. It’s rarely blatant. First comes a slight drag fitting a new accessory, then a sticky clamp that should snap, now fighting back. Pretty soon, a project that should flow starts leaking minutes and draining your patience. Tool performance fades not in a dramatic breakdown but through tiny setbacks—less speed, sloppier cuts, more fatigue by the hour.

    Why “Dry Enough” Storage Fools You Every Time

    It’s easy to think a cool, dry shelf will shield your kit. But real workshops don’t stick to neat rules. Even bone-dry air lets condensation form on cold steel after a night’s temperature drop. And tool metal loves to hold moisture—maybe sweat from last session’s quick grip, maybe summer humidity that lingers for hours between tasks.

    The problem: you don’t see it until it matters. A paper-thin smear of corrosion on blade seats and clamps saps the “quick change” right out of your multitool. That extra force needed to seat a blade? It isn’t just nuisance—it translates directly to lost accuracy, awkward grip angles, and amplified hand fatigue every session. Sometimes, rust sets in less than a week if dust and sweat ride into storage. The tool looks fine but behaves all wrong when you need real control.

    A Few Extra Seconds Change Everything: Wipe and Oil

    The proof is easiest to spot in side-by-side use. Grab two multitools—one tossed onto the shelf after work, the other wiped and oiled before storage. The first time you swap a fine-tooth blade, the neglected tool seizes up, misaligns, or sends you searching for extra torque just to lock it in. The oiled tool feels instantly different—clamps close with a smooth snap, accessories drop into position, and you don’t burn energy wrestling tiny details on an already tight job.

    Picture trimming a door casing flush against tile: if your blade mount grabs, your line slips or the multitool stalls just as you reach the edge. Or switch to detail sanding for cabinetry: every extra gram of resistance magnifies your error and roughs up your finish. Rust quietly trades away the very precision the multitool was meant for, multiplying correction work later. It isn’t dramatic failure; it’s relentless, creeping friction that chips quality and extends your to-do list.

    Where It Really Hurts: Friction at Every Step

    Resistance isn’t just psychological; it’s measurable. A sticking quick-change slot can chew up bits and blades, untighten mounts mid-use, and push your grip into unsafe wrist contortions. Miss one oiling, and you’ll find every accessory change takes longer, every pad eats more grit, and every failed line means sanding out mistakes you could have avoided. That half-minute fighting a stuck part while a drill or multitool runs at your heels adds up; so does the fatigue from every rougher hand motion forced by hidden corrosion.

    Rust doesn’t limit itself to the showpiece tools, either. Drill chucks start to skip when mounting bits. Changing to a spade bit or countersink means jiggling through resistance instead of a snappy shift. Even adjusting clamping guides—anything with bare steel—becomes effort, especially under jobsite pressure where every second counts and a misaligned bit spells rework.

    Not Just Surface Trouble: How Moisture Lingers

    Sawdust, sweat, and stickiness are stealthy allies of rust. Woodchips from a humid cut, greasy fingerprints after a long install, dust packed into slot corners—every one traps moisture right where rust loves to start. Metal left bare, even after a quick cloth-off, gives corrosion a foothold before you notice a single brown fleck. By the time you feel resistance, blade tips may already be chipped, and accessory fit can drift just enough to force extra sanding or bad cuts, draining both accuracy and tempo.

    If you move between locations—garage, basement shop, jobsite trailer—those temperature swings and bursts of damp air set up fast. One overnight reset, and accessory slots can transform from smooth to sticky before you ever see it coming.

    The Three Second Habit: Quick Oiling, Lasting Results

    There’s no magic: just seconds of real prevention. After the usual dust-off, a light spray or dab of mineral oil on mounts and contact faces throws up a barrier, buying time against moisture. This isn’t fussy maintenance; it’s the difference between days of glide and days of grind. Across real shops, this step can drop the effort needed to seat attachments by half. Clamp force falls, swaps become easy, and by the next session, your multitool responds with the snap and surety you felt the first week you bought it.

    It’s invaluable on big tasks—a full sheet install, a series of switch changes—but the payoff multiplies on small, late-night fixes and awkward angles where lost control means another late return to the shop. A few seconds of oil is simply a form of time-saving insurance that stacks up over project after project.

    Keep It Doable: Oil Where It Counts, When It Counts

    Focus on high-contact parts, not just surfaces. Skip the urge to polish every inch; prioritize slots, clamps, blade seats, and active fasteners. Build it into your post-work rhythm: brush, wipe, a few drops of oil, then close up. If your workspace is prone to condensation—garage, crawlspace, van—treat every use as a potential risk and oil each time. Climatic control, bone-dry air, or a light session? Maybe weekly is enough, but never skip after a sweaty or high-speed job.

    When your tool “just feels off”—hesitation slotting a blade, shaky clamps, a hitch changing bits—a quick check for orange dust and a steel wool touch-up can buy back smooth performance. If you spot true pitting or ragged edges, call it time for replacement; that damage signals control you can’t recover mid-task.

    Break the Friction Cycle—Project by Project

    If smooth operation is fading, don’t just muscle through—look for rust. Slowdowns—wobbly blades, sticky clamps, pads that chew up scratch after scratch—almost always connect back to moisture and a skipped oil. Start cleaning and oiling and you’ll feel the reversal: effortless swaps, tight cuts, more stamina, and control that lasts the whole session.

    Fast-paced shops, cramped garages, corners overflowing with last week’s scraps—they all tempt you to just “store and forget.” But every fix-up later, every repeat job to correct a botched edge, starts with a few seconds neglected when putting the tool away. Oil isn’t about being precious; it’s straight-up practical, and it pays for itself in smoother cuts, faster battery swaps, and less fatigue on every task.

    http://gumboll.myshopify.com