Category: Tools & Workshop

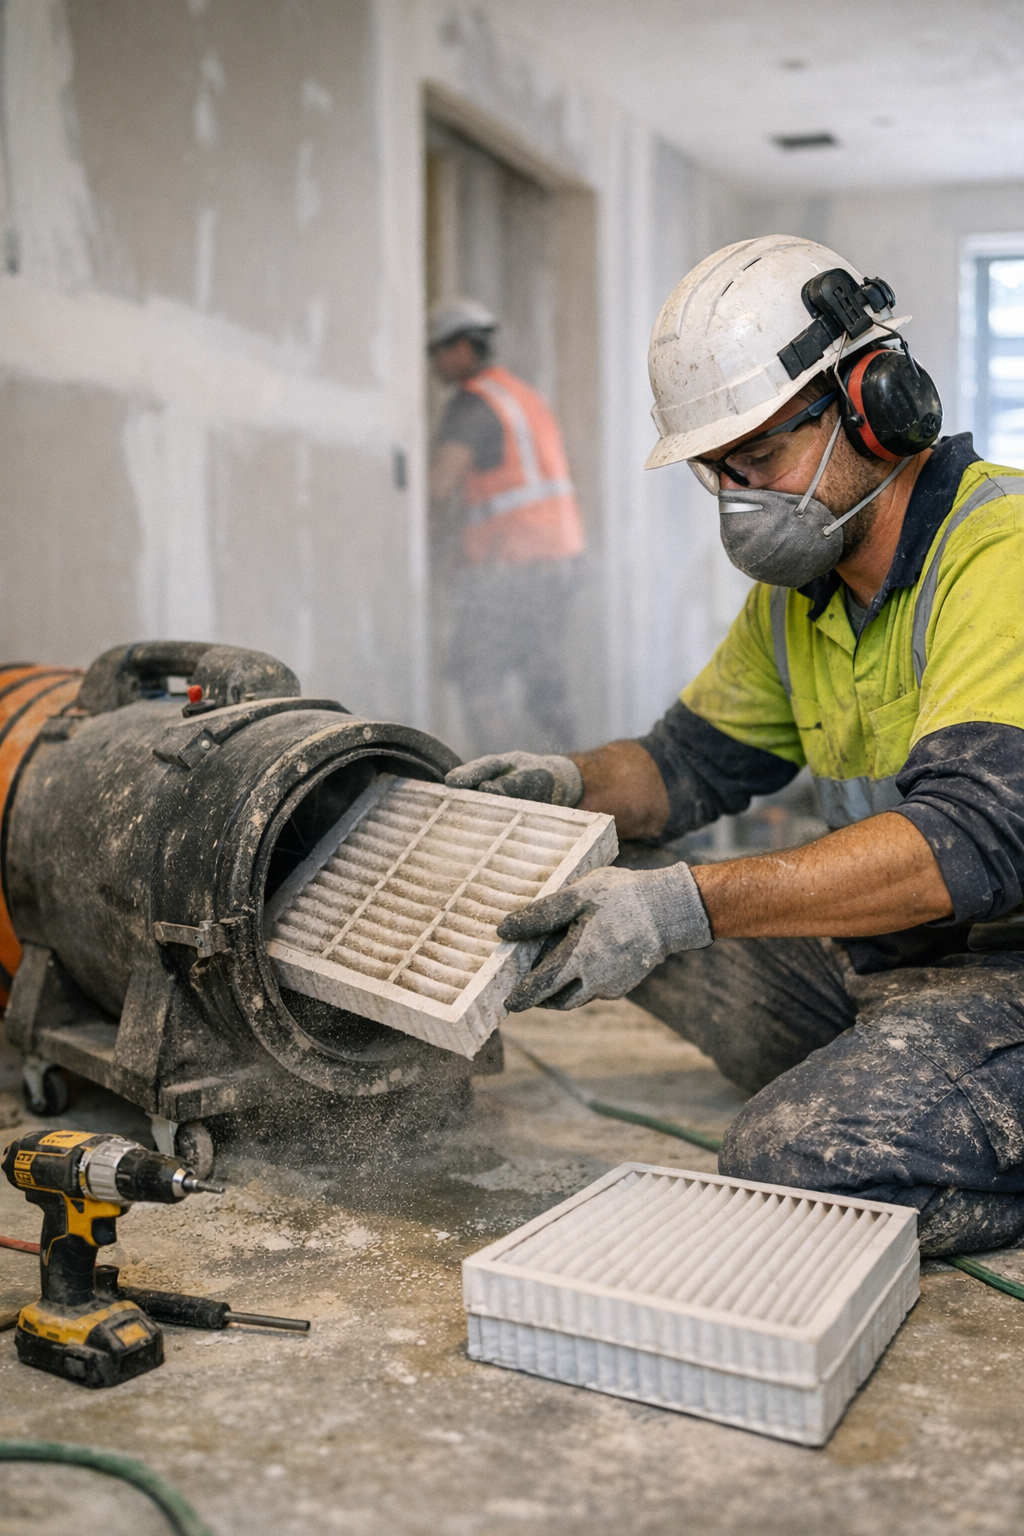
  • Why Regular Ventilation Fan Attachment Care Extends Equipment Life

    There’s nothing abstract about dust and poor airflow on the job—it’s what turns an eight-hour shift into a true endurance test. Midway through a sanding day, or right as you’re setting up for another pass with the cut station, you notice it: the stale heaviness in the air, a creeping rasp in your throat, the weird hum that rides the background. It’s not just inconvenience. It’s wasted energy, slower cleanups, lost focus, and the mounting pressure of knowing that your ventilation—supposedly your backup—is now the point of failure.

    That breakdown rarely starts with the tool itself. Most times, it’s the attachments—the shrouds, filters, and cuffs you slapped on because “they fit”—that quietly turn a solid fan into a stalling, straining headache. Raw horsepower won’t save you if your seals are loose or filters are choked. The devil’s in the details: a brittle edge on your shroud, a filter left in one shift too long, a coupler flexing just enough to bleed suction while you’re neck-deep in drywall dust.

    Overlooked Attachment Issues That Drain a Workday

    The little signals show up before anything dramatic happens. Maybe the fan starts hesitating when you punch it on, or you catch tiny flurries of dust riding right past your setup after you finish routing or drilling. Ignore these—and you’re not just risking a messy job. You’re inviting downtime, half-clean surfaces, and the kind of air quality that leaves everyone foggy and spent before noon.

    Common trouble from neglected attachments:

    • Airflow that quietly drops by the hour—sanding debris and sawdust outpacing your exhaust
    • More ambient noise, making simple calls or directions a strain over grinding, sawing, or cutting
    • Dust sneaking past worn seals, only to be discovered after inspection or when it’s too late to avoid the re-clean

    Run that a few shifts in a row, and suddenly you’re spending more time tracking down issues than moving onto the next task. What should be an assist becomes a handicap—especially with back-to-back jobs lined up.

    When Attachments Go From “Works Fine” to Real Risk

    It’s not enough for two fan filters or shrouds to look similar on the bench; on site, the gap is real. The difference shows up under actual pressure—when you clamp on to catch the fallout from aggressive sawing or during a fast round of taping and sanding.

    Attachment fit isn’t cosmetic—it’s control. Sloppy seals mean drifting dust and wasted airflow. A crisp, snug shroud keeps suction directed, debris corralled, and prevents those faint rattles that echo as the day stretches on. But the moment your attachment loses tension, it’s obvious: more vibration in the grip, dust trails at your corners, and a low-level sense that everything is just harder than it should be.

    In spaces that demand discretion—late-night floor installs, hospital maintenance, client-facing remodels—a shaky attachment is more than a nuisance. Noise climbs, fans strain, and what should be routine turns into fatigue territory, both for your tools and your team.

    Field Example: The Filter That Slipped—And Set You Back

    End of day: drywall’s been sanded, and you’re racing the clock before the walkthrough. The fan’s familiar; the filter’s seen a dozen jobs, but today it presses in loose. Twenty minutes in, the ventilation smells faintly chalky. The air’s stubborn, your own dust mask clogs too fast. You finish, but post-inspection there’s grit where there should be clean finish. That “swap filter later” decision? It means staying late for a forced re-clean, or explaining to a site supervisor why corners didn’t pass muster.

    Those five quiet minutes to swap a fresh filter are what save a whole day’s output—and your reputation—from preventable callbacks.

    Better Habits: Small Tweaks, Real Time Saved

    Most pros are guilty of riding attachments “one more shift.” But every time a filter goes just a little too long, you’re gambling with suction consistency, tool strain, and mental drag. Wait for the whistle or that first puff of visible dust, and you’re already losing time—usually right when it matters most.

    After one too many fan stalls mid-shift—always in the middle of cutting or hung up sanding—we shifted the routine: swap every 40 hours, not just when filters look ragged. Suddenly, airflow was steady, motor noise dropped, and fans finished out their shifts without overheating or bizarre stutters. No more mid-job resets, no more guessing when things would fizzle. That rhythm lets you move from one task to the next—saw, sand, sweep—without dreading an unexpected tool failure.

    Quick Habit Change: Mark Every Install Date

    Looks aren’t enough. Keep a marker handy and note the install date right on the filter or shroud. It’s a tiny move that ends the “was this last week or last job?” guessing game—and keeps weak attachments from sabotaging a critical day’s work.

    Catching Problems Early—So Your Tools Don’t Fail When It Counts

    It’s easy to tune out the warning sounds and settle for “pretty good” air. That faint whirr, that hint of dust vibing at the edge of your workspace, the sluggish ramp-up when you’re in the middle of back-to-back drilling runs—they all build up. Ignore them too long, and you’re left scrambling, losing momentum, even risking failed inspections.

    In real job flow, every adjustment matters. Whether you’re swapping between finish work and fast demo cuts, running late-night sanding, or keeping a micro-shop fresh during a nonstop week, keeping attachments sharp and rotating filters before breakdowns become visible stops problems before they cost you time, energy, and authority.

    Maintenance isn’t empty routine. On a demanding shift, it’s what keeps your day moving—and your results solid—no matter how much dust, debris, or unexpected overtime tries to slow you down.

    http://gumboll.myshopify.com

  • Why Strict Closet Systems Fail When Energy Runs Low

    Everyone loves that first glimpse of a newly organized closet: rows of shirts lined up, bins sitting like sentinels, everything freshly folded and labeled. But three days later, the reality of daily life sinks in. You’re reaching for socks while half-asleep, nudging a stack of t-shirts to grab the only clean one at the bottom, or shoving a hoodie on top of a too-full shelf. The order that looked effortless Sunday evening starts to fray before the week’s even half over.

    Why “Picture-Perfect” Setups Break Down

    On day one, tightly assigned spots and hard-edged bins seem logical—the closet has zones, each item a home, nothing wandering. But it’s an unnatural pace to maintain. Routines don’t pause for the system: kids come crashing in for soccer gear, your partner moves stacks to find that one missing shoe, or you’re late and barely toss things back. A single sluggish morning or a couple of nights skipping the full reset, and the uniform rows dissolve into something almost—but not quite—organized.

    Real habits always win. Even with the best intentions, most days don’t run on closet discipline. Shirts meant for one pile land sideways on another. Folded stacks slide out of square each time you reach in. Overflow builds on empty shelf corners. Soon, it takes just a day or two for a “finished” closet to slip into a repeat cycle of half-kept categories and improvisational storage decisions. If you’ve ever found a winter scarf tangled with last summer’s shorts, you’ve felt this drift firsthand.

    The True Everyday Pain Points

    It’s not just the big messes. It’s friction in the in-between moments. The stack of jeans that collapses when you fish out the bottom pair. The labeled bin for hats that now holds hats, gloves, and a jumble of mail. The shelf that was supposed to be “sportswear only” but becomes a catchall by midweek. Entryways tell a similar story, with shoes spilling into traffic lanes and mittens quietly annexing every available slot.

    Overflow and the Trap of Not-Quite Clutter

    Most of the time, it happens quietly. There’s still the illusion of order—nothing dramatic, just little trade-offs: slippers wedged behind a backpack, workout gear overtaking the “jackets only” hook, or folded stacks slowly giving way under the weight of one-more thing. The closet’s surface might look okay, but reach for something, and you’re met with resistance—items jammed tight, categories bleeding into each other, grabbing one thing always displaces two more.

    Resets: Where Systems Succeed or Fail

    The toughest test isn’t first setup—it’s whether you can quickly bounce back from everyday chaos. If restoring order means emptying half the shelf to fix one stack, or unloading a bin to get things back in their lane, resets start to slip. Low-energy days or busy evenings make strict boundaries impossible to enforce. Instead of a 60-second straighten-up, you’re looking at a half-hour re-sort nobody wants to tackle. Little messes layer up; “almost organized” quietly becomes barely managed.

    What Actually Happens Between Mondays and Fridays

    Imagine the morning rush: you’re already running late, rifling for the right shirt. In the process, half the stack slumps, and you cram it back however it’ll fit. The next day, you do the same, but now the section meant for folded shirts morphs into a jumble, scattered with a loose sock or a gym band. By Thursday, bins are mixed and shelves have surrendered any last sense of division. What looked like clear zones five days ago now feels like pure improvisation.

    Flexible Zones for Real-World Closets

    Rigid systems are no match for messy mornings. Storage setups that last build in the flexibility to absorb off days and imperfect returns. Swapping tight dividers for larger baskets or grouping all “everyday shirts” in one open zone makes post-chaos resets easier and much faster. Instead of fighting against the grain of your daily habits, the closet adjusts—accepting quick stashes and rough returns without the system unraveling.

    This isn’t giving up on structure; it’s getting smarter about where you need it. Keep categories for high-use items loose and accessible—easy to drop in, easy to pull out. You don’t need absolute order for order to work. The faster things can get back in place (even if “place” is a bit fuzzy), the less the chaos spreads. A closet that resets in a minute with a little sweep is one that stays usable all week—even when life gets messy.

    Dialing In on What Actually Works

    Match the setup to your real rhythms—not your “someday” self. Notice the spots where things always slip and adjust those rules first:

    • Store your frequent-rotation clothes at chest height, so you’re not always reaching behind or shifting stacks to grab what you wear daily.
    • In high-traffic spots, replace tightly labeled bins with open baskets. Wide categories (“all workout gear” or “kids’ outerwear”) survive everyday chaos much better than hyper-specific ones.
    • Leave “free space” every few shelves or cubbies—a built-in buffer for laundry days, midweek overflows, or that random oddball item that has nowhere else to land.

    Apply this logic in any zone under pressure: entryways, laundry rooms, even mudrooms. Open baskets beat narrow cubbies for catching hats, water bottles, and scattered chargers. The goal isn’t immaculate order—it’s resilience, so when routines stretch or break, your space flexes instead of falling apart.

    Spotting Trouble Before it Spreads

    Clutter rarely erupts all at once—it seeps in, item by item. The pile that grows unaddressed. The stack that teeters until nobody wants to touch it. The system that can’t be reset quickly becomes the system that gets ignored. The fix: set up so you can course-correct tiny missteps in seconds—one stray shirt, one mixed bin—before the mess grows muscles. No ten-minute restacks, no guilt spiral, just an easy path back to usable order.

    Choose Resilience Over Perfection

    The closets that actually make life easier aren’t the ones that look untouched in magazine photos. They’re the ones that help you recover after real, hectic days. When your storage setup lets you shrug off a bad week and restore order in sixty seconds—not sixty minutes—daily stress drops. A closet that bends with your habits is one you can actually keep using, not just admire once it’s freshly cleaned.

    Find practical closet storage solutions that match your real routines—and help your home work better every week—at ClosetWorks.

  • Why Placing Heavy Items Low Transforms Workshop Shelving Stability

    The problem isn’t that your garage storage looks bad—it’s that it keeps letting you down when it matters most. That flawless shelf line, that “organized” corner, the wall rack showing off all the right bins: at 7am, you feel set up. By 7:10, reality bites. Grab the heavy cooler from up top and the entire shelf shimmies. Wheel out the rolling cart and every nearby box shifts just enough to block your way. What looked tidy yesterday now turns into a stealth obstacle course. In the garage, the shed, or any unforgiving utility zone, it’s not being organized that matters—it’s whether your setup actually works under real, everyday pressure.

    The Daily Sabotage: When Storage Fights Back

    That modular shelf you built out with perfectly spaced bins and neat open space? It only behaves for the photo. In the friction of daily use—swapping a tool, grabbing the salt mid-storm, wrestling out the awkward floor jack—it starts slipping. You finish one clean reset only to face a new pile inching closer to the door by the next morning. That rolling cabinet you used to slide out with one hand now sticks, blocked by bins that never get put back up top. The walking lane you count on shrinks, narrowed by the gravity of “just for now” overflows. Fitting things in was easy; keeping them clear and accessible isn’t.

    Top-Heavy Trouble: Where Setups Tip from Order to Chaos

    Here’s the trap: heavy stuff stacked high doesn’t just create a risk—it breaks the entire flow of your zone. You meant for those upper bins to hold just seasonal gear, but soon the big toolbox is up there too. Each time you reach, the unit rocks or you steady it with a hip. Move a mobile rack and—wait for it—the tilt makes you cringe a little, so you wheel it less and leave it half blocking everything. That once-logical arrangement hides a quiet instability. The more you reach, rearrange, and adjust, the wobblier it gets—and the more likely you are to dump overflow on the floor or stuff “temporarily” into whatever corner hasn’t been blocked yet.

    Where “Organized” Means Blocked Paths and Slowdowns

    Before the mess even registers, you’ve lost flow. Instead of quick access and smooth resets, you find yourself detouring carts just to get through, squeezing around that always-in-the-way bin, or bracing racks every time you touch something heavy. Wall space looks full but isn’t truly useful; the best walking path gets parceled out to boxes waiting for a real home. Good storage on paper often devolves into bad movement and slow, awkward routines. A setup meant to solve chaos quietly becomes another part of the clutter cycle—never really letting you move, restock, or reset without stopping to fix something first.

    The Shift that Fixes More Than You Expect

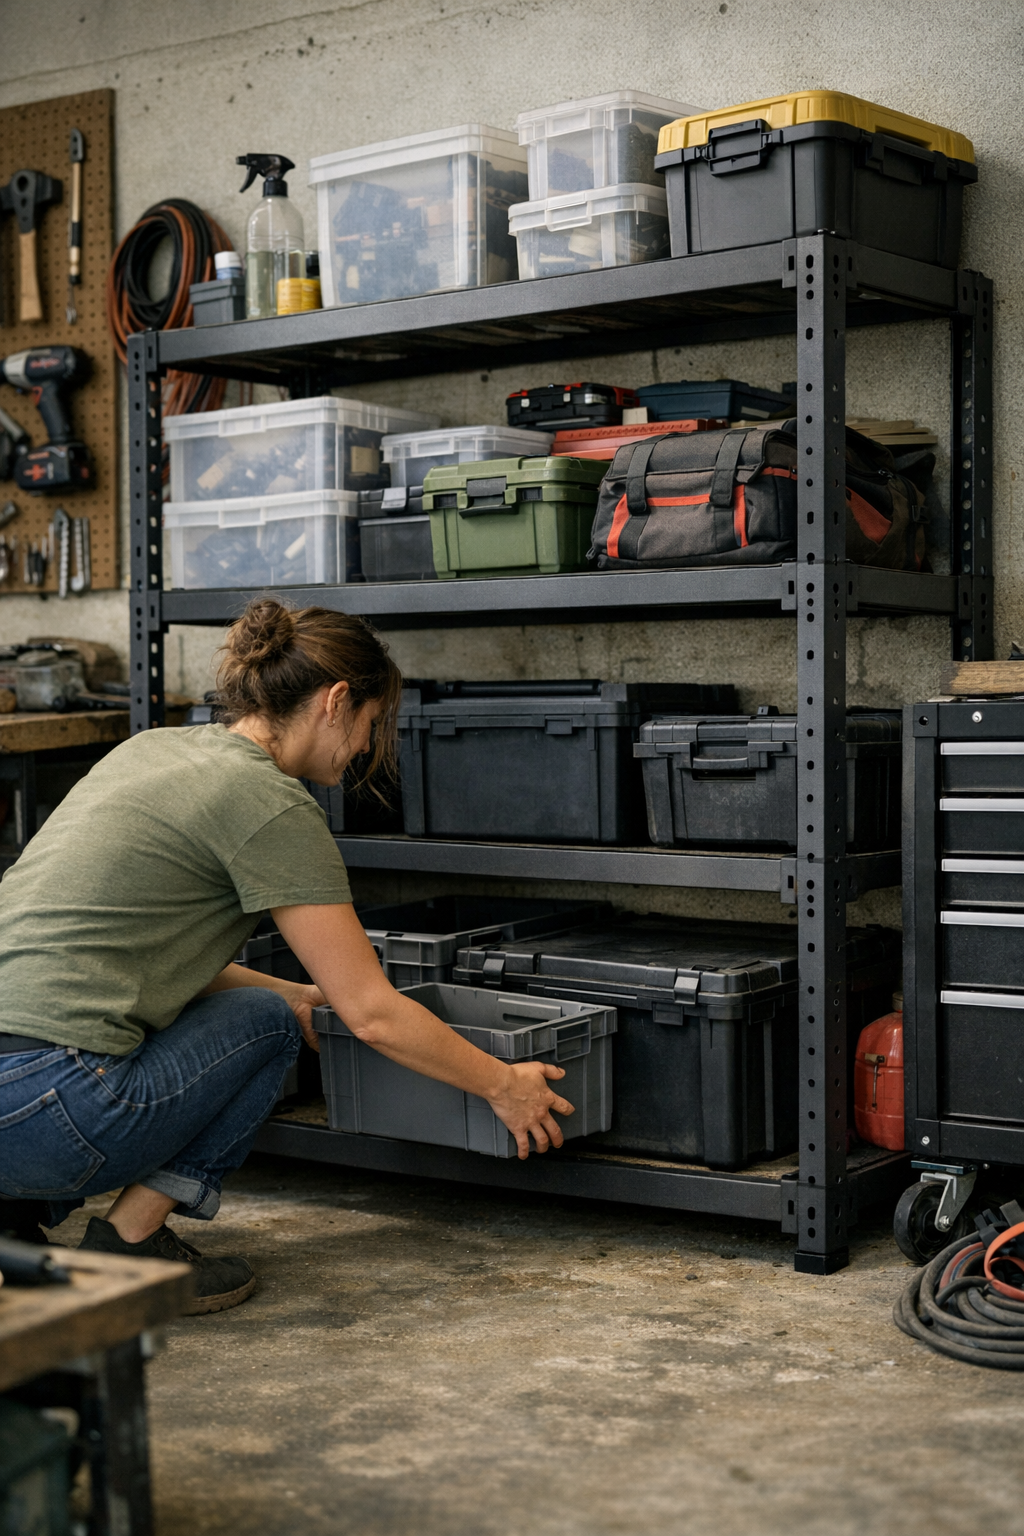
    There’s one reliable move: always anchor your heaviest loads low, no matter how inconvenient it seems at first. Resetting means more than making the frame happy—it completely changes your daily routine. Drop those stubborn bins of winter salt or auto parts down to the lowest shelf. The structure stiffens. The swaying, that instinct to brace things before pulling, simply disappears. Mobility returns; the cart stops snagging. You stop doing small acrobatics every time you try to get something out or put it back. Light gear up top, heavy gear in the base—suddenly, the system doesn’t nag you for attention. It just works, quietly, for the fiftieth time as well as the first.

    If your reflex is to grab a shelf for balance before removing something, it’s a red flag you’re living with top-heavy tension. Even shifting a few dense bins to the ground shelf breaks the feedback loop of wobble, blocked paths, and slow resets. Setups aren’t just about “where things go”—they’re about how you move.

    Real Use, Real Difference: See It in Movement

    Dragging weight down on paper doesn’t change your garage’s footprint. What it does is strip away all those unconscious little workarounds—pushing carts sideways to open a lane, stashing things in dead corners, taking two trips to avoid a teetering bin. With the heaviest supplies grounded, your flow kicks back in. Lighter stuff up high? No more shelf shivers or surprise avalanches. Even if bending for winter tires means a few squats, trading that for a clean access lane is a win.

    The value creeps up every time you walk in for a fresh round of sorting or find yourself reaching for that tool cabinet at speed. The routine—use, return, reset—runs smooth again. No last-minute shuffling to uncover a handle. No backing out bins just to reclaim the floor. The right anchor points let the storage fade into the background and the work take center stage, instead of the other way around.

    Spot Check: Forget “Pretty,” Aim for Stable

    If you’re reaching out to steady a shelf, stop. It doesn’t matter how sharp the setup looks. Stability is the test that counts. Put the heaviest, most stubborn objects at the lowest point. Judge the system by how it stands up to daily resets, not how it stands still for a photo. Aligned shelves stay put, quick returns stay quick, and your lanes keep open—even as seasons (and storage demands) change. No more re-stacking your best intentions every weekend.

    Stability Is the Single Upgrade That Outlasts Effort

    “Good enough” storage fades fast under real use. The difference between a barely-functioning setup and a truly reliable one is how steadily it protects your flow after dozens of uses, not just at setup. That’s why heavy-down, light-up isn’t a minor tweak—it’s the backbone for movement, access, and clean restarts. Make the swap one time, and watch as the rest of your area—previously a tangle of slowdowns—quietly, believably, stays available for work.

    You can browse modular options and zone-specific solutions at StackNest.

  • Why Proper Sealing Makes All the Difference in Remodel Ventilation

    Every remodel starts with hope—fresh trim, crisp walls, that satisfying last coat. But it only takes one sanding session to realize: mess is the part no one warned you about. Fine dust creeps past drop cloths and drifts through air that’s supposed to be clear. What’s worse? The ventilation fans you set up to control it can sabotage you if they aren’t tuned to the chaos of an actual job site.

    Where Dust Really Escapes—And Why “Good Enough” Isn’t

    Most of us grab a fan with the right CFM and figure, that’s settled. But on real jobs—think cramped garages, patched-up window frames, rooms with three paint-splattered extension cords snaking underfoot—specs stop mattering the moment you hit power.

    By evening, you’re chasing halos of dust trailing along windowsills, finding powder tracing every groove and latch you already cleaned. This dust isn’t random; it’s finding the same cracks at the fan edges or through the loose corners of leftover plastic wrap. Suddenly, a “pretty good” setup guarantees you’re wiping the same sill, again and again, just to keep it presentable.

    The Missed Details That Cost You

    This is where the frustration creeps in. Old sash windows never seat tight. A box fan pressed into the frame leaves a 3 mm gap, and that barely-noticed opening lets a day’s worth of sanding sneak right back inside. The dust lines you see later? They’re the record of every seal you skipped or bit of tape you thought you didn’t need.

    Picture a cabinet repaint: by round two with the orbital sander, the hardware should gleam. But instead, powder traces the hinges, and odd angles catch stray dust you thought was cleared. The job drags—you keep cleaning, and that haze in the kitchen light never actually fades away. Precision work can’t compete with migrating dust.

    Why Fan Ratings Disappoint in Real Life

    Temporary setups always start with optimism. Two fans, plenty of plastic sheeting, maybe even a new air scrubber. But midweek, you find yourself swapping clogged drop cloths and scrubbing floors more than sanding or cutting. That’s because, in the real world, no two fans perform equally once windows, tape, and jobsite clutter get involved.

    • Plastic sheeting sags or peels back as work drags on—dust slips through the soft gaps.
    • Window frames, especially in older houses, fight every attempt at a seal. Tape alone isn’t enough.
    • Big CFM? Worthless if edges aren’t tight. That dusty haze finds every weakness, no matter what the box promises.

    It doesn’t happen all at once. Three or four rounds of sanding, cutting, or popping nail holes, and those small islands of dust begin pooling in every corner you missed—pulling you into a cleaning loop instead of finishing the room.

    Real Scenes: Hours Lost, Edges Blurred

    You finish a round of trim sanding, flick off the fan, and leave for lunch. When you’re back, the air’s cleared a bit, but the sills and trim sport a ghostly layer—visible only when sunlight cuts in. Grit crunches under your boots, and the residue turns every painted edge sticky. The room is supposed to be ready for paint, but more hours will disappear into recleaning. Odd-shaped windows or warped frames only make it worse: sealing becomes improvisation, never precision.

    Older spaces make you pay double. Bowed frames, swollen wood, antique hardware that keeps the fan from ever sitting flush—the cleanup simply never ends. By the last coat, fatigue sets in, precision slips, and the final result looks less sharp than you planned.

    Quick Fixes That Actually Stick

    You don’t need an upgrade—just discipline on the details. Crews that get ahead often double up on their plastic sheeting at the fan, layering tape until every edge hugs the frame. Every seam or gap wider than 5 mm gets a fresh strip of painter’s tape, no excuses.

    There’s a night-and-day difference on the cleanup: fewer smudges, fewer haze complaints, and actual breathing room in the air. Cleanup shrinks to what’s reasonable, and finished surfaces finally stay finished. It doesn’t just feel better; the quality of your detail—painted trim or polished flooring—holds up under bright light and close inspection.

    Test every setup: run a strip of tape in front of the fan and watch its movement. If the tape hangs limp or flutters away from the window, something’s leaking—stop, seal, and check again. Five extra minutes now means saving yourself hours later.

    Field FAQ: What Survives in Tough Jobs?

    Will a cheap box fan ever be enough?
    It might—if you obsess over sealing and check it every round. Don’t skip filtration if fumes are part of the job. Without attention, box fans leak fine dust or paint vapor right back in; by the third sanding, you’ll see the film where you don’t want it.

    How do you spot a lousy seal before it ruins your finish?
    After your first round, look for sharp dust lines at the far ends of the room, a slow buildup in corners, or a faint stickiness on what should be a clean surface. Even a passing hand over painted trim picks up grit—clear signal something escaped.

    Quickest improvement if you’re stuck?
    Don’t overthink it—seal every edge. Double up plastic, fix weak spots with fresh tape, and target any gap, no matter how small. If you keep finding dust, reassess not just the fan, but your entire fit. Sometimes swapping the direction, or re-pressurizing the setup with a different window, changes everything.

    The Payoff: Containment That Works—Not Just on Paper

    Perfect control? Rare. What really matters is a system that adapts—not one that just looks good for a walkthrough. Jobs go smoother, and detail work holds up, when you embrace tight sealing as routine—not luck.

    No tool or accessory beats minutes spent tightening up seals. If you notice haze, tacky residue, or still have to vacuum after every stage, trust what you see, not what the box claims. In real remodels, control is earned setup by setup—and the best crews know their sharpest competitive edge isn’t a fancier tool, but tighter, smarter staging before the first cut or sanding pass.

    http://gumboll.myshopify.com

  • Choosing Between Wire and Solid Shelving for Lasting Closet Organization

    The feeling of an organized closet is always temporary. You start with neat folded shirts, sorted bins, and a little pride in the new order. But by midweek, stacks are slumping, socks have gone wandering, and the space is slipping back to chaos. It’s not just habit—more often, it’s your shelving setup staging a quiet rebellion against your routines. The difference between “looking organized” and keeping things in check day after day lives in the details of how your shelves perform under real pressure.

    Wire vs. Solid Shelving: Where the Friction Actually Starts

    At the install, wire and solid shelving seem equally serviceable. Both hold clothes, display baskets, and offer that temporary sense of newness. But with regular use—the quick reach for your favorite tee, the scramble for a matching sock, or the daily shuffle of stacks—friction accumulates. Suddenly, shelf type shapes whether your closet stays orderly or slides toward clutter that spreads fast.

    Wire Shelving: Light and Open, Until Things Start to Slip

    Wire shelves promise airiness, so your closet never feels heavy. The gaps mean dust falls away, and you can see what’s stored. But the day-to-day frustrations grow familiar fast:

    • Stacks that won’t behave: Each time you pull from the middle or bottom, every shirt up top shifts—or topples. Folded piles tilt and sink between wires, so “straight lines” are gone by Wednesday.
    • Small items escape: Socks, underwear, and accessories slip through the mesh or wedge into awkward gaps at the back. By Friday, finding a matching pair means plucking pieces from corners you never meant to use.
    • Visible wire marks: Pull out a favorite sweater and find it patterned with subtle grid lines from resting across the shelf’s metal supports.

    Inevitably, resets pile up: grabbing one thing demands you re-stack half your wardrobe. Shelves that looked ready-made for organizing quickly require daily intervention just to avoid a slow drift back to “random bin” mode.

    Solid Shelving: Stable, Predictable—But Demanding in New Ways

    Swap in solid shelves and routines start to feel less fragile. Shirts stay stacked. Yank one from the middle, and the rest hold still. Socks don’t vanish. Category lines—T-shirts, sleepwear, scarves—stay crisp through the week.

    Yet, you trade one compromise for another:

    • Mess on display: Spills, shed lint, or even a dribble of hair product are unmissable. The flat surface acts as a stage, not a sieve.
    • Trapped air, trapped moisture: Tightly stacked clothes and closed-off shelves can lock in dampness—a surprise when you grab a towel that hasn’t quite dried, or notice a faint musty pocket at the back of a packed shelf.

    So the maintenance shifts: less re-stacking, more quick wipes and occasional shelf airing. It’s a different rhythm—fewer resets, but new habits to maintain that “ready” look.

    Real-World Closet: What Actually Changes During a Week

    What plays out over seven days with each shelf style? Consider a reach-in closet once the “organizing high” fades and routines take over.

    Day One: Everything in Its Place (for Now)

    Start with pristine stacks, perfectly sorted bins, and categories so clear you wonder why this ever felt difficult. Wire and solid shelves both win the “after photo.” For a while.

    Midweek: When Reality Clutters Back In

    On wire shelves, your best-folded piles can’t take the strain. By Thursday, stacks are angling off center and socks have migrated behind the bins. A quick search for one T-shirt means nudging everything else, and the “sections” you started with blur into each other.

    Solid shelves? Stacks stay aligned. But now a leaky lotion bottle has left a tell-tale spot, or last night’s dark scarf has dusted off lint everyone can see. Nothing’s shifted, but the cleaning list grows. And on both shelf types, a frantic morning can still create a quick “all scarves in one pile” situation.

    The real test is repetition: Wire shelves sap energy through constant re-alignment. Solid shelves save the stacks but shift your work to visible mess—trade-offs, not miracles.

    Resets and Retrieval: Where Time Gets Lost

    No closet escapes the need for resets—a five-minute evening sweep to fix the day’s chaos. But on wire, it’s more like ten: grabbing a sweater from underneath means everything above has to be tidied too, and bins that started separate start blending contents. Categories erode not by neglect, but by repeated use pushing against a flimsy foundation.

    Solid shelving keeps order stronger. Resetting usually means a single dust-wipe or replacing a bin gone astray—not fishing socks out of the wire grid or restacking toppled shirts. It’s still real work, but the chaos is more contained.

    Access Points: The Little Moments That Matter Most

    Where shelving truly matters is in those daily “why is this harder than it should be?” moments:

    • Grabbing from the bottom: On wire, the risk is a full-stack collapse. Solid shelves hold their shape so you can slide a shirt out without triggering an avalanche.
    • Finding both socks in the same place: On wire, small things disappear through gaps or slowly migrate out of easy reach. On solid shelves, pairs stay together—less hunting, less bending.
    • Bins behaving badly: Wire shelves let stuff fall into the cracks between bin and shelf edge, so categories blur fast. Solid shelves keep contents in place, though you’ll see every crumb and dust fleck after a week of rummaging—a cue for a quick clean, not a major overhaul.

    Simple Tweaks for Smoother Days

    Real-world closet maintenance isn’t about starting over. Washable shelf liners on solid surfaces buffer against drips and messes—toss them in the laundry and reset is done. For wire, rigid-bottom bins are heroes: socks, underwear, ties, and the lost-and-found stay corralled and can be lifted out, not fished for under the grid.

    One practical rule: Put your daily-use items at mid-level—within easy reach and less likely to be disturbed. No matter the shelf, the less you disrupt, the more categories stay stable, and the faster a five-minute reset actually feels like five minutes.

    The Bottom Line: Shelf Type Shapes Your Everyday Routine

    If “organized” requires a full closet reshuffle every other day, something’s broken. The right shelf setup isn’t about showroom looks—it’s about real-world access, clear categories that resist chaos, and resets that don’t balloon in effort.

    Wire shelves offer openness and airflow, but make you pay in constant fuss and blurred boundaries. Solid shelves deliver steadier stacks and more dependable categories, but the cleaning is real and the air doesn’t always flow to the back corners.

    No shelf solves everything—but noticing exactly where your closet slows you down lets you adapt. Sometimes it’s a matter of bins, liners, and shelf-level moves. Sometimes, it’s swapping shelf types entirely. What matters most: your daily routine runs smoother, categories stay intact, and resets get shorter—as a closet should enable, not undermine.

    For more ways to match your shelving to your daily storage habits, visit ClosetWorks.

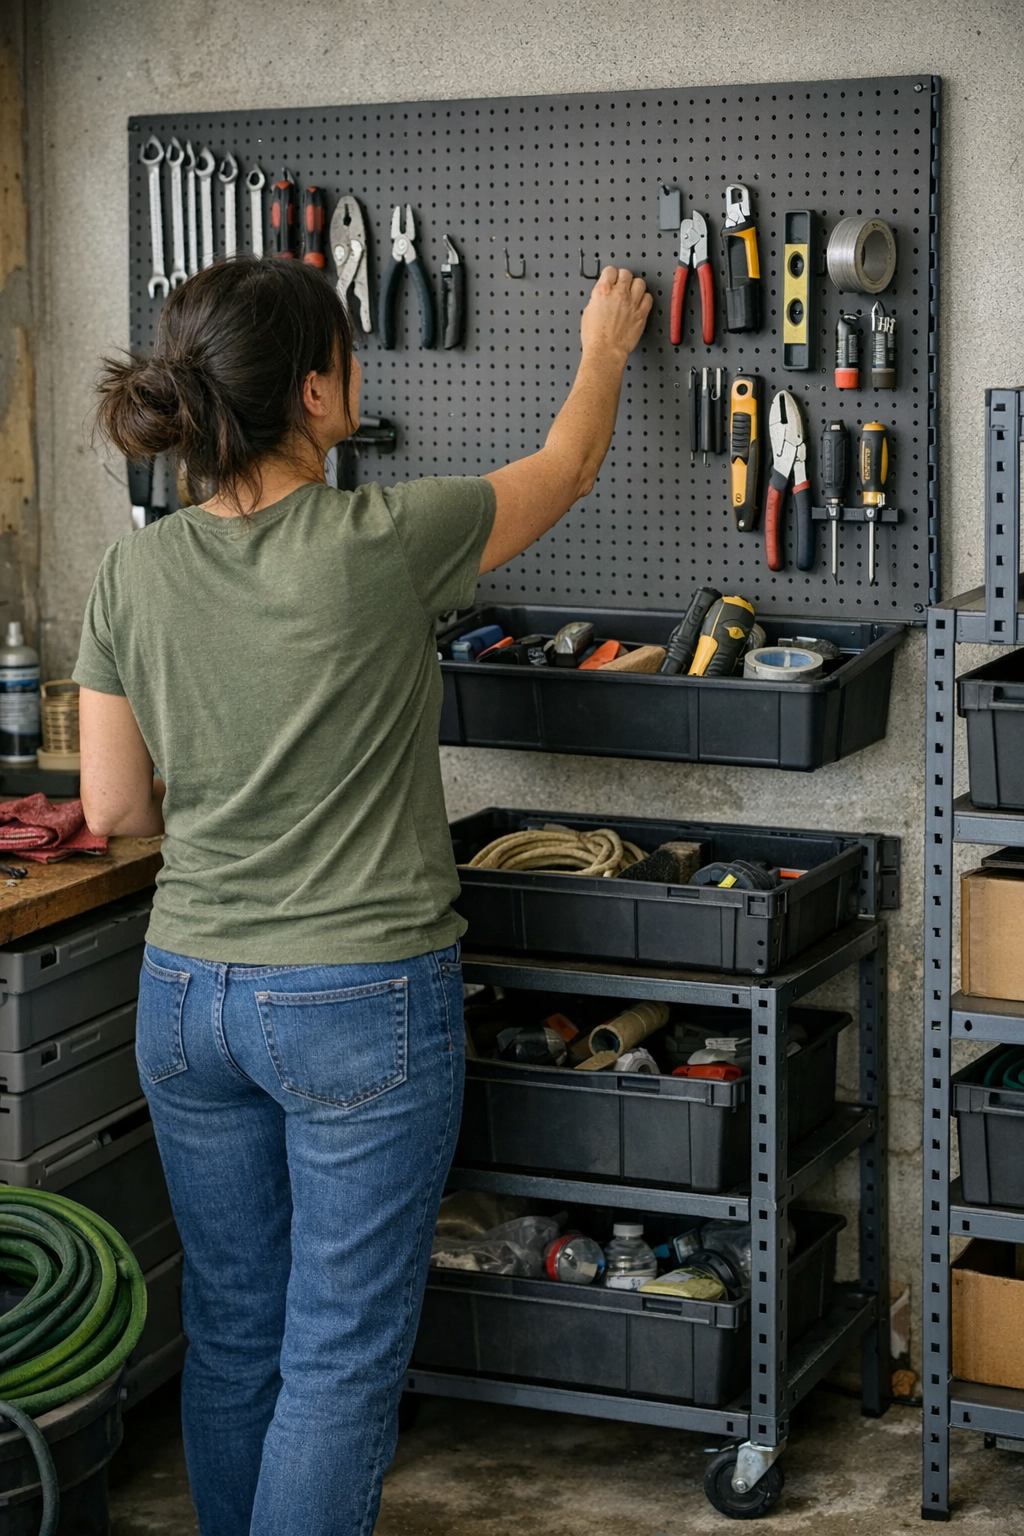
  • How Pegboard Layouts Reveal Missing Tools and Disrupt Workflow

    Where the Clean Pegboard Wall Works—And Where It Fails

    Finishing a fresh pegboard wall in your garage or workshop feels like crossing a threshold. Hooks snap in, hammers line up, and suddenly every tool has its moment in the sun. For one bright afternoon the setup is pristine: wide open sightlines, exactly spaced groupings, nothing buried or lost. It’s not just the satisfaction of order—it’s that flash of hope that maybe, finally, grabbing a tool won’t disrupt your flow. No more basket digging or drawer searches. Just walk up, pick up, get to work.

    But then real life moves in. Within days—a rushed repair here, a borrowed tool there—the wall’s perfect logic sags. Each gap shouts at you, clutter creeps in, and grabbing what you need quietly gets slower. The wall promises efficiency, but the moment your hands are full or routines fray, the openness starts to betray the setup.

    How Return Friction Creeps In

    Pegboards thrive on visibility: everything’s right there, until what’s missing jumps out just as sharply. It’s not an obvious flaw on day one, and it isn’t sabotage—it’s the reality of actual work. A wrench set aside to “put back later” during a midday rush, a neighbor wandering off with your all-purpose pliers, or a late project wrap-up where tools are tossed on the nearest surface instead of reset on their hooks. The instability multiplies with the pace of use.

    The next day, you grab for what’s gone, your eye landing on a blank hook. Instead of a smooth sequence, you pause, reverse, and retrace steps across the room—double-checking benches, glancing behind the rolling cart you had to shift just to open up space. Multiply that little stall by a week’s worth of tasks, and the wall’s clean design reveals itself as a brittle system: it only holds up when every reset is flawless, every time. That’s not routine—it’s wishful thinking.

    Openness Becomes a Signal for Disorder

    Pegboards sell the vision of everything on display, while closed cabinets gently hide your mistakes. At first, the exposure feels empowering—tools are uncrowded, arrangements seem obvious. But the cost is relentless: the second a screwdriver skips its return, the whole row looks crooked. One empty hook halts your eye every pass. Clustered tools—three on a spot meant for one—turn from “at least I put it back” into a silent mark of friction. The wall won’t shut up about it.

    Worse, in shared or busy garages, your missing wrench is now everyone’s problem. One person skips a reset, another starts a wild goose chase. You notice two trips across the room for the same item or end up circling back just to double-check that the open gap isn’t hiding a tool wedged behind a cabinet again. The wall is meant to save time, but each little return failure ripples, breaking momentum and dragging everyone into minor, repeating searches.

    The Mess of Routine in Motion

    Picture a typical rush: you’re up early to fix the garden gate. Drill in hand, you cross to the bench for new bits—and the tool stays on the bench, “just for a second,” while you field a call. By the time you return, the wall shows only its empty outline. You’re hunting behind the rolling chest (had to nudge that aside, again), squinting around the shelf edge, picturing whether you left the tool in another corner.

    Busy weeks layer extra chaos. Tools moving between wall hooks, drawers, temporary shelves—each detour adds up. One area turns into a dumping ground for overflow. The top of a rolling cart becomes a tool graveyard. That enticing wall, all lines and logic, now blocks fluid movement. Dead corners never fill in. Reset discipline dissolves: it “looks” organized, but really, you’re working around the setup more than through it. Instead of freeing up the floor and reducing cross-room traffic, the wall becomes another slowdown. What you see matches the ideal; what you feel is more stops, more redundant motion, more awkward maneuvering to reach a basic tool.

    Relief in Real Tweaks: Add a Bin, Change the Flow

    A truly functional pegboard isn’t the one with perfect rows and no clutter—it’s the setup that cushions the blows of actual, imperfect routines. The tweaks that matter most are often small but decisive. Shift your highest-use tools to the most reachable spots—think shoulder height, near the main work zone, never behind something you’ll keep dragging out of the way. Then, add a narrow shelf or shallow bin directly under the board. When you’re mid-project, and resets slip, that space catches overflow instead of letting it sprawl.

    This one move changes the texture of everyday use. You’re no longer forced into an all-or-nothing reset. Stray tools can land one step from their hook, buying you time without visual disaster. Floor space stays clear, and you stop tiptoeing through growing clutter islands. Shared garages see fewer finger-pointing debates, because the system now flexes for normal busy overlap. It’s not about giving up on order—it’s about making sure small lapses don’t snowball into major stalls.

    Pegboards vs. Cabinets: Real-World Trade-Offs

    Don’t fall for storage fantasy. Closed cabinets feel clean—until a bad drawer stacks up a year’s worth of mismatched gear, invisible until you’re forced to dump it all and start over. Pegboards make your system’s strengths and failures public: there’s nowhere for chaos to hide, but every glitch grabs your focus. If your setup helps tools get reset naturally—preferably as the last step of the work, not an extra ordeal—the wall stays clear and the routine stays quick. If not, openness just means more “Hey, what’s missing now?” moments.

    The pegboard is not the hero or the villain; it’s the test of whether your storage fits the pressures of your real routine. Does the wall encourage the right returns, or does it break down under a week of actual mess?

    Designing for Reset, Not Perfection

    A pegboard shouldn’t be a static display. Its worth comes from supporting the random, messy churn of repeated daily projects. That means:

    • Cluster your high-touch tools in your true action zone, not across the garage or blocked by a rolling shelf.
    • Add catch-all bins or ledges for tools in motion; let them serve as short-term landing pads, not permanent clutter pits.
    • Treat open gaps as feedback, not failure—move zones, rethink access, and adjust the wall when patterns keep breaking down.
    • Let go of showroom standards. Clarity and speed matter more than the illusion of an untouched wall.

    Your setup should survive sloppy resets and hectic weekends—not just look good after a half-day purge. The right adjustments reduce wasted steps and dead corners, letting you grab, return, and keep moving even when life refuses to slow down.

    Pegboard walls aren’t a magic fix. But when built with honest reset routines—where an imperfect return doesn’t logjam the flow—they become a lasting asset, not a recurring frustration. Aim for a wall that supports the chaos, not one that’s undone by it.

    Explore more practical storage setups and solutions at StackNest.

  • Why Adjustable Closet Shelves Outperform Fixed Options Over Time

    Closet shelves—the quiet accelerators or slowdowns of your daily routine. At first, the choice between adjustable and fixed shelves can feel like an afterthought. But fast-forward a few weeks into real life—rushed workdays, laundry catchup, last-minute swaps—and that detail quietly starts steering how your closet actually works under pressure. Shelves that seemed well-planned on install day soon reveal where efficiency holds, and where daily habits hit frustrating snags: that extra sweater that won’t quite fit, the tangle of shoes at the bottom, the stack of shirts that’s lost its shape by Thursday. The organization you started with slips, replaced by recurring micro-battles against clutter—and how your shelves are built is at the heart of it.

    How Closets Slide from Order to Overflow

    Fixed shelves deliver that immediate, showroom-worthy look. Shoes in a line, shirts neatly stacked, space mapped out by type. But give it two weeks—season changes, shopping trips, a busy family morning—and the seams start to show. Need to fit in new boots? You end up cramming them in wherever there’s a gap. Grab a bag from the bottom? Now you’re digging through a pile. Bins that were once sorted get mixed as you shuffle to find space for winter accessories. The edge where one category ended and another began blurs fast, and soon you’re bracing a stack with one hand just to pull something from underneath. It’s not chaos, but it’s slow, and it doesn’t reset with a quick tidy. Every reach, every restock, is a reminder—these shelves set the rules, not you.

    Why Adjustable Shelves Shift the Everyday Reality

    Adaptability isn’t a bonus upgrade—it’s a lifeline for real-world use. The biggest difference with adjustable shelving is felt on ordinary days when your routine flexes. Shoes spill from a gym trip? Raise the bottom shelf for fast toss-back. Winter sweaters crowding out tees? Drop a divider shelf so each stack stands alone, instead of merging into one toppling column. A tall tote bag that won’t fit anywhere? One minor reposition and it’s effortlessly slotted, not awkwardly wedged.

    The strength isn’t in the aesthetics—it’s in the reset speed. Adjust, stack, and slide bins without unearthing an avalanche. Edge lines stay crisp, categories stay divided, and you spend less time reshuffling and more time seeing exactly what’s there. The tiny pin holes fade into the background next to the time you save never double-stacking again.

    Scenes from the Closet Frontlines

    Consider a family entryway on a rainy Friday. By the end of the week, the shelf is a patchwork of shoes kicked behind other shoes, gloves tumbling out of bins, backpacks teetering on top. If the shelves are fixed, everyone’s fishing awkwardly—reaching behind boots to find sneakers, accidentally mixing hats in with shopping bags. The aftermath? A permanent bottleneck, slow mornings, and an open invitation for clutter to just spill onto the floor.

    Switch to adjustable: five minutes, a shelf clicks up, and suddenly boots and gym gear have a home under one section, while gloves and hats settle in organized trays above. Instead of improvising a “temporary” pile, there’s just enough breathing room. Cleaning up isn’t about major overhauls—it’s about slotting things back where they belong, quickly, before the clutter cascade even starts.

    Where Fixed Shelves Still Serve (and Where They Don’t)

    There are spaces where fixed shelving works just fine: a library of identical books, or a guest room with neatly folded linens that barely move between seasons. But closets—especially in homes where needs shift with weather or lifestyle—rarely look the same for long. That’s where the cracks show.

    Tall or irregular items are the pressure test. With fixed shelves, you’re often wasting that extra six inches above a sweater stack, or you’re forced to pile higher than is practical. Reaching for a light jacket means moving three big sweaters, and putting anything away usually means breaking the stack again. After a few rounds, all those neat divisions dissolve, and “organized” becomes more about appearance than function.

    The True Differentiator: How Fast Order Can Be Restored

    Few people look forward to the monthly closet reboot. Fixed shelves guarantee this will take longer—moving stacks, accepting awkward gaps, and resigning yourself to living with sagging piles. The edge that was once flawless becomes a seesaw. Even when technically “put away,” nothing is easy to grab or return in a single step.

    Adjustable shelving stops the cycle. Raise a shelf a couple inches and the bottom is immediately useful again—boots, bins, backpacks find their zones with zero balancing act. The reset isn’t a project; it’s a natural part of the routine. Categories can be re-established, and the urge to start a new pile “just for now” fades away because there’s finally room for what you’re actually storing, not just what fit on opening day.

    Common Concerns with Adjustable Shelves—Answered

    Do adjustable shelves support real daily use?

    A quality adjustable shelf system, with sturdy pins and hardware, meets everyday needs for clothes, shoes, and household bins—without sagging or shifting during normal use. For especially heavy items, confirm load ratings, but for 99% of closet gear, adjustables hold steady if correctly installed.

    What about the look—are all those holes a problem?

    The real visual threat isn’t a row of discreet pinholes; it’s an untidy shelf edge, buckling under awkward, misfit piles. Spaced right, shelves give each group a home—meaning edges stay sharp, contents stay contained, and the scene looks managed, not make-do.

    And bulky items? Where do they go?

    This is where fixed shelves collapse as a strategy. Tall boots, helmet bins, or the out-of-the-blue winter bedding all force major compromises with fixed systems. Adjustable shelving turns that pain point into a quick solve: shift, slide, and it fits—no more abandoned overflow on the closet floor.

    From “It Looks Great” to “It Stays Great”

    Every closet starts organized; most don’t stay that way. The real test is three months in: does putting something away feel easy, or do you flinch at the thought of yet another re-stack? Fixed shelves guarantee initial order, but rarely adapt as real life intrudes. Adjustable shelves do what storage is supposed to—bend to fit your needs, not the other way around. The system moves with you, making small resets a normal part of every week, not an exhausting event. Clear lines, fewer piles, and a setup that’s ready for whatever comes next—most days, that’s the advantage you feel, every single time you open the door.

    Ready to build storage that fits around your real life? Explore ClosetWorks for more ideas and practical solutions.

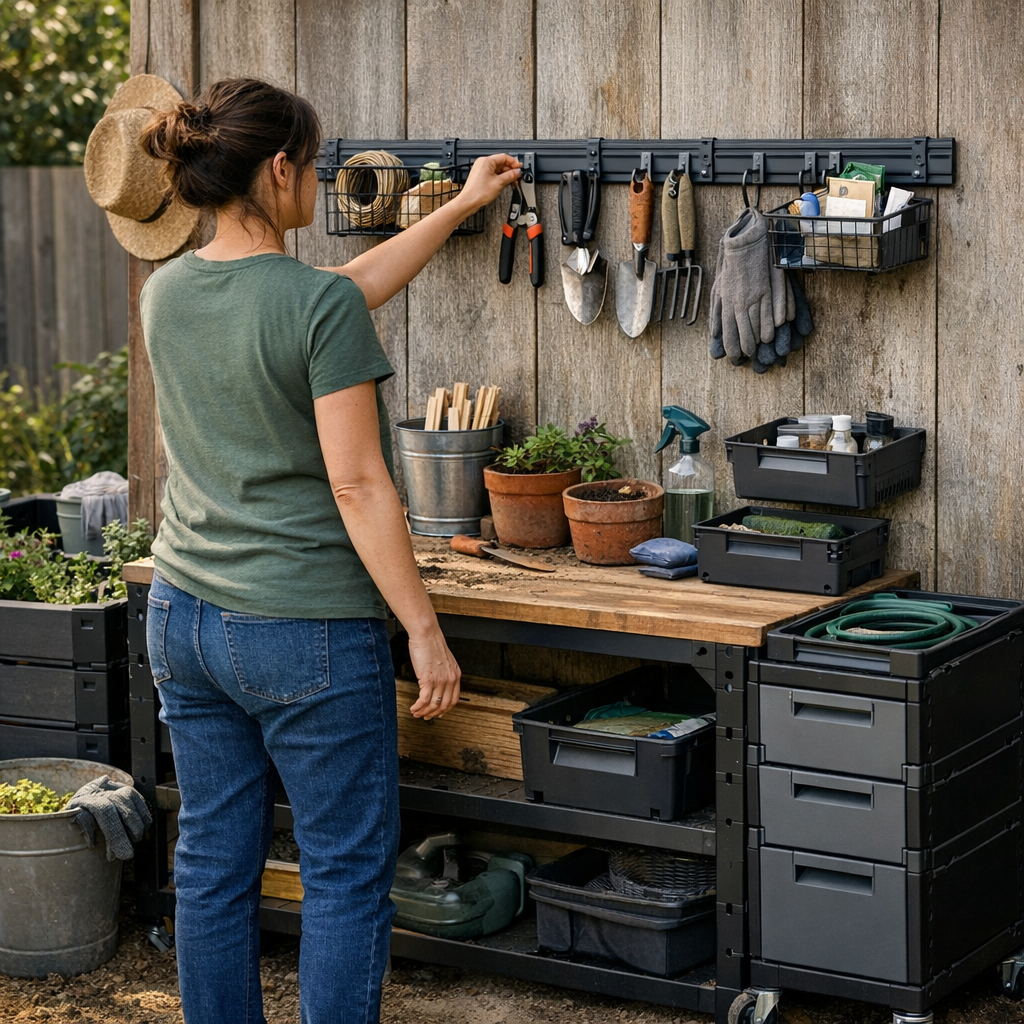
  • Why Your Wall Rail System Feels Cluttered Despite Looking Organized

    That clean wall rail setup is supposed to solve the mess—so why do you still find yourself rearranging tools just to get work done? The illusion is persistent: on day one, hooks and baskets snap into perfect formation, and for a few brief hours, your garage, shed, or workshop looks “fixed.” But real routines don’t run on symmetry, and as the days stack up, that sense of control quietly unravels. You end up standing in the same spot, shifting a cart to reach a shovel, or retracing steps to the same overstuffed hook, wondering where all that planning actually went.

    Where the System Breaks Down: The Slow Creep of Routine Friction

    The unraveling rarely feels dramatic. It starts as a daily pause—that moment you hesitate, tool in hand, because the closest hook is blocked or you’re reaching behind one cabinet edge for the third time today. Gear slides into the high-traffic zone, stacking on itself. Overflow seeps across the most convenient reaches, while pockets of wall—clear on paper—never actually get used.

    This is the story in every real utility corner, not just garages: a garden rack above a potting bench, storage rails in shed corridors, utility hooks at the car wash corner. Items cluster wherever the path is shortest, leaving awkward dead space where your arm never naturally lands. After a month, that “organized” wall looks less like a system and more like another source of lost time.

    Visual Order vs. Actual Flow

    Most wall rail kits set you up to chase the look of order—spaced hooks, even rows, every inch accounted for. The trouble is, real life doesn’t cooperate. Daily use punches holes in the theory, exposing the system’s weak points instead of hiding them.

    Your go-to tools—the hammer, the garden fork, that pair of gloves—move in a tight orbit around your main work zone. Everything else gathers dust or monopolizes a corner you almost never visit. No matter how much storage you add, the pattern is stubborn: the area nearest your routine fills instantly, and the farthest hooks are ignored or become a dumping ground for overflow.

    Everyday Setup Friction—Up Close

    • You have to edge a heavy hose cart away—again—just to get to the only open hook for the rake.
    • High-use hooks turn into clutter islands, hidden under mittens or random off-season gear.
    • That promising far corner stays pristine, because it’s always half a step too far when your hands are full.
    • Returning tools gets sloppy: you wedge a shovel behind a basket “temporarily,” and days later, nothing’s back in order.

    It’s not just mess that signals a problem—it’s the fact you keep tripping over the same small obstacles, losing seconds here and there, until the system feels like more work than it’s worth.

    The Hidden Cost: Dead Space and Routine Bottlenecks

    Imagine a backyard wall rail above the potting bench. The first weekend: trowels, gloves, and plant ties are spaced with surgical precision. By week three, the left section is still empty—nobody wants to stretch for it—while the hooks above the center are packed tight. Need your favorite pruners? Plan on unhooking gloves, shifting a basket, and maybe knocking over a spool of twine on the way.

    The limitation isn’t how much you can store—it’s where and how you do it. Clutter here is often silent: the subtle spillover, the extra shuffle that interrupts your set-down-and-go rhythm, the way dead spots remain clean but useless.

    Resetting for Real Use: Small Tweaks, Real Results

    The real fix doesn’t come from adding more rails or accessories—it’s reshaping how your wall rail actually fits your repeated movements. Forget perfect spacing. Shift high-use tools within arm’s reach of your main work path. Let the rarely grabbed gear occupy the dead ends. What used to be a two-foot “neutral” gap can become a single honest buffer, freeing the rest for what you grab ten times a week.

    Here’s where it matters: suddenly you’re not shifting things aside to make space, or parking tools wherever they land “just for now.” The tools you need most take the direct route home. The time-sinks—the little stutters and resets—fade. The wall looks less magazine-ready and more like something you actually use, because now it is.

    Real-World, No-Nonsense Adjustments

    • Watch out for forced detours: If you keep moving a cart just to reach a hook, move the hook—not the cart. Convenience beats symmetry every time.
    • Embrace flexible zones: Some hooks will go dormant in off-seasons. Let your wall rail adapt as your routines shift through the year.
    • Leave intentional breathing room: Not every inch needs a hook. Gaps let you return items faster, buffer overflow, and clear the reset pathway.

    The Goal: A Setup That Feels Natural—Not Just Looks Organized

    Anyone can make a wall system look sharp on install day. The real challenge is a month later, when the test isn’t visual—it’s whether your flow gets easier or your steps multiply. Efficiency isn’t always pretty; sometimes it’s a dense cluster of hooks where the work really happens and open wall where your elbow needs to swing.

    Walk through your wall setup after weeks of actual use. Where do you slow down? What collects overflow? What spots stay empty by habit? The best wall rail setups absorb these realities—and morph to fit your reset patterns, helping you reclaim time and motion without constant tinkering.

    If your system “looks” organized but you still stumble over gear or reshuffle hooks every week, that’s your real signal to make a change. Your goal isn’t showroom symmetry—it’s a setup you can’t help but use well, because it fits the way you move, not just the way you want it to look.

    http://stacknest.myshopify.com

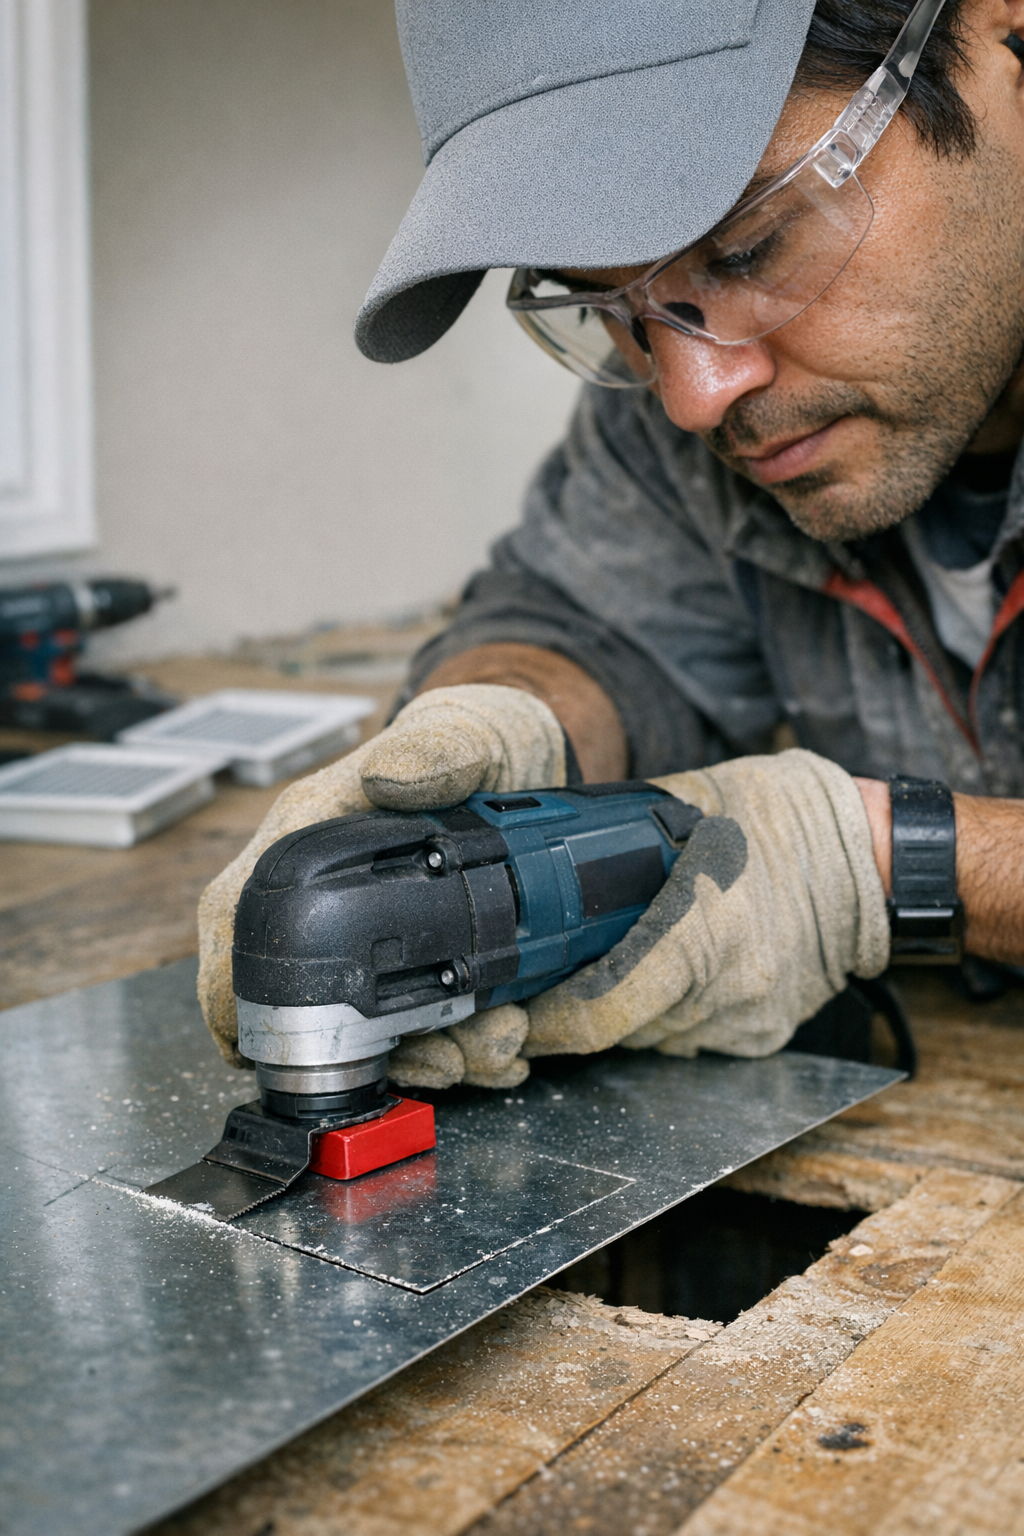
  • Why Consistent Blade Angle Control Improves Oscillating Multitool Cuts

    On any real jobsite, here’s how it begins: You settle in with your oscillating multitool, blade sharp and square, and the first vent cut kicks out crisp and clean. But by the third or fourth hole, things start to slip. Edges don’t line up, corners wander, suddenly you’re fixing gaps you didn’t plan for and sanding as long as you cut. What’s happened? It isn’t just “muscle memory” failing—it’s the quiet sabotage of sloppy blade angle, creeping in every time the work repeats. The more openings you need, the more that tiny, overlooked variable turns easy cuts into a pileup of frustration, patching, and wasted minutes.

    Where It All Unravels: Small Misses Become Big Problems

    We all trust our eyes and hands for simple tasks. Drop a blade into plywood—feels straight, looks fine. But on repeat work, every degree off angle snowballs. Miss by a hair on the second cut, and the third goes further astray; soon enough, seams drift, and recalibrating mid-run feels like chasing your own shadow. Minor mistakes aren’t obvious on one-offs—clean-up is routine. But when jobs involve batch drilling, cutting, or venting, those tiny slips get carried forward. By mid-job, your “fast” start trades places with extra sanding, rerouting, and tweaks just to cover the growing mismatch.

    “It Seemed Solid—Why’s It Getting Messy?”

    The multitool feels forgiving—at first. Fresh blade, smooth plunge, no resistance. But start moving down a row: each new hole exposes unexpected flares, a drifting edge, or a sunken corner. Sometimes, the blade bites, grabs, or veers off path—forcing you to stop and reset, or, worse, live with a jagged, unsquare opening. Metal work amplifies every slip: a bad angle brings a chattering racket and leaves abrasive burrs nobody wants to sand out.

    The Reality: One Mistake Bleeds Into the Next

    Imagine an actual vent-run. You prep your layout—tape measure swinging, marker streaks still fresh. First cut is perfect, second is passable, but by the fourth, the right edge has started drifting and the blade now wants to veer, forcing awkward corrections. Suddenly, you’re patching the fit, trying to file proud corners, weighing up whether to recut or fudge a fix. The rhythm’s broken—each cut worsens as the last’s error becomes the next’s starting point. You’ve gone from tight, clean progress to damage control.

    Don’t Blame the Blade—Blame the Angle First

    Swapping to a premium bi-metal blade or a higher TPI can help, sure. But no blade can rescue cuts if your angle’s off by even a few degrees each time. The magic isn’t in sharper teeth—it’s consistency at the crucial moment where blade meets material. Factories use built-in guides for a reason: real control, job after job. Most shops and jobsites are more improvised, but you don’t need a custom jig to see a leap in results—just repeatable, physical reference every time you make the plunge. Control the angle, and the tool starts working with you instead of against you.

    A Scrap Spacer: Fastest Fix on the Bench

    Here’s what actually works: I started setting an 8mm spacer—a leftover chunk of wood—under the heel of my multitool when lining up vent openings. That single, repeatable move snapped my angle in place every time. Suddenly, six vent holes looked like six intentional cuts, not a slow slide into chaos. No hunting down bumps after, no surprise grabs from the blade mid-cut. The speed difference was real, but the main gain was consistency—no more rogue seams or awkward sanding at the end.

    Know the Signs: Chasing Errors Means Angle Slipped

    How do you know it’s time to rethink your approach? Watch for:

    • Gaps getting wider further down the line
    • Unpredictable, wavy vent shapes
    • Blade hesitations, sudden kicks, or stalls
    • Sanding and correction chewing up more time after each cut

    Bottom line: If these show up, your “eye-tested” angle is bleeding error into the whole workflow.

    Stop Guessing—Physical Guides Mean Fewer Surprises

    Habit says “I’ll be careful” is enough—real life says otherwise. For repeat cuts, nothing beats dropping a quick homemade fence, scrap block, or simple heel guide at the cutting spot. Letting your tool reference off a fixed point every time will save way more effort and cleanup than hoping your hand finds the same pitch on its own. For vents, cutouts, even switch boxes—physical guides equal smoother progress, cleaner seams, and a lot less aggravation mid-batch.

    Every Step Adds Up—Reduce Uncertainty, Reduce Fatigue

    Spend hours with oscillating tools and you notice: the lighter your correction load, the longer you last. Physical references don’t just improve final fit—they mean less constant sand-guess-check, less hand strain, and fewer wrong-size openings causing redo chaos. Nothing fakes the relief of knowing every hole will see its cover drop flush on the first shot.

    It’s About Angle—More Than You Think

    Sure, a dull blade or low TPI makes a rough cut. But if your approach angle is off, even a perfect blade chews up time and nerves. Lock the angle and you’ll see: cleaner chips, true seams, less battery drain (the motor isn’t fighting your mistake), and a visible improvement from hole to hole. Ignore it, and every fix gets costlier—on both finish quality and fatigue.

    When Every Cut Feels Like a Slog—Look at Your Setup

    Before swapping blades, doubling down on pressure, or blaming job fatigue, check your reference. Every repeated task magnifies tiny setup flaws, and a simple angle spacer can save you from hours lost to rescue-sanding or recut nightmares. When you want real gains—in time, finish, and control—a repeatable, simple angle guide quietly does more than new gear ever can.

    See more tools and solutions at Gumboll.

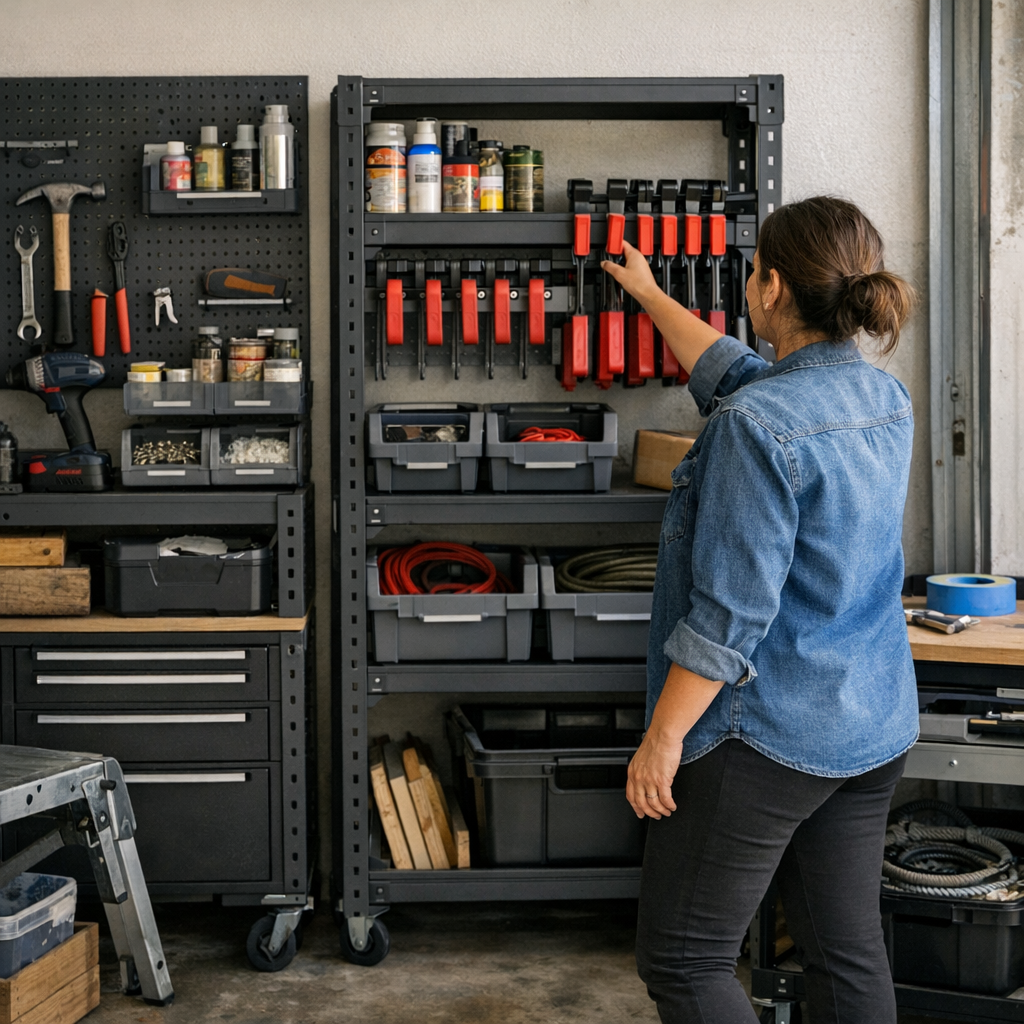
  • Why Fixed Storage Roles Outperform Flexible Systems in Busy Workshops

    Every new garage or workshop setup feels full of potential: bins neatly mounted, pegboards bristling with promise, carts gliding smoothly into empty corners. For a brief stretch, the whole area looks engineered for speed and efficiency. But then real work starts—pulling a few tools, stashing supplies in a rush, reaching for the cart you rolled aside last night. Almost overnight, that “modular flexibility” turns sideways. Quick grabs turn into mini scavenger hunts. Carts block the path you meant to keep clear. The system that looked right on day one quietly starts working against you when the pressure’s on and your hands are full.

    Where “Flexible” Turns Frustrating

    Walk into a freshly arranged space: open bins everywhere, a cart you can roll “wherever you need it,” peg hooks waiting to be reassigned. For a moment, it’s perfect. But stick around through a few project swaps, and the cracks appear. That mobile cart? Now wedged halfway across the room because you needed the work surface, blocking every pass to the other side. The bin for “miscellaneous” screws? Overflowing and stacked beneath a toolbox, impossible to sift through quickly. Every quick change or small reset means pausing, nudging, peeking, and second-guessing. The flexibility that sounded so empowering now soaks up your momentum in tiny, annoying ways.

    At the root of it all: When every slot and shelf is open to “whatever fits,” the mental load creeps up. Tools don’t flow naturally back to their homes—they just end up wherever’s easiest in the moment. You bend, detour, and hesitate—until a five-minute project leaves the space a little less sorted than before. The pattern keeps repeating: more time spent shuffling, less time actually working.

    Fixed Homes vs. Free-For-All: Where Real Use Draws the Line

    Flexible storage seems like the antidote to clutter. It promises adaptability, the power to change with your workflow. But spend a week in a garage or shop actually living with all that flexibility, and you start to see why it falls short when pressure mounts:

    • Overflow zones multiply. That empty shelf becomes a dumping ground for random fasteners, paint cans, or half-finished side projects. You lose sight of what’s intentional and what’s just “sitting there for now.”
    • Mobile pieces get in the way. The cart that started out neatly nested becomes a speed bump. Instead of freeing up space, it blocks the path between workbench and door.
    • The hunt extends. Favorite tools drift farther from their “usual” resting places after every session. You scan pegboards, move bins aside, crouch to check under the bench, all for one lost driver.

    Compare this to a fixed-role setup. Assign a wall rack—no exceptions—for drivers. Carve out a shelf labeled clamps, and never let anything else creep onto it. Suddenly, every end-of-task reset is quick, almost automatic. Tools land exactly where they belong, so next time you reach, they’re already within arm’s distance. Your workspace returns to “ready” with nothing to untangle or explain.

    Looking Organized vs. Working Smoothly

    This is the honest frustration: a garage can look orderly—bins lined up, hooks filled, no loose clutter in sight—but still work against you. Watch for a week and you’ll spot the cracks: a tape measure buried in a parts drawer, clamps scattered across three zones, the hardware bin absorbing loose washers, wire, and shims. Visual tidiness hides growing confusion, and every reset gets a little slower, a little less certain, as the lines between categories blur.

    Scene in Motion: The Anatomy of Setup Drift

    Imagine a real workbench routine: you’re sanding a frame, fixing an outdoor chair, sorting hardware for a quick fence repair—all in the same week. By Friday, the shelf for abrasives is half-filled with glue bottles. That dedicated spot for pliers now hosts a soldering iron. The rolling cart—meant to follow you—sits stuck by the back door, blocking the path because you wanted it “out of the way” yesterday. Overflow stacks up on the edges, brushes drift to the floor, and every time you reset, you have to scan the whole wall just to find the basics.

    This isn’t messy—yet—but it’s slow, awkward, and full of little workarounds. Each misplaced item means a pause, a rethink, or a detour. Over a month, it steals hours. More often, it chips away at your willingness to start a new project—who wants to spend fifteen minutes reshuffling just to clear a spot?

    Assigning Roles: Small Shifts, Real Relief

    The breakthrough often comes with a tiny change: labels on shelves, one definite hook per tool group, a strict “clamps go here, nothing else” rule. In real use, these fixed markers do what flexibility never can—reset routines turn mindless, tools flow predictably, and overflow stops collecting where it shouldn’t. Even after a flurry of repairs or a long build, clamps end up on their own shelf. Drills hang right back on the pegboard, no questions. There’s no guessing, no scanning the whole space—just a smooth, fast return before you head out the door.

    You haven’t added square footage. You haven’t covered every inch of wall. But the system works better, because your usual movements—grab, use, return—actually fit the setup instead of fighting it.

    Spotting Friction Points: Signs Your System is Slipping

    Keep an eye on your own space for a few days. Odds are you’ll spot these problem zones:

    • Carts stranded awkwardly in passageways, moved just because it’s easier than rethinking where they belong
    • One shelf or wall nook quietly ballooning with overflow—paints, gloves, mystery hardware—all “just for now” but never truly reset
    • Every tool return forcing you to scan three surfaces instead of going straight to one spot
    • Dead corners where bins gather dust and nothing you need is ever close at hand

    Each one signals a system out of sync with your actual habits. The space looks logical when empty, but it slows you down, nudges you off balance, and builds up silent inefficiencies you feel with every pass through the shop.

    Fixed Where It Matters—Flexible Where It Doesn’t

    Here’s the secret rhythm of a space that stays truly usable: high-use tools—drills, drivers, clamps—get unchanging homes, always visible and always accessible. That saves not just seconds but energy, making resets fast and return flow nearly automatic. Meanwhile, seasonal or low-frequency items—odd hardware, paint trays, rags—can float in open bins or flexible drawers. You don’t need perfection, just the critical routines anchored down so nothing slows you when you’re mid-project.

    Quick experiment: Instead of remaking every inch, just pick your most-used tool group. Assign it a fixed, unmistakable home and watch a week’s worth of routines. Most of the “Where did I…?” moments disappear overnight—and so does the creeping frustration that chokes off momentum.

    The Hidden Power of Stable Roles

    It feels counterintuitive to lock in floor or wall space for dedicated tools when you crave adaptability. But dependable setups win in the long run: the system quietly boosts clarity, the awkward dead zones disappear, and every tool is right where you expect, every single time. The penalty for blurring roles is clear—more piles, more blocked paths, more head-scratching, and less actual building or fixing.

    The setups that last—year in, year out—aren’t just tidy on install day. They stay smooth because routines have priority. Your movements rule the layout, not the other way around. Fixed roles for your core tools preserve zone clarity, harness every square inch, and make expansion or reconfiguration painless instead of overwhelming. The best spaces mix security where it counts with flexibility where it’s earned—leaving you free to get to work, not get bogged down by reset after reset.

    You can explore tools and modular systems designed to solve these everyday setup problems at StackNest.