Category: Tools & Workshop

  • How Clear Return Spots Transform Workshop Organization and Efficiency

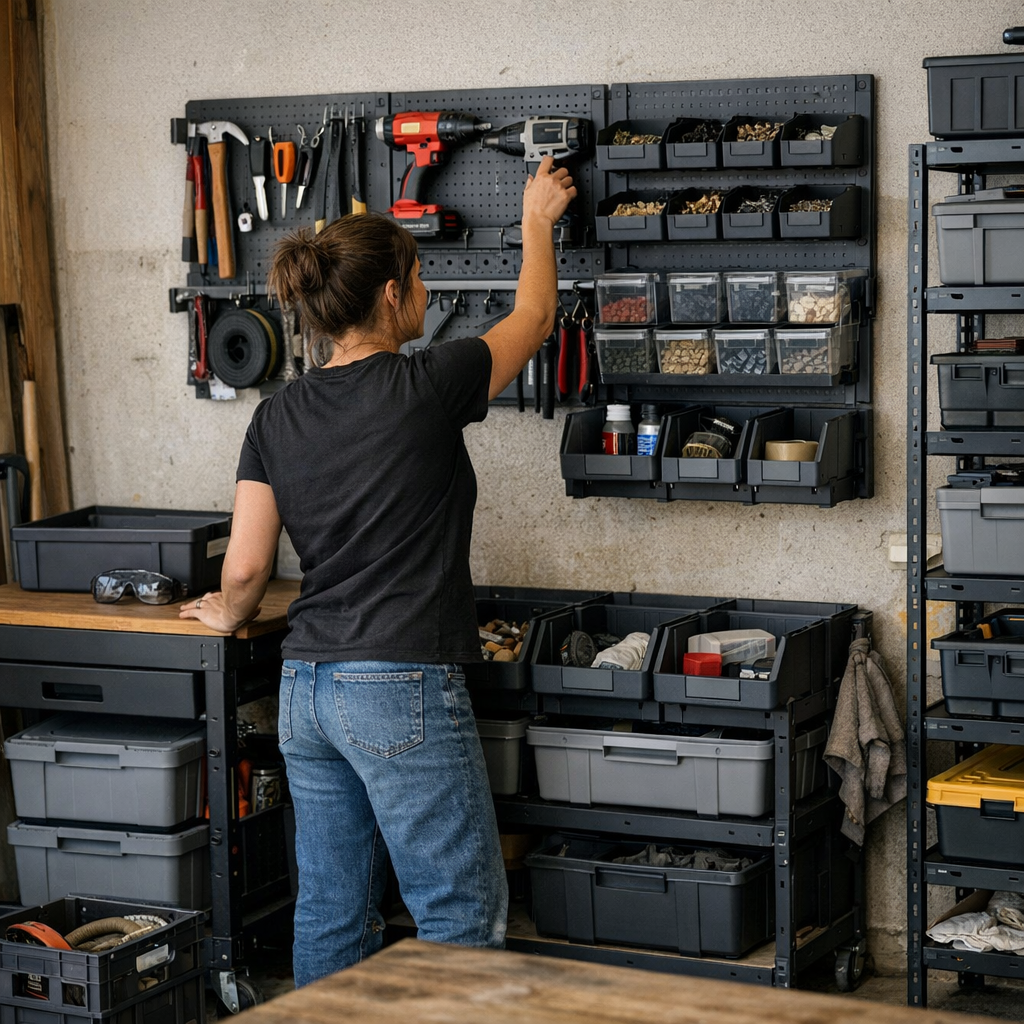
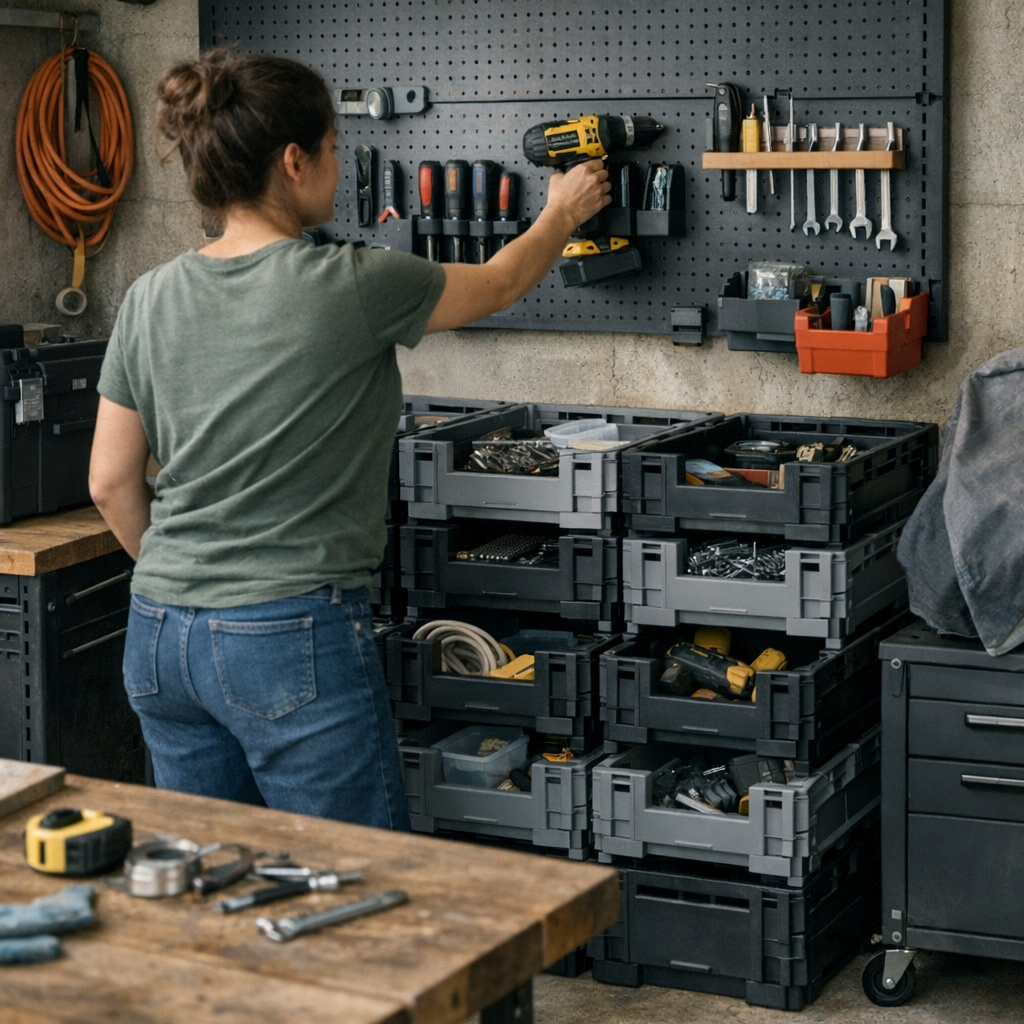
    The illusion of organization fades fast when real life kicks in. Day one of a new garage setup always looks promising—rows of crates, tool rails, and freshly mounted walls suggest order has finally arrived. But it’s never day one that tests you. It’s day seven, when you’ve juggled projects, grabbed supplies on the fly, and raced to put things back before dinner. That’s when the cracks form. Tools are out of place, supplies drift onto any open surface, and what’s supposed to work—just doesn’t. The setup that looked clean on install turns patchy the moment routines collide with reality.

    Visible Order vs. Daily Chaos

    You roll your cart along what should be a clear path, only to squeeze past a shelf that juts too far or sidestep a bin left in the “close enough” zone. Maybe you reach for a drill, but first you have to move yesterday’s project overflow off your workbench. Modular crates sit fully loaded beneath a neat pegboard, yet you catch yourself hesitating—do these pliers go here, or should you drop them anywhere that isn’t full? It isn’t about how tidy your wall looks right now. It’s about whether the space lets you move, grab, and reset without having to think.

    The Places Where Clutter Sneaks In

    Clutter rarely arrives all at once. It’s the gloves tossed on top of a random crate—the one that now mixes sandpaper, hose attachments, and a stray measuring tape. It’s the flat spot near the door collecting everything you intend to put back “properly” later. These are not storage shortages. They’re signals that return points are unclear—or too far out of the way. Every extra second spent making that decision becomes the beginning of a pile. Pretty soon, your cart is blocked in, the wall looks busy but yields nothing instantly, and a “dead” corner swallows a bucket you won’t need for weeks.

    Why “It’ll Do” Layouts Fall Apart

    Forget blaming lazy habits. In real setups, every small inefficiency gets multiplied by routine: re-parking your rolling chest just to get through the space; grouping paint supplies with cable ties because “they’ll sort later”; shoving bins aside to access what’s actually needed. Unlabeled crates become catch-alls. Wall hooks turn into drop zones for whatever fits. Corners and ledges attract overflow just because they’re empty. The friction builds—not with dramatic messes, but in a slow, steady creep of stuff that chokes your flow and leaves resets feeling endless.

    Movement Blocked, Momentum Lost

    The hidden cost isn’t the occasional mess, but the way your layout starts to fight you. Reaching around the same bulky edge, nudging a rolling cart past boxes that missed their mark, or bending awkwardly because a return spot is just out of the way—all those tiny blockages wear you down. They discourage tidying up on auto-pilot. Instead, you make do. The original plan, clean on paper, now quietly undermines the way you really use the space.

    The Practical Shift: Make Returns Instinctive

    Improvement starts not with buying more storage, but by erasing friction from return actions. When every tool or supply has a single, unmistakable slot, resets become nearly automatic. Swapping generic bins for wall-mounted holders shaped for each item transformed my bench overnight. Drivers slipped in by handle, the tape measure found its shape-fit cradle, and tools stopped lingering in piles. No “almost” homes—just obvious, instant returns with zero double takes.

    The Speed of No-Think Storage

    Within days, what used to stall—pausing to remember which crate was for pliers, or hunting bits—gave way to quick, seamless resets. When you use labels, distinct shapes, and visible cues—even for garden corners or deep utility shelves—there’s no incentive to cut corners, even in a rush. It’s the difference between tossing gloves in a random crate and sliding them into a bin made just for them. The right storage doesn’t add work; it removes decisions.

    Trouble Signs: Is Your Setup Getting in the Way?

    If you see tools spreading across any flat surface, or materials clustered on the top of carts and chests, your layout is slowing you down. If you reset by shuffling gear “just for now”—knowing you’ll need to sort it later—that’s your cue. Your space’s true test is how it handles the return moments, especially after a busy stretch when you’re most tempted to skip steps.

    Micro Tweaks, Lasting Results

    You don’t need a full rebuild to fix these pressure points. Sometimes it’s as simple as adding shape-matched holders, popping in clear labels, or carving out wall space that’s obvious even when your hands are full. Notice where overflow collects—those “almost” spots are prime upgrade targets. If something repeatedly lands where it doesn’t belong, it’s because its real home isn’t quick enough to reach.

    Let Routines Dictate Layout, Not Just Looks

    The most effective setups aren’t measured by how much they hold, but by how little they force you to stop and think. Week after week, it’s the layouts where every item has an obvious, repeatable home that keep everything moving. Access stays direct. Paths stay clear. Gear resets itself—not from magic tidying, but from design that matches the tug-and-pull of real use. That’s when your walls, crates, and benches finally work with you, not against you.
    http://stacknest.myshopify.com

  • Why Accessible Storage Beats Stylish Baskets for Daily Use

    The promise of perfect storage—those rows of matching baskets, spotless glass jars, and deep, coordinated bins—rarely survives a busy week. Real life immediately tests your setup. Suddenly, the “minimal” shelf isn’t minimal at all: it’s a catch-all for loose receipts, tangled chargers, and single socks gone missing in the deepest bin. The pristine order you built quietly dissolves—because underneath the surface calm, your storage is causing as much chaos as it hides.

    When Looks Smother Function

    There’s a quiet thrill in lining up identical bins after a organizing session. But the illusion breaks the moment you’re short on time or energy. Need a scarf before work? You’re elbow-deep in a bin, disrupting three other stacks. Searching for the right pair of flats? Now all four shoe baskets are on the floor. That sense of visual calm, so appealing at first, quickly turns to stubborn friction: you end up shifting, restacking, and digging for simple things that should be easy grabs.

    It happens everywhere—bedroom closets, hallway shelves, laundry built-ins. Deep bins and layered baskets offer instant “tidy,” but their peace is fragile. Every small search becomes a little excavation. Hats and scarves blur together, folded stacks collapse the second one item is pulled. The system starts turning your time-saving routines into slow, daily scavenger hunts.

    What “Looks Tidy” Gets Wrong

    There’s a painful difference between storage that poses for a photo—and storage that holds up during a hectic Tuesday morning.

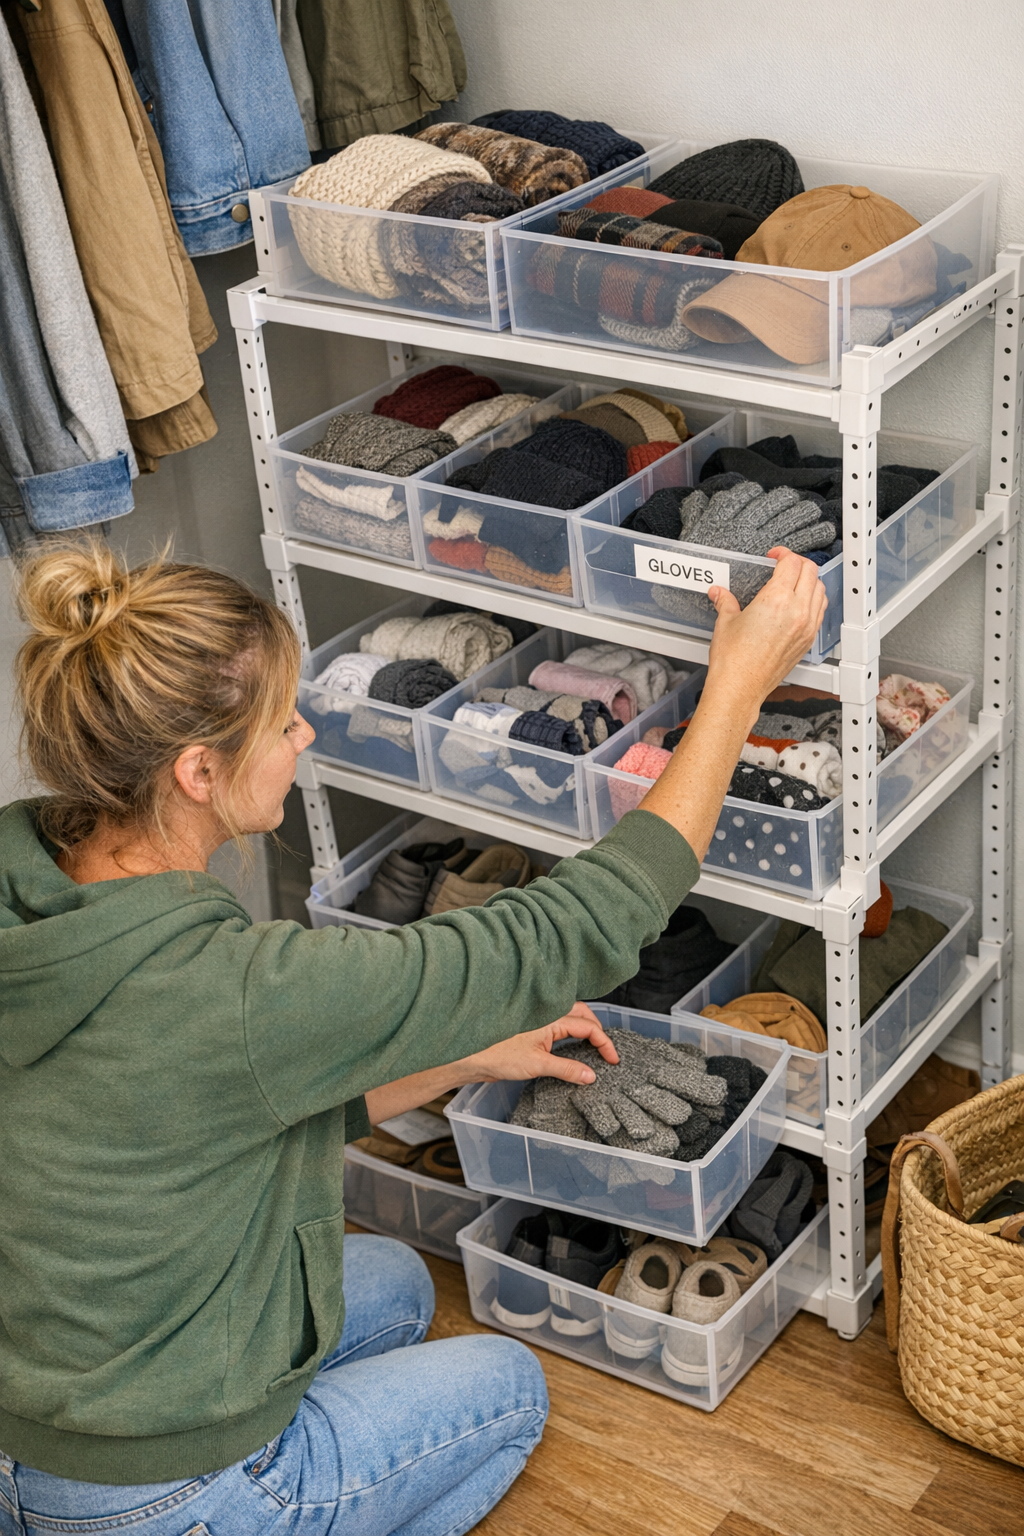
    Open shelves and shallow bins look almost plain in comparison, but that’s what makes them powerful. They force the mess to the surface. A missing glove is spotted at a glance. A half-empty bathroom tray shouts for a refill. Instead of hiding problems, these setups solve them in real time: corrections happen the moment something slips, no buried clutter or blind rummaging.

    Hidden or deep containers break that feedback loop. You never see what’s missing or misplaced until you’re frustrated by it. Categories melt together. You avoid the system because it’s extra work just to use it. The end result? Your “organized” room silently breeds more shuffling, more piles in new places, more abandoned corners as your effort fails to stick.

    How the Mess Returns: Scenes from Real Life

    Take a hallway closet meant for everyday grab-and-go: kids’ sneakers, scarves, reusable shopping bags. Maybe you started with neat baskets for each category. But after one frantic week (soccer games, late returns, weather shifts), everything blends. Gloves wind up lost inside tote bags, hats mingle with dog leashes, unread mail covers the lot. By Friday, that “just organized” closet is a puzzle you have to solve on your hands and knees.

    Or look at a utility shelf stocked with cleaning supplies. Sliding bottles behind bigger bottles, stacking extra sponges on top, the old spray cleaner vanishes to the back. You forget it exists until you buy another—and by the time you sort things out, you’re dealing with expired products, overflows, and a jammed shelf that won’t close.

    The same happens in laundry rooms and pantries: oversized bins swallow socks, folded stacks topple as you reach for a shirt, and shelves meant for rowed order become layered mysteries that eat entire evenings when it’s time to reset.

    Why Easy Reset Beats Impressive Style

    The mark of useful storage isn’t a spotless look—it’s how quickly you spot a mess and restore order without starting over.

    Switching from deep bins to shallow trays, or simply adding clear dividers, quietly transforms how you interact with your space. No more guessing where things belong. Categories hold their shape. What used to be a Sunday afternoon overhaul is now a three-minute tidy: slip shoes back in one move, slide loose batteries into their tray, get the lids back on cleaners without a shuffle. Sometimes, it’s as simple as capping bin depth at eight inches—enough to see everything, too shallow for anything to get lost.

    Two Sharper Habits that Outperform Expensive “Fixes”

    • Keep it shallow and open: Visibility comes first. Open-top, low bins are never glamorous, but you can see instantly when you’ve run low on batteries or when the “keys and wallet” spot is drifting. The fewer layers to peel back, the less chaos builds behind the scenes.
    • Give every staple a clear-cut home: Real boundaries matter. Think shelf dividers for purse and bulk food, labeled trays for charger cords and loose coins. When each daily-use item has a visible zone, you train yourself—and everyone else—to return things right. Less re-sorting, less relabeling, less wondering “where did that go?” after a long day.

    The Difference You’ll Notice—Even on Bad Weeks

    Good storage setups make routines frictionless. You open a closet, see what’s missing, act in seconds. Mornings move; evenings end with a 30-second tidy, not a mini-rebuild. On the rare week when chaos wins—entry bench buried in muddy shoes, craft bin flooding with random schoolwork—it isn’t a crisis. The disorder is visible, isolated, and fixing it doesn’t mean repacking everything, just pulling one section back into line.

    If grabbing or returning something takes more than ten seconds, your “organized” setup is slowing you down, not helping—even if it looks the part.

    Change just one thing this week: swap a deep catch-all for an open tray. Add a divider to the bin that always reverts to a jumble. Watch how much less time you spend searching, stacking, and reorganizing—proof that real storage wins in the daily trenches, not the staged reveal.

    For practical storage systems built for everyday routines—not just showroom gloss—visit ClosetWorks.

  • Choosing Impact Sockets That Withstand High-Torque Workloads Reliably

    Most days in the shop, you don’t think twice about your impact sockets—until one suddenly holds you up. On a brake job where every bolt seems welded in place, or a wheel rotation turning into a battle with salt-locked lugs, the difference between a “decent” socket and one built for real abuse isn’t theoretical. It’s right there in your workflow: slipping, rounding, or that sickening snap that leaves you reaching for an extractor before you’ve even finished your coffee. In those moments, the right socket isn’t a luxury—it’s the difference between moving fast and losing an afternoon.

    How Trouble Starts: The Subtle Signs Your Socket’s Failing

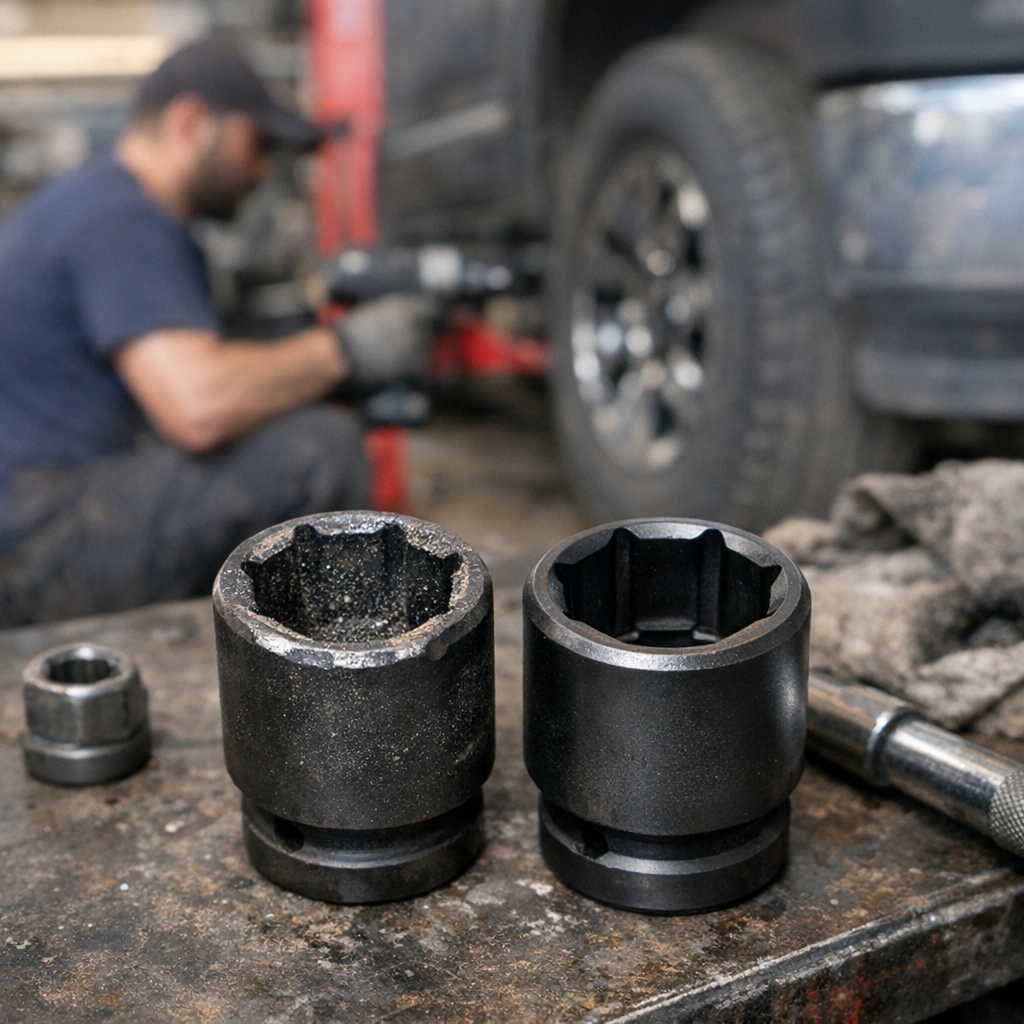
    The warning signals rarely arrive as dramatic failures. Instead, it’s the everyday annoyances: trace amounts of metal dust in the palm of your glove, tiny steel splinters falling from the socket right onto your workbench, or a growing slackness as you wrench u-joints or hammer seized fasteners. One minute the tool fits; the next, you’re fighting to keep it aligned under torque, feeling the slop creep in as the edges start to lose their bite.

    By the time you notice heat radiating from the socket or hear the changed pitch in your impact driver, you’re already riding past the socket’s best days. Cycle after cycle, things get gritty—biting down harder just to break loose another bolt, cleaning up flakes off your work surface, and spending more time fussing over fit than finishing the job. The progression is slow—until suddenly, it isn’t.

    Socket Materials: Why Shortcuts Cost You in the Long Run

    From a distance, most impact sockets look interchangeable. Identical finishes, similar heft. But take a pile of “budget” sockets through back-to-back jobs—be it an engine tear-down or a day of frame restoration—and shortcuts start bleeding out in the worst ways. Softer steel and lazy heat treating don’t just dent; they transmit punishing vibration right up your wrist and start shedding metal dust with every stubborn fastener.

    On high-resistance tasks—rusted suspension bolts, caliper hardware that’s seen a dozen winters—low-quality sockets will telegraph their limits. Edges go blunt in the middle of a job, alignment suffers, and you spend more minutes backtracking, digging out leftovers from rounded heads, and vacuuming steel shavings before you can even swap wheels. All that fatigue adds up—on you, your tools, and your patience.

    Day Two Headaches: What You Really Pay For

    If you’ve ever powered through a fleet tire change only to realize half your sockets now spin loose or wedge tight, you know the true price wasn’t on the packaging. “Good enough” sockets lead to stop-start progress—a pulsing rhythm of re-seating, cursing, and searching for your last good size. Debris piles up. Your hands grow sore from vibration. By the second or third project, the inconvenience shifts from background noise to workflow-killer.

    Swap in a top-tier impact socket for just one rotation, and the difference shows up immediately. Clean seating, crisp engagement, and less time cleaning up after metallic carnage. That means steadier progress, less uncertainty, and a smoother finish when your shift is already running long. It’s not tool snobbery—it’s the difference between cycling through wheels or bits without dread and dreading when the next jam is coming.

    Hardness Ratings—And Why They Matter Only When They’re Right

    On paper, that Rockwell HRC range (42–48) is just a number. Under actual use, it’s a shield against the pile of half-usable sockets in your drawer. Too soft and the socket mushrooms out under stress. Too hard, and you’ll chip it on a gnarly exhaust clamp. The right hardness doesn’t just survive round after round of impact blows—it keeps its edges, seats predictably, and lets you focus on the job instead of the next tool failure.

    Even a microscopic difference matters. If your socket is just a hair oversized, or if hardness is off by a single rating, you’ll notice bolt heads start to round off and vibration rebound straight into your grip. Over time, that extra wear translates into unpredictable breakdowns and more hours lost on mid-job fixes. Consistent fit equals fewer tools trashed, fewer fasteners ruined, and just plain less stress with every rotation.

    Real-World Red Flags: When to Swap, Not Push Through

    It doesn’t take a catastrophic break to tell you a socket’s shot. Watch for gritty dust collecting in your toolbox, rounded edges, that telltale looseness when you drive into a head, or that subtle grind as you push to break a bolt free. Extra flakes on your bench? More resistance with every pass? Those are your cues to retire it. Ignore them and you’re burning both time and your next paycheck on replacements.

    The Cost of Using the Wrong Socket

    Grab a regular chrome socket for a high-torque job and you can almost predict how it’ll play out. One hesitation, and it shatters—leaving you with a cracked mess locked on the fastener. If you’ve ever fought to drill or chisel a broken socket out of a transmission housing or a cramped wheel hub, you know how quickly productivity grinds to a halt. It isn’t just an inconvenience. It’s time lost, parts at risk, and the creeping hassle of undoing mistakes you could have avoided by grabbing the right tool from the start.

    Finding Sockets That Earn Their Place—Not Just Their Price

    Choosing the right impact socket doesn’t suddenly make shop life easy. But consistently reaching for quality saves you from compounding mistakes and punishing detours. Look for real, field-proven materials—ones with heat treatment that stands up over hundreds of cycles and reviews that talk about months or years of steady use, not just first-day shine. Before every demanding session, do a quick fit check. That small habit means catching drift before your day turns rough. And for the key sizes—ones you hammer every week—keep a backup ready. One failed socket shouldn’t sideline your entire schedule.

    The best socket hardly gets noticed: it does the job, doesn’t slow you down, and won’t have you scrubbing steel dust off your knuckles after close. Real toughness is measured in the rhythm of your work—when you can lock in, stay focused, and actually finish without your tools turning against you.

    Browse Gumboll’s full range of impact sockets and accessories

  • Why Modular Storage Systems Often Fail Under Real-World Use

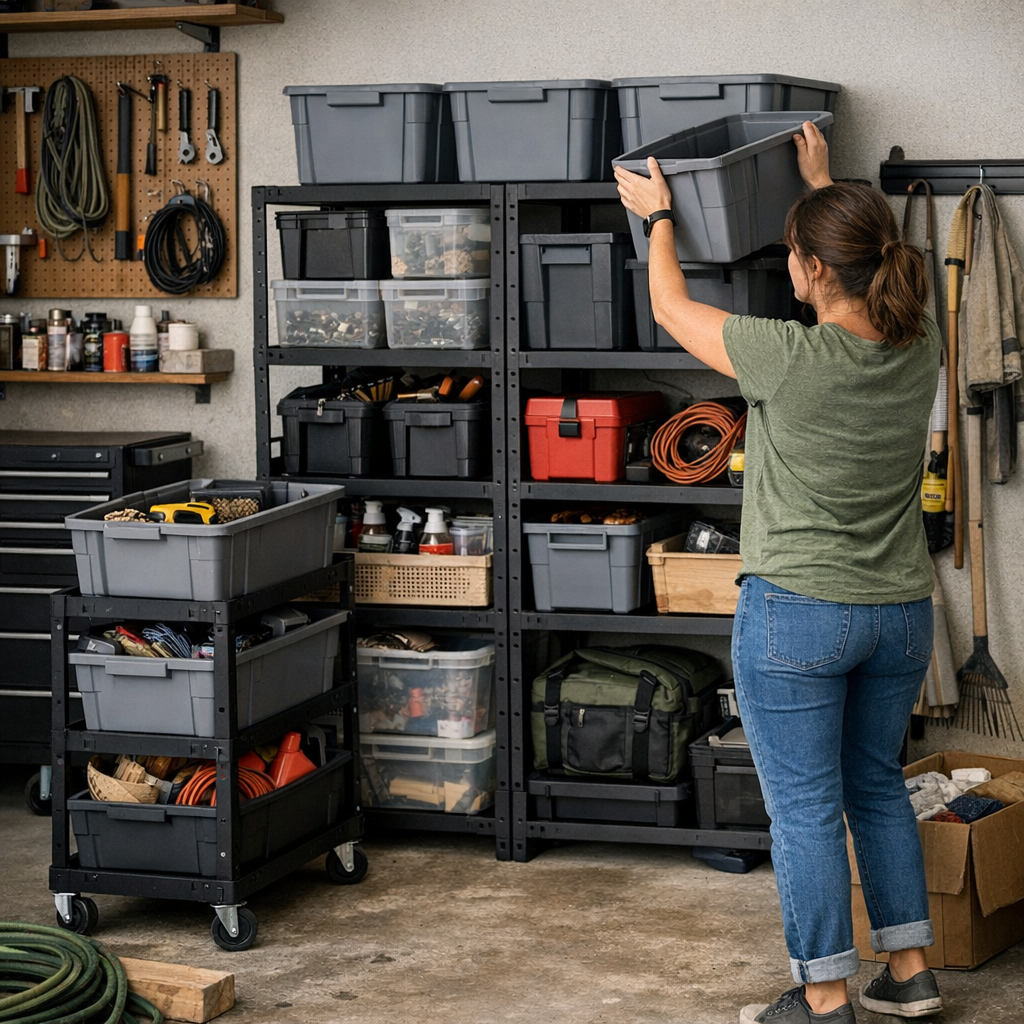
    At the start, garage organization feels like a big win. The shelves are lined up just right, bins have labels, every tool claims a slot. But give it a few days—a few busy afternoons, a handful of trips in and out—and the cracks start showing. The modular rack you planned so carefully is blocked by a rolling cart you had to nudge sideways. That open walkway is now pinched by a pile of odds and ends waiting for “later.” Bins don’t line up. A dead zone is forming. What felt efficient on paper becomes a daily source of little frustrations, all stacking up the more you actually use your setup.

    Where “Looks Organized” Stops Working

    At a glance, it’s still neat: bins in rows, no obvious chaos. But open one, and you’re reminded why it’s rarely used—a heavier bin is always sitting on top, so accessing anything means a drawn-out game of Jenga. Return a rake to its bracket and it instantly tips into the wheel path because another tool didn’t get fully returned last time. The cart rolls—but always needs to be pulled out again just to open a lower shelf.

    This is the hidden friction: Every movement is a workaround. A corner you planned on being flexible is already clogged. That “perfectly filled” wall rack now demands a sidestep or a shuffle every other time you reach for something. Small, repeated interruptions eat away at the feeling of order you started with.

    When Wall Space Isn’t Really Useful

    There’s a difference between filling the walls and actually clearing your movement. Mounting racks edge-to-edge may look efficient, but if getting to what you use most means squeezing past unmovable bins, your daily routines get slower, not smoother. The real test isn’t how many cubic feet you use—it’s how quickly you can put your hand on what you need and reset the zone after.

    Daily Reality: Efficiency Slips, Slowdowns Stack Up

    Fast-forward to midweek. That open zone by the door has picked up overflow. Projects-in-progress are perched wherever there’s a flat surface. To pull out one power tool, you need to drag the cart away from the shelf, detour past a stack of tubs, and edge sideways through a narrow gap—hoping not to catch a handle or send a pile cascading. Resetting the space after a project now takes as long as the work itself. The “system” stores things, but actually breaks up the flow you need to move.

    When Setup Meets Real Movement

    Initial plans don’t stand up to surprise runs for supplies—or a project that turns out messier than expected. Rigid layouts, with every slot filled and all bins stacked high, have nowhere to flex. Suddenly an empty shelf becomes priceless, and the absence of slack is the main thing slowing you down. Instead of returning quickly, you circle around, searching for a place where new overflow won’t block the next routine.

    Obstacles That Keep Returning

    Pay attention to where you keep getting stuck:

    • Shifting the same cart or rack over and over, just to open a path.
    • A dead corner collects bags, boxes, or tools that never seem to get re-homed.
    • Wall panels technically store more—but reaching what you need is never simple.
    • You rarely return each tool to its “slot” because it’s too much work after a long session.
    • The floor claims new piles every week—inevitably in the way.

    These aren’t quirks; they’re the system revealing its weak points. If it feels like you’re always resetting things two or three times, the setup fits your area—but not the way you actually work and move through it.

    Don’t Just Clear Space—Make Setup Support the Way You Work

    It’s tempting to squeeze storage into every available inch, but the best setups are honest about movement. Real efficiency is built in the gaps: a place to park a cart without blocking a main thoroughfare, a shelf that’s purposefully left clear for project fallout, a bin that’s always open for fast drop-offs. Fill every wall and you lose the adaptability you need at peak mess. Sometimes it’s the small slack—a cart that actually docks at the edge, or a shelf that’s never overstuffed—that keeps the whole zone moving.

    Simple, Real-World Tweaks to Cut Friction

    1. Always-open overflow: Designate a shelf or bin that’s never filled with permanent storage. It catches all the in-progress tools and avoids the pile on the floor.

    2. Nudge for breathing room: Even moving a main rack a few inches off a corner or away from a walkway can eliminate an awkward turn-around—so you aren’t body-blocked by your own system.

    Let Use, Not Just Looks, Guide Your Garage

    Order isn’t about how packed or pristine your setup seems after a weekend re-org. Long-term, it comes down to how easily you reset the space after real, repeated use. The best systems don’t just store more—they reduce backtracking, stop piles from returning, and let you move as directly as possible. That’s the difference between “organized” and usable. When you stop fighting clutter and start flowing through your garage, you know the setup is actually working.

    Find modular solutions and practical setup ideas at StackNest.

  • How Clear Categories Transform Closet Storage for Daily Ease

    The closet that looks crisp on setup day rarely stays that way. It’s not the first photo-ready glance that matters—it’s the rough-and-tumble of busy mornings, rushed changes, and last-minute gear grabs that truly test a closet system. You start with sleek shelves and matching bins, but by Wednesday, your best intentions unravel: piles tip, bins become hiding spots, and what passed for “organized” starts to blur under the real pressure of daily life.

    The Illusion of Order: When Neatness Fades Fast

    The first days after you organize a closet feel satisfying. Everything lines up. But real use exposes the cracks. You need a shirt—it’s under two others. Grabbing it unravels the stack, sleeves tangle, you refold on autopilot. Scarves look tidy in that deep bin, until you’re fishing past hats and belt buckles for the one you need, making a mess along the way.

    Visual order can mislead the moment you live with your choices. Categories quietly collapse: pants drift into shirt space, baskets blend wool socks with gloves, ties vanish under running gear. Suddenly, you find yourself digging, shuffling, re-sorting—often just for one simple thing.

    Everyday Habits Break Weak Systems

    Frustration Hiding in the Daily Grab

    Your real closet test comes at rush hour. If finding a belt means shifting two bins and pinching your finger, that’s a fail. Pulling a single pair of socks shouldn’t cascade half a pile onto the closet floor. It’s not one dramatic moment—just repeated little hassles: wasted seconds, lost visibility, piles that grow lopsided, or favorite items swallowed up in the wrong spot.

    These aren’t just annoyances. They build up, undermining even the best-looking setups. A shelf that eats up vertical space but holds only one reliable stack, or a basket so deep you forget what’s at the bottom, quickly turns organization into a constant, low-level project instead of a support in your routine.

    Strained Shelves, Slumped Stacks, and Blended Bins

    How long do your folded sweaters hold their shape before the whole pile shifts? Deep shelves offer volume, but at a cost: grab one item, others tumble or sprawl. You’re fixing two messes just to get dressed. The pattern repeats at the entry: a “catch-all” basket by the door turns grab-and-go into dig-and-delay as gloves, hats, and keys mix within days.

    The more often you need to reset a shelf or sort through overflow, the less your system is working for you. If your closet feels like a recurring do-over, the pain points are dictating your habits, not the other way around.

    Why Some Organization Sticks (and Some Falls Apart)

    The difference between fleeting neatness and real function is how quickly you can access, return, and reset what you use—without triggering chaos elsewhere. This often comes down to a handful of game-changing tweaks:

    • Shelf dividers that keep stacks defined—no more merging jeans and shirts, no more piles bleeding into each other.
    • Baskets sized just right for the category: large enough for winter gloves, but not so oversized that everything swirls together or disappears. Seeing the bottom at a glance is key.
    • Adjustable shelves or racks that match stack height to reality. Three or four sweaters per stack—never ten. This means less toppling and fewer rescue missions for items buried beneath.

    One shift makes a telling difference: replacing an all-purpose bin with a row of smaller, clearly labeled baskets. No more mixed-up accessories, no more hidden scarves, and no more “I’ll deal with it later.” Resets shrink from hour-long projects to two-minute touch-ups.

    Is Your Closet System Failing the Daily Test?

    The warning signs are clear if you look beyond appearances. Do you:

    • Move stacks or baskets just to reach an everyday piece?
    • Watch folded piles collapse and sprawl by midweek, no matter how you fold?
    • Find unrelated things mixing in “organized” bins or on shelves?
    • Chase rogue shoes, tangled belts, or stray bags that keep escaping their assigned spot?

    If any of these feel familiar, your setup isn’t keeping pace with the way you live. The struggle isn’t a lack of effort—it’s a lack of structure that reflects real patterns and pressures.

    Reset Speed: The True Test of a Closet That Works

    How long does it take to put your closet back in order after an average week? If simple resets—scarf back in place, shoes on the rack, shirts lined up—take five minutes or less, your system is quietly working. If the job grows or you start dreading the tidy-up, that’s a clear signal: something in the setup is creating friction instead of reducing it.

    Tip: Try a reset at the end of the week, timer in hand. If you’re fussing, digging, or shuffling more than you’d like, focus on making categories clearer, reducing stack height, or swapping dark, deep bins for open, visible baskets. Sometimes one small fix is enough to change the rhythm of the whole routine.

    When Storage Stops Being a Chore

    The best closet arrangement quietly disappears into your day. Categories hold steady. Stacks stay sharp. Your route—socks, shirt, sweater, shoes—flows without stall or second thought. You stop “organizing” and just use the space, never worrying about a small item sparking a bigger mess or a pile collapsing by Thursday. The system has faded into the background, holding its structure even as your habits flex and shift.

    True, lasting organization proves itself not in how perfect it looks after one big tidy-up, but in the weeks that follow. When resets are fast, blends don’t happen, and your closet works as hard as you do, the system is doing its real job—quietly, reliably, and without drawing attention to itself.

    closetworks.myshopify.com

  • Why Regular Impact Wrench Calibration Prevents Costly Assembly Errors

    There’s a unique kind of aggravation in finishing an assembly—only to watch bolts edge loose, seams gap, or complaints return within days. If you’ve ever had to drop tools to re-torque a stubborn seam or track down an annoying rattle, you know those invisible problems that start with your most relied-on wrenches. Tool spec sheets might look almost identical, but day after day—through cut, drill, and fastening runs—the gap between a truly dialed tool and a drifter only grows. You can’t spot calibration drift with bare eyes, but you’ll feel it when your “finished” job circles back with trouble.

    Where The Slippage Starts: Calibration Drift on Real Jobs

    First days with a freshly tuned wrench usually go smooth—aluminum brackets cinch tight, new steel plates align without fuss, and fasteners come up to torque predictably. But real shop time creeps in: painted frame steel fights back, threads hit with corrosion, assemblies happen in cramped, uneven corners. Suddenly, the wrench feels a tad softer, or that final turn of the bolt starts to lack the stop you expect. On a quiet line you might shrug and keep moving—until, days later, the seam reveals a telltale gap or bolts demand a full force retighten.

    This is where the cost gets real. Missing spec by a few ft-lbs might seem minor, but that slip spreads: vibration control gets weaker, fit goes off, and the domino effect rolls on. Instead of pushing your project forward, you’re backtracking—cutting in new edges, sanding down bad joins, and cleaning up the avoidable mess one loose bolt started.

    Where Tool Weakness Hides—And When It Finally Shows

    Run through a rack of plastic anchors or softer alloys and the wrench might seem flawless; you won’t notice calibration fade through routine repetition. But shift to tougher scenes—fastening into painted flanges, overhead bracing, or popping decades-old rusted bolts—and that missing edge becomes obvious. The little things start dragging: bits that don’t bite, screws that spin just shy of flush, or blades that veer off true, forcing correction passes or “just good enough” fixes nobody likes to admit.

    Drift Doesn’t Announce Itself: Recognize the Tells

    An out-of-calibration wrench doesn’t scream for help. It’ll sound nearly the same, vibrate just a touch off rhythm—you might only catch it in the fatigue of late shifts or when the consistency in your work drops. Real warning signs show up after the job: seams that don’t sit right, bolts that back off after a first shake, or recurring calls for rework. If you hear your crew mutter “didn’t hold like last time,” invisible drift is already hurting your workflow.

    Scenes from the Floor: How Drift Eats Into Your Day

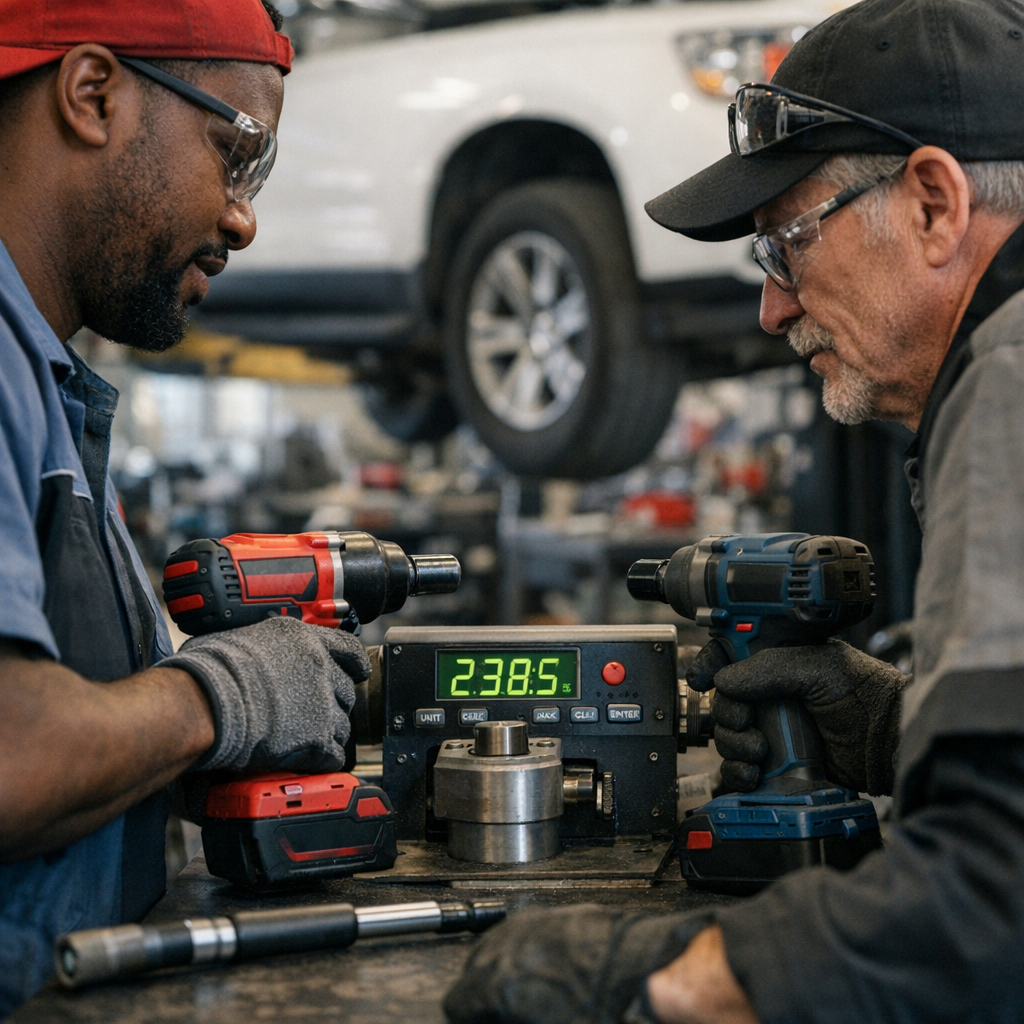
    Imagine pushing through a series of wheel swaps. By lug number twenty, a sliver of looseness sneaks in—not enough to halt you, but enough to question. A torque stick reveals you’re almost a dozen ft-lbs under. That slip is all it takes for bolts to walk out and for callbacks to pile up over the week. It’s not just the fix; it’s shuffling schedules, doubling back on jobs you already crossed off, and the fatigue that stacks when you’re chasing mistake after mistake down dusty shop aisles.

    The Fatigue Factor: How Calibration Drift Wears You Down

    No one uses tools in showroom conditions. Grease gums up trigger pulls, old paint chips work into moving parts, vibration bleeds output, and awkward jobs—up ladders, in cramped bays, across battered benches—take a toll. Over time, performance slips quietly; a drill grinds a little slower, a sander leaves uneven scratch patterns, a once-precise cut now frays at the edge. Each small miss compounds, swapping control and efficiency for extra labor and mounting mistakes.

    Make Calibration Routine, Not a Panic Response

    If you’ve been burned by mysterious loose bolts or shifty joints, calibration isn’t a formal box to check—it’s survival. Setting a calibration schedule—every six to eight weeks for tools in constant rotation—re-centers your workflow. Tightness in assembly, dust reduction from fewer sanding fixes, and smooth, predictable blade and bit performance show up fast when wrenches hit true spec every time.

    • Bolts hold tension even after machines run hot and vibrate for hours.
    • Seams stay true, saving re-torque headaches and last-minute sanding fixes.
    • Torque readings hover where they should, not scattered across a dozen ft-lbs—making every follow-up check a formality, not a scramble.

    Whether it’s an assembly line or a scattered home garage, keeping calibration routine translates into fewer surprise callbacks, smoother builds, and less time choking out fires set by fading precision.

    Don’t Wait for Warning Lights—When to Calibrate in Real Work

    Lock in calibration checks every six to eight weeks whenever a tool is in daily grind. Don’t let a stubborn job or tool “just feeling off” slide—run a check immediately if anything seems wrong. Pay attention to not just loose bolts and gapped seams, but also the subtler hits: fasteners that don’t bite first time, cuts that wander, or a wrench that needs more squeeze for every output. If a tool drops more than 10 ft-lbs from baseline, recalibration jumps to the top of the action list. Otherwise, those lost hours and do-overs keep stacking—stealing progress from even the best crew.

    Real Payoff: Consistency That Saves Your Energy

    Routine calibration isn’t a box-tick—it’s the backbone of reliable work. Sharper torque, surer control, and fewer repeat jobs mean faster builds and fewer afternoons lost to avoidable fixes. From fast repairs to weeklong builds in noisy, debris-choked garages, it’s that small, consistent advantage that prevents the spiral of touch-ups and fatigue. Make calibration a habit: keep your tools trustworthy, your output tight, and your projects finished—once, not twice.

    Gumboll: For the tools that make the difference

  • Why Defining Home Spots Stops Clutter Drift in Your Workspace

    The first week after installing modular shelving and wall rails, it feels like you’ve finally cracked the garage. Everything has its row, the bins are still crisp with labels, all that old clutter cleared away. But anyone who actually uses their workspace—day after day—knows this honeymoon vanishes fast. By month’s end, the bins drift, the daily tools land on any available surface, overflow collects at the edges, and the generous aisle you planned for becomes a one-foot squeeze. Resetting the space is less clean-up, more rearranging the same obstacles. The hidden failing isn’t broken hardware—it’s missing “home spots” for the staples you handle every single day.

    When “Looking Organized” Stops Being Enough

    It’s easy to mistake shelf symmetry for a real solution. Freshly organized cubes and wall grids promise an end to hunting for gear. In practice, those tidy rows start slipping apart with each round of projects. Daily friction builds almost invisibly: a tape measure always left teetering on the edge, garden shears propped on the freezer, extension cords tangling with tools in the catch-all bin.

    The real trouble creeps in: Without firm, intuitive landing spots tied to your actual routines, even premium modular setups quietly unravel. The things you grab most never get a dedicated home—so they pile up, circulate, or squat “temporarily” in the nearest open spot. Gradually, your shiny setup turns into an obstacle course of half-empty bins and crowded corners.

    How the System Blinds You to the Actual Problem

    Consider the real flow: every week, you find yourself shifting a rolling cart yet again, just to get at the saw you actually need. You reach behind a stack of bins—meant to be accessible, now blocking their own shelf. Hooks and cubbies look neat until their layout doesn’t match the way you move. Suddenly those wall rails start collecting “just for now” piles instead of organizing your tools.

    Rigid sorting (all hand tools here, all garden gear there) barely survives real life. The cordless drill never sits quite right beside the long-handled rake. Heavy loppers bend the bin meant for light clippers. Overflow containers, meant as backup, wedge their way to the door—forcing you to loop around every time you carry supplies in or out. You start noticing “dead corners” that only exist to collect what doesn’t fit anywhere else.

    Why Real “Home Spots” Change Everything

    More bins won’t solve it. The fix is logic that fits your routine: give every high-rotation tool or supply a specific, visible landing place. Don’t over-complicate and label everything—zero in on the gear that travels between hand and shelf almost daily. The ratchet set, the utility knife, those gloves that never stay put—each needs a dedicated, clearly marked home instead of a vague shelf or generic bin.

    One example: a garage owner quit chasing screwdrivers by blocking out a corner of the top shelf, labeling it with tape and color, and making it the only legal landing zone. Now screwdrivers actually return to their spot, not the paint shelf, not the counter, not lost to the clutter-jungle. Another win: mounting a small rail at eye level—just for two kinds of gardening shears—meant resets became automatic. They never vanished into the bin of spare cords. End-of-day cleanup got faster because you stopped hunting and stopped moving bins just to carve out space.

    What Makes a “Home Spot” Stick

    • Visibility: You see it without digging or guessing.
    • Access: Nothing else blocks or hides it—not even the easy stuff.
    • Precision: It’s sized for the item—enough space, not sprawling empty space.
    • Personal marker: Tape, label, color—whatever jumps out so there’s no pause.

    When high-touch items land in their exact place every time, your hands remember. Resetting becomes automatic. Search and shuffle disappear.

    What Modular Shelving Nails—and What It Misses

    Modular means flexibility—a rolling cart that actually moves to your work zone, rails that can go up or down when spring projects replace winter ones. That’s real-world advantage over fixed systems. But “flexible” isn’t enough without intention: you need to decide which tool lands where, and see those decisions reinforced in the layout. If you keep hesitating or double-checking where an item belongs, something’s off.

    If one wall is bursting and the other is always empty, or if certain spots always collect “floaters”—stray drills, bags of screws, always-out battery packs—you’re seeing clues. The organized look fades the moment your daily flow (grab, move, return) doesn’t match your storage map. You start sidestepping carts, reaching around bins, stepping over backup crates that block your path out the door.

    Why Clutter Sneaks Back

    No matter how clean you make it, spaces without true home spots revert. A level perches on the garden bench for a week. Zip ties scatter into whatever bin is closest. Even right after a major reset, by Friday you find yourself moving two boxes to reach your drill—again. Blocked aisles, out-of-place tools, awkward piles: these aren’t rare accidents, they’re signals the system isn’t working with your actual behaviors.

    Is Your Storage System Actually Working?

    • Is your “mobile” cart mostly blocking your only walkway?
    • Do you reach past bins constantly just to get what you need?
    • Does one zone always fill up, while shelves elsewhere gather dust?
    • Is there a corner that quietly becomes overflow central, week after week?
    • Do resets take longer with each round—more shuffling, less true cleanup?

    These are your cues. Not that you need more storage, but that you need clearer, smarter home spots for the tools and supplies you use every cycle.

    Real Clarity Isn’t More Bins—It’s Better Flow

    Here’s the test: At the end of a day, can you reset the core zone in under a minute, without stopping to think? Or are you still negotiating with your setup—babysitting bins, making awkward Tetris moves?

    Spaces that work in reality make resets second nature. Every go-to tool or supply returns to a familiar, easy spot. Walkways don’t disappear behind backup boxes. Daily motion is clear and unblocked. The storage expands when the project changes, without turning every clean-up into a mini-move. You forget about your system—because it fits your habits.

    The payoff isn’t a showroom. It’s that on a random weekday, you can step in, grab what you need, and put it back without breaking stride. Setup stops being a project of its own and just works—the way you actually work.

    Find modular storage that adapts as your real habits shift at StackNest.

  • How Thoughtful Closet Design Reduces Daily Clutter and Saves Time

    Every closet has that brief, hopeful moment—right after the big clean—when folded piles stand straight, baskets line up, and hangers point the same direction. It looks organized. You feel in control. But then, regular life sneaks back in. You dig out shoes hidden behind sweaters. A basket gets dragged out just to reach your work bag. By Thursday morning, the shirt stack collapses after one hurried grab, and that tidy feeling dissolves into quiet frustration. What looked organized doesn’t stay easy. In just a week, it’s obvious: the difference between “put away” and “works every day” is all in the design.

    Where Storage Starts Failing—Subtle, Repeated Frictions

    Real-use storage isn’t about perfect stacks—it’s about avoiding the need to touch, nudge, and restack just to get to something routine. When shelves hold more than one type of item, or family members share the same closet, friction multiplies fast. If you reach for a scarf and send two hats tumbling, or you have to drag out a bin and sift through mismatched socks, the system is wearing thin. These moments slow you down more than you realize—and signal what isn’t working.

    Clutter on the shelf’s edge, corners that always seem “busy,” and piles that melt into each other aren’t just daily annoyances. They’re proof the setup needs a rethink, not just another round of tidying.

    How Disorder Grows, One Grab at a Time

    Mess rarely erupts in a single afternoon. Take a hallway closet doing double-duty: towels folded on one side, boots and gloves jammed on the other. Week one, it’s fine. By week two, the boots have muscled towels into corners, stacks slide inward, and midday grabs leave mittens on the floor. That shelf isn’t “messy”—it just demands fixing itself, constantly, for basic use.

    Bedroom closets fall apart the same way. First, shelves fill too fast. Then, grabbing a T-shirt sends sweaters slumping forward. Suddenly, bins are mystery boxes—one mix of slippers, scarves, and last year’s pool float. The change is slow, but the friction is daily. These aren’t failures; they’re the lived-in proof that looks fade under real habits.

    Resetting Shouldn’t Be a Project

    If you need a two-step process to get to what you want—slide this, re-stack that—or find yourself folding towels just to make boots fit again, something’s wrong. The true red flag: when each “quick tidy-up” turns into a mini chore, and every grab requires a workaround. That’s not a sustainable system; that’s barely controlled chaos.

    Every Category Needs Its Own Track

    The most resilient closets don’t rely on stacks staying perfect. They rely on categories staying separate—with boundaries that survive through dozens of busy mornings. A system works when a quick toss or a single pull doesn’t blur the lines or tip the balance. But when shoes migrate into towel territory, or that “winter bin” absorbs whatever won’t fit elsewhere, the closet’s letting you down.

    Sometimes, one divider makes the difference. Install a vertical panel between towels and boots: suddenly, pushing shoes in doesn’t squash folded linens, and towels stay upright through daily grabs. No more reshuffling. Resetting drops from five steps to one. The space stops asking for attention and just works—even when you’re in a hurry.

    Spotting Warning Signs Before It All Collapses

    Most storage headaches announce themselves early:

    • Stacks toppling or oozing across shelf edges
    • Categories blending every week until it’s just “stuff”
    • Digging or reshuffling just to grab a single thing
    • Baskets or bins filling up but not clarifying what’s inside
    • Shelves running out of space, faster than the actual volume of your stuff

    These aren’t personal defeats—they’re signals you need clearer inner boundaries or better-fitted tools. Often all it takes is a right-sized bin or a simple shelf divider to reroute chaos into a routine that sticks.

    Small Adjustments, Big Improvement

    There’s no one-size fix, but a few targeted changes overhaul most closets:

    • Simple Dividers: Stop boots from bulldozing towels, keep bags from toppling sweaters. A vertical panel keeps items in their zone—even after a clumsy grab.
    • Purpose-Built Bins: Assign bins to a single item type and keep them that way. If a bin eats shoes, hats, and old receipts, it won’t sort anything—it’ll just hide the mess.
    • Hooks for Habitual Grabs: Scarves, handbags, and jackets tossed on hooks are instantly accessible—and don’t topple anything else when you reach for them.

    Even a minor shift—raising a shelf to use dead vertical space, or designating a defined drop-zone for shoes—can deliver a smoother morning. You shouldn’t have to “prepare” your closet every week for it to work; when categories keep their lane and daily use runs smoothly, the storage pays you back every time.

    The Real Test: Living with the System

    Looking organized isn’t the same as living organized. Closets prove their worth by surviving daily habits—not just surviving the first cleanup photo. The space that lets you reach, return, and reset with one motion is a keeper. The system that asks for constant correction isn’t offering clarity; it’s just performing order.

    Don’t settle for storage that holds, but doesn’t help. A closet that makes you adjust, re-stack, or search with every use falls short—no matter how tidy it once looked. The real upgrade is when fixes fade into the background and routines get faster, even on the busiest mornings.

    For storage solutions designed to work with how you actually live—dividers, fitted bins, smarter shelves, and simple hooks—find options at ClosetWorks.

  • Choosing Jig Saw Blades That Resist Heat for Cleaner Continuous Cuts

    The drag hits fast. One minute your jig saw is gliding through MDF, plywood, or laminate—then suddenly every inch feels slow, rough, and heavier in the hand. It’s the classic shop scenario: What started as easy work through soft pine turns into a grind as soon as you hit denser stock or start racking up more cuts. Clean lines and quick progress slip away, replaced by burning edges, wandering blades, and the extra passes that steal your afternoon.

    When Standard Blades Rapidly Fall Behind

    On light cuts or soft scrap, most jig saw blades seem fine. For small projects or occasional use, standard blades follow the line and get through the job. Nothing feels off—at first. But get into a real build, where the cut list stretches and every board seems to get thicker, and the limits snap into focus. Routine work exposes “good enough” blades for what they are—the weak link that slows you down and chews up your finish.

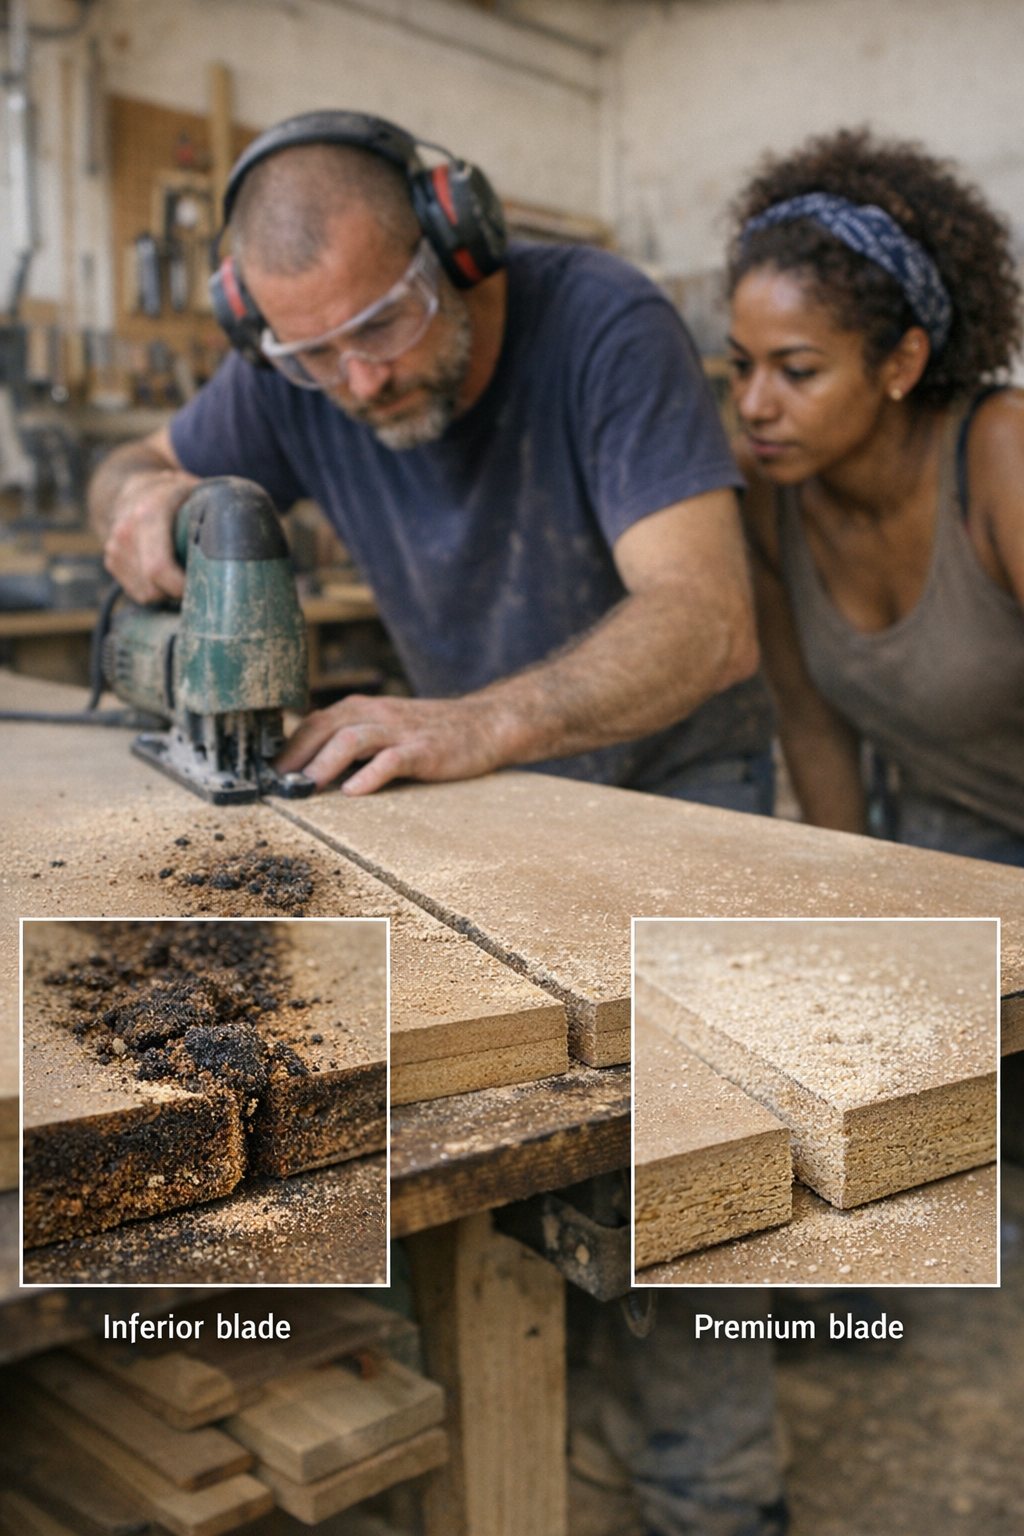
    Heat creeps in. Edges splinter. Each fresh pass demands more muscle and attention, while the saw bucks harder and your accuracy suffers. You end up wasting energy reworking mistakes, replacing cheap blades, and sanding out messes you didn’t expect to make. The hit isn’t only to your speed—it’s the cramped grip, the burned scrap pile, and the creeping frustration when your tools can’t keep up with real workflow.

    How Trouble Builds, One Cut at a Time

    Picture a workbench strewn with sheet goods, afternoon sun bleeding heat through a garage door. The first few runs are crisp, no problem. By strip number four, the story changes: The blade lags, you grip tighter, the saw protests with a harsher sound, and that distinct scent—hot glue and charred wood—rises from the cutline. Now, every board feels like you’re working uphill.

    • Overheated edges: That telltale shine along the cut, or scorch marks that resist even firm sanding.
    • Gummed-up teeth: Sawdust clinging in sticky lumps, stalling your blade partway through a rip.
    • More effort, worse cuts: Needing two hands to keep straight, and still sanding out ragged lines later.
    • Wandering and chip-out: The blade flexes out of line, leaving uneven laminate or chewed MDF edges.

    Every fresh board, the fight grows. By the time a pro or serious hobbyist is halfway through their stack, the cost of “convenient” blades is fully obvious. What’s meant to save a buck ends up costing time, energy, and results.

    What Actually Sets Premium Blades Apart

    Marketing promises “fast, clean” cuts, but real difference comes down to the details: sharper geometry, friction-cutting coatings, and tougher alloys built to survive more than a couple of passes. A premium blade bites cleaner, ejects dust instead of melting it, and resists the clog-and-drag that torpedoes jobsite efficiency. You’ll hear it in steadier motor tone, see it in dust that stays pale—signs of a blade that’s staying cool under pressure.

    The improvement isn’t just the first cut. A genuinely high-quality blade stays sharp after a dozen sheets, not just a couple. It holds its precision, resists buildup, and won’t punish your forearms or finishing time. Less mid-job stress, less blade fiddling, and fewer touch-ups—those savings add up fast in a real shop workflow.

    Real-World Example: Cabinet Cuts Without the Stall-Out

    Let’s say you’re busting down a full 18mm MDF sheet for cabinets. Standard blade? The first cuts are fine. Then you’re using more pressure to stay on line, blade wobble creeps in, and you’re grinding through awkward heat-blued edges. Now you’re scraping off char or recutting splintered sides—a recipe for lost momentum and wasted stock.

    Swap to a quality, coated blade with smart tooth design and suddenly the feed rate stays constant, the saw feels lighter, and the blade runs cooler. Cuts track straight, and you’re not fighting flex or trying to sand out char. After a while, you realize you’re not tensing your wrist or stopping to yank out stuck debris. That’s what premium actually looks like: smoother workflow you can feel, not just see.

    How to Spot Blade Problems Before You Lose Quality

    The real warning signs aren’t on the packaging. They show up when you’ve been working over and over, especially on denser materials in real heat:

    • Cutting produces smoke, not just dust, midway into the sheet.
    • The saw edges off the line or jumps hard enough to make you slow way down.
    • Hand fatigue climbs fast and cuts start to look rushed or jagged after just a few passes.

    Catch these before your project unravels. These aren’t small annoyances—they’re your cue to put down the bargain blade before you double back for fixes or even need to recut finished panels.

    Quick Tactics That Save Finishes (and Strain)

    A tip you won’t see on the label: If the cut starts feeling tougher or you see burnt debris, stop. Clear dust from the teeth, let the blade cool off, and resist “muscling through”—it rarely ends well. If it keeps giving off heat or binds again, switch out to a quality blade. The extra few bucks you spend will show up as smoother edges, less sanding, and a lot less strain on you and your tools.

    Choosing Blades That Keep the Work Moving

    Real shop flow—especially when you’re bouncing between the garage, jobsite, and home—depends on tools that can last more than a handful of cuts. A good blade means you maintain control, cut fatigue, and keep your focus on progress, not frustration. Smoother cuts. Less cleanup. Fewer “redo” moments when everything feels like it’s sticking or burning out early.

    If you’re running panels back-to-back or just sick of fighting slow-tool syndrome, check the blade you’re using before that first line. The true value of a premium blade doesn’t always show up until the tenth (or twentieth) pass—but by then, every extra bit of smoothness, straight tracking, and saved effort pays real dividends on your time and results.

    Shop power tools, blades, and real performance accessories at Gumboll

  • Creating Wall Storage That Matches Daily Use and Reduces Clutter

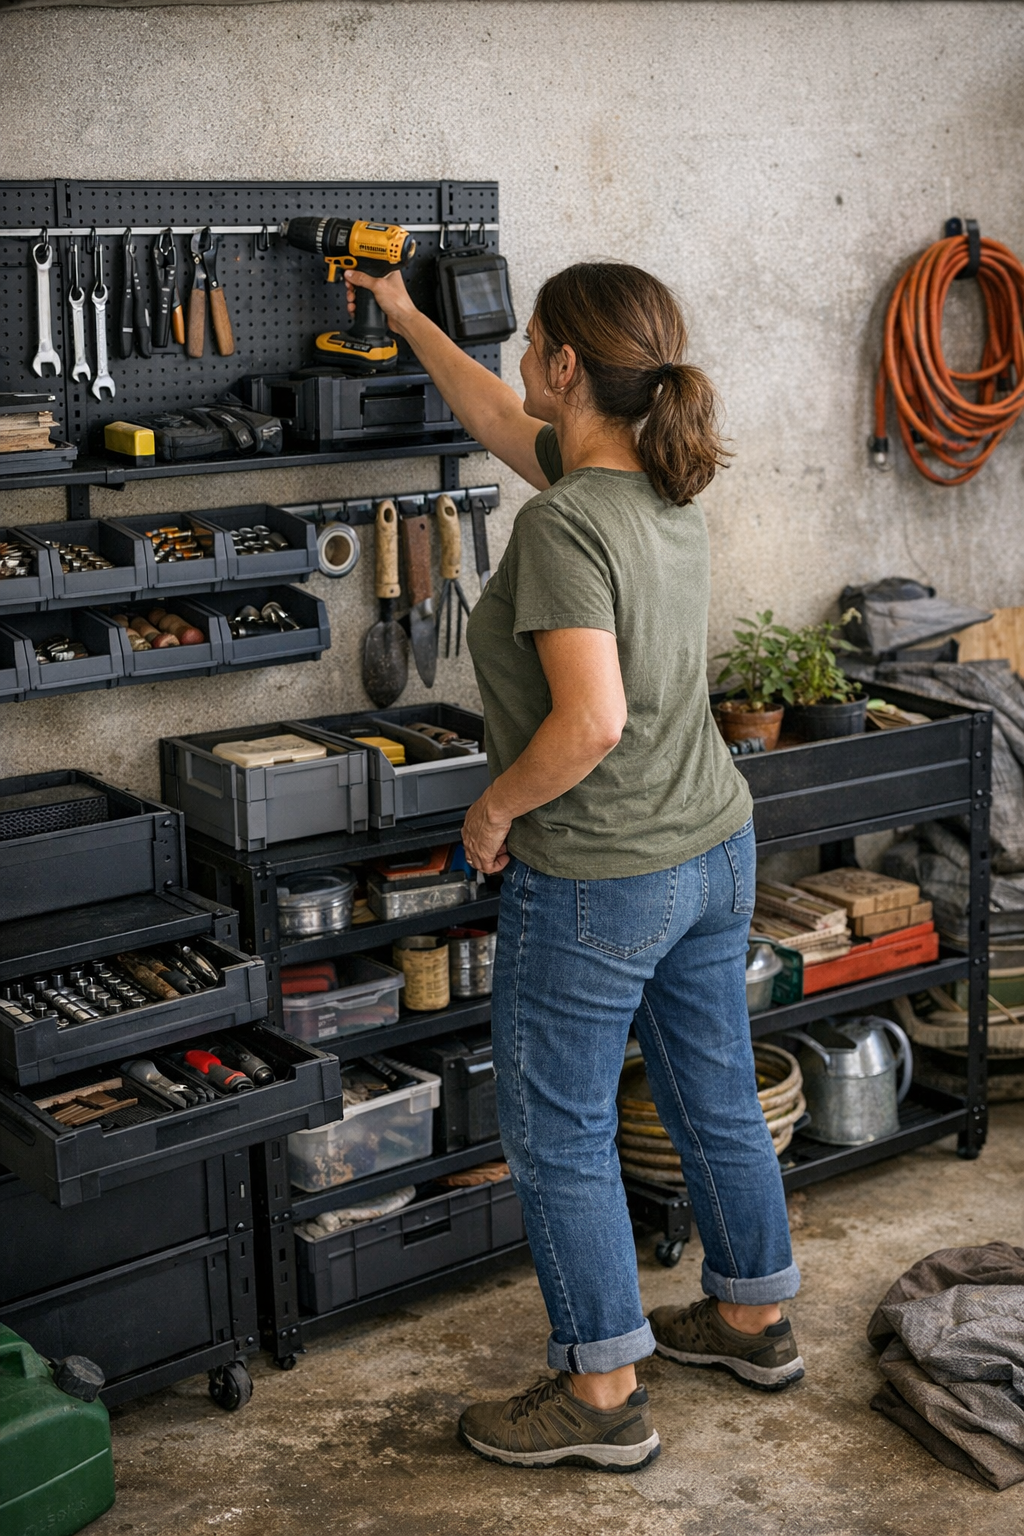
    That rush of satisfaction when you first set up wall storage in your garage or workshop is real—and a bit deceptive. Shelves are lined up. Tools and parts stand at attention in labeled bins. The floor feels open for the first time in months. But then, as you dig into actual work—one project, maybe two—the system you just installed begins to press back. Your wall looks organized, but your hands and habits say otherwise.

    When “Organized” Stops Fitting Your Routine

    The typical wall storage layout—stacked bins, crisp pegboards, modular tracks—gives the illusion of readiness. But walk through a few real jobs and the compromise becomes obvious. Each grab for a tool changes the flow: reaching past awkward edges, skirting around a rolling cart parked in the only open gap, shifting one bin just to get to another. The setup that’s supposed to streamline your area quietly slows you down, project by project.

    Maybe the fastener box you need is two rows up, just out of reach, and you stand on tiptoe—again. Or you’re always bumping the cabinet door because the handles crowd each other. For all the visible order, the routines beneath keep stutter-stepping, collecting little piles of “return later” on every available surface. The floor might stay clear, but your effort is getting rerouted by your own storage system.

    The Misleading Calm of a Clean Wall

    Don’t trust that tidy look at a glance. Sure, a flush row of bins looks neat, but if pulling out one means unstacking two, or if a pegboard jammed with tools means handles get hooked together, the surface calm is masking daily friction. The real cost is measured in small, repeated disruptions—each time you have to shuffle boxes to get a single drill bit, or circle around a rolling cart parked out of ‘temporary’ necessity.

    Ask anyone with a loaded garage wall: Over time, your top-use tools wander. Bins double-stack, or land on the floor “just for now.” You start tracking which bins gather dust because it’s too annoying to return things properly. A handsome wall becomes a maze of micro-adjustments, minor blockages, and the slow creep of overflow into your freshly reclaimed floor space.

    Everyday Clues That the Wall Isn’t Pulling Its Weight

    Real life exposes what the neat install hides. Picture a Monday—your drill lives in prime territory, but by Thursday, pliers and screwdrivers have migrated to the workbench after repeated stretching or acrobatics just to hang them back. Three bottlenecks crop up again and again:

    • Overlapping pegs: It takes a wrist twist to fit a screwdriver back without shifting a wrench or knocking off your measuring tape.
    • Bland, packed bins: Rows of small hardware bins blur into one, so you resort to rummaging every time you need a washer, and “returning” items is just as tedious.
    • The “default drop zone”: Bins lower on the wall gradually claim all the busy tools, because returning them up high is just awkward enough that you stop bothering. Suddenly, overflow hardware mixes with daily drivers—a habitat for clutter.

    Now the smooth return after a project is replaced by improvisation: a favorite tool perched on the edge of a shelf, an extension cord coiled in an empty cart, the whole area slowly drifting off-script. Containment beats chaos but never quite delivers a frictionless flow—you’re maintaining appearances, not momentum.

    Pushing Past Looks: The Impact of Real-World Tweaks

    Improvement isn’t about adding another label or ordering more bins. It’s about shaping the system to meet your actual moves, not just mimic the showroom. Try this:

    • Center your most-used tools at chest height, spaced apart so you can grab and replace each one with a single, blind reach—no dodging neighboring handles.
    • Dedicate lower shelves to bulk hardware or overflow, where you expect to dig, not reset quickly.
    • Divide the wall by function. Make one section for hand tools, another for fasteners, a third for safety gear—rather than mixing everything on one crowded board.
    • Look at how you actually approach the wall. If you’re always reaching above eye-level or leaning sideways, lower the busiest zone by a foot. That 12-inch tweak can kill off a daily annoyance for good, shrinking the awkward footprint and making resets automatic again.

    The effect? Those gaps where clutter collected disappear. You stop inventing workarounds and start trusting the wall to support, not interrupt, your projects. Suddenly, you’re not thinking about storage mid-job—it just keeps pace with you.

    Can You Feel the Friction? Here’s How to Notice

    The evidence is right in front of you: tools start living on carts, benchtops, or even the floor. If every cleanup uncovers a pile of “I’ll put that away later,” it’s not laziness—it’s the wall getting in your way. And the classic mistake? Trying to fix it by adding bins, which only spreads the mess unless the zones match real tasks.

    Watch for dead corners—sections of wall you never use because the angle’s wrong or reaching around a cabinet edge is always awkward. These spots pull in random leftovers and quickly become clutter magnets. True efficiency comes from resisting the urge to fill every inch and instead making every zone a natural “home” for something you use—no shuffling needed.

    Immediate Fixes That Actually Work

    • If returning a tool requires moving (or risking) another, rework that area so each tool’s path is direct and single-step.
    • If one wall is jammed while another stays empty, cut the guesswork: set obvious roles for each zone so you’re never “just putting it somewhere.”
    • If cleanup time lags behind the work itself, change zone height, rethink traffic paths, or let go of the urge to over-stack for looks. The time you reclaim is the proof it’s working.

    The Difference You Actually Feel: Movement, Not Just Order

    A wall setup that truly helps doesn’t just look sharp—it erases the small stalls that slow you down. Resetting after a rush job stops being a chore. You reach, use, and return tools on autopilot, without second-guessing where things live. The floor stays open because the wall absorbs routine clutter—no clogged corners, no accidental drop zones.

    The real mark of an effective setup isn’t the first-day reveal but how easy movement stays, week after week. When you’re not tracing the same awkward footprints or pausing to untangle a storage pileup, you know the system fits your flow. In the end, it’s about matching visible order to lived-in clarity—a shift from staging a space to actually owning it, day by day.

    Find modular wall setups, rolling carts, and storage systems designed to flow with your real routines at StackNest.