Category: Tools & Workshop

  • Choosing Between Wire Shelf Baskets and Dividers for Lasting Closet Order

    Closet shelves never stay fixed for long—no matter how perfect they look on reset day, real life exposes every flaw fast. Maybe you fight through a tangle of bags every morning, or dig for a sweater buried beneath a toppled stack. You spend time reorganizing, but within a couple busy days, shelf order crumbles. Categories blur, grab-and-go is gone, and you’re back to reshuffling. That’s where the choice between wire shelf baskets and dividers really matters—not in how they look on day one, but in how they hold up against your actual, imperfect routines.

    The Recurring Messes That Break Most Closet Setups

    Closets fail right at the stress points: reaching behind a pile for your favorite shirt, pulling out towels from underneath a teetering heap, shoving a purse back into a crowded corner. Even after a full reset, stacks lose shape fast. Shirts slump, jeans squash lighter items, and anything not perfectly folded migrates. By midweek, the clean rows you created melt together, and the “sections” you defined are lost.

    The core problem is reliability: Can you keep categories separate—and reach what you want—without a nightly reset or constant frustration? Both wire shelf baskets and shelf dividers claim to solve this, but their limits surface the moment you need speed or make less-than-careful moves.

    Shelf Dividers: Order That Works—Until It Doesn’t

    With shelf dividers, there’s an immediate visual payoff. Folded shirts, stacks of jeans, even towels look tidy and split into clean, logical zones. You feel like you’ve carved out permanent space for every type of clothing. Lines are crisp, boundaries obvious—a snapshot of organization.

    How Dividers Let Clutter Creep Back

    But the first busy morning usually wipes out the photo-ready look. Pull a shirt from the middle? The stack slouches and spreads beyond its allotted lane. Grab jeans in a rush, and the pile next door shifts. Dividers can’t stop stacks from changing shape or clothes from losing definition. If your family shares the closet, a careless reach multiplies disruption. By the end of the week, “divided” shelves look like a bad Jenga game—lots of vague, overflowing piles to rescue yet again.

    The Everyday Scenarios

    Picture the top shelf in a busy entry closet: scarves, hats, towels, all positioned between clear dividers. It works until someone’s looking for their missing beanie, or digging for guest sheets at the back. In seconds, dividers are bypassed as items fall over, forcing new stacks into old spaces. Dividers are at their best only when everything stays stackable and nobody’s in a hurry—but real closets rarely run that way.

    Wire Shelf Baskets: Containment with a Side of Inconvenience

    Wire baskets transform messy shelves by drawing firm lines: odd-shaped bags, slippery knits, and all the loose accessories finally have a corral. Baskets stop items from drifting or spilling into each other, even after a week of use. The difference is visible—categories stay put, and you don’t spend your evenings herding sweaters back into their zone.

    The Catch: Retrieval Isn’t Always Instant

    But baskets come with their own quirks. Looking for the clutch at the bottom? You’ll need to lift or unpack what’s on top, or pull out the basket entirely. This works for items you use occasionally, but if you’re reaching in each day, it slows you down. Baskets reduce shelf chaos, but they trade the luxury of fast, at-a-glance access for the discipline of stronger containment.

    Everyday Basket Realities

    Envision a laundry shelf lined with baskets: socks, dryer sheets, stray cleaning cloths all packed together. Items never wander off, but “grab and go” becomes “root around and repack.” It’s neater—your shelves don’t dissolve during the week—but now you introduce a mini sort-out ritual whenever you use them. The mess is contained, but your routine includes new steps.

    Mixing Baskets and Dividers: Building Real Resilience

    Closets rarely stick to one category per shelf—most have oddball mixes: stacks of jeans beside loose workout gear, guest linens next to bags. No single system can cope with this shifting terrain. Dividers keep shirts and pants from sprawling—but can’t cage loose or hard-to-fold items. Baskets handle the wild cards, but slow down access to everyday pieces.

    The most durable setups blend both: Line up shirts or pants between dividers for quick scanning and pulling—reserve baskets for soft, lumpy, or slippery items that rebel against stacking. This not only keeps roles and categories clear but also absorbs the inevitable chaos of rushed mornings, sharing with family, or odd-shaped belongings. The result? Your shelves function, even when your routine doesn’t stay flawless.

    Simple Storage Tweaks That Actually Help

    • Put baskets where things creep: Place them in overflow zones—where extra purses, scarves, or workout gear tend to invade neighboring stacks.
    • Use dividers where stacking works: Reserve them for shallow shelves or rows meant for like-sized items—shirts, towels, jeans—where all you want to prevent is sideways spread, not total separation.
    • Leave breathing room on your shelves: Resist the temptation to pack every inch. Giving each storage zone just a bit of slack cuts down on knocking things over and means less frequent major resets.

    From “Organized” to Actually Easy

    Overstuffed shelves aren’t fixed with a single product or a single reset. Real organization lives in the day-to-day: reaching for what you need without reshuffling half a closet, sections holding their meaning, and clutter staying where it belongs. It’s not showroom perfection—it’s a system that gets knocked around all week and still works.

    Wire shelf baskets and dividers each target different storage headaches. Neither is a miracle on its own—but the right mix, grounded in the reality of your routines, gives you a closet that stays useful after the photos are taken. The best setups aren’t about impressing guests, but about making the morning rush less frantic and reset duty a quick task—not a chore that eats up your Sunday night.

    Shop ClosetWorks closet organization systems, baskets, and dividers

  • Protect Your Home Exterior with Safe Pressure Washer Techniques

    The warning signs rarely announce themselves until it’s too late: a waver in the spray pattern, the sudden buzz of vibration in your hand, the pitch of water shifting as it hits paint instead of siding. One careless pass with a pressure washer can turn a satisfying cleanup day into a fresh problem—scratched finishes, sodden wood, and headaches that you won’t spot until the next job, or the next rainstorm.

    Pressure Washing: Where Routine Maintenance Goes Off the Rails

    Pulled from the corner of the shop, a pressure washer offers that elusive promise—make the battered work site look new, without hours of scrubbing. But beneath that raw speed is a choice: every squeeze of the trigger is a split-second decision about how much you’re risking the surfaces you meant to protect. The urge to move fast, to cut through that grime and dust, is real. So is the creeping regret when you realize a dirty deck has become a fuzzed-out patchwork, or trim is left with missing flecks of paint you swear were solid an hour ago.

    The fallout rarely appears as spray hits siding or rail. Instead, it sneaks up a day or week later—streaks across wood grain, warped boards, water ghosting underneath siding panels. There’s no dramatic blowout. There’s just that moment, standing with a sander or a caulk tube, wishing you’d run a different tip or eased off the trigger a few minutes sooner.

    Why Tool and Surface Mismatch Always Finds You

    Most pressure washers and their kits look near identical on the hardware aisle—plastic cases, curly hoses, nozzles impossible to keep sorted. That sameness hides crucial differences. Maybe you’re running a cleanup after a day of cutting new bench timbers, flying through dust and chips. The sprayer glides smooth across PVC or composite: quick, controlled, no resistance in the grip. But wheel around to a weathered back shed—the one with the paint already thinning from last winter—and suddenly that smoothness turns into a grating feedback through your wrist, spray marks blooming in the spots you can’t unsee.

    The minute you pair a wrong tip or push the PSI too high, you’re no longer cleaning—you’re creating your next repair list. Fine fibers lift off old planks, paint edges curl, and anywhere the spray lingers at the wrong angle, you’re one pass away from patches you’ll need to resand and coat. Most jobs don’t show the issue while you’re still working. The real cost lands later, in uneven textures, peeling surfaces, and wasted materials.

    On the Clock: A Scene from the Jobsite

    It’s the start of the season. Tools are scattered everywhere—plunge saws cooling off, a stack of drill batteries still charging, and you just wrapped up a run with the pressure washer on a grimy slab. It should be a quick reset: blast mildew off lower siding, touch up the window trim, sweep pollen off upper sills. But you don’t re-check the tip—still set up for concrete grit—and you go at soft paint and old wood at full tilt.

    The first loop feels efficient. The second? Paint flecks swirl in the runoff, the smooth grip buzzes oddly in your hand, and now you see you’ve overdone it. The real sting comes hours later, when dried streaks pop out or the surface fuzzes where you lingered too long. Now, instead of a finished job, you’re prepping boards for sanding and awkward touch-ups you didn’t budget for.

    Adapt or Repeat: Lessons in Tool Adjustment

    Too many callbacks and minor disasters—grain razed, smooth siding left pitted, edges of trim feathered out—finally pushed a change. I ditched the turbo nozzle and started every wood or painted job with a 40-degree tip and low pressure. The immediate effect? The sprayer ran smooth, no feedback jolting through the handle, and the water rolled off evenly instead of eating into the finish.

    There’s no wizardry here. When the job meant washing close to vents or gaps, I widened the spray and doubled my distance. It wasn’t just about surface protection—it also meant less debris flung in the shop, fewer mystery drips behind trim, and, crucially, no surprise moisture showing up under window casings later that week. Cleanup sped up. The cycle of resanding, painting, and fixing faded. Surfaces actually lasted, so I wasn’t running the sander or paint tray every season just to hide last year’s mistakes.

    Three Classic Pressure Washer Mistakes That Haunt Real Projects

    Trusting the Default Setup

    If you’re always using whatever tip or pressure setting the tool had last—especially in the scramble to knock out tasks—you’re asking for micro-damage. Even a half-step too much turns a maintenance wash into a subtle destroyer, roughening wood, piping water precisely where it shouldn’t go, and erasing finish in ways that don’t show up until you’re back on the ladder for repairs.

    Bigger Isn’t Better: Overpowering Sensitive Surfaces

    That urge to blitz through soft pine, trim, or painted wood with a tight jet? It feels effective until you catch yourself gently sanding out scars or hauling out tubs of filler for all the spots you “cleaned” a bit too hard. If you’re repainting after every wash, your setup is all wrong.

    Spraying Blind around Edges and Gaps

    Too much confidence near seams, vents, or window edges with the narrow spray? That’s an invitation for inside leaks, trapped grit, and late-season mold. Experience means noticing how water pools, how edges feel under spray, and stepping back—literally—when those clues add up.

    Quick Shifts That Pay Off Down the Line

    • Begin with the widest spray angle and only narrow if absolutely necessary. Wider coverage means less risk of instant damage.
    • Lower the PSI until surfaces show zero color shift, fiber rise, or roughness. If the spray “sounds” different on contact, you’re too aggressive.
    • Double your standoff distance near joints and openings. It’s a small slowdown for you, but caps off a parade of future repairs and pristine pawprints from debris that never gets a chance to scatter.

    The Feel and Feedback: Knowing When to Change Course

    Don’t just watch—listen and feel. If the grip vibrates oddly, if runoff leaves standing pools rather than sheets clean, or if the spray’s tone roughens mid-pass, those are all red lights. If you’re routinely sanding the same boards after each wash, that’s the tool talking back: you’re wasting time and creating work you don’t bill for.

    Skilled users don’t wait for disaster. Mid-job, they tweak the angle, switch the tip, step back. Those quick pivots aren’t interruptions—they’re basic shop sense, and they’re what make efficient work actually last.

    Keep the Cleanup off Your Punch List

    Pressure washing should end work, not create it. Use a 25- to 40-degree tip for wood and painted surfaces; reserve the pinpoint jets for the spots that truly demand it—bare concrete, brick, or caked-on trouble. If a section feels off, stop. Change the setup before fixing another mess.

    Every time you reach for the pressure washer, you’re deciding what gets cleaned—and what’s going back on the fix-it list. Make the right tweak, and the finish you want is the finish you get, not just until the next rain, but all season.

    http://gumboll.myshopify.com

  • Why Your Organized Cabinets Fail During Real Daily Use and How to Fix It

    The Neat Setup That Doesn’t Last

    Anyone who’s ever lined up a set of cabinets or snapped together a modular shelf knows the momentary satisfaction of a picture-perfect setup. For a day or two, every bin and tray sits in the right spot. But as routines kick in, friction pops up fast—cart wheels catch, tools float from assigned spots, narrow pathways become obstacle courses, and corners meant for “overflow just for now” turn into permanent dumping grounds. The truth is, setups that look finished on Saturday crumble by Wednesday under the pressure of real use.

    When “Storage” Only Looks Organized

    The real test isn’t more space—it’s smoother movement. There’s a quiet difference between stashing things away and building a setup that keeps pace with you. Cabinets and racks promise order on install day, but repeatedly shifting carts just to clear an aisle, sliding a door around a bin you didn’t plan for, or lifting three trays to reach one screw—that’s where cracks appear. Day by day, these micro-obstacles slow you down and pull energy out of every routine. Organized storage that interrupts your flow is just another form of clutter.

    Seven Days In: The Real Scene

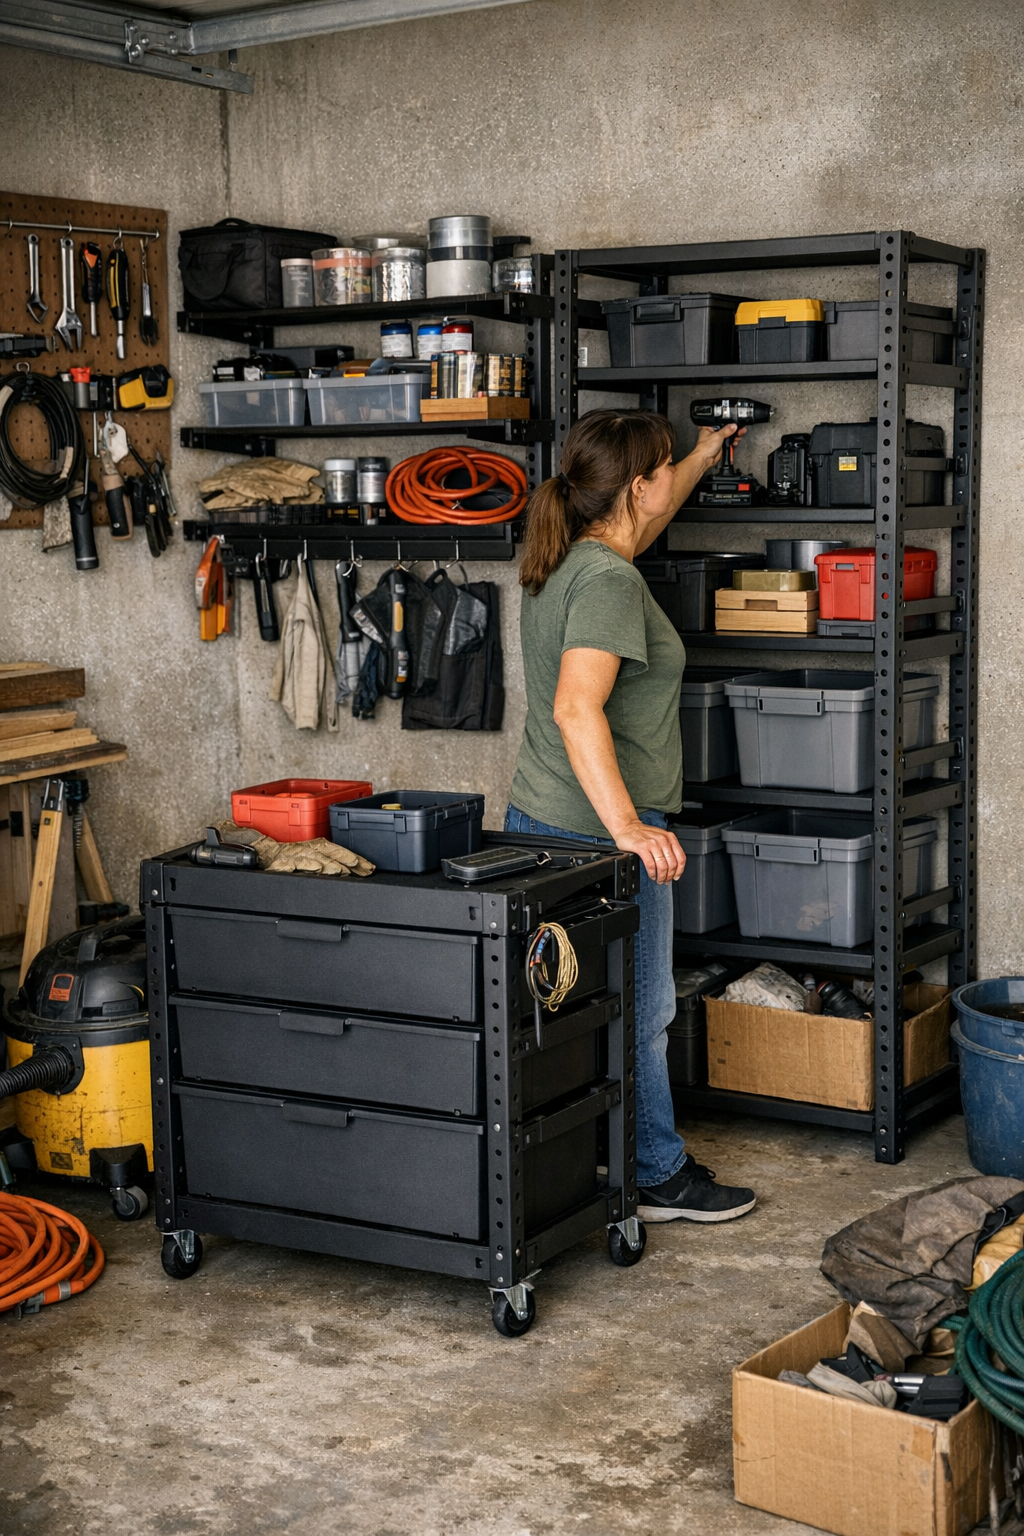
    Picture your garage or utility shed after a week of everyday projects. The shelf that started spotless now hosts “temporary” piles—garden gloves over toolboxes, a bag of fertilizer wedged behind painting supplies. The rolling cart looks parked and perfect, but every time you bring in the mower you’re forced to shuffle it back and forth just to pass. Need a box of screws? You’ll be restacking bins again, because the “logical order” from day one never survives five hurried returns.

    Tools start living on the workbench because the wall-mounted rack forces you to thread past protruding hooks or other bins just to hang them up. The one awkward corner—too small for real storage—collects everything with no home until it becomes a mini-landfill. No single moment is dramatic, yet each missed return, each detour or workaround, chips away at the tidy illusion.

    Where Setup Friction Sneaks In

    If you recognize these signs, the system is underperforming:

    • Paths that shrink as carts, bins, or doors jut into the aisle
    • Stacks or piles left “for the weekend” that quietly settle in
    • Flat surfaces buried under tools in limbo between use and put-away
    • Drawers and cabinets swinging open more often than closed, because it’s a hassle to use them
    • Feeling boxed in—moving sideways instead of striding through the space
    • Return routines getting longer, not sharper, week by week

    These triggers reveal a system that stores, but doesn’t serve. Setup pressure exposes where theory falls short of lived reality.

    Looks Organized…but Blocks You All Week

    Walk through any setup that’s supposed to be “done.” Row after row of cabinets may look sharp but force you to inch along a narrow chute, especially when both sides eat up the aisle. Stacking trays sound smart until “retrieving one” becomes solving a small puzzle. Wall racks—great in the blueprint—often end up as logjams, demanding an awkward reach every time. With each day of real use, pathways close in, piles emerge, and minor hassles quietly turn into the new routine. Visual order can mask a setup that’s actively slowing you down.

    Small Layout Tweaks, Big Everyday Payoff

    Most real fixes are about inches, not overhauls. One simple shift—moving adjustable, open-access shelves to a single wall—freed enough aisle width that carts could park without trapping you in. Suddenly, bins went back in place without shifting neighboring trays. Redesigning for open movement (not maximum storage) pried those lost inches back and made everyday resets snappier. Who needs another cabinet if you unclog the path you already use?

    Take stock after a week of normal churn: Is your main route still open? Can you reset tools fast? Or does every return risk triggering a pile-up “just for now”? Minor changes—grouping high-use items in arm’s reach, repositioning carts closer to the door, leaving one wall spare—create setups that bend to your real routine, not just your layout plan.

    Return Flow Is the Real Barometer

    The best setups almost disappear during use—you move, grab, and return without breaking stride. If you catch yourself detouring, ducking around corners, or mentally putting off the reset (“I’ll put this away later”), the system is leaking. Test yourself: Late in the week, walk your most common paths. Where do you detour, reach, or get jammed up? Adjust one element—a shelf height, a cart position, a bin location—and watch the space open up. Sustainable order comes from how easy it is to maintain, not from a quick install-day snapshot.

    Build Storage Around Routine, Not Just Floor Plan

    The right solution depends as much on habits as on square footage. Wall-mounted organizers are gold in tight corners—if nothing nearby blocks the approach. Open shelves beat deep cabinets if you’re always rotating large gear. There’s no single answer, but setups that follow your rhythms—not just the room’s geometry—hold up week after week. Pay attention to where you pause, pile up, or hesitate: that’s where friction quietly builds.

    What Actually Works, Week After Week

    The true mark of a solid system is not how much it stores or how “finished” it looks, but whether it holds together under routine pressure. Most of the time, improvement means making common zones easier to reach and resets simpler—not adding more places for overflow to hide. Smooth-functioning setups reveal themselves in how little you think about them—and how rarely things start piling up for “later.” Clarity and movement outlast neatness every time.

    Find modular storage systems, cabinets, mobile units, and workshop organization that actually work under real-world conditions at StackNest.

  • Choosing Shelf Dividers That Keep Deep Closet Shelves Organized Over Time

    The deep shelf in your closet promises more space—but in real life, it rarely lives up to that hope for long. At first, bigger shelves seem like the answer. You line up fresh dividers, maybe set some bins, and pile in your sweaters, sheets, or off-season clothes. But a few weeks later, you’re right back to frustrated digging. Stacks slump and spread, categories dissolve, and the simple act of grabbing a t-shirt can send an entire row sliding forward. The real challenge isn’t finding “storage solutions”—it’s creating a setup that actually keeps up with the chaos of daily living, rushed mornings, and the constant coming and going of real stuff, not showroom props.

    The Trouble With Deep Shelves: Space That Hides More Than It Helps

    On paper, deep shelves mean you never run out of room. In practice, they encourage overpacking and forgetting. Every extra inch lets piles stretch—and that’s when clothes start spilling over or drifting backward into the darkness. Need the towels you stuffed in the back? Prepare to unstack half the shelf to reach them. Reach for a single pullover and three more come along for the ride. If you’ve ever found a month-old sweater hidden behind a wobbly row, you know how quickly generous space turns into a black hole.

    Most deep shelf layouts ignore how we actually use our closets. Even with dividers, the wrong setup crowds things so you’re constantly shifting stacks, chasing runaway piles, or straightening after every “just one thing.” What started as a fix becomes a recurring annoyance—and most products only half-solve the problem.

    Why Most Shelf Dividers Stall (Or Fail) in the Real World

    Try a few types and the differences reveal themselves within a week. Acrylic dividers make the shelf look neat, but if you stuff soft sweaters next to those hard edges, the stacks turn curved, and grabbing one piece often bumps the rest out of shape. Wire frames flex—great for jumbled towels or bags—but their give means jeans or heavier piles sag and spill, and the boundaries you set start to blur. Bins group things nicely for the first day, but become clutter collectors with hidden socks, tangled scarves, or forgotten accessories buried below. You trade visible clutter for invisible overflow.

    Over a typical month, here’s what happens: categories merge, stacks tip or blend, and what used to be “grab and go” now means digging, restacking, and quietly cursing that one divider that shifts every other day. Routines slow down. You spend more time resetting the shelf than actually using it. Daily storage is constant friction, not the streamlined experience you hoped for.

    The Real-Life Test: Where Dividers Work (And Don’t)

    Imagine you’re late, reaching for that one shirt behind a high pile. The acrylic divider keeps its line, but as you tug, the whole stack wobbles—now you’re smoothing everything just to close the door again. With wire dividers, the rows look fine on Sunday, but by Friday, T-shirts and jeans have drifted over the lines, and you’re mushing piles together “just for today.” Bins organize on day one, but by day three you’re hauling down entire boxes to find a single pair of gloves, making the closet feel more like a puzzle than a tool. Each fix handles one issue but brings a new wrinkle into play.

    Small Changes That Make a Real Difference

    Big improvement doesn’t necessarily require a total overhaul—or another long afternoon spent reorganizing. Sometimes, switching from three narrow dividers to just two wider, sturdier ones makes your stacks resist sideways drift. A well-notched, grippy acrylic divider planted two inches behind the front edge creates easier grab zones—folded shirts stay upright and you can scan what’s there without re-stacking. Spacing is crucial: cramming too many dividers blocks access, but too few let things lean and blend.

    One practical shift: Instead of packing in dividers, aim for about 18-inch zones. This forces you to limit each section to what actually fits, keeps piles stable, and means resets after a hectic morning are as simple as nudging things back into place—rather than re-doing an entire system.

    Bins: When They Work, When They Don’t

    Bins seem like the ultimate shortcut—they tidy up stray items in one move. But unless the bin fits the shelf’s depth and your actual items, problems show up quickly. Small things sink out of sight or slide under larger pieces, and over time, the “grouped” system turns into a hidden jumble. Bins help manage seasonal gear, but for everyday essentials, they can make things harder to see and slower to grab—especially when you need something at the bottom or back. Instead of solving clutter, the wrong bin just changes where the mess collects.

    Wire Dividers: Flexible Friends With Short Memories

    Wire dividers flex for bulky or odd-shaped items—think floppy duffel bags, extra linens—but that very flexibility is their downfall for anything heavy or stacked tall. A few days in, heavy jeans start to bow the wires, sections blend, and your quickly folded “separate” piles become indistinct. Wire is forgiving, but not strong enough to hold the line where you need reliable zones most.

    How Anchoring and Spacing Beat Shelf Drift

    Whether you choose acrylic, wire, or another style, the key is how securely each piece stays put under daily stress. Locking, slip-resistant bases anchor dividers so you’re not finding them halfway down the shelf by Friday. Consistent spacing—enough that clothes breathe, but not so much they tip—keeps the system from unraveling into “miscellaneous” by the end of the week. And even the best divider can’t defeat overstuffing; once you try to force in “just one more,” lines disappear and disorder creeps in again.

    Routine tip: After restocking laundry or switching out seasons, take ten seconds to check divider positions—and resist cramming in extras “just until next time.” That short pause keeps everything aligned longer and prevents the slow slide back to chaos.

    Looks Organized? Or Feels Organized?

    There’s a difference between a shelf that looks sorted after setup and one that makes sense in the thick of your week. It might photograph well on Sunday night, but if by Wednesday you’re straightening stacks or repacking bins, the system isn’t working for your real routine. Functional storage means each section stays tidy with quick, imperfect resets—no shuffling, no silent collapse when you grab that last T-shirt before work.

    The point isn’t showroom perfection. It’s lasting clarity—visible categories, fewer disrupted stacks, and a closet you can trust when you’re in a hurry. You know it’s working when you can grab what you need and return it without fuss. Anchored dividers, thoughtful spacing, and realistic limits help your shelf support life as it actually happens, not how you wish it would go.

    Solve the deep-shelf shuffle for good—see daily-use storage options at ClosetWorks.

  • Choosing the Right Jig Saw Blade for Flawless Laminated Board Cuts

    The first few cuts almost lull you into confidence. You clamp down a sheet of melamine, snap your go-to jigsaw blade into place, and the cut feels smooth. The edge looks decent—no glaring chips, no tear-out. You lay out a second panel for shelves or closet inserts, and again the kerf seems tidy. The trap is right there: the belief that your “standard” wood blade is all you need. But that easy start rarely holds. Soon enough, the flaws creep in—invisible at first, then impossible to ignore as the project drags on, panel after panel.

    Misleading Beginnings—When Trouble Starts

    Anyone shaping a batch of laminated boards knows the pattern. The first cut feels fine, maybe the second. But by the third, the shallow confidence wears off. Small chips appear along the laminate face. Corners look uneven, and the cuts stop lining up flush. A project that started clean is now a patchwork of sanding, manual alignment, and masking mistakes. That “good enough” blade quickly becomes the root of a pile of small, time-sapping headaches—glue lines that flake apart, edges that no longer match, and visible flaws along what should be a crisp finish.

    Why Standard Wood Blades Fall Short

    It’s easy to think any blade labeled “fine finish” will handle sheet goods—after all, wood is wood, right? But if you’ve ever watched a jigsaw hesitate or snag through melamine, you know better. A general-purpose wood blade, even when sharp, bites too aggressively into hard laminate. Instead of slicing, it chews: you feel the jigsaw fighting your hands, teeth rattling and wandering. The cutline gets ragged, vibration travels up your arm, and you’re forced to steer harder just to keep a straight path. Each pass sounds harsher, sometimes even burning or melting plastic at the edge. Suddenly, you need to spend extra minutes sanding or stash the panel somewhere the damage won’t show.

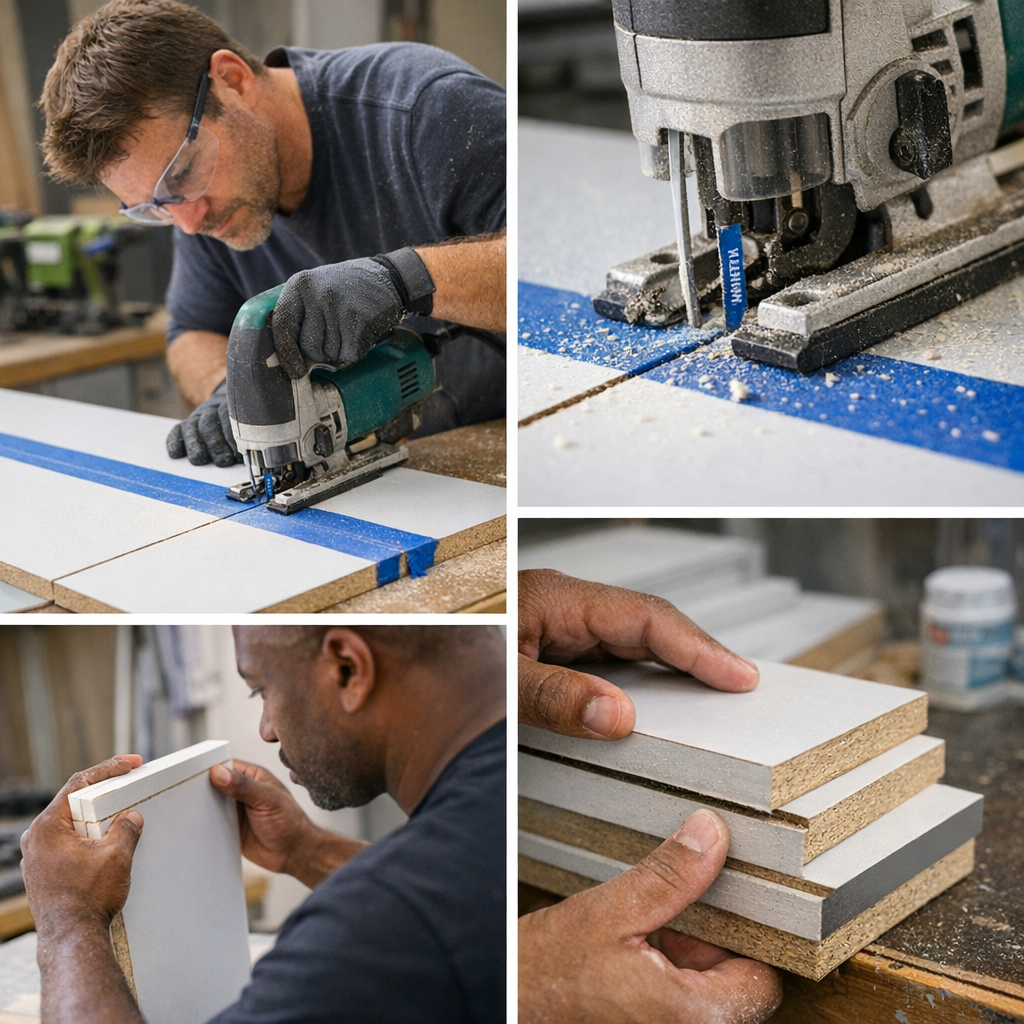
    Switch to a purpose-built laminate blade—think upward-facing teeth, 10+ teeth per inch, marked for sheet goods—and those flaws fade fast. The blade slides through the face layer, not under it. The jigsaw hums at a steady pitch. You finish a board and move right to the next, not bogged down by cleanup. The difference is in the feel: less resistance, more consistent control, and a near-complete end to edge crumbling. It isn’t a miracle, but it’s a very real shift in the quality of every cut.

    The Stack Test—Where Consistency Falls Apart

    Where blade choice matters isn’t in that first satisfying slice—it’s in repeatability. Imagine trimming a run of eight white melamine panels for a home office build: the difference really shows on cuts four, five, and six. With a standard wood blade, heat builds, the teeth dull, and you’re fighting to keep the jigsaw straight. Each successive board has a little more chip-out than the last. Stack the finished pieces and edge alignment goes off—the tight, square shelf corner you had in mind shifts into a gap you’ll be filling with caulk or wood putty later.

    All of this chips away at more than just the results. Fatigue sets in. Hands tense up against vibration, wrists absorb the jigsaw’s kickback, and concentration drifts after wrestling through uneven resistance. By the end of even a short batch, you end up chasing blade errors across every downstream task—filing, gluing, compensating for inconsistent kerf, or re-marking panels that should have just fit in the first place.

    The Mid-Project Blade Swap

    No one wants to stop mid-job, reach for the blade case, or break their stride. But if you’re honest, there’s always a moment—usually after the third disappointing cut—where you know a change would save you far more time in the long run. Replacing a worn general blade with a dedicated T-shank laminate blade (10 TPI or higher, reverse-tooth if possible) isn’t just a fix. It’s a reset. Suddenly, cuts regain that first-pass quality, the jigsaw follows the line, and the edge holds up even after you’ve run a dozen boards. Post-cut sanding turns into a two-swipe routine, not a major production. And you get clear, predictable results the whole way through—no need for confidence checks after every panel.

    Field trick to keep in your pocket: For especially slick or high-gloss laminates, lay down a strip of painter’s tape over your cut line. You’ll see chip-out drop even more. Blade and tape together, you can hold edge fraying under a millimeter—enough to avoid fillers or paint touch-up, even on show faces.

    Recognizing Cut Quality—And When to Intervene

    Laminates rarely scream disaster after a single cut. But when you find yourself reaching for the sanding block after every board, or nudging corners to fake a flush fit, stop blaming the tool or the board. The culprit is almost always the blade. If cut speed slows, vibration ticks upward, or edge damage shows—even in the slightest—treat it as your end-of-blade warning sign. These moments are clues: blade fatigue creeps in slow, then ruins three panels in a row before you catch it. Changing blades or bits isn’t wasted time—it’s prevention, trading thirty seconds now for hours saved correcting flaws later.

    The lesson holds for drilling, sanding, even driving screws into particleboard: when results start slipping, don’t just push through with more force or faith. Trust your senses. If an accessory feels off, intervene before the mistake repeats across your entire batch.

    Consistency Beats Perfection

    What proves a tool setup isn’t the beauty of a single cut—it’s what happens when you work through the eighth, the tenth, or your tired, last panel of the day. Repeatable, controlled results stack up into real progress. The right jig saw blade, made for laminates, keeps projects moving predictably. Clean edges mean fewer repairs later. Less vibration means energy in your hands, not lost to the tool. Instead of wrestling for every good board, you’re lining up panels that fit, simply and reliably. No magic, just the difference between fighting your material or letting your tools help you win.

    Small changes—like swapping blades before issues build—don’t just upgrade your cut lines. They improve every phase of the job, from first layout to final install. When cut quality matters, switch early. You’ll spend less time fixing, more time building, and every panel will prove the payoff in your hands—not just in the sales pitch.

    Visit Gumboll for tools, accessories, and upgrades for the jobsite and workshop.

  • How Small Storage Adjustments Prevent Clutter in Busy Garages

    A garage or workshop always starts out with promise. On setup day, every tool has a resting place, the wall racks line up in perfect rows, and you almost want to leave the space untouched. Fast-forward one week: you’ve sprinted in for the socket wrench, dumped a muddy rake after yardwork, or juggled a box of winter gear with nowhere obvious to drop it. Reality intrudes quickly, and the illusion of “done” fades. In daily life, a tidy setup is only as strong as its weakest return path or most awkwardly parked cart. Every shortcut, every not-quite-right reset adds up—until what looked organized proves anything but intuitive under real, repeated use.

    Where Real Friction Surfaces: The Trap of the Perfect Layout

    You invest in adjustable shelves, anchor the heavy cabinet to the wall, and wheel in a modular chest—trying to wring every inch from your square footage. But the first day you’re in a rush, that careful order hits a snag: the roll-out cart blocks the wall rack, the corner bins demand a sideways shuffle, the deep cabinet is useless with the doors jammed half-shut by overflow. The problem isn’t that you lack storage space or that things look disorganized—it’s that the setup fights you in motion. What begins as a crisp layout can, by Wednesday, feel like a maze of micro-obstacles and routines that require too much thought.

    Static layouts—fixed shelving wedged into corners, wall racks that seemed smart until you tried working around them—turn every small change into a big one. One stray bin forces you to move two others. The cart you rolled out for one project becomes the permanent gatekeeper for half your supplies. Rigidity isn’t just a style issue; it locks you into patterns where “returning things” becomes a negotiation, not a habit.

    Dead Corners and Overflow: Subtle Drifts into Disorder

    The breakdown doesn’t happen suddenly. It creeps in, right where movement gets pinched. You reach for the blower—except the rolling chest, never quite stored right, blocks half the shelf. Or the pile of bins at the back needs moving just to grab a cord that barely gets used. Your wall space is “maximized,” but certain essentials are semi-buried. Soon, the least intuitive returns keep bubbling up: a tote on the floor, gloves stashed wherever there’s a flat surface, hoses draping over what was meant to be a clean bench.

    It’s the midweek scene that tells the real story: Saturday you orchestrate a reset—mobile chest squared off, walkways open, wall rack immaculate. By Monday, the new tote lands blocking access. By Tuesday, you’re tossing garden gloves on top “for just a second.” By Thursday, an awkward box of hardware hovers in the reset zone, always about to be put away. The main path slowly disappears, routines get clumsy, and the next time you want the air hose, you’re sidestepping half a chore’s worth of confusion. No one monumentally failed to “keep up”—the system simply never flowed with the everyday pulse.

    Clutter doesn’t shout; it leaks in where the return path feels like a puzzle. Systems that look crisp at rest falter when packed days force improvisation, and routines break down not at the edge, but right through the heart of the space.

    Reset Fatigue: Why Permanent Order Is a Myth

    Every so-called “optimized” setup, as any homeowner knows, becomes an obstacle course under pressure. Park a mobile drawer too near the workbench, and you’re opening it halfway, nudging it just to squeeze through. Fix a sliding door cabinet in tight, and a single out-of-place bag can block the whole thing. When overflow zones absorb one too many “for now” items, your workflow grinds. It starts with a single trouble spot—maybe the power tools corner, maybe the gardening zone—but soon enough, you’re negotiating every movement: where can I actually step, what do I need to move next?

    These aren’t dramatic disasters. They’re the slow grind of increased friction—return routines that drag, resets that loom larger, and a lingering feeling that order is always one big clean-up away. The supposed efficiency ends up stealing more of your Saturday than you’d ever planned.

    Movement First: Regaining Control Over Your Space

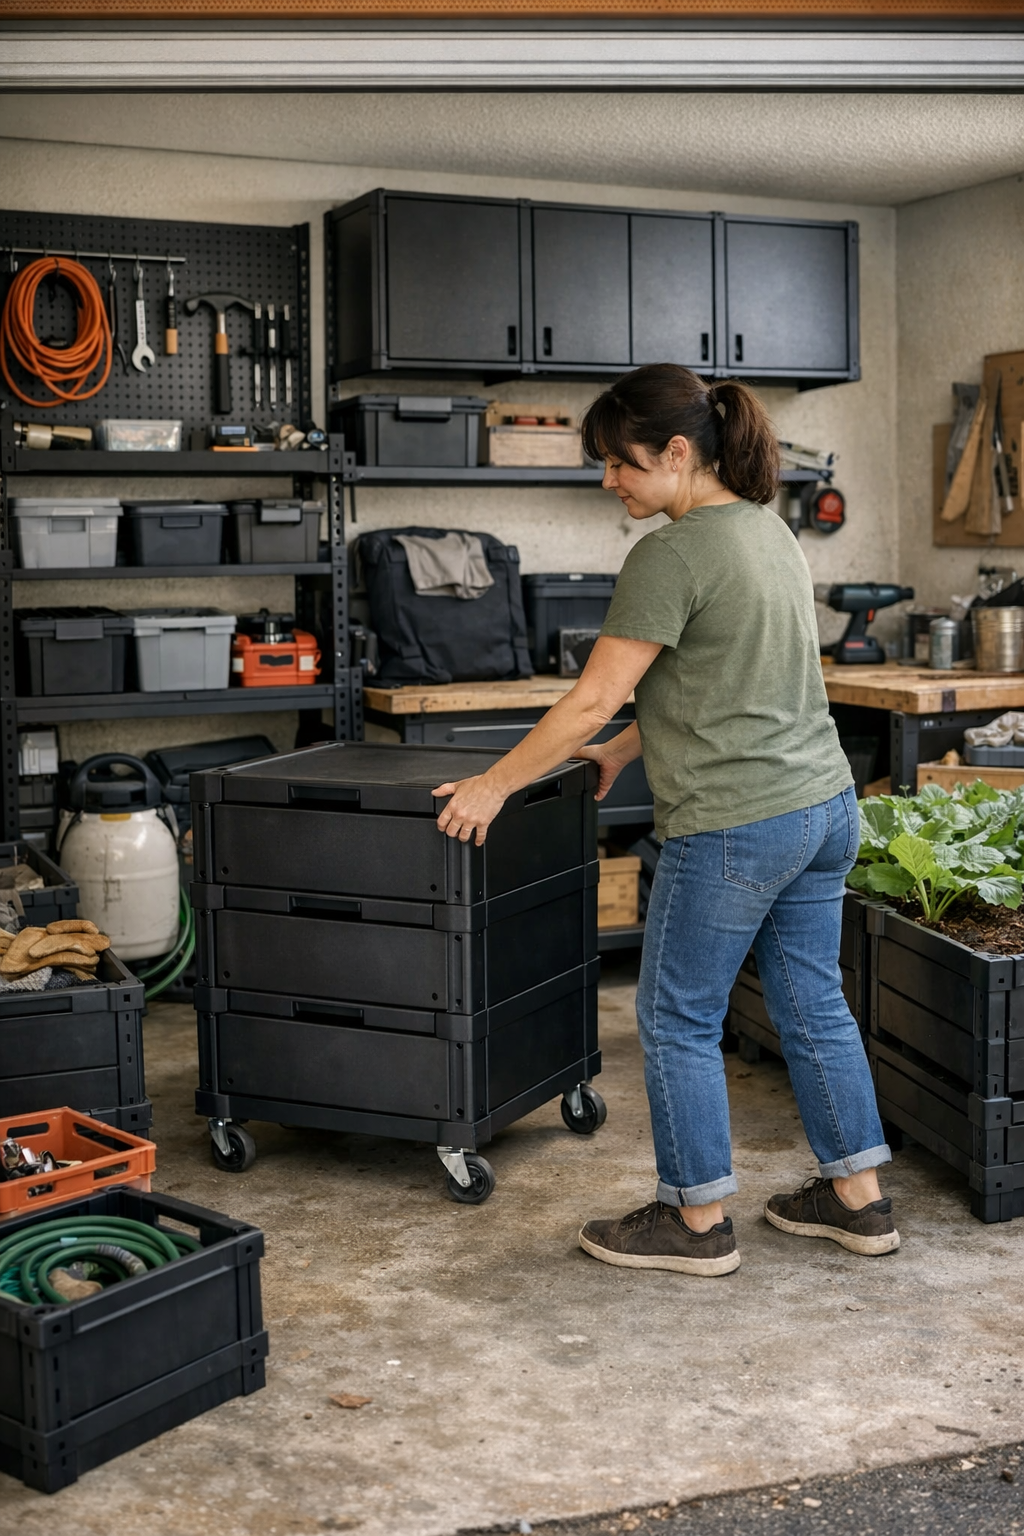
    The real difference comes from setups that clear paths, not just maximize storage. It’s a shift you feel the first time you roll a modular chest two feet out of the collision zone and watch a “dead” wall rack become useful again. Suddenly, you grab gear without wading through obstacles; you return items without orchestrating a mini-move every single time.

    That single shift produced outsized results:

    • Corner shelves finally accessible for daily items instead of emergency overflow storage.
    • Cabinet doors opening wide, not snagged on a wandering cart’s wheels.
    • Resetting became an end-of-day scan—a minute or two of genuine order—instead of a twenty-minute shuffle just to see the floor again.

    There are still long weeks where a project leaves clutter trailing behind. But here’s the difference: pathways stay open, resets don’t require heavy lifting, and returning things no longer teeters on frustration. When the movement flows, the whole system flexes to match your actual routine—not just the plan on a blueprint.

    Sniffing Out Subtle Warning Signs

    Where does your system quietly fail? Bins creep toward the door; caster wheels edge into walkways; carts hover in front of what you actually use. These aren’t signs that you’re lazy; they’re the setup revealing its blind spots. If putting things back feels like a chore, the layout itself is resisting your rhythm—not the other way around.

    Watch for these silent tripwires:

    • Units packed too close to main paths, shrinking usable floor—especially after a busy afternoon.
    • Zones squeezed so tight that a single open drawer or door transforms into an instant hazard or catchall for overflow.
    • Wall sections lost behind car bumpers, open doors, or always-parked tools—turning “accessible” storage into dead space.

    Spotting these patterns early can be the difference between an easy tweak and yet another dreaded all-day reset. The sooner you move the friction, the easier it is to stay ahead of the slow boil toward chaos.

    Building a Setup That Stays Flexible—and Useful

    The goal isn’t more shelves—it’s more freedom to move, return, and reset without thinking twice. If your neatly staged zones gradually erode into “just close enough” returns and haphazard drop spots, it’s time to get ruthless: shift a cart, redraw where overflow lives, slim down the zone footprint to what actually makes sense for your hands-on habits. The most usable spaces aren’t gallery-ready; they simply let you pass through, grab what you need, and put things back with zero resistance, even after a busy week.

    Real improvement is messy, incremental—a far cry from showroom illusion. It’s the small, believable wins: not needing to move a pile every time you want your drill; not getting boxed in by wheels you meant to make things easier; not dreading the Sunday reset. Every solved pinch-point, every reclaimed corner, every streamlined return path moves your garage or workshop from looking organized to actually making sense in use—and that, over time, is what keeps the clutter from creeping back in.

    Find more practical solutions for real spaces at StackNest.

  • Why Fewer Closet Sections Improve Daily Organization and Access

    The over-organized closet looks perfect for a day—until real life takes over. Maybe you’ve stood back and admired your color-coded rows and crisp dividers, only to have the order unravel by Thursday. It’s a setup that looks promising, all sleek segments, until the laundry piles up, you run late, or you try to stash one new jacket. Suddenly, every small section works against you. The closet feels more like a rigid puzzle than a space that flexes for your actual routine.

    When Dividers Start to Get in the Way

    On day one: everything sorted, everything “in its place.” Shirts in one slot, sweaters in another, bags boxed in tight cubbies. But the first time you put away a fresh stack of shirts, reality sets in. You’re forced to wedge, refold, and slide piles just to squeeze in basics. What began as tidy quickly becomes a juggling act—reaching past one stack to grab another, shuffling bins or toppling folded clothes to find a single tee.

    Within a week, categories start to blur. Overflowing stacks lean over divider edges. You want one pair of jeans, but grabbing it means lifting a sagging pile or taking down a basket just to get access. The more segmented the shelf, the more steps each on-the-go change demands.

    Too Many Sections, Too Much Work

    It’s easy to think extra divisions mean extra order. But in practice, every rigid section shapes how you use—or fight—your space. Narrow slots cap how high you can stack, and bins corralled by too many walls lose their original use. Instead of a broad shelf where categories can flex, you’re trapped reshuffling and re-stacking daily.

    Once you bring in a load of laundry, friction ramps up. Jeans bulge over the partition meant to contain them. Socks migrate into the T-shirt stack. Move one pile, and two more lose shape. The closet shifts from “organized” to “always in progress”—a daily struggle to keep up, rather than a space that works with you.

    Scene: The Shelf Reshuffle You Live With

    Imagine three vertical sections at eye level. In theory: socks, jeans, T-shirts in perfect rows. But the minute you’re rushing or short on time? Jeans invade the shirt space. You dig for gym shorts and send two folded piles sliding. Every morning reset gets slower. Even digging out a single scarf means nudging a dozen things out of the way—and a single busy day can leave those divides meaningless.

    Why Wider, Fewer Sections Feel Different

    It feels risky at first—removing dividers, going with one broad shelf. But fewer, wider sections make your space responsive instead of rigid. Without barriers, baskets shift easily, piles adjust, and stacks are reachable without contortion. You can grab what you need without triggering an avalanche. Resetting after laundry is as simple as sliding things sideways, not balancing items one by one through a maze of dividers.

    Think of it this way: combine those three cramped 12-inch slots into one open 36-inch run. Suddenly, you can spread out, shift stacks with both hands, and reset your closet in a minute, not ten. No more tight grab-and-pull routines, no more “where will this go?” puzzles.

    Is Your Closet Picking Fights?

    Notice where the routine gets clumsy. Does pulling one tee topple another stack? Do you dodge bins and boxes to reach the back? Do shelves feel too full, too fast—even though you’re not storing more? If grabbing a single item means moving two others, your sections are probably slowing you down instead of helping.

    The Hidden Problem: When Dividers Make More Clutter

    Every added partition means lost breathing room. Vertical dividers eat shelf area, trapping air above and beside stacks—space you can’t use for storage. Instead of neat stacks, you get compressed piles and bins that get messy faster. A “sock section” fills up and spills over, so socks wander into the shirt pile. The original boundaries blur, and the “organized” look fades under a real week’s worth of use.

    Baskets meant for belts or scarves end up hiding anything that wouldn’t fit elsewhere. What started as categorization turns into a catch-all. Suddenly, you’re hunting for simple things and bumping into invisible storage “rules” made by all those extra walls.

    Troubleshoot: Spot and Fix the Over-Divided Closet

    If a quick reset now takes half your afternoon, or you dread putting away laundry, the signs are clear. Watch for:

    • Piles that collapse when you reach for one item
    • Sections where contents routinely spill or blend together
    • Baskets you stop using for their original purpose
    • That exhausted feeling after every closet “reset”

    One fix: Take out or combine a couple of the tightest dividers. Push bins together and see how much faster you can retrieve, stack, or reset. You want clear categories, but also the freedom to adjust your system for real life—not slow it down with artificial barriers.

    When Storage Flows With Life—Not Against It

    A closet that keeps up with your routine isn’t flawless, but it absorbs the mess. Fewer, broader zones mean you can drop in extra laundry, stash tomorrow’s gym bag, or make space for new finds—without crowding or constant shuffling. Stacks stay upright, not teetering. Shelves feel roomy even as needs shift. And resets take seconds, not stretches of your morning.

    Storage that really works doesn’t just look good on day one—it flexes for your real habits, over and over, so you spend less time fighting your closet and more time moving through your day.

    Shop ClosetWorks storage solutions here.

  • Why Fall Protection Anchor Points Perform Differently Over Time on Job Sites

    The separation between what’s claimed on spec sheets and what plays out day after day at the bench isn’t academic—it’s lived. Nowhere does that divide bite harder than with fall protection anchor points. You install a “rated” anchor, read the clean instructions, trust the paperwork. But fast-forward a week of real work—rotating between wood, steel, or chipped concrete—fatigue sets in, the surface isn’t pristine, and the anchors begin telling their true story.

    Reality Check: Anchors Don’t Age Gracefully

    Out of the box, anchors feel reliable—bolts spin in with honest resistance, tie-offs stay drum-tight, everything behaves. But the shine fades. That satisfying thread gives way to stickiness as dust, paint, and old finish collect. Classic scene: you’re mid-project, glove smudged with concrete fines, and that anchor you trusted yesterday now needs a forced grip just to bite in. Suddenly, what was supposed to be a five-minute reset becomes a wrestling match with stubborn hardware and creeping doubt.

    These daily resets grind down more than just the finish. Minute movements, a half-turn here, an odd vibration there—tiny losses in tightness build up. Under the collar: flecks of metal, dull grooves, an aura of wear. Not disaster, but distraction. You sweep away accumulated shavings, knowing every cycle steals a little security—and adds a little frustration.

    Spec Sheets vs. Jobsite Survival

    Specs look identical until the real work starts. Every anchor in the lineup shows similar load ratings. Instructions copy each other. But in the constant churn—install, load, move, reset—anchors reveal their differences:

    • That “meets code” model? It chews through soft wood after five installs.
    • The one with the nice coating? It grinds against steel, leaving metal confetti at your feet by lunch.

    What matters isn’t how an anchor sounds on paper, but how it survives dozens of cycles in mixed terrain—aged joists one moment, fresh paint the next, and always a crust of shop dust to throw off the fit. A good anchor keeps that confident resistance each time, while bad ones grind, slip, or slowly erode right under your hands.

    Shop Floor Reality: Swapping Between Surfaces

    Picture the pace: first task, you’re fastening into weathered rafters; after break, you’re on a steel I-beam that’s gone through five winters. Drop in your trusted anchor—solid, quick, clean. Next rotation, you borrow an “identical” anchor from backup stock. It snags, jams, and you’re forced to stop to wipe out shavings after every cycle. Not only are you losing time—your confidence dips. Now you’re checking your harness twice, asking yourself if a shortcut is worth the risk. Friction multiplies, both in routine and in the back of your mind.

    Small Problems Stack Up Quickly

    On a spotless test bench, flaws hide. But field anchors go gritty fast. Grind through five panels of concrete—one anchor still bites, the other slips, leaving debris on every reset. Suddenly, you’re spending ten extra minutes an hour just on cleanup. That’s fatigue the manual never warned about: grout dust on every thread, scored finishes, the edge of real-world tool performance, where “good enough” quietly downgrades into “maybe not today.”

    This is where trust erodes: anchor play at the collar, visual debris piling up, lock-down checks performed twice. Nerves fray, especially high up or around crowded conduit runs. Anyone who’s spent a season at height knows the moment a tool stops feeling like an ally and becomes a liability.

    When Quality Matters: What Actually Changes?

    True shop-tested anchors do more than simply resist rust. Anti-corrosion coatings earn their keep spanning paint, rust, steel, and rough wood, shift after shift. Replaceable sleeves mean every fresh install feels like the first. The best anchors maintain a snug, confident “bite” and a steady torque—no surprises, no sudden drag or give—even as you run through a month of mixed surfaces and rushed resets.

    The Payoff: Less Fatigue, Steadier Focus

    A reliable anchor doesn’t just save a minute—it saves your energy and conviction. When the hardware behaves, routines settle. No overthinking, no drawn-out inspections, just the quiet confidence that every tie-off is going to lock in the way you expect. That’s more focus for actual work, less for second-guessing safety equipment.

    After my crews switched to anchors with proven anti-corrosion finish and easily swapped sleeves, the fatigue curve changed. Less edge wear, barely any metal dust, and installs that kept their tightness through every PPE check—day in, day out. After thirty cycles, collar wiggle still below 0.8mm. On real jobsites, that imperceptible difference shows up in everything from faster turnarounds to fewer late-day mistakes.

    Field-Tested Tips: How to Keep Your Edge

    • Put your best anchor through the hardest work first: Save reliable hardware for mixed, dirty, or difficult surfaces—let budget copies handle the clean, stationary installs.
    • Always clean before resetting: A fast wipe at every anchor point clears invisible debris that, left alone, accelerates wear and throws off critical surfaces.
    • Pay attention to metal shavings or stubborn threading: These signals come before major slippage—don’t ignore them just because you’re on a roll.

    Good Hardware Lowers the Friction—Not the Stakes

    The difference between a solid anchor and a “good enough” anchor isn’t just paperwork. It’s found in the hundred small moments: the tool that resists every slip, the anchor that checks out perfectly even with dirty gloves, the gear that stays predictable across long shifts and three battery changes. Tools can’t eliminate friction, but the right ones lower it enough that you stay in control—job after job—when the pressure’s on.

    See gear built for the realities of your work at Gumboll.

  • Why Smooth-Closing Cabinet Doors Transform Your Workspace Flow

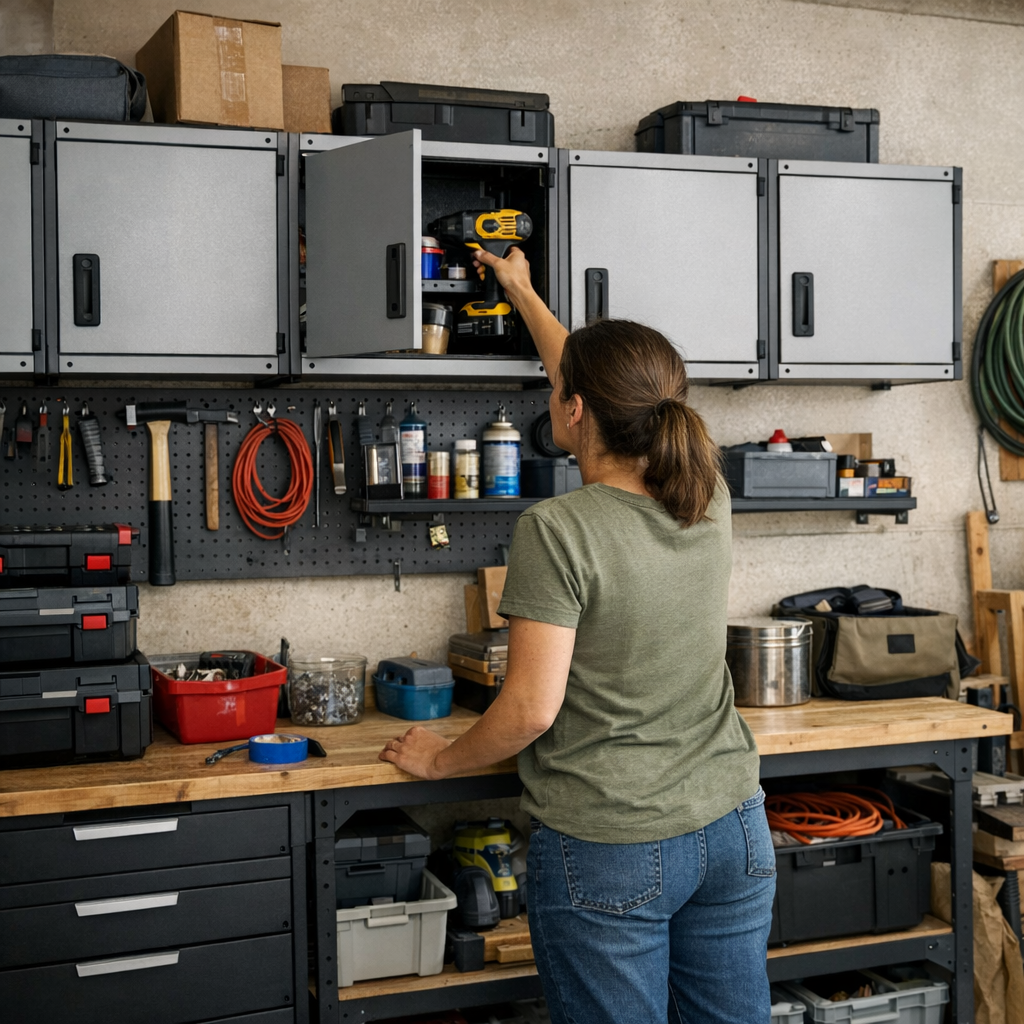
    Wall cabinets come with the promise of order, but the real verdict reveals itself in motion, not just in looks. Walk into any freshly setup garage or workshop: everything appears tight, measured, purposeful. Doors close flush, shelves are empty and inviting, and for maybe a day or two, the illusion holds. Then the routine starts. You reach, stash, grab, return, and suddenly the small flaws surface. A door whose hinge always catches. A cart you have to edge sideways—again—just to squeeze past. Each interaction isn’t chaos, but every little snag edges the space closer to it.

    Early Impressions: Visual Order, Hidden Friction

    The satisfaction on install day is real—wall storage fits perfectly and promises a lasting reset. But let a few real jobs run through—a Saturday tire swap, a scramble to find the right bit on a Tuesday evening—and the system’s tolerance for daily life gets tested. The left cabinet now bumps the shelf if you aren’t precise. That cart, which fit beside the bench on day one, now needs a two-step shuffle just to open a cabinet all the way. Handles that lined up in catalog photos start becoming daily hurdles instead of time savers.

    What unravels the order isn’t a single big mess. It’s the drip of micro-frictions: a hinge drag that means you hesitate before closing the door, a door that has to be nudged twice, the subtle pileup of “I’ll do it later” tools sneaking back onto the benchtop. Each reset is just a little bit slower, and the space starts rewriting itself around what’s awkward, not what’s useful.

    Fitting In Isn’t the Same as Flowing Well

    Plenty of setups look brilliant on paper. The wall is lined, every inch accounted for, and technically, everything “fits.” Yet fast-forward to real life, and the cracks appear: a shelf that’s just deep enough to snag long-handled tools, cabinet doors that threaten to collide if opened in the wrong order, sections crowded with bins you rarely touch because they’re never on your direct path. Friction breeds improvisation: today’s tools get stacked on the nearest cart or stashed “just for now,” and by the week’s end, you’re walking around overflow piles that seemed impossible on install day.

    One stubborn hinge becomes ten missed resets a day. The routine falters. Instead of breezing through clean returns, you’re constantly adjusting, shifting, or outright avoiding the areas that should make life easier. The visual order’s still there, but beneath it, movement slows, intent gets foggy, and the system begs for a redesign.

    The Telltale Grind: Everyday Annoyances in Action

    The reveal is always in the details: dropping a clamp back onto the shelf as dinner’s served, sidestepping a cart to grab a bit box during a hasty fix, or constantly steering around a cabinet corner that eats up path space. Maybe it’s the organizer tray you keep shifting, or the dead zone that ends up as the “overflow” pile—those awkward corners where surface clutter quietly accumulates, out of necessity, not design.

    Even the smartest modular systems slip in tight quarters. The wall’s covered in storage, yet you’re still reaching awkwardly or unlocking another bottleneck. Deep shelves become tool traps, mobile chests—ideal on day one—now block the best routes, forcing you to reroute every morning. The more you tweak, the more you realize: “full” doesn’t mean “usable.”

    Micro Fix, Macro Difference: One Hinge, All the Change

    Picture a midweek evening: you’re juggling a finish nailer, ready to stow it, and again the cabinet door jams an inch before closing. Do you force it—risking a click that doesn’t quite seal—or leave the tool out, telling yourself you’ll fix it later? By tomorrow, more gear crowds the bench, and your reset is ruined. Now imagine swapping out that basic hinge for one self-adjusting model: suddenly the door clears, swings closed without thought, and your tools actually end up where they’re meant to—each round trip seamless, not a second guess.

    That’s what keeps the system alive: near-invisible upgrades that transform daily flow. Not dramatic makeovers—just tweaks that erase friction before it multiplies.

    Judge By Routine, Not The Showroom

    Looks count, but the real measure is motion. Pressure-test every part of the setup the way you actually use it: open doors in succession, return tools mid-sprint, see what snags, stalls, or demands a workaround. That’s when tiny gaps and misalignments announce themselves—the millimeter differences that become ten-second delays, again and again, as the weeks grind by.

    What stayed perfectly square when empty can drift fast as weight stacks up: hinges sink, shelves flex, doors rub. A setup that starts stiff and sharp may, by midmonth, become a place you dodge rather than use. Every hairline misfit is a momentum trap just waiting to emerge in routine resets.

    Fix Problems Early—Or Prepare For Creeping Clutter

    Tackle friction the moment you feel it. If reaching for a tool means bracing a shelf with your knee, or you’re catching an out-of-true door twice a session, don’t let it pass. Adjustable or soft-closing hinges are more than upgrades—they’re ways to keep access smooth, movement one-handed, and surfaces from becoming permanent drop zones. Sometimes a shelf needs to shift by a finger-width, or a default hinge needs replacing with something that self-corrects or swings wider. Tiny changes now are what block messes from snowballing later.

    Tip: Install-day perfection rarely survives first use. Check again once cabinets are loaded and routines are underway. Re-align. Retighten. Minor adjustments made early stave off the fatigue of fighting your own storage week after week.

    The Payoff: Real Movement, Real Reset

    The difference starts to show—cabinets that close with a casual push, nothing grinding or lagging, pathways that stay clear no matter how many cycles you run. A setup tuned for motion means you’re not sidestepping obstacles or retracing old pile-ups. Instead, every hand return finds its place, corners stay open, and you spend more time working than setting the stage. Zones clear with a wipe, not an hour’s sort. Cabinet storage becomes a tool, not another maintenance headache.

    Getting ahead of friction pays out daily, in the way you flow through a project, not just the way your space photographs. The right tweaks let the order you see on day one actually survive week five—and make the workshop, or garage, feel like it works for you, not against you.

    http://stacknest.myshopify.com

  • Why Daily Use Reveals the True Strength of Your Storage System

    The real verdict on a storage setup isn’t the photo you snap when everything’s freshly arranged—it’s how your space stands up to the next seven days of life. Shoes once sorted end up mixed in the bin again. Sweatshirts slide into piles at the back of an overcrowded shelf. You start every morning rooting through baskets for that one missing glove, or rebalance lurching stacks before you can hang up your coat. The daily friction is rarely about how things look; it’s about whether your closet or entryway actually keeps pace with your real routines—or quietly fuels the clutter cycle behind a facade of organization.

    When “Sorted” Turns Into Work

    Baskets, dividers, branded bins—they should be shortcuts, but too often, they become the reason your routine stalls out. Maybe shoes fall into one big container and, within days, your neat rows dissolve into a single mess of mismatched pairs. Folded shirts start as sharp stacks but soon sag sideways, and you’re forced to remake the pile whenever you need something from the bottom. Every “organized” system adds its own small toll: move three things to get to one, smooth out a shelf after grabbing a tee, untangle a scarf from behind your bags.

    Each micro-disruption stacks up: digging, restacking, shifting, sighing at the heap sneaking out from behind closet doors. These aren’t background chores—they’re speed bumps embedded in your morning, turning a tidy look into hidden labor no one wants to repeat.

    What Really Matters: Fast Access or Crisp Appearance?

    When you strip away the styling, real storage decisions hinge on one question: Can you grab what you need without unraveling the entire system? On day one, nearly any setup works. By day four, cracks appear—the “all shoes here” bin transforms from contained to crammed, and stealth piles of boots and stray sneakers migrate out onto the floor. The minute putting away a scarf requires balancing a leaning stack or finding your sneakers means digging under winter boots, you can feel the system failing in real time.

    Take, for example, that deep basket at the front door. It’s pristine at first. By the next week—sandals wedge under heavy boots, one sock is missing, and you’re kicking shoes aside to get through the door. The bin isn’t a storage solution; it’s a high-walled pile-up.

    The Disappearing Act (and the Overflow)

    Bins and baskets hide mess, but they’re just as good at hiding your go-to stuff. If you need to rummage, your storage is making things harder, not easier. This is most obvious with high-traffic items—kid shoes, everyday tees, beloved hats. Meanwhile, open shelves hand you visibility—but not boundaries: jeans avalanche into tee-shirt territory, smaller items migrate, stacks tip closer and closer to collapse. Before long, the neat divisions you set up blur out of habit; shirts pile over pants, socks spill across cubbies, and putting things back becomes an act of willpower rather than a routine step.

    Entryway Ground Truth: Why the Shoe Bin Fails

    Let’s be concrete. In a shared front closet, one big shoe bin seems like a fix. For a week you enjoy a clear floor—then shoes start accumulating outside the bin, heavier boots flatten everything below, and nobody can find their sneakers without a full excavation. The mess isn’t anyone’s fault. The system demands too many steps just to get in or out the door. Hiding clutter doesn’t help if it comes at the price of daily hassle—and soon the bin becomes a waiting room for overflow, not an organizer for what you actually wear.

    The Game-Changer: Storage You Can Reset Instantly

    A swap—two tiered racks instead of a bin, sorted by type or family member—transforms the entryway rhythm. Now shoes are in the open, paired, grab-and-go. You return them with one motion. No digging, no balancing, no silent buildup of stray pairs. Resetting after school or coming home is so easy you hardly notice doing it—and that’s the upgrade most people only realize in retrospect: clutter doesn’t circle back, and the pile never reforms.

    Spotting Hidden Storage Friction

    Not sure whether your setup is pulling its weight? These are the telltale signs:

    • You usually have to move something to get the thing you actually want.
    • Piles start to lean or spread sideways after a couple uses.
    • Categories slip—bags nest with sweaters, gym shoes end up beneath snow boots.
    • What started “organized” always spills onto the floor, or you start leaving things out because putting them away feels like a project.

    These warning signs aren’t background noise. They’re evidence your system is slowing you down, quietly turning daily life into a scavenger hunt and making every “reset” longer than it should be.

    Matching Storage to How You Actually Use It

    There’s no perfect, permanent solution—but certain setups make daily life noticeably smoother:

    • Open shelves win for daily items—think shoes, jeans, sweatshirts—where speed trumps the risk of a little visual mess (as long as shelves aren’t overflowing).
    • Bins and baskets are best for backup or seasonal stuff, not your rotating favorites—anything buried is destined to get skipped or stir up stress.
    • Dividers, cubbies, and multi-tier racks hold the line where categories blur or small items scatter. These nudge routines to stick, reducing the urge to pile and reshuffle.

    If you’re constantly resetting the same shelf or basket, try splitting the space vertically (add a short rack or small divider) or narrowing what lives there (one spot, one purpose). Don’t wait for the next closet cleanout—swift tweaks beat total overhauls and make it easier to keep pace with changing seasons and shifting schedules.

    When Your Space Quietly Supports You

    The mark of storage that truly works isn’t pristine shelves—it’s forgetting about them entirely. When you stop thinking about where things go, and your morning routines flow without stops or grumbles, that’s the system earning its keep. No more rebalancing fallen stacks or playing hide-and-seek for the missing mitten. Your space flexes with you, instead of demanding resets every few days.

    No system is bulletproof. Sometimes baskets fill up, shelves grow crowded, categories slip. But when fixes are simple—a new divider here, a taller rack there—clutter never gains a foothold, and the work of “staying organized” dissolves into your daily rhythm. In the end, the payoff is more time actually living in your space—and less time managing it.

    Discover more storage options for everyday spaces at ClosetWorks.