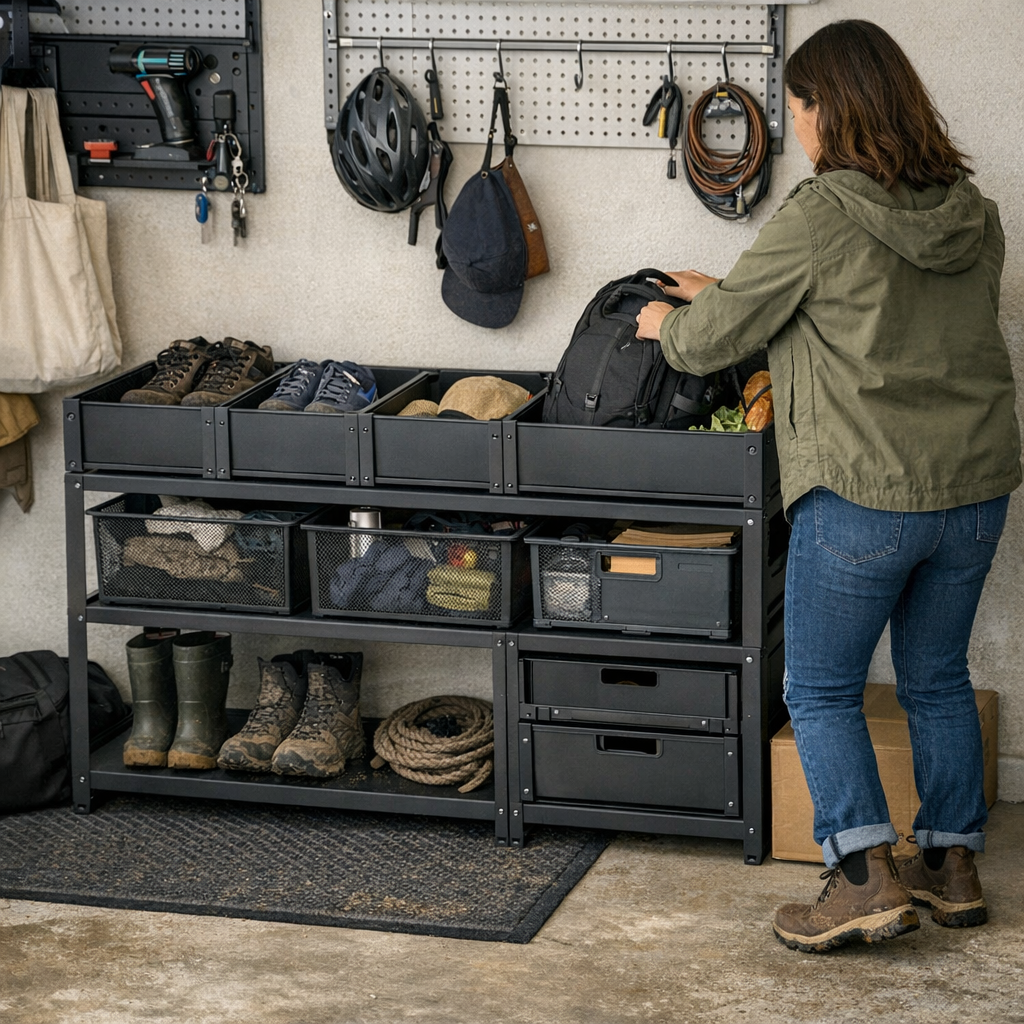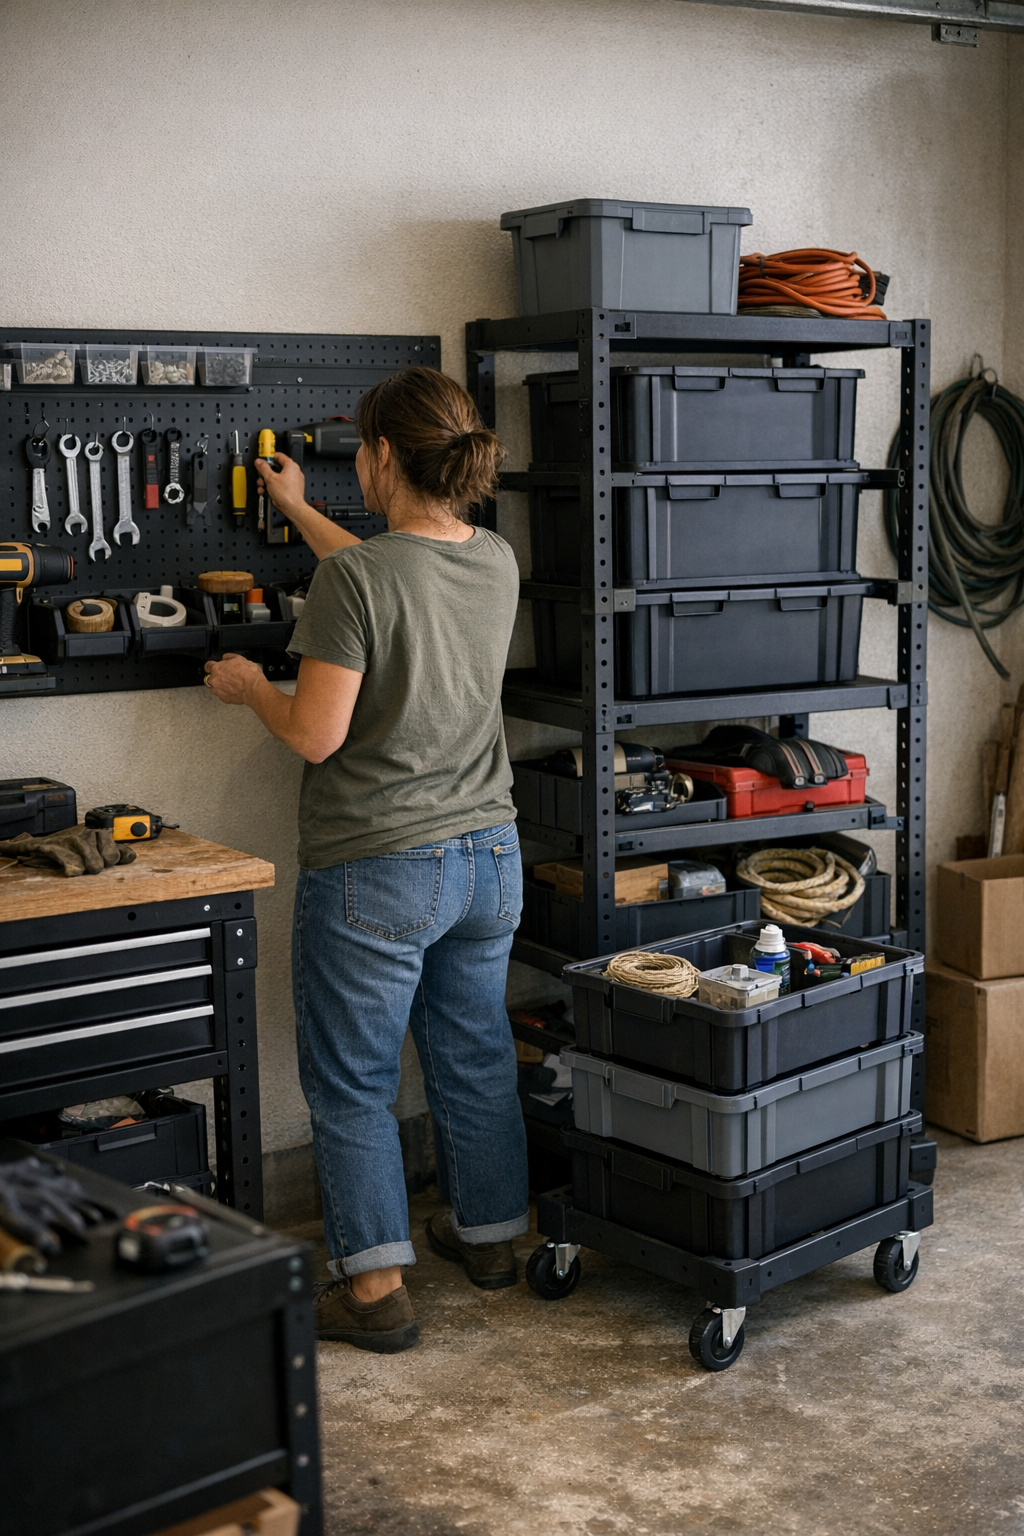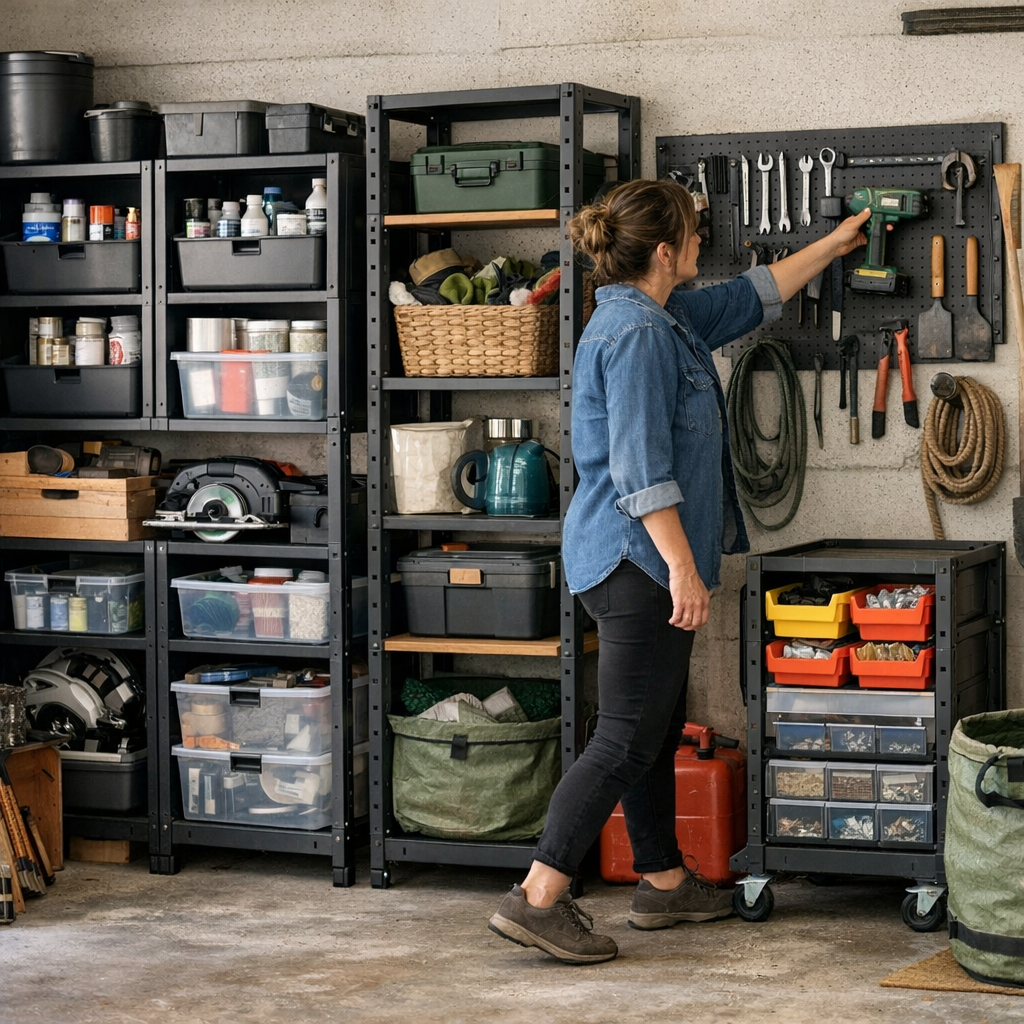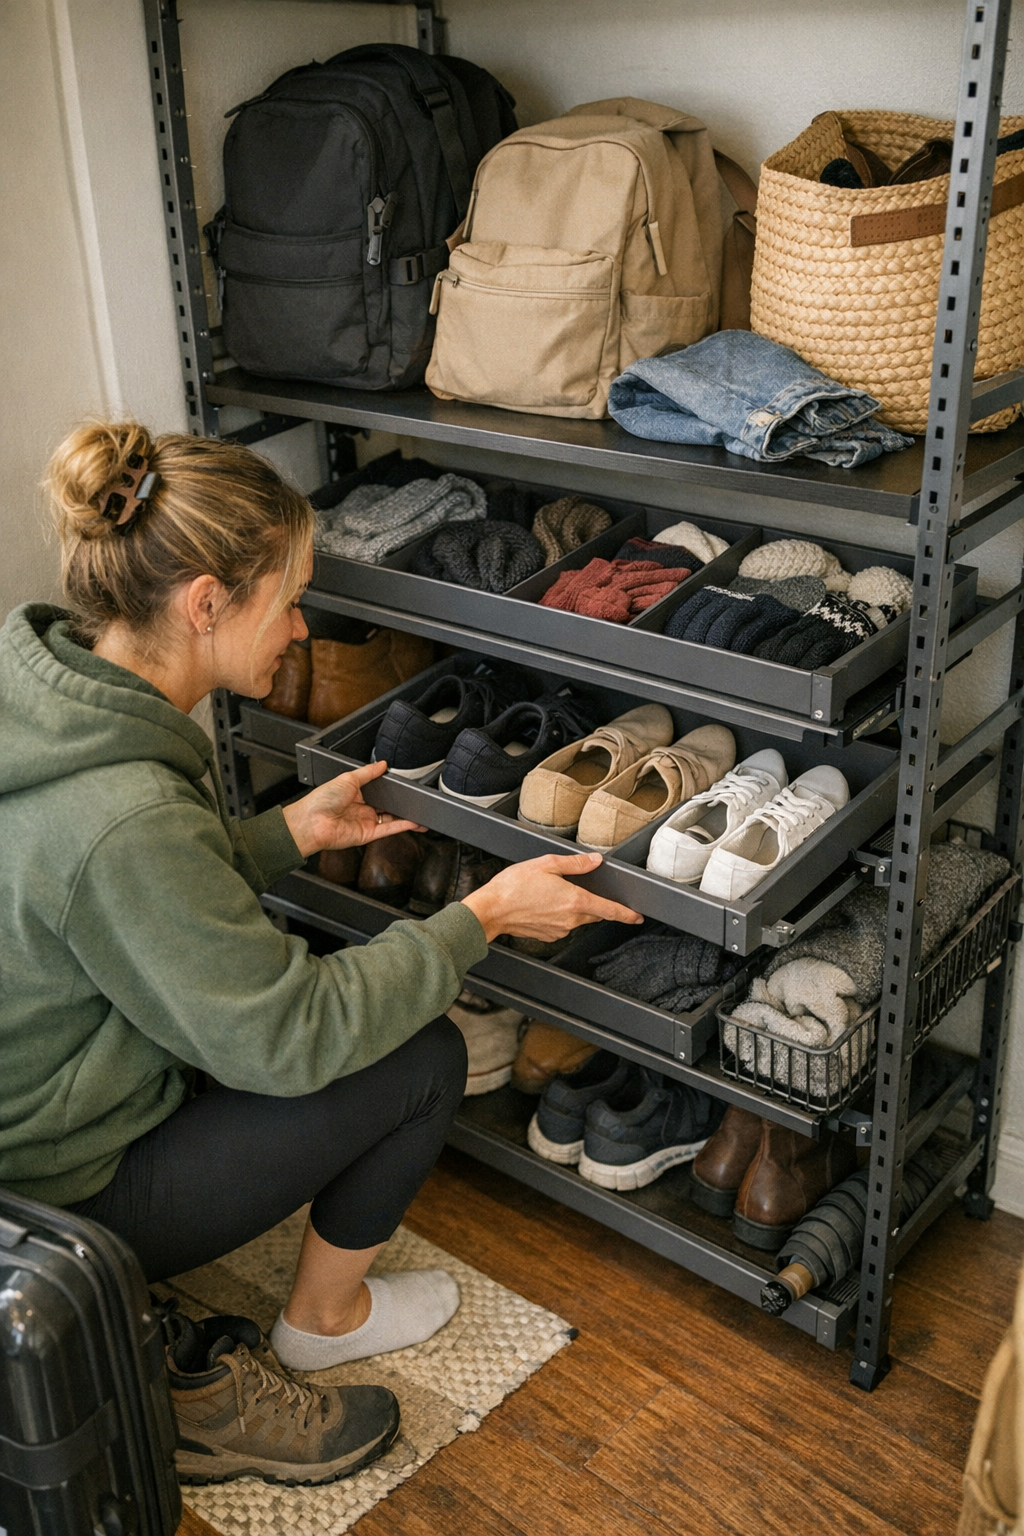
Category: Tools & Workshop

  • Why Tape Storage Needs More Than Just a Shelf for Lasting Order

    The Tape Roll Shelf: Neat for a Day, Chaos by the Weekend

    Open that storage closet or garage shelf and you’ll see it—those tape rolls lined up, labels facing out, offering a flash of “finally organized” relief. But let a weekend pass, or invite the real world of repairs, kids’ crafts, or frantic supply grabs, and the order collapses. Tape shifts. Rolls slide into new territories, pile into awkward stacks, or vanish behind battery bricks and bins. The promise of easy access becomes a cycle of digging, shuffling, and sighing—an old friction disguised as tidiness.

    How Tape Rolls Escape Organization

    It’s one thing to arrange a shelf so it looks organized for a photo, and another to keep it that way for more than two days of actual use. Tape rolls are especially notorious: grab one quickly and the others jostle out of line. Half-used rolls get tossed on top while searching for a specific label, and by Tuesday, painter’s tape is fraternizing with extension cords. You know the drill—reach for masking tape and move an entire stack aside, or find duct tape hiding two bins over. Open shelves do little to keep the chaos contained.

    The mess isn’t a sudden avalanche, but a slow shift. By week’s end, it takes two hands to rescue the right roll—carefully, unless you want tape tumbling onto cleaning sprays and sandpaper. Every retrieval is a minor negotiation with the shelf, dragging the job out longer than it should be.

    From Shelf Rows to Trays: When Enough is Enough

    That first, neat row appeals for speed—but never holds its ground. No one plans for mess; we line up tapes by type and call it done. But within days, open shelves turn into tape parking lots. Maybe you wedge an extra roll down the side after a rushed cleanup, only to return later and wonder why nothing is where it belongs. The shelf goes from showcase to scavenger hunt.

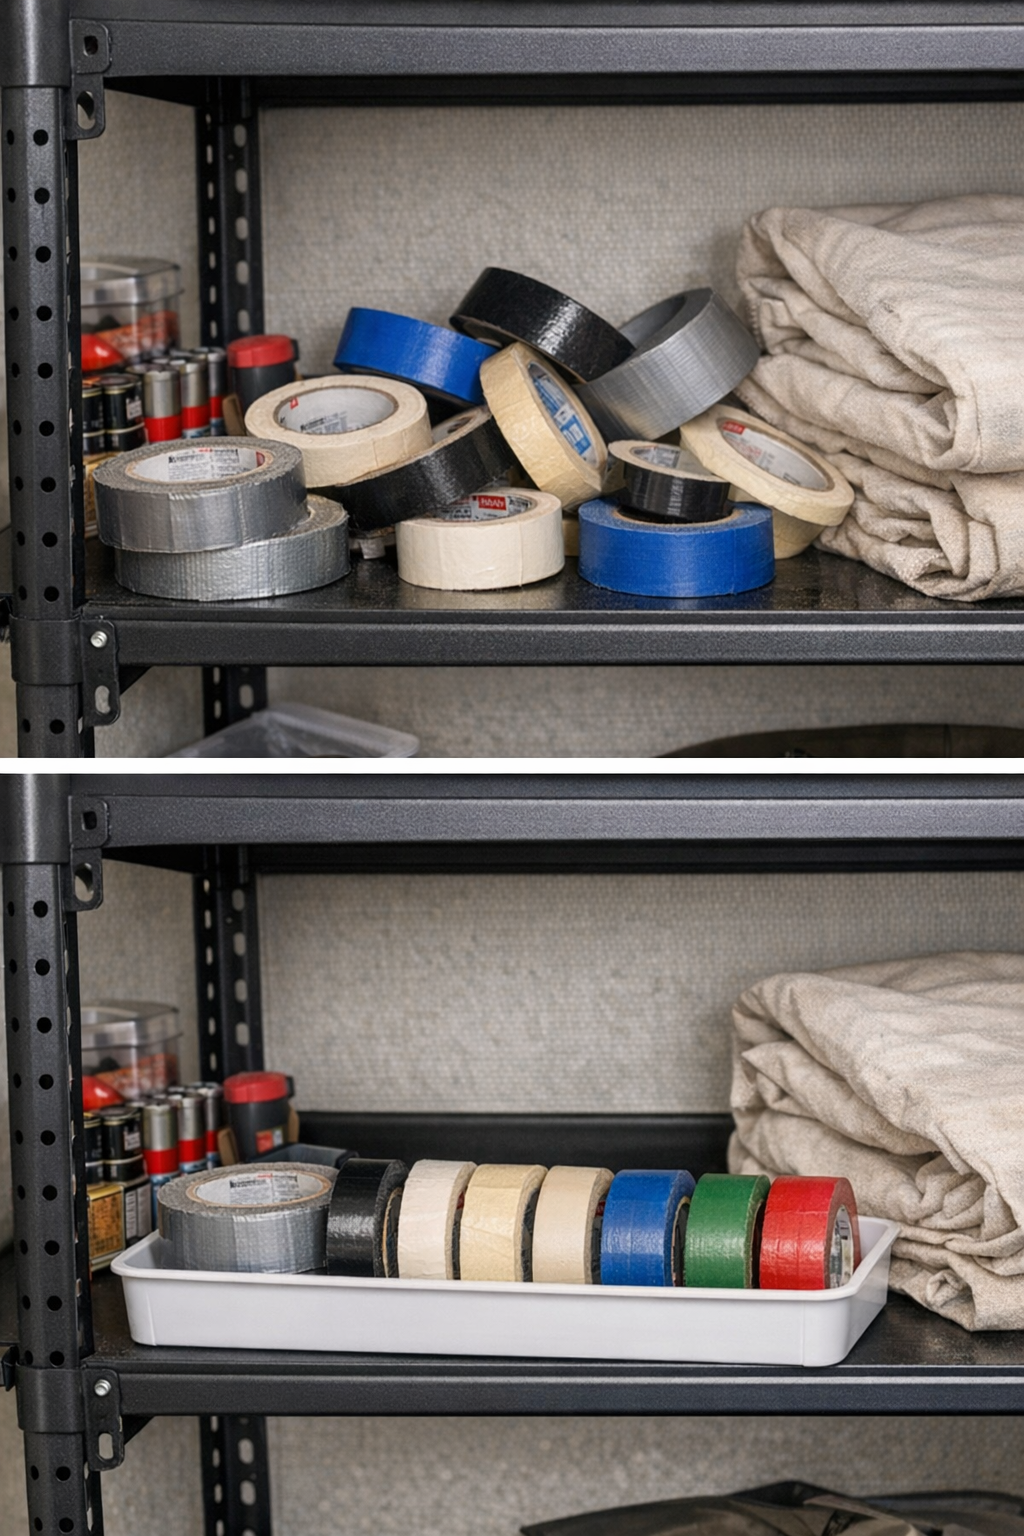
    This is the moment trays make their entrance—not as a grand solution, but as a practical boundary. Drop in a low bin, a shallow painter’s box, anything with sides. Suddenly, tape rolls stop wandering. One-handed resets are possible: finish the job, sweep the loose rolls back into the tray, and move on. It feels subtle—barely a change—but those thin edges quietly enforce order long after the photo-op is over.

    Clutter Outpaces Good Intentions

    Don’t underestimate the hidden toll of a shelf slipping into disarray. One day you’re spending an extra thirty seconds searching for the right tape. Next time, you’re inching a heavy bin to dig out a buried roll, or unstacking a pile just to grab something small. Categories blend: painter’s tape bumps up against cleaning supplies; electrical tape tumbles in with rags. The time spent hunting accumulates—not dramatic, but persistent enough to notice.

    Worse in shared or high-traffic spaces, this slow spread is almost inevitable. Hall closets, catch-all garage shelving, the laundry corner—it only takes a handful of misfiled supplies before every zone on the shelf starts to lose purpose. Tiny errors, like a roll out of place, stack up into regular disruptions. What should be one grab-and-go action becomes a mini reset every time.

    What Defined Boundaries Really Do

    Trays don’t guarantee perfect order, but they keep disorder from spreading unchecked. Add even a shallow tray and watch what changes. Tape rolls huddle together, easy to see and grab, instead of leaking into the next category. You skip “shelf Tetris” and accept some daily mess—now hemmed in and quick to reset before it takes over.

    There’s a visual difference. After a couple of busy days, a taped-off line of rolls is usually gone, but a tray holds steady. The tapes stay upfront, labels readable, always reachable without moving half the shelf. You’re not hunting around or stacking and restacking every time. The minimal boundary holds, turning a swirling mess into a managed little zone.

    Scenes from the Real Storage Trench

    You come home from a late project, toss tools and leftover tape onto the shelf, intending to regroup later. Two days later, painter’s tape is missing—it rolled across to the bin with batteries after a housemate’s cleanup. Another afternoon, you’re rushing and the duct tape falls behind a heavy bucket of screws, wedged out of sight. One roll in the wrong place means seven minutes rearranging, stacking, and moving things you didn’t mean to touch. The shelf’s organization crumbles under normal, even responsible, use.

    With everyone grabbing supplies—kids, partners, or just you over and over—the shelf never gets a true reset. Categories blur, patience thins, and the original logic is lost. Unless you put up some kind of resistance—a tray, a bin, just enough structure—the shelf keeps slipping from “set up” to “cluttered again.”

    Containment: Calm By Design, Not Accident

    What a tray does isn’t dramatic, but it’s steady. Instead of finding tape stuck in a box of light bulbs, you see categories reappear. Every tape roll stays visible, always in its home, accessible without digging. Best of all, the tray stays shallow—deep containers just hide the mess. Low sides mean quick visual checks, easy grab-and-go, and effortless returns. Resets take seconds, not minutes; frustration ebbs away because everything fights less for space.

    With a Tray, Shelf Friction Drops

    • Put-away is instant. Tapes don’t sprawl—they slide into their spot, every time.
    • Other supplies aren’t invaded. No more tape rolls crashing into paint, light bulbs, or batteries.
    • Lost rolls are a thing of the past. You look and see what’s missing, immediately.

    Most critically, you get a shelf that keeps working, not just for show. Order that endures through quick grabs, messy projects, and real rotation—not a showroom-perfect fantasy, but a usable reality.

    Small, Real Fixes for Tapes That Behave

    Pick a tray that fits just your main tape types—too roomy, and you’ll stack; too tight, and you’ll choke the system. Don’t overload it: cramming every last roll invites a whole new jumble. Opt for low-front trays for that one-glance label check. Every couple of weeks, do a quick scan: if you spot a roll that’s gone rogue, toss it back before it builds a new pile-up. A few short habits, one thin tray—suddenly, your shelf starts holding the line, not dragging you back into another hunt.

    For storage fixes that hold up to lived-in routines—closets, shelves, and the daily shuffle—visit ClosetWorks.
  • Why Testing Your Closet Setup Beats Buying New Storage Solutions

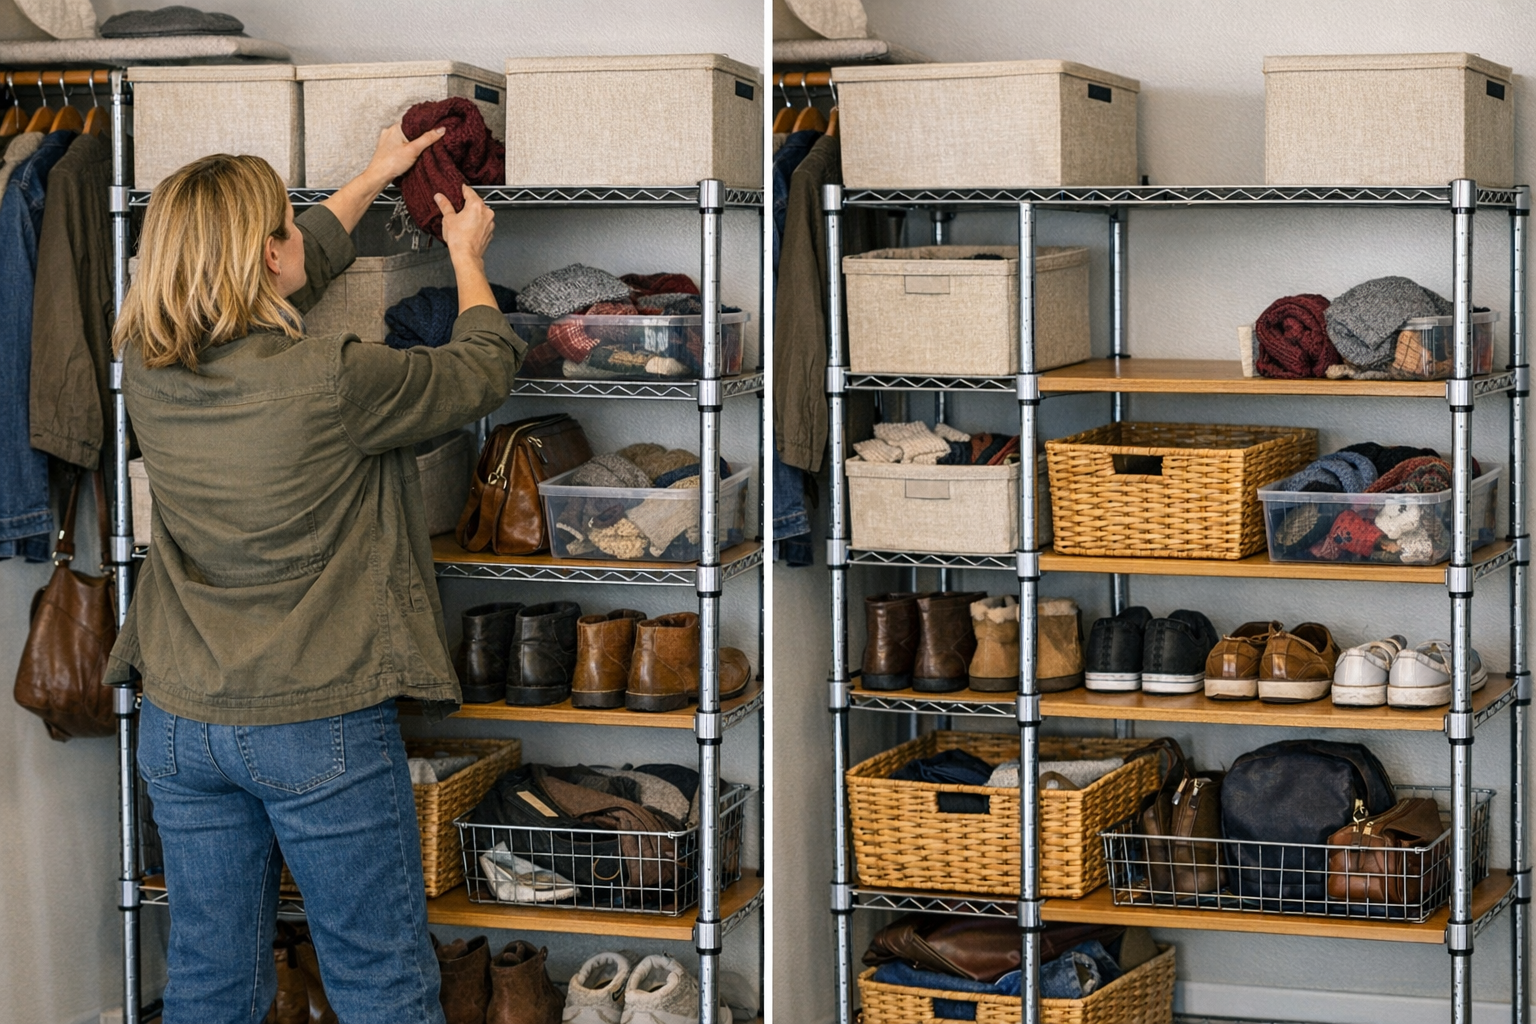
    Most closets start out looking under control—and by the end of the week, they betray you. You start with a fresh floor, sorted bins, folded shirts in satisfying rows, and shoes lined up as if everything might finally stay in place. But two or three actual mornings later, boots have crept outside their zone, a hat is missing in action, scarves are tangled, and that crisp order has given way to new clusters of chaos. The truth isn’t that you failed to organize—it’s that your closet was built for how it looks at rest, not for the thousand small moments you actually use it.

    The Real-World Storage Challenge

    The usual fix? More bins, more dividers, more labels. These work on day one: you pull out a sweater, find your gloves, and everything snaps back into place. But the first day isn’t real life. As soon as you’re running late and need your favorite pair of shoes—now buried behind three others—the cracks in the system show. You stack sweaters but, after a couple grabs, the pile starts to lean. That tight row of baskets? Every time you need the back one, you’re shuffling the whole shelf. Soon, “tidy” turns into a juggling act, and the effort required to keep it up grows with every use.

    The main storage struggle isn’t just visibility—it’s friction and access. If putting a pair of boots away means moving three bins or reaching deep into a dark shelf, you start negotiating with yourself: “I’ll put this away later.” That “later” piles up—literally—until the system itself becomes the problem you wanted to solve.

    Daily Use Quickly Breaks Good Intentions

    Imagine your entry closet at 8:15 AM. The bus is coming, someone’s digging for their backpack (shoved awkwardly on top of a basket), shoes have multiplied by the door, a coat sleeve blocks access to gloves, and you grab whatever you can before heading out. Even if you set up clear categories—hats in one bin, extra shoes in another, scarves neatly rolled—by Tuesday, those boundaries have blurred. A rogue pair of sneakers is blocking the boots, a baseball cap has migrated, and bags now lean against everything.

    This isn’t laziness. It’s inevitable when a system only looks organized standing still. The storage that “fits” the most often requires the most reshuffling—and after just a few normal days, categories dissolve and resets get slower. That row of identical baskets? Practical in theory, but if you have to pull out the front two for every reach, the rest of the shelf becomes staging for stuff you don’t have time to sort.

    Small Frictions Compound

    You barely notice the extra steps at first—the quick bin move to get a hat, the nudge of a shirt stack so the right one slips free. But multiply those little annoyances all week long. Now, two bins are out of place and it’s easier to start a pile on the floor than restore the order. What started as good intentions quickly slides into a cycle of workaround and delay.

    Does Your System Survive a Normal Week?

    The best way to stress-test your shelves: ignore resets for three days and see what happens. Open the closet, grab what you need, put things back as you’re able—but don’t stop to re-stack, re-fold, or re-categorize every time. Where does the order break down?

    • Do you need to remove two bins just to get to socks at the back?
    • Are folded shirts losing their shape by midweek?
    • Are shoes and boots spreading sideways or blocking the way?
    • Do bins end up mixed within a few normal uses?

    When those patterns show up, your system’s friction is too high. The neat surface fails the daily test: quick access, clear categories, and a reset that actually feels doable in real time.

    Why Adding More Storage Makes Clutter Worse

    It’s tempting to solve overflow by stacking in one more bin or squeezing in another shelf divider. But jamming in more storage often increases friction: blocked access, tighter shelves, and nowhere to stage items in transition. When every inch is filled, you lose the flexibility to simply set something down in its right place. Instead, gloves get tossed in the nearest gap, shoes are wedged between bins, and loose items stack up within days.

    The real improvement isn’t about hitting “maximum capacity.” It’s about keeping the system functional in the middle of a busy week—doors flung open, hands full, and zero desire to reshuffle three rows just to put away a scarf.

    A Daily-Life Fix: Make Room for Movement

    Consider the hallway closet that used to implode by Wednesday. Every item had a labeled bin—yet order still collapsed by the end of the week. The actual solution was to remove a single, barely-used bin. That freed up just enough open space—a slim gap, a landing spot—to act as a buffer for influx and quick returns. Suddenly, items stopped piling on the floor. Bins stayed sorted. Gloves were easily tossed back into place without knocking down another category. Everything flowed, not because there were more tools, but because there was finally margin to move.

    Let Shelves “Breathe”: The Pressure Valve Principle

    A purposeful gap—five inches, one missing basket, a clear end of shelf—serves as your closet’s relief valve. It breaks up crowding and gives you a spot to park in-transit items. That shelf may look a little less packed in the Sunday “after” photo, but by Friday, it’s the difference between a quick toss-back and a total reorganization.

    Apply this logic anywhere: bedroom closets where t-shirts tumble off the stack, entryways where shoes overload the mat, laundry areas where the overflow never quite fits. The best indicator you need space isn’t what you see at rest—it’s how fast you can restore order on a Wednesday night, and how distinct your categories remain after just a few family uses.

    Recognize Storage Bottlenecks Before They Cause Trouble

    Watch for these recurring pain points:

    • You avoid putting away shoes because you have to move three pairs first.
    • You hesitate to reach for a shirt at the bottom of a stack, so clothes pile on top instead.
    • Baskets that started sorted end up mixed or overflowing before the weekend hits.
    • Vertical space goes unused because everything’s jammed at shelf-level.

    If you repeatedly work around your systems—hesitating, stacking “for now,” avoiding certain shelves—it’s a sign your storage needs breathing room, not another organizing bin.

    Long-Term Function Beats Quick “Before and After”

    An organized closet only succeeds if you can use it easily three days, three weeks, and three months after you set it up. When “put away” comes with too many steps, or categories are constantly overlapping, the storage becomes one more obstacle. Real function means margins. It means clear zones that survive daily life, and open space so resets don’t require a whole afternoon.

    Try This: Build In an Open Section

    Instead of crowding every inch, reset your closet by deliberately leaving one shelf or basket empty. Notice what happens by the end of the week. Does that gap keep clutter from spreading? Do items find their way back without a shuffling cascade? If the space fills instantly, treat it as a signal: what’s actually used, and what could be let go so the rest can finally function? The right margin makes every remaining section easier to reach, reset, and keep sorted—for real life, not just photos.

    Storage That Moves With You

    If your system needs constant workarounds, the answer probably isn’t another product—it’s recognizing where daily use breaks the “just organized” surface. Look for storage solutions that stand up to repeated grabs and quick returns, not just a neat snapshot. Whether you’re overhauling a closet, taming an entryway, or rescuing a laundry shelf, check how much reshuffling you’re doing, how categories hold up by midweek, and how fast you can restore order without starting from scratch. Something as simple as removing a bin or reserving open shelf space can turn a closet from a frustration zone into a functional tool.

    If you want more ways to design spaces that actually work—day after day, through real family use—explore shelving, bins, and storage systems built for living at ClosetWorks.

  • Mastering Circular Saw Precision Through Consistent Workflow Control

    There’s nothing that tests your patience—or your reputation—like chasing clean, accurate cuts through a full run of plywood or trim. The real world isn’t forgiving: one hasty setup, a dull blade, or a guide that shifts mid-pass, and the pieces you depended on start drifting off-spec before you even realize it. Maybe you’re roughing out sheet goods for cabinetry, laying out built-ins on the garage floor, or running boards for a custom install. On paper, it’s just measure, clamp, cut. In practice, every single tool detail—blade, guide, base plate, even a bit of sawdust underfoot—either pulls your workflow forward or drags it slowly out of line.

    Where Problems Actually Start: The Imperceptible Slip

    Trouble rarely announces itself all at once. You feel a subtle vibration in the saw’s handle as it meets the material. A thin, fuzzy edge glances back at you as the piece falls away. Maybe it’s an unremarkable extra millimeter—easy to ignore, once or twice. But keep stacking those boards, and the initial sloppiness compounds. Suddenly, your “quick cleanup” shifts to grudging filler, patching out-of-square reveals, or—worst of all—wasting another sheet because the error is now baked into everything else.

    This isn’t theory. Anyone who’s spent an afternoon chasing accuracy has hit that wall: the first three or four passes go fine, then batch fatigue hits. Clamps never feel tight enough. The blade bites differently. Something’s always slightly out—never quite worth stopping for, until every piece in the pile is off. It’s less about a single bad move, more about a slow tilt that you only see after it’s cost you real material or time.

    Why the “Okay” Setup Fails When It Counts

    The hidden killer: your workflow is only as strong as its weakest link—and that link doesn’t break, it just gives a little, over and over, until the tolerance is gone. Maybe your blade’s razor sharp but your guide flexes a few millimeters under real clamp pressure. Maybe the base plate, after a couple of drops, has developed an invisible burr that snags and subtly kicks your cut out of line. One or two passes, things look fine. Creep up to a dozen, and “just a hair off” becomes seams that gape and panels you can’t trust to line up.

    How Drifts and Defects Multiply

    Picture two setups: both start with a crisp plywood rip. But an hour in, dust builds up beneath one saw’s guard, enough to tilt the cut. Or a bargain guide’s plastic flexes when you lean in for a longer pass. You don’t spot it cut-to-cut. You see it when your parts won’t dry fit—edges won’t mate, gaps you can’t clamp away, and the finish line suddenly feels a lot farther off. If that early “almost right” doesn’t utterly hold up to repetition, you’re signing up for cumulative frustration.

    Micro-Defects: Tiny Flaws, Big Headaches

    Fast forward to jobsite reality—cutting panels for built-in shelves or trim for a client wall. The first few crosscuts look fine. Then you spot splintering right at the visible leading edge, or a chip you can’t hide. A little error—one shaky clamp, dust kickback, a blade you should’ve swapped three cuts ago—can punish every piece that follows. There’s no “undo.” Sand more and you risk blowing your reveal. Try filling and you’re fighting the clock, late into the night, covering up for tool sloppiness that should’ve been caught before you started batch production.

    One mistake leads to another. Bad cuts force extra sanding, extra sanding steals your reveal, badly-matched joints waste your lumber or your time—and your profit margin gets chewed up one avoidable error at a time.

    Making Small Changes That Bank Time and Materials

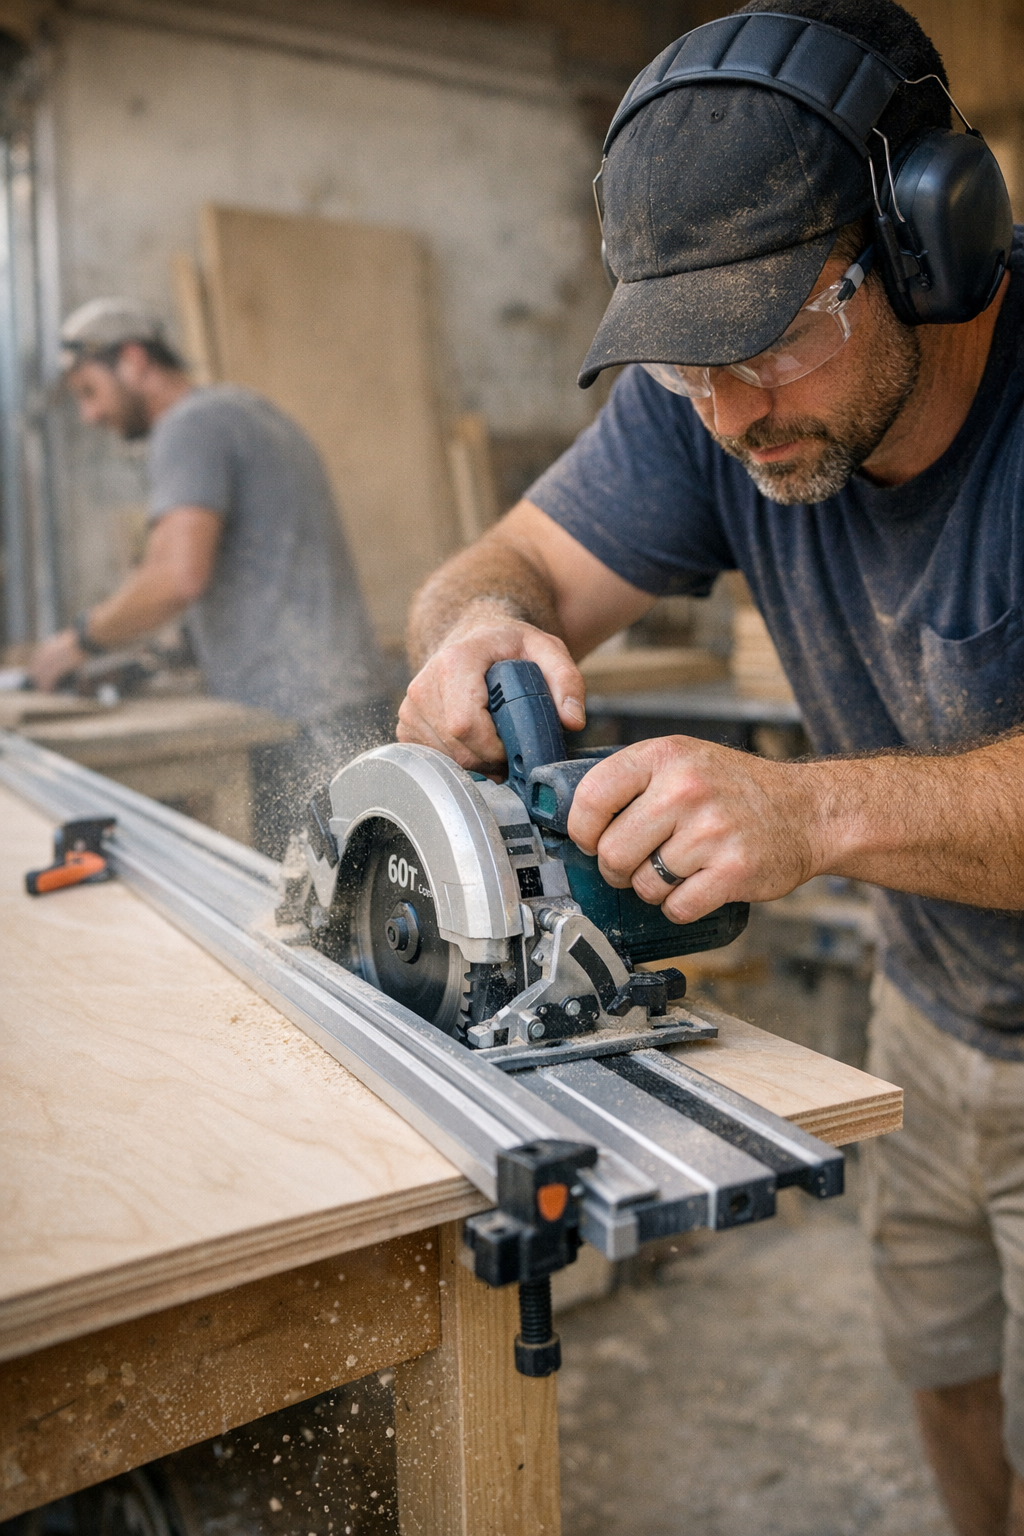
    Most workflow disasters can’t be fixed with brute horsepower or flash. Sometimes it’s as basic as swapping to a rigid, full-length aluminum guide clamp, then locking it down so there’s zero flex. Or trading your dull rough blade for a finish-grade, carbide-tipped 60-tooth that actually matches the work—even if it takes a minute to change. On a recent batch job, that shift alone shrank blowout from full-millimeter splinters to barely-noticeable scratches. The difference? Less re-cutting, less sanding, and by the third panel, you’re actually ahead instead of behind—even as the cuts stack up.

    How to Spot Tool Weakness Before It Spoils the Run

    Before the job slides off track, look for:

    • Edge quality that’s getting worse as you move through your cut list
    • Hard-to-explain burn marks, even with steady, deliberate passes
    • Joints that refuse to close, no matter how creative you get with clamps
    • Sawdust buildup throwing off your base plate mid-pass—sudden resistance or shifting under your hands

    When you can’t “fix it in sanding,” you’re likely fighting a bad setup or a worn accessory, not just user error. Adjust now, before cutting your mistakes twice.

    On-Site: How Skilled Crews Catch Issues as They Work

    What sets a tight, on-schedule job apart from the late-night scramble isn’t guesswork or “feel”—it’s recognizing the earliest warning signs and acting fast. Little flaws in your setup compound into big ones. A scraped base plate pulls your angle. A guide with flex steals your straightness. A dull blade forces more muscle, making it easy to slip, veer, or leave ragged fibers behind. Ignore the cues and you’re pulling out the filler and sander just to deliver passable work. Catch them, and you control the outcome—every time, not just on the first few pieces.

    Field-Tested Habits for Reliable, Repeatable Results

    • Clean your base plate before every new batch: One stray shaving or grain can make the saw rock and send your cut off-course.
    • Support offcuts from falling mid-cut: A drooping edge yanks the blade unpredictably, ruining control and finish. Stands or sacrificial scraps pay for themselves immediately.
    • Replace blades at the first whiff of burning or chatter: Don’t convince yourself “it’ll make it through one more board”—blades are cheap next to wasted material or surprise overcuts.

    Consistency Isn’t Glamorous, but It Pays—Every Single Time

    You don’t need a show-stopping first cut to finish strong. You need a routine that actually survives a full day’s workload—a workflow that doesn’t sneak in surprises the later you get in the stack. Taking five minutes upfront to check clamps, guides, base plates, and blade sharpness isn’t some amateur move—it’s what lets pros avoid scrambling when the pressure hits. Don’t wait for the visible flaws. Adjust early. The time and effort you bank at the start save you a world of slow, frustrating repair when you can least afford it.

    Find tools, blades, guides, and accessories built for real jobsite performance at Gumboll.

  • Transform Your Entryway with a Functional Drop Zone to Prevent Clutter

    Where Entryway Friction Really Begins

    The warning signs rarely look dramatic. A pair of shoes sneak past the mat. Backpacks settle into a heap, inches from the door. Someone’s keys land on the same random shelf, then vanish—again. The friction isn’t sudden, but it builds, every time someone comes or goes. A few stray items turn the simplest route through the entry into a daily obstacle course. It’s not about whether you own a bench or a set of hooks—it’s about whether anything in your setup actually stops the flow of clutter before it scatters, or if every return just bounces the mess to another corner.

    The Real Scene at the End of Any Day

    The actual state of most entryways has nothing to do with those serene, catalog-ready photos. Shoes angle off in unpredictable directions. Bags cling precariously to hooks—until someone knocks two down at once. Keys migrate. The “return flow” in homes, garages, and workshops is less a gentle routine and more a multi-user collision—people, gear, pets, parcels, all hitting the same space at the same time. If the landing zone can’t absorb that impact, spillover is unavoidable. It leaks past bins and benches, hunting for any open real estate and little by little, the chaos keeps spreading.

    When Storage Looks Right…Until It Doesn’t
    It’s easy to trick yourself with more baskets or stacking yet another modular shelf. All that neatness evaporates at rush hour: one person wrangling groceries, another dragging in muddy boots, someone else trying to find the dog’s leash for the fourth time. Skinny shelves—empty, perfect—become impassable the instant stuff arrives. Even a wall of storage can fail if it crowds the aisle. You end up with everyone shuffling sideways, dodging stuff, waiting to put things down. It’s the quiet chaos of a layout that looks organized, but can’t keep up with how your household actually moves.

    Where Storage Ends and the Mess Spills Out

    Sometimes the “solution” becomes the slow clog. You squeeze a rolling cart into the corner, and now you’re shifting it several times a day just to get the door open. A tall cabinet keeps shoes hidden, but every morning you’re blindly reaching past one overloaded shelf for a missing bag. Baskets line the wall, lovely until they fill; after that, overflow spreads right onto the floor. These micro-annoyances are easy to ignore at first, but they shape your mood each time you pass through. An entryway that never truly clears itself quietly turns into something you sidestep or avoid resetting.

    Four Rainy Days: A Drop Zone Stress Test

    Imagine run after run through bad weather. The boot count doubles, jackets pile up, groceries wedge themselves against what used to be floor space. Your storage “zone” surrenders by lunch. By Wednesday, the pile has escaped its supposed containment—every crossing demands a sidestep, a lift, a hunt for keys under something you didn’t mean to set down. Tidying becomes a project. The original intent—easy reset, clearer movement—gets replaced by constant low-grade reshuffling, and the area is never just “ready.”

    Turning a Bottleneck into a True Buffer

    The shift isn’t about more storage. It’s about the shape of storage. Swapping a hooks-and-shelf setup for a single, wall-mounted surface with real depth (try 50cm, raised off the floor) does something most systems can’t: it offers a landing zone wide enough for messy days, deep enough for an arm’s load of everything, but still stays out of the walkway. Suddenly, boots, mail, gym bags and packages land onto one surface, without tumbling onto each other or rolling off the edge. The wider buffer lets two people pass through at once, no zigzag required. It absorbs the gear—so movement through the space finally feels free again.

    Why Depth (Not Height) Wins for Real Loads
    Most failures come from storage being too vertical, too shallow, or too precious: tall units eat up eye-level space, narrow bins can’t absorb an influx. If the zone’s footprint is at least 40–60cm deep, it takes the brunt of what you actually drop—packs, parcels, shoes—while the crucial crossing stays open. Depth doesn’t just add capacity. It prevents pileups from breaking across the walkway, so you don’t end up stepping around the very system meant to help you. Especially in tight entryways, depth solves more than stacking ever will.

    How You Know It’s Finally Working

    The test is simple. Wait for the evening rush. If gear and shoes hit the zone and stay contained, and you can walk a straight line without moving something out of your path, you’ve got a winner. The bigger signal: you survive a half-messy week without dragging carts aside or tripping over overflow. If you’re no longer forced into nightly resets, but the space is still accessible, the drop zone is finally doing what storage is supposed to—catching, not just storing, the mess of real life.

    Everyday Friction—And Why Minute Tweaks Matter

    No setup stays perfect. But small, repeatable changes keep your entry or garage useful, not just tidy on Sunday evening. Some pressure points to watch for in routine use:

    • Spotting serial overflow. Is there always that one corner where debris collects—beside the cart you need to move, the shelf no one can reach, or atop a “temporary” pile? That’s your signal to rethink the landing zone.
    • Identifying the block. The cart that’s never where it belongs, the basket no one uses because it’s half in the way, the unreachable hook—those add drag to your crossings, especially when you’re rushed.
    • Testing lived-in capacity, not just looks. If the day’s real load—jacket, groceries, work gear—overwhelms the space, don’t add another bin. Re-examine how direct and deep your drop zone really is, and whether it matches the impact of a normal return.

    A working drop zone is almost invisible: it performs in the background, freeing up movement without creating a new obstruction. If you’re aware of the setup because you’re wrestling with it, style isn’t the problem—the fit is.

    Resets Are Won in the Details, Not in Perfection

    What matters most isn’t flawless organization, but the speed and ease of sliding from chaos back to functional order. The right drop zone absorbs the shock of entry, lets you put things down without blocking everyone else, and shrinks the time needed for small resets. That’s what turns entryways, high-traffic garages, and backroom utility corners from frustration zones into legitimate buffers—ready for whatever comes through the door without demanding constant attention.

    Find storage that follows your routines and fits the choreography of your space. The best entry solution isn’t always the one that looks tidy in a product shot—it’s the one that, day after day, quietly keeps you moving forward instead of slowing you down.

    http://stacknest.myshopify.com

  • Why Your Modular Storage System Isn’t Working As You Think

    It’s easy to love a fresh storage setup—until the honeymoon ends. On day one, everything in your garage or workshop slots neatly into carts, racks, or those crisp-labeled bins. But within a week, that perfect order feels less like a solution and more like a series of small obstacles. Setting gear aside “just for now” becomes routine, and suddenly your prized layout means sliding carts to access the bench, stepping over stray tools, and debating where the garden shears should live. The promise of order gets quietly buried under the reality of use.

    Where “Organized” Starts to Slow You Down

    The real wear isn’t obvious at first. Maybe you added wall racks across the long side of your garage, or stacked a mobile cabinet where the sunlight hits. It all looks efficient—until you notice your movement changing. You detour around the chest blocking the best path, or pause to fit a rake into an already-maxed hook. The system that’s supposed to help you ends up demanding work before you’ve even started a project.

    This friction isn’t dramatic, but it’s everywhere in daily routines:

    • Having to shift a cart or roll away a chest just to open a cabinet or walk to your main work surface.
    • Watching a well-planned rack fill ahead of schedule, forcing leftover gear onto windowsills or any free surface.
    • Tools lingering out on the bench—not from laziness, but because their drawer now needs you to clear space first.

    Looks Tidy—Moves Clumsy? The Pattern Shows Quickly

    Resets should be a non-event: drop the driver, toss out cutoffs, return the trimmer. But if your setup interrupts that flow—forcing you to dodge a cabinet edge or snake through parked carts—resets slow to a crawl or quietly stop happening altogether.

    Picture the daily sequence: a rolling toolbox slowly migrates into the aisles, blocking what used to be walkable space. Pretty soon, the fastest route from street to garden looks like an obstacle course of “just for now” storage. Or that well-measured pegboard, a foot too far from your bench, means your most-used pliers have a new semi-permanent home on any flat surface within reach. The system looks neat, but it never feels truly matched to how you move.

    It’s never about effort—it’s about a setup that forces tiny reroutes and micro-decisions, silently slowing you down.

    Overflow Piles and Awkward Corners: Hidden Clutter Zones

    Even the most disciplined setups reveal weak spots after a few active weekends. Floor racks pull in miscellaneous items at first, but deep bins become black holes by midseason. Overflow gear piles up on any available ledge, and bins get stacked, shuffled, and forgotten as soon as you have to fight past a blocked corner. Walkways shrink. Pulling one hose nozzle now means moving an entire tower of odds and ends first.

    Give it a month, and “organized” morphs into a series of small, nagging interruptions: moving mulch to reach the socket set, rolling aside a garden cart that never gets back to its proper spot, skirting around a folding ladder propped in the only open gap. Day after day, the system’s flaws encourage shortcuts—leaving tools out, skipping the reset, letting clutter creep back in.

    The Real Upgrade: Storage That Follows Your Routine

    No number of new labels or upgraded bins fixes this. The real turning point comes when you stop organizing for looks and start building for movement—for the way you actually use and return gear when things get busy. Sometimes it’s as simple as pushing a rolling rack directly against the wall, because that keeps the path clear. Once you make movement the anchor, you stop choosing between “put it away right” and “get out of the garage already”—resets just happen, without detours or excuses.

    This is the shift that sticks: always defend at least one clear, direct path. Keep your top-used modules fixed in the area where your hand naturally goes after every project. When your flow is protected, resets become automatic, and the system stays in sync with real, routine use—not showroom neatness.

    Field-Tested Tactics for Less Mess, Less Stress

    If your space keeps pulling you into the same annoying fixes—new pile zones, slow resets, or misplaced favorites—try these in-the-trenches adjustments:

    • Audit your reset for snags. Which spot do you avoid because it’s blocked, cramped, or simply never quite within arm’s reach?
    • Leave lanes open—never fill every inch. Park carts and bins so you don’t have to move them to pass or return gear. The clear space is what keeps everything moving.
    • Cluster essentials near the point of use, not just on the nearest empty wall. Keep hooks and drop zones by doors or benches, right where movement naturally slows down.
    • Assign dead corners for true overflow only, not for returning daily tools. If needed, add a lightweight tub on wheels for oddball items—never for routine resets.

    Storage That Gets Out of the Way

    Spend a few weeks with any system and the difference becomes obvious: setups that demand thought feel heavier with each reset, while well-zoned layouts almost disappear—they’re so tuned to your routine that you don’t think about them. The prize isn’t a picture-perfect garage. It’s a space that runs silent, where every tool returns with no friction, even when a project leaves a mess or several people are passing through.

    The goal is storage that fades out of your workflow, not a system that needs babysitting. Anchor your core modules. Shape the layout around the real paths you take. When it just works without a second thought, that’s when your garage or workshop is finally set up for you—not just for show.

    If you’re ready for storage that moves with you, not against you, explore focused modular layouts at StackNest.

  • Choosing Between Shelf Dividers and Storage Bins for Lasting Closet Order

    After a weekend closet overhaul, shelf dividers and storage bins can make any space look impressively in order. But as soon as the weekday rush kicks in, the real test begins. Shirts migrate, stacks sink, and small items multiply in the shadows—a familiar cycle for anyone juggling tight mornings and shared spaces. The question isn’t how organized your shelves look on day one, but whether that order survives the daily stampede for jackets, jeans, or a single missing glove. The way you separate stacks and contain loose things decides if calm stays or if clutter crowds back in by Wednesday.

    Shelf Dividers: Clear Boundaries, Quick Grab—Until Things Shift

    Step into your closet right after a fresh sort. Shelf dividers give folded sweaters and jeans their own lanes. Nothing topples, nothing blends. It’s immediately easier to pull a favorite shirt—instead of triggering an avalanche, you slide it out and move on. Vertical lines keep categories honest, especially in a closet touched by more than one set of hands. This system sings when items are stable, stacks stay short, and you’re not mixing big and small pieces together.

    But it only takes one rushed morning to spot the cracks: a stray beanie tossed on top, kids digging for hoodies, or a partner reaching back for a shirt and squashing two piles. Dividers stop sweaters from creeping sideways—they don’t prevent gloves from vanishing under stacks or loose socks perching wherever there’s room. By midweek, category lines blur; what started crisp now begs a reset, just to hold the chaos back.

    Storage Bins: Taming the Small Stuff, Hiding the Mess

    Where dividers corral big items, bins fence in the little things. Hats, scarves, belts—anything too risky to stack—disappear into bins and, at least for a day, everything looks managed. The clutter is hidden, the shelf looks cleaner, and you can sweep in spare socks or backup mittens without overthinking.

    The trouble comes when you’re late and need that one glove. Bins are deep, dark, and deceptively mixed. Search for a scarf, and you pull out hats, a mismatched set of mittens, and maybe last season’s sunscreen. Bins keep strays off the floor, but inside, categories tangle with every hasty grab. And if the shelves are deep, it’s a fishing expedition—everything falls to the bottom, and you’re left sifting blind to locate what you need.

    When Shelves Stop Making Sense

    Most closets start with ambitions: jeans here, gym shorts there, each shelf with a role. But a fast morning throws all that out. Stacks tip. A single oversized hoodie sits halfway across two zones. Categories blend, especially if you’re always dropping last-minute additions wherever there’s space. A shirt sliding to the floor or a hat wedged in the entryway means your system is starting to fray.

    Dividers that once separated adult and kids’ clothes now can’t stop socks from sneaking in. Unlabeled bins turn from “hats only” to “whatever fits,” assembling a patchwork of odds and ends. Soon, hallway benches and closet corners become general dumping grounds, no longer even pretending to streamline daily traffic. The roles you set begin to dissolve into general storage limbo.

    What Daily Use Really Looks Like

    Picture 7:10 am on a Thursday. Dividers at eye level still hold the line for sweaters and folded shirts, but down by your feet, bins hide a scramble of gloves and scarves. Reach up for a jacket buried in the middle of the pile—now two stacks lean, and a beanie drifts down a shelf. The next person in needs matching mittens and flips through the nearest bin, tangling socks in the process. By Friday, that initial order is a memory, and cleanup is already overdue.

    Move to the laundry area—dividers keep towels upright, until a single washcloth strays or an extra bath mat gets wedged wherever it fits. Utility shelves lined with bins start their week categorized, but by the time chores roll around, batteries share space with sponges and the original plan is lost. The problem isn’t effort—it’s how fragile most set-ups prove the moment you start using them for real.

    How Combining Dividers and Bins Finally Sticks

    Systems last when they match the mess—not just the mood after a big clean. The game changer: Dividers keep folded piles neat and upright (think: jeans, shirts, towels), while sturdy, clearly labeled bins catch everything loose and unstackable (gloves, scarves, belts). Give each bin one job, tape on a label (“winter scarves,” “kiddo hats”), and stick to it. That small clarity is what prevents the daily reshuffling and keeps your categories from turning into catch-alls.

    With bins locked into clear roles and stacks held in place by dividers, your closet can take a beating: after a busy week, everything resets in minutes. No more shelf space being hijacked by a flood of socks or wrestling a mountain of mixed-up accessories. The vertical space finally gets used without inviting a mess back in.

    Small Tweaks for Better-Lasting Order

    Don’t skip labels: even scrawling “sweaters” in marker on a divider or “mittens” on a bin prevents items from bouncing between zones. If your shelves are extra wide, try bins behind and open divided stacks in front—everyday jeans up close, off-season extras corralled behind.

    Don’t let bins and stacks overlap into one sprawling holding pen. The closer your setup matches your grab-and-go routine—the less you’re shuffling piles or emptying bins for single items—the longer your order holds up. If 90% of your closet is folded, stick with dividers; if drift and scatter haunt your shelves, give loose things their own homes. And embrace quick resets: five minutes at the end of the week is how order beats chaos, round after round.

    Real Results: Faster Resets, Less Daily Friction

    The best test for any closet isn’t the before-and-after photo—it’s how fast you get things back in place on an average night. A strong setup means minimum reshuffling and maximum clarity, even as things move. Dividers stabilize what’s steady, bins round up the wild cards, and the setup flexes with daily use. Watch as you go: Where do stacks always tip? What bin just becomes a black hole? Tweak, re-label, and watch your closet become a system you don’t dread resetting. That’s organization that finally keeps up with real life.

    See more practical storage solutions at ClosetWorks.

  • Controlling Heat and Abrasives to Prevent Metal Discoloration in Grinding

    If you’ve ever clocked a real shift on the grinder, you know how quickly the best-laid plan can unravel. What’s supposed to be a fast touch-up—a weld smoothed here, a sharp edge dressed there—suddenly turns into a marathon of chasing ugly, splotchy streaks. Out of nowhere, that familiar blue or gold haze creeps across the metal. It barely looks like damage at first, but you know exactly what comes next: stubborn temper marks that won’t buff out, more abrasive changes, more sore wrists, and a whole lot more wasted time at cleanup.

    When Discoloration Becomes a Shop-Slowing Hassle

    Most have ignored an early patch of blue or brown and figured it would vanish with a couple quick passes. But optimism fades fast. Each time the wheel dwells too long—or you push a little harder out of impatience—the colors cut deeper, and you’re left with ugly spots that just won’t budge. Now you’re juggling disc changes, breaking out finer grits, or even backtracking to rework a finish that should already be done. In a real shop, workflow matters. When you’re grinding a bunch of pieces for a rush job or trying to get welds uniform across a rail, those “small” stains turn into real production bottlenecks.

    Hidden Heat: The Real Source of Your Color Troubles

    Discoloration on steel and stainless isn’t just a cosmetic nuisance—it’s the calling card of heat gone wild. Every grinder operator has felt how fast heat builds up under a coarse disc or when you try to muscle through with a tired, overloaded wheel. You might not see anything on the first pass, but keep circling those seams or long edges and suddenly the rainbow arrives. With thin material—sheet metal, boxed sections, pre-cut rail—it’s even more dramatic: temperatures climb with each pass, and just a moment’s lapse sends you deep into cleanup territory.

    It’s not just about looks, either. Once heat-discolored patches take hold, they anchor oxide layers and sometimes even shift the metal’s structure, making every bit of follow-up work that much slower.

    The Stainless Steel Test: Why Errors Cost More

    Grind on stainless and the stakes climb. There’s no hiding from your mistakes—rainbows develop fast and set in deep. Anyone who’s worked a continuous weld on a stainless bracket or countertop knows the panic of watching subtle blues turn into stubborn brown shadows. In a busy kitchen build, you’ll see welders pausing, swapping out for higher-grade ceramic discs, and dropping RPMs, all just to keep those telltale colors from haunting the surface and multiplying touch-ups at the tail end.

    When Disc Choice Translates to Real Work (and Less Frustration)

    Mid-grind, the difference between a run-of-the-mill aluminum oxide disc and a purpose-built ceramic blend changes everything. Side by side, a standard wheel throws lots of long, hot sparks—great for speed, brutal for heat. The ceramic disc’s sparks are tighter, the touch is cooler, and your grip doesn’t buzz with the same warmth after a few passes. That means your hands, wrists, and nerves last longer, and so does the uniformity of the metal itself.

    It’s tempting to reach for whatever’s in the drawer, but every shortcut here shows up later. Cheap, coarse discs carve fast but lay waste to the finish. The slightly stiffer resistance of a ceramic disc, especially in the 60-80 grit range, rewards you up front: fewer blue burns, less lost time switching abrasives, and a lot less surprise at the sander before paint or TIG.

    Reality Snap: Running a Rail in the Field

    Picture it—the sound of grinders, one hand bracing a rail section fresh off a structural weld, earplugs buzzing against steel hum. The plan: blend quickly, keep things moving, stay cool. But as you press in and that rail heats under your glove, you catch the first glint of blue, gold, and purple curling out by the weld. If you plow forward, the stains get more assertive—even a new abrasive can’t rescue it all. Instead, stopping for a disc check, easing off on pressure, and letting the metal cool off—even for a minute—can keep your workflow tight and your finish uniform without the endless spiral of “just one more pass.”

    Backing Off: Why Moderate Speeds and Better Discs Are Game-Changers

    This is where a smart setup pays off, every single time. Drop your variable-speed grinder’s RPM from max (10,000) to a controlled 5,500, lock in a quality 60-grit ceramic disc, and the chemistry changes instantly. In daily shop use, a quick test with an infrared thermometer showed a dramatic shift—110°C at moderate speed, compared to the punishing 160°C you’d hit at full throttle with a basic disc. It’s the difference between a shop that tucks up at the end of the day and a shop that spends overtime sanding out mistakes.

    That slower, smoother approach feels strange at first. Maybe it challenges your “get it done” instincts. But suddenly, blue heat signatures barely appear, edge uniformity stays tight, and your grinding time drops—you’re not fighting to erase the aftermath of impatience.

    Micro-Adjustments: Small Tweaks, Big Results

    Three habits make a powerful difference in daily grind work:

    • Work in short stints—don’t try to push one surface or weld nonstop. Let the metal breathe, and so will you.
    • If heat builds under your hand, don’t push harder—swap in a finer or ceramic disc to cool things off mid-session.
    • Stay alert during batch work; if you see rainbow patterning start to creep in, pause and reset before it escalates.

    Even just swapping to a better abrasive mid-job or taking a one-minute break can stop an ugly finish from spiraling. It’s habit, not heroics, that makes cleanup easier later.

    FAQ: Beating the Blue, Job After Job

    How can I actually prevent blue staining?

    Back the RPM down, use ceramic or high-quality abrasives, and chunk big work up into manageable, quick sessions. Catch color early and pivot before it cascades—think of the stains as an early warning, not a final verdict.

    Why does stainless steel punish mistakes so quickly?

    Stainless not only heats faster but holds onto that heat longer, spotlighting every slip in dwell time or pressure. Don’t rush—pace your work and stay vigilant about what your hands and eyes are telling you.

    Is grinding slower always worth it?

    Not if all you’re doing is rough prepping mild steel for framing. But for visible, precision work—or anything touching final finishes—lower speed and better discs always save time on the back end. It’s never wasted when the end goal is clean metal ready for the next step.

    Grind Smarter, Save Your Workflow

    Heat shimmer, blue streaks, ugly brown halos—they’re more than enough to ruin a long day at the bench or on-site. Every choice, from your RPM to the disc in your hand, can cut or compound cleanup. The best shops know: small, conscious adjustments now mean less arm strain, better finishes, and fewer late-night do-overs. Don’t aim for perfect—just aim for fewer unwelcome surprises when the grinder powers down for the day.

    Shop Gumboll for workshop-ready grinders, discs, and tool gear

  • Why Purpose-Based Storage Zones Transform Garage Efficiency Over Time

    There’s a rush that comes with a freshly arranged garage or workshop. Racks finally bolted level, every bin matched and snapped in place, the floor swept and tools lined up in satisfying symmetry—for a moment, it feels like you’ve unlocked a new system, one that will keep chaos at bay. But then Monday turns up. You’re halfway into a fix, lugging in supplies or cleaning up after a project, and the honeymoon is over. Suddenly, that pristine arrangement starts showing where it truly holds up—and where it quietly slows you down.

    When Storage Looks Tidy But Movement Stalls

    The biggest trap for any organized garage or workshop is this: storage that solves “the mess” but creates frustration beneath the surface. On the outside, rows of identical bins and matching cabinets promise order. But come cleanup time, you find yourself hesitating. Did you stash those screws in this bin, or the next? Now you’re prying open lids, swapping trays, and replaying last week’s logic. The uniform look is clean, but your actual movements are anything but efficient.

    Worse, when items are sorted simply by what fits—rather than what actually belongs together—things get muddled. The shovel sits next to a lug wrench. Extension cords end up jumbled with socket sets. And the solution? You shift a cart just to get to a shelf (again), or find yourself stretching awkwardly around a cabinet edge for something you need with one hand full. The wall might be lined, but it’s not working with you. And the floor—meant to be clear—becomes a holding pen for whatever doesn’t click neatly into your “system.” Every small stumble—overflow piles, blocked shelves—chips away at the smooth routine you set out to build.

    Where Uniform Storage Breaks Down in Everyday Use

    It’s under real, repeated use that most storage setups reveal their cracks. Sure, the matched system looks pristine and resets easily on a slow Sunday. But fast-forward to the next urgent repair or inventory restock, and you’re guessing which bin holds what, or which shelf silently shifted since last week’s cleanup. The ‘organized’ impression disappears as soon as you realize the rolling tool chest always sits in front of the one shelf you keep needing, but moving it means clearing a new cascade of piles every time.

    The friction isn’t dramatic, but it’s relentless. Over time, corners collect tools in limbo, shelves absorb loose bits that defy your labels, and one stray item—“just for now”—snowballs into an entire shelf of miscellaneous. An arrangement that started tidy drives micro-resets with every use: reshuffling, retagging, and backtracking. You don’t get obvious mess, but you lose easy flow—resetting the space becomes a sequence of small corrections instead of one satisfying action.

    Why Zones With a Single Mission Keep Work Flowing

    The real breakthrough comes from trading showy uniformity for zones with one job each. It’s about function that fits the way you work, not just the way your hardware store display looked. Assigning a clear role to every section changes the pace. One wall becomes the tool area—shears, trowels, hand tools together, nowhere near the paints or power tools. A sturdy cart turns into the fastener hub: every screw, bolt, nail sorted by size, not just tucked away “somewhere.” Suddenly, movement gets automatic—returning an item means you already know exactly where it belongs. No more flipping labels or opening every bin to guess. The system works at the speed of your memory, not its appearance.

    This doesn’t demand elaborate label schemes or color codes. Sometimes the fix is the opposite: let the rows get asymmetric if it means categories stay sharp. Painting supplies isolated on their own high shelf. Garden hoses in a rolling bin that migrates with the seasons: near the door for summer, stashed out of the way by winter. Purpose-based zoning does more than tidy up—it warns you before overflow happens and keeps your everyday reset as simple as a single, deliberate motion.

    Spotting Early Warning Signs Before Zones Blur

    Pay attention to hesitation—when you reach for storage and stop because the “right” spot is suddenly unclear. One week it’s a drill that lands with the brushes, next it’s sandpaper blending into a drawer of old tape. These small slips signal a zone beginning to blur. The fixes don’t have to be big: shift a shelf’s contents, toss up a clear label, or roll in an extra bin for short-term spillover. These micro-adjustments keep things from devolving into another corner of confusion and save you the giant reorganizational weekend you’d rather never do again.

    Real Scenes: How Zones Outperform Shelf Symmetry

    After the dust settles from a busy weekend project, you can spot the pain points at a glance. The floor cart holds an odd array—old hose clamps, garden wire, December’s windshield scraper, and a roll of painter’s tape from last night. The cart’s side, never meant for storage, starts acting as a drop-off zone—slowing every attempt to put something back. The wall rack hides the wrench you need behind two backup hammers and a pry bar set you never actually use. That clear front of “organization” is now just a veneer over awkward reacharounds and missed cues.

    That’s when the difference becomes impossible to ignore. Systems that actually work are not the showy ones, but the ones where returning something is as natural as grabbing it in the first place. Even as new projects shift what you need or the seasons change the supplies in rotation, a clear, purpose-based setup lets the rhythm stay unbroken. It’s not about filling every inch, but about minimizing excuses for stray piles and repeat reshuffling.

    Making the Area Work With You—Not Against You

    The real test of any setup isn’t an empty, photo-ready workspace—it’s how unfussy it stays after weeks of real-world use. If every zone leads you instantly to the right move—no guessing, no side-stepping extra piles—then the routine clicks, especially on the busiest days. But if uniform setups hide all logic or demand daily dance steps to avoid overlap, most of your time goes to constant minor resets and workaround habits that never feel natural.

    The setups worth keeping are the ones you barely have to think about—the ones that allow you to work, clean up, and reset with barely a pause. The reward isn’t perfect looks; it’s real, persistent clarity. That’s why the simplest shift—ditching generic storage walls for clear, category-led zones—pays off well after the novelty wears off.

    Find practical storage and organization options for workshops, garages, and utility spaces at StackNest.

  • How Functional Storage Transforms Daily Routines Beyond Looks

    True storage success isn’t about how clean your closet looks on day one—it’s about whether the system still holds up once the everyday scramble actually begins. Most setups seem fine at first glance: baskets aligned, sweaters folded, shoes paired and parked. But real life is never still. Every weekday morning tests the system—blindly feeling for boots in a dark closet, digging past coats to find a single glove, shifting three bins just to fish out a gym bag. The difference between “organized” and genuinely functional storage is measured in these hurried, repeat-use moments that set the tone for the day.

    Everyday Storage Friction: Where It Really Shows Up

    The slow creep of chaos rarely shouts. It’s silent, steady, and familiar to anyone living with clutter that doesn’t start messy but slides there fast. By midweek, you’ve likely felt:

    • Stacks swelling to the edge of shelves, folded sweaters slipping into lopsided towers after just two grabs.
    • Baskets and bins losing their roles, turning from sorted categories to bottomless catch-alls—a winter hat tangled with outgoing mail, last week’s mittens buried under today’s scarf.
    • Entryways choking up with shoes and tote bags, making the only clear floor space the spot you’re about to cover with whatever you just walked in holding.
    • The daily shuffle and rearrange, where simply putting something away means sliding, restacking, and hoping it doesn’t all collapse by tomorrow.

    What’s subtle on Sunday becomes friction by Thursday. Small annoyances add up—each wasted motion tempting you to drop something “just for now,” setting off a chain of clutter that feels harder to undo every day. Unless the setup is built for this constant motion, it slowly loses shape and purpose.

    Surface Order vs. Real Function: When Good-Looking Systems Fail

    The right baskets, matching bins, and tidy shelves can fake order—for a while. But neatness doesn’t survive daily use if the logic behind the categories isn’t clear. Without firm dividers or visible boundaries, baskets slide into chaos: yesterday’s paperwork sinks beneath today’s scarf, and every search turns into a rummage.

    Open shelves are especially prone to slow drift. Placing things back never happens as neatly as the first time. Shoes inch forward. Sweater piles slouch left or right. Anything at the back turns invisible, impossible to reach without dislodging everything in front. The illusion of order erodes in minutes, and one hurried morning leaves the system looking ransacked until the next reset.

    Up Close: The Week in the Hall Closet

    Consider the overworked hall closet: wire shoe rack below, open shelving above. On Sunday, everything lines up. But by day three:

    • The front row of shoes has crept forward, cutting off access to any pair in the back row.
    • Snagging sneakers from the rear means balancing on one foot, removing boots, and causing the whole row to wobble.
    • Gloves have no clear landing spot—they’re draped over shoes or stuffed behind coats, gradually forming their own unplanned heap.
    • By Friday, you’re fishing for one mitten in a pile of hats, boots, and December’s forgotten lunch receipt—all layered and tangled together.

    Each “simple” grab takes longer. Every time you return something, the original order collapses further. The cost isn’t just mess—it’s lost time, extra effort, and frustration that leaks into the next part of your day.

    How Small Upgrades Create Lasting Categories

    Most friction in daily storage use comes from a lack of clear, anchored categories. Now picture that same crowded closet, but with shallow, pull-out trays segmented by adjustable dividers. Shoes each get their own lane. Gloves and hats land in labeled, see-through bins above. Suddenly, every item has a staying spot—even after repeat grabs:

    • Grab shoes without disturbing the whole row. No more digging or rescuing crushed pairs from the bottom of a heap.
    • Return gloves to a defined compartment, not a vague bin where patterns blur and items disappear.
    • Overflow is obvious—if a category fills, you see it instantly, rather than discovering the problem weeks later in a mountain of stray gear.
    • The closet not only stays visually together through the week, it feels reliable: no second-guessing what goes where or how much friction you’ll face Monday morning.

    This doesn’t require a full renovation. Sometimes, swapping a deep, mystery bin for a shallow, open-front tray—or installing one adjustable divider—shifts the whole routine. The way you move through the space changes. You stop double-handling items. The reset takes seconds, not minutes.

    Category Clarity: The Key to No-Guesswork Storage

    What works on Instagram isn’t always what lasts in a living home. The setups that endure are built around routines that repeat: pull, use, return—without thinking. If your system demands constant restacking or “resetting” means starting over each week, category clarity is missing.

    Test your setup: can you single out a category—a bag, workout clothes, winter hats—without touching everything else? If not, define a home for each frequent-use item. A shallow tray, a clearly divided shelf, or a set of labeled hooks can turn habitual clutter zones into permanent order. Ask honestly: are your keys, gym socks, or headphones actually within easy reach, or are you always fishing them out from behind something else?

    Tip: When In Doubt, Go Shallow

    Deep bins and thick stacks are hiding spots, not organizers. If you ever find yourself sifting, opt for storage that’s shallow and visible. The less you have to dig, the less mess you’ll make. Often the most sustainable fix is pulling out a bulky bin the system didn’t need and replacing it with a low-profile tray that leaves every item in plain sight.

    The True Test Is Reset Speed

    Clutter rarely explodes in a day—it creeps in when resetting the space starts to feel like work. When a storage setup lets you put things back in a matter of seconds, clutter never gets a foothold. Messes stay small, routines stay smoother, and your attention moves on to better things than tidying the closet—again.

    Watch out for these warning signs:

    • Category zones fading together—no one’s sure where anything belongs
    • Returning items that require three steps when one should do
    • Stacking, shuffling, and “quick fixes” becoming routine instead of rare

    If any sound familiar, the design is adding weight—not removing it.

    Function Over First Impressions—Every Time

    In homes that see real use, organization isn’t about staged photos or tidy surfaces that collapse under pressure. The right storage system holds steady through a full week of living: what you grab on Friday feels just as easy and obvious as it did on Sunday. Messes are brief, not embedded. The payoff isn’t just a cleaner space—it’s a smoother routine, less frustration, and a closet or entryway that fits the way you actually live.

    For storage solutions built for real routines, visit ClosetWorks.

  • Ensuring Angle Grinder Disc Speed Matches for Safer, Cleaner Cuts

    There’s a moment every angle grinder user dreads—the telling jolt as your tool starts to buck and chatter halfway through a cut. You brace harder, but the wheel judders and the edge you meant to keep clean scorches and splinters instead. That instant, you know: something’s off, and it usually comes down to one thing—your disc’s speed rating versus your grinder’s power. This isn’t a small detail. Making the wrong match between disc and tool creates a drag on every part of your process. The fallout shows up everywhere: rough finishes that won’t sand smooth, discs reduced to shreds in half the lifespan, and that background frustration as your workflow breaks down while you double-check—or redo—your last pass. In actual shops and out on job sites, overlooking this spec isn’t a one-off mistake; it’s a recurring time-waster and quality killer.

    How Disc Speed Ratings Affect Every Cut

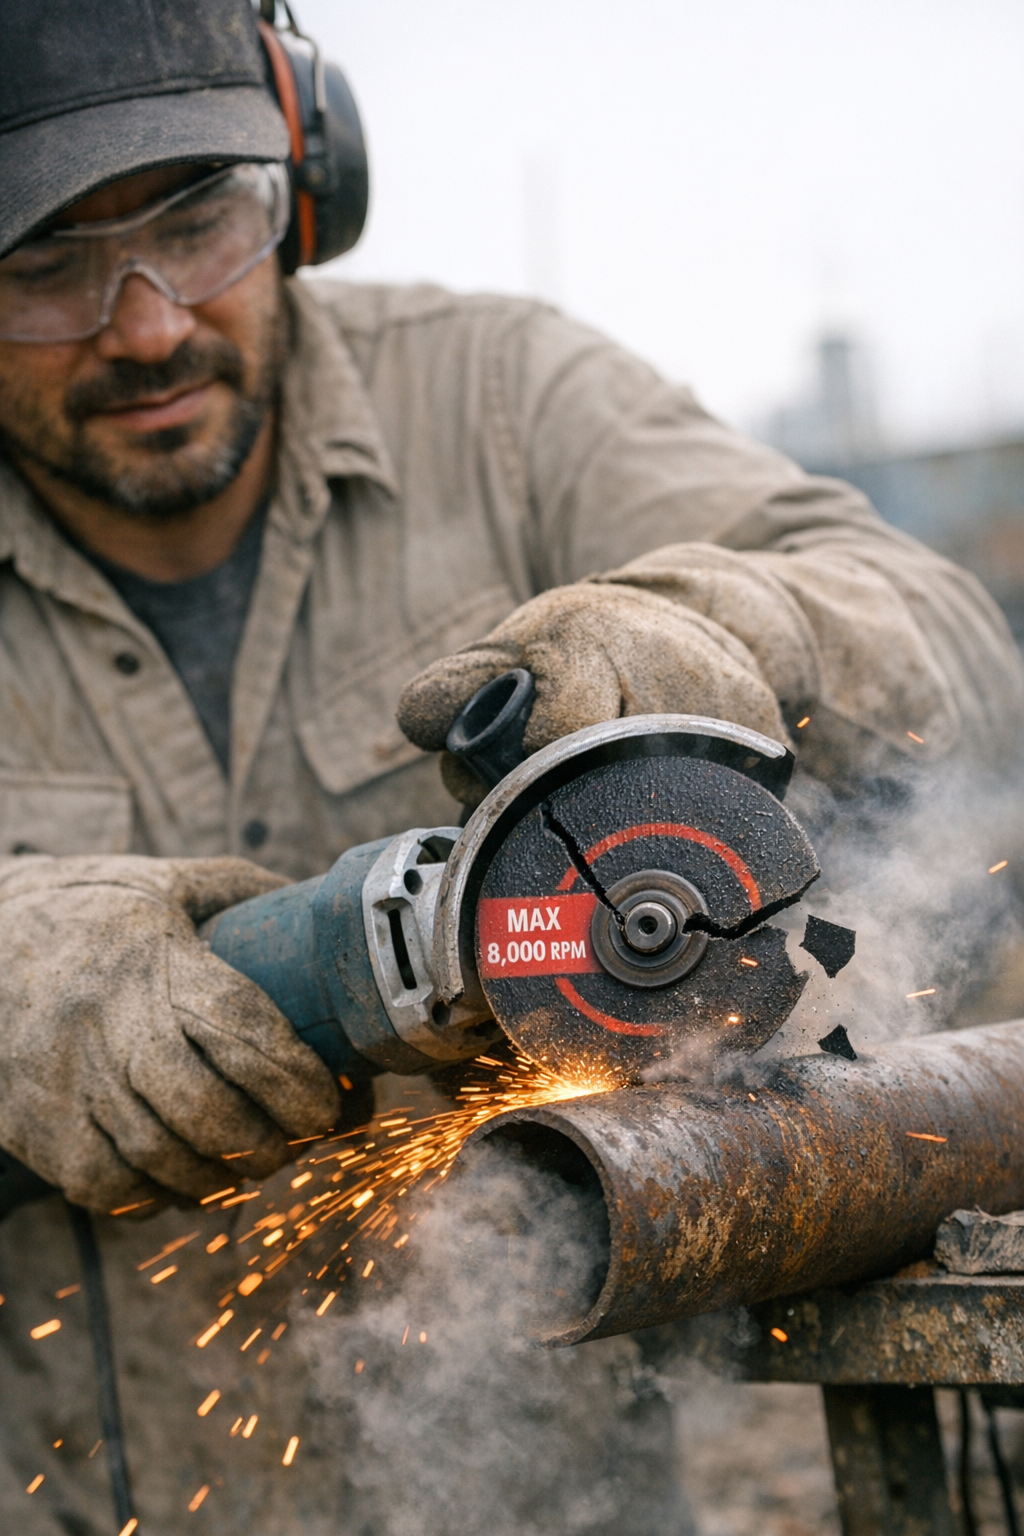
    Grab the wrong disc from your overcrowded tool bench—a disc rated for 8,000 RPM instead of the 12,000 your grinder’s built for—and you might not notice a difference at first. The disc mounts. The sparks fly. But the instant you start a real cut—grinding down thick welds or shearing through steel studs—a subtle shudder creeps in. That vibration is new, the tool’s control isn’t as tight, and you can feel your progress stalling.

    Heat comes next, radiating through your gloves. The grinder’s tone changes pitch, edging on a rattle. Instead of a sharp, clean edge, you end up with blue streaks, scalloped gouges, and a finish you’re going to have to rework—if the disc doesn’t crack or melt first. Ignore speed ratings, and suddenly every job feels like walking through mud, wasting both discs and patience in the process.

    Slices of Real-World Friction

    The Five-Minute Fix That Wrecks an Afternoon

    Picture a cramped fabrication shop: bench space is at a premium, sawdust and filings cake every surface, and your project list is backed up. You’re in a rush, need a new cutting disc, and grab the first one that fits. Midway through the cut, the grinder’s vibration ratchets up—you grit your teeth and finish, but what was supposed to save you time actually chews up the material and leaves a ragged, burnt edge. Now you’re stuck sanding out mistakes or cutting a replacement piece, all because a mismatched disc turned one quick task into a time sink.

    The Relief When Specs Align

    You swap to a disc rated well above your grinder’s RPM. Instantly, the difference is physical—the wheel flows through steel or aluminum, your hand stops cramping, and every line comes out straighter and cooler. Grinding welds takes less effort, the residue is minimal, and your shoulders aren’t aching from wrestling the tool. Stack up a dozen of these small saves on any job and you finish hours sooner, not stuck behind on punch-list fixes.

    The Fallout of a Wrong-Speed Disc

    Loss of control and extra effort. Push a disc past its max RPM and you feel it—a grinding resistance, sudden warmth, and odd debris hitting your wrist. The grinder wants to veer off track, you feel forced to compensate, and precision goes out the window. The sense of fighting your own tool multiplies wear on both the disc and your patience.

    Premature breakdowns and bigger messes. Discs that can’t handle your grinder’s speed wear into odd shapes fast. You’ll see chunks fly, edges burn, or even discs chip or delaminate mid-job. Every pass leaves more dust and an uneven surface that needs a second go-around. For big projects—long seams, thick angle iron, tough masonry—a mismatched disc can shatter outright, taking your workflow (and maybe your nerves) with it.

    How To Spot—and Prevent—A Speed Mismatch

    Same size, same thickness, similar packaging—two discs can look identical until you check the fine print. RPM ratings, tucked into a label’s edge, make all the difference. In a busy shop or during back-to-back jobs, it’s easy to let muscle memory guide you, reaching for the familiar package instead of double-checking the rating. But the result shows up fast: shaky cuts, rough finishes, and the feeling that you’re stuck redoing your best work for reasons that aren’t always obvious.

    If you move between different materials, swap discs often, or share equipment, these mismatches get more likely. The habit of grabbing “what’s closest” will cost you in headache and wasted effort, especially on days where you can’t afford surprises or second-guessing your tools.

    Make the Right Match—Every Time

    Always Start with an RPM Check

    It takes less than ten seconds: read the disc’s max RPM—usually stamped right on the label, sometimes edge-printed on the wheel. Cross-check it with your grinder’s top speed (found stamped near the handle or in the manual). If the disc’s max RPM is lower than your grinder’s output, don’t risk it—grab a different disc.

    Give Yourself an RPM Cushion

    Don’t just match specs—build in some margin. Ideally, use discs rated at least 2,000 RPM above your tool’s top speed. That buffer absorbs inevitable overpressure when you lean in hard, and protects both tool and finish when you’re pushing through tougher material or angle cuts.

    Handle Larger Discs with Real Caution

    Switching up to a bigger disc? Only safe if your grinder can slow down to well under the disc’s max RPM. Fixed-speed grinders with big, slow-rated discs are a recipe for cracks, shrapnel, and blown project timelines. Do the math and let specs—not just convenience—guide your setup.

    Your Disc-Speed Questions, Answered

    What if I toss a low-RPM disc on my high-speed grinder?
    You’ll feel it: sharp, chattery vibration, fast edge wear, and before long—hairline cracks, burning, and chips flying off. You risk damaging your tool, your workpiece, and your fingers. It’s not worth the gamble.

    Where can I check disc speed ratings?
    Look directly at the wheel’s label for printed or stamped max RPM. Your grinder’s specs should be easy to spot near the handle or in your manual—know them by heart if you want to work smarter.

    Can I run big discs at low speeds for delicate tasks?
    Only if your grinder is variable speed and set below the disc’s rating. There’s no safe shortcut to make a slow disc spin faster. Always match tool, disc, and task—the time saved in clean, fast progress is worth it.

    Small Habits, Major Payoff

    When you keep disc speeds matched to your grinder, everything improves—the tool feels lighter, your lines get cleaner, and hours lost swapping burnt discs or sanding out mistakes come back to you. It isn’t magic. It’s a simple, repeatable step that means less fatigue, fewer near-misses, and finished work you don’t dread showing or installing. Take the extra half-minute. Your future self—and anyone relying on the finished product—will thank you.

    Shop Gumboll tools & accessories