Category: Tools & Workshop

  • Why Drawer Design Shapes Your Daily Storage Efficiency and Routine

    Drawers or open shelves: both look tidy at first glance, but the real test comes at 7:23 on a rushed Thursday morning. That’s when you’re elbow-deep in a drawer, searching for the socks you know you put there, and you realize—your storage solution isn’t actually helping you. It just looked good for a day or two. The difference between a closet that photographs well and one that keeps up with real, everyday routines comes down to less visible details: friction, category drift, and how smoothly you can reset at the end of a busy week.

    Drawers: Neat on the Surface, Chaos Beneath

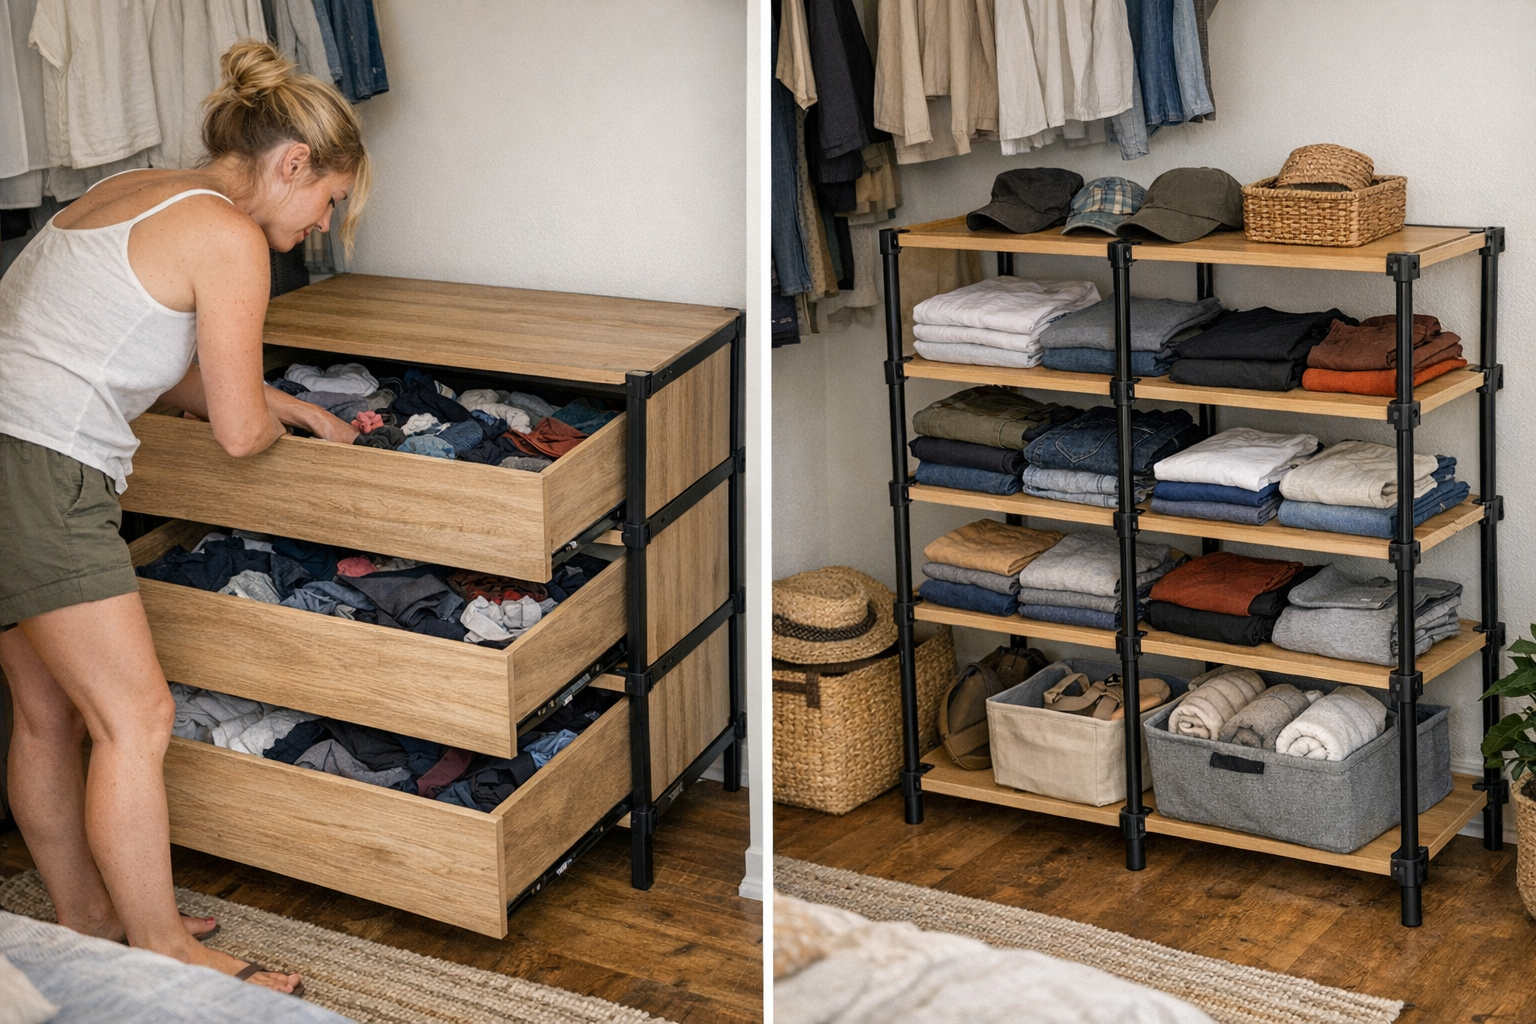
    Imagine the lower half of your closet lined with deep drawers—everything sorted, folded, hidden from view after a weekend reset. By midweek, though, that illusion starts to slip. You can’t put your hands on what you need without disrupting layers: socks disappear under t-shirts, sports bras slide to the back, athletic tops get lost. The sense of order you worked for quietly comes undone, one hurried grab at a time.

    Deep drawers make it far too easy for categories to blur with each rush. They swallow poorly folded stacks, and items shift and topple before you notice. What starts as minimalist calm turns into a churned-up mix just below the surface.

    The Drag of Reaching, Shuffling, and Searching

    This friction adds up in the routine details. Every morning, reaching for one specific shirt means touching—if not actively moving—three others. Socks stuck at the bottom force a half-unfold of everything on top. Untangling a pile to find a single missing gym short slows you down and leaves folded stacks looking punched-in. Drawer resets take longer each time, and what once felt efficient slips into maintenance mode—constant process, barely keeping pace.

    The trouble is mostly hidden. Drawers fool you with surface order, but every repeated reach disturbs the balance. Eventually, it’s easier to stop resetting entirely and just live with low-level chaos.

    Shelves: Full Visibility, Fast Access, Real Limits

    Shelves, by contrast, refuse to let items hide. Every piece—pants, towels, folded knits—competes for visible space. With no deep layers, you pull what you need without dislodging the rest. Each category is exposed, so mixing is obvious and retrieving is quick. You lose less time to searching or reshuffling. Shelves tell on you: overstuff them or neglect a row, and chaos is instantly on display.

    But shelves can crowd up fast. Too many stacks become hard to control, and soft items spill into each other nearly overnight. One oversized sweater can push an entire row toward collapse. The neat line up front quietly grows into a jumble when no one’s looking. Still, you always know where things are—and if you use bins or baskets, they force you to define what goes where, at least until overflow starts again.

    Scene: Mudroom Entryway Shelves in Practice

    Picture the honesty of a mudroom shelf lined with baskets. There’s a tray for keys, a bin for hats, boots set out in their spot. Categories stay clear because each is visible and easy to access. But if shoes start landing outside their bin, or baskets overflow, clutter spreads instantly from shelf surface to floor. Even then, finding the right scarf or gloves is a glance and grab—fast, but risking visual clutter and the need for constant pulse-checks.

    Dividers: Small Fix, Big Relief

    Back to the bedroom closet: add removable dividers and watch the tone shift. Each divider becomes a miniature boundary—shirts here, leggings there, socks corralled to one side. Suddenly, the drawer you’d grown to dread opens to clear, persistent zones. The scramble for a specific item is gone; instead, you can nab what you want with a single reach. Stacks hold shape. Crumpling slows down. The difference isn’t always dramatic, but it’s real—you’ll feel it when resets become near automatic instead of a weekend project.

    Dividers quietly prevent category sprawl and reduce the subtle mess that builds from little misplacements. Implementation is simple, but the payoff comes in every rushed morning and low-stress reset.

    Quick Check: How Deep Is Too Deep?

    If grabbing your favorite workout tee means moving two or more layers, your drawer is working against you. Too much vertical space invites chaos. Shallow drawers or strategic dividers force a single layer—everything visible, nothing buried, so mornings flow and clean-up is fast.

    Reset Anxiety: Signs Your Storage Isn’t Working

    When storage works, even hectic routines don’t unravel it. If you’re hesitating to reset a space because it seems overwhelming, your system needs tweaking—not just more discipline. Drawers devolve without boundaries. Shelves overflow without limits. True storage success shows not just in how easily you can tidy up, but in how little there is to fix each evening or weekend.

    The best setups don’t rely on constant vigilance—they quietly keep things organized day after day. Whether that means confining socks to a single slot or making towels easy to grab off a shelf, the difference is functional, not just visual.

    Beyond the Closet: Where Storage Friction Sneaks In

    This tension shows up in every high-use zone:

    • Kitchen drawers without flatware dividers devolve into utensil grab-bags.
    • Bathroom cabinets with deep baskets let bottles vanish at the back and half-used products multiply.
    • Garage workbenches lose all order when one tool gets wedged behind another inside a deep drawer.

    The cycle is the same: each time you have to move the wrong thing to find the right one, friction accumulates. Each small fix—dividers, bins, clear visibility—reduces the reset grind and keeps daily routines smoother.

    What Works: Everyday Storage Tactics

    If you find yourself wasting time searching or resetting, try this:

    • Root out hidden layers—deep drawers and bins love to hide clutter. Add dividers or split a single deep drawer into two shallow ones if possible.
    • Track how often you have to move one thing to get what you really want. If it’s frequent, reorganize for single-layer or single-category access.
    • For shelves or busy drawers, reduce categories: one type of thing per shelf (or per bin) lets you see when clutter is creeping in.
    • Move your most-used items to open storage or top-access spots—control friction, then customize boundaries where chaos appears most often.

    The lowest-friction storage setups are the ones you barely have to think about. Small changes like a simple divider or a swap to open shelving can transform how a space functions in real, messy, repeatable life. If your system feels like it’s always on the edge of chaos, it isn’t you—it’s the setup. Good storage adapts to your rhythm and helps declutter as you live, not just after a big reset.

    Discover practical options and smarter routines at ClosetWorks.
  • How Entryway Storage Can Transform Daily Routines and Reduce Clutter

    Entryway storage always flatters to deceive—until real life sets in. On day one, everything feels under control: hooks in neat formation, cubbies perfectly squared, shelves lining up like architectural plans. You stand there, picturing every shoe, bag, and coat in its place, convinced you’ve finally closed the gap between chaos and calm. Then routines hit. The careful symmetry crumbles—shoes block the walkway, jackets pile three to a hook, and baskets overflow with whatever didn’t fit elsewhere. Within a week, the entry looks less like a system and more like a lived-in scramble, proving yet again that first impressions fade fast once actual habits collide with even the best-laid setups.

    When Setup Meets the Pace of Real Life

    This is where most storage systems reveal their true colors: not on setup day, but during back-to-back mornings and unpredictable evenings. The difference between a space that quietly resets itself and one that slips into disarray comes down to what happens as people move through it—bags grabbed in a rush, muddy boots dumped in the nearest gap, groceries suspended on whatever surface is open for half a second.

    Photo-ready order holds together for about three days—until you’re wrestling a backpack from under two coats or twisting sideways just to wedge boots onto a shelf that looked spacious enough only in the catalog. When bins are awkward, hooks too high, or shelves crammed too tight to reach, the cleanup routine becomes a workout. If your storage doesn’t fit the reality of your movements, you fall into workarounds: shuffling bins to clear a path, negotiating space with someone else, or simply stacking one thing awkwardly atop another and telling yourself you’ll fix it on Saturday. Most setups don’t fail all at once. They fail in all the little ways that force you to constantly make up for what the layout won’t let you do naturally.

    Tracing the Slow Breakdown

    What does it really look like when a setup stops working? Shoes start clustering in the wrong places—with piles creeping closer to doorways and traffic lanes. Hooks disappear under three jackets, so anything new gets draped over a bench, or lands on the nearest basket. Items without obvious homes—hats, sports gear, pet leashes—migrate to what should be clear corners, slowly becoming obstacles for anyone stepping inside. Every pass through the area is an improvisation: nudge the rolling cart again, sidestep the chest that never fits quite right, or reroute entirely because one cabinet blocks half the flow.

    You know the system’s failing not by the volume of stuff, but by how often you find yourself moving things just to move yourself. Categories blend out of frustration, not necessity—a shelf meant for shoes now shares duty with mail and the odd umbrella, simply out of reach-based convenience. Instead of helping you get in and out, the setup becomes another source of negotiation—and the difference is measurable in every sigh, slowdown, and missed morning exit.

    Everyday Friction Points You Can’t Ignore

    Picture getting home at 6 PM with two grocery bags and soggy boots. The hook closest to the door? Already smothered by winter coats, demanding an awkward stretch if you want yours to fit. You try the cubby, but the angle’s too tight—why twist awkwardly when it takes half the time to just leave shoes by the wall? Within days, that shortcut becomes routine, and soon everyone’s stepping over a sprawl of shoes. That’s where gridlock starts: one small inconvenience creates a chain reaction of clutter.

    For smaller entries, those problems only grow. A cabinet door that blocks passage every time it swings open, a corner that’s never quite empty but always full of “for now” gear—these little design misfires draw a direct line between storage on paper and the real-life shuffle and sidestep. Storage isn’t just a numbers game; the shape, reach, and footprint of every piece determines whether movement flows or constantly faces micro-obstacles. It doesn’t matter how many bins you squeeze in if you’re reshuffling contents or paths every single day.

    Reshuffling: The Invisible Time Drain

    You rarely notice just how much time and energy you waste until the entry forces your hand. That rolling cart isn’t just in the way once—it has to be shifted two, maybe three times, just so you can sit on the bench. The wall lined with identical hooks never adapts—so when Saturday soccer starts, there’s nowhere to put the extra bag except by wedging it onto the nearest available spot. Overflow becomes a way of life, not an exception. What started as “enough storage” pivots into a daily chore that chips away at the utility the setup should have provided.

    Small Fixes with Outsize Impact

    Tiny layout changes often pay off the most. Swap one long row of hooks for staggered pegs at two different heights and suddenly the congestion vanishes—no more wrestling a jacket off the lower hook just to reach a kid’s backpack. It’s a five-minute adjustment that buys back time, space, and convenience.

    Move a shoe shelf six inches clear of the main path—now there’s no need to squeeze sideways or leave shoes heaped by the door. The open pathway signals where things should land, making clutter instantly visible and easier to resolve. These aren’t splashy remodels, just subtle realignments that quietly eliminate friction. Return flow—actually putting things back—feels natural, so the area resets without even having to think about it. Weekends stop being reserved for an entryway comeback.

    Setup Tactics That Withstand the Mess

    The best setups aren’t the ones that look the sharpest on delivery day—they’re the ones that can absorb mess and routine pressure, then still snap back. Day-to-day usability matters more than total storage capacity, with setups either smoothing your routines or making you fight for access every time.

    • Break the straight line. Don’t force every hook and shelf into a tidy row—stagger heights and mix wall with floor-level storage. A bench below hooks, or bins overlapping hook zones, lets you organize vertically without creating bottlenecks.
    • Keep wall and floor systems distinct but complementary. Separate jobs mean less pile-up—so carts and cabinets don’t choke the same corner, and mobile units aren’t nailed down at the expense of flow. Rolling storage should move out of the way (not just look like it can), and modular bins should let you reclaim or repurpose dead space as your needs shift.
    • Treat repeat overflow as a flashing light. If one corner keeps capturing stray gear, solve for easier access there—or redefine what belongs to that spot. Don’t just add another layer; rethink the zone.
    • Use awkward wall spans and corners as adaptable zones, not abandoned ones. Modular systems can slide, expand, or contract. Done right, they make even the least convenient nooks carry their weight—so no spot’s a permanent backlog.

    Audit Your Reset Routine

    Once a week, pause. Watch how things circle back to their “spots,” if they circle back at all. If a bin or hook is always skipped, or if you ever catch yourself cutting corners because a shelf is awkward to reach, it’s a cue: something about the layout isn’t matching your flow. Real organization isn’t about visual order; it’s about a system that quietly resets itself during real movement—not as a chore to be done after the fact.

    Why Looks Aren’t Enough: Lasting Setup vs. Surface Order

    An entryway only earns its keep if it stands up to repeated, daily use. It’s not enough for storage to be present; it needs to keep clear movement routes, distinct categories, and a naturally resetting flow. If every pass means sidestepping, double-stacking, or improvising with overflow piles, the setup just adds to your work. The win is a space that does its job while your routine stays uninterrupted—not picture-perfect, but always ready for the next round.

    Discover modular storage systems built for real, repeated use at StackNest.

  • Choosing Laser Levels That Stay Visible in Harsh Outdoor Conditions

    You know the sinking feeling: middle of the job, sunburn already settling in, and your laser level line has all but vanished. This morning, laying out formwork or marking fence posts, the beam was razor-sharp. Now—midday glare, dust hanging in the air, heat rising off the slab—you’re crouched down, straining to catch the ghost of a line you depend on for straightness and square. Every wasted minute crawling, wiping concrete, or guessing distances is budget leaking out, and accuracy flipping a coin. Out here, beam performance is the difference between knocking out the rest of your layout—or doubling back in frustration to re-check everything by eye.

    Why Most Lasers Go Missing Outdoors

    It’s easy to think all laser levels are equal, at least until you hit a real jobsite. In a shaded trailer or your garage, everything looks bright—until dust, sunlight, or a pale work surface chews up the beam. Out on exposed concrete or pale deck boards, weaker models just dissolve. Missed lines aren’t just a small nuisance: they breed subtle mistakes that creep through every step, whether you’re setting anchor bolts or stretching string for a fence line. By the time you spot a crooked run or an offset hole, it’s already hours or hardware wasted.

    Sun, Dust, and Tool Realities in the Field

    Real-world pace means you’re drilling anchor points, fastening bracket lines, and moving stakes—often solo, often with dust and glare fighting you every step. By late morning, even a laser that seemed fine inside can turn unreliable. After a round of hammer drilling or sawing, dust hangs over your workspace and the line weakens into a blur. You end up bending, shifting your plywood just to pick up the beam, or checking a measurement with a tape for the third time. This isn’t just annoying—it breaks your momentum, burns time, and racks up fatigue. No one wants to second-guess every cut or hole under the pressure of a tight schedule.

    What Makes a Laser Level Actually Jobsite-Ready?

    The disconnect happens because spec sheets rarely match jobsite reality. You want numbers to promise clarity, but the fine print buries the difference between a tool that carries its weight and one that falls apart as conditions change. Out here, beam strength, diode quality, and smart optical tech mean everything. These are the factors that keep your layouts tight and your workflow steady as the site goes from early cool to baking chaos.

    Specs That Pay Off—Not Just on Paper

    A high-output green diode (think class 3R, 5mW or more) is a start. In full sun on dusty OSB, these outshine basic red by an order of magnitude. But even a strong beam reaches its limit: that’s when pulse mode paired with a receiver becomes essential. When the naked eye can’t catch that line—across ten meters of sun-scoured concrete or through a haze of drywall powder—a good receiver finds it every time. With this setup, you keep working at full speed and precision, attacking each task with the confidence that your marks are trustworthy, not up for debate.

    Where Line Visibility Makes or Breaks Workflow

    Imagine this reality: You’re lining up posts across uneven terrain. After the third round of drilling, the site is dusted white, and afternoon glare is merciless. Your “inside-bright” laser is a memory—now it’s a matter of stooping, re-aiming, or just guessing. Workflow stalls. By day’s end, you’re mentally worn, physical accuracy drops, and every measurement feels like a gamble.

    Contrast that with a purpose-built outdoor tool. The line stays crisp, even stretching across dull slabs, mottled cut marks, or shadowed boards. No need to “hunt” for your line—you see it, trust it, and move fast. The job runs smoother, your accuracy holds, and the risk of error shrinks. After hours in the field, you realize how many slowdowns you’ve dodged—not through luck, but through gear that’s actually up to the conditions.

    Tiny Slips, Big Consequences

    Every pro knows minor slip-ups add up—especially with invisible layout lines. You catch yourself “eyeballing” where you should be exacting. It’s the same frustration as a worn drill bit chewing through hardware or a blade that bogs in OSB. It adds invisible costs: rework, remeasuring, and—eventually—redrilling holes or recutting studs, just to reclaim lost accuracy. It’s real-world drag that basic tools never account for.

    Upgrades That Actually Matter in the Field

    “Overkill” isn’t the point—workable margin is. Jumping from 12 to 27 meters of visible range can mean the difference between hustling through a perimeter check or wandering around with a tape measure, muttering. More than that, the right receiver lets you work blind to the beam—firing lines through sun-glare, around corners, or over gritty rebar mats—without a pause. That’s control that cuts out the guesswork, keeps your head up, and actually lets you work, not chase fading lines.

    Real-World Tips: Keep Your Layout Moving

    Stash backup batteries within reach. High-output lasers burn through juice when temperatures climb and outputs are running at full. The last thing you need is a power-out mid-layout—especially with a site full of partial stakes and unsettled marks.

    Clean your lens as routinely as you sweep your slab. No beam, however bold, can punch through a dusty film. Quick lens wipes between measurements are the cheapest insurance against lost visibility.

    Jobsite Questions—No-Nonsense Answers

    Why does my laser vanish outside but stay bright indoors?
    Most budget lasers lack the muscle—weak diodes and no outdoor mode—so sunlight wipes them out. Outdoor-grade models are engineered to throw stronger beams and sync with detectors that pick up what you can’t see, keeping you consistent under any conditions.

    Is green automatically better than red outside?
    Green is easier for the eye to spot, but it’s only as good as the power behind it. Output and detector compatibility matter more than the color itself. Even high-viz green can turn ghostly on a bad slab if the internals aren’t up to snuff.

    Do I really need a receiver for site work?
    Anything over a few meters in the open, especially on bright slabs or bare ground, becomes guesswork without a receiver. Detectors read what’s invisible, meaning you keep moving with pace and precision—instead of stopping to squint and hope.

    Don’t Let the Line Disappear—Or Your Momentum

    The lines that fade mid-job drag down the whole day: slower drilling, less sure cutting, constant rechecking, and mounting fatigue. Better visibility isn’t a magic bullet, but it is the difference between staying on pace and fighting your tools every step. Out here, the right laser means less crawling, more control, and confidence that the line you trust at 8 a.m. is still working for you by 3 p.m. Get the gear that earns back those lost minutes—and keeps every stake and saw cut on track, start to finish.

    Find your next outdoor-ready laser level and practical jobsite essentials at Gumboll.

  • How Fixed Drawer Dividers Transform Daily Home Organization and Calm

    The Calm Drawer Illusion: When Setup-Day Order Disappears

    The first day you set up new drawer dividers, everything looks like a photo shoot. Socks perfectly folded, utensils lined up, hair ties in their own spot. But the real truth comes later—when you’re scrambling on a Wednesday morning or tossing things into drawers after a late night. That’s when you hit the same old friction: stacks losing shape, categories bleeding together, and those organizers that felt so crisp at first now quietly failing the test of real life. The illusion isn’t what you see right after setup. It’s believing that look will stick without changing how things move and shift when you actually live with them.

    The Friction That Sneaks Up—And Spreads Fast

    Drawers don’t shout when your system slips—they quietly let things unravel. That’s how you wind up moving three things to get what you need. A sock slithers over a flimsy divider. Hair ties end up tangled around a comb. Utensils bunch together until the slim spatula goes missing under a pile. You don’t always notice it the first time, but after a few rushed days, those clean lines are history. Suddenly, grabbing one thing means sifting through clutter that barely even looks like a system anymore.

    When Organized Stops Saving You Time

    It’s usually not the messiest drawers that slow you down. It’s the “pretty organized” ones where categories keep slipping. An open tray looks fine at first, but by Thursday makeup brushes are mixed with floss and earrings, and getting one thing means shuffling four. The more a drawer gets used—bathrooms, kitchen tools, a catchall drop-zone—the more obvious the weak points become. If you catch yourself dreading a reset or spending those extra seconds fixing the dividers “just so,” your system is mostly for show, not for speed.

    The Daily Test: Where Your Setup Really Breaks Down

    Picture your bathroom during the real morning scramble. You reach for toothpaste and instead dig through lip balm, moisturizer, travel shampoo, and a rogue bracelet. By bedtime, the situation repeats—brushes and bottles have drifted into each other’s lanes, and anything small is lost under something bulky. Those little misplacements add up, making every grab slower and every reset less satisfying.

    By the end of the week, it’s not outright chaos, but the promise of easy access is gone. Suddenly you’re pausing to readjust stacks, rescue items buried at the back, or just shove things aside. It’s not that you don’t have organizers—it’s that your organizers don’t hold the line when real life pushes back.

    Entryways and Utility Drawers: Where Order Collapses Fast

    Take the entryway. Keys, sunglasses, mail, earbuds—they have designated spots, but only in theory. The first few days with a new tray feel structured until mail covers the keys, sunglasses bury under a scarf, and soon it’s a catch-all. Busy areas demand boundaries that hold, or you end up searching for essentials every single time you leave the house.

    The Silent Workload of Weak Storage

    Every time you hunt for something lost, or restack piles just to find a basic item, your storage is working against you. If one quick hand, or one child’s grab, is all it takes for categories to collapse, the daily friction multiplies. Kitchen drawers are classic here: a place for ladles and tongs on paper, but by the weekend you’re wading through loose chip clips and random corkscrews. You might reset it all Sunday afternoon, but after three rushed meals, it’s the same old shuffle.

    Closets and dressers have their own version: tall stacks that crumble after two days, deep bins where socks, shirts, and underwear blur together, and sections meant for “just pants” that quietly collect extra odds and ends. If you’re moving piles just to get to the item you wear most, you know your organization is all surface and no backbone.

    Strong Boundaries, Fewer Resets: Storage That Stays Useful

    The solution isn’t buying more containers—it’s picking the right ones for the job. Choose shallow, dedicated bins or trays that match what you actually use and how you reach for it. In the bathroom, a tray for hair ties that’s too narrow for brushes will keep them separate by default. Assign each daily-use bottle or tube its own defined space—no piles, no ambiguity.

    Utility drawers shape up with bins sized for the task: a snug container for batteries, a divided tray for rubber bands, a box for screwdrivers (not tools and tape and loose lightbulbs all in one). In the closet, pick bins just tall enough for T-shirts, not so deep you lose the bottom row. The goal: you return things without thinking about it, and the system quietly resets itself through everyday use, not just a big once-a-week effort.

    Practical Rule: Don’t Let Bins Become Black Holes

    Deep bins tempt you to toss in anything extra. Resist. When bins have a real physical boundary for each category—and they aren’t overloaded—the inevitable mess can’t sneak in and take over. Leave a little space between bins, so things can’t hop boundaries with one clumsy reach. With smaller, clearer zones, it takes only a five-second sweep to keep things in check instead of an exhausting overhaul every weekend.

    Does Your System Hold Up—Or Just Look Good?

    A real storage system stands up to your busiest days, not just your motivation to tidy. Ask yourself with every drawer or shelf:

    • After several days of use, can you still find and grab each item instantly?
    • Are quick returns truly quick—or do you have to rearrange, re-stack, or push things aside?
    • Is “resetting” getting faster over time, or do you keep fighting the same small mess?
    • When you’re in a rush, do boundaries hold—or does chaos always creep back in?

    If your answer is “sometimes, but not really,” you don’t have a failing system—you just have the wrong boundaries in place.

    The Subtle Payoff: Calm That Spreads Room by Room

    Real calm isn’t about a flawless showpiece drawer—it’s about a setup that shrugs off the blur of normal life. Choosing bins and organizers that hold clear, realistic category lines shrinks the invisible work of organization. It means less time spent reshuffling, and more time just using your stuff. When your drawer resets itself almost by accident, you notice other things get easier, too—the entryway doesn’t bottleneck, the kitchen drawer stays friendly, and last-minute searches simply vanish.

    Browse storage and drawer solutions at ClosetWorks

  • Why Ground-Level Storage Slows Your Workflow and How to Fix It

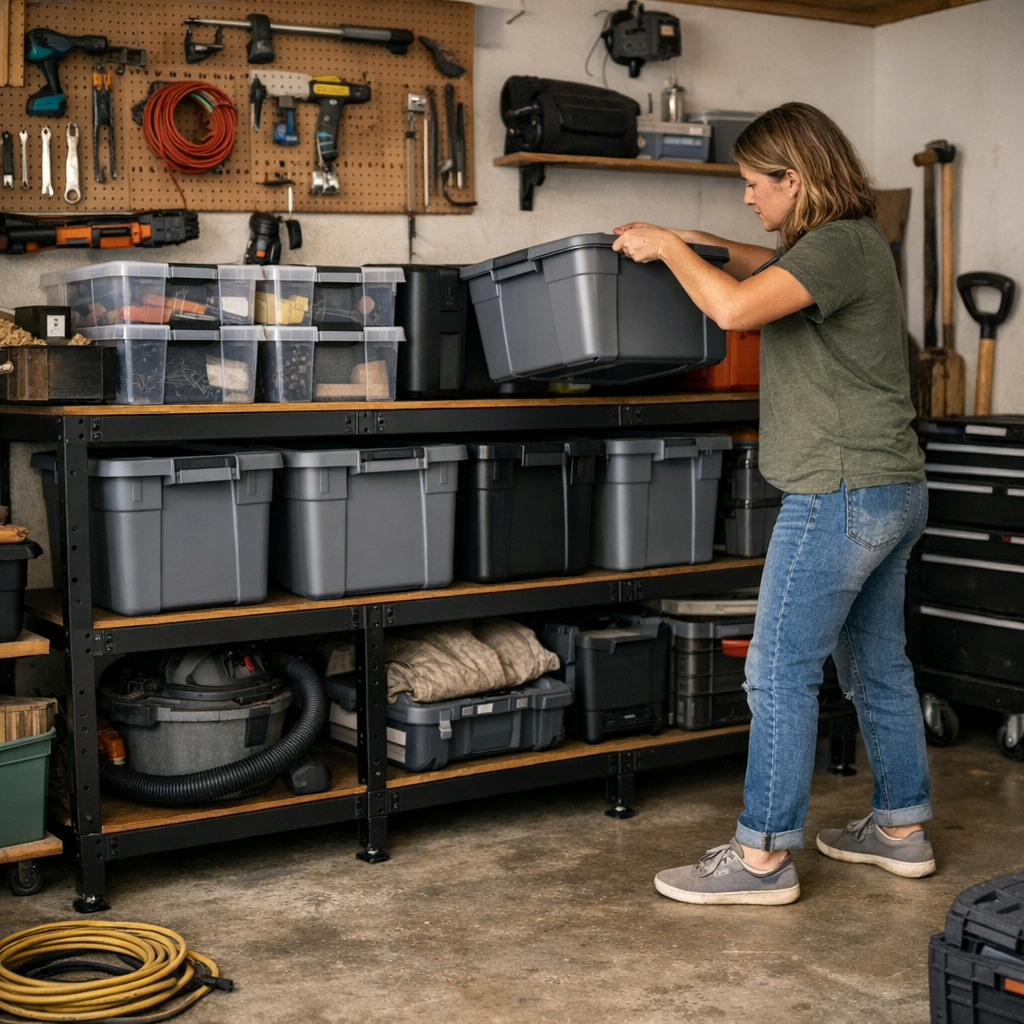
    The comfort of floor storage is always temporary. At first glance, the bins along your garage wall or the crates at the edge of the workshop look deliberate—labels crisp, floors swept, everything lined up for action. It’s a transformation you notice immediately. But by Wednesday, those same neat lines force a slow shuffle: bending for the lower bin, shoving a stack aside to reach the bucket underneath, inching a cart just to clear a path. That sense of control unravels every time you hunt for a tool or make space for the next project. The system that’s supposed to keep you moving quietly becomes what stalls you mid-routine.

    Order That Only Holds on the Surface

    There’s a crucial gap between storage that fits the room and storage that fits the way you actually use the room. Floor-based rows of bins deliver a sharp first impression—until repeated grabbing, returning, and shifting churns that order into a daily obstacle course. The slip is so subtle you hardly notice it at first: ducking beneath a low shelf, sliding a bin a few inches, leaving one out “for now” because the next job is coming up fast. But these small detours pile up fast. Before you know it, the bin by the door is always askew, and your main pathway is a zigzag around another stack growing in the corner. What looked efficiently stored now shapes how—sometimes even whether—you get the job done.

    The Cumulative Drag of Repeated Moves

    Picture unloading new supplies midweek. The intention: quick, easy access. The reality: bins edge-to-edge, barely enough room to wedge in another container. An open box half-blocks the entrance. Your first project is now a slow step-and-shift routine—buckets moved, bins nudged, hunting for a part that’s buried under last project’s leftovers. Each week, categories blur as labels land on the wrong bin, and the top layer becomes a precarious stack that dares you to pull from the bottom. Over time, “organized” becomes an endurance test of stacking, restacking, and working around your own system.

    Blocked Paths, Dead Corners, and the Hidden Cost

    The breakdown happens quietly, away from that first-day order. It’s not a pileup overnight—it’s a space that loses its flow, task by task. The cart doesn’t go back where it belongs because bins block the route. Wall space below knee level fills with storage, but above it, nothing is usable; gear overflows into empty corners that were supposed to stay clear. Floor bins—once a tidy grid—become a real-life Tetris: bump one, and the others shift off-mark. Now the space isn’t flexible, it’s stuck—forcing improvised piles, awkward detours, and a pattern of always working around clutter instead of clearing it.

    Everyday Friction, In Practice

    • You try to grab a drill at the back—but two bins and a cart are blocking access, so you pull out half the row, only to put them all back minutes later.
    • Resetting for the next project means balancing stacks, hoping the lid stays on. An accidental shove and it all slides off-mark—again.
    • That simple evening repair takes longer; the path you cleared last weekend is now blocked by an overflow bin from Monday.
    • You realize you’re carving out more time managing storage than working on the project itself.

    Why Real Routines Outpace Floor Storage

    If your bins store holiday décor or untouched archives, floor setups work for a time. But day-in, day-out use—gardening, repairs, the workbench routine—reveals the friction fast. More bending to dig beneath the last stack. More detours when a cart or hose blocks the “main” route. Tools and parts never quite make it back to their slot, so categories blur; overflow bins migrate from one zone to another, turning spatial order into a moving target. In setups with any real rotation, the footprint that looks organized on Sunday becomes the slow-down you dodge all week long.

    When Visual Order Becomes Practical Disorder

    You don’t notice efficiency slipping away until it’s gone. Suddenly, every retrieval has its own obstacle course: stepping over the end of a bin line, twisting around an out-of-place cart, bending and re-stacking more often than actually using what’s stored. The path is “clear” only if you’re willing to rework it—so you start avoiding certain supplies, or stacking odds and ends elsewhere “just for now.” What was meant to speed up projects now eats up whole afternoons with routine shuffling just to restore that illusion of order.

    The Game-Changer: Lifting Storage Off the Floor

    In one garage, the breakthrough came not from buying more bins, but from lifting storage a modest six inches off the floor. Suddenly the daily bends, shuffles, and stumbles faded. Carts rolled cleanly underneath, aisles stayed open, and bins became easy to access—no toppling, no triple-stack, no detours needed. Without adding a single square foot, the difference in everyday movement was immediate: the setup actually encouraged order to last, not unravel.

    This isn’t magic—just a smarter use of space. No more sliding boxes to get the one you need. No more dead spots in the corners. Cleaning up stopped being a full-on production; it became a two-minute reset. You could finally see and reach everything in one step. The whole footprint performed more like an active workspace—and less like a storage unit you dreaded sorting.

    Four Ways to Quiet the Daily Friction

    • Break the stack habit: Store bins in a single layer. Toppling, digging, restacking—it all disappears. Need something? One move. Done.
    • Lift with intention: A low platform or modular shelf means rollers fit beneath, bins pull out fast, and you’ll stop using open floor as overflow parking.
    • Spot the overtime signals: If you’re bending, shoving, or re-sorting bins more often, your setup’s overdue for a rethink. The moment it slows you down, change it.
    • Test your reset: Returning things to place shouldn’t feel like a chore. If it does, your system isn’t built for repeat use—fix the pain before it becomes baked into your routine.

    Let the Workspace Move With You

    No setup eliminates all effort. But the right one keeps friction low, even when projects, tools, and routines change. Floor storage might look decisive, but if every return to your garage, workshop, or shed brings a new obstacle or detour—even a small one—the organization is only skin-deep.

    Refining your layout doesn’t demand a total overhaul. Just raising storage, rethinking the footprint, or swapping stacks for modular shelves can flip the routine: no more sidesteps, no more daily blockages, and no more abandoning projects because it’s not worth the reach. If resets feel like a chore or your “organized” area leaves you reshuffling, don’t blame yourself—pivot the setup. Protect your pathways, keep your best gear within arm’s reach, and build a space that actually works with you, not against you.

    Find modular storage solutions built for real-world use at StackNest.

  • How Proper Storage Preserves Laser Level Accuracy Over Time

    The real difference between a go-to laser level and one you quietly dread using isn’t obvious on day one—it exposes itself by the fourth layout, halfway through a dusty week, when the clock’s ticking and the beam refuses to land where you need it most. If you’ve ever hustled back onto a site after a weekend, full intent on making clean marks for cabinet mounts or framing lines, only to discover your once-crisp laser is smeared, shuddering, or unexpectedly off, you know that creeping frustration. Maybe the first job back, you assume a dying battery or a quick lens wipe will fix it. But when you’re adjusting your handsaw mid-cut or redrawing drill points yet again, it’s not bad luck—it’s the slow payoff of rushed storage and skipped care. In real shop and site life—squaring tiles on uneven board, punching reference holes for dowel jigs, or firing up a row of anchors—precision isn’t optional. A laser you can’t trust means extra checking, slower movement, and mistakes that stick around until the punch list.

    Behind the Closed Case: Where Laser Levels Actually Wear Down

    Forget what the slick exterior promises. Inside, months of use in a gritty garage, a muggy basement, or that back-of-truck toolkit leave subtle damage. The real trouble isn’t a dramatic fall or caked mud—it’s what builds up quietly in bad storage habits.

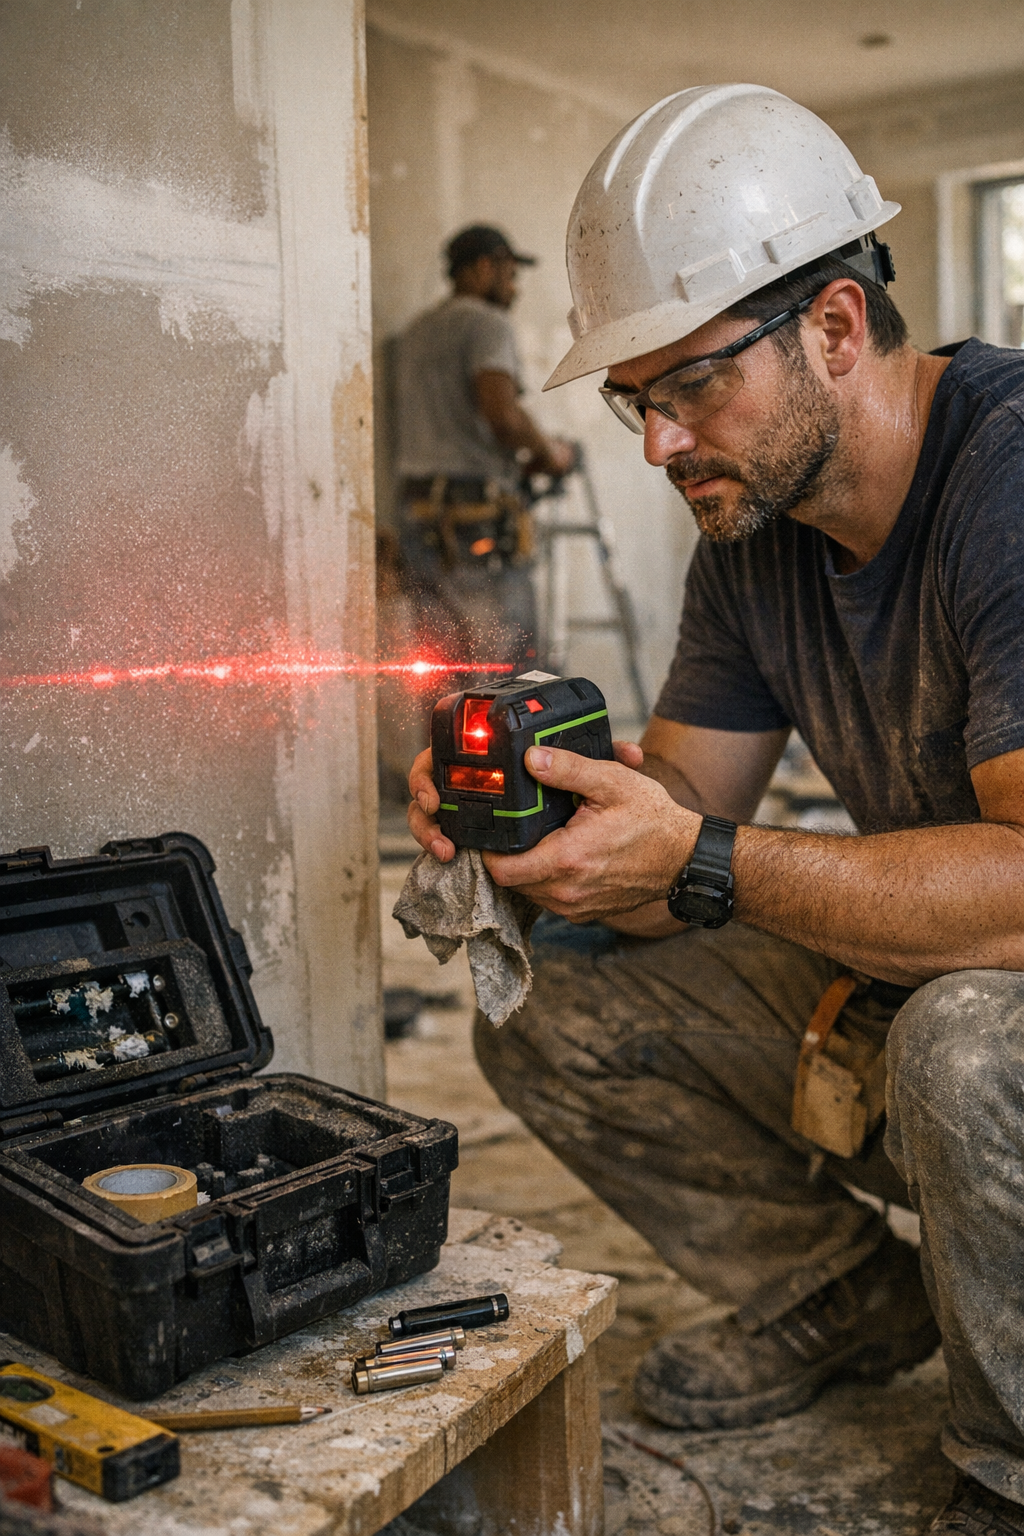
    Picture a late night after drywall sanding—tools everywhere, debris on every flat surface. You shove your laser back in the case—batteries untouched, glass streaked, the inside of the box catching stray grit. At next setup, it powers up like normal. But by the second project, as you shift from rough patching to a tight tile line, the beam splits, blurs, or won’t hug the edge you’re cutting. Now you’re aiming a drill and second-guessing every mark, losing momentum with every slow correction. That’s not just annoying; it’s where workflow really grinds down.

    Where You Notice the Failure—And What It Costs

    Laser issues rarely interrupt in the first five minutes. They show up halfway through a ceiling grid install, when you realize lines aren’t parallel and have to re-chalk. Or right as you’re setting anchors for shelving, and the beam drops out on one side of the room. What looks like normal wear is more often dust inside the housing, damp battery contacts, or corrosion you’d never spot until accuracy matters.

    How Bad Storage Steals Your Precision

    The biggest storage mistakes rarely finish a tool off immediately—they drain your trust and pile up extra work. Tiny routine shortcuts accumulate:

    • Clouded or streaky beams, making detail work almost impossible when tracing cut lines or drilling pilot holes
    • Balky, unreliable power—especially with battery corrosion sneaking in after a few humid days inside the case
    • Loss of calibration after being jammed tight in the box or rattled around between jobs
    • Minutes lost re-drawing or verifying every layout line because you can’t trust the projection
    • Frustrating corrections—like shaving down a fresh cut because a faded line led you off-mark

    On real jobs, “just a few minutes” of lost time multiplies fast. Redoing fastener placements, miscutting panels, or fidgeting to get an anchor back into plumb chews up the energy you should be putting into making progress. When you can’t trust your beam to stay true, you compensate—not with precision, but with caution and fatigue.

    Actual Site Moments: When Storage Habits Show Up

    Walk onto a fresh project, stacks of plywood and hardware ready, anxious to rip through layout and start cutting. You set the laser for the opening pass—expecting a sharp, steady line. But what you see is a patchy, dull mark that disappears against dark board or skates across a glossy tile. By hour two, midway through fastening brackets or tracing for an outlet box, you’re back to the tape measure, recalibrating by hand, and wasting energy chasing the right reference. Waving a shirt sleeve at the optics or swapping batteries in a hurry does nothing for the beam’s focus under harsh lights or reflective surfaces. From there, the whole task list—drilling, screwing, trimming—gets slower and more error-prone.

    Now put your workflow beside that crew member who always preps their kit: batteries out, glass cleaned, everything dry. Their laser fires up instantly, line dead-on across the full distance—even after a rough unload or stray nudge. While you’re rubbing grit off the lens and re-checking your square, they’re tightening fixtures, making clean drill points, and actually finishing.

    The Compound Benefit of Simple Habits

    The takeaway? That fellow tech’s laser shrugs off battery swaps, scaffold bumps, even the odd spill without going rogue. A wiped lens and dry contacts mean their projection stays tight—inside 1–2mm—over room-length stretches. Instead of wrestling with missing marks or drifting beams, they move on to actual work: controlled, accurate cuts; faster mounting; less backtracking and tool fatigue. Over time, that margin of control translates directly to cleaner installs and smoother days.

    Building Storage Discipline Into Your Routine

    Laser level care isn’t complicated or slow. It’s about small choices, every shift, before the box closes:

    • Clean with the right cloth: After dusty jobs—sanding, grinding, demo—use a proper optical or microfiber cloth to wipe the lens. Skip paper towels or shirt sleeves: these scratch glass, dulling beam clarity for every line thereafter.
    • Always remove batteries if the tool’s off duty more than a couple days. Even premium batteries can leak, ruining your contacts and adding invisible resistance. A quick battery pull means the laser is ready, not unreliable, when the next run starts.
    • Slip a silica gel packet in the case, especially if you store gear in basements, garages, or see temperature swings. That little packet keeps humidity from creeping into sensitive contacts and circuitry.
    • Never park your tool “just for now” in dusty, sticky, or damp spots—like a bench next to a finish sander or a trunk with an open glue pot. The random storage move that “won’t matter this once” is usually where the next problem starts.

    Field-Tested Storage Questions Answered

    Is leaving batteries in for a few weeks really a problem?

    Absolutely. Even a short stint with batteries inside means corrosion risk—and the more humid or varying the site, the higher the odds it creeps in. If you want the laser to power up right when the walls go up or concrete’s waiting, pull the batteries. Get your rhythm down: if you wouldn’t leave the charger in your drill, don’t trust batteries sitting in your laser over downtime.

    What’s the right way to clean the optics?

    Use only an optical-grade or microfiber cloth—the kind made for camera lenses. Rags, tissues, or abrasive wipes leave scratch tracks that scatter the beam and wash out your reference. If you’ve been cutting tile, grinding mortar, or running abrasive saws nearby, make lens cleaning the very last step before packing up. Your eyes—and your drill bit—will thank you.

    Why do some lasers give up accuracy so much sooner?

    Frequent offenders: batteries left in, glass never cleaned, tight-packed then forgotten in a tray full of sawdust. Small corrosion, ground-in grit, and skipped calibrations all combine to downgrade performance. Ignore it for long, and you introduce errors—awkward cuts, re-drilling, endless cross-checking—that slow every part of the job.

    What You Gain: Trustworthy Lines, Fewer Mistakes

    Keep your laser level clean, dry, and battery-free between jobs and it stays dependable—not just for today’s layout, but on every cut, drill, and fixture install after. Neglect the routine, and the problems sneak up the moment things get busy. You waste focus, redo work, and wind up questioning even the best gear just when speed and accuracy matter most.

    Stock up on reliable tools, trade-tested accessories, and real-world jobsite equipment at Gumboll.

  • Choosing Between Wire and Solid Shelving for Everyday Closet Use

    The real test for closet shelving comes long after installation—once life and clutter move in. Right away, a wall of wire or solid shelves looks crisp, promising control. But within days, the surface you trusted starts pushing back: stacks listing sideways, shirts smudged with dust or with sleeves sagging through metal grids, accessories blurring categories, and bins morphing into drop zones instead of keeping anything contained. It’s never just about what looks neat in photos. It’s about the hidden everyday friction—those micro-delays and constant mini-resets that either make storage feel manageable, or make every closet visit another round of tidying up something that won’t stay put.

    Shelf Surfaces Shape How (Un)Organized Your Routine Feels

    Shelving choice is hardly background—it sets the rules for how you interact with your stuff every morning. Wire and solid shelves aren’t just structure; they dictate access, encourage or fight disorder, and quietly shape the daily rhythm of getting dressed, grabbing linens, or corralling entryway clutter. Their tradeoffs don’t show up in a static snapshot—they emerge through repeated, ordinary use.

    Wire Shelving: Light, Flexible, and Relentlessly Imperfect

    Wire shelves win points for their open look and easy adjustability. In a crowded hallway closet or laundry nook, the airiness and instant visibility feel like relief—until real routines expose the sneaky drawbacks:

    • Stacks fall apart with every grab: Tug out a shirt in the middle, and the neat pile turns slouchy. A sweater sleeve threads through the grid, pulling the rest off balance. By the second laundry day, lines that looked so disciplined slouch, droop, and slide toward the gaps.
    • Soft clothes lose shape—fast: Thicker sweaters, knits, or scarves take on the wire indent pattern. Piled high, they start to bulge and sag, refusing to stay square. Those tidy folds you painstakingly made Sunday night? Gone by Thursday morning.
    • Small things tumble or vanish: Rolled belts, light shoes, even gloves or beanies migrate through the shelf gaps or slip behind bins—creating hard-to-see, hard-to-reach mess zones that clutter the floor or get lost in the shadows.

    If everything lives inside sturdy bins, wire shelving copes. But try stacking soft piles directly, and you’re forced into constant touch-ups. The result: every “quick grab” becomes a little project—straightening stacks, fishing a lost sock, or re-lining up collapsed rows just to keep some order alive.

    Solid Shelving: Predictable Support, New Problems to Solve

    Solid shelves seem to promise a fix: one smooth, gap-free surface under every stack. Shirts, pants, bins—everything sits level, categories look crisp, and piles hold their shape. But the trade-off is slower, subtler:

    • Dust sneaks in and stays: Especially behind stacks or under baskets, dust and lint collect in dead spots you barely notice. Pull out one item and discover a film, or worse—have to wipe down the whole shelf before adding clean laundry.
    • Sections can clog and lose distinction: Fill solid shelves edge-to-edge and airflow drops; the “back zone” becomes out-of-sight, out-of-mind. Suddenly, work pants stretch into casual jeans, stray socks drift behind storage boxes, and you’re not entirely sure where the off-season pile stops.
    • Cleaning becomes a recurring chore: Unlike wire, where most dust falls through, solid shelves demand attention. Miss a cleaning cycle, especially with pets or open windows, and lint builds in corners—and gets subtly ground into fabric as you retrieve clothes.

    The upside is obvious: you can pull out a shirt mid-row and—so long as you fold reasonably well—the rest of the stack remains upright. Categories are easier to hold firm. But unless you’re someone who regularly wipes down surfaces, solid shelves quietly collect the invisible grime that transforms “organized” into “stale.”

    Routine Friction: Where Real Closets Really Lose Ground

    Mornings expose the gap between shelved optimism and real use. You reach into a wire shelf for a favorite sweater—the sleeves have wriggled through the grid, dragging out half the pile. Now there’s a scarf trying to escape through the back, and two t-shirts are wedged under a basket. By Wednesday, you’re taking time to rebuild the stacks, just to keep the closet looking passable.

    Or maybe it’s the entry shelf for kid gear: on a solid shelf, hats and gloves stay stacked—until dust starts nesting behind out-of-rotation mittens. You’re forced to lift every basket just to swipe up the dust bunnies, and fleeting organization mixes with that subtle, stale feeling by the weekend.

    The friction isn’t abstract. It’s visible: stacks topple, bins become junk drawers, and designated shelf sections lose their borders. Category lines blur and resets get slower—not dramatic, but persistent enough to matter.

    Small Tweaks That Shift the Whole Closet Experience

    Sometimes, a weekend tweak makes hours of weekly maintenance vanish. Add a felt or fabric liner atop solid shelving and suddenly scarves and tees stay square—edges stop drooping, piles resist sliding, and you don’t have to rebuild stacks on the fly. It’s not perfect, but core categories hold longer between resets. Each reach retrieves the item you actually want, rather than unleashing a minor avalanche.

    Wire shelves benefit from shallow bins or semi-rigid baskets, containing the worst spillovers. Still, the wire’s structure means loose piles want to sag and splay. You nudge one thing and another shifts—and there’s no hiding the reality: wire surfaces make you manage the mess more actively, with less payoff for every round of tidying.

    The real strain isn’t purely visual—it’s cumulative. You burn extra minutes hunting a sock dropped behind a bin, re-folding shirts slipped off the pile, or wiping up that lint patch before setting down fresh bedding. When “organized” turns into “lots of extra steps,” every reset feels less worthwhile.

    The Mix-Match Method: Designing for Your Actual Routine

    Most closets can’t—and shouldn’t—be all wire or all solid. The best routines come from mixing surfaces and adjusting for use:

    • Dedicate solid shelving to daily-used, stackable items like shirts, sweaters, and linens—anywhere a stable, flat zone slows the collapse of piles and keeps categories clear between washes.
    • Reserve wire shelving for out-of-the-way or high-up storage, overflow jackets and shoes, or as base surfaces for baskets and bins—where visibility and airflow matter more than perfect stack discipline.
    • Layer in soft liners, fabric pads, or low dividers if certain sections—especially for delicates—keep sliding into disarray or attract dust.

    Your closet doesn’t need to be showroom-perfect—it just needs to work better on Tuesday morning than it did on Monday. You notice the improvement not because it always looks perfect, but because you’re no longer forced into constant reshuffling, rescue missions for lost items, or fighting categories that collapse overnight. The rhythm becomes: reach, grab, move on—with a reset that actually lasts longer than a week.

    Storage That Actually Keeps Up With You

    Both wire and solid shelves start with a promise: a closet that looks and feels under control. But daily frictions—tilted piles, slow resets, sneaky dust, unruly bins—quickly reveal what works and what doesn’t. Build around how you use each shelf: what needs more support, what can handle more airflow, and what just can’t afford to get neglected. The best setup is the one that adapts alongside your actual routine, keeping categories visible, piles steady, and resets quick enough to feel like progress instead of another round of chores.

    Shop ClosetWorks for more practical closet systems and shelving solutions

  • Creating Functional Bag Storage That Keeps Entryways Clear and Organized

    Bag storage setups decide whether your space moves freely—or bottlenecks with every busy day. Walk into a garage, mudroom, or workshop and you know it instantly: in one, bags are stored with intention, and grabbing what you need is mindless. In another, bags explode across every surface, paths choke up, and you find yourself sidestepping, shifting, or flat-out detouring through a gauntlet of pile-ups. These trouble spots take over surprisingly fast—often as soon as storage gets chosen for looks, not for living.

    When “Tidy” Storage Trips Up Your Routine

    The neatness of wall hooks, slim shelves, or a new rail has instant appeal. On setup day, everything feels under control. Then routine sets in: by Thursday, those five hooks hold seven bags, straps corkscrewing together, canvas flopping to the floor. A stacked bin that looked minimal ends up blocking your access to the cabinet, forcing an awkward reach every time you need a tool.

    This isn’t a rare problem—it’s what happens when storage solves the look but ignores what life actually throws at it. Slim bins and hooks clear the wall, sure, but once the family is late for practice or a bulky backpack doesn’t hang up neatly, the system falls apart. Bins become black holes for overflow, rolling carts wander and sprawl into walkways, and suddenly your “organized zone” is just new clutter in disguise. Instead of friction fading, it quietly multiplies.

    Where Setup Fails: Overflow, Obstruction, and the Slowed-Down Reset

    The flaws show up quickly—just watch after a handful of real-life returns. That “catch-all” shelf with good intentions? It’s now a leaning mountain of tangled bags and loose straps that slide right off the edge. Wall hooks fill up fast, and overflow bags drop straight onto the floor, or, worse, sprawl over a bench or worktop, seizing even more space. The once-open corner turns into a hesitation point—do you shove, reroute, or risk stepping on someone’s gym bag?

    The classic dead-end hallway makes this painfully clear: peg rails go in to keep bags off the floor, but after one missed return, a single gym bag sits right where you need to walk. By the week’s end, a casual drape becomes a layered pile-up, forcing everyone to take an awkward sideways slide or, more likely, just avoid the area until the next big clean. The promise of “enough storage” unravels alarmingly fast—just a couple imperfect days and the whole flow bottlenecks, making the space feel smaller than ever.

    The Real Scene: Why “Organized” So Often Slows You Down

    Picture the daily scramble: you’re late, one hand on your bag, reaching for a jacket with the other. The only way to hang up your bag is to shift that rolling cart—again—back into its spot, which it never seems to stay in. Rows of bags bristle off hooks at shoulder level, a stray tote pokes your elbow, and a bin wedged under the shelf means you can’t step back without catching your heel. Weekend plans for a quick reset collide with reality: untangling, restacking, uncovering blocked doors, buying back your route through the space. “Organized” doesn’t mean friction-free. As soon as routines get rushed, everything piles up.

    What Actually Works: Storage That Bends Without Breaking

    The setups that last handle the chaos of real returns—gear slung down, extra equipment appearing unplanned, resets that take seconds, not minutes. If you have to shift one bag to put up another, the system’s already too rigid. If a missed return means a slip hazard, the whole routine gets upended. Function beats form every single time: setups must absorb imperfect days and overflow, not demand perfection to keep the path clear.

    The acid test: Does your storage flex when you toss in “just one more bag”? If two people come home at once, do you still have a walkable route? Can you drop, hang, or shove things away without needing a full reorganize by Friday?

    Making Room for Error: The Smart Drop Zone

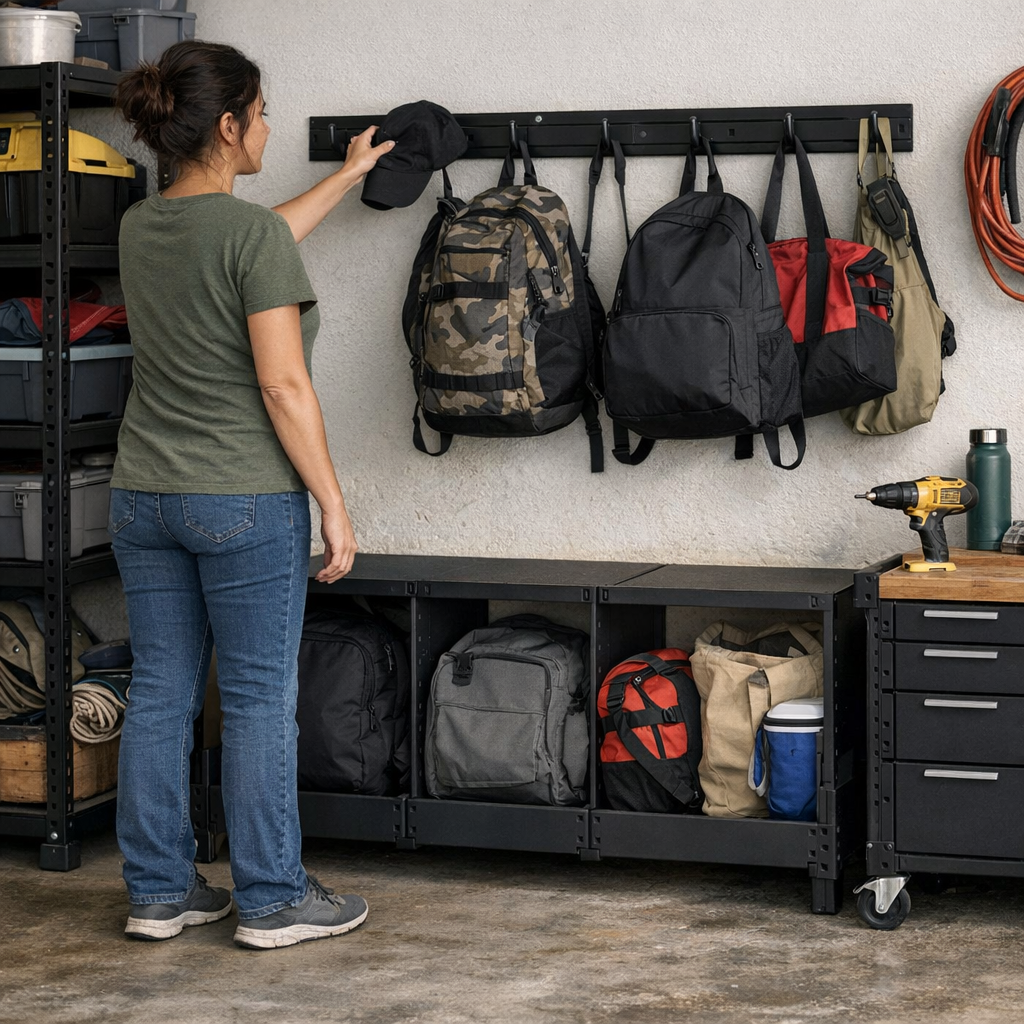
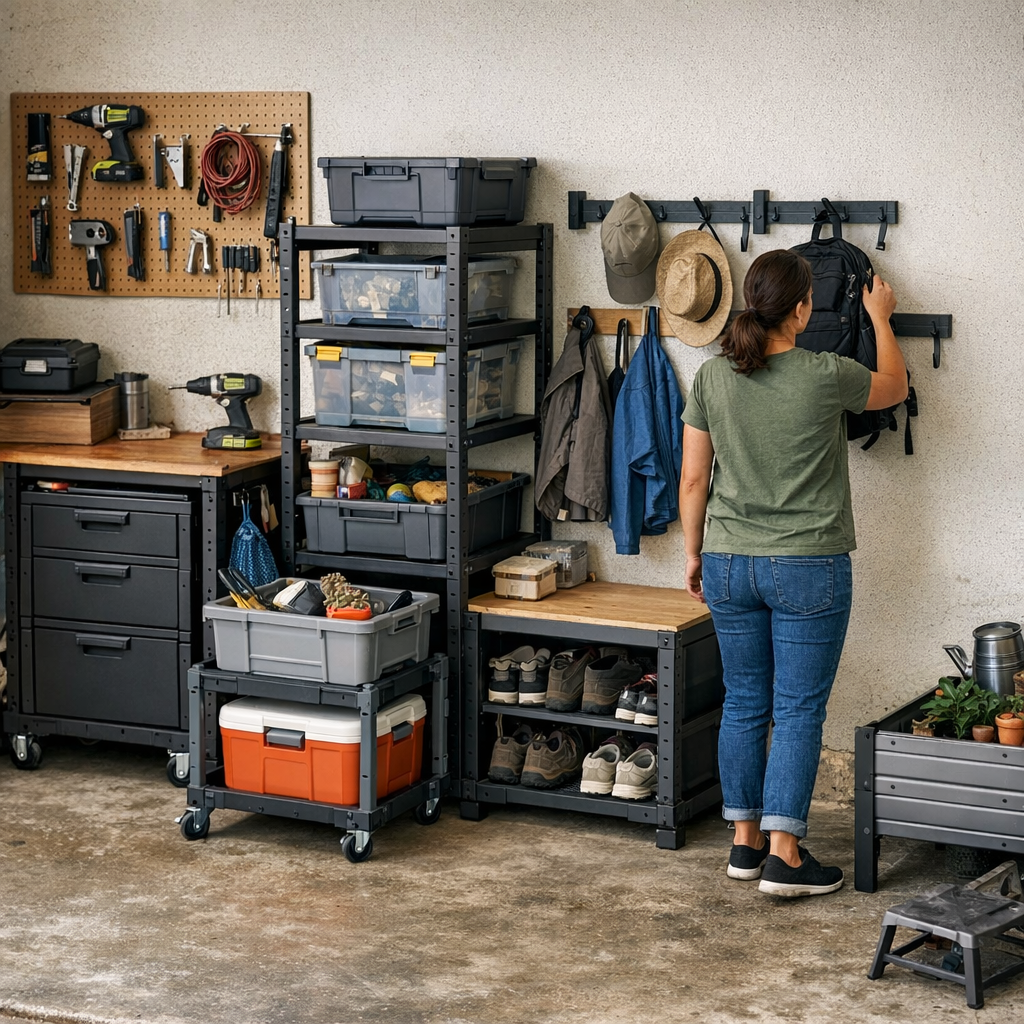
    Here’s where a simple low cubby—open at the front, under those overloaded pegs—completely shifts the routine. Suddenly, instead of bags spilling across the floor or bristling from every hook, stray returns have an instant landing pad. You no longer choreograph a delicate dance just to reach the cabinet or bench. People can drop a bag and keep moving. The system absorbs overflow and quietly resets itself with almost no extra thought. The room holds more, but feels less cluttered, and you buy back the one thing every busy route needs: clear, predictable movement.

    And it’s more than a visual fix. Gone are the habitual sidesteps and panicked sweeps just to open a door. The space stays open even as it fills up, and the cycle of frustrated rearranging breaks.

    Five Telltale Signs Your Bag Storage Doesn’t Actually Work

    • The floor’s always covered—even after you tidy, stray bags creep back by the end of the week.
    • You find yourself untangling straps, wrangling rolling carts, or restacking bins more than once a week.
    • “Passing through” means dodging, shuffling, or shifting some other object just to make room.
    • The wall section you installed for storage is technically used—but half the time, you’re still blocked during the morning rush.
    • The area only looks clear after a deep reset and never holds up in real, repeated use.

    Sharper Tactics: How to Make Bag Storage Actually Flow

    • Layer vertical and floor solutions. Pair durable hooks for the “hang-and-go” crowd with an open cubby beneath for rushed returns and bulkier items. Missed the hook? No problem—the bag still lands out of the way.
    • Leave room for real-life overspill. If you install modular rails or shelves, set up a floor “catch” area for overflow so nothing spirals out into the path or blocks a door.
    • Pave a home for mobile units. Rolling carts and chests are only helpful if they stay put. Demarcate a parking spot—tape, mat, or floor decal—so mobile units don’t slowly invade walkways.
    • Prioritize resets that happen naturally. Setups should self-correct: after a week of heavy use, a quick sweep or toss-in restores order. Avoid organizing systems that only pay off after a marathon tidy on Sunday night.

    What Matters: Movement Over Mere Appearance

    The ultimate test isn’t how “organized” a space looks when empty, but how it holds up on a week of missed hooks, armful returns, and lopsided overflow. A well-placed cubby, modular bin, or rugged wall hook buys you margin—so you can move, drop, stash, and reset quickly, even when things go sideways.

    When storage is tuned to the way life really hits it, you don’t waste time shuffling, dodging, or constantly re-staging every square foot. What’s left is simple: less friction, more room to move, and a setup that holds up through the mess, not just in photos.

    Find setups and modular organizers for real spaces and routines at StackNest.

  • Avoiding Kickback in Deep Rip Cuts by Matching Riving Knife Width

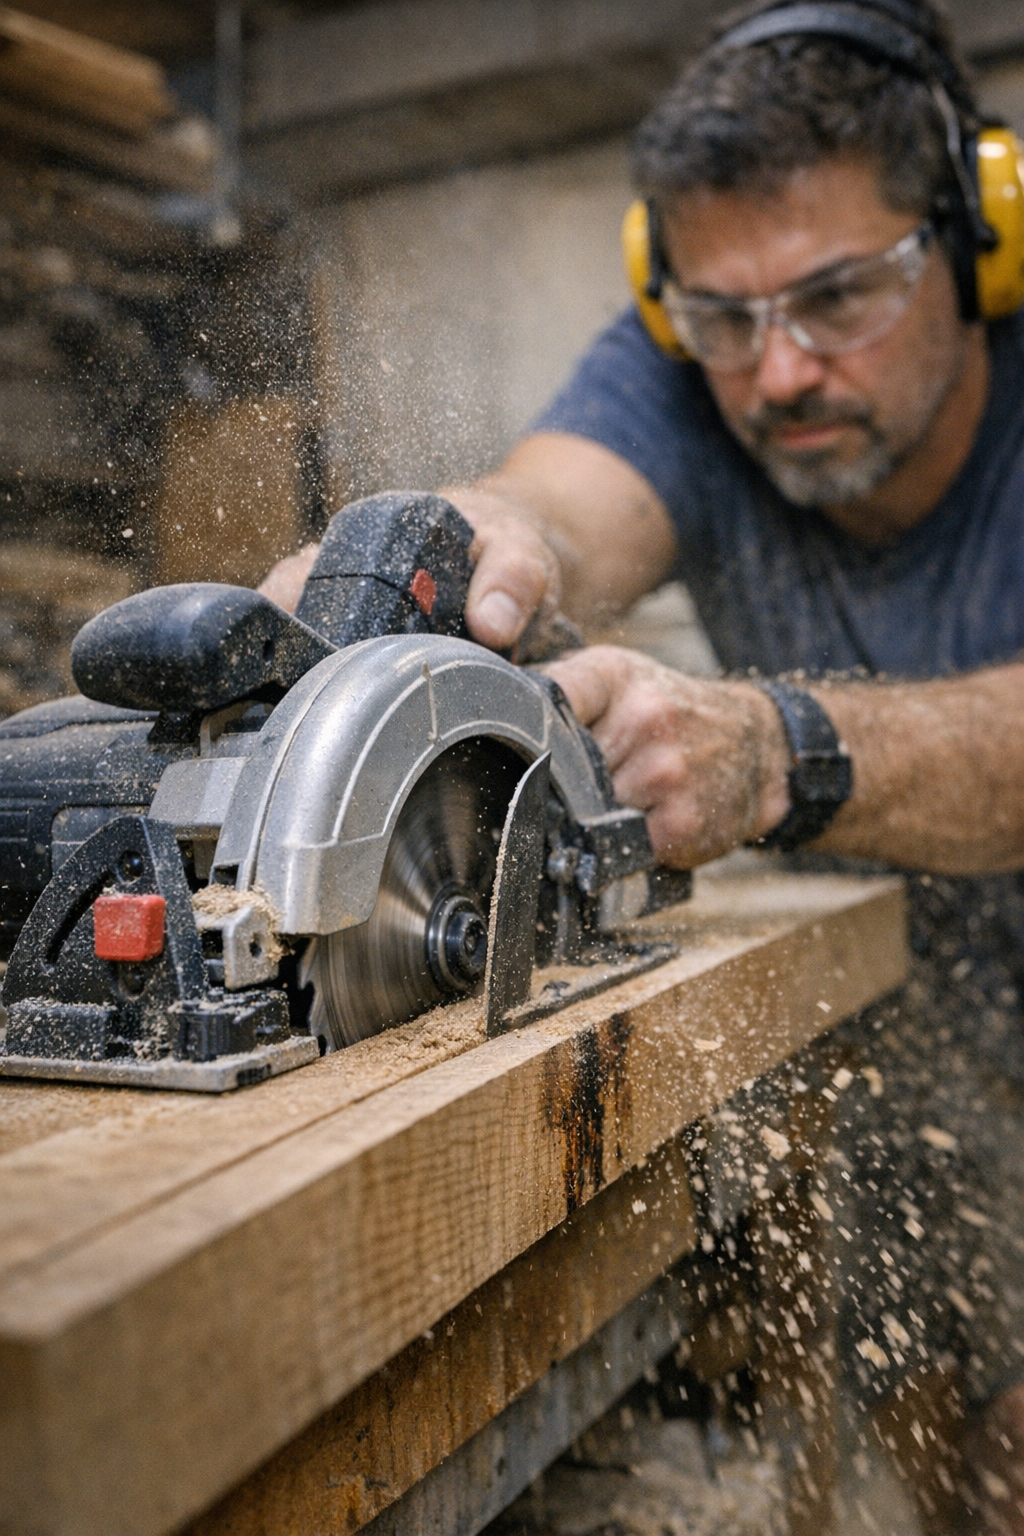
    You’re pushing through a stubborn maple board, halfway into a long rip, when the saw suddenly lurches. The cut starts to drift, the motor strains, and what should have been a crisp, straight edge now threatens to burn or splinter. There’s no question: in the pressure of real-world cutting—garage projects, jobsite runs, tight workshops—the difference between smooth workflow and lost time is rarely about horsepower or blade size. It comes down to the details others miss—like the fit between riving knife and blade kerf.

    Why Saws That “Seem Equal” Leave You Stuck Mid-Cut

    On a display rack, two saws might look nearly identical—same blade diameter, familiar handles, matching weights. Judged by spec sheets alone, you’d expect them to perform side-by-side in the shop. The reality? Small engineering gaps, invisible until you’re deep into real stock, can make the workday unravel fast. The split-second between control and chaos often comes down to what’s happening behind the blade, out of sight but not out of mind once things bind or kick.

    Test cuts on cheap pine or ply rarely show the truth. The real issues surface only when you get serious—ripping through tough oak, framing fir, dense sheet goods. Suddenly, every pass feels heavier, the cut line wants to wander, and the saw starts grabbing or biting. Kickback risk jumps. You go from thinking about the project to wrestling the tool, burning minutes correcting what shouldn’t need fixing.

    How Subtle Setup Gaps Compound in Real Use

    It all adds up, usually in fractions. If your riving knife runs even a touch too wide compared to the blade’s kerf, it forces extra friction into every cut. Sawdust doesn’t clear; it compacts. The feed stalls. The saw might stall or stutter, then burst free, threatening your line and control.

    This isn’t a woodworking myth or some “perfect shop” detail. It shows up every time you try to run a series of rips for a glue-up, or dive into a heavy batch of shelving stock. Every board after your first feels tougher. Your shoulder starts to complain. Instead of steady progress, you’re slowing down to compensate for drifting lines and ragged, splintered edges—a tiny design mismatch compounding your effort with every pass.

    Kickback: When the Small Flaw Turns Dangerous

    You’re on your third or fourth rip through thick hardwood, the shop dust hanging heavy, and suddenly the saw yanks back. There’s a flash of heat at the cut, a burnt smell—what used to feel like an easy, controlled draw now turns hostile. Most pros will check their grip or stance, but the real problem often hides in the jam: the riving knife squeezing just enough to bind, thanks to a kerf mismatch or sawdust build-up. What looked fine at setup becomes the afternoon’s main headache—or worse, a real safety hazard.

    When a Fraction of a Millimeter Changes Everything

    Late in the day, with a stack of boards to go, the problem sharpens. First pass: not bad. By the fifth, you’re fighting for control, each push slower and shakier, the motor less willing. The blade’s still plenty sharp. But the riving knife—barely wider than ideal—turns every chip into a potential wedge. Heat builds up, the grain resists, and suddenly even smooth feeding stock wants to burn or tear out.

    Change out to a saw with a better-matched, slightly slimmer riving knife and it’s an immediate relief. Dust clears, the blade glides, and you get to focus on guiding the line instead of forcing it. You won’t find that on most feature lists, but in practice it’s the deciding variable between “almost right” and cuts that land clean every time, even when the wood itself is unpredictable.

    Shop Reality: The Fatigue and Friction Are Real

    Anyone running glue-up panels in a packed shop knows the cycle: you start off confident, then end up pausing between boards, weighing whether to keep muscling through, risk more tear-out, or accept another round of block sanding. The difference that half-millimeter slimmer riving knife makes? You’re staying on line, letting the motor do the work, and keeping your focus on the job instead of second-guessing the next cut. No showy features, just hours of fatigue you never got stuck with.

    Small Setup Details, Big Daily Impact

    It’s tempting to let yourself get distracted by battery ratings, brushless motors, or the latest claims on cut count. But after you crank out more than a few boards, the only numbers that matter are how riving knife and blade kerf fit together. Even a minor mismatch—barely noticeable during a quick test—becomes relentless when you’re grinding through hardwoods board after board. Get it wrong: every pass binds, scorches, or strays. Get it right: work stays fluid, cleanup drops, and you avoid that end-of-day shoulder ache that signals the tool’s been fighting you instead of helping.

    Watch for These Warning Signs

    If things get worse as you push on, look for:

    • The saw suddenly bogging or kicking midway through a cut
    • Heat burn marks or roughness appearing along the waste edge
    • Feed force noticeably increasing; each pass harder than the last
    • Sawdust refusing to clear, clogging at the riving knife’s heel
    • Excess time sanding out splinters and ragged tears

    Don’t just blame blade life or “tough wood.” Double-check whether the riving knife is crowding your cut. The real-world feedback is in how the saw feels and sounds under load, not in how the parts looked during setup.

    Smart Shop Habits That Prevent Headaches

    Let the saw’s feel—not just the cut quality—guide you to questions. Even a trusted tool will develop quirks: a base that’s just a little out of square, a kerf filled with chip buildup, or an ejection chute half-blocked by pitch. Ignore this, and you’ll be fighting the tool by lunch.

    Fast reality check: after a gnarly deep rip, take a beat and check the riving knife for heat darkening or sawdust buildup. It doesn’t take much—a hair’s thickness of pitch or dust—to gum up the gap, creating drag where there should be none. Every fresh blade, every switch for a specialty cut, double-check fit: riving knife and blade kerf, side by side. It’s five seconds that’ll spare an hour of aggravation if things start to bind. And if you’re powering through multiple rips, keep a narrow brush or quick air blast handy—cleaning out that space between passes helps you avoid the cascade of problems that build up when you skip it.

    Saws That Survive Real Repetition

    Most circular saw breakdowns don’t start with the motor—they start right behind the blade. Ignore flashy specs; the saws that hold up, board after board, are those that stay just clear enough at the riving knife to keep dust moving and the feed natural long after the battery buzz or corded whine is old news. The goal isn’t flawlessness—it’s building a work rhythm you can trust, with the kind of smooth, predictable cuts that reduce rework and wear, even on your longest days.

    Find circular saws and accessories tuned for real work at Gumboll.

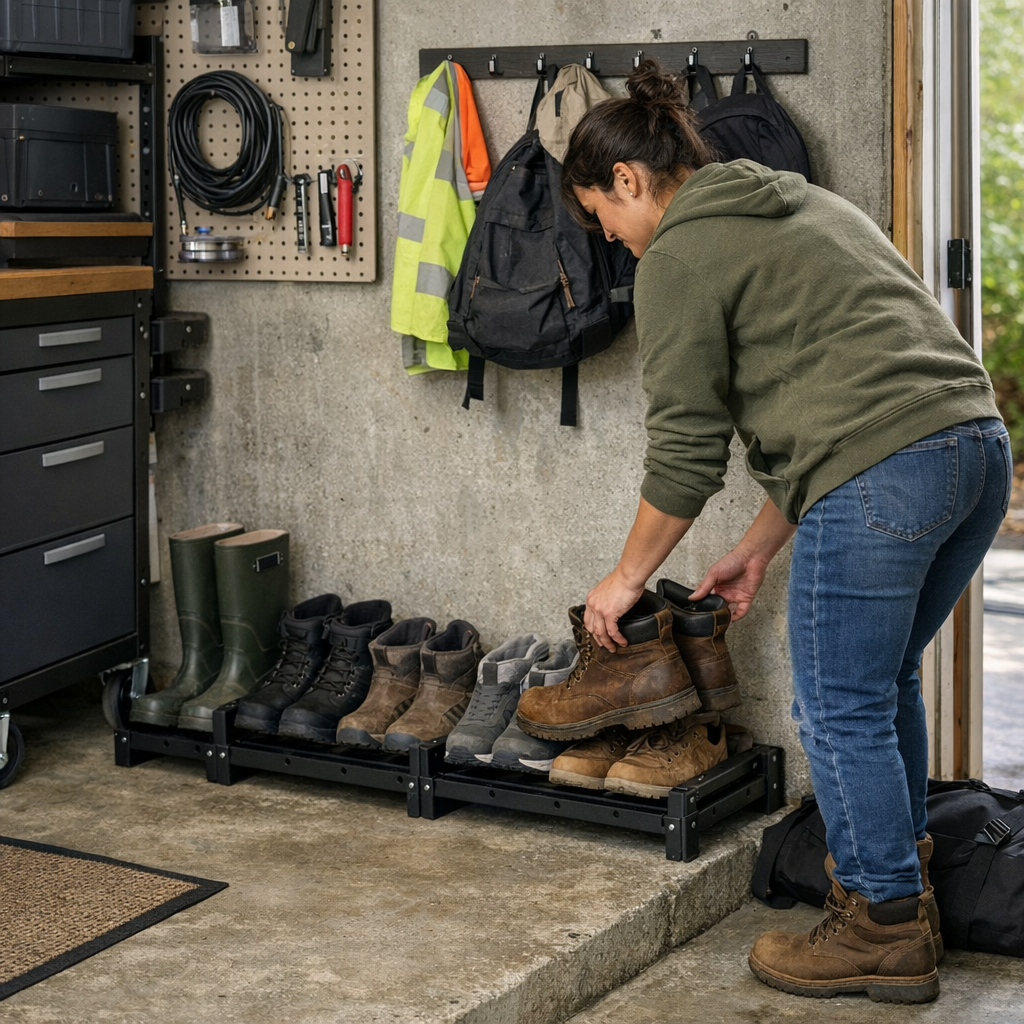
  • Why Grounded Shoe Storage Improves Entryway Flow and Reduces Clutter

    Every garage entry or mudroom starts out with the promise of order—shoes off the floor, traffic flowing, everything in its place. By day three, that promise is already cracking. You’re sidestepping bins to wedge the door open, pausing to shove a runaway boot out of the walkway, looping around a storage rack that seemed “space-saving” on paper but shrinks your path in real life. Look closely, and it’s the difference between a setup that photographs as organized and one that actually lets a family move, pause, and repeat—all week, not just on a tidy Sunday.

    Where Storage Collides with Everyday Movement

    Shoe storage fails aren’t about clutter—they’re about collision. That rack near the door: does it quietly disappear, or are you bumping it every time you walk through with groceries? Does a bin keep shoes contained, or does it create a pile you have to shuffle just to pull out your bag? The issues surface fast: a wall bin hogs elbow room near the key hooks, a floor rack eats up the landing zone, or an “organizer” turns one easy trip into a circuit of interruptions and awkward pivots.

    It’s the repeated, barely-noticed obstacles that build up frustration. Those nudges to keep shoes aligned, the bending to re-catch a pair kicked aside, and the shoulder-turn to squeeze past—these are the signs your storage clashes with your routine, not fits it. And the longer a setup requires manual resets, the less it’s actually working.

    Wall-Mounted Storage: Out of Sight, In Your Flow

    Wall-mounted racks look neat until you live with them. Suspend the shoes: yes, less on the floor. But every inch they protrude matters when space is short. In reality, a “slim” rack can belly out into vital walkway. It stubs carts, snags bags, and narrows the spot where two people would otherwise pass side-by-side. Over time, marks and bumps appear exactly where you grip the doorframe or fumble for a tote.

    And when you’re under pressure—school rush, arms full—one stray pair topples right into the crossing. Storms just move the mess upward: now drips and mud drop directly into the stretch you want to keep clean. “Off the floor” is no help if it’s always in the line of fire.

    Floor Racks and Bins: Control or Clog?

    Set storage on the floor and you dodge some pitfalls, but you invite others. Bins that bulge just past the corner slow every pass. A big “catchall” tub looks clean on Monday and turns messy by Wednesday, shoes layered and spilling because nothing guides them back. Walkways shrink as overflow piles up until someone’s tripping, or—worse—skipping the bin entirely to toss shoes anywhere the path is clear.

    Here’s how setups reveal themselves: the area stops resetting itself. Pairs linger off to the side, left halfway in the bin or banked at weird angles. Cleaning gets skipped because of another step—moving the whole container, untangling laces, clearing mud from a traffic path now twice as dirty. If you’re ducking around the same obstacle more than once a day, the system has started to work against you.

    What Lasts: Layouts for Real-Life Use

    The setups that make it through a week mostly unscathed aren’t the showpieces—they’re the ones you barely notice. They create invisible lanes that accommodate the real choreography: carrying bags in, pushing the stroller out, getting multiple people past each other without stops or sidesteps.

    Take a floor rack dropped parallel against the wall, set back far enough—not right up at the door, not jutting into the cold zone. In one honest test, switching from a wall unit to a slanted, low rack granted a full 22-inch clear lane. That’s not a number for a product tag; it’s enough for two kids to run by or to carry a week’s worth of groceries without a hip bump or a second glance. That angle meant shoes lined up on their own again, not stacked or turned awkwardly. Mud collected on the mat, not on the bags, and re-entry meant shoes landed where they belonged—no extra cleanup loop.

    Small Shifts, Real Impact

    It’s rarely a complete overhaul. Sometimes just pulling a unit four inches away from the bottleneck lets the zone breathe. Splitting one oversized bin into two shorter rows brings a sense of order—everyone finds their own spot, overflows stop, and the “always-in-the-way” area becomes a footnote instead of a daily headache. The best layouts don’t max out capacity at the cost of simplicity. With nothing blocking the obvious through-line, shoes move in and out naturally, and traffic no longer staggers or doubles back.

    Good Storage Lets Good Habits Settle

    Choke points spawn mess and apologies. Wall pegs stick out right where the sports bag hangs; a bin blocks the spot you pause to tie laces. These collection spots are magnets for unfinished resets, and the more often you have to apologize (“I’ll move this in a second”), the more the system is failing the routine. What works? Floor solutions so discreet they’re almost invisible—low, zone-conscious, never crowding the critical inches that make one space passable for all sizes and speeds.

    Quick Real-World Fixes

    • Do a real-life walkthrough: Carry laundry, wheel a cart, move through with kids or groceries. If a setup slows you down more than once, reposition or resize it.
    • Stop building upward: Tall bins and high racks encourage overstuffing and block sightlines. Priority is always width and clear access, never more vertical stacking.
    • Guard a clear lane (20–24 inches minimum): Never let racks or bins intrude here. This path isn’t for shoes—it’s for movement. Defend it, and even the smallest entry stays workable.

    The real win isn’t just a tidy floor—it’s frictionless movement. Shoe storage that respects the natural ways people move will always quietly outperform any system that only looks good in a product shot. The right setup isn’t what organizes the most—it’s what disappears from your daily routine almost entirely, every time you walk in or out.

    http://stacknest.myshopify.com