Category: Tools & Workshop

  • How Nailer Airflow Design Impacts Precision and Job Efficiency

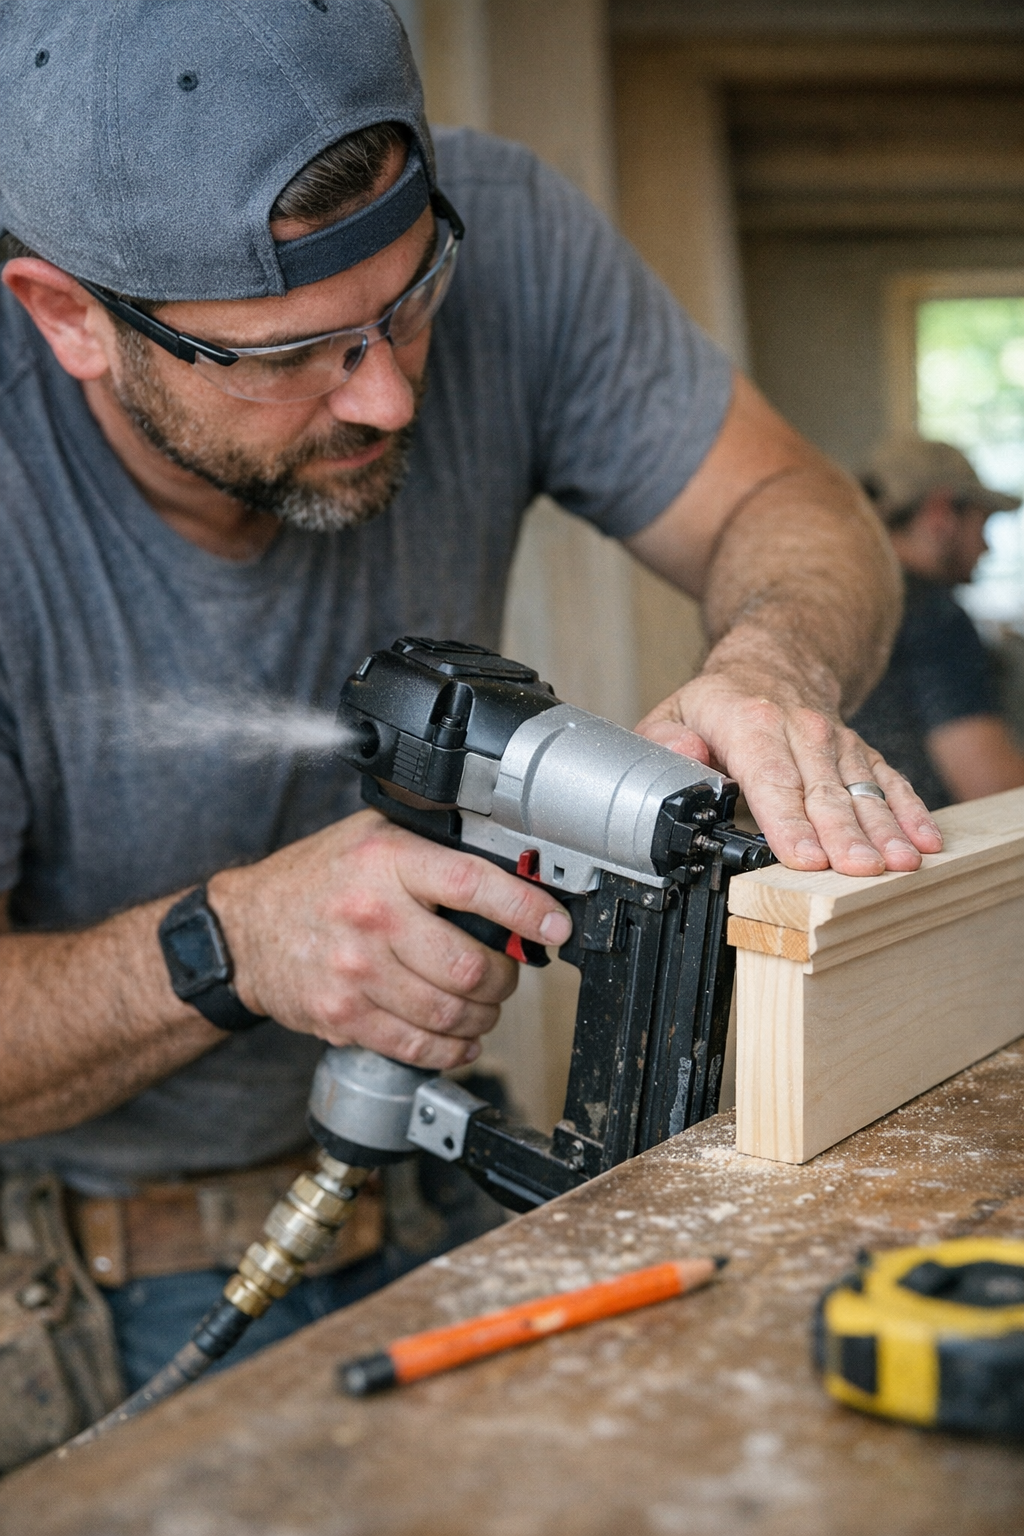
    The first dozen nails never tell the truth. Most pneumatic nailers feel solid for a handful of test shots. Stand at the bench, take your time, everything lines up—no dust, no distractions, crisp trigger, flush nails. But the real test starts when you move from careful samples to a roomful of trim or a string of finish work. Suddenly, every shortcut in the nailer’s airflow design comes back to bite. Dust starts drifting over your marks, every clap of exhaust chips at your focus, and that smooth rhythm gets interrupted as you wipe down your board or squint for lost lines. Tool power and grip only get you so far. In the thick of a job, it’s airflow—the way exhaust moves, where it shoots debris—that separates a tool you trust from one you battle.

    Airflow Missteps: The Slow Build of Friction

    Anyone who’s paused mid-baseboard—wiping away crud, hunting for a buried line—knows airflow design isn’t just engineer trivia. A side exhaust looks harmless on the spec sheet, but real use tells a different story. After fifty quick shots, you’re left with trails of dust peppering your working edge, scratches marring what should have been a clean reveal, a layer of debris clouding the one spot you need clear. Each misplaced blow of air sets off a new chain reaction: more sanding, more touch-ups, more time spent coaxing heads flush instead of moving on to the next room.

    This is the cost that doesn’t show in the specs—the repeated interruption, the minutes lost picking grit out of seams, the creeping frustration as a would-be-efficient nailer becomes one more thing to manage. Even a strong tool, if it spews exhaust in the wrong direction, turns fast finishing into backtracking and edge cleanup.

    Design Over Specs: Where Nailers Actually Differ

    On a shelf, every pneumatic nailer feels like a safe bet. Similar weight, magazine, trigger—nothing obviously wrong. But take them into a real job—where fast repetition and tight grain matter, where flush matters more than fast—and you spot the difference that work crews always notice first. It isn’t the logo or the feel, but how the tool manages what you don’t see: heat, pressure, swirling exhaust.

    Consistency Slips When the Air Blows Wrong

    Try running a side-exhaust nailer through prepped maple trim. The first few nails are fine. By the time you hit the fiftieth, fine dust is clouding every guide mark, bouncing into wet finish, and pushing you to tilt or twist the tool just to see what you’re doing. Each “click” leaves a mess you have to clear before you trust the alignment again. Sometimes proud nail heads creep in, even if your technique hasn’t changed. By late afternoon, you’re not just nailing—you’re cleaning up after the tool itself.

    Swap in a rear-exhaust nailer and the equation changes. Exhaust air shoots behind you, away from the board, your hand, and the finish. The difference? Critical seams stay visible. Flush nails become routine, not a coin toss. You spend less time correcting and more getting clean, repeatable results across the entire run.

    On-Site: Where Bad Airflow Really Costs You

    Picture a long afternoon cut-up with trim and corner joints. By job number seven, you’re juggling precision, fatigue, and a swirl of loose dust. A side-vent nailer guarantees a pattern:

    • Every shot sprays debris onto your marking lines
    • Sections cloud over, pushing you to re-mark as you go
    • You feel the extra heat as exhaust runs down your grip
    • Proud nail heads force extra sanding just to keep up

    Each flaw only takes a second to fix—but they add up. A moment’s wipe, a retouch here, a quick sand there. Before you know it, the momentum of your routine is broken. The line blurs, finish work slows, and what should be a smooth pass turns into a series of tiny cleanups. Not catastrophic, but never as clean as it could be—and never as fast.

    Small Tweaks, Tangible Results

    Retrofitting an exhaust or switching to a rear-vented model isn’t a theory. On a real job—58 nails into 40x10mm maple trim—just shifting the exhaust dropped surface splits to zero and meant every nail set flush on the first try. The grip ran cooler, eyestrain dropped, and cleanup at the end of the day felt almost like skipping a chore. Fewer sanding passes. No mid-job stops to mark over lines lost to dust. Instead of fixing errors, you’re stringing together clean join after clean join. Over a week, those minutes roll up into whole hours reclaimed.

    No miracle—just a series of skipped frustrations and less wasted energy. Veteran crews don’t see this as a luxury; for stacked jobs or detail work, it’s what keeps the work tight even as tiredness closes in.

    Watch for These Airflow Red Flags

    Some signs that airflow is holding you back aren’t loud, but they’re painfully consistent:

    • Tool vibration creeps up every hour you run
    • Nail set becomes unpredictable, especially as the day runs long or the stock gets harder
    • The housing warms up—noticeably—well before the shift ends

    These “little” issues cost you more every time they repeat. What seems like a minor hassle becomes a grind of re-work, repeated fixes, early fatigue. Don’t treat airflow as a brochure buzzword. In the field, it’s the quiet factor that decides whether a nailer helps you finish strong or leaves you sanding out flaws until dinner.

    Endurance on the Line: Why Airflow Rules in the Long Haul

    Magazine size and trigger feel matter, but once the job stretches into hours, airflow becomes the silent differentiator. One nailer stays reliable, each pass just as clean as the first. The other asks more of you with every reload—more pauses, more sanding, more lost focus. On busy floors and jobsite corners, these are the differences that stick—especially when the margin for error vanishes and “close enough” won’t impress anyone at the walk-through.

    Keep it practical: After any hint of surface vibration, uneven nail depth, or excessive body heat from the tool, stop. Clean the vents, test the exhaust direction. That five-minute tune-up is a smarter investment than forty minutes chasing second-rate results with sandpaper and filler.

    Find pneumatic nailers and jobsite tools built for real work at Gumboll.
  • How Standardized Modular Bins Transform Garage Organization and Efficiency

    The truth about “organized” garages is that most never quite work as planned. You haul out every dusty bin, stack them with care, wedge a rolling cart into a corner, and line up shelves like dominoes—sure, it looks tidy on Sunday afternoon. But by Thursday? The cracks show. The ladder is blocked again. Retrieving garden shears means shifting two containers and balancing one lid against your knee so it doesn’t slam shut. Every “grab and go” turns into a cautious shuffle, detouring around a cart that never stays put. The feeling isn’t disaster, but it’s not seamless either. The order you created takes daily hits—adding slow friction that multiplies the more you use the space.

    When tidy falls apart: Where routine meets real-life

    You stand back, see everything “put away,” and call it a win. But a garage that looks organized isn’t the same as one that lets you move freely. The first frustration usually comes fast—a shelf blocks half of the only real walkway, forcing you to squeeze sideways, shoulder to the wall. Bins of different heights don’t nest, so you wind up building awkward stacks in random spots. Every time you need the extension cord from the bottom of the pile, there’s that old routine: stoop, unstack, pull, restack, curse. Feel familiar?

    The daily setup becomes a game of avoidance. That rolling rack you originally parked inside the door now migrates, wedge-like, near the workbench, scraping over uneven concrete. One move always triggers three more: slide the cart, nudge the shelf, shift the scattered bin—just to clear a path. The supposed system starts to feel like a slow-moving obstacle course.

    The slow breakdown of mixed storage

    The rookie move: set up bins, a couple different shelves, a cart for heavy tools, and call it organized. At first, each type of storage promises a purpose—the hardware bin here, painting gear there. But the seams don’t hold. Bins won’t tuck flush against shelves, casters hit cracks and refuse to budge, deep containers hide behind others. Soon, every edge—the dead zone by the back wall, the strip under the window—catches oddball overflow that won’t quite fit anywhere else.

    Every time you return something, you size up the mess. Does this bin fit in the gap beside the rolling rack, or do you wedge it by the freezer, half-blocking the path? Each decision means a little shuffle, a nudge, a small compromise. The “one-time setup” turns into a hundred micro-adjustments that bog you down and blur your original zones into chaos.

    Weekend reality: The garage after real use

    Picture Saturday after a rushed repair or dig in the garden. You’ve pulled out the bin of hand tools, spilled a box of screws on the counter, hauled the rolling cart out to reach your favorite shovel. Now—time to tidy up:

    • The extra-large bin slides just far enough to block an outlet and jams small containers into the margin. Plugging anything in requires a foot-long reach-around.
    • The cart only fits back in its spot if you turn it diagonally, eating up a third of your walkway.
    • You’re sidestepping around tight corners, hip-checking a shelf, steadying your armful of tools, all to make it through without a spill.

    Each “reset” takes longer than last time. Storage creeps into every usable strip of floor, but with each cleanup, things settle just a little further from where they belong. By week’s end, it’s hard to tell where one zone stops and the next begins.

    Uniform bins rewrite the routine

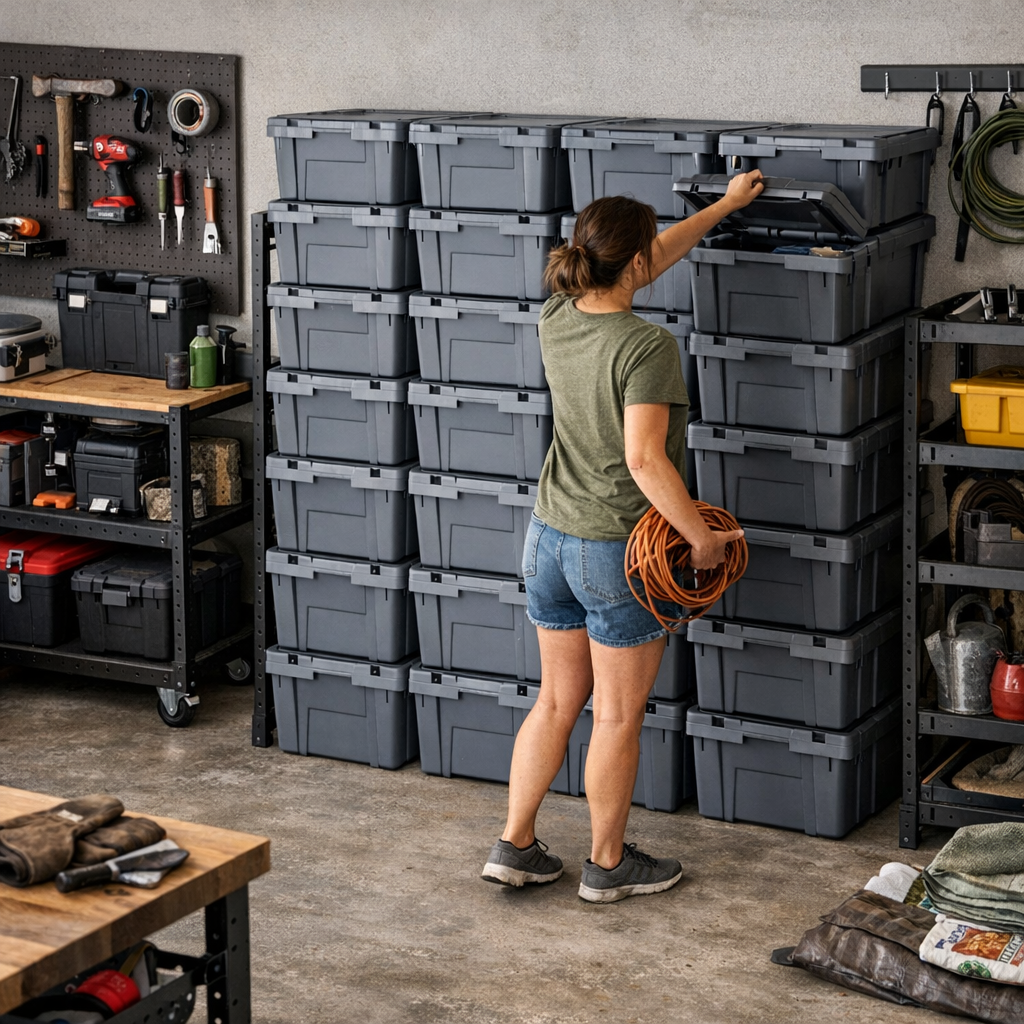
    The shift isn’t about owning less—it’s about bins that fit together, every time. Move to a single size of modular, stackable container and the space starts to cooperate. Bins line up neatly, lids don’t hang up or require unstacking, and there’s finally a straight edge along the wall, not a series of jutting corners inhaling all the floor space. That six-inch strip by the door? It becomes usable: slide a bin in—done.

    Uniformity creates a kind of muscle memory. Need the drill? You know exactly which bin, exactly how to lift the lid—no guessing, no creative rearranging just to get under one box. The wall stays clear, walkways go back to actual walking, and the dreaded “reshuffling” disappears. You see instantly when something’s out of place, instead of wondering if you left it somewhere in the back corner last week.

    Giving up variety? Or gaining usable space?

    This isn’t about stuffing the awkwardly sized garden rake into a bin that’s too small—it’s about choosing a set of containers whose footprint matches your gear and your patterns. Oversized bins eat corners and block walkways, so get real about your most-used pathways. The reward for matching your system to your routines? Clear floor paths that stay clear. Resetting after a project actually feels as quick as it should, and zones don’t spill out of bounds with every use.

    The price of ignoring the mismatch

    Stick with a piecemeal setup, and the penalties add up. Walkways narrow as bins slide crooked; corners collect random overflow; wall edges fill, but never usefully. A quick reset grows into a mini-move—track down the right lid, realign the cart, squeeze the toolbox in wherever it fits. It’s never catastrophic, but it’s always slow. Each little hurdle chips away at the space’s promise of effortless use, turning routines that should take seconds into small projects of their own.

    Keeping the flow: Habits that stop the slide

    Even uniform bins aren’t magic unless you work with them. Take a few minutes every couple weeks to scan for spots where loose gear is gathering (high shelves, back corners, wherever the system feels “fuzzy”). Tweak the layout before a dead zone grows. If your routines change—a new tool, a new hobby—adapt where needed. When the system follows the way you actually use the space, resets go back to simple. Tidying up after a project doesn’t feel like a negotiation, just another part of the rhythm.

    And you notice the difference fast. Gear goes back without detours. You spend less time hunting or shifting and more time actually working. The garage finally moves at your pace—not the other way around.

    The real test of organization isn’t the first impression after a deep clean—it’s how smoothly the space handles your fourth, tenth, or fiftieth project. A unified storage system isn’t about perfection; it’s about supporting your routines without interruptions. The right containers become less about storage, more about removing the friction between you and the work you want to do.

    Visit StackNest for systems that stay in line with real use.

  • Why Your Storage System Fails to Stop Clutter on Surfaces Every Day

    You add another shelf or bring home new bins, confident this is the moment the kitchen counter or bedroom dresser will finally stay clear. But by midweek, the same island of mail, stray receipts, and tomorrow’s gym clothes gathers again. It’s not a lack of storage—it’s the missing place for items you’re not finished with. And until those “in-between” things have a clear home, the daily reset stays just out of reach.

    When More Shelves Only Hide the Problem

    It’s easy to believe that another row of shelves, or a fresh stack of bins, brings order. At first, surfaces look emptier. Gloves and umbrellas have new homes. The bathroom shelf lines up with extra toothpaste. But real routines ignore these boundaries. Suddenly, today’s permission slip, a phone charger in regular rotation, returns to the counter. The book you’re halfway through refuses to disappear into storage. By Friday, “just for now” things sprawl again.

    The friction isn’t in what you’ve stored—it’s what you can’t quite put away yet. The open return, keys you’ll need once more before bed, or sunglasses waiting for the weekend outing—they leapfrog from table to shelf to dresser without a destination. Each day, a little stack builds. Resets become slower. Order blurs into rearrangement.

    The Missing Middle: Where Storage Systems Break Down

    Walk into two closets with identical shelving and bins. Both start with folded tees, labeled baskets, shoes in their cubes. One remains steady as routines pulse through it—the other, by Wednesday, has gym clothes draping the chair, a purse flopped against a bin, and documents “for later” perched on top. The difference? A real, recognizable place for the unfinished, not-yet-filed, not-done items that always exist in real life.

    In systems that skip this step, you end up reshuffling. The “waiting” stack goes from nightstand to chair. The new pair of jeans hovers on the closet ledge, not quite introduced to a permanent space. Each time you tidy, you move the same things over and over. The system isn’t broken by chaos—it’s undone by real, imperfect routines that need a buffer zone for the in-between.

    Looking Organized vs. Living Organized

    It’s simple to admire a storage nook after a deep clean—the lines stay neat, shelves show every object in its spot, baskets labeled and lids closed. But unless there’s a holding zone for messy middle stages, that clarity won’t last. As soon as the pace of life returns, bags for tomorrow’s errands, dry cleaning tags, or open envelopes land wherever there’s space. The hooks and bins work for what’s finished; the “in use” things spill and mix, making each reset feel frustratingly familiar.

    Everyday Evidence: How Unfinished Stuff Takes Over

    Think of a family entryway table. Monday looks clear after a good rearrange. But by Thursday, a formation grows: unsorted mail, a bus pass, house keys, tomorrow’s chess club snack. None have a permanent place, but none can disappear yet. The logic of “put it all away” is no match for the real-life churn of items you’re actively using.

    The bedroom dresser tells the same story. Fresh bins win the aesthetic war—until you need tomorrow’s workout gear or the book you dip into nightly. The top of the dresser fills with a lineup of “current” things, crowding the space. The organization below is untouched, but everything you actually touch each day hovers in this awkward middle ground and slowly erases the sense of order the moment life gets busy.

    Why Storage Without a Middle Ground Falls Short

    Adding another container, shelf, or drawer doesn’t fix this churn. When storage is only “for good” or “for gone,” but never “for now,” surfaces morph back into landing zones. It’s not that you need endless shelving—it’s that you need a waystation. As a result, piles return not from lack of storage, but from the absence of a flexible, designed limbo for what isn’t finished but can’t disappear.

    The Real Performance Test: Reset Speed, Not Looks

    An effective storage setup isn’t only about first impressions; it’s about the speed and clarity of the reset. If clearing the room at the end of the day means moving mail from kitchen counter to living room ottoman, or sliding today’s project from desk to nightstand, the system is only shifting the burden, not clearing it. Over time, these little migrations slow resets and slowly make the most “organized” rooms feel like they’re always one busy afternoon away from sliding backward.

    The Simple Fix: Introducing the “For Now” Basket

    One hallway transformed with a single handled basket slid under the entry table. Not a decorative bin meant to “hide” clutter, but a basket big enough for phone chargers, unread mail, ongoing paperwork—anything in motion. Each evening, instead of redistributing clutter, the day’s in-process items collect in one spot, visible but contained. By Sunday, a quick clearout empties the basket in minutes, restoring surfaces and keeping permanent storage intact.

    That’s the real unlock: create a visible, purposely labeled basket, tray, or bin at the friction point—not tucked away in a closet, but front and center, where “unfinished” things naturally cluster. This is for today’s reading, the jacket in rotation, the returns you’ll deal with tomorrow. Once a week (or more often if you like), scan and reset just this single spot. Suddenly, your surfaces stay open for living, and the reset stops feeling like an endless game of musical stacks.

    Does Your Storage Embrace the “In Use” Zone?

    Even with well-built organizers and fresh bins, lingering project folders, tools, or library books claim enough table space to break your system’s rhythm if you skip this middle-ground zone. Surface clutter almost always signals a system that organizes what’s “done” but leaves daily work-in-progress homeless.

    Build a habit and a small home for those daily drifters, and you’ll see the transformation: faster resets, clearer surfaces, less shuffling, and systems that actually keep up. The boost isn’t in showroom perfection—it’s in how your space recovers and flexes around your routines, no matter how many unfinished items move in and out every week.

    Visit ClosetWorks for practical storage systems built for daily living.

  • Balancing Sanding Speed and Finish Quality for Consistent Results

    Sanding a dozen panels in a row is when reality hits: the faster you push, the uglier the surface gets—and every streak or swirl you leave behind just piles on more rework down the line. The temptation is obvious: crank the sander up, rip through the old finish, and get on to the next project. But after your third or fourth piece, it’s clear speed comes with a cost—stray marks, rising heat, variegated grain, and a tool that feels harder to steer each round. Every pass starts feeling like payback for chasing a shortcut that never quite pans out. Anyone with a deadline and a stack of real-world work knows this struggle. Electric sanders deliver muscle, but overlook the balance between speed and control, and you’re stuck fixing the byproducts rather than moving forward.

    Speed Feels Efficient—Until It Isn’t

    First panels off the stack, you want to believe fast is better. Working through a batch of cabinet faces or prepping table tops, high sander speed strips finish in seconds. Jobsite urgency makes it feel right. But after you pull off that first mask and brush away the dust, reality shows up: deep scratch trails run across the grain, tiny swirls catch in the light, and outside edges feel just a touch sharp. The work you “saved” time on now needs another round.

    The real headache with high-speed sanding is delayed. What looks like progress ends with you burning through extra sandpaper and dragging the tool back over problem spots. Shop dust starts escaping the vacuum, the pad gets hot, and you end up pressing harder, not smarter. If you’ve ever stopped to swap a new pad before finishing a single surface, you know the cycle: muscle through one flaw, introduce another, and the task keeps growing by inches.

    Batch Work Exposes Every Flaw

    Where speed truly falls apart: repetitive, high-detail work. Prepping a long run of shelves, rows of doors, or panels needing a consistent touch brings out every shortcut. That “just blast it flat” mentality works for rough stripping, but as soon as you need a presentable finish, every hasty pass leaves its record. A cabinet front burnished at high speed might look fine dry, but try laying down stain—uneven absorption and ghosted swirl marks refuse to hide.

    And when fatigue settles in, your hand slips with subtle but deadly pressure. The pad skips at a corner, abandons a dull smear, or carves a line that won’t fade. Drop to slower speed and finer grit, and the feeling improves—if uneven sanding hasn’t already sealed the mistake in too deep. Most of the time, it’s not a dramatic disaster—it’s the slow grind of fixing what quick passes left behind, deciding if this piece “makes the cut” or joins the redo pile when you’re already counting panels left to go.

    Small Warnings—Big Failures

    Most sanding trouble starts quietly. At first, it’s just a bit more tingle in your palm, or the sander sounding off-key as the pad hums across plywood. The dust that escapes your vacuum system is finer, thicker, and hangs longer in the air. You take longer breaks, shake your hand out, or start noticing that the tool’s harder to guide. Slip once, and you’ll chip an edge. Drag a finger across the grain, and you notice a faint ridge that won’t smooth. These signals—buzzing hands, micro-ridges, lost collection—mean you’re running too hot, too fast, or fighting the tool more than working with it.

    Dial, Don’t Muscle—How Speed Actually Feels

    That numbered dial on every sander isn’t there for show. Turn it up and the tool’s whole sound changes: the pitch climbs, the vibration gets sharp, and your arms tense just to steady the ride. At lower speeds, the pitch drops back and you hit a sweet spot—smooth pad contact, better dust pickup, and a finish that feels almost natural under your hand. After an hour, you remember what control is. Instead of wrestling the tool, you start steering it—edge to edge, with fewer corrections and a cleaner line at every panel seam.

    Even among tools with similar specs, this difference in feel is real. An orbital sander racing at full tilt (10,000 OPM) can wipe a pine board bare with force, but you’ll watch it leave micro-holograms everywhere. Ease off to 7,000 OPM and you trade a few seconds per pass for repeatable, level results that feel the same at 4 PM as they did before lunch—without the palm strain or extra clean-up.

    Cabinet Install Scene: Rush Costs More Than Time

    Walk onto a site with a stack of empty cabinets needing custom shelves. First instinct: run the finishing passes wide open, dust flying, machine howling—the first three shelves jump off the bench. But then you notice the edges are raw, scuffs are showing despite fresh sandpaper, and every shelf needs more work by hand. Next batch, you drop the sander a speed or two, focus on deliberate overlaps, and let the tool move—not push. Suddenly the edges blend, the dust clears easier, and a palm check reveals a surface ready for topcoat, not redo. The promise of speed? It only pays if quality survives. Most times, it’s just setting yourself up to sand the same spots twice.

    Tweaking Your Process—Where Results Actually Change

    Small speed shifts make the difference. For sections where finish matters—cabinet faces, trial fit panels, pre-stain prepping—bring the sander down to around 7,000 OPM. Go easy on the grip, let the tool float, and notice how pad changes last longer and your hands don’t buzz post-shift. Across ten panels, this pace actually speeds you up: fewer stalls, less heat, and rarely a missed swirl to patch. By the end, your hands and materials both thank you for not trying to muscle through every inch.

    Between finishing coats, especially before applying clear or paint, run a fine grit at a steady, mid-speed pace (7,000–8,000 OPM). The extra minute here pays double when the final topcoat hits glass-smooth, with hidden marks staying hidden—even in sunlight or under LEDs.

    Four Telltale Signs You’re Sanding Too Fast

    • The pad’s vibration sharpens and the machine howls against the work.
    • Fine dust regularly escapes past collection, hanging in the air.
    • The sander stutters on edges, or you’re left reworking corners and seams.
    • Subtle scratches reappear even after wiping clean.

    If you spot these, back down the speed, lighten your grip, and let the sander work at its pace—not yours. It’s almost always faster overall.

    The Work Doesn’t Lie: Consistency Outlasts Speed

    At Gumboll, our shop tools are built for the daily grind—projects where “good enough” isn’t, and panels need to match from first run to last touch. After dozens of runs, the lesson’s clear: using raw speed to “finish fast” means you revisit the same mistakes later. The time saved in initial passes drains away to rework, pad changes, or the quiet moment you realize a fine swirl is suddenly visible across half the job.

    It’s steady, controlled sanding—sometimes a click or two below full power—that keeps results consistent, tools running cool, hands ready for the next task, and shop deadlines from turning into long nights bent over the same project.

    See more practical tools and jobsite supplies at Gumboll.

  • Choosing Between Wire Shelf Baskets and Solid Bins for Closet Organization

    There are two closet moments that tell you everything: grabbing something in a rush, and putting it back later—half paying attention, half balancing groceries, coats, or bags. That’s when your storage setup reveals its true character. If every reach is smooth, if every return is obvious, you barely notice the shelves. But when your bins and baskets fight your habits—items tipping, piles collapsing, odd socks slipping out of sight—order unravels fast. The choice between wire shelf baskets and solid shelf bins doesn’t just shape visual neatness; it shapes whether your routine flows or silently grinds to a halt.

    When Routines Collide with Storage Reality

    Most bins and baskets look fine the first day. You sort, stack, and close the door on tidy lines. But daily life has other plans: you reach for gloves on a freezing morning, toss hat and scarf after school, dig for a missing charger in a rush. This is where small frustrations stack up. Wire baskets start to sag with socks poking through or belts slipping out the side. Solid bins stack high, and suddenly you’re lifting out two just to get to the third. The test isn’t how it looks after a reset—it’s whether you can maintain that order through unplanned grabs, returns, and family traffic.

    Wire baskets make everything visible and aired out—until smaller pieces refuse to stay put. Bagged snacks, kids’ mittens, or hairbands drift through the gaps or wedge in odd corners. It’s workable if you only store big, steady items—towels, extra linens, chunky sweaters—but the moment your setup faces real-life clutter, things start showing up in the wrong place. Resetting that shelf means a hunt: socks hiding behind frames, scarves tangled through the wires, category boundaries blurring every busy morning.

    Solid Bins: Tidiness That Can Cost You Time

    Solid bins promise containment. No gaps for clutter to escape, just a lineup of matching calm. Everything looks in control. But what’s hidden is also easy to forget. You label, maybe, but after a week you’re guessing: which bin has extra shopping bags? Where did those winter hats end up? Each retrieval becomes trial-and-error—lifting two bins, then a third, until you finally find the right roll of tape or the lost glove, while stacking and restacking the rest.

    As bins multiply, access slows down. In a jam-packed entryway closet, suddenly it’s not mess you see, but time slipping away. Getting out the door means moving bins just to get to the one you need. The surface stays neat—but the routine underneath quietly bogs down. If every small access requires a reshuffle, you’ll eventually start skipping resets. Soon, towels and gym gear start mixing, and yesterday’s order erodes from the inside.

    Scenes from a Closet: The Repetition Trap

    Picture a hallway closet built for everything: reusable bags, hats, baseball mitts, soccer socks. On a Monday, both bin and basket arrangements seem workable. By Friday, the story is different. Wire baskets reveal a trail of gloves, singles peeking through railings, one sock wedged behind where it’s fallen out. Solid bins, meanwhile, protect order—until you need the bottom bin and wind up pulling out most of the stack, arms full, items landing in new piles each time. Every restack jumbles categories, and by the end of the week, you’re rerouting the same stray items, never quite sure where they belong.

    That’s how “organizing” falls apart: not from one big mess, but from a dozen tiny misalignments between containers and daily routine. Suddenly you’re reshuffling—stacking, restacking, finding homes for things that drift—and the irritation quietly builds. The system stops serving you and starts needing service.

    A Smarter Mix: Using Both to Match Real Life

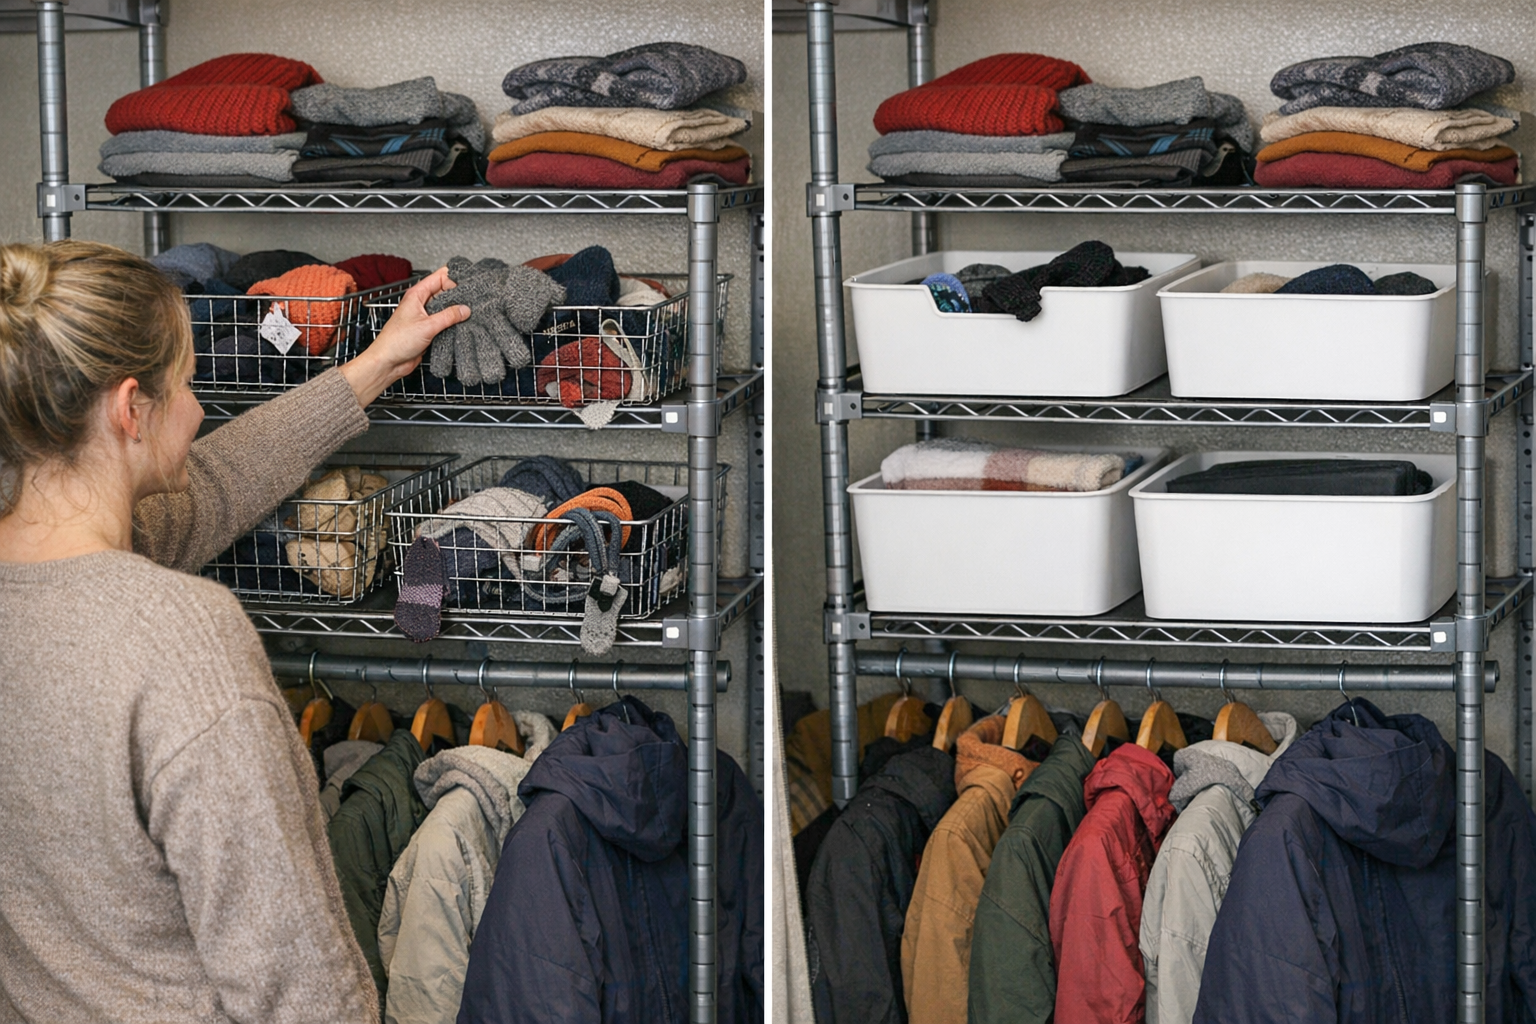
    The real answer isn’t a single solution—it’s recognizing what actually gets used, and how. Swap out deep, solid bins for shallow, open-top bins in your most-used spots: gloves, hats, scarves now live in easy-to-grab trays. Instead of digging, you see and snag. Wire baskets? Limit them to what behaves: spare towels, clean jerseys, or any item that won’t slip through or tangle. The point isn’t showroom perfection, but realistic speed. Your closet looks maintained because it’s easy to reset—not because you obsessively restack after every rush hour.

    Small Tip:

    Don’t just trust memory. Label bins, or use translucent options—a one-second glance cuts five steps of trial-and-error. No more pulling out bins only to find them empty or off-track. This tiny habit slows future chaos before it starts.

    Stacking Up: Shelf Space and Sustainable Order

    Solid bins stack sturdily—reclaiming vertical real estate on packed shelves. But as the column grows, so does the access cost. Digging through three bins for the bottom item means more disruption, and with overloaded bins, shifts get heavier and sloppier. Wire baskets can’t really stack: tiered, they shed small items or leave unstable gaps. Yet a wire basket at the top—holding light, rarely-used items—makes use of airspace without inviting daily wrestling matches.

    Ask yourself honestly: Will you actually restack three bins each time? If not, one layer of bins—even if it means sacrificing some vertical capacity—delivers speed and repeatable order. Convenience isn’t just saving space; it’s saving your routine from slowing down.

    Category Discipline: How You Assign Space Is Everything

    Don’t let any container—wire or solid—turn into a random catch-all. When every basket and bin has a single job, your closet answers back fast: hats are here, scarves there, sports gear gets its own home. The more you mix or overfill (half hats, half socks, emergency odds-and-ends), the messier the shelf resets get—and soon, the old cycle of lost time returns. Sharp categories, not just sharp-looking bins, are what actually save you minutes every week.

    Real-World Tip:

    If you’re shuffling extras between bins or watching categories migrate, it’s time to split them. Two purpose-specific bins will always be easier—and faster—than one overstuffed “miscellaneous” bin you keep avoiding.

    Beyond Looks: How Small Storage Swaps Reshape Everyday Flow

    No bin or basket redesigns your habits on its own. But matching container choice to your real categories—depth, visibility, how often you reach—quietly shifts a closet from staged “after” photo to a system that holds up week after week. The true test? Whether you can reset your closet in seconds after a chaotic morning, or whether every reset just adds to your resistance. A shallower bin at eye level here, a wire basket for gym towels there—these barely-noticed tweaks are what keep order alive in busy homes long after the first organizing spree fades.

    Looks might fool you, but function never does. The system that survives five busy Mondays is the one you’ll trust, use, and repeat. That’s how storage becomes background calm, not a source of daily tension.

    http://closetworks.myshopify.com

  • How Modular Workshop Storage Can Improve Workflow and Reduce Clutter

    There’s a satisfying moment after reorganizing a workshop: new bins snapped into place, rails mounted, every tool sorted and labeled. Everything looks sharp, uncluttered—a grid of order ready for real projects. But beneath that first-glance neatness, true usability gets tested the moment routine work returns. Within days, the gap between a wall that looks organized and a setup that actually works starts getting wider, and the friction seeps back into every session.

    How “Organized” Falls Apart Once Work Begins

    On install day, hanging up rails and stacking modular bins feels like a meaningful upgrade. Each tool is visible, fasteners are easy to spot, and the worktable finally breathes. Yet after several evenings of real work—fixing a mower, starting a half-finished build, or just tackling small repairs—the weaknesses that weren’t obvious up front start to show themselves.

    Flat carts and open shelves tempt you to use any free spot as a drop zone. It becomes second nature to lay down a wrench on whatever surface is closest, especially when bins get crammed or hooks fill up. Overflow creeps in: a pile on the corner, stray screws in an empty cup, clamps parked in new, less-logical places. Soon, you’re moving last night’s pile before you even start, and those extra steps eat time and motivation. Organization lives on the surface, but workflow starts to lag underneath.

    One Evening, a Dozen Interruptions

    Imagine it’s 8:30 PM and you’re halfway through swapping hardware on a bench. The mobile cart, meant for convenience, now blocks the aisle because everything temporarily lands there during frantic moments. Hooks on the wall hold what’s in progress, but start to cluster, hiding must-have tools under layers of what’s “mid-project.” By cleanup, the once-clear bench is a patchwork: drill here, pliers there, tape measure across the bins, and a slow, backward puzzle to figure out where each piece belongs. Most “modular” layouts fail at this stage—not because of lack of storage, but because every open surface or oversized bin quietly attracts overflow and breaks the rhythm of return.

    Surface Order vs. Return Flow: Where Friction Lives

    Every storage system looks good in the after-photo. But setting something down and getting it back in the right spot without pausing the flow—that’s the real test. A setup that interrupts routine will show its cracks fast: you shuffle parts from bench to cart, then from cart to shelf, always one small step away from a reset that drags out longer than planned.

    You feel a weak return flow as extra steps and slow movement: digging behind taller bins to find a driver, shifting piles on a flat cart, bending around rolled cabinets that now serve as rerouted paths. Space gets used, but not in ways that speed up work. Instead, you’re reshuffling or sidestepping to recover pieces buried under yesterday’s overflow—and your “organized” wall fades into a static backdrop while the chaos shifts from surface to surface.

    Early Warning Signs of Bottleneck Zones

    Bottlenecks rarely announce themselves. A cleared workbench becomes an ad hoc tray for every misplaced screw. A run of bins along the wall looks busy, but if only three or four keep getting used, the rest turn into ignored storage or places where old hardware simply disappears. The isolated corner with an untouched basket—or worse, a catchall of scraps and half-empty tubes—absorbs more odds and ends than actual projects, gradually slowing you down every time you pass.

    That “just this week” overflow pile is really a recurring symptom. Any surface that isn’t defined with intent turns into the room’s memory hole. Slow invisible buildup leads to regular frustration and increasingly sluggish resets.

    What Real Tweaks Make Immediately Better

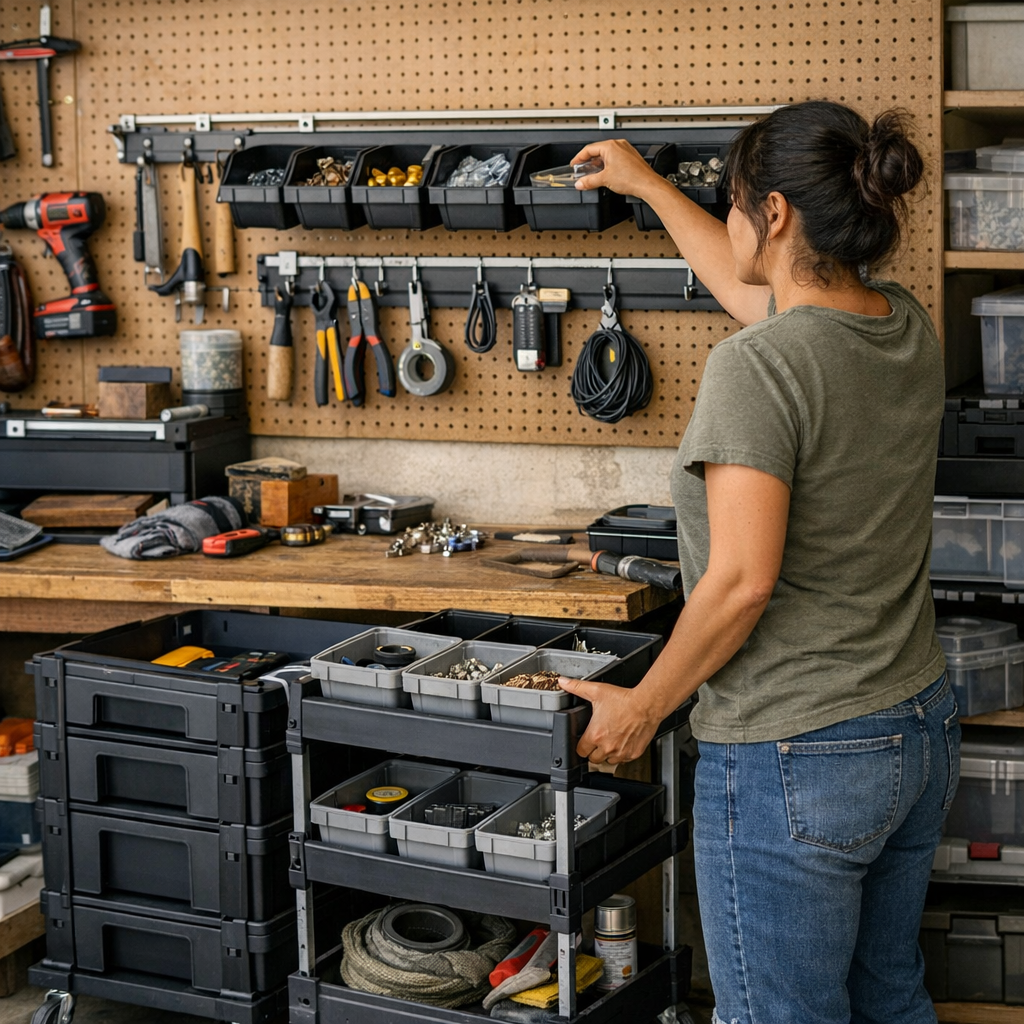
    One practical fix: mount shallow, open bins directly above the bench at eye level. This fundamentally changes cleanup and return movements. Instead of “just setting it down for now”—which becomes “finding it tomorrow”—putting away frequently used bits, pliers, or screws is a single, direct motion. The friction of circling the bench or detouring past a blocky cart disappears. Defined, purpose-built sections make destruction of flat, ambiguous surfaces possible—your bench doesn’t become a holding zone for every stray item anymore.

    Signs It’s Time to Tune Up Your Setup

    • You push or reroute the cart several times just to get across the space.
    • Piles overlap, and tools drift from assigned bins to stacked layers without clear lines.
    • Your bin wall still makes you dance around obstacles or hunt for essentials hidden in visual noise.
    • Open areas keep attracting a daily mess—resetting takes longer every night.
    • Corners and bottom shelves never get touched for actual projects but bristle with unused or forgotten gear you’re reluctant to move.

    None of these issues are dramatic on day one. They compound over time, as the system collides with real, repetitive use. What works isn’t pristine perfection, but practical design—one that channels your actual habits and lets returns feel like a step in your working rhythm, not a “clean for the weekend” ritual.

    Finding the Right Mix: Open, Closed, and Accessible

    Closed bins keep small hardware from wandering, but only work when you can open, reach, and stow in one fluid step. For tools grabbed constantly, open hooks and rails along the active wall win every time—they cut the cycle into seconds, not minutes. Strong setups blend both: closed for the loose stuff, open for the daily drivers, and everything sorted small and clear. Oversized bins or catchall baskets? They’re just future junk drawers in disguise. Dividing the wall into clear, labeled, bite-sized homes means no searching, less stacking, and nearly automatic cleanup with each pass.

    Tuning for Daily Use, Not Just a Clean Photo

    Decluttering is barely half of the work. Any open table or shelf that’s not broken up will pull in overflow and slow resets, every single session. Segmenting surfaces, tightening “return” paths, and reserving open zones for only what cycles in and out daily removes endless minor annoyances, whether it’s a one-car garage or a backyard work shed.

    Status-check after two weeks by watching the patterns: Which spots get dumped on, which bins go untouched, which corners block easy movement, and which surfaces force you to pick up the same batch of pieces more than once per project? Fix these with tighter modular zones, refined bin sizes, properly spaced hooks, and carts that don’t double as holding pens. The true win isn’t a wall that photographs as tidy, but one that resets itself, session after session, without dragging you back to zero each time.

    Shop modular storage and workspace solutions at StackNest

  • Choosing the Right Air Cleaning Nozzle for Varied Surfaces

    Spend an hour with an air tool, and you’ll feel what most never see: the real difference between “good enough” and clean, efficient work isn’t raw power—it’s the nozzle on the end. Straight out of the box, fan heads and pinpoint tips look like minor variations. But the illusion lasts only as long as you stick to the easiest surface. Sweep a wide shop bench after sanding, and sure, any nozzle gives you results. Move on to rough concrete edges, coarse pavers, or brick seams—suddenly dust comes back, stubborn grit clings in lines, and what felt simple becomes a repetitive grind. Every missed patch is another squeeze of the trigger, and every pass is another minute lost.

    The Hidden Cost of Settling for “Close Enough”

    Here’s how it plays out on an ordinary cleanup: You start with a fan nozzle, clearing the bench after a sanding marathon. Sweep the floor, flick away wood shavings, everything looks on track. But as soon as you hit the textured brick base of a wall, the nozzle glides uselessly over ridges. Dust settles into grooves, dark streaks snake along low spots, and you end up chasing scraps from under tool racks. You push harder, but nothing budges. Frustration comes quietly—hands tiring, mental focus slipping, and the finish getting patchier with every extra pass.

    This isn’t just a workshop quirk—the same headache turns up in garages, onsite corners, and gritty walkways outside any job trailer. When the wrong nozzle faces the wrong surface, energy drains fast. The problem isn’t lack of effort. It’s a tool that’s just outmatched by the demands of the job—the flat sweeps are fine, but messy edges ruin the end result.

    Why Nozzle Type Matters, Every Single Time

    Put the accessories side-by-side and you’ll see three clear personalities:

    • Fan nozzles: Ideal for fast, even coverage across big, flat decks or shop floors. Perfect… until you run into inconsistencies—grooves, ridges, or anything below the surface. They float, but don’t dig.
    • Pinpoint nozzles: Precision jets for narrow seams, cracks, and rough texturing. They dig out old joint dust and packed grime, but covering a full slab with one is like trimming a lawn with scissors—tedious and fatiguing.
    • Turbo heads: Pure force for caked mud, stuck shavings, or post-construction grit. Too much on soft woods will scar the surface—the brute strength solution where subtlety fails.

    One pass with the “right” tool can save five with the wrong. But the catch is, most people grab whatever’s close and stick with it—so grit piles up in joints, pressure marks scar soft material, and what should be a five-minute blast drags into twenty. That’s not just lost time. It’s repetitive work, growing fatigue, and a finish that never quite looks professional.

    Where the Frustration Builds: The Mid-Job Reality

    Problems don’t show up in the first sweep—they sneak in after fatigue sets in. The classic example: you’re doing annual shop cleanup, moving quick with a fan nozzle over the bench. The visible dust clears, boards shine. But you roll over to the concrete base and find grimy lines stubbornly hanging on. Multiple passes, stubborn dirt, and suddenly your “almost done” turns into “what am I missing?”

    This is where you realize: the problem is the surface, not your skill. The fix isn’t more pressure or more passes. It’s knowing it’s time to swap nozzles for the surface—not just out of routine, but when the work throws up resistance.

    Quick-Swap: The Move That Saves You

    The single biggest workflow change? Keep both a fan and pinpoint nozzle handy—and switch the second you feel progress stall. As soon as you start seeing streaks, or as soon as corners stay dirty after a pass, pause and swap. Don’t gut it out or wait for frustration to peak. Clicking over at the first sign of drag means you don’t double your effort or spend the rest of the job fighting with the tool.

    Does the Right Nozzle Really Save Time and Energy?

    Reality check from long shop days: sticking with a fan nozzle on pitted or dirty surfaces can cost you roughly a third more backtracking compared to simply grabbing the pinpoint. For anyone moving between surfaces—a bench here, concrete there—that’s the difference between finishing today or dragging the job out. Quick nozzle swaps aren’t about speed—they’re about consistency and not running hands and wrists into the ground.

    How to Tell You Need to Change Nozzles

    It’s subtle at first, but these are the red flags:

    • Dust lines standing out after the first cleaning sweep
    • Grit tucked deep in seams or brick joints, resisting pass after pass
    • Swirl marks or minor scarring after heavy use of turbo heads
    • Your hand aching after “just a few more tries” in the same spot

    If cleanup doesn’t get easier with repetition, or if you hear the slap of air change pitch over rougher zones, that’s your cue. Swap early, not at the end.

    Real-World Use: Shop Routine to Dusty Brick

    Picture this: after re-sawing lumber and blasting joinery, your workspace floor is a patchwork of fine dust, odd corners, and brick baseboard. The fan nozzle makes quick work of the main drag in the open—but as you hit the edge bricks, dust stacks up. More pressure just numbs your hand and barely shifts the mess. Swap in a pinpoint tip, and suddenly the grooves clear, with less squeezing and less repetition.

    Miss this moment, and you waste energy chasing stubborn debris. That extra strain doesn’t just slow you down—over time, it breaks your rhythm, adds drag to every workflow, and leaves a jobsite that never quite looks finished.

    One Change: Keep Your Nozzles Ready

    Don’t bury your alternates at the back of the bench. Clip a fan and pinpoint nozzle to your tool belt, apron, or utility pouch every time you start a mixed-surface job. The extra prep pays off the second the surface changes. Think of swapping nozzles like using the right bit or blade for the material—yes, there’s a pause, but the work is smoother, cleaner, and a lot less punishing over hours or days.

    The Work Pays You Back

    Real productivity isn’t in piling up accessories—it’s in noticing when the work slows and adapting, fast. A nozzle swap can’t polish a floor or fix bad prep, but it can cut wasted effort and keep results consistent. Next time dust starts to streak, or you sense fatigue ratcheting up, switch that tip. Your body, your schedule, and every job after will run smoother for it.

    Shop tools and accessories at Gumboll

  • How Soft-Close Drawers Transform Everyday Closet Organization and Efficiency

    It starts small—the first week after your so-called “closet reset,” everything looks perfect. But by day three, the familiar drift returns: stacks of shirts slide sideways, that sock you always reach for vanishes behind a pile of shorts, and closing a drawer requires an awkward double-push. The dull thud and screech become background noise, but the friction never really fades. Rushed mornings have you tugging at a stuck drawer, and at night, every bang feels twice as loud as you tiptoe past sleeping family. What seemed organized in the showroom starts feeling like a constant maintenance project at home. That’s when you notice what standard drawers truly miss—and where soft-close starts to matter.

    Daily Storage: Where “Organized” Starts to Fall Apart

    A closet can hide its frustration well. Doors close, surfaces align, and at a glance, you’re “together.” But reach for anything not on top—a shirt under a stack, socks from the back—and you get friction. With standard drawers, you live with:

    • Shirts slouching sideways from a single rough close
    • Underwear and socks migrating into corners, practically disappearing
    • Piles losing their shape by midweek, forcing a slow-motion re-stack
    • That nagging sense that one careless tug sets you back two days of tidying

    The cost is small but constant: pausing to realign piles, slow-gliding drawers to dodge noise, and quietly hoping nothing slides out of sight. Especially in a space shared with someone else, the energy you spend just keeping things “good enough” adds up—faster than you think.

    When Drawer Friction Becomes a Daily Grind

    Drawer mechanics might sound trivial until you live with the flaws. If you rely on quick, predictable access, clutter-free resets, and peace in shared spaces, weak drawers can be your worst enemy. Real-life storage struggles surface in moments like:

    • Morning chaos—digging under shuffled shirts for what you actually want, with stacks losing their hold
    • The late-night shuffle, tiptoeing as every drawer echoes through the house
    • Shared bedrooms, where one careless close shakes someone else’s sleep
    • Laundry day, watching newly folded piles collapse with the first use

    Soft-close drawers answer with control: a smooth, unhurried glide that ends in a gentle, silent close. No drama, no jolt—just a space that stays ready for next time.

    Why Standard Drawers Quickly Wear You Down

    Identical at a glance, worlds apart when stress-tested. Standard drawers age poorly—tracks wear grooves, drawers misalign, the rails start to drag, and gentle organization dissolves with every slam. It goes well beyond aesthetics:

    • Grinding rails sabotage any quiet-hour routine
    • Repeated force leads to tiny cracks, nicks, and long-term wobble
    • The same five shirts in rotation—because digging for the rest is too much frustration
    • Tidy bins quickly blend as items migrate, losing all order

    Multiply this friction across the week, and even a well-designed closet can feel like it’s working against you. Appearance fades fast when daily use means repeated resets and searching for lost basics.

    How Small Hassles Add Up—And Wear You Down

    The reality is constant: you open, tug, and the contents lurch; close the drawer, and feel everything shift. Even simple routines—like grabbing gym socks or finding a tee—turn into micro-battles. At night, you dread the crash that undoes your careful organizing; in the morning, you shuffle piles to make room for what should be an easy grab. The promise of “organized” fades into the grind of reshuffling every other day. The real dividing line is how the closet supports routine—not just how it looks after a Sunday reset.

    The Shift: Real-Life Joy of Soft-Close Drawers

    Upgrading isn’t about luxury—it’s about losing those daily setbacks. Soft-close brings small, repeatable wins: you pull, you find, you nudge, you move on. The quiet closing means:

    • You don’t inch the drawer shut to keep peace—just one push, every time
    • Stacks stay upright for days, making what you need instantly visible
    • Clutter can’t migrate to corners; what you set stays put
    • Even with multiple uses in a hectic morning, nothing falls out of order

    Across weeks, it’s real time and energy saved—no more constant re-sorting, no stealth tidying in the dark, no lost basics. It’s not showroom perfection, but now, your organization isn’t undone by a simple drawer close.

    The Realistic Payoff

    Be clear: soft-close drawers won’t prevent every stray sock or collapsing pile. But they do lift the daily baseline—less shifting, fewer resets, and a closet that’s easier to put back together, even if you occasionally slip. If you’re worn down by little battles, and the gap between “looks organized” and “actually is” drives you nuts, this one upgrade bridges that gap more than a new set of bins or another round of Sunday folding.

    What Real Closet Owners Ask

    Will soft-close actually help in a shared space? In bedrooms—especially with kids, partners, or roommates—soft-close drawers keep routines gentle. No more accidental wake-ups or apologetic noise.

    Can you add soft-close to what you already have? Sometimes. It depends on your hardware and the shape of your drawers—some cases call for new runners, others benefit more from a full swap. Check the drawer’s construction before making the call.

    Is the difference obvious from the start? Only after real use. The payoff surfaces after a week of rushes and resets—when you realize what hasn’t slipped, shifted, or vanished since laundry day. Long-term, the improvement is felt more than shown.

    Closet Storage That Stops Slipping Behind

    A closet isn’t just about initial order—it’s about how well it holds up on your busiest days. The divide between “full” and “functional” is defined by these details. Soft-close drawers won’t turn you into a minimalist, but they do keep energy focused on what matters—getting dressed, coming home, moving on—not fighting another round of silent closet triage. It’s one upgrade that works overtime, even when you don’t notice it—until you finally realize things are still where you left them.

    Shop ClosetWorks storage solutions

  • Why Upgrading Tool Storage Beats Buying New Tools Every Time

    There’s a reason “organized” doesn’t always feel organized—especially after a week in the workshop or garage. The setup is crisp on day one: wall racks lined up, bins labeled, the new rolling cabinet snapped into the perfect showcase spot. It’s the moment everything looks under control. Fast forward a few days, and the illusion starts to crack. That cabinet’s now wedged in, narrowing your path every time you squeeze by. The rolling cart gets nudged around to clear space—then sits awkwardly, half in the walkway, until your next project. Bins fill unevenly: “Sockets” spills over, while Phillips screwdrivers end up loose somewhere closer, because you just need them more. The gap between “looks organized” and “actually works, every day” becomes impossible to ignore.

    When Storage Structure Steals Your Flow

    It’s easy to blame clutter on a lack of bins or fancy cabinets, but most of the real friction comes from the bones of your layout. Maybe your wall panel sits six inches too high—the top hooks go unused, or worse, demand a stepstool for anything you put there. A floor cabinet might keep gear hidden, but suddenly its open drawer blocks your route whenever you need the drill. The visible order fades as new habits take hold. Instead, what remains is a network of small, consistent annoyances: the aisle that could be clear if only that rolling cart had somewhere better to live; the back corner that gets used as a dumping ground for awkward-size clamps because nothing else fits; the regular trek back and forth after realizing your most-used tool never made it home last time.

    The ‘Wall or Floor?’ Trap (and Why Both Can Fail)

    Wall-mounted systems sell the dream: gear off the floor, everything one glance away. But three projects later, you’re reaching over a tangle of hooks for that hex key, sliding aside a ladder to grab the garden shears shoved behind. It’s “sorted,” but not seamless. Meanwhile, floor storage promises flexibility—until your rolling cabinet lands right in the lane where you actually walk, and starts catching overflow: half-used glue bottles, random hardware, the one tool you couldn’t quite find a spot for. What’s supposed to flex ends up blocking you in, movement-by-movement.

    If your setup collects friction faster than it collects tools, it’s not working. Each awkward shuffle—dragging a mobile cart, digging through a low, shadowed shelf, stretching for a tool because the hooks are just out of reach—chips away at the promise of an effortlessly ordered space. The friction isn’t dramatic, but it builds up daily until your own routine is shaped around all these little workarounds.

    Why ‘Everything in Its Place’ Isn’t Enough

    The surface-level fix is tempting: bins labeled, shelving dialed in, pegboard hooks filled to capacity. For a moment, it really does look sharp. But then, a rolling cart meant for one task slips into dead space and becomes a catch-all. Wall storage jams up when retrieving a tape measure means shifting two drill bits and a flashlight first. Soon, one shelf or bench attracts everything that doesn’t really “belong.” Corners don’t become open—they become permanent limbo for bulky saws or that garden rake with nowhere else to go.

    Visual tidiness collapses under routine use if the system ignores real movement. If returning a tool means awkwardly working around a bottleneck—or if project overflow piles up on whatever’s closest—system breakdown is only a matter of time. As routines settle in, resets get slower, and the neat look you started with becomes harder and harder to reclaim.

    Micro-Frustrations Signal Larger Problems

    • Shuffling a rolling cart out of the way—every time you need to move long lumber or an armful of supplies.
    • Edging around a cabinet corner, because it’s always half-blocking your path to the power tools.
    • Wall space technically used, but the top hooks stretch the limits of what’s practical—so they stay empty, or gather only items you rarely need.
    • The same shelf perpetually collects overflow: half the gear lands there, the rest scattered wherever there’s open surface.
    • Dead zones where odd-shaped gear gathers dust, undisturbed, because reaching there means moving three other things first.

    Fixing Flow: Why Smarter Beats Bigger

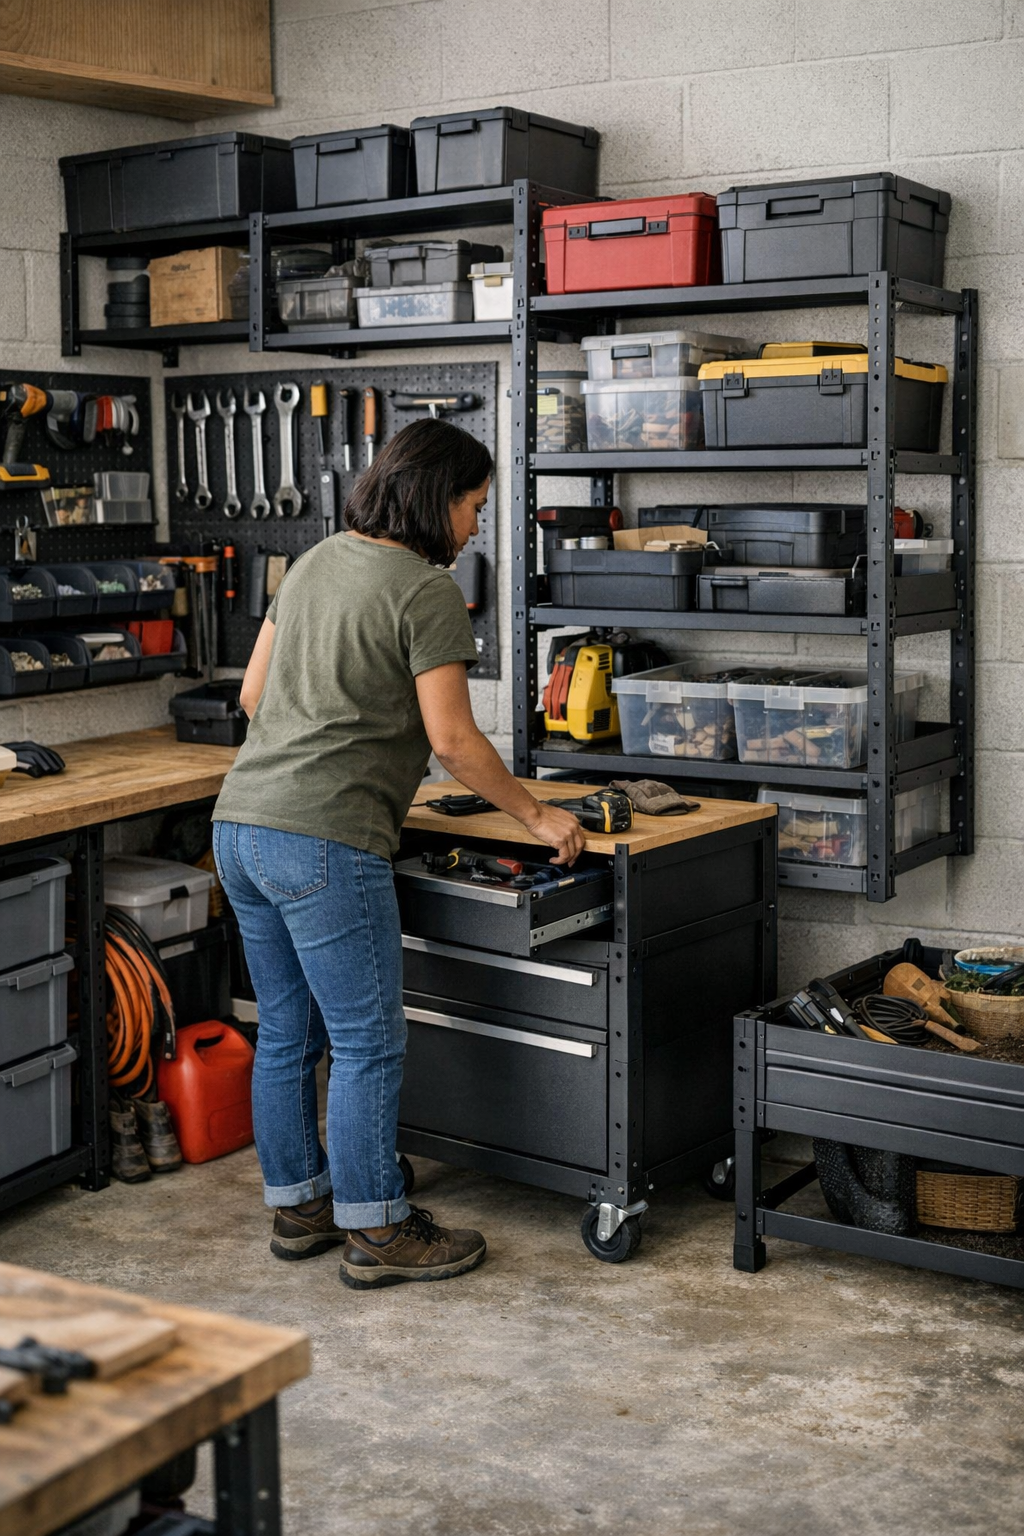
    Real organization isn’t about adding more places to stash tools—it’s about fitting storage to your movement, not the other way around. Swapping a chunky deep cabinet for a narrow wall-mounted rail (even if it “stores less”) can turn a cramped shuffle into an open stroll. Rethinking by task—putting your go-to tools at natural standing height, storing heavy or seasonal stuff just below—means you don’t end up with piles on the floor. The entire reset routine shrinks: less zig-zag, more straight-line return. Suddenly, cleaning up feels almost automatic.

    The real test? How simple is it to put things back, every single day.

    If it takes even a couple of extra steps, or a detour around an ill-placed cabinet, you’re likely to skip it—resulting in mess that accumulates faster than you realize. Aligning storage with the way you work, not just what you have, shifts the entire feel of the space. Strong systems separate high-frequency from occasional use—not just by type, but by how and where you move. Sometimes, the biggest win is as small as moving a single shelf or cart to free up a pathway that always gets clogged.

    Quick Fix: When Overflow Doesn’t Stop

    If one zone keeps spilling over, it’s not for lack of containers—it’s a sign your workspace is fighting your routine. Before buying another organizer, ask yourself: is your gardening gear stranded across the garage from the back door? Is that cordless drill forever on the bench because it’s annoying to put away? Relocating storage even just a bit—closer to the real action—can reduce reset friction, more than any new bin or flashy label ever could.

    How Real Improvement Shows Itself

    An effective setup doesn’t just look tidy—it lets you clear and reset the area with hardly a second thought. The true difference comes after several rounds of heavy use: floors are open, tools find their way back home, and you’re not trapped in a loop of shifting carts or making “temporary” piles. Zones hold firm because they match how you move, not just how you imagined they might be used.

    If, after a full week, you’re still reshuffling, detouring around awkward corners, or babysitting tools back to their “homes,” the setup is still fighting you. The right storage makes the entire routine feel lighter, not heavier. Pay attention to how your space holds up after daily use—not just how it shines for a photo.

    For storage that makes your workshop or garage actually work—through weeks, not just moments—check out StackNest.

  • Mastering Sander Choices for Flawless Wood Surface Preparation

    It’s always at the finish line—when you’re convinced the sanding is perfect—that reality hits. You wipe on stain or clear coat, and suddenly every careless track or tight swirl leaps out. At this point, there’s no patch or quick fix; correcting the mistake means retracing your steps, sanding again, burning more time, and sometimes scrapping material. It’s one of the most common, maddening stalls in any real shop or garage: overlooked sanding flaws, coming back to haunt you when it’s too late to hide them.

    Why Sander Choice Isn’t Just a Detail—It Decides the Outcome

    In the grind of the workshop, tool choice is about control, fatigue, and how each sander shapes real wood under pressure. Grabbing the first sander within reach often feels like the fastest move—but “fast” is meaningless if the tool leaves deep grooves and vibration scars you’ll only see later, under angled light. The gap between “good enough” and truly clean prep is where most projects go sideways, and it’s almost always decided by which sander you use, when, and how long you stick with it.

    One mistake—like pushing a belt sander too deep into late-stage prep—presses permanent tracks into the wood. These marks won’t vanish no matter how much you blend with lighter sanders. Add in a tired sanding pad or a machine that rattles after a long session, and those tiny surface ripples multiply. Each unnoticed scar is a setback waiting to be discovered with the first swipe of finish.

    How Sanders Really Differ When It Matters

    Orbital, random orbital, belt—they’re not just names. Each sander has a noticeable personality that only shows up in real use. Think of flattening a warped maple countertop: a belt sander makes fast work of high spots, but a moment’s hesitation in one spot and you’ve got troughs etched so deep they haunt the finished piece. At this stage, speed is a double-edged sword—every extra second risks irreversible grooves.

    Switching to an orbital sander tones down the risk. The flat, circular motion is safer on sharp edges and curves, but it’s not flawless—it leaves those fine, repeating swirls that only become visible under shop lights or in morning sun through a window. Then there’s the random orbital: more aggressive than an orbital, but less risky than belt, it scatters scratch patterns and clears dust faster. The difference becomes obvious over hours of work. With a random orbital, blending is forgiving, and the surface feels truly uniform to the touch—while orbital-only sanding leaves unwanted smudges and haze that show up every time the light changes.

    Scene: Maple Cabinet Doors—Living with the Chatter

    Say you’re prepping a set of maple cabinet doors, chasing that consistent satin sheen. You try to stretch the orbital through every step. By the third door, the sander’s subtle vibration starts working against you—grain direction changes, chatter sets in, and faint cross-hatching appears. They look minor until finish goes on, and then every defect lines up in the glare, multiplying your frustration. If you recognize this—finding your “quick finish” dragging into a whole extra sanding session—you know how precise sander choice matters at the smallest scale.

    The Sequence That Avoids Regret

    Better results don’t come from just buying a fancier tool—they come from matching the sander and grit to each stage, then switching at the right moment. The classic routine: start rough, progress in stages, end with finesse. For leveling warped panels or removing glue, fire up the belt sander with 80-grit—fast and relentless, but step away before it starts to “dig in.” Immediately move to random orbital with 120-grit: focus here on blending grooves and harmonizing the grain. When it’s time for delicate edge transitions or curved rails, don’t force a full-size sander—grab an orbital or, for tight spots, a sanding block. End the process with a random orbital and 180-grit, but never drag out this final stage—no more than a few minutes per square meter, or you risk compressing the fibers and ruining stain uptake.

    Trying too hard for “invisible” perfection late in the process is its own trap. Over-sanding at high grit leads to dead, patchy spots—a mistake most learn after the first ruined finish coat. Recognize that sweet spot: smooth, ready for finish, but still alive and open to stain.

    Catch Mistakes Before They’re Sealed in Place

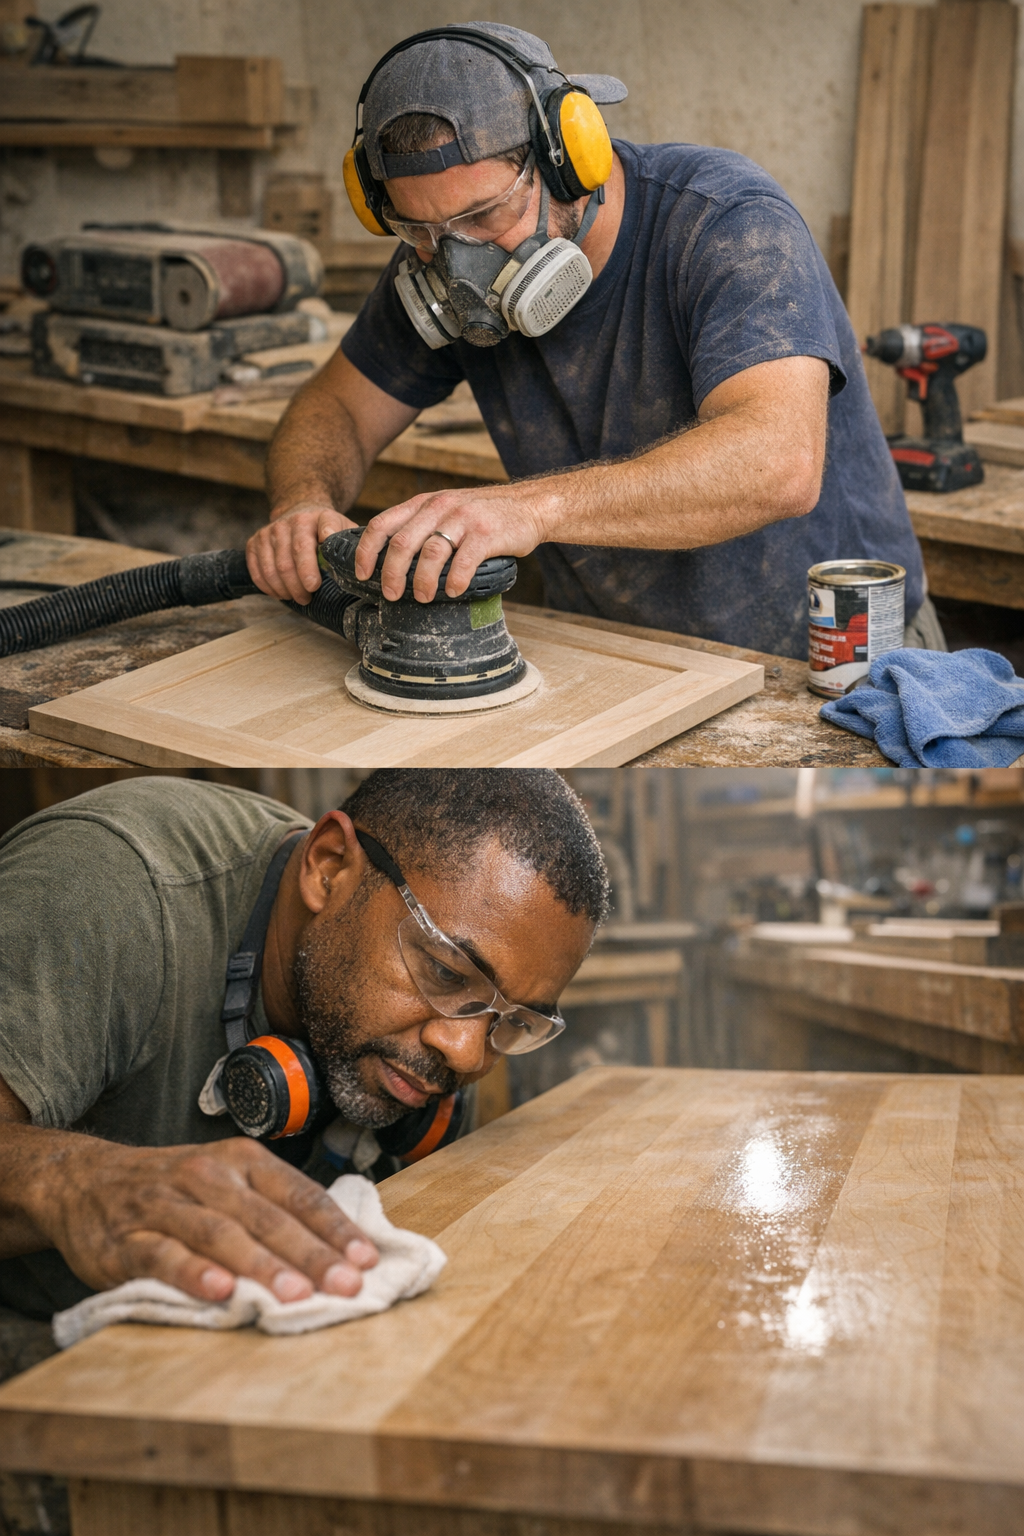
    Stop trusting your eyes alone. A rapid wipe-down with mineral spirits darkens the grain and spotlights every leftover mark: subtle belt sander ridges, orbital swirls, compressed areas that don’t match the rest. Under this temporary spotlight, fixes are possible and quick—before finish makes the errors permanent. A few extra minutes with the right sander and just enough pressure saves hours of rework, and sometimes the cost of new material.

    Don’t Ignore Dust—It Bites Back

    Every swirl of sanding dust not only clouds the air, but clogs pads, reduces sanding power, and creates invisible scratches that reappear at the worst time. If your sander’s dust system isn’t pulling its weight, you’re grinding spent grit back into the surface. A shop vac connected to the sander, or even a quality dust bag, keeps work predictable and cuts down on backtracking through grits. Less dust means less time wasted, cleaner results, and a smoother workflow—especially on big pieces or batch runs.

    Dial In Smarter Sanding Habits

    The difference between a pro-looking surface and a painful redo comes from daily habits—not just the gear. Watch for signals: a sander that suddenly feels “sticky” or starts to catch probably needs a grit change, not more pressure. Keep a sanding block on hand for inside corners and tight moldings—forcing a power sander where it doesn’t belong guarantees rounded edges and wonky reveals. Cutting corners to save time here is what actually wastes it later.

    There’s a flow to good sanding. Watching a seasoned pro, you’ll see them swap sanders, check grain in raking light, and pause to feel the surface with bare hands. They don’t chase textbook steps; they chase consistency, saving themselves the headache of post-finish surprises. In the end, effective surface prep is about precision, control, and learning to stop before pushing the wood past its best. Sanding isn’t about achieving perfection. It’s about knowing when good is truly good—and having the tools and process to back that up, project after project.

    Visit Gumboll for practical tools and gear built for jobsite performance.