Category: Tools & Workshop

  • Why Storage Systems Fail Over Time and How to Fix Them for Daily Use

    Why “Organized” Can Still Mean Frustration

    The photo-ready closet is a siren song. Rows of matching bins, almost military-perfect folds, and a shelf that practically dares everyday life to mess it up. But give it a month—sometimes just a week—and that glossy “after” look often starts working against you. Socks end up buried behind bins that block your reach. The “tidy” stacks soften, lean, and collapse as you fish out a single shirt. Shelves become slow, awkward obstacle courses instead of helping hands. Somehow, clutter returns—not as a mess you can see at a glance, but as a string of tiny slowdowns, shortcuts, and silent frustrations that linger in your routine.

    This is the trap: setups that solve for appearance on day one, but not for how you use your space twenty days—or two hundred days—later. A closet system that seemed perfect on a Saturday afternoon routinely starts to buckle by Wednesday, when the bin you need is under three others, or you have to reshuffle an entire stack just to grab gym shorts before work.

    When Looks Deceive: The Downside of Fast Fixes

    The “Organized” Illusion. It’s tempting to grab a set of bins, snap on some lids, and call it done. Deep bins promise to hide chaos. Tall stacks create the momentary high of order. But under weekday pressure, these fixes unravel—because perfectly contained isn’t always perfectly usable. Most of us don’t have the patience (or time) to unstack and restack bins just to reach the daily basics—and the more steps it takes to get to what you need, the more temptation there is to leave things out “for now.”

    Picture the hallway closet before work: In a rush, you swing open the door hunting for your gym bag, only to face a wobbly tower of bins. Each one you move threatens to unmake the careful order you spent a weekend creating. By Thursday, stray gloves lurk at the back, scarves are balled up in corners, and the shelf loses its logic. If grabbing one thing means shifting three others, the system has failed real life—no matter how good it looked the day you finished.

    Where Storage Starts to Slow You Down

    The truth leaks out in seconds lost: delays you only notice when they add up. Need a hat? Now you’re pulling lids off opaque bins, rooting blindly, and causing an avalanche by the third try. Soon, the lids stay off, overflow takes over, and the idea of “resetting” the shelf feels heavier every day.

    Open baskets sound like freedom, faster access, and ease—but if there’s no divider, they devolve just as quickly. Small stuff sinks to the bottom; headphones twist into glove tangles. Within weeks, what was “organized” morphs into a mixed catchall you dig through instead of use.

    How “Perfect” Setups Fall Apart in Routine Use

    Every system shines—until you use it. Take the classic shelf of folded t-shirts: crisp lines on Monday, slumped stacks by Friday. Every time you grab a shirt in the middle, the neat pile sags or slides, and you’re restacking after a single pull. Or the tidy row of shoes by the door that, after three busy days, has extra pairs creeping up the wall, lost mates hiding behind boots, and the “zone” evaporates under rush hour reality.

    Spotting the Real Issue: If you catch yourself constantly restacking, moving items just to reach a basic, or sighing at the sight of a shelf that should make life easier, you’re not failing at organization—the system just isn’t matching your daily moves.

    Small Tweaks, Big Gains: Making Storage Actually Work

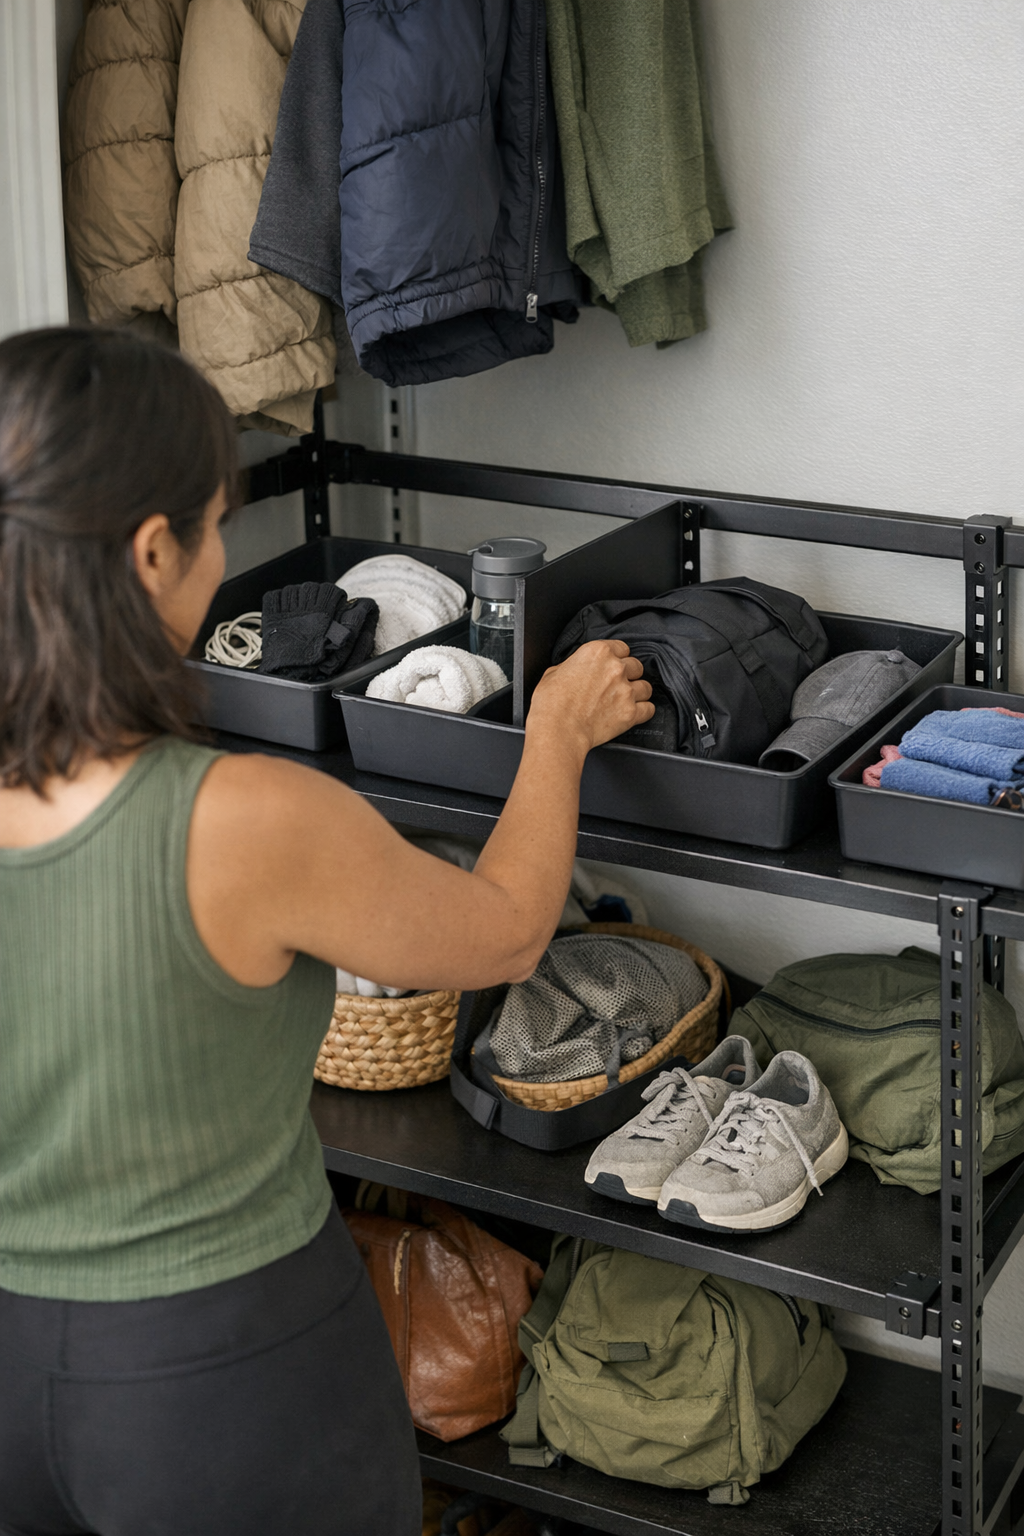
    Real fixes aren’t grand gestures. In one hallway closet overhaul, swapping deep bins for shorter trays and adding a vertical divider changed everything: the gym bag became a one-reach grab, not a rescue mission buried behind tote bags. Hats and gloves finally kept to their lanes. With trays only one item deep, nothing disappeared—and even at the end of a long day, the quick reset felt doable, not draining.

    This change didn’t turn the closet into a magazine spread. But it did make roles clear, cut down on stuff left out “for now,” and nearly erased the old habit of stacking things wherever there was room.

    Why Storage Logic Fades—And How to Prevent It

    The biggest culprit? Expecting rigid structures to fit routines that always shift. Too many bins, and it takes three steps to put anything away—so you don’t. Slicing categories too thin means you stop sorting altogether. Real homes reward flexibility and visibility: fewer, open containers with clear boundaries and easy access. They aren’t always photogenic, but they hold up through hectic mornings and messy weeks.

    Design for Habit, Not Just for Show

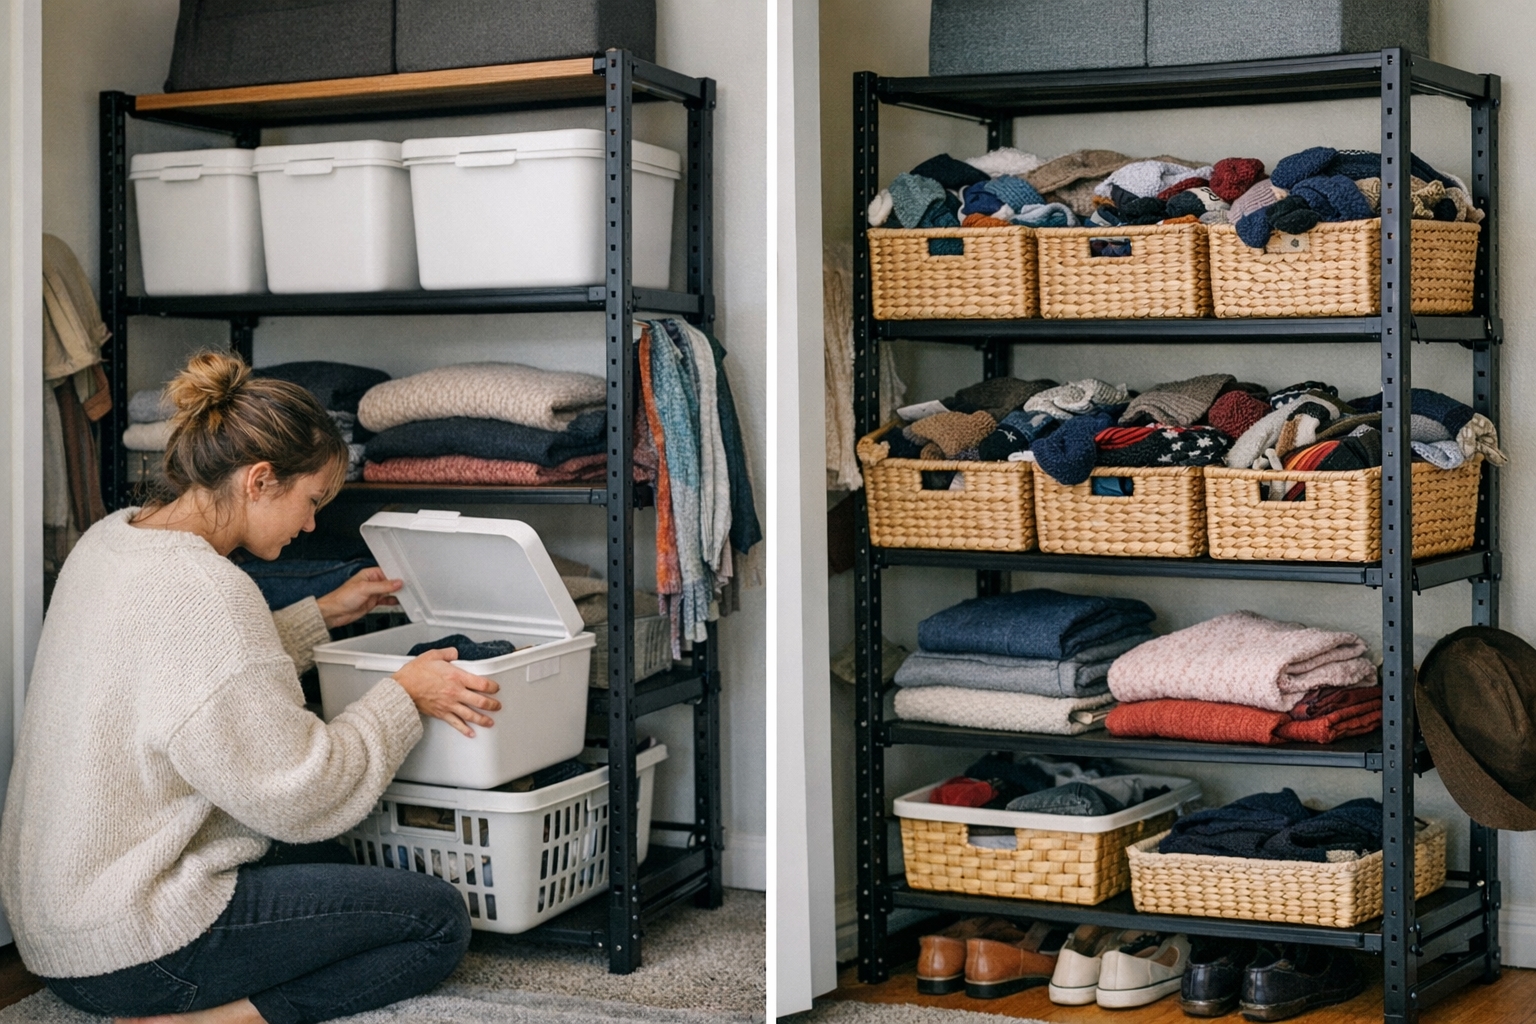
    The gold standard isn’t the shelf that impresses visitors, but the setup you actually want to keep using. Choose containers based on real grabs and put-backs. For your everyday routine, use open trays and baskets—dividers where needed—so you see what’s there and can return things without hesitation. Keep lids and closed bins for out-of-season sweaters or backup bedding you reach for a few times a year, not for the things you need at 7 AM.

    Keep an eye on the warning signs: that pile growing on top of a bin, the object that won’t quite fit its box, the repeated detour around an overfilled basket. These are clues—use them to fine-tune, not overhaul. Often, the smallest tweak (a divider, a shorter tray, a shelf lifted two inches) delivers the most relief, making daily access easier and keeping clutter from sneaking back in.

    Make Your Storage an Ally—Not an Obstacle

    No one’s routine is picture-perfect, and no storage system will always stay that way. But a setup with smart visibility, honest boundaries, and fewer steps does more than just look good—it operates in sync with you. Whether it’s your primary closet, the rush-hour entry zone, or that kitchen shelf you raid five times a day, storage that truly works makes busy, messy weeks feel a little smoother. Instead of frustration hiding beneath the surface, you get support you can count on—even when life gets messy.

    Find practical closet systems, shelving, trays, dividers, and more at ClosetWorks.
  • Choosing the Right Reciprocating Saw Blades for Mixed Material Cuts

    If you’ve ever burned an afternoon forcing a reciprocating saw through a messy tangle of wood, nails, PVC, and metal brackets, you already know: using the wrong blade isn’t just slower—it’s an invitation to ruined cuts, wasted materials, and a forearm cramp before lunch. Real job sites rarely hand you clean, single-material runs. A neat line can turn ugly in an instant—one hidden screw, a quick hit of electrical conduit, and suddenly the saw stalls or veers off course. You can almost predict it: the ragged ends, the numbing vibration, and the steady drag that piles up minute by minute. The store wall might make all blades look similar, but when you’re deep in a remodel or an urgent patch, the wrong match is the kind of mistake you only make once—or pay for twice in repairs.

    Where It Goes Wrong: Mixed-Material Strain on Saws

    Blades claim “multi-material” or “demolition” on the packaging, but the streets are different. Out in the dust and sweat, you’re breaking through wood studs, biting into drywall, skimming plastic, then suddenly crunching into buried hardware. Every layer means new resistance, new friction. Blades made for a single material throw off more than just noise—expect handle rattle, heat where it shouldn’t be, and seams that will haunt you on final inspection. Not just chips and splinters—sometimes full-on blade deflection, chewed drywall, and the slow, creeping calamity of a cut gone sideways.

    The “universal” blade, it turns out, is often only universal in making more work. It splinters or staggers at transitions, riding up over metals, bogging down in plastics, wandering off your pencil line. What looks like a five-minute fix balloons into rework, wasted stock, and fatigue in your grip long before quitting time arrives.

    It’s the Details—Not the Packaging—That Separate Blades

    Line up any hardware display and it’s easy to be fooled: flat blades, bright labels, assurances of “versatility.” In the real world, the difference reveals itself in seconds. A high-quality bi-metal blade rated for “wood with nails” glides through a stubborn stud—even when a nail interrupts your path. No vile chattering, no scorched dust cloud, no forced blade stop. But swap in a course-toothed wood blade, and the minute you clip metal, every vibration in the handle spikes, the cut staggers, and you’re left easing the tool back onto your mark while the job grinds to a halt.

    In-Job Friction You’ll Know by Heart

    The retrofit run: Routing wire behind drywall, you’re up against pine, calcified gypsum, maybe steel corner bead. The right blade slides through with one controlled stroke—even a hit of aluminum only slows, never stalls. The wrong blade catches, wobbles, and the exit wound is jagged: nothing a round of filler can hide. Now you’re fixing as you go, not finishing.

    Emergency patch turns marathon: You gamble on a “universal” blade through spotty framing, old fasteners, and mismatched woods. The result? Saw chatter, pauses to unclog teeth, seams that force extra planing—or worse, a finish you have to sand for half an hour just to blend. Your sweat soaks in before you’re even done with the first pass.

    What Really Improves With the Right Blade?

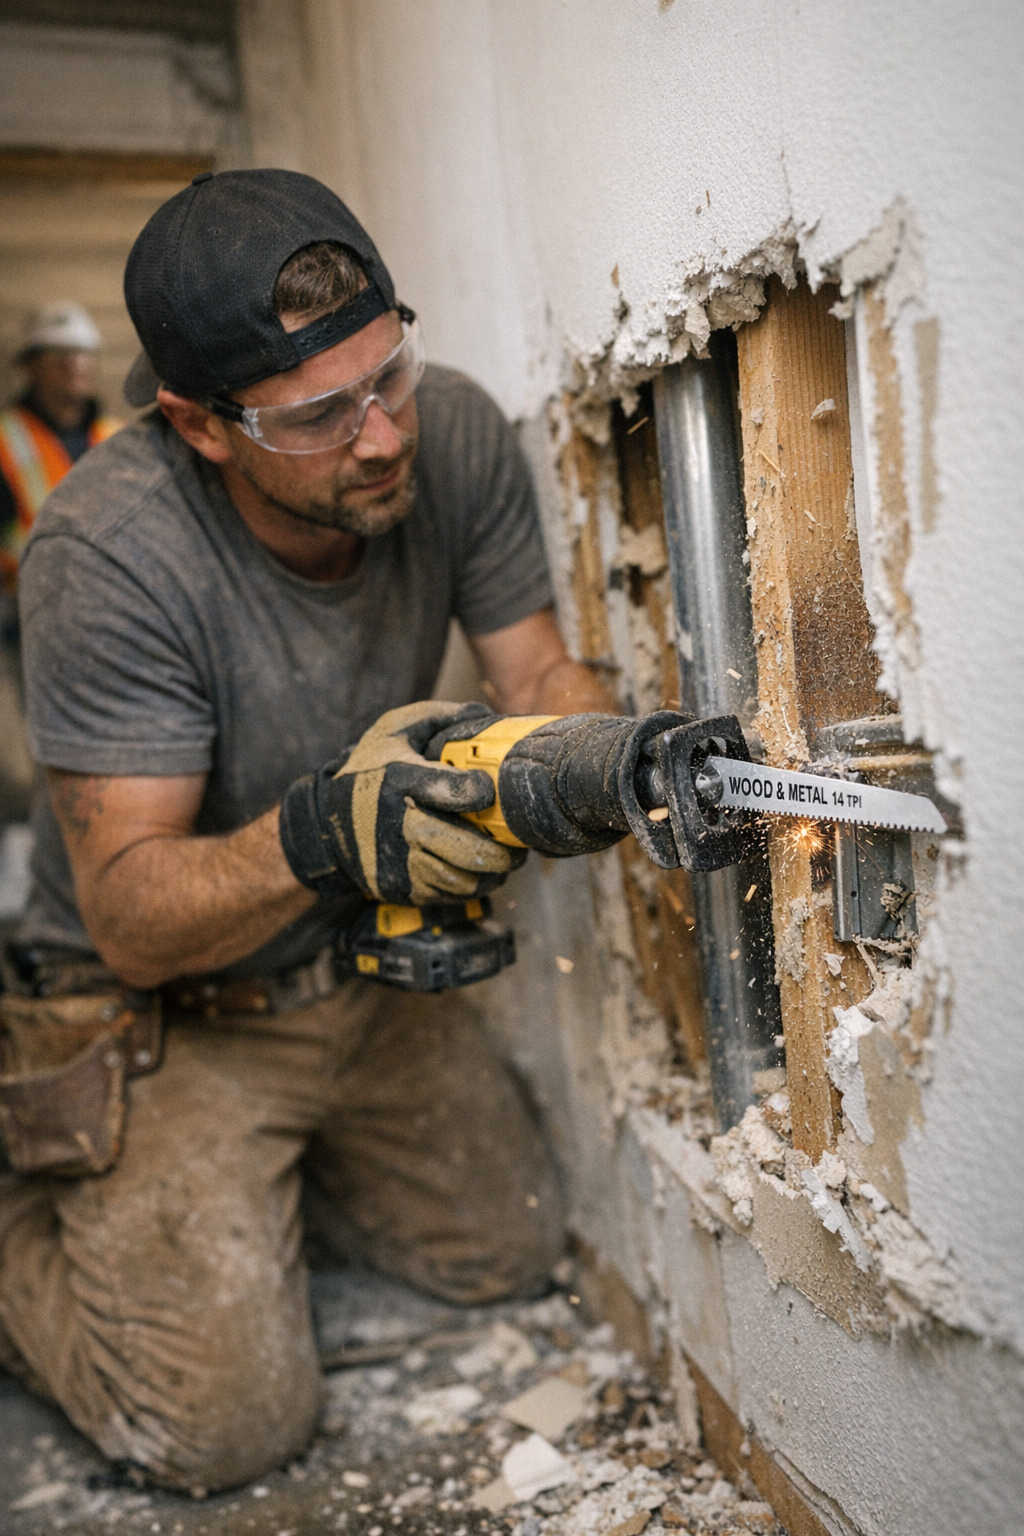
    Most crews earning their scars settle on a sweet spot: a moderate-tooth bi-metal blade—around 14 TPI—specced for “wood with nails” and “light metal.” The difference is vivid from the first stroke. Instead of hiccups every time you hit a screw, the saw just hums through. Your pencil line actually survives transitions, not just the easy lumber. Cleanup shrinks from endless sanding (ten-foot boards knocked down to fluff) to a couple of clean passes with a block. Sheet alignment lines up tight, so you spend the next hour assembling, not improvising repairs to crooked panels.

    Control improves hour by hour: No more yanking or riding the trigger, no desperate wrist work to steer the saw back on track. With the right blade, you’re steady through surprises—less fatigue means steadier hands by afternoon, and more eyes on layout instead of fighting vibration. Material loss dips, scrap piles shrink, and at the end of the day, the cut list is shorter because your first passes actually count.

    When Your Blade is Telling You Something—Listen

    A blade rarely fails without warning. Feel for sudden extra buzz as you sink from wood into metal, or if the saw just starts fighting the material harder than usual. Notice a faint burnt smell, or see blackened streaks in the dust? That’s the heat rising—teeth dull, the blade binding, and the finish suffering in real time. Ragged seams, smoke on layer changes, or the tool suddenly tracking off mark are red flags. Don’t stubborn through “just this last cut.” A two-minute blade swap can save an hour—especially if the alternative is tearing out a warped or burnt piece you’d hoped to keep.

    Universal Blades: Quick, But Not Quality

    Sure, universal blades are tempting when you’re flying blind or racing the clock. But they rarely cut clean—expect more chipping in soft woods, seam tearout, vibration in the hand that builds across the day. You can feel quality slipping: seams that never sit flush, finishing work that never seems to end, and wrists that ache before coffee wears off. Across dozens of cuts, that shortcut only stretches the job.

    Adapt or Accumulate Mistakes—That’s the Real Choice

    Mixed-material work is unpredictable—that’s the point. The best results go to those who spot trouble early: is the blade kicking more? Do seams roughen as you move through a new fastener? Pros don’t wait for disaster—they swap blades before small hiccups pile up. Your first few cuts are the signal. Miss it, and you can spend all afternoon sanding patched seams and hiding imperfections. Catch it, and you keep the job moving—less waste, fewer wrist breaks, a finished face that actually passes a close-up inspection.

    Shop blades, tools, and gear designed for real jobsite challenges at Gumboll.

  • Why Defining Your Storage System Before Buying Organizers Matters

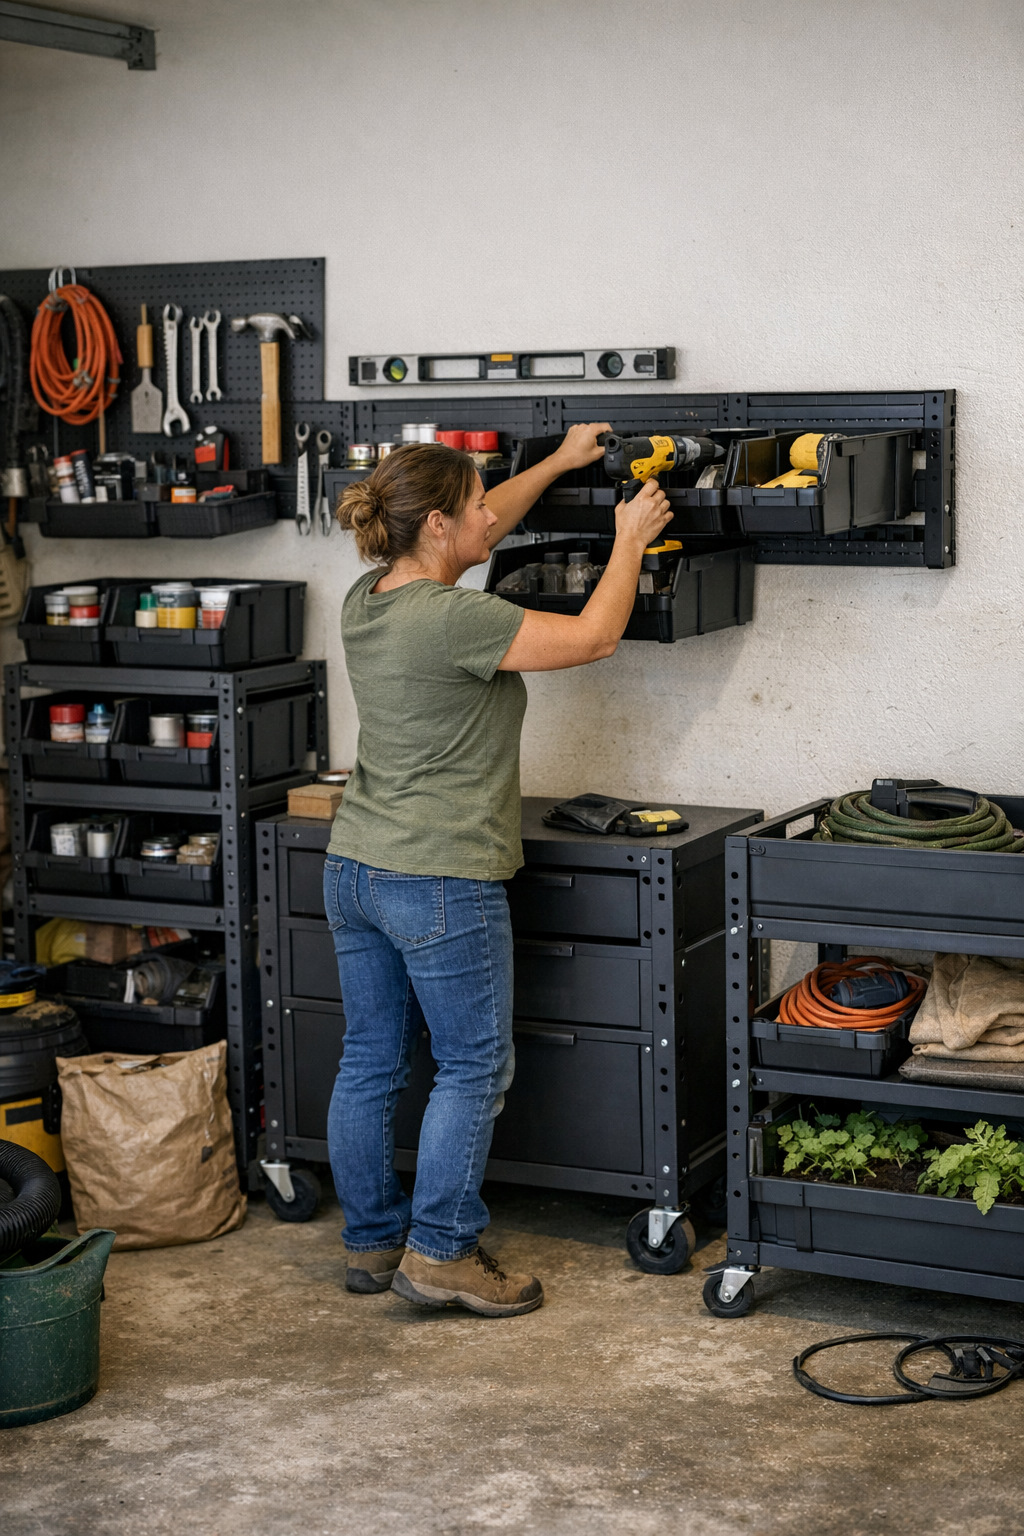
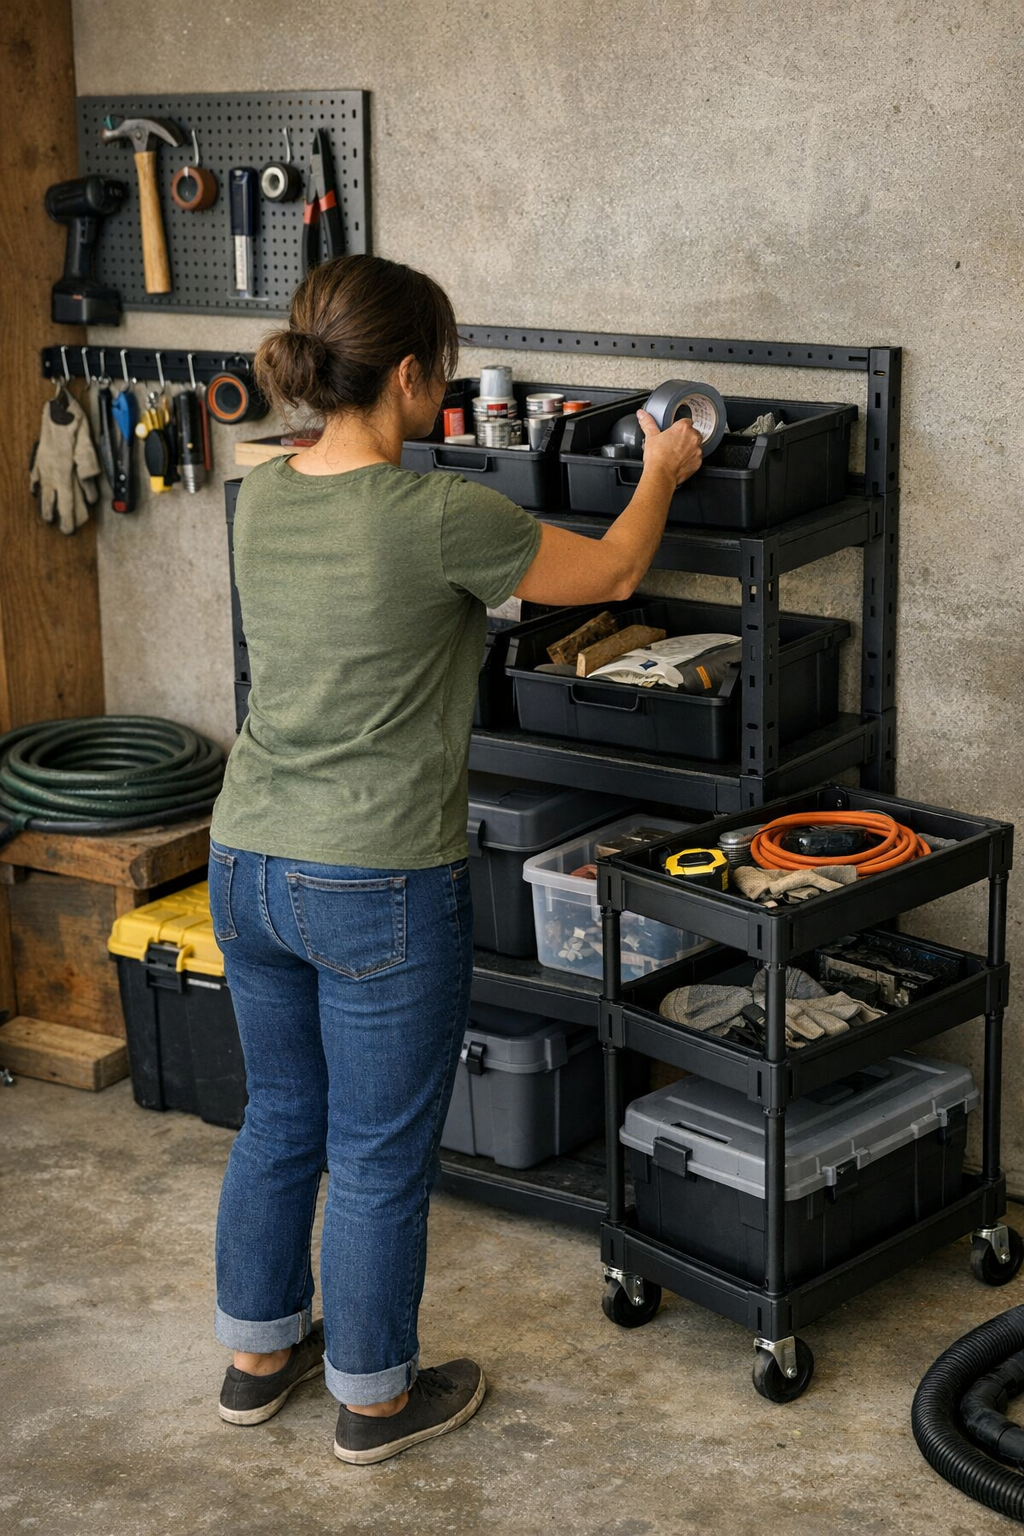
    The urge to finally “get organized” in a garage, workshop, or shed always starts out hopeful: a Saturday trip down the organizer aisle, ready to conquer clutter for good. You buy the matching bins, sturdy racks, and stackable trays, load them onto every shelf and pegboard, and for a brief moment, it looks like real progress. But then you try to use the space—the real way you use it. That’s when things start to slide. The order looks convincing, but friction creeps in: bins block each other, wall racks swallow what you need, a rolling cart lodges itself in your main route for the third time this week. The space seems sorted but everyday tasks get messier, not simpler. Practical setups rarely need more containers—they need better flow.

    How “Organized” Can Still Mean Awkward—And Why It Keeps Happening

    It’s easy to feel done once everything looks uniform. But looks don’t fix the underlying problems. A stack of trays might line up on the bench, but by midweek you’re digging through the wrong one to find your favorite screwdriver. Hooks meant for tools turn into tangled parking for garden hoses, always at the wrong height. The rolling cart’s wheels jam in the only walkway that actually gets used, so you push it aside, rerouting yourself around obstacles you only created last weekend.

    This is the everyday cycle: a space that photographs neatly, but disrupts your routine. The problems never show up at setup. They show up later—on the third time you twist through a blocked path or move stacks just to access what’s hiding at the back. Everything technically fits, but nothing moves smoothly. You end up shoving containers an inch this way, a box that way, trying to make the arrangement adapt to your habits, instead of the other way around.

    Real Routine Interrupts: How Setup Creates Unexpected Barriers

    Working in smaller areas makes these gaps painfully clear. You mount a pegboard and sort bins by category, but soon you’re playing Tetris: always shifting something to get what you really need. The most-used tray ends up four feet away because it looked better there, not because you ever grab it from that angle. Unused wall space turns into a dumping ground for random cords, while the floor’s corners gather overflow—a bag of nuts and bolts, a grime-streaked tarp. These slowdowns are subtle, but constant—especially with dirty hands, a time crunch, or a chilly garage where one extra step is one too many.

    The friction is cumulative. In the evening, cleanup turns into awkward shuffling: stacking mismatched bins that don’t nest, sliding gloves onto any open surface, piling odds and ends onto a cart you have to relocate for the third time. Week after week, what started as order quietly morphs into constant mini-resets that steal your time and block smooth movement.

    Why Looking the Part Doesn’t Make a Space Work

    The visual payoff of a coordinated setup disappears the first time you need to unhook three things to access one. Trays that nestle perfectly together are a headache once you realize the items you use most are buried or blocked. Every reach-around or awkward maneuver is a reminder: organizers chosen for the sake of looking “tidy” often get in the way of real, repeated use.

    There’s a real cost here. Bad wall layout means tools drip onto the floor, oversized racks gobble up working space, and neglected corners fill with overflow that slows every task. The more you shuffle and shift, the less satisfying the “system” becomes—if it even counts as a system at all.

    The Hidden Gaps Routine Always Exposes

    The weaknesses surface during rushed mornings, sudden weather, or whenever your hands are full. That narrow storage path in the shed? Always blocked by a rolling cart you have to drag aside just to access drawers. Baskets tucked under benches? Great until you need one fast, crouching and re-sorting in an awkward huddle. What works in a catalog photo collapses under repeated, real-life cycles—the ones you didn’t plan for, but repeat every week.

    Shift Your Mindset: Design the System, Not Just the Storage

    The real fix doesn’t come from more containers. It comes from stepping back and mapping how you actually use the space. Walk the whole area. Where do your hands land first? Which path does your body naturally take? Where is movement always interrupted, and which stretch of wall or bench inevitably collects overflow?

    Building a system means prioritizing effortless reach and uncluttered movement. That could mean a wall rail at standing height, holding trays that slide out without blocking anything else. Or modular panels that shift as your needs evolve—freeing you from a fixed rack that always pinches the same high-traffic spot. Instead of containers dictating your routine, the system adapts to you. The right layout clears paths, zones, and corners that would otherwise turn into storage purgatory.

    Practical Upgrades: What “System-First” Actually Changes

    When each organizer is chosen to slot into a bigger blueprint, the difference is immediately obvious. Tools you use weekly have their own tray, at a height you can reach in one motion—no reshuffling required. The wall system keeps overflow off the floor and finally kills the pile in that always-messy corner. End-of-week reset stops feeling like an all-day battle; each tool and glove lands where it belongs without friction, so you can actually finish and move on.

    It doesn’t look like a showroom. It feels like work goes faster and cleanup finally snaps into place. Nothing’s perfect, but the endless shuffling stops, replaced by a setup that lightens the load instead of building new obstacles.

    Spotting a Layout That Still Needs Work

    Does a cart block your walkway every time you open a cabinet? Does wall space look busy but nothing’s actually in reach? Do bins stack to awkward heights, or do categories keep bleeding together as you tidy?

    These are the tells: when the “organization” keeps breaking down into weekly rituals of restacking, redirecting, and re-sorting, the underlying system just isn’t right. Only when you can move through the space cleanly, grab what you need instantly, and return things without inventing new routines, do you know the setup is working with you—not against you.

    Turning Intentions Into Lasting Improvements

    If you want a space that stays organized, stop letting organizers dictate the plan. Start with movement, daily reach, and the ability to reset quickly—choose solutions that serve those needs. Usually that means fewer containers, smarter wall systems, and layouts that don’t require acrobatics to keep in shape.

    Organization stops being a battle the moment your setup feels frictionless—when trays draw out, carts park clear, and bins return to their spots without a second thought. That’s the shift: a workshop, garage, or shed that stores what matters, supports your real habits, and finally makes the whole project worth the effort.

    Shop StackNest for smarter workspace systems

  • Choosing Between Open Shelves and Closed Cabinets for Closet Storage Efficiency

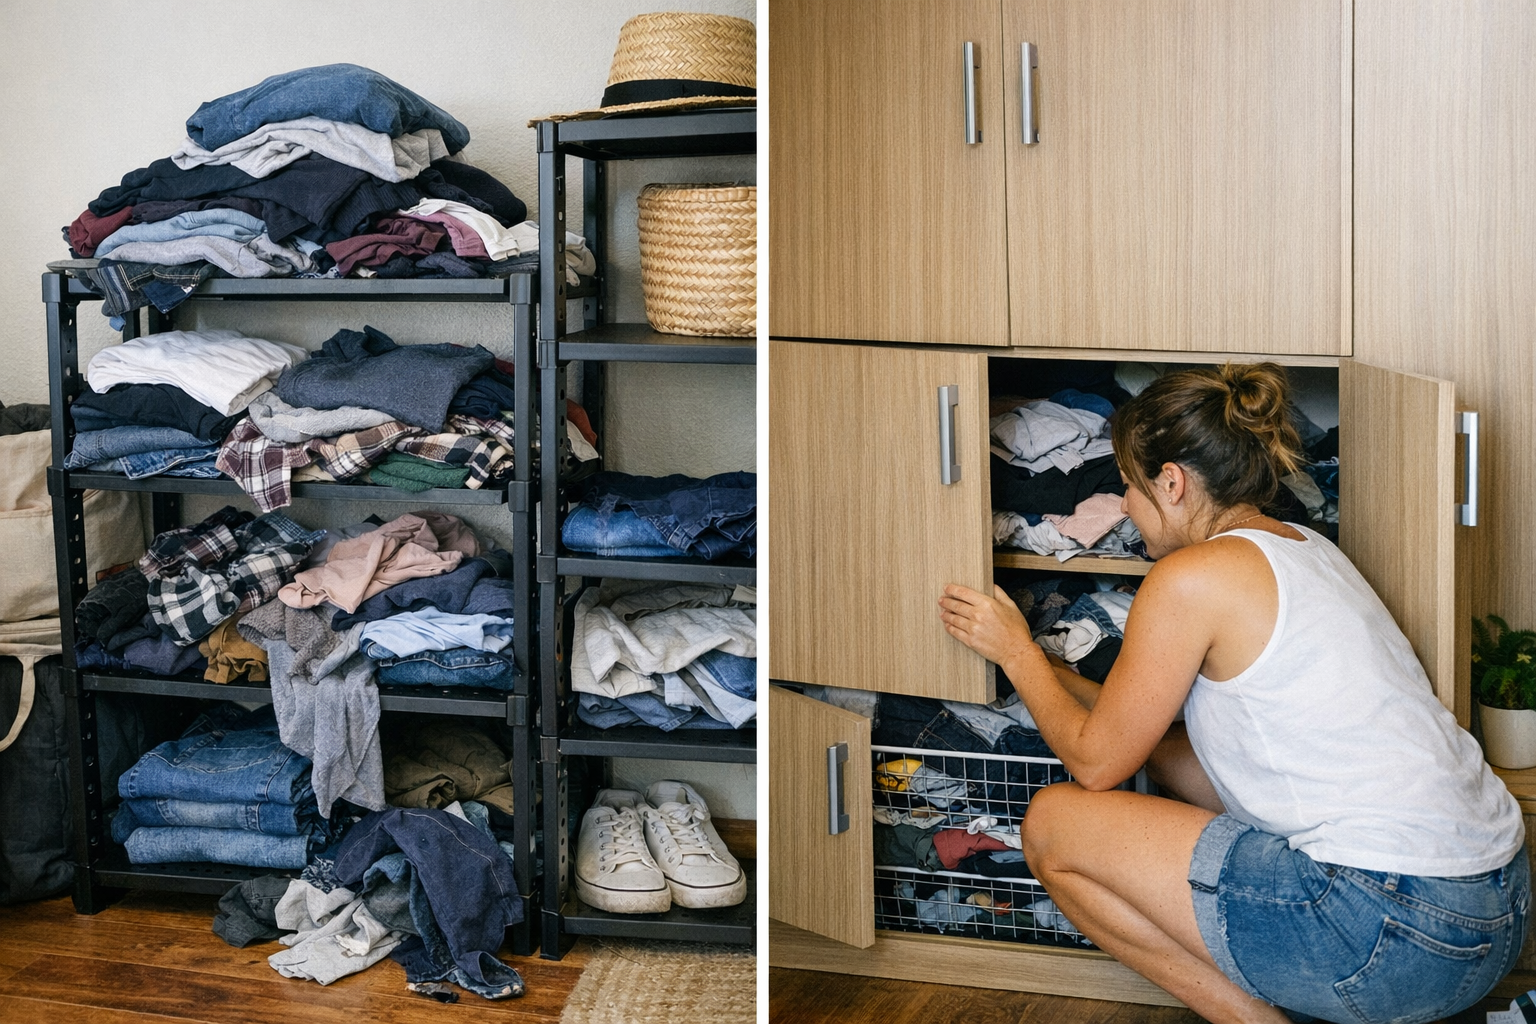
    Closets unravel faster than anyone admits. Shelves look pristine on move-in day; every row of T-shirts, jeans, or sweaters says you’ll be the person who always knows where everything is. But within a week, the truth sets in. Each quick reach pulls a sleeve out of place or collapses a stack. What should’ve been “grab and go” becomes “search and rescue” as clothes mingle, piles slide, and yesterday’s neatness becomes today’s barely-contained chaos. The friction isn’t just cosmetic. The daily grind—finding, returning, reshuffling—chips away at your morning and adds one more invisible obstacle before you walk out the door.

    Open Shelving: Fast Starts, Messy Finishes

    Open shelves invite bold organization—until the real world intervenes. That first week, there’s no barrier: you spot your favorite shirt, snatch it, and the closet feels like an efficient extension of your routine. But by Thursday, that stack of T-shirts sags, half folded and half slumped onto yesterday’s jeans. A single stray item—a gym towel, a ball cap—slides in and suddenly your “T-shirt section” is just a general pile. Every movement tries to be one-handed and quick, and in the race, categories blur. Before long, the entire shelf is contested ground.

    The upside—immediate access—is also its downfall. Open shelving turns small slips into big messes. One rushed grab leaves shirts spilling into sweaters; a couple of forgotten refolds later and half the closet is in disarray. Instead of one shelf for each category, you end up defending shelf borders from accidental invasions every time you reach for something tucked in the back. Minor disorder grows visible and persistent, demanding regular resets most people never get around to.

    Closed Cabinets: Calm Outside, Chaos Inside

    Closed cabinets give the illusion of control—at least until you open them. Doors shut, clutter disappears, and from the outside, everything looks calm. For anyone craving less visual noise, cabinets seem like a peace treaty. And in tight spaces or high-traffic entryways, that’s no small benefit.

    But function tells a different story. Simple retrieval becomes a chore. Need a shirt near the bottom? You’ll move two stacks to get at it. Looking for a rarely-worn sweater? It’s buried behind months of accumulated “someday” clothes. Over time, out-of-rotation items slink to the back: a single jacket gets lost behind bins, socks vanish behind spare shoes, and entire categories quietly mix until you’re not sure what you own. Cabinets protect from dust, but also hide the warning signs—disorder multiplies unseen, until “just grab that thing” turns into a mini excavation.

    When Out of Sight Means Out of Control

    The surface order of cabinets discourages touch-ups, and that’s the trap. Because clutter isn’t visible, you let things slide; then, when you finally hunt for the winter hat or last clean hoodie, half the contents spill onto the closet floor. Cabinets make it easy to hide problems, but harder to maintain a functional sort. You don’t see the blend of categories or the collapse of folded stacks until you’re knee-deep in stuff you forgot about.

    Why Routines Break Even the Best-Laid Storage Plans

    Most storage “systems” fail where daily habits collide with ideal setups. Maybe you start with jeans, tees, and hoodies in distinct rows on a shelf. After a week, jeans have invaded the T-shirt section, and the original logic is long gone. Or you fill a cabinet with winter gear in April and, months later, aren’t sure what’s in the back anymore—just that it’s in the way when you’re hunting for an everyday item.

    Routines are ruthless: kids jam clothes wherever there’s space; adults toss scarves or bags on the closest shelf. The result? Shelves that crowd too fast, bins that become grab-bags, and closets where each section gradually loses its role. You start with “zones,” but by mid-month, you’re just hoping things don’t fall on your feet. Resetting everything after each use isn’t realistic—a true system should survive imperfect routines, not collapse under them.

    Divide and Contain: Practical Fixes That Actually Stick

    You don’t need a renovation, just a few targeted shifts. Start with shelf dividers: a vertical insert here doesn’t just separate stacks, it prevents jeans from tipping into shirts and keeps the edge of your shelf from morphing into a jumble. With real walls guiding each pile, stacks retain shape longer and category lines stop drifting. Instead of re-folding everything after each morning, you just nudge a sleeve back inside its zone—small, fast corrections instead of full resets.

    Segmentation gives your closet structure its backbone. For deep shelves, store light, high-use items upfront and keep heavier, rare-use pieces at the back, so the stacks in front don’t tip. In kids’ closets, label bins (“Socks,” “PJs”) so even in a hurry, putting things back mostly right is realistic. Consistency matters more than precision, and small changes—dividers, bins, labels—create pockets of order that survive rushed routines.

    Mix and Match: Stacking the Odds for Lasting Order

    One storage style rarely solves all problems. Pair open shelves (for everyday items) with closed cabinets or deep bins (for what you use less often or seasonally). Overlay dividers or bins inside both. This mixed approach cuts down the “closet domino effect”—where one broken section brings the whole system down. Open shelves stay resettable and visible, while cabinets swallow clutter you don’t need right now—without turning every retrieval into a hunt.

    Clues Your Storage Isn’t Working—And What to Do Next

    How do you know you’re heading for trouble? If you’re constantly reshuffling the same stack or losing track of what goes where, those are red flags. The shelf you restack every two days, or the cabinet that absorbs things you never find again—these are cues, not failures. Tweak high-friction zones first: add a divider, assign a bin, or shift categories so “hot spots” get special treatment without reorganizing everything at once.

    The real test is resilience, not perfection. When a closet lets you put things back close enough after a busy day—and makes it obvious what belongs where—chaos stays contained. What matters isn’t how flawless your closet looks for a photo, but how easily it bounces back from daily use.

    Making Storage Work for Your Life, Not Just for Show

    Open shelving shines for speed, but demands frequent touch-ups or clever dividing. Cabinets offer peace to the eye, but can quietly sabotage daily access if left unmanaged. Most lives need a blend, plus smart zoning inside each section. Watch for trouble spots in your routine—crowded shelves, mixed bins, or perpetual reshuffling—and adjust with practical fixes instead of chasing closet perfection. The goal is not showroom neatness, but a closet that never slows you down, no matter how hectic the week.

    Find practical storage systems designed for real daily use at ClosetWorks.

  • Mastering Reciprocating Saw Control for Cleaner Demolition Cuts

    There’s a familiar thud of disappointment that hits every time your so-called “clean cut” turns into another repair job. You line up your reciprocating saw, start strong, and by the end of the cut, you’re patching splintered edges or filling gaps you didn’t plan for. The frustration isn’t just about rough lines—it’s about wasted time, extra cleanup, and the nagging sense you’re wrestling the tool instead of working with it.

    Why Good Cuts Go Bad as a Project Progresses

    That first pull through drywall is effortless. The blade hums, the dust drifts, and you’re reminded why demolition sometimes looks easy on camera. But as the day stacks up—moving from open space to awkward angles, from fresh wood to mystery studs loaded with old nails—that sense of control starts to fade. A shoe that’s floating a quarter inch off the workpiece doesn’t seem like a big deal at first, but several cuts in, the difference is hard to miss: lines wobble, vibration doubles, and you’re reaching for patching compound yet again.

    It’s not about getting one cut perfect. The real challenge shows in the third stud, the fifth section of drywall, the endless parade of oddball framing. Over a long session, neglecting shoe pressure turns minor wander into a recurring headache—especially when every “just a little off” line adds up on finishing day.

    When Shoe Bracing Fails, Repairs Stack Up

    Picture the scene: You’re halfway through a window demo, shoe pressed firmly on the sill. Then you hit a patch of buried fasteners, your grip slips, and for just a moment, the shoe lifts. That’s all it takes—suddenly the blade kicks, tracks off line, and you’re left staring at ragged plywood and splintered trim. One lapse in pressure becomes a half-hour erased, with repairs eating into any progress you thought you’d made.

    The problems multiply. With each floated pass, heat builds in the blade, fasteners deflect the cut, and the tool jerks in your hand. By afternoon, what began as basic demo feels more like triage: chasing crooked cuts, filling torn-out openings, and sanding away the evidence. Bracing isn’t just a technique—skip it, and the mess compounds fast.

    Shoe Bracing: The Simple Shift That Pays in Precision

    The pros know the difference: steady, deliberate shoe pressure. Anchor the saw’s shoe flat against the surface every time, and you gain control back from the tool—managing vibration, steering the blade, keeping the line from drifting with every kick or snag. It transforms cuts from jagged prodding to smooth, predictable progress—even when fasteners try to jerk you off course.

    Take a simple experiment: ten quick cuts through framing old pine, some with the shoe braced, some floating. Where you hold steady, deviation hugs the line—barely 2mm of drift, even if you clip a hidden brad. Float the shoe on that same series and it’s a completely different story: wander, splinters, and up to 6mm swing per cut. That difference might sound small, but multiply it over a hundred feet of framing, and your finish work adds up fast—painfully so when sanding arm fatigue kicks in.

    Scenario Check: Cutting in Tight Spaces Behind Tile

    Bathroom renovations bring the worst: cramped angles, hardback tile, and rusted lath nails that defy clean cutting. Here, even one dropped bracing hand on the final inch means the blade veers, chipping more backing than you planned. Apply focused shoe pressure with the other hand close for balance, and you’ll feel the tool settle and the cut smoothing out. That discipline—feeling the shoe, not just the vibration—saves full sheets of tileboard and keeps you off the phone for another last-minute materials run.

    Blade Choice: Where Speed Can Ruin the Finish

    No trick of technique rescues a bad blade—what you load matters. Low TPI blades are made for fast, aggressive demolition in soft woods, but every jump in speed risks more harsh chatter, chipped edges, and flex when you meet hidden nails. For finishes that’ll actually disappear behind paint or tile, higher TPI steel is the unsung hero: a little slower, but the result is fewer ragged ends and less of those “whoops” edge moments that nobody enjoys patching. Use the rough stuff for raw framing, save the finer teeth for visible lines—your putty knife and sanding block will thank you.

    Spotting Cut Drift Before It Becomes a Disaster

    The signs show up fast: sudden blade chatter, dust collecting thick on the good side of the line, or those early inches where the blade starts pulling away before you even reach the far stud. Any of these should trigger an immediate pause—a habit check to reset your shoe, realign, and change grip before you commit to a full cut you’ll regret.

    Reset, Every Time: The Five-Second Demolition Habit

    Taking five deliberate seconds before each cut—flattening the shoe, bracing your stance, breathing—pays in ways you’ll notice later, especially under tough work conditions. Whether you’re overhead, cutting at odd angles in tight soffits, or pushing through repeated stud walls, that constant reset fights off slip-ups. The result? Less rework, fewer patch jobs, and less wear on both you and your tools.

    Winning the Cleanup Game: How Bracing Shifts the Whole Day

    Tool control is more than just a good habit—it’s the hidden secret to finishing jobs with clean edges and less dust. Braced shoe pressure means fewer seams to fill, less material chewed up, and a noticeable drop in that end-of-day fatigue that sets in after too many fix-its. Stay disciplined with every cut, and the reward is real: straighter lines, shorter cleanup, smoother finishes, and more time to move on, instead of circling back for another round with the sandpaper.

    See the practical lineup at Gumboll for jobsite-ready saws, blades, and accessories built for real-world repeat work.

  • How Modular Wall Systems Transform Workshop Flow and Efficiency

    Spaces don’t fall apart overnight. The slow disaster in most garages, workshops, or catchall utility corners happens in plain sight—creeping in, not in a single event, but through routines that quietly bend and crowd the area week after week. Day one, everything feels ordered: gear on wall panels, shelves loaded, tool carts docked, overflow hidden inside cabinets. Then the cracks appear. Carts migrate into footpaths. Tools go missing in their own home. The line between “it fits” and “it flows” becomes clearer with every blocked step and every project you put off just to clear space.

    Why Clutter Isn’t the Real Villain—It’s Friction That Kills Productivity

    It’s easy to judge a setup by its storage capacity, or how peaceful it looks behind closed doors. But in practice, utility isn’t about hiding. It’s about movement—can you reach what you need without a detour, and put it back in seconds without debate? Every extra sidestep adds up. Each time a tool lands “just for now” on the nearest cart or bench, that’s a sign: the system isn’t supporting your routine, it’s subtly getting in the way.

    The friction sneaks up. The once-clear aisle now requires bumping a cart aside just to grab a wrench. Cabinets, originally flush to the wall, block off flow when their doors open into narrow walkways. Simple retrievals become slow dances around corners and obstacles, and resets stretch further out because each return is another mini-task, not a smooth motion.

    When Order on Paper Breaks Down in Real Life

    Blueprints give you “a place for everything.” In daily use, you meet the compromises head-on. Maybe the garden cart “fits” between the mower and the shelving—until you try weaving through with bags of soil, stepping awkwardly or shifting the cart out of the way each time. What should be a passing thought (“I’ll move this later”) turns into a cycle: more items pile up in mismatched zones because putting things back is always slightly more involved than it should be.

    Those micro-hesitations and daily workarounds are signals from your setup. Every time you pause—move a bin, consider where to stash a tool, or let something rest in a “temporary” spot—it’s your system adding resistance. Over time, those small problems lead to a major slowdown. Returning tools becomes a chore, and you catch yourself working around your own layout instead of with it.

    Cabinets, Carts, and Wall Racks—Why Looks Aren’t the Same as Usability

    Closed cabinets and storage chests give that tidy, uniform finish—at a cost. The process to retrieve a tool becomes: walk over, open the door, remember which drawer, dodge around spilled-over carts, and reverse the whole thing just to put it back. It feels functional, but those extra movements eat away at momentum. If every cabinet arc or drawer pull blocks part of your only walkway, the space isn’t working for you.

    Open wall racks and modular panels look messier but tell a different story if they’re tuned right. When hooks actually match your grab-and-go tools, resets shrink to near-zero. Glance up, tools at eye level—done. But overload the panel or ignore your real rhythms, and you’ve just pushed the mess where everyone can see, compounding friction and making resets even trickier.

    Small Shifts That Reshape the Space

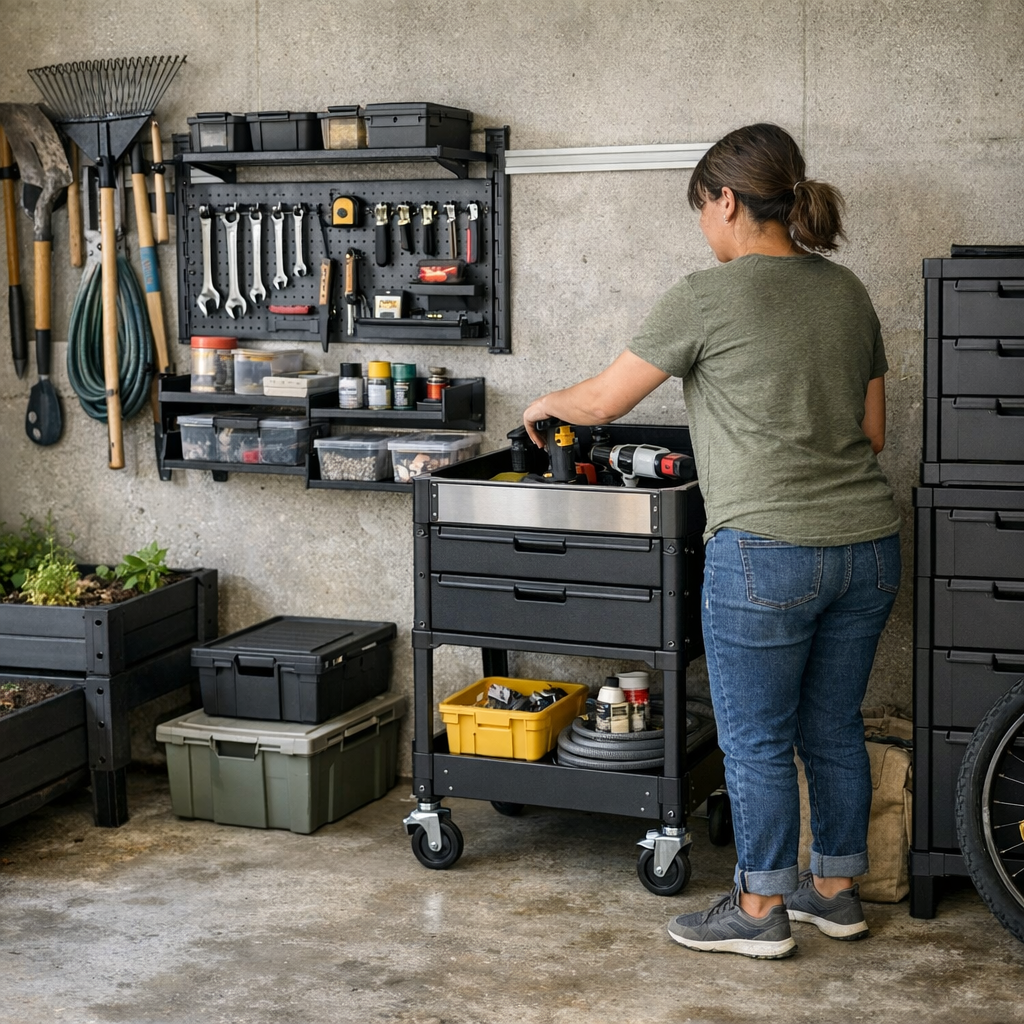
    Most improvements aren’t sweeping overhauls—they’re tight, specific moves. Raising a utility rail by 10 inches can clear a crowded bench and put your go-to tools where you naturally reach. Replace low shelves with a single horizontal panel, and suddenly your cart glides through clean space that isn’t blocked by bins or corners. The shift feels physical: no more shuffling, no pausing to reroute. The difference? Resetting the space nearly disappears from your mind because nothing interrupts the flow.

    Keep an eye on dead corners—if a certain spot always collects stray items, it’s likely serving the wrong purpose. Mount a basket or drop in a slim bin right there, and overflow vanishes without fanfare. The best tweaks are subtle, but their effect on daily friction is immediate and ongoing.

    When Routine Struggles Signal a Layout Problem

    You feel it before you see it: tight corridors, carts squeezed out of alignment, that “one spot” where everything lingers on its way elsewhere. Reaching for a tool and finding a stack blocking access is not just a minor hassle—it’s a red flag that the arrangement is piling on extra steps. If you hesitate—or regularly wage small battles to get at what you need—it’s time for a reset, not just more storage.

    Ask yourself: Was yesterday’s clean-up a smooth glide, or a multi-step puzzle? Were you caught moving three things to put away one? If your process is a constant reshuffling act, the system is leaking efficiency and inviting new clutter with every use.

    What Actually Makes a Setup Work—Not Just “Appear” Organized

    Strong setups erase decision fatigue. There’s no sorting, no debate—just reach, use, and put away on autopilot. This isn’t about hiding every tool, but about actually aligning high-use items with open paths, keeping doors and corners clear, and tucking rarely-used supplies into deep-storage zones that don’t disrupt your rhythm. Resets get so quick you stop noticing them.

    Pay attention the next time you’re working—are you thinking about the project, or are you strategizing how to maneuver through the space? The less mental effort spent managing storage, the more productive (and less stressful) your routine becomes.

    Quick Setup Stress Tests and Practical Zone Fixes

    • Reset Timer: Wrap up a regular job and clock how long it takes to return everything. If it’s over a couple minutes or involves repeated shifting, focus on that zone’s layout.
    • Walkway Audit: Stand in the main path—can you cross it without sideways steps or stops? Even a foot-wide cleared lane, gained via wall-mounts, opens the whole space up.
    • Overflow Hotspots: Notice where piles always reappear. Add a grab bin or customized rack right there, so overflow lands where it makes sense rather than choking other areas.
    • Favor Habit Over Hype: Tailor setups around what you actually reach for, not just what looks sharp in a catalog. If the system can’t flex with your routines, no amount of sleekness will fix the friction.

    Forget aiming for a space that’s just “organized.” Focus on a setup where moving, grabbing, and putting things back is frictionless—where nothing blocks your rhythm and overflow stops piling up in dead corners. The reward isn’t just a cleaner look; it’s reclaiming the time and mental bandwidth lost to constant rearranging and reset delays.

    Explore modular storage and organization solutions at StackNest

  • Choosing Between Bins and Baskets for Closet Shelving Efficiency

    That moment you open the closet in a rush—missing glove, vanishing scarf, socks buried under yesterday’s T-shirts—the frustration isn’t a lack of containers. It’s the daily shuffle: reaching, rummaging, moving piles just to get one thing. Bins and baskets promise order, but the mess reappears—just in new disguises. The right container isn’t about matching labels; it’s about stopping the morning hunt before it starts.

    At First, Everything Looks Tidy—Then Real Life Moves In

    The day you line up bins or baskets, your closet looks transformed: straight rows, clean corners, a sense of new possibility. Maybe for a week, the surface stays calm. But the routines—the pre-work scramble, kids running late, laundry day resets—reveal the weak spots no catalog photo shows. One shelf turns crowded, items spill between zones, and you’re back to digging for what you need.

    Bins: Tidy Facade, Hidden Headaches

    Beneath the smooth surface, bins turn every small retrieval into a hassle. Lids off, bins stacked, categories blurred—half your morning goes to searching for that one short-sleeved shirt or pair of gloves. Smaller items drown at the bottom, while new laundry gets squashed on top “just for now.” Trying to pull one thing means reshuffling the rest. Shelves look organized, but inside chaos quietly spreads. The more you try to “contain” the mess, the more you lose track of what’s buried where.

    The Repeated Scene: Dig, Dump, Delay

    Imagine school drop-off in ten minutes. You reach for the labeled “winter gear” bin, but everything you need is at the bottom. Scarves and hats blend together; yesterday’s lost mitten surfaces only after two layers come out. Soon, lids stay off and new piles form in front, defeating the original system. Look closely, and you’ll see: the more you hide for neatness, the more you end up repeating the same search every week.

    Baskets: Quick Access, Category Creep

    Baskets make grabbing what you see easier, but they can’t keep boundaries in place when the week takes over. You spot socks or sunscreen instantly, avoiding the full-bin search. But baskets with open sides or no dividers let items migrate—scarves slide over, toys mix with shoes, sunglasses get lost under hats. Use the shelf a few times, and your careful categories start merging in plain view.

    The Pile-Up: When Boundaries Disappear

    That basket meant for belts? A week later, pacifiers, headbands, and old receipts are mixed in. Every open-top solution starts as a shortcut, but the shortcut quickly collapses into a heap when life gets busy. Sure, nothing is hidden—but now the shelf always looks like it’s mid-cleanup, never finished.

    What Happens When It’s Time to Reset?

    The difference between a workable system and wasted shelf space shows during real resets, when you actually have to put things away—fast. If you find yourself sighing at the idea of restacking, opening lids, or separating jumbled items after laundry or a late-night cleanup, the container isn’t helping. Bins can create “dead zones”—places you never reach for because it’s too much work. Baskets can become overflow traps, with small items breaking the system’s boundaries. Both stall progress for one reason: access is never as easy as it looks.

    How Long Does “Put Away” Take in Your Closet?

    A closet only works if resets fit real-life energy levels. After switching to mid-sized, solid-sided baskets—nothing too high, nothing too open—reset time changed from multi-step chore to one motion: grab, drop, done. No more hunting for lost pairs, no more refolding. One decision—better basket shape—cuts the constant cycle of fix, mess, repeat. You start trusting the shelf to keep its role, instead of treating it like a zone of constant repair.

    Kids, Categories, and the Chain Reaction

    Let kids loose with baskets, and you’ll watch their cleanup habits unravel after a single sleepover—matchbox cars in with hats, Legos hiding under books. Bins, on the other hand, turn into black holes where no one—adult or child—remembers what went where. Either way, the “organized” look falls apart as soon as busy life intervenes. Rushed weeks, last-minute packing, seasons changing—all multiply the drift away from the system you set up.

    Where Do Items Drift During the Week?

    Yesterday’s clean pile becomes today’s mixed stack. Towels blend with T-shirts, accessories scatter into new territory. If your shelves aren’t guiding you—if you find yourself always “fixing” categories or digging out missing things—your container choice is working against your routines, not with them. And the busier the schedule, the faster the shelf dissolves into disorder.

    Spotting Where the Real Friction Lives

    This isn’t about bins versus baskets—it’s about finding out where storage breaks down for your family. Is the frustration hiding in things you can’t see, or in the categories that won’t stay put? Do you avoid tidying up because it takes too many steps, or because your shelves don’t actually hold boundaries? The repeat pain point signals the true fix—not a label, but a gentle change in structure that matches your habits.

    Try this: Swap one cluttered shelf for mid-height, solid-sided baskets—just for a week. Track how fast you put items away and how often you have to dig or redo a category. If the reset gets easier—and the shelf stays orderly with less fuss—you’ve found the right fit. If not, shift again. Storage is never “done.” It’s about making what’s visible stay useful, not just neat on day one.

    Don’t Just Store—Set Up Shelves You Can Live With

    Your closet is a living space, not a frozen photo. Every shelf is a test of your real habits—how fast you can reach, reset, and keep like with like, even on messy days. Bins can turn shelves into lost & founds. Baskets can turn into pile zones. The best system is the one you barely notice each day, because it matches how you actually move, reach, and reset. Watch the friction points—then don’t be afraid to try an upgrade, even if it’s just one basket at a time. A closet that works is about less hunting, less fixing, and more space actually working quietly in your real life.

    http://closetworks.myshopify.com

  • Preventing Nail Blowout in Softwood by Adjusting Nail Size and Pressure

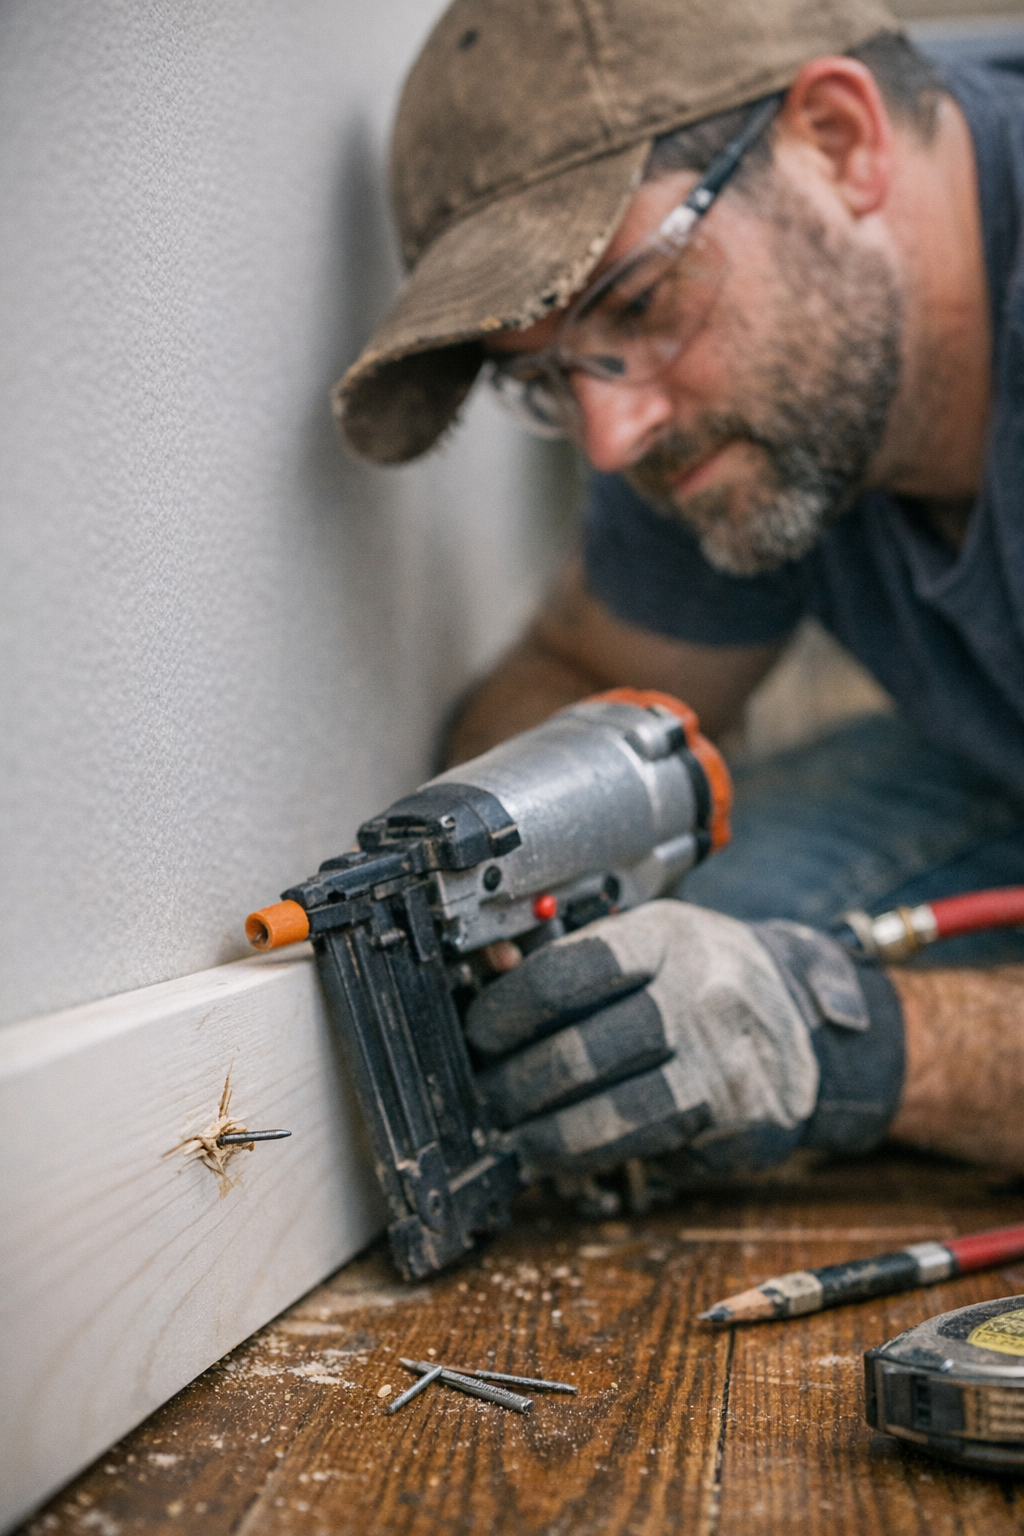
    You rarely hear nail blowout coming—it’s the kind of trouble that sneaks up in the blur of a real job. One minute, every fastener is landing flush and hidden; the next, your finger brushes a hairline split, or a nail head winks out from a stretch of pine baseboard that’s supposed to look finished. These aren’t catastrophic misses—they’re the slow leaks that drain time and patience, especially when the day’s goal is to get the trim installed and move on.

    The warning signs are almost invisible at first: a slight vibration through the glove, a little more resistance on the trigger, or a surface that suddenly doesn’t feel as smooth under your hand. But push through, try to keep pace, and it adds up fast—cracked casing, wandering fasteners, and a patchwork of filler spots you’ll end up chasing long after the nailer’s been put down. That’s the softwood fight every pro and weekend remodeler recognizes: a rhythm interrupted by tool drift and the unforgiving nature of pine and poplar, where soft grains amplify every small slip.

    Why Nail Blowout Happens—And Why Softwood Fights Back

    Most nailers impress during the first careful passes. Sink a 16-gauge nail into clean, straight pine, and you’ll get a satisfying bite—so long as you’re slow. But real work isn’t slow. It’s pushing through awkward corners, reaching across stair treads, working around furniture that should’ve been moved first. What you chose—a brad or finish nail, a 16-gauge or lighter 18—suddenly matters when your arms are tired and you’re firing to keep the day moving.

    The real enemy isn’t the wood, it’s the gradual mismatch between what the tool is doing and what the material needs. Every bump of the nosepiece, every unnoticed notch on the depth dial, every hour your grip wears out—all these shift you closer to a missed seat or an ugly split. And the softer the wood, the more those imperfections grow.

    Tool Settings and Fastener Choice: The Errors That Sneak Up

    Jobs rarely get wrecked by big mistakes. Instead, it’s a rolling series of small mismatches that creep in. Nailer settings drift. Pressure jumps five PSI high after a compressor cycle. The fastener feels “right enough” until it isn’t—too thick, too long, or just a hair too aggressive for thin trim or patchy pine.

    Production speed only makes the problem worse. What started as perfect becomes a spatter of repair zones—filled holes and feathered cracks—halfway through the wall before you even notice. And by then, the only options are sanding, patching, or retracing your steps row by row.

    Real-World Example: Where the Weak Link Shows First

    Picture the end of a long day: you’re knocking out baseboards in a cold mudroom, last light slipping through the window, compressor kicking underfoot. The boards start crisp. By the twelfth panel, your grip’s off, the tool’s heavier, and surface resistance flickers in your wrist. You work ahead of your own inspection. It’s not until a hand-sweep at the end that you notice the raised seams—evidence of tiny blowouts that snuck past in the push for speed.

    The fix wasn’t changing brands or models. It was dialing back pressure, swapping a 16-gauge for an 18, rechecking angle and approach, and—just as crucial—building in quick checks. With the right tweaks, repair time drops. The workflow evens out. You keep momentum, because you’re no longer stopping to fix what you just finished.

    Nail Blowout Anatomy: Technique Versus Tool Limits

    Most blowouts trace back to where method and material lose sync. The usual suspects:

    • Nails too thick for the board’s give
    • Fasteners fired too close to the edge or directly along grain lines
    • Depth or pressure cranked too high, sending nails through instead of seating flush

    Working faster only piles on error. Skip one flush check, and the small mistakes multiply. The end result: the last board needs twice the patching as the first.

    Smart Course Corrections in Real Time

    Softwoods are unpredictable. Two pine boards, same batch, can behave differently. The setting that’s perfect on the left wall can blow right through on the right. A quick check every handful of boards—feel the surface, inspect the seat—pays back an hour you’d lose to fixing missed blowouts. Pausing isn’t wasted time when it dodges a bigger fix later.

    Angles, Grain Direction, and How Blowouts Happen Anyway

    Firing straight in is easier, but it’s also how splits happen—especially on edge or with cheap trim. Tipping the tool, even a little, lets the nail ride the grain, not fight it. And when you cross knots or hit denser streaks, watch for deflection—a previously invisible brad can veer off, ruin a face, or pop out the side before you even see it coming. Staying alert, switching your approach, and never relying solely on muscle memory keeps the repair pile down.

    Work tip worth repeating: If your nailer kicks or the trigger feels odd mid-run, don’t just press ahead. Stop and look at what just happened. That’s often all the warning you get before a pattern of splits starts, either from a drifting setting or a subtle change in the material.

    Stopping Patchwork Before It Starts: Routine, Not Perfection

    Most blowouts can be contained—if you spot the pattern fast enough. It’s when tiny failures start multiplying up and down the run that sanding and filler take over your evening. Build small habits into your workflow: drag a palm along each stretch of new trim, rest your eye on the seam, and reset before minor issues get out of hand.

    You’re not aiming for showroom perfection on every board. The real win is steady progress and catching tool drift before it becomes another hour lost to patching. When your settings, nail choice, and angle align with the wood in front of you, you finish faster and with less waste—and the job stands up when someone inevitably runs a finger along that seam months down the line.

    For more work-tested tools and accessories that keep daily fastening, sanding, and cutting on track (even when the job throws you curves), visit Gumboll.

  • Streamlining Small Workspaces: How Fewer Storage Zones Boost Efficiency

    A garage, shed, or crowded backyard corner can look perfectly dialed in—hooks loaded, rails filled, bins lined up like a catalog photo—and still throw you off every time you try to actually get something done. The initial setup lures you in with false confidence: tools have a slot, nothing is underfoot, and best of all, every system claims it’ll flex to your workflow. But that “everything in its place” feeling never lasts long. The real test isn’t on setup day—it’s in the grind of a normal week, when setups get stressed, paths fill up, and routines hit friction you never planned for.

    When “All-in” Storage Grinds Your Workflow

    The impulse is universal—if there’s empty wall or floor, fill it. Mount another rack. Add a rolling cart. Hang another row of hooks. Pretty soon, every foot of space gets drafted into storage duty and things still feel organized—until you’re mid-project and need to return the drill, but the shelf is blocked by a bin you have to move first. Or you go for a screwdriver, only to play a five-second search game because the right one is hidden among tools you use once a year.

    • Paths that started open fill with the awkward drift of carts and bins
    • Grabbing a box of screws means tugging out three other containers first
    • “Flexible” carts set in the perfect spot… until you need to squeeze past them every half-hour

    What looks maximally organized is often maximally inconvenient when you’re in the middle of a normal work loop.

    Access Erodes, Movement Slows

    This breakdown is slow, but unmistakable. Suddenly, returning tools just means choreographing a series of nudges, slides, and shuffles. The rolling cart—supposed to be mobile—camped out for days because it has nowhere else to live. That “handy” back corner? It’s an overflow graveyard—not from laziness, but because there’s no painless way to put anything there, so things pile up instead. Wall hooks become a jumble, their promise of visibility and quick access replaced by a tangle of odd-angle clamps, rarely used hardware, and the things you actually need buried in between.

    For most people, the friction shows up like this:

    • Reshuffling bins one more time, just to finish a small task
    • Walking an awkward loop around a cabinet corner—again—to put away a tool
    • Giving up and leaving things out instead of forcing another round of rearrangement

    It doesn’t feel like outright clutter. Instead, it’s constant interruption—a setup that organizes everything, but never quite lets your routine move freely.

    Clearing the Logjam: Fewer, Focused Zones

    The fix isn’t minimalism for its own sake—it’s finding the minimum number of storage zones that truly support how you use the space. In one real-world trial, three modular shelves and a rolling cart became just two shelves, with the cart pulled in only for big, messy projects.

    • The previously blocked bottom shelf was open and ready to use every day
    • Tool returns stopped feeling like a traffic puzzle
    • That narrow corridor across the floor stayed wholly walkable—even at the week’s end

    This isn’t about stripping down for the optics. It’s about matching the setup to the actual rhythm of grabbing, using, and returning your most-used gear—so resets happen fast, and regular movement stays smooth. The difference is clear: instead of fighting to get things back “in place,” the system falls away. That kind of frictionless reset never shows up in before-and-after snapshots, but it’s instantly felt during a real run of projects.

    Warning Signs: When “Organized” Tips Into Overbuilt

    How can you tell if you’ve crossed the line from plenty to too much? Look for these friction points:

    • You pause, eyeing a shelf, anticipating a shuffle before you can put anything away
    • Your hand automatically moves the same cart—over and over—just to grab basics
    • Corners accumulate half-finished returns because you skipped the return entirely
    • Walkways shrink a little more each cycle, feeling tighter by the week

    When setups start creating these small hurdles, they’re making routines harder, not smoother. The best test isn’t a tidy shelf right after a cleanup, but the speed and ease of a reset at the messiest point between tasks.

    Choosing Wall vs. Floor: How Access Eats Storage Space

    Wall-mounted systems score points in theory—freeing up floor, “putting vertical space to work.” But overload the rail and every retrieval becomes a tangle: you unhook four tools to get the fifth. On the floor, big chests and carts give you instant stowaway spots—but in cramped aisles and busy shops, they swallow up movement space and park themselves right in your way. Leaner wall zones and one truly functional chest routinely beat a landscape of carts and tacked-on bins.

    The Real Cost of “Just in Case” Add-Ons

    We all justify the extra tray (for rare hardware), the bonus bin (for off-season stuff), or the wall hook ready “just in case.” Problem is, those add-ons guarantee fresh clutter. Soon enough, the question isn’t “where did I put that?” but “where can I even put this?” The workspace you perfected in the opening stretch quietly drifts back to blocked aisles, overflow corners, and a permanent game of storage Tetris.

    Resetting Without the Strain: Clarity, Not Just Containment

    What actually works isn’t maximizing storage—it’s minimizing the struggle. The strongest setups make it easy to return, grab, and reset—no matter how many projects cycle through in a week. Over time, friction shrinks: you move without steering carts, dodging corners, or playing musical chairs with bins. The gold standard is almost invisible: your storage disappears into the routine, barely noticed, because it never slows you down.

    Real-World Tip: Build in a Buffer Zone

    Every functional shop—big or small—needs a soft landing for projects in progress, sudden influxes, or stuff you’re not ready to put away yet. Reserve a single open shelf, a dedicated tray, or room for a small cart that isn’t always active—just fills up when needed. That buffer becomes controlled chaos, keeping your primary zones unblocked and your daily routine flowing. No more endless reshuffling; just one sweep and you’re back to clear movement.

    “Perfect” Isn’t the Point: Function Outlasts First Impressions

    The setup that wins isn’t the one that looks flawless in a photo. After days of busy, repetitive use, only the systems tuned to real work patterns survive without drifting into chaos. The difference isn’t in how packed your storage looks—but in how quickly you can reclaim order and keep tools in motion. In the end, an organized space shouldn’t get in the way. It should all but disappear behind the rhythm of your routine—leaving you free to get things done, again and again, without restarting from scratch.

    Visit StackNest for practical storage systems that make real spaces easier to use.

  • Choosing Between Shelf Dividers and Storage Bins for Closet Order

    Nothing drags down a bedroom routine faster than stumbling through your own closet. A row of sweaters sliding into chaos, stacks collapsing by Wednesday, bins packed with who-knows-what—it’s these daily micro-frustrations that quietly decide whether your closet is a real help or a hidden stress. Sure, shelf dividers and storage bins both promise an “organized” look on day one. But the real proof comes after seven days of rushed mornings, reused jeans, and laundry piles that never quite reset the same way twice. This isn’t just about tidiness—it’s how your closet holds up to constant, unpredictable use.

    Closet Order That Survives: Why Setup Is Everything

    At first, any shelf can look tidy. But after a few hectic mornings—when you’re reaching past one shirt for another or tugging at the stack for your go-to sweater—neat lines slide and mixes creep in. Shelf dividers and bins both claim to bring order, yet each brings its own headaches. Their weak spots don’t show until you’re actually living with the system, not just admiring it post-organize.

    Shelf dividers promise clarity: jeans start here, knits belong there, dress shirts have their own turf. But as soon as someone grabs from the middle or shoves in a fresh pile without care, those zones blur. Stacks flatten or tip sideways, the boundary fades, and suddenly you’re hunting for socks in a slope of T-shirts. Dividers slow down the chaos, but unless you refold like a machine, stacks will stray.

    Bins contain, but at a price. They hide mess out of sight—for a while. Accessories, keepsakes, and off-season hats stay put, but finding one thing means digging through all of it. Bins absorb clutter, yet make it easy to lose track of what’s inside. Each hurried search upends yesterday’s careful sorting, and soon you’re stacking odds and ends on top “just for now.”

    Where Closets Fall Apart: Daily Friction Points

    Shelf Dividers: The Lean, the Drift, the Disappearing Zones

    Picture laundry day. Stacks return, each within its divider’s slot. By midweek, reality hits: you’re in a hurry, reaching for something at the bottom. Stacks shift, sleeves sneak into neighboring piles, and by the time you need that favorite top, the divider’s just marking where order once was. When shelves are too crowded, every tug threatens the whole row—dividers become little more than speed bumps.

    Bins: Where “Sorted” Turns Into “Somewhere in There”

    Move up a shelf—neat, matching bins look like control. But after a few days, the search begins: gloves, scarves, belts, memorabilia, all in one bin. Pulling out what you need means upending everything above it. Bins that once created calm now become landfills for whatever doesn’t have a home. If you’re forced to unstack bins or rearrange two just to access the third, the process starts to feel less like storing and more like shuffling.

    The danger? Overflow migrates fast—when it’s easier to dump than to dig, the “temporary” piles grow on dressers, floors, any surface nearby until your closet’s chaos seeps into the whole room.

    The Core Tradeoff: Access Versus Containment

    What do you need more: quick visibility or tight control? Shelf dividers are perfect for clothing you use daily and want to see at a glance—think shirts or jeans you grab from the front. When you only pick from the top, dividers usually hold the system together. But with slippery knits or bulging sweatshirts, stacks never keep their shape for long, and every reach disrupts the equilibrium.

    Bins, on the other hand, conquer sprawl—nothing falls off the shelf and the mess stays disguised. But every time you need something specific, you’re slowing yourself down: pull out the bin, rummage, repack, and play Tetris to fit everything back in. The more a bin is used, the more its contents tangle. Suddenly “organized” just means “out of sight.”

    The real solution is smarter mixing: use dividers for high-frequency clothing you reach for most, with a little breathing room between each section. Turn to bins for the items you pull less often—off-season gear, mementos, spare accessories—and keep those bins higher up or out of the main traffic lane. This way, essentials remain open and easy, while only the real “clutter catchers” get sealed away.

    Storage in Action: A Week Inside Your Closet

    Morning Rush: The Hidden Costs of “Almost Organized”

    Rushed weekday mornings have no patience for a fragile system. You’re reaching for a specific shirt—blocked by a leaning heap. Forced to restack, you mutter about whoever last shoved things back carelessly. Within days, what started as “work shirts here, weekend shirts there” devolves into a single mess stuffed wherever space appears. Instead of saving time, the dividers now mean an extra step to access anything buried in the back.

    Laundry Day: The Make-or-Break Reset

    Come laundry night, the trap of mystery bins is clear. Bins labeled “accessories” turn out to be a medley: gloves, spare hangers, a mismatched sock, that winter hat you forgot you owned. The quick reset you wanted becomes half an hour of sorting—and a temptation to just toss everything back and hope for the best, knowing you’ll dig for it later anyway.

    Small Shifts, Real Results: How to Keep Order Alive

    Build in slack—not just separation. Give two inches (or more) between stacks under each divider. Crowding kills organization fast; just a little space lets you grab what you need without wrecking the row.

    Keep daily clothing in open territory. Stash bins up high or in deeper shelves, but let the items you use all the time stay visible and in reach. Label bins, or pick clear ones, so you know what’s lost inside before you dig.

    Never treat bins and dividers as rivals—combine them on purpose. Dividers corral your everyday wear, while bins capture what you only touch occasionally. Always leave a gap between the two systems on each shelf. The boundary is what makes category separation stick, and what saves you from “re-sorting” the same things week after week.

    What True Closet Organization Actually Looks Like

    Anyone can make a closet look neat for a day. But true progress shows itself in the messy moments: when you grab what you need without shifting everything; when resetting after laundry is a five-minute job, not an hour-long slog; when dresser tops and bedroom corners stop collecting the items your closet should handle. The real victory isn’t how your closet photographs, but how much smoother your daily routine feels.

    No system fits everyone the same. The right balance of dividers and bins depends on your habits, your space, and whether you want to spend your evenings organizing or actually living. If you find yourself reshuffling the same stacks, or fishing through bins for things you can’t see, don’t be afraid to tweak—sometimes a little more space, or one bin swapped for an open slot, is the difference between ongoing frustration and a closet that finally works for you.

    Shop ClosetWorks for practical storage solutions that fit your daily routines.