Category: Tools & Workshop

  • Why Storage Systems Fail Over Time and How to Keep Them Functional

    The first day with a new storage setup—whether it’s in the garage, garden, or workshop—always feels like a minor victory. Tools have homes. The floor is finally clear. You can see the workbench and imagine move-anywhere productivity. But the real verdict doesn’t come on setup day. It arrives in the churn of real use: when you’re pushing through errands, bouncing between tasks, and suddenly that “perfect system” starts putting bumps in your path. What started as neat and promising can quickly turn into an obstacle course, crowding your routine where it should step aside.

    How Storage Systems Start Working Against You

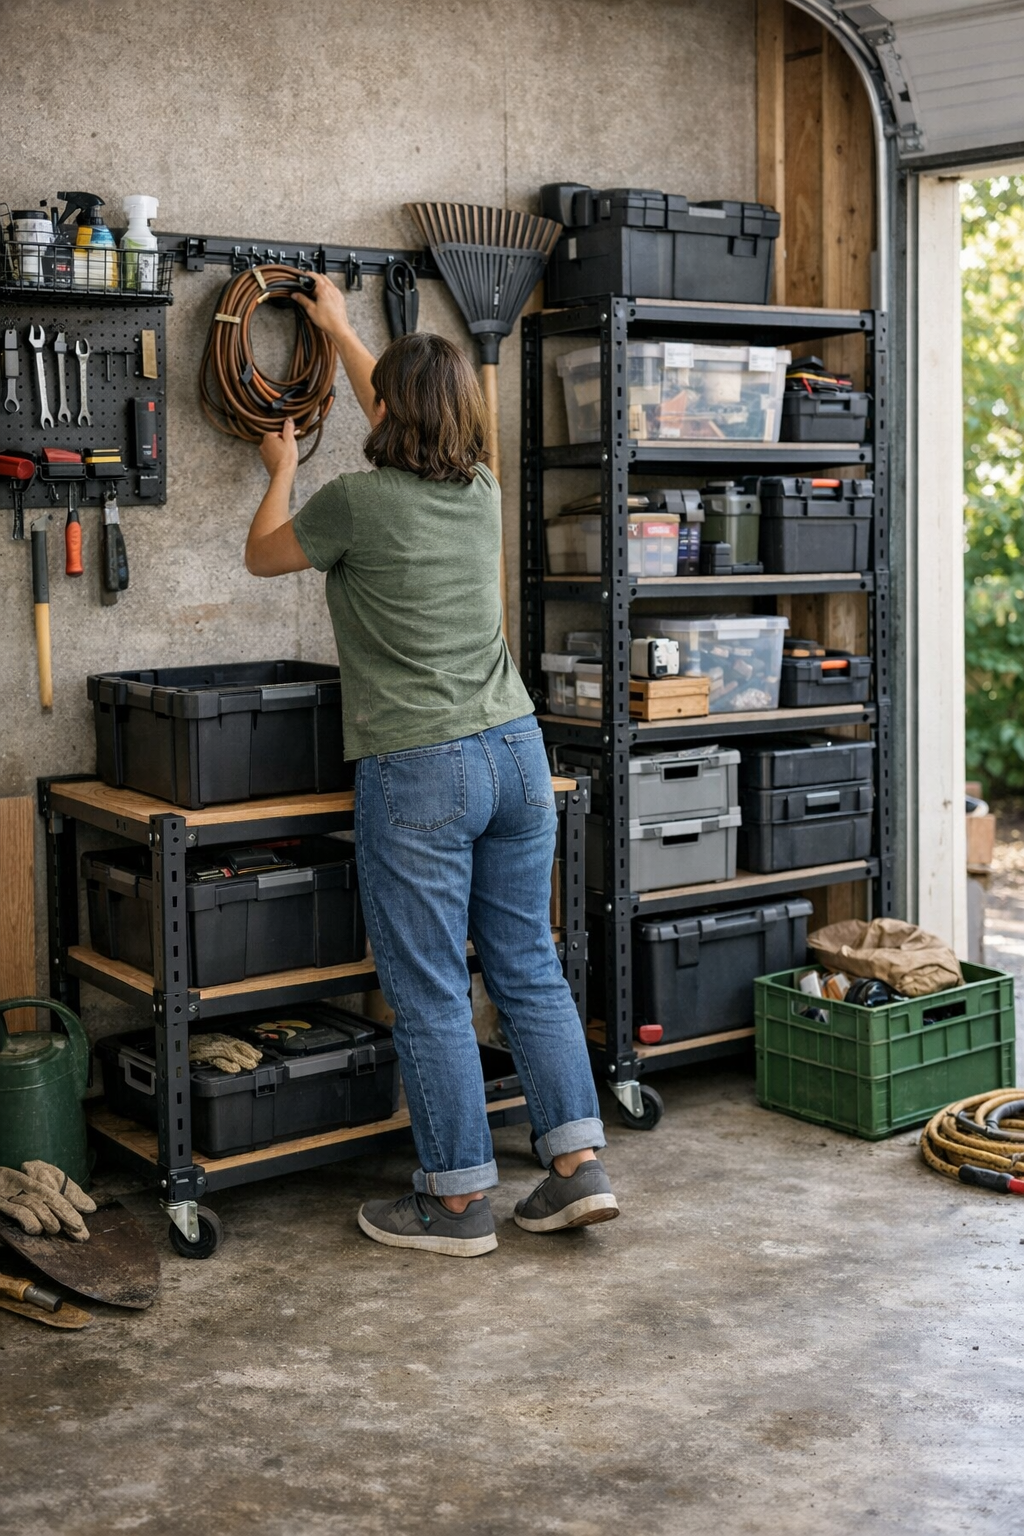
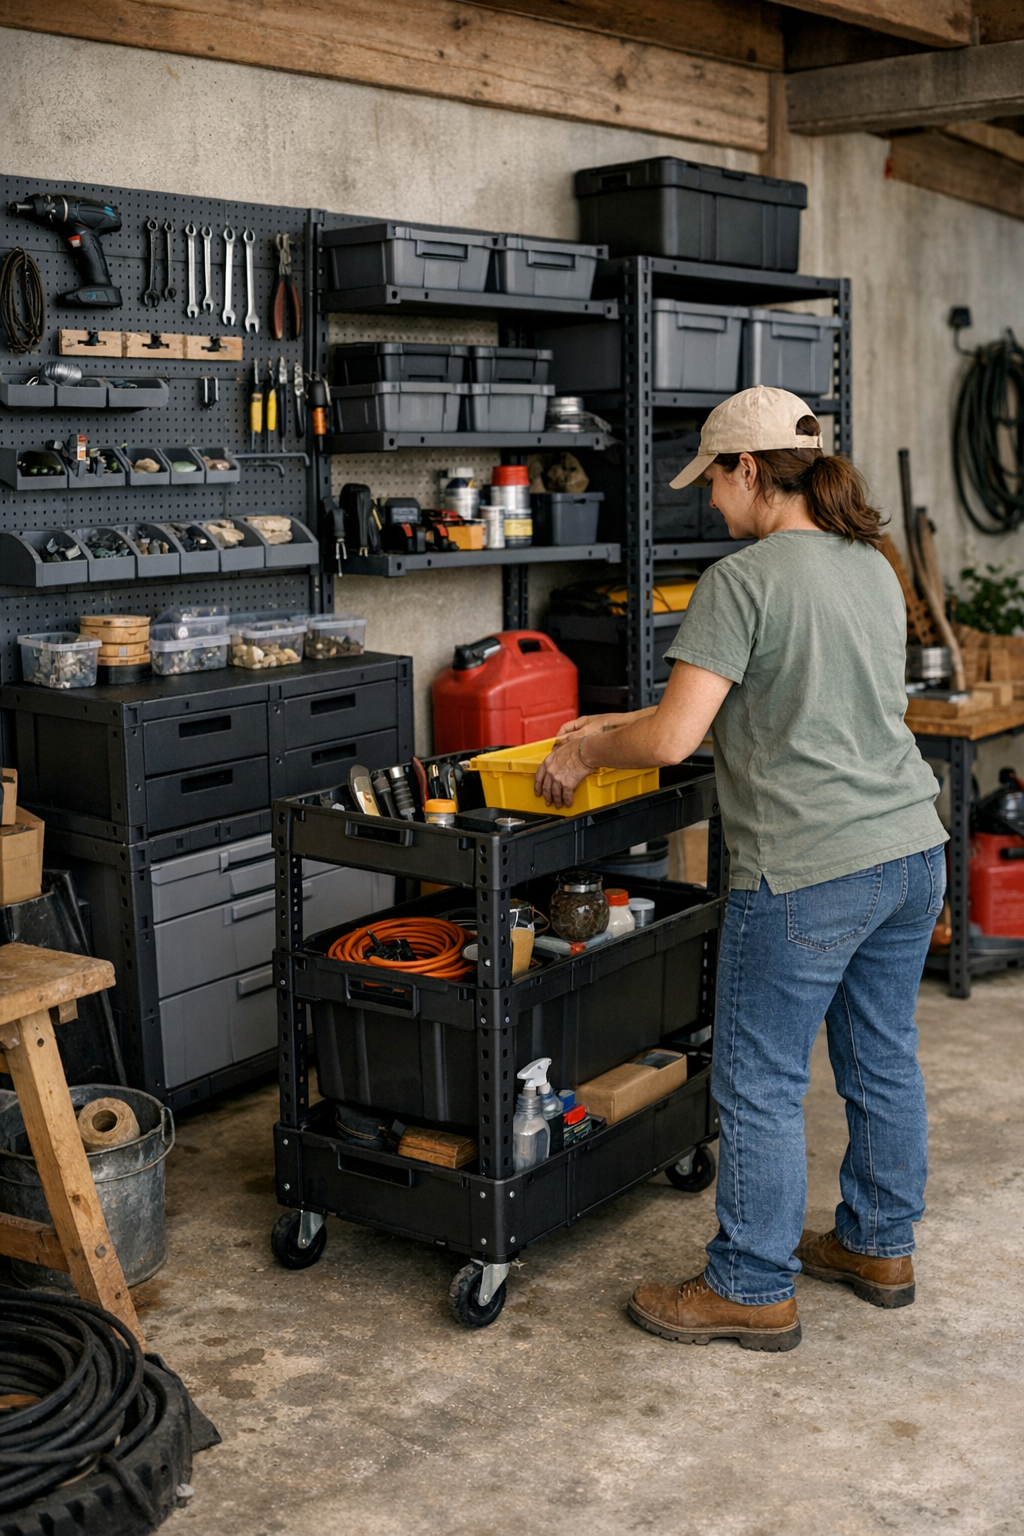
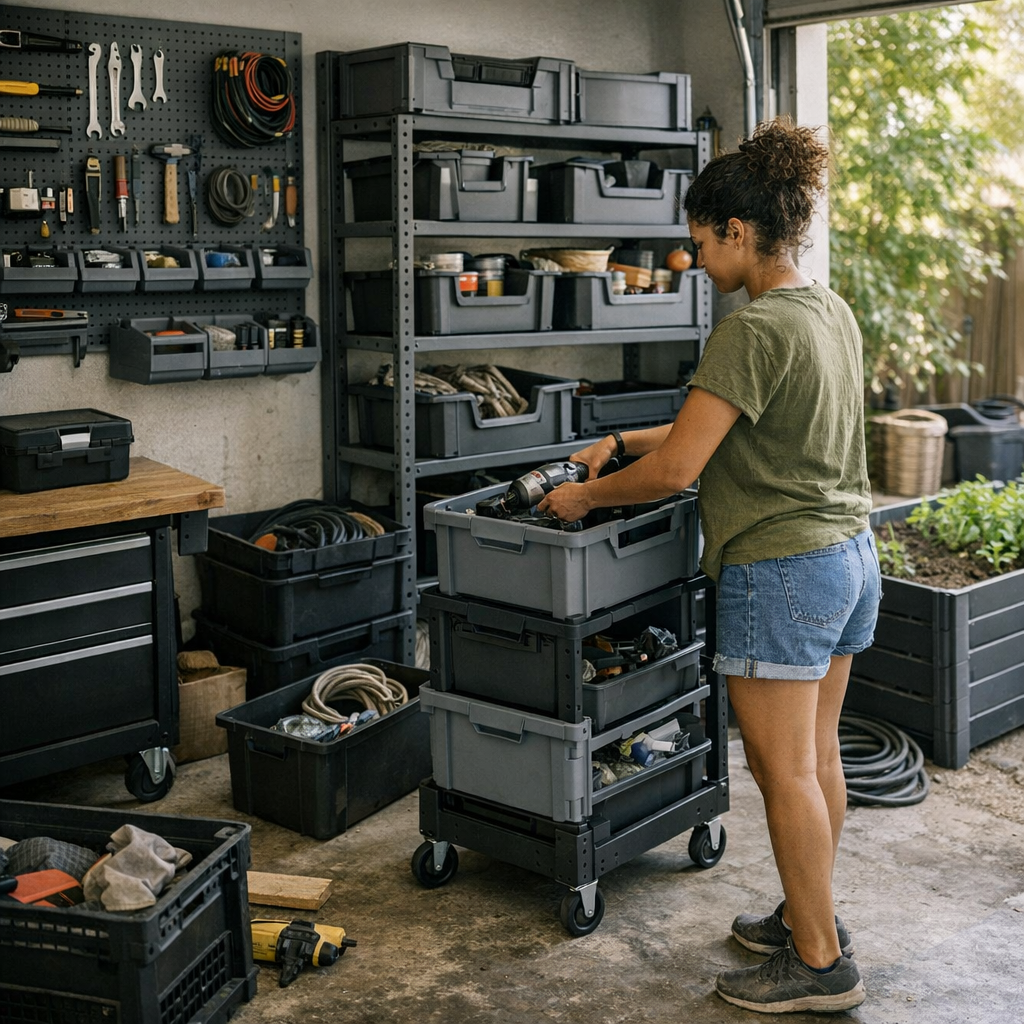
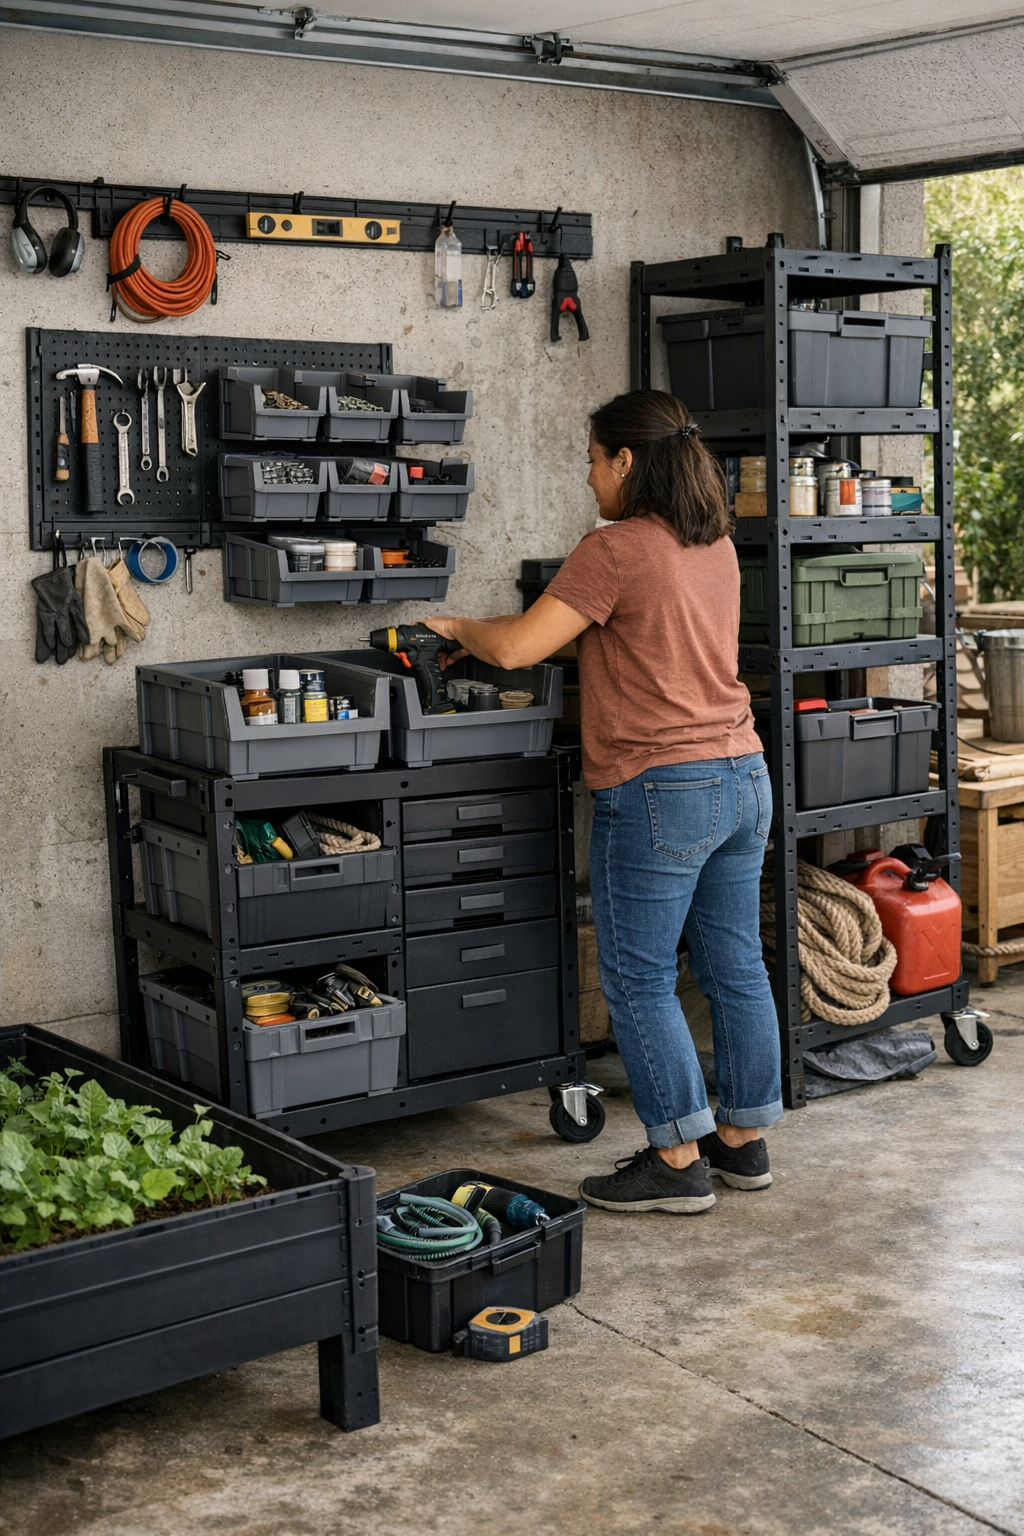
    Those wall racks, rolling carts, and modular bins promise to bring order. And at first, the improvement is obvious—you walk in, no piles underfoot, everything slotted in place. But as the calendar fills with half-finished projects and new supplies, reality sets in. That rolling cart you loved on day one? Now it’s blocking the aisle every time you need to drag the mower out or bring in a sack of soil. Wall racks show off your collection, but your most-used tools end up just out of reach or buried behind a row of things you use once a season.

    Friction starts small, then builds: a pair of bins blocking the drill for the third day in a row, a cart wedged in the exact spot you want to turn, a corner that never quite empties out. At first, it’s a few extra seconds. But stack these up—five nudges, three detours, the daily search for snips or a box of fasteners—and your routine slows. The “organized” area gradually fills with tools left out, overflow zones, and a creeping sense that the storage solution is just reshuffling the mess at a different angle.

    Where Storage Systems Fail the Day-to-Day

    The flaws don’t show during a careful Sunday setup—they emerge after weeks of improvising. Imagine grabbing a handful of screws in the middle of a busy Saturday, only to swerve around the same rolling cart that keeps popping back into the path. Or dropping a wrench onto a countertop, then realizing you need to unstack two bins just to put it away again. The little hassles multiply until you find yourself leaving tools out—because returning them feels like another chore.

    • Pulling three stacked bins apart just to fish out the one thing you always need.
    • Pushing the cart aside for the fifth time that morning, just to squeeze by.
    • Parking tools on a half-cleared bench, promising yourself you’ll sort them “later.”

    Most setups don’t collapse in a single dramatic event. Instead, the routine grinds down. The area built to help you work ends up breaking your stride—and all the neatness counts for little if you can’t move, grab, and put back tools in real time.

    Why “Tidy” Isn’t Always “Efficient”

    Looking organized is not the same as working efficiently. The clean rows of bins might impress at a glance, but if every trip means unstacking and tucking away awkwardly, you’re paying with time. Wall racks can clear the floor but make you stretch, reach, or shuffle sideways each time you need the gear you reach for daily.

    Consider the deep bin stack: it looks space-savvy—until you’re lifting three containers to dig out a socket set from the back. By the end of the project, an overflow pile appears “just for now”—right in the walking lane. A week later, the corner that should funnel supplies becomes a dead spot, holding whatever didn’t get put away because the process was just a bit too much hassle. Slowly, resets get ignored and the surface meant for working is reclaimed by clutter.

    Shifting from Storage to Movement

    The fix isn’t always more storage. Sometimes it’s subtraction—removing what gets in your way. After months of repeating the same detour, clearing out the overstacked bins and relocating the bulky cart changed the entire flow. Suddenly, the shortest route wasn’t blocked. Rather than three sidesteps to get across the space, it was a direct walk. The friction points—those subtle pauses and hesitations—vanished, and tools returned to their spots because it only took a second, not a reshuffle.

    Watch for repeating roadblocks: If you’re always shifting the same container or inching past the cart that almost fits, those are signals. The right move might be clearing that one high-traffic zone or reassigning where “overflow” lands. Sometimes moving a single choke point is enough to reset the area—without bringing in another organizer or gadget.

    Pinpointing Where Things Really Go Wrong

    Wall-Mounted Racks: Convenience or Compromise?

    Nothing beats cleared floor space on paper, but reality bites when racks get overloaded or hung above a comfortable reach. Instead of a grab-and-go, you’re balancing on tiptoes, reaching behind objects—or just leaving the tool on the bench for next time. Efficiency gives way to workaround: the “temporary” pile, the forgotten pair of shears, the bags that start nesting on the nearest chest instead of going up on the rack.

    Bin Systems and the Dead Corner Effect

    Storing bins side by side or front to back can look efficient, until every use means shuffling containers. Over time, the extra steps (and resistance) add up, and those “organized” bins become magnets for small piles—items stacked on top or just dropped nearby because returning them means disrupting the configuration. Dead corners aren’t truly empty; they’re the places that absorb whatever doesn’t have an easy return path. The result: slow but steady creep of clutter into what used to be clear space.

    Making Storage Work for Your Routine

    The best storage setup doesn’t just look tidy—it makes every movement smoother. When you can grab, use, and return something without sidestepping, restacking, or hesitating, the system works for you, not against you. True improvement is about reducing decisions and effort in the reset, not maximizing how much you can jam onto a rack.

    Every gadget promises a cleaner workspace, but only the system that fits your daily routine actually keeps order in play. Look where your flow is getting interrupted—those nudge points, chokepoints, and clutter-friendly corners. Don’t hesitate to tear up what isn’t working: shift containers, clear out the cart, and reclaim direct paths. The goal isn’t perfection; it’s practical motion. The best storage is the setup you hardly notice—because resetting the area is so easy, you do it without thinking, not just on clean-up day.

    Find modular systems, rolling carts, wall setups, and practical tools for working spaces at StackNest.


  • Why Stylish Storage Often Complicates Daily Access and Organization

    The perfectly arranged closet always looks great—right up until real life moves back in. All those matching bins and color-coordinated baskets promise easy order, but within days, the cracks appear. Shoes spill into the middle, gloves vanish into the wrong bin, and the morning rush leaves folded stacks crumpled and corners crowded. The show-home setup quickly gives way to the reality of daily routines: quick changes, tired evenings, unpredictable schedules. Suddenly the gap between “looks organized” and “actually works” is impossible to miss.

    When Style Adds Steps—and Friction

    At first, identical containers and perfect symmetry trick you into feeling in control. The neatness feels self-sustaining. But those matching lids and deep baskets rarely hold up to repeated use. Tall bins block your view, labels are forgotten, and opaque baskets mean mystery contents. Every time you reach for a charger or scarf, you’re shuffling containers—lifting, sliding, guessing. The system’s style becomes the source of its drag.

    The extra steps pile up quietly. By midweek, you’re reaching behind stacks to grab one thing, moving three baskets to find another, and reshuffling each time you put something back. Gloves land in the shoe bin. Chargers spill out over hats. Lids go missing—then never return. That “maintainable” closet now demands your attention every night, fighting your routines instead of supporting them.

    Where Appearance Beats Access: The Real Tradeoffs

    Picture a shared hallway closet lined up with matching lidded cubes. The initial effect is serene—everything straight, surfaces clear. But life in a busy home wears that system down fast. The moment you’re running late, bins get tugged out but not returned. Lids disappear. The most-used things migrate to the only open basket in front, while the rest become a jumble of tangled hats, tangled cords, and mystery items buried in the stacks.

    The daily rhythm exposes the system’s blind spot: categories blend, stacks topple, and shelf edges become drop zones “just for now.” Finding earbuds means upturning three bins. Grabbing gloves means reshuffling the row. Instead of curbing clutter, the closet hides it in plain sight—or worse, scatters it across the house as everyone leaves things where they land.

    The Real Weight of Over-Styled Storage

    Why does a closet that once looked effortless suddenly feel like work? Because you’re managing the setup, not using it. Each action—lifting a bin to see what’s behind, stacking baskets to reach something below, fishing through an unlabeled container—adds friction. Over time, what was supposed to simplify your life turns into a puzzle you solve on repeat.

    And as routines overlap—packages coming in, sports gear coming out, seasons changing—the categories lose shape. Winter gear slides into summer bins, everyday items get shuffled. The once-tidy arrangement becomes a daily game of stacking and re-sorting, just to get to the next morning without a pile-up.

    Spotting Storage Fatigue

    The warning signs are always the same: bins left out, piles forming at the edges, stuff “temporarily” stashed anywhere it fits. If opening the closet means shuffling three things just to grab one, or if you start leaving things out because putting them away is a hassle, your storage isn’t working for you—it’s working against you.

    What Happens When Storage Fits Your Routine

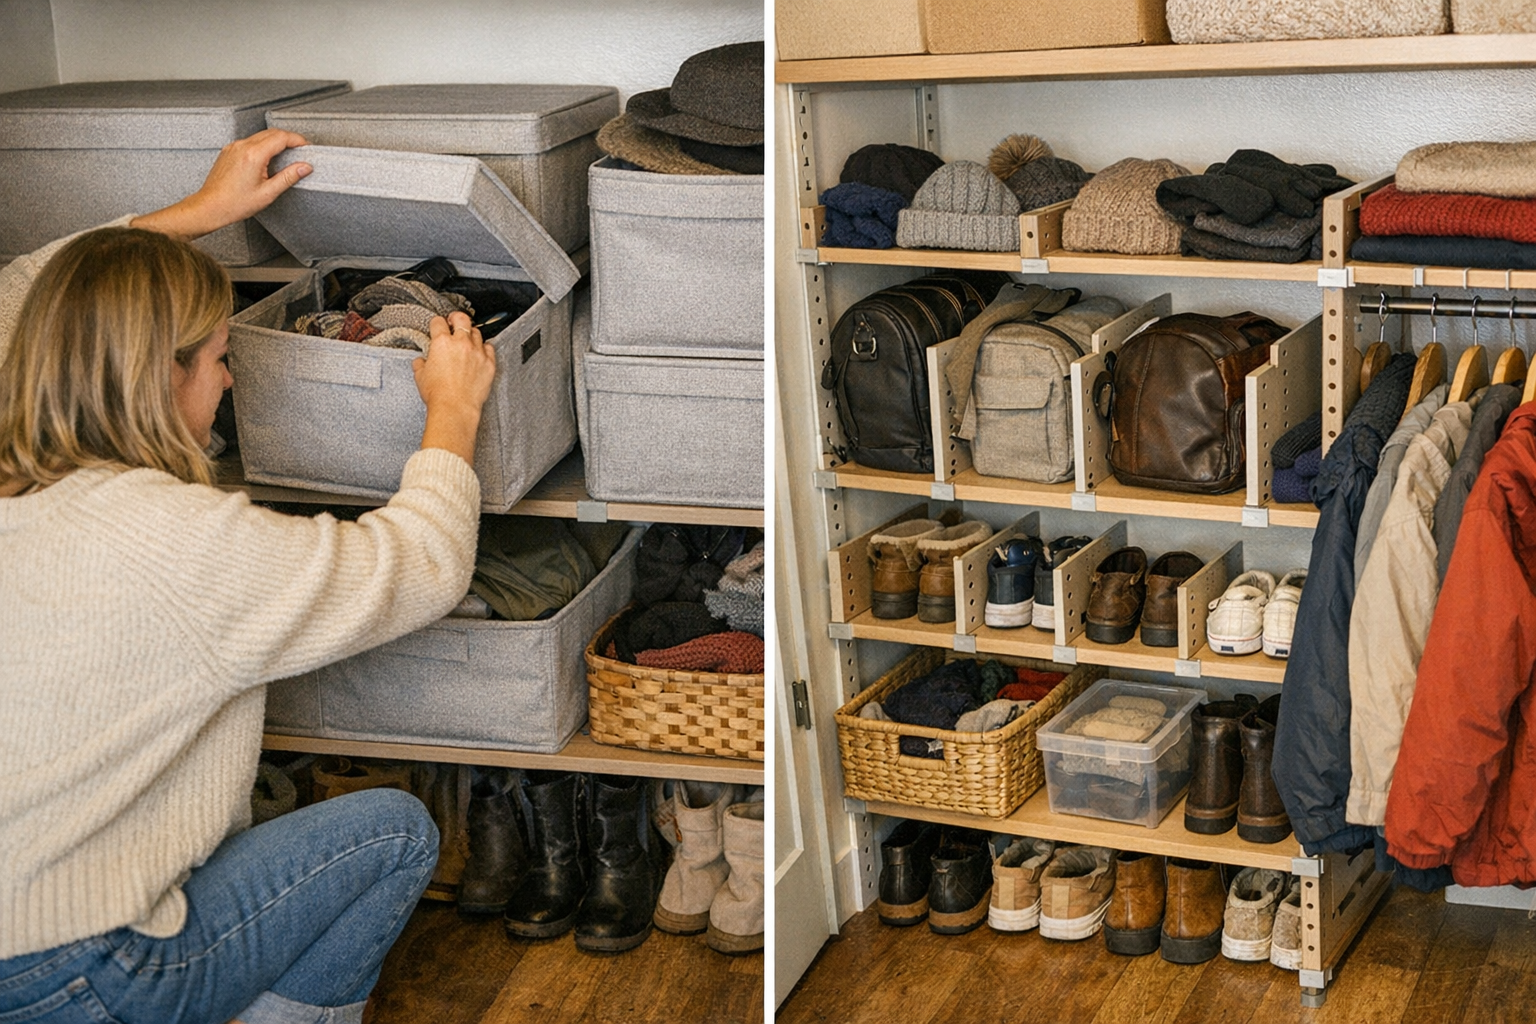
    Real solutions don’t come from adding more containers. The fix is aligning your setup with the way you actually use your space. In my own hallway closet, the breakthrough came from swapping a row of deep matching baskets for a mix of small open bins and a waist-high open shelf. Suddenly, there were no more hidden piles or balancing acts—shoes landed fast, grab-and-go items like hats and gloves had a simple drop zone, and all the high-use things were visible and within arm’s reach. The open shelf’s front edge, once a landing zone for clutter, finally stayed clear all week—because putting things away stopped feeling like extra effort.

    Smart storage setups reinforce routines instead of resisting them: when you can see what’s missing at a glance, you’re less likely to let clutter build. When putting something back takes one step, resets are faster by default. The system becomes self-sustaining because it’s built for how you live, not just how you want it to look.

    Designing Storage That Holds Up

    No closet or mudroom stays perfectly neat forever. But effective storage serves daily rhythms and fights back against clutter creep. Instead of fixating on matching bins and symmetry, use containers and shelves that mirror real-life categories—and keep your most-used items between knee and shoulder height. Break up deep shelves with open bins for things you reach for daily, and keep sealed baskets for out-of-season or rarely-used items. At least one open edge lets you spot missing or misplaced things before chaos takes over.

    Practical Tweaks That Make a Difference

    • Rethink shelf heights: Everyday grab-and-go items should land at “easy reach” level. If you’re crouching or reaching overhead for basics, swap the layout.
    • Watch for “bin overload”: If containers are multiplying—or migrating across shelves—ask if you really need a bin for everything. Sometimes an open shelf beats another box.
    • Audit your reset speed: If clearing clutter takes more than a minute, track down the storage step that slows you down. Strip out anything that creates extra work just to put things back.

    A Storage Setup Built for Real Life

    You don’t need a full overhaul—just honest tweaks where your routines meet resistance. The most effective changes rarely look drastic, but they pay off every day: less reshuffling, fewer mystery piles, and a closet that keeps its categories clear. Over time, your space feels lighter—not just because the surface looks right, but because it quietly supports the way you actually live. Everyone finds what they need, putting things away takes seconds, and sudden pileups become a distant memory.

    Find practical closet systems, shelves, and everyday storage options at ClosetWorks.

  • Why Consistent Anchor Depth Measurement Matters for Hammer Drill Accuracy

    Depth control doesn’t get respect—until it derails your whole install. If you’ve actually spent hours on anchor holes—drilling for racks, brackets, or overhead hangers—you know how quickly a fast, tidy project slips into a haze of misfires and slowdowns. At first, every hole feels smooth. But after a dozen plunges, cement dust grinds into your gloves, sharp tape marks fade out, and you’re second-guessing every bit of progress. Suddenly the anchors sit proud, don’t seat flush, or bite too shallow. Now you’re reaching for a punch or chisel, halting that early momentum, and muttering about “good enough.” What should be a half-hour run turns into wasted energy, patch-ups, and frustration that nobody budgeted for.

    The Real-World Mess of Measuring Anchor Depth

    Whether you’re mounting heavy brackets in a damp basement or securing a pipe run in a grimy garage, every anchor has to land just right. That should be routine, but on real jobsites, the margin shrinks fast. Shop dust turns that crisp white tape into an unreadable smear before you’re even halfway. The drill’s built-in depth stop, if you bother setting it, can loosen from vibration or just get ignored in a rush. Even a collar, if set in a hurry, has a way of drifting after a few cycles. Every workaround has a weak spot, and small lapses quietly stack up until one “quick” job becomes an afternoon of fixing what the tape or stops missed.

    When Tape Fails—and Morning Shortcuts Bite Back

    Slapping a tape flag on your bit is fine for a handful of holes—but under real pressure, tape slides, gets obscured by cement, or peels off mid-run. By the fifth or sixth hole, you’re squinting at fingerprints and guessing depth by muscle memory. If your hands are slick or the lighting bad, good luck actually seeing any marker. There’s no consistency, and suddenly you’re shoving anchors and hoping they’ll seat. Of course, you hit one too shallow—so now you’re cleaning, prying, maybe running a new hole, and losing flow as your arms and patience give out.

    Collars and Stops: Feel Without the Guesswork

    Swap tape for a true depth collar and it’s a different job. The second you feel that collar touch concrete, you know you’ve hit target—no peering through dust, no second-guessing. It’s tactile, not visual. You can check depth by feel, even if visibility is shot. Proper stops or collars don’t win awards for perfection. They win by making every hole routine: line it up, drill till you hit resistance, move on without hesitation. The payoff is measured in smooth installs and projects that finish on pace with the first anchor every time.

    Scenes the Shop Floor Knows Too Well

    The difference shows up when you’re working at awkward angles or with your head pressed beneath a shelf, nose full of dust. Try keeping a tape mark visible when drilling overhead—concrete snow falls, your marker is gone in seconds, and now you’re guessing. Or drive anchors next to a web of old patched holes; you can’t afford a slip, but you also can’t clearly see your bit. The “quick fix” holes become repeat offenders—anchors end up proud, you reach for a hammer, and you know you’ll be explaining it later.

    This is where a fixed collar saves time and nerves. You don’t have to see the mark. The bit stops where it should, no drama, no extra cleanup. Less fuss with tools, less chance of scarring the wall forcing in shallow anchors, and fewer do-overs. It’s these imperfect moments—poor visibility, awkward spaces, and fatigue—where real stops or collars quietly pull their weight.

    Tool Setup: The Small Habit That Pays All Day

    Setup is seconds; mistakes burn hours. Set up with a depth collar—just a minute with a caliper or even a tape measure. Dial it in a few millimeters deeper than the anchor to clear dust. That’s all it takes. Set tight, that collar gives you repeatable, reliable hits, no matter how many anchors or how tired you get. The payoff isn’t theoretical: it’s bracket lines that stay level, fewer anchors that have to be hammered, and no more “almost” flush fastenings that catch a critical eye at the walkthrough.

    Stick with tape and, by hole number ten, accuracy fades. Each misstep demands a cleanup pause, sometimes fresh bits, sometimes redrilling. What felt streamlined at 9 am becomes a slow-motion loop of checking and fixing, slicing up both energy and jobsite morale. In the long run, control saves more than it costs.

    Background Habits for Depth Consistency

    • Set collars with actual measurements. Even a quick check with a caliper or tape beats a rough guess every time.
    • Drill a little deeper than anchor length (4-6 mm is usually safe). That extra depth catches stray dust and lets anchors truly sit flush.
    • Re-tighten collars every dozen holes. Hammer drills vibrate things loose—don’t assume nothing’s shifted.
    • Change out dull bits fast. Rounded tips throw off both speed and control, dragging your workflow to a crawl.

    The Win: Smoother Installs, Fewer “Do-Overs”

    The best installers aren’t just quick—they’re steady. Reliable depth means reliable anchoring, and it shows up in cleaner work and jobs that finish right the first time. You don’t have to chase perfection. Aim for habits that limit surprises: a simple collar, a minute’s setup, and fewer corrections down the line. Less wasted motion. Less backtracking. Less aggravation when conditions are rough and the work just won’t wait.

    Shop tools and accessories built for real job site reliability at Gumboll.

  • Why Wall-Mounted Storage Outperforms Floor Units in Busy Workspaces

    The real mark of an organized garage or workshop isn’t how it looks after a deep clean—it’s whether you can move, grab, and reset gear easily, day after day. The frustration comes not from a pile of clutter, but from a setup that turns every reset into a minor obstacle course. For all the talk of order, a space that seems “organized” on Saturday morning can quietly unravel by Wednesday, especially when floor units trap movement and collect overflow. In contrast, wall-mounted storage supports your routines—keeping paths clear and resets near effortless, no matter how many projects run back-to-back.

    Beyond the First Clean-Up: Where Friction Actually Starts

    That first hour after a big reorganization—rows of floor bins lined up, racks standing tall—feels like a transformation. Tools are sorted, everything visible, the floor reclaimed. But the testing ground isn’t the “after” photo. It’s what happens when you’re coming in with muddy boots one day and switching out garden gear the next. Racks inch into walkways. Bins scoot closer to doorframes. Suddenly, the space that felt wide open becomes a series of small detours and awkward hesitations.

    By the second or third reset, the cracks really show. Shoes pause at the edge of a shelving unit that’s crept forward, or you hesitate before rolling a cart that’s blocking the main lane—again. Resets go from a sweep of the hand to a multi-step dance: move this, shift that, just to reclaim the movement you thought you’d built in.

    The Hidden Problem with Floor-Based Storage: Movement Interruptions

    Floor units organize your gear—but claim your space in the process. There’s an initial calm: modular bins, racks, and carts suggest flexibility. Then daily reality intrudes. You haul out a lawn mower, return with a half-used tool bag, or grab a cleaning bucket in a hurry. A bin doesn’t make it back perfectly flush. A cart is left halfway between bench and exit, subtly wedged where you need to walk.

    Soon, what once held overflow becomes a magnet for it. A shovel is nudged to the wrong side of a freestanding shelf and stays there all week. Gear piles up against the “front row.” High-use zones morph into clutter traps, while corners sit empty or awkwardly unused, since floor storage is hard to move once overflow collects.

    Real Example: When Floor Overflow Slows Everything

    Picture the typical weekend reset. Hoses dry out by the wall, boots come off in a hurry, an overstuffed bin lands where you normally turn the cart. By Wednesday, you need to slide that bin aside just to carry groceries through, then shove a project crate back in line. The five-minute tidy becomes a multi-step routine: move-bin, pick-up, restore-path, repeat. The result isn’t chaos, but a slowing drag—more shuffling, less progress, every single week.

    Wall-Mounted Rails: Preserving the Flow of a Working Space

    A simple rail along the studs, a tidy bank of wall hooks, or a mounted rack seems almost insignificant at setup. But the shift in daily use is profound. No more stepping around bins or finding the cart’s in your way again. The floor stays open, with clear lanes through every high-traffic area—even on the busiest days.

    Returning a broom or tote is a direct movement, not a puzzle. The “return path” never gets choked with overflow, because everything parks above ground zero. The result: access stays quick, resets shrink back to seconds, and the garage feels ready for actual work—not just for show.

    Resetting Doesn’t Have to Get Harder—If the Floor Isn’t in Play

    Take away just two freestanding bins and you feel it instantly: straight-line movement between entry and workbench, no more weave-and-dodge through awkward footprints. Overflow tucks onto the wall or hangs in dead vertical space that never got used before. Resetting stops being a chore because there’s nothing left to drag, stack, or shuffle first. The area simply works, over and over, without a hitch.

    The True Cost of “Making Room” Again and Again

    Any floor footprint—no matter how efficient on paper—becomes a bottleneck with regular use. Quiet Tuesday? No problem. Three weekends in? The rack near the workbench now demands a sidestep every time you cross the room. Routine movement slows to a shuffle. Tools get left out, not from laziness, but because the path back is cluttered.

    This slow build-up—the quiet reshuffling, the subtle blockades—creates a hidden tax on your time and willingness to put things back. Before you know it, tasks get put off, not because you don’t want to do them, but because you’ve learned to expect a micro-hassle just to find a clear route.

    Designing for Routine: Why Floor Space Matters Most

    Order should support movement—not interrupt it. The setups that actually last aren’t just about maximizing storage, but about minimizing interference with the everyday flow. Wall-mounted racks don’t fight with carts, tubs, or boots—they slip seamlessly into the backdrop. There’s rarely a need to “make room,” and resets keep their original speed even as the area gets busy.

    Practical Tip: Protect Your Return Path First

    When rethinking your space, don’t just count storage slots—walk the actual route from entry to bench to door. Any item that repeatedly needs shifting—a cart, a bin, that “temporary” rack—is a candidate for the wall or for removal. Sometimes eliminating a single floor piece opens up an entire workflow and stops overflow before it ever starts.

    How Wall vs. Floor Storage Really Performs

    Why do wall-mounted rails keep things simple? It’s all about keeping the reset direct: grab, use, return—in one motion, with nothing to step around. The floor stays clear for work, and overflow never gathers in the main lane, so daily order is easy to maintain.

    Where do floor systems fall short? Anything that sits where you walk will become a landing spot for stray gear, stray bags, and the unfinished business of daily projects. More steps, more shifting—and more frustration with every round of cleanup.

    What are the pitfalls of wall setups? Overcrowd a wall or misplace the hooks, and you end up with dead corners or a jumble of tools that don’t really see use. However, unlike floor clutter, these issues don’t block movement—they just waste potential, which is a much easier fix.

    Reset Routines That Make Sense After Real Use

    The best setups don’t just look good on reset day—they stay easy for months of actual, messy use. Wall-mounted storage keeps lanes open and routines intact, so you spend less time reshuffling and more time actually working. Clutter has nowhere to collect and it’s clear what belongs where—so there’s never a question of “where to put this” when you’re done.

    If you want storage that works with your movement, not against it, start with the return path and keep your floor as free as possible. See storage options built for real-world resets at StackNest.

  • Why Setting Boundaries Transforms Closet Stacking Into Lasting Order

    The illusion of a tamed closet shelf rarely survives the first few busy days. Stacks of folded shirts line up neatly and bins squeeze edge-to-edge, promising order. But fast-forward to Wednesday morning: you’re digging through piles, steadying a collapsing stack with your elbow, bracing a bin that’s wandered halfway across the shelf. The surface still looks “organized,” but the friction is building—and not just because you have too many clothes.

    Why “Stacked and Sorted” Fails by Midweek

    The first setup always feels promising: folded items arranged like a display, containers right to the border, everything giving off that ‘after’ photo energy. Reality arrives the moment you need your favorite sweater from three layers down—or when you try to return a t-shirt to a category that’s already started to blur. Each attempt to grab, return, or reshuffle sends corners drooping and stacks slumping. What started as order quickly dissolves into a juggling act: pull one thing, hold up another, watch the overflow spill into whatever space is open. Categories you swore you’d keep separate slide together, and a shelf intended for “sweaters” becomes part accessory graveyard.

    How Boundaries Break Down (and Clutter Creeps In)

    Deep shelves almost invite trouble. The more surface area you have, the more likely stacks and bins are to lose form after a few real-life uses. By day three, those once-crisp edges get fuzzy. A hurried morning leaves shirts nudged into the scarf zone. By the second laundry cycle, you’re barely able to tell where one type of clothing ends and the next begins. Maybe you wedge a basket between half-crushed piles just to keep things from sliding completely out of place.

    None of it feels catastrophic in the moment. Instead, it drags at you—a slow, steady loss of clarity, until grabbing a single item means rearranging everything around it. The problem isn’t just “stuff overflow.” It’s the absence of a real stopping point—something that holds the line when you’re not looking.

    Boundaries: The Real Secret to Closet Calm

    What keeps a closet feeling orderly isn’t perfection—it’s the presence of a real, unmoving limit. Shelf dividers, solid-sided bins, or even strict rules about stack size act as brakes against the natural spread of clutter. Their effect is easiest to see after you’ve gone without them. With a clear boundary, your “shirts” section stops at the divider—every time. Reach, retrieve, replace: the rest of the closet holds its form.

    In contrast, a bare shelf without boundaries mutates over days. The first shift is barely noticeable, but soon you’re double-handedly controlling piles, or re-folding shirts just to make space for one more. The shelf’s edge ceases to mean anything—the drift wins, and every section bleeds into the next until only the top layer looks intentional.

    One Closet, Two Outcomes

    Picture this: a closet with two shelves. Both start organized, but only one has fixed dividers every foot. By the end of a week, the divided shelf still lets you grab a hoodie or return a scarf without pushing two stacks together or holding up a toppling pile. The undivided shelf? Categories blur, and you catch yourself propping up one side just to slide something back—from visible order to visible frustration, in less than a workweek.

    Boundaries That Actually Hold Up

    So what works? Rigid boundaries—physical ones you can’t ignore or accidentally shift. Install vertical shelf dividers every 10–12 inches, or use bins with upright, sturdy sides. Even a tough shoebox can stand in as a makeshift border until a better solution comes along.

    The reliability comes down to this: when a stack has a set limit, every grab, return, or hurried reach is absorbed by the boundary, not by your hand or hope. You get one-handed access without needing to restack leftovers or worry about the pile slowly slithering sideways. After laundry day, items return right where they belong, instead of starting the next slow slide toward chaos. Resets are short; lines hold.

    Self-Check: Signs You’ve Outgrown Open Stacks

    If these feel familiar, your closet needs real boundaries:

    • You support one pile just to access another
    • You spend more time restacking than actually using the items
    • Sections that used to make sense (“shirts here, scarves there”) are now hopelessly blended

    Smarter Stacking for Everyday Closets

    Keep go-to items in a single-height stack wherever possible. Doubling up works for out-of-season or less-used things, but daily essentials topple plenty fast. Jeans and chunky sweaters can withstand taller piles; t-shirts and delicate linens cannot.

    Choose dividers that are firm but flexible. Clip-in shelf dividers or slotted organizers stay put through daily use, so your closet doesn’t drift out of order at the first grab. Temporary solutions are better than none—shoeboxes, shallow totes, even repurposed bookends—all create edges that buy you time and clarity.

    The True Difference: One Clear Edge

    A closet isn’t “good” because the shelves are deep or the containers pretty. The turning point is always a real physical edge— one that absorbs daily motion so you don’t. That edge means every shirt returns to its spot, resets don’t drag out, and you know at a glance what category belongs where, even at the end of a hectic week. Without boundaries, even the most beautiful setup backslides into hassle. With the right edge, the chaos is contained—and your morning routine (and mood) improves by more than a little.

    If your closet feels crowded, slow, or in need of constant policing, stop stacking for height and start creating boundaries that last. Order isn’t about how much you can fit—it’s about how easily everything finds (and keeps) its place.

    Shop practical closet solutions at ClosetWorks

  • Minimizing Jig Saw Blade Drift for Cleaner Thick Panel Cuts

    You don’t spot jig saw blade drift while you’re cutting— You discover it when the panels hit the workbench and the edges won’t line up. That’s the moment you realize: cutting thick panels isn’t the satisfying “slice and stack” routine it looked like on the first couple sheets. Whether you’re running lengths of 32mm MDF or breaking down butcher block, those early success stories lull you into a rhythm. Then the friction creeps in. The saw starts to fight you just a bit more with every cut. Joints that should be seamless now need aggressive sanding. You spend longer clamping and re-trimming than actually assembling. Suddenly you’re second-guessing your grip, your setup—even the wood. But the real culprit, slowly compounding in the background, is blade drift worming its way down each cut, turning finishing work into a rescue effort.

    How Blade Drift Sneaks Into the Workflow

    On job one, it’s invisible. Two or three panels come out straight. You move with confidence—until your fifth thick cut, and the panels refuse to sit flush. Joints get rough, the grain tears, and it never feels like a single “bad move” caused it. You blame shaky hands, a glitchy saw, a deadline-induced caffeine jolt. The reality: a blade that’s been slowly flexing off its line, lost in the noise and vibration of repeat use.

    Fatigue starts small but snowballs fast. Each round, you press just a touch harder. The saw vibrates longer, the handle runs hot, and what felt like muscle memory turns into unconscious overcorrection. The blade starts to warm, bend, and walk. Slow enough that you can miss it on sheet two—glaringly obvious when you’re sanding out misaligned seams three hours later.

    Blade Drift: Small Lag that Compounds with Every Pass

    True blade drift doesn’t announce itself in a single bad cut. It’s a series of minor setbacks—the flex in a blade, a kerf that’s too wide, the urge to push faster when the saw stutters. What really goes wrong?

    • Stiffness rules the line. Soft blades feel fine early, then bow and veer on thicker material. A stiffer blade traces the layout you intended—panel after panel.
    • Kerf width isn’t just a number. Wide kerfs cause more friction, more vibration, more heat, and more wandering. Narrow kerfs glide truer and avoid the rough, scorched edge that only gets worse with each round of cutting.
    • Repetition is the silent thief. The longer you cut, the more lapses appear. Stiffness in your hand, wandering focus, and a dull blade invite mistakes that don’t show up until it’s assembly time.

    The result? What looked like a “good enough” blade on panel one gives you a ragged, misaligned gap by panel five—no matter how many minutes you lose at the sander trying to fix it.

    In the Shop: Where Drift Disrupts Build Flow

    The real hits show up mid-project: six slabs of butcher block, each topping 35mm, all queued for cabinet tops. With every panel, the early satisfaction wears thinner. On piece four, the jig saw starts to judder, the motor seems to strain, and the cut swerves—sometimes only half a millimeter, but enough to break the groove on a joint. You feel the blade catch and hesitate. Just one wrong choice—a generic, floppy blade midway through the stack—can sabotage your afternoon. In one case, chasing convenience cost the builder an extra hour: switching to a bargain blade meant recutting, resanding, and resigning himself to filler. Multiply this by every “just get it done” shortcut, and the backlog grows: wasted material, missed deadlines, cut corners you can’t hide after the last round of shellac.

    Choosing Blades: Why Similar Isn’t the Same

    Buying blades by the label is tempting. “Hardwood,” “precision,” “fine cut”—all sound right, but not every package tells the full story. Two blades of the same length and tooth count might behave worlds apart once you hit serious material. Softer steel flexes under pressure, wide kerfs bog the cut, and low-grade teeth dull out halfway through your run. Once vibration sets in and the saw turns jumpy, the best you can do is wrestle the workpiece and hope the sander covers your tracks.

    Test for real payoff: Check the specs—look for high-carbon or bi-metal designs, and aim for a narrower kerf every time. Run two blade types on scrap before you commit them to your workpiece. Sometimes, the winner is a surprise—the stiffer, “slower” blade outpaces the flashy label once you’re on the fifth thick cut.

    When Your Setup Works for You—Not Against You

    Get it right: stiff blade, narrow kerf, and a conscious drop in feed rate. Don’t force the saw. If your machine allows, set orbital action low—enough to eject sawdust, not enough to send the blade thrashing. Suddenly, even tough oak panels part clean, edges barely need more than a finishing pass with a sanding block. On a five-piece job, your drift is barely a hair’s width. Not flawless, but finally predictable—and predictable saves hours.

    You can’t fake a perfect seam, but you can stack the odds. Fewer repairs. Less time hunched over a sander. Enough consistency that the last cut is almost as sharp as the first—without gambling on luck or muscle memory.

    Warning Signs: The Subtle Feedback You Can’t Ignore

    Drift never announces itself with drama. It’s the small signals that matter:

    • Unexpected resistance halfway through a cut
    • Edges rougher on the underside than the top—gaps you didn’t see on pass one
    • The saw shudders more, demanding two hands when one used to be enough
    • The blade or motor housing surprisingly hot after long runs

    These signals build slowly, and they’re almost always the first sign you’re heading for misalignment. Ignore them, and you’ll spend the evening wishing you hadn’t.

    Shortcuts That Cost—and Tweaks That Deliver Every Time

    Slow the pace to stay in control. Pushing harder for the sake of speed forces the blade sideways, especially in thick stock. Reduce orbital setting when depth matters. If you’re burning through a stack, check the blade after every few panels—a small nick or warp at the tip can quietly ruin the next run of cuts.

    Stock extra blades—and use them. No blade handles repeated thick-panel jobs forever. Swapping to a new blade keeps cuts crisp and control intact. If the job list runs long, invest in bulk—not just for peace of mind, but to match blades to wood and panel thickness without hesitation.

    Precision Pays—Especially Under Deadline

    Preventing blade drift is a discipline, not a one-off fix. The reward isn’t gold-plate perfection—it’s a stack of panels that actually fit by shift’s end. The mistake with drift is letting minor slip-ups snowball: a nick here, a gap there, and suddenly the project runs late or finish quality suffers. Stay alert to the tool’s feedback—resistance, heat, vibration. Cut with a blade that actually matches the job, and stay ruthless about switching out tired hardware. That’s how you end the day closing panels clean, not fighting endless rounds of sanding to hide what drift slowly ruined.

    Explore practical jig saw blades and worksite accessories at Gumboll

  • Why Thirty-Second Resets Transform Workshop Storage Efficiency

    Why “Organized” Setups Break Down So Fast

    The first day a storage makeover goes live—racks assembled, mobile carts perfectly aligned, bins labeled and stacked—it looks like order has finally landed. But fast-forward a week or two, and reality creeps in. The cart that once hugged the wall is now parked in the middle, always in the way. You wedge a bin out from under a shelf, only to realize there’s nowhere to set it down. That easy-access corner starts collecting orphaned screw packs and paint cans. The promise of simplicity is replaced by small, draining obstacles: shuffling equipment just to reach a cabinet, returning a tool only to find everything’s too tight to slide it in. The fix that was supposed to speed you up now takes extra time, every single reset.

    The Practical Reset Test: Is Your System Actually Useable?

    This is the truth no catalog photo shows: if it takes longer than thirty seconds to put something away or clear a section, your “system” isn’t holding up under real use. Order can survive a few rounds, but daily routines push layouts in ways pretty pictures never predict. That thirty-second mark isn’t arbitrary—it’s the difference between a setup that quietly works in the background and one you avoid whenever possible. The longer the reset, the more you’ll cut corners, pile up “just for now” overflow, and sidestep the area entirely. You start to resent the space that’s supposed to make things easier.

    Where Setup Friction Really Builds

    Take what seems like a small win: a modular rack that finally clears floor space. It feels right until the slots tighten and returning a saw or drill means balancing it on the end, out of place. That mobile cart? On day one, it glides between work zones. But now its turning radius means swinging it wide just to open a cabinet, or nudging it out of the path over and over. Each detour or awkward step is a few seconds lost. Spread across a project or weekend, you’re losing genuine working time—just from a footprint that almost fits, or a route that almost stays clear. Resetting stops being a non-event and starts feeling like a penalty.

    The Moment a Setup Shows Its Weakness

    Most storage solutions don’t fail at installation—failure becomes obvious on the fifth time you need to restock, late at night when you just want to clean up, or during a rush to find the right gear. What reveals the flaws?

    • One section that always overflows—junk, tools, spare fasteners—because it’s closer or easier to dump things “just for now.”
    • A cabinet that looks tidy, but forces you to extend your reach well past comfort, straining against crowded shelves for every simple return.
    • Mobile units technically clear the floor but force you to sidestep, roll, or even pick up equipment just to reach what’s behind them.

    On the surface, everything looks fine. But beneath, slow resets and awkward movement start stacking up. Go past thirty seconds on a routine reset and the whole workflow gets slower—by inches, then by yards.

    The Slip: Watching Efficiency Unravel Over a Weekend

    Here’s how it played out in real life: I set up a combination of wall-mounted storage for tools and a sturdy, low-footprint cart for fast-access hardware. Day one, all’s well—everything goes back where it belongs, open floor space, nothing in the way. By Sunday? The cart becomes a magnet for spare screw boxes and cable ties—random overflow that doesn’t “fit” anywhere else. The upper rack turns into a balancing act just to reach commonly used screws, while returning tools means walking the long way around the now-in-the-way cart. What was seamless for three resets becomes a gauntlet by the fourth or fifth—the signs of friction multiplying until avoiding the setup entirely almost seems easier.

    Design for the Thirty-Second Return

    The turning point isn’t more storage—it’s building everything around a fast, frictionless reset window. If putting something away, clearing a bench, or restocking a bin ever drags beyond thirty seconds, that section’s layout needs rethinking. Here’s what changed my setup:

    • Unblocking main paths: I moved the cart and reconsidered shelf depth, so neither blocked my go-to routes.
    • Simplifying actions: Every motion—returning a drill, grabbing a bit, sliding a bin—became a one-step process, achievable with a turn or short reach.
    • Fixing spillover traps: Corners that caught overflow got assigned clear, open spots. When overflow appeared, it was fixed in real time, not left to grow into another pile.

    Fast resets keep disorder from snowballing—even after repeated use, there’s no sludge of awkward workarounds to slow you down.

    Identifying and Breaking Real-World Chokepoints

    When a space feels off—when a cart lives in your direct path, or the same shelf overflows again and again—you know the setup’s costing you. More bins or hooks won’t fix it; adjusting the flow will. Hunt for:

    • Footprints—large or small—that edge too close to main walk zones, breaking up natural movement.
    • Overflow magnet areas—low shelves, ends of carts, that become “temporary” but end up permanent holding zones.
    • Reset points—bins or cabinets—where you always have to rethink how to stack, slide, or sort, instead of simply returning things.

    Targeting these pain points doesn’t just clean up the layout—it frees up both physical space and mental bandwidth. The usual friction disappears before it starts.

    How to Keep Resets Effortless

    • Preserve open space. Never overfill racks or cabinets. Leave gaps so you’re not forcing tools back in, even when you’re in a rush.
    • Time your resets. If putting anything away starts to drag, trim, rearrange, or split up sections until every action hits that quick thirty-second mark.
    • Attack overflow at the source. The moment you spot a pile-up zone, adjust the layout so it never becomes a dumping ground. Fix layout friction, not just symptoms.

    The Difference Between Looking Organized and Working Seamlessly

    The setups that really last aren’t polished photo shoots—they’re the behind-the-scenes workhorses that reset as fast on the fiftieth use as the first. What matters isn’t cramming more in, but creating layouts that you can clear, recover, and start fresh—without friction getting baked into your everyday routine.

    When maintenance becomes second nature because of design, not daily effort, you get your time and space back. That’s what separates a layout that “looks” organized from one that actually works—again and again, for the long haul.

    View practical modular storage solutions at StackNest

  • Why System-Based Storage Outperforms Motivation-Driven Closet Setups

    The real test of any closet or shelf isn’t how good it looks after you’ve cleaned it—it’s how it holds up the next time your morning is running late and you need to grab the right pair of shoes in the dark. That’s where most storage “solutions” get exposed. What starts as a picture-perfect setup quickly runs into the mess of daily life: clothes tumbling from stacks, baskets collecting everything but what they’re supposed to, every search for a missing hat turning into a small avalanche.

    If your storage only works when you have time and motivation, it’s not really working. The difference between a tidy shelf and a functional one becomes obvious in those repeat moments—when you’re moving piles just to get a shirt, or shoving shoes aside because the bin’s already full. Organization should survive real life, not just the Sunday evening reset.

    When “Organized” Shelves Start Slowing You Down

    The appeal of neat rows, matching bins, and folded piles is undeniable. At first, there’s a sense of calm—everything in its place, labels facing forward. But that order rarely survives the week. On a busy Thursday, you’re reaching over two storage boxes just to hunt down a kid’s soccer cleats, sending a pile of sweaters sliding in the process, or tossing shoes back in a rush and ruining the line.

    “Project organizing” feels productive—stacking, sorting, labeling, and admiring the result. But what happens when you’re trying to put away groceries with one hand and keep a child from tripping over a pile of boots with the other? The system falls apart not all at once, but in small, daily breakdowns.

    How Categories Disappear—One Reach at a Time

    Uniform bins promise clarity but, by Friday, most become grab-bags. The container that started with just hats picks up loose gloves, stray receipts, and someone’s headphones. Each hurried morning or tired evening erodes the original order. That means more searching, more reshuffling, more time spent rooting through shelves just to find the right scarf—or the second glove buried at the bottom.

    The problem isn’t laziness; it’s the friction in the setup. You shouldn’t have to take out an entire basket just to retrieve a pair of socks, or re-stack a pile of shirts so they don’t topple while you dig for one at the bottom. What you gain in visual neatness, you lose in speed and clarity.

    The Everyday Clues Your Storage Isn’t Keeping Up

    There are patterns you’ll start to notice—subtle ways your “organizing” system is resisting you instead of helping:

    • Stacks of folded shirts collapsing halfway through the week, because real use is never top-down
    • Shoes creeping out of bins and spreading across the floor as pairs get separated and space dwindles
    • Baskets turning into dumping grounds for anything homeless—yesterday’s mail with backpacks and mittens
    • Shelves loaded from front to back, so every retrieval means shifting the whole row forward
    • The creeping realization that, even after a weekend of cleaning, you’re just days away from clutter taking over again

    Entryways: Mess Finds You Fast

    Shared spaces expose storage flaws quickest. If grabbing a school bag means moving three pairs of boots, or if hats, scarves, and water bottles merge into an indistinguishable pile by Wednesday, your system isn’t keeping up. Maybe everything looks calm after Sunday’s reset, but by midweek routines, order dissolves. Shelves become landing zones, bins overflow, and the “categories” you set slip away with every rushed exit or muddy shoe drop.

    Why Motivation Can’t Beat Everyday Wear and Tear

    The problem with project-style organizing is that it depends on big bursts of energy—and those never arrive when the house is chaotic. True storage solutions don’t count on your motivation; they make staying organized the path of least resistance. A system that works means you can put things away quickly and grab what you need without setting off a chain reaction of clutter.

    Shelves with built-in dividers or tiered sections make every category obvious and accessible—a pair of shoes has a true “spot,” bags don’t pile up on boots, and gloves aren’t lost among scarves. Low-profile separators keep items from migrating; using sections prevents stacks from merging into one indistinct heap. You shouldn’t need a two-handed effort to extract a sweatshirt or dig for keys. Well-defined storage turns retrieval and resets into one-move actions, not clumsy reshuffles.

    What does this feel like in practice? There’s no hunt, no restacking, no mini clean-out every time you need something. Everything returns to its space quickly, whether you’re resetting for the next day’s commute or just clearing the bench in five minutes before guests arrive.

    Real Improvement: Stays Useful, Not Just Tidy

    You’ll know your storage is working when you aren’t dreading the reset. Instead of stuffing baskets until they’re overflowing or stacking shoes wherever there’s space, you guide them back to a defined section—one that actually fits, holds shape, and keeps categories from blending. The shelf still looks organized—more importantly, it acts organized—after repeated use and three rounds of laundry.

    As a quick, daily check: notice where you still find yourself shifting one group of items just to access another. That’s usually the spot that needs a divider, an extra tier, or a clearer boundary—not more effort from you, but smarter design for repeat situations.

    “Stored” vs. “Usable”: The Real Difference

    The long-term payoff isn’t in magazine-perfect photos. It’s in how often you find yourself not fighting with the setup. Spaces built for easy, repeatable grabs and easy returns stay sane, even when family routines are unpredictable and messy. Organizing projects run out of steam the moment daily life starts erasing their lines; system-based storage stays grounded because it’s made for how things are actually used.

    If you’re constantly rearranging a shelf, or if grabbing one thing scatters three others, it’s time to switch focus from surface “order” to real, daily function. Your closet or shelf doesn’t have to be perfect—it just has to work, reliably, when routine life is at its most chaotic.

    See smarter closet and shelving systems designed for life in motion at ClosetWorks.

  • Choosing the Right Jigsaw Blade for Precise Curved Cuts Every Time

    Nothing derails a cut—or a whole project—quite like a jigsaw blade that refuses to play along with your template. The first gentle sweep through birch ply feels promising, until the curve tightens. That’s when the blade stiffens, buzzes, and leaves a jagged track behind. Push harder, and you’ll see familiar signs: the blade bending outward, the saw motor sounding strained, and the “curve” quickly veering off your pencil line. If you’ve tried fitting panels or shelves with hand-cut arcs, you know this pain—wobbly edges, splintered veneer, and more time spent fixing than cutting.

    When the Blade Fights Back: What Actually Happens Mid-Cut

    Curves rarely look intimidating on paper. But in the real workshop, fitting a tight scribe for a cabinet or cutting a patch panel that needs to mate perfectly exposes just how unforgiving curved cuts can be. Most people pop in the standard jigsaw blade—the one fresh from the tool case—and assume it’s good enough. As the saw rounds the bend, though, you watch the line start to wander, no matter how steady your grip. Getting a clean, usable part feels less like carpentry and more like damage control.

    On actual jobs, this drift means more than a scruffy edge. The piece won’t nestle into place. Joints are uncooperative, and you end up sanding and test-fitting, sometimes until the fit goes loose. The struggle isn’t about your skill—it’s almost always about the wrong blade working against you.

    Curve Cuts Demand the Right Blade, Not Just “Any” Blade

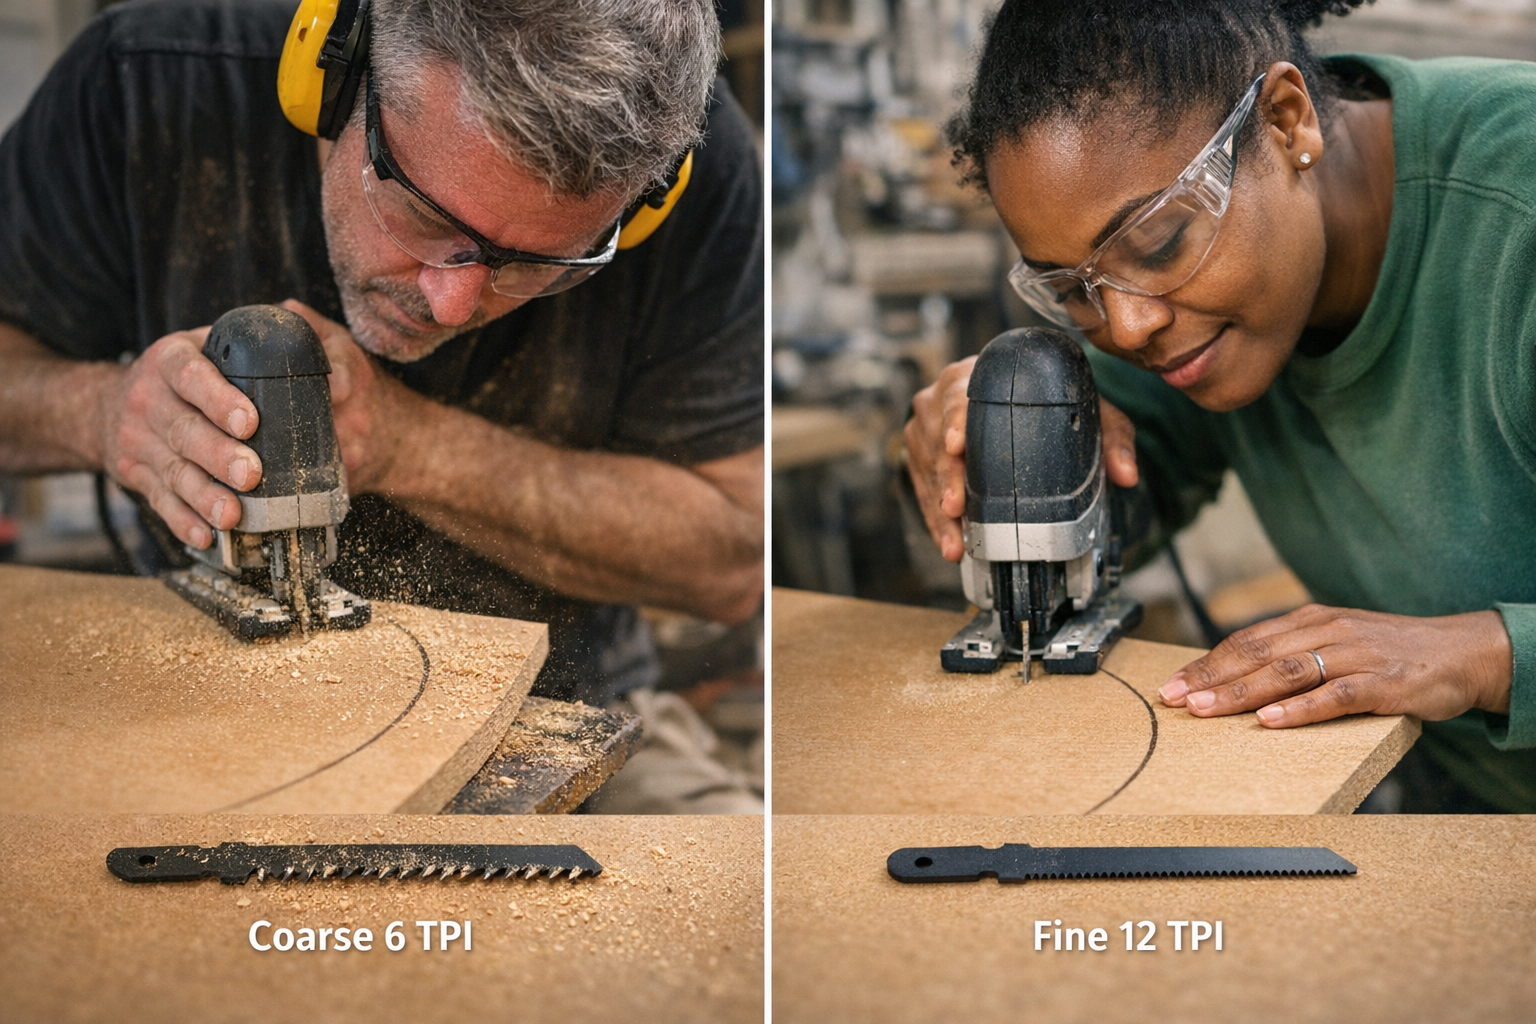
    What sabotages you halfway through a cut is the blade itself—specifically, its width and tooth design. The typical 6 TPI blade (the default in most kits) is wide, aggressive, and eager to blast through straight runs in pine or spruce. Slide that same blade around a 40mm inside radius in MDF or plywood, and resistance ramps up instantly. The blade bows, the kerf drifts wide, and chips tear out along the edge. Try to bull through multiple curved cuts and suddenly every part needs extensive sanding. Small pattern slips balloon into sanding marathons, driving up fatigue and frustration.

    Swapping to a blade designed for curves—narrower, with 10–12 TPI—flips the script. Instead of wrestling for control, you watch the saw glide steadily around templates. The blade tracks predictably, and the dust comes off fine, not in chunks. When you compare both cuts, the curved-blade edge is ready for finish work with minimal touch-up. The time you claw back from sanding is real—and so is the drop in muscle fatigue.

    Reality Check: Fitting a Panel Without the Guesswork

    Picture yourself tracing out an S-curve on a shelf blank to clear pipes or baseboard. Run it with the kit blade: it bites hard, motor groans, splinters fan off both sides, and the fit is off by a mile. Slap on a 12 TPI, narrow profile blade for the rerun. Now the jigsaw hugs the template without skittering. The cut’s edge is smooth, the test fit just happens—no grinding, no filler, just a panel that drops in flush. One pass, one light sanding, done.

    What Changes When the Blade Suits the Curve?

    The difference turns up everywhere: how much control you feel, how steady the saw sounds, and how fresh your arms and wrists are by cut three or four. The right blade means it’s the tool—not your hands—handling the curve. You don’t have to muscle it around radii or course-correct constantly. The saw keeps a true line; you’re not compensating for flex or hoping a sander will rescue a rough corner later.

    Across a project, these savings multiply. Fewer stop-and-sand breaks, fewer ruined parts, and way less physical strain. In a shop, those “little” moments add up. The right blade isn’t luxury—it’s how you keep small jobs from swelling into exhausting, error-prone slogs.

    Spot the Warning Signs: When Your Blade Is Losing the Battle

    Watch for these telltale signals that your blade isn’t cut out for the job:

    • Escalating vibration as you round corners or switch grain direction.
    • A fuzzy, torn edge forming mid-arc—especially noticeable in MDF or laminate.
    • Visible saw marks or bottom-face blowout appearing right off the line.
    • The cut line bulges away from your tape or pencil mark, denying even a careful guide.

    These aren’t minor annoyances—they’re clues you’re losing time and risking a bad fit. Don’t accept a tool fighting you as “normal.” Swap blades before cleanup becomes the biggest task.

    Field Your Questions: Curve Cutting Answers from Real Shop Time

    How do I choose a jigsaw blade for tight curves?

    Always look for narrow blades with a higher tooth count—ideally 10–12 TPI. These blades flex less in tight turns and deliver cleaner results, especially on radii under 50mm or on materials likely to chip. For broad, shallow curves or thick framing, sure, the standard blade can handle it. But for finish-level work or fragile faces, fine teeth and a slim profile win every time.

    Why do my curves always tear out or finish rough?

    Most often, it’s a coarse or wide blade grinding against the material rather than slicing through it. Plywood in particular hates aggressive blades—they rip fibers and leave ragged edges. Instead, slow your feed, let the blade do the work, and reduce saw speed. Don’t try to “overpower” a bad blade choice.

    Does adjusting my jigsaw’s speed or orbital setting matter?

    Definitely. Pairing a narrow, fine-toothed blade with slower saw speed and minimal orbital action produces the cleanest edges, especially around intricate templates. You get less chip-out in hardwoods and a silky finish in laminates. If clean curves matter, always try reducing both before blaming your skills.

    Workshop Tips for Smoother, Easier Curve Cuts

    • Follow the blade’s lead. Let your feed rate match the blade’s ability to turn—not the other way around.
    • Keep one or two sharp curve-cut blades at the ready and swap instantly when resistance crops up.
    • Double-mark important arcs—use pencil and masking tape—so you catch drift immediately, especially where a visible veneer edge matters.

    You don’t need a drawer full of specialty blades. A basic set of curve blades, alongside the stock types, pays for itself in hours recovered and repairs avoided.

    Recognize Blade Trouble Before the Mess Grows

    It’s easy to stick with a blade that “sort of works,” especially mid-project. But the cost piles up—crooked lines, aching hands, endless sanding. Whenever your cut starts veering or the saw begins to chatter, that’s your cue: pause, switch blades, and let the tool carry its weight. Stepping back for a moment beats losing time—and materials—to a fixable problem.

    Find jigsaw blades and accessories at Gumboll

  • Why a Simple Reset Rule Keeps Your Workspace Functional Every Day

    Set up a garage, workshop, or utility space, and you know the initial satisfaction: every shelf snapped in, bins stacked, tools racked in clean rows. But the real test comes weeks later—once normal projects and everyday mess start rewriting your layout, one shortcut and pileup at a time. A setup might look perfect the first day, but when you walk in midweek, rushed and juggling hands full, how well does it stand up to real-life use? That’s the real question of storage performance.

    The Real Challenge: Routine Use, Not First Impressions

    In the beginning, modular carts roll smoothly, wall panels gleam, and every tool has its numbered spot. But the moment jobs get busy, reality intrudes. Need your sander? You set it down “for just a minute” on a cart—then never move it back. Slide a bin to open the cabinet. Nudge a rolling chest sideways so you can squeeze past. A good plan on paper starts eroding every time you have to move two things just to get at a third.

    The signs are everywhere: corners morph into dumping grounds, overflow baskets settle into main walkways, and wall hooks once lined with tools transform into extra shelves for boxes and gear “waiting for later.” The more you adjust your movement to avoid blockages, the slower everything feels. Showroom order fades fast; daily function starts to drag.

    Where Friction Builds Up—And How Fast

    Little obstacles quickly become walls. Maybe it’s the cabinet that always catches your hip because you have to angle around it, or the rolling cart permanently parked across your main path because there’s nowhere else for it to go. Pretty soon, your setup isn’t serving you—you’re serving the setup, reshuffling bins and sidestepping baskets just to get started.

    It’s deeper than not having enough storage. The true issue is the return flow—the ability to bring the space back to ready without a restructuring marathon every Saturday. When every task involves juggling, shifting, or detouring around awkward footprints, even the best-planned layouts grow tiresome. That’s how what promised smooth access turns into slow frustration.

    Overflow Creep: The Silent Space Stealer

    The constant enemy? Overflow that appears quietly and never seems to leave. It’s the “later” pile—leftover hardware, half-used rolls of tape, project scraps balanced on a bin for just a day or two. But as soon as one session ends and another begins, nothing’s actually cleared. The piles migrate: a bin mound by the wall, stray gear teetering on a cart, a bag wedged into a corner that was supposed to be open.

    Instead of a clear area, you end up weaving around makeshift stacks, stretching to reach what used to be directly in front of you. Overhead shelves become landing pads for random overflow. Corners you thought would boost capacity instead just collect things nobody wants to deal with. The cost? Your main routes shrink, work slows, and you start avoiding your own setup.

    The Reset Rule: What Separates Usable from Unraveling

    The secret behind workspaces that actually stay clear is surprisingly simple: a minimal, truly doable reset routine. Not a complete overhaul, but a short, repeatable step you can manage every time—even when you’re in a hurry or done for the day. It’s less about neatness and more about preventing drag: identifying where stray tools or overflow bins belong (even temporarily) and making sure key movement paths are always open for next time.

    In practice, it could be as basic as this: at the end of a session, anything left out goes to one designated catch-all spot next to the exit. Quick scan, five items into the overflow zone—then you’re free. The workspace isn’t museum-grade pristine, but you aren’t starting the next job clearing a runway. The crucial difference? Resetting no longer feels like work; it’s just routine, no matter how chaotic the project was.

    How to Tell If You Need a New Reset Rule

    You don’t need a full-on mess to spot a setup problem—just small patterns that signal friction:

    • Constantly shifting a cart or basket just to open a path or cabinet
    • Finding random tools or supplies stranded in areas they don’t belong
    • A recurring pile in the same dead corner, never quite cleared
    • Avoiding certain zones because “temporary” clutter keeps lingering a little too long
    • Resetting the space feels like an intimidating commitment, not a quick evening wrap-up

    When you notice movement slowing, routes narrowing, or stalling before a task because of blockages—your storage needs less organizing and more routine resetting.

    Why Hardware Alone Falls Short

    It’s easy to believe another wall rack or set of bins is the answer. And yes, modular gear helps showcase a catalog-level workspace—at first. But when there’s no fast path to clearing overflow, even the nicest wall panels end up buried under “on hold” gear, and rolling bins morph into roadblocks. Tools and supplies have a place to live, but getting them back there feels like a mini project every time.

    In the end, storage only works if it supports constant return to clarity. Otherwise, you’re stuck in the classic shed trap: gear technically organized, but in practice, always one pile away from chaos, and momentum lost to endless reshuffling.

    How to Build a Reset-Resistant Layout

    1. Create a Single Overflow Zone

    Designate just one spot for overflow—a visible, convenient area by the door or the main walkway. When a session ends, only this spot needs attention. You avoid the spread of piles and keep the rest of the space functional.

    2. Guard Your Main Artery

    No matter how you arrange storage—rolling chests, racks, bins—commit to never blocking the core walking route. Protect it: if you have to wrestle a cart or step over a basket to get through, the risk of friction and buildup multiplies.

    3. Redefine “Good Enough”

    You won’t always have time for deep resets. That’s normal. Make it your pattern to do the five-minute version: stash what’s loose in the overflow, realign anything left astray, move on. The art is routine return, not visual perfection.

    Real Use: The Only Test That Matters

    Setup success isn’t measured by how impressive it looked the first day, but by how smoothly you can walk in, start work, and reset the space—even after a stressful week. If the layout lets you return to baseline with minimal effort and almost no thought, friction stays low and the workshop remains an asset rather than a source of dread.

    The best storage never stops you in your tracks. Its real promise isn’t perfect rows, but routines that hold up when you’re tired, distracted, and in a hurry. Every setup fails eventually if resets are too hard—but the right reset rules keep your space useful, no matter how often chaos visits.

    Explore practical storage setups at StackNest.