Category: Tools & Workshop

  • Why Matching Screw Heads to Driver Bits Prevents Costly Jobsite Errors

    You feel it before you see it: the bit stutters, the screw head chews out, and suddenly a smooth drive is replaced by grinding resistance and ugly scars around the fastener. This isn’t the rookie mistake of the first screw—this is what happens as the hours stack up, as repetition exposes the difference between “good enough” tool pairing and the small mismatches that can sabotage your finish. On deck builds, subfloors, framing runs—when the pace matters and consistency pays the bills—a mismatched driver bit isn’t just an annoyance. It’s what slows you down, wrecks your lines, and, an hour in, turns tool confidence into tool fatigue.

    Why “Close Enough” Isn’t: Real Consequences of Bit-Screw Mismatch

    Spread out a pocketful of crosshead screws—Phillips, Pozidriv, even JIS—and they all blur together. When you’re behind schedule or working in low light, it’s easy to grab the “almost right” bit and push on. For the first few screws, there’s a false sense of security: the fit seems tight; the screws bite. Fast-forward fifty screws, though, and the cost starts tallying up. Cam-out lines snake across the heads. You get screws proud of the surface, seams you have to wrangle back together, driver bits that start to feel like they’ve got a mind of their own. That tiny slop at the bit tip multiplies—joint after joint, panel after panel—until proud heads and unsightly chips become not just cosmetic issues but real structural annoyances. More time sanding, more time re-aligning, more patchwork just to make things look finished.

    How Bit Problems Multiply Over the Day

    What starts as a barely-there wobble turns into a pattern. Especially with near-identical bits—Phillips, Pozidriv—the difference hides until you’re deep in a board run. As the torque ramps up (fastening subfloor, finishing drywall, pinning decking), you hear the grinding skip. The driver jumps, leaving those silvery trails, and then you’re wrestling half-driven screws or scraping knuckles on the joists prying out mistakes.

    The problem is relentless with impact drivers. Under speed, every mismatch is magnified—sometimes you get a perfect drive, more often there’s a slip or a flare just as the joint tightens. You lose the steady rhythm, and so does the work.

    On Site: Why “It Fits” Can’t Cut It

    Tool tests don’t stop at a handful of screws. Real jobs look like full sheets, long rows—one after another for hours. Whether you’re running fasteners through treated lumber or pre-drilled metal, your bit is in the wood as long as your hands are. If you reach for “close enough,” bit-to-head slop quickly blooms into bigger problems: cam-outs multiply, screw heads collapse, and once-tight seams drift as tension gets lost mid-run. Suddenly, you’re pulling fasteners back out, re-setting panels, burning minutes on fixes you wouldn’t need if each drive actually counted.

    Fatigue: Not Just Physical

    The real grind of cam-out isn’t just how it slows your hands. Every time the driver skips and the bit smears, you’re forced to double down—more pressure on the trigger, more micro-adjustments, more minutes lost swapping bits or chasing a “good enough” fit. The wrist takes the hits, but so does your focus. Rework interrupts the flow, turning straightforward tasks into stop-and-start marathons.

    Where Small Details Change Everything: Phillips, Pozidriv, Torx, and Square

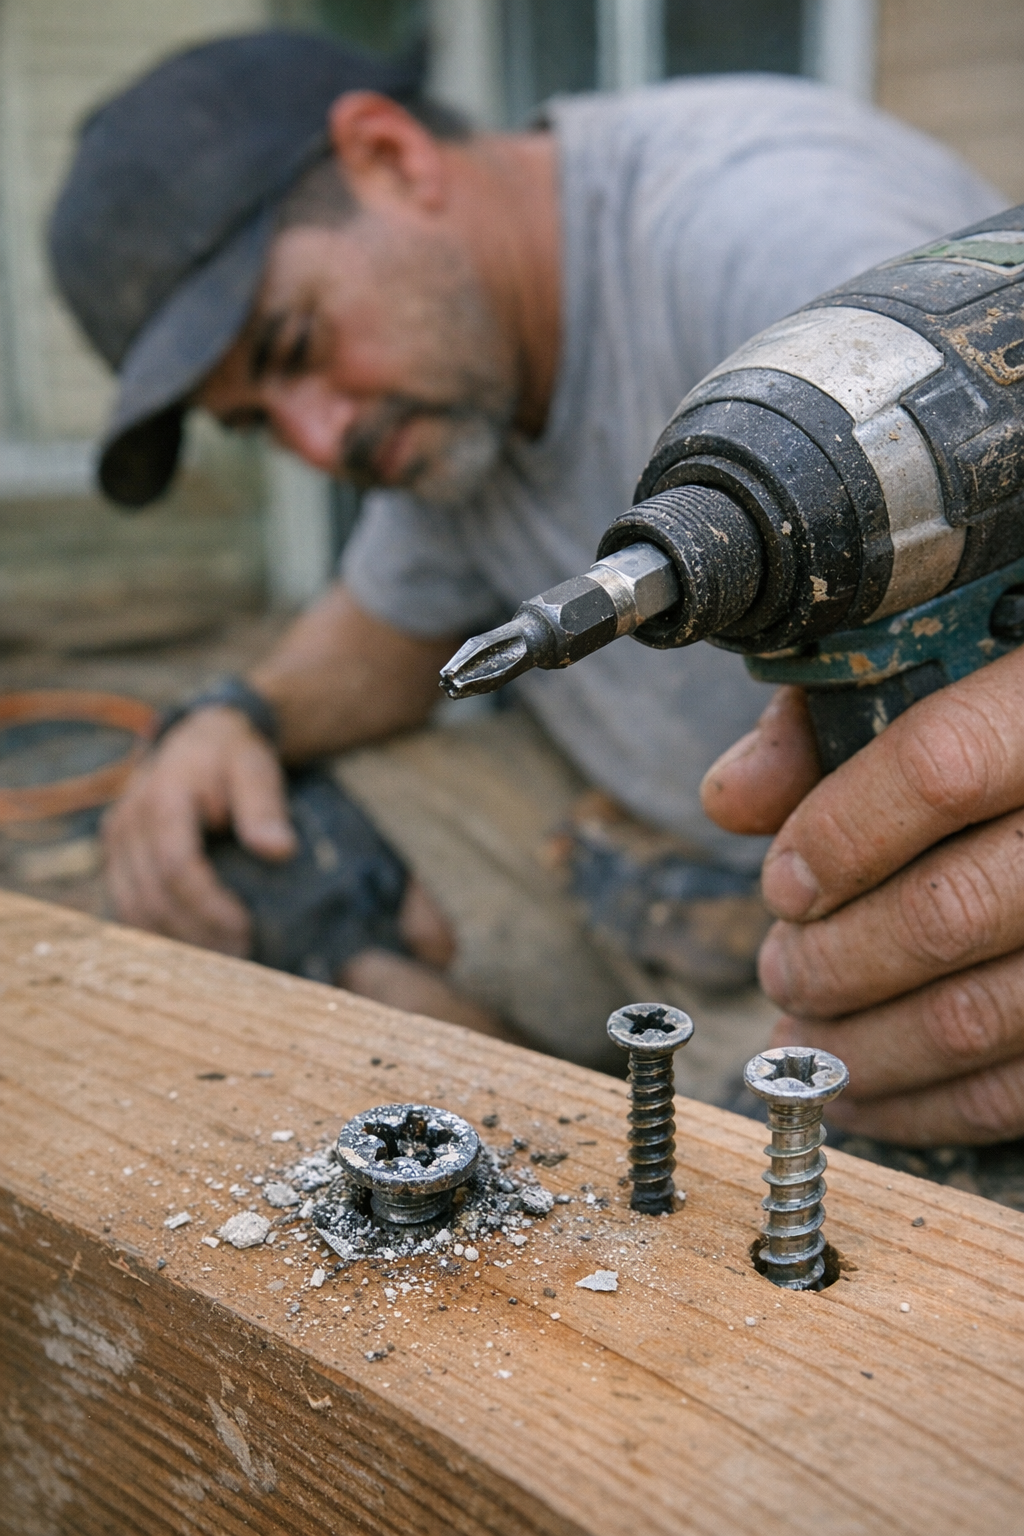
    What looks identical in the toolbox rarely acts identical under stress. Phillips and Pozidriv—even the most practiced eyes can confuse them, but their performance tells the truth after a few dozen screws. A true match lets you cruise: reliable grip, predictable depth, zero hesitation between fastenings. But a lookalike bit? Suddenly you’re finding metal dust on the tip, feeling the bite go soft, watching screws stall halfway through the board.

    The stakes go up with harder wood and high-torque drivers. Perfectly matched sets—Torx for Torx, Square for Robertson, Phillips for Phillips—turn what used to be guesswork into muscle memory. Each screw seats cleanly, rows pull flush, and the only time you pause is to reload the driver. Over a full workday, that predictability keeps projects moving: less rework, fewer strip-outs, and smoother transitions panel to panel. The contrast is real—the day’s effort goes further, the finish looks sharper, and the whole job feels less of a grind.

    Fasten Smarter: Habits That Save Projects

    Swap bits at the first sign of trouble. Don’t settle for “almost works”—replace worn or dirty bits before they force costly fixes. Keep your bit sets organized and within immediate reach, especially for high-turnover tasks. Spot metal shavings early? Bit skips even once? Better to change now than to dig out ruined screws later.

    When loading up for high-speed fastening, take three extra seconds: check not just the size, but the actual pattern. A Torx bit that’s even slightly off won’t hold up under torque; a Phillips or Pozidriv that doesn’t fit true is an invitation for cam-out chaos. If the bit rattles inside the screw, swap it. That hesitation is your warning; don’t ignore it. Every swap is cheaper than a half-day spent hiding torn-out fasteners.

    Field Habit: Run the “Last-Check” Test

    Before tackling a row—be it framing, drywall, or trim—run two test screws. Listen for the click, feel for immediate slop, and actually look: is the screw sitting flush, is the drive clean, is the bit quiet? If a test run shows trouble, fix the pairing now. Catching small mismatches here means fewer surprises mid-job and less strain at the finish line.

    Warning Signs: Don’t Ignore These Bit-Head Clues

    • Driver skips or slips under steady pressure
    • Metal or paint dust gathering at the screw head
    • Screws that never seat flush—no matter the pressure
    • Tiny gaps showing up after you finish a panel
    • Bits and screw heads feeling loose, even fresh out of the box

    Any of these is more than an annoyance—it’s an early warning that your setup needs work. Waiting only makes the repair job longer and the day more frustrating.

    The Real Payoff: Why Bit-Screw Matching Changes the Job

    The win isn’t perfection—it’s consistency and control, especially when speed matters. Matching bits exactly to each screw head isn’t busywork; it’s the fastest fix for preserving workflow, preventing fatigue, and protecting every visible edge and seam. That minor adjustment—choosing the right bit every single time—pays you back over an entire project. Suddenly, fastenings stay flush, corrections shrink, and you’re able to hand off a finish that stands up to scrutiny. Every matched pairing saves a handful of seconds, but across hundreds of screws, it’s the margin between sprinting to catch up and moving confidently to the next job.

    On every worksite, a smarter approach to your bits doesn’t just cut out hassle—it keeps the work clean, the timeline tight, and your tools (and wrists) ready for more.

    http://gumboll.myshopify.com

  • Why Modular Outdoor Storage Outperforms Traditional Weatherproof Chests

    The first day you finish an outdoor storage zone, it looks like you finally solved the chaos. The bins line up in crisp rows, the chest is wedged tightly to the wall, and every tool stands at attention on a shelf. You step back and feel ready for anything—until reality takes over. The next rain rolls through. You slog in, boots dripping and arms loaded, only to trip over the chest blocking your path. The “waterproof” lid jams on the wall, impossible to open without shifting the whole box. Gloves and towels pile up at awkward angles. The walkway that looked so clear yesterday now feels like a crowded alley, and each return becomes a clumsy detour through muddy bottles, tight corners, and bins too packed to budge.

    Why Order Doesn’t Survive the Elements (or Real Life)

    It’s not the setup—it’s what happens after. Outdoor storage always looks finished on day one, but repeated weather and daily use expose every shortcut. Lid clearance you never considered is suddenly tight. That chest whose footprint once felt smart now traps your movement, forcing you to sidestep and nudge it for every pass. Tools creep into unused corners, creating new overflow spots you never meant to have.

    This isn’t a flaw in your plan—it’s what happens when real routines crash into static arrangements. You bend around bins to grab one rake, only to notice you’re always moving something out of the way. The clever wall rack now breaks up the space so much you flow from task to task slower than before. “Organized” melts into aggravation as dead corners swallow gear and tight gaps choke the route you walk every day.

    “Organized” At a Glance, Friction Every Time You Return

    The visual calm of opening day has a hidden cost: movement stalls, access tightens, and you spend more time fixing the setup than using it. The difference between “it fits” and “it works” gets obvious fast. The matching bins that lined up so satisfyingly now block you when a single awkward rake or lopper won’t slide in. The neat shelf you planned for gloves crowds the entry the moment a basket overflows. Every trip out means stepping over one thing, shifting two others, and telling yourself—again—you’ll reorganize later.

    The symptoms build up in daily returns: the rush to get gear inside before the next downpour, the tangle of basket handles against the door, and the frustration of pulling out boxes just to stow a hose. Each cycle adds a new layer of friction. It’s not storage—it’s a daily shuffle, and by midseason the tidy layout is already unraveling, one soggy pile at a time.

    Scenes From an Outdoor Setup That Doesn’t Flow

    Picture a real return: The rain’s just stopped; you’re juggling potting soil, muddy gloves, and the shovel you used yesterday. As you squeeze past the chest wedged by the walkway, your elbow grazes a shelf that seemed perfectly placed—until now. The “sealed” bin that dominated your setup becomes a recurring obstacle for your boots and buckets. Overflow baskets by the door fill up, so you stop to untangle gloves from a garden fork—is anything actually easier?

    Here’s what keeps breaking down, no matter how organized things look at first:

    • Shoving the heavy chest aside just to access what’s behind it.
    • Boxed-in corners that turn into dumping grounds for stray hoses and tools.
    • Wall racks that slice up the space, making every movement a zigzag.
    • Bins crammed tight, so getting anything out means a game of reverse Jenga—every time.

    With each use, your carefully planned order becomes a shuffled-in shortcut. The more the weather shifts, the more often you’re forced to reshuffle just to keep the space usable.

    From Cluttered Reset to Real Flow: Modular Storage in Action

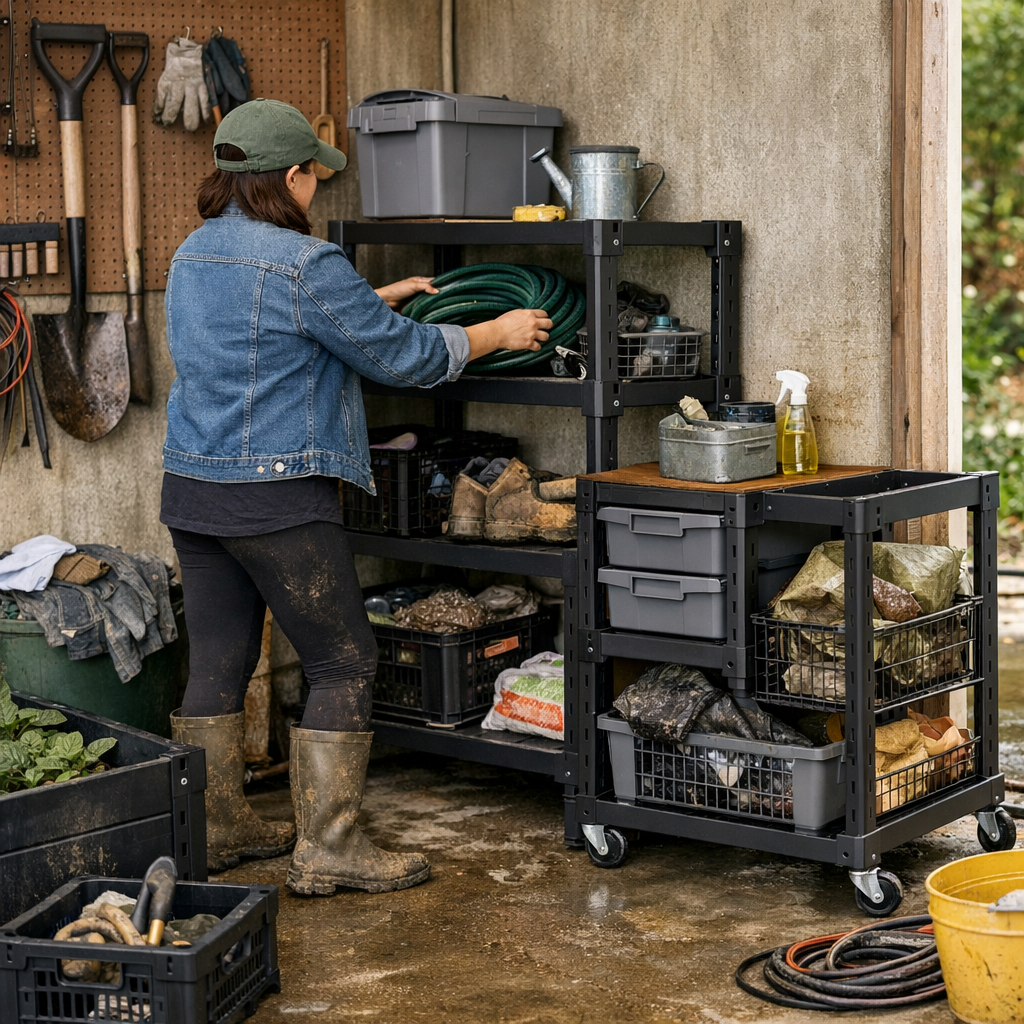
    The big shift came after one too many muddy struggles. Swapping the chest for a modular rack seemed minor—until it wasn’t. Open shelves, lifted just enough to let runoff escape, and no tight corners to crowd your movement. The game-changer? What the setup didn’t do: no blocked path, no lids jamming against the siding, no dead zones attracting the overflow.

    Returning with soaking-wet gear, you could drop items straight onto an open shelf, let the airflow dry them down, and be done—no twisting, dragging, or stacking on top of old bins. The path stayed clear, every return felt less like a shuffle, and resetting the area was almost automatic. Real flow meant not thinking about your storage during the messiest days, because nothing forced you to work around it.

    When a Chest or Bin Still Makes Sense

    Some storage zones don’t demand daily access. Sealed chests are fine for gear that stays put—winter covers, pool floats, or spare hose. But if your setup has tools, boots, or supplies that rotate seasonally or get wet and muddy, closed bins quickly become an anchor. The difference stacks up: open racks adapt, while closed containers keep asking for workarounds, stacking, or extra trips to unbury a single thing. Overflow is rare, resetting is faster, and the gear you use most lands exactly where it needs to, every time you come back.

    Practical Moves: Small Changes, Smoother Routines

    • Go for open racks with raised feet: This lets water drain and air move, speeding up drying and making it easy to clean up after storms.
    • Don’t stack bins just to save space: Stacked bins always look neater in a catalog than in real life. Every extra layer means triple the work later.
    • Test door and lid clearance now, not later: Even a couple inches add up with muddy boots and wet arms. If the lid or door blocks your movement, your routine pays the price.
    • Find and fix “overflow magnets”: The same corners and shelf edges collect the cast-offs every week. Small tweaks here—like shifting a rack or adding a landing space—save hours across a season, and keep clutter from making a comeback.

    The Lasting Difference: Function Over First Impressions

    Most outdoor storage setups crack after a few weeks of real, dirty use—not because they weren’t neat enough, but because they weren’t built for movement. You don’t feel great storage when you’re looking at it; you feel it when nothing blocks your path or slows your return. The proof is in the afternoon when you toss a muddy shovel onto a clear shelf and step away, ready for next time.

    If the setup looks organized but blocks your route, those lost minutes pile up—reshuffling, unstacking, sloshing past half-closed lids. That’s where modular storage shines: built for seeing, grabbing, and returning gear without thinking. It’s not about “perfect” order. It’s about less friction, more flow, and a space that keeps working no matter how rough the season gets.

    Explore modular storage that actually works with you at StackNest.

  • Solid vs Wire Shelf Dividers: Which Keeps Your Closet Neater Longer

    Most closet shelf dividers sell the same day-one promise: stack your shirts, bags, or towels neatly behind each barrier and—at first glance—everything looks fixed. But real life isn’t still. By the end of the week, you start to notice the gap between “organized” and actually workable. Sweaters lean, t-shirts droop sideways, and boundaries blur almost imperceptibly. Suddenly you find yourself shuffling through mixed piles, reaching around slumping stacks, or even digging for a lost scarf that slid between dividers. The question of wire versus solid shelf dividers stops being theoretical—and starts shaping how much effort you spend just keeping your closet in check.

    Day-One Order, Day-Four Friction: Where Shelf Dividers Fall Short

    At first, every divider promises separated sections and stable stacks. In reality, their true test comes not in the setup, but in the scramble: quick grabs for pants on a weekday morning, pulling out one towel while other piles crowd in, stretching for that one bag wedged behind others. This is when you see the difference between a shelf that holds its shape—and one where divisions melt away as the week goes on.

    Wire Dividers: Boundaries with Blind Spots

    Wire dividers advertise structure but often leak stability at the edges. Sure, they keep boots and folded jeans roughly contained. But when you pile up softer clothes—think stacks of tees, rolled gym tanks, loosely folded pajamas—small items slip through the gaps. One shirt corner droops between wires. By Friday, the stacks lean, merge, and you’re left untangling a subtle pile-up. Worse, when you’re in a hurry, reaching for one thing often unbalances everything nearby, making each reset slower and messier.

    Solid Dividers: Stacks Stay Put

    Solid shelf dividers create a different rhythm. The wall they provide means a hoodie can be tugged free without causing the neighbor pile to collapse. Soft scarves, thin tees, even slippery athletic gear—these don’t cascade sideways or fudge the boundaries as easily. When you push stacks higher to maximize space, solid dividers keep them upright, letting you actually use the full vertical height without risking a midweek slide. The difference isn’t just neater lines; it’s the way categories maintain their shape through your daily rushes, resets, and lazy toss-ins.

    Midweek Reality: The Grab-and-Go Test

    The cracks show up right in the middle of an average week. Imagine stretching on tiptoe for a favorite shirt and dislodging half a pile of tees, which then slouch into another section. Instead of a clean pull, you’re left restacking what you disrupted—sometimes during the morning rush, sometimes late at night. Those extra few seconds add up, making the closet feel more high-maintenance than helpful. Every repeat reset chips away at the illusion of order, until you realize you’re spending more time fixing the system than enjoying it.

    With solid dividers, resetting is a two-second gesture: a quick hand swipe lines things back up, no fiddling with lost socks poking behind wires or scarves slipping out of sight. Order survives the weekday rush—and comes back instantly after laundry.

    When Dividers Decide: Does Your System Hold Up?

    Without meaningful boundaries, categories crumble fast. What started as separate stacks merges into one sprawling blend: gloves with hats, towels with sheets, handbags tangling together. Entryway bins absorb every lost mitten; closet shelves devolve into a guessing game. This spiral is especially quick if your shelves are crowded or if vertical space isn’t fully used. Wire dividers let boundaries sag, so shelves “fill up” well before they should. Solid ones, by actually supporting higher stacks, let you claim back vertical inches and keep piles standing tall. Suddenly, those shelves that always felt cramped can hold more—without sacrificing clarity.

    Bags, Shoes, and Why Solidity Matters

    Handbags and purses are the biggest giveaway. On wire dividers, stray straps droop, small bags fall sideways, and corners wedge awkwardly between bars—a slow slide towards clutter. With solid dividers, each piece stays upright, ready to grab and instantly visible. Pull out your work tote and you find it facing forward, not buried sideways or pressed out of sight. The same goes for shoes on higher shelves or hats in a mudroom—solid lines mean you don’t sift through a mixed-up crowd every time you need something.

    Reset Frequency: Divide Less, Adjust Less

    It’s not just how dividers look, but how often they force you to intervene. Wire-divided shelves demand micro-adjustments after every use—rescuing slumped socks, straightening piles, untangling hats. Solid dividers, meanwhile, buy you quiet time between resets. When it is time to tidy, a single pass is usually enough: slide a stack straight, dust off an easy-to-reach surface, grab what you need without chaos rippling across the shelf. Every daily routine—from grabbing gym clothes to restocking towels—becomes faster, calmer, and a little more satisfying.

    Micro-Tweaks That Actually Help

    • Lock dividers tight: Wobbly dividers, no matter the style, undo the point. Make sure every divider is firmly in place after each shelf reset.
    • Don’t overcrowd: Overstuffed shelves defeat even the best dividers. Leave a sliver of space beside each wall for a smoother grab and easier maintenance.

    These details keep your dividing system visible and useful, instead of one more thing you stop appreciating after setup.

    The Right Divider: For the Way You Really Use Space

    A freshly divided shelf is only the beginning. The real question is: does it stay organized through a regular week—mornings, evenings, five-minutes-til-out-the-door? Choosing between wire and solid isn’t about looks; it’s about what you want at the end of your day. If you find yourself constantly reshuffling stacks, watching categories blur, or losing time on slow resets, solid dividers deliver a working upgrade: steadier stacks, faster access, and less daily annoyance.

    Solid dividers are rarely glamour purchases, but for crowded shelves, soft fabrics, or high-turnover closets, they pay for themselves in time saved and friction avoided. If a divider lets you spot what you need—and the system holds after a week of grabs and resets—you’ve found a better way to run your space.

    Find storage dividers that hold up to real daily life at ClosetWorks.

  • Choosing the Right Multitool for Precise Cuts in Tight Spaces

    Crammed under a cabinet, knee pressed against cold tile, one hand straining to hold a multitool steady while the other fights gravity—this is where shortcuts and spec sheets stop mattering, and real control becomes the only thing that counts. When the angle is wrong, the cabinet lip blocks your sightline, and every inch of movement risks splintering trim or scuffing a pipe, you feel the difference between a tool that just fits and a tool that actually helps you get the line right. It’s not raw power—most cordless multitools will chew through drywall, plywood, or copper the first few passes—but the details shaping the last pass: vibration, grip, blade stability, and the real biting control that lets you finish one-handed, in the dark, with dust settling on your sleeves.

    The First Friction: When “Good Enough” Stops Working

    It doesn’t take long on a real job—especially an old rental or a retrofit—to realize the headache isn’t always reaching the work. Any multitool might squeeze behind a joist for the first couple of cuts, and if both hands are free, you’ll fly through clean plywood edges. But those are the rare easy moments. Arms stretched overhead, shoulder wedged under a furnace duct, the job changes: tool stability starts making or breaking your cuts. Even a faint shudder in the handle, if ignored, turns straight lines jagged or pitches the blade sideways when you’re flush-cutting casing or notching subfloor. Before you know it, you’re left with gaps to fill, corners to sand, and hand cramps that never make it onto a punch list.

    Shave a few millimeters off on every cut, and suddenly panel fit and outlet covers become a grind. That “almost straight” kerf? Multiply it by six rooms or a dozen pipes, and it becomes the difference between walking away finished and coming back with sanding blocks.

    The Creep of Fatigue and Wander

    These aren’t big, dramatic failures—they’re subtle, stacking annoyances. Vibration starts as a hum, ends as a buzz in your bones. A multitool that feels stable for the first outlet soon becomes a fight after a run of maple baseboard or dense cement board. The grip demands a tighter squeeze, your wrist starts to stiffen, and by the tenth cut, you’re compensating so much you lose all sense of the original line. Small mistakes—drifting off a mark, slipping against a copper pipe—now need hand-filing or double passes, with more dust and less patience.

    Real Difference: One Closet Install, Two Tools

    Picture this: two multitools, brand-new blades, a cramped closet. The first tool—short body, real vibration-dampening grip—stays on mark, whether slicing a drywall patch or making clean corners in old pine. Twenty cuts in, you still feel in control. The other tool, just slightly heavier and less balanced, starts wobbling as soon as you reach overhead. By cut five, it’s sliding away from the pencil line, gouging drywall, the edge going ragged. Now every notched stud or panel needs extra work with a rasp or filler—work added by tool drift, not user error.

    Balance and design are everything when a task isn’t at bench height. Even a few extra ounces in the wrong spot multiplies your effort, especially one-handed or with arms extended. The awkward “walking” motion of a blade meeting resistance breaks focus, breaks rhythm, and makes simple jobs feel heavier than they should.

    Cramped Realities: The Truth of Working in Tight Spaces

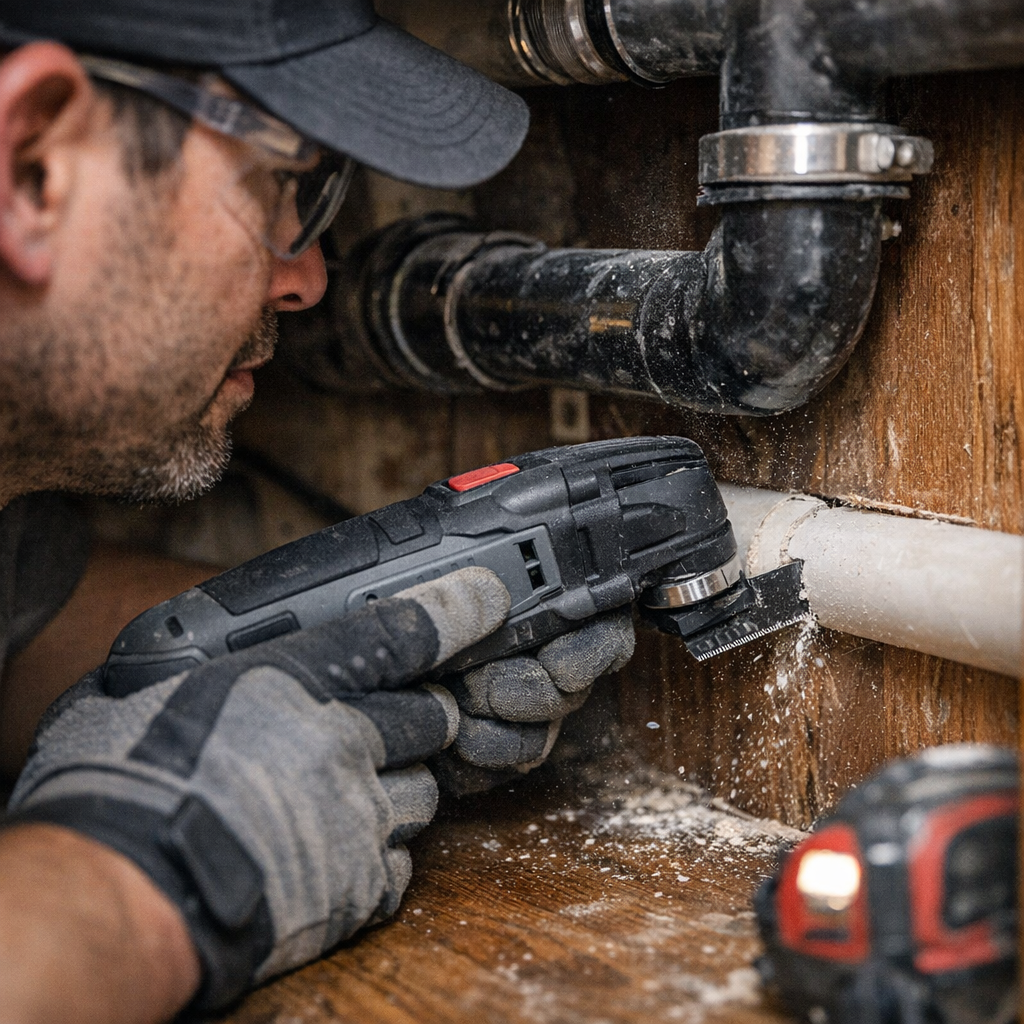
    Here’s where theory gets tested: Wedged under a 1960s kitchen sink, hacking through a PVC trap that’s up against the back wall, you trust your multitool—because every slip could mean a leak or an ugly scar on the cabinet. Elbow grinding against wood, dust falling into your shirt, you start to notice every bit of vibration or front-heavy bulk. With the right tool, the blade bites neatly, steady at slow speed, following the contour of the pipe without jumping or leaving a shredded edge. With the wrong one, after two passes, vibration ramps up, the tool skips out of the groove, and you’re left with a cut edge too rough to seal, plus another chunk of wasted time wrestling with sandpaper.

    This is not a rare ordeal—it’s standard in crawlspaces, behind shower pans, inside laundry alcoves. The takeaway: Every bit of control counts more in contorted jobs, magnified by every cut and every mistake you can’t un-do in cheap laminate or brittle ABS.

    Upgrades That Pay Off on Every Job

    The surprise is how much subtle improvements flip the script. Swapping to a multitool with an 80mm short body and genuine anti-vibration grip, you suddenly last longer before the pins-and-needles start. The bigger breakthrough is in the accessories—moving from basic blades to sharp Japanese-tooth versions brings:

    • No more lurching starts—the blade glides into cuts, with less bouncing or chatter in knots and tight corners.
    • Smoother finishes every time—even when kicking up dust or hitting an old drywall screw hidden in the wood.

    What changes, job after job? Less fatigue, steadier hands, cleaner results—fewer return trips with a sanding pad or filler. Your workflow stops stalling, and you actually end up finishing more, fixing less.

    The Warning Signs: When Vibration Becomes the Boss

    You don’t always catch the problem in the moment. Only when your palm is fizzing and you notice your blade’s wandered out of its track do you realize fatigue has taken over. You’re stopping to massage your hand, double-checking every new cut, momentum gone.

    Multitools with anti-vibration grips and well-matched blades aren’t just easier on your hands—they keep the job on track when the angles are bad and the space is tight. Pair Japanese-tooth blades for wood and finer teeth for stubborn plastics or pipes. These aren’t minor tweaks—they’re the difference between consistent results and an afternoon of chasing flaws.

    Finish Strong: The Real Difference After Hours of Work

    Specs matter far less than what you feel after the fifth battery swap or the fortieth flush cut. A well-engineered multitool—compact, balanced, gripping true, and vibrating less—delivers repeatable results, not just on open bench cuts but in the contorted, overhead, or awkward spaces that never make the promo reels. Set your pace, finish with fewer redos, and spend less time on cleanup you didn’t plan for.

    And don’t ignore comfort when things heat up. If you’re working gloved in summer, or fingers sweating in a furnace-blasted crawlspace, grips that resist slip, heat, and fatigue buy you more usable hours—especially when the job can’t wait and you’re fighting through a mess of old wiring or stubborn hardware in a corner nobody sees but everyone will notice if it’s rough.

    The bottom line? Tools aren’t made equal once you’re past the setup phase. In the spots nobody brags about—half-lit crawlspaces, behind toilets, backs of cabinets—it’s the feel in your hand, not the nameplate, that decides if you keep momentum… or wish you’d brought better gear.

    Find practical multitools, blades, and jobsite gear at Gumboll

  • Why Choosing Fewer Storage Units Improves Workshop Efficiency and Flow

    Overflow corners—everyone’s got one. In any working garage or workshop, there’s that spot where the system starts to break down. What begins as a carefully organized zone—tools lined on hooks, supplies boxed on shelves—inevitably hits a wall. A new cart, a tall shelving unit, or “just one more” storage bin feels like the fix. For a day, maybe two, the area looks crisp. But by the third rushed project or busy Saturday, you notice the cost: you’re shifting carts to get through, edging around sharp corners, stretching for bins that seemed accessible on paper but hide behind layers in practice. The overflow corner, once meant to help, gradually becomes the main source of friction—forcing workarounds that sap your energy and slow your routine.

    Why “One More Storage Piece” Rarely Solves It

    It’s easy to rationalize another rack or shelf when open floor feels like missed opportunity. But every addition comes with hidden consequences. What felt like efficiency—an extra cart tucked between workbenches or a new shelf filling the wall—rarely lasts through actual use. As soon as you’re carrying tools in both hands or moving fast between tasks, you run up against it: that rolling cart you have to angle just to open a cabinet, the shelf that crowds out your step as you prep at the bench. It looks sleek until you’re forced into a shuffling, sidestepping routine that eats up time and focus.

    The Realities of Shift-and-Squeeze

    Imagine sprinting into a project, arms full—cordless drill in one hand, box of screws in the other. The path you cleared yesterday is now blocked by the “fix” you added last week. You’re nudging the shelf a few inches, dodging the new cabinet edge, and somehow always reaching behind something to get the tool you actually need. These aren’t just minor annoyances—they turn quick resets into drawn-out puzzles. Each work session ends with you piecing the area back together, hoping next time you won’t be trapped by your own setup.

    When Maximizing Space Backfires

    At first glance, stacked bins, tall rails, and multilevel carts promise an end to chaos—they make unused air space work and clear the benchtop, right? That’s the theory. But the “everything visible, everything accessible” dream doesn’t hold when you’re in a rush. Hooks positioned too high, bins layered behind others, and shelves packed so tightly you have to move two things just to grab one—they kill the flow. Instead of clear work zones, you build a layered obstacle course that demands constant shuffling and re-sorting just to stay on track.

    Vertical Overload: Wall “Optimization” Gone Wrong

    Wall systems seem ideal until you’re reaching for a wrench that’s tucked behind three other hanging tools. In a hurry? Good luck. Every “optimized” peg becomes a mini-bottleneck. Instead of a single, smooth motion, you’re lifting, sliding, and re-hooking items—a process that drags, especially over weeks of repeated use. A wall full of gear might look orderly for a photo, but if you can never return something in a single step, you’re losing the battle for real efficiency.

    In Practice: The Setup That Got in Its Own Way

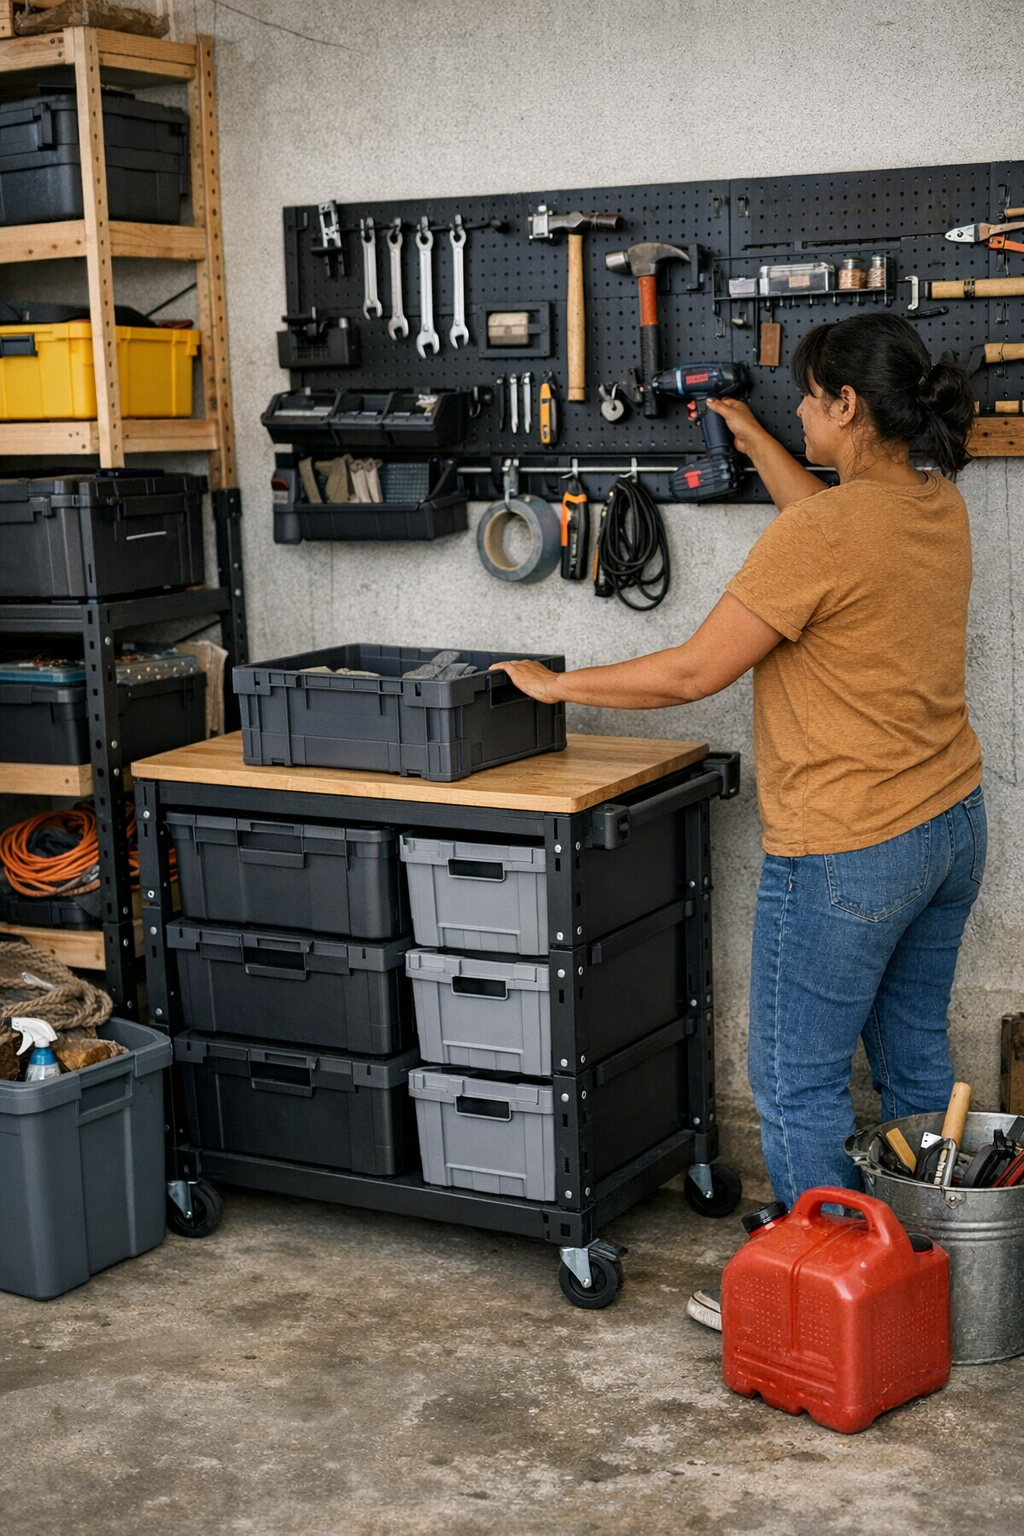
    I once crammed a slender mobile shelf into my narrow garage, convinced it would eliminate the random heap of clamps and fasteners. At first, it worked: chaos was contained and every piece had a home. But almost immediately, the downsides appeared. To unload gear, I’d have to wheel the shelf—never quite straight—just to get to the main storage. Every time I tried to close the cabinet, I’d remember I needed to rotate the shelf out of the arc. Putting things away became a sideways zigzag through the zone, bouncing off units like a pinball. What solved scattered piles in theory slowed every project in reality—resetting at the end of the day felt like rerouting through a mini-maze, every single time.

    A Small Edit That Changed Everything

    Eventually, I ditched the shelf and went radical: a single adjustable rail, one basket, one row lower. Suddenly, the whole rhythm changed. I could reach, return, and move without a single sidestep. Floor space opened up and nothing crowded the doorway. Resetting—wiping down the bench, sweeping, stowing tools—shrank to minutes. For the first time, putting the space back together didn’t feel like solving a sliding-tile puzzle.

    How to Spot Real Storage Friction

    If you’re always managing workarounds, your storage isn’t working. Pause and take note—are you stepping over bins, sliding carts just to open a drawer, or negotiating sharp angles because there’s simply too much in the way? The more you find yourself rearranging the solution instead of using your gear, the less usefulness you get out of the setup. “Organized” doesn’t matter if it’s blocking your everyday movement. When obstacles outnumber clear steps, the system risks becoming another layer of clutter itself.

    The Problem of Clutter Magnet Zones

    Some corners just refuse to play nice—no matter how neatly you arrange things, they end up as accidental dumping grounds when traffic slows or access is tight. Piling in another cabinet or bin never really fixes the problem. Tightly packed dead corners limit what you actually use, turning valuable floor or wall area into a stalled, unusable pocket that only collects more overflow with time.

    How Less Storage Builds More Movement

    The real win isn’t squeezing more units into the floor plan—it’s about letting your routine dictate what stays, where. A reliable layout is one where every tool has a direct, no-obstacle path back home, and you instinctively flow from task to reset. This isn’t about Pinterest-level neatness; it’s about open walkways, fast cleanup, and spaces that stay functional during the busiest Saturday rush. On days when projects multiply, you notice: fewer bottlenecks, no reshuffling, no more wrestling overflow carts just to sweep up.

    Micro-Adjustments, Outsized Results

    The biggest performance leap sometimes comes from the smallest changes. Dropping a basket one hook lower, shifting a cart to the room’s true edge (not its path), or even removing a shelf entirely can transform awkward navigation into easy, repeated flow. The difference appears not just visually, but in how smoothly you glide through work, how little you have to think about returning tools, and how much less effort it takes to keep things in check.

    Measure Efficiency by Movement, Not Just Capacity

    Real workshop efficiency isn’t about maximum storage. It’s about minimum interference: how few steps it takes to grab, use, and put away the essentials. No unnecessary backtracking, no detours around crowded corners, no long pauses to reshuffle bins just to put things back. If cleanup feels quick and returning tools takes almost no thought, you’ve found the sweet spot. Sometimes the best addition is removing what gets in your way.

    Find more practical modular storage ideas for real workshops and garages at StackNest.

  • How Clear Zones and Soft Dividers Transform Closet Organization

    The truth about an organized closet: it only looks calm until daily life moves in. By Wednesday, those tidy stacks and labeled bins can feel like they’re working against you—forcing awkward double-hand shuffles, hidden piles, and the slow creep of category chaos. The real difference isn’t how much you store, but whether your setup makes it nearly impossible for things to drift, blend, and disappear. When a pair of shoes goes missing beneath a toppled stack of shirts, or gloves vanish beneath hats and tote bags, you see just how quickly the friction multiplies.

    Looks Organized. Stays Frustrating.

    Give yourself an afternoon: everything folded, baskets lined up, even a couple of labels. It’s satisfying—until the first working morning. In a rush, you toss sneakers on top of sweaters or sling a hat over whatever pile is handy. The closet’s surface order stays, but one shortcut at a time, you’re setting up daily headaches.

    This is the real cost: A closet that looks crisp on Sunday but becomes an obstacle course by Thursday. Shoes creep into sweater zones. Scarves vanishing into bins meant for belts. That “miscellaneous” basket swallows one new category after another until finding anything fast is a guessing game. What started as efficient storage now demands constant correction.

    Wide Shelves, Deep Bins—And Why Stuff Goes Missing

    Think of that default closet shelf: broad, deep, and flanked by an eager, empty bin. On day one, it’s easy—each item roughly in its place. But the routine quickly betrays you. Shoes drift sideways into shirt territory. The bin for “belts only” quietly takes on sunglasses, an umbrella, even a winter hat someone abandoned. Grabbing what you need turns clumsy:

    • Shoes stuck under a lopsided sweater stack force you to pull out half the pile.
    • Digging for a belt means burrowing through three unrelated items you never meant to store there.
    • Stashing a scarf becomes a negotiation with yesterday’s “temporary” additions.

    You end up resetting the shelf with nearly every use—and the system that seemed so promising just adds more work to routine moments.

    How Categories Blur—and Why It Matters

    When storage zones blur, small hassles become constant interruptions. The “gloves & hats” bin begins to absorb odds and ends—mittens on top, a knitted scarf tangled with last month’s lost sock. The hunt for a glove turns into a messy excavation, half the bin emptied onto the floor. In a high-traffic closet, this isn’t a rare scenario. It’s almost daily: a short delay before rushing out, a mini-reshuffle upon return, and slow-building frustration as every category fights for space.

    With each cycle, the urge to put things back fades—and what started as an intuitive setup now demands extra thought and effort every time you open the closet door.

    Give Everything a Landing Zone

    Here’s the shift that matters: clear, gentle boundaries that encourage items to settle where they belong—no mental overhead required. Not elaborate. Just enough structure to keep hats from invading the glove pile, shoes in their own lane, and categories visibly separate, even during your busiest mornings.

    The practical changes:

    • Swap one open bin for two smaller, shallower ones—one for hats, one for gloves. Overlapping stops cold.
    • Add dividers to shoe racks so each pair claims its own slot. Less sideways sprawl, faster retrieval.
    • Keep baskets only as deep as necessary—so nothing disappears at the bottom or gets buried out of sight.

    These tweaks mean you rarely need to move one thing to get another. Resetting the closet happens almost by habit—the next item finds its spot without effort, and the chance of a misplaced favorite drops dramatically.

    Everyday Friction—How It Builds

    The sweater stack shuffle: Chasing the right shirt means disturbing a teetering pile—with a shoe wedged in the middle.
    The basket lottery: That generous bin now hides three winter gloves, last year’s running hat, and a grocery bag—finding one thing takes emptying half its contents.
    The migrating entryway: Scarves fall from hooks, boots wander, and twice a week you clear a path through catch-all clutter just to find your keys.

    These moments kill momentum. They chip away at the “quick in, quick out” promise an organized closet is supposed to deliver. Lack of boundaries, not lack of space, is why things go sideways.

    Gentle Boundaries: What Makes Them Work

    You don’t want rigid cubbies for every object—but soft, purpose-driven boundaries completely shift how your closet behaves. A simple bin with a divider, a shoe tray that draws a line down the middle, or a set of face-out vertical organizers can:

    • Keep similar items together and visible—no blind digging.
    • Reduce clutter creep, since every category is easy to spot and return.
    • Make daily tidying almost thoughtless—items move back with zero mental negotiation.

    A Quick Visibility Fix

    If something slips behind a stack or vanishes to the back of a deep bin, it fades from daily use. Put the things you actually grab up front and upright—shallow bins, standing pouches, low-profile trays. The easier it is to see, the less likely it is to slip into the category chaos most closets hide.

    Storage That Cooperates With Real Life

    No system is flawless—the goal isn’t a magazine spread, but friction that fades in everyday use. With the right boundaries, resets shrink to seconds instead of minutes. Schedules stay hectic, but at least the closet doesn’t get in your way. Shoes have a slot. Sweaters stay stacked. Gloves come home to their own easy-access bin. You get out the door with one less headache—and your space works for you, week after week, with less effort and less stress.

    Shop ClosetWorks for practical storage solutions

  • Maintaining Impact Driver Bit Retention for Consistent Fastening Performance

    The moment you snap a bit into your impact driver, you’re making a bet: when things get uncomfortable, will this setup actually hold? In the morning, everything clicks into place—fresh bit, clean collet, jobs flying by. But as the day digs in and you’re running screws overhead, wrestling engineered studs, or buzzing through old subfloor, bit retention stops being a background detail. One slip, one chewed screw head, and you’re reminded—tool performance isn’t just about torque numbers, it’s about what happens when wear, dust, and repetition add up.

    Bit Retention: The Hidden Weak Link

    Work a job—real wood, tight space, arms above your head—and each micro-move matters. The first screws go in like clockwork. By mid-shift, a bit of play in the collet creeps in, blurring how much control you actually have. That tiny looseness starts a cascade: bits back out, cam-out scars pile up, and screw heads look melted or torn by the end of the run. It’s not a dramatic “pop”—just a creeping slop that sabotages your finish and your speed. Neglected retention doesn’t shout; it erodes your rhythm, drive after drive.

    How Problems Creep Up (and Why You Don’t Notice Right Away)

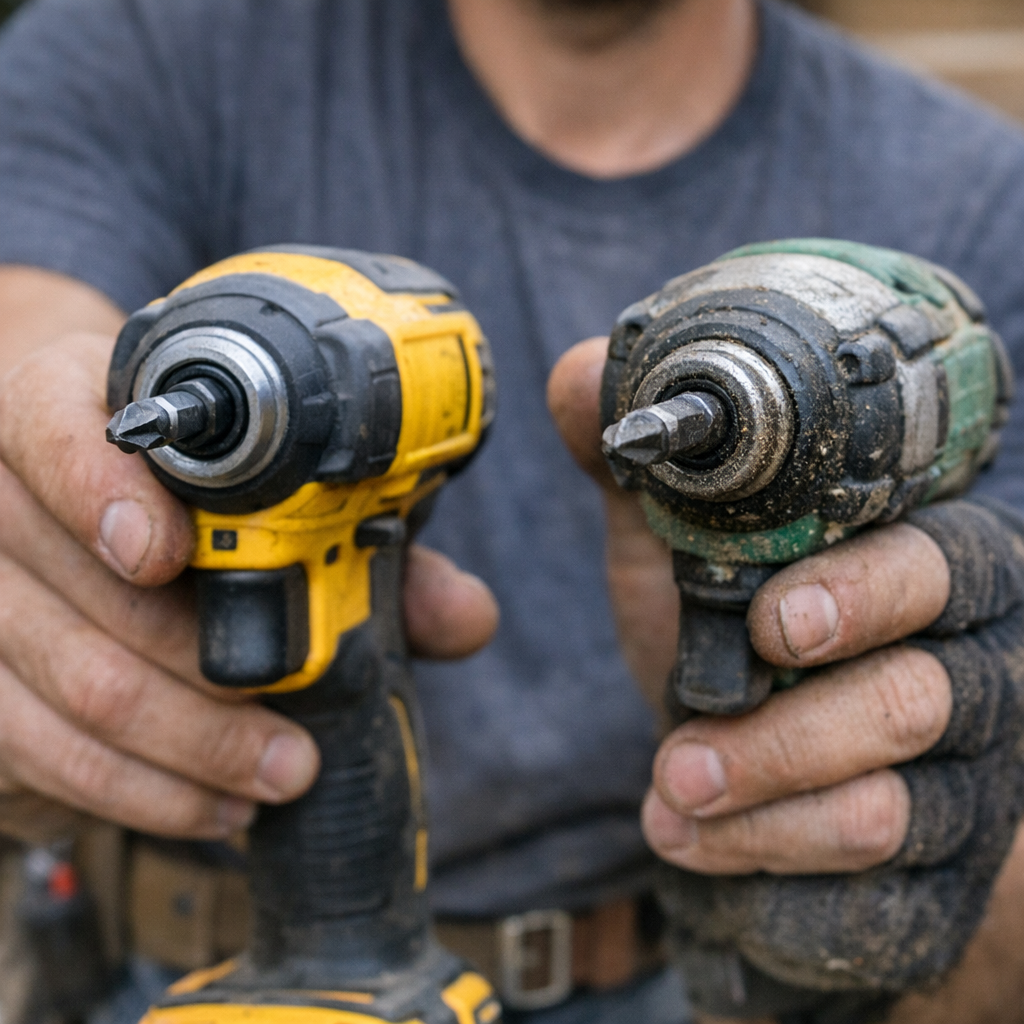
    Set two drivers on the bench—one’s cared for, one’s barely wiped down. Both feel fine on the first plywood sheet, but push into denser, rougher stock and the gap shows. Sawdust, resin, or just Monday’s grime keeps the bit from seating flush. It acts “close enough” until you hit a stubborn fastener and suddenly the bit skips, rattles, or sticks partway out of the drive head.

    This isn’t just theory—it’s routine shop trouble: One week, no cleaning, and suddenly you’re extracting bits jammed in a resin-soaked collet, or replacing screws that look shredded before they’re even tight. Swap bits too often without wiping down, and you’ll see fine metal flakes and growing side-wobble build up fast. The “click” you trusted at the start? If you’re not vigilant, it’s acting as cover for accumulating slop.

    What Maintenance Actually Feels Like Under Real Pressure

    Bring two tools to a stubborn corner cut—both loaded with fresh bits. The cared-for driver channels energy cleanly, every squeeze feeling tight and expected through the handle. Grab a carelessly maintained driver and you’ll start picking up extra wiggle, unexpected vibration, and fasteners driven at a crooked angle. It’s not just damaged screws—it’s energy lost, bumps transferred straight to your wrist, and time burned fixing avoidable scars.

    Try keeping your arms overhead after a full bag of screws: On the second ladder move, muscle memory wants the tool to just work. But that slop in the collet or sleeve leads to the bit catching, bucking, or even sliding just enough to jam a screw too deep. Small lapses in retention turn into fatigue fast, and the job starts feeling heavier than it should.

    Five Minutes That Change a Week of Fastening

    One crew member, cutting corners on cleanup, starts noticing bit wobble and chewed heads halfway through a door install. He finally stops, wipes down the collet, brushes out debris, drops a hint of oil in. The result: instant drop in side-play. Suddenly, every screw sets flush, metal shards disappear, and finish work picks up speed. No new driver, just a five-minute reset that saves twenty minutes of headaches by the end of the day.

    Real-world ritual: Keep a small rag and oil in your tool roll. Quick wipe, drop of oil between material swaps—especially when moving from gritty treated lumber to interior ply—means fewer mid-run interruptions and tighter fits every time.

    Spotting When Your Driver’s Slipping

    Know the signs before mistakes build up:

    • Bits start spinning or wobbling after the third or fourth screw
    • Screw heads finish with sharp, torn edges—even on “easy” material
    • You feel a surprise jolt down the handle, or an odd chattering sound mid-drive
    • Bright scuffs or chatter rings form around fastener heads instead of clean seats

    If any of these start showing up, stop and check your retention—especially after dusty jobs or swapping between different fastener types and materials. Ignoring the creeping play all but guarantees lost efficiency and rougher finishes as the day drags on.

    Small Habits, Big Results—Why Most Runs Stand or Fall on Maintenance

    Smoother work isn’t about the newest driver on the truck—it usually comes from the most consistent habits. Daily care—dusting the collet, feeling for wiggle, the smallest hint of oil—keeps your workflow tight and your tool honest. By the hundredth fastener, that five-minute check will be the reason your work looks clean, feels lighter, and doesn’t stall out hunting for a backup bit or sanding over avoidable damage.

    If you want more practical tool solutions built for real work, visit Gumboll.

  • Why Your Garage Storage Fails After a Few Uses and How to Fix It

    The difference between a space that “looks organized” and one that truly works for you is exposed at the exact moment you’re in a hurry—reaching for a tool, trying to reset the bench between jobs, or hunting for that one item you know you put “somewhere obvious.” In the world of garages, workshops, and utility rooms, the setup isn’t tested by photos on day one—it’s tested by the repeat friction that creeps in day after day.

    Where Friction Lurks: The Subtle Enemies of Flow

    Most setups start out promising. You spend a weekend lining up shelving, add a fresh cart, maybe even label every bin. At first, there’s relief: everything feels in control. But fast-forward a few weekends of real projects, and the cracks show.

    Do you find yourself nudging a cart aside—again—just to swing open a cabinet door? Unstacking two lighter bins to get that heavier one you always use? If grabbing a screwdriver means weaving through an awkward footprint or shuffling an overflow pile for the third time this week, your storage is silently slowing you down. What looked efficient becomes a daily source of tiny interruptions.

    When “Organized” Turns Into Obstacles

    An area that appears uncluttered on day one can quickly sabotage itself under stress. Return a tool after a long project and discover there’s no clear place—so it gets tossed in the nearest open bin. Then you block a shelf with leftover gear. Soon, small delays become predictable: sidestepping, pushing aside, rummaging. Every extra step and blocked route reinforces the same truth: the system fits the stuff, but not the way you actually use the space.

    Reality Check: The Shuffle Trap in Action

    You finish yard work with tools caked in dirt. You bring a shovel back to the garage, but can’t return it to its intended spot—maybe a camping cooler is blocking the shelf, or a folding chair wedged in from the last “reset.” Out of time, you lean the shovel against a wall or wedge it into a bin. By next weekend, it’s buried, and the quick return becomes another drawn-out hunt. Over time, what should be “grab-and-go” turns into constant reshuffling. The system doesn’t fall apart all at once—it wears you down through accumulated friction.

    Overflow Zones and Corners Gone Stale

    Every setup develops trouble spots: one shelf that absorbs anything that doesn’t fit elsewhere, the back corner that becomes a graveyard for half-finished projects, a stretch of wall that’s labeled but never truly used. When those overflow areas swell with stray items—when you keep parking a cart in the only clear floor path, or junk spreads into the same awkward corner—the layout has stopped supporting you and started resisting your flow.

    Overflow signals lost ground. It eats up valuable floor space, clogs walkways, and bogs down even the quickest reset. The mobile cart meant to increase flexibility becomes immobile—parked in front of standing space, collecting whatever you can’t put away quickly. Instead of relieving chaos, your “solution” reshuffles it into places that interrupt real work.

    Pretending to Be Organized—Until Use Proves Otherwise

    Beneath the surface order—stacked bins, neat labels, fresh lines on the floor—old problems often persist. If putting anything away regularly means shifting something else or inventing new categories on the fly, your routines suffer. What starts as organization slips into a free-for-all: categories blur, clear paths vanish, and the time spent “maintaining” only increases.

    Unlocking Flow: One Upgrade Can Change Everything

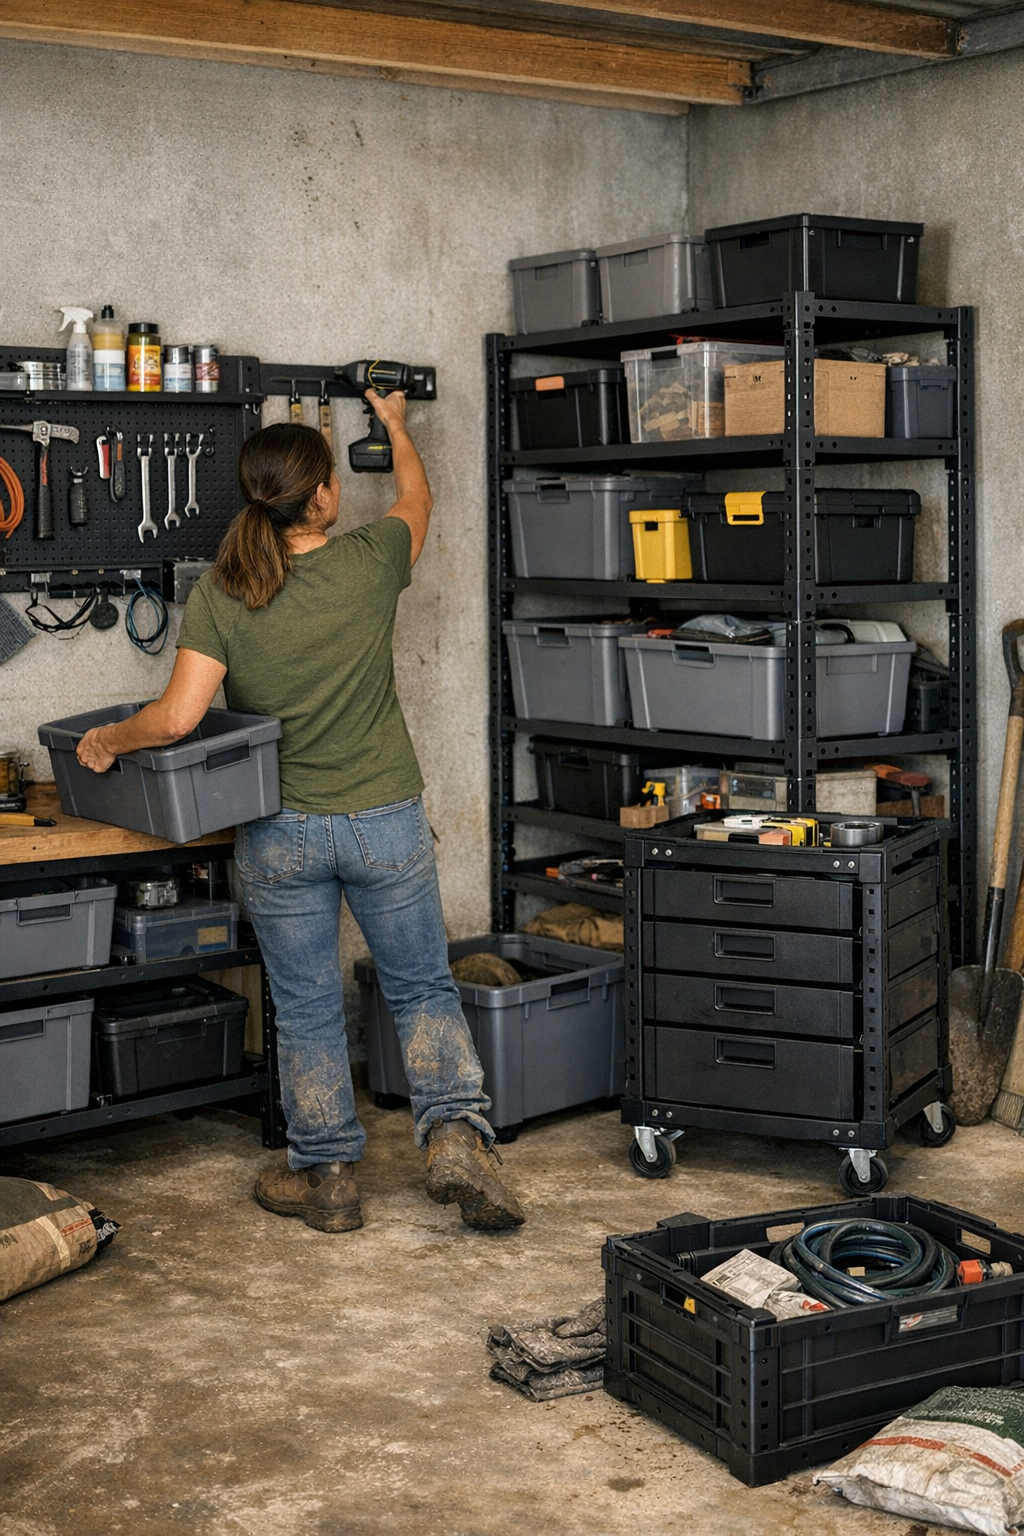
    True improvement rarely means a full overhaul. Often, one smart tweak unlocks your whole routine. Swap a deep, double-stacked shelf for a shallow wall rail above the bench: suddenly, you’re not reaching over three bins for pliers—they’re just there, in sight, at hand. No more stacking and restacking. The setup isn’t perfect, but every grab-and-return is smoother, faster, less likely to snowball into chaos.

    These changes don’t erase mess forever—but they create a system that stays functional even as tools shift in and out. Over time, that’s the real difference: a workspace that adapts to use instead of collapsing under it.

    Try These Two Real-World Tests

    • Map your return moves: The next time you’re done with a chore, notice exactly how you put back the five things you touched most. Are there extra steps? Do you have to detour or move something else first? Small annoyances repeat and multiply fast.
    • Spot your quiet spill zones: Pay attention to which areas gather items “just for now.” Are those shelves or floor areas attracting overflow because there’s no real home for those objects? This is the setup’s pressure test—where it breaks, revise with clarity or fresh storage before clutter becomes the default.

    Making the Setup Last: Build for Use, Not Photos

    The best setups aren’t the most visually impressive; they’re the ones that let you move without second-guessing, reset without dragging bins around, and adapt quickly as needs change. In practice, that often looks like:

    • Mounting your high-turnover tools right where you actually use them—even if it “breaks” the symmetry.
    • Creating designated cart paths free from blockage, not just empty floor on setup day.
    • Picking storage shallow enough that nothing gets buried, so you see it, grab it, and put it back—no buried layers waiting for next season.
    • Tweaking the system regularly when new overflow or dead zones appear; don’t wait until frustration sets in.

    Setup is a living pattern—never finished, always adapting. A system that fits your real routine makes daily movement simpler, not more complicated. If you constantly find yourself blocked, overloaded, or reshuffling despite best efforts, it’s not disorganization—it’s your current setup holding you back. The right, practical adjustment can shift your workspace from a struggle back to a tool that actually helps.

    http://stacknest.myshopify.com

  • Balancing Style and Function in Everyday Storage Solutions

    The glossy promise of “organized” storage is everywhere—matching baskets, rows of bins, that dream of everything in its place. But real-life pressure points surface fast: not on day one, but during the third rushed morning, the fourth laundry load, the fifteenth time you dig for headphones you swore were in “the basket.” Instantly neat-looking spaces are easy to create, especially in active zones like entryways, closets, or at the base of the stairs. But as the week unfolds, it’s the usability—not the look—that matters. That’s where so many setups quietly break down.

    Photo-Ready or Practical? The Tradeoff You Feel Every Day

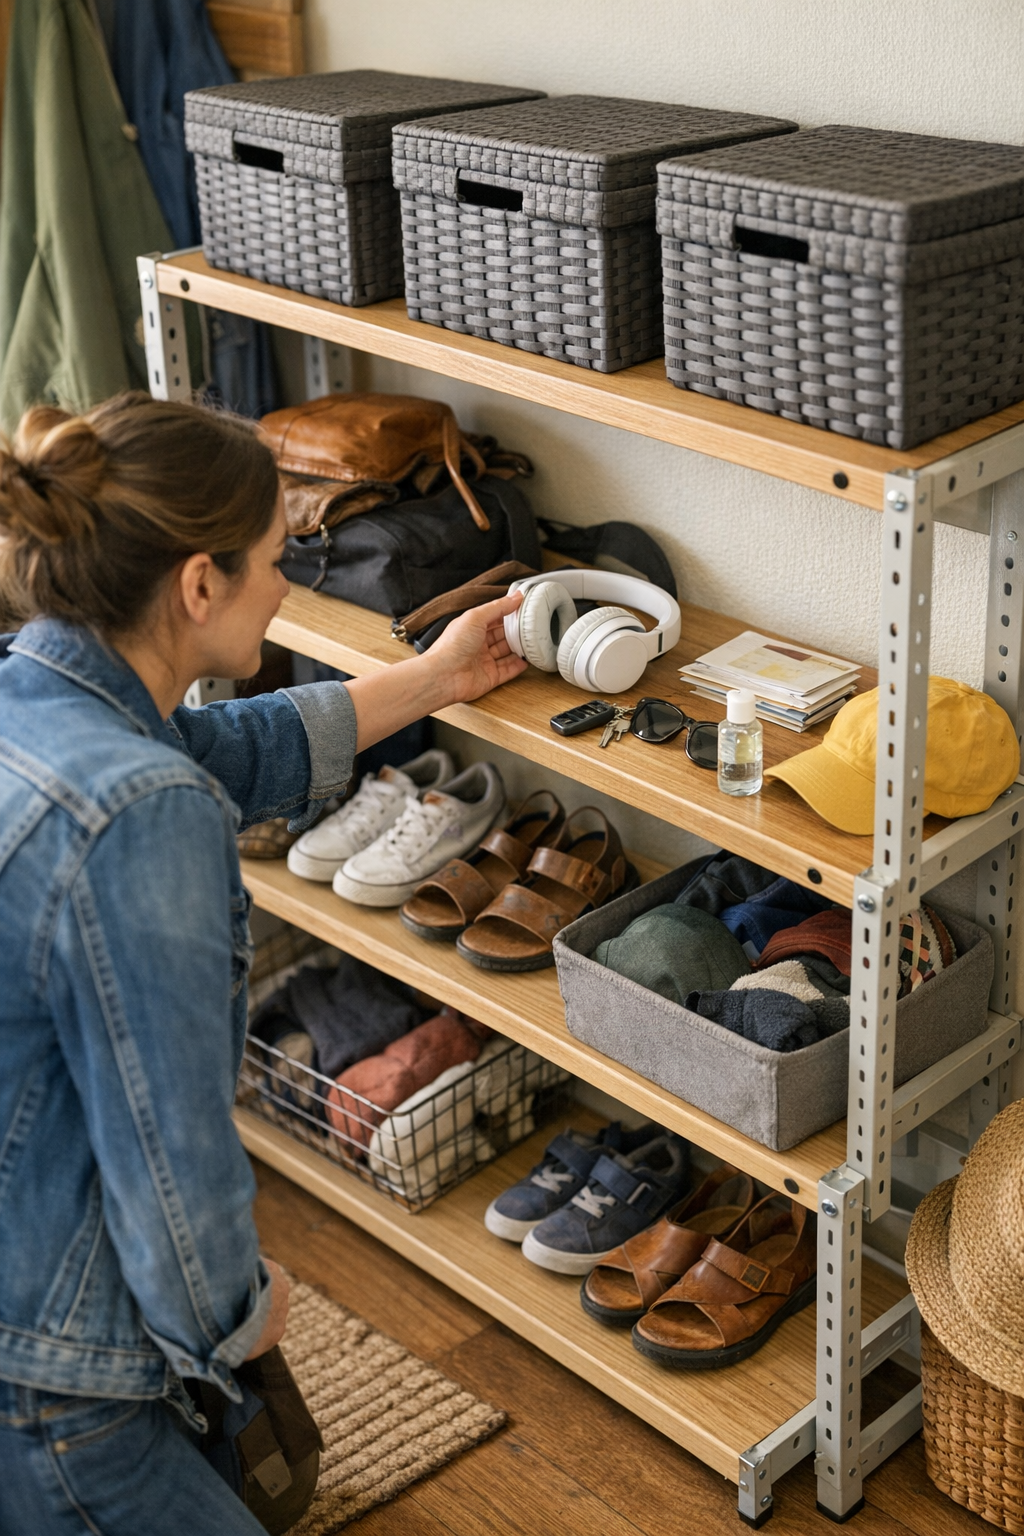
    Uniform bins and pretty baskets deliver instant transformation: shelves go from chaos to a glossy catalog page. The illusion usually unravels by breakfast. With nearly identical baskets, the search begins: all the lids look the same, but today you need the field trip form, a left glove, the earbuds for the bus ride. Closed storage turns morning access into a guessing game—lifting lids, peeking under folded scarves, hoping you don’t have to upend a stack to check the next bin down.

    This whack-a-mole hunt doesn’t limit itself to one spot. Bins migrate to bedroom bookcases, hallway shelves, laundry nooks, and suddenly every quick grab becomes a mini excavation. The daily buildup is subtle: things quietly drift out of the “system” onto open surfaces—a hat on the banister, shoes abandoned by the sofa—because retrieving them from “organized” storage now takes three extra steps nobody wants to repeat.

    When Hidden Storage Creates New Problems

    Closed bins aren’t inherently flawed—they’re just mismatched with everyday, high-touch items. For backup extension cords, extra mittens, or holiday decorations, hiding stuff away makes sense. For everything you—and everyone else—actually touches on a daily basis, it just gets in the way. With phones dying, mail needing sorting, and a child late for practice, the last thing you want is to fumble through the wrong basket—again.

    Categories That Don’t Stick

    Every storage system starts with hope: one bin for hats, one for pet stuff, another labeled for “chargers.” By Thursday, the charger bin holds crayons, goggles, and a single slipper. Life’s pace tramples categories. After enough mishaps—gloves tossed in “mail,” receipts hopelessly crumpled under scarves—the whole family stops bothering, because the work of sorting outweighs the payoff. Overflow builds up, and the original boundaries dissolve.

    The Chain Reaction of Extra Steps

    Scenes repeat: the dog leash hides in the third bin down, so two bins come out, slumping the tidy line of containers. Grab one thing, reshuffle them all. Or worse, you open, dig, and realize—wrong one. Stack, unstack, restack: these slowdowns add up and pile on irritation. By Friday, the shelves look less peaceful, more like an obstacle course. The “easy” routine is suddenly a test of patience.

    High-Traffic Zones: Where Order Collapses First

    Busy entryways expose the weakness immediately. Everyone coming in or rushing out wants surface-level speed, not lid-lifting or mystery bins. What begins as organized—backpacks in a bin, shoes stacked away—ends with sneakers clustered by the door and bags draped over chairs. The system quietly fails under the pressure of life in motion.

    Closet shelves tell a similar story. Folded shirts start upright in a deep basket, but as outfits are yanked during frantic mornings, the pile tips, shirts slouch, and soon everything’s toppled at the bottom. Instead of maintaining order, the storage container becomes just another mess to sort through, not a system that keeps its own shape.

    Real-life storage only works if it keeps pace with habits. If putting things away takes too many steps, or if seeing what you have requires constant uncovering, clutter will always find new homes—usually on the nearest horizontal surface. By Thursday night, open counters and spare chairs fill with everything crowded out of neat-looking bins.

    Open Storage: The Real Shortcut to Staying Organized

    Here’s where small changes make a visible difference: open bins, shallow trays, and clear shelves change the whole dynamic. With daily-use essentials in full view, you skip the rituals of sorting and hunting. Suddenly, “grab and go” routines work as intended. The result isn’t just speed, but better boundaries and less reshuffling overall. What actually happens day to day:

    • Immediate access: Water bottles, keys, headphones—one move, not five, and you’re out the door.
    • Easier resets: When you see the shelf crowding, you can purge or rehome items in seconds—no more “out of sight, forgotten ‘til spring cleaning.”
    • Role clarity restored: It’s obvious what goes where, so hats stay with hats, tech stays together, and the dog leash doesn’t wander into snack storage.
    • Fewer lost items: Visibility cuts down on double-buys and last-minute panics—if you see something’s missing, you notice right away.

    Set a Visual Limit—the “Tray Is Full” Trigger

    Open storage comes with a built-in signal: when the tray fills or the bin overflows, it’s time to purge. No more mystery stockpiles hiding behind closed lids. Use a shallow tray as a parking space for daily items—when you can’t fit more, it’s an obvious cue to reset. The shelf stays steady and your system regulates itself, not just on day one, but over months of use.

    Know When It’s Time to Rethink Your Setup

    You’ll feel it first in your own daily beat—if you can put things away and find them again without pausing, your system works. But when you catch yourself:

    • Repeating the same hunt for the basics
    • Noticing bins morph into mixed heaps that lose their roles
    • Watching “just for now” items multiply on counters
    • Feeling hesitation or annoyance every time you need to return something

    —that’s your gut telling you it’s broken. Usually, you don’t need a total overhaul; one open shelf at “grab height,” or a few see-through bins in the busiest spots, is enough to take the pressure off and win back function. You don’t need perfect categories—just visible, one-move homes within reach.

    Where Style Meets Reality (and Actually Lasts)

    There’s still a place for lidded boxes and matching baskets. For guest blankets, off-season decor, or craft supplies you reach for once a month, the benefits of hidden storage—dust control, visual calm—make sense. But for your “in and out” stuff, visibility wins every time. Durable, livable order isn’t about glossy calm; it’s about being able to function, fast, every day—even after a tornado of a week.

    If shelving still feels crowded, bins fill up fast, or the “organized” look falls apart by midweek, consider: a move toward open, obvious storage isn’t just style—it’s relief. And relief tends to last longer than any label.

    Find practical solutions for every routine and room at ClosetWorks.

  • Prevent Masonry Drill Bit Overheating with Carbide Tips and Proper Technique

    Halfway down a row of concrete block, your drill buckles, the bit smokes, and progress grinds to a halt. You started clean—anchors ready, a fresh bit that looked promising in the lineup. But by hole seven or eight, every push on the trigger feels heavier. Dust comes out black and gritty, the bit’s tip is too hot to touch, and that perfect paint finish is left scarred by ragged holes. Most crews have lived this shift: what seemed like a routine string of fixings turns into an hour spent patching, swapping dull bits, and wishing you’d grabbed masonry-rated gear.

    The Subtle But Brutal Gap Between Bit Types

    On the bench, “all-purpose” and masonry-labeled bits look nearly identical. Toss either in your kit and you might not think twice—until you put them into real material, back-to-back. The first handful of holes into concrete tends to hide the difference. Steel bits blast through soft surfaces and even tease you with early success in block. Then, as soon as you’re locked into a repetitive run, their limits reveal themselves: the drill starts to whine, you force the tool more, and the bit edge starts to fail from heat soak not visible at first glance. Suddenly, instead of drilling, you’re stuck in a loop—bit stalls, holes get uglier, and your work tempo falls apart.

    Why Heat and Vibration Steal the Job from You

    Masonry work generates relentless heat—fast. Drill bits meant for wood or metal aren’t built for this: their edges overheat, metal blunts out, and dust turns dark within minutes. As temperature climbs, you feel more resistance, the tool starts wobbling, and your holes lose their precision. It’s not just about progress—now your anchors risk shifting or slipping. Even one ragged entry can lead to patching, redrilling, or worse, leaving behind a weak fastening point you’ll worry about long after cleanup.

    Carbide-tipped masonry bits are different for one simple reason: they’re made to stay sharp through the heat. The carbide edge cuts cleaner, dissipates heat faster, and resists vibration. You keep your rhythm, and holes stay true—so you’re patching less and moving faster, without burning through your forearms or your bit stash.

    Quick Scene: Swapping Bits, Feeling the Real Change

    Try blasting three holes in old brick with a basic steel bit. The drill labors. Dust is burnt. The result? Jagged, chipped entry points and paint you’ll have to fix. Switch to carbide mid-job—immediately less vibration, the noise smooths out, and round holes actually hold anchors snug. You finish faster, and the wall looks like you planned it—not like you fought with it.

    When Good Drilling Starts to Go Bad—Spotting the Decline in Real Time

    Picture it: fastening conduit runs, spacing brackets evenly along that block wall. Early on, every anchor seats cleanly. But as you move down the line—especially if you’re stubbornly sticking with a worn or generic bit—the problems compound:

    • The drill growls and chatters, fighting the material at each new hole.
    • Acrid heat rises—burnt dust, scorched bit tips, and the unmistakable smell of overheated metal.
    • Entry points chip out, paint flakes, and the holes drift off-round or widen unpredictably.
    • Dust gets gritty, black, sometimes even clumps or fuses inside the hole, making each pass harder than the last.

    By hole ten, you’re juggling patch compound and swapping bits, hoping you haven’t ruined the finish or the day’s schedule. Anchors sit loose. You try “wobble-drilling” to get through—but you know it’s a shortcut you’ll pay for when those brackets get checked down the road.

    Working On, Not Against, the Wall: How Carbide Bits Change the Game

    When you switch to carbide-tipped gear and add a rhythm of short pauses, everything clicks back into place. Trusted job habits make the improvement obvious:

    • The bit keeps its edge—hole after hole, 20 or more, with far less chatter or pressure needed.
    • Pausing briefly to brush out packed dust or tap the bit free keeps holes cool and sharp—five seconds you gain back tenfold by skipping later repairs.
    • Feel it in your hand: steadier runs, fewer tool surges, and predictable cut speed the whole way down a bracket line.

    When the bit stays sharp, the tool does most of the work—not your wrist, not your patience, not tomorrow’s patch list.

    Field Habits That Actually Save Time

    Here’s what separates a smooth run from a struggle:

    • Clear dust every few holes. Packed debris acts like insulation—trapping heat, blunting your bit, and ruining hole quality fast.
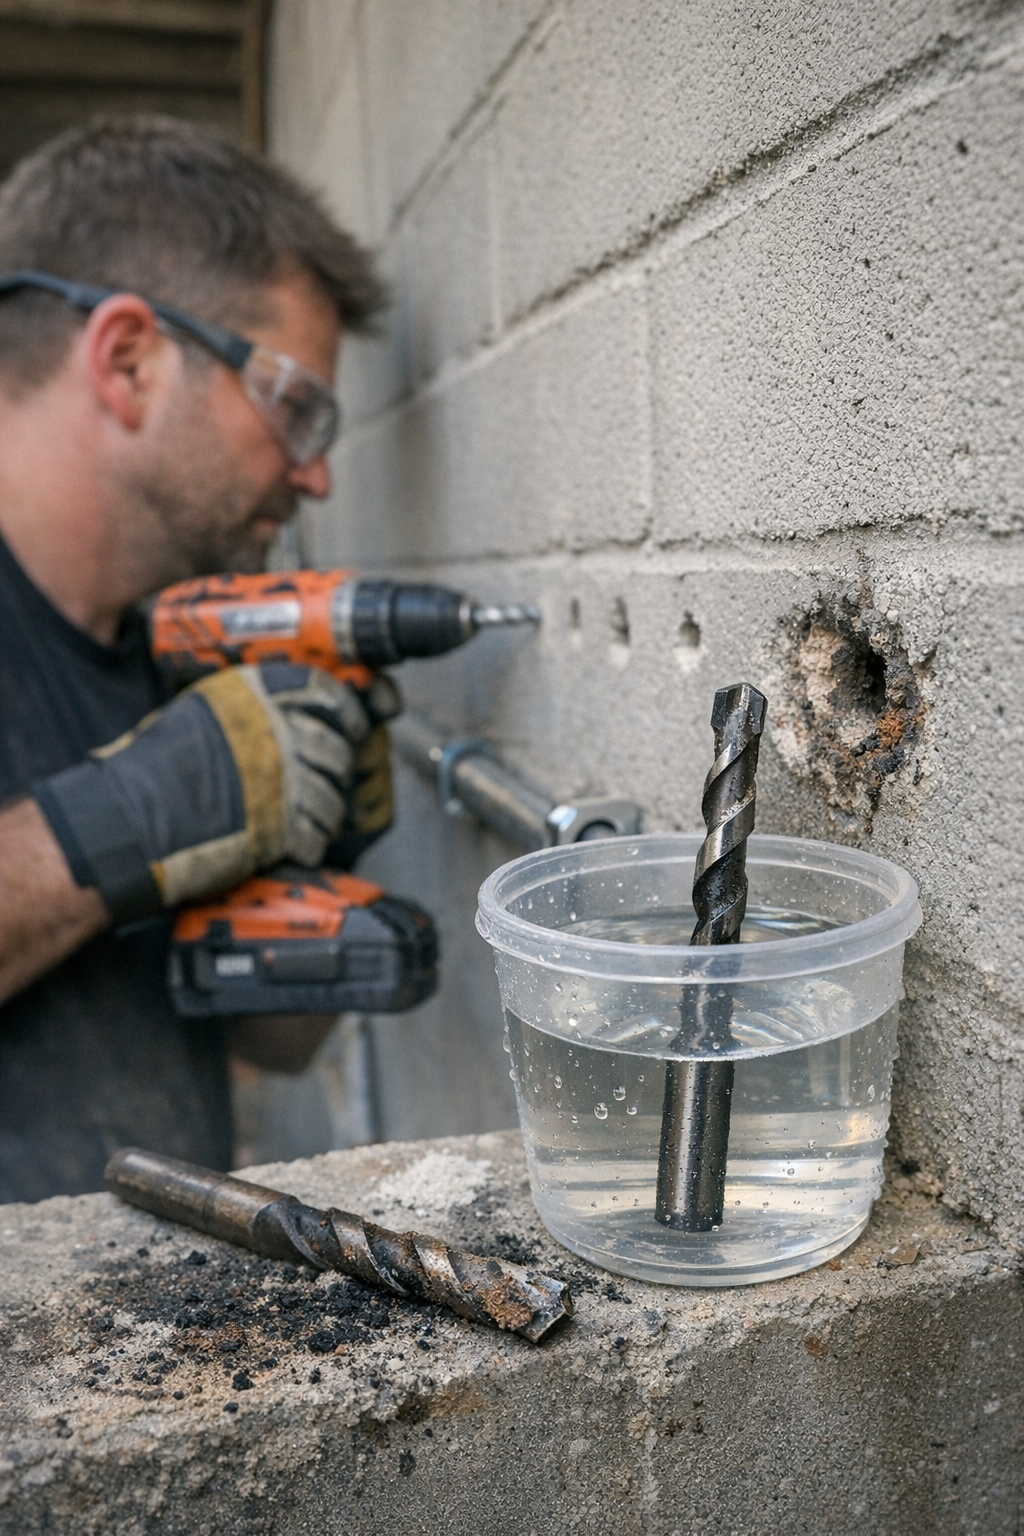
    • For relentless block or old concrete, dip the bit in water or use a mist sprayer. It’s a two-second move that stops overheating before it starts, giving you a real shot at making one bit go the distance.

    For a handful of holes in newer brick you might skip these. But facing a row of block or jobs where finish quality matters, these tricks mean less downtime, fewer broken bits, and walls that don’t betray the battle fought for every anchor.

    Real-Life Questions About Bit Overheating—Answered

    Why do my bits burn out so fast in concrete or block?

    Dense masonry builds heat inside holes way faster than wood or drywall. Standard bits can’t ventilate or deal with constant friction—they dull, slip, and burn, sometimes inside ten holes. Masonry-rated carbide bits, plus mid-job pauses, stay working longer and avoid that mid-job collapse.

    How can I tell a bit is cooked—before it ruins the wall?

    The drill starts dragging, vibration rises, and burnt dust or scorched tips show up quick. You’ll often smell a sharp, burnt odor before noticing visible damage. When these signs hit, stop—cool the bit, clear the debris, and don’t try to muscle through, or you’ll create more work later.

    Is water dipping just for pros, or does it help on basic runs?

    If you’re knocking out a couple holes in soft material, water isn’t always worth the fuss. But if you’re tackling a long line in older block or stubborn concrete, a quick dip or spritz between batches can extend bit life and preserve finish—actual time saved, not just for show.

    No Hype, Just Fewer Headaches and a Cleaner Result

    No drill bit is magic, and nothing bypasses wear forever. But in the chaos of real jobs—walls that aren’t perfect, anchors spaced by tape measure and instinct, paint that actually matters—the right bit, sharper drill rhythm, and small cooling habits take the fight out of the work. Instead, you keep your focus, your tools last, and the job wraps up without the telltale scars of a fight lost to heat and haste. Lose sight of these basics and you’re not just fixing ugly holes—you’re losing time, money, and trust in your own work.

    Explore Gumboll’s selection of masonry-rated bits and real job gear at http://gumboll.myshopify.com