Category: Lighting & Work Setup

  • Why Scanning Twice with a Stud Finder Secures Lasting Wall Lighting

    Install a ceiling light that looks “right” and you might not catch what’s missing until daily use exposes it. The fixture looks flush, the room glows—then, by the third laundry cycle, something shifts. The hallway light tilts after a sharp door slam. The mirror sconce shivers every time someone leans in too close. Suddenly, “good enough” mounting turns into flicker, drift, and uneven shadow—reminders that missing the stud wasn’t just a first-day mistake, but a setup for repeated interruption.

    The Problem Behind “Almost Right” Lighting Installs

    No one thinks about their hallway flush mount or bathroom sconce after the first install—until a week later, when flaws start to show. All it takes is a centered fixture biting into drywall (not actual framing), and tiny stresses build with every footstep, closing door, or bump. That quick pass with the stud finder? It left just enough margin for error. Now, you’re patching chipped paint around loose screws, or spinning a utility light back into position before every load of laundry. What starts as “good enough” becomes another slow, invisible leak of comfort—and time.

    The biggest culprit isn’t the fixture itself. It’s lazy anchoring: screws set into weak substrate instead of structure. A stud finder flown fast across painted drywall picks up false edges, misses true centers, and gives mounting points that only feel stable—until the reality of movement sets in. What follows is a cycle: light shifts, shadows creep, and what worked on day one starts working against you. Frequent fixes, re-drilling, and touch-ups become just more maintenance layered onto routine life.

    Quiet Trouble Spots: Where Slack Mounts Show Up First

    Corridors and High-Movement Zones

    A hallway ceiling fixture might look balanced, but with only drywall behind the screws, even small vibrations throw it off. Every slammed door adds a fraction of sag; within days, the light’s axis is crooked, shadows bunch unevenly along one edge, and late-night crossings get interrupted by a buzzing overhead. These flaws get sharper with every pass—especially wherever traffic is constant or unpredictable.

    Mirror and Vanity Lights: When Every Angle Counts

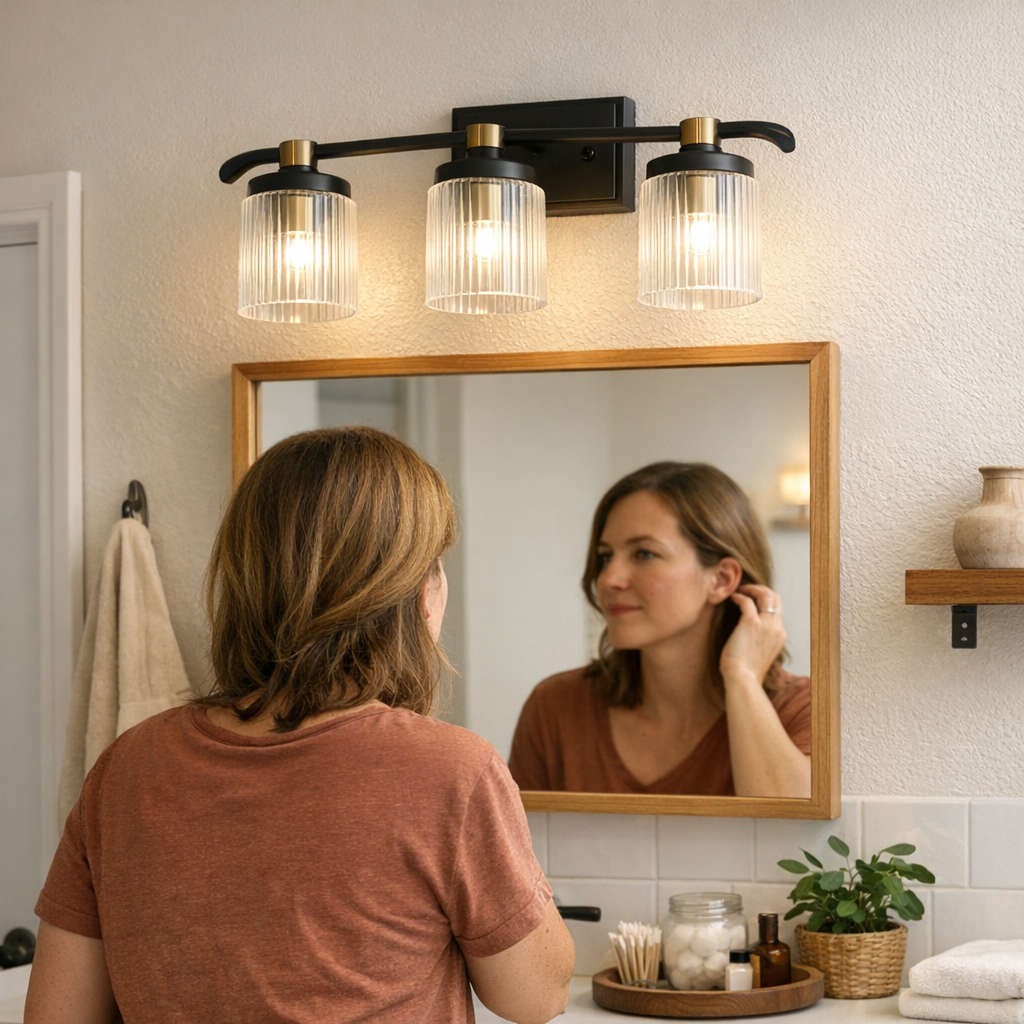
    Here, a sconce that slipped out of level means trust is gone. The first gentle bump tips the light—and your reflection—off-center. Suddenly one cheek catches glare; the other, shadow. Even a small shift turns every morning routine into a game of angling for clear, steady light. Fixing the hardware never seems to last, because the root problem was missed during install, not discovered after.

    Stairways and Tight Spaces

    Halfway up the stairs, a fixture that rattles or buzzes is more than an annoyance—it’s a signal that mounting failed. Miss the stud, and every climb loosens screws further. With each descent, the light sways slightly, bouncing shadow across the steps. Pause at the landing, and instead of steady clarity, you’re squinting between bright spots and patchy dark, questioning your own footing. Lighting’s real job—making the route easy and safe—is lost to a mounting shortcut.

    The Real-World Impact of Stud Accuracy

    Fixtures in living spaces absorb more punishment than most people imagine. Doors crack open, baskets are dragged past, temperature shifts make materials flex—all sending tiny tremors to anything fastened into drywall alone. Even a half-inch error between stud and anchor accumulates: the fixture tilts, fasteners slip, and what once looked seamless feels increasingly off-balance.

    You see the consequences in:

    • Rooms where the work surface or counter edge always seems shadowed, no matter the bulb
    • Stairwells where one side is always easier to see than the other
    • Entryway lights buzzing or shifting focus after guests come and go
    • Hallways that glow on paper but lose practical clarity every evening

    “Almost works” isn’t a minor detail—it adds up, frustration by frustration, until there’s no option but to re-anchor and repair.

    Double Scanning: Small Habit, Big Difference

    Slow down your scan. A stud finder pushed too quickly gives a false sense of security. Slide in one direction, mark the hit, and then repeat from the other end. The stud’s true center is where those marks overlap. When working over tile, thick drywall, or moisture-resistant panels, confirm your stud finder’s depth setting before trusting a reading.

    Always work from a fixed point—like a door frame, not a guess. Check that your marks agree before you drill. This habit does more than prevent crooked installations: it means fewer repairs, a light that truly stays where you need it, and routines uninterrupted by slow fixture failure. Slowing down once saves time, noise, and rework for months to come.

    Personal Example: From Ongoing Drift to Solid Confidence

    After months battling a hallway sconce that always worked itself loose, double scanning became my go-to. I marked stud hits from both directions and referenced off the nearest frame—not the center of the wall. The change was immediate: the new mounting stayed solid, with even lighting from stair landing to hallway end. Each night, crossing that path, I stopped thinking about the fixture entirely—which was the point.

    Fixture Types and Real-Use Stress Points

    Flush mounts in entryways, wall sconces beside laundry machines, vanity lights for narrow bathrooms—all face a unique mix of movement and routine stress. Drywall anchors lose. Heavy fixtures, high-traffic zones, and anything near stair-turns, corridor junctions, or overhead work areas demand structure. Secure through to the framing or joist, period. Most ceilings—especially lower or wider ones—hide supports farther apart than you think. Skipping the second scan might make the room look “done,” but it guarantees ongoing issues the moment life gets noisy.

    A few extra minutes finding the stud don’t just prevent sag or flicker. They keep the fixture invisible in the best way—supporting the space, not distracting from it.

    Quick Tips for Stud-Secure Lighting Installations

    • Test your stud finder’s depth regularly—damp rooms, tile backsplashes, and thicker walls fool old batteries and weak settings fast.
    • Nail the mounting to structure through high-movement zones; drywall anchors are a short-term patch at best.
    • Mark both sides of the stud—stop trusting any single “beep” or edge reading, especially for heavy or hardwired fixtures.
    • Trade speed for accuracy where it counts: halls, stairs, mirrors, laundry. A truly anchored light melts into the background so you never have to think about it during use.

    Lighting That Supports Real Routines

    The real difference between “done” and durable isn’t visible in a final inspection—it shows up in what you stop noticing. No shifting shadows on a hallway turn, no glare escaping around a once-wobbly mirror sconce, no patchy dimness every laundry cycle. Lighting that’s securely mounted becomes invisible support for your habits, not a recurring problem. The shortcut—skipping the careful stud scan—always sends the problem back later. Every routine reminds you until the job is truly done.

    If steady, glare-free, and shadow-controlled lighting is worth it in your busiest indoor spaces, a slower double scan for the stud does more than any fancy fixture could on its own.

    For task-ready, well-anchored fixtures designed for repeated real-world use, visit LightHelper.

  • How Fixed Cable Paths Keep Your Desk Edge Clear and Organized

    Most desks start clean—but it rarely lasts. After the first tidy setup, small cable problems come back fast: a charging cord drifts into your writing space, USB leads slip over the desk’s front edge, power bricks edge closer to where your arm lands. You start by brushing them aside, but by midweek it’s a familiar grind: nudging cables back when they invade your notebook space, catching a wire under your palm as you move from keyboard to pen. What looks organized in the morning falls apart in routine use—not from visible clutter, but friction at the desk edge where your work actually happens.

    Where Clean Looks Fall Apart During Real Work

    The illusion of order holds—for about half a workday. Everything lines up: organizer set, monitor arm fixed, drawers closed flush. But start shifting between tasks—type, jot a note, plug in a device—and the desk’s edge unravels. Cables pile against drawer handles. A charging cable that stayed put at 8 a.m. now blocks your pen when you reach for a pad. A power adapter nudges into your elbow as you adjust your chair. Each movement adds micro-friction, breaking up your workflow every time your hand catches on a stray cord or you catch yourself stopping to clear a surface that looked clear minutes before.

    This isn’t just background annoyance. Each arm reach or device swap means another cable is out of place. If your setup asks you to dodge cords every time you move between keyboard and notebook, that “organized look” becomes a maintenance loop: fix, reset, repeat. In compact workstations, where every inch matters and notepad space has to fight USB lines for the same territory, the drain is constant. By your second reset, you’re wasting focus regaining open space instead of working.

    Cable Drift: The Slow Creep That Breaks Flow

    Let a single cord slip for an hour and you’ll feel it: the laptop shift for a quick call sends the charger cable sliding into your lap; a chair pull leaves a USB lead snaking across the area you just cleared; reaching into a shallow drawer yanks another power cord into view. Unanchored cables don’t wait for a deep clean—they wedge themselves into hand space, tangle with drawer units, or fling themselves onto the desk as you adjust your posture. Each time you repeat your most basic task (rotate the monitor, open a drawer, charge a device), you’re forced to rearrange whatever has crept forward.

    This isn’t a one-day nuisance—it’s built into the setup. The cycle is familiar: start by placing the cord, turn away, look back, and it’s already migrated somewhere inconvenient. If a surface has to handle both monitor work and constant note-taking, cable chaos isn’t a rare slip—it’s daily resistance. Every misplaced cord is a split-second interruption that, after enough repeats, chips away at your usable space and working rhythm.

    Structuring the Flow: Locking Cables Into Place

    The answer isn’t another reset—it’s physical structure. Reroute cables through an under-desk tray and lock each one with a fixed, sturdy clip. This pins every charging cable, USB lead, and adapter along a single, predictable exit path—no slack allowed to snake into the workspace. Power bricks hang from the tray, off your surface completely. Only the cables you actually use exit upward, anchored at a fixed spot, sitting no farther than a finger-width from the edge, with nowhere else to wander.

    Drop the cable paths just a few inches below the working edge, and suddenly your writing and reach zones feel as open as they look. “Move the wire before you write” disappears from your routine. You’re free to slide a notepad in beside your keyboard, pull out a drawer without a cord slapping into your palm, even reposition your screen late in the day without catching cables that have drifted into your elbow swing. The edge doesn’t just look uncluttered—it finally acts that way, after real cycles of use.

    How Compounding Friction Adds Up (and When It Disappears)

    No single cable nudge feels urgent, but every time you recover a lost connector or untangle wires to free a notebook, you lose seconds and snap your focus. In shallow desks or split setups where there’s always a competition for reach space, those seconds become the gap between productive work and a setup that resists you. The mental signal that you “never really have space at the edge” is the constant background tax—never major, but always there, adding just enough delay that you stop trusting your surface to stay ready.

    Anchor the cables. Fix the routes. Resets stop being a nagging chore—now you pull out a device, take notes, adjust your chair, all without dragging a power cord back from the floor or finding your charging lead hooked around an organizer. The surface stays open, not because you tidied more often, but because the structure blocks drift entirely. The friction, finally, disappears without effort.

    The Shift That Stuck: Anchored Clips and Predictable Paths

    It wasn’t a big renovation. A tray under the desk, several rigid clips, one rule: no loose cables in the hand zone. Heavy chargers lived in the tray, out of the work area. The main surface stayed genuinely open—so you could actually move a notebook without clearing a route. Desk routines that once started with “collect and reset the cords” quietly vanished. No more surface clutter creeping back after lunch. No more cords waiting to trip your next move.

    Not every desk frustration disappears, but the single most repeatable nuisance—the cable chaos undoing your organization—does. You stop fighting the same problem every morning. Instead, the edge holds steady, so the desk you cleared on Monday still works on Friday.

    Common Questions on Keeping the Desk Edge Ready

    Where do cable trays or clips actually make the most difference?

    Mount trays or rigid clips beneath the back edge of your desk, about four inches in from where your hands and wrists rest for typing or writing. That keeps every cable running close and parallel to the surface—blocked from drifting into your work area and nearly invisible in daily movement. Under-surface trays make even heavy adapters stay out of hand reach, preventing crowd buildup in your critical space.

    If my desk looks clear, do I really need cable management?

    Yes—because “looks clear” doesn’t survive real work. If cable routes aren’t fixed, wires fall into the same hand spaces as you reconnect, move monitors, or type beside your notebook. The edge you cleared keeps filling back in. Only firm paths protect your usable reach from slow invasion.

    How do I keep cables from fraying or wearing out at the exit?

    Use a rigid, padded clip or flexible sleeve right at the desk exit. This eliminates the sharp bends and abrasion that eventually split cable insulation or cause charging to fail. With a stable anchor, the cord always returns to the same spot, ready for action, never dragging visual clutter with it.

    A Desk Edge That Holds Its Own—Session After Session

    The gain isn’t aesthetic—it’s subtraction of the most persistent interruption at the point of use. A neat-looking desk means nothing if cables drift back by noon. Desk setups that endure aren’t just “organized,” they channel cables on purpose and keep them locked in place. That’s how you trade a desk that sabotages your flow for one that quietly supports it.

    When cables have to follow a set route, resets become infrequent, the edge stays ready, and your surface remains usable across all the task-switching, drawer-pulling, and chair shifting a real workday demands.

    Explore the full WorkBasic collection

  • Managing Plug-In Lighting Accessories for Flexible Indoor Spaces

    Plug-in lighting promises instant brightness for any desk, shelf, or shared table—but it’s the mess and movement underneath that decide if it actually works day after day. That neat first setup doesn’t last. As soon as the second charging cable tangles with your lamp cord, or you catch yourself rerouting a loose extension for the third time in a week, it’s clear: flexibility can mean constant, low-level disorder. The cable tucked behind the monitor drags into view each time you reposition your laptop, and the lamp you placed for zero glare at night greets you with a blinding angle the next morning—not because you did anything wrong, but because portable setups are always one small shift away from another interruption. Real comfort with plug-in lighting depends less on surface tidiness and more on whether the system stands up to the friction of repeat use in a real room.

    Why Plug-In Lighting Is Flexible—But Fragile Under Daily Use

    The main draw is obvious: plug-in options are fast, adaptable, and require almost zero commitment. A clamp lamp on the bookshelf, an under-cabinet strip, or a portable desk light lets you reshape a space fast—no holes, no long-term decision, just plug and play. For a table that toggles between dinner, work, and kid projects, or a corner that dumps you from office to reading zone in seconds, you get real freedom to adapt.

    But over time, daily routines expose how quickly that freedom frays. Cables start tracing awkward detours—dangling across walkways, crowding shelf edges, always hunting for the nearest outlet. You might fix the lamp cord on Monday, but by Thursday it’s crossing your coffee zone again. An extension head sticks out behind the couch, forcing you to step up and over, or you find a panel light’s adhesive back starting to let go after a little too much repositioning. These aren’t just eyesores: every stray cable, every misaligned clamp is a repeat friction point—reminding you that “portable” often means “constantly managed.”

    How Clutter, Glare, and Cable Management Interrupt the Routine

    A lighting setup can look clean in the morning and feel like a hassle by the afternoon—especially in active rooms or shifting work zones.

    • Missed edges: An under-cabinet light might brighten the middle of your counter, but the dim edge where you actually chop or prep means you’re always readjusting. Illumination that skips the real work area adds drag to what should be a simple routine.
    • Sudden glare: That night-friendly lamp becomes an eye-straining bright spot at sunrise, sending you back to fuss with angles, shade position, or even switching it off to dodge the shine. Lighting that needs this much babysitting doesn’t disappear into the background.
    • Surface invasion: Clamp lights and slim stick-ons drift—one loose bracket, and the “clear” table now demands a nudge before you can set down your bag. The line between supportive and intrusive shrinks fast as parts slide, cables slump, or pieces creep into daily pathways.

    By Friday, a desk that looked organized on Monday is crowded with the fallout—adjusted lights, visible cords, clutter that’s less about mess than about constant small interruptions.

    Real-Life Setups: When Flexibility Becomes a Hassle

    Consider a multipurpose home office: a conference zone by video call all morning, then a homework hub in the evening. You set up plug-in work lights—easy, adaptable, no drilling. Within days, the freedom unwinds: extension cords turn into trip hazards, a clamp lamp slides out of range just as you join a call, and that “minimal” setup means stray wires greet you every time you cross the room. Each fix lasts a little shorter than the last.

    Or a compact kitchen with an adhesive under-cabinet strip—the prep surface stays bright for a while. But repeated cleaning loosens the strip just enough for the cable to drop into view, making each meal cleanup another reminder that stick-on solutions are rarely set-and-forget. The promise of flexibility comes with a price: every re-angled task, each wiped surface, gives new chances for wires, shadows, or detachment to break your flow.

    How Small Fixes Improve Day-to-Day Use

    Tidiness with plug-in lighting isn’t about making the space prettier; it’s about removing obstacles you bump into over and over. In one desk setup, swapping a loose extension for a slim, surface-mounted raceway did more than hide a line: it stopped chair legs from catching wires every time someone stood up. Elsewhere, adhesive cable clips lined along the back edge of a shelf kept lighting cords from slumping into the workspace—making cleaning easier and signaling fewer “readjustment” days.

    Even minor repositioning—rerouting a clamp lamp cord behind a bracket instead of across a desk—can quiet down distractions. None of these fixes are magic. The lamp stays “portable.” But the room stops reminding you, every few hours, where the setup isn’t working. That’s the line between a solution that’s flexible and one that’s quietly, repeatably functional—ready for change but solid until you actually need to move it.

    Tip: Commit to Cable Paths, Even If the Light Isn’t Permanent

    Don’t leave cords roaming for later. Lock in your cable path—along the baseboard, hugging a desk frame, or tucked in a corner—using cable clips, adhesive guides, or a low-profile raceway. It’s fast insurance: visual calm, less chance of snagging, and a setup that interrupts you less during normal shifts of bags, chairs, or daily sweeps.

    What Actually Holds Up Over Time?

    This is where most setups falter: by week two, is the lighting still doing its job without new friction? Plug-in gear will always move a bit—weighted bases and better clamps stretch the fix further, but any exposed wire or loose anchor invites another disruption. There is no truly “maintenance-free” portable setup. Stability means choosing which interruption you can live with and actively designing out the worst: cords you must dodge, brackets that need nudging, or task lights that flare up at the wrong hour.

    Choosing the Right Plug-In Accessories for Real Spaces

    Clamp lamps, adhesive panels, low-profile under-shelf strips—these are easier on your walls and simple to swap out when you need to relocate. But their real value shows when you prioritize secure grip and built-in cable guidance. That up-front detail matters: fewer resets after cleaning, less time untangling, and fewer evenings spent adjusting what looked “minimal” but acted unpredictable. The cable route and anchor method are what decide if your room just looks neater, or actually works better all week.

    Find a Balance Between Flexibility and Order

    Daily friction sneaks up if you sidestep it in the name of flexibility. The best plug-in setups aren’t invisible; they’re reliable and tuned for how you really move, clean, and work. Ditch the idea of a perfect showroom look if that means more cable drift or repeated fidgeting. Instead, double down on cable routes and stable mounting—especially for shifting desk edges, shared shelves, or any zone that changes roles by the hour. The goal isn’t just a cleaner line, but a lighting system that feels resolved each day—even after a week of unpredictable routines.

    http://www.lightsupport.myshopify.com

  • Why Marking Drill Holes with Tape Ensures Perfect Lighting Alignment

    You install a new flush mount, wall sconce, or bathroom light and expect a finished upgrade—until you step back and see it: the faint tilt, uneven glare across the mirror, or a shadow slicing through the one spot you use every day. Small misalignments at install—the kind that slip in from “eyeballing” or quick measurements—don’t just look sloppy. They shape the room: task areas go dim, stair landings gather dark patches, and daily movement gets awkward. In real-world lighting—hallways, vanities, laundry rooms—a few millimeters off at the start means years of living with fixtures that never feel quite right.

    The Hidden Gravity of a Few Millimeters

    Indoor lights rarely fail dramatically; they fail in the margins. A ceiling panel that’s even slightly skewed throws shadows where you fold laundry. A bathroom mirror catches glare on one half, leaving the other in semi-darkness. Spaces that look bright at first click feel tiring after a week, simply because a misplaced light throws off routines. Repetitive annoyance creeps in—lingering at a stair turn to find your footing, leaning to one side at the mirror for even light, or shifting groceries around for a well-lit countertop. These aren’t one-time irritations; they’re baked into the space by the way drill holes were marked in the first place.

    Every small error grows when the routine sets in. By the third or fourth pass up the stares, or the tenth time you notice your face half-shadowed at the vanity, you realize these quirks aren’t going anywhere. That’s when tiny miscalculations become noisy, everyday friction—avoidable, but now part of the room.

    Why Tape Marks Change Lighting, Not Just Looks

    Lighting isn’t just about hardware or style. What matters most is how that fixture’s position matches up with how the space gets used again and again. Tape marks—simple painter’s tape, not a fancy tool—are where intention gets checked against reality. Without them, lines go crooked, shadows stretch the wrong way, and glare jumps into view from exactly the spots where you stand and move.

    Marking with tape beats memory and visual guessing by:

    • Making real perspective visible: Tape lets you check the intended position exactly from where you’ll walk, turn, or do work—so you catch problems before drill bits leave scars.
    • Protecting small spaces: In narrow baths or corridors, just a little off-center becomes a glaring flaw. Tape helps lock in the right spot on the wall or ceiling, where the fixture actually serves the room’s pattern.

    Real Scenes: Seeing the Problem Emerge

    Small Bathrooms: Every Inch of Light Counts

    Picture a bath where the mirror’s edge nearly kisses the wall. Hang the vanity light by feel, and you’re stuck leaning at an angle each morning—one side of your face bright, the other in shadow. You stop noticing the room and start compensating for it, shifting with the fixture’s mistake every single day. It isn’t just a cosmetic miss—it’s built-in inconvenience at the most-used zone.

    Hallways: Subtle Shifts, Immediate Effects

    Hallways and entries survive on a single fixture. Mount it without taping the mark and, over time, you find the left wall’s always gloomed, or the right side stays washed out. Movement patterns twist: you hug the bright side, rush past the shadows. A minor mounting slip interrupts flow for years—until you finally face a rework.

    Laundry Rooms and Task Areas: Glare and Shadows

    What looks “centered” from the doorway can mean constant shadow at the folding table, or glare bouncing straight into your eyes by the second load. Under-cabinet lights seem promising, but a guessed placement leaves the best working edge dark, making you angle every dish or shuffle piles just to see clearly. A room can look well-lit but still blind or strain you right where it matters.

    The Cascade from Small Errors

    The difference between “it looks finished” and “it actually works” comes down to placement. Tape marks are a small step that turns potential errors visible—before the drill locks them in. Without that check, routine failures start stacking up:

    • Ceiling lights or sconces show a tilt that grows more obvious every day
    • Work surfaces stay in the shadow, no matter how many bulbs you swap
    • Mirror zones collect uneven glare, making tasks awkward instead of easy
    • Fixes mean patched drywall, paint, and more time lost—never fully restoring the surface

    In small rooms and flexible-use spaces, these flaws are amplified. Once you’ve lived with them, “almost straight” becomes a persistent defect burned into your routines.

    A Small Habit for Consistently Usable Light

    The most functional lighting is invisible in everyday use—you don’t have to sidestep shadows, lean for clarity, or wonder why one spot never feels comfortable.

    Getting there isn’t about expensive fixtures or complicated plans. It’s this: mark center and edges with tape, transfer marks to the surface, and review from every real angle you’ll use. Hold the fixture in place, check for off-kilter shadows or glare, and adjust before drilling. In corners and tight runs, a centimeter is the make-or-break difference. This habit pushes chronic little problems—odd tilts, dim edges, fixed glare—out of your routine for good. You notice best not because the lighting wows you, but because nothing interrupts; the room finally matches how you move, see, and work.

    Practical Tips for Lighting Precision

    • Choose blue painter’s tape—it stands out, peels off cleanly, and won’t pull paint.
    • Mark your spots from use-perspective, not just stand-in-front drilling. Get to where you’ll actually need light.
    • For fixtures with multiple screws, measure between tape but also double-check by visual alignment—since walls and ceilings aren’t always as straight as the level suggests.
    • Before committing, hold up the fixture (even loosely) to spot which way shadows or glare land, and tweak placement if needed.

    Lighting that Works, Not Just Lights Up

    Good tape-based marking doesn’t show off when the switch flips. Its value is felt later: a hallway that just stays evenly bright, a mirror that doesn’t force you to lean, a laundry counter that stays lit no matter the hour. The best setups “disappear” because they don’t draw attention—they clear the path for whatever you’re doing, without constant correction.

    Lighting isn’t about wattage or bold new styles; it’s about whether the space actually works at the points you use the most. Painter’s tape isn’t a shortcut—it’s the everyday tool for getting usable, satisfying light without drama, mess, or expensive second tries.

    Find more practical indoor-lighting solutions at LightHelper.

  • Optimizing Cable Placement for Seamless Desk Workflow and Efficiency

    You spend an afternoon threading cables behind trays, dropping cords into cable boxes, clipping everything tight for that showroom-clear desktop. But fast forward a week: you reach for your phone charger in the middle of a call—nothing. The headset cable you need is buried out of reach. It’s not the chaos of a messy desk that slows you down—it’s the invisible drag when the right cable is out of line with the way you actually move. Over and over, you’re forced into awkward stretches and pauses, proof that a workspace can look organized but still work against the way you use it. At a glance, your desk is tidy—but your workflow tells another story, full of stops, resets, and fumbled access.

    Why a Tidy Desk Can Still Disrupt Your Workflow

    Visible order does not equal functional flow. Smooth cable runs tucked behind drawers or sealed tight in trays might pass an inspection, but the daily grind reveals their weakness: when the cable you need doesn’t land where your hand naturally goes, your workflow sags. It’s the difference between a desk that photographs cleanly and one that keeps up with real, rapid switching—keyboard to notebook, monitor to manual sketch, tablet to charge. Hidden cables turn simple tasks into a parade of stalls, especially in home offices pressed for space or on shared surfaces where every extra reach matters.

    The little things build up: a charge cable ends just out of easy reach, or an under-desk tray blocks you from plugging in at the critical moment. Instead of supporting your routine, your “solution” forces endless micro-fixes. You either give up and let cords spill over the edge for speed, or you waste extra minutes each night resetting the illusion of control. The clean look slips—often by the end of day one.

    Real-World Friction: Small Disconnects All Workday Long

    It’s not just about looking clutter-free—it’s the mismatch between setup and movement that grinds down efficiency. You hop between a laptop and a docked monitor, with a meeting live on one and a backup device recharging on the far corner. You reach for a cable and realize it’s wedged under a tray—or just half an inch too short. Each switch means fishing, rerouting, or dislodging your careful cable control—turning small shifts into repeated failures.

    If your cable plan is built on appearance at rest, not movement in use, you’re designing friction right into your workflow. That “clean” cable run for your main monitor becomes a blockade when you need to plug in a recorder, or transition quickly from tablet to laptop without breaking pace.

    How Workflow Changes Expose Cable Placement Weaknesses

    Long stretches of focused work, or days packed with back-to-back calls, lay bare these gaps. One moment you’re gliding across tasks; the next, you’re craning your wrist, shifting trays, or unintentionally yanking a cable from its constraining clip. As you toggle devices—plug in, unplug, charge, move—the endpoints creep forward, cables pile at the desk front, and the compact look unravels. Resets multiply; any time gained on “tidy” dissolves on the next device change.

    Eventually, you face a choice: keep the surface free and slow yourself down, or let the cables escape their designated hideaways and get real work done. Either way, the compromise signals that the original layout was built for looks, not for motion.

    The Breakthrough: Matching Cable Endpoints to Real-Life Reach

    The real fix comes when cable management follows your hand, not just your eye. Placing a charging cable so it lands just inside natural reach from your keyboard beat every other upgrade or organizer. This 14-inch shift turned out to be the change that actually sped up the desk—not more gear, not stricter order. No more deep fishing for a cord trapped behind a tray, no more momentary stumbles mid-action. The visual calm stayed intact because there was nothing left to put back; the desk simply kept up.

    Frequent transitions—charging one device, swapping to another, connecting an accessory mid-flow—became unremarkable, which is the goal. The desk looked organized, but felt faster because the structure finally matched how and where you move, not just how you want it to appear for an hour or two.

    Building for Real Use: Practical Cable Placement Tips

    Cable Clips: Prioritize Movement, Not Just Neatness

    Anchor cable clips along the route your hand follows—whether that’s within a hand-span of the keyboard, at the desk’s front edge, or by your most-used device dock. Even a two-inch reposition can turn a desperate search into a single, fluid motion.

    Cable Routing: Hide Strategically, Never Completely

    Under-desk trays, cable sleeves, and bins work best when they follow your hand’s daily return points. Don’t squeeze a cable so deep into a tray that only a stub is left out—surface just enough cord at your regular contact zone. This one allowance can erase repeated crawling under the desk or stretching for an inch more slack.

    Watch for Over-Organizing: When Order Creates Its Own Mess

    Overdoing it—locking every cable far out of sight—usually backfires in two work cycles. Every time you need to plug in, you’re forced to unthread or haul out the cord, ending with every cable right back on the desk’s edge after a day or two. A rigid system that pleases the eye at 8am falls apart through the reality of six or seven real transitions.

    Scenes from a Better Setup: How it Feels in Use

    Tune cable endpoints just once and you see the difference: device changes don’t scatter cables across the workspace, there’s less drag after a long session, and nothing prompts an evening reset. Even a compact desk or shared surface starts to keep pace—no re-routing cords, no surprise knots mid-project, and no drawer or tray fighting for elbow room. The best setups don’t draw attention; they simply vanish from conscious thought and stay out of your way.

    Flawless isn’t the goal—adaptable is. The setups that win aren’t perfect by photo, but invisible in action: you shift seats, move between notebook and keyboard, pivot monitors, yet the cables stay out of your thinking and off your to-do list.

    Quick FAQ for Real Desk Troubles

    • Where’s the best spot for cable clips? Right along the pathway your hand travels to plug and unplug the most-used devices—not in the far-corner or tucked behind deep storage, but within a natural wrist’s reach.
    • How do I keep cables hidden without creating slowdowns? Surface a short run at your most frequent contact point, with the rest tucked away. Opt for a visible blend, not a total conceal.
    • Most common cable setup mistake? Hiding cable ends for a pristine look, then repeating the same cable rescue all day as disorder creeps back and every swap becomes a battle against your own system.

    Bottom line: A desk isn’t “organized” unless it actually fits the way you move through real work—full of shifting devices, quick swaps, and occasional surprises. Cables that land at your real reach zone feel obvious in use and invisible to your routine. If you’re still untangling, resetting, or fishing for the same cord daily, your setup is signaling it needs a structural change—not another minute spent hiding the problem.

    Explore the full WorkBasic collection

  • Flexible Plug-In Lighting Solutions for Ever-Changing Workspaces

    A lighting setup that looks flawless out of the box rarely survives the first few rounds of actual use. You clear your workspace, run cables out of sight, tuck switches out of reach—only to find yourself dragging cords back across the surface the moment your routine shifts. Move the monitor, and suddenly the wall lamp is throwing glare directly in your eyes. Bring in a new device, and sockets that seemed plentiful are buried behind a tangle. The surface stays camera-ready, but friction creeps in: exposed cables snake over your desk, switches get hidden in dead zones, and your “finished” setup demands awkward workarounds week after week. These are not just aesthetic blemishes—they take time, break focus, and make every minor change feel like a full reset.

    The Trouble with Fixed Lights: Locked-In Looks, Stuck Routines

    Hardwired lights promise a clean, stable look—cords disappear, brackets anchor lamps exactly where they’re meant to go. On day one, it feels solved. That illusion rarely lasts: drag a desk to follow a shift in daylight, or swap to a wider monitor, and now the sconce that “finished” the room throws either too much brightness at your face or barely reaches the working edge. Cables meant to be gone for good resurface when you need to plug in equipment in a new spot. Each small change makes the original install feel less clever.

    Fixed mounts and cable paths lock your lighting into a single function—and any deviation leaves you choosing between dealing with glare, working in half-light, or stretching for a power source behind furniture. Even cleaning the area becomes a negotiation as cords and switches settle into the least accessible zones. In practice, these installations look resolved but rarely adapt cleanly when the ground rules shift.

    Plug-In Accessories: Flexible, But Visibly Imperfect

    In rooms where the setup is never final—shared desks, project tables, hobby corners—a plug-in lamp or movable task light cuts through the strain. Suddenly you can shift the lamp, chase away a shadow, or loop power to a new spot with zero tools and no call to an installer. Rearranging to sidestep glare or adjust for a second chair? Just pivot the light or slide a power strip along the edge.

    But flexibility always trades neatness for adaptability. Extra cords show up at floor level or trace the edges of your work area. A line that was invisible last week becomes a distraction after a quick rearrangement—often winding up under your rolling chair or cutting across the only clear spot for your feet. Over time, instead of one clean cable solution, the room inherits a visible web—and the setup never quite returns to the clean slate of install day. The compromise is persistent but manageable, especially compared to wrestling with a fixed setup every time your use changes.

    How Setup Choices Affect Real-Life Use

    This difference gets sharp during repeated shifts. Think of a table that flips from solo focus in the morning to group project in the afternoon. A hardwired under-shelf light might line up perfectly once but fall short when half the surface gets repositioned or blocked. Plug-in lamps and modular power strips make reconfiguring possible in seconds, but their cords still want to slip back into view or create new points of visual clutter unless you manage each stretch and anchor point.

    There’s no total victory: the “clean” approach resists everyday workarounds, and the “flexible” approach invites small ongoing trade-offs. But in a room where function shifts regularly, those trade-offs usually end up feeling lighter and less punishing than clinging to a single, fixed layout.

    Real-World Scene: Managing Desk Chaos After Rearrangement

    After a week of shuffling furniture and updating equipment, a previously neat shared desk is split by draped lamp cords—each plotting its own unpredictable trail to the nearest outlet. Stack a few chargers and suddenly switches vanish beneath piles of notebooks, while every chair movement risks yanking a plug from the wall.

    The fix isn’t “perfect,” but mounting a plug-in strip beneath the table edge reroutes all the main cables out of direct sight. Plug-ins now drop straight down, cleanups are just moving devices—not untangling spaghetti. The desk may never look invisible—but it regains actual usefulness between shifts, and tangled nests gradually disappear from the main working zone. Visual compromise is minimal compared to the reduction in daily hassle.

    Repeated Issues That Keep Showing Up

    • Shadowed Corners: Desk lights fixed at install don’t reach when your routine or table position shifts.
    • Visible Cable Clutter: Even setups with hidden lines develop knots and loops once devices are plugged in across surfaces.
    • Inflexible Switches: Reaching a switch behind a monitor or stack of files adds friction every single day.
    • Unintentional Tripping Hazards: Quick moves leave cords straying into footpaths, inviting snags or stumbles.
    • Looks Good, Feels Awkward: The room’s visual finish often comes at the price of everyday adjustability and comfort, especially as needs shift.

    Small Adjustments That Actually Help

    A few targeted changes cut straight to the heart of living with lighting, without chasing spotless minimalism:

    • Mount a power strip beneath a desk edge or behind a shelf—this keeps charging and task lights easy to reach while clearing space above.
    • Use cord clips or guides to keep lines tidy along walls or surfaces, minimizing clutter without creating permanent obstacles.
    • Choose lamps and brackets that allow movement—for any area likely to get rearranged, adjustability matters more than chasing a flawless first impression.

    Choosing Between Neat Looks and Daily Usability

    Whether you’re working in a shared office, staging guest setups, or flipping the room role every week, the pain points of a rigid, “polished” setup appear fast: shadowed spots, inaccessible switches, or a surface that blocks more than it brightens. Plug-in options and adjustables may never get rid of every cable in sight, but they turn friction into quick fixes—making each change easier, instead of locking in barriers you’re stuck with. The priority isn’t making cables vanish, but making everyday use actually flow. Sometimes that means letting a single visible cord trade off for a workspace that flexes with you, not against you.

    Find flexible lighting and support solutions for real work areas at LightSupport.

  • How Painter’s Tape Provides Steady Support for Solo Lighting Installations

    Ever step into what’s supposed to be a well-lit hallway, only to notice the ceiling light has slowly sagged or thrown a shadow right where you need to see? Most people blame bad luck or cheap fixtures, but the root cause usually starts with installation—one person, two hands, gravity working against you, and a fixture that barely sits right from day one. That crooked sconce above the mirror, or the flush mount that gaps near the ceiling, doesn’t happen by itself. It’s the result of an awkward balancing act, holding wires and mounting plates overhead while trying to tighten screws—always wishing for a third hand. The difference between reliable lighting and that nagging tilt often comes down to what happens in those five tense minutes on the ladder: slip once, and you’ll see it every evening as you flick the switch or brush your teeth in uneven shadow.

    When Bright Isn’t Clear—And the Space Still Fights You

    Most indoor lighting isn’t about new fixtures or matching finishes—it’s about hitting the one spot that keeps your routine moving. But flaws creep in quickly: a stairwell light that leaves dark edges on every turn, a mirror fixture that forces you to lean in or shuffle left just to get a clear reflection, a hallway that looks bright but never picks up the corners. These are the routine moments where lighting fails you, not with dramatic outages, but with quiet, repeated friction. Each pass through the hallway, each time your arm stretches out for the switch, those small misalignments cost you again: shadows on the counter, a glare line right across your eyes, a landing that feels less safe because coverage slipped by a few degrees. Rarely is it the style that fails; it’s a slow drift or off-angle that started the first day you installed alone.

    Mounting Alone: Why That Fixture Never Sits Right

    Hang a ceiling light or wall sconce without help, and you get a front-row seat to why so many fixtures end up shifted, sagged, or crooked. One hand holds weight overhead, the other fumbles with wires or screws. You wedge the fixture with your elbow, prop it with your shoulder, or risk letting go entirely for a crucial screw. Tall ceiling? Forget even pressure. Tight spot above a mirror or in the stair turn? Every adjustment pushes something out of line. Even with two people, unless one acts solely as a steadying hand, the fixture usually shifts at the least forgiving moment.

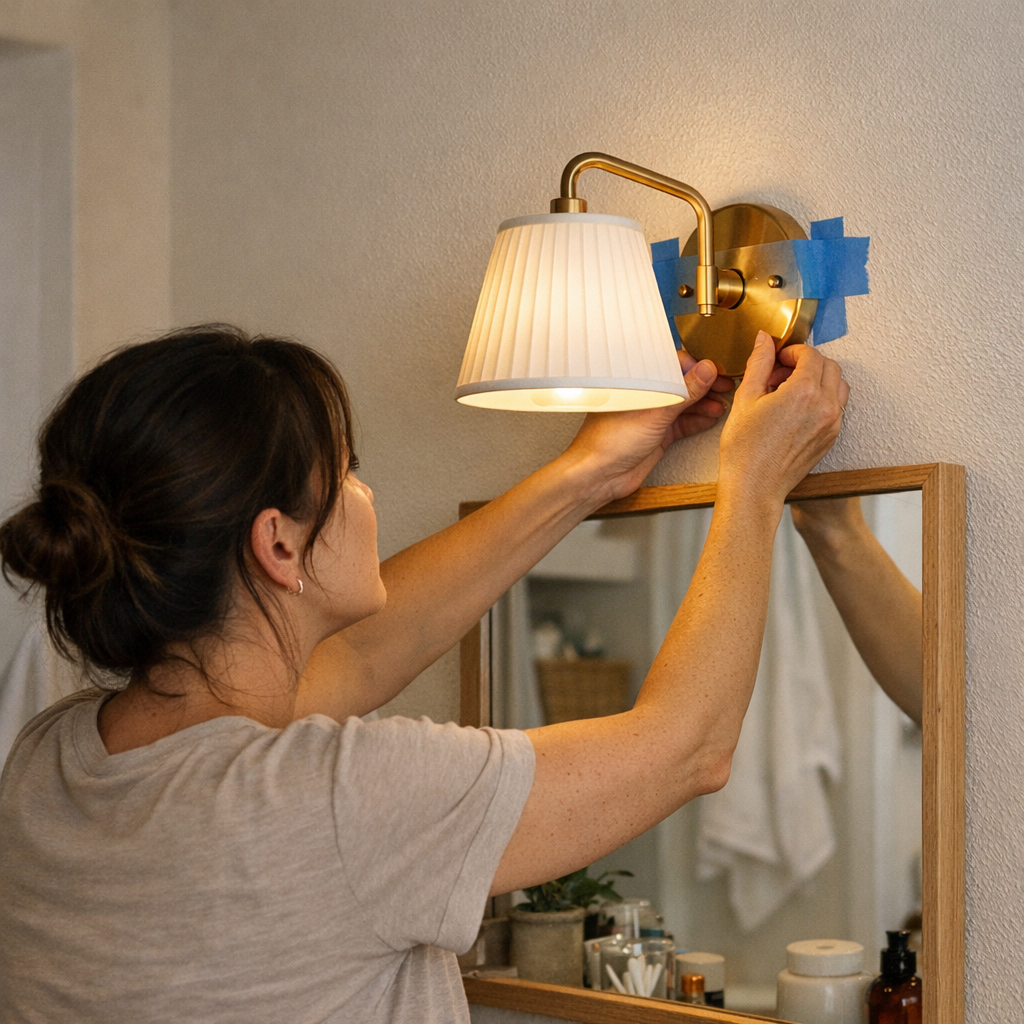
    This is where painter’s tape becomes every lighting installer’s secret weapon. Used as a quick anchor, painter’s tape lets you stick the mounting plate or fixture base at exactly the right spot while you handle wiring and hardware. It doesn’t replace the mounting bracket—it simply stops gravity and weak handholds from deciding your alignment. The tape buys you real precision, so the fixture doesn’t twist or dip with every movement or tired wrist. It’s small insurance, but the cost of skipping it isn’t obvious until you live with the results for months.

    Where Precision Can’t Be Faked

    • Above bathroom mirrors: Even a tiny tilt can double facial shadows, turning shaving or makeup into a squinting, awkward dance as you chase clean light.
    • Along stairways: An off-center sconce or semi-flush turns steps into alternating bright glare and uncertain shadow, especially when racing downstairs or carrying groceries.
    • In hallways and entry spaces: A flush mount that dips or glares never feels settled, and uneven spread will pop up every time you fish for keys or navigate the edge after dark.

    Painters tape—pressed straight across the fixture base before connecting wires—delivers a few decisive minutes where nothing sags, tips, or rotates out of place. This makes all the difference, not in the before-and-after photos, but in your seventh hurried passage, when you expect the light to just work—and it does.

    The Hidden Cost of “I’ll Just Hold It”

    Skip temporary support, and the penalty shows up in the most ordinary routines—not dramatic problems, but a steady drip of inconvenience:

    • Sconces sag just enough to cast odd side-shadows on your face or the cabinet, forcing constant shifting.
    • Flush-mounts never truly hug the ceiling, leaving rings of shadow that gather dust or draw the eye—reminding you where the job went slightly wrong.
    • Ceiling lights start out level, but gravity and loose torque pull them gradually into a crooked lean, so the brightness patches one end but not the other.
    • Worse, rushed wiring produces connections that flicker or drop out, all because the base moved while your hands were busy elsewhere.

    Quick Example: Hallway Test, Tape vs. Gravity

    Last time I replaced a hallway fixture, three strips of painter’s tape solved what two hands never could. One across each mounting edge, one across the front—the base sat steady while I worked. Wiring wasn’t a contortion act, and for once, the fixture finished flush to the ceiling with no need to adjust later. Even after six months, the light stays level no matter how fast the dog charges through or how many times the circuit trips. The difference isn’t just visible; it’s the absence of daily annoyance for everyone who uses that hallway.

    Why Small Deviations Create Big Hassles

    Everything starts to go off-track with just a slight misalignment. A single gap or a few degrees’ tilt means glare where you want eyedrop shadow, or blackout on a stair tread you thought was safe. People adapt—swiveling at the mirror, angling heads to avoid bright spots, slowing at the dark end of the hallway. It’s not an obvious disaster, but it turns “usable” into “workaround.” If every routine includes an unconscious pause to correct for your light’s shortcomings, the advantage of any premium fixture gets lost instantly.

    Painters tape is the small margin that lets you finish the job right—even solo. The result isn’t just good-looking on install day—it holds up through months of restless mornings, midnight stair runs, and crowded doorway crossings. Lighting that stops being a visible struggle and quietly gets out of the way, again and again.

    Painters Tape: Purpose-Built for Install, Not Just Painting

    Painters tape is designed for temporary application on trim, painted drywall, or ceilings. It sticks long enough to handle your electrical work and support the fixture, then comes away clean—no residue, no peeled paint—if you pull it promptly after mounting. For delicate finishes or specialty wallcoverings, spot-test first. For most standard surfaces, it’s exactly the frictionless support lighting needs.

    Final Word: Reliable Light Depends on Five Extra Seconds

    Forgoing that “third hand” can seem insignificant—right up to the point when you realize your new light now throws off your daily routine. Nearly invisible install shortcuts lead to lights you’ll adjust, avoid, or resent with every use. The fix takes seconds: anchor with painter’s tape, finish at your pace, pull away when steady. The next hundred crossings, steps, or quick mirror checks? They stay clean, level, and balanced—not because you got lucky, but because you wrestled gravity at the right moment.

    For solutions that make every part of your living space clearly and reliably usable—not just looking bright, but truly working right—visit LightHelper.

  • How Cable Clips Transform Your Desk Into a Distraction-Free Workspace

    Most desks start the day looking organized—devices lined up, cables measured out, surfaces clear enough to pass for “sorted.” But that surface order burns off fast. Unplug a laptop to move across the room. Swap a headset for a video call. The headset cable slides just far enough to vanish behind a monitor. The phone charger drops from desk height, brushing your thigh before hitting the floor. After only a few cycles, you’re bending down, feeling around behind the drawer, cursing a tangled mess that wasn’t visible that morning. Every hour stacks its own little interruptions—especially on desks with shallow depth, crowded between a task lamp, drawer, leg space, and a keyboard that’s never quite where you left it. “Organized” stops meaning “usable” as soon as you need to move fast from one tool to the next.

    Desk neatness vs. repeated cable drift: why “organized” isn’t enough

    Visible order can be a trap. That clean reset you do—winding cables into trays, tucking them through slots, lining up boxes—works only until the first burst of actual work. Slide your chair just a little further from the desk, reach for a notebook on the crowded side, or plug in a new accessory, and now a cable is dragging under a chair wheel, snagging a drawer pull, or slipping out of sight entirely. Neatness is the illusion; what breaks focus is the hunt. The frustration isn’t just clutter—it’s every lost second chasing a cable that has drifted out of reach at the exact wrong moment.

    The problem builds, reset by reset. A cable dropped under the desk isn’t a one-off headache—it slows everything, especially if your port cluster lives behind the monitor or around under-desk storage units. Each retrieval is a break: pausing to fish for a charger that wedged behind a tray, or rerouting a mouse cord so it stops looping around the lamp base. Slowdowns come from dozens of micro-adjustments that interrupt your flow, not from big visual messes. The cost is felt in time lost—and in the way small hassles interrupt real work.

    The small shift: what cable clips actually change day to day

    Cable clips cut out the slow grind of repeated cable loss. Anchoring cords at the desk’s edge, where you actually use them, breaks the cycle. Unplug the phone: the charging cable stays exactly where you left it. Unplug the headset after a call: still right there, not falling off, not slipping behind a storage drawer. A week in, you realize you haven’t bent under the desk once to chase a cord. Cables finally behave—they’re no longer wanderers waiting to trip you up during the next fast movement, but fixed parts of your reset routine.

    When cables remain at hand, each reset becomes reliable. Instead of a desk that grows more chaotic as the day goes on, you get repeatable motions: reach, unplug, return—no time lost, no digging between the storage unit and the wall, no charger lying halfway across the floor. Predictability in cable location shrinks the routine obstacles that pile up in high-use, mixed-device setups. Over time, the reduction in friction is the difference between a desk you dread resetting and a surface that runs on autopilot—even when the session is heavy with plugging, unplugging, and shuffling devices around a limited workspace.

    Real work, real interruptions: scenes that change with better anchoring

    Consider the after-call reset: you unplug a headset—and it stays put, not flopping off the edge. Charging cords don’t disappear the moment your hand leaves them. When you swap from keyboard to notebook in a tight layout, or clear a path for a cup of coffee, cords still align at your fingertips. Even through a day of flipping between docks and direct connections, the routine inconvenience fades: there’s nothing hiding under the drawer or forcing you to stretch around the monitor riser every time you need a port. The payoff isn’t just time—it’s not losing rhythm to the micro-annoyances that pile up on crowded, compact desks.

    In tight workstations—where under-desk storage already cuts leg space and every surface inch is claimed—a cable clip set eight inches apart redefines the workflow. Movements become predictable, not scattered. Instead of chasing what slipped, you just reset and move on. The payoff isn’t glamour; it’s efficiency you feel every hour, especially when the day stacks device use, calls, and quick resets one after another.

    Trade-offs and quick realities: what to expect before you add cable clips

    Clips have limits—know them before you commit. If your desk is little more than a glass sheet or you swap layouts with every season, mounting and remounting cable clips can be awkward. Rigid setups risk boxing you in if you’re the kind who moves everything twice a week or rotates devices in and out of your main zone daily. Ports at the far rear mean you might need to test a few paths before your reset routine stops feeling awkward—especially around deep under-desk organizers or when frequent repositioning blocks an expected spot.

    But these trade-offs mostly hit edge cases. For mixed setups—where tablets, notebooks, and peripherals rotate through the main zone all week—the difference in day-to-day order is immediate. Each session resets faster. The minutes saved pile up quietly, not as major time blocks but as micro-moments where you didn’t get forced into an off-balance crouch just to recover a charger knocked behind a bar-light or cable box. A workspace can look minimal and still force you to hunt; proper cable anchoring is where visible order becomes actual usability.

    Small installation choices that change the result

    Placement isn’t abstract—it drives ease or hassle all day. Target the edge closest to your most-touched ports; for most, that’s front right for power, left of center for audio. Too wide, and cables flop or overlap. Too close, and cables tangle in use. Space just tight enough so nothing ever falls below edge level, but not so close you’re fighting two cables in the same clip. Leave measured slack so every device moves without jerk or droop. For high-traffic USB hubs or docks, put distinct clips just past the reach zone so reconnecting becomes second nature, not a “where did it go now?” moment.

    Within a week, the reset habit hardwires itself—clip the cable, finish the session, move on. Suddenly, the end-of-day reset is trivial: fewer cables sprawled across under-shelf drawers, no more floor-fishing for what vanished mid-meeting. The positive cycle holds especially when task volume spikes and device shuffling increases. This isn’t a one-time tidying—it’s a permanent drop in routine friction.

    Quick questions and practical answers on cable clips

    How do cable clips actually stop cords from slipping off?

    Clips intercept the cable a hair before the desk edge, creating a fixed endpoint; everyday movements—including unplugging or rolling your chair—can’t generate enough slack to knock the cord onto the floor or wedge it under a drawer. Even if a cable jerks loose, its travel range is boxed in, so retrieval is short, direct, and never blind.

    Where should I put cable clips on my desk?

    Lay out clips at edges closest to each main port or device. Each cable gets its own space, with enough distance to prevent crossover but close enough to the working edge that retrieval is a single motion. Tension matters—too taut or too slack both create their own problems, so test until cables rest at the ready but move freely enough for real-life reach.

    Are there setups where cable clips work less well?

    If your desktop is ultra-thin, oddly contoured, or prone to rapid rearrangement, fixed clips can frustrate or lose grip. In these cases, consider repositionable or temporary-stick clips that let you refine cable paths after a few days of use, rather than committing to a permanent spot on day one.

    The shift from minimal to usable: what matters after the first week

    Desk setups that only look minimal rarely withstand a week of real work. The only surface order that counts is the kind you can actually reset—without input lag, cable recovery missions, or re-tidying every afternoon. Cable clips are a small but structural fix that instantly upgrades a space from “kept tidy” to “works in practice.” Instead of chasing appearance, you build reset reliability; surface order stops being decorative and becomes the background for repeatable, unbroken work cycles. Eventually, you spot the difference in what you aren’t doing—no more crouching, no more cable hunts, no more detours around blocked drawers—just a surface and setup that quietly let you move, unplug, and return, hour after hour.

    Explore the full WorkBasic collection

  • Choosing Indoor Bulbs That Prevent Heat Build-Up in Small Spaces

    Most indoor lighting issues aren’t about brightness—they’re about what accumulates after the lights have been on for a while. In real bathrooms, hallways, utility corners, or stairwells, a fixture that seemed perfect at install starts to reveal its edge: the mirror fogs before anyone showers, air in passageways grows dense after just a few crossings, or the bathroom vanity feels sticky before you even finish your routine. These aren’t quirks—they’re signals that the bulb’s heat output is quietly working against you, quietly layering discomfort into spaces designed for movement and clarity. Replace “well-lit” with “mildly oppressive” and the difference in daily function is anything but subtle. In rooms meant for repeated, purposeful use, bulb-generated heat is often what makes the difference between a fixture that blends in and a setup you quietly try to avoid.

    Why Bulb Heat Is an Invisible Friction Point

    Bulb heat doesn’t announce itself during installation. A new flush mount, semi-flush, or wall sconce often looks right and covers the space—until routines press in. It’s easy to glance at wattage, color temperature, or fixture style and assume the job is done. But in confined spots—small bathrooms with sealed doors, laundry nooks boxed in, low-ceilinged hallways—every hour of bulb time leaves its mark. Incandescent and halogen bulbs trade some of their inviting warmth for a slow-release heat load. In rooms with nowhere for warm air to go, that’s the crack in the armor: surfaces capture and radiate heat, condensation forms earlier, and what started as a clear, lit space now drags at every pause or passage.

    Everyday Friction: How Overheated Fixtures Disrupt Flow

    The Corridor That Becomes a Gauntlet

    Picture a hallway just wide enough to pass through, fixed with flush ceiling lights or close wall sconces. For the first few passes, the lighting seems to work: floor is lit, shadows are pushed out. But by mid-afternoon or evening, each walkthrough brings a weight—literal heat hanging in the corridor. You start speeding up to avoid the overhead warmth, or simply avoid the route altogether. The space has light, but loses its ease of movement. The wrong bulb turns a clear path into a spot you dodge.

    Mirror Clarity Breaking Down Before the Steam

    At the bathroom vanity, a flush mount lights the glass well—at least early on. But after a couple of grooming routines, you notice it: fog at the edge of the mirror, well before any steam. The air above the counter grows restrictive. It’s not mechanical failure, ventilation, or humidity from a shower; it’s bulb heat pooling over the glass, setting off the fog before the water even runs.

    Laundry and Utility: The Chore Zone Turns Heavy

    Inside a laundry room with low airflow and a semi-flush ceiling light, the effect feels cumulative. Each cycle with the light on builds up warmth until the walls themselves seem to clamp down. Folding feels stuffier, ventilation acts too slowly, and even short tasks start to tire you out. The brightness is there. The room is “usable.” But the experience becomes quietly strained—another case of heat, not just light, making chores harder.

    How Low-Heat Bulbs Change the Routine’s Texture

    LED and compact fluorescent bulbs cut the cycle of collected heat, making rooms feel usable no matter how often the switch flips.

    LEDs in particular release only a sliver of the heat produced by old-style bulbs. This single choice keeps the ceiling, wall, and air around fixtures from sliding into stuffiness—so morning prep, laundry rounds, or stair crossings feel ordinary, not like battling a dense zone in your own house. It’s a change that often goes unnoticed in the moment but means, a week later, surfaces remain neutral and movement feels as easy at hour five as it did at minute one.

    Spotting the Absence of Irritation After Switching

    Swap a standard 60-watt incandescent for an LED over a stair landing and see what’s missing: that hotspot you once dodged on every busy evening. Now, crossing floors doesn’t require a quick escape. Illumination stays steady, but the creeping warmth that used to stake out the top stair is simply gone—visibility remains high without creating new obstacles.

    Task Areas: When Heat No Longer Lingers

    At the mirror or the laundry counter, eliminating bulb heat means less edge-fog, fewer mirror wipes, and no sense of invisible exhaustion at the end of use. Instead of light making the space slightly more difficult—to see, to pause, to use—you get routines that finish as cleanly as they start.

    Quick Diagnosis: Is Heat Your Real Lighting Problem?

    Do this: after your fixture’s been on for a while, carefully touch near (not directly on) the mount. If you feel warmth radiating, or if stuffiness builds up in tight spaces faster than expected, the bulb is likely overloading the room with heat. Common signals:

    • Mirror edges fog or streak before the bathroom steams up
    • Hallway or stairwell air starts to press in after a few crossings
    • Rooms need long, awkward cooling after you shut the light off

    These issues surface fastest in low-ceiling, poorly vented, or high-use spaces—especially where repeated routines keep the light on longer or require frequent stops and starts.

    Small Swaps That Remove the Drag

    • Install LED or compact fluorescent bulbs in enclosed fixtures— they dramatically cut excess heat without sacrificing visibility or control.
    • Confirm fixture compatibility, especially with damp-rated or sealed flush mounts—an easy oversight that can cause other headaches.
    • Combine efficient bulbs with better airflow whenever possible—a cracked door, quick vent fan, or shorter “on” cycles all reinforce the cooling effect.

    The smartest fix is the quiet one—where your bathroom, hallway, or laundry zone feels completely unremarkable after hours of use. No residual weight, no early fog, just a space that never interferes with the routine.

    Lighting That Keeps Pace With Repeated Routines

    Good indoor lighting never calls attention to itself; it lets you move, pause, shave, fold, and cross through as if the fixture simply wasn’t there. Poor lighting—especially from high-heat bulbs—forces a choice: put up with subtle extra effort or start resenting every pause for fogging, glare, or thickened air. The real test is repeated use: the stair turn that’s no longer a barrier, the bathroom mirror that stays clear, the laundry counter that doesn’t sap focus at the end of the day. Bulb choice shapes every one of those moments.

    Choose bulbs for actual repeated rhythms: minimize heat, check your fixture match, and watch how the room feels as routines stack up. The best lighting upgrade is the one that removes invisible obstacles—keeping your space not just “lit,” but genuinely hassle-free to use every time.

    Explore more at LightHelper

  • Anchored Cable Management Transforms Your Desk Workflow Efficiency

    A desk can look spotless and still trip you up—especially when cable chaos hides under the surface. If you connect and disconnect devices every day, you know the pattern: you reach for your notebook and a cable drags across your arm. Sit down in a hurry, and your charger clips your chair or pulls tight at your ankle. Try shifting your keyboard or clearing space for a notepad and a forgotten cable blocks, snags, or yanks itself back out of reach. Each small interruption breaks your flow. The desk still looks right, but feels stuck. Over a day—or a week—these friction points pile up, proving that visible order does not equal easy work. The wrong cable setup turns even the neatest shelf or clean sweep into a reset loop you never quite escape.

    What Actually Changes When Desk Cables Are Properly Anchored

    When work pressure kicks in—shifting from email to sketching, charging a phone, flicking on a lamp—the difference between tidy cables and true usability shows up immediately. A guided cable path isn’t just about appearance; it keeps cords from sabotaging your routine at exactly the wrong moment. An under-desk tray keeps power lines out of the way when you roll your chair or reach for a drawer. A cable box takes the cluster off the desktop and out of leg space. Clips, magnetized or mechanical, stop connector ends from falling behind the desk just as you need them. Each anchor fits someone’s real work: trays for fixed setups or shared desks, clips for fast device swaps, boxes for hiding the clutter but potentially slowing quick changes. The improvement is obvious when task speed rises—your charger’s just where you left it, your lamp never shifts off target, and the “quick plug” actually is quick.

    The Difference Between Looking Organized and Working Smoothly

    It’s easy to fall for a desk that looks calm—until work starts and old irritations reappear. Mid-project, you slide your notebook beside the keyboard and a loose cord drags back into your writing space. Shift your mouse and suddenly the pad is hooked on a headphone cable. These aren’t rare mistakes; they’re signals your cable path doesn’t match your reach or routine. Tucked cables may look clean but still block your natural move set.

    Any time you pause to nudge a cord or clear space for your hands, your desk layout is taking from your attention, not returning it. True cable anchoring—tray, clip, channel—erases these micro-pauses and lets devices and hands move as expected. The improvement isn’t just in calm; it’s in every cycle you don’t have to reset.

    Real Desk Moments: How Setup Choices Save or Burn Energy

    Consider where cable bottlenecks usually show up: the rear corner, where phone chargers, lamp cords, and USB hubs tangle below the sightline. It feels clever at first to drop everything behind the edge. But the price shows itself quickly. Mid-task, a gentle tug for your phone drops your lamp cord over your papers. Swap a device, and the charger vanishes under the desk. Each recovery means digging, unplugging, fishing—work interrupted, focus scattered, small resets breaking the day. Even small repeated detours can wear you out.

    This is where structural change—the right under-desk tray or a disciplined row of cable clips—does more than tidy. The cable can flex, but never slip into the wrong spot. No charger yanks; no lamp off-balance. Even when you move fast, the fallout never spreads across your usable space. A steady cable track blocks predictable annoyances, so you stop losing energy to the same reset.

    Case Study: From Loose Drop-Offs to a Desk That Stays Ready

    One user gave up on chasing cables and added a fixed tray underneath. Lamp wires and chargers routed directly out of reach—the “dead zone” along the desk edge became a buffer for hands and notes. Suddenly, drawers opened without hitting tangles, connectors stayed visible, and nothing rolled behind the surface. The biggest change didn’t show up as a perfect photo, but as the list of problems gone missing. Opening the drawer no longer jerked a power cord loose; retrieving a charger was instant, not a mini scavenger hunt. In a few weeks, the pattern was clear—no more routine resets, no more slowdowns for the sake of “order.” The real win was not having to think about it at all.

    FAQs: Anchoring Your Cables Without Overcomplicating the Desk

    How do I pick between cable boxes, trays, or clips?

    Let your work style decide. If you reroute or unplug often, clips keep cords accessible and flexible. For hiding clustered adapters or hub lines, cable boxes work—but they can slow fast swaps. Under-desk trays organize multiple cords in one sweep beneath, which is best if your main desk devices rarely change. For setups that shift with the workday, mixed use—trays for power and clips for chargers or headphones—gives the best blend of stability and speed.

    How can I tell if my cable setup isn’t actually helping?

    Watch for red flags: digging for a missing cord, straining around cable clusters to open a drawer, pausing to untangle mid-task—these all mean your “organized” look is still costing you time. If cables invade your reach, block motion, or require regular rescue, better anchoring is due.

    Can cable management fix small monitor or lighting annoyances?

    Yes—many monitor drift and lamp angle problems start with cables anchoring the wrong way. Unsecured wires pull screens slightly off-center or nudge a lamp out of the sweet spot. Guided, anchored cables hold these settings steady, cutting down the slow slip that builds up posture strain.

    When Setup Matches Habit: Why Guided Cords Bring Everything Together

    The strongest change from real cable anchoring isn’t style—it’s reliability under pressure. When you route cables to fit your actual work, each move stays predictable, even when sessions get busy or device swaps pile up. The best system is the simplest one that matches your actions: clips only where you reach most; trays deep enough for all chargers you leave overnight; boxes where the mess matters more than instant access. Each day that cords stay “almost” right but drift out of line, you lose a little flow—hesitant reaches, extra attention, fragmented focus. Once cables match your pace, the desk surface stops demanding resets and starts making work easier, no matter what you plug in next.

    If you want a setup built for real movement, not just tidy optics, start with cable guides and give every anchor a job. Your desk will feel more stable, your routines less fussy, and each work session will launch straight—a surface that keeps up instead of holding you back.

    Explore the full WorkBasic collection