
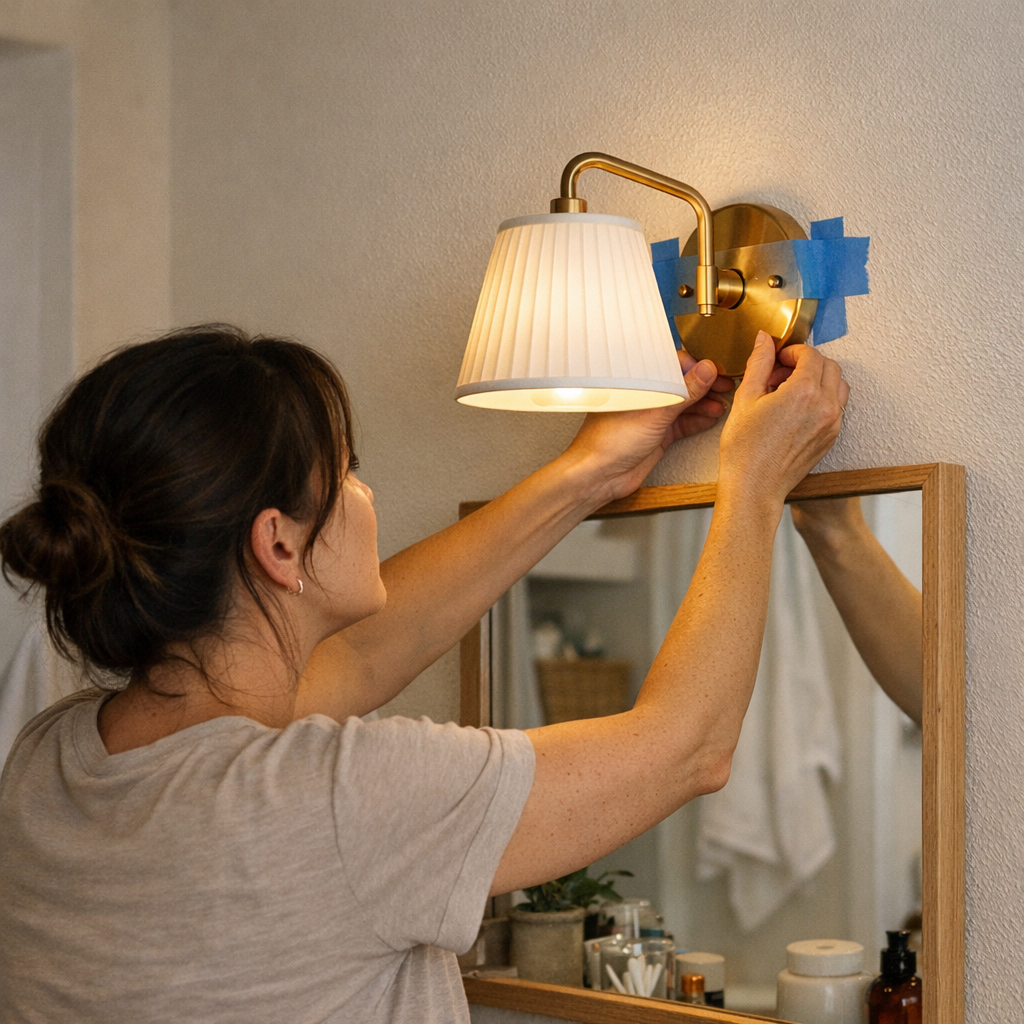
Ever step into what’s supposed to be a well-lit hallway, only to notice the ceiling light has slowly sagged or thrown a shadow right where you need to see? Most people blame bad luck or cheap fixtures, but the root cause usually starts with installation—one person, two hands, gravity working against you, and a fixture that barely sits right from day one. That crooked sconce above the mirror, or the flush mount that gaps near the ceiling, doesn’t happen by itself. It’s the result of an awkward balancing act, holding wires and mounting plates overhead while trying to tighten screws—always wishing for a third hand. The difference between reliable lighting and that nagging tilt often comes down to what happens in those five tense minutes on the ladder: slip once, and you’ll see it every evening as you flick the switch or brush your teeth in uneven shadow.
When Bright Isn’t Clear—And the Space Still Fights You
Most indoor lighting isn’t about new fixtures or matching finishes—it’s about hitting the one spot that keeps your routine moving. But flaws creep in quickly: a stairwell light that leaves dark edges on every turn, a mirror fixture that forces you to lean in or shuffle left just to get a clear reflection, a hallway that looks bright but never picks up the corners. These are the routine moments where lighting fails you, not with dramatic outages, but with quiet, repeated friction. Each pass through the hallway, each time your arm stretches out for the switch, those small misalignments cost you again: shadows on the counter, a glare line right across your eyes, a landing that feels less safe because coverage slipped by a few degrees. Rarely is it the style that fails; it’s a slow drift or off-angle that started the first day you installed alone.
Mounting Alone: Why That Fixture Never Sits Right
Hang a ceiling light or wall sconce without help, and you get a front-row seat to why so many fixtures end up shifted, sagged, or crooked. One hand holds weight overhead, the other fumbles with wires or screws. You wedge the fixture with your elbow, prop it with your shoulder, or risk letting go entirely for a crucial screw. Tall ceiling? Forget even pressure. Tight spot above a mirror or in the stair turn? Every adjustment pushes something out of line. Even with two people, unless one acts solely as a steadying hand, the fixture usually shifts at the least forgiving moment.
This is where painter’s tape becomes every lighting installer’s secret weapon. Used as a quick anchor, painter’s tape lets you stick the mounting plate or fixture base at exactly the right spot while you handle wiring and hardware. It doesn’t replace the mounting bracket—it simply stops gravity and weak handholds from deciding your alignment. The tape buys you real precision, so the fixture doesn’t twist or dip with every movement or tired wrist. It’s small insurance, but the cost of skipping it isn’t obvious until you live with the results for months.
Where Precision Can’t Be Faked
- Above bathroom mirrors: Even a tiny tilt can double facial shadows, turning shaving or makeup into a squinting, awkward dance as you chase clean light.
- Along stairways: An off-center sconce or semi-flush turns steps into alternating bright glare and uncertain shadow, especially when racing downstairs or carrying groceries.
- In hallways and entry spaces: A flush mount that dips or glares never feels settled, and uneven spread will pop up every time you fish for keys or navigate the edge after dark.
Painters tape—pressed straight across the fixture base before connecting wires—delivers a few decisive minutes where nothing sags, tips, or rotates out of place. This makes all the difference, not in the before-and-after photos, but in your seventh hurried passage, when you expect the light to just work—and it does.
The Hidden Cost of “I’ll Just Hold It”
Skip temporary support, and the penalty shows up in the most ordinary routines—not dramatic problems, but a steady drip of inconvenience:
- Sconces sag just enough to cast odd side-shadows on your face or the cabinet, forcing constant shifting.
- Flush-mounts never truly hug the ceiling, leaving rings of shadow that gather dust or draw the eye—reminding you where the job went slightly wrong.
- Ceiling lights start out level, but gravity and loose torque pull them gradually into a crooked lean, so the brightness patches one end but not the other.
- Worse, rushed wiring produces connections that flicker or drop out, all because the base moved while your hands were busy elsewhere.
Quick Example: Hallway Test, Tape vs. Gravity
Last time I replaced a hallway fixture, three strips of painter’s tape solved what two hands never could. One across each mounting edge, one across the front—the base sat steady while I worked. Wiring wasn’t a contortion act, and for once, the fixture finished flush to the ceiling with no need to adjust later. Even after six months, the light stays level no matter how fast the dog charges through or how many times the circuit trips. The difference isn’t just visible; it’s the absence of daily annoyance for everyone who uses that hallway.
Why Small Deviations Create Big Hassles
Everything starts to go off-track with just a slight misalignment. A single gap or a few degrees’ tilt means glare where you want eyedrop shadow, or blackout on a stair tread you thought was safe. People adapt—swiveling at the mirror, angling heads to avoid bright spots, slowing at the dark end of the hallway. It’s not an obvious disaster, but it turns “usable” into “workaround.” If every routine includes an unconscious pause to correct for your light’s shortcomings, the advantage of any premium fixture gets lost instantly.
Painters tape is the small margin that lets you finish the job right—even solo. The result isn’t just good-looking on install day—it holds up through months of restless mornings, midnight stair runs, and crowded doorway crossings. Lighting that stops being a visible struggle and quietly gets out of the way, again and again.
Painters Tape: Purpose-Built for Install, Not Just Painting
Painters tape is designed for temporary application on trim, painted drywall, or ceilings. It sticks long enough to handle your electrical work and support the fixture, then comes away clean—no residue, no peeled paint—if you pull it promptly after mounting. For delicate finishes or specialty wallcoverings, spot-test first. For most standard surfaces, it’s exactly the frictionless support lighting needs.
Final Word: Reliable Light Depends on Five Extra Seconds
Forgoing that “third hand” can seem insignificant—right up to the point when you realize your new light now throws off your daily routine. Nearly invisible install shortcuts lead to lights you’ll adjust, avoid, or resent with every use. The fix takes seconds: anchor with painter’s tape, finish at your pace, pull away when steady. The next hundred crossings, steps, or quick mirror checks? They stay clean, level, and balanced—not because you got lucky, but because you wrestled gravity at the right moment.
For solutions that make every part of your living space clearly and reliably usable—not just looking bright, but truly working right—visit LightHelper.