Author: jaesoon_admin

  • Why Modular Garage Storage Needs More Than Just a Neat Look

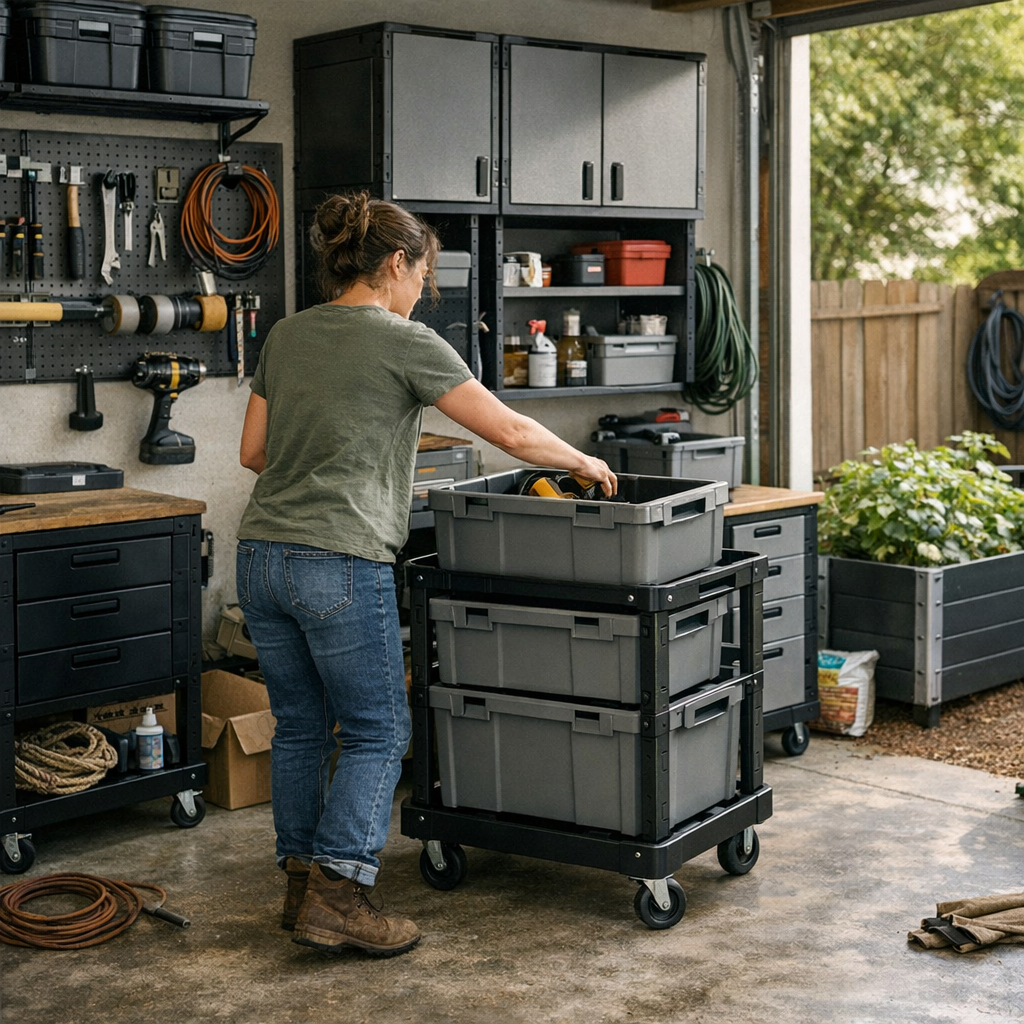
    The promise of a clean, organized garage or workshop is always seductive: lined-up cabinets, a rolling tool cart, maybe a new wall rack or modular bench. On install day, everything slots together—bins fit, floors show off their shine, wall space gets busy without feeling claustrophobic. It feels like, finally, chaos will stay banished. And for a few days, it almost does.

    But as soon as the routine kicks in—tools in, tools out, surprise repairs, hurried project pivots—those gleaming setups start revealing their cracks. A space that once looked like the solution starts tripping you up, demanding sidesteps, awkward reaches, and endless mini-resets. What happens to “order” when the space actually gets used, day after day?

    The Trap of Looking Organized

    It’s easy to fall for a setup that photographs well. Cabinets shut smoothly, bins match, nothing spills out. But for most workshops and garages, order shouldn’t end at the surface. Closely parked carts and dense racks create the appearance of storage—but when you’re mid-task and need to swap tools fast, that “neat” arrangement starts to fight back.

    The friction is subtle at first: A drawer that blocks the walkway unless you nudge a cart out of the way. A tool chest whose side handle catches your pocket every time you pass. Wheels that settle in the most convenient, rather than correct, place. All those tiny interruptions add up until you’ve stopped putting things back, “temporary” piles materialize, and walking space—the thing you counted on—shrinks one stray bin at a time.

    When the Routine Breaks the Setup

    Visit any single-car garage on a Monday morning. The weekend’s order has started to erode. You go to put away a big saw; the rolling cart that holds its blades is boxed in by the recycling bin, which itself is squeezed between the mower and the wall. To return a set of drill bits, you have to half-twist around the open cabinet door because there’s barely enough room for your knee. The supposed “system” now costs you double steps and bent shoulders just to do the basics.

    The flow becomes an obstacle course. Maybe a corded tool lives near a cable reel mounted slightly too close to a shelving edge, turning every crossing into a cautious sidestep and slow shuffle. Soon, open surfaces start capturing the overflow—screwdrivers here, tape rolls there. The floor becomes a last resort, even if wall space is technically unused, simply because the right path is never quite clear enough.

    How Overflow Finds Its Hiding Spots

    Every small workaround—“just set the cart here for a sec,” “I’ll come back for that part”—quietly rewires your routine. One corner gradually becomes a dumping ground for leftover fasteners, spent batteries, or tool accessories no one wants to walk back. Each reset turns into its own spatial puzzle: moving bins, shifting carts, detouring just to reclaim space. Productivity dips, and every extra obstacle invites not just frustration but tripping hazards and wasted setup time.

    Why “Everything Fits” Isn’t Enough

    Squeezing gear in does not equal smooth working space. Stackable containers might technically maximize every vertical inch, but if what you need is always under two more boxes, you’ll start leaving tools out, “just for now.” Cabinet runs that looked perfect at first gloss struggle when carts can’t return to their spot or wide bins block each other under actual use. The system captures stuff, but doesn’t serve the real flow of daily work.

    Even wall racks that start tidy lose their touch if daily use nudges them just out of ideal position. And soon, matching modules become rivals—mobile chests drift, bins pile into traffic lanes, and the work zone divides itself against you.

    Every Tiny Delay Matters

    Spend a few hours in a real, active shop, and the inefficiencies pop: sidestepping for swinging cabinet doors, shifting a rolling cart for the fifth time just to clear a lane, stopping to reshuffle so you can cross from bench to rack. The more these moments stack up, the more work slows, and the less natural the whole setup feels. The line between useful order and new inconvenience blurs fast—especially when every “quick” fix costs one more move.

    Tiny Adjustments, Tangible Results

    This isn’t about ripping everything out and starting from scratch. Real improvement often comes from smaller, sharper moves: shifting a cabinet by the width of your favorite bin to open a needed path, or closing the gap between shelves and racks to just wide enough for a confident grip—but narrow enough to avoid dead-space clutter. These changes open actual return lanes and make it possible to reset the space fast, not just make it look okay at a glance.

    The most effective tweak? Assign every cart—every mobile bin—a specific “parking spot.” Give each wheeled unit a home that is never in the working lane, never tucked “wherever it fits.” Suddenly, rolling storage stops blocking key stretches, and mid-task shuffles all but disappear. You’ll know it’s working when you reach for a tool and don’t have to push anything aside first.

    Wall Storage vs. Mobile Units: The Everyday Reality

    Wall-mounted solutions promise open floors and less clutter, especially in dense garages or small backyard shops. Often, they deliver—if, and only if, hooks aren’t stacked too close and shelves aren’t overloaded. Misplaced mounts or overly long tool arms can turn “efficient storage” into an awkward reach or an elbow hazard. For wall space to help, it needs to respect the natural motion of regular work, not just look tidy for a snapshot.

    Mobile units are lifesavers for evolving projects—but their very flexibility is the hazard. Without a return lane and a non-negotiable home base, they clog up the heart of a space with just a day or two of drifting. What starts as an adaptable layout quickly becomes a game of leapfrog every time you need to cross from one end to the other.

    Reset Speed Beats Picture-Perfect Order

    The real test comes not when the day ends, but when it restarts. Can you move, retrieve, and put away gear without detours, obstacles, or extra steps—even when you’re tired or distracted? A good setup works in silence: tools drift naturally back home, corners don’t attract clutter, and you spend almost no time shuffling or hunting. Sessions begin with immediate focus, not five minutes of cleanup, and you remember how your space feels more than how it looks in a still photo.

    If you’re stuck, shifting the same cart for the third time, zigzagging around the same stubborn handle, or parking in a walkway “just until later,” it’s your setup—not your habits—asking for a smarter adjustment.

    Want storage that fits the way you actually use your space? See setups that put real flow first at StackNest.
  • Effective Outdoor Storage Solutions to Prevent Wet Gear Messes

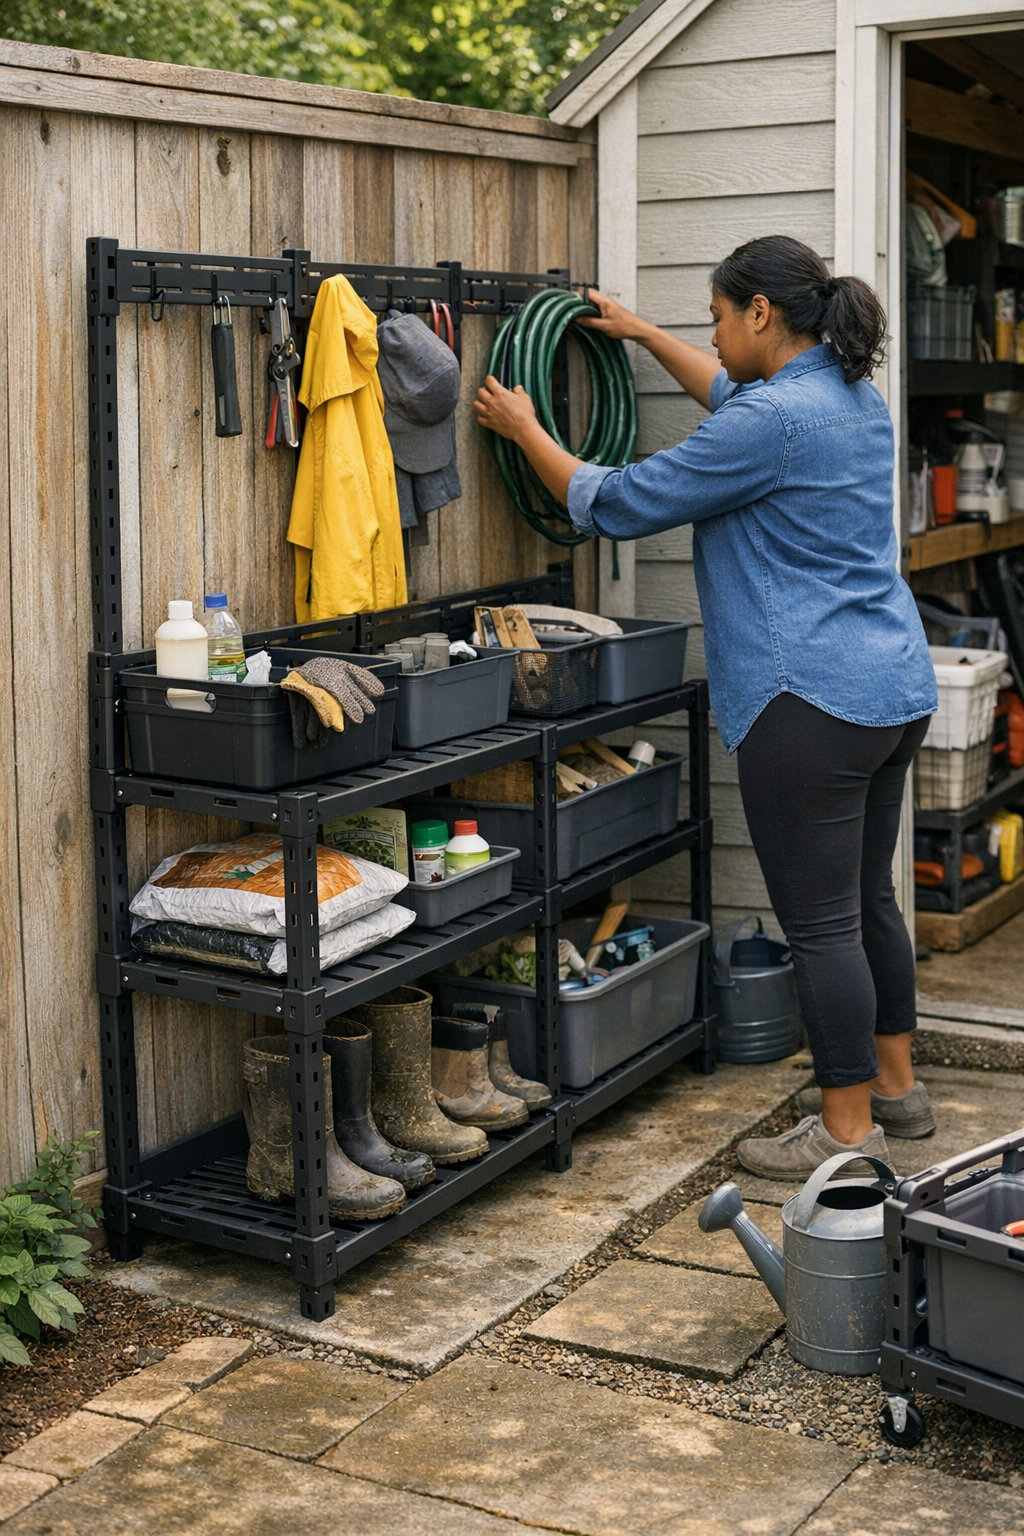
    Wet boots in a side-yard, dripping jackets tossed at the garage threshold, mud tracks slicing across the path—most outdoor entry setups are built to appear tidy, but real routines tear through that illusion fast. You set down a boot tray by the door or line up bins along the fence, and for one day it looks like a solution. Then rain comes, everyone barrels in at once, and suddenly the nice layout turns into a repeating shuffle: trays overflow, bins block your only clear route, and squeezing past the mess gets added to your to-do list. In these pocket-sized utility zones—backyard corners, narrow strip entries, garage entries—the friction is subtle at first but compounds with every step and every wet day.

    When “Organized” Storage Blocks Your Actual Routine

    Wall racks, bench trays, modular bins—they promise “reset and forget” ease. But the gap between a neat install and a setup you can use daily lives in the overlooked details: a wall rack that practically grazes your shoulder as you squeeze by, a shelf situated right where you plant your foot after stepping inside. Visual order snaps the moment you actually move through the space. You spot muddy footprints scattered where you just cleaned, gear that creeps back into your path, and the constant drag of returning the zone to “clean” after every use.

    True-to-life moments from real setups: Try to hang a jacket and instantly realize there’s no spot left that won’t leave it brushing against a soggy sleeve. A once-roomy tray fills after two pairs of boots and a backpack, water sloshing to the edge before anyone else arrives. Floor bins meant for “overflow” become permanent fixtures, slowly shortening your walking line until the reset means not just organizing gear, but physically rerouting your way in or out. Every attempt to clear up creates its own micro-blockage somewhere else.

    Order That Lasts: Prioritizing Open Movement

    The best outdoor storage setups aren’t about having more places to stash gear—they’re about making sure movement stays free and obvious, even when the weather’s making things messy. Open rails, spaced wall units, or raised shelves change daily use in a way closed bins can’t: boots and gear can dry without pooling or blocking, and you’re not forced to do a dance around a mountain of wet stuff every time you pass through. Slotted or suspended storage drains away runoff, so you’re not stepping in surprise puddles—or worse, splashing yesterday’s drips onto today’s dry shoes. Most importantly, the space resists letting gear crawl back into traffic lines, no matter how many pairs come through or how chaotic the week gets.

    The Trouble with “Contained” Storage

    Flood the main entry with bins or trays and it’ll look controlled until the first downpour or crowded afternoon. Containment falls apart fast: stacked trays hit capacity, a wall rack fills, and suddenly you’re stacking boots on boots, hesitating before dropping anything for fear of tipping the balance. The easy “drop and go” becomes a careful rearrangement—instead of one quick task, you’re sorting wet from dry, lifting gear to rescue what’s underneath, and hoping you haven’t just traded one annoyance for three new ones.

    Everyday Friction: Blocked Flow, Tense Resets

    When racks hug the walkway or bins hover right at the edge of where you step, the whole routine gets pinched. Returning home turns into a sidestep past saturated coats, a lurch around trays that have crept into the route, or moving bins just to free up the door swing. It’s not an exception—it’s how most setups break down on any busy or wet day. At first, you notice only little delays. Over time, those delays wear on you: slower resets, muddier footprints, and a sense that you’re forever fighting the layout you thought would help.

    What “Fixing” the Zone Actually Looks Like

    In most outdoor corners, fixing the friction means simplifying, not adding. In one backyard side strip, moving the boot zone just a few steps off the central walk—then trading a braced rack for an open rail—changed everything. Suddenly, boots had a real “home” away from the direct walkway. The shelf at shin-height—finally left clear—became the landing pad for anything wet. No more tiny dances through puddles, no more blocking the door just to shuffle someone else’s gear. Now, the routine reset was a five-minute sweep, not a session of lifting, draining, and reorganizing the whole zone.

    Reality check: As soon as the storage zone stayed more open, gear stopped drifting into the route everyone used. Wet boots actually stayed in their own line, and clearing after a rainstorm shrank from an ordeal to a quick last check—no more overflow, no more resets bleeding into the next use.

    Where Outdoor Order Fails (and How to Spot It)

    • Binning the entry path: Tray or bin close to the main line? All it does is collect splashes, missteps, and sidestepping bodies, not just boots.
    • Wall racks in the walkway: If hanging gear sits right where you need your knees or feet, drips collect underfoot, making every “quick entry” a detour.
    • Dead end corners = accumulation zones: Any “empty” nook too far from the routine gets stuffed with overflow, turning into a slow-growing blockade as routines change or guests pile in.
    • Assuming lines and bins equal flow: Just because something’s divided doesn’t keep movement fast—watch if you’re stepping around, lifting, or resetting even with all the supposed organization in place.

    Small Corrections with Real Impact

    Shift main gear storage out of the direct line of movement. Even moving bins or shelves half a meter away from the main door path is enough to keep the worst splash and mess outside your “in/out” route. Use quick brackets or folding rails to create separation, keeping run-off and gear from drifting where you need to step.

    Prioritize open rails and shelves for anything wet. They won’t trap water, they dry faster, and cleanup after heavy use takes minutes, not hours. Closed bins look tight but one thunderstorm proves the difference—pooling at the bottom, moisture lingering, and a reset that gets stickier as the week goes on.

    When Setup Finally Matches Real Use

    The right outdoor layout isn’t a matter of adding the flashiest wall system—it’s in making the zone adjust as people, moisture, and routines change. One change in shelf placement can keep your main path wide open, and an open rail can stop drips before they soak the floor where you walk. You’ll find yourself resetting less, cleaning less, and finally feeling like your space is working for you—not forcing you to work around it. A setup that makes the worst days less frustrating is worth holding onto. When the design fits the routine, every reset gets easier—and you stop resenting the small, muddy jobs the outdoors brings in.

    Discover practical outdoor storage setups at TidyYard

  • Balancing Open Shelves and Basket Storage for Lasting Closet Order

    Every closet looks promising on day one—rows of folded clothes, empty shelves, everything in its place. But real life quickly unravels that tidy promise. What begins as crisp organization meets the chaos of daily routines: piles get jostled, socks disappear into the back, stray scarves migrate, and the clean divide between gym gear and work bags blurs with every hurried grab. That “system” you thought would last all year? It’s fighting against your mornings—and losing.

    Open Shelves: From Orderly Display to Daily Shuffle

    Open shelves feel like a fix-all when you move in. Every item is visible—sweaters lined up, accessories stacked in neat piles. But the reality of getting dressed knocks that order off balance. You reach for a t-shirt in the middle and disrupt every shirt above it. Grab a gym towel for a last-minute workout, and half the pile sags out of formation. Scarves slide off their perch when you pull out just one.

    This is where friction builds: Socks drift behind sweatshirts, a stack of tees loses its shape, and the ends of every shelf quietly gather random items—yesterday’s belt, a pair of headphones, winter gloves no one bothered to return. The space between categories vanishes; soon, “sports gear” is covering “work layers” and “everyday basics.” Your shelf isn’t a stage anymore—it’s a battleground for daily negotiations.

    Hidden Costs: The Re-Stack Ritual

    By day three, organization is mostly an illusion. You spend precious minutes re-stacking the same piles just to grab what you actually wear. Need that navy sweater at the bottom? Everything on top comes out for a temporary relocation—often spilling over to other stacks. The quick grab always turns into a reshuffle, and the put-away routine becomes a balancing act: press and hope the stack holds, knowing it rarely does.

    Baskets: Containment with a Catch

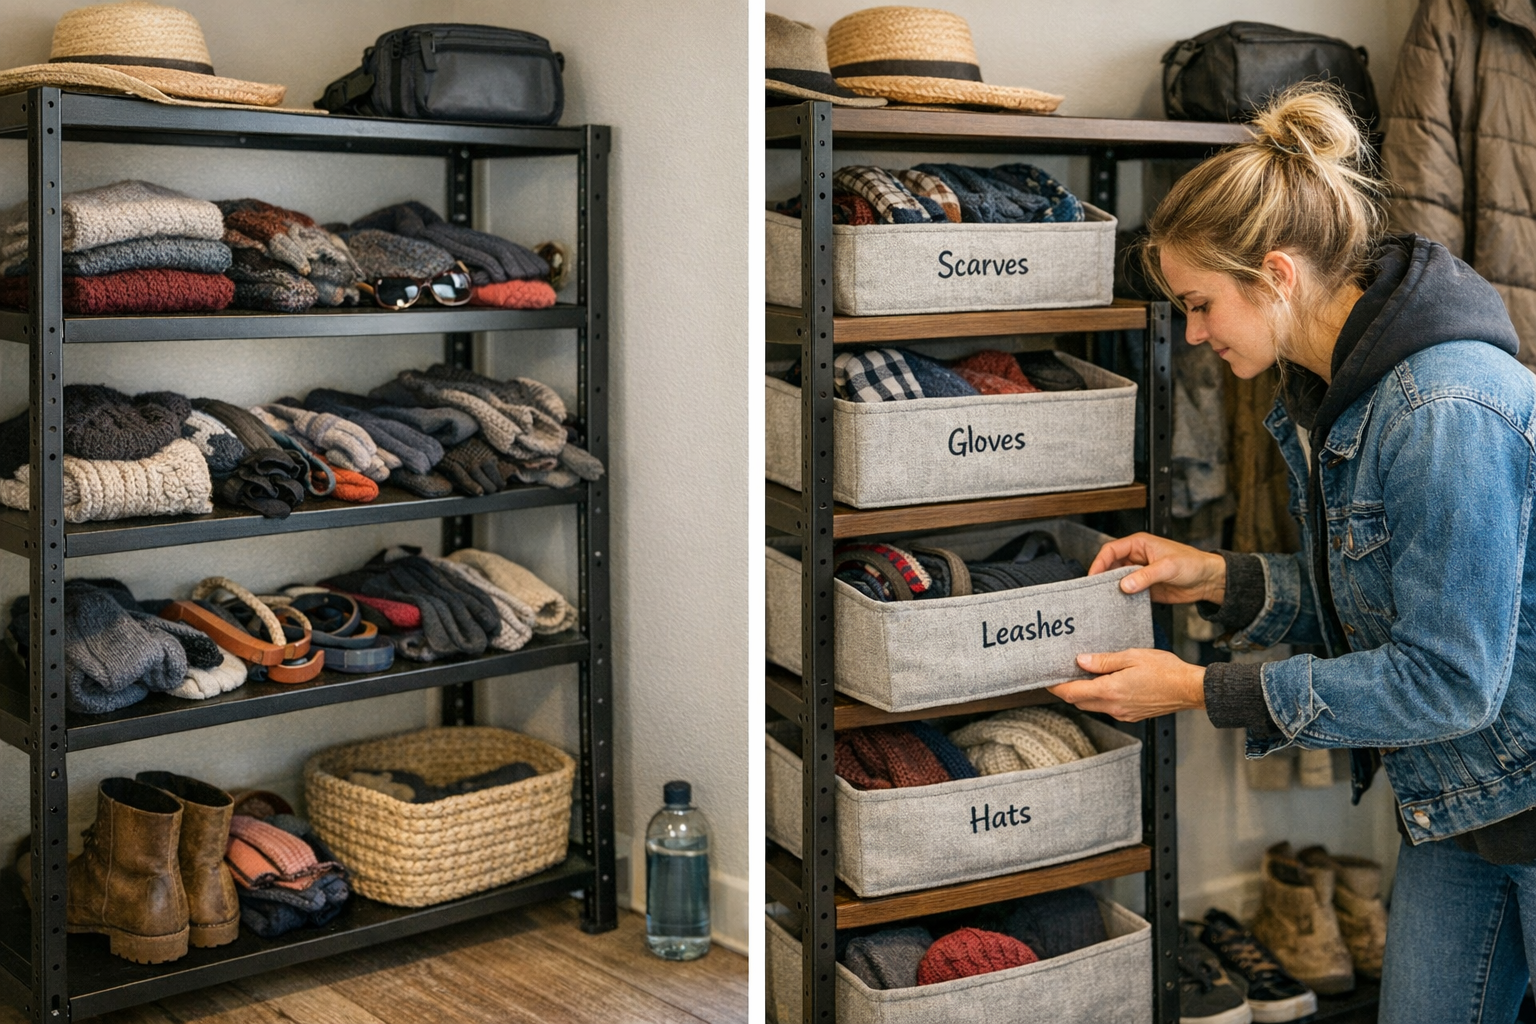
    When open shelves lose the battle, baskets look like relief. Instead of fighting every item back into a pile, you drop gloves, beanies, or charging cords into a basket and let the sides corral the chaos. For soft, slippery, or oddly shaped belongings—especially those that migrate daily—baskets give you the boundaries shelves never can.

    Instant containment means: No more scarves sliding into shirt stacks, no more loose gym towels taking over a whole shelf. The front of your shelves stays open and usable. After a busy week, the “reset” is a matter of tossing things into their baskets—not a full-scale resorting mission. The uprising of clutter pauses right at the basket edges instead of spilling across your closet floor.

    The New Hassle: What’s Out of Sight Gets Lost

    Baskets come with their own pitfall: Searching blind. Overfilled, unlabeled bins turn into a guessing game—did you leave your hat in the “winter” basket or “sports”? Is the other glove at the very bottom? In busy moments, searching means hauling out three containers, digging to the base, then reassembling what you just scattered. Visibility trades places with containment—organization stops looking chaotic but begins feeling slower.

    Labeling isn’t optional—it’s your map. Masking tape with big marker letters beats a pretty label you have to squint at. The real secret: one category per basket. “Miscellaneous” bins become unsorted junk drawers within days; the narrower the category, the faster you find (and return) what you need.

    The Telltale Signs Your System Isn’t Working

    How do you know your storage setup is failing? The signs show up almost overnight: shelves look crowded even when half-full, you’re reshuffling the same piles every few days, and the front of every shelf is clogged with things that should have a home. Entryway closets are a perfect storm—gloves, dog leashes, hats, and keys multiply and spread, especially after a weather change.

    These stress points aren’t always about too little space—they’re about role confusion. Baskets rescue the categories that refuse to fold, won’t stack, or travel from room to room. Shelves still shine for what’s boxy, sturdy, and doesn’t need constant reshuffling. The closet that feels easiest to maintain is usually the one that mixes both, dividing by what survives the daily grab-and-go cycle and what needs a border to stay contained.

    Minimal Tweaks, Noticeable Results

    Test this in your own routine: Move just one category—say, unruly accessories or scattered tech gear—from a shelf into a basket. After a week, notice the small wins: shelves that finally stay neat, less sprawl on flat surfaces, and quicker resets at the end of the day. Suddenly, you’re not fighting your storage—you’re making it work with you, not against you. The space feels organized because it actually functions that way.

    Smart, Real-World Storage Fixes

    • Shallow baskets beat deep bins. Low, wide baskets mean everything is within reach, not buried at the bottom. Grabbing what you need never becomes a dig.
    • Labels must be bold and obvious. Fast retrieval beats pretty aesthetics. A strip of masking tape and a black marker can save daily minutes over designer tags.
    • Keep “misc” out of your system. If a shelf or basket always attracts out-of-place items, reassign its job. Change the function—don’t let clutter set the rules.
    • Leave breathing room. Shelves and baskets filled to maximum are the first to unravel. Keeping them 20% empty turns “resetting” into a light touch instead of a chore.

    A Closet That Holds Up Under Real Pressure

    No closet survives untouched. Between rushed mornings, seasonal gear shuffles, and everyone’s habit of dropping things wherever, the work is never truly “done.” Open shelves display, but demand discipline. Baskets contain, but obscure. The real win isn’t perfection—it’s reliability under stress. When the things you reach for most spill into baskets, and what needs visibility stays on shelves, the routine feels lighter. Your closet functions not just for a photo, but for how you actually live—less time reorganizing, more time using what you have.

    Find practical storage solutions and more everyday tips at ClosetWorks.

  • Why Standard Laser Levels Struggle with Bright Outdoor Conditions

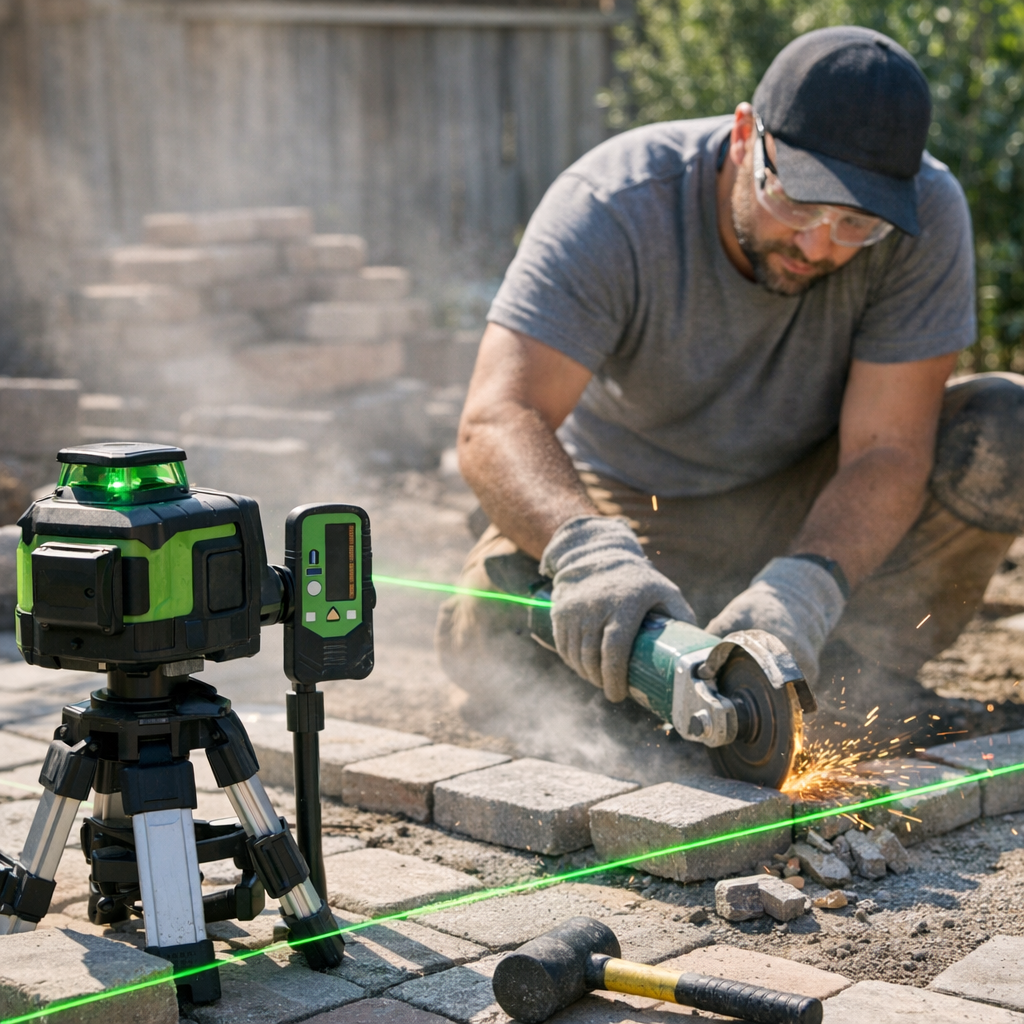
    Midway through a cut, the line vanishes. It’s not subtle—you step back, the sun’s at your shoulder, and the laser you relied on has simply faded out. Now you’re no longer guiding the saw, or the drill, or the sander. You’re squinting, guessing, propping up your body just to catch what used to be a clear, bold guide. What was supposed to be a quick, precise setup out on the slab or pavers turns into a slog of double-checks and backtracks. Each tool pass grows more cautious; every movement gets tenser. And somehow, the jobs you planned for one trip across the line end up forcing two, three, or more—just because your alignment faded away the moment you needed it to last.

    When Sunlight Erases Your Reference

    Laser levels are a given for cutting, fastening, marking, or aligning outdoors. Indoors, nearly any cheap red laser holds up. But take that same tool out onto an exposed patio or driveway, and its line disappears as the sun clears the trees. On pale stone or wet concrete, even turning your head can lose the alignment.

    The friction isn’t just “harder to see.” You’re suddenly shielding the laser with a gloved hand, crouching at odd angles, and moving gear around just to make the beam visible. There’s a constant choreography—dropping tools, blocking glare, hoping you can hold everything steady long enough to mark a single true line. As the day rolls along, all those adjustments snowball. Precision unravels; tool trust goes out the window. By noon, your tape measure gets more use than your blade.

    How Faded Lines Multiply Mistakes

    A single missed alignment rarely ruins a project—it’s the snowball effect that eats the day. Lining up for the fourth brick cut, now the guide’s a guess. Later, installing deck brackets, you find yourself drilling slightly off, making mental notes to “fix it later.” Every pass where the line is faded means the next task inherits that slippage, whether it’s a grinding disk straying off or a sanding block tracing yesterday’s crooked guess.

    Gradually, jobs take longer—marks need adjusting, seams don’t close, cuts overlap. By late afternoon, actual progress gets lost in a cycle of fixing what wasn’t right on the first go. When the guide line can’t keep up with the conditions, your whole rhythm turns into repair work and remeasurement, not building.

    Hands-On: The Laser That Disappears in Plain Sight

    Imagine grinding tile for an outdoor step. You grab the laser, fire it across your workspace, and for the first hour, it’s crisp. Then sunlight hits full force. What used to be a bold line now flickers—one minute clear, the next a suggestion. You waste time ducking and weaving just for that brief angle where the line’s visible. Each time you guess, there’s a wobble in the cut. The result? Uneven joints, extra sanding, and the same tool running twice as long, all because the beam vanished under open sky.

    When “Good Enough” Isn’t—Why Laser Choice Matters

    On the shelf, all laser levels seem similar—solid blocks, bright packaging, the same line promises. In use, they’re worlds apart.

    Field-ready models stand out by output, color, and accessories designed for real outdoor stress. Entry red-beam levels run soft diodes—their lines evaporate in sunlight. A good green-beam upgrade means richer visibility at a glance. Lock in a pulse mode or use a receiver, and the laser becomes readable at surprising distances, even across light stone or asphalt. The difference isn’t just comfort; it’s fewer stuttered stops, less repositioning, and far less guesswork on every pass.

    The Fatigue Factor: What Cheap Tools Cost

    Use a bargain indoor laser outside, and the hassle compounds: more kneeling, more arm strain from awkward reach-ins, more bent-neck stares waiting for the beam. You start feeling it before you notice; fatigue creeps in as every step turns manual. At end of day, it’s not just thrown-off cuts, it’s the drag of physical wear—time and energy lost wrestling with a tool never designed for the light you’re actually working in.

    What Improves with the Right Laser in the Mix?

    Upgrading isn’t about “tech for tech’s sake.” It’s the difference between trusting every move with the saw or driver, or checking, correcting, and apologizing for drift all afternoon. A green-beam outdoor laser with a receiver means one bold line, visible at the actual spot you need it: on sun-washed tile, on a hot deck, on pale block. Cut paths turn steady again. Fasteners find their holes. There’s a visible guide from first setup to final fit—no matter what the sky’s doing.

    Shielding the beam goes away. You’re no longer trying to remember where the line was—you just see it. Movement smooths out. Your body stops contorting to chase a signal that’s always fading. There’s real, physical relief: less second-guessing, less rework, more time moving forward.

    Real-World Gain: Smoother Flow, Fewer Corrections

    The biggest shift isn’t perfect speed. It’s the return of quiet control—with the right tool, you finish more jobs on the intended line, not the fallback. You stand up straighter, use fewer bandaids, and the workday feels productive rather than patched together. When you have a reliable line, every tool—from grinders to sanders—performs closer to its real potential on the first pass, not after a round of fixes.

    When Your Laser Level Is Quietly Holding You Back

    Not sure your old laser is the bottleneck? Look for the red flags: repeated seam gaps, angles that don’t add up, long shadows as you eye the mark from three spots before moving. If you’re holding tools still just to make out a line or squatting for “the right view,” the job’s already harder than it ought to be. The cost shows up in wasted cuts, sore wrists, and—over a week—a lot of lost minutes and material.

    Field tip: Test your current laser outside mid-afternoon. If the beam’s nowhere to be found—or fades by the time you walk a few paces away—it’s not up to outdoor reality. Consider a dedicated green-beam model with a good receiver for conditions your projects actually see.

    What You Miss When You Don’t Upgrade

    Precision on site isn’t just about tools—it’s about tools that suit the actual friction of your day: sunlight, glare, squinting, and lines that vanish with every cloud break. The wrong laser level drains accuracy, saps energy, and demands more bodywork than you’d ever plan for at the start of a shift. A proper upgrade pays for itself not in marketing claims, but in hours recouped and work that finally tracks with your own standards.

    The next outdoor job—be it pavers, patio cuts, or bracket installs—comes down to the line you can actually see when you start, and when you finish. Choose the tool that keeps up, and the entire process shifts from patchwork toward real, usable progress—on schedule, and under open sky.

    Explore more job-ready laser levels and outdoor tools at Gumboll.

  • How Strong Scents Disrupt Your Cat’s Favorite Resting Spots at Home

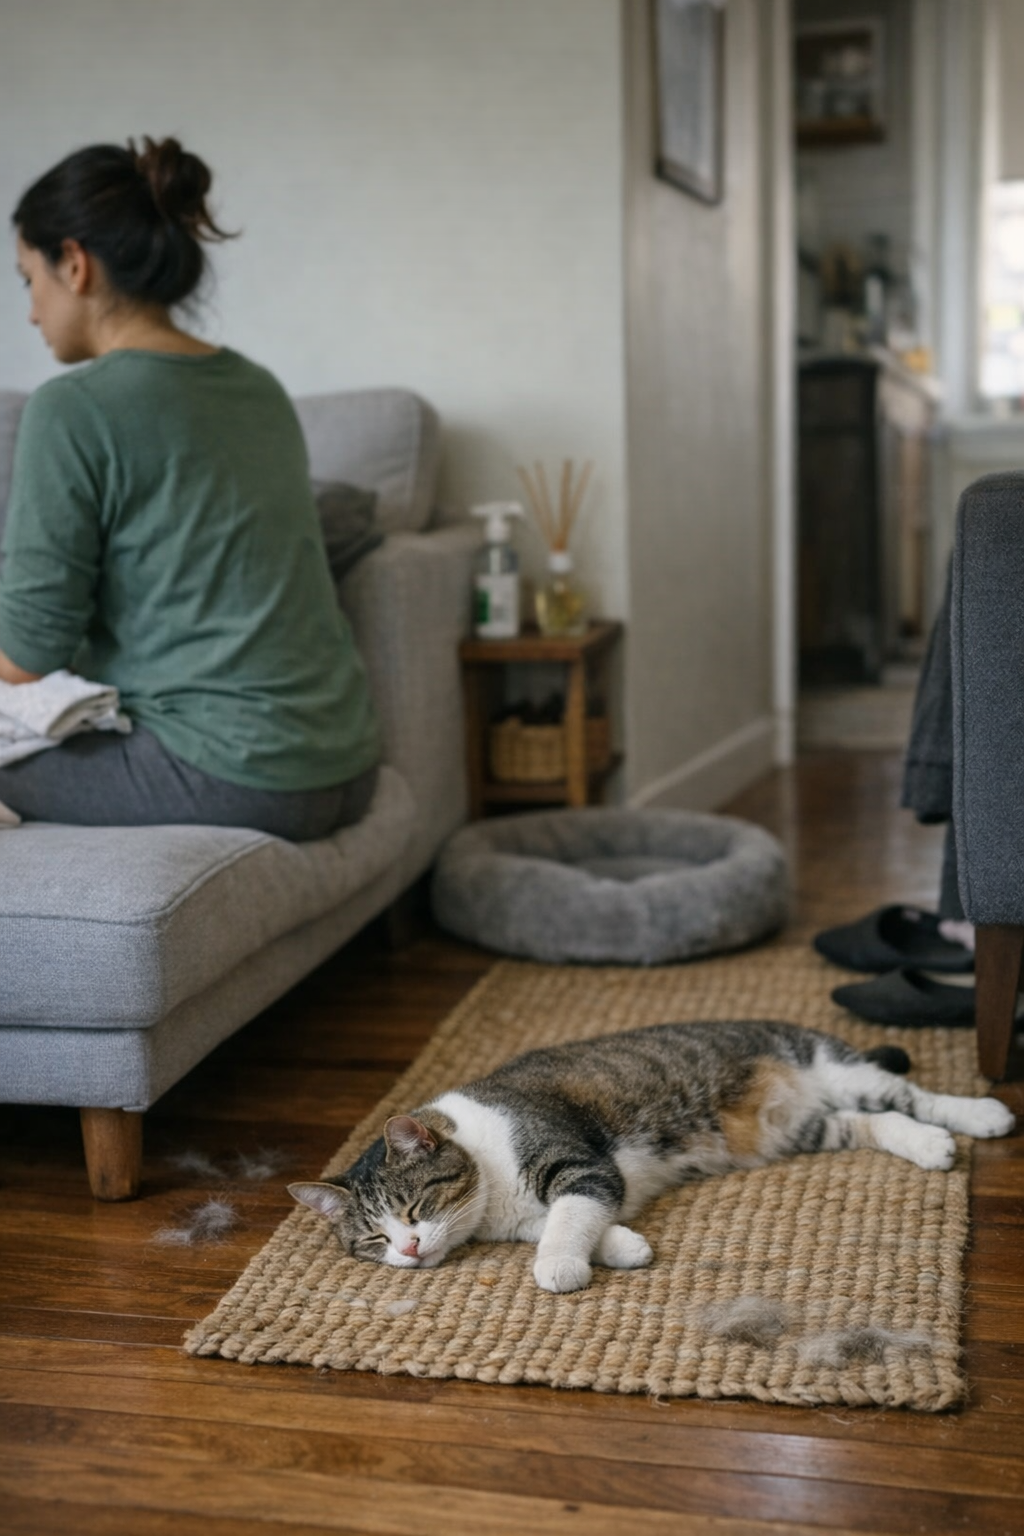
    The “perfect” cat rest corner is supposed to solve mess—bed tucked in, fur contained, traffic out of the way. But after a few routines, it unravels: your cat starts skipping the corner altogether. Instead, you’re finding rolled-up fur on hallway rugs, scrunched laundry baskets suddenly in use, sofa edges moonlighting as nap zones. That tidy cat bed? Ignored. And cleanup multiplies—now you’re vacuuming places that went untouched for months, while the “easy-clean” spot sits pristine and empty. The reality: it only takes one overlooked detail for a so-called low-maintenance setup to become a daily headache.

    When the “Perfect” Cat Bed Goes Empty (and Cleanup Spreads)

    The main culprit is scent. Not heavy odors, but everyday layers: detergent, lingering wipes, plug-in fresheners, or last week’s citrus cleaner. Indoor cats track these changes fast—what seems like a harmless scented candle or a “fresh” laundry drop can quietly push them out. If you’ve ever wondered why your cat suddenly abandons their spot after a change-up in cleaning products, this is usually it. The shift is rarely dramatic at first: a missed nap or two, a longer stretch on an unexpected rug. But after a week of strong scents nearby, the rest corner is abandoned, and the fur starts showing up in harder-to-reach spaces.

    How does this actually look? Maybe the first sign is subtle—your cat spends less time in the corner, more on the hallway mat. Leave a room-scent plug-in nearby or fold heavily scented laundry in their spot: the pattern’s set. By the end of the week, cleaning now means chasing fur into new zones, not a quick shake of the mat. The original setup, neat but scent-soaked, quietly fails.

    How Scent Turns “Low-Maintenance” Into More Work

    Indoor cat routines slip fast when scent creeps in. The corner you picked for easy resets now collects dust, not fur. Instead of shaking out a bed, you’re digging lint rollers out of drawers because fur keeps spreading to the sofa, hallway, and shared-use blankets. What was meant to keep mess contained is now forcing you into extra wipe-downs and surprise vacuums in every room but the intended one.

    This isn’t a one-time annoyance—it builds. Day one: you catch a few shedding hairs on the old-loved spot. By the third strong cleaner cycle or laundry day, the cat is gone, and the mess map rewrites itself. The “solved” rest area turns into another corner to keep resetting, even though it barely gets used. The routine is the same, but now cleanup is scattered and off schedule.

    Visible Friction: When a Room Looks Set but Adds Maintenance

    The warning sign is clear: the main rest spot stays clean, but fur spreads to new places—a line of cat hair on the hallway runner, a smudge on the chair cushion, a fresh patch on the comforter. Resetting the rest bed stops working—now you’re forced into follow-up vacuums and late-night lint rolls in spots the cat never visited before. If you find yourself retracing steps and cleaning “cat-free” rooms, the original setup isn’t working. Each round of off-schedule cleanup is time and energy wasted on a patchwork of newly adopted nap zones.

    Scent Interrupts Home Routines—Quietly, Then All at Once

    The real tension shows itself during morning routines and evening resets—the moments when you expect cleaning to be predictable. You reach for a toy under the couch and spot an unexpected clump of shed hair; meanwhile, the rest bed stays spotless and unused. A scented room spray or folded laundry in the wrong spot is enough to break the routine. Refixing the bed never helps if fragrance still clings nearby. The supposed “easy-care” rest area just becomes something you keep cleaning out of habit, not function.

    Cleaners, air fresheners, and “fresh” laundry might smell harmless to us, but for indoor cats, even a passing intensity shifts their sense of home turf. Beds and mats that once anchored their routine become “don’t touch” zones, pushing mess and nap cycles right into your daily path. The setup still appears clean, but all the work now happens in the wrong place.

    When Cleanliness Makes Life Harder, Not Smoother

    What starts as a neat solution often ends up creating more friction over time. That “contained” bed, meant for a weekly shake-out, sits idle. Vacuums and lint rollers invade the rest of the house. Little has visually changed, but you’ve lost the fast, predictable reset—cleanup now means doubling back to unexpected rooms, late at night or before work. Strong scents force this shuffle, and every attempt to “make things cleaner” by using fresheners or strong detergents just entrenches the chaos.

    Actual Fixes: Smarter Scent Boundaries, Not Impossible Perfection

    You don’t need a sterile, scentless home—just new rules about where fragrance belongs. The real solution is straightforward: move strong scent sources—detergents, diffusers, cleaning sprays—at least one meter (about two arm’s lengths) from the cat’s main rest area. Fold bedding somewhere else. Pull scented plug-ins from the zone for a few days after cleaning. Skip the “fragrance boost” for any fabric that goes into the bed or mat. This small adjustment resets the cat’s pattern far more reliably than endless bed rearrangements or high-maintenance deep cleans.

    Once scent stops crowding the rest area, most cats return quickly—some overnight, some after a few low-scent days. Cleanup shrinks back to one spot. Mats and blankets start picking up fur again (instead of just collecting dust), and reset time drops. Maintenance becomes routine, not guesswork.

    Small Tweaks That Change the Daily Flow

    Switch to unscented or lightly-scented detergents for cat bedding. Rinse blankets and mats thoroughly, and let them air-dry away from strong-smelling rooms before putting them back. Keep cleaners, especially citrus or floral scents, away from the rest zone entirely. These swaps require little effort, but keep fur and mess where you expect—making every reset faster, without turning your home into a scentless box.

    You don’t have to erase all smell—most cats ignore faint, well-ventilated scents. It’s the high-intensity “change” that breaks their attachment. Each unnecessary fragrance increases the risk of cleanup getting out of hand, whether that means a detour to vacuum a guest bed or an extra wipe-down before every meal. Remove softeners and scented dryer sheets from the routine, especially during unexpected washes, to stop the cycle before it restarts.

    Spotting the Scent Shift Before Cleanup Scatters

    Here’s how you know scent is quietly undermining your setup:

    • Your cat abruptly avoids a rest spot after a change in cleaning or laundry products.
    • Fur shows up where it never used to—edge of the sofa, second bedroom, family-room throw.
    • Every cleaning session, you find mess in one more “off-limits” room or shared zone.

    If this happens, trace back to the last wash load or air freshener used near their spot. Removing or moving scent sources usually resets the routine faster than any physical rearrangement.

    Functional, Not Just Tidy: Making Cat Rest Setups Work for You

    True indoor-cat setups aren’t about perfect displays—they’re about function you can repeat, even on your busiest days. If a bed or mat stops being used, the weak point is rarely clutter; it’s usually an invisible (but fixable) change in scent logic. In a small apartment or shared family space, that detail is the difference between cleanup you barely notice and a frustrating spiral where cat supplies scatter across every zone.

    Instead of endlessly resetting or “refreshing” the rest area, shift your focus: move scented items aside with every clean, fold, or refill. Small changes add up—over dozens of daily cycles, this keeps rest corners in use, cleanup predictable, and the line between cat and shared space clear. That’s the real edge: not a visually perfect setup, but one that absorbs mess, keeps the schedule predictable, and doesn’t make you chase fur across every room.

    Discover more practical setups and daily problem-solvers at StillWhisker.

  • Why Linear and Panel Ceiling Lights Transform Everyday Room Lighting

    Every unfinished desk setup has a tell: the corner that stays dim, the tangle of cables that outlasts every tidy-up, the lamp you nudge three times a day and still can’t get right. Cramped workstations, shared surfaces, and shelf-lined walls reveal a stubborn pattern—glare where you want comfort, shadow where you need clarity, exposed cables catching dust and attention. Even when you cycle through different accent lamps or reposition cords, there’s a sense of grinding friction—the routine won’t flow, the space never feels resolved, and the mess rebounds after every reset. The trouble isn’t always a missing fixture; more often, it’s mismatched lighting and a patchwork of supports that can’t keep up with how the space is actually used.

    Where Patchy Lighting and Clutter Keep Returning

    Spend a few real weeks at a desk wedged into a room edge or between shelves: you route cables, you reorganize, slide the lamp closer to the monitor. Within days, the drag returns. Accent lamps and scattered desk lights carve small wells of glow, but they can’t catch the far edge or the shelf end where you reach for chargers or files. Shadows stretch just past every lamp’s reach; cords sneak out from behind the monitor or puddle below the outlets. Nothing feels anchored. More rerouting means more visual clutter.

    The frustration becomes real the moment you move from quick check-ins to actual tasks—collaborating at a shared desk, switching between reading, typing, handling paperwork. The limitations pile up: dark strips along the desk edge, a blind spot under the shelf, and cables always threatening to trip up your next move. A cluttered look is a warning, but the deeper drag is how often you need to fix, tweak, and adjust just to get a basic level of comfort.

    Why Panel and Linear Ceiling Lights Change the Equation

    Mounting a panel or linear ceiling light above your core zone is a shift you feel in the routine, not just the look. Direct, evenly thrown light clears up both work surfaces and those awkward shadow patches that accent lamps never reach. Outlets stop overflowing, extra lamps become obsolete, and scattered cabling drops away. The old loop—rolling your chair to catch a better angle, unplugging one device to find another, nudging a lamp every time your mood or task changes—starts fading out of the workday.

    Another side effect hits instantly: uniform, practical light exposes the corners standard accent lighting left in hiding. Dull cables, dust-bunny outlets, the missed pen under the shelf edge—they’re suddenly plain to see. What passed as “good enough” under soft, patchy light now reads as half measures. Real, even illumination reveals each weak spot in the routine and makes the “clean” state last because there’s no easy place for disorder to gather.

    The Moment Dead Zones Disappear

    Picture a desk stacked tight against a wall, a shelf pressed close, and power bricks fighting for access below. A couple of accent lamps provide a pleasing start—a cone of light on your keyboard, a glow marking the corner. But within the first week of real work, familiar friction returns. Cables overload a single outlet run, your drawing hand falls into shadow, and changes in layout (adding a new charger, sliding in a second monitor) set off a new wave of cord mess and dim patches.

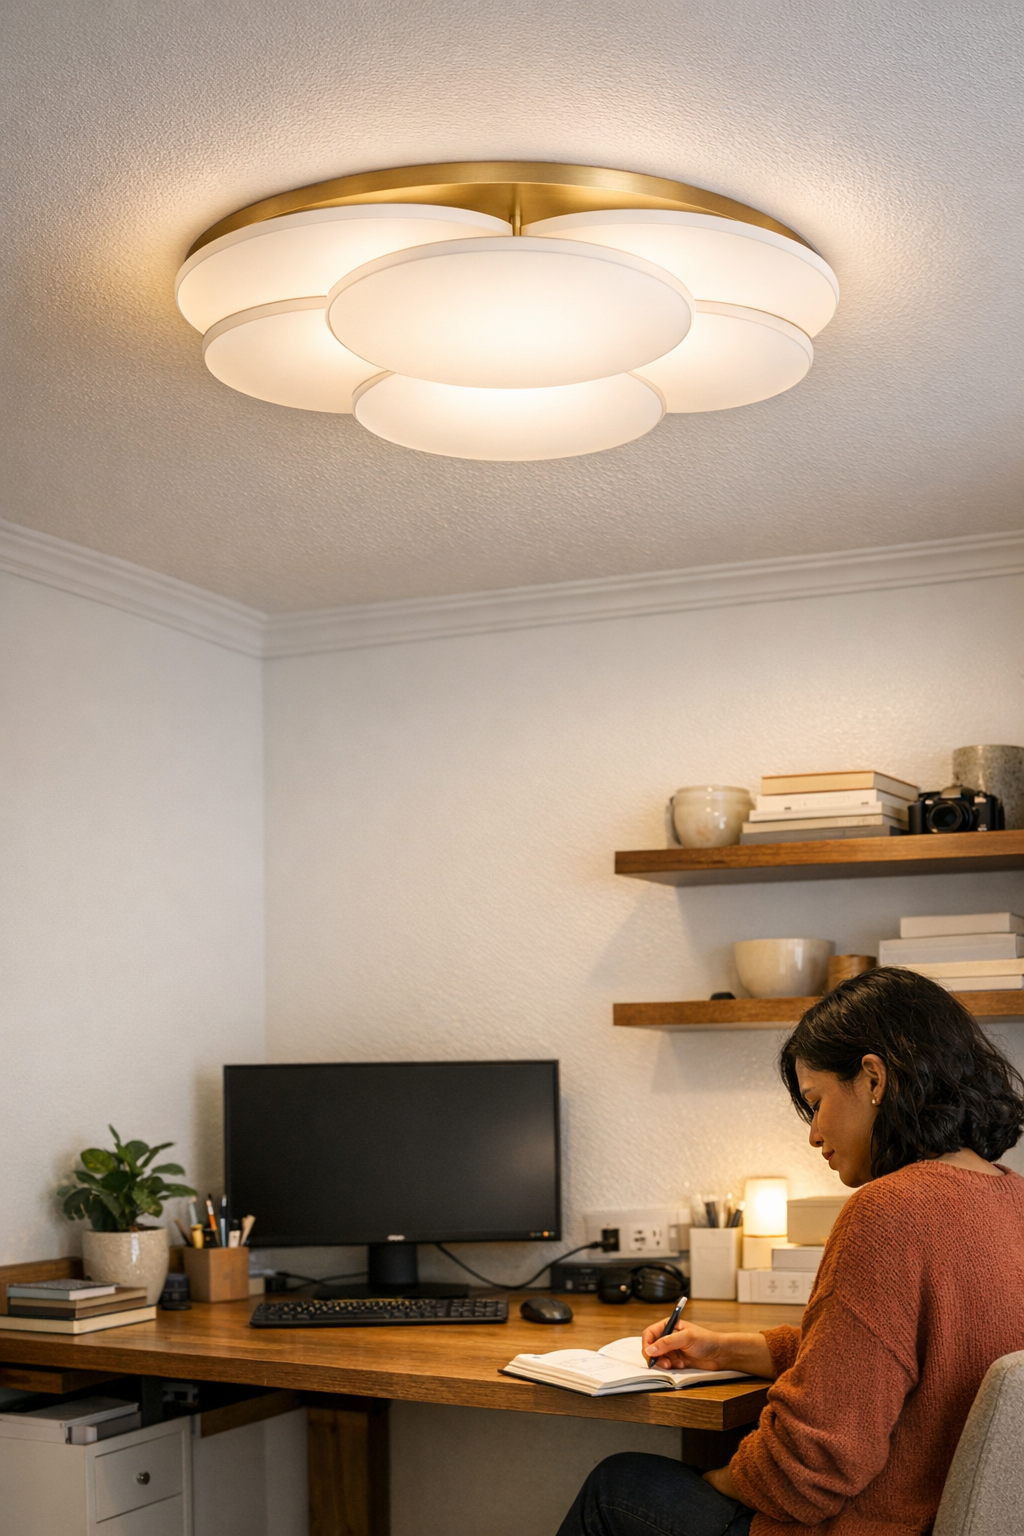
    Swap in a flat panel ceiling light, placed in line with the desk and shelf—not just anywhere above—and the change is obvious the first evening. No more shadowed tools, no more hidden USB drives swallowed by a dark strip, and a dramatic drop in daily cable tangles—often by half or better. This isn’t cosmetic: working, reading, and cleanup all happen without pause, because visibility finally matches the space’s real use, not just its display angle.

    When Surface Cleanliness Equals Real Usability

    In most workspaces, “tidy” is mostly for show—easily unbalanced by new projects or one too many cables. The real payoff comes when every surface stays both visible and accessible across every task, without constant fussing. Before a ceiling panel upgrade, you might start the morning with a bright, neat space, but by lunchtime—after a few project changes—papers creep into shadow, and the desk face is split between glare and dimness. Tools migrate to the lit pocket; everything else disappears under piles and weak light.

    Smart mounting and support fix this at the structural level. Center a panel light above both desk and shelf—aligning it, if you can, to match the main run of your power strip or bracket supports—and the benefit is immediate. The need for daily untangling, constant re-positioning, and awkward wrist angles vanishes. Even minor detection—the stray microSD, that runaway pen cap—is easier, because you aren’t battling glare or guessing if you missed something in the shadow. Instead of tidying by shifting clutter out of sight, you simply stop having places for clutter to hide.

    The Drawbacks of Relying on Accent Lighting Alone

    Accent lamps fit a purpose—but handling main work zones with them is a recipe for repeating the same interruptions. At a glance, they promise flexibility and mood. After any real stretch of use, the cracks appear:

    • You’re up and down all day, re-aiming to dodge glare as the sun shifts or your task changes.
    • Cables sprawl across the desktop or into arm’s reach, refusing to stay routed, getting worse as you add or swap devices.
    • Every tweak in layout—new screen, moved printer—means another plug, more support, and more visual mess, not less.

    No cable routing trick holds for long. And the bottom line: if you need both sides of your workspace—the “good” side plus those neglected corners and shelf-ends—accent lights can’t stretch far enough. Every new task or device restarts the shuffle, consuming time and attention before you even begin actual work.

    Better Placement: How to Avoid the Most Common Lighting Misses

    Real misses aren’t abstract—they crop up every day:

    • Mounting a fixture too tight to a wall so one section blazes while the rest sits in shadow.
    • Focusing the light on the main desk but ignoring an adjacent shelf, leaving a dark band where needed gear goes missing.
    • Running cables or support brackets in the open, cluttering sightlines and turning every clean-up into an extra job.

    A fix that matters: Lay out your real tools, devices, and daily stacks before choosing a lighting layout. Judge whether you can reach everything without crossing through cords or angling for stray light. Then, run brackets or cable supports out of direct sight and above, not along, the workspace—so access and visibility aren’t disrupted the second you sit down.

    When Lighting Setup Stops Requiring Attention

    The best proof your lighting and supports are working is this: you stop thinking about them entirely. With a solid ceiling light placed where the work happens, and all support hardware trimmed out of the way, everyday routines run smooth—and boring in the best way. Papers slide, hands swap tools, new gear moves in. Nothing about the setup demands your attention. You’re not hunting for lost items, not juggling cables, not shifting lamps to find an untouched patch of clarity.

    The tradeoff is clear: accent lighting’s layers look great but can’t manage the reality of day-to-day work. What matters, in the long run, isn’t first impressions or showroom looks—it’s the disappearance of friction: no more shadowed tools, cable distractions, or half-finished surfaces breaking your flow. If you work at a compact desk, share crowded table space, or need every shelf useable—not just visible—the step from patchy light to clear, evenly distributed ceiling lighting makes the difference. Check that coverage extends where you need it, and even the messiest routines stop fighting the space.

    Visit LightSupport for practical indoor lighting and support.

  • How a Night-Before Reset Transforms Carry-On Travel Efficiency

    Most carry-ons fail right when you need them most: packed with precision at home, then unraveling at every airport checkpoint. The structure that looked smart in your living room—pouches zipped, cables wrapped, documents slotted—starts showing cracks the moment you hurry for your passport at security or fumble for a boarding pass while juggling trays. The problem isn’t organizing once; it’s surviving every rushed reach and awkward reset. What works for one tidy night rarely works for three cycles of pressure, especially when you’re pressed for time at gate entry or forced to repack with a line building behind you. This is where a bag that “looks organized” often drags you down, and where real carry-on design—spotted at CarryOnSupply—shows its difference.

    When Neatness Collides with Movement

    The bag you felt smug about at home can turn on you fast after two airport turns. Slide it into a security tray, and layers that seemed orderly become a slow-motion obstacle course. One pouch blocks your passport; an “organized” document gets lost behind a cable wrap. Unzipping for a laptop means fishing past snug pockets, unstacking organizers now stacked on top of each other. Each layer adds seconds—or hands—where you only wanted one quick pull. What once looked like organization now demands a full partial unpack, just to retrieve one item amid the crowd.

    Even minimal layouts backfire if they require an exact reset every single time. That neat row of pouches turns into a cascade on the security belt. Hunting for a pen or a phone cord mid-boarding means juggling slots and stacking organizers in your lap. Unless a section survives the push and pull of real travel—with items used and returned under stress—being “organized” quickly becomes another friction point.

    The Drag of Over-Controlled Packing

    Perfect-at-home systems—layered organizers, double-stacked pouches, ultra-nested inner pockets—start to suffocate the minute you move. Packing every inch for “maximum control” builds booby traps in actual use: the zippered pocket you can’t reach without emptying a layer, the tech organizer that makes you detangle three cables to grab one, the “safe” compartment that hides your boarding pass during back-to-back checks. Packing control turns into micro-delays, each reset slowing movement instead of speeding it.

    • Tray logjam: That tight document holder you tucked behind a pouch at home makes you dump half the bag for a passport scan.
    • Organizer gridlock: A complex cable case that snags your only charger with three others, forcing a reverse Tetris game each time you recharge.
    • Blocked access: A zipper pocket you thought was “secure” at home is now buried when it’s time for an ID at boarding—turning the quick check into an awkward scramble.

    With every repeat, the control you designed in becomes a chore you have to unwind before moving forward again.

    Resets That Restore Flow—Or Create New Snags

    Most travelers have their “reset ritual”—everything refolded, compartments reassigned, every item in its lane the night before a flight. But under airport conditions, neat packing is only half the battle. Lived-in flow depends less on perfect stacks and more on keeping high-frequency items exactly where fast retrieval won’t jam up the rest of your setup.

    • Where do you feel a snag—zippers catching, pouches wedging, pockets overlapping?
    • What have you had to pull out entirely just to get one thing back in motion?
    • Do you need to split your bag open just for a single boarding card or charger?

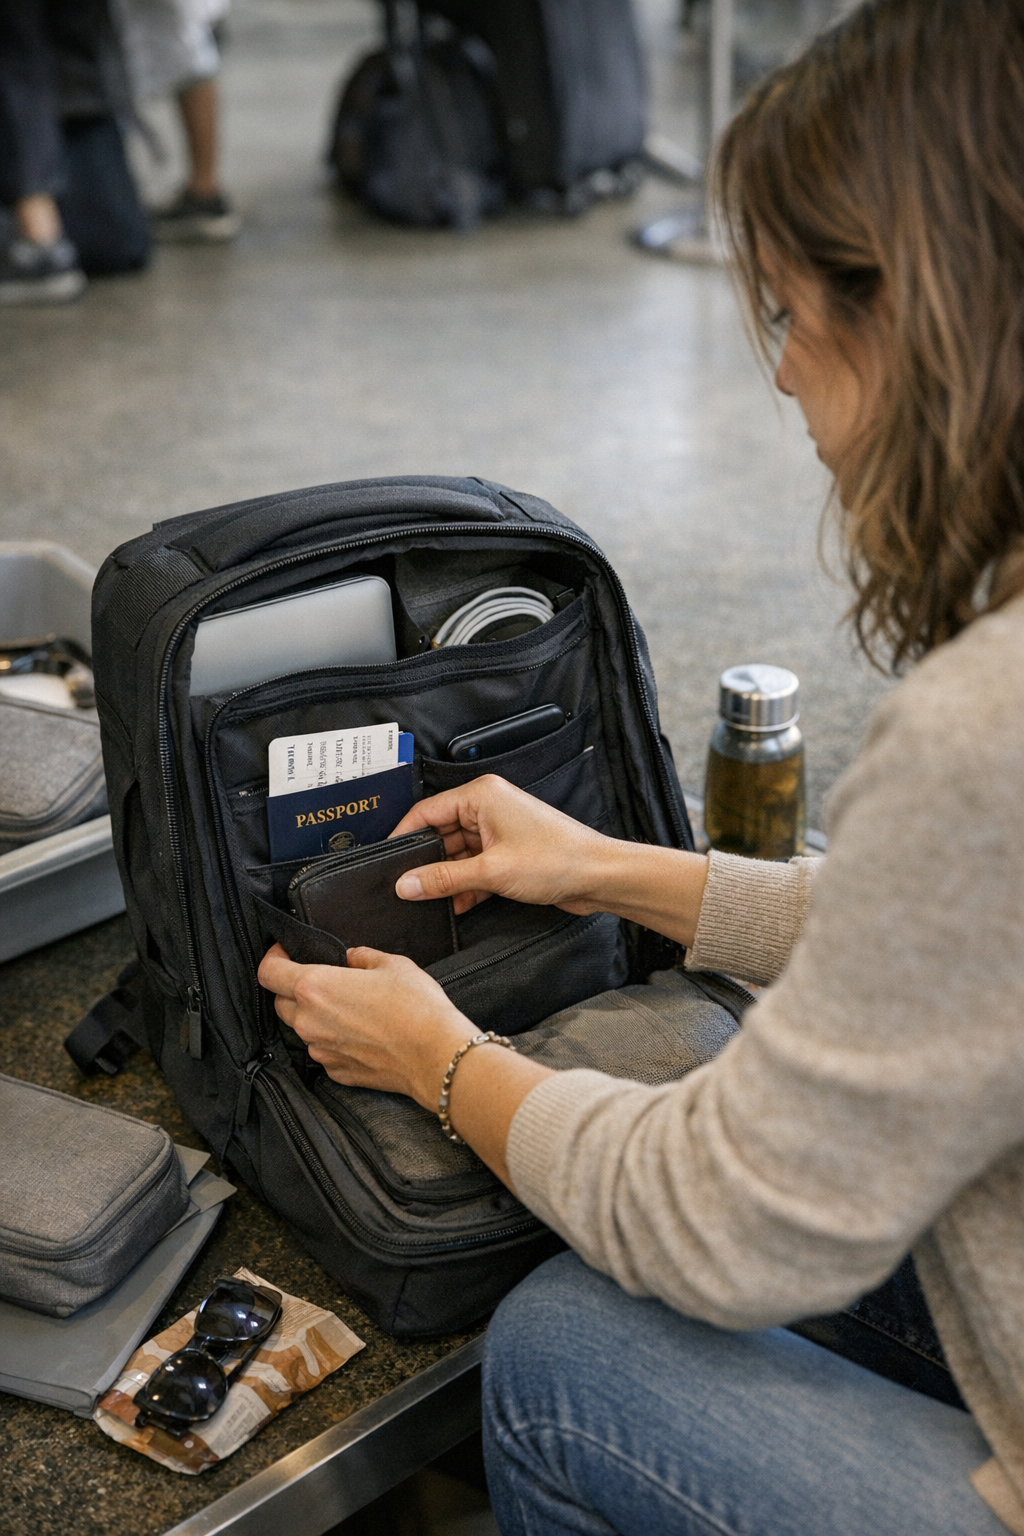
    Real resets protect your fastest grabs: passport, phone, wallet, tickets. These don’t belong deep in a tactile maze. Design that endures airport stress means fewer doubled-up compartments, flat easy panels for high-use items, and one zip—never three—to reach what you actually use at each checkpoint. It isn’t the neatest section that works; it’s the one you don’t have to think twice about at boarding or security.

    The Real Test: Returning After Repeated Rounds

    It’s easy to be “organized” once—hard to stay that way after a day of transfers, tight gates, and three rounds of partial repacks. With every lap, slick setups often collapse where it counts:

    • Gate pressure: Boarding group called—are you digging through half your bag for the phone, panicking as people wait?
    • Bin access: Needing a charger mid-flight—can you grab it without spilling the contents, or do you wedge the bag between seats for awkward access?
    • Security repeat: Every time you slide the laptop out, does it unravel the careful sequence you set up at home?

    Bags that pass one test often fail the second or third. The repetition exposes where a bad pocket, unnecessary overlap, or rigid layout turns a five-second task into a clumsy minute-long wrangle. At a certain point, friction multiplies; your setup goes from “looks under control” to “slowing you down with every routine action.”

    Overlapping Compartments: The Source of Repeat Friction

    Nested, overlapping, or cross-stacked compartments—the minor mistakes that don’t show up in your bedroom mirror—compound every airport routine. That snack sleeve covering your wallet, or the tech pouch in front of key documents, adds a new step every time you reach. Each overlap that felt harmless at home magnifies when:

    • ID buried two-deep: You need to fish out two pouches before you find the one with your boarding pass.
    • Disappearing act: A pen or headphone slides behind a toiletry kit, not to be seen until touchdown.
    • Forced repacks: After one rushed grab, the only way to reseat your items is to start from scratch while the line behind you grows impatient.

    The pattern stays the same—every added step shaves speed off your travel routine, making the bag feel less like a tool and more like a chore to manage. A crowded or over-featured organizer punishes you with drag, even if it hides the mess for a moment.

    What Actually Makes a Carry-On Setup Work?

    After missed layovers, sprinted connections, and multiple rounds of “just one more check,” the difference always comes back to: Can you get to what you use most without breaking your own setup? For most travelers, the best switch isn’t adding organizers, but leaving certain sections open and uncongested. One fast-access panel for documents, tickets, and a pen beats a stack of zippered helpers nine times out of ten—especially during checkpoint sprints or repacks outside the arrival gate. The setups that last aren’t the ones that only look good after a reset, but those that move as smoothly on the third use as on the first.

    After trying the “open zone” approach—one dedicated spot, always unburdened for essentials—the endless pouch shuffle faded fast. Resets stopped collapsing at the next squeeze through security, and the whole bag started feeling… lighter. You see the contrast: setups that survive real-world cycles, versus those that only hold together for a single photo.

    Design Choices That Survive Real Airport Routines

    • Protect core pockets for high-frequency items—don’t double them up or stack behind zippered layers.
    • Limit overlapping compartments near main access points; avoid pouch nesting where it slows your hand during the busiest moments.
    • Keep retrieval a one-move task, not a multi-draw process. Each delay during a checkpoint is a design flaw, not just a packing error.
    • See how your setup holds after two airport cycles, not just a tidy kitchen table reset.

    If you travel back-to-back, hustle between terminals, or often reset in cramped spots, these choices translate directly into smoother movement and less dead time. The right carry-on design takes weight off your transitions, not just your shoulder.

    After the Reset: Does Your Bag Still Move With You?

    When you arrive, don’t just check whether your bag “looks orderly”—test how it moves. Does grabbing your passport, re-seating a laptop, or pulling a charger still require digging through packed layers? If your “reset” only restores appearances, it hasn’t solved repeated drag. True improvement comes where overlap is minimal and items needed most are always a clean reach away. The margin between an “organized” carry-on and one that lets you move lighter is stubbornly specific: fewer barriers between need and access, especially as the travel cycle repeats.

    Explore carry-on tools and travel organizers at CarryOnSupply.

  • Transform Your Dog Care Routine with Simple Setup Changes

    Where Small Interruptions Hide in Daily Dog Care

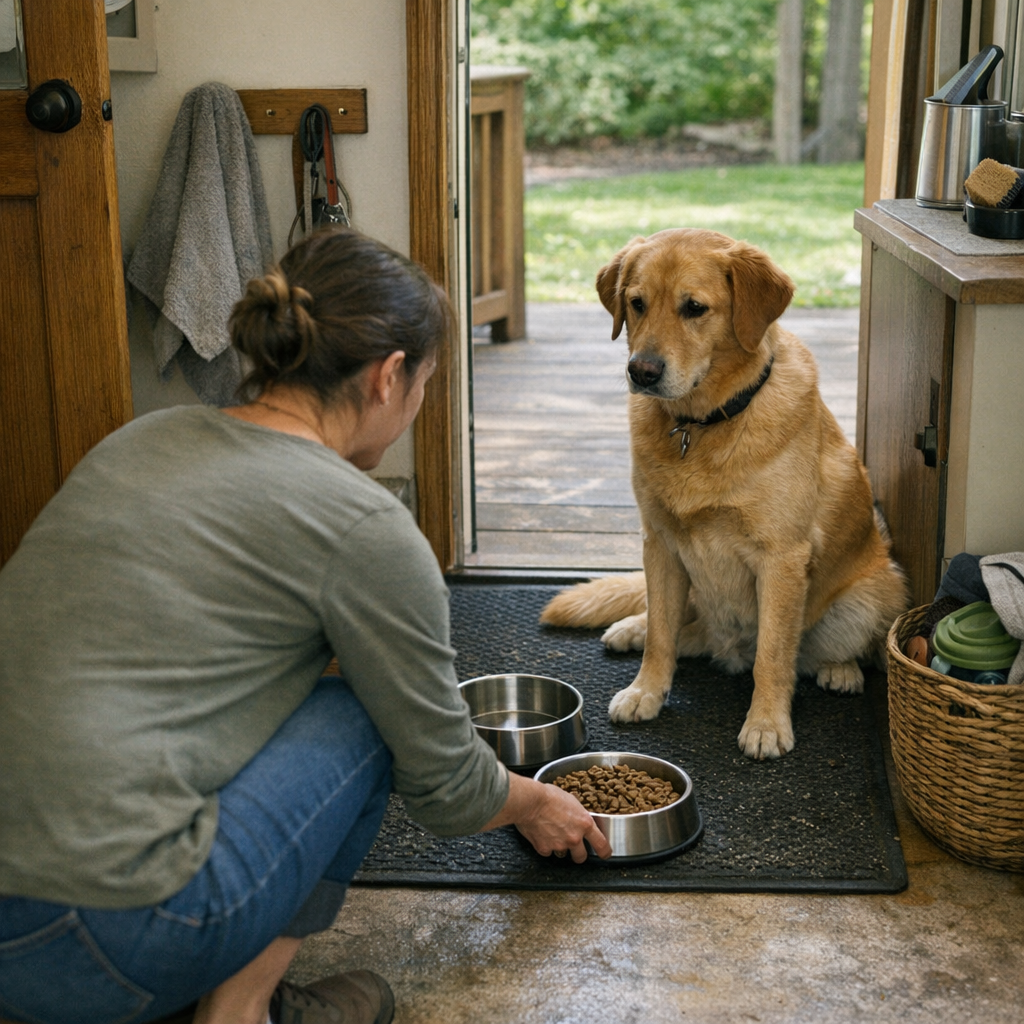
    Daily dog care routines look dependable on the surface—a bowl is rinsed, a towel is hung, the feeding corner appears under control. But minor snags start showing up fast. The moment you need to grab a towel for wet paws and realize it’s across the room, the normal flow is already disrupted. One missed wipe or awkward reach interrupts a routine that was supposed to be quick. These tiny, repeated delays accumulate: stray kibble underfoot, water spots you notice hours later, towels never where you expect them. Even when the space looks organized, basic actions like feeding or cleaning up begin stretching out, reshuffling your mornings and slowing down busy evenings. Over just a few days, what seemed like a smooth system starts revealing gaps.

    Practical Scenes: How Routines Get Interrupted

    Start of the weekday: you reach for the food bowl, measure kibble, but your dog bumps you—spilling some on the floor. Now you’re down on your hands and knees, sweeping up while your dog circles, waiting. After a walk, muddy paws land on the mat because the towel is not at hand; you end up cleaning both dog and entryway. The issue isn’t that you lack supplies—they’re nearby, but never right where you need them. One item blocks another, or grabbing a wipe means shifting a heavy bag first. Each extra move makes the routine just a bit slower. Over the week, dried water spots collect near the bowl, and stray food appears in corners you didn’t expect.

    Multiply those disruptions: water refills delayed because the bottle is tucked behind other containers, or the quickest brush buried under a pile. The tools are present, but practical access never feels simple, especially when your attention is split or you’re running late. The routine that worked on day one now costs extra steps with every repetition.

    When Order Looks Right, But Doesn’t Work

    A pet corner can be organized and still break down in actual use. Hooks, bins, wipes, and brushes all line up until time pressure exposes the cracks. A newly installed hook makes a towel easier to see—but also blocks the drawer you open for treats. The food bin looks tidy in its spot, but to scoop kibble, you have to move another container out of the way. Real interruptions surface not when you’re setting up, but the instant you need to move fast—like returning from a night walk and realizing the water bowl is empty, or when one missing item turns the whole routine into a slow shuffle.

    Each time you move two things to reach one, or find clutter returning to high-traffic spots, it’s a sign the system looks organized but doesn’t keep pace with everyday demands. That gap grows as routine resets—feeding, water, after-walk cleanup—keep exposing the same weak points.

    The Cumulative Cost of Delays

    By Friday, the cost of small inefficiencies is concrete: late-night cleaning, half-used wipes crowding bins, clutter sneaking back into entry spaces. It’s rarely one big mess but a pattern of repeated slowdowns—each delay adding just enough drag to wear on the routine. Even when you think supplies are close enough, just being “almost” ready means water bowls get filled after mealtime, feeding becomes a two-step process, and late cleanup interrupts your evening.

    A bowl placed behind the treat bin, or a towel hook installed just out of reach from the door means more travel at the busiest moments. Each split-second choice—leave a water spot, skip a quick wipe, pile items out of the way “for now”—shows up as visible mess later. What began as a tidy system becomes a pattern of minor workarounds that slow you down daily.

    Observations from Adjusted Spaces

    The fixes that matter are rarely about adding more shelves or bins—they’re about micro-adjustments. Lowering a towel hook to door level, keeping wipes container in arm’s reach, or making rinsing the bowl a single-action step lets you stay ahead of interruptions. Suddenly, you’re not stuck searching for a wipe while muddy paws keep moving, or reaching up while juggling the leash, food scoop, and an eager dog.

    As these changes settle in, the difference is obvious: fewer surprise messes, bins not overflowing, cleanup tools reset exactly where you’ll need them next. The improvement isn’t a dramatic overhaul—it’s a drop in friction you feel most when hands are full or patience is thinning at the end of a long day.

    The Difference Between Tidy and Truly Smooth Care

    A setup that hides visual clutter might still interrupt care actions. When items are neatly organized but not in grab range—when feeding tools are always a stretch farther or cleaning wipes end up blocked by stacked gear—the result is a tidy space that frustrates in practice. True smoothness means actions feel as direct and natural at the end of the week as at the start. Look for where access breaks down: that’s where routines falter first.

    As you shift placement—moving key items closer, clearing entry points, adjusting shelf heights—you notice feeding, cleanup, and resets revert to simple, repeatable motions. Decrease the tension and routines hold up under busy, real-life pressure, not just a photo-ready moment after organizing.

    Less Friction, More Consistency

    Every small tweak—relocating a towel, repositioning the water bottle, clearing out one corner where clutter gathers—cuts down on routine drag. Assess not just how tidy your setup appears, but how usable it is mid-rush, leash in one hand, treat pouch in the other. The less you have to reshuffle, the more time and attention stays with your pet, not with your storage system. It doesn’t have to be picture-perfect; it needs to be consistently manageable, even on your busiest days.

    See calm routines made practical at CalmPetSupply.

  • Creating a Quiet Window to Ease Your Dog’s Midday Restlessness

    Midday “rest” shouldn’t mean ten minutes of circling, three false starts, and a dog’s sigh every time you step into the hallway. If your dog keeps scanning from bed to corridor after lunch—never quite relaxing—it’s not just harmless fidgeting. It’s a visible weak point in the daily routine: a supposed downtime that collapses under the weight of hallway crossings, vacuum bursts, and scattered gear. Instead of recharging, both you and your dog end up half-alert, with the routine feeling patchier every day.

    When Quiet Time Isn’t Really Quiet

    Picture this: lunch is over, you expect your dog to curl up and actually rest, but within minutes he’s circling the bed again, raising his head at every distant footstep, or bolting upright when someone swings past with a basket of laundry. A nap keeps slipping out of reach. What looks like harmless shifting often signals that the so-called “quiet period” is porous—built on shaky ground where every small disruption stacks against genuine rest. Your own to-do list stretches, but the dog’s ears track the movement around him, and your focus splits further every time he restarts his routine.

    The cost isn’t dramatic; it’s cumulative. With each reset—another flop, a lifted head, another shuffle between rest spots—real rest becomes less likely. Instead of walking away refreshed, you both slog through the afternoon stuck in a broken rhythm, chores fragmenting, energy draining faster as each interruption chips away at recovery.

    Unseen Friction: The Little Things That Break Rest

    Midday disruption rarely announces itself with a bang. Instead, it’s a pattern of split attention: doors swinging open, laundry runs through resting zones, or a quick vacuum session “just for a minute” that snaps your dog to high alert. Even room setups that look clean—a soft bed, a water bowl tucked just out of the walkway—won’t fix the underlying slow leak if daily movement slices through the nap window. The problem isn’t visible mess; it’s broken flow. With three or four interruptions in an hour, a rest period meant to smooth out the day gets shredded into fragments—and neither side fully resets.

    The Pattern Repeats: What Regular Midday Disturbance Actually Feels Like

    If you watch closely, the routine breakdown isn’t subtle. A dog shuffles back and forth between two beds, picks a spot, then moves again five minutes later as footsteps approach. Over a week, you start dodging around your own dog to do laundry, pausing work to check why he’s restless, or tiptoeing through rooms to avoid another sigh-filled shift. Eventually, the workaround becomes the default: instead of real rest, both dogs and owners resign themselves to a midday hustle that never truly smooths out. The routine’s weakest link just keeps resurfacing—no matter how well-placed the bed or how tidy the corner looks right after cleanup.

    Recognizing the Subtle Signals: How Routine Failure Shows Up

    Midday restlessness signals show in small, repeated behaviors like:

    • Circling the bed after eating, never quite committing
    • Switching between two or three close rest spots instead of landing in one
    • Jolting up at hallway sounds, vacuum clicks, or kitchen drawers slamming
    • Ears tracking each new footstep, even during “quiet” hours
    • Short attempts at napping that break quickly, or a constant cycle of starting over

    These patterns point past comfort gear or tiredness. They reveal the structure itself isn’t reliable—a routine forced to adapt to every new interruption, where downtime is always one noise away from ending.

    The Real Fix: Building a Trustworthy “Quiet Window”

    Lasting change doesn’t come from buying a plusher bed. It comes from reducing cross-traffic, delaying noisy chores, and carving out a 30- to 60-minute block where the home’s movement pattern shifts. A real “quiet window” means:

    • Tightening down hallway and doorway crossings for one protected stretch
    • Pushing off vacuum, laundry, and clattering cleanup until the window closes
    • Directing phone calls and deliveries away from the resting zone
    • Re-locating the dog’s bed outside major traffic lines—even if it looks less picture-perfect

    “Quiet” doesn’t require a soundproofed house. What works is a reliable pause in the background churn—enough for a dog to stop bracing for the next disturbance and settle fully into sleep.

    Routine Change: What a Real Reset Looks Like

    One concrete shift—a 45-minute block where nobody crossed the hallway, and the vacuum stayed silent—turned a month of restless circling into solid afternoon naps. Instead of constant head lifts and scanning the door, the dog sprawled comfortably, slept deeper, and didn’t jump at every passing shadow. Not only did the dog decompress, but owner chores clustered more predictably. Most telling was how the “weak link”—those recurring, exasperated sighs or mid-nap retreats—just stopped dominating the post-lunch routine. Both human and dog returned to the afternoon noticeably steadier.

    Why the Bed Alone Isn’t Enough

    Comfort gear can’t fix a broken flow. A bed wedged into a cute nook still flunks the test if the main thoroughfare to the kitchen fires up with every family movement. It’s an easy trap: the space looks ship-shape until real daily use exposes how often rest gets broken. If the only way to secure downtime is to “beat” the next slam of the door, no bed or toy pile will patch the gap. Ease of movement—both for dog and owner—is usually the first thing sacrificed when the setup picks looks over actual flow.

    Routine Distraction Loop: Specific Sticking Points

    • Vacuuming “just quickly” after lunch—dog never hits deep sleep, turns what should be a 30-minute nap into scattered 12-minute bursts.
    • A bed that doubles as a shortcut: dog shuffles aside half a dozen times before finally giving up, turning a rest period into a traffic jam.
    • Toys and beds stacked neatly in corners that block cleaning or create awkward step-arounds, so the setup looks organized but grates in walkthroughs.
    • Trying to multitask chores and rest—“he’ll settle while I clean”—ends in both tasks getting chopped up, dragging out the day’s reset.

    Resetting the Flow: Small Shifts, Noticeable Payoff

    Even an imperfect “quiet window” can reset the pattern. A dog stretched out, fully at ease for a single protected hour, leads to less chopping up of tasks, fewer dog-owner workarounds, and a routine that doesn’t demand constant micro-adjustments or workaround cleaning paths. Across the week, the difference shows up in:

    • Longer, deeper naps that actually hold
    • Less tension between normal pet needs and practical owner tasks
    • Cleanup and resets happening in reliable blocks, not scattered throughout the day
    • A routine resilient enough that even busier days don’t topple it with a handful of interruptions

    The payoff is concrete: chores that don’t require tiptoeing, a midday block that holds together, and fewer spilled-over tasks—on both sides of the routine.

    Making It Work for Your Space

    No layout is flawless, and “quiet windows” are rarely perfect. Some homes need a closed door, a temporary gate, or a chore schedule that avoids certain hallways right after lunch. For others, it’s as simple as pausing broom duty and rerouting footsteps for 45 minutes. The goal is never stillness at all costs but a stretch where dog and owner both stop bracing for the next nudge, shuffle, or rapid traffic line through the rest zone.

    If the same problem keeps bubbling up—circling, repeated sighs, or tasks that get interrupted the same way every day—it’s the setup’s structure, not just a missing comfort piece. Where and when quiet is protected pays off more than any new gear tossed into the mix.

    The Real Difference: A Routine That Holds

    A reliable afternoon reset isn’t about layering on more gear or forcing a perfectly furnished nook. It’s about clearing the repeated interruptions that make rest so much work, day after day. A protected block in the home flow—the hallway that goes quiet, the pause on chores, the deliberate setup outside heavy walkways—builds a midday routine you can actually trust. The result isn’t just a better nap, it’s a stronger reset point for both owner and dog that holds up to real use all week.

    For routines ready to stop running into the same wall, find practical setups built for repeatable, low-friction downtime at DogPile.

  • Why Scanning Twice with a Stud Finder Secures Lasting Wall Lighting

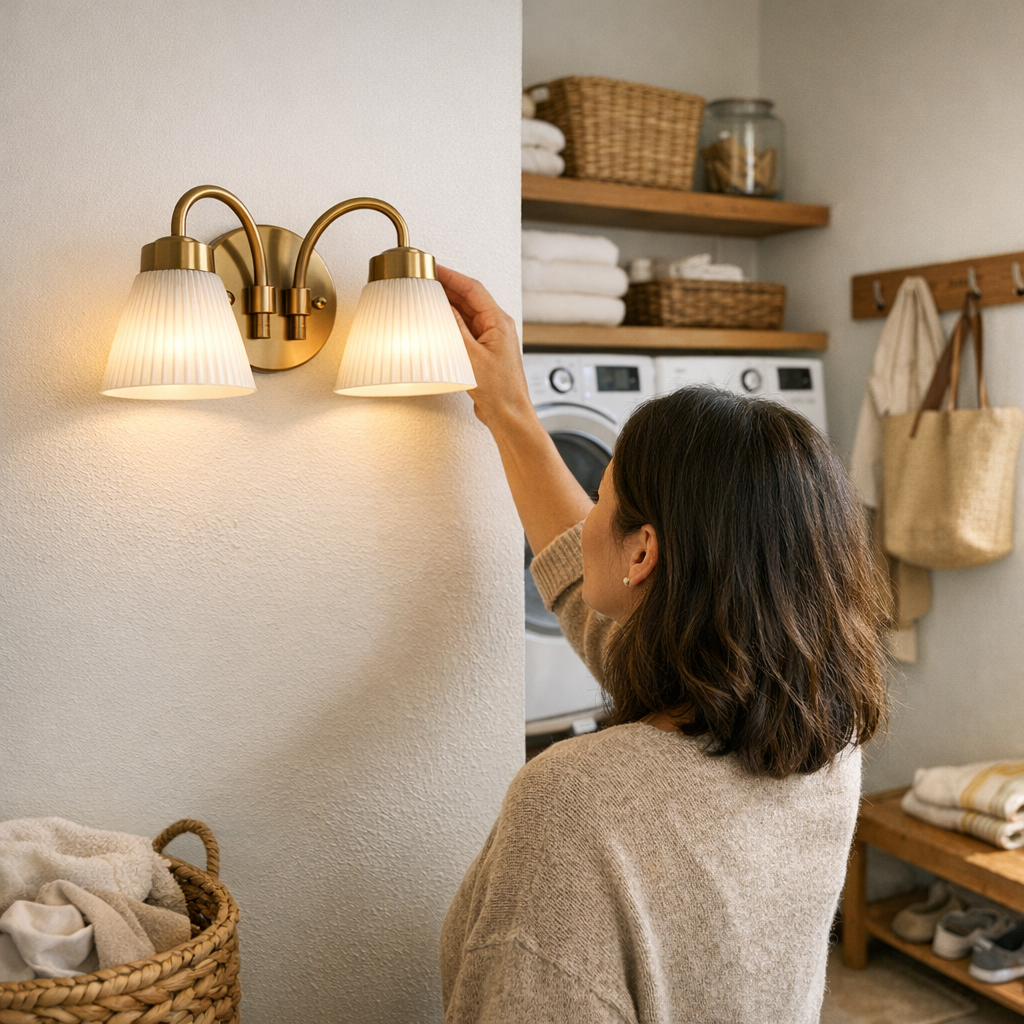
    Install a ceiling light that looks “right” and you might not catch what’s missing until daily use exposes it. The fixture looks flush, the room glows—then, by the third laundry cycle, something shifts. The hallway light tilts after a sharp door slam. The mirror sconce shivers every time someone leans in too close. Suddenly, “good enough” mounting turns into flicker, drift, and uneven shadow—reminders that missing the stud wasn’t just a first-day mistake, but a setup for repeated interruption.

    The Problem Behind “Almost Right” Lighting Installs

    No one thinks about their hallway flush mount or bathroom sconce after the first install—until a week later, when flaws start to show. All it takes is a centered fixture biting into drywall (not actual framing), and tiny stresses build with every footstep, closing door, or bump. That quick pass with the stud finder? It left just enough margin for error. Now, you’re patching chipped paint around loose screws, or spinning a utility light back into position before every load of laundry. What starts as “good enough” becomes another slow, invisible leak of comfort—and time.

    The biggest culprit isn’t the fixture itself. It’s lazy anchoring: screws set into weak substrate instead of structure. A stud finder flown fast across painted drywall picks up false edges, misses true centers, and gives mounting points that only feel stable—until the reality of movement sets in. What follows is a cycle: light shifts, shadows creep, and what worked on day one starts working against you. Frequent fixes, re-drilling, and touch-ups become just more maintenance layered onto routine life.

    Quiet Trouble Spots: Where Slack Mounts Show Up First

    Corridors and High-Movement Zones

    A hallway ceiling fixture might look balanced, but with only drywall behind the screws, even small vibrations throw it off. Every slammed door adds a fraction of sag; within days, the light’s axis is crooked, shadows bunch unevenly along one edge, and late-night crossings get interrupted by a buzzing overhead. These flaws get sharper with every pass—especially wherever traffic is constant or unpredictable.

    Mirror and Vanity Lights: When Every Angle Counts

    Here, a sconce that slipped out of level means trust is gone. The first gentle bump tips the light—and your reflection—off-center. Suddenly one cheek catches glare; the other, shadow. Even a small shift turns every morning routine into a game of angling for clear, steady light. Fixing the hardware never seems to last, because the root problem was missed during install, not discovered after.

    Stairways and Tight Spaces

    Halfway up the stairs, a fixture that rattles or buzzes is more than an annoyance—it’s a signal that mounting failed. Miss the stud, and every climb loosens screws further. With each descent, the light sways slightly, bouncing shadow across the steps. Pause at the landing, and instead of steady clarity, you’re squinting between bright spots and patchy dark, questioning your own footing. Lighting’s real job—making the route easy and safe—is lost to a mounting shortcut.

    The Real-World Impact of Stud Accuracy

    Fixtures in living spaces absorb more punishment than most people imagine. Doors crack open, baskets are dragged past, temperature shifts make materials flex—all sending tiny tremors to anything fastened into drywall alone. Even a half-inch error between stud and anchor accumulates: the fixture tilts, fasteners slip, and what once looked seamless feels increasingly off-balance.

    You see the consequences in:

    • Rooms where the work surface or counter edge always seems shadowed, no matter the bulb
    • Stairwells where one side is always easier to see than the other
    • Entryway lights buzzing or shifting focus after guests come and go
    • Hallways that glow on paper but lose practical clarity every evening

    “Almost works” isn’t a minor detail—it adds up, frustration by frustration, until there’s no option but to re-anchor and repair.

    Double Scanning: Small Habit, Big Difference

    Slow down your scan. A stud finder pushed too quickly gives a false sense of security. Slide in one direction, mark the hit, and then repeat from the other end. The stud’s true center is where those marks overlap. When working over tile, thick drywall, or moisture-resistant panels, confirm your stud finder’s depth setting before trusting a reading.

    Always work from a fixed point—like a door frame, not a guess. Check that your marks agree before you drill. This habit does more than prevent crooked installations: it means fewer repairs, a light that truly stays where you need it, and routines uninterrupted by slow fixture failure. Slowing down once saves time, noise, and rework for months to come.

    Personal Example: From Ongoing Drift to Solid Confidence

    After months battling a hallway sconce that always worked itself loose, double scanning became my go-to. I marked stud hits from both directions and referenced off the nearest frame—not the center of the wall. The change was immediate: the new mounting stayed solid, with even lighting from stair landing to hallway end. Each night, crossing that path, I stopped thinking about the fixture entirely—which was the point.

    Fixture Types and Real-Use Stress Points

    Flush mounts in entryways, wall sconces beside laundry machines, vanity lights for narrow bathrooms—all face a unique mix of movement and routine stress. Drywall anchors lose. Heavy fixtures, high-traffic zones, and anything near stair-turns, corridor junctions, or overhead work areas demand structure. Secure through to the framing or joist, period. Most ceilings—especially lower or wider ones—hide supports farther apart than you think. Skipping the second scan might make the room look “done,” but it guarantees ongoing issues the moment life gets noisy.

    A few extra minutes finding the stud don’t just prevent sag or flicker. They keep the fixture invisible in the best way—supporting the space, not distracting from it.

    Quick Tips for Stud-Secure Lighting Installations

    • Test your stud finder’s depth regularly—damp rooms, tile backsplashes, and thicker walls fool old batteries and weak settings fast.
    • Nail the mounting to structure through high-movement zones; drywall anchors are a short-term patch at best.
    • Mark both sides of the stud—stop trusting any single “beep” or edge reading, especially for heavy or hardwired fixtures.
    • Trade speed for accuracy where it counts: halls, stairs, mirrors, laundry. A truly anchored light melts into the background so you never have to think about it during use.

    Lighting That Supports Real Routines

    The real difference between “done” and durable isn’t visible in a final inspection—it shows up in what you stop noticing. No shifting shadows on a hallway turn, no glare escaping around a once-wobbly mirror sconce, no patchy dimness every laundry cycle. Lighting that’s securely mounted becomes invisible support for your habits, not a recurring problem. The shortcut—skipping the careful stud scan—always sends the problem back later. Every routine reminds you until the job is truly done.

    If steady, glare-free, and shadow-controlled lighting is worth it in your busiest indoor spaces, a slower double scan for the stud does more than any fancy fixture could on its own.

    For task-ready, well-anchored fixtures designed for repeated real-world use, visit LightHelper.