Blog

  • How Closed Door Linen Cupboards Can Prevent Hidden Clutter in Paper Storage

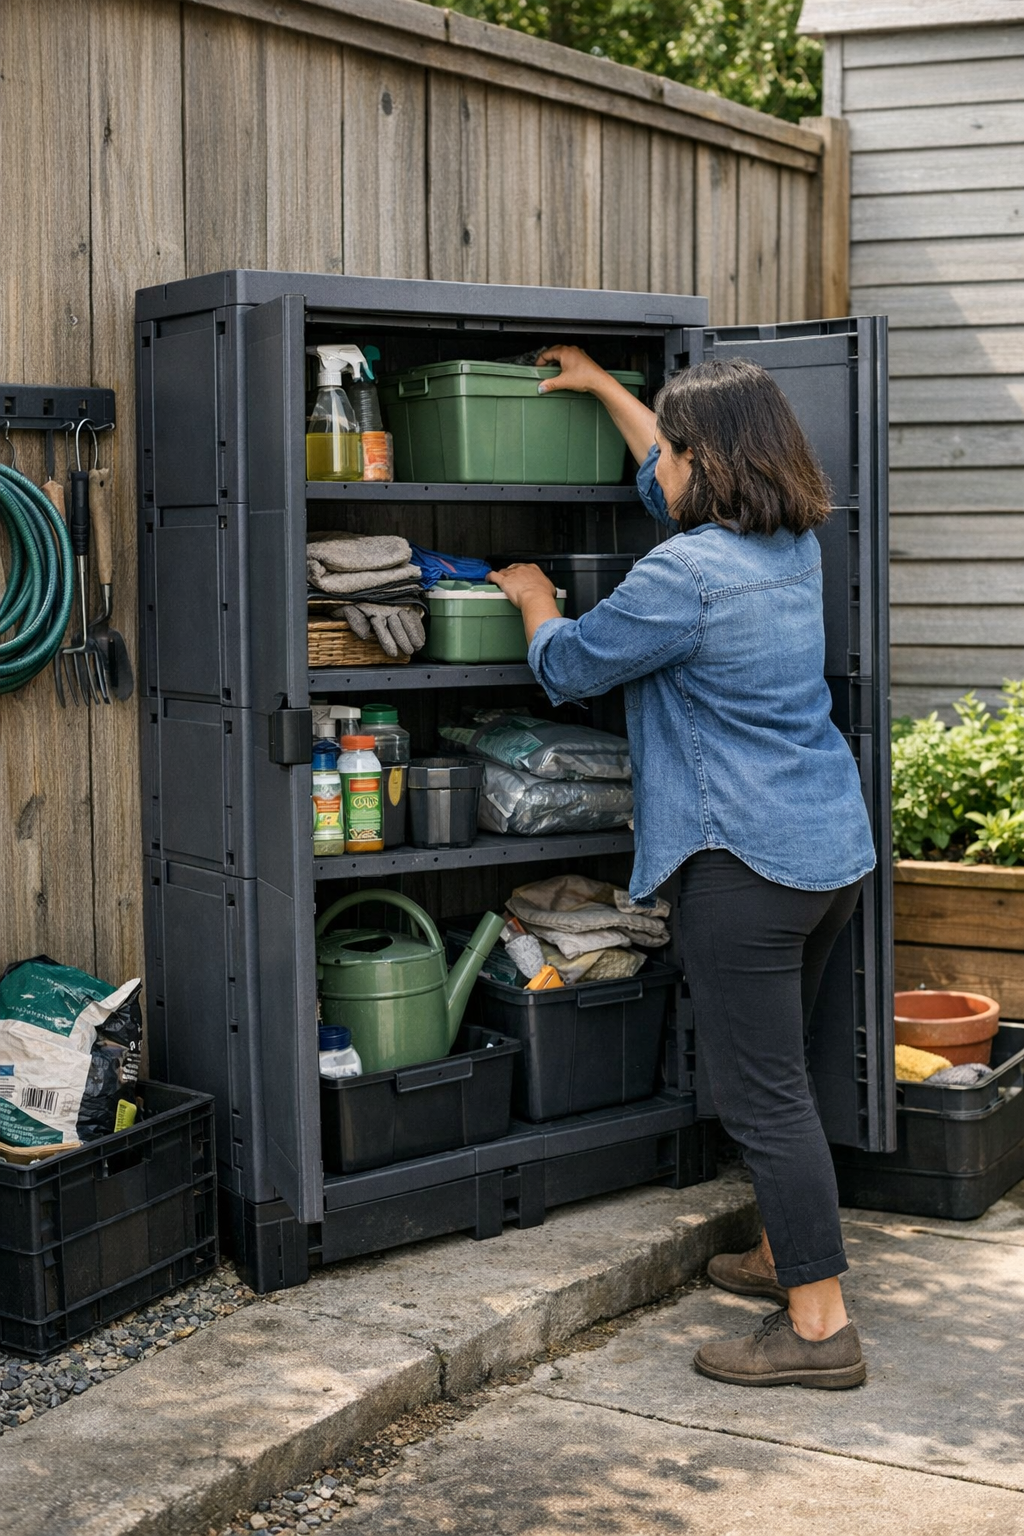
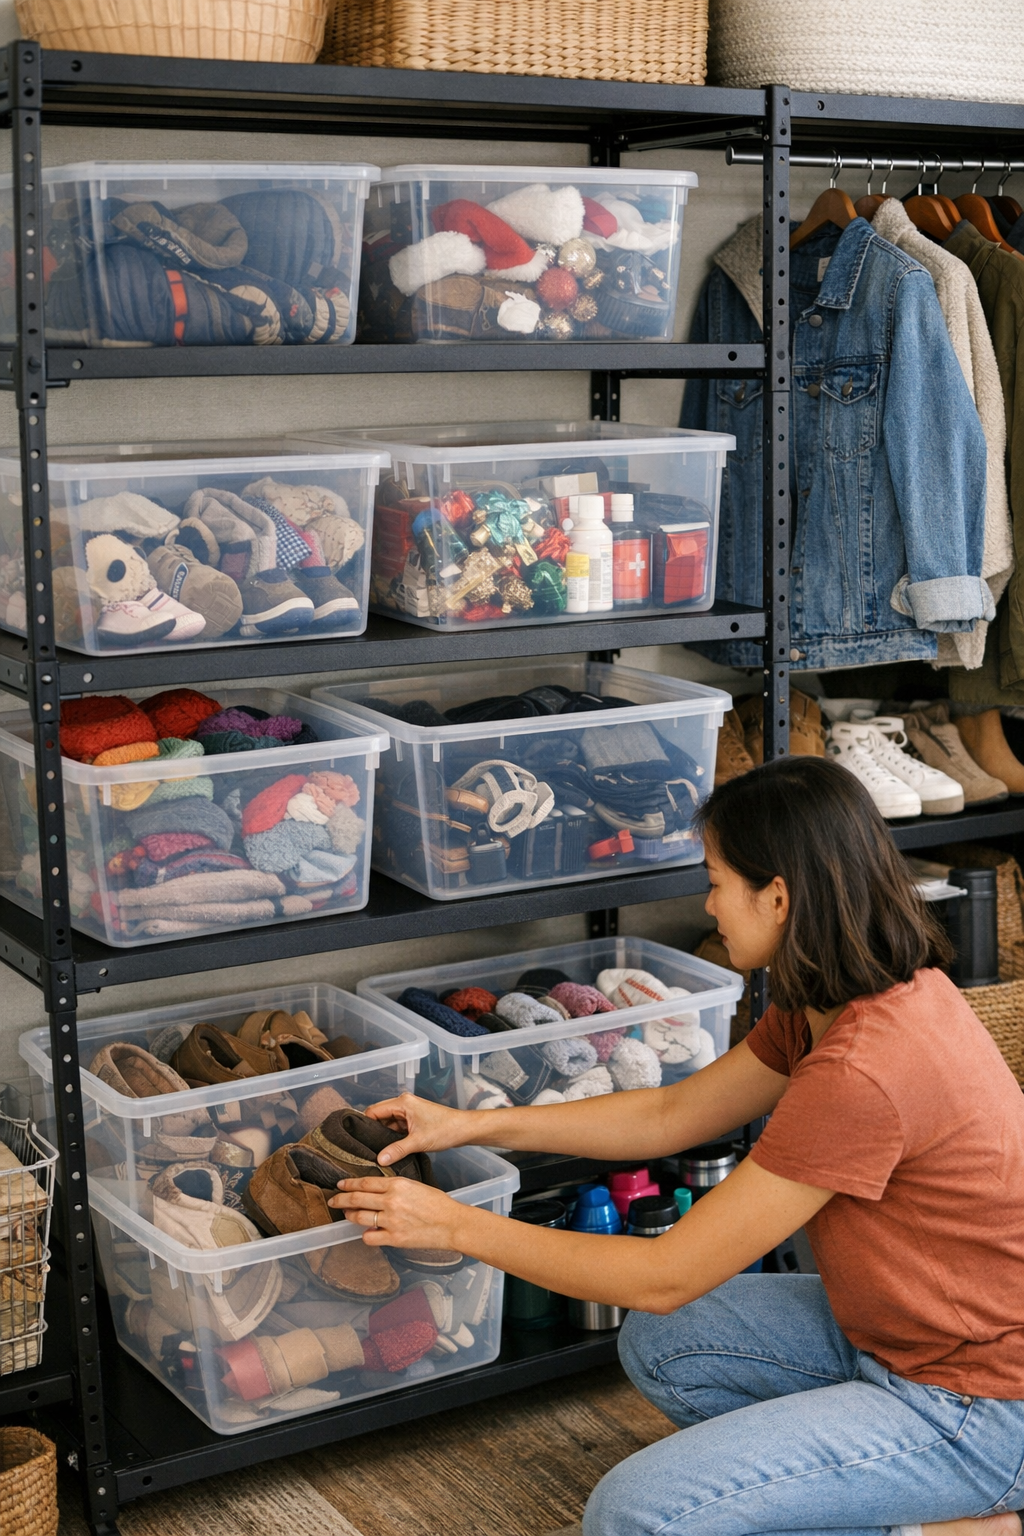
    A closed linen cupboard might look organized—but inside, silent chaos builds with every restock and rush retrieval. On day one, everything sits in neat stacks behind a flat door, yet by the third emergency search or bulk refill, the whole zone turns messy in ways you can’t ignore. What promises smooth order from the hallway masks a daily grind inside: crushed paper towels under sagging spare packs, new supplies jammed at the back, and spills that slow you down at the worst moments. Here’s the real friction: setups built for mere appearance collapse fast under repeat use. Every “hidden” mess is a reset waiting to happen, and most linen storage fails where it matters—at the point of actual, lived-through retrieval.

    When the Cupboard Looks Good—But Starts Failing Inside

    The familiar cycle: fresh shelves one week, a gap-toothed pileup the next. Paper towels, tissue boxes, and backup bulk packs fill the space in clean rows only until the first supply switch. Family restocks with different pack sizes show up, but shelf depth that looked generous one week becomes a trapdoor for lost or crushed items the next. Soon, reaching for a roll means knuckling under half-collapsed stacks, tugging at torn bags, and digging through shadowy corners as time pressure climbs. Hidden disorder grows out of open gaps, inconsistent stacking, and the lack of real divisions.

    Repeated use exposes the structure’s limits fast. Shallow shelving and “flexible” zones become gridlock. Too-tall stacks tip sideways, light packs are pinned under heavy ones, and the reachable area up front clogs with whatever was easiest to drop, not to find. It doesn’t take long before overflow crowds the hinge, the door won’t shut cleanly, and you’re forced to shift half the contents just for a simple return. No amount of surface neatness fixes a system that’s only organized for one static, ideal load.

    Where Hidden Storage Falls Short: Real-Use Patterns

    Most linen cupboards fail when real traffic—restocks, retrievals, supply changes—starts testing the zone. Weak setups don’t survive the following:

    • Digging to Retrieve: That quick grab becomes a hunt. Items meant for easy access are buried or wedged; reaching in collapses adjacent stacks, and anything taken out rarely returns to the same place.
    • Overflow Rooms: After bigger restocks, new packs have no clear home and start spilling into hallway chairs, bathroom shelves, or even atop laundry bins—turning your “system” inside out before you notice.
    • Blocked Access: Jammed shelves pin goods against hinges or crowd the entry so that pulling one item turns into a minor unpacking event.
    • Category Drift: Over time, what was “left for towels, right for paper” blurs; packs are stashed wherever a gap appears, and the original order is lost. The next search takes twice as long.

    These aren’t abstract problems—they show up as slow resets, hard-to-find stock, and that recurring shuffle where yesterday’s “fix” becomes today’s obstacle. Instead of adapting, the storage starts working against you—never quite matching actual living patterns, and always one supply run away from breakdown.

    Small Adjustments with Outsized Impact

    The difference between storage that just hides mess and storage that really works comes down to internal structure. One practical shift: add a horizontal divider about a third up from the cupboard’s base. This “layered zone” divides routine access from backup supply. What changes:

    • Restocking Becomes Smoother: Extras land up top—lifting pressure off daily-use packs below and stopping the endless squish/crush cycle.
    • Everyday Retrieval Stays Effortless: The main “grab zone” stays clear, so quick pulls don’t destabilize the rest of the shelf. Retrieval is no longer a gamble.
    • Category Drift Slows Down: Dividers make it obvious when something’s out of place. Return flow improves—misfiled items show up fast.

    For most paper goods, a shelf depth of 12–16 inches matches real reach and keeps supplies from vanishing to the back. Deep cupboards benefit from one pull-out bin or stacking organizer—but don’t go overboard. Too many inserts can turn adaptable space into rigid cubbies that overcomplicate restocked routines, especially when packaging sizes change. Friction comes from fighting the setup, not from visible clutter.

    Stopping Hidden Mess Before It Starts

    The biggest problem isn’t what you see when the cupboard is shut—it’s what happens every time you open it. Gaps without boundaries, shelf heights that don’t match the tallest pack, and missing bins all lead to slow supply migration, silent category drift, and wandering overflow. Minutes are lost recovering order, with backup packs sneaking onto open shelves, the nearest chair, or even the floor. The stress isn’t the mess itself, but the hidden reset burden—each return takes longer, and each grab becomes unpredictable.

    The closed door can stall the problem, but not solve it. The real test is whether you can retrieve or restock quickly, by feel, consistently. Good storage interrupts the cycle before chaos spreads, keeping routines sharp and resets quick—without requiring a full unload every time the supply flow changes.

    Tips That Save You from Repeated Friction

    • Set shelf height to fit your tallest regular pack—enough headroom to slide in or out, but not so much that supplies topple or mix zones.
    • Use removable bins for infrequent items—a clearly labeled container prevents overflow from wandering into daily-use territory.
    • Don’t over-compartmentalize—leave at least one flexible space for unexpected bulk buys or seasonal supply changes, so your system can adjust without constant rearranging.

    The Difference Between Looking Organized—And Staying Organized

    Most linen storage looks calm behind closed doors, but function breaks down where order hasn’t been built for regular disruption. A divider, the right shelf depth, and one well-used bin won’t make the scene picture-perfect, but they do slow category drift and keep resets to a quick, repeatable task—even as seasons, supply bulk, and family routines change. Over time, the best measure of a worthwhile setup isn’t a snapshot of order, but a system that stands up—day after day, rush after rush—without forcing another round of silent frustration.

    Find practical storage solutions at Gridry.

  • Choosing the Right Oscillating Tool Blade for Precise Detail Cuts

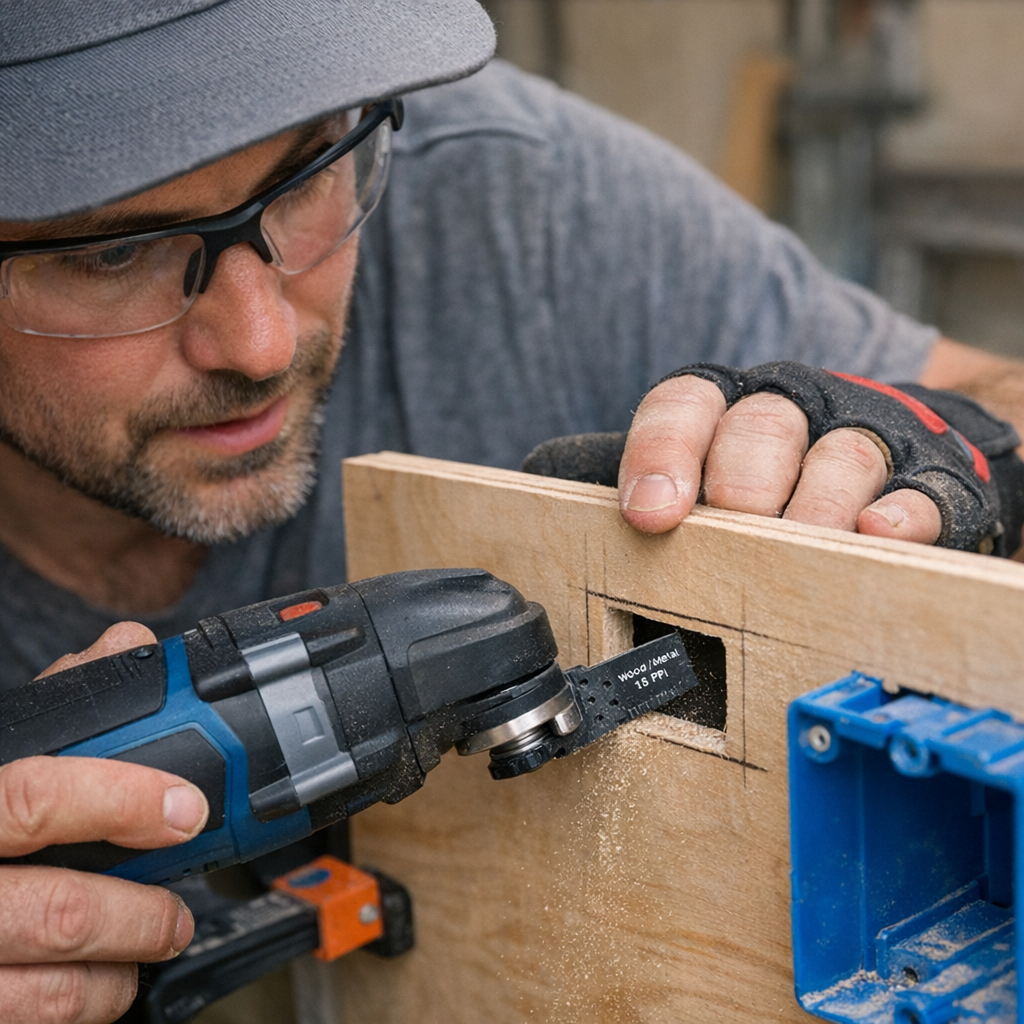
    You only notice the downgrade when it’s too late. Rip into plywood or MDF with a new oscillating tool blade, and sure—your first cut looks great. The line is crisp, progress feels smooth, and your confidence builds. But the instant you start tracing that tight corner for the second junction box—when repeat cuts are coming fast, in awkward positions, on finished surfaces—reality hits. Edges fray, seams turn rough, and the time you’re saving on “fast” cuts gets burned up chasing splinters with sandpaper. The cheap or dull blade that felt fine on pass one is quietly draining your time, precision, and nerves.

    Where Projects Unravel: After the First Pass

    The problems rarely show up in the easy opening move. It’s when you need three, five, seven cuts identical—on-site, mid-install, or while balancing a panel against your knee—that the general-purpose blade’s flaws multiply. Instead of slicing, you’re wrestling to hold your mark as the tool drifts, tears at the grain, or sags into a jagged arc halfway through. By the third box opening or second vent notch, you’re not finishing the job—you’re stuck on edge repair, backfilling blown corners and sanding down accidental overcuts.

    This isn’t just DIY frustration. On real jobs—installing window casings, running outlet cutouts, or building cabinetry—the margin for roughness vanishes fast. A few rough cuts become a pile of putty and wasted time. Fatigue grows, mistakes breed, and tidy work turns into a pro-level headache.

    The Right Blade for Real Momentum

    Walk the tool aisle and “universal” blades seem interchangeable. But the second you pull the trigger, design shows itself. An 18-TPI bi-metal fine-tooth blade isn’t about marketing—it’s about control, cut by cut. The teeth glide instead of grabbing. You can see it: rounded corners stay crisp, the line hugs the scribe, and there’s far less chip-out in hardwoods or laminated panels.

    You know the moment—a generic blade chatters because your angle’s barely off, veers out, or binds when you hit glue or layered grain. The tool feels like it’s fighting you for control. Swap to a precision fine-tooth blade, and everything steadies: the cut tracks where your hand wants, not where the blade drags you. Corners stay sharp. Less sanding, less correction. You stay in rhythm.

    Kerf, Vibration, and Consistency

    When shaping vent cutouts or tight insets, blade kerf matters. Coarse teeth “bounce out” on curves, forcing you wide, making for hours of messy correction. Fine teeth mean a tighter kerf, which keeps every cut cleaner with less rattle on the tool and less vibration in your wrist. Do one, two, or a dozen inlet cuts—clean edges save you effort on every subsequent pass. Skip the kerf drama, and you’ll see it: less dust cloud, more matching lines, and no rush for filler at the end.

    Blade Fatigue: Spotting the Drop-Off Early

    The warning signs are subtle—but they matter. Maybe you’re working in an attic or fitting panels overhead, and after a few tight cuts, the tool suddenly feels rough. More vibration. The edge looks fuzzy. You’re forcing progress instead of guiding it. That’s the moment when bad blade choice turns a small gap into an afternoon repair job.

    Swapping in a fresh, fine-tooth blade—purpose-built for under 3/4” wood—transforms the process mid-task. Instantly, the blade tracks smoother, leaves less residue, and the work speeds back up. The difference isn’t night and day, but it’s real: less effort, less frustration, less dust waiting for you at cleanup.

    Tighten Everything: Clamp, Steady, Execute

    There’s temptation to cut corners—hold a panel by hand, skip the clamps “just this once,” or rush setup in a tight space. That little shortcut almost always demands payback. Secure your workpiece and the blade holds its line. Vibration drops, wandering stops, and awkward corrections become less frequent—especially when working across tricky wood grain or layered material. Five minutes with clamps saves half an hour of apology sanding later.

    The Real Limits of “Universal” Blades

    “Multipurpose” sounds good—until you see chewed edges and can’t get a flush fit on finished surfaces. Matching blade TPI and tooth profile to your material isn’t snobbery—it’s insurance against wasted labor and re-work. High-TPI, fine-tooth blades excel on the materials where finish really matters: hardwoods, MDF, laminate, paneling. Especially when you need repeatable quality across a job, the right blade is the only thing between you and a production line of touchups.

    Don’t ignore blade fatigue. Push one blade through far too many cuts and you’ll feel it sag. Consistency slips as quickly as edge sharpness. Time spent wrestling with worn teeth is time not spent making real progress. Swapping out blades faster than you think you “need” to pays off by the end of the day.

    Repeatability Over Perfection

    The dream of the flawless first cut is a distraction. Real work—whether in a home garage or bustling jobsite—relies on repeated performance, not one-off heroics. The question is: can your tools make the next five, seven, ten cuts match that first? Or do imperfections spiral, turning a quick run into a patch job?

    Pros and careful DIYers check not just blade sharpness, but appropriateness—will this blade keep pace project after project? You can’t skip all finish work, but you can eliminate most of it by stacking repeated, clean results. In practice, that’s the best speed boost you’ll ever get.

    Habits That Actually Save Your Time

    Those who last in the shop or on-site work with a few unsung rules:

    • Clamp your material; “holding steady” isn’t enough for good results.
    • Guide the blade—never force it. Control is everything on detail work.
    • Swap blades sooner than later, especially when vibration rises or results slip.
    • Choose blade TPI and profile based on what you’ll cut and how many times you’ll repeat it—not just what’s on sale.

    Day after day, those habits matter more than the accessory on the label. You end up with less wasted effort, less ache in your arm, and more time for actual progress instead of rework. Cleaner panels, fewer fixes, better mood at the end of the project.

    Bottom line: The right blade and a few hard-earned habits do more for real jobs than any universal shortcut. You save time, you save panels, and you save your patience—cut after cut, job after job.

    Shop practical blades and accessories at Gumboll

  • Why Modular Storage Systems Outperform Fixed Setups Over Time

    The illusion of perfect storage falls apart as soon as real routines collide with it. Your garage, shed, or workshop corner might look dialed in on day one—shelves standing crisp, every bin aligned, carts tucked neatly in place. Then actual life happens: you reach for a buried tool, squeeze around a cart that never quite moves out of the way, or lose five minutes sorting through what was supposed to be “accessible” storage. The surprising truth? It’s not clutter that sabotages good organization, it’s the slow grind of daily use exposing where your layout was designed for looks—not for action.

    The Downsides That Show Up on Week Two

    That first Saturday, every shovel and socket has a labeled slot, and the whole setup promises to stay easy for months. But routines always shift. Spring brings new garden trays. The kid’s bike needs a quick repair. Partners start using the space for their projects, and DIY ambitions (big or small) mean tools are suddenly needed—and put back—in a different order.

    Clutter is subtle, not sudden. It’s the rake you leave by the door “just until you’re done,” or the detour around a stuck cart that only gets longer. It’s the shelf whose door never fully opens because another bin migrated into the way. Rigid storage shines for a photo—but often becomes the reason you’re shuffling, sidestepping, or stacking things out of sequence just to get by.

    Where Neatness Fails to Keep Up

    There’s a hard line between spaces that look organized and those that actually flex for how you work. Wall hooks and fixed shelves deliver that showroom promise: everything visible, “a place for everything.” But real utility falls apart when you’re:

    • Sliding a cart sideways every time you need that back bin
    • Reaching around the same clunky cabinet edge, again and again
    • Noticing tidy zones merging into catchall areas you never intended

    “It looks right” isn’t enough. Setups with zero slack leave nowhere for overflow—no open gap to toss a muddy glove, no place to stash that surprise supply run. Each time you invent a shortcut, stack gear “just until tomorrow,” or let a corner collect overflow, a friction point is locked in. All those micro-delays add up. What started clear can quietly become a maze: constant reshuffling, slowed-down resets, and a creeping sense that order is always just out of reach.

    Shed Realities: When Storage Becomes an Obstacle

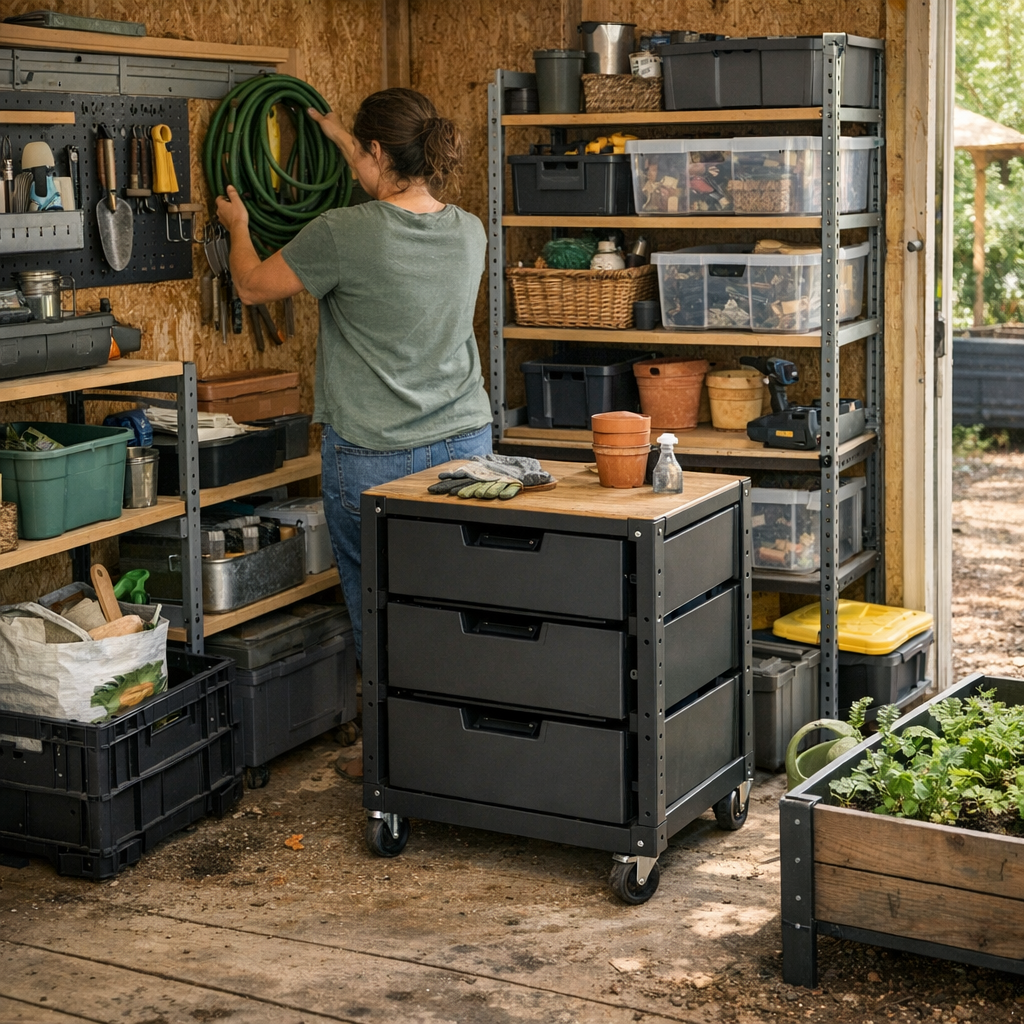
    Picture a backyard shed halfway through spring. The new rails still hold labeled bins. The mobile bench is front and center, and you can still spot the floor. But the rhythm changes fast: a delivery of soil trays clogs one side, muddy boots land by the door, and the rolling cart—once a hero—blocks the only workable shortcut.

    Now, putting tools away takes more steps. You squeeze past stacked boxes to prop open a wall shelf, only to discover the drawer is blocked by a poorly placed rake. Each reset feels heavier. Soon, you’re tossing things in the nearest open spot because resetting to zero requires moving five other pieces. The once-neat space starts building aversion—not habit. What was meant to help is now in your way.

    What Changes When Storage Can Move With You

    Shift even one piece—a fixed rack traded for a modular shelf, an open panel introduced, or a cart given space to pivot without boxing itself in. Sudden change: trays fit without cramming, the cart swings through cleanly, and returning a tool means one quick move, not three workarounds. Less sidestepping, less dented gear, no awkward shuffles between zones.

    This is what makes the difference: It’s not about prettier storage, but function that cuts down on friction. When the layout absorbs new projects or last-minute changes with barely a pause, you’re less likely to fall into the trap of stacking, jamming, or dreading the daily reset. The system stays light on its feet—even when you’re not.

    Minor Tweaks, Major Improvement

    Sometimes, freedom is just one mobile shelf or a panel left open. Suddenly, wheel paths are clear, zones don’t merge, and it’s easier to fix a workflow before chaos settles in. Resetting is a two-minute task, not a scavenger hunt—so you stay in motion, not in maintenance mode.

    Friction Finds: How to Spot Layout Breakdowns

    After a truly busy week, take a scan:

    • The same pile always forms where “just put it there for now” is the norm
    • Carts wind up off their tracks—because turning is a pain, not a habit
    • Wall storage darkens behind other gear, turning access into an event
    • Reset routines that take too many steps, or get skipped altogether

    If your quickest “clean up” is a new stack, your system is quietly tripping you up. When putting one thing away always means shuffling two more, or blocked routes force repeated detours, your storage isn’t adapting—it’s multiplying the grind. Every new workaround is proof the original setup just can’t keep up with you.

    Why Modularity Pays Off When Things Get Messy

    Modular storage isn’t about looking the part—it’s about each section, cart, or wall mount becoming movable parts in a working system. As projects shift, these components adapt. True modular setups preserve real movement paths, so even as gear cycles in and out, zones don’t blur and resets stay simple.

    The payoff isn’t a perfect catalog shot—it’s reaching for a tool and finding a way open, every time. Real-life storage needs to absorb change without demanding a full reset with every season or every side project. With shelves and carts that move (and room for slack), you finally get a setup that works with you, not against you—cutting out the friction that too often comes packaged as “organization.”

    See modular storage options built for real daily reset at StackNest.

  • Streamline Your Desk Setup by Routing Cables from One Side Only

    The myth of a perfectly “organized” desk collapses fast the moment you actually try to work at one. A desk can look clean—cords coiled, adapters within reach, power strips tucked away—yet the first real work session tells the truth. By day two, cables snag your notebook when you reach across. Drawers catch on dangling chargers. A mouse stutters because its cord is pinned under a charging brick. Under-desk space, meant for legs, turns into a maze: boxes, blocks, one ankle-snag after another. Every reset tries to restore order, but friction quietly returns—revealing that what looks sorted rarely stays usable after repeated, real tasks.

    That’s when the actual problem shows up: Desk friction builds less from visible mess, and more from cables and tools entering your space from every angle. A clean surface doesn’t guarantee a clear workflow. The entry point of every cord—where and how it cuts across your routines—decides whether your setup helps, or just gets in the way.

    Why “one side only” changes everything about cable management

    Route every cable—power, USB, adapters—through one edge and you change the way your entire station functions under pressure. The real improvement isn’t just visual. It’s how the desk physically responds during actual use:

    • No more pausing because your sleeve tugs a cable as you grab a pen or reach for your notebook.
    • Drawers swing open smoothly—no unexpected collisions with an overfed power brick stuck behind the handle.
    • Swapping devices finally feels like a two-step task, not a cautious game of spaghetti untangling.

    Instead of slowdowns at every rearrange, your workspace stays ready for the next task. The top looks ordered—and stays that way—because minor annoyances never gain a foothold. Single-edge cable entry doesn’t just tidy a desk; it prevents the slow slide into repeated-use frustration.

    When an “organized” cord layout is the root of your workstation friction

    Desks often chase symmetry: charger to the right for phone, USB hub out back, laptop power on the left. On setup day, that spread feels logical, even “custom.” Two days in, the system misfires:

    • Now plugging in a tablet blocks where you want your sketchbook.
    • Your dominant hand can’t avoid a cord bulge; every note-taking session meets resistance or a tangle.
    • Adding another charger means gambling on which drawer you can open without rerouting lines first.

    These aren’t dramatic desk failures, just slow-building resistances that make every session a little less efficient. The surface fools you with its tidiness, but the workflow stalls. Real cable chaos isn’t about what you see—it’s the invisible friction from scattered, unpredictable entry points that break your session’s flow.

    The difference a single-side approach makes in real work

    Mid-morning on a real desk: notebook spread out, mug nearby, phone on charge. If lines come in from multiple sides:

    • Every time you slide the notebook away, it snags on an unfamiliar cord.
    • Your right wrist brushes past an unanchored cable—phone stops charging, plug needs to be checked again.
    • Chair arms never slide in smoothly. There’s always a mystery cable getting flexed or partially yanked free under the desk.

    This friction rarely shouts, but it piles up. By midweek, you stop trying to reset the desk at all. Cords refuse to cooperate, so tools drift out of place, and each routine action takes a little longer.

    But with single-side cable routing—maybe a left-edge power strip, cords trimmed and wrapped back—your main working area stays open. The reach zone next to the dominant hand remains clear: pen, notes, phone, mug—nothing blocks easy access. Chair movement is unblocked, and plug swaps become a one-motion task. The shift is instant and quiet—a physical path for work, not a cord-dodging dance.

    How to change—without a desk overhaul

    Full rewiring isn’t necessary. Small, targeted changes produce the shift:

    • Pick your edge: Start with the side nearest wall outlets, but check carefully—choose the side that minimizes storage or drawer interference and doesn’t block chair arms.
    • Mount the strip under or behind the desk edge. Skip placing it on the desktop. Hidden mounting means fewer stray lines and a tighter, cleared surface.
    • Cut the slack short. Cables need only a minimal loop onto the desk—just enough for movement, but not enough to migrate visibly.
    • Guide all lines along the back edge, not the surface center. This keeps cables away from hands, paper, and tools, so the desk feels less like a minefield and more like usable space.

    Once cable entry is contained, the old frustration spots fade. The desk side previously clogged with power bricks or dangling phone chargers becomes an open, flexible landing strip for whatever your work cycle actually requires.

    How does this affect other workstation tools?

    Single-edge cable entry pays off across every tool:

    • Monitor arms don’t need to thread cables around messy loops; height or tilt can be adjusted cleanly, with less chance of pulling a connected device.
    • Under-desk storage and drawers open their full range—charging blocks no longer lurk, waiting to jam or unplug with one careless motion.
    • Task chairs and stools finally slide in neatly, not stuck on an unseen, migrating power cord below the surface.
    • Desk lamps, monitor risers, and other peripherals all pull from a single, predictable line, reducing the chance of accidental overlap and surface clutter.

    Each minor workstation task—opening a drawer, scooting a chair, moving the screen—is less likely to prompt a small but memorable interruption.

    Quick Q&A: Smart cord entry choices

    What’s the top cable mistake in real workstations?

    Letting cables enter anywhere—“just using what’s nearby”—is nearly always the trap. Every new line fans the tangle and blocks movement or storage. Centralizing makes the contrast obvious after a single full reset.

    How do I know if the single-side method fits my actual desk?

    If you swap devices more than once per session, alternate typing and handwriting, or find yourself detangling at least one cord after every break, this approach almost certainly buys you back real speed. Do a quick check: does the desk layout and outlet position allow for one-side concentration? If not, the problem may be your layout or furniture—not your accessories.

    Will this mess up my monitor arm or block my drawers?

    If you plan, almost never. Feed cables to avoid monitor arm clamps and drawer glides—if one edge blocks everything, rotate devices or tweak hardware locations before re-routing. The goal: tools move without pausing for cables—workflow defines layout, not the other way around.

    Real improvement means fewer slowdowns, not just a cleaner look

    The most productive workstations aren’t just “organized”—they’re free of preventable slowdowns. Cable entry is the most common fault line: it’s not about how neat things look after a Sunday reset, but whether a busy Tuesday lets you move and reset without irritation. You can upgrade chairs, add monitor arms, fill drawers with organizers—but if cable entry splits across three sides, every session eventually gets slower and less rewarding to use.

    Route every cord through one chosen side and you’ll see it: desk stays open, working zones remain clear, and you reset almost by habit rather than caution. The upgrade is invisible but unmistakable—attention finally shifts from negotiating your workspace to actually using it.

    Explore the full WorkBasic collection

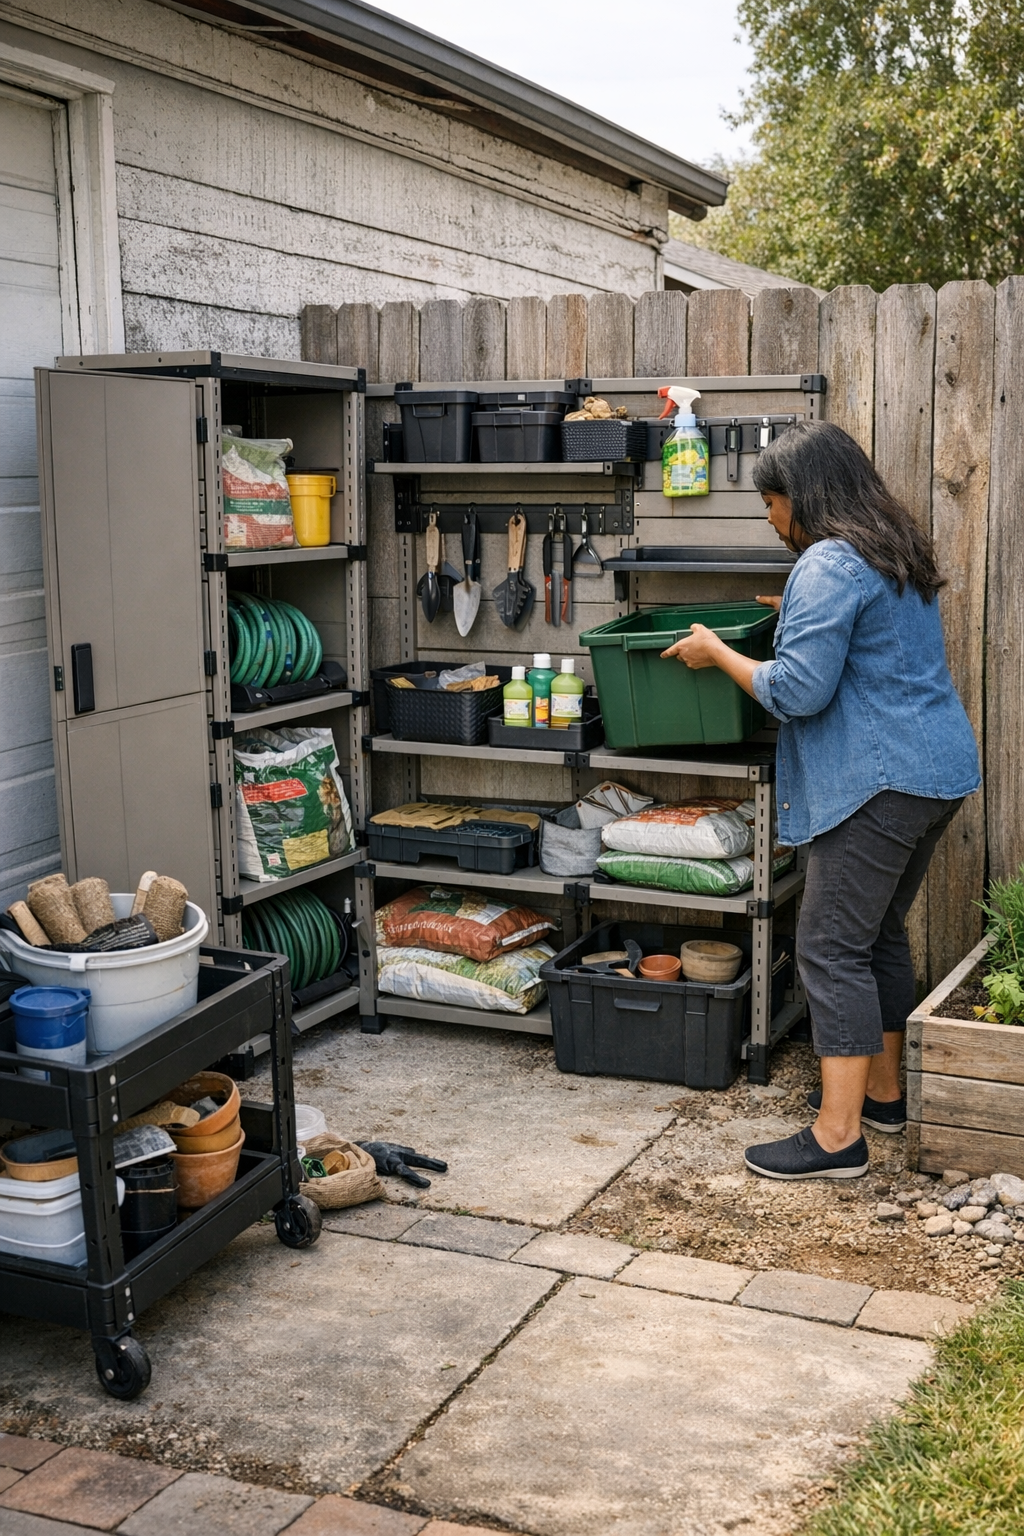
  • Maximizing Small Yard Space with Wall-Mounted Storage Solutions

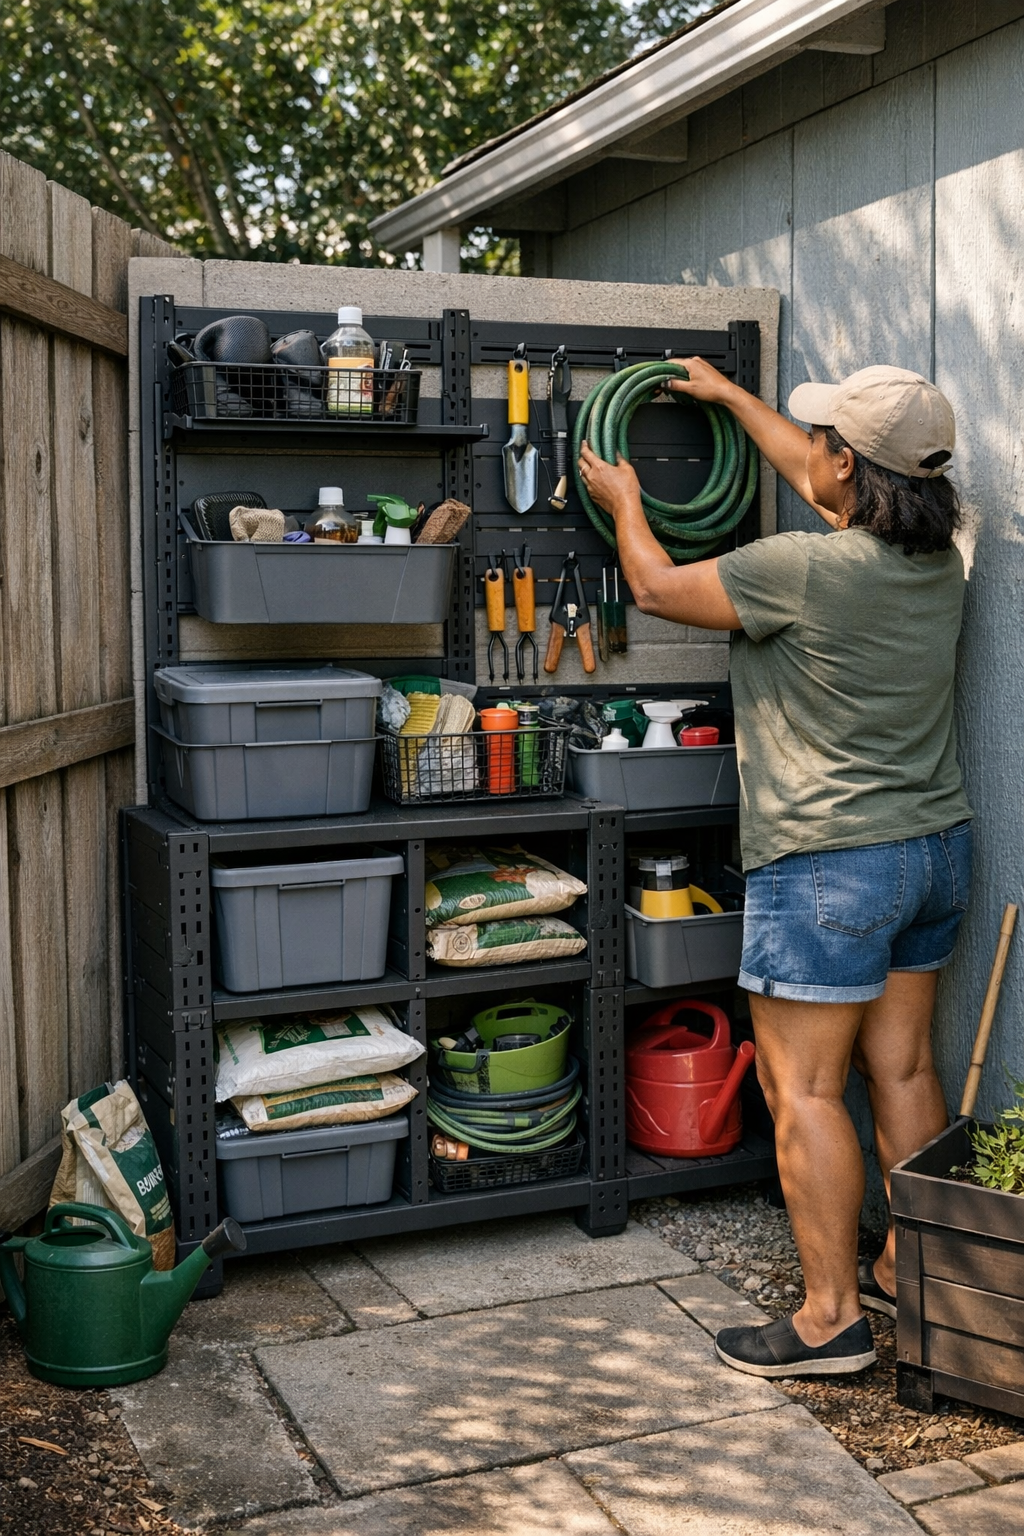
    Outdoor storage in a tight space can turn a quick trip outside into a series of slow-motion sidesteps. The side path meant as a shortcut becomes a gauntlet of bins, boxes, and gear that never quite has a real home. If you’ve ever balanced grocery bags while nudging aside folding chairs just to reach the gate, you know the real cost isn’t surface clutter—it’s lost flow, daily workarounds, and a setup that never stops requiring a reset.

    When “Stack and Stash” Turns Into Stuck and Shuffle

    Most small yards, side strips, or patio-edge utility areas start optimistically: bins lined against a fence, a floor unit standing sentry beside the shed, stray gear corralled “for now.” But as weeks fill with lawn games, garden projects, or kids’ bikes, the scheme collapses. Anything that lands on the ground or stacks just inside the walking lane isn’t stored—it’s stranded. The narrow passage from garage to garden gets pinched by each thing left on the floor, until rerouting your day becomes automatic.

    Frustration builds in tiny increments: a rake propped at the wrong angle, planters blocking the utility meter, a bag of potting soil you mean to put away but never do. One errand means dodging handles, sidestepping overflow, or awkwardly shifting bins to unlock the gate. Even returning a single item—if it means moving two—starts to feel pointless, so things pile up “until later.” Eventually, the path becomes the problem.

    How Floor Storage Quietly Hijacks a Space

    It’s rarely the number of bins that breaks the system—it’s the way storage creeps from the margins into your main route. The moment gear moves from the edge into your walking path, space shrinks and routines stall. Picture trying to grab a trowel for quick weeding: instead of a three-second task, it’s now a shuffle—slide the bucket, tip the chair, unstack the lid, squint for gloves. That friction breeds shortcuts and clutter: gear that never goes back, bins whose surfaces turn into new drop zones, and a constant sense you’re cleaning around the mess, not through it.

    When a yard juggles mixed routines—morning bike runs, evening garden watering, weekend sports equipment—this crowding accelerates. What felt “organized” on Sunday afternoon looks like a heap by Wednesday. Floor bins become invisible obstacles. Wall space goes unused. Corners silently collect overflow until the effort to restore order demands a whole Saturday.

    Wall Systems: The Difference Between Clear and Crowded

    The breakthrough isn’t squeezing in more bins. It’s reclaiming the pathway—keeping movement automatic, not something you have to engineer every time you step outside. Wall-mounted racks, modular panels, or even simple hooks transform how a space feels and how much work it demands.

    When tools, balls, or air pumps hang at shoulder height, there’s less dodging and less stack-and-topple. Returning a trowel doesn’t mean moving three things, and grabbing hedge shears becomes a one-step move, not a dance around clutter. Cleanup doesn’t compete with your main route; it slots right in. The more gear stays off the ground, the less likely you’ll find yourself working around your own setup.

    Real Fix: Put the High-Traffic Gear Where You Walk

    Let the wall carry the weight of your daily routine. Reserve the prime zone—between eye and waist—for anything you use every week. Floor bins still have a place, but move them out of the main lane and make them home base for things you store, not things you grab. Watch how much easier it is to return secateurs or stash the leash when it’s a straight reach, not a mini excavation.

    What Happens When a Routine Gets Boxed In

    Imagine a compact yard with stepping stones barely a foot wide. Early spring: it’s tidy, bins lined up against the fence. By July, two side chairs are wedged in after a birthday BBQ, one bag of charcoal blocks the spigot, and cones from last weekend’s soccer practice cluster by the door. You can still get through, but every return means a pause: move the lid, adjust the planter, push a bin so you can reach the hose.

    Over time, intent gives way to avoidance. One person delays putting tools back. Another leaves gloves on the table. The “quick reset” never gets done, because what should take 20 seconds now gets deferred until someone feels like spending 20 minutes reshuffling everything.

    What’s Different When The Wall Does the Lifting?

    Even a four-foot panel of wall hooks—placed right along your path—shifts the pattern. Balls, clippers, and folding chairs hang ready. Returning them is fast because the rack is in the flow of traffic, not behind a pile. You notice how much less time is spent moving one thing to reach another, how less often gear sits temporarily on the ground “just for a day.” Resetting becomes instinctive—a motion you make as you pass through, rather than waiting for a scheduled cleanup that rarely happens.

    The smallest details compound: an open basket to drop gloves at the right height, a shallow shelf for go-to cushions, a simple hook for the hose. These fixes are the difference between a compact utility lane and a yard that eats up your afternoon with chores.

    The Day-One Trap: What “Organized” Misses After Real Use

    It’s easy to celebrate an organized scene: new bins, tidy rows, fresh labels. But watch the space after the first real week—it tells the story. Does returning a shovel mean moving a storage box blocking the wall rack? Is a tall floor unit eating up the only open sight line or wedging blocking movement? Does the overflow corner reappear, even after you swore to tackle it last month?

    • Is putting something away forcing you to move something else first?
    • Does one big “storage win” actually interrupt your daily walk-through?
    • Is there a spot that keeps becoming a dumping ground—no matter how you organize?

    If the answer is yes, the setup is built for the photo, not the real routine. Effective organization respects daily friction: high-traffic gear gets top wall space, bins living in tucked-away spots never cross the main route, and the system flexes with your changing cycle of use—not just at the initial setup.

    Adjusting on the Fly: Storage that Moves with You

    Rigid systems break under real use. Modular panels, repositionable hooks, and easy-swap baskets let you shift the setup as your needs change—soccer season to garden season, winter to spring. Permanent drilling isn’t always necessary; some of the most practical setups let you swap accessories, adjust spacing, and change layouts without committing to a single pattern. Flexibility is what turns a one-time tidy-up into ongoing relief.

    The Test: Can You Move, Reset, and Return—Without Thinking About Storage?

    This isn’t about a showroom yard or Instagram “after.” It’s whether you can step outside, bring in groceries, or chase down a runaway ball without rerouting around your own gear. When storage absorbs clutter at the edge—not in the main circulation lane—the space finally stops fighting you. Each routine runs smoother, and the process of keeping up with it slips into daily life instead of piling up for a dreaded Saturday reset.

    It doesn’t take a renovation: one hook for the only tool you actually use, a bin set aside for once-a-year gear, a shelf that changes as your needs change. The difference isn’t cosmetic—it’s whether your yard serves your day, or just looks organized until the next routine derails it. That’s what you notice, every time you step outside.

    Explore more practical storage options for real outdoor spaces at TidyYard.

  • Why Combining Ceiling and Task Lighting Transforms Everyday Safety Indoors

    You can spot the problem after just a week: a room that looked “finished” under new ceiling fixtures but keeps interrupting your routines. You pause at the bottom stair, feeling for the next step. You shift between shadows and glare in front of the bathroom mirror, or reach blindly for socks in a laundry corner that’s always dim. Most lighting passes the install-day test—but when daily movement brings weak visibility, missed keys, and slowed routines, it’s clear the fixture choices or placement aren’t matching what the space actually demands.

    The Hidden Gaps in “Complete” Lighting

    Flush mount ceiling lights, semi-flush styles, and linear fixtures check boxes for general fill and a presentable look. But lived-in use quickly reveals what’s missing. Behind a bathroom sink, shadows appear each time you lean closer. The mirror throws a lopsided glow, forcing you to shift left and right just to shave or apply makeup with both sides of your face visible. Hallways promise openness but instead break into segments—one area bright, the next lost below a shadow from a doorframe. In the laundry, the countertop vanishes into a shadow every time you drop a sock or hunt for change. The “bright enough” fixtures fix the look, not the movement—or the frustration.

    Daily Friction That Builds Up Fast

    Lighting doesn’t have to fail dramatically to slow you down. Miss a stair edge late at night. Bump your knee on a hallway turn hidden from the main fixture. Fumble for keys on a shadowed entry mat—these little stumbles cue you that brightness isn’t the same as easy use. Kids, guests, or anyone carrying an armful of groceries feel these flaws even more, and that early “ready” feeling from new lighting evaporates. The problem isn’t how bright the room is; it’s how well you can actually use it in motion, at speed, and on autopilot.

    Why Ceiling Lights Alone Rarely Get the Job Done

    Most homes were wired with one big overhead—easy for an electrician, simple for a builder, detached from how you’ll actually move and see every day. But rooms are full of edges and obstacles: corners you rarely step into, work surfaces tucked under cabinets, and step-downs or doors that make light fade before you need it. The result: any ceiling light leaves dead angles. There’s always a vanished patch behind the washing machine, a vanity shadow, a bottom stair you feel around for in the dark, or the back third of a countertop lost in gloom. The more you repeat a routine, the more these dead zones get in your way.

    Routine Use Reveals What Brightness Can’t Fix

    • Stairways: Overhead lighting pools at the landing, barely reaching the full depth of each step. As you climb at night, you slow down—eyes adjusting, one hand ready for the rail.
    • Bathrooms: With only an overhead, grooming becomes guesswork. You bob side to side for clear light; shadow patches force you into odd angles; mirror glare returns every time the sun shifts.
    • Laundry rooms: The fixture says the room is bright, but the working edge—where lost coins, tags, and dust collect—remains a blind spot. Tasks turn into a hunt by feel, or you prop a flashlight in a laundry basket just to see clearly.
    • Entryways: Entry mats and shoes disappear at the threshold. Wet weather adds glare, making it easier to miss a step or track water past the carpet while juggling bags.
    • Hallways: Light fades just when you cross a door, hesitate at a threshold, or swing a laundry basket around—a stubbed toe or a bumped knuckle is the reminder that even “bright” spaces can create micro-risks.

    Layering Light: The Real-World Upgrade

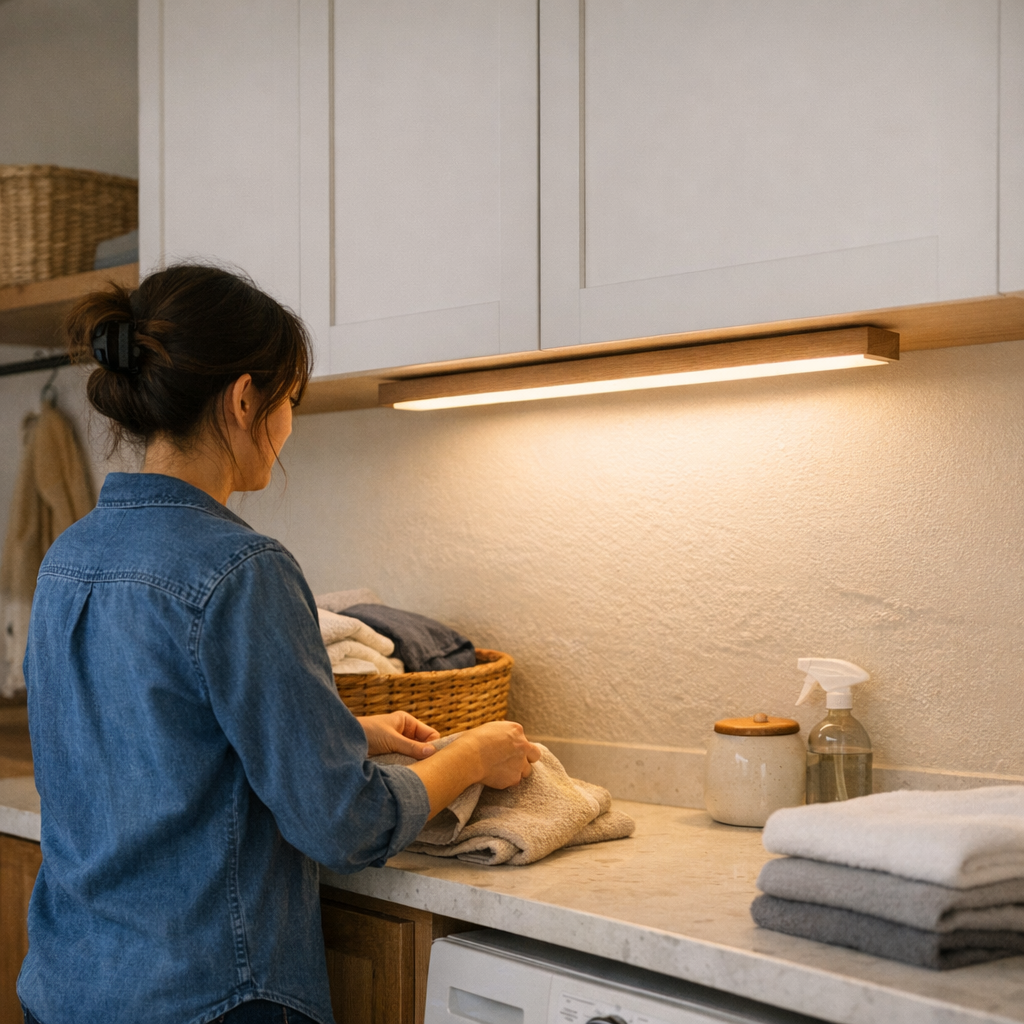
    Ceiling fixtures do their job, but won’t erase the daily friction. Layering—combining ceiling lights with wall sconces, mirror lights, under-cabinet strips, or fixed task spots—is how you actually clear these snags. Even one well-placed fixture can erase years of stop-and-go movement, shadowed surfaces, and repeated hassle.

    A Small Shift That Makes the Routine Smoother

    In one stubborn laundry room, simply adding a damp-rated wall sconce over the counter made sorting and folding faster. Not because the bulbs were brighter, but because the old drop-shadow finally disappeared. No more feeling blindly along the back edge; no more digging for a flashlight in the junk drawer. This kind of “invisible fix” means less pausing, smoother movement, and a room that finally works as promised—without needing a full overhaul.

    Why Placement Rules (and General Advice Fails)

    It’s not just the number of fixtures—it’s where the light lands. Wall sconces defeat those sink and mirror shadows overhead fixtures ignore. Vanity lights even out both sides of your face and stop the shadow play. Under-cabinet strips pull the working edge of your kitchen and laundry into full visibility. In any room facing moisture or drifted-in humidity—bathrooms, laundry, certain entry zones—damp-rated fixtures last longer and prevent sudden outages from corrosion or short circuits. General lighting advice ignores the real pain: poor placement makes a room look right and feel awkward for years.

    Spotting Trouble Spots Before They Drag Down the Room

    “Looks good, works bad” lighting signals itself with these repeated aches:

    • Do hallway shadows stretch from every doorframe or corner, breaking up your walk?
    • Does the mirror force you to lean or shift just to get a clear, shadow-free reflection?
    • Is the laundry counter’s back edge always lost in the dark unless you move a lamp or lean at a strange angle?
    • Are the stairs clear at noon but vague at night, causing that tiny hesitation with every step?
    • Do you find yourself squinting or fumbling for keys at an entry or in corners, even with the lights on?

    If you recognize these, you rarely need to rewire the whole room. Targeted lighting—just one or two purpose-placed fixtures—often dissolves the most stubborn friction better than a new all-room fixture ever could.

    Quick Tips for Targeted, Reliable Lighting

    • Ignore the old junction box habits—light what you actually use. Place sconces, under-cabinet, or task lighting directly where you work, move, or pause, not just where there’s a pre-cut hole in the ceiling.
    • Never skip damp-rated fixtures in moisture-prone spots. This is non-negotiable in bathrooms, laundry, and corners that stay steamy or are cleaned hard—risking flicker or corrosion costs you visibility and safety.
    • Test with your real routine, not just a glance. Walk the space after install. Any step, counter, or face that stays in awkward shadow gets its own lighting fix—don’t settle for “good enough” brightness at the center.
    • Balanced, shadow-free movement beats brute brightness. The best setups let you move, wash, sort, or check the mirror without pause—not with floodlights, but with placement that clears every hurdle your routine finds.

    At the End of the Day, It’s About Quiet Reliability

    A space that quietly supports you, day after day, almost always adds a focused fix: one stair sconce, a mirror-side task light, or a slim under-cabinet strip where the general overhead fails. These aren’t splashy upgrades. They’re what makes a room move from “finished on paper” to a space where motion, vision, and daily tasks happen without interruption, second-guessing, or shadowed edges.

    See which purpose-ready lighting options can smooth out your space at LightHelper.

  • Reducing Indoor Cat Feeding Conflicts with Separate Zones

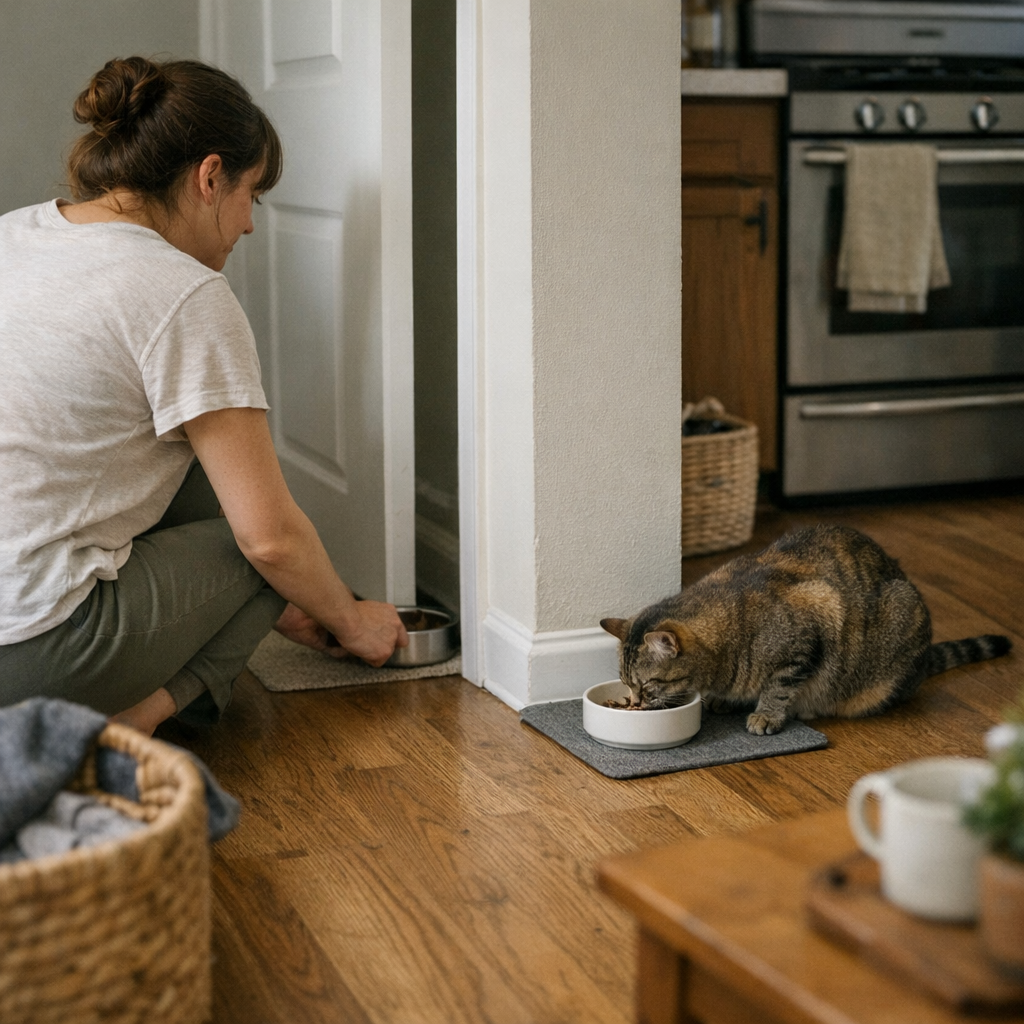
    The promise of a “neat feeding station” for multiple indoor cats collapses quickly under real, repeated use. By meal three, the mat that once looked organized is already betraying you: bowls drift until one wedges under the cabinet, kibbles scatter into unreachable cracks, and at least one cat is left hovering, waiting for a clear spot that never lasts. Crouching for escaped food or blotting up a fresh water spill becomes part of your actual routine—no matter how perfectly you set it up the night before. Tidy at a glance, messy in lived reality: the friction doesn’t just return, it spreads. You notice, every day, that a single “feeding area” is quietly working against you—and against your cats—in a way the packaging never admits. StillWhisker owners see this gap again and again: setups that clean up okay, but never keep the room or the routine on your side for long.

    When One Feeding Area Is Too Many Problems

    It seems rational: all bowls together, one compact mat, mess contained. But the close-corner solution breaks down as soon as routines collide—particularly when your cats have different eating speeds or want space. Real-world problems surface fast:

    • Bowl drift: The bold cat shoves, bowls slide and overlap, and both become unstable. Bowls might hitch halfway under the furniture or block each other like it’s a contest, not a meal.
    • Kibble leak: Crunchy food bounces or gets batted past mat edges, hiding along baseboards or vanishing under appliances, just out of reach until it starts attracting ants or dust.
    • Crowded restlessness: One cat stalls while the other looks on, unwilling to share close space, or abandons the meal entirely, returning to pick at leftovers after the bottleneck clears.
    • Mound of mess: By mid-morning, the mat shows a perimeter of ground-in crumbs, water rings, and sticky paw prints that seem to wander farther each day.

    Every “quick reset” is wishful thinking: you wipe a surface, only to spot a pellet under the cupboard two hours later; you nudge bowls back, but every serving shifts things out of place again. The gap between what looks fine and what actually works deepens with each reset that takes longer than it should.

    How Close Feeding Zones Start to Disrupt the Whole Room

    The mess is not just local. Cramming all feeding gear into one spot quietly turns an organized feeding corner into a room-wide interruption:

    • You find yourself side-stepping bowls while heading to the fridge or stepping in crusted-over puddles you didn’t see at first.
    • Litter dust and stray toys creep into the feeding zone, then get tracked further, compounding mess in places you never meant to manage.
    • The right cleanup tool (wipes, hand vac, broom) is close, but not within grab range—so you “do it later,” and little messes accumulate until later is much too late.
    • Resetting after mealtime isn’t a two-second fix anymore—it becomes a separate task, often rushed or skipped, leaving you behind on the next round before you’ve cleared the last.

    These aren’t isolated flaws—they’re the reliable signals that surface-only setups ignore. A system that hides daily interruptions under a veneer of visual order turns ordinary upkeep into ongoing hassle. If you find yourself bending for the same fix twice a day, the “organized” look is holding you back.

    Reading the Real Signs: When a Feeding Setup Needs a Change

    If your cats are blocking, waiting, or circling off before meals are over, the setup is delivering its own form of feedback. Patterned disruptions tell you exactly where the structure fails:

    • One cat edges along the mat or stands behind another, unwilling to eat without space—leaving half the bowl untouched.
    • The quieter cat finds an exit route instead of finishing, giving priority to distance rather than food.
    • Unfinished meals are left as an open invitation for pests, not a convenience.
    • You’re repositioning (not just refilling) bowls at almost every meal—no matter how well you thought you arranged things last time.

    Repeated scuffles, leftovers, and cleaning delays aren’t quirks—they’re warnings that friction is baked into your routine. As every “reset” gets later and takes more out of you, the setup keeps adding invisible work to what should be a simple process.

    Why Splitting Feeding Zones Lightens the Load for Cats and Humans

    Actually separating feeding spots—not just sliding bowls a foot apart, but creating distance—changes the story overnight. Instantly:

    • Bowls stay anchored. No more midnight migration to the baseboard or disappearing under the kitchen cart.
    • Cats each claim a space without the constant side-eyes and strategic blockades. They eat directly, not defensively.
    • Kibble fallout drops. Mess stops recurring on the same tiles or baseboard cracks.
    • Cleanup turns into a single, knowable step—no crawling for lost food, no surprise puddles that sour the mood.

    Set up a secondary feeding spot—even just a few rooms away—and you lose the tedious patchwork of fixing the same mess. The strain shifts from endless repair to quick, shallow upkeep. A bowl behind a hallway door stays clean till bedtime. That trouble-mat in the kitchen finally looks (and feels) low-maintenance, needing less kneel-and-sweep attention.

    Less Stress for Cats Means Smoother Flow for You

    With real separation, low-level tension drops away. No one guards. There’s no drama before every meal, and no lingering worry about late or uneven eating. Cats drift in and out of their own zones, leaving the rest of the room calm and unmarked. The one who eats slow and the one who eats fast both get what they need—without the human side having to play traffic cop or run interference.

    Choosing the Right Spots: Quiet, Clear, and Out of Conflict

    Location shapes outcome, not just appearance. The best feeding splits are not accidental but calculated:

    • Out of sight: A corner behind a door or in a nook—places cats won’t meet eyes while eating—quickly reduces pushy attempts and boundary testing.
    • Side access: Space on both sides of each bowl lets cats come and go without being trapped or blocked, ending the passive standoff.
    • Avoid the litter zone: Convenience isn’t worth crossover mess or extra stress. Keep food far from where the litter box lives.
    • Steer clear of major walkways: If your usual route crosses a feeding spot, you’ll collide with bowls or step in the mess, making the routine more stressful for everyone.

    Look for trouble signs: If you’re always cleaning the same patch or redirecting traffic around a certain spot, don’t accept it. Rearrangement fixes outcomes, not just appearances.

    New Setup, New Habits: What to Expect in Day-to-Day Use

    The real benefit isn’t superficial tidiness—it’s friction finally dropping from repeated use. When feeding points fit natural movement and cat behavior, everyday pressures visibly lessen:

    • Rarely do you see abandoned kibble or water pooled beneath the stove, waiting for a late rescue mission.
    • Cleanup shrinks to a glance and a swipe. Deep cleans become rare instead of routine.
    • Cats move freely, habits realign. No more pausing, pacing, or sneaking food after hours.
    • The border between cat space and human walking space stops blurring; no more adjusting your route to avoid bowl drift or puddles in main pathways.

    Instant resets fade away. The feeding area no longer demands reactive fixes every few hours. Instead, the setup stands up to real rhythms—matching the morning’s calm even after a long, busy day of repeated use.

    Practical Tips: Keeping the Routine Easy to Maintain

    • Spot-check after main meals: Fast scans catch stray crumbs and let you avoid bigger, later mess. Most days this becomes a matter of seconds.
    • Keep supplies in reach: Wipes or a hand vac need to be within arm’s reach, not just nearby. If grabbing cleanup tools is its own step, old messes will get skipped—then circle back as work later.
    • Flag any new friction fast: If a setup starts tugging at your time or feels tense again, shift locations a few feet or around a corner. Small changes can eliminate repeated stress entirely.

    Above all

  • How Smart Pet Travel Bags Reduce Stress and Speed Up Your Trip

    It’s easy to trust your pet travel setup before the trip starts—but the real test comes the first time you need something fast and can’t get to it. You feel the friction as soon as you reach for a wipe with one hand while steadying your dog, or fumble to find a bowl at a rest stop only to dig past a blanket and documents. In pet travel, the problem isn’t how organized your bag looks; it’s how those “just-in-case” layers, overlapping pockets, and blocked zippers add seconds of hassle at the exact moment you need flow, not friction. PawGoTravel lives in these pressure points—where travel gear either quietly breaks your rhythm or keeps pace, stop after stop.

    When “Looks Ready” Isn’t the Same as “Works Smoothly”

    An organized pet bag looks reliable at first glance. But the real divide shows up the moment movement starts. Maybe your leash slips in front of the main zipper, or wipes end up wedged behind a spare shirt. The collapsible water bowl, so logically packed, becomes a buried obstacle every time. The system looks calm until repeated stops reveal that well-zipped sections can still act like locked boxes—each extra second adds a layer of frustration to what should be basic travel routines.

    The Repeat Offenders: Small Delays That Add Up

    Fast access isn’t about carrying more, but about smart reach. A calm bag at the gate can become a source of clumsy struggles by the third trip to the aisle, especially if quick-grab gear drifts downward or gets trapped behind comfort items. You usually don’t notice until you’re forced into an awkward twist—one hand trying to keep your pet steady, the other sorting through a mess of “organized” layers. That’s when the difference between well-packed and well-placed items gets loud, every single stop.

    Scenes Every Pet Traveler Will Recognize

    Pet-travel setups rarely fail from lack of compartments. More often, it’s the mismatch between actual travel flow and how compartments behave under stress. Friction creeps in during:

    1. The Stop-and-Search Cycle

    A layover hits. Your carrier’s on one shoulder, your pet shifting with each announcement. You know your wipes are packed, but with one hand on the carrier and the other digging, it takes shuffling through larger items—blankets, harness, documents—before you finally reach them. That “organized” start is gone, replaced by the dreaded unpack-just-to-access rut. The original order offers zero help when every grab becomes a multi-step process in public, under pressure.

    2. The Overlapping Zones of Owner and Pet

    It’s routine: charger cords creep into pet supply pockets, snack bars wedge next to treats, or vaccination paperwork blocks leash access. Owner and pet items—blended for efficiency—end up making retrieval a two-sided chore. You’re repeatedly shifting your own things to deal with your pet’s, the line between the two getting messier at every rest stop or seat change.

    3. The Comfort-But-Complication Dilemma

    The cushion you add for a smoother ride or the plush toy meant to soothe your pet all have a knack for migrating on top of immediate needs. That “comfort-first” choice pays off only until you try to grab cleaning supplies or slip out a bowl—forcing a mid-trip reshuffle. Soothing one problem quietly sets up the next: calm pet, blocked access, slower you.

    Packing Logic vs. Access Logic

    Most travelers trust “packed and zipped” means ready. But motion—boarding, stopping, seat changes—exposes what static organization keeps hidden. Essentials packed under low-use gear turn single-handed cleanups or mid-trip snacks into unpack-and-repack drills, especially with bags lacking top or front pockets. The absence of true quick-access means routine actions demand both hands and extra seconds, just when you have no extra to spare.

    Not Just a One-Time Hassle

    These aren’t isolated annoyances. Real trips run on cycles: reach, pause, reshuffle, and repeat. If you’re always pulling out the wrong pouch first or shifting aside your own cables to reach the pet bowl, your bag structure is quietly working against you—and every restart gets heavier. The inconvenience is cumulative: small interruptions drain focus from your pet and slow down every return to movement.

    Adapting for Real, Repeatable Travel Moments

    What fixes the problem isn’t clever folding or more pockets. It’s noticing which items you actually grab first, over and over, and setting them up for reach—a side pocket for wipes, top slot for bowls, leash clip that doesn’t snag. That way, you avoid digging, don’t interrupt your pet’s calm, and sidestep the cycle of minor delays stacking up. The change isn’t about the gear’s look but about building access patterns that match the trip’s real tempo.

    “Looks Prepared” vs. “Feels Easier”

    No bag fails at the start. Weakness appears when the stable, backseat-perfect kit turns unreliable after a few cycles—subtle overlaps jam key move points, or visual tidiness hides access issues no one sees until routines repeat. Over time, bags built for smoother reach—not prettier lines—keep you and your pet in forward motion. Faster comfort, quicker cleanup, fewer restarts: set structure right, and every small action keeps the trip moving, not stalling.

    Practical Observations from the Field

    • External and top-access pockets save more time than their size suggests: that one-second reach beats any “deep clean” at every delay.
    • Bags geared for one-hand-only retrieval let you handle brief stops without breaking your carry or making your pet wait longer than necessary.
    • A neat setup under inspection is meaningless if the first delay exposes that essentials are always two layers away from where your hand lands.
    • Owner/pet item overlap is a recurring pain—dedicated, reliably placed pet pouches prevent the need to unpack and repack for the same action, again and again.

    Making Each Restart Smoother, Not Slower

    The measure of a travel setup isn’t its initial order, but how many silent pauses you avoid after each stop. Gear that keeps wipes, bowls, treats, and leash exactly where you reach next time means less reshuffling, less pet anxiety, less drag on your focus. The smoothest pet-travel setups aren’t necessarily sleeker—they’re quieter in use, dissolving friction so you and your pet can actually keep moving together, not working against your own system.

    Explore practical pet-travel organizers and setups that actually keep pace at PawGoTravel.

  • How Recognizing Your Dog’s Doorway Pause Improves Leash Walks

    The difference between a smooth dog walk and a routine that grinds every morning often comes down to those 15 seconds at the door. You reach for the leash—only to find it half-hidden behind the coat rack. Your other hand tries to fish out the wipes because someone (maybe you) piled a muddy towel on top of the entry bench. The dog hovers at the frame while you shuffle shoes and keys and coax her out, but the leash snags, your knee bumps the bin, and already the walk feels like something you’re working against instead of for. These doorway pauses and gear bottlenecks aren’t random. They’re small signals that add up fast—and show exactly where a daily setup isn’t quite working. It’s the difference between a home that just stores dog supplies and a DogPile-ready zone where walk routines run smoother, not slower.

    When the Doorway Pause Isn’t Just a Pause

    Call it stubbornness or confusion, but most delays at the door start when dog supplies drift into paths meant for people—or when routines keep tripping over the same misplaced towel, leash pile, or rogue toy. The pause at the threshold stops being brief. You’re mentally ticking off missing items, trying to clear a strip of floor space, while your dog reads your tension and hangs back. That little hesitation isn’t neutral; it’s the first crack in the routine. Clumsy setups—gear edging into walking space, wipes buried under treat bags—turn doorway pauses from forgettable moments into slow buildups of irritation.

    Each trip through the threshold with a tangle or a missing item reinforces the friction, not just for you but for the dog. You nudge; she resists. The walk starts with correction and tension. Over time, neither of you launches cleanly: leash tension replaces momentum, and anticipation gives way to correction. Walk energy drags before you’re out of sight of home. If every morning stumbles over the same five-second snag, eventually the walk itself feels like a series of corrections—right from the first step.

    How Small Friction Grows into Habitual Snags

    Rarely does dog routine friction blow up in a single flash; it builds from small, repeatable annoyances. Your dog hesitates because yesterday, her leash yanked sharply—because the harness was at the bottom of the pile, or you had to sidestep water bowls that always crowd the threshold after breakfast. Wiping muddy paws gets delayed because the wipes slid behind the shoes. The “cleanup zone” is technically there, but it never seems to be close enough when the actual mess happens. Eventually, daily prep devolves into a series of micro-recoveries—fetching, rearranging, and subtly hurrying through steps that should be simple.

    Every repeated urge to keep moving—every “let’s go” said with growing impatience—adds a thread of tension that compounds with each walk. Watch for how quickly your leash snags now versus a week ago, or how often your dog turns back or pulls away before you’re halfway down the block. A walk interrupted at the threshold rarely gets its flow back. The speed bumps aren’t just at the door; they echo until you’re home again—and next time around, the cycle repeats, usually in the exact same spot.

    The Walk Starts at the Threshold—Literally

    Picture the weekday rush: keys wedged between your fingers, leash jammed under yesterday’s raincoat, and a vague sense you’re forgetting something. Your dog stands at the frame, bracing her paws, glancing back to see if you’re ready, even as your hands are busy untangling the gear mess that seems to remake itself daily. If every walk starts with this scramble, the result is obvious: a launch that feels late before it begins, a dog more alert to your frustration than to the world outside, a leash under tension before the first step.

    This isn’t about a single step—it’s about your readiness and your dog’s. Rushed starts show up as more frequent leash corrections, zig-zagging at the curb, and failed attempts to find a rhythm. Owners notice it most when routines snarl: towels out of reach post-mud, harnesses MIA under a toy heap, bags buried behind other chores. Entryways that pass the “look neat” test in photos can still fail in live use, hiding obstacles that cost time and focus. Dogs feel these missed beats faster than you might notice—they know the difference between a settled launch and a scramble.

    Turning the Pause Into a Useful Reset

    After enough fumbled starts, some owners finally try a different approach: What if that threshold pause isn’t just tolerated, but used? Instead of dragging your dog or shuffling impatiently, both of you wait—feet and paws square, leash loose. You watch for the real sign of readiness: your dog’s body angles forward, attention shifts outside, and the hesitation melts. Sometimes you catch a tail wag, a sigh, or a subtle shift that tells you she’s unplugged from the hallway tangle and plugged into the moment outside. It’s not a trick; it’s a reset—brief, simple, and more powerful than most commands.

    Add this reset to your walk prep and you’ll see the pattern change: the leash stays calm over those first ten steps, corrections fade, and the back-and-forth tension drops. Over repeat use, the threshold becomes less a battleground and more a shared launchpad. Dogs learn; so do people. The pause transforms into a clear signal, not a moment to rush or ignore.

    Spotting True Readiness: What To Look For

    Posture tells the story. A relaxed, upright dog—tail soft, shoulders loose, steady glance forward—signals true readiness at the threshold. If your dog averts her eyes, stiffens her stance, or fidgets every few seconds, she’s not with you yet. Owners who learn to wait (by seconds, not minutes) start to see the contrast: less rushing, more focus, fewer leash fights on the sidewalk. There’s no need for elaborate cues or endless patience. The takeaway is simple: allow a pause for both parties to sync up before heading out.

    Practical Obstacles: When Setup Still Gets in the Way

    Even if you master the pause, real-life setups keep testing you. Some days, you reach for the leash but grab a tangle of jackets instead. On return, the wipes you always mean to have close are lost behind a pile you rearranged just yesterday. The dog comes in muddy, tail wagging, while you’re patting down bins or digging in drawers—attention lost, mess spreading. Even “organized” spots sabotage you if the right gear isn’t right where you need it, at exactly the right moment. Cleanup supplies look accessible until it matters; bowls look tidy until your hands are full and a shoe rack breaks your stride; re-entry stalls because the towel is always just out of comfortable reach.

    This is where most setups fail their real test—not that they look messy, but that they demand micro-adjustments mid-routine. The reset gets rushed, the flow stalls, and dog energy rebounds unfocused. However much the area looks “ready,” friction returns whenever actual need meets delayed access or tangled gear.

    Making the Most of the Pause: Real-World Tweaks

    To fix the routine, don’t just declutter—rethink reach and placement:

    • Keep essentials truly at hand, not tucked away. Place leashes, towels, and pickup bags where your fingers touch them—no bins to dig behind, no awkward sideways shuffle. The most usable spot is just before the physical threshold, where you pause anyway.
    • Add a joint reset cue. A mat, corner rug, or even a strip of tape can mark exactly where both you and your dog pause together—making the habit easier to repeat by design, not just luck.
    • Check your body language for slippage. If you start to lean, fidget, or multitask at the door, your dog will mirror the distraction. Stand square, breathe, and watch how your dog settles faster with a calmer lead-in.
    • Stage for the return, not just the exit. After muddy walks or scattershot outings, place towels and wipes in arm’s reach of the door—visible and ready, not buried under laundry or forgotten in another room. The right setup cuts time lost to scrambling and keeps your dog with you for the whole return routine.

    The Long-Game: Less Tension, More Usable Trust

    Repeating the threshold reset doesn’t solve every snag overnight. Some days you’ll backslide—reshuffling gear, losing wipes, fumbling through clutter you thought you’d fixed. Yet, over the weeks, the entry zone gets easier to use, the pause becomes a cue instead of a delay, and you’ll notice your dog checking in with you instead of resisting. The walk flows out the door, not against it. The post-walk reset gets easier, not harder, and the cycle of tension starts to break.

    Routine friction hides in the little things—a leash in the wrong bin, a towel just out of reach, gear that spreads back into your space when you’re not looking. A setup that looks tidy but still makes daily flow harder signals exactly where DogPile thinking starts:

  • Why Proper Brackets and Cable Management Keep Lighting Perfect Longer

    Even the sleekest indoor lighting setup can start to unravel within days of use. That flush-mounted LED? It creeps askew after the second desk shuffle. Cables that vanished at install reappear, catching the eye—or a sleeve—every time someone plugs in a device. One week in, you’re not admiring a crisp workspace; you’re nudging lights back into line, pushing cords aside, and wondering why all that supposed “minimalism” now feels like a recurring maintenance job instead of a solved problem.

    The False Security of a Finished Look

    Minimal cable clips and slim brackets promise calm surfaces but rarely outlast a real week in a shared or flexed room. If support fails, convenience collapses—no matter how neat it looked initially.

    Picture a desk: On day one, the linear LED disappears under the shelf, cable hidden. By Friday, the bar leans just off-parallel, leaving one edge in shadow. Cable clamps loosen as laptops come and go, until an exposed wire cuts across that “clean” line. Suddenly it’s not just the look that suffers; it’s the way you use the space—constantly realigning, tucking, re-routeing. The sense of “done” dissolves as you fight the same annoyances, one interruption at a time.

    • A fixture that sags a few millimeters throws glare onto the work surface or leaves half the desk in murky light
    • A cord, at first tamed by a discreet clamp, slips forward and becomes the obstacle you move around every morning
    • Daily use turns a “solved” setup into a slow cycle of repeated, forgettable corrections

    This is more than cosmetic. In high-traffic kitchens, compact shared desks, and shallow shelves, every flex or bump makes minor weaknesses obvious and unignorable.

    Where Most Lighting Setups Start to Unravel

    The illusion ends after you clean, plug in, or adjust—usually by the third interaction. Weak points consistently emerge, including:

    • Brackets that flex, so an edge droops and uneven light spills onto backsplashes or out toward the user—making small tasks harder and reintroducing glare
    • Cable management designed to hide, but not to hold, slips near high-tension spots—think of where power strips meet desk legs, or where a cable rounds a corner that sees constant movement
    • Single-point supports, which rotate or slide with a brief nudge, especially on floating shelves or flexible wall panels

    These failures rarely announce themselves. Instead, they erode visibility, inject glare, or leave once-lit corners in a new dimness. An under-shelf LED brightens a counter until a bump leaves a dull shadow. In every shared workspace, the hidden cord migrates—first off-stage, then snaking visibly, then snagging as soon as a chair is rolled back.

    How Subtle Drift Becomes Everyday Friction

    Lighting drift and visible cable creep aren’t dramatic. They build subtly, with the next realigned light, jostled wire, or minor tilt. The test: Do you fix the same little thing every few days?

    • A student’s under-shelf lamp, mounted with a center bracket, demanded near-daily nudging. Switching to a dual-lock bracket and clamp kept it set—the “finished” feeling finally lasted through a month of use.
    • Two side-by-side kitchen LED bars: one secured on both ends stayed even, giving full counter light; the other, clipped at one point only, slouched until a prep area faded half into shadow and made chopping awkward.

    Fixes That Actually Last Beyond Day One

    The difference between constant fixes and true clarity isn’t surface-level minimalism but real support matched to repeated movement.

    • Double-bracket supports, especially with locking tabs, stop dips across longer LED bars or heavy shelves; single brackets rarely survive repeated shelf flexes or hands brushing past.
    • Cable clamps belong where force happens most, not just where wires are visible—usually at transition points, plug-ins, or the edge within arm’s reach, not halfway along a hidden run.
    • Early, intentional retightening during the first week makes a visible difference—pressing a clip or adjusting a bracket after the room settles can prolong the setup’s clean look and real use.

    It’s not about over-accessorizing. The right choices, placed by habit patterns, make the clutter disappear—and stay gone—despite hands, chairs, and plugged-in chaos.

    Small Setup Tweaks: From Daily Fix to Seamless Use

    Still fighting alignment drift? Move your anchor point closer to where hands interact with the surface—often just a few centimeters is enough to keep things steady under real-world traffic.

    Cables inching back toward visibility? A clamp or adhesive guide placed right at the main trouble spot (entry edge, wall drop, plug socket) can lock the cable’s path. When supports anticipate the room’s daily behavior, maintenance falls away—you notice the light, not the setup.

    Questions That Come Up Again and Again

    Why does my light fixture keep drifting out of place?

    The most common reason: brackets are undersized or fixed only at one end. Every shelf flex or accidental bump nudges the bar, and edge droop accumulates. Secure two-point brackets and periodically check for slip in real use—not just after install.

    How do I stop cables from becoming visible, even with cable management?

    Clamps often fail because they’re not placed where movement happens. Install them at transition spots—corners, plug zones, or emerging from behind desks—to prevent creeping wires from reappearing with every user adjustment.

    What’s the most frequent mistake people make in lighting setup?

    Choosing accessories based on visual neatness instead of how the space is actually used. “Invisible” brackets or once-tucked cables turn into visible distractions if real-world motion, tension, or flex isn’t addressed at the setup stage.

    Recognizing What Really Lasts in Lighting Setup

    The value of a lighting support setup shows up weeks later. If you’re still straightening, untangling, or nudging month after month, the solution failed silent stress-testing. Areas that truly feel “finished” let you walk in, use the space, and never think about the hardware—because every contact point, wire path, and bracket was judged for how you really move, plug, or clean, not just how it looked in photos.

    For practical, lasting solutions in indoor lighting support and cable management, visit LightSupport.