Blog

  • How Hiding Power Bricks Can Transform Your Workspace Efficiency

    Most desks look organized—until you try moving. If you work with multiple devices, you know the quiet aggravation: power bricks lining the back edge, tangled adapters elbowing into your writing space, cables dragging across your keyboard just as you reach for a notepad. A workspace can photograph clean, but daily use tells another story: shifting your chair, adjusting a monitor, or bringing out a notebook becomes a repeat collision with loose wires and lurking chargers. “Out of sight” isn’t just tidier; it’s the difference between a desk that stays workable and a surface that keeps sabotaging your flow.

    Power Bricks: More Than Just Visual Clutter

    The problem is rarely urgent. But throughout the week, a pattern emerges. Snap open your laptop, and a charger nudges your mug. Reach for a jotter and cables have shifted, cluttering the open area you just cleared. Devices slide off alignment, and each movement—typing, sketching, trading devices—creates a fresh snag or disruption. What looked “organized” now feels booby-trapped. Accessories that felt harmless on Monday become Thursday’s frustration triggers.

    No single snag ruins the day, but the build-up drains focus and speed. After each call, it’s the same routine: push a power brick aside, untangle a charging wire wedged beneath your wrist, pick up a dropped pen blocked by another adapter. Reset moments multiply—student, home worker, or office pro, the friction repeats. The surface still looks ready, but your workflow now zig-zags around the same mess, cycle after cycle.

    The First Real Relief: Moving Bricks Below the Surface

    The step change comes when adapters, chargers, and power bricks finally move out of the action zone. Under-desk cable trays, clamp-on boxes, or adhesive cable ledges flip the script: what clogged your working edge now drops below, clearing not just sightlines, but also reach paths and reset space. With clutter shifted, you can drag a notebook beside your keyboard, scoot a mouse, or even re-center your chair mid-session—without bumping a charger each time.

    This isn’t about looking minimal. It’s a real difference in motion: switching from writing to typing stays smooth, post-meeting resets stop feeling like cleanup drills, and open desk depth becomes usable again. You notice it most when moving fast—no more pausing to dodge an adapter before sliding your monitor forward or swinging under-desk storage open.

    This Fix Isn’t Universal—Matching Method to Routine

    No concealment move solves everything. The real trade-off is raw clarity versus plug-speed. If your desk is mostly settled—one laptop, two consistent devices—it’s game changing to hide almost everything. Each adjustment is quicker, and the writing area breathes again. But if you’re in charger-rotation mode—frequently swapping test devices, guest laptops, fresh accessories—purely hiding power bricks starts to cost time. Every change means crawling under a tray, undoing cable clips, or tracking what’s actually connected. Hidden adapters clear space, but if device-swaps are constant, access slows—less friction, but more backtracking.

    How Desk Setup Choices Change Day-to-Day Work

    Picture a real shared workspace: one person docking for morning calls, another plugging in tablet and phone on the fly. When chargers live on the desktop, each handoff means clearing a cluster of adapters, wrangling a snarl of wires, and rebuilding working order. A quick note or connect-the-cable moment always becomes a clean-up interruption. Over a full day, even a neat setup doesn’t avoid mid-afternoon bloat—clutter rebounds, and tempers tighten faster than anyone expects.

    Add under-desk cable management, and transitions change. The desk itself stops fighting back: switching users, flipping from laptop to notebook, or running a focus block happens with the desktop clear. The clutter “booby trap” is gone—less to move, less to remember. Still, rapid plug swaps or new device chargers reveal the limits: each new need means reaching under, rerouting a wire, sometimes bumping knees on a storage tray. The clean look and flow are real gains, but speed isn’t always perfect. Each setup rides a line between lasting clarity and small access sacrifices.

    The Real Turning Point: Improving Both Clarity and Speed

    Most people find relief not with all-in hiding, but with partial concealment or adaptable organizers. A cable box along the desk’s rear edge keeps bricks and adapters controlled—but lets key device cords poke through at reach spots. With routine, you learn cable locations by feel, not sight. This lets you shift posture, swap devices, or share the space without knocking adapters loose, opening drawers blocked by charger knots, or disturbing a careful notebook lineup. It’s not absolute tidiness, but for real work the trade-off beats both the chaos of loose adapters and the slowdown of full hideaway setups.

    No-Nonsense FAQ: Common Use Scenarios

    Can I hide power bricks without drilling my desk?

    Yes—many adhesive-mounted cable boxes, trays, and ledges secure under the desk or behind drawers with no screws. Always check adhesive strength for both the expected load and your desk’s surface to avoid midweek surprise drops.

    What about frequent device swaps?

    If your desk is a hub for guest laptops, test devices, or loaner hardware, don’t bury every charger. Leave one fast-access adapter on the desk or in a pop-out tray; keep the less-used bricks concealed. You get the order you want, plus instant plug-ins for fast-moving swaps without searching under the surface.

    Will this overheat power bricks?

    Most well-designed cable boxes have ventilation slots or open sides. Avoid trapping power bricks in deep, sealed spaces or stacking them. If airflow is unblocked and the box isn’t overloaded, standard chargers run at safe temperatures—but always check for warmth on heavy-use days.

    The Practical Difference: From Looking Organized to Working Smoothly

    The gap between a neat desk and one that works is bigger than it looks. A clear desktop means nothing if every seat return means shifting a cable clump, untangling the same brick, or bumping a notepad out of reach. Moving adapters and power bricks below the action zone doesn’t just look better—it makes each new work cycle, reset, or task switch faster and less tiring. The workflow becomes “ready” on repeat, not just after a deep clean.

    For single-user setups, a concealed system makes routines automatic—no need for afternoon resets. For shift workers, shared desks, or anyone with constantly changing device needs, a mix of hidden organizers and open-access outlets gives the best of both: clarity plus true speed. A good setup won’t make heavy sessions frictionless, but it will stop the small battles from adding up before the week is half done.

    Explore the full WorkBasic collection

  • How Small Routine Changes Can Reduce Dog Leash Pulling Effectively

    Every dog owner hits the same snag: your walk runs smoothly—until it doesn’t. You reach the corner, the park gate, or even your neighbor’s mailbox, and the leash yanks tight. The problem hits the same spot every day, not because of bad behavior, but because the structure of your routine keeps creating the same stumbling block. From the outside, the walk looks easy. Up close, it’s interrupted rhythm, quick frustration, and the unmistakable feeling that some part of your setup keeps letting you down—one more reminder that “tidy enough” isn’t always livable when you’re actually moving, leash in hand.

    Spotting the Problem: Where Walks Break Down

    Your route never really surprises you—neither does the friction. The leash is right by the door (until it slips behind a shoe pile). You know exactly where the walk drags: busy corner, park entrance, mailbox. Every time, the leash pulls or your dog surges at the exact spot you expect. The pattern repeats—slow walking, grip tightening, scramble to reset—and your morning feels chopped up before you’ve even started.

    These trouble points aren’t flukes. Each small snag chips away at your patience and makes the rest of the walk—and even coming back home—feel ragged. A single five-second stall doesn’t just delay you; it makes the rest of the route more awkward, and each repetition trains your dog to expect tension right there, every time.

    What’s Really Happening? The Friction Behind Predictable Pulling

    If you always pause or fumble with your phone, keys, or bag at the same spot, your dog isn’t just sensing your habit—they’re primed to bolt or tense up the second you slow. Routine gets baked into the environment. That messy curb, that patch before the park, the habit of shifting your bag at the same time—these become signals for disruption. Not every walk is a training problem; most are symptoms of a home setup or gear placement that wires friction into your flow, again and again.

    Dogs watch for signals—sometimes it’s your voice, but just as often a curb, a patch of shadow, or the sound of you re-gripping the leash. Over time, these micro-patterns steer the entire outing.

    Many owners learn the hard way that friction grows from habits they never meant to build. The “organized” entryway becomes an obstacle course. The spot you always adjust your jacket becomes the very place your dog lunges. Instead of a relaxing loop, the walk feels like a chain of tiny battles that never quite get solved.

    The Hidden Impact of Small Rhythm Breaks

    It’s easy to shrug off a two-second pause—until you realize it shapes the walk that follows. One stumble near the park gate and you’re quicker-tempered, your dog is jumpier, and both sides are losing patience. On paper, you left the house prepared, but by the second snag the route feels choppy and tense. Nervous energy saps the fun from sniffing, the leash feels heavier, and coming home means more wiping, more grabbing, more stress—none of it visible in a tidy room photo.

    Repeated friction doesn’t just shorten the walk. It leaves you both spending energy in the wrong places: fussing instead of exploring, correcting instead of resetting. The moment that should restore calm starts draining it, step by step, from leash clip to return.

    Real Scenarios Where Friction Shows Up

    Reaching for the Leash—and Finding Something Blocking the Flow

    It never starts outside. You’re hurrying, hands full, reach for the leash—except it’s tangled behind boots, or lost under yesterday’s bag drop. A “fixed” storage spot is only as good as it feels in the rush, not the tidy photos. When grabbing the leash means shuffling half the entryway, you’re starting every walk with a layer of stress you didn’t budget for. With every repeat, that same awkward reach costs seconds and drains patience before a single step hits the sidewalk.

    Cleanup Delays After the Walk

    Returning home, your dog’s paws are muddy, the leash is damp, and ready-to-reset feels like a myth. The wipes were there—last week. Now they’ve migrated under a tote bag or slipped behind a crate. You look organized, but when cleanup’s not instantly reachable, you’re stuck fumbling while mud creeps further in. A setup that passes the “company’s coming” test still fails the daily dog routine if it makes you dig for supplies every single afternoon.

    Comfort vs. Repeated Reset Friction

    Chasing comfort usually creates its own loop. You lay a plush mat near the door so your dog can land soft after walks, but now it soaks up stray water and traps muddy prints; cleaning the mat adds work, not relief. Or you push toys close for easy play, only to spend half your afternoon nudging them away from door swings and walking paths. “Comfort” solves one problem and quietly hands you another: easier settles up front, extra cleanup or tripping hazards on the back end.

    Routine Anchors: The Power of a Predictable Pause

    When the same tension points repeat, the answer isn’t more correction—it’s moving the anchor. Step off routine autopilot and choose an intentional pause before the problem zone. Instead of yanking the leash at the gate, stop and settle at the mailbox—a step earlier than your usual snag. This moves the tension cue back, interrupting the reflex before it builds. A simple, clear pause—used consistently—signals both you and your dog: here is where we reset.

    This predictable anchor creates a margin. Repeat it, and the worst spot loses its power. The frantic energy gets redirected; the leash holds lighter just by routine adjustment, not by battle. Over a few days, you get fewer stops and sharper transitions—less scrambling to recover rhythm, more smooth movement through the usual trouble zone.

    Not Just Theory: How Routine Adjustment Changes the Walk

    Most people don’t realize the gains until they live them. After a week of anchoring pause before the pressure point, you’re moving steadier. The leash loosens, the walk flows, and cleanup on return is less hectic because you’re not coming home frazzled. On paper, nothing major changed—the real shift is in rhythm: fewer micro-adjustments, less compounded stress, more space to actually walk the route you meant to take.

    No setup is perfect. Squirrels, noisy trucks, or a rain-soaked doormat will throw off your best routine. But when your daily structure signals “reset” before trouble starts, both the walk and the homecoming hold together better under pressure. You move from reacting to controlling the pace—and each week, more of the routine goes on autopilot, with less need to correct midstream.

    Frequently Noticed Weak Points in Everyday Walks

    The Same Problems Keep Coming Back

    Change the baskets, move the hooks, swap the mat—some weak points just keep resurfacing. The toy in the aisle, the towel always a step too far, the leash jammed behind rain boots. A setup can be neat and still fail in action if it interrupts you at the same second every day. Repeated use quickly shows which solutions are only “organized” by sight, not by speed or reach when you’re mid-routine and hands-occupied.

    Setup Decisions That Feel “Okay”—Until They Don’t

    What seems logical on day one—treats by the door, shoes out of the way, leash in a basket—can unravel once real life repeats. The jar perfect for rewarding calm is suddenly out of reach right when you need it, so you skip the reward. The shoes you moved keep creeping back into trip-range, so you side-step, losing your rhythm. Over a week, the gap shows: tidy setups that only look ready aren’t the same as ones you can actually use, moment after moment.

    Subtle Gains and Real-World Adjustments

    The difference isn’t grand, but it’s real: the routine either eats into your patience a little more each day, or it supports you without extra effort. The right pause defuses leash tension early; the right gear spot puts the towel where you reach for it, not where it photographs well. Over enough repetitions—rainy mornings, after-dark returns—anchor points and friction-free placement trim the edge off every step. It’s not dramatic, but the feeling is obvious once you’ve lived it: easier, less interrupted movement from leash-up to reset.

    Takeaways: Making the Walk and Reset Work Together

    If you keep hitting the same snag on your daily walk, the problem isn’t habit or stubbornness—it’s the routine structure bottlenecking in the same place. Change the anchor, improve the flow: build your pause before the friction spot, place your cleanup where real hands reach, and judge every setup by how it handles repeated use. The best dog routines look barely different from any normal day—except they keep the weak points from piling up. And that’s the DogPile world: setups, placements, and adjustments that matter when the novelty’s worn off and your lived-in routine is what actually decides your day.

    For

  • How Pet Travel Bags Can Improve Stop-and-Go Trips with Smart Design

    A pet travel bag that looks perfectly organized can still slow you down when it matters most: during real stops with a live, restless animal and no free hand. That neat, ready-to-go setup—the one where the leash is packed, the bowl is secure, and every wipe is folded—often collapses in the first real test: reaching for an essential at a messy rest area, with one arm controlling the dog and the other hunting through compartments. The gear is there, but when wipes are zipped beneath extra bedding or the leash is locked under an outer layer, speed and calm break down fast. In the rush of a pause-and-go pet trip, visible order quickly drifts into awkward digging, reshuffling, and the sense that your “prepared” bag wasn’t really built for movement.

    Why “Looks Organized” Isn’t the Same as Working Smoothly

    A color-coded, compartment-filled travel kit can trick you into feeling ready—until you actually travel. The real difference shows up when the outside order doesn’t match how you use the bag with a moving, impatient animal. On a short drive with two stops, the “all set” feeling disappears the first time you grab for a leash that’s trapped under a blanket. One hand keeps the dog in check, while the other is lost in a pocket maze. What looked sensible at home becomes five minutes stuck fumbling with zippers and shifting snacks, while your pet’s patience and the car’s calm evaporate.

    The Repeat-Stop Spiral: Where Friction Builds

    The real strain of a weakly-structured bag emerges after the second or third stop: wipes buried, bowl under a treat pouch, leash tangled with waste bags. Each time you reach, you repeat the hunt, made slower by last round’s rushed repacking. It’s not the visual mess—it’s the kinetic interruption. Grabbing a wipe after muddy paws turns from quick fix to two-handed shuffle. By mid-trip, the hassle expands: ordinary stops drag out as your routine reroutes around the bag, not with it.

    Quick-Access: The Difference Between Moving and Stalling

    What holds a pet travel setup together isn’t measured by how tidy it looks zipped up, but by how fast you can reach a wipe, leash, or bowl with one hand while steadying the pet with the other. When essentials are sealed behind layers or buried below rarely used comfort rolls, every cleanup or leash-on moment turns into an unpack-and-repack show. If “quick access” needs three steps or both hands, real travel slows to a crawl—and the bag’s organization becomes the obstacle, not the solution.

    Comfort Features That Accidentally Slow You Down

    A bag packed for calm—soft pockets, plush bedding, extra cushions—seems like an upgrade right until the leash is wedged beneath a rolled mat. What’s meant for your pet’s comfort turns into a speed bump. On the road, there’s a tradeoff: every padded layer or extra blanket crowds the fast-access zone. The comfort that soothes your pet can become the exact thing that blocks a fast, one-handed grab during an urgent moment. In repeated use, these “extras” turn small tasks into big pauses.

    Owner-and-Pet Overlap: Where the Setup Gets Tangled

    Shared space turns overlap into a problem. Bottle for you, bowl for your dog, snacks for both—item boundaries blur quickly. Reaching for wipes but hitting your phone, or aiming for your sunglasses only to pull up dog treats: that’s not just disorganization, it’s a structure that ignores real movement. By the second rest stop, pouches blend, and you’re reshuffling not just for the animal but for yourself. Every crossover—squeezing your charger past a chew toy—adds another hiccup to the supposedly “organized” trip.

    Elegant Packing vs. Real-Time Handling

    A perfectly packed bag on your kitchen counter gives zero warning about how it will behave at the fourth stop, with a thirsty pet and a dripping water bowl. True organization isn’t measured at takeoff—it’s stress-tested when you need to grab and reset in seconds, not minutes. If the bag’s design helps you close, drop, and move after each interruption—essentials falling simply into reachable pouches—you know the structure is working. If instead you’re racing to line up zippers while balancing the bag and an impatient animal, your “orderly” setup is breaking stride, not helping it.

    How Fast Can You Restart?

    The best test is when restart feels like a single motion: wipes down, bowl snapped shut, bag closed, return to the driver’s seat unbroken. But if you’re always untangling liners or shoving scattered gear under a comfort roll every time, something’s wrong. The more a setup makes you repeatedly reset instead of move, the less prepared it really is for live travel.

    Simple Structural Tweaks Make All the Difference

    Small changes rewrite the pace of the trip. Critical items—wipes, bowl, leash—should always live in shallow, exterior pockets or behind a simple flap, ready for one-hand grab, never under two zippers or hidden beneath comfort gear. Moving your most-used pieces to side pockets, clipping the leash to an exterior ring, or using a magnetic closure for wipes does more for momentum than any amount of visual tidying. The upgrade isn’t aesthetic—it’s the difference between a smooth, one-motion cleanup and another stop lost to a seat-side juggling act.

    Spotting the Weak Point: Signs Your Pet Bag Isn’t Helping

    • You have to dig or reshuffle for the same essentials at every stop.
    • Wipes or bags always resist your first reach, costing extra seconds when you’re holding the leash.
    • Balancing pet, bag, and cleanup becomes a circus, with one hand always in the wrong place.
    • Every restart takes longer to organize the gear than to actually handle your pet.

    These points—often ignored—quietly define whether travel feels easy or turns into a cycle of small, avoidable stalls.

    Designing for Smoother Rhythm, Not Just Neater Packing

    A bag built for real trip rhythm keeps you moving even when things go off-plan. The pay-off isn’t just neatness; it’s seconds saved at every stop, a cleanup that ends instinctively, and a return to driving that doesn’t mean gear scrambling or routine break. Only after two or three cycles does the true difference show: a bag that simply flows, not just stores. It’s not about first-glance order—it’s about which setup holds up when the trip gets real.

    Find practical pet travel setups, organizers, and quick-access solutions designed for real trip rhythm at PawGoTravel.

  • Why Choosing Rigid Metal Fixtures Matters for Long-Lasting Lighting

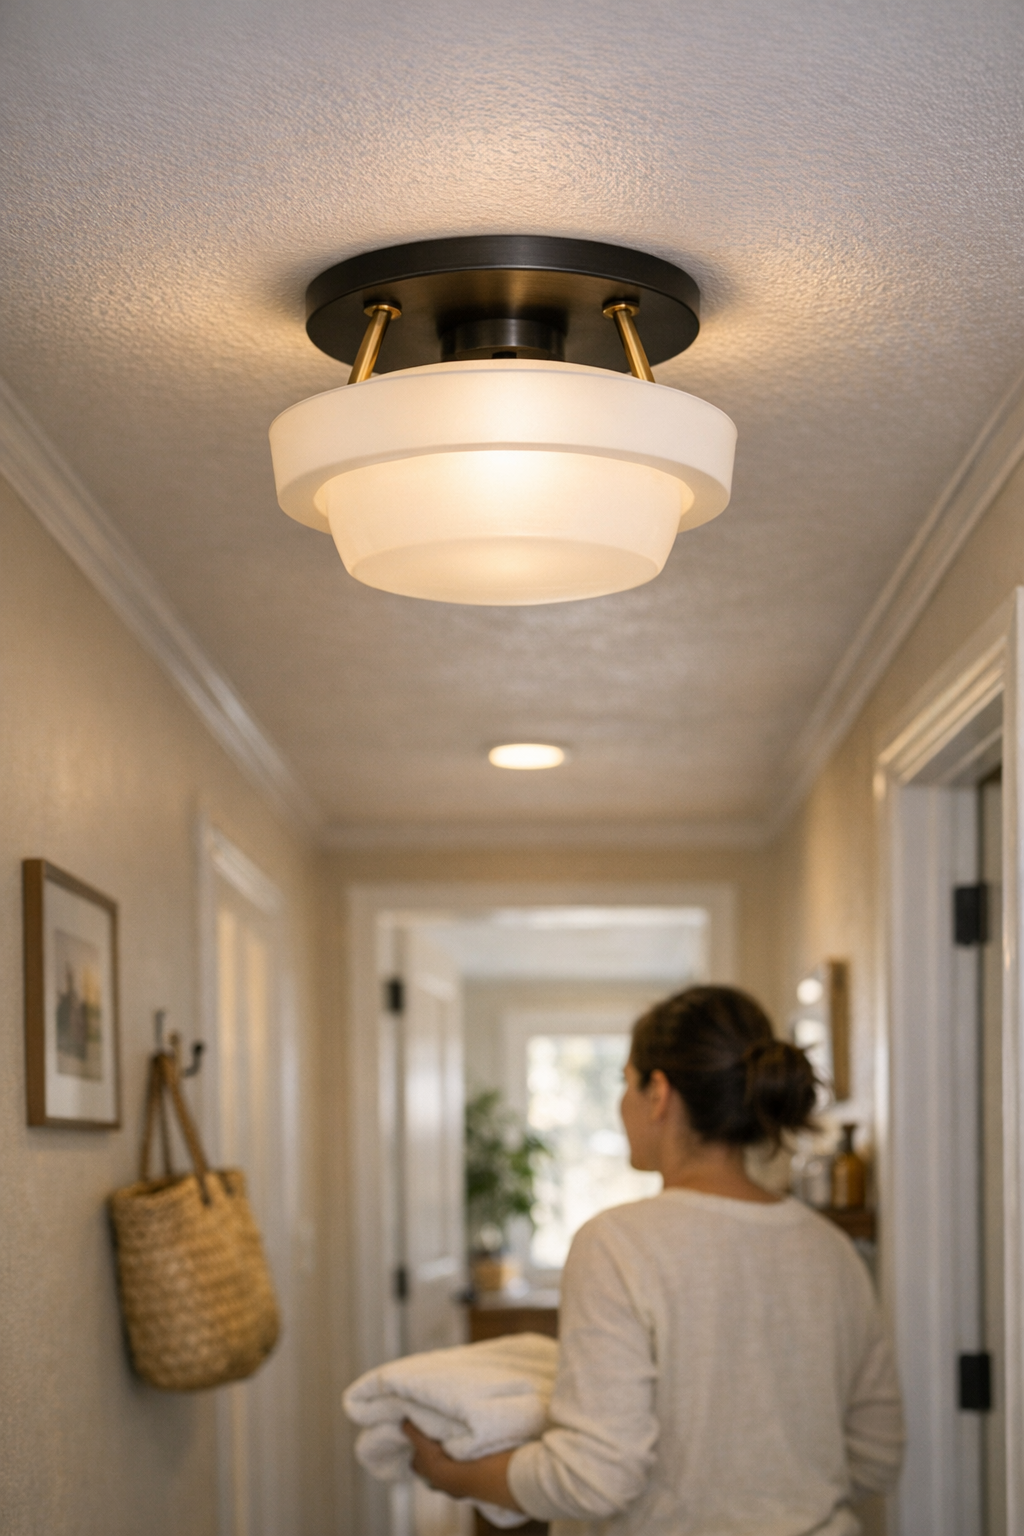
    Weak ceiling and wall lights reveal their faults fast in places you use every day—hallways, bathrooms, utility rooms—especially where visibility and movement can’t afford interruption. If you’ve ever rounded a stair turn and caught a flash of glare at eye level, or watched a flush mount droop in your line of sight after a few months, you’ve seen how flimsy fixture materials betray themselves. The reality: a light that wobbles, shifts, or warps with each slam of a door or swipe of a cleaning cloth quietly turns “bright enough” into a daily frustration. That trim that twists as you tighten it, a base that lifts at one edge, or a wall sconce that leans by next week—none seem major right out of the box, but they compound fast, and the result is always visible: uneven spread, growing shadows, and a sense your lighting isn’t really helping.

    The Real Trouble with Flimsy Fixture Materials

    It never starts with disaster. You install a new flush mount or wall sconce, give the screws a last turn, and notice the metal yields ever so slightly. No one else spots it—at first. Then a week of bumped doors, hot showers, or vacuum handles, and that flex ripples into the light itself. What was once flush and stable now sags at the seam, casting shadow lines that weren’t there before or leaving patches of glare against the mirror. The fixture hasn’t broken, but it’s surrendered the job: instead of clear, predictable light, you get movement-caused uncertainty that piles up in daily use. Enter a hallway at night, edge past laundry baskets, and suddenly you’re tracing your own shadow along the wall, not moving with confidence.

    Why Fixture Rigidity Makes a Real Difference

    This isn’t about looks—rigid fixtures anchor usable, reliable lighting over time. Spaces that carry foot traffic, moisture, or cleaning tools—narrow halls, steamy bathrooms, utility corners—punish even tiny structural weaknesses. The moment you feel a bracket bend under tightening pressure, or a ceiling base that shifts side-to-side, you’re setting up trouble. Every vibration, every sweep across the trim multiplies the original flex. The effect snowballs: gaps at the base, mounting screws that loosen, alignment that never sits square. The difference is night and day—quite literally, as one section of your counter goes dark or the corner stair stays unlit after dusk.

    What Soft Metal Looks Like in Daily Life

    Visualize a hallway only a stride wide, always busy in the evening. That new, thinner flush mount holds—momentarily. But a week of narrow misses and direct bumps, and the fixture drifts out of alignment. A warped edge lets shadows leak out; one side now casts down more sharply. The room isn’t dimmer by the bulb, but your vision fills with dead spots, and suddenly dragging a bin or carrying groceries after sundown feels off-balance. At the vanity, things are no better—one poorly anchored sconce throws light unevenly, making one half of your face crystal-clear and the other washed out or lost in shadow. Everything’s more effort. You catch yourself compensating unconsciously: tilting your head, shuffling sideways, reaching for another light or squinting to check for spills by the washer.

    It’s not failure, just a creeping burden. Weakness in the fixture warps how you use the space, every single time you walk in.

    How Subtle Flex Compounds Over Time

    The small shifts never stop accumulating. Every cleaning swipe, every cycle of humidity and drying, each vibration from footsteps or slammed doors drives the flex point further out. The fixture—especially flush mount or sconce—turns subtly but permanently off-square. That leaves you with unchecked shadow, glare that drifts from benign to blinding, and “hot spots” on otherwise even surfaces. Mounting screws loosen, trim pulls away, and the chase for true-even lighting becomes a weekly task you never needed before. It’s not just a visual flaw; safety edges vanish in the shadows along hallways or stair turns, and the work surface loses clarity just when you need it most.

    The Gradual Creep: Shadow, Glare, and Lost Visibility

    The warning signs are obvious if you’re looking—shadow triangles growing across corridor edges, perimeter gloom when you expected wall-to-wall coverage, hard reflections in the mirror where light used to be soft. You may find yourself reaching for a screwdriver for the third time that month, tightening, nudging, hoping for a fix, but the structural weakness always returns. The room is “lit,” but never actually easy to use: glare at the wrong angle, a missing half of the counter, or a staircase that feels less certain with every trip.

    Can’t All Fixtures Handle Everyday Friction?

    Most fixtures—fresh from the box—look satisfyingly bright and flush. But what matters isn’t their output on day one, it’s how the structure resists the push and pull of real movement: repeated vibration, contact, and damp cycles turn thin trims and bendable brackets into future problems. The prettiest rating sticker won’t offset weak metal. Even “damp-rated” ceiling lights can lose their fit and focus if the body flexes under installation torque or mounting pressure; those small movements never stop costing comfort and clarity in busy, high-touch zones.

    Even Small Flex Leads to Big Shifts

    Picture the reality—carrying two bags through a low, narrow hallway in the evening, only to find one side of the fixture shifted, and the far wall now lost in shadow. Or wiping a vanity sconce and sensing the metal flex beneath your cloth. Next morning, half your reflection feels washed out. The solution? Temporary workarounds: an emergency night light plugged in, a second cleaning run, or just a growing list of spots you avoid at certain times. None solve the root cause. The weakness remains—and so do the blind spots, glare, and shadow interruptions that force you to change how you move through your own space.

    When a Solid Fixture Enters the Picture

    Swap a wobbly, drifting fixture for a rigid, all-metal model—with a real, flush base—and the effect is immediate. Suddenly, door slams and steam cycles don’t matter. The light doesn’t tilt, shadows stay put, and you stop having to second-guess where the dark patches will show up each week. Hallway turns become predictable; stair landings stay clearly lit; cleaning no longer throws fixtures out of line. The improvement is felt by its absence: you’re not thinking about the lighting every time you pass through. Movement flows, edges are easy to see, and the room simply works—no repeated fixing, no subtle adjustment rituals, no stutter-step at the top of the stairs.

    One Small Tip: Test Before You Finish Installing

    Before committing, firmly press and torque along the trim and mount. If you see flex, bowing, or a base that will not sit flush, stop. The cost of “just good enough” now is months of extra adjusting later.

    Quick Reference: Recognizing and Avoiding Flex-Driven Issues

    How do I spot a weak fixture during install? Press, tighten, check the base line. Any movement, flex, or edge separation means the material won’t keep up—especially in places with vibration, moisture, or constant cleaning.

    What happens if I ignore the flex? Expect drooping trims, loose screws, and shifting alignment—cue the daily return of glare, growing shadow, or intermittent dark corners. Over time, even the wiring stability is at risk from repeated movement.

    Is “damp-rated” alone enough? Not by itself—plenty of models pass the moisture test but still use weak metal. Always combine good ratings with visible structure: test for rigidity before mounting anywhere that sees real use.

    Why Fixture Build Quality Isn’t a Small Detail

    What feels like a minor material shortcut in a fixture quietly shapes how you enter, move, and see inside your own home. Ignore the subtle flex, and you’ll live with unreliable coverage: half-lit paths, awkward mirror shadows, and a steady stream of small frustrations across rooms you thought were “done.” A well-built, rigid fixture isn’t just about avoiding repairs—it’s about actually using every part of your hallway, bathroom, or laundry for what it was meant for. The difference shows every time you stop gripping the wall in the dark, give up the work surface at night, or hesitate at a stair turn. Ignore build, and you inherit the friction. Choose solid structure, and the frustration never gets a foothold.

    See practical fixtures that make daily movement easier at LightHelper.

  • Why Removing Extra Car Accessories Improves Daily Driving Comfort

    A car that looks organized isn’t always easier to use—and too often, setups meant to cut chaos end up slowing you down in the moments you need speed the most. Picture what actually happens: You slide back into the driver’s seat after a busy stop, but have to shift a console bin before you can set down your coffee. Your phone mount looked tidy yesterday, but now the charging cable is twisted under a seat organizer, pulling just enough to pop your phone out of reach. Organizers and accessories promise order, but in real use, each new layer can add its own obstacle. The difference isn’t about appearances; it’s about whether your entire setup flows on a crunch-time Tuesday or quietly creates new friction—with every drive, store run, or parking-lot hustle. This is where real car-use accessories, like those from DriveWellSupply, have to prove their worth in small, repeated routines—otherwise, your car’s “fixes” become just as much the problem.

    When More Organizers Don’t Mean Less Effort

    Extra bins and clever gadgets might look right the first week, but as soon as your morning is rushed, hidden issues surface. That seat-side caddy seems handy until you’re wedging your groceries between storage trays and loose cables. A trunk crate keeps one load tidy, then slides forward at the next short stop and scatters what you just packed. Charging cables loop exactly where your elbow rests, turning a fast phone grab into finger gymnastics. Every new compartment is a possible obstacle if it’s not tuned to your real flow. If your daily car rhythm means errands, kid pickups, or tight parking, these “solutions” can quietly increase the number of steps—and the time you spend fixing them.

    Recognizing the Subtle Slowdowns

    It doesn’t feel like a breakdown; it’s just a repeat interruption. You reach for your phone and have to unravel a charger from your shopping bag strap (again). Unloading groceries, you slide a bin aside to get at your umbrella, only to scatter reusable bags that now wedge behind the seat. Each adjustment isn’t dramatic. But when small corrections stack up—across coffee runs, carpool drops, and gym stops—your car becomes less easy, not more.

    Hidden Friction: When Clean Looks Interrupt Flow

    After cleaning, a car can look perfectly set—until actual use exposes the weak links. The most common trouble? Accessories that only “work” until movement happens: pouches that snag on passing bags, seatback organizers that crowd rear passengers, liners that slide under wet shoes and fold where dirt collects. That extra slim trash bin you added? Now it brushes your leg with every shift, pushing a little annoyance into every trip.

    Repeated Use Reveals What’s Working

    It’s not the first drive that exposes trouble—it’s that fifth trip through your commute or errand loop. You find yourself yanking a seatbelt trapped beneath a new mat, or pausing to detangle a charging cable that migrated across the console. What seemed “fixed” on day one becomes a cycle of rearranging and correcting on day five. It’s the gap between an interior that photographs well and one that feels comfortable hour after hour, for the actual way you drive.

    Real-World Scenes: Where Clutter Returns

    Here are everyday signs your setup isn’t flowing, just looking better on the surface:

    • Seat-side blockades: You aim to drop your bag on the passenger seat, but the new bin at the seat edge forces an awkward two-step shuffle every time.
    • Tangled charging: What started as a neat cable now loops around your parking pass and phone mount—unplugging means untwisting two or three things before you can drive off.
    • Shifting mats: Protective floor liners bunch up under muddy boots, pushing mess into uncovered spots and forcing quick mat resets at each stop.
    • Clutter in disguise: Door pocket organizers become “catch-all” traps, filling with old receipts and wrappers that make cleaning harder, not easier.

    The Tipping Point: When Organized Means Slowed Down

    The promise: less hassle. The result? Sunglasses buried under an extra pouch, charging access hidden behind overlapping bins. A clue that the fix failed: You spend more time tweaking your setup than actually using it efficiently. That’s when organization drifts from helpful to headache.

    How Small Delays Add Up

    Pouches and trays multiply until no open spot remains—arms full of groceries, you realize nowhere is flat or clear for a simple set-down. Hanging trash bags swing and slap your leg with each turn. What felt practical now requires daily fiddling, and you notice—without change, setup “improvements” are just more drag, layered thinly over the old mess.

    The Power of Subtraction: Simplify to Improve Flow

    The real fix? Remove what doesn’t earn its spot. Keeping only gear that solves a specific, recurring pain point reduces friction in every movement. The difference shows up fast:

    • Direct charging: One cord, routed cleanly, that’s always in reach but never tangled or snagged on bags or pockets—no more cable spaghetti.
    • Open footwells: Less junk beneath seats means seat tracks glide and vacuuming becomes a breeze.
    • Single-move exits: When mats stay flat and organizers don’t spill or shift, you aren’t pausing to untangle things before leaving the car.
    • Lower cleanup resistance: Fewer corners and pouches means a quick sweep works—and clutter is less likely to creep back unchecked.

    How to Decide What Stays

    It’s not about a stripped-down car. It’s about keeping only what repeatedly makes daily routines easier. The best DriveWellSupply setups are those you never have to think about after install:

    • They stay put—seat mats and organizers that don’t migrate after five round-trips
    • They let you grab, plug in, or sweep clean in a single, unblocked motion
    • They serve a clear purpose every drive, not just “maybe someday” convenience

    Constantly nudging or restraightening an accessory? Remove it for a week. Most drivers find they don’t miss half the multitask gear—the relief is in fewer interruptions, smoother re-entry, and a car that cooperates instead of resists.

    Small Fixes, Noticeable Relief

    Sometimes it’s rerouting a charging cable or ditching the under-seat basket; sometimes it’s clearing out an organizer that just collects new junk. No car interior is ever “done,” but every smart subtraction shaves seconds and hassle off the daily drive. Skip setups that please the eye but stall your routines—choose adjustments that make actual use easier, especially when the car gets busy and life moves fast.

    Shop DriveWellSupply for practical car-use solutions.

  • How Linear and Panel Lights Transform Kitchen Lighting and Usability

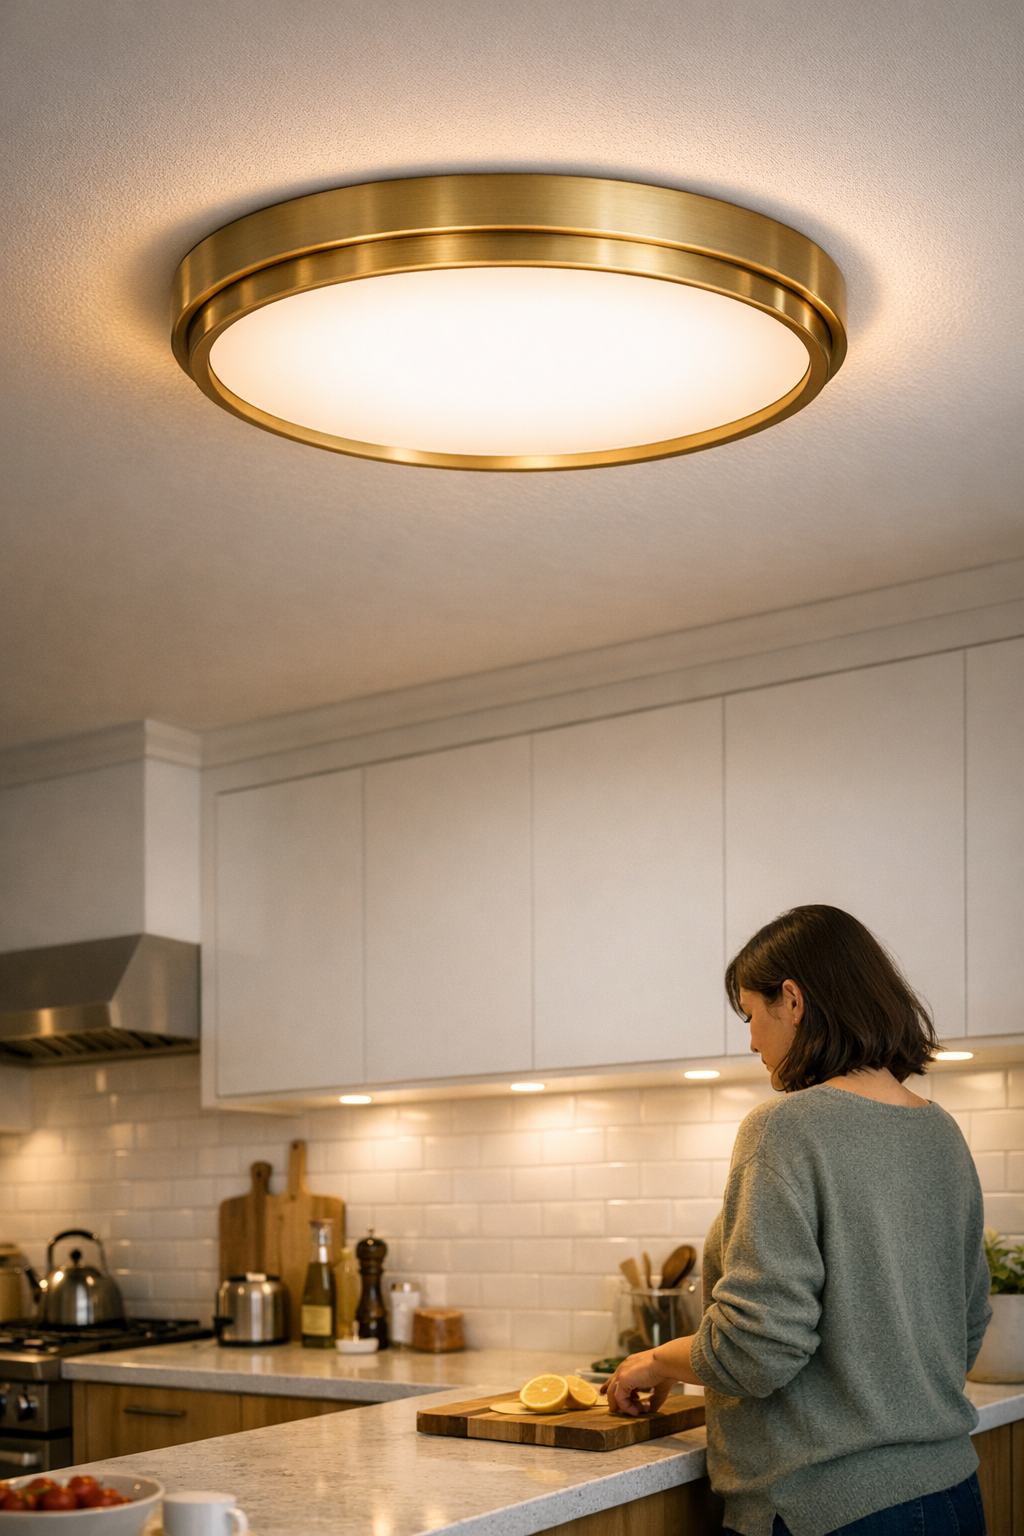
    Kitchens that pass the “organizing” test still slip into daily friction when the ceiling lighting falls short. The wrong fixture position leaves you tilting your head to spot a spill, reaching for a light switch just to see the back counter, or finding cables and mounts more obvious than the food you’re prepping. You’re not dealing with a one-time annoyance—it’s the silent drag of poor coverage, glare bursts, and blind spots that resurface every time you slice, rinse, or wipe. Even with an uncluttered plan, these lighting weak points interrupt basics: clean lines don’t prevent overlooked mess, and the promise of ‘minimal’ vanishes under exposed hardware and mismatched glow.

    Why Clean Looks Don’t Always Mean Comfortable Use

    A row of ceiling spotlights, pendants, or flush-mounts may look organized overhead, but each brings its own shadow logic. When fixture placement isn’t actively mapped to prep, sink, and cook zones, shadow overlap and glare lines slice up the space. The brightest patch often lands a few inches from where you actually work, while cables meant to be discreet catch attention every time a bracket edge flashes in the wrong light. Suddenly, your clean kitchen starts highlighting cable runs instead of meal surfaces.

    This friction reveals itself slowly. You miss smudges along the sink edge until you shift position and realize half the counter is shaded. A streak of crumbs appears only when you crouch or turn off the overhead. These are not just minor inconveniences—they keep routines jagged: touch up a spill here, pause to squint there, never quite scrubbing with confidence because the light misses where hands go most.

    The Day-to-Day Impact of Patchwork Lighting

    A setup that’s almost right becomes quietly exhausting. Gradually, you notice yourself dragging a cutting board back and forth, trying to catch usable light, or breaking the flow to angle a tray so the stove edge is visible. Every fix ripples a problem elsewhere: cluster fixtures to hide clutter, and you inherit rival pools of shadow. Mount a glossy linear and glare stings just as you lean forward. The cable bundle you cleaned up now spotlights a dust trail the fixture never fully covers.

    The pattern exposes itself in the small hours or after cleanup, never when the room is staged: by dawn, rinsing a mug in dusk-shadow, or midnight, trying to wipe a stubborn smear under a lit patch that somehow leaves the wall edge murky. The ceiling’s finish helps nothing if every daily task pulls you into poor angles or partial darkness.

    Panel and Linear Lighting: More Promise, But Not Always a Fix

    Swapping scattered pendants for a seamless LED panel or linear strip seems like progress—neat surfaces, invisible cables, the illusion of even light. Visually, the room goes from cluttered to streamlined in an hour. But after a week, problems creep back in: if the panel rests too centrally or the strip floats away from wall edges, shadows reform in the only places you regularly stand. Illumination dots right above your head but leaves the crucial slice of backsplash dim or veiled in reflected glare from a shiny counter.

    Even minimal mounting hardware shows its limits in repeated use. Cables intended to hug the ceiling sag near brackets, picking up crumbs and dust with every busy cooking cycle. Wall-proximal linears that promised edge clarity instead miss by an inch if the support wasn’t properly placed, restoring the very blind spots you aimed to erase.

    The Setup That Looks Better, But Still Feels Off

    • Pull the toaster to the wall edge, and now one hand works in deep shadow while the other faces sharp glare.
    • Slide kitchen gear to the neatest line, and find the edge remains aloft in partial darkness no matter how you rearrange.
    • Tidy cable bunched along a bracket stands out as soon as a crumb coats the line or a smudge hits where cleaning becomes tricky.

    Routine still means circling annoyances—wiping twice, shifting plates just to see clearly, or pausing every few minutes when another over-bright patch chases you from the prep space you actually use.

    Real Improvement: Matching Light to Daily Movement

    The real gain arrives not from the fixture’s aesthetics, but the precision of its placement. Nudge a linear strip six inches nearer the wall—guaranteeing it tracks the run of your chopping, rinsing, or plating zone—and friction drops. Suddenly, splatters stand out early, elbows avoid glare, and you use the full prep edge regardless of the hour or angle.

    Anchoring brackets tightly in the least visible spots, routing cables flush to corners, tilting panels so all action areas get direct spray—these tactical tweaks outperform raw wattage upgrades. Frustrations you learned to work around—persistent crumbs, shadowed corners, awkward cable crossings—shrink not because the light is brighter or newer, but because the coverage now anticipates your real path.

    Tip: Test Lighting Before Final Mounting

    If you’re installing a new panel or linear, temporarily tape it in position and run through your actual kitchen routine after dark. Notice where the light falters—dim streaks, glare bursts, stray dust catching on a cable. A minor shift matters: the right placement cancels months of small hassle, while an off-center mount invites a steady drip of daily irritation.

    Spotting Persistent Lighting Gaps

    The weakness often shows in how you clean. If you catch yourself scrubbing areas rarely touched, or hunting dust by daylight because last night’s light hid debris, your setup still misses your motion patterns. Lights that ignore the realities of movement and cleaning habits guarantee overlooked mess, a cycle of annoyance, and a surface that never stays “done.”

    The Cable and Support Factor

    Even slimline fixtures can throw everyday use off if cable runs, brackets, or supports interrupt the eye line or snag stray dust. In a kitchen, exposed wires anchor crumbs, and every bracket you move around highlights where the setup wasn’t quite resolved. The “invisible” install quickly feels loud once you notice cleaning has become more complicated—not less.

    Beyond Looks: Does the Kitchen Actually Work Easier?

    Don’t call the upgrade finished as soon as the room looks unbroken overhead. Wait for routines: is wiping the counter easier? Are you moving objects less just to see them? Have cables honestly vanished, or did they just relocate into view?

    The real test is repeated use. If light lands exactly where you work, with cables managed out of both sight and disruption, the setup fades (in a good way) into background support. If you’re still pausing—pausing to see, pausing to wipe, pausing to dodge—those “upgrades” are just style on the ceiling, not substance on the surface. In a room used dozens of times a week, these differences accumulate. Invisible problems, left unchecked, pile up as fast as visible mess.

    For all your practical indoor lighting and support solutions, visit LightSupport.

  • Why Stud-Mounted Entryway Storage Outperforms Drywall Anchors Over Time

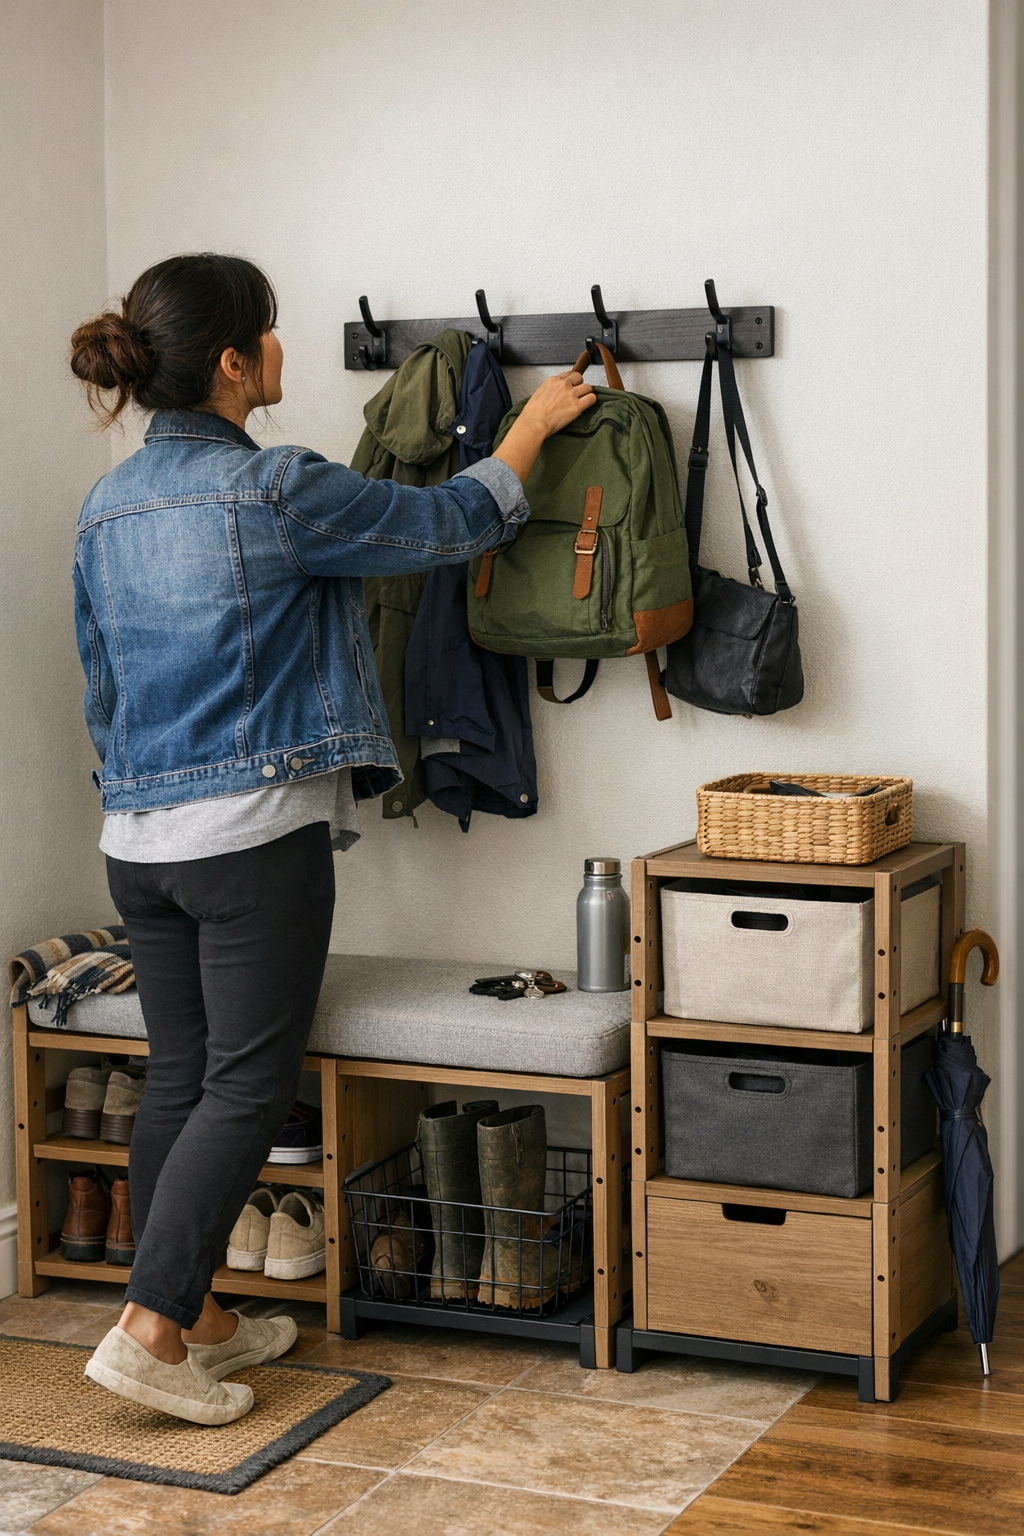
    Most entryway setups don’t collapse all at once—they skew, sag, or lose you a few precious steps before anyone notices. The signs arrive fast: suddenly, your best wall hook hangs a little lower, a scuff deepens beneath the shelf edge, or yesterday’s bags lean so precariously you stop trusting even the sturdy spots. This is not about aesthetics. It’s the moment your daily drop zone crosses from “barely holding” to “quietly failing”—and the only real warning is the way small resets start taking longer and the morning flow starts stalling. If you want an entryway that survives repeated school runs, wet gear dumps, random overflow, and back-and-forth bag switching, the strength and placement of your wall mounting decides whether your threshold keeps running, or keeps recalibrating.

    How Fast Can Order Unravel in a Busy Entryway?

    For the first days after putting up wall hooks or shelves, the system holds together. Hooks stand level, shoes briefly behave, and returning things to their place passes for “done.” But as one routine blurs into the next—rushed Monday mornings, drippy outdoor gear, tired schoolbags—weak anchoring reveals itself. Drywall-mounted hooks start shifting as soon as too many bags cluster, or wet coats arrive in waves. Once a hook tilts, you’ll see bags migrate to benches, shoes pile near doors, and anything that’s “just set down for now” quietly becomes a tripping hazard. Resetting after one messy afternoon gets harder; by week’s end, the original order doesn’t survive the traffic it’s supposed to tame.

    The Reality of Repeat Loads: Why Stud Mounting Changes the Game

    What separates an entryway setup you can trust from one you keep fixing? It usually comes down to where—and how—each component hits the wall. Just because two wall hooks look identical doesn’t mean they’ll last through the same pounding: schoolbags, raincoats, muddy boots, gym gear. Here’s where things break down after actual use:

    • Drywall-mounted: Looks fine until actual weight or sideways tugs start nudging it loose. One overfilled hook can become a tilted anchor or even rip out and leave a dent or gash below. Each micro-movement under stress widens the gap for the next small failure.
    • Stud-mounted: Screws catch solid wood, taking repeated, uneven weight day after day. Hooks remain level, storage stays predictable, and daily resets shrink to seconds—even after a double-bagged school morning or a sudden stack of soggy gear.

    This isn’t about cosmetic longevity; it’s about whether “organized” means order holds up in daily chaos, or if every return-home turns into a slow-motion shuffle around unstable storage.

    Shared Spaces, Shared Strain: Everyday Scenarios in Transition Zones

    The Drifting Shoes and Expanding Rows

    Monday: four shoes in a disciplined line, hooks lined above. By Friday, shoes creep towards the door, compress into odd corners, and extra bags dangle where hooks feel least wobbly. If mounting points slip—even a little—the line breaks. And every detour around the pile means more time lost and more friction at the busiest five feet of your house.

    Benches That Become Overflow Zones

    A bench below the hooks starts out as a clean pause for tying shoes. But once one hook sags, emptied backpacks and bulky coats take over its surface. The “temporary spot” quickly becomes the default. Instead of solving mess, you inherit a loop: items move from wall to bench to floor and back, never genuinely clearing the threshold. Stud-mounted hooks above stop this creep—when they hold, overflow rarely lands for long.

    Blocked Pathways and Slow-Reset Weekdays

    Mounting hooks or racks where convenient—rather than where studs run—invites long-term gridlock. Shoes lose their slot, the entry path squeezes tight, and the scramble to clear passage becomes a multi-step reset, not a quick fix. Every slow turn or re-hang tells you the setup looks “finished” but works like it’s hanging by a thread.

    Beneath the Surface: How to Test and Improve Your Entryway Mounting

    Test your setup now: Grab a stud finder and check what’s behind each anchor point. Hooks and shelves with at least one screw in a stud rarely shift. If mounting in studs isn’t possible, select high-strength wall anchors—but recognize that traffic-heavy zones punish every shortcut. Watch how often you need to re-tighten, re-center, or simply work around an anchor you don’t trust. The more cycles your entryway endures, the less margin non-stud hardware offers before visible breakdown.

    One practical adjustment: If your ideal layout doesn’t line up with stud locations, don’t stretch weak anchors across the wall just for symmetry. Three stud-anchored hooks you trust get used more reliably—and last far longer—than five that constantly risk twisting loose or leaving holes to patch every season.

    When a Setup Holds (or Fails): What the Difference Looks Like Long-Term

    A stud-anchored entryway delivers the real payoff when routines break down: Mondays with extra bags, days when weather triples the hang-up load, weeks when nobody has time to reset. Bags land, gear cycles through, and the system stands up to it. Meanwhile, the wall looks no worse for wear—no fresh scars, no hairline cracks, no tilting hardware. By contrast, setups built on wishful thinking and wall anchors alone nearly always reveal their failure by the third round of rushing out the door. What was “good enough” quickly hits its wall—literally. The fix is rarely just cosmetic.

    Questions That Come Up During Real Use

    How do I know if my hooks or shelves are mounted correctly?

    Gently pull down or forward—if the hook feels rock solid and immovable, you’ve likely hit a stud. Squishy give, a hollow tap, or visible wiggle means it’s relying on drywall. Stud finders confirm fast. Catching it now prevents wall wounds and rework later.

    If studs aren’t where I want my hooks, what’s my best option?

    Go with the best wall anchors rated for repeat load. But check these regularly, and don’t be surprised if trouble zones (main bag drop, rainy gear area) need repair sooner. Whenever possible, shift your plan to hit studs—even just one per device.

    What are the early warning signs of mounting failure?

    Look for hooks that start sloping after any extra load, spreading screw holes, chipped paint rings, or hardware that shifts when bumped. Frequent small shifts mean you’re already on borrowed time—act before re-hanging and repairs eat into your week.

    Entryway Storage That Actually Matches the Mess

    Most entryways can be made to look organized—for one photo, or one afternoon. The real test is whether a setup still works after it meets rain, traffic, and the relentless return flow of active lives. Solutions built on stud anchors don’t just look sharper longer—they let order survive, even as gear volume and user habits keep testing whatever you install. Every time you drop a bag and the wall still feels secure, you know the system is set for real-world rhythms, not just show. In a transition zone, that difference is the one that actually stays visible—and useable—every day.

    See storage options built for transition zones at Betweenry.

  • How Clear Shelf Boundaries Transform Everyday Storage and Cut Clutter

    You reset a shelf and it looks great—for a moment. Folded rows, labeled categories, everything neat. But then reality steps in: you grab a sweater and a charging cable tumbles out, or you shove a pair of shoes back on the shelf and suddenly the scarf pile sags. A single family week is all it takes to blur the lines you worked to create. The problem? Most shelves aren’t short on space—they’re short on boundaries that can survive actual, everyday use.

    Why Open Shelves Break Down So Fast

    Open shelves seem like the gold standard for flexibility. You see every item at a glance, can slide in any odd shape, and nothing blocks your reach. But after the first round of real-life grabbing, categories start to blend and drift. That “workout gear” stack slouches into the towels. The row of books becomes a landing zone for receipts and random cords. Every quick restock—sometimes rushed, sometimes by someone else—makes the invisible boundaries fade. Within days, a shelf meant for easy access turns into an awkward search, forcing you to move piles just to get at the one thing you actually need.

    How Disorder Sneaks In and Takes Over

    Disorder isn’t dramatic; it’s incremental. You toss socks on folded shirts “just for now,” slip a flashlight behind some paperback books, or drop grocery bags on top of hats because you’re in a hurry. Each shortcut seems harmless—until you need an umbrella during a storm and find yourself elbow-deep in unrelated clutter. Now, every rescue mission leaves the shelf more tangled. What used to be a tidy reset now becomes a mini overhaul, dragging out for far longer and never feeling quite complete.

    The Hidden Mess Behind “Close Enough” Storage

    It’s one thing for a shelf to look fine and another for it to function under pressure. Take a hallway closet: you start with piles for gloves, scarves, maybe a bin for hats. But busy mornings hit, and gloves slide into scarves, hats topple, and categories blur. The real cost creeps in daily. Suddenly, you’re digging for keys under hats or pulling stacks apart to find one glove. Instead of small, quick resets, you wind up resenting the now-daunting task of reclaiming a single spot—and dreading the inevitable weekend re-clean.

    Shared Spaces Multiply the Friction

    Where family routines overlap—entryways, laundry shelves, kid closets—the spread is even faster. One person grabs a pair of shoes and leaves socks askew; someone else stuffs mail behind the hats. In high-traffic zones, boundaries melt in half the time, and everyone pays the price: shoes spread, bags pile up, the “easy-access” entryway turns into everyone’s least favorite traffic jam.

    Boundaries: The Storage Upgrade That Actually Works

    What actually makes order last? Assigning every item or category a specific, reserved spot. Shelf dividers, bins, or even strategic visual cues help enforce simple rules and halt the slow slide of clutter. In the same over-taxed closet, a pair of dividers and one sturdy bin instantly contained drifting piles. Now, when a glove escapes, it returns to its zone fast—without knocking hats and scarves out of place. A dedicated bin for keys or chargers means you don’t have to upend half the shelf to find what matters.

    Dividers and Bins: Small Changes, Huge Improvement

    Dividers turn sagging stacks into stable lanes—your shirts stop lurching sideways and towels keep to their own slice of space. Bins act as catch-alls for loose odds and ends like sunglasses, cables, or little seasonal items. The effect? Instead of re-sorting a jumbled shelf at the end of each week, you just nudge one stray item back home. Urgent retrievals—rain gear on a stormy morning, the right charger before school—start to feel routine instead of fraught.

    The False Promise of Flexible Shelving

    Open, boundary-less shelves promise adaptability, ready for all your odd shapes and changing needs. But flexibility comes at a price: shelves “absorb” whatever lands. Mail, sports gear, jackets—all merge until, next time, you’re shifting half the contents to reach what you want. The supposed convenience turns to frustration as items topple, mingle, and creep into new territory, demanding more tidying than ever.

    Visibility Without the Mess

    Compare this: on one side, an open shelf where folded stacks lose shape with every grab, and bins become mysterious mixes of “whatever fits.” On the other, a divided setup: t-shirts separated by sturdy supports, kids’ socks corralled in their own bin, belts visible and accessible. Not only does each item have a home, but it’s obvious when something is missing or when a category needs attention. You see what you have, you see what you need.

    Simple Shifts That Change the Game

    You don’t need custom-built cabinetry or major changes. Often, a set of affordable dividers or a couple of durable bins breaks the reset cycle completely. For real improvement on shelves you use daily, try these:

    • Separate scarves from gloves so piles aren’t in each other’s way—nothing gets buried or blended.
    • Gather small, easily-lost items (keys, chargers, sunglasses) in a bin that’s easy to pull out and return as a whole.
    • Keep divider edges visible so you can tell at a glance when a stack is creeping out of bounds, making maintenance nearly automatic.

    The bigger win isn’t prettier shelves—it’s faster, frustration-free access. With defined spaces, you grab what you need, reset in seconds, and never waste time digging for hidden treasures or cleaning up pile after pile.

    Habits to Make Order Stick

    Once new boundaries are in place, a few micro-habits ensure they last:

    • Slot it back: Get everyone used to returning items to their designated spot—even when hurrying out the door. This simple practice chokes off clutter creep at its source.
    • Quick tweaks, not giant overhauls: When you spot a scarf edging into the glove zone, or notice a bin getting out of hand, take a minute to realign instead of letting mess multiply. Regular micro-fixes keep the system tight with barely any effort.

    Pay attention to where structure falters. If one bin overflows or a divider never seems to work, adjust the setup. Durable storage isn’t about a perfect one-time solution—it’s about staying responsive to how your shelves actually get used, week after week.

    True Organization Reveals Itself Over Time

    A shelf that merely looks organized rarely stays that way. The difference with real, resilient storage is tangible—day after day, the space works for you rather than against you. Boundaries that last mean you can restock quickly, retrieve fast, and reset with minimal effort—even as the week gets messy and routines change. Purposeful dividers, bins, and zones don’t just hold your things; they hold the line when life speeds up.

    Ready for storage solutions built for the way you actually live? Find shelf dividers, bins, and real fixes at ClosetWorks.

  • Why Wall-Mounted Hose Racks Transform Shared Outdoor Spaces

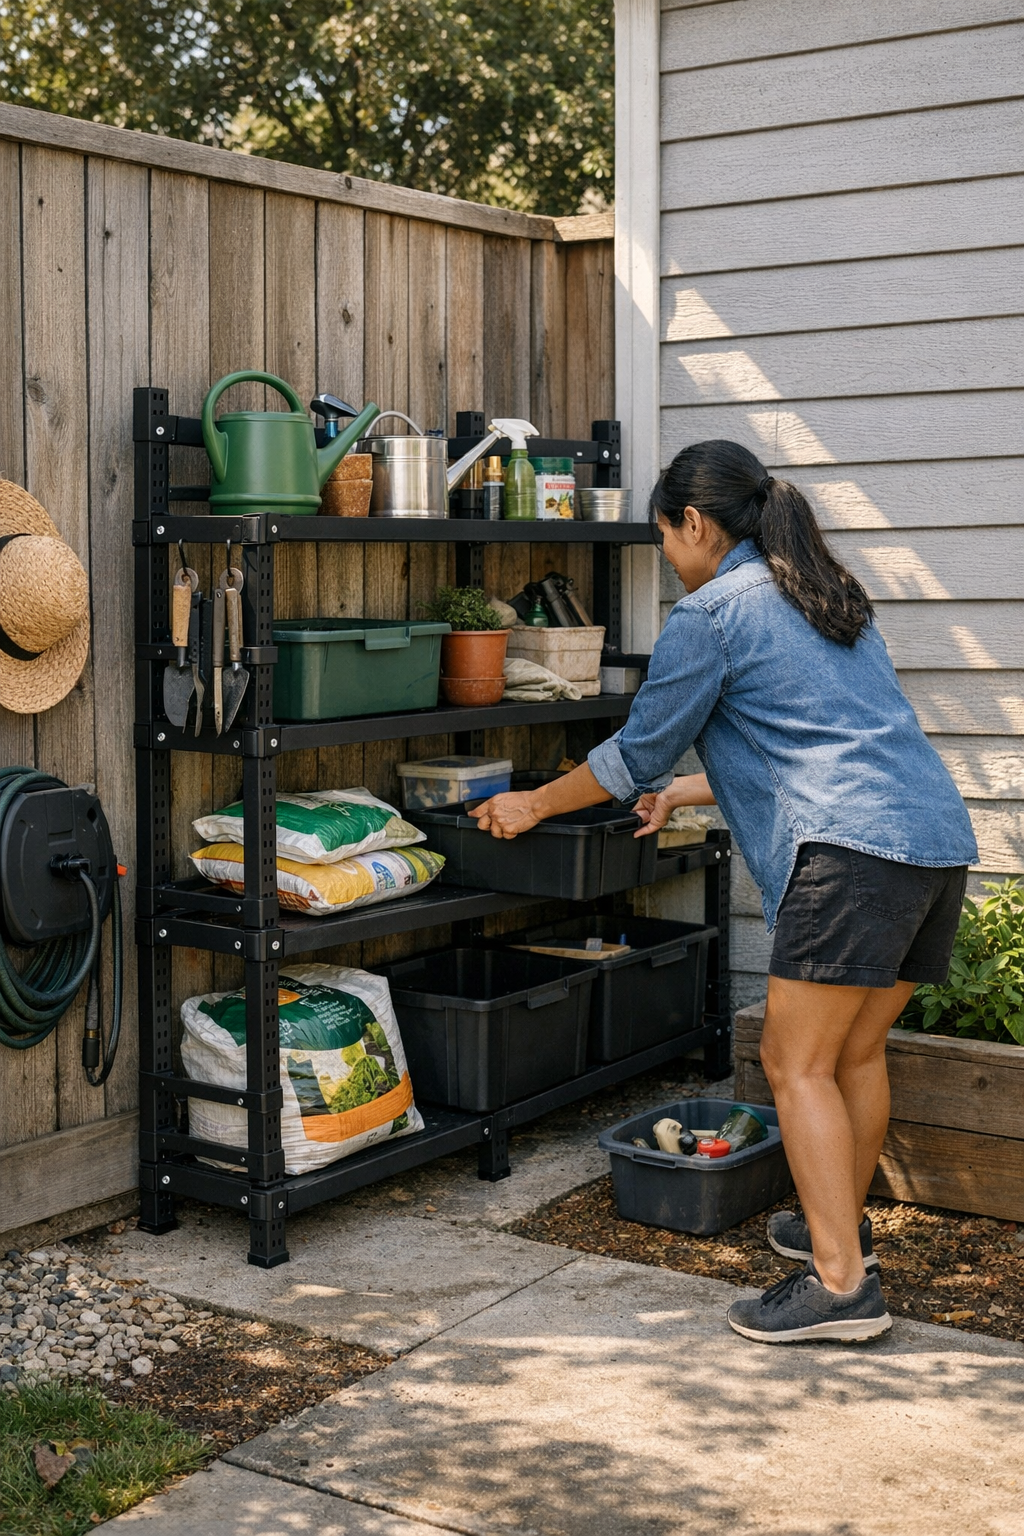
    The tangled hose across the backyard path isn’t just the day’s mess—it’s proof that this “storage solution” isn’t working for the way you actually use the space. For anyone dodging loops to get through the gate, wrestling coils before watering, or watching the same hose pile reappear week after week, the issue goes beyond clutter. Every reset, every trip, every sidestep highlights a setup that interrupts your movement instead of clearing it.

    Why Storage Choices Shape How the Yard Really Works

    Dropping a hose into a floor bin looks like instant order—until another person grabs it, the weather leaves it muddy, or a quick return after dark leaves coils spilling halfway out. That first clean coil, the “starting fresh” feeling, rarely makes it past the first week. Bin lids go missing. Loops slide out and collect gravel. What’s supposed to be contained ends up underfoot, forcing detours or stopgap shoves with your foot just to open the gate.

    This isn’t about neatness for show—it’s about whether your setup actually clears walkways and return zones. In busy, shared, or compact yard areas, every inch matters. The wrong storage ends up multiplying mess and movement blocks, trapping everyone in repeated reshuffling.

    How Fast the Day-One Plan Breaks Down

    Think of the first day: the brand-new hose bin neatly lines the path by the side yard. Everything fits, and it feels like you’ve finally organized that awkward stretch. Fast forward—one rushed morning, someone drops the hose in half-coiled. It rains, and the next grab leaves a muddy snarl. Within a few uses, one loop swerves into the main path. Two skipped resets later, the floor is scattered with grit and you’re spending several minutes untangling and sweeping before you can even water the plants.

    Every “I’ll fix that later” builds up, one misplaced coil at a time. And the more people use the yard, the quicker the bin’s border breaks down, until what’s supposedly “put away” is just blocking the route instead.

    Contrast that with a wall-mounted rack—anchored at arm’s height along the main walkway. Suddenly, the hose never sits on the ground to start with. Even a messy return gets held out of the way, and it takes only seconds, not minutes, to clear the lane again. Less stooping, less tripping, and day after day, you notice: you’re not shoving things aside just to get through.

    Why Shared Spaces Multiply Setup Friction

    Side yards, narrow patio edges, the tight spot between the garage and a fence—these see constant traffic from gardeners, kids, pets, and quick outdoor jobs. Each person brings different habits and timing. Floor bins and loose baskets seem like “easy” solutions, but quick drops become lingering hazards. One person leaves the hose half-spilled, and it sits there for days because nobody wants to deal with the jumble. The pathway turns into a shuffle zone, collecting leftover tools and muddy puddles around the storage “solution.”

    Swap in a wall rack at shoulder height, and even imperfect returns work better. The hose clears the floor, blunting most of the mess before it starts. There’s still the occasional loose loop, but the ground beneath stays open for feet and wheels—not for the next pileup.

    Placement: The Hidden Difference

    Where you put the storage matters more than what you buy. Stick a rack too low, or wedge it into a corner blocked by a bin, and you’re back to shuffling gear every time. Put the rack on open wall, with a clean stretch beneath it, and suddenly the “right” return feels natural—especially when you pass by every day. Storage within easy grabbing distance pushes everyone, even the messiest user, to use it.

    Try mounting a rack right beside the route you actually walk, not in a quiet corner you hope will stay organized. Over a month, you’ll notice fewer loops out of place, fewer last-minute detours, and, quietly, the routine becomes smoother. Setup structure does the work, not the user’s willpower.

    How Setup Details Change Everyday Use

    Setup problems don’t come from laziness—they come from layouts that slow down resets or never really fit with daily projects, watering, play, or cleanup. When your storage matches the real flow of movement, “returning the hose” goes from dreaded chore to an automatic flick of the wrist. Finished dragging it across the beds? Two seconds, and it’s off the ground—not pooled around your ankles until someone finally wrangles the mess.

    Got kids or users at different heights? Double up—add a second, lower hook. Suddenly, instead of one big dump zone, there’s a spot for everyone. That’s usually all it takes to keep the main path clear, without one group’s shortcuts blocking everyone else.

    Is Floor Storage Ever Worth It?

    Sometimes, yes—if the hose sits far from any main walkway, or is only touched by one person. Maybe the back edge of a detached garage, way out of everyone’s way. But bring in shared use, or any traffic through that corner, and the bin becomes a magnet for spills, drops, and slow-building clutter. The promise of “contained” quickly slips into the reality of “in the way”—and if you ever have to pull the bin aside just to pass, it’s a sign the footprint isn’t right for your yard’s actual rhythm.

    This Isn’t About Looking Tidy—It’s About Moving Freely

    The organized “after” photo is only the beginning. True test: is the setup still working after rain, a busy week, or two people in a hurry? The best hose storage keeps pathways and return zones open, even when resets get sloppy or the routine gets chaotic. It’s not about perfect returns—it’s about letting everyday use happen without building up invisible obstacles or extra steps. The end result? Fewer blockages, less reshuffling, and a yard that fits how you actually live, not just how it looked on day one.

    TidyYard outdoor storage solutions

  • Why Workshop Storage Systems Fail Over Time and How to Fix Them

    The workshop felt dialed in—on day one. Racks lined the walls, every tool had its slot, and a mobile cart sat thoughtfully nearby, promising easy overflow. In those first smooth hours, it felt tight and responsive: walk in, grab what you need, put it back. But as the projects stacked up and hands reached for the same driver or mallet for the third time, the initial order started to slip. A single nudge to the cart’s wheels made just enough space for a lumber cut—then left it blocking the main rack. The screwdriver was returned, but not all the way. By midweek, the supposed efficiency was outmatched by small, nagging detours, the workflow quietly devolving into a series of workarounds.

    When “Organized” Quietly Gets in the Way

    Most setups look sharp just after a reset: pegboard lines clean, labeled bins stacked up, a mobile cart ready for “extras.” The layout promises easy flow, but once real work starts, invisible friction sets in. That cart—so convenient for overflow—becomes an obstacle every time it blocks the main rack or crowds the edge of the bench. Returning a tool turns into a mini maze: slide, pivot, reach awkwardly around the cart’s handle. Every sidestep to get around a cabinet or cramped shelf chips away at the feeling of smooth movement.

    Meanwhile, corners turn dead as shelf ends or drawers extend a little too far—just enough to shave usable floor. Overflow clutters quickly: clamps “resting” on the cart handle, measuring tapes left on cabinet tops, screws queued up for return. In the rush, you skip the extra step to proper storage because even tiny obstructions add up. Beneath the surface, efficiency leaks away—one slow return at a time.

    The Routine: How Organization Fades

    Order on paper rarely survives actual workflow. Take the drill everyone uses: it starts with a clear home up front, but by afternoon it’s resting on a half-open shelf, blocked by a shifted cart. To put it back, you now have to shuffle the cart aside (again), or balance it “just for now” somewhere nearby. Multiply that by a dozen daily returns, and within days, a tidy rack has a backlog of half-stashed tools—less from laziness, more from subtle barriers that wear down routine.

    The issue isn’t lack of storage—it’s the constant drag of blocked access and awkward movement. Slow tool returns. Bumping past overfilled carts. Detours and doubled-back steps all because the setup works on a diagram, but chokes up in the real-life surge.

    Where Overflow Hides and Clutter Builds

    Watch any high-traffic zone by a cart or modular chest: “temporary” stacks appear out of nowhere. A mallet hangs from the cart lip. Pliers get jammed into a not-quite-empty bin. Full zones spill over not from capacity but from blocked lines of access. Pileups don’t register on day one, but they’re unmistakable by Friday. The very spots meant for order end up collecting the pieces that don’t fit the flow.

    The Surprising Power of a Small Shift

    The difference between feeling boxed in and moving freely can come down to shifting the cart just 16 inches outside the main return lane. Suddenly, there’s a clear path—no more shuffling or bumping to return essentials. Instead of a traffic jam, the work loop feels natural again. It’s not a massive overhaul, just a tweak that respects how the space is actually used. Immediately, tool returns get quicker, “temporary” stacks fade, and the temptation to abandon items nearby drops off.

    Paired with moving the most-used tools to chest-level rack slots and keeping overflow on the cart—not in the main work zone—routine resets become almost second nature. These tweaks don’t just preserve the intended layout; they defend it from the quiet slip of daily use. By re-mapping the setup to real behavior, order actually lasts.

    Letting Your Layout Reflect Real Life

    No system is one-size-fits-all, and that’s the point. Wall racks maximize airspace but can’t absorb bulky bits once a project swells. Mobile carts enable growth, but park them in the main artery for too long and they become semi-permanent roadblocks. Modular chests and deep shelving create storage—until they sprawl into walkways and corral movement at the edges. Lasting setups are those where wall, cart, and shelving placements track the actual pulse of your routines—where things truly land, not just where they look best for a photo.

    How to Spot a Layout That’s Dragging You Down

    Signs it’s time to rethink the arrangement:

    • You’re always shifting carts or zig-zagging past cabinets just to reach a tool
    • Tools and parts keep piling up “just for now” on whatever’s closest
    • Overflow zones turn into the unofficial dumping ground and stay that way
    • Rerouting your path—taking extra steps—to skirt around dead corners or overcrowded carts
    • The wall looks organized, but is practically a hassle to use at full speed

    If any of this sounds familiar, your setup is creating silent friction—however “organized” it might look after a reset.

    Lasting Ease vs. The Day-One Glow

    The real test of a workspace isn’t a picture-perfect reset. It’s whether, over weeks and months, you can move without thinking, reset without roadblocks, and keep access to every tool as easy as the first week. True clarity comes from layouts that absorb real-life use, not just survive it.

    It’s clearing main return lanes instead of filling every inch. Keeping high-frequency slots comfortably at arm’s reach, not in the name of “grid symmetry.” Resetting carts to the ready position at the end of each session. These are small shifts, but the payoff—faster returns, less reshuffling, more usable space—is cumulative. Little improvements beat dramatic overhauls every time.

    The ultimate measure isn’t an organized look—it’s a setup that works as hard as you do, all the way through the messy details and silent resets of everyday use.

    See what modular storage, wall systems, and smart cart placement can do for real daily use at StackNest.