Blog

  • How Thoughtful Pet Travel Gear Enhances Comfort on Airplanes

    Mid-flight, your pet starts to squirm. You reach for wipes, a chew, some cleanup gear—only to hit a maze of pockets, stiff zippers, and buried essentials. What felt “organized” rolling through security now works against you, turning every quick reach into a small wrestling match under the seat. The trip’s real stress isn’t the flight or your pet’s mood; it’s the slow grind of digging, shifting, and re-reshuffling for the same basic items—again and again.

    The Subtle Erosion of In-Flight Calm

    Neat on paper rarely means easy in the aisle. Once you’ve boarded, stowed your bag, and your dog’s already tucking in, the flaws start surfacing: a bag’s opening resists mid-flight grabs; a comfort toy is wedged deep instead of at hand; wipes vanish behind layers. With every routine check—post-takeoff, post-bathroom, after snacks—micro-hassles build up. Each snag on a zipper or pocket is a fresh interruption, a micro-slip away from actually keeping your pet calm.

    Packing for a dog or cat isn’t frantic until you’re jolted by turbulence and find yourself digging for chews, squinting for the wipes, or awkwardly detangling leashes from snack bags—over and over, especially on longer flights. Calm isn’t lost all at once; it’s chipped away by these repeated, low-key collisions between planning and real use.

    In-Flight Organization: Looks Versus Living With It

    It’s easy to choose a pet travel bag that looks “systematic”: signature pockets, layered zippers, striking dividers—ready for any Instagram pre-takeoff shot. But what looks prepared isn’t always practical. The difference surfaces the first time you reach for something—not at home, but crammed next to your feet, pinched between bags, or as your pet fusses at the worst moment.

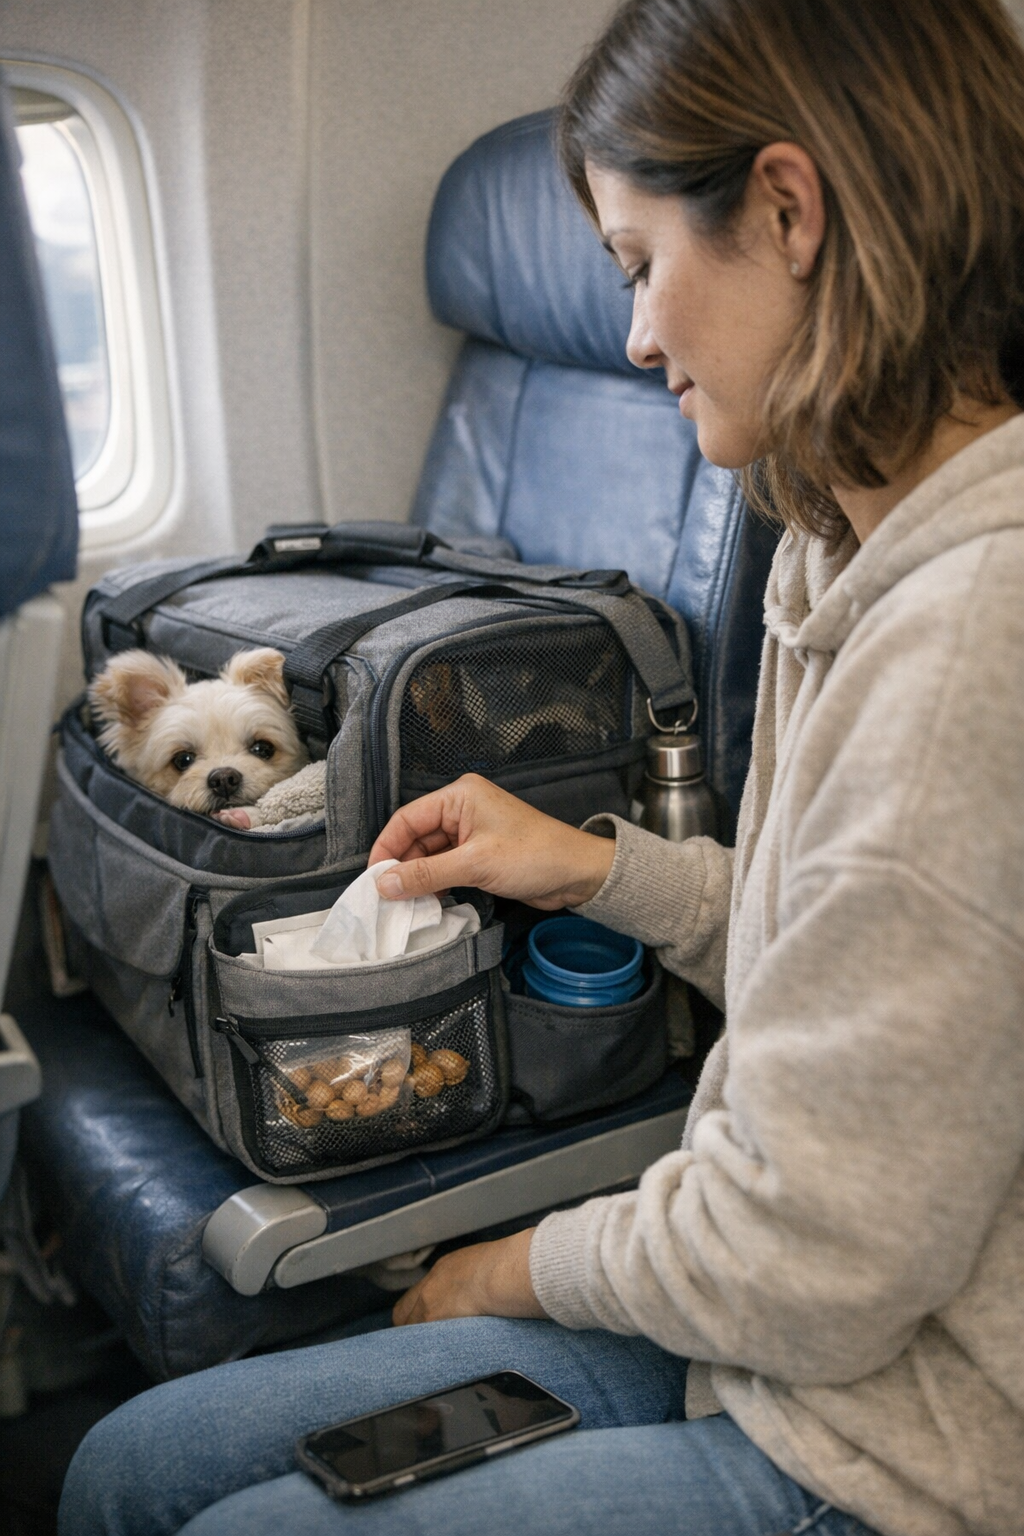
    Picture this: wipes “organized” three zippers deep, treats under the backup leash, bowls needing a full unzip to reach. On the ground, it’s a system. In the air, it’s wasted movement, small delays, and quick tension. You know the setup isn’t working when you start predicting which pocket you’ll fumble—and when you keep doing it anyway.

    Compare with a streamlined setup: a seat-facing pouch for wipes, chews placed at the opening, bowls in their own slip—quick grabs, no digging. Function wins over surface, even if it’s less photogenic. Each reach gets easier, and moments of friction actually shrink, not pile up.

    When Repetition Reveals the Weak Points

    One messy reach doesn’t ruin a flight. What gets you is recurring friction: wipes always stuck behind a bottle, treats handy but bowls blocked by straps, cleanup gear buried where you need it fast. You handle it once, then again—and as cycles repeat, impatience and clutter return, no matter how tidy things looked on the first pass. Every “just one more adjustment” is a real cost, not just a minor nuisance.

    Real Scenes From Under the Seat (and Under Pressure)

    Take a short regional flight. Boarding’s smooth, gear packed, wipes on hand—or so it seems. As soon as my dog shifts and an accident is close, I realize the wipes are locked under the water bowl, behind a zipped pocket. I need to hold the harness, open the wrong flap, and end up dumping the carrier’s contents at my feet. Tight aisles close in, my bag starts to sag, and anyone watching wouldn’t spot chaos, but I feel it in every wasted second and sideways shuffle.

    Next round: turbulence hits; pet needs a chew. It’s “organized” but nested away. My own headphones, combined with pet stuff for convenience, come out hooked together with the leash. Each reach devolves into another shuffle—small, real, and increasingly annoying.

    How the “Fix” Feels in Real Use

    Fixing this wasn’t about more sections or better dividers—it was about getting high-use items truly upfront and friction-free: wipes in a slit pouch with zero zippers, chews in an open mesh above the fold, bowls upright and instantly pickable. These tweaks barely show up in a product chart but erase several seconds of hassle on every reach. Suddenly, restless readjusting fades. Each move feels predictable, routine, even automatic—especially mid-flight, where every extra motion costs composure.

    After several flights, resets stop dragging. I don’t dread grabbing for gear; I just do it. The bag gets less “styled,” but every trip runs smoother. My dog settles faster because my own movements are steadier, no clumsy fumble to signal tension.

    The Overlap Problem: When Pet and Owner Items Collide

    Big frustration? Owner and pet gear slowly tangling into one. Water bottle slides alongside leashes; headphones tangle with treats. The instinct is usually to over-organize—add pockets, more straps, more complexity. In reality, that just adds time to each step: headphones, then wipes, then wallet, now all stacked on top of each other in a cramped gap beneath the seat.

    The simplest way out is to set “lanes”: keep your personal must-haves out of the quick-access lineup for pet essentials. Less overlap means less interruption. Every cut motion—every item you don’t have to move or untangle—buys back a little calm on a crowded plane or a jerky train stop.

    Function Over Appearance: The Real World Test

    What truly matters is repeated motion, not surface neatness. If wipes, chews, or bowls always demand an extra pause or pocket shuffle, organization isn’t working—even if everything looked perfect when zipped at home. Routines snowball: every micro-delay at snack breaks, cleanup stops, or layovers accumulates, turning structure into a source of friction rather than flow.

    Mess minimized for the sake of appearance doesn’t cut down interruptions. The test is whether you reset and move faster—or fall into a cycle of stop, dig, and sigh at every common need. If you build up hesitation before each reach, your setup’s failing somewhere that actually matters.

    Small Shifts That Create a Noticeable Difference

    What works looks basic:

    • Wipes in an open, seat-facing pouch—never buried or zipped away.
    • Treats at the top, not under a layer of backup gear.
    • Bowls stored upright, each with a direct reach—no digging.
    • Clear lines between your own and your pet’s essentials—ditch the temptation to merge everything into a mega-pocket.

    Trips rarely go seamless, but the right setup won’t make each return heavier than the last. Each movement gets lighter, interruptions shrink, and awkward restarts become rare rather than routine.

    When Calm Isn’t “Set and Forget”

    The best travel routines win by staying out of your way, not by being clever. Flawless-looking setups still unravel if access breaks down with use. If you’re moving faster, reaching easier, and your pet catches your steadiness, you’re doing it right—even if that means an “imperfect” pack after several hours aloft. The real test isn’t a tidy finish; it’s repeated calm reclaimed through every ordinary interruption, and a travel structure that works with, not against, real-world movement.

    Find travel bags, seat-side comfort setups, and access-first organizers at PawGoTravel.
  • Why Proper Wire Space Prevents Flickering and Uneven Lighting Fixtures

    Flush ceiling lights that won’t close flat, awkward shadow streaks on the wall, or a hallway that seems bright but always leaves part of the path in doubt—these common indoor lighting failures rarely start with a bad bulb. It’s the wiring, cramped out of sight behind too-small fixture bases, that turns a room from “technically lit” to a source of constant minor strain. Every time you reach to clean a lens, flip a switch, or just try to see the full counter in your laundry, you feel it: the stiff cover that won’t seat fully, the unreliable light every time furniture bumps the wall, or the steps you take more slowly because the bottom stair fades into shadow. What looks like a finished install becomes a repeat performance of shifting covers, flicker, and off-kilter brightness—especially when narrow hallways, small bath mirrors, or multi-switched laundry zones pack in extra wiring.

    When “Installed” Doesn’t Mean “Usable”: The Friction of Crowded Lighting

    Mounting a ceiling or wall fixture feels like progress until you live with it. Most wiring mistakes hide behind a solid-looking fixture and show up only after several weeks—never in the first hour. Instead of true, shadow-free visibility, crowded junction boxes deliver:

    • Covers that won’t seat flush, twisting or resisting no matter how many times you try
    • Bright central light with creeping dark edges along floors, counters, or mirror lines
    • Fixture bases that shift or tilt days or even months after install with the slightest touch
    • Surprise flickering after you wipe down a surface, swap a bulb, or even just nudge the housing when cleaning

    This friction isn’t just lost brightness. It erodes routines: the bathroom mirror that throws off your shave or makeup, the stairs where every night walk feels risky, the laundry counter you can never fully see edge to edge. Each visit means an extra pause, a small adjustment, or a growing wariness of “did I fix that light, or is it about to act up again?”

    How Overcrowded Junction Boxes Create Daily Lighting Headaches

    You don’t see the real culprit until repetition exposes it. Cramped wiring doesn’t just hide; it guarantees trouble:

    • Loose or unreliable connections: Slight bumps or minor tweaks break circuit contact, dimming or killing light on just one side.
    • Bulging, leaky covers: Gaps appear around the edge—collecting dust, inviting moisture, or letting even more air through in damp spaces like bathrooms and laundry zones. Cleaning turns from routine to risk.
    • Shifting light footprint: Even if a fixture claims even output, an angled install sends shadows along walls, floors, or mirrors—making setups like stairs or vanities visually unreliable.
    • Bulb and socket fatigue: More wire means more crush, warped seats, and early failures that repeat the cycle of flicker and fiddling.

    Miss a stair edge or misjudge a damp floor and it’s not just annoying—it’s unsafe. The wrong fixture behind the right specs becomes a quietly persistent problem in the places you need clarity and confidence most.

    Real-World Scenes: Where the Difference Shows Up Every Day

    Pausing at a Stairway Turn

    Every misaligned fixture becomes obvious the night you descend the stairs—one step lands in full light, the next falls into a dull shadow that’s never quite fixed. The underlying problem: a fixture forced off-plumb by excess wiring stuffed into a shallow base, so light can’t reach the landing cleanly. You compensate, your gait slows, and the routine becomes a small risk.

    Leaning in at the Bathroom Mirror

    Wall vanity lights should erase under-eye shadows, but too-tight wiring leaves the cover tilted or gapped. Steam finds every crack, and post-shower you’re met by indirect glare or a flicker at the worst moment. You shift your stance, turn your head, trying to sidestep that one bright flare or gray patch—never quite achieving the balanced light you thought you bought.

    Sorting Laundry Under Flickering Light

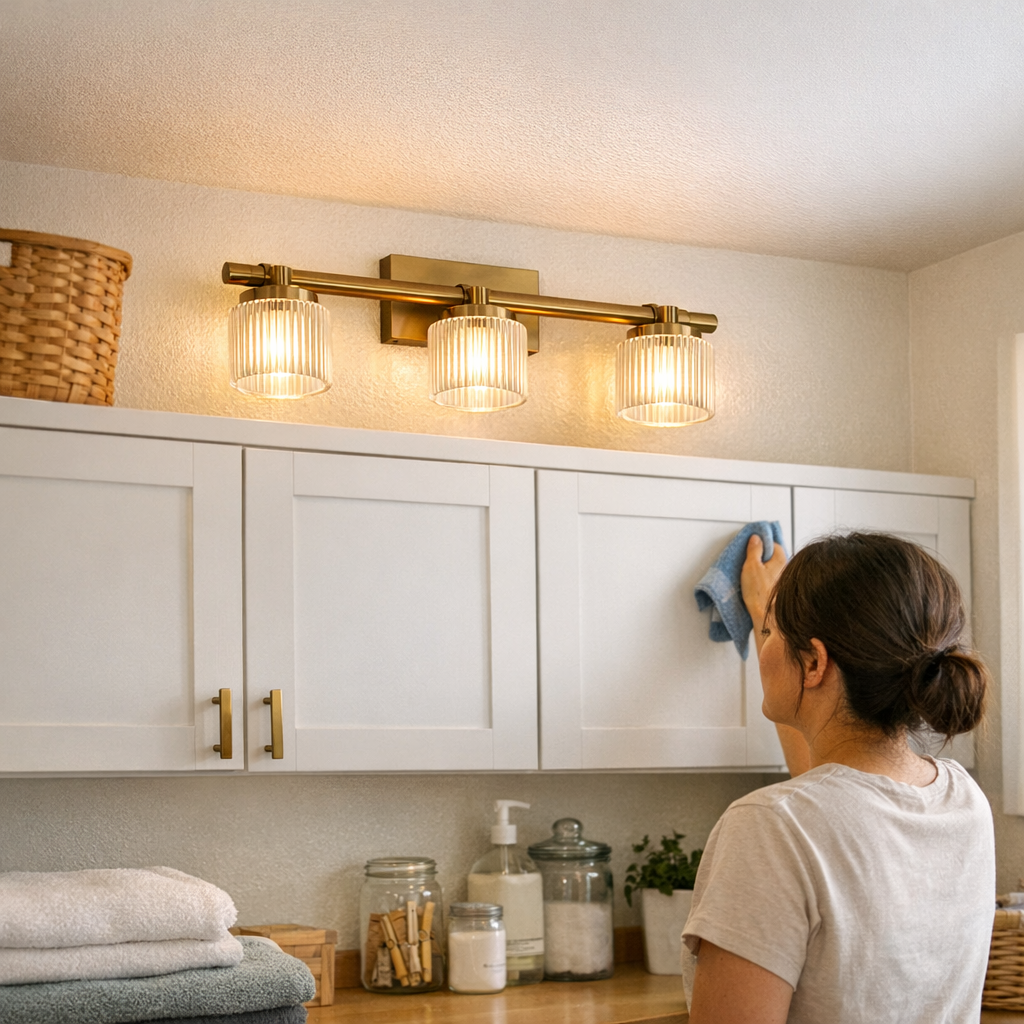
    In laundry rooms, the goal should be obvious visibility across every inch of the folding counter. When extra wires crowd a flush mount, the cover bows, breaking the spread and dropping unexpected shadows exactly where you stack folded shirts. The small hassle grows: a single nudge or routine cleaning brings the flicker back, and every fix is temporary.

    Moving Down a Hallway—But Only Half is Usable

    Hallways should guide movement, but a crowded fixture leaves a persistent stripe of shadow at one end. No matter how many bulbs you swap, you find yourself drifting to the bright side, running hands along the wall, pausing before entering—movement loses its fluidity because the light won’t cooperate. The room appears “lit” but never feels fully usable.

    It’s Not Just about Brightness—It’s the Right Fixture Fit

    Two flush mount lights can promise identical output, but only one with enough base depth can actually host all its wiring without distortion. The difference isn’t on the box—it shows up each morning, evening, and weekend chore when covers stay steady, glare is controlled, and edges stay clear. A deeper, cleaner fit prevents not just sagging but the accumulation of “almost light”—patchy, uneven, and never fully reliable. Trust in a space wears out when you learn which spots, switches, or motions set it off.

    Practical tip: If your light is on a multi-switch circuit, or you notice resistance as you attach a fixture, pause before forcing. Count wires, check connector size, and choose a fixture base with the real internal clearance your box needs—don’t let a tight fit set up months of routine interruptions.

    What to Watch for—And When to Rethink Your Solution

    • Covers that need force or never sit flush
    • Flicker triggered by ordinary cleaning, humidity, or minor movement
    • Visible dust or moisture tracking through edge gaps
    • Shadow lines or dimmer corners that worsen over time—especially in active areas
    • If the switch, cover, or bulb never quite “feels right” after a few weeks’ use

    If you recognize any of these, don’t let surface brightness hide the real trouble. Wire crowding is a repeat offender, and fixing bulb specs won’t solve it—rethink the fixture’s internal space before troubleshooting anything else.

    Building Reliable Lighting Means Solving Wire Management Up Front

    Room lighting never stays neutral. The balance between fixture depth, wiring layout, and repeated movement is what lets a space hold up over seasons, not just on the install day. When you solve wire fit before mounting a flush or semi-flush fixture, you remove a chain of flickers, tilts, and partial shadows before they can start. That means mirrors give true light; stairs feel secure; hallways and laundry counters keep their visibility week after week.

    The spaces you depend on deserve more than “lit enough.” Every well-managed wire behind a stable, correctly fitted fixture is one less daily stutter, one more surface or path made confidently usable. Let your rooms prove their value by how quietly, and reliably, their lighting works each day—no second guessing required.

    LightHelper

  • Why Reliable Docking Transforms Modular Storage Efficiency

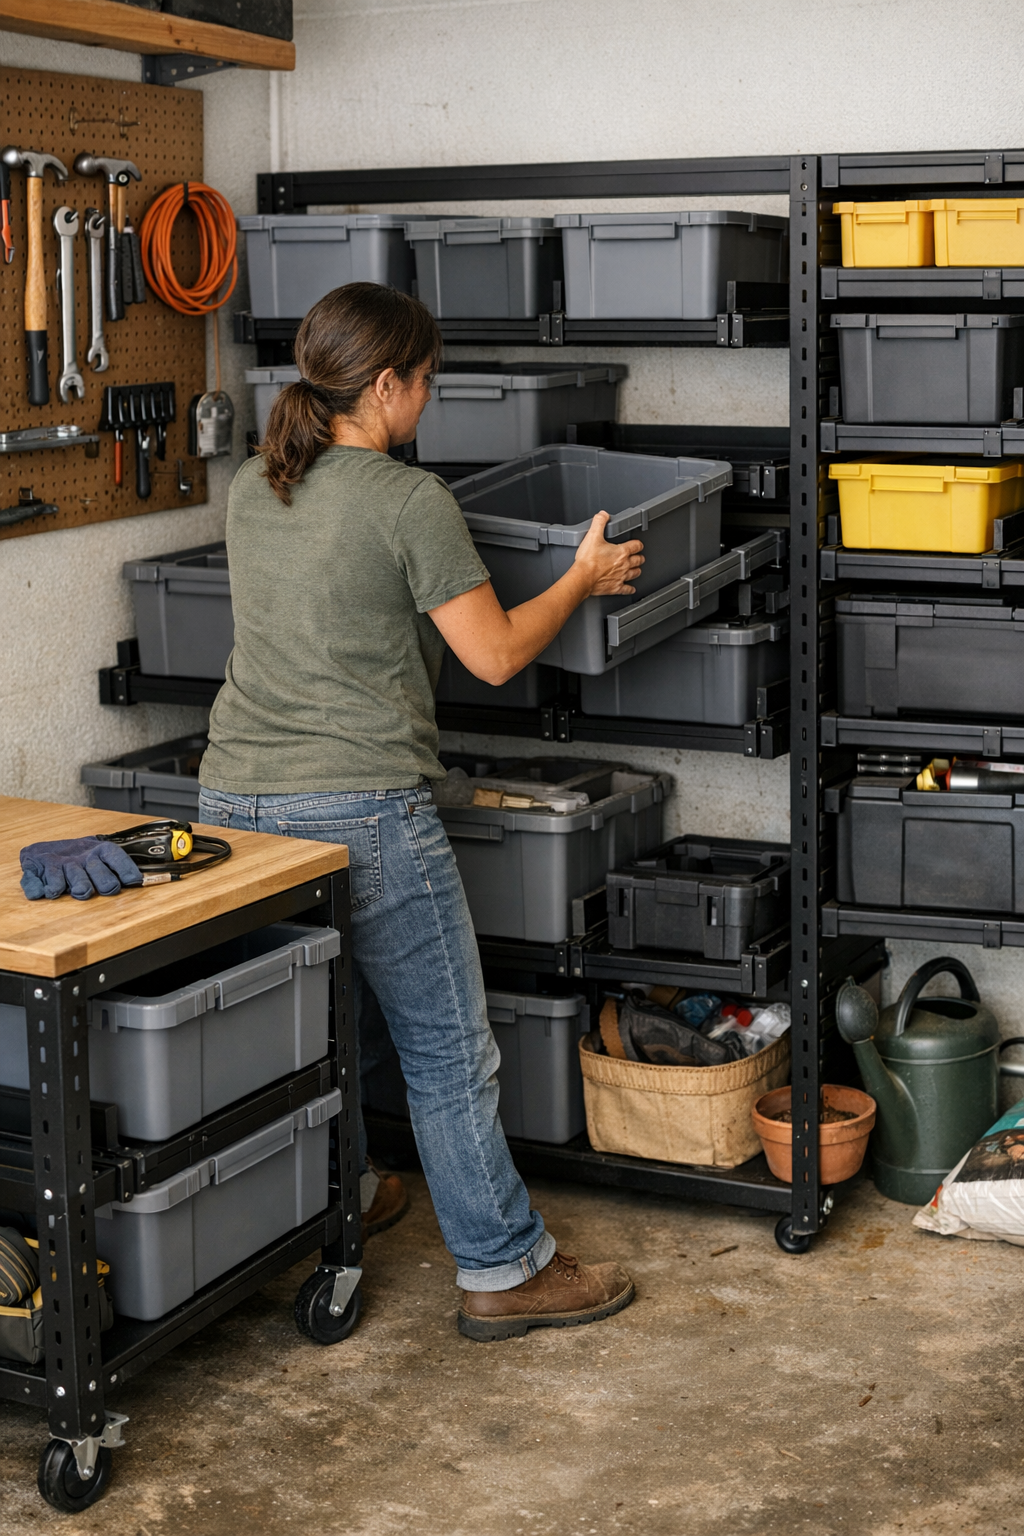
    The rush of pride after overhauling your garage or workshop is real. For an hour, maybe even a weekend, every shelf lines up, bins sit flush, and the floor feels wide open. It looks perfect. But the honeymoon fades the moment you actually get to work: dragging the hose in, returning a heavy drill, steering the rolling cart with one hand while keeping an eye on a batch of fasteners in the other. This is when the true shape of your layout reveals itself—not when everything’s pristine, but when things need to slide back into place, fast, usually with only half your attention left. Suddenly, the question isn’t how tidy the setup looks—it’s whether it can handle the churn of real use without turning into chaos all over again.

    The Hidden Weak Spots That Creep Up on Busy Weekends

    At first, even a flawed system hides its faults. But in action, little hiccups repeat—bins that never seem to seat right the first try, carts that always seem to block just enough aisle to make every passing trip a squeeze. Where storage fights the return, the whole space starts to resist your routine. Movement turns clumsy. You’re nudging bins, shifting carts diagonally, or detouring around the one cabinet edge always jutting out past the work zone.

    This slow slide into disorder doesn’t explode in one big mess; it happens in increments. A wayward bin lingers out of its spot “just for now.” The end of one row quietly becomes an overflow pile—gloves, odds, and the shovel you’re too rushed to squeeze back between other gear. Dead corners fill with what doesn’t fit elsewhere. Eventually, every new task means first reshuffling the last task’s leftovers.

    Docking: The Physical Difference Between “Tidy” and “Effortless”

    When every storage piece docks instantly and reliably, you stop thinking about storage entirely. The best setups let you return a hammer, a set of gardening shears, or an armful of odds and ends with a one-handed slide or a blind push in passing. There’s no fiddling, no extra turns, no checking if things lined up. Your whole flow stays intact, even when your hands aren’t empty or your mind’s on the next step.

    Everyday Setbacks You Don’t Notice Until They Add Up

    Picture this: Mobile bins stacked on plain shelves. On paper, there’s a place for everything. But try unloading after an afternoon outside—your hands are dirty, you’re juggling a few tools, and one bin refuses to dock. It’s crooked, maybe backwards, and needs a second fumble to sit right. The cart you rolled out earlier? It never returns flush to the wall, leaving an annoying wedge of lost floor space right where you want to walk. Pretty soon, routines stall: you sidestep, nudge, and on the third trip your patience wears thin. The setup can store things, sure, but it forces workarounds at every turn.

    How Minor Friction Becomes Major Disorder

    These minor struggles might seem harmless, but they snowball. Over time, tools start to gather in piles—closer to the workbench or on the nearest surface, because getting them “home” feels like another task. You keep shifting one rolling cabinet back and forth, just to clear enough room to open a drawer or access what’s behind. Overflow becomes routine; zones meant for flow turn into dumping grounds. Every movement through the space involves squeezing past something not quite where it belongs.

    A truly resilient setup shrugs off sloppy returns and quick drop-offs. If you can’t rediscover order without slowing down or using both hands, the system will always settle back into clutter. Clear aisles get pinched as carts drift, bins sit askew, and your carefully mapped-out zones blur into catch-alls. That sense of control you chased with the reorganization begins to unravel in slow motion.

    Real-World Example: When Optimization Backfires

    Imagine a single-car garage, squeezed for space but maxed out with two lines of modular bins and a rolling tool chest. On paper, every inch works. By the end of week one, reality intrudes. Bin rails call for a two-handed dance to dock each return. The tool chest, always meant to tuck aside, starts to wedge out on an angle after every use, blocking access to a corner shelf. A shovel, forced into a gap, jams the rest of the lineup, so it gets abandoned in the only free corner. Within days, every pathway demands another awkward step, every retrieval triggers a reshuffle, and routine maintenance—sweeping the floor, clearing a spot to work—takes twice as long. The garage isn’t full; it’s just functionally blocked.

    Why Physical Guides Outperform Good Intentions

    What keeps order isn’t discipline, but design. Physical guides—rails, channels, bumpers, or defined stops—quietly enforce alignment no matter how rushed or careless the return. You slide a bin and it locks into place; roll a cart until it clicks against a bumper and suddenly the aisle’s clear again. Footpaths don’t shrink. Wall zones stay usable. Every return is a single, mindless motion, not another puzzle to solve at the end of the task.

    Without these guides, even the sharpest visual layout unravels with regular use. Bins drift off center, carts wedge at odd angles, wall space fills with random leftovers until you’re digging to find what’s next. But add a few effective rails or channel stops, and you can reset the whole area with a handful of casual returns. The difference isn’t in how it looks but in how it performs—especially when working fast or under distraction.

    Fast Upgrades: Docking That Fixes Routine Clutter

    Restoring flow doesn’t require a total rebuild. Retrofit add-ons—like adhesive rail strips, magnetic guides, low-profile channel kits, or bolt-on stoppers—can turn any shelving or rack system from decorative to dependable. Many commercial storage units and rolling cabinets have options for add-on docking hardware. Even a simple tactile end-stop on a shelf keeps bins in check and stops the slow sideways drift. The impact is real: no more re-centering after every use, and no more micro-adjustments just to keep the zone clear. A 10-minute tweak can give back hours of hassle across the month.

    Spot the Choke Points—Then Solve Them for Good

    If you’re repeating the same shuffle every week—a cart half-blocking the walkway, bins always askew, and overflow zones always growing—a missing docking solution might be why your space feels harder to keep tidy than it should. Instead of fighting to maintain order, smart layouts work with your habits. A system built to absorb hasty returns stays orderly regardless of the pace of life, freeing you to actually use your garage or workshop, not just clean it.

    Day after day, that’s the upgrade that matters most: clear movement, fast resets, and storage zones that actually stay clear. With the right guides in place, order becomes automatic—never a project, just what happens next.

    Explore modular storage systems and docking solutions designed for real, repeatable routines at StackNest.

  • Why Single-Spot Outdoor Storage Fails and How to Fix It

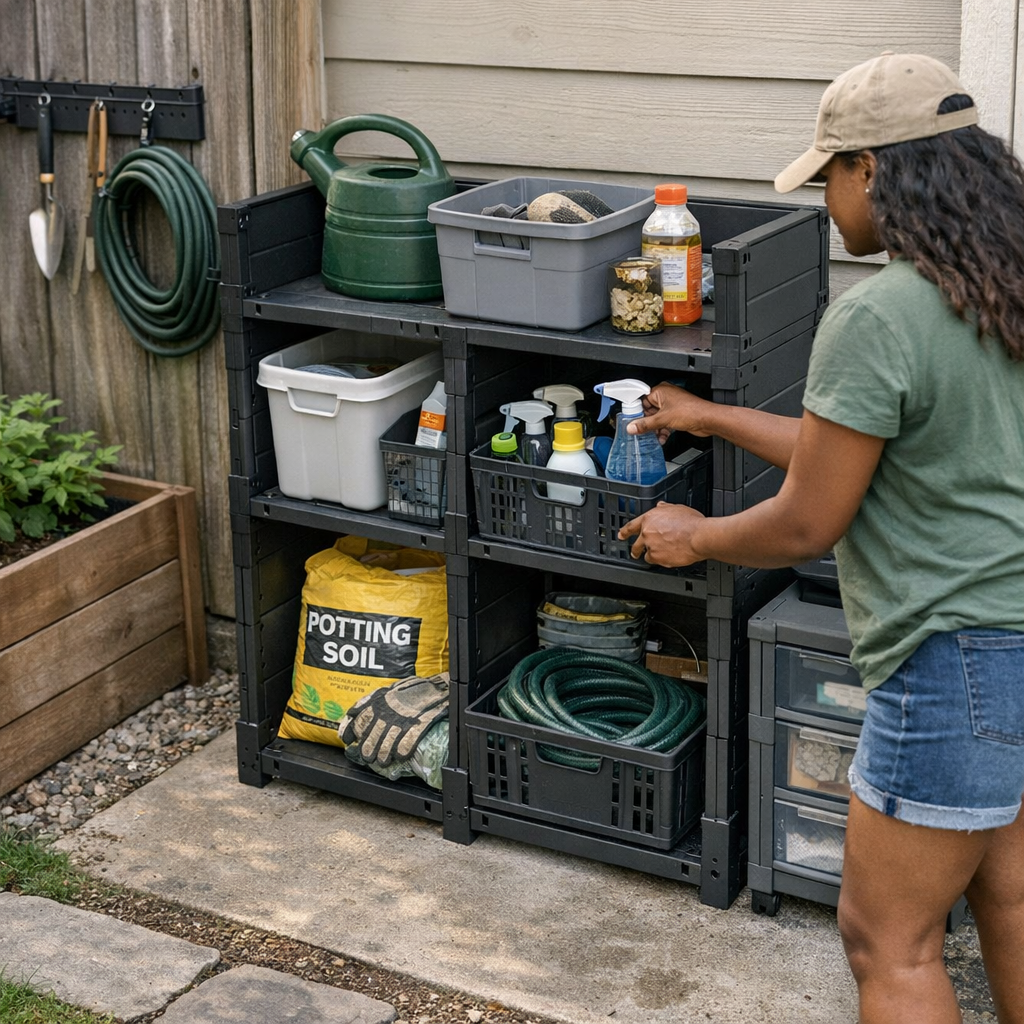
    The backyard corner that never stays cleared: Everyone knows it—the one spot where tools and gear keep piling up, no matter how many “deep cleans” or weekend resets you manage. You drag your mower in after a wet mow, try to hang up a tangled hose, wedge the shovel where it might not topple. By Tuesday, garden gloves, old nozzles, and stray hand tools have already formed a new heap. If you share the space—family, roommates, neighbors—the buildup doubles. It’s not laziness. The real burden is fighting a setup that never matches how the space actually gets used. The same gear, the same routines, always push back against the old “fixes” that look organized but fall apart under pressure.

    The Single Zone Squeeze

    Almost every backyard falls for the single drop zone: one bin stuffed by the fence, one overworked hook near the door, one rack shoehorned into the side-yard. These setups promise order but quietly lock everyone into the same problem: all return traffic slams straight into the same crowded bottleneck. By Wednesday, tools are balanced on top of each other, that roomy bin is stuffed and hard to close, and the tidy row of rakes is now a locked-up wedge. To grab a spade, you have to juggle three tangled handles and hope you don’t send a bucket rolling down the path.

    The Real Reason Things Drift Out of Place

    In theory, a single wall rack or shared bin should be efficient—a place for everything. In practice, everyone on their way back from a muddy job or quick chore just drops things at the closest empty spot. If you’re coming in with dirt-caked boots or hands full of clippings, the “right” spot barely crosses your mind. Over and over, the area closest to the door or gate absorbs every shortcut. Because there’s never enough spread for return flow, the overflow always floods back into that same corner or bin.

    Everyday Problems: When Storage Layout Gets in Your Way

    You finish trimming after a surprise rain—the side path is mucky, so you move quick, trying not to track in more mud. The only free hook already holds a coil of wet gloves from someone else. Every other tool is jammed into the same bin, handles sticking out at odd angles. You angle the mower in, brush against a leaning rake, and watch a pair of gloves drop into a puddle. Next day, you need a hand trowel and end up emptying half the bin just to find it under the heap. What started as “everything in one place” turns into “nothing is easy to grab.” Each step means more fishing, more reshuffling, and less actual work done.

    Where Standard Bins and Racks Quietly Fail

    The problem isn’t obvious at first. Standard bins swallow the first batch of gear, but on a normal week? Short tools disappear under heavier ones. Lids get left open, so rainwater pools by the fence. The side-yard rack looks fine for a day, then every hook is overloaded and all it takes is one misplaced shovel for the pileup to start again. The friction builds slowly: soon, you can’t move through the area without bumping something out of place or tripping over a lost trowel. Resetting turns into a full chore, not a quick fix.

    Even modular racks, when lumped in one wall space, end up collecting all the problem overflow. “More storage” is a tempting idea, but usually just grows the pile, not the access. Corners that should free up pathways become clogged dead zones. Too often, what looked organized is back to being a visible, slow-moving mess.

    How Distributing Storage Unblocks the Routine

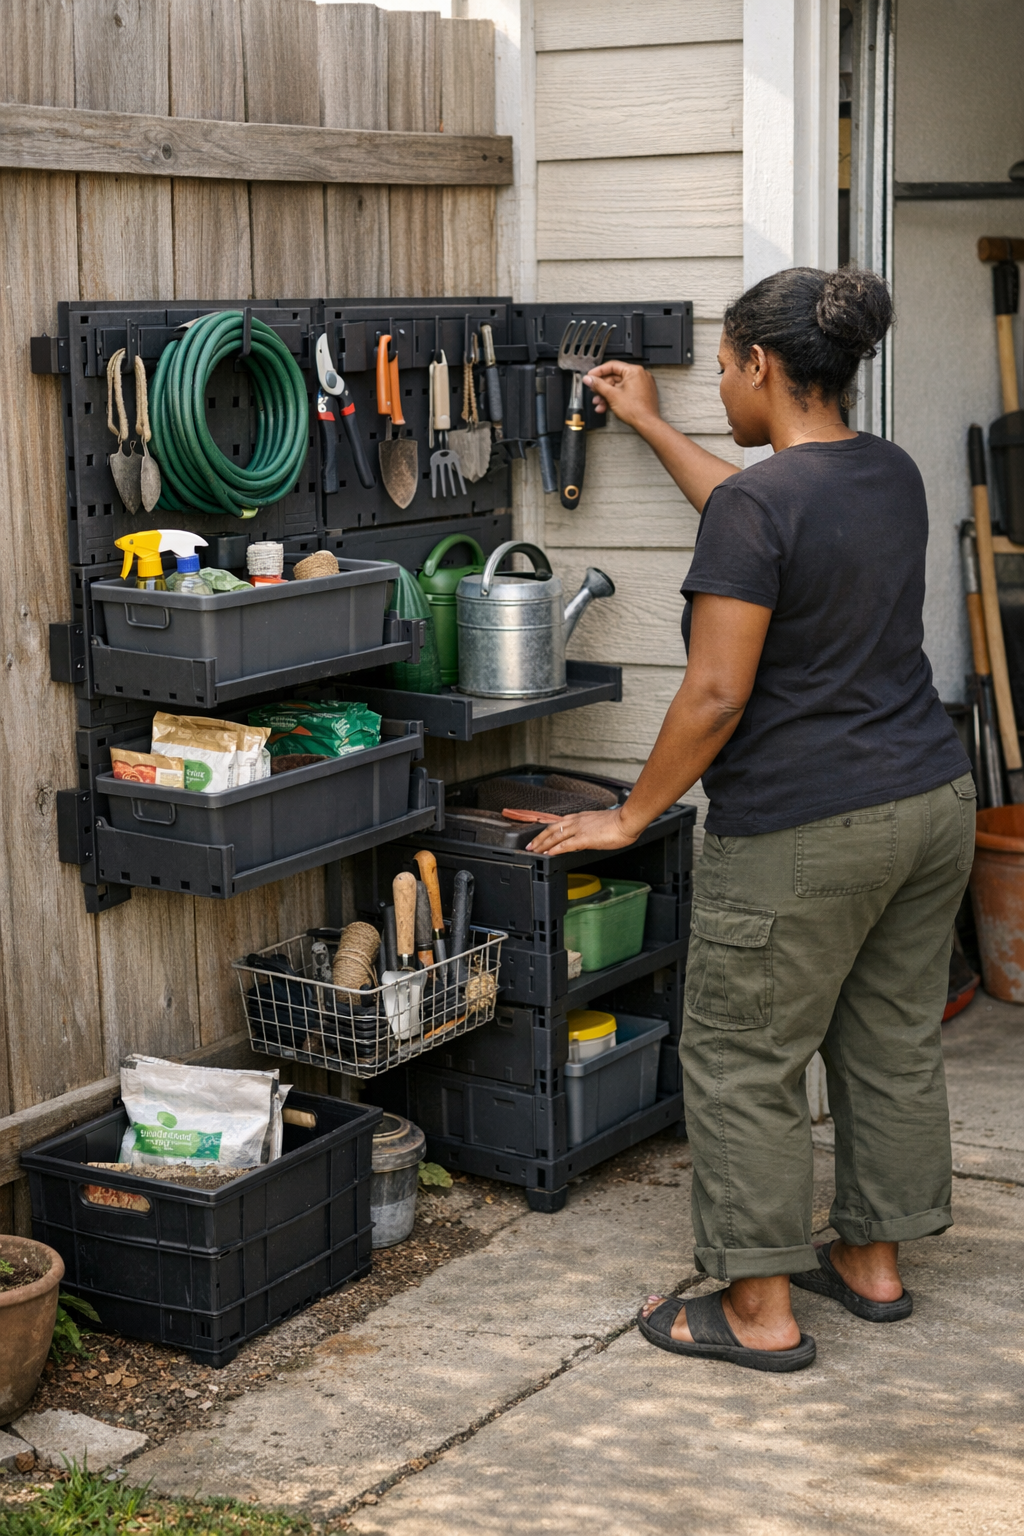
    The game-changer isn’t more capacity—it’s dividing where things return. Replacing one bulky bin or unified rack with separate wall panels, spaced-out hooks, or small modular sections gives you actual movement. Instead of everyone shuffling back to the same over-stuffed area, people drop tools at the nearest clear spot. The odds of one return “traffic jam” drop fast—because there isn’t a single spot to jam up.

    Does your garage edge have dead stretches? Hang a panel at each end, leaving the center open. That awkward side-yard? Break it into two small sections: one for muddy, heavy equipment, another for quick-grab hand gear. This layout means no single spot can overflow unnoticed, and if one fills up, it’s obvious—and easy to fix before it spreads. The path stays clear. Cleanups go from a weekly grind to a simple once-over.

    After the Setup Change: What Actually Shifts

    The difference isn’t flashy, but it shows in the routine. No one needs to move five tools just to hang one. The walk from garden bed to wall drop shrinks to a single step or lean. Clutter is easy to spot because it’s actually separated, not stacked head-high. That endless corner pile finally gives up. Resets take minutes, and you stop dreading the “put everything away” step because it doesn’t require a total reshuffle. The wall setups hold—useful, not just neat for a day.

    Tweaks That Make Distributed Setups Work

    Make usefulness visible: Tools you grab every day go in the easiest spots; heavy or rare-use items get a more out-of-the-way hook. If an area clogs up, call it overflow and reorganize a section, not the whole line. For narrow zones or high-traffic paths, angle sections outward into open space instead of across the passage—no more blocked entries or pinched walkways.

    Frequent rain or muddy gear? Drop an absorbent mat or rugged tray beneath the “wet zone” hooks. Small details like this keep the rest of the strip from going slippery and mean less cleanup later. The goal isn’t to look like a catalog but to stop your setup from quietly betraying you after a couple normal, messy days.

    It’s About Function, Not Flawlessness

    No backyard, garage, or fence-line holds showroom perfection—nor should it try. The setups that work aren’t the ones that stay pristine but the ones that make it harder for clutter to take over in the first place. Distributed storage won’t prevent every tool from vanishing or stop mud at the gate. Gear will shift, gloves will wander, someone will still drop a rake behind the compost bin. The difference is, every reset is smaller. Cleanup is lighter. The same old corner isn’t waiting for that next unmovable pile. In real outdoor zones, it’s the right structure—not just “more room”—that keeps your routines rolling instead of grinding to another messy halt.

    See more practical outdoor storage approaches at TidyYard.

  • Why Selective Drawer Labeling Boosts Desk Efficiency During Busy Days

    An organized desk promises quick starts and smooth routines. Every pen has a tray, every cable vanishes under the surface, and those drawers close on what feels like a finished solution—you sit down believing the reset is permanent. But as soon as the day shifts—when a charger moves from bag to desktop during a rushed call, or you fumble for a sticky note while your screen lights up with back-to-back urgent tasks—the cracks show. A clean desk hides friction until it counts. You pause, scan one storage tray, then another, maybe rifle the same drawer twice while your flow slips. That half-second stutter isn’t dramatic until it’s stacked: small interruptions spread across a week, quietly erasing the advantage of every morning reset. The more your setup relies on silent memory and unlabeled order, the more that invisible drag creeps in whenever real work collides with routine breaks.

    The Clean Desk That Stumbles When Work Moves Fast

    Clutter doesn’t have to be visible to slow you down. Drawer organizers and neat storage boxes create the look of productivity, but glossy order only holds until routines flex or timing gets tight. The unlabeled workstation isn’t a mess—it’s a moving target. The same cable that slipped easily into its tray yesterday turns up under a notebook or beside a wireless mouse after one long afternoon of calls. Loose headphones blend with chargers; pens migrate just far enough to force a double-check. Each swap or tool hunt is just awkward enough to break your stride, especially when your natural reach path is blocked by under-desk storage or an extra unit that seemed smart until it started intercepting your knees.

    Fast cycles expose the soft spots. By Thursday, “Is the backup drive in the left drawer or right?” becomes routine, and a once-clear system now means you’re touching three places instead of one. Those little grabs amount to resets you didn’t plan for—the paper organizer looks sharp but fails to anchor your most-used tools when the workflow doesn’t pause for sorting.

    When Drawer Labels Make All the Difference

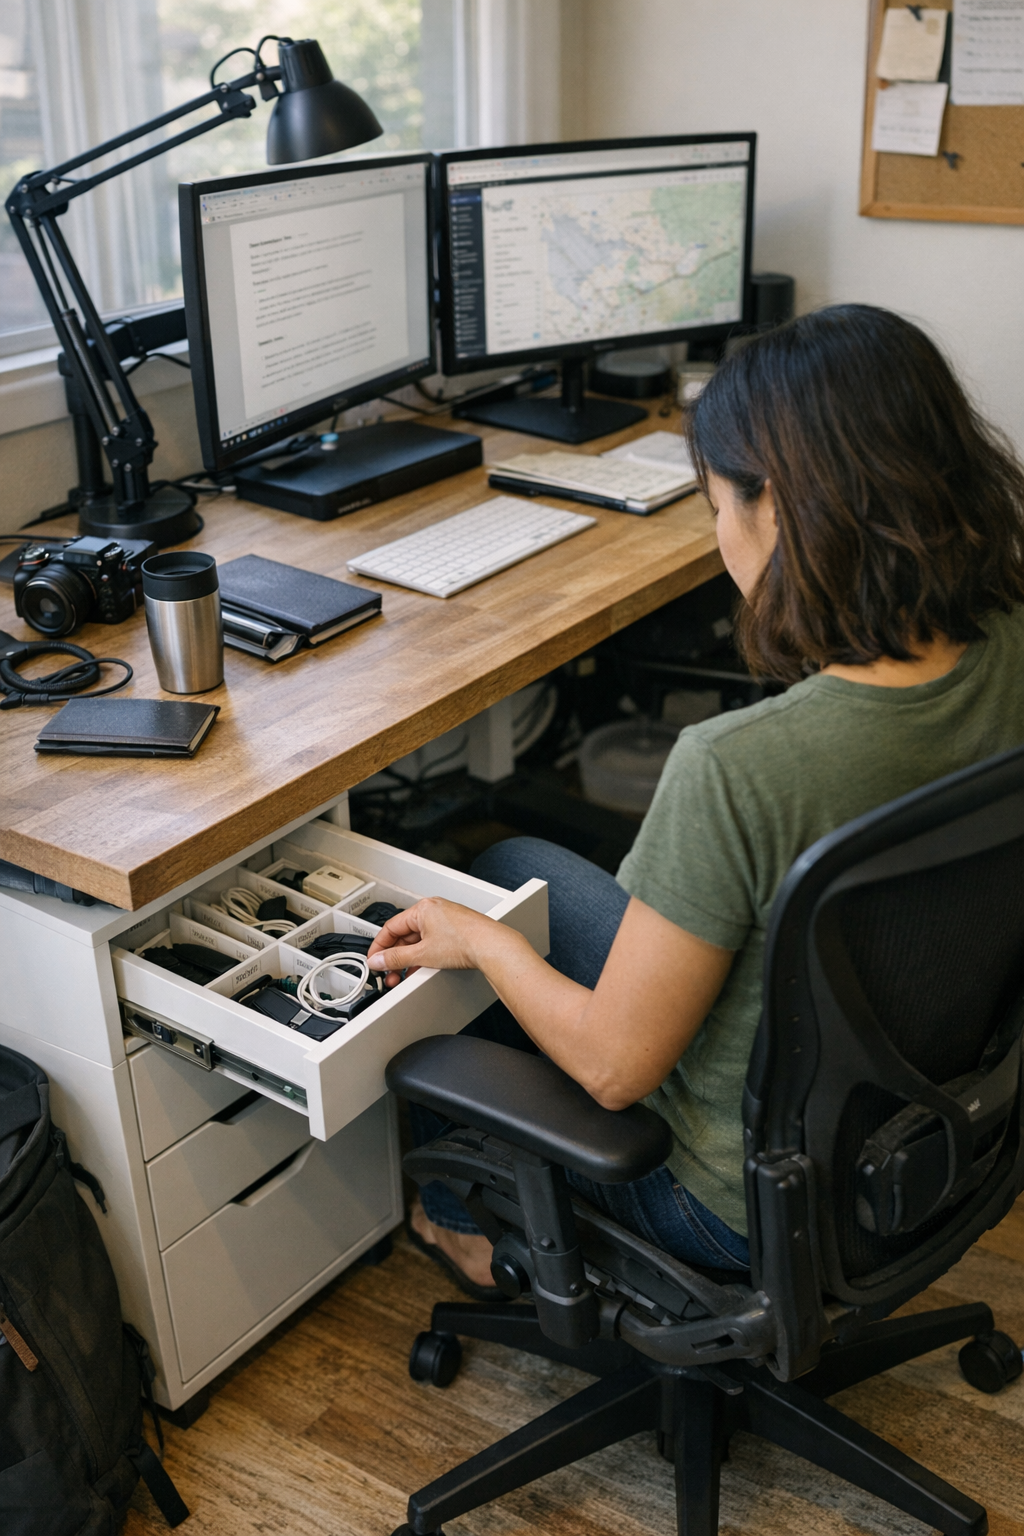
    Labeled drawers don’t announce themselves in a still photo, but in motion, they’re the difference between flowing through the day and hesitating mid-task. Reach for the SD card—your hand goes straight there. Open a drawer for two types of cables—one scan is enough. By contrast, even the tidiest unlabeled system invites drift: you guess, second-guess, move to the next bin, or toss something back where it “sort of fits.” During busy stretches, those micro-mistakes start to shape your perception of the whole setup—suddenly a perfect system has invisible friction lines everywhere you need speed.

    Picture a week with high-rotation drawers: by Wednesday, pen refills have swapped with adapters, USB keys mixed with receipts, and each retrieval has shifted from routine to chance. The visual order on Monday doesn’t defeat the lived chaos by Friday, especially after every meeting leaves a charger somewhere new.

    Stress-Test Moments: When Flow Breaks Down

    Desk organization works when the routine is calm. But most setups fail their test during spikes: double-device days, urgent deadline sprints, or when you’re shifting between keyboard and notebook while fielding messages. It’s in those moments—the cable tray partially blocked by a laptop stand, or a deep drawer that never quite lines up with where your left hand reaches—that well-intentioned systems slow you down. You hunt for the USB dongle and emerge with yesterday’s receipts, or yank a drawer only to find it packed with things that belong elsewhere but never made it back. Labels, meanwhile, quietly rescue these situations: they cut reset time, anchor items, and save you from the seconds lost to guesswork, even as the work surface looks as minimal as ever.

    Delay can come from the unexpected: a quick device swap, a not-quite-centered monitor arm forcing your body to bend, the way a task light skips the exact spot you’re writing your notes. When the whole setup relies on memory, every real-world curveball becomes a drag on your momentum.

    Making Organization Work for Real-World Routines

    It’s a mistake to cover every inch with labels—real improvement comes from targeting. Most desks only need the top “traffic” drawers marked: the ones you open every session, where fast multitasking or blended contents create constant turnover. Labeling just these hotspots is enough to change retrieval from hesitation to habit. High-use, mixed-content drawers get bold, readable cues; low-rotation and single-item drawers stay clean and label-free, preserving calm where it’s earned and urgency where it’s needed most.

    This way, the workspace avoids the clutter of over-labeling and the stalls of memory-only systems. You skip sticker fatigue and endless name edits—just quick visual guidance, anchored to the physical workflow that repeats most, especially on high-pressure days. The aim isn’t decoration; it’s keeping the desk functional and frustration-proof even when routines collapse or priorities stack up unexpectedly.

    The Small Stuff That Changes Everything

    Sometimes a label is the whole difference between a smooth handoff and a stalled reset. “Cables—Power” keeps you from upending a drawer when an urgent plug-in comes; “Adapters” makes the grab-and-go motion truly single-step, regardless of how many swaps a chaotic week brings. These aren’t just niceties: they’re friction-busters that grow in value every time you sit down again. Tiny cues accumulate into a desk that stays ready, even as your tools and priorities rotate unpredictably.

    Quick FAQ: Labeling Drawers Without Overdoing It

    Which drawers should get labels?
    Target drawers you open repeatedly during the day or that hold blended groups of tools. If you notice yourself scanning for something twice, the system needs a label.

    Does labeling ruin a streamlined desk look?
    Not if you’re selective. Focusing only on high-turnover drawers keeps your primary workspace minimal while giving clarity where reach and reset speed matter. Most drawer fronts—and the surface itself—remain untouched.

    Can a label-free drawer ever work well?
    Yes—for dedicated, single-item, or infrequently used drawers. But frequent-use, mixed-item drawers don’t stay stable without visible anchors. If you’re reaching and pausing, a simple label restores flow.

    Workstation Flow: Labels Support Real Use, Not Just Appearance

    Scrubbing every label off your setup might look great for a moment—until hidden friction returns and productivity stalls. Routines shift, memory slips, new cables and devices shuffle in. Targeted labeling—clear markers for drawer “hotspots” and nothing extra—bridges the gap between aesthetic order and functional speed. This is the small, concrete tweak that helps a real workstation keep up: clarity where pressure lands, open simplicity elsewhere. Organization finally supports the way you really work, not just how your desk looks after a clean-up sweep.

    Explore the full WorkBasic collection

  • How Small Changes in Cat Zones Cut Down Daily Cleanup Hassles

    Every “neat” indoor-cat setup hides a silent tradeoff: your kitchen looks calm, litter stays out of sight, and toys are stacked in a bin. But by Wednesday, you’re swiping familiar water drops off the floor, stooping for the same stray toy under a chair, and wiping the edge of the mat where grit thickens—again. You don’t need a worse mess to notice the problem; you need fewer repeat interruptions. If you dread the next routine reset even when everything’s put away, your cat’s corner isn’t failing by sight—it’s failing by friction. The real StillWhisker difference isn’t just looks, but the way the smallest misalignments in food, water, or litter setups turn into recurring chores, never visible in day-one photos.

    Why “Tidy” Cat Spaces Still Create Work

    It’s easy to treat “order” as the end goal: set out the bowls, sweep the corner, close the toy bin. But the real test is whether your daily patterns are smoother—or just hiding the same old obstacles. Most “organized” cat setups conceal friction by trapping maintenance in predictable weak zones: that bowl nook that always needs extra wiping, toys that never stay put, a mat edge that still leaks grit. If you keep doubling back—resetting, wiping, shuffling—you’re not outpacing the mess. You’re stuck in routine correction engineered into your setup from the start.

    Snapshots Hide Accumulating Friction

    Freshly cleaned, any cat area feels under control: bowls polished, toys out of sight, mats squared. But by midweek, water lines the floor past the tray, mat edges curl, and litter dust goes further. The gap becomes obvious: a space made for show stalls after two days of real use. Smooth initial order hides the fact that daily friction always returns right at the same pain points.

    Where Cat Zones Quietly Break Down

    The breakdown isn’t dramatic—it’s wearingly familiar:

    • Food bowls positioned so every refill leaves a drip zone just past the mat, or forces you to slide a nearby appliance to pour without bumping things.
    • Litter boxes with mats that stop short, so every exit traces the same faint grit into your hallway—a daily sweep you already resent.
    • Toy bins that never stop the migration: balls reappear under the couch, crinkle mice block the closet, forcing mini rescues when you’re just passing by with laundry.

    These aren’t cosmetic problems; they’re the pinch that lags every routine. Even if the area stays “neat,” the actual order breaks down in the exact same places, day after day.

    What Makes a Setup “Feel Right” For a Cat—And For You?

    The right setup isn’t just cleaner on day one—it’s less disruptive by day five. A space that absorbs repeated-use friction fades into the background. But a setup that simply “looks tidy” amplifies the cycle of minor corrections: you end up spending more time mopping, reaching, chasing escaped toys, or untangling mats than before.

    Real-World Stress Points: Reaching, Refilling, and Resetting

    These stress points stack up, each in their own way:

    Blocked by Bowls or Baskets

    Bowls stashed “out of the way” often end up right where you need to walk. You lean awkwardly over a bin to refill water, or slide the setup back and forth just to prevent streaks and splashes—compounding the friction. Your routine may seem easier, but the same off-angle reach or small swipe slows you down at every mealtime.

    Litter Trails That Loiter Where You Least Expect

    Litter mats only help if they match how your cat actually steps out. Misaligned mats mean dusty footprints land right where your socks land, leading to another unplanned sweep. Traces reappear just past the edge—never quite contained, always needing cleanup in exactly the wrong place.

    Toys That Keep Escaping (and Interrupting)

    A full bin means nothing if toys always make their way under furniture or into shared traffic zones. The true cost isn’t just a missing toy—it’s another reach, another shift, another break in whatever you were doing simply because setups leave escape routes wide open. “Quick tidy” becomes a loop you expect, proof your system doesn’t really hold the line between play and the rest of the house.

    When Comfort Creates New Snags

    Soft beds, plush mats, or inviting rest corners solve comfort but multiply upkeep. A fluffy blanket collects fur, bunches up, and blocks a vent just when you need to sweep. Solving for coziness regularly makes resets messier—what welcomes your cat quietly clutters your workflow. The cost may not show immediately, but over a week’s patterns, it slows every quick pass-down to a more frustrating reset.

    The Cycle of “Last Minute” Cleanups

    Some setups guarantee minor but constant extra steps:

    • Supplies just out of reach: Wipes or bags “stored close” are still an extra few seconds away, making every cleanup feel like an interruption.
    • Cat gear drifting into human space: A station shuffled out of sight spreads further as bowls walk toward open walkways, putting you and your cat in direct traffic, just to minimize visible mess.
    • Comfort items that tangle the flow: A sound-dampening mat that won’t stay put means each reset brings a fresh round of smoothing and shifting—small, but cumulative.

    Scene Update: Small Shifts, Big Change

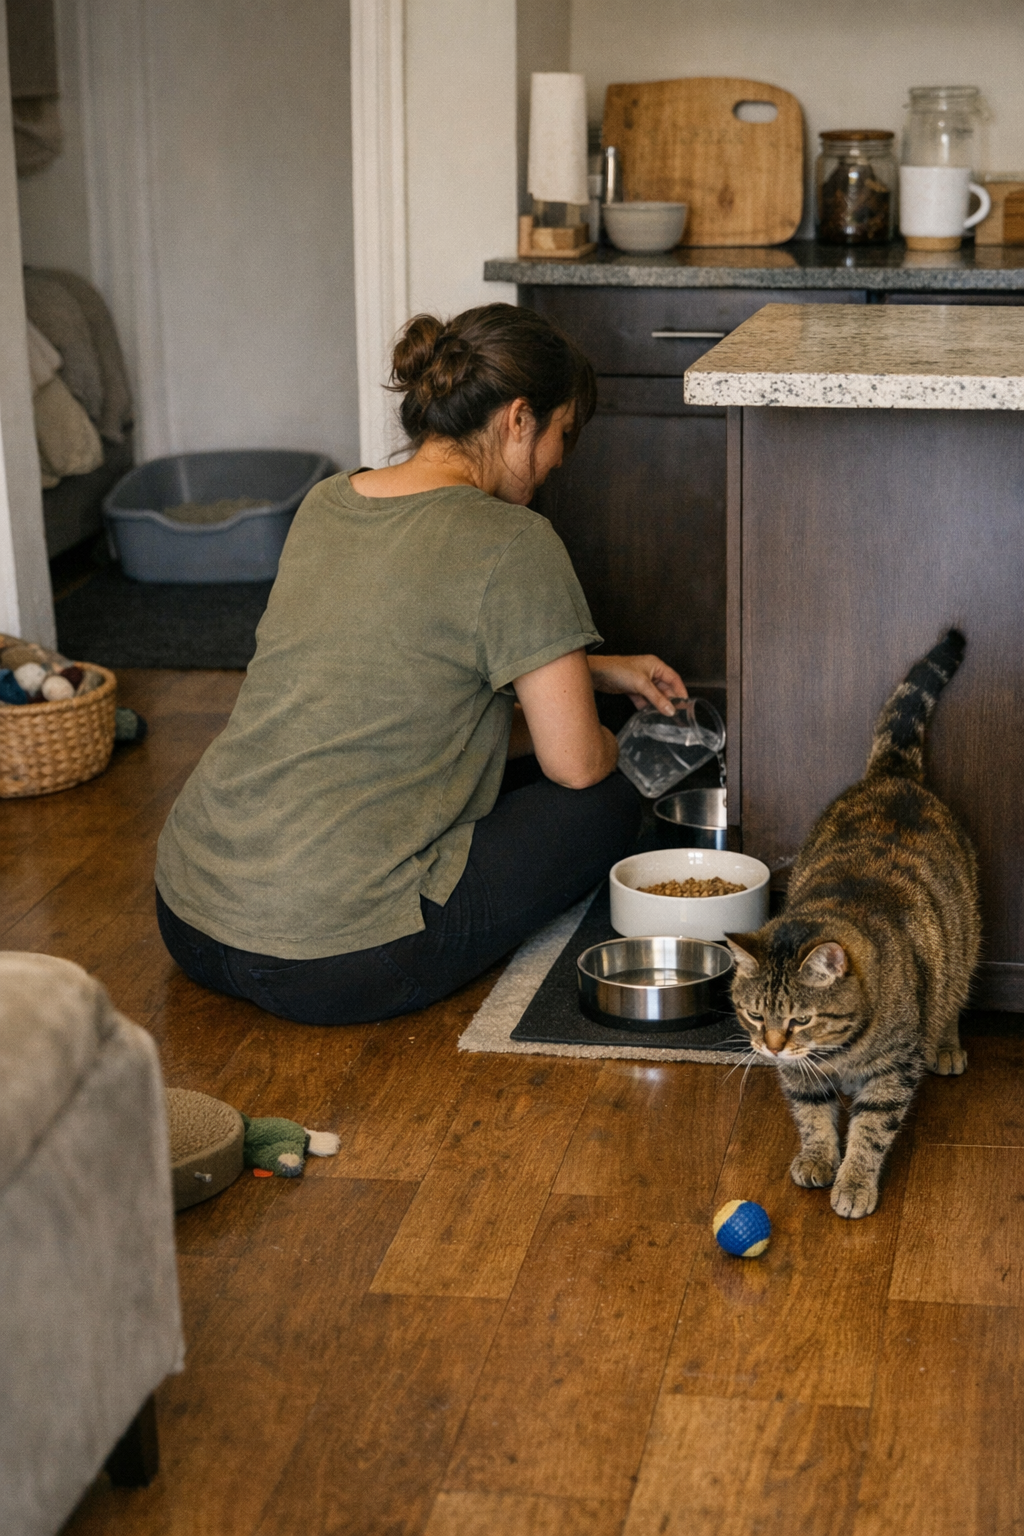
    Instead of hoping to “keep up” with friction, you can realign your setup to stop it from snowballing. Try shifting food and water to the side of the kitchen island—out of heavy traffic but reachable without contorting or moving other items. Upgrade to a hard-edge food mat just wider than both bowls, and runoff instantly becomes one contained swipe, not a creeping floor stain. You might only gain a couple inches of coverage, but that margin cuts your daily wiping in half. Less bending, less hunting for missed crumbs, more time between actual cleanups.

    Repositioning your litter area for a flush mat/doorway alignment chokes off the main scatter path: instead of daily hallway sweeps, spot-cleaning becomes rare, not routine. Small interventions—lining up mat edges, moving return bins closer to action—mean fewer daily breaks for rescue or reset. When routines stop exposing the same weak points, your mind recognizes it: maintenance pressures fade, and you do less “checking” because the setup holds longer under real use, not just by appearance.

    Barriers, Bins, and Reclaiming Calm

    Sometimes all it takes is a low-edge bin or a soft wedge plugged into toy escape pathways. Block off the classic under-couch gap and toys stop doubling as daily trip hazards. Or, shift toys to an edge zone—still visible, now out of foot traffic—and “return and reset” shrinks to a single sweep, not an endless scavenger hunt. Every small fix adds real margin to your routine instead of just new clutter to supervise.

    The Key: Less Correction, Not Just Less Clutter

    The goal isn’t just tidy surfaces—it’s a rhythm where you stop seeing the same spots yelling for attention. Only then does the line between “cat zone” and the rest of your living space truly hold. Strong setups defeat hidden friction, not just visible mess. The real success isn’t in a photo-ready corner, but in days you don’t even remember checking beneath the table or chasing after another forgotten mess.

    Find more ways to quiet the repeat problems of shared indoor-cat life at StillWhisker.

  • Preventing Angle Grinder Overheat During Extended Remodeling Tasks

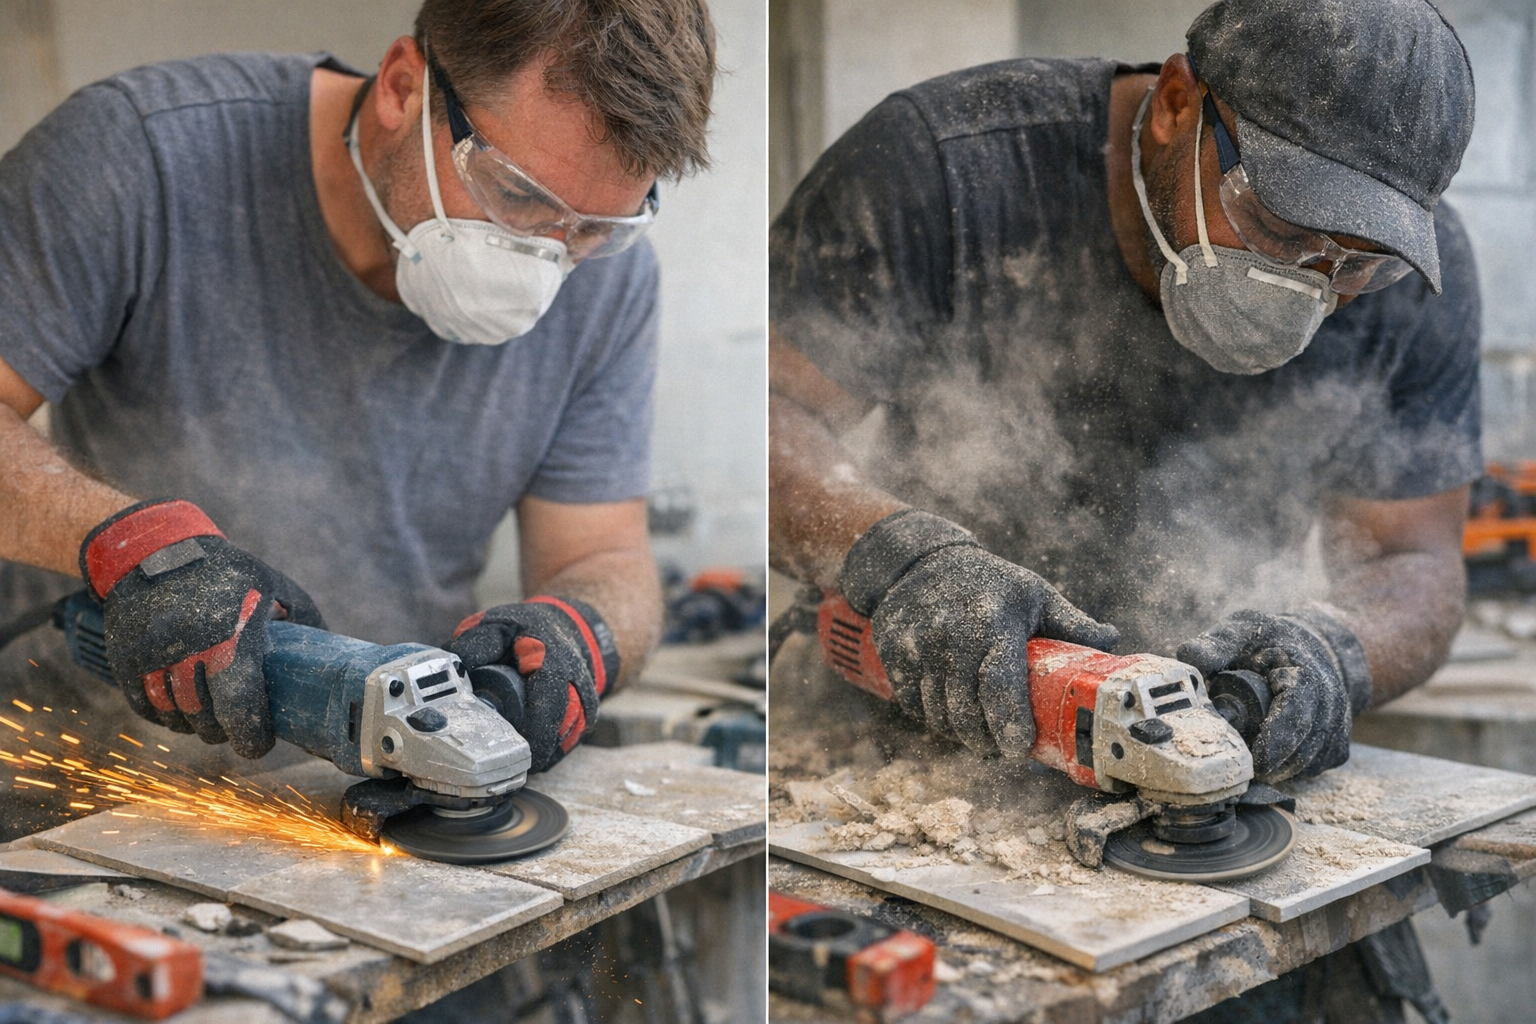
    If you’ve ever ripped through a full day of drywall cutting, tile trimming, or metal sanding, you know the shift: the job starts crisp, but progress quietly grinds down. The angle grinder that flew through grout lines an hour ago is now fighting you—edges chip, lines wander, and your hands ache from the tool’s growing warmth. You try to muscle through, and suddenly you’re stuck: a simple project hijacked by an overheated grinder you thought could handle more than it actually can.

    The Slow Creep of Overheating—And How It Shows Up

    No one feels the problem out of the gate. On a fresh start, even bargain grinders cruise through thin steel or tile backer with satisfying control. But stretch an afternoon replacing a backsplash or resurfacing a bathroom—dust thickening in the air, handle slick against sweat—and you start losing the fine touch. Clean cuts demand brute force. The casing radiates heat. Instead of shavings, you get clumpy, sticky dust. Every grip feels heavier.

    It’s easy to chalk this up to tough material or a long workday—until your seams turn ragged and your patience starts leaking away. Repairs that should be five-minute fixes balloon into full re-cuts or desperate edge-sanding. All because the grinder started fighting you, not helping.

    The Tool’s Limits—Not Just Yours—Set the Pace

    Heat sneaks up, quietly changing how your tool behaves. On most job sites, it shows in repetition—grind, adjust, drill, repeat. That’s when you see the split: run two similar grinders side by side, and they feel identical until you hit the third or fourth stubborn tile or start sanding flush through rusted plate. Suddenly, one holds its RPMs and remains cool, delivering sharp lines and steady control. The other lags—RPMs dip, the handle warms ominously, and vibrations buzz through your grip. Cut quality nose-dives as resistance builds, and the motor’s smooth hum gives way to a strained, sluggish churn. Dust turns grainy and heavy. What’s really happening? The tool’s fighting its internal heat more than it’s working the material.

    Little Warnings That Add Up Fast

    Seasoned hands spot trouble sooner: dust clogging in odd places, vent slots hot enough to notice, a faint drag as you drive a screw or slice through a joist. A blade or bit that wandered easily now grabs and snarls, chewing up more board than you wanted. The finish falls apart: chipped tile, burned drywall edges, screw heads that strip rather than bite. It’s a domino effect—fatigue in the tool multiplies fatigue in you, and what should be an hour’s work stretches into two.

    Picture grinding away at a kitchen renovation. By midday, your dust mask clogs with heavy powder, and control slips—cuts that started straight now require two-handed correction. Every blade swap and disc change feels more desperate. By late afternoon, the workspace is thick with debris and you’re cleaning more than cutting, wishing you’d stopped ten minutes earlier for airflow or a longer tool break.

    Why Heat Sabotages Your Workflow

    It’s more than just hot handles. Overheated grinders burn out soft-start circuits, chew through brushes, and dry bearings until every movement stiffens. That means sudden stall-outs or safety shut-offs when deadlines are tight. Missed heat cues force you into last-minute cleanups, or worse—blown tools that need downtime or, bluntly, replacing before the job is done. Trying to speed up by ignoring the warning signs nearly always adds extra hours, not fewer.

    Build Smarter Routines—Not Just Bigger Muscles

    This isn’t about pampering your tools, but about respecting the limits you only discover through real work. Switching to a grinder rated for at least 1,200 watts isn’t a luxury—it’s self-defense. The upgrade isn’t just raw power: it’s steadier RPMs under load, cleaner cuts deeper into the day, and discs that run cooler and last longer. But the real shift comes from changing your habits. Forced cooldowns—even five minutes every half hour—pay off more than one last rush to finish before lunch. Keep vent slots clear. Alternate heavy grinding or cutting with lighter prep work or fastening. Swap out a worn blade for a fresh disc before you notice the slowdown.

    On a recent tile demo, sticking to a timer—twenty minutes on, five off—kept the tool’s chassis cool enough to touch. Every detail went smoother: lines stayed straight, cuts stayed crisp, and by 5 p.m., there were no ugly surprises or frantic touch-ups. PPE was less of a chore, and fatigue slacked off instead of building up by the hour.

    Simple Hacks for Hot Jobsite Days

    If your routine still leaves your grinder gasping for air, improvise. Run a box fan across your bench or clamp a desk fan nearby to move hot air through the body. It’s not high-tech, but a steady breeze spares the tool—and your nerves—on sweltering afternoons or in tight corners where heat just lingers. Swap bits and blades quickly; don’t wait for smoke or that scorched, metal smell.

    Catch the Signals—Or Pay Double on Cleanup

    Blown finishes almost never start with an obvious failure. Instead, it’s sticky dust, rough seams, guide lines going off-track, or a suddenly aggressive blade. Catching these moments early isn’t fussy; it’s practical. It spares you evening recuts and helps you hand off a job that looks professional from start to finish.

    Big claims and technical specs matter less than how the grinder actually behaves hour after hour. Trust how the tool feels in your hands and set your workflow accordingly. Every grinder hits its limits—ignore the warning, and the tool will decide when you’re done, not the other way around.

    See all practical power tools and jobsite equipment at Gumboll.

  • How Stable Cubby Organizers Transform Handbag Storage Efficiency

    Most closet handbag organizers look right for a week—then sabotage your mornings. By day four, bags have tipped over, straps have tangled, and smaller pouches are hidden behind bulky totes. What started as an “organized” shelf fast becomes a daily tangle, stealing time you don’t have and turning every retrieval into a minor reset. A neatly sorted row one day morphs into blocked access, hidden overflow, and a parade of quick, silent frustrations.

    When Storage Looks Right, but Works Wrong

    Lining up bags in tidy cubbies by size or color feels like a win at first—until a real week runs its course. Too-deep cubbies, soft-sided compartments, or oversized slots let bags slouch, topple, and spill their straps across boundaries. The first morning rush knocks everything slightly out of place; by midweek, what seemed sorted is crowded, uneven, and makes you hunt for a missing pouch or reach around a lumped-up tote. You end up reshuffling after each use but never really restoring order.

    The giveaway is reaching twice for the same hidden clutch or restacking a pile of crossbodies that slid after grabbing a tote. The organizer quietly generates new clutter, even as it was supposed to prevent it.

    The Hidden Cost of Weak Structure

    Behind the surface, the wrong cubby setup breeds small, constant friction: collapsed bags obscure what’s behind, straps snake into the next slot, one sagging item drags neighbors crooked. Instead of a visible grid, you get a slow drift into confusion. This means blocked access as you stand in the closet, path partially closed by bags sliding out or toppling over; late starts because a quick grab turns into a full-shelf shuffle; increasing hesitation about putting things back, because the “return flow” is now a balancing act.

    This isn’t just an appearance problem. In real spaces—closets, bedroom walls, utility nooks—a system that can’t survive repeated use becomes part of the problem. Deep cubbies swallow smaller bags until you “rediscover” them on laundry day. Floor-pressure increases as overflow bags pile up at the base, forcing you to step around or move stray items just to get out the door. A storage zone that collects hesitation or overflow is not helping you.

    How Structure Changes Everyday Retrieval

    Order that lasts depends on stability and visibility. Open, rigid dividers keep bags upright and separated—so you can grab tomorrow’s satchel with one motion without dislodging a handle, burying a pouch, or having to re-square the whole lineup. Soft, sagging, or oversized compartments might look clean when empty, but by day three they collapse under mixed use, making retrieval a negotiation instead of a habit.

    Fast Grabs, No Drama

    When every slot holds firm, you grab your mid-sized bag without shifting the rest—and putting it back is a single motion, not a careful shuffle. The less you have to think about restoring order, the more likely order holds. Full shelves should still offer visible, dedicated slots, not a horizontal jumble. Overflow piles and wedged bags mean every new item is returned with a silent compromise (“just for now”), building future reset work into today’s rush.

    Visible = Usable

    Take a single look: can you actually see the shape and handle of each bag? Or is your “organized” row making you slide one sideways just to find another? Every storage pause signals a weak system. The more visible every bag, the less time you’ll spend on repeated corrections—and the shelf stays genuinely usable, not just technically sorted.

    Design Details That Make or Break Cubbies

    Open-front cubbies outperform closed boxes for repeated access: they prevent “category drift” where clutches, crossbodies, and totes end up mixed and hard to see. Closed cubbies do look cleaner at rest, but introduce blind spots and make daily retrieval a blind guess, especially in tight closets with awkward doors. The core issue isn’t just neatness—it’s whether you can spot, reach, and restore every item without moving something else.

    Divider rigidity decides the outcome. Fixed, shallow partitions keep both thick totes and thin clutches upright and separated, preventing the domino effect that quickly derails order. Adjustable divider heights matter: higher slots contain slouchier, larger bags; lower ones stop smaller pouches from slipping or being buried. Floppy or bent partitions compress categories until clarity is lost—and mixed-up shapes dominate the shelf.

    Small Adjustments, Noticeable Difference

    Switching from deep or soft cubbies to rigid, modular dividers isn’t just about looks—it cuts down on daily reshuffling and halts the build-up of invisible clutter. A week in, upright slots stay upright. No more lifting four bags to rescue one, or pausing to unknot straps before heading out. The rhythm of storage—grabbing, returning, shifting—becomes second nature, not a repetitive battle with your own organizer.

    Light Routine Tips to Lock In Order

    Sort by shape and base strength. Let structured bags form a stable backbone, placing softer ones at the edge or in firmer slots. Modular dividers can and should be adjusted after a week’s trial—let the system fit your habits rather than force a false symmetry. Daily use exposes what isn’t working quickly.

    Refresh, don’t reset. Once a week, move the heaviest-use bags forward and keep categories from drifting together—a handful of seconds now prevents a mid-month overhaul later. The greatest cost of a weak system is hidden: quiet category confusion that creeps up until the only solution is a frustrating, time-eating reset.

    Beyond Looking Organized: A Setup That Holds Up to Daily Life

    The real gap isn’t between messy and Instagram-perfect—it’s between setups that hold order and those that slowly undo it. Bags stay upright, categories don’t blend, retrieval means one hand—not both—and the shelf never becomes another source of hesitation or hidden chores. Let structure do the work: you’ll spend less time untangling, less time making up for a sagging system, and mornings now start with a choice, not a search.

    A system that truly supports daily use delivers where appearance cannot—on the days nobody is watching but you.

    Find more practical storage solutions at Gridry.

  • How Quiet Door Closures Improve Your Dog’s Rest and Home Routine

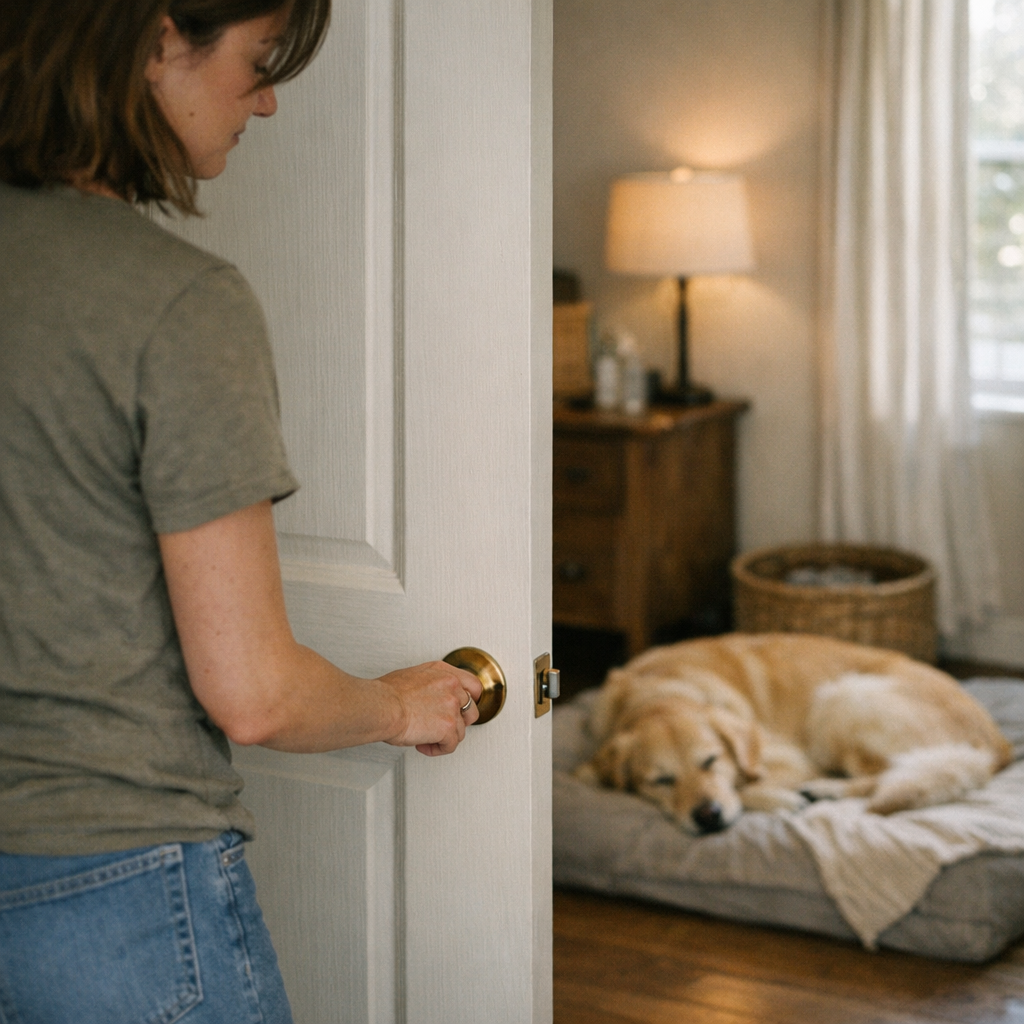
    The way you close the door before your dog’s rest time isn’t just a finishing gesture—it’s the real divider between a room that supports deep rest and a corner that keeps leaking distractions. If you’ve stood in that doorway, debating whether a quiet tug is enough or catching your dog’s half-raised head after every hallway noise, you know what’s really at stake. You can line up the right bed, arrange water just so, and keep the space clear—yet it only takes a careless, barely-closed door to undo the entire reset. Every loose latch, every open crack invites the outside back in: paw taps, the restless head dip, the constant “are we done yet?” stare. The difference isn’t cosmetic; it’s the line between a routine that actually resets the house and one that quietly drains your patience.

    The Familiar Friction: When the Door Never Quite Settles the Room

    Most rest setups look right from afar. Bed’s in place, traffic path is clear, your dog drops into a curl, but that uneasy energy hangs around: is it really rest, or just monitoring from a different angle?

    Real friction: You close the door—too quickly or just enough—start down the hall, and within moments, the pattern repeats. The muffled sound of dog nails against the floor, a shifting shadow under the door seam, the echo of your own steps or fridge door traveling straight through the gap. Instead of calming down, your dog’s body tenses: ears up, ready for anything. Restlessness sets in before you even make a cup of coffee. The “closed” door fails to block the swirl of movement outside, leaving your dog to decode every laugh, cupboard shut, or stray voice. Settlement becomes surveillance: the same cycle, every afternoon, every bedtime, no matter how neat the corner looks to you.

    Why the Door Close Impacts Your Dog’s Rest (and Your Routine)

    This isn’t about eliminating all noise—it’s about sending the right signal at the right moment. When you close the door softly, fully, and with purpose, your dog recognizes a boundary: the rest shift. Any hesitation—the door bouncing off the jamb, a rattled handle, or a careless gap—broadcasts uncertainty. That small difference replays: predictable rest versus repeated interruption. Over just a few uses, patterns lock in. The dog who learns the door will quietly click and stay closed becomes the dog who sets down faster, lasts longer between wakeups, and requires less rescuing. Let it slip, and familiar frictions creep back in:

    • Circling, shifting, or repeated “testing” to check if the coast is clear
    • Heads popping up for every distant step
    • Extended watchfulness, not actual relaxation
    • Breaks that get broken for everyone else—reset after reset

    Real-World Complications: It’s Not Just the Door

    The setup is more than a shut door. Bed placement, sound lanes, and the spaces where dog and human flow cross paths all stack up. Put the bed flush to the door, and every nudge or vibration jolts your dog awake. Space it back with a clear buffer—half a meter or more—suddenly, distant sounds fade, drafts drop out, and the physical divide becomes real. It’s not just about making things look calmer—it’s about making sure the setup blocks the daily friction points you can’t see until you run the routine for real. The edge cases add up: one misplaced bed, one blocked bowl, one door that never quite stays shut, and the cost piles onto every day you try to get your dog to settle.

    The Unseen Downside: Friction Accumulates

    A door left mostly closed seems minor—until it drains an hour across a week. Your dog looks fine, but small flaws show up every cycle:

    • Door not tight? Every pass in the hallway or kitchen triggers a micro-wake
    • Shortened nap: the dog stands in the doorway, half in and half out, waiting for you
    • Chopped-up flow: you pause prepping food, dealing with bags, or moving laundry to resettle the dog over and over
    • Rest morphs into pacing, circling, or vigilance—no one gets a break

    This is the compounding drag: the space looks prepped but can’t actually buy you, or your dog, a stretch of peace before something pulls you right back to square one.

    The Small Adjustment That Changes the Routine

    The real-world fix is simple: guide your dog to their spot, close the door fully, gently but with a final “click,” and make sure no gear (no bowl, no bed, no crate wall) is jammed up against the action zone. That small half-meter of bedding distance from the door buffer absorbs shakes, cuts sounds, and sets eligibility for rest that sticks.

    After even a few runs, the payoffs are obvious:

    • Fewer “half-lift” responses to random sounds outside
    • More uninterrupted downtime, fewer accidental get-ups
    • The dog stops dashing to the door every time something shifts outside

    This isn’t effortless at first. Busy days make it easier to push and move on, but the quick reset—slow door, buffer space—becomes self-sustaining. Over time, less owner intervention is needed. Calm becomes the norm, not the exception inherited only after the third failed attempt.

    The Price of Slipping Back: Why Consistency Matters

    Letting habits go—propped door, bed inching forward, a lazy latch—undoes a week’s focus in one rushed errand. Every less-than-clean step brings the old pattern: standing by the crack, checking the hall light, waiting instead of resting. Only a consistent door close and setup routine keeps rest from slipping back into a noisy holding pattern.

    Why Not Just Accept Some Noise? The Real Difference of a Clean Close

    Acclimating to noise isn’t the same as shedding tension. For most setups, strict silence doesn’t help—but repeatable boundaries do. A firmly shut door signals a predictable block; a partial close leaves unknowns to manage. Your dog stops scanning only when the signals are always the same. A missed signal (door not fully closed, slam, or rattle) reintroduces background static—forcing them to keep one ear and half their brain tuned for the next interruption.

    Everyday Broken Flow: A Setup That Looks Fine But Works Slowly

    The same logic shows up everywhere: reaching for a leash but knocking into scattered wipes, grabbing for a post-walk towel and finding it buried, or losing time reshuffling bowls that keep drifting into walkways. A rest setup can be neat but slow to use—a tidy corner that still involutes your routine with avoidable slowdowns. If you’re repeatedly blocked at key moments (walks, cleanup, settling down, crate resets), the space isn’t supporting the flow, it’s resisting it. The cost is rarely dramatic, but always felt in the background drag it creates.

    Refining the Flow: Practical Adjustments Anyone Can Make

    Better flow doesn’t mean more rules or new gear—it means fixing the points you actually trip over. For rest routines, that means:

    • Always closing the door gently, completely, without shortcuts
    • Keeping bed, crate, and bowls out of the door’s immediate sweep and buffer zone
    • Tracking which outside noises consistently disrupt calm, then moving the setup to reduce their impact before friction builds up
    • Owning the friction up front—don’t chase lost calm after it’s already gone

    The goal isn’t an immaculate space, but a setup that holds firm against the same repeat problems—so you don’t spend each day correcting what the routine could have prevented on its own.

    Small Tweaks, Lasting Payoff

    It rarely takes dramatic change: just a quieter, slower door, a rest zone with a buffer, and gear that stays out of the main action path. The rest is about removing the reasons to reset—letting comfort and routine support each other, not clash. Most days, that’s enough to keep the next hour calm, and the next routine less likely to run off track.

    Find rest setups, cleanup gear, and routine-ready solutions made for real-life routines at DogPile.

  • Slim Lighting Solutions That Keep Workspaces Clear and Functional

    Cluttered desks and tangled cords aren’t just side effects—they’re a warning signal your lighting setup isn’t actually working for you. After a week, the friction becomes impossible to ignore: light brackets eat into shelf space, cables hang into reach every time you plug or unplug, and surfaces designed for work become navigation puzzles. An area that looked organized on move-in day turns into a hands-on obstacle course—lighting intended to help now interrupts the simplest tasks, from cleaning to opening a notebook to sliding your chair.

    When Clutter Creeps In: The Hidden Cost of Bulky Fixtures

    Most people buy lighting once, but use it a hundred times—rarely pausing to picture how much elbow room will remain after cords and brackets take over. Opt for a thick, hardware-heavy fixture and open space quickly disappears: cable coils find permanent residence at the desk edge, tall arms shadow books or snag bags, and every “quick clean” means dodging supports and wiping around clamps. Over days, the clutter isn’t just visible—it’s physically in the way. You fumble past a bracket to charge a laptop, shift a lamp just to wipe dust, then add “fix lighting mess” to your mental to-do list.

    The disruption is practical, not just visual. Let cables run across active spots or block shelf edges, and every equipment adjustment becomes an awkward workaround—built for a static showroom, not situations where seats shift, routines change, or you just want to clear a surface fast.

    Slim and Low Profile: Practical Lighting that Stays Out of the Way

    The difference only becomes obvious after repeated use: fixtures that look minimal don’t always behave that way, especially in tight quarters. Slim lights and low-profile bars don’t just clear up photos—they free up real working edge. Daily impact changes fast:

    • No visible cables forming new “corners” in your line of sight
    • No support arms eating into vertical reach or casting excess shadow
    • No hidden dust magnets or new snag points for sleeves and cables

    You know your lighting is overdue for an upgrade the moment you keep shoving cords aside to spread out papers, or notice guests pausing before sitting to see where the lamp arm can swing. Even minimal-looking hardware often turns annoying when used by more than one person or when the setup needs to shift for a new task. Routine motions—moving a charger, turning to get something, or simply cleaning—expose what bulky setups hide at first glance.

    Repeated Use Reveals What a Setup Really Feels Like

    The true test hits by the first week of use. A swing-arm lamp with a clean look seems fine until the shade blocks an outlet, or a bracket means you have to reach awkwardly for a book. Cleaning becomes an exercise in working around fixed hardware and dodging cords that stick out just enough to catch a cloth or a sleeve.

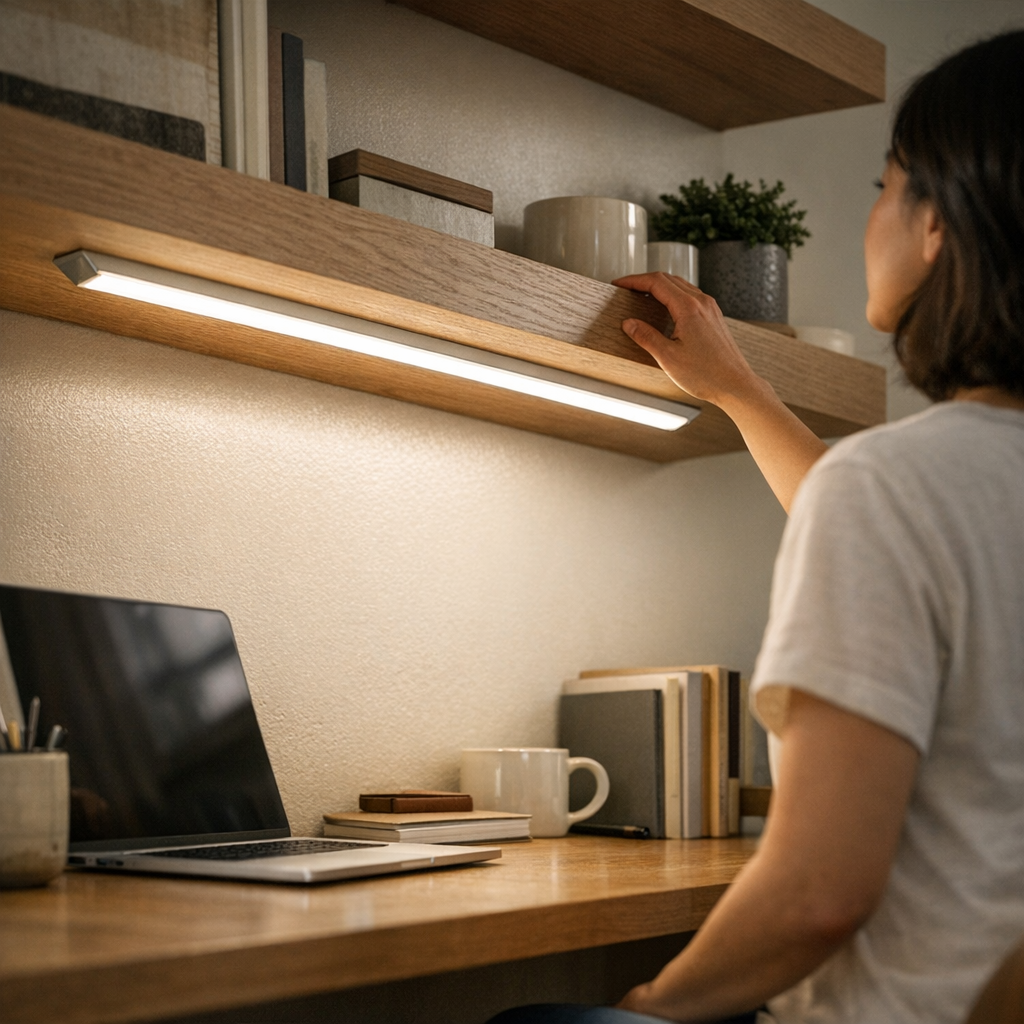
    Switch to a low-profile LED bar under a shelf or along the back edge of the desk and the relationship with the surface changes. The light stays out of the way, reach is open from edge to edge, and even after a week’s mix of projects, repositioning, and cleaning, nothing interrupts. There’s a visible absence—no sudden tangle, no makeshift adjustments, no clearing gear just to use the area you set up as “organized.”

    Shared Spaces Show the Difference Faster

    Shared desks put setup friction on display. A clamp-arm lamp that works for one user leaves the next with a tangle of cable and a bracket blocking a comfortable position. Over a few days, the sequence is predictable: people start shifting chairs sideways, stacking items away from the arm, or leaving the lamp unplugged to avoid the extra step. Surface clutter increases and everyone adapts to the light—rather than the light adapting to the room.

    With a low-profile strip mounted under a shelf or along a wall edge, these problems recede. No one has to negotiate for cord space. There are no bulky arms to inch around or brackets dictating where the work zone ends. The clean feel remains, because the light works invisibly—everyone can sit, read, or charge devices without dodging hardware or tracing cable paths.

    Desk Transformation: Small Shifts, Big Results

    Swapping a heavy swing-arm for a slim LED bar immediately changed how the entire back edge of a desk could be used. Suddenly:

    • Devices, notebooks—even things as irregular as a water bottle—could move anywhere along the surface without colliding with hardware or tugging a cord loose
    • Light was evenly spread, no sharp glare where you’d normally rest your hands
    • Cleanup went from a five-minute maneuver around brackets to a single wipe—no unplugging, no careful dusting

    What changed wasn’t just tidiness, but the daily mechanics. No more yanking a lamp aside to reach a power strip, no more pausing to detangle a cable after shifting work materials. That practical clarity—you never need to remind yourself to “fix the lighting situation”—signals a structural improvement, not a passing clean look.

    Shelves, Cabinets, and the Reality of Limited Space

    On shelves or inside cabinets, even a small bracket or stray wire quickly turns usable inches into lost space. Install a thick fixture, and soon you’re stacking books in front of a mount or brushing past a cord to get to supplies. With slim under-shelf LED bars, every front edge stays accessible—for hands, cleaning, and light itself. The fixture disappears into the background, yet coverage reliably reaches to the visible edge, with no bump risk and no tangle when shifting stored items.

    If you choose a large accent piece for style or maximum output, expect the tradeoff: cable management becomes critical, and surface area shrinks by the width of every bracket, cable, and connector. These are choices imposed by hardware—not just aesthetics.

    Cable Management: Don’t Treat It as Optional

    Even a minimal fixture can lose all practical benefit if its cable becomes the next visual nuisance. A thin wire over a desk, left unmanaged, turns into a line you see—and catch—every time you plug in a device or tidy up. “Looking simple” at installation fades fast if a week later, there’s a loop draping down a wall or crossing the field of view at an awkward angle.

    The obvious fix: adhesive cable channels or discrete clips to guide cords along surfaces and out of the action zone. This doesn’t just clean up the look; it eliminates daily cable snags, accidental tugs, and visual clutter, freeing up attention and workspace for what actually matters.

    Brightness, Placement, and Actual Task Visibility

    The fear with slim fixtures is losing usable light. But brightness means nothing if the light falls in the wrong place. Most modern low-profile LED bars far outshine their bulk, easily lighting desk runs or shelf edges. What actually fails most often? Poor placement. A bright light, misaligned, leaves a dim work area or glints directly off screens; too far back, and the front edge of your work disappears in a dim zone that negates the extra lumens entirely.

    Choosing fit and placement over arbitrary output transforms the space. A slim bar installed where you actually reach and write—rather than where it “looks best”—results in clear, usable surfaces and even task illumination, not just a pretty wash.

    Living with Lighting: The Difference Shows Over Time

    The warning signs are immediate but often ignored: a shelf edge catches cable twice in a day, a lamp blocks a simple reach, a “finished” desk setup still requires routine workarounds. These small frustrations add up: lost momentum, uneven work zones, constant mental notes to fix, move, or clean when the hardware never really fit the tasks it’s supposed to support.

    The real upgrade isn’t visible on installation day—it’s what stays unbroken after a dozen different routines. Slim, low-profile lighting reduces interruptions, reserves space for new needs, and lets every adjustment happen smoothly, without hardware holding the room back.

    Day after day, small frictions vanish—and you start noticing your work, not your lighting. LightSupport