Category: Tools & Workshop

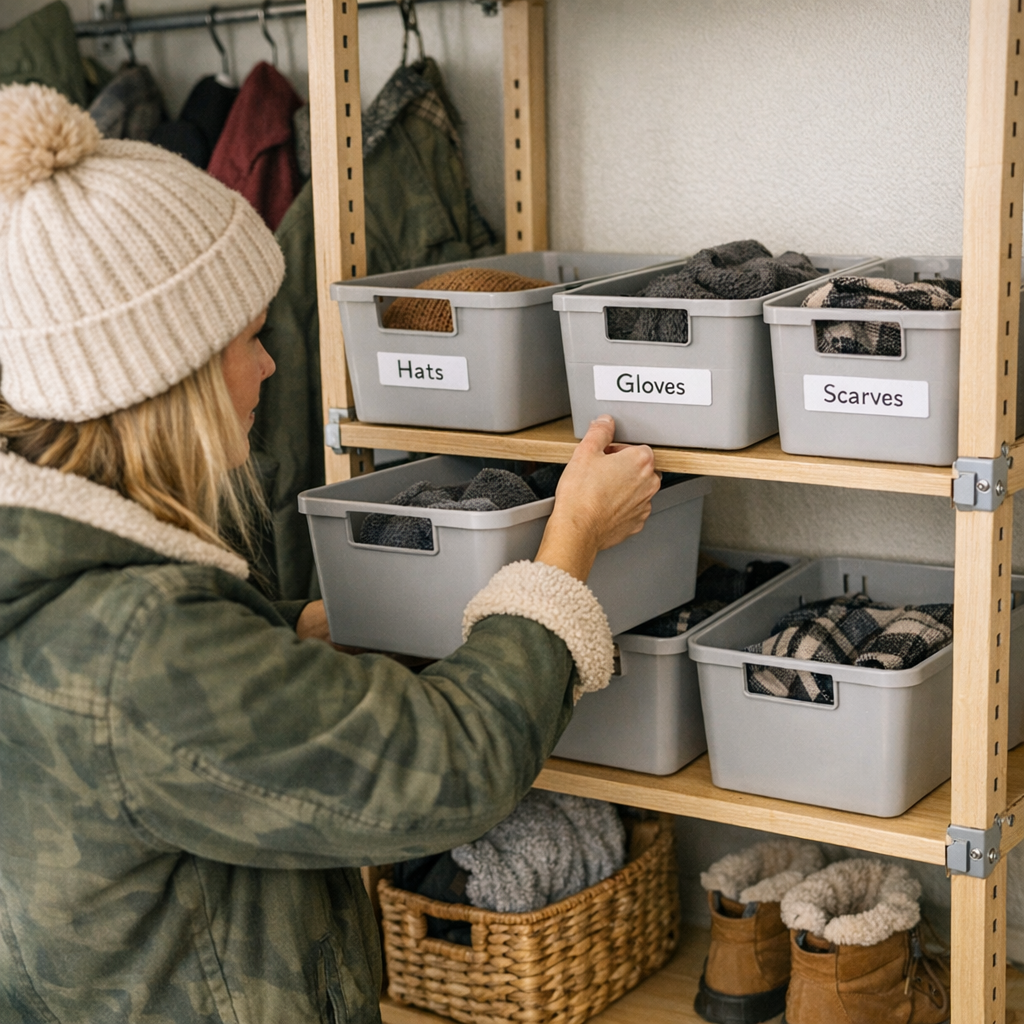
  • Why Movable Bins Extend Shelf-Edge Label Durability in Busy Closets

    The first week after an organizing overhaul can feel deceptively satisfying. All those matching bins in your entry closet or laundry shelf, each with a crisp new label—everything finally in its place, every category spelled out. But as real life moves in, so does the slow unraveling: bins get bumped, labels start to peel, and the clarity that felt permanent starts fading fast. By week two, what looked organized is under steady attack from rush-hour mornings, bulky gear, and the chaos of daily traffic. Suddenly, a “finished” closet becomes a source of extra fixes and confusion—right where you wanted less hassle.

    How Label Placement Becomes a Daily Friction

    Picture a shelf lined with bins so tightly packed, there’s no room to breathe. Every attempt to pull out a bin in the middle requires nudging others aside, pushing labels with every move. At first, those labels on the shelf edge seem like a simple answer—you glance, you grab. But as bins grind past the edge, corners lift, labels shift or tear, and in the scramble to get one kid’s hat or one pair of gloves, you end up with labels stuck to the wrong containers or hanging by a thread.

    It doesn’t implode all at once. Instead, the system wears down—bins moved out of order, categories drifting, labels signaling the wrong contents or missing altogether. What should feel automated starts demanding attention: correcting bins, smoothing stickers, hunting for what used to be easy to find. The original organization slowly morphs into a game of catch-up.

    Where Crowded Closets Expose the Weakness

    The problem hits hardest in the entry closet—a daily battleground. Picture parents grabbing boots from the lowest shelf, kids stuffing backpacks and sports gear wherever there’s space, someone shoving a bin aside to reach for an umbrella buried in back. Nobody stops to handle labels gently or keep categories strict. In the rush, bins swap places—the hat bin drops onto the “Gloves” label, the “Scarves” tag dangles over an empty slot, and by the end of the week, half the bins are misplaced and the shelf is a guessing game.

    Bins tugged out for a single missing shoe often take neighboring labels with them. Adjust one overstuffed container, and the entire section slides into disorder. The result? Labels are never synced to what’s inside, and everyone is back to pulling out multiple bins just to check each one—multiplying mess rather than minimizing it.

    What You Lose When Bins Can’t Move

    Packing bins edge-to-edge seems smart—maximum space, minimum wasted shelf. But in practice, it creates its own bottleneck. With nowhere to shift, bins scrape past labels every time they move—tearing, folding, or simply losing their hold. Adhesive builds up, label corners curl, and sometimes half the category name vanishes. More crucially, as what you store shifts—winter hats today, rain gear next month, overflow toys after that—labels get out of sync, and resetting everything becomes a hassle you put off.

    Soon, relabeling isn’t a once-in-a-while tune-up, but a regular chore. What looked neat on day one turns, within a few hurried mornings, into another source of friction—costing you time every reset as bins and labels fight each other for space.

    The Shift: Bins and Labels Move as One

    There’s a small but powerful upgrade: let bins breathe, and let labels move with the bins. Leave even half an inch between containers so each one slides freely. Labels stuck not to the shelf edge but directly to the bin—or attached with a hook, tag, or clip—stay with their contents no matter where you swap or slide. Now, when you need to shift for a season, re-sort after a school project, or clear out Saturday’s clutter, your system flexes instead of falling apart.

    Choose labels built for this, too—removable, strong, and easy to reposition. Instead of scrubbing away adhesive trails or peeling off remnants, you just move the label with the new bin, skip the sticky cleanup, and keep categories visible in one step. Even as gear rotates—mittens in January, pool towels in June, homework supplies come autumn—everyone knows what’s what, and the shelf stays readable and reliable.

    Spotting When Your Setup Isn’t Working

    The signs aren’t subtle: you reach for one bin and two more tumble. You fish for a scarf, but labels come off in your hand. Containers never seem to be where their labels say, and no amount of resetting keeps things straight for long. Shelf edges start collecting dust, lint, and curled corners as labels detach with every grab. These moments aren’t minor—they’re proof the system isn’t matching up to daily needs, and the labels aren’t keeping up with real life.

    Practical Tweaks That Keep Things Organized—For Real

    Give bins room to move

    Never press bins right to the edge or jam them in tight. Half an inch of space lets bins slide freely, protects labels, and stops the classic domino effect of toppling stacks when you reach for something in the middle.

    Pick labels that flex with you

    Go for strong but removable adhesive, magnetic tags, or hooked label holders. Place them where hands won’t constantly scuff them—on the bin handle, lid, or side. With this, updating or relabeling is a one-step fix, never a full weekend project.

    Keep bins and labels in sync, always

    As categories change, slide your bins, shift your labels, and keep order without fuss. From winter gloves to summer sandals, your shelf stays current—not just visually tidy, but actually functional.

    Notice hiccups and adjust

    If bins become a puzzle to access or labels fade out of use in just a few weeks, recognize it’s not you—it’s the setup. That moment of repeated reshuffling means it’s time to give the system more space and flexibility. The ease shows up in the morning—the right bin, the right label, no double-checking.

    The Payoff: Organization That Stays Useful

    When storage adapts, categories remain visible, resets stay quick, and the structure holds up on your busiest, sloppiest days—not just for tidy photos. Shelves become faster to use; you spend less time hunting and more time simply grabbing what’s needed. Family routines run smoother, entryway clutter gets contained, and every bin earns its keep long after “organizing day” is over. That’s the quiet but real payoff: a space that works as hard as you do, season after season.

    Find more practical strategies and products to keep your storage working at ClosetWorks.
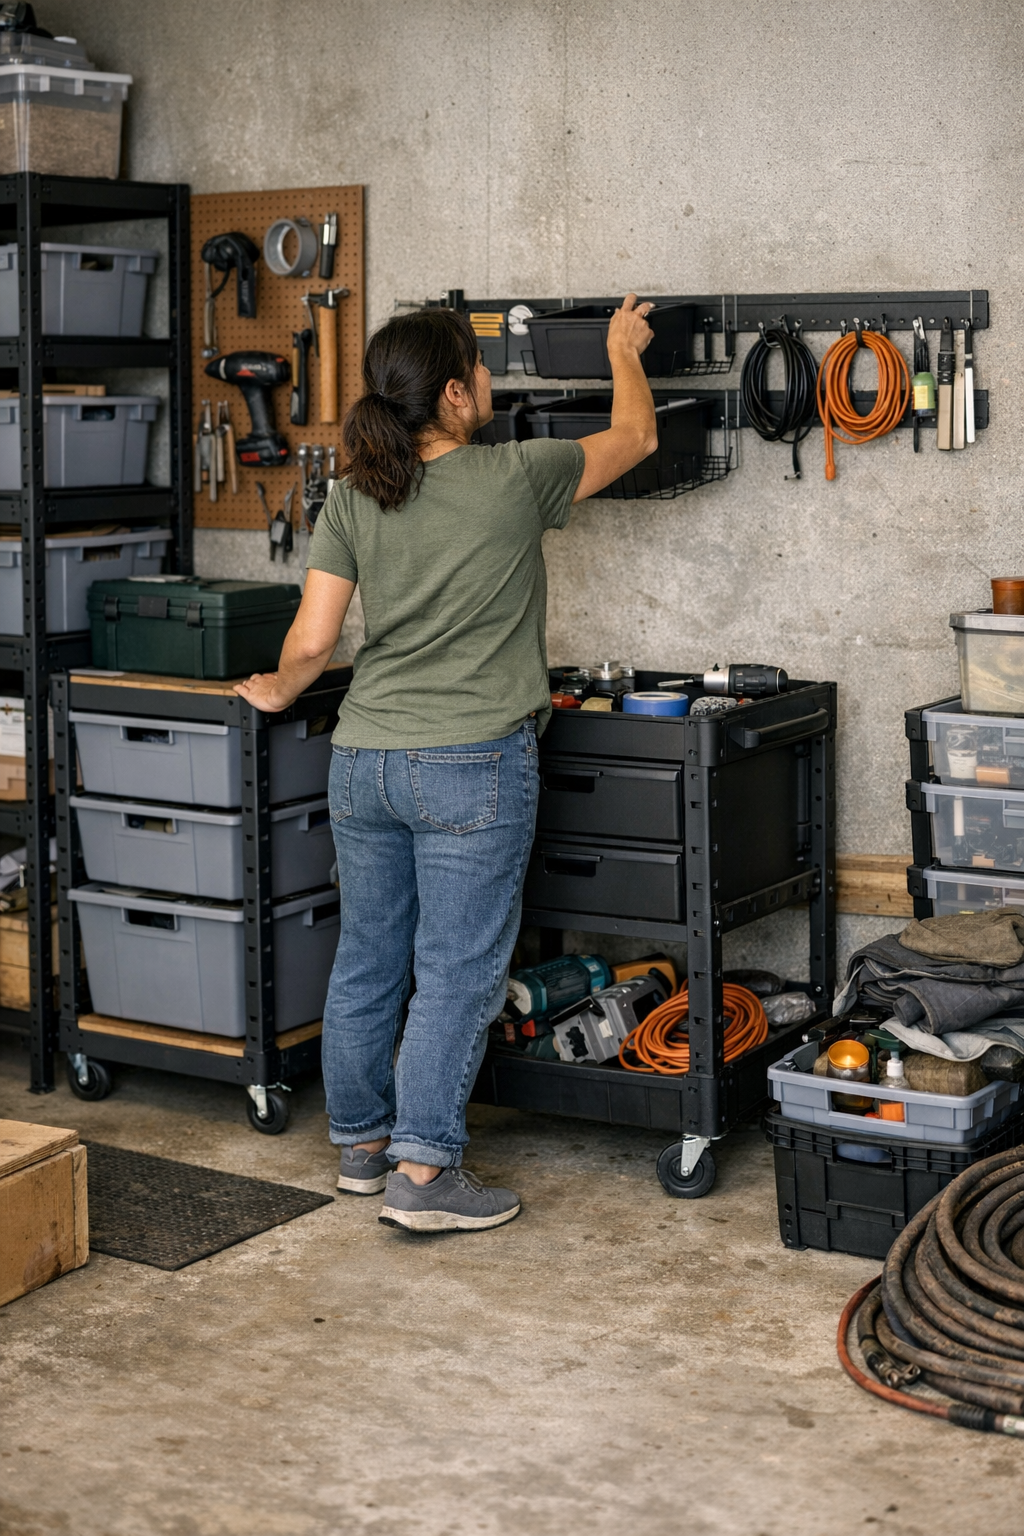
  • Why Rearranging Your Workspace Isn’t Always True Organization

    Every reset looks perfect for a day. Bins labeled, carts lined up, floor swept, shelves squared—your garage or workbench corner finally feels under control. But a true setup isn’t proven by the calm after cleaning. It’s tested by real weeks: constant fetch-and-return, a crowded path, corners you sidestep, and old habits sneaking back in.

    Surface Order vs. Underlying Friction

    That initial sense of victory—everything in its place—fades fast once routine hits. You grab a tool and clip the edge of a cart. Bins begin clustering in the only open spot, which quickly becomes crowded. A cart, flawless in photos, now blocks just enough space that you find yourself shuffling it left, right, back, over and over as projects come and go. Resets, meant to be quick, turn into long sessions of putting away “what doesn’t fit” again.

    The illusion of neatness is easy; actual usability is harder. Fresh labels and crisp stacks might impress your camera, but they rarely hold up under the pressure of daily motion. The layouts that last are not the ones that look tightest—they’re the ones that stop fighting your routine and start flowing with it, even when the space looks half-empty.

    The Real Test: Day-After-Day Use

    Every time you work in the space, the system reveals its blind spots. Maybe you have to swerve around a cart—one hand balancing a bin, the other opening a drawer that barely clears the shelf behind it. Suddenly, “flexibility” means zigzagging to get a screwdriver. The return path for tools gets clogged because one area always absorbs overflow. You’re not reorganizing; you’re repeatedly compensating for small mistakes in the layout.

    Adding another rolling chest or sticking up extra hooks feels like progress, but it often multiplies these micro-frictions unless they genuinely fit the way you move. Suddenly, you’re dodging blocked walkways and team-lift zones that never see use—or reshuffling items that should have a simple route back after every project.

    Scene: The Perpetually Misplaced Cart

    Visualize the wall: storage bins stacked, two carts tucked underneath. That’s the ideal. By midweek, though, one cart has crept forward, then sideways—now it blocks the cabinet door you reach for three times a day. Any quick reset means nudging the cart out, sneaking around one corner, then struggling with the odd gap behind where lost bits and random tools collect out of sight. The fix isn’t another round of tidying; it’s noticing that the “perfect” lineup breaks down when actually used.

    Scene: A Wall Rail That Sucks in the Extras

    Wall rails promise easy grab-and-go, but routine exposes the truth. What started as your solution for daily tools quietly turns one stretch into a magnet for overflow: shears, odd pliers, a pack of zip ties you grabbed once and never moved. You plan to clear it later, but each week, it grows—blocking straightforward access right when you’re mid-project. The surface stays “organized” yet resists clean workflow when you most need it.

    How to Spot a Broken Routine, Not Just a Mess

    If putting things away gets slower and sloppier, the setup is telling you something. Concrete warning signs include:

    • The same corner or shelf collects random gear, turning into a reset job each time
    • Returning tools or bins means moving something else first—never a direct return
    • Main walkways get squeezed by carts or racks, breaking up your movement
    • One storage zone gets overloaded, while an entire wall sits mostly unused

    The “organized” look does not mean the system works; the real test is how little reshuffling or retidying your routine requires to bring things back to order.

    What Actually Fixes the Flow

    The classic trap is maximizing every inch: carts side by side, shelves butting up, rails loaded ceiling-high. But in use, that wall-to-wall arrangement means jammed walk paths and awkward returns. The fastest fix is often the hardest to accept: leave more gap than you think you need.

    Small Gaps, Big Difference

    Try parking your rolling cart six inches off from the rack instead of flush. Suddenly, you can return a bin or reach behind without a three-step shuffle. The extra stretch of open floor feels “wasted” until it earns you fifteen faster returns that week—and those missing scuffs on the paint where carts used to bump and drag. Practical breathing room beats a flawless grid every time, especially along main reset routes and wall edges.

    Trust real ease, not flawless looks. Strategic emptiness—open zones at corners, between carts, or in front of cabinets—shrinks reset time and makes the space less overwhelming to use, even after months of clutter creep.

    Solving Overflow and Breaking Up Dead Space

    Overflow is more than clutter. It marks the spot where your setup fails to match your real path. Maybe your “overflow” bin is too far from where you always drop tools. Maybe a blocked shelf collects castoffs behind a stuck cart. Every unsorted pile signals a place where your system put appearances over convenience—and each pile always seems to return unless you rethink the zone.

    A Simple Test: Rotate the Trouble Spots

    Pick a trouble spot—a cart, an overloaded wall section, an awkward corner. Switch its location or empty it for a week. Watch what happens. Do dropped tools naturally find a new home, or does the gap fill right back up? Is access easier, or are you just shifting the friction? This small experiment exposes whether the friction is built into the layout, not just the stuff. Real fixes come from seeing where the system blocks you again and again, then opening that space up for what you actually do—not what you wish the setup would achieve.

    Lasting Setups Make Life Easier, Not Just Neater

    Setups that feel “done” usually aren’t. The real winners never draw attention: resets are quick, movement is automatic, and things land in place without you squeezing past, backtracking, or moving a cart for the third time in an hour. It’s not about perfection; it’s about a space that finally stops fighting your routine.

    You can browse practical modular storage, rolling carts, and real-use workshop systems at StackNest.

  • Optimizing Ventilation Fan Filter Cleaning for Better Airflow and Longevity

    The warning signs aren’t subtle if you know where to look (and listen). You’re deep into sanding down panels, sawdust feathering onto your boots, the fan’s hum pressing dust toward the exit. Then the pitch shifts—less zip, more drag. Not catastrophic, but you feel it: the shop air thickens, the fan’s restart drags, and even your next cut feels harder. It’s not just about comfort; tool performance and your own energy take the hit. Overlook this, and even the sharpest blade or the newest cordless drill starts to feel bogged down.

    Skipping Maintenance? The Tools Notice First

    It’s tempting to see filter cleaning as an afterthought—piggybacked onto a bench cleanup or ignored until light through the vent looks suspiciously gray. But in actual use—drilling into seasoned pine, grinding through steel hangers, sanding compound from wall repair—neglected filters put pressure where you notice it most:

    • Subtle, then stubborn drop in airflow, making dust linger over your workstation
    • Fan pitch deepens under load, adding a whine to background noise
    • Fan body radiates uncomfortable heat midway through a busy morning

    Stretch cleaning too far and you pay not just with haze in the air. Dust hovers, motors run hotter, and soon it’s not just filter life on the line but bearings, ductwork, and your patience with every clogged drill fluting or slow-to-cool saw blade.

    Why “Set-It-and-Forget-It” Schedules Backfire

    On real jobs, the clean-every-week mentality crumples fast. The pace and type of your work explode that system: two days of cutting MDF or drywall mud outpace a light week of assembly by a mile. By the time you spot caked dust on vent fins or breathe in a muskier haze, you’re already losing tool sharpness and shop stamina.

    Work Surges Don’t Wait for Friday

    Maybe you just finished a long day cutting cement board in the back shed. Dust claims every flat surface—fan grills, clamps, even the phone you set on a shelf two hours earlier. No “Friday” reset covers for Monday’s sudden grind. Those unchecked surges don’t just mean longer cleanups; the grime ends up inside tools, tightening collets and scraping bearings, costing you precision and adding resistance to every new cut or battery swap.

    Fan Feedback: When Small Changes Signal Bigger Trouble

    Not all filters behave the same, and guessing is a bad wager. Two filters, side by side, might look identical at a glance. Throw a week’s worth of belt sanding at both—the finer media chokes early, fan noise switches from hum to groan, your next drill pass throws more dust than it catches. The other filter, coarser but lower-rated, breathes easy (for now), but lets more grit slip through and line your saw’s moving parts. Look for what the fan is telling you, not just what you see with a flashlight.

    • The fan’s whine shifts lower, more strained, after each session attaching fence plates
    • Heat climbs with every run of long drywall cuts or deep hole drilling
    • Grit accumulates not just inside duct seams, but also on miters, bit trays, and battery chargers

    These signals show up most when you’re mid-task, not standing idle—thick air after a sanding marathon, fans lagging when you power-up for the next round, small upticks in hand fatigue as tools work just a bit harder with each pass.

    Saying Goodbye to Guesswork: Pressure Tells the Truth

    If you’ve wasted time on both extremes—waiting too long and cleaning obsessively “just in case”—switching to measurement instead of hope changes everything. A manometer mounted to the fan housing tells you real pressure, not guesses; for one dust-blown workshop, 50 pascals was where trouble started. Once that line tipped, quick filter cleaning meant snapping airflow and sound back to normal, every single time—regardless of how superficially clean the filter seemed.

    After every high-dust stint—planing edges, batch drilling joist holes—checking static pressure trumped every tired calendar schedule. It landed cleaning right where it belonged: after 9–12 hours of real load, not “once per week” by habit. The result? Fewer sluggish re-cuts, sharper bit handling, steadier tool pace without surprise slowdowns.

    Adapt or Burn Time

    Keeping cleaning tied to performance, not guesswork, pays off:

    • Constant airflow and a familiar fan note, even after back-to-back grinding rounds
    • Longer stretches between pricey filter swaps
    • Far less rogue grit sabotaging smooth miters or seizing up blade guides

    No manometer? Use what you have: check for fan warmth mid-way through a heavy cut session, tune in to pitch changes when the chop saw throws sparks, or spot fine powder at duct exits instead of at the main filter. These are the workshop’s way of keeping score, and they always beat the calendar.

    The Filter You Pick Changes Everything

    Swapping to a finer, denser filter mesh might make the air smell cleaner, but expect tighter windows for cleaning. Finer filters choke faster under real dust loads—especially after you spend hours sanding filler or ripping fiberboard. Coarse filters can fake a longer light-duty interval, but send more grit to tools where it does the most harm. If you just upgraded filters and suddenly find yourself cleaning more often, you’re seeing reality, not a defect. It means more dust is being caught before it gets to your hand tools and motor windings.

    Workable Cleaning: Tools, Timing, and Real Signs

    Skip the wall calendar. Let tool feel and shop air set your pace. If the fan’s getting louder, the body’s almost hot to the touch, or fine dust refuses to clear, it’s time. Pay close attention after the dirtiest tasks: sanding rough plywood, grinding old bolts, building a run of cabinets that covers the floor in sawdust. Count these as your checkpoints—don’t wait for a marked date.

    If you invest in a pressure gauge, use it as your reality check. If not, rely on the shop’s narrative: the shift in fan tone, odd warmth at the casing, grit sneaking into hinge points. These are as good as any calendar when it comes to keeping tools sharp and air clear.

    Bottom line: every less-burdened filter helps your saws cut quicker, bits run cooler, batteries last that much longer, and your own focus holds steady—without the drag of a dusty, sluggish shop. That’s productivity you feel every session, not just when you clear the vent for inspection.

    For practical fan filters and more workshop-tested tools, visit Gumboll.

  • Why Strict Closet Labels Fail and How Flexible Storage Solves It

    Order That Disappears: Why Closet Organization Rarely Sticks

    Step into most homes, and you’ll spot the ritual: closet shelves lined with bins labeled “Socks,” “Hats,” “Workout Gear.” For a day or two, everything clicks—socks all in a row, hats stacked in their own bin. It feels possible, even likely, that this time the system will hold. But real life bulldozes the plan. Morning routines spill socks into the sweater bin. Hats get tossed over scarves. The neat, named surfaces start to conceal a mess that’s only getting harder to navigate. And when you’re late, you don’t have the luxury to gently file everything in the right place—so items stack up, logic blurs, and what looked organized becomes a daily scramble all over again.

    Why Label-First Systems Crack Under Real Life

    A wall of labeled baskets appeals in theory: each thing in its place, chaos tamed by crisp handwriting. But actual daily use reveals the limits. You stack folded shirts in the “T-Shirts” bin—by Friday, that bin is overflowing, so the next clean shirt perches on a pile in “Sweaters” instead. The “Gloves” basket gets invaded by a rogue scarf, then gym socks sneak in when you’re out of time. Every category starts to blur. When bins are too full, overflow isn’t rare—it’s routine. Organization that only works when everything is perfectly returned is a setup for slow collapse, not sustainable order.

    It’s not laziness; it’s the reality of how people move. Looking for a watch in the “Accessories” bin? Everything else gets jostled. Shelving winter boots means nudging aside shoes you just put away. The more a system relies on exact returns, the more brittle it becomes—one rushed move breaks the pattern, and the cracks spread.

    Beneath the Surface: The Hidden Mess in “Tidy” Closets

    Closed bins mask the drift—until you need something. Open the lid on a “Winter Accessories” box and you’ll dig past sunglasses, tangled scarves, gloves from two winters ago, and maybe a rain poncho tossed on top. From the outside, everything still looks orderly. On the inside, it’s a jumble. Every search means more rummaging, stacks lose their shape, and what should have been a quick grab becomes a mini excavation.

    This isn’t just slow or clumsy—it’s unsustainable. When your setup depends on everyone perfectly remembering what belongs where, mistakes pile up. A single off-week—one rushed laundry return, a bag of shoes dropped at the wrong end of the closet—leaves the system struggling to recover. By Saturday, “resetting” isn’t a two-minute tidy. It’s a full-on sorting session.

    The Relentless Morning Rush

    The real test happens when you’re in a hurry. Picture the start of a weekday: the “Rain” bin—intended just for umbrellas—now holds a scarf, two mismatched mittens, and a soccer jersey. Shoes are stacked three deep, so every retrieval means shifting pairs and collapsing rows. The “easy” access vanishes, and delays add up in inches—not quite chaos, but never smooth. Each day multiplies the odds that you’ll just shove things wherever there’s space, pushing the closet further from its neat beginnings.

    When Resetting Overtakes Usefulness

    The system’s cracks show in how long resets take. Need something from the bottom basket? Time to lift and restack every bin above. Labeled shelves spark their own confusion: does this thin scarf live with hats, or does it squeeze back into the “Accessories” bin with half the rest? Each unlabeled or overstuffed bin is a tiny hurdle, slowing you down just enough to skip the step next time.

    Soon, every misfiled piece becomes tomorrow’s problem. Original categories fade as people adapt on the fly. Instead of order, you get a slow buildup of hesitation—where does this go?—and what started as a five-second reset balloons into a ten-minute chore once a week. If putting things away feels like work, the system isn’t serving you; you’re serving the system.

    How Flexible Zones Rescue Everyday Storage

    The turning point comes with honest adjustment. Trying to force stricter categories and more labels usually just entrenches the drift. What actually works: setups designed for the way you live, not just the way closets look in catalogs. Open bins become easy drop zones for high-traffic items. Shelf gaps are wide enough to let you see and grab what you need without shuffling four stacks to get to a single glove.

    The shift is visible and practical. Scarves land in open bins where they’re quick to grab and easy to drop back. When a section fills up, items calmly spill into the next space—without collapsing the whole system. At the end of a busy week, resetting takes minutes, not an hour. No one wonders where to toss the extra mittens. The closet keeps working, even when the “right” bin is full or the label is ignored on a hectic night.

    The Best Setups Assume Imperfection

    The sustainable setups don’t count on everyone pausing and recalling the master plan every time. Open baskets handle daily churn, while rarely used zones or guest gear get more defined spots. There’s slack in the system—enough give so one missed return doesn’t trigger unraveling. Labels don’t stop overlap, but flexible design catches it before it spreads.

    How to Spot a Closet That Isn’t Really Working

    Watch for these classic signs your storage isn’t syncing with your routine:

    • Bins that start out organized, but end up as catch-alls.
    • Putting things away feels tedious—not quick or obvious.
    • Reset sessions keep getting longer as categories blur.
    • Indecision about where anything belongs—even for things you use daily.

    These little sticking points grow week after week, gradually draining time and adding silent stress to your routine.

    Design for Your Routine, Not the Ideal

    The answer isn’t to abandon order but to make it fit the patterns you actually follow. Use labels where they help: shelves for backup linens, or baskets at the top for out-of-season gear. But focus flexibility where things move most—open bins at eye level, dividers that let a folded stack breathe, and shelves you don’t need to reach behind just to get daily essentials. If a bin becomes a mixed bag, that’s feedback, not failure—it means the flow needs a tweak, not a stricter label.

    Small Fixes, Real Relief

    Monitor how you interact: Do you dread tackling the bottom shelf? Are the most-grabbed items buried behind closed baskets? If you’re always shuffling the same things from pile to pile, your closet’s asking for reconsideration. Try raising a bin for easier access, spreading out shoe racks to lessen crowding, or dropping rigid categories for open zones. These small shifts can add back those lost minutes—making daily resets so quick you barely notice them.

    Order That Holds—Even When “Perfect” Slips

    A closet isn’t truly organized just because the labels line up. Real order is the kind that survives the everyday mess—the one you can keep without a chore list. If your resets shrink, your access speeds up, and your stress goes down, your system is working—even if that last bin is always half-mixed.

    For products designed around daily realities—shelves, racks, and bins that can take real-life routines in stride—visit ClosetWorks.

  • Prevent Overheating in Long Cuts with the Right Drill Bit Choices

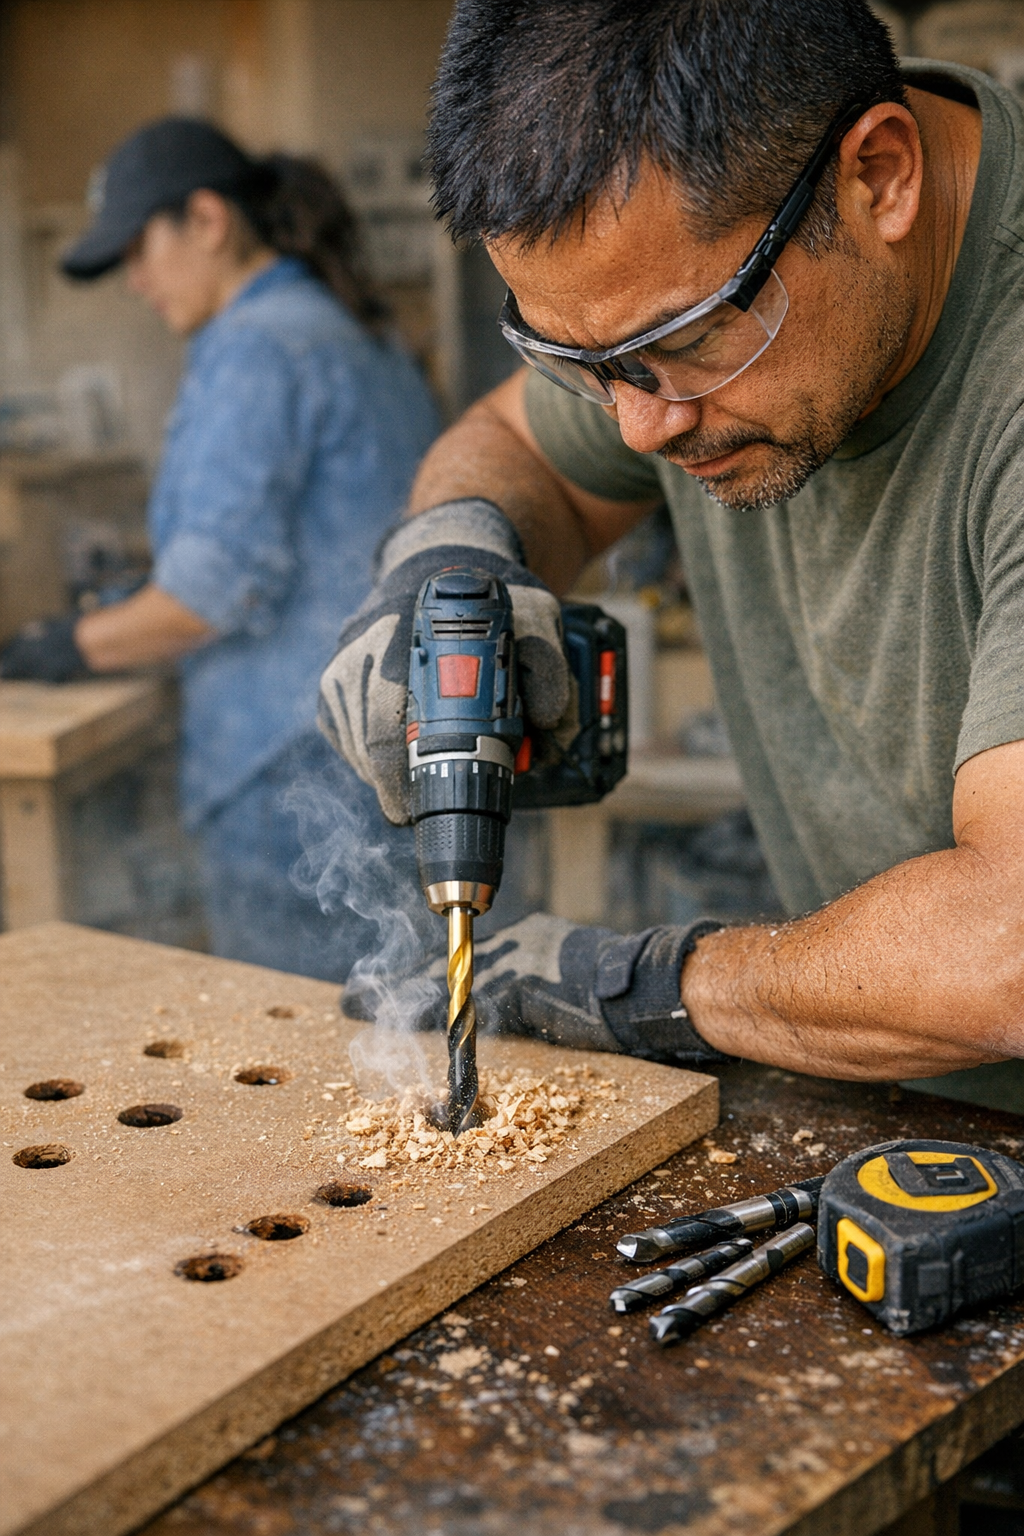
    If you’ve stood over a half-finished panel drilling your twentieth hole—shoulder tensed, drill spinning hot, bit tip feathered with smoke—you know the real bottleneck isn’t your muscle or your patience. It’s whether your bit, blade, or driver holds up when the work gets repetitive, the wood gets denser, and every inch starts to fight back. The difference between a clean run and a dragged-out mess is usually the moment your tool starts to lose its edge—or you start to wrestle it just to keep going.

    The Moment Your Drill Bit Turns Into Work

    The warning signs don’t jump out at hole number three. For a handful of fast cuts, nearly any new bit can fool you—but on the twelfth, or the sixteenth, friction creeps in. You press the trigger, but now the bit whines, hesitates, and you’re pushing harder chasing that smooth exit—except the far side splinters, the wood smells burnt, and you’re suddenly one step closer to a sanding marathon.

    Miss these early cues and your progress stalls: edges chip out, holes run ragged, and your finish work multiplies. The real trouble isn’t a dull point. It’s the heat rising, chips clogging the flutes, and a worn edge that turns both tool and workflow against you—dragging the whole job down a notch at a time.

    Where Overheating and Drag Sneak Up

    Soft pine lets you get away with a cheap bit. But start drilling in MDF, red oak, or face a stack of repeated fastenings, and bit quality announces itself—sometimes too late. Heat and drag only show up after a pocketful of holes, when you’re already shouldering through each pass. The burn line by the exit face, the tight aroma of scorched fiber: they’ll cost you in clean-up, and they’re a sign your bit has crossed a line.

    Let these “minor” signs pile up and suddenly hardware doesn’t seat flush, pilot holes wander, and each new set takes longer. Day after day, tiny losses compound. The difference isn’t theoretical—it’s lining up panels that refuse to cooperate and cleaning up material that shouldn’t need it.

    Chip Removal: Non-Negotiable for Good Drilling

    There’s no shortcut—chip buildup is the silent killer of both pace and edge. Clogged flutes mean trapped heat, slow progress, scorched stock, and an arm that aches from compensating. Assembly lines and shop teams know the pattern: swap in bits that clear chips fast, and everything speeds up. Rely on muscle instead, and you’ll churn through bits—and patience—twice as fast.

    The Bit Quality Divide—Exposed by Real Work

    One new bit looks much like another until you face a stack of tasks. Anyone who’s ruined a project after a half-day of repeat drilling can tell you: bargain bits start to whine and bind, producing little more than scorched powder long before you’re done. The tell? Instead of steady shavings, you’re left with dust and rising temperature at your fingertips.

    Compare that to a titanium-coated split-point with an honest chip-clearing design. Each pass throws thick, healthy chips and comes out clean—not just for three holes, but for thirty. The downstream effect is obvious: fewer scorch marks to sand, entry and exit holes that actually match, and less fatigue in your grip and your time sheet.

    When Shop Fatigue Sets In

    You’ve likely lived it: a production wave installing hardware, sheet after sheet on the table, a box of screws waiting. Early on, things move. By set three, the bit drags, and you find yourself withdrawing mid-hole, checking for heat, or waiting it out. Every extra pause telegraphs to the next step—control slips, alignment drifts, and you’re wrestling trial fits and filler instead of stacking finished panels.

    Small Tweaks, Big Payoff

    Switching to a well-designed, coated bit—especially those split-points built to clear chips fast—won’t magically fix sloppy work. But you’ll feel the change as the day runs: chips clear with less effort, heat doesn’t linger, and you’re not constantly stopping to let the tool cool down. In real tests, tip temperature drops from 230°F to 170°F is believable—and so is getting to cleanup with less sanding because exit holes stay neat.

    Pro tip: Don’t wait for clogs. Build a habit of clearing chips every three or four holes—even a quick tap or blowout keeps things moving. Across a day, those saved seconds grow into fewer tool changes and less grip fatigue.

    Know When to Step Back and Reset

    When the bit starts to complain—smoke wafts up, chips turn brown, you feel yourself leaning in—it’s time to stop pushing. That shiny-glazed look on the bit? That’s lost edge, not “just hot.” If you hesitate to touch the bit for fear of burning yourself, that’s the moment for a break, a bit swap, or a check-in with your drilling rhythm. Touch with care; let it cool before even checking.

    Pacing Over Speed—How Drilling Gets Smoother

    Hammering through at max speed only guarantees heat and wear. Keep RPMs steady and moderate. Pause often, clear chips, and don’t be lured by the promise of faster cutting—the bit and material last longer, and your line stays true. You’ll finish cleaner in the same time or better, with less touch-up required.

    Do Specialized Bits Actually Matter for Repeat Drilling?

    They do—and the difference is cumulative. A bit built for chip ejection, with a tough coating and precise point, means steadier holes, minimal blow-out, and much less frustrating rework. The payoff isn’t hype: it’s noticing how much less you’re fixing, patching, or adapting your workflow over the long haul.

    Don’t Let Small Problems Grow Into Big Delays

    Dull edges and creeping heat can be tolerated hole by hole, but over an afternoon of repeat drilling or fastening, the slowdown—and the fatigue—compound. The real fix is as much habit as hardware: watch for that extra resistance, the hint of smoke, or the tiny scorch at the edge. Adjust your rhythm, make chip clearing a reflex, and choose bits matched to the task. Smart adjustments and honest tools don’t just get you to the finish—they keep you sane on the way there.

    Find proven bits and accessories for real work at Gumboll.

  • Choosing Between Wire and Solid Shelving for Efficient Closet Organization

    Wire or solid shelving? The question seems minor—until your closet gets a week of real, daily traffic. At first, both options promise easy tidiness: socks off the carpet, bins upright, shoes no longer fighting for floor space. But as routines stack up—those ten-second grabs before work, the quick stashes before guests arrive—the gaps show up fast. What once looked “organized” starts requiring extra hands, extra resets, and a little more patience than you usually budget for on a busy morning.

    When “Neat” Starts to Slip: The Surprising Friction in Closets

    That first Sunday, everything’s sharp—shirts folded into perfect rows, bins lined up by color, nothing crowding the floor. But watch what actually happens by midweek: a couple of shirts lean toward the edge, socks poking through wires, and bins drifting out of alignment. Suddenly, grabbing one t-shirt means nudging a whole stack back in place. The frustration is subtle—a lift here, a rescue there—but it adds up, making what should be two steps into a slow-motion shuffle, especially when you’re late or sharing the closet rush.

    Solid shelving hides its usefulness—items stay put, bins keep their shape. With wire, every gap is a chance for something to sag, snag, or disappear just out of reach.

    Your Routine, Reshuffled: How Shelf Choice Changes Daily Use

    Grabbing in a Hurry: One Smooth Reach or Clumsy Double-Grab?

    Solid shelves turn a grab-and-go into just that: pick up a folded shirt and the rest stay in line. But reach for the same shirt on wire shelving and you might slide out a second one, or unfold half the stack edging through the gaps. Socks or lightweight scarves? They slip through the wires, falling to wherever’s hardest to reach—often vanishing until your next deep clean or morning panic.

    Stack Shape vs. Fresh Air

    Wire shelving wins for drying boots or letting gear breathe—great for mudrooms or keeping mustiness at bay. But when it comes to piles of t-shirts, towels, or work clothes, the lack of a flat surface slowly takes its toll. Corners droop, stacks shift sideways, and before Friday, categories mingle. Suddenly, “organized” means restacking, hunting, or just sighing at a now-lumpy pile.

    Bin friction is silent until it isn’t: Bins on solid shelves slide in and out, no guesswork. On wire, they catch, tip, and sometimes spill, especially when you need just one thing from the bottom. Over time, those tiny snags eat away at the sense that your closet has a clear system—and slow you down just when you need it most.

    Real-World Closet Scenarios: Shelving Differences That Actually Matter

    Imagine a typical reach-in closet. Shoes lined on a wire shelf, clothes folded overhead, bins waiting at the back. It looks great after your Sunday reset. Midweek reality?

    • You reach for a mid-stack shirt—half of it’s been creased by a wire rung, the sock that once sat on top is now on a shoe below.
    • Sliding a bin back into place, it tips against the wire rather than gliding home, scattering odds and ends into your neatly hung shirts.
    • That stack of folded towels? They’ve started to wander, each pile blending into the next as small sags and sideways shifts blur any real category.

    This isn’t chaos—it’s a quiet creep toward clutter. Instead of a clean grab, now you’re chasing socks, restacking shirts, rescuing a bin, all in the time you meant to spend just getting dressed. It’s not about “mess”—it’s about how quickly small problems add minutes (and irritations) to your reset routine.

    Why Resets Get Slower—And How to Fix Them

    Laundry day should reset everything. But if wire shelves underpin your most-used stacks, you’ll notice: creases deepen, piles slip, and bins tilt out of formation by Wednesday. Fixing it means more steps—unstack, restack, poke things back through the wires. Swap in a solid shelf and this friction fades: you place a pile and it holds, lines stay neat even if you’re digging for that one favorite tee. The more you skip these micro-corrections, the faster and easier the space is to actually live with.

    Dust, Droppage, and What Actually Stays Clean

    Solid shelving shields your lower shelves—no dust raining down on shoes or winter coats. The tradeoff: you’ll notice dust accumulate and need a wipe now and then, but it’s all on one easy-to-clean surface. Wire lets dust (and sometimes loose change or tags) fall to whatever is underneath—usually right onto the boots or bags you don’t want to wipe every week. That means extra cleanup, a little frustration, and another maintenance habit you didn’t ask for.

    Shelf Strength: Keeping Categories Clear, Not Crammed

    Weight isn’t the main issue—most shelves take whatever you stack. What changes is how each type handles off-center weight or shifting piles. Wire shelves flex, making one stack tip into another, so separation blurs and your categories become a jumbled lineup. Solid shelves hold their own, so categories stay distinct: sweaters don’t spill into the towels, and bins keep their lane. Less flex means less mixing, less double-checking, and more time saved on every reset.

    The Real-World Mix: Where Both Shelf Types Fit

    It’s rarely about picking one format for your whole closet. Use solid shelves anywhere you need stacks to hold, categories to stay crisp, or bins to actually slide. Keep wire for spots where airflow matters—soggy boots, running shoes, gym gear. The trick is getting honest about your habits: If you dread constant straightening, go solid where you reach most. If you need speed-dry for outdoor gear, let it breathe—just not under the folded stacks that drive you nuts.

    Immediate upgrade, zero remodel: If changing shelves isn’t in the cards, use a rigid liner or board cut to fit the wire section holding your stacks. Suddenly, shirts and bins stop tilting, and you keep the airflow (and easy cleaning) below.

    The Subtle Shift: From “Looks Organized” to Truly Usable

    The surest sign your closet setup is working? You back away midweek and nothing’s toppled, drifted, or disappeared. Stacks hold their shape. Bins return home after each use. There’s no morning hunt for socks lost through the wire, and resets don’t drag on. It’s not showroom-perfect—just easier, clearer, faster. That’s the difference: less reshuffling, better flow, and a closet that quietly supports your routine instead of sabotaging it.

    If you’re looking for custom storage that fits your real routine—not just a tidy Sunday photo—explore practical solutions at ClosetWorks.

  • Streamlining Storage Solutions to Reduce Clutter and Boost Workflow

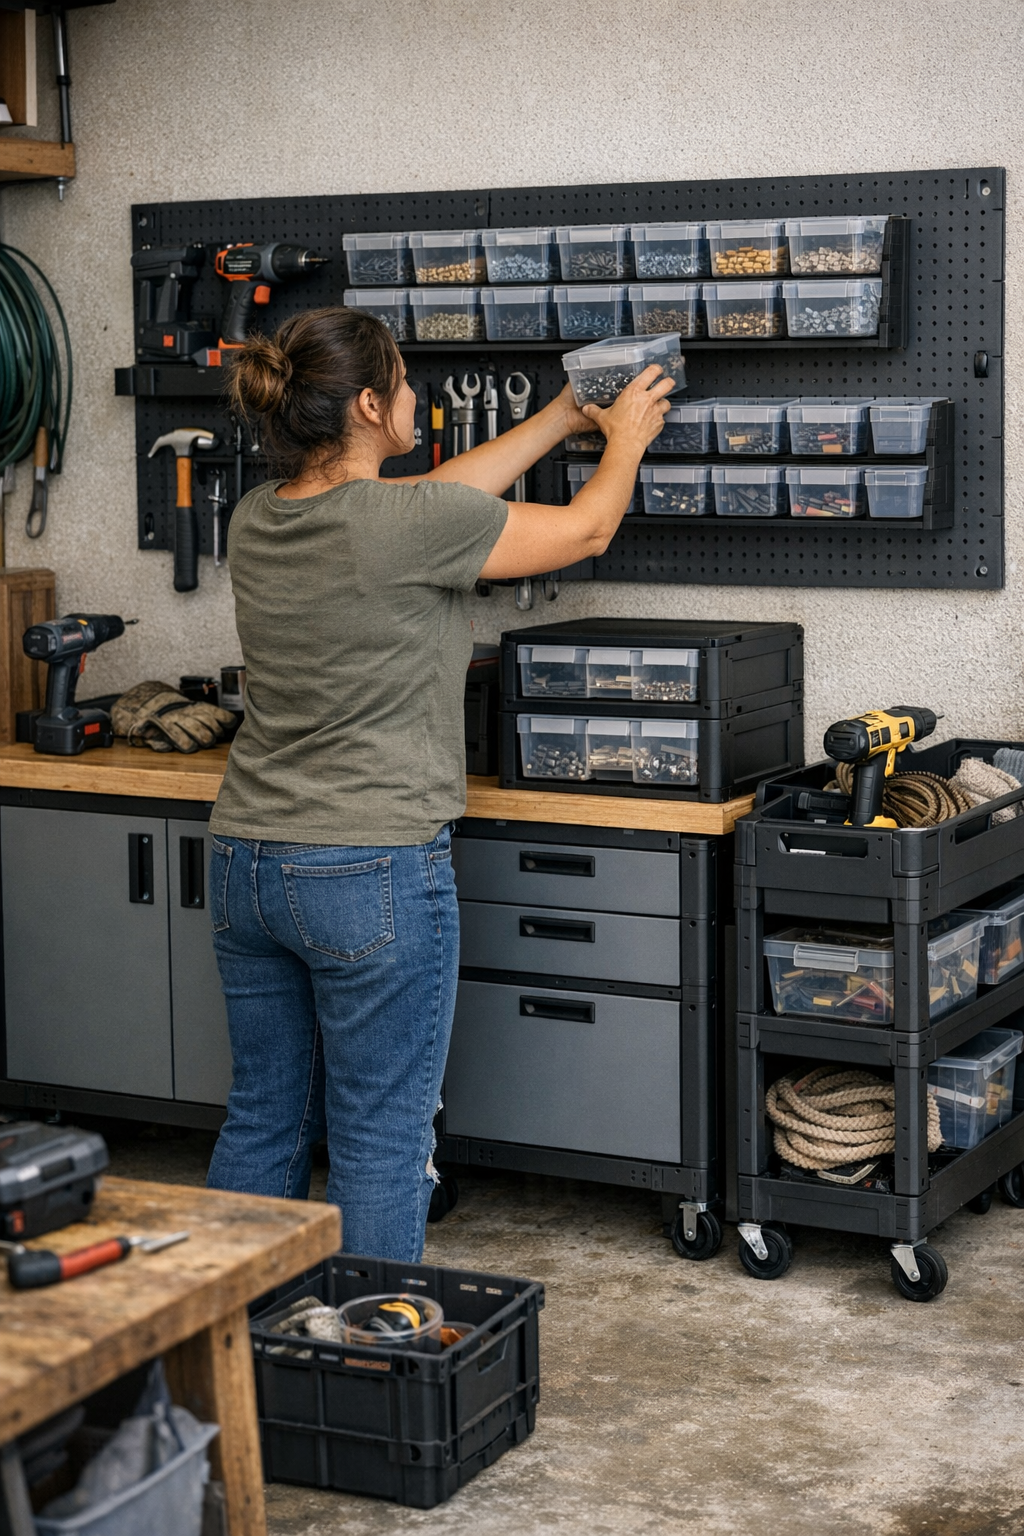
    The real verdict on any garage or workshop setup isn’t the way it looks on install day—it’s what survives a week of actual use. Projects pile up. Hardware and hose reels creep onto open countertops. Carts—meant to be mobile helpers—drift sideways, blocking paths. Pegboards fill, plus one more hook gets squeezed into every sliver of wall. A few days later, the promise of order already unravels. Every reset drags out longer; the sense of control you built is chipped away by the return of clutter, disguised as “flexibility.”

    More Options Don’t Equal More Order

    It’s easy to believe that another shelf or bin will finally fix the chaos. Why not add just one more rack, try another cabinet with deeper drawers, or squeeze in a second rolling cart? On the surface, these tweaks seem smart—tools off the floor, every supply sorted. But as the real routine resumes, the trap sets in. Each new surface competes for your attention. Tools drift: the hammer lands on the new shelf “for now,” screws get split between wall bins and the bench tray. Instead of a single obvious return spot, you end up with a dozen “temporary” drop zones battling for permanence.

    Bit by bit, clear floor space surrenders to piles that have no real home. That rolling cart, meant for efficiency, wedges itself in front of the cabinet you use most. The path from the garage entry to your workbench? Blocked again, this time by a tote you only meant to leave out for a minute. Even a quick reset after mowing or fixing a bike turns into an extended shuffle: shoving carts aside, rerouting around half-empty bins, deciding (and re-deciding) which shelf “should” hold the mallet today. The space that looked so usable on paper now asks for detours every day.

    Choice Overload: How Storage Stops Serving You

    When every tool has several options, putting things away gets harder, not easier. That moment of mental pause—“Does this belong on the pegboard, in the drawer, or maybe the top of the cart?”—kills return speed and builds resistance. Multiply those split-second choices across a Saturday’s worth of fixes, and what should be a quick cleanup turns into a wandering circuit through your own maze.

    You start to feel it in daily habits. Clamps get parked on the workbench corner “just for now.” Hose nozzles, left out because the wall bin’s out of reach, start multiplying by the doorway. Screws never travel back to the right shelf, because the cart they landed on is still sitting by the door—where you dropped it mid-project. Little by little, the system that once felt crisp and organized slowly bogs down into familiar frustration.

    Spaces That Work Against Your Routine

    If you find yourself dragging a cart into the hallway just to swing a cabinet open or sidestepping around a wall shelf that stays half-used, you’re not alone. These small, regular hassles are the fallout of overlapping zones and storage footprints that take more than they give back. That “versatile” rolling cart? If it’s living in the thoroughfare, it’s just another obstacle. Dead corners in the garage get even less useful, while lines of motion—carefully mapped out in theory—clog up under the weight of competing organizers. Resets get slower, and those quick grabs turn clumsy, not precise.

    Clarity, Not Quantity: The Zones That Outlast the Mess

    The best setups aren’t the ones with the most spots—they’re the ones with the clearest, most defined paths. When every essential tool or supply has exactly one predictable home, you don’t have to think about where it goes. Resetting after a project becomes a short routine: each piece in its place, each bin with a single job. The habit sticks—not because you’re suddenly tidier, but because the return is frictionless.

    For smaller shops, shared garages, or tiny backyard sheds, paring back options usually makes the biggest functional difference. If you have one labeled hardware bin, two key hooks for the hand tools you use daily, and a single, purpose-built utility cart (never parked in the way), movement and access feel effortless. Clutter recedes—not because you own less, but because what you do own is easier to put back, every single time.

    Two Saturdays, Two Very Different Resets

    Picture it: one weekend, you pull out the drill from a wall hook, fumble for the right bit in a mobile cart, and find fasteners in one of a few overhead boxes. Ten minutes in, halfway through your task, every flat surface is buried under drill bits, clamps, and hardware. The return trip is a mess—walking long, uncertain routes to return each tool, dodging a cart that’s now blocking the only open lane. Resetting takes twenty minutes; the urge to “just leave it for later” follows.

    Now try it with a cleaner setup. You ditch that second cart. Fasteners go in one bin—always—right next to the tool they match. Suddenly, you work in straight lines; movement is direct instead of zigzag. The open section of your workbench stays open all week, not buried in “to be sorted.” There’s no question about where things go, so nothing sits out “just until next time.” Your space doesn’t just look organized—every piece of it genuinely makes your routine faster.

    Micro-Tweaks With Major Impact

    Real change isn’t about stripping down to the bare minimum or adding new “miracle” organizers. It’s about recognizing dead-end zones, combining redundant bins, and tuning each spot for daily flow. Group garden hand tools on a single rack, not scattered between pegboard, drawer, and windowsill. Rework any cart that never stows cleanly—convert it into a project kit, or simply let it go. If a certain corner catches overflow week after week, that’s not a coincidence; it’s feedback. Tighten boundaries until every returning item lands without a second thought.

    Set a simple timer on your weekly cleanup. If putting everything back eats up more than a few minutes, you’re still fighting your own setup. A strong layout isn’t about visual minimalism—it’s about resetting without a mental list or wasted trips. That’s the sign your storage is finally working with you, not against you.

    Quick Fixes for Real Storage Trouble

    Is less storage the same as having less gear?
    Not at all. What needs to go are the extra, optional drop zones—the holding tanks for stuff that rarely sees use. What you actually use stays, but its home gets easier to spot and harder to forget.

    How do I know if my setup’s too complicated?
    Ask yourself how often you hesitate at the end of a job. If tools wind up on the floor, chairs, or migrate to surprising corners, setup sprawl and decision fatigue have crept in. A little annoyance now is a lot of clutter later.

    Wall storage or carts: which works best?
    Walls are gold for daily grab-and-go tools and predictable routines. Carts work when they’re single-purpose—rolling out for a specific project, then stowed. When floor and wall systems start overlapping or fighting for the same tools, dead space and blocked access are right behind.

    Routines Decide If a Setup Actually Works

    The best-organized space isn’t the one crammed with organizers. It’s the space where you can move, reset, and grab what you need—without pausing, rerouting, or reshuffling every time. Every time a return path gets blocked, or a reset takes too long, it’s a sign to consolidate, not expand. Your area should fit your habits, not slow them down.

    For storage that’s actually designed for the way real routines run—not just for showroom photos—visit StackNest.

  • Maintaining Circular Saw Performance Through Regular Motor Vent Cleaning

    The first sign isn’t always a breakdown—it’s when the cut starts to resist you. You’re pushing the circular saw through plywood, aiming for a clean line you’ve cut a hundred times before, and something shifts: the motor strains, the blade stalls for half a heartbeat, and the steady, confident hum flattens into a deeper groan. Lines that should be crisp start to splinter, and the edge feels rough even before you reach for the sander. You pause, press forward, try not to read too much into it—maybe it’s just a tough patch of glue or the blade’s getting old. But the drag keeps building. Dust has slowly choked the motor vents, air is trapped, and the tool is quietly falling behind your momentum. For anyone who cuts, drills, or sands on real jobsites, this is a creeping friction you’ve felt more than once—always threatening to stall your pace right when there’s still half a stack of panels waiting.

    Dust Isn’t Background—It’s the Thing That Wears You Down

    Every workspace tells the same story: dust never stops coming, and it never floats in just one direction. When you rip down MDF or score fiber cement, those clouds hang tight in the air, sink into the grinder, and invade every vent in your saw, drill, or sander. The floor might get swept at the end of the day, but the real mess settles inside your tools. When vents clog, the results go way beyond a dirty case: the inside runs hotter, airflow drops, and the RPMs you depend on for control start to slip, cut after cut.

    This isn’t about the first board or a single screw. Usually, you feel it mid-way through a project—the fifth panel into a built-in, or returning after hours of trim work. The saw won’t glide, your drill feels labored driving long screws, or the sander bogs down on corners it once breezed through. Tasks that once felt automatic suddenly eat twice the focus and double your energy. Fatigue creeps up, and your workflow goes off-track. The real cost isn’t just the rough edge you have to sand—it’s the way tool drag chips away at your control, your speed, and your willingness to keep pushing through the day.

    When a Tool Starts Fighting Back: The Hidden Toll of Neglect

    Set two circular saws side by side—one vent cleaned, one ignored for a stretch of heavy jobs. Outwardly, they’re twins. But swap blades and run the same board, and the difference is immediate. The clean saw breezes through, the gummed-up one lags on every push or stalls on denser knots. You end up leaning harder, chasing accuracy you could once trust on instinct, and every pass turns into a minor wrestling match.

    Picture the tail end of a built-in shelving marathon: the panel cuts keep coming, the inside corners get trickier, and fatigue starts to seep into your grip. With a tool breathing easy, you hit your marks with less strain, less overcorrection, and minimal cleanup. Let vent dust stack up, and suddenly you’re breaking rhythm—waiting for a motor to cool off or powering through a lineup of rough, splintered cuts, knowing every mistake means more work before the job’s done. By the time you finally stop to check the vents, the handle’s hot and the casing radiates a heat that doesn’t fade with the trigger off.

    One Missed Cleaning Becomes Ten Minutes Lost—Over and Over

    The decline sneaks up. Maybe a drill needs longer between holes, or the saw leaves you nervous on long rips. You blame the workpiece, your blade, even your own technique—rarely considering that weeks of ignored vent dust are stacking fatigue and time loss into every session. As the pressure builds, you spend more effort keeping cuts on track and correcting “almost good enough” surfaces, adding micro-delays that snowball straight into overtime.

    Cleaning Vents Isn’t Just Maintenance—It’s How You Keep Control

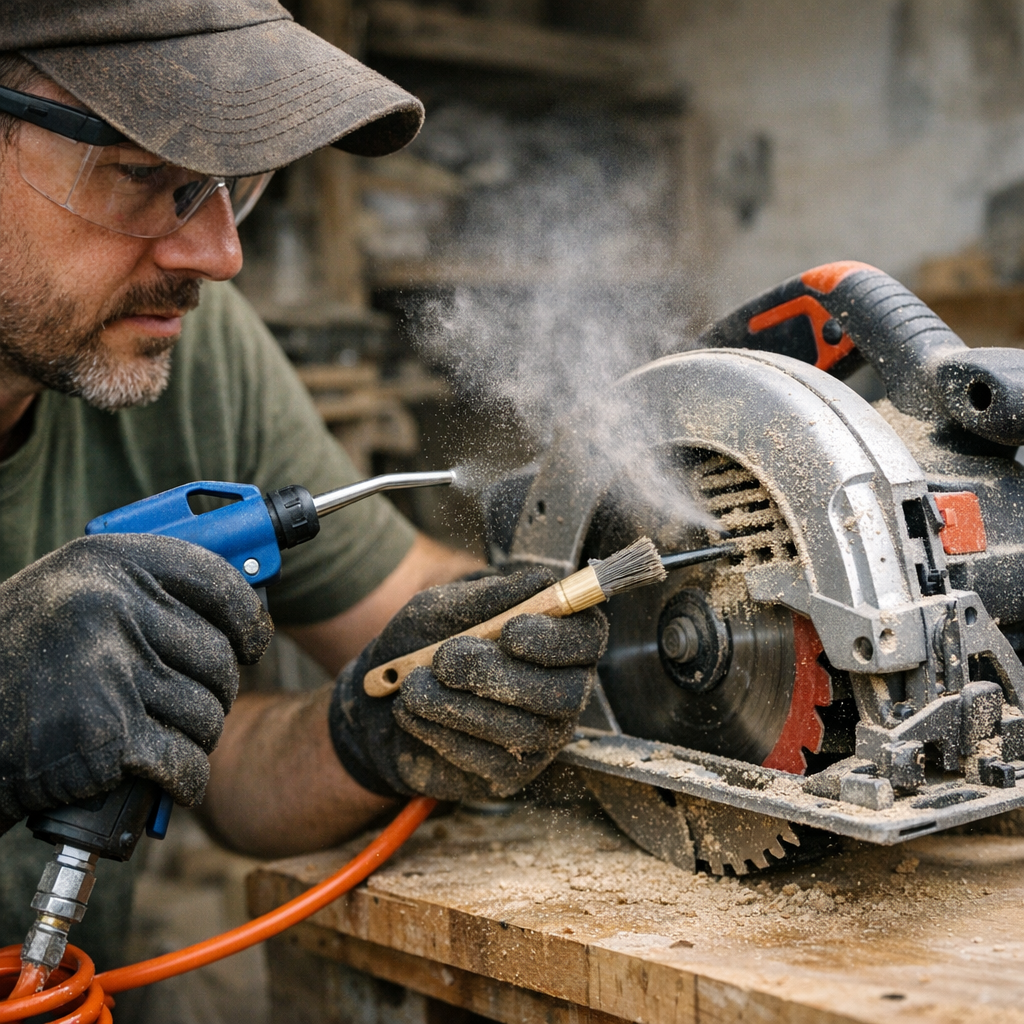
    No one wants to halt progress for maintenance, but payback is obvious where it counts: smoother action, less frustration, and work that moves at your speed. Surface dust wipes away easy. The problem is inside—compacted around vent fins and motor slots where a rag never reaches. The difference came for me after wrenching through an MDF-heavy week: a dedicated, narrow brush (under 10mm, stiff bristles) plus a hit of compressed air, fired against the direction of vent slots. Hit this routine every other day as dust piles up, or faster during high-output weeks, and the slow fade in tool performance simply doesn’t arrive.

    The results feel real: blade RPM drop stays barely noticeable, my sander’s pace is steady, even after hours of use, and the saw’s casing stays touchable—even at day’s end. Every pass is closer to what a sharp blade—and a sharp tool—should feel like. Less chipping, smoother lines, and, most of all, the rare pleasure of not having to backtrack on rough cuts just to make the finished piece look right.

    Read the Signals Early—Then Act

    Be quick on the symptoms: trigger feels sticky on start-up; the saw’s body warms up fast, even on short cuts; the workpiece smells scorched after what should be routine. Don’t wait for problems to snowball. Spot these red flags and put the vent cleaning at the top of your punch list—the longer you delay, the more upstream work gets undone by a sluggish, unpredictable tool.

    Fast, Practical Vent Cleaning: No Excuses for Skipping

    Start every vent cleaning session with the tool unplugged—don’t skip safety for speed. Go in with medium-pressure compressed air (not maxed out, avoid pushing more dust in), following the vent orientation to clear instead of compacting debris. Follow up with that narrow brush for anything stubborn. For heavy composite or particle board work, clean every two days—or even daily if you see buildup smothering the slots.

    No air on site? That stiff brush still loosens most gunk if you keep at it. Skipping the process just means you’re banking on luck—a bad bet when a few minutes of care keeps hours of trouble off your back.

    Know These Signs—And Don’t Wait:

    • Tool hesitates to spin up or never quite sounds right, even after swapping to a new blade or bit
    • Handle and casing uncomfortably hot mid-job, not just sun-warm
    • More burning or discoloration than you expect in the kerf or screw hole
    • Lines go rough, wander, or turn splintery no matter how careful you are

    If even one of these shows up, deep clean the vents before finishing another cut or run—you’ll notice the difference within the first hour back on task.

    Keeping Vents Clear Means Keeping Your Workflow Yours

    One gummed-up vent won’t ruin your week, but layer on neglect and suddenly you’re working harder for worse results, tired before lunch, struggling to trust your technique. Cut quality drops, battery swaps become constant, tool control grows unpredictable—and you start looking for problems everywhere but at the real source.

    Routine vent cleaning isn’t glamorous, but it’s the line between fighting the job and keeping your hours in your own hands. The sharpest blade, highest-torque drill, or smoothest sander is only half the story—consistent performance is about letting your tools breathe, every day, so they can deliver for you instead of holding you back.

    http://gumboll.myshopify.com

  • Why Fixed Closet Roles Lead to Hidden Clutter and Slow Resets

    The promise of an organized closet rarely survives daily living. What starts as a perfectly mapped-out system—shoes lined up on the rack, sweaters folded in bins, labels on every basket—quickly meets reality. Shelves fill faster than you expected. A single bin morphs into a dumping ground for anything without a home. Slowly, your once-neat setup turns clumsy: shirts topple from stacks, sunglasses vanish into baskets meant for gloves, and every “quick tidy” gets slower. The layout didn’t change. The friction did—and it’s the small, creeping clutter that wears you down.

    Why Closet Setups Fray So Fast

    We start with clear roles: shoes at the bottom, shirts on the middle shelves, scarves and hats assigned to labeled bins above. But daily life is a moving target. Seasons change. New clothes squeeze in next to keepers you rarely wear. That spacious scarf basket now bulges and slumps, cramming against spring hats you want to grab in a hurry. Piles of gym clothes, never planned for, hover between sections and grow until the next elusive closet overhaul. It gets easier to shove things “somewhere,” especially if it means shifting a stack or dragging out a bin just to put one item away. Suddenly, a system meant to create order resists every tweak—and it’s your time and patience that get lost.

    Hidden Friction of Fixed Storage Zones

    Assigning every shelf and bin a permanent category seems clever—until a single purchase or wardrobe change tips the balance. Fixed shelving and rigid roles mean there’s no place for new shoes unless something gets buried or a stack sags at the edge. A week’s laundry waits on the floor. Off-season clothes slide farther and farther back, turning labeled bins into murky overflow zones. Within weeks, it takes three moves to retrieve yesterday’s jeans or a favorite bag. The closet doesn’t look bad, but invisible effort drags at every step: you avoid certain areas, dump “for later” piles out of sight, or shuffle stacks rather than dealing with what no longer fits your categories.

    The Real Signs Your System Isn’t Working

    The slow collapse shows up everywhere you look:

    • Stacks that once held their shape topple because every grab from the bottom threatens a landslide.
    • Shoes stray from their row, invading random corners or blocking the door.
    • Bins host a growing mix of gloves, scarves, and whatever you were too rushed to sort.
    • A simple morning routine turns into a search-and-rescue as you dig past three misplaced items for something in the back.
    • The tidy reset you managed easily last fall now doubles in time because categories keep blurring.

    The problem isn’t laziness. It’s that fixed roles don’t flex as routines shift. Without regular tweaks, “organized” becomes a thin disguise for slow, hidden clutter creep.

    Making Storage Roles Flexible—Without Starting Over

    The answer isn’t a full reset; it’s small, live-in adjustments. Adjustable shelf dividers and flexible bins are less glamorous than grand overhauls, but they rescue function when needs change. Limit folded stacks to numbers that actually hold—six shirts instead of ten. If shelves start to crowd or topple, it’s a signal, not a failure. Switch shelf order when seasons shift: let boots or sweaters move down, and lighter items rise. The quicker you spot crowded bins or sagging stacks, the less time you lose. Instead of waiting for chaos, set a calendar reminder for a 15-minute review every few months—just enough to adjust for what your routine actually demands.

    Sometimes it’s simply kicking out whatever’s turned a bin into a junk zone. Other times, it means rethinking whether you really need three sections for scarves when last season’s hats are getting crammed. The goal isn’t perfection, but visible, adjustable roles that match the way you use the space today—not last year.

    Open Shelves vs. Labeled Bins: Living the Trade-Off

    Open shelves give you instant feedback. You see trouble before it turns to chaos—a tilting stack, an item edging toward the floor, categories slipping out of bounds. It’s easy to grab and go, reshuffle fast, and use vertical space for what you actually reach for. Labeled bins promise clarity, but only if you keep up with what’s inside. When life gets busy, bins quietly turn into blind spots, collecting clutter that never gets sorted. They hide mess—until you’re forced into a weekend triage session.

    Most closets need both: open shelves for high-traffic items, a few bins for what rarely moves. The catch is that roles should shift as your needs do—or else new routines will always end up crammed into old labels. Quick reviews and small swaps keep the balance, and make it easier to spot when a category is overdue for an edit.

    Spotting and Stopping the Slow Creep

    You don’t need to rebuild your closet at every sign of drift—but you do need to notice when it’s becoming slower or less useful:

    • Retrieving a daily item now means reaching past piles or rooting through bins you barely recognize.
    • Overflow lingers at the closet edge, with no easy place to stash it.
    • You hesitate to put things away, because you’d rather avoid wrestling a crowded shelf or jumbled bin.
    • Shelves feel packed tighter, even when your wardrobe hasn’t really grown.

    Visible, routine maintenance is the real secret. If you’re constantly moving a stray gym shirt or digging for matching socks, it’s a gentle prompt: adjust now, before the system breaks down. Sometimes a shelf tweak or bin swap is all it takes to buy back that sense of ease. Ignore the signs too long, and a quick reset turns into a weekend project you’ve learned to dread.

    A Closet That Actually Keeps Up

    Life never stays static, and a closet shouldn’t either. The real win isn’t showroom perfection—it’s storage that adapts without endless overhauls. As shelves fill, bins drift, or stacks slump, treat it as feedback. Rotate, combine, or shrink categories before frustration sets in. The difference isn’t just visual; it’s morning routines that flow, resets that go quickly, and a space you actually want to use, not just hide behind the door. A closet might look organized for a week, but only a flexible, regularly reviewed system feels easy month after month.

    http://closetworks.myshopify.com

  • Why Clear Boundaries Make Modular Wall Storage Truly Effective

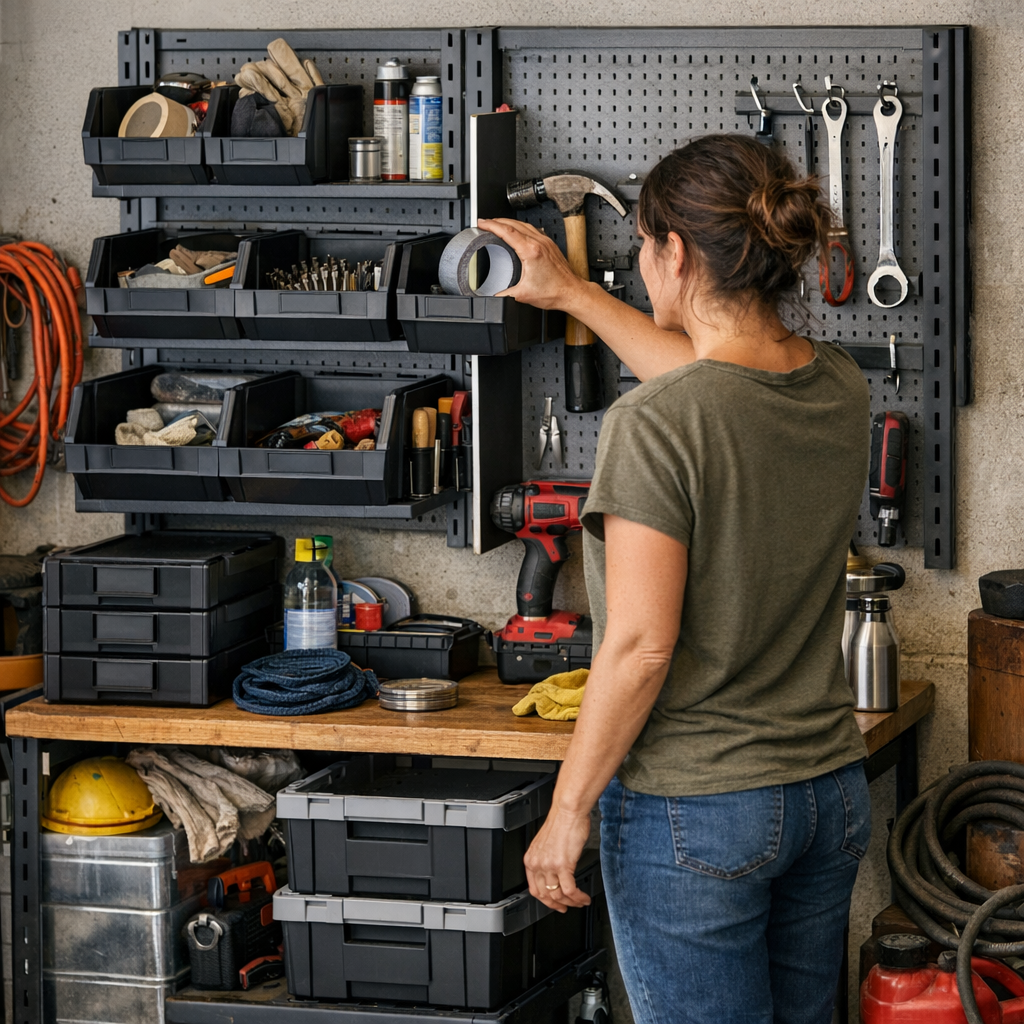
    The real test of a wall storage system isn’t how perfect it looks on day one—it’s what you find after a week of messy projects and busy routines. The initial buzz is pure optimism: freshly installed shelves, labeled bins snapping into place, every tool clipped to its grid. But come Thursday night, the old shuffle returns. You slide a box aside to reach paint brushes. A rolling cart, just an inch off, blocks you from the one drawer you need. The tight corner, meant for spare hardware, turns into a dumping ground. The promise of total order quietly unravels—and the problem isn’t that you lack storage, but that the setup can’t keep pace when real life moves in.

    Why “Organized” Falls Apart After the First Week

    The pattern repeats itself: brand-new wall grids and bins hold up for a few days, maybe a week, but soon you’re nudging bottles aside for a screwdriver or fishing bits out of the wrong tray. The culprit isn’t sloppy habits—it’s a flaw in the system. Wall setups that only prioritize “neatness” overlook what happens when routines hit: return flow breaks down. You squeeze tools back wherever there’s open space; bins overflow; lines between zones fade. What seemed like plenty of storage ends up demanding constant maintenance.

    Suddenly, resets get slower. That easy reach becomes a two-step maneuver around a cart, and once-clear access zones start to clog with overflow. The system becomes background noise—always close to tidy, never quite effortless.

    Why Boundaries Matter More Than Bins

    What separates a wall that works from one that just looks good? Physical boundaries. Not just lines on a plan, but tactile edges—real dividers, visible gaps, purposeful stops. These boundaries force every tool and carton back into its home, not just “somewhere nearby.” Overflow gets blocked before it starts, and categories no longer melt into each other.

    Without these stops, even the sharpest-looking setup collapses during daily rush. Reach for a wrench, and yesterday’s hammer slips into its spot. A bin swallows two categories. The next return becomes a question, not a reflex, and resetting the wall turns into an extra chore.

    What Real-World Friction Looks Like (And How It Stacks Up)

    Three days in, the small aches of setup failure start piling up:

    • Shifting the Same Cart—Just to clear the way, you nudge a rolling cart three feet left, over and over, breaking flow.
    • Always Reaching Around an Edge—A cabinet blocks access to the one bin you actually use most, so you find yourself stretching and bumping tools off their hooks.
    • “Dead” Corners That Stay Dead—A wall zone never gets used right, slowly collecting whatever doesn’t fit elsewhere—a box of gloves, a pack of spare fasteners, a mystery tangle of cords.
    • Overflow Magnet Zones—One stretch of wall starts out as “overflow” but becomes the dumping spot. Each tool added makes the reset less likely, and the mess harder to ignore.
    • Endless Reshuffling—You spend actual project time pushing bins back into place and re-sorting tools that have bled into the wrong zone.

    This is the difference between “everything has a place” and “everything returns to its place without thinking. When boundaries are missing, every routine reintroduces disorder. A setup should fade into the background—handling clutter before it starts, not demanding extra attention after the fact.

    How One Divider Can Change Everything

    Forget overhauling your entire wall. Sometimes, the simplest fix—sliding in a vertical board, mounting a pegboard panel, or even repositioning a single basket—draws the line nothing else could. Suddenly, tools can’t wander. Bins don’t swallow each other’s contents. The boundary turns a soft suggestion into a hard stop.

    In one real garage, just installing a narrow divider between paint supplies and automotive gear made a visible difference the very next project. The “wandering” of items stopped cold, the old pattern of stacking on the dividing line went away, and cleanup after a full session shrank from fifteen minutes to five. Overflow simply didn’t have room to start.

    The Practical Payoff of Obvious Stops

    Even a small, deliberate boundary delivers outsized benefits:

    • Cuts off sprawl and spillover, so tools stay findable and bins don’t blur together.
    • Makes putting things back a snap, even on the busiest day—no cramming, no “I’ll sort it later.”
    • Signals to everyone—family, helpers, or coworkers—exactly where each zone ends, removing the guesswork from daily use.

    Is Your Wall System Working Against You?

    Ask these questions before blaming yourself for clutter:

    • Do you keep losing the same tools or supplies, even with labeled bins?
    • Are bins and hooks slowly merging, with categories leaking into each other?
    • Does every return feel like it seeds a bigger mess for later?
    • Do busy entry points or work zones keep collecting pile-ups that block movement?

    These patterns aren’t about needing more space—they reveal not enough structure. Subtle boundaries, or the lack of them, guide your real habits. The less you need to “think” about where things land, the less friction there is every time you use your wall.

    When Looking Organized Just Isn’t Enough

    Don’t get fooled by perfect symmetry and neat lines. A wall filled with bins can still create work if it doesn’t reflect how you move, grab, and reset. If grabbing a hammer means shifting two boxes, or if a quick return starts a domino of reshuffling, the setup is only working on the surface.

    The metric isn’t fullness—it’s friction. Clear walls with clear boundaries make resets quick and invisible; fuzzy boundaries mean more time spent cleaning than doing actual work. Over the long run, a system with sharper divisions will always win out, no matter how impressive a floor-to-ceiling wall of bins might look in photos.

    One Change, Big Difference

    Don’t wait for frustration to build into a cleanout day. Try adding one divider, repositioning a cabinet, or moving bins so there’s an unmistakable stop point. See how quickly routine use gets easier. The best wall setups aren’t just installed—they’re gradually tuned to fit how you actually use the space, making your routine smoother and your workspace feel truly yours.

    Discover more practical, real-world storage solutions at StackNest.