Category: Lighting & Work Setup

  • How Proper Bathroom Lighting Eliminates Shadows and Reduces Cleanup

    Most people don’t realize their lighting fails until the consequences show up—like a damp towel wedged below the sink that’s always just a little too wet, day after day. The room feels bright from the doorway, but as soon as you wash your hands or rinse out a shirt, frustration creeps in: missed splashes, hidden puddles behind the faucet, and a steady drip that only gets found at chore time. You mop, dry, and still never feel caught up, as if the simple act of cleaning invites more hidden work. In a bathroom or laundry zone, every “invisible” cleanup is a signal: your light isn’t just underpowered—it’s missing the area you actually use.

    The Overhead Light Trap: Why Some Fixtures Look Bright But Fall Short

    It’s easy to install one overhead fixture and think the whole room is handled. The problem is, light that covers the floor doesn’t guarantee you’ll see what matters on the counter, in the basin, or along the mirror. The room glows until you move. The difference becomes obvious when you lean in to check your jawline and catch your own shadow blocking the task. Corners near the sink fade away. A slightly glossy counter suddenly hides stray droplets unless you hunt for a better angle. The farther from the center, the worse it gets—scrubbing the edge of the basin turns from “quick wipe” to random guessing at dark patches.

    The biggest differences show up right where routines repeat:

    • Does the light fall directly along the faucet, or skip past the work area?
    • Do your own hands or arms throw back harsh shadows as you move?
    • Does glare bounce off the mirror and force you to reposition to see clearly?

    Routine Disruptions: Small Signs That Something’s Off

    The wrong lighting feels like nervous effort disguised as caution. Quick shaves end with a check for missed spots and unexpected droplets. After a hand-wash, you find a trail the overhead never showed. In the laundry, cuffs come away wet from a splash that looked invisible moments before, and the towel below—still always needed—quietly soaks up what your eye missed. Each “minor” cleanup isn’t just bad luck; it’s a routine being distorted by lighting that only looks good from arm’s length.

    Watch for these moments:

    • Shaving in your own shadow: You reach in, but the main beam lands behind your head. Half your jaw disappears into darkness and every move demands a new angle.
    • Mystery puddles after chores: Rings of water creep across the far rim of the sink, often only becoming visible when you stoop or drag the backup towel across the counter—again.
    • Laundry zone misfires: The center of the basin shines, but wet edges are left to hope and feel. The result: another damp cloth forgotten on the ledge, and another “oops” at the end of the week.

    The routine never feels smooth. You finish, but can’t trust the surface is truly clean. Every action includes a small correction or a backup check, and that towel under the sink isn’t just a formality—it’s a silent confession the light isn’t keeping up.

    Brightness Isn’t Enough: Understanding Shadow and Glare

    High-watt bulbs and big fixtures may fill the room with light, but what matters is whether that brightness ends up where the work happens. Many ceiling and wall lights promise high output but throw dark lines across faucet handles or leave the near side of a mirror murky. Even in a room painted white, you can find yourself aiming bottles or running your hand along the wrong spot, chasing shadows that move every time you shift.

    Worse yet, poorly aimed fixtures turn the mirror into a spotlight—glare hits your eyes, not the actual detail you need. Stand in the real task zone and you’ll block or scatter the only useful beam. The brightest install on paper becomes a blur of missed spots and random reflection in real life, with the same towel chasing what you never quite catch in time.

    Lighting That Moves With You: Fixing the Missed Spots

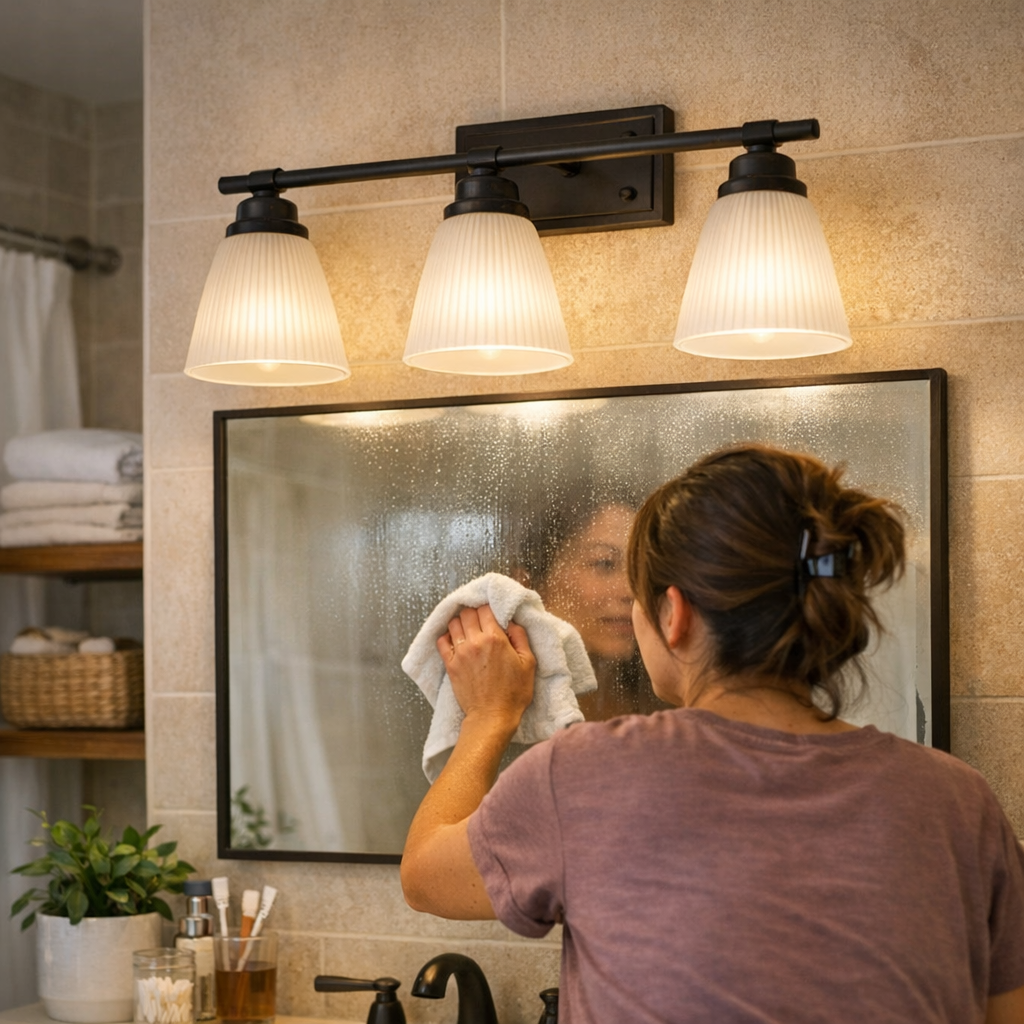
    The real fix isn’t more brightness but placing damp-rated wall fixtures at the points where hands, face, and water meet: on both sides of the mirror or tight above the basin. Suddenly, shadow lines melt. Faucet ledges are crisp and dry at the end of chores. The backup towel goes untouched for days—finally a precaution, not a lifeline.

    This isn’t about technical specs—it’s about closing the gap between the way you move and the way your light moves with you:

    • Light fills the task zone, not just the empty floor
    • Shadow “dead zones” shrink as you bend or reach
    • Glare backs off; you see detail even while shifting position at the mirror

    The invisible mess—the one you only spotted after staining your sleeve or wiping a missed drip—becomes the rarity. Cleaning stops feeling like an afterthought, and the routine pushes forward instead of retracing steps.

    Real Tips for More Usable Light Where You Need It

    1. Place Lighting at Face and Hand Level

    Fixtures above and to the sides of mirrors balance light directly across your face and sink. This wipes out the harsh shadow that overhead-only setups throw right where you need clarity for shaving, cleaning, or detail-ready routines.

    2. Use Damp-Rated Fixtures for Busy Zones

    Fixtures near water and steam must resist fog and corrosion. Damp-rated options stay clear and safe even as splashes become routine, keeping performance steady after dozens of wash-ups or chore sprints.

    3. Test Every Angle Before You Commit

    Before wiring in, bring a temporary lamp through a real routine—wash, wipe, check the mirror. See how the shadow travels, watch the glare. This quick trial reveals the weak points no catalog shot ever does, and gives you a daily gain instead of an endless workaround.

    Beyond Looks: Lighting That Matches How You Live

    Switching your lighting isn’t about chasing a brighter room—it’s about getting every corner, ledge, and work zone to actually show up as you move. A fixture that finally closes the gap between “looks clean” and “is clean” means hallways feel balanced, edges don’t vanish, and the laundry counter helps you finish faster. Each routine becomes quick, clear, and doesn’t leave behind another hidden task.

    That backup towel? With the right setup, it returns to its original purpose: backup, not a lighting bandage.

    See more tailored solutions for real indoor lighting at LightHelper.
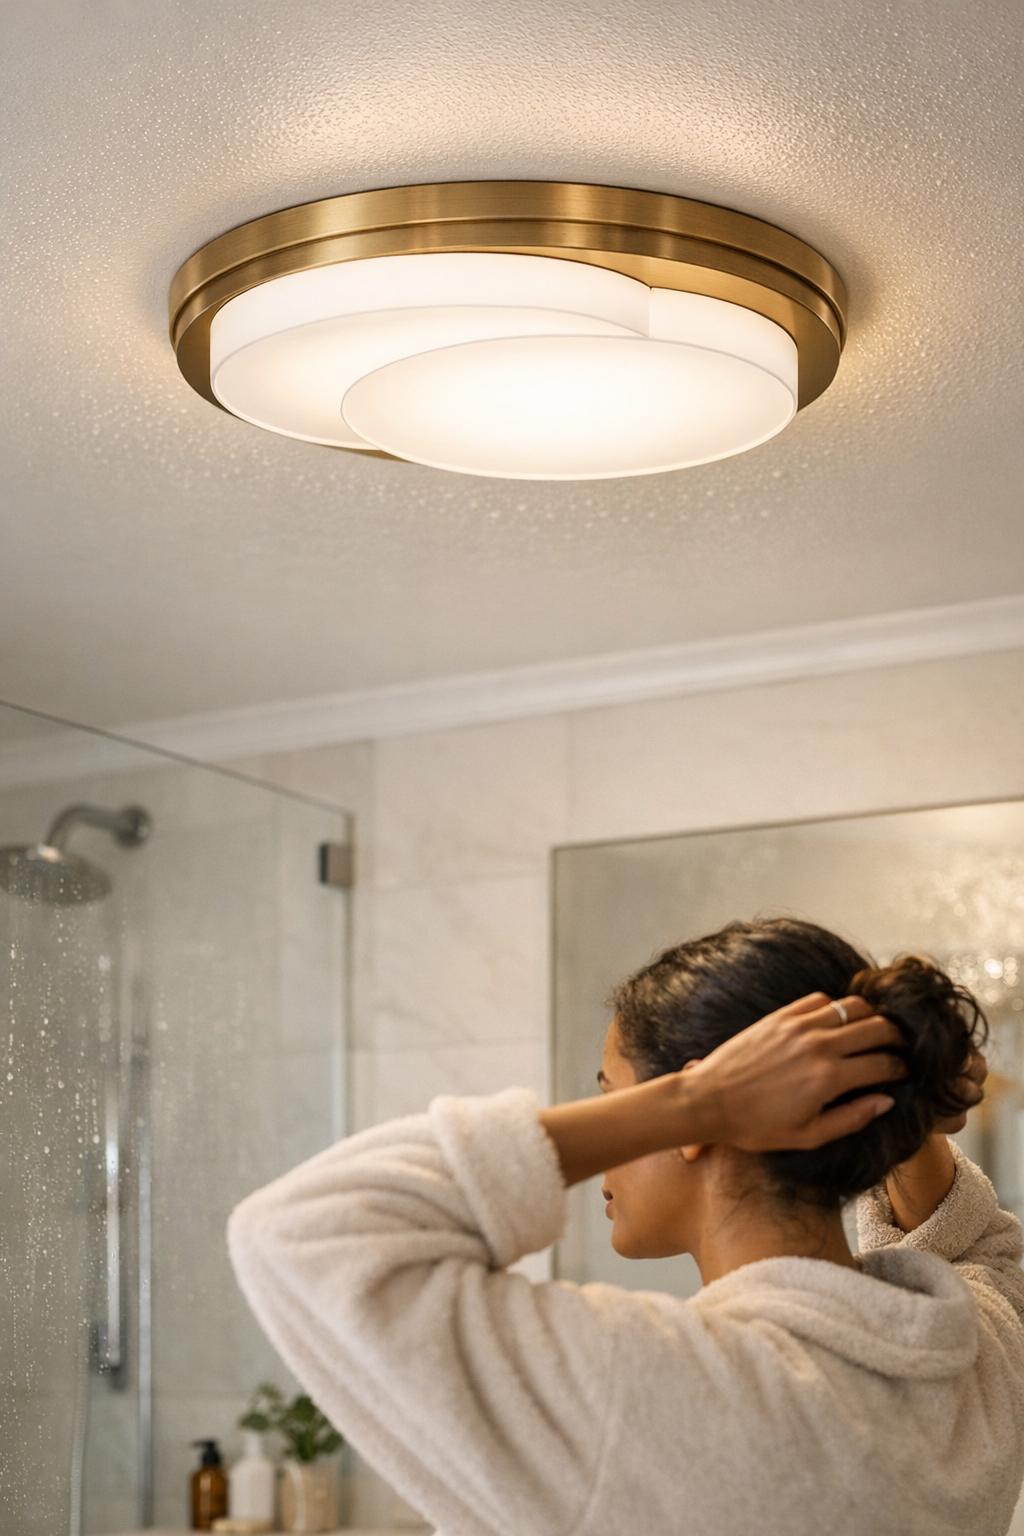
  • Why Bathroom Rated Lighting Outperforms Standard Fixtures Over Time

    Every bathroom fixture faces a quiet, daily stress test from steam. A light that looks solid straight out of the box—flush to the ceiling, bright and polished—can start giving itself away within weeks. Steam collects after showers, builds up in small corners, and seeps into mounting points that seemed sealed. Suddenly, a lens is slow to clear, a faint moisture outline lingers on the trim, and screw heads take on early flecks of rust. Day after day, these marks accumulate: not dramatic failure, but an unmistakable signal that ordinary fixtures lose ground fast in actual bathroom conditions.

    How Daily Steam Creeps In

    Most standard fixtures aren’t designed for persistent, humid cycles. The consequence isn’t immediate—it’s the haze that develops behind the lens after days of repeated showers and poor venting. Edges that started out glossy now tint yellow where moisture migrates. Wherever water pools, a streak appears and refuses to wipe away fully. By the time you realize the mounting won’t dry out or the lens keeps holding a fog line, the invasion is set. These signals don’t just show up on cleaning day—they settle in, week after week, until the fixture feels permanently tired.

    Visible Clues: Small Issues, Big Frustration

    The friction is clearest during basic routines. Flip the switch for bright, clear output—there’s a pause, a shadow, a dull haze. You squint to shave or re-angle for makeup, noticing that one edge of the sink stays dim and the other shifts yellow. Cleaning turns into a midweek chore, scrubbing stains that always return. Corrosion creeps along screw heads. Every “quick wipe” barely undoes what steam does all over again by morning. It’s not just visual clutter; it’s daily lost time and effort that shouldn’t be part of your routine.

    The Real Risk Isn’t Just Looks

    Steam quietly attacks the core function. Unsealed seams and exposed cable runs give moisture a direct entry—not just dulling appearance, but causing flicker, uneven spread, and breakdowns when reliability matters most. A shadow appears above the tub where light once reached. Around the mirror, a shadow stains a side you need clear. The fixture risks failing at rush hour, forcing awkward resets or repairs when you have no bandwidth to deal with it. Even minor patchiness in output leaves the room less functional, and the setup less trustworthy, every single day.

    Bathroom Rated Fixtures vs. Standard Looks

    Flush-mount “bathroom” and standard ceiling lights seem similar on first install: both look finished and neat. But use separates them quickly. Two identical bathrooms—one with an everyday fixture, the other with a true bathroom-rated model—illustrate the divide. The differences don’t yell, but they don’t go away.

    • Standard fixture: After a month, fog forms behind the lens. Condensation rides the glass and never quite dries, so each week’s output softens—not from design, but from a slow invasion of moisture and film. You polish and the result barely lasts a few days.
    • Bathroom rated fixture: Output stays clear, even as steam fills the air. Gasket seals block damp from sneaking inside. Hardware doesn’t corrode; you wipe dust, not residue. The mounting feels as tight as day one, and the light acts as expected—never lagging, never patchy—no matter how many showers pass.

    Where the Details Matter Most

    It’s the invisible armor—extra gaskets, hidden seals, tight cable ports—that keeps a bathroom’s routine from turning into a constant battle with steam. With these details, cleaning means less friction: less shadow at the periphery, less random yellowing, fewer panic scrubs before guests arrive. The room delivers the coverage and clarity you count on, so your morning doesn’t stall over details that shouldn’t break down.

    The Repeated Friction of a Poor Setup

    Picture the rush to get out the door: condensation clouds the mirror, and the light over the sink only throws brightness one way. Wiping the glass clears your reflection for a second, but the actual light stays uneven—half the counter in shadow, the other in dim yellow. That’s not a cleaning issue—it’s the buildup of months with the wrong fixture. You only realize the problem in the moments you need reliability: mid-shave, makeup half-applied, or when the fixture flares out under routine use.

    Shared, low-vent bathrooms double the effect. Fixtures chosen for looks or “good enough for now” stories lose the fight to steam faster. The price is paid not just in appearance, but in small, repeated interruptions—swapping bulbs, hand-wiping rust, hoping the mounting won’t loosen after every deep clean. The surface may look intact, but every morning starts with a new hassle you didn’t notice the first week.

    Small Fixes with Real Payoff

    Switching to bathroom-rated lighting is less about technical specs and more about eliminating the routine frictions that stack up day to day. Gaskets that actually seal, cable entries that block moisture, and brackets designed to resist corrosion mean cleaning returns to being occasional, not desperate.

    • No more drywall stains or ceiling rings. Good seals keep steam out of the mounting, so marks don’t return.
    • Consistent brightness. No more edge gloom or slow light-up—coverage remains even, eliminating the telltale shadows that signal stubborn condensation.
    • Stable cable paths. Covered cable entries prevent hidden stains and out-of-sight corrosion, so the support stays solid even behind the trim.

    You won’t see instant change, but you’ll notice what’s gone—the need to fight glare, chase shadow patches, or clean the same streaks repeatedly.

    What to Check Before You Replace—or Buy

    The label and build matter as much as style. Check for real IP (Ingress Protection) ratings, or clear “damp/wet location” listings—not vague claims, but explicit specs on the product tag or manual. A fixture that skips these isn’t made to stand up to bathroom conditions, especially directly over a shower or beside a mirror constantly fogged by steam.

    Key warning or deciding signs:

    • Gasket seals tight against lens and trim, not just decorative bands
    • Mounting screws and brackets coated or made rust-resistant
    • Cable entries with visible moisture blockage—nothing left exposed behind the housing

    Miss these, and you’re left with a setup that demands constant “fixing,” never truly resolved.

    Why the Right Details Outlast Quick Installs

    Bathroom-rated fixtures aren’t about overbuilding for code—they’re about defending the daily routine against the slow creep of dim corners, stains, and breakdowns. Seals, cable supports, and real water resistance mean a busy bathroom keeps functioning without distraction. You don’t have to second-guess the mounting after a humid week or race to clean before light output dips again.

    No installation is immune to every flaw, but when you choose setups that solve for steam and repeated friction, the room keeps working for you, not against you. The difference isn’t just in appearance, but in how often you’re interrupted—or finally left alone—by your lighting.

    For practical indoor lighting, bathroom fixtures, seals, cable supports, and more, visit LightSupport.

  • Why Routing Cables Along the Shortest Path Improves Workstation Efficiency

    A desk that looks organized at 8 a.m. can start working against you by noon. Cables that were “tucked away” during setup slip loose the first time you swing your chair out, stretch for a notebook, or push a drawer back in. Suddenly, that spotless surface is undermined by hidden slack bunching near your feet, cords dragging under the chair base, or a USB cable knotted behind an organizer. The frustration isn’t just visual—each detour or interruption in your workflow, from accidentally yanking a charger to untangling cords in a rush, signals that the setup isn’t actually suited for real, repeated work. This is the difference: either the way you route, clip, and control cables shields you from daily slowdowns, or it lets small friction points wear at your flow all week long. This is the world of desk organizers, cable trays, clip sleeves, under-desk storage, and the quiet but constant pressure they impose on—or remove from—your day-to-day session.

    Why the Clean Desk Snapshot Rarely Survives the First Week

    Initial order rarely means functional order once you get to work. The routes your cables take—tucked behind a drawer unit, zigzagged with extra slack, crammed around under-desk storage—begin to reveal weak points as soon as you start moving between laptop, keyboard, and paperwork. The clean look fades fast when a monitor cord pops free during the first big chair scoot, or a charger’s extra line pools underfoot by midweek. If you need to pull out a notebook beside your keyboard or reclaim desk depth lost to organizers, you may find hidden cables suddenly right in your reach path. The setups that survive aren’t just neat; they handle movement without letting friction return.

    Every dropped wire in the under-desk zone, every cable loop slipping out between your legs or pinched by a barely-closed drawer, can balloon into actual workflow cost—untangling messes, dealing with dust clumps, pausing to hunt for the right plug. Those seconds add up and quietly break your focus far faster than pure surface clutter ever did.

    Direct Cable Clips: A Small Change with Daily Impact

    Clipping cables directly and tightly along the shortest route—from device to outlet or hub—locks your setup into usable shape. No more shifting bundles falling out after every desk reset. No exposed slack waiting to snag an ankle during a fast swivel. Instead, cords follow your desk’s frame and lines, staying clear of both legroom and reach zones. It’s not about hiding wires for a cleaner look; it’s about stopping the pattern of repeated cable rescue when you swap devices, move a monitor, or spread out paperwork for a midday draft.

    Every cycle—sliding into a task chair, re-connecting a laptop, switching from typing to handwriting—happens without interruption. No time wasted shoving cords back behind an organizer, kicking aside a slack loop, or re-seating a misplaced cable box. The desk finally keeps pace with you, not the other way around.

    What Really Happens When You Choose a Longer Cable Route?

    For most people, the first instinct is to hide cables deep in trays, snake them behind drawers, or wrap them around the far edge to keep the desktop clear. But with each foot traveled, slack collects out of sight. By the end of the week, that hidden slack pools up where you move—cables drooping into leg space, popping out when you shift the chair, or jamming behind under-desk storage you thought kept things organized. Switching devices becomes a game of follow-the-cord to wherever it got wedged last. The tradeoff for concealment is constant micro-adjustments and the routine “where did the end go?” delay every time you set up for the next work block.

    Wider cable paths are also more exposed to accidental bumps—especially if you’re using under-desk storage, rolling task chairs, or need to shift your keyboard and monitor for changing tasks. Over time, surface tidiness gives way to returned clutter and the hidden friction of cords blocking basic movement or getting yanked unexpectedly.

    Everyday Friction: How Cable Routing Affects Real Routines

    Consider a typical session: you roll in, slide your arm forward to wake the laptop, and shift a notepad beside the keyboard. If a charger cable runs under your legs or a USB cord snakes around a filing unit, you’ll feel it: a tug on your foot, an awkward pause as a wire hooks under a chair wheel, or momentary hunting for which plug got stuck. Even a tidy surface can betray you if each device change means ducking under the desk or pulling slack from a tray. These aren’t rare events—they’re the everyday friction that builds until the desk starts to feel like a barrier instead of a tool.

    Short clipped cable runs protect against this by following the edge or underlip of the desk, where your feet and reach never interfere. When you move from typing to sketching, reposition a monitor, or swing for a quick file grab from a drawer, nothing snags or needs a reset. This isn’t just about power lines; it’s the same for USB hubs, docking connectors, or even the stray charging cord for wireless headphones. The workflow stays unblocked even as your surface shifts throughout the day.

    The Rediscovered Comfort: Desk Resets Become Effortless

    There’s a hidden payoff when cables are clipped short and anchored out of reach: rapid resets after every task switch. One hour’s focused work, the next juggling a video call, then spreading files for a review—your desktop stays clear, and there’s no pile of tangled cords to sweep aside or tuck back. It lets you reclaim desk depth, shift devices without tracing stray wires, and move back into the zone without a physical cleanup every session. This is what makes a setup easier to revisit, day after day.

    In practice, cutting cable length and clipping tightly to the desk meant I stopped dealing with cords coiling around my ankles or blocking drawer openings. The power strip, anchored out of my leg path, no longer collected dust. Plugging in, switching monitor sides, or grabbing a notebook from beside the keyboard started happening in seconds instead of minutes, without needing to untangle or re-route anything after a busy stretch.

    Practical Observations from Repeated Use

    How Many Clips Do You Really Need?

    For most setups, two or three clips per cable run are enough to lock down power and data lines both above and below the desk. Place one near each endpoint—close to the device and near the socket or hub—with a third midway if the cable crosses open space or passes by a drawer. Always leave just enough slack to swap devices without tugging, but not enough for loops to dip into reach or leg zones. Overtightening risks damaging cables and also creates new problems when something needs to move.

    Clips vs. Trays and Boxes: Which System Fits Your Routine?

    Concealed trays and boxes fit setups where nothing ever moves—where your devices stay locked and you never unplug. But for any active desk, clips beat trays for actual usability. Swapping a charger, unplugging for a standing session, or switching a display’s position? Clips let you change things instantly, while trays hide mess until it spills out or slow every adjustment with extra steps. The more you move monitors, swap devices, or reset your work zone, the more the open, visible logic of clipped cables makes life easier.

    Stopping Clips from Failing or Falling

    If cables keep appearing on the floor or out of their clips, it’s almost always dust, old adhesive, or leftover unused slack. Clean surfaces thoroughly before sticking, tension the cables gently, and give everything a test-adjustment after setup. After an hour or two of use, check for droop and reseat any weak points before they become problems. This two-step approach—cleaned surfaces and immediate feedback—catches 90% of repeat failures and keeps resets genuinely frictionless.

    What Makes Clipped, Direct Cable Runs Work Long-Term?

    The win isn’t aesthetic. Direct, well-anchored cable runs remove the invisible friction points that grind down momentum—stealth foot snags, charger loops springing onto the floor, or missing cables delaying a meeting. Over weeks, that reliability is what makes the desk inviting instead of something you “reset” out of guilt. Even as priorities and layouts shift, the system keeps pace.

    It’s almost automatic: setups that genuinely support movement, fast device access, and routine resets stay in the background—never returning as a source of small, compounding annoyance. By contrast, hidden or extended cable paths come back to haunt you at the worst times: a charger disappears when you’re already late, or a power lead pops loose during the last work sprint. Either your setup shrinks friction with every cycle, or it hands you invisible obstacles as the real routine returns.

    Explore the full WorkBasic collection

  • Choosing Ceiling Lights That Reduce Dust Visibility and Eye Strain

    Most rooms look fine under new ceiling lighting—until reality sets in. Bathrooms, laundry nooks, and hallways might seem “bright enough” on day one, but that same light can quickly announce its flaws. After a week of real use, harsh glare shows up on the mirror each morning, dust trails cut across shelf edges, and clean tiles flash every smudge. It’s not the paint or the products: it’s stray beams, unfiltered shadows, and every polished surface becoming a stage for dust and streaks. The right fixture never reveals these burdens in the first place; the wrong one makes you chase them on repeat.

    Where Glare and Dust Make Ordinary Tasks Harder

    Leaning in at the bathroom mirror, you squint past glare that wasn’t obvious at installation. Crossing the hall, a “bright” ceiling bulb throws half the space into splotchy shadow as you move. Fold laundry at dusk, and lint glows in the beam, making clean piles feel undone. Harsh open-bulb fixtures turn what should be minor annoyances into daily chores. Exposed bulbs flood cabinets and counters with cold light, exaggerating every stray particle—even surfaces scrubbed that morning look careless. Light that’s meant to reveal actually disrupts: the edge of the counter vanishes under a sharp shadow, mirror tasks demand shifting position, and movement slows to dodge sudden flashes of glare.

    Poor overhead light—uncorrected, stark, or undiffused—translates into missed lint, streaks distilled in harsh reflections, and cleaning that never seems to satisfy. Task surfaces lose contrast just when you need it; vision blurs in a narrow spot while everything else fades into dim blur. The wrong ceiling light sets up routines for constant, low-level friction.

    Movement and Visibility: Not Just About Lumens

    “High brightness” doesn’t mean high usability. Notice how a single unshielded fixture in a narrow corridor leads to:

    • Side walls plunging into shadow, so footsteps land less surely near the baseboard
    • Glare catching your peripheral vision at every stair turn, making the next step less certain
    • Laundry-room air filled with visible dust motes, spotlighted instead of ignored

    Even a glossy surface—sink, tile, or shelf—looks unclean under lighting that pushes every imperfection into focus. Soon, you wipe and re-wipe, not because anything changed, but because the light keeps exposing what you’d rather stay invisible. You duck your head to line up an angle in the mirror or find yourself shuffling toward corners, dodging the brightest patches. It’s a distraction built into daily use, not a problem of cleaning products or missed spots.

    Why Routine Cleaning Isn’t Enough

    When a utility space or bathroom won’t look clean for more than a few hours, don’t blame the brush. Blame the fixture. Airborne lint and moisture hover above your sightline—and with each use, open-bulb or clear-lens lights send direct beams through the haze, making what’s floating or slightly smudged look permanent. Dust lands quickest on upper surfaces; exposed light fixtures punch it into view rather than softening edges or hiding what cleaning already handled.

    Enclosed or diffused fixtures offer relief in real conditions. In a shower-heavy bathroom, a sealed, damp-rated flush mount softly fills the space, scattering light rather than creating visual hotspots, which calms streaks and hides post-shower haze. A semi-flush in the laundry with a sealed lens keeps late-day lint from becoming a shadow-casting event, meaning you no longer see debris floating above every work surface, and basic cleaning actually sticks.

    Repeated Use, Repeated Frustration—Until You Change the Fixture

    Install a sleek new light in your laundry corner, then wait three wash cycles. Suddenly, lint glows midair and shelf edges look grimy, even after you just wiped down. Clean, step back, repeat—until you realize the light itself is the nagging problem. Every load brings back the same bands of dust, shadows, and distraction. Switch to a sealed diffuser with proper coverage, and you see the change immediately in routine, not just appearance: folding, sorting, and walking through no longer means chasing reflections. Eyes stop straining, tasks stop stuttering, and the room feels easier even if you did nothing else differently.

    Hallways, Bathrooms, and The Case for Glare Control

    Ceiling lights that fail to control or diffuse their output undermine movement and comfort. Walk a hallway with an exposed bulb: shadow pools near the door, one wall glares at every pass, and the stair turn demands caution. Stair treads catch steely lines of light, making dust stand out in ways daily sweeping can’t erase. Entryway fixtures with weak coverage brighten upper walls while leaving traffic paths shaky and unsteady—a pattern only noticeable when you rush through with arms full or kids trailing behind. As routines pile up, so does the irritation.

    In bathrooms, damp air churns up fine particles, and unless a fixture shields the source, beams exaggerate flaws onto mirrors and tile. “Brighter” can mean sharper discomfort: open bulbs reveal every print, streak, and speck, trading the look of light for the burden of endless spot-checking. The mirror becomes hostile to clarity, not because the room is dirty, but because the lighting refuses to cooperate with actual use.

    The Payoff for Choosing Diffused and Damp-Rated Fixtures

    Upgrade to a fully enclosed or diffused ceiling fixture and notice immediate relief: glare drops, streaks fade, and cleaning starts to last. In high-humidity bathrooms, light flows gently, so you stop tracing dust lines after every shower. Hallways develop evenness—corners hold their shape instead of vanishing behind splotchy shadows. Laundry becomes less about chasing lint and more about simply completing the job. This isn’t decorative—it’s practical: the right fixture reclaims control from dust and glare, letting routines finish clean instead of starting over.

    Practical tip: Opt for a fixture that completely encloses or diffuses the light source wherever humidity, lint, or fast traffic are involved. Even swapping out an open bulb for a flush lens can turn a wearying routine into a clear, completed task—with less eye strain and no extra cleaning. If you’re stuck re-cleaning a counter, rubbing your eyes, or dodging glare on every pass, the problem is usually the fixture itself, not the amount of effort.

    Small Steps That Make Lighting Work With You

    When you catch a flare of glare after sundown, or walk a hallway that slips from shadow to dazzle, check the fixture first—not your eyes. Ask if it:

    • Is fully sealed or carries a diffused cover to block direct beams
    • Spreads light gently and reaches shadow-prone spots without harsh lines
    • Prevents dust and moisture buildup inside the lens area

    Small choices like these decide if a space just “looks lit up” for a minute or actually functions clearly for weeks. The right ceiling light means the difference between endless correction and routines that work without attention.

    Lighting That Keeps Up With Real Routines

    Functional indoor lighting doesn’t disappear into the background—it actively prevents new sources of frustration and distraction. In bathrooms, utility rooms, and busy hallways, the right ceiling light rarely gets noticed first. Instead, you spot what’s missing: glare points, floating dust, lost edges, and visually forced chores that once slowed your movement. Details like a safe stair turn or a mirror free from searchlights are not luxuries—they’re signals that the setup finally works with your daily life.

    And while swaps or upgrades won’t make a room perfect, they will make routines sustainable. You stop solving your lighting problem over and over. Instead, you return to a space that’s ready, not fighting against your habits. See real examples—and find practical, glare-taming ceiling lights for every challenging room—at LightHelper.

  • Why Stairway Lighting Should Prioritize Guidance Over Brightness for Safety

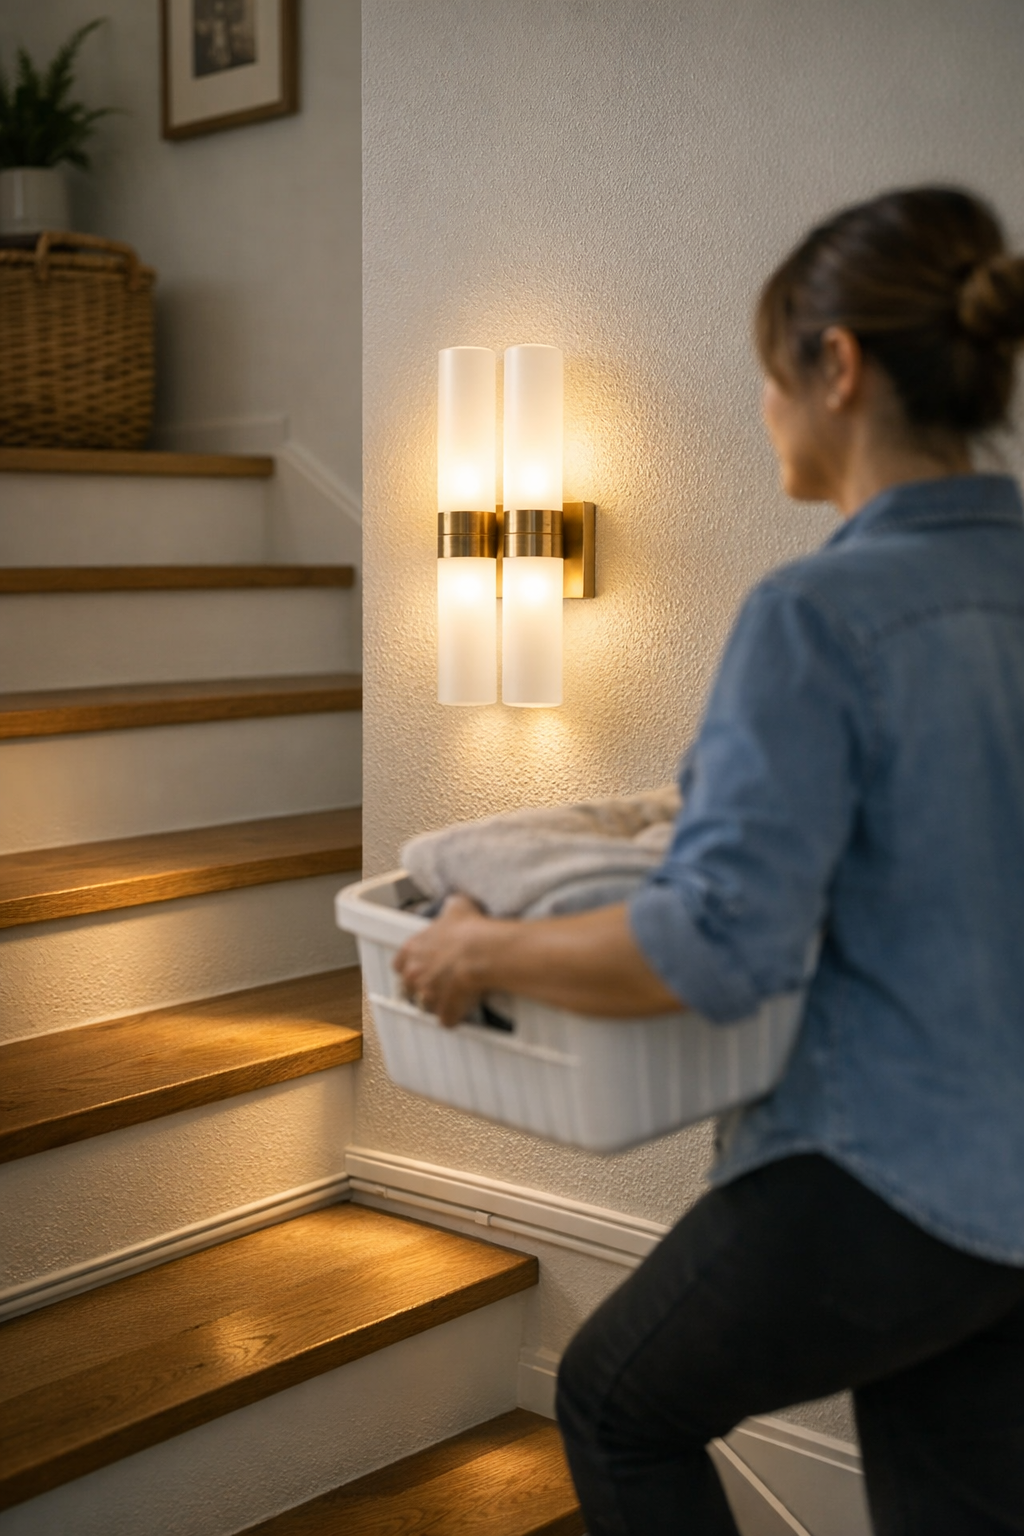
    A staircase can look sharp in every photo—and still feel like trouble every single night. The wrong lighting means one cold patch of glare by the landing, cables running exactly where your foot lands, and step edges that blur under your eyes the minute daylight disappears. If you judge your stairs by appearance alone, you’re almost guaranteed to miss what matters: the moment you slow down, shift the laundry in your arms, or duck your head to sidestep a misplaced fixture, you know the setup is working against you.

    Why the Right Stairway Lighting Isn’t Just About Looks

    Stairways aren’t just pass-throughs—they force you to move at odd angles, balancing in low or shifting light. Many setups only target the surface: more brightness, or at best, neater cable runs. But correct lighting support depends on where—exactly—the beam lands and how every bracket, tray, or strip stays out of your path. The fixture that seems “hidden” can cast new shadows. Tidy cables can still grab a shoe or a vacuum. Brackets that hide well in photos may jab a hand on the way up. None of this shows up until you’re using those stairs, again and again, after sunset or with an armload slowing your focus.

    There’s a gulf between “visible stairs” and step edges you trust. Missed coverage forces people to pause at dark spots, double-check risers, and grip rails tighter than they want—especially after dusk or with a box in hand. That discomfort is quiet, persistent, and easy to underestimate until it becomes the nightly routine.

    Common Lighting Hazards That Sneak Up in Daily Use

    Glare Where You Least Expect It

    A misplaced fixture on a split stair and you’re staring straight into a harsh spot, not seeing where your foot needs to land. Daytime means nothing here—at night, that flash steals your sense of the tread. Even a half-second’s hesitation builds a new, awkward caution into what should be an automatic routine.

    Shadow Traps and Dim Edges

    Minimal wall lights, panel LEDs, or step strips aim for a clean finish but regularly leave corners murky and edges blurred. The steps might look distinct during install, but glare spreads and the bottom risers fade. You notice it when kids jump over a shadowed patch or older family members hug the rail for an extra second. It’s not just cosmetic: it’s a missed cue that slows everyone down, often at the most-used parts of the stairway.

    Cable Clutter and Support That Interferes

    The sharpest light installation is ruined by exposed cable loops—or even “almost-hidden” channels with poorly tested placement. Shoes catch, cleaners snag, and after a week, every run is a visual distraction or a real trip hazard. Sleek brackets feel invisible at first, then draw attention the first time your hand catches the rail or a toe bumps an edge. The elements meant to support cleaner lighting often invent their own small frictions if placed without living-through testing.

    When Well-Intended Fixes Still Fall Short

    Installers focus on looks—flush-mount, cable hidden, bracket slim. But after a few weeks, the setup’s real personality appears: slow movement through shadowed zones, bottom risers in semi-darkness, the hard-learned path to avoid. The spot that looked solved on paper becomes the edge you wish were clearer each night you carry groceries or laundry baskets up and down.

    Lasting improvement almost always trades flawless visuals for invisible usability. The perfect install fades from view only when movement is so natural you forget the lighting exists—because now, you never have to second-guess the next step.

    Small, Targeted Changes That Make the Biggest Impact

    Adjusting Light Placement for Real Clarity

    True change can come from something as basic as lowering the wall light to just above each tread—delivering even, practical coverage without blind spots. Suddenly, your route doesn’t break pace near the shadows. Arms full, dusk in the hall, you move without stutter or hesitation—the steps are clear, the edges revealed, the daily climb stops feeling like a minor obstacle.

    Keeping Cable Management Practical

    High, “invisible” cable runs often become the worst offenders after a week of real use. A well-placed cable tray along the baseboard isn’t invisible, but it keeps the floor path clean—no loops, no snags, less visual chaos. Every time you vacuum without catching on a stray cord, you see the value in practical setup over showroom invisibility.

    Learning from Everyday Friction

    The real proof is felt after dozens of rounds: hands relax on the railing, tired feet glide up and down, and guests make it through without even glancing at their steps. You no longer think about the lighting, the cables, or the next fixture bump—the staircase becomes just a path, not a puzzle. That’s the mark of a setup built from lived experience, not just a tidy appearance.

    Frequently Overlooked Questions (With Straightforward Answers)

    Should stairway lights be motion-activated for safety?
    Not always. Motion sensors help in unpredictable homes, but steady, always-on step lighting—placed for actual use—means consistent guidance at every hour. No flashes, no waits, just steps you can trust instantly, even in the dark.

    What color temperature works best for stair safety after dark?
    Neutral white (3500K–4000K) carves step edges clearly without harshness or a medical look. It sidesteps the too-cool, too-warm extremes, making night trips feel guided and comfortable…not clinical or hidden in gloom.

    How do you keep stairway cables both safe and out of sight?
    Use the lowest-profile channels you can, pressed tightly to the baseboard or tucked beneath the stair lips—never on the open run. Try the cable path for a week before finishing: only daily movement reveals the annoying snags you won’t spot at installation.

    Building a Stairway That Holds Up to Real Life

    The install that holds up best is rarely the one that could win a style contest—but it delivers where you move, day after day. Low-mounted fixtures, solid cable trays, and tested support pieces mean fewer corrections, less mental tension, and a stairway that finally disappears into routine use. The real test is weeks later: quick movement, no slowdowns, no thought wasted on lighting—just steps that work with your life, not against it.

    You don’t need the cleanest look—you just need stairs that meet you where you live, reducing drag and removing the subtle hassles that pile up in everyday routines.

    For lighting and support options built for how stairs are actually used, visit LightSupport.

  • Creating Clear Cable Boundaries to Maintain an Organized Desk Space

    Desk clutter is rarely solved by tidying alone. Even after clearing every note, stacking every pen, and aligning your monitors, cables have their own agenda. They snake back onto your workspace, slip behind drawers, knot around the legs of your office chair, and convert every clean-up into a short-lived victory. The friction isn’t just appearance—it’s practical. A single misrouted charging cable derails your focus in the middle of a task. The moment you tug your laptop closer, a cord pulls tight. You adjust your chair and a cable loop snags your foot. In the end, a setup that looks organized still feels crowded and unpredictable every single day.

    When “clean” isn’t the same as “easy”

    Desk clarity is not reliable—it’s breakable. At 9am, the desktop looks fine. By 11, devices have shuffled, the keyboard has slid forward, and a USB line—firmly “secured” earlier—drops into the gap beneath the desk. You reach for a notebook and catch a cable with your elbow, dragging it across your mouse pad. The neat surface falls apart in moments not because cables are visible, but because each movement fights an invisible resistance. When you juggle multiple devices—a phone, a tablet, spare drives—every addition shakes loose another knot or forces a reach under the desk. The reality hits: an organized look is not the same as frictionless flow.

    The moment repeated reach turns into friction

    It’s not the cables you see; it’s the cables you have to track down. Hiding cords behind or below the desk often means turning every device swap into a low-stakes struggle. That phone charger, routed behind a monitor for the “clean” effect, needs two hands and neck craning just to plug in. Headphones tangled with a lamp cable force you to reach into the gap left by an under-desk drawer unit that blocks natural access. Even a rigid cable box, positioned too far back, becomes less a solution and more a daily mini-scavenger hunt. The workspace looks less messy but reacts less smoothly—especially when work ramps up or you share the desk with someone else. Cables out of sight quickly become cables out of reach.

    Small obstacles add up. Having to sweep aside sticky notes to fish out a cable at 3pm disrupts flow and marks the moment when the desk stops supporting you. A charging cord on the verge of slipping to the floor turns every reset into a scramble. When you move the keyboard closer to make room for a notepad, a hidden USB line snags and drags everything with it. For those who switch between calls, notetaking, and multiple devices in one session, this repeated interruption isn’t background noise—it’s a measurable slowdown that returns with every cycle. The desk starts orderly and ends tangled—almost by design.

    How clear cable routes turned the routine around

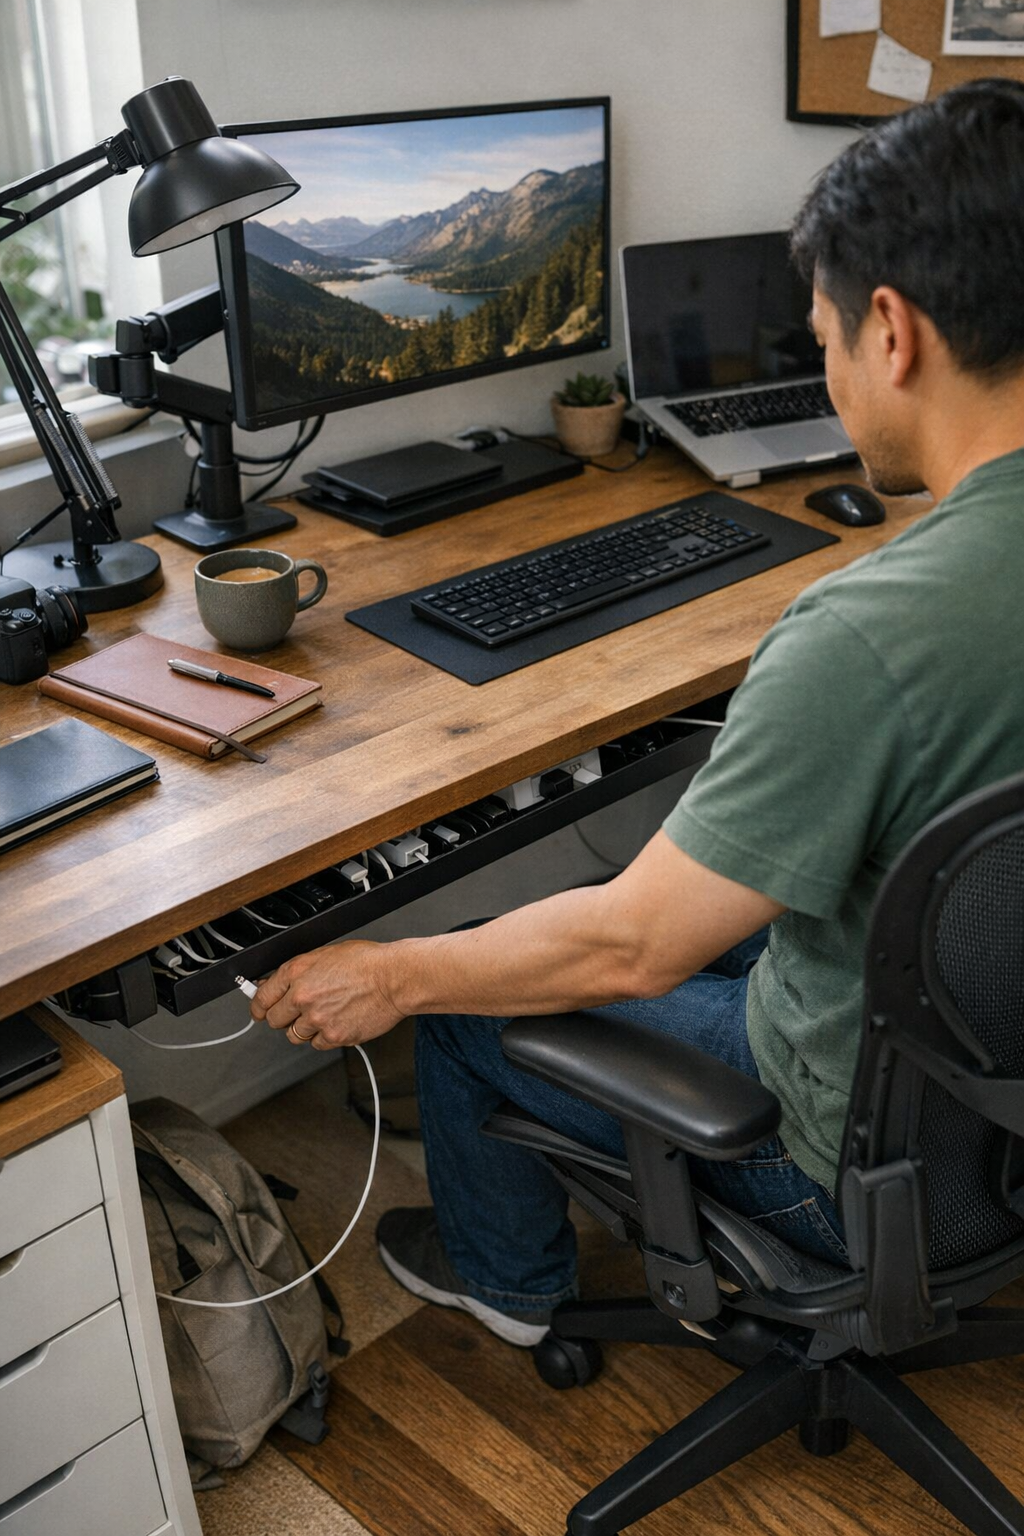
    Fixing cable chaos isn’t about vanishing everything behind closed drawers. The single, most repeatable win: cable boundaries that are accessible, visible, and deliberate. Not overdesigned sleeves and elaborate cable management kits—just a basic under-desk tray, attached close enough to reach without standing. With routes defined, chargers and adapters can “float” just beneath the desktop—grabbed or returned in one move, no rummaging, no lost time. No more floorbound cables or wild loops crossing your workspace.

    Every cable lands in a spot you expect. At the end of one task, the cord goes back in the tray without a second thought. No wedging behind monitors, no memory games about which gap it went into. You reach for a charger tomorrow, your hand finds it—before you even finish sitting down. The space in front of your keyboard stays clear for paper, a mug, or tablet, instead of being broken up by random lines or tripped by a charging cable stretched just a bit too far.

    Why not hide everything?

    It’s tempting to try and make every cable vanish. But as soon as you need to swap a device, hunt down a dying battery, or make a call, total concealment flips from clean to counterproductive. Hidden cords—buried under drawers, behind under-desk storage, or zipped so tightly they can’t move—turn every quick-change into a small task. Real cable control isn’t stealth; it’s accessible order that breaks zero times per day.

    Everyday examples: more than just a tidy look

    What do accessible, bounded cable routes actually change in real work?

    • No more cable searches: Chargers stay predictably within reach—not entangled beneath a pedestal drawer or lost behind the monitor riser.
    • Faster resets: Ending a work stretch means moving one or two cables—not battling a growing tangle hiding under a pile of notes or sliding onto the floor.
    • Unbroken workspace edge: Routing lines right below the front edge keeps the surface open for your notepad, coffee, or a sudden second device—desk depth gets preserved instead of eaten by cable clutter.
    • Zero surprise snags: When cords don’t drape across leg space or drag under wheels, you stop kicking, pulling, and knocking things loose during normal movement.

    The result stacks up day after day: strong boundaries shift the desk from a problem to reset to a tool that holds its shape—even after heavy multi-device use or a fast, messy morning.

    Quick answers for cable boundary problems

    How do I keep my desk neat if I swap cables often?
    Install a shallow cable tray or organizer close to where your hands work—under the desk’s front edge, not hidden behind storage. Device swaps stop breaking your rhythm when cables stay easy to reach and easier to return.

    Why do “hidden” cables still get in the way?
    Because “out of sight” is not a usable pathway—pushed-aside cords migrate, loop into the working space, or drag everything else with them. Only clear, fixed boundaries actually prevent returns to chaos.

    Does cable control really help focus?
    Absolutely. The fewer small corrections you make—untangling, reaching, tracking down the right cord—the more momentum builds between tasks. Real cable discipline means interruption drops, decision-making flattens, and reset friction stops costing you minutes you never notice losing.

    Making cable boundaries part of your actual workflow

    A desk that stays functional after ten cable swaps and endless resets does it by making return motions automatic. Not perfect at 9am and scrambled by 2pm—but recoverable, with every cord returning to the same place. Out-of-the-box cable routes and visible trays don’t make the space flawless. They make each reach, swap, and reset predictable—restoring rhythm instead of breaking it.

    By Thursday, not just Monday, the change is obvious: cable piles don’t reform, high-use lines are within immediate reach, and the routine of moving between keyboard, notebook, and monitor actually feels less pieced-together. These boundaries make a desk both more durable and less tiring—with or without company, even with every device in play. Cable boundaries aren’t a perfect system—they’re a repeatable advantage you notice only after the pain is gone.

    Explore the full WorkBasic collection

  • Why Waiting to Install Bathroom Lights Prevents Fog and Corrosion

    Install a bathroom or laundry fixture in a room still holding moisture and you set yourself up for daily lighting trouble: streaky mirrors that never wipe clear, soft haze trapped behind the lens, and corners that fade into shadow no matter how new the bulb. The enemy is less the fixture choice, more the timing—moisture seeps into damp-rated and standard lights alike if you rush the install and seal in humidity. If you’ve ever stood on a stool to swap a flush mount right after a steam-heavy laundry cycle, or struggled with persistent fog in the morning mirror, you’ve felt this slow-burn mistake subtracting from every routine.

    Why Steamy Installs Sabotage Reliable Lighting

    Rushing installation is common the minute a room feels “clean enough.” But putting up a light when steam still lingers after a shower or a load of laundry means moisture gets trapped behind the cover—exactly where you can’t reach. Even a damp-rated fixture is built for constant humidity, not the sudden cloud that soaks in during an impatient install. The moment the lens seals against a foggy tile or a mirror with beads clinging to the edge, you’re writing haze and shadow into the future performance of that light.

    This kind of mistake doesn’t announce itself early. Instead, light that felt open and crisp slowly turns unfocused. Inside edges cloud up. Shadows become noticeable in spots you used to trust, especially at the sink or the end of a corridor. Mirror reflections warp at the edges; what should be an easy shave or skincare check becomes about maneuvering under uneven brightness. The struggle is rarely dramatic, but it repeats: wipe after wipe, you never get back to day-one clarity.

    The Problem Builds With Every Routine

    Lighting failures in moisture-prone rooms aren’t one-off annoyances—they wear you down. Post-shower mirror checks turn into awkward squinting, and laundry surfaces stay stuck in a partial gloom no matter how strong the “overall” light output seems. Stairs take on new risk, as the landing fades into an uneven gloom, or glare blooms exactly where you need safe footing.

    This isn’t superficial. Every incomplete wipe, every misjudged drop of detergent, every missed step comes from one basic error: letting humidity get sealed into the lighting from the outset. Tall claims about fixture durability don’t overwrite the truth that a damp install means ongoing maintenance, persistent cleaning, and slow loss of visibility.

    First-Day Brightness: Why It’s a False Signal

    On installation day, every fixture looks clean and definitive. A new flush mount glows broadly in the bathroom; a revamped vanity mirror reflects even light. But if that fixture was put up in a humid rush, give it a few weeks—the lens dulls at the margins, the shadow line creeps higher, colors start to flatten, and easier routines now require extra steps. Compare two bath lights months later: one installed bone-dry, one rushed into a steamy room. The dry mount delivers even, usable light across tiles, mirrors, and sinks; the other throws cold bands, shadowed pockets, or a haze that just will not wipe out.

    Scenes from Real Spaces: How the Problem Shows Up

    Bathroom Mirrors That Won’t Stay Clear

    The daily fight: two identical lights above the mirror, but one clouds up at the edges no matter how much you clean. The culprit isn’t the cleaning product—it’s the fog caught behind the lens during installation. Clarity shrinks to a central oval, and precise tasks like shaving or liner become a clumsy negotiation with semi-shadow and uneven edges. Each routine takes longer, never feeling quite right again.

    Laundry Rooms with Stubborn Clouding

    Laundry zones often get hasty installs—old fixture down, new one up after steamy wash runs. Result: stubborn lens clouding that doesn’t respond to new bulbs or more cleaning. Piles of clothes take on strange colors in this patchy, half-lit glare. Sorting whites from darks or checking stains becomes slower and more frustrating than it should be, as shadow and color distortion resist quick fixes.

    Stairways Suffering from Partial Shadows and Glare

    Replacing a stairway ceiling light after mopping or running a humidifier feels efficient, but if humidity lingers, the effect is clear within weeks: glare blooms on the first turn, safe edges at stair landings are caught in shadow, and movement slows on instinct. Lighting looks adequate—until daylight fades and you find yourself hesitating at the corner, judging shadows by the step.

    What Works: Waiting—Even When It’s Inconvenient

    The real fix is patience: never install until every surface is dry. Wait at least 60–90 minutes after steam-producing chores. Check mirrors and tile—no fog, no bead, no condensation on wires. If just breathing on the glass produces fog, you’re still too early. Rushing undoes even the best fixture rating and locks you into months of extra cleaning or shadow-battling. Sometimes a fan or open window helps, but dry means truly dry—don’t shortcut the process.

    How to Spot and Fix an Installation Done Too Soon

    If your lighting never fully clears, your mirror always seems dulled at the edge, or shadow lines keep moving no matter the bulb, installation timing may be at fault. Often, this creeps in right after an “upgrade”—the light looks finished, but clarity is never the same. Safely removing the fixture and drying it out may buy time, but permanent improvements often call for uninstalling and reinstalling in a completely dry environment. This is the only way to stop the haze from recurring.

    Lighting That Works With You, Not Against You

    Functional spaces—bathrooms, laundry corners, entryways, stairwells—call for lighting that responds to constant humidity and routine movements, not just decorative looks. A fixture installed in the right spot at the wrong time isn’t a small error—it’s repeated frustration built in: mirror fog, color distortion in sorting, hesitation at a stair landing. The cost is practicality, not just “brightness.”

    The lesson is clear, if not glamorous: wait for bone-dry conditions before installing, every time. This single habit preserves light quality for years. The best lights protect routines, not just surfaces. For proven options and practical guidance on bathroom, laundry, hallway, and damp-rated lighting setups that fit real routines, visit LightHelper.

  • How Indirect Lighting and Cable Management Transform Entryway Comfort

    Entryway lighting never fails in the first hour—it fails during the week’s routines. The cables you thought were out of sight start catching dust and shoes. A fixture that looked perfect washes the mat in glare or leaves you hunching to avoid direct light, turning a neat installation into a source of daily friction. Anyone who’s spent a few mornings dodging shadows, stepping over cords, or missing a bag in the dim knows there’s a sharp difference between lighting that simply looks ordered and lighting that actually stays out of your way in real use. What works on day one often becomes a fresh problem by day three.

    When Neat Installations Turn Into Daily Friction

    Install a ceiling light or sconce, clean up your cables, clear the entry floor—everything seems resolved for a moment. By the end of the first week, patterns emerge: a bracket blocks easy access, a cable that hugged the wall now attracts lint and drags against shoes, or a panel casts an awkward pool of shadow you never noticed at installation. Narrow, high-traffic entryways—especially those with shared hooks or benches—expose these irritations fastest.

    Friction builds where you notice it least at first: Ceiling panels that shone brightly during setup now dump glare straight into your eyes every time you walk in. The area behind the bench, once visible, turns murky at dusk; the mat edge blends into shadow, making small objects easy to miss and entryway dirt harder to spot. Each nagging visual interruption slows you down and makes cleaning clumsier, especially when the household is busy.

    The Real Cost of Ignoring Cable Runs and Supports

    Cables rarely bother you until they start shaping how you move. Exposed cords, clumsy covers, mismatched brackets—each becomes a snare for dust and an obstacle for feet and bags. Tight entryways give you little margin for error; what looks “fine” during installation becomes an obstruction within days, making the whole zone tighter and busier than it should be.

    Even premium hardware doesn’t solve the lived problem if cords cross open walls or cut in front of benches. A clean setup can go bad overnight: arrive home in a hurry, tangle a toe, sweep the floor, nudge a cable loose, and the supposedly tidy install becomes yet another thing to fix again. What looked like long-term neatness turns into a cycle of small practical disruptions.

    Looks “Done,” Acts Like a Distraction

    The satisfaction of “finishing” a lighting update fades fast if details go ignored. Fixtures aimed straight down burn bright spots onto the floor, revealing every missed streak and casting unnecessary shadows. Soft panels left with their edges exposed startle and distract. Even a cord suppressed by a quick trick—forced behind a basket edge or kinked at the base of a bracket—eventually wriggles free and needs fiddling. True threshold comfort isn’t about that first satisfied look. It’s about whether the entry fades out of consciousness and stops inserting new annoyances every day you use it.

    Scene: The Narrow Shared Entryway

    Think of a compact apartment entry: one wall fitted with hooks, a shelf stacked with shoes, and three people competing for hanger space. An overhead ceiling light promises full coverage but quickly shows its limits. Instead of clarity, you get shadows reaching behind coats, brightness flaring into your eyes, and a dim edge at the mat just where you need to see dirt on arrival or find keys by habit.

    Cable issues don’t stay hidden: A tidy cable run, pressed along the baseboard or shelf, works for a few days—then the pressure of cleaning, feet, and bags has it creeping loose. The cable cover that once blended in starts collecting debris. The moment you think, “I’ll have to fix that again,” you know the setup’s logic didn’t account for repeated use.

    Small Practical Changes: Indirect Wall-Mounted Lighting

    The real shift rarely comes from brighter fixtures—it comes from changing how and where the light hits, and how the setup lets you forget about it in use. In that entry above, swapping the bright ceiling panel for low-profile wall sconces—mounted in line with the shelf, with swivel adjustment—quietly changed everything after a week. One sconce aimed across the hooks made every bag easier to spot; the other focused on the mat’s edge, highlighting dirt but never forcing you to squint. All wires vanished: routed behind the shelf, dropping into a hidden basket. No stuck-on cable covers, no need to reach or reset after every sweep.

    Visible Difference After Routine Use

    • That irritating glare at the doorway vanished—no more ducking under a “hot spot.”
    • Cables quit tripping you up, so you could sweep or dash through without obstruction.
    • The edge of the mat stayed visible, helping intercept dirt right at the door and making quick drops less risky.
    • Brackets never crossed high-traffic paths or snagged sleeves, so movement stayed fluid and cleaning stayed simple.

    Over weeks, the improvements stuck. No more hunting for keys in the dark. No ritual of straightening cables before visitors arrive. The entry felt done—not because it was flawless, but because the lighting and supports stopped being factors you had to manage every day.

    Building Entryways That Stay Comfortable to Use

    Entry lighting that holds up after installation isn’t just neat—it actually keeps the threshold clear of new annoyances. Real-world setups that work longer share a few practical patterns:

    • Keep fixtures outside direct sightlines. Sconces with indirect spread or ceiling panels set off-angle reduce strain and glare, making the area navigable even in a rush.
    • Route cables behind furniture, under shelves, or through storage components. Hiding the cable run prevents snags, keeps shoes and bins from shifting the wire, and cuts down on dust collection along open paths.
    • Use accent or directional lighting to outline the exact hooks, shelves, or surfaces you grab most. You don’t need total brightness—you need clarity in the handful of zones that matter, without amplifying clutter elsewhere.
    • Mount supports—invisible brackets or wall hardware—out of foot and hand paths. It’s not enough to look sleek; regular movement exposes any hardware that strays into active zones.

    One Practical Cable Management Fix

    Use the bulk of your existing furniture—shelves, shoe racks, storage bins—to conceal and secure cable runs. When cables stay tucked against the solid, rarely-moved edge of a bench or routed tightly behind storage, they avoid being jostled or dislodged, even with frequent cleaning. This single change often does more for long-term neatness than switching the light itself.

    Why Most Quick Fixes Don’t Hold Up

    Many entryway lighting setups fade from “fine” to frustrating not through catastrophic failure, but through accumulations: glare you notice while juggling bags, lost visibility where you actually need it, and cables that migrate back into view with every cleaning. Fixing appearance is easy—making something function invisibly week after week takes more structural judgment. Where cables travel, where brackets frame or block, and where the light actually lands are the details that separate a setup you trust from one you’re forever tidying or tolerating.

    The silent test for an entryway that works: After a full week, are you still fiddling with cords, re-aiming the light, or does the setup finally let you come and go without thinking about it? The best entry lighting blends away, staying practical and invisible beneath the routines it quietly supports.

    http://www.lightsupport.myshopify.com

  • How Guided Cable Management Speeds Up Desk Resets and Reduces Clutter

    Most cable chaos isn’t a tangled ball—it’s the hidden drag that slows down every reset. A clean workstation means little if the first device swap yanks a mouse across the desk or sends a power brick tumbling onto your foot. Even with surfaces that pass the Instagram test, a headset cord snags your chair wheel, or a charger snakes just low enough to block a quick drawer pull. Friction builds not in obvious mess, but in those split-second interruptions: a cable clinging under a drawer just as you need to move, or an adapter jammed below a monitor riser. What looks organized at first becomes a lineup of small slowdowns that chip away at every work cycle—especially when you try to clean up or swap devices in a rush.

    Where cable management shows up the most: in the middle of everything

    The weak point in any setup reveals itself when you actually move between tasks. Switching from keyboard to notebook, reaching for a charger mid-call, clearing space beside your mouse for a document—these actions decide whether your desk’s structure helps or hinders you. Cables that seemed “managed” during setup turn into tripwires when you shift your laptop dock or need quick access to a storage bin. One cable slides across the writing pad, another blocks the path to a drawer, and the illusion of order dissolves with each repeated reach. Desk utility doesn’t collapse because things look cluttered; it falters when cord paths cross your workflow at the exact moment you’re trying to move quickly.

    The subtle but real difference: trays versus boxes

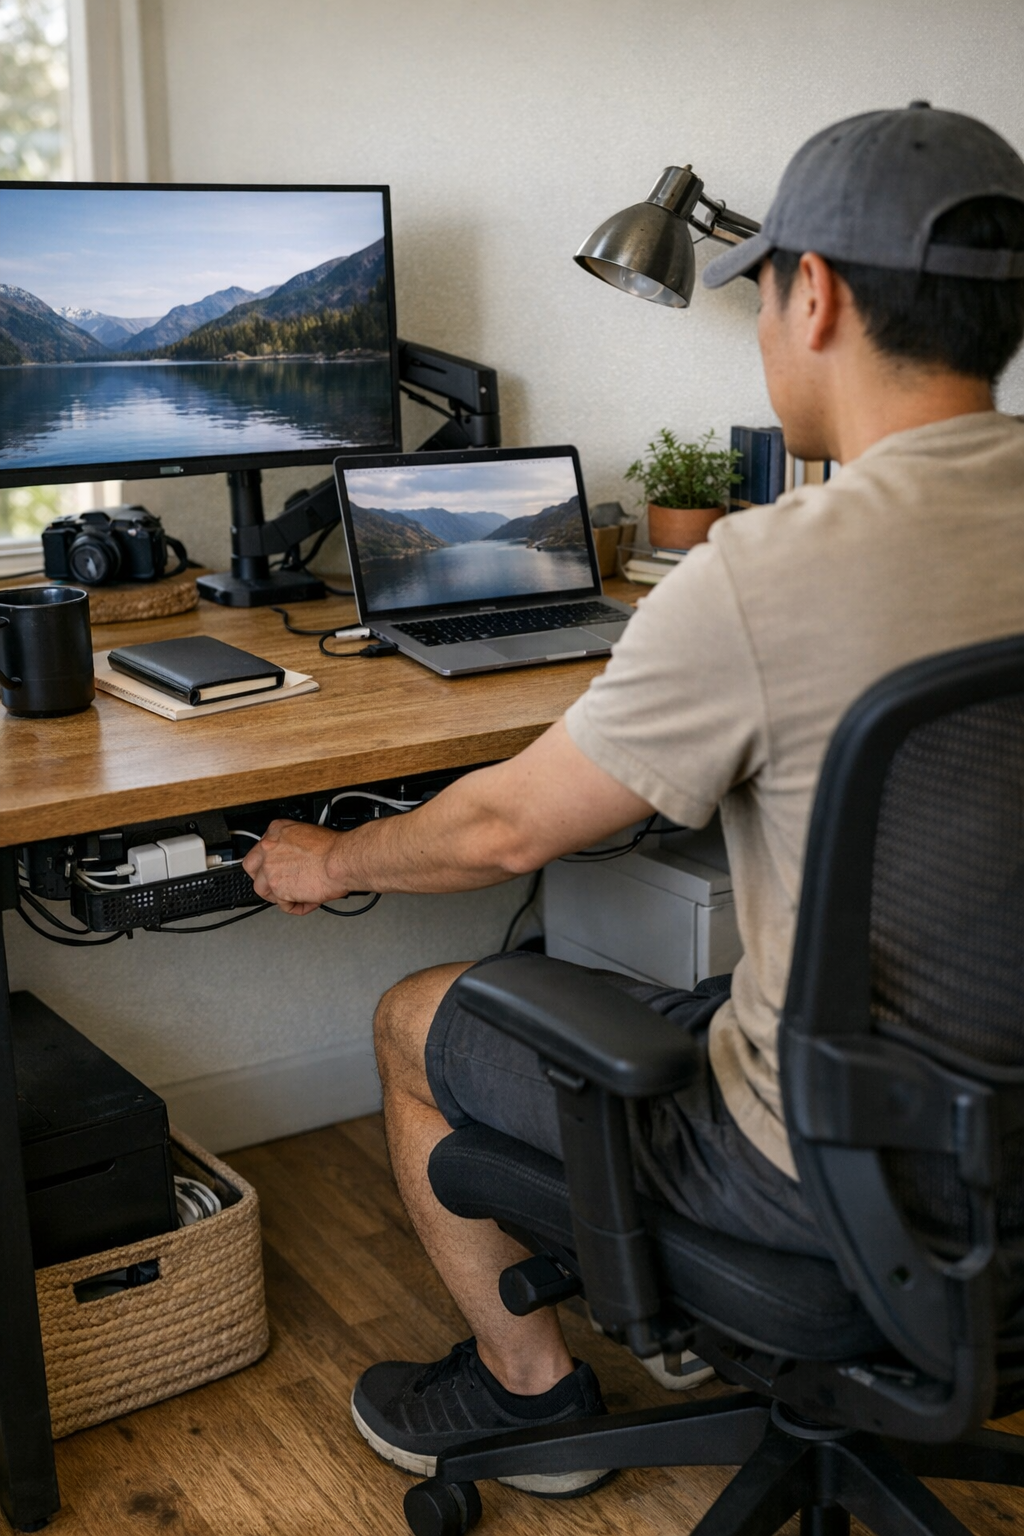
    Trays and boxes both target clutter, but only one makes your workflow faster. Under-desk cable trays keep cords on a single, reachable route—so swapping a laptop charger or disconnecting an adapter becomes a simple, one-handed motion. You feel the difference: one quick reach and back to work. Cable boxes, designed for neatness, cluster everything together behind a lid. They do hide visual mess, but demand two hands and extra time every time you need a different cable mid-task—lifting, sorting, and re-bundling everything after each change. That promising setup feel of a “clean look” fades fast when a shared workspace or frequent device resets turn the box into a pocket of randomness rather than a true system.

    Resets are where your choice gets tested. Trays mean quick, reliable access, while boxes mean you’ll be fishing for cords when you least have patience. The more frequently you switch devices—a headset in the morning, phone charging after lunch, external drive at day’s end—the more every second spent untangling or unboxing adds up. What looks controlled becomes a real distraction when every change becomes a process.

    Everyday workstation routines and where friction hides

    True slowdown doesn’t announce itself until you’re mid-reset. You end a video call, reach for headphones, only to find the cord snagged behind your side drawer—a gentle tug drags out the whole pile, disconnects a charger, and sends your storage bin askew. Five seconds here, ten seconds there, multiplied by every switch, means “quick resets” take longer and you lose the thread of focus. These interruptions don’t just slow you down once; they stack up over a week, turning brief task changes into repeated frustration.

    Cleaning is another tell. If wiping crumbs makes a cable slip off the desk edge or pulls on something under the surface, then you haven’t solved the real problem. A guided system—using under-desk trays, edge clips, or cable sleeves—keeps movements friction-free: no hidden tangles, no accidental disconnections during routine care, and no repeated shuffling just to keep working.

    What actually improved my desk: one guided path, above knee height

    Too many cable resets and accidental knee kicks finally pushed me to install a single under-desk tray along the back edge of my desk. Immediately, every cord followed a predictable route—high enough to avoid wheels and clear of my legs, low enough for one-hand access. Suddenly, no more charger trailing onto the floor, no more blocked drawers, no silent drift of cables every time I slide the chair back. The result wasn’t a cable-free zone, but a setup where device transitions matched the actual demands of my workflow: no hunting, no unintentional disconnects, no surface clutter disguised as “order.” For the first time, resets actually felt as quick as they looked on a clean desk.

    Quick answers for the messy middle of real work

    Shared desks: faster swaps or cleaner looks?

    Cable trays outperform cable boxes for active, shared desks. Trays keep each cord visible and accessible, so every user can adjust or swap out connections without opening, sorting, or risking tangles. With boxes, every new user must dig through the pile and reorganize, which is slower and increases the risk of unplugging the wrong device.

    Under-desk storage: help or hidden hassle?

    Without structured routing, cables are the quickest way to ruin useful under-desk storage. Uncontrolled drop-downs block drawers, snag on bins, and turn bins or file drawers from a help into a recurring obstacle. A routed tray or cable path above drawer height lets you use all your leg space and storage without any last-second cable rerouting.

    Most common cable mistake: hidden but unhelpful

    Never just drop loose cables into a box thinking it’s organized. The effect is short-lived. As soon as you need to swap or redirect a power or data line, you face a slow unravel—turning what should be a two-second change into a minute-long interruption. Separate, guided paths keep device routine fast and prevent accidental unplugs that trigger yet another reset.

    The right structure isn’t invisible, but it keeps you moving

    The real measure of a desk isn’t the number of cables showing—it’s how little they interfere with your flow. Guided trays, visible clips, cable sleeves: none may win a pure-mood contest, but in everyday work they mean less shuffling, faster cleaning, easier swaps, and fewer accidental disconnects. When your desk finally works at the speed you move—not just the speed it looks—then you know you’ve found a system that values repeat flow over surface show. This is how you keep minor mess from turning into the next day’s major hurdle—by making every reset feel as clean as it looks.

    Explore the full WorkBasic collection

  • Why Moisture-Rated Ceiling Lights Matter in Bathrooms and Laundry Rooms

    Ceiling lights in bathrooms and laundry rooms rarely get a second thought—until badly balanced light turns fast routines into a grind. If you are wiping a foggy mirror yet half your face is still lost in shadow, or tripping into the laundry area and finding the corners look muddy even when the fixture’s on, you’re not missing style: you’re running into the real limits of lighting that wasn’t built to handle steam, moisture, or repeated use. The day you notice glare hotspots above a wet countertop, or uneven spread sending half the floor into darkness, is the day the wrong light stops being invisible—and starts dragging routines to a crawl.

    Where Lighting Choices Actually Matter

    The gap between “fine for now” and “works every week” isn’t obvious the day a fixture is installed. Basic ceiling lights—whether labeled for damp use or not—look almost identical until the first month of real routines. Step by step, the differences stack up: fixtures that hold their clarity versus setups that let edge shadows, flicker, or smear-prone glass creep in every time the humidity spikes.

    Steam after hot showers, condensation rings around fixtures, and dim corners aren’t random: they’re a warning from the room itself. The moment dampness lingers, a light’s moisture rating decides whether you’re running a safe, usable space—or putting up with patchy glare, unpredictably dark edges, and daily workaround habits that wear you down.

    Moisture Changes Everything: The Real-World Ceiling Challenge

    Bathrooms, laundry spaces, even the inside of the shower—these areas grind down ordinary fixtures faster than almost anywhere else at home. At first, every light throws out a “glow.” After weeks of steam and condensation cycles, tiny flaws crack open:

    • The mirror’s edge picks up dark bands no matter how clean the glass is.
    • Glare hovers over the ceiling but leaves sinks or counters unpredictably murky.
    • Standard fixtures (lacking a true damp or moisture rating) begin to buzz, flicker, or dull out after enough back-to-back showers or a parade of laundry cycles.

    This isn’t just about how a space looks—the real question is whether the lighting keeps up on heavy-use days when every shortcut gets exposed.

    Mirror Zones and Vanity Routines: Where Uneven Lighting Shows Up Fast

    Picture the morning rush: you lean to wipe a streaked mirror but the left side of your face is softly lit, the right thrown into glare, and the middle split by a hard shadow. Each rinse, wipe, or quick shave makes the imbalance worse if the overhead fixture can’t handle dampness—humidity exaggerates the difference, pushing the edges further into shadow while pooling glare over the rest. By the end of a month, routine tasks start demanding extra steps just to get basic clarity.

    Switch to a properly rated ceiling fixture. Even after ten steamy showers, the spread holds up. The mirror clears faster, the face remains evenly lit, and tasks flow—less eyestrain, less second-guessing if you missed a spot. It’s not dramatic, but that low-level friction quickly separates lighting that plays along from lighting that works against you.

    Shadow Buildup: What Routine Use Actually Looks Like

    Moisture doesn’t just cause cosmetic streaks. Over the weeks, standard ceiling lights above vanities, counters, or the far end of the laundry bench show real wear:

    • Shadows creep outward a little more after each humid cycle, subtly warping where your eyes expect clear light.
    • Room edges lose sharpness—making it easier to miss dropped items or step into a barely-seen wet spot.
    • Frustration builds: you add a clip-on lamp for a task, or fumble for a flashlight to make up for the fixture’s faded power.

    These aren’t sudden breakdowns but an ordinary, creeping decline that you notice most when routines feel slower and less certain.

    Laundry Zones: Patchy Light and Slowed-Down Movement

    No one designs a laundry room for drama, but light that can’t handle steam makes every step less certain. After a wash, condensation beads overhead, and a generic ceiling light leaves sorting bins dim and folding tables half-lit. The dark side of a towel pile, the color of a missing sock, the bottle on the back of the shelf—routine tasks start pausing mid-move, shoulders tensed, as you re-adjust for a patch of persistent shadow that never seems to go away.

    Lighting that holds steady in week twelve, not just on day one, keeps the room usable—no matter how often the cycle repeats.

    Condensation: When a Ceiling Light Becomes a Weak Link

    Notice regular condensation on ceiling panels, around your fixtures, or on cloudy mirrors? The wrong fixture isn’t an inconvenience—it’s a growing maintenance risk. Ordinary ceiling lights, even if well-sealed at first, will eventually:

    • Show signs of internal corrosion, faint staining, or rings where moisture collects again and again.
    • Develop flicker or random shut-offs when electrical contacts degrade in repeated humidity.
    • Throw uneven light, so whole work surfaces drop into shadow not because of a bulb, but because the fixture has quietly lost its evenness under stress.

    You know it’s happening when a room looks “on” but nothing is fully visible where and when you actually need it.

    When Everyday Lighting Fails: Practical Impact

    When light fails routine use, the problem isn’t just irritation—it’s lost time and new risks. A bathroom where water spots are lost in shadow, or a laundry zone where glare hides edges and leaves puddles undetected, quietly increases the chance of slips, missed steps, and small accidents. A foggy mirror that never fully clears slows morning routines, while corners made dim hide dropped items for days.

    • Edges of wet floors blend in—making slips or hasty moves riskier.
    • Persistent mirror fog turns small tasks into drawn-out rituals (and more wiping means more chances for an awkward reach).
    • Supplies, tools, or everyday laundry items vanish into peripheral shadows—forcing repeat searches or missed details.

    At best, it’s a drain. At worst, it makes a “routine” area quietly fail when pressure is on.

    Consistency Beats First Impressions: Lighting That Actually Works

    What a damp-rated fixture offers isn’t visible in the packaging or even the first few days: it’s the way even spread, consistent brightness, and glare control survive months in a wet, steamy room. Mirror zones stay usable, corners remain defined, and safe, comfortable movement continues—no matter how many loads, showers, or quick cleanups a week brings.

    Every indoor zone comes with its own stress test. For anywhere humidity, splashes, or steam are part of the routine, an ordinary sealed fixture is already fading in the background. Step up to lighting with real moisture resistance, and the line between an active, reliable space and a zone that sabotages itself becomes clear with every use, not just in the catalog.

    If standing in uneven light or working around patchy glare is slowing you down, the next fixture is less about style and more about whether your routines feel smoother, safer, and less interrupted for the long run. See what actually stays usable day after day, at Shop LightHelper: Damp-Rated Ceiling Fixtures and Practical Indoor Lighting