Author: jaesoon_admin

  • Why Prioritizing Shelf Height Improves Garage Organization Efficiency

    The garage was perfect—at least for a day. Shelves set by the level, bins snapped into their assigned places. Everything snapped into its new home, neat as a product photo. But within a week, that hard-won order starts undermining itself. Familiar tools pile up on the bench, a set of screws gets dumped on the cart, and you’re ducking, twisting, or reaching just to grab what you use daily. Suddenly, the setup that felt finished now won’t keep pace with your routine.

    When Looks Win—but Use Loses

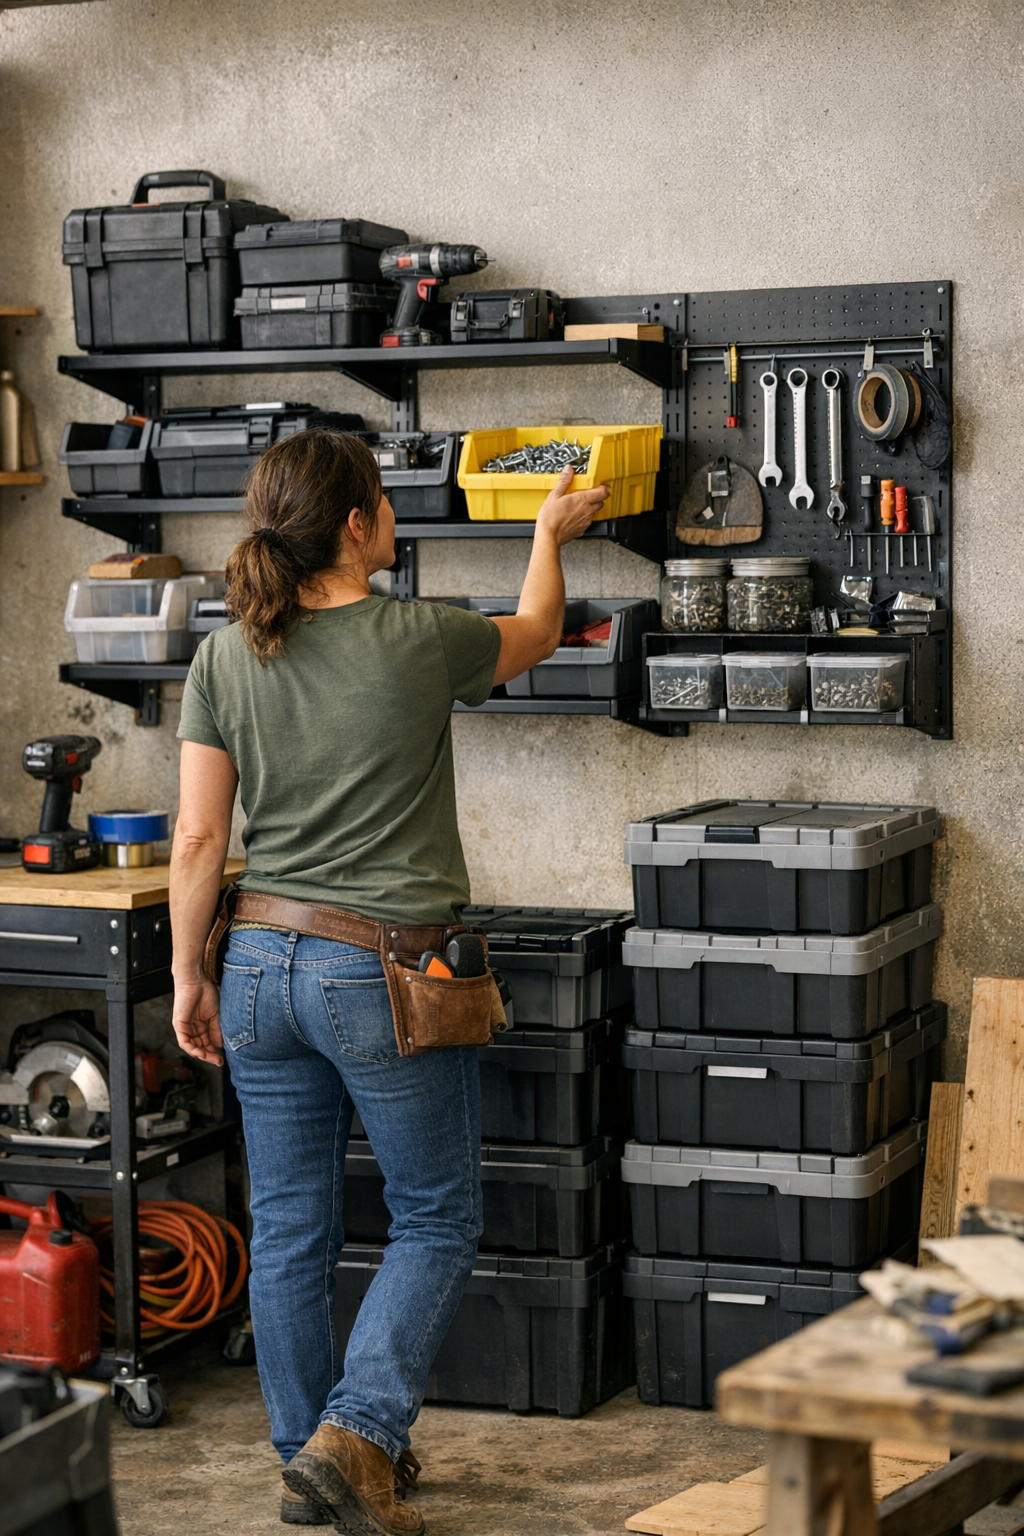
    The promise of a modular wall is seductive: crisp lines, nothing out of place, every stud supporting some storage miracle. In reality, though, a layout designed for the empty room almost never survives your first week of full use. Returning the drill case means an awkward crouch to a bin set too low. The shelf set “just so” for visual balance is half a foot out of easy reach, so screws and tape measures accumulate on whatever surface is closest mid-task. Your hands search out shortcuts, and makeshift clusters—cordless tools on stools, hardware on carts—start threatening the whole zone’s flow. That “organized” look becomes an obstacle course the minute you try to work at your pace.

    The Trap of Perfect Grids

    The tighter the grid, the easier it is to create friction that lingers. Lower shelves turn into catch-alls: half-used tubes of caulk, a cracked flashlight, backup fluids, and all the ragtag “later” items. Bins at mid-level—chosen for symmetry—demand constant bending or twisting for basics. Every round of work nudges these annoyances further: dead corners go untouched, a rolling cart keeps drifting just to clear wall access, and you invent more temporary homes for the things you use most. Overflow piles creep in: sandpaper mountains on the bench, random bits tossed on an open cart because putting them away isn’t quick or comfortable.

    Even the act of moving slows. The modular cabinet near the door needs a cart scooted aside before you can reach inside. One awkward shelf cuts off part of your wall zone—a foot of wasted space you can see, but never quite use. These small, repeated inconveniences chip away at the satisfaction of having “everything in its place.”

    Where Friction Builds, Order Breaks

    The real breakdown isn’t overnight—it’s the tenth cycle where each step gets slower. A tool chest must be dragged out just to reach a side drawer. The cabinet that initially looked “flush” now traps your movement, forcing sidesteps or pauses between work areas. You catch yourself organizing the same five tools every evening, not because you’re messy, but because their supposed “home” isn’t where your hands naturally land.

    Resetting takes too long. You hesitate, knowing each cleanup will mean more bending and shuffling. “Order” becomes something you do at the end of the day instead of something that helps you get through it.

    One Real Adjustment Changes Everything

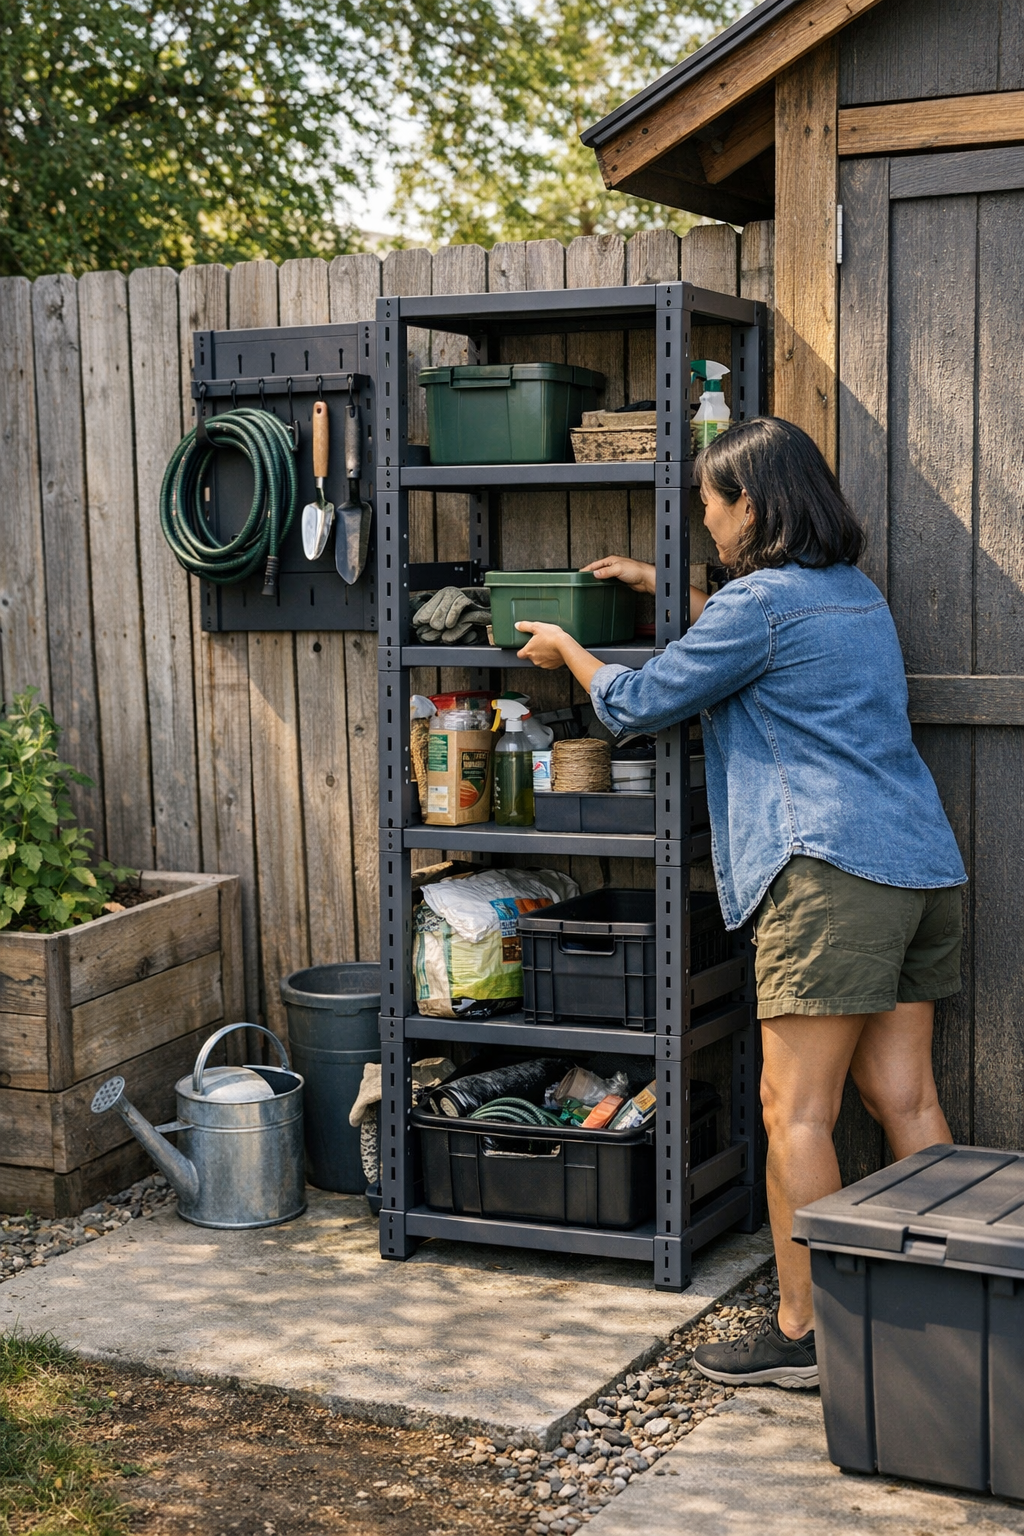
    Try shifting a shelf just six inches higher—or reworking one row of bins so your must-haves sit right between hip and chest height. The shift is subtle, but the result lands hard: drills, bits, and hardware fall into your hand at full arm’s reach. You return tools as you move, instead of staging them for a bigger cleanup later. The system runs at your speed, not against it. Overflow disappears as clutter stays in motion, never lingering on the bench or the path in front of drawers.

    The route between zones almost clears itself. No more rerouting the cart just to reach a bin. Resetting feels less like a ritual and more like a reflex—one less reason to procrastinate putting things back.

    Finding Your True Reach Zone

    Aesthetics fade during actual use—practical reach stands the test. In garages and workspaces, the “zone of least effort” usually sits from hip to chest height (about 34–48 inches up). Bins or shelves below that line gather things you don’t need now—or things you toss “for now.” Anything much higher is only worth using for gear you rarely grab or for lightweight items with no daily urgency.

    Instead of chasing symmetry when laying out your wall, chase routine. Act out your five most common tool grabs. Where does your free hand go? Where does your body turn or pause mid-step? That spot you keep returning to is your true storage zone—everything else can settle in above, below, or out of the way.

    Space That Works—Not Just Space That’s Filled

    It’s tempting to “finish” a wall when it’s empty, spacing everything for the look, not for use. But the moment your setup faces daily tasks, every misplacement exposes itself: a blocked corner when you bring in a ladder, a step stool always within arm’s reach, but in the path. One cart gets too close to the door. Behind a floor bin, a foot-wide dead spot collects dust and forgotten odds and ends.

    Active zones—whether a workbench or an entire garage—should clear as easily as they fill. If you find yourself hesitating to clean up because it means bending or moving things just to restore order, your system is already losing. The more a layout caters to your movement, the more likely it is to stay organized after the twentieth task—not just on setup day.

    If the Reset Is Smooth, the System Lasts

    The best setups feel almost magnetic—it’s easier to put something back than to drop it mid-stride. Tools settle into place as a part of your walk through the area. You roll a cart or twist a chest and everything is instantly accessible, no reshuffling required.

    If the path from “used” to “put away” feels natural, your storage holds up. If not, the overflow builds—until surfaces vanish and the wall grid is just a showpiece above the clutter.

    Spot-Test Your Setup’s Weak Spots

    Think your system’s dialed in? Take ten of your most common items and run through the real routine—return them in sequence, with gloves on or pushing a cart. Where do you pause, reroute, or put something down for “later”? That’s exactly where your arrangement needs a tweak. Sometimes a single shelf move or a cart rolled back by a foot turns frustration into flow.

    The setups that actually last don’t just look tidy—they feel easy, over and over. Build for reach, not appearance, and your space will work with you, not against you, no matter how many times you fill it.
    Find practical storage solutions at StackNest.

  • How Locking Wheels Transform Entryway Carts Into Stable Storage Solutions

    Mobile carts promise entryway order, but in real transition spaces—where traffic repeats, hands are full, and routines collide—the wrong wheels turn that promise into constant frustration. The minute a cart can’t hold its ground, mobility stops helping: instead of flexibly shifting out of the way, it drifts back into paths, clogs the drop zone, and interrupts the flow that makes crossings manageable. The tidy look vanishes the second daily use begins—and every uncontrolled shift eats into time, space, and patience.

    When a Rolling Cart Slides from Solution to Obstacle

    Every return builds tension at the threshold. Shoes multiply in the same band of floor. Bags and coats land in a pile that redraws the edge between the clear path and lived-in chaos. A mobile cart looks like relief, but as soon as its wheels won’t stay put—especially when nudged during real traffic—it becomes an active problem. Push it aside while juggling groceries, and it rolls back just enough to block the shoe lineup or slice the walkway. The inconvenience repeats:

    • Drop a bag, and the cart edges toward the utility bench, narrowing the route and splitting the zone.
    • Sit to tug off boots, only to find the cart drifted, turning the shoe row into a two-deep mess you need to tidy again before leaving.
    • Mail, keys, and stray gear layer up, the cart sabotaging whatever boundary you meant to hold—creeping into door swing or taking over a previously cleared corner.

    Initial neatness collapses into slow, repeated resets—quietly turning flexibility into a cycle of backtracking and blocked movement every time the entry fills up.

    Why Locking Wheels Aren’t Optional in Transition Spaces

    Drop zones are where movement pressure and storage needs collide. Storage has to shift for sweeping, but when everyone arrives together—or routines stack up—mobile furniture without anchored wheels can’t control the flow. Each small nudge or accidental bump sends the cart off course, demanding correction just to keep the walkway clear or recover lost shoe space.

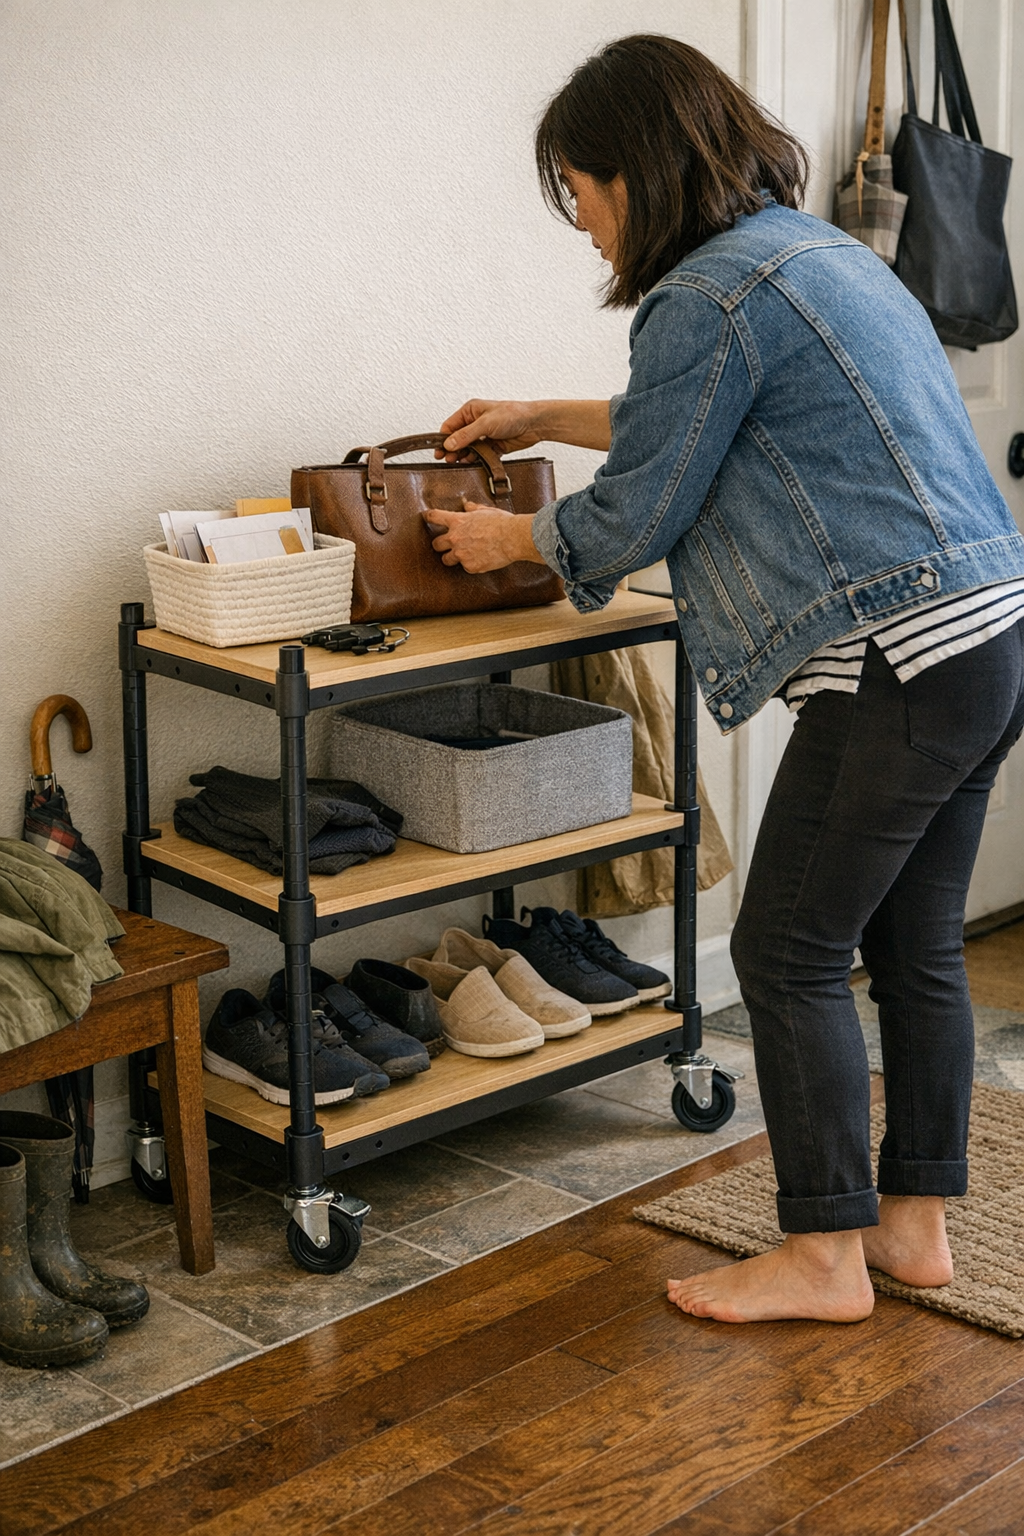
    Wheel locks redraw this outcome. A cart you can push into place and anchor with a foot tap becomes a reliable wall: it marks a stable edge, lets you drop bags or align shoes, and holds up even as the threshold crowds. Flexibility still exists—the cart moves when you want—but only on your terms. When the wheels lock, temporary placement stops and stable order holds.

    Scenes Where Wheel Locks Make All the Difference

    Most failed setups don’t look failed—until the threshold fills. Picture a wet evening, hands full of mail, everyone dropping gear:

    • Drifting creates pile-ups: As you unload, the cart slides forward under the weight. Shoes start spilling beyond their intended line, and the clear zone collapses into a slow squeeze for the next person.
    • Overnight migration: An unanchored cart slides past tile lines, quietly inching into household space, blocking the swing of the door or making the entry bench unusable until someone shoves everything back.
    • Locking wheels hold the border: When locks work, the cart absorbs as much daily pressure as needed but stands firm. Bags stack, gear drops, but the organization holds. Real use stays visible—rows don’t collapse, and there’s no guessing whether the cart will drift mid-routine.

    The Hidden Cost of Unanchored Carts: Constant Resets

    A mobile cart that can’t anchor signals its failure in the daily shuffle: its placement slips a little farther out of line with every use, and the gap between entry order and threshold reality grows. Bags block the bench instead of resting beside it. Shoes start mixing with hallway traffic. The entry looks controlled for a day or two, then deteriorates to semi-permanent pileup. Every reset takes longer—first you find the cart, then you clear the blockage, then you can actually tidy up.

    With locking wheels, this cycle shrinks. Entry gear lands in predictable places, and restoring order means sliding a shoe or shifting a bag—not undoing a week’s worth of scatter. Walkways stay clear; drop zones remain functional. The real value is felt in not having to fix the same chaos repeatedly.

    Testing for Genuine Stability: A Quick Routine

    True mobility works only if it doesn’t turn into drift. A practical check: roll the cart to a visual marker (tile line, floorboard edge), engage the locks, and nudge it sideways or forward with your foot—hands-free, like during an unplanned entry. If it shifts, the hardware is weak. Strong wheel locks hold under real entryway pressure, letting the cart remain where you set it, resisting even those distracted bumps that mark real routine use.

    Practical Tip: Maintenance for Reliability

    Wheel locks only work when free from grit. Small gravel and dust build up, undermining even the best lock. Every few weeks, run a quick check: pop the locks on and off, wipe away any debris. This simple habit keeps the cart’s anchors effective and the reset cycle shorter, directly protecting the flow of your drop zone.

    When Are Locking Wheels Essential, and When Can You Skip Them?

    If your cart stays parked at the edge of a zone and rarely enters the main traffic path, standard wheels may be enough. But once a cart becomes central to daily unloading—especially in narrow thresholds or high-rotation entries—locking wheels become non-negotiable. They decide whether you have order or end up with clutter that outpaces every tidy-up. When mobility cannot be controlled, flexible storage turns into permanent inconvenience—a frustration visible in every blocked path and every delayed reset.

    Order, Flow, and the Unseen Work of Threshold Storage

    The true job of mobile entryway storage isn’t just containing shoes and bags—it’s about holding a line against drift, supporting clear passage, and keeping the drop zone resilient under daily use. Wheel locks look like a minor feature, but under threshold pressure, they’re the difference between living in a reset loop and keeping order in a space that never stops moving. In real routines, storage that stays put when it matters most gives you back time, clarity, and lasting calm in the busiest two square meters of your home.

    See more threshold storage designed for real entryway routines at Betweenry.

  • How Adjusting Bowl Placement Transforms Your Dog’s Mealtime Routine

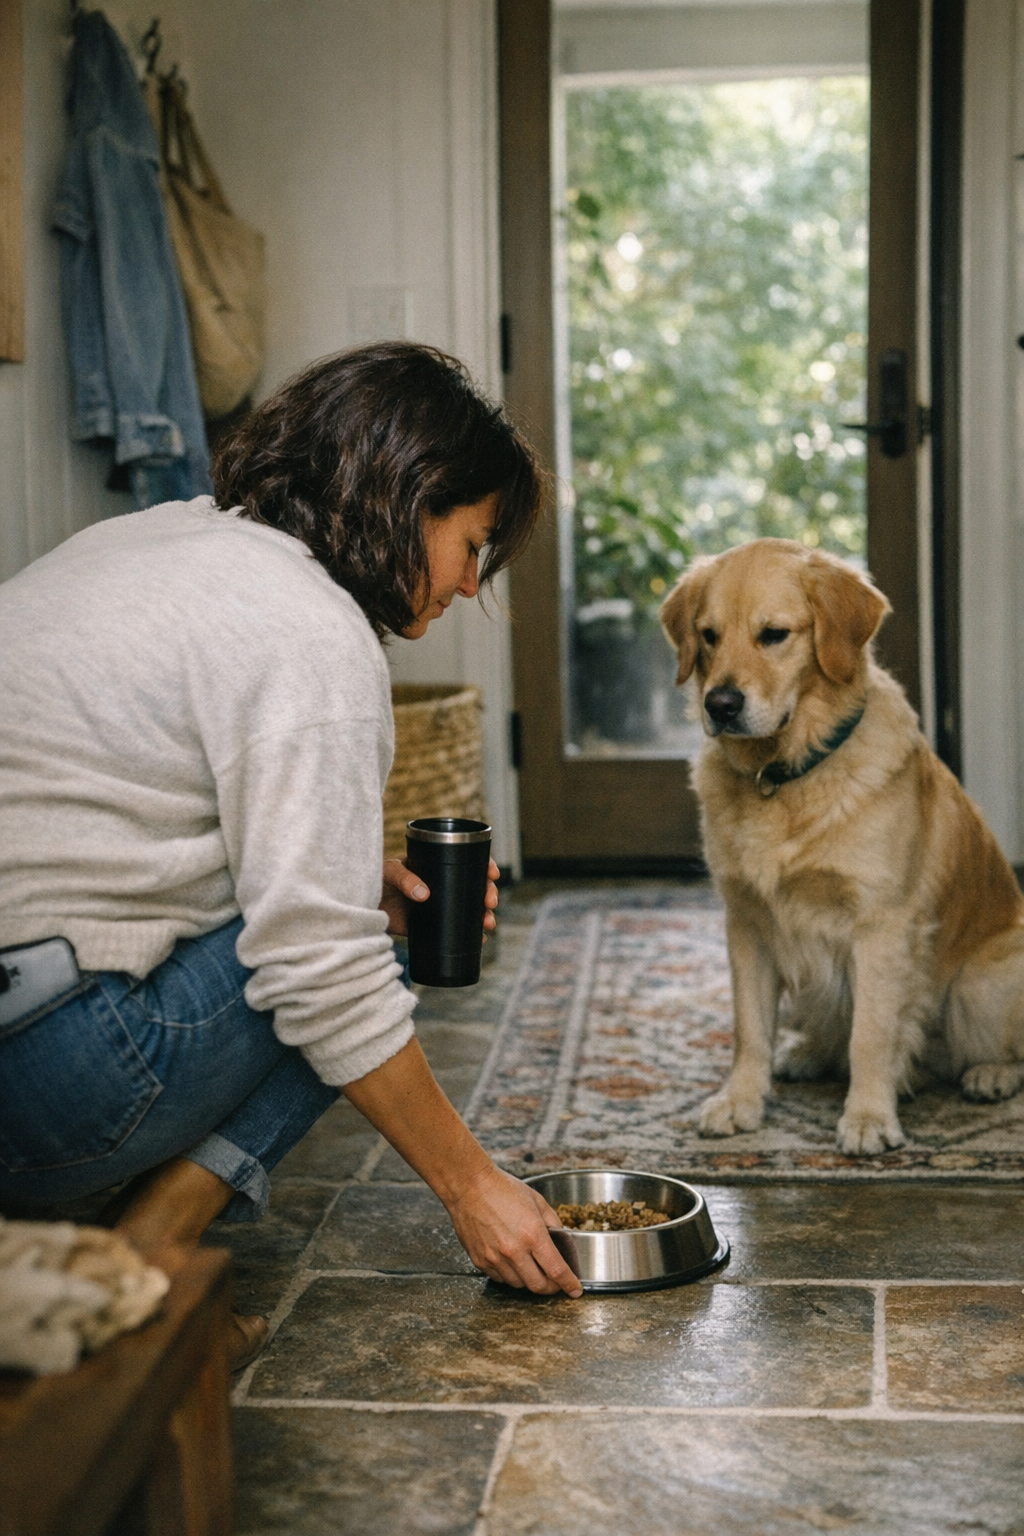
    If you live with a dog, feeding isn’t just pouring kibble in a bowl—it’s stepping over paws, dodging noses, and making snap decisions with a dog orbiting every move. Kitchens turn into obstacle courses at mealtimes: one second, you’re reaching for the bowl; the next, a streak of fur blocks your path or knocks the bowl at your ankle. The “routine” is rarely smooth. You can tidy the bowls, sweep up spills, and straighten mats, but every handoff still risks a collision. The metal ring of the bowl may sound familiar, but what it sets off—a scramble, a blocked entrance, or another dropped scoop—is what wears on you, day after day. This isn’t a dog behavior issue; it’s a setup problem. That’s what DogPile’s world is built to solve.

    The Feeding “Obstacle Course”: Where Calm Breaks Down

    What actually drags your routine isn’t the dog’s excitement—it’s how unprepared layouts feed the chaos before a single bite is taken. The first day, it’s nothing: sidestep, smile, move on. The tenth day, it’s choreography with both hands full—bowl in one, mug or leash in the other, dog zig-zagging wherever you step. That’s when kibble bounces across tile for the third time this week, or the water bowl tips into the footpath again. Suddenly, breakfast becomes a footrace—before your own coffee is poured.

    The pattern isn’t “cute dog energy”—it’s friction built into your house. Missed beats creep in: every morning you’re held up as the dog rushes, every dinner starts with a shoulder-nudge blockade. Friction that feels small at first expands, until meal handoffs steal a real chunk of your day.

    Blocked Paths, Jostled Bowls, Slowed Mornings

    Bowl placement shapes every step. If your dog eats anywhere near your path—at the kitchen door, close to the main hallway—the sprint begins the second you reach for food. With both hands full, feeding isn’t simple. You angle your body, nudge your dog back with a knee, clutch your mug, and still spill kibble or water while readjusting. Even tidy corners break down in daily use: the step from “prepped” to “fed” turns into a slow, unpredictable shuffle repeated every meal.

    Single interruptions don’t feel like much, but multiply them. The difference between a one-minute meal setup and three minutes of repeat negotiating adds up, trading away whole mornings for a fix that never sticks. Instead of cruising through the kitchen, you end up plotting alternate routes just to avoid another block-and-reset dance.

    The Pattern Adds Up: When “Manageable” Turns into Repeated Drag

    Ignore friction and it becomes your default—right until a rushed morning exposes every weak spot in your setup. The “just a minute” delay snowballs. When you’re already late, excitement means a bumped bowl, another pause, lost rhythm. What should be automatic—a calm, fast handoff—becomes another source of noise and frustration. At the root: bowl access and delivery always feel at odds with everything else you’re juggling.

    “Tidy” Isn’t Always “Easy”

    Mats, matching bowls, an organized counter—on the surface, it’s calm. Under pressure, the system reveals cracks: resetting the bowl position every time a paw slips, wiping new puddles before your own meal, or sliding bowls back into place after each feeding. The mess may look contained, but if you’re still stepping over the same problems, your setup is organizing the friction, not removing it.

    Real Users, Real Friction: Scenes That Break the Routine

    The friction isn’t rare, it’s the standard:

    • Leash in one hand, kibble in the other: The path is clear until you turn—then your dog parks sideways in the gap, blocking your next move.
    • After a muddy walk: You grab the bowl, but realize wipes are shoved in a drawer across the room. Cleanup is a late scramble every time.
    • Trying for calm: “Wait” means little against the bowl’s noise—your dog lunges, you reset, tension spikes. “Simple” feeding turns into a performance of stop-and-start.
    • Chasing tidiness: Even neatly stacked bowls force you to step over the waiting dog, so the routine never speeds up—just looks neater from a distance.

    These hiccups aren’t flukes—they are recurring friction points, showing the routine was never built to lower owner interruption and handoff clutter. The setup organizes the look, but it can’t untangle the real daily traffic jams.

    What the Bowl Clink Really Means: Predictability vs. Excitement

    The quick sound of a bowl shouldn’t dictate your whole morning, but in most homes, it does. For the dog, “bowl hits the tile” means surge forward now—every time. If the sound always signals “go,” it’s baked into both your routine and theirs. When that clink becomes “wait for calm access” instead, the difference isn’t in what you see, but how the flow of events changes: calm for you, calm for them, and fewer hands-busy collisions.

    Repeated use exposes every shortcut. A setup that lasts isn’t the one that looks tidy for company photos—it’s the one you don’t curse under your breath after five rushed mornings. It keeps transitions smooth every time: with hands full, phone buzzing, or just not enough energy left for one more reset.

    Access Timing: Does Your Dog Anticipate or Hold Back?

    The best handoff isn’t “command, then drop bowl”—it’s a routine where the dog waits out of the main path, away from the direct entrance. Precise location matters: if the bowl stays near the outer wall or mudroom and the dog holds back until the motion stops, you get a clear runway. If they bounce at your feet, the old slow-motion shuffle returns. The difference is visible in posture and speed: quick, distraction-free, or interrupted every step by resetting the setup with a knee or raised voice.

    The Setup Shift That Actually Changes the Routine

    The biggest change isn’t a new command—it’s physically shifting where and how the bowl is delivered. Most owners don’t plan it at first: the bowl lands at the old spot, chaos repeats. Move the feeding zone—across a line, near a back wall, away from the room’s mouth—and pause before setting down. With the dog waiting out of the direct path, a “clink” no longer means “charge.”

    Creating a Pause: The “Three-Second Rule”

    Add three seconds of true stillness before you set down the bowl. At first, it’s awkward—sometimes you wait, sometimes you don’t. But over a week, the routine starts flowing: bowl down, dog waits, your body moves freely through the kitchen. The mess, the darting, and the coaching all shrink. What once guaranteed a scramble now becomes forgettable—just one clean beat in your day, not the routine’s main event.

    It’s a setup decision, not a behavior overhaul. No need for new gadgets or a training plan. You change delivery, access, and space, and the downstream chaos fades out. Mealtime becomes just something that works—even if the rest of the day is running late.

    Spotting the Weak Points: Where Setup Still Trips Up the Routine

    Here’s where the cracks usually appear—even in what looks organized:

    • “Tidy” placement blocks critical access: Bowls along a wall seem fine, but if that wall is your only kitchen entry, you still have to bump a dog out of the way every meal.
    • Cleanup always delayed: Wipes or towels live across the room, so any spill means retracing your steps, letting drips spread before you can fix them.
    • Gear spills into movement zones: Bins and bowls drift toward central footpaths, and suddenly each routine demands more detours and careful steps—for you and the dog.
    • Resetting never ends: Every tidy-up is followed by a new traffic jam or bowl nudge that undoes the “system” a week later.

    Routine That Works: Less Reset, More Flow

    Feeding patterns that last aren’t about visual order—they’re about setups that clear the true friction points before and after meals. That means:

    • Bowls positioned just out of main footpaths—so neither human nor dog needs to sidestep with hands full.
    • Calm is built into the routine: access hinges on a reliable pause, not a command yelled across the room.
    • Movement space around feeding stays clear—no more micro-corrections or high-tension pivots to avoid a collision at your feet.

    The result isn’t instant perfection

  • Choosing Under Shelf Bar Lights with Softened Corners for Comfortable Workspaces


    A desk can look organized but still wear you down hour by hour. Bright surface lamps leave streaks across your monitor. Shelves cast stubborn shadows just where you need clarity. And what should be a tidy, usable workspace turns into a mess of minor frustrations: glare patches, creeping eye fatigue, and a constant sense that your “clean” setup still gets in your way. The promise of under-shelf bar lights—streamlined, even light with no desktop clutter—only pays off if the physical details deliver. The real test isn’t how the setup looks after a morning tidy, but how friction creeps in when you return for late work, juggle devices, or reset for the third time in a day.

    When Light Structure Quietly Shapes Your Workday

    Slide a bar light under your shelf and the first session feels like an upgrade—no lamp base to work around, no obvious dead zones across the desk. But move through a week of normal routines and new distractions surface: a harsh-edged light bar sits just at your left periphery, its sharp corners catching you with sudden bright spots every time you slide a notepad closer. By Wednesday, you’re tilting your monitor, scooting the chair, or shifting your phone charger to make the space feel workable again. The hard boundary of an exposed light end tugs your attention every time you try to get comfortable.

    This isn’t random discomfort: Your eyes feel scratchy by late afternoon, your elbows keep bumping cables or organizers as you adjust your seating, and your hand drifts to shade a patch of glare just to read page margins. Setup friction multiplies—quiet, sure, but always there, especially if you work long stretches at the same desk.

    The Hidden Difference Between Looking Tidy and Working Smoothly

    A freshly reset desk with a flush, square-cornered light looks perfect—but within ten minutes, reality returns. The notebook slides next to the keyboard, a stray charging cable tangles with your pen, and you’re hunting for a highlighter behind your mouse. That “straight edge” of the under-shelf light becomes more than a visual finish: angled flares shoot onto your hands and new shadows cut across your workspace. You end up rearranging, not working. The appearance of order comes at the cost of repeated micro-delays—subtle, but steadily wearing down your workflow.

    Don’t mistake a tidy surface for a smooth process. What seemed efficient quickly turns into a routine where you’re constantly resetting positions, fighting minor distractions, and burning focus dodging light artifacts instead of getting through your actual tasks.

    Where Lighting Decisions Echo in Everyday Workflow

    Take any real afternoon: answering emails, thumbing through a notepad, jumping back to the spreadsheet. A hard-edged bar light amplifies desk mess. Cables or notebooks sticking out? They cast new, high-contrast flares. Reach under the shelf for a pen—glare knifes across your vision and you pause, readjust, lose your next thought. By midweek, the simple routine of swapping between digital and paper work slows down, replaced by awkward angles and a rhythm of “move, squint, nudge, continue.”

    It won’t wreck one session, but across hours, it piles up: your desk stops feeling like an extension of your workflow and starts acting like a surface that pushes back—a place you have to fix again after every stretch of real productivity. A clean line in the morning grows into static in the afternoon.

    A Small Fix With Noticeable Impact: The Softened-Edge Bar

    The easiest mistake is living with this routine—a little chair scoot, another failed lighting reset, never fully accepting why the setup annoys you. Swap in a bar light with softened, rounded corners and the desk starts to cooperate: glare drops, the boundary between shelf and working surface softens, and those jumpy bright spots at the edges go away. This isn’t a dramatic switch, but after a few days, the difference is concrete: you stop squinting, no longer shade the desk with your hand, and your monitor doesn’t need a last-minute tilt. The background friction recedes. Workflow feels like it belongs at the desk rather than circulating around obstacles.

    You’ll notice this mostly after breaks: walk away and return, and the workspace is “ready.” No extra habits, no overcorrecting for the light, no new workaround. The setup stops asking for attention, which means you regain lost seconds—and lost focus—each cycle.

    Real-World Observations from Extended Use

    The payoff isn’t instant; it builds through real use. At first, a soft-edge bar light just works—but the real win comes after a busy Thursday, when you realize you haven’t rubbed your eyes or shifted your chair to chase away a glare line since Monday. Repetitive desk cycles—charging, flipping between paper and screen, plugging in another device—feel less draining. The subtle edge between light and darkness blurs just enough to keep your sightline steady and your workflow smooth, no matter how often you cycle through focus, reset, and return.

    This is how good desk gear stays invisible: no repeated workaround, no setup tweaks between every session. Visual noise falls away, and the desk supports the work—even through the mess and movement of a real, busy day.

    FAQ: Decoding the Specifics of Under Shelf Bar Lighting

    Why do softened bar light corners matter, really?

    Hard corners and exposed edges throw sharp beams at awkward angles, disrupting sightlines as you reach, reset, or adjust your seat. Softer, rounded or frosted edges blend transitions—no sudden glare, just a usable, calm pool of light wherever your work drifts.

    Isn’t this mostly about looks?

    No. This is about the physical structure shaping your daily tasks. The fixture’s edge actually changes how your desk feels after several rounds of device shifts, note-taking, and resets. Styling is secondary when comfort and workflow are on the line.

    What’s the biggest recurring mistake?

    Mounting the bar too near the desk edge and picking models with raw, unfrosted ends. It’ll look clean at first—but day after day, you’ll dodge new glare hotspots and start modifying your behavior just to deal with badly directed light. Every approach or midday reset becomes slower and less natural.

    What Actually Makes the Desk More Usable

    Picking an under-shelf bar with softened, well-finished corners is about removing small, repeated irritations—the invisible static that slows and exhausts desk work over time. Real improvement shows up as the absence of friction: fewer interruptions, no chair shuffle just to escape a bright line, less compensating for light where it shouldn’t hit. Every session resets smoother, and you spend more time moving between tasks and less time fixing your setup. The desk just works, even when your workflow is unpredictable.

    The real metric: when you stop thinking about the gear and simply use the space, it means your setup is finally pulling its weight. Every physical structure should serve the pace of your work, not the other way around.

    Explore the full WorkBasic collection


  • Why Even Diffusion Matters More Than Brightness in Under-Cabinet Lighting

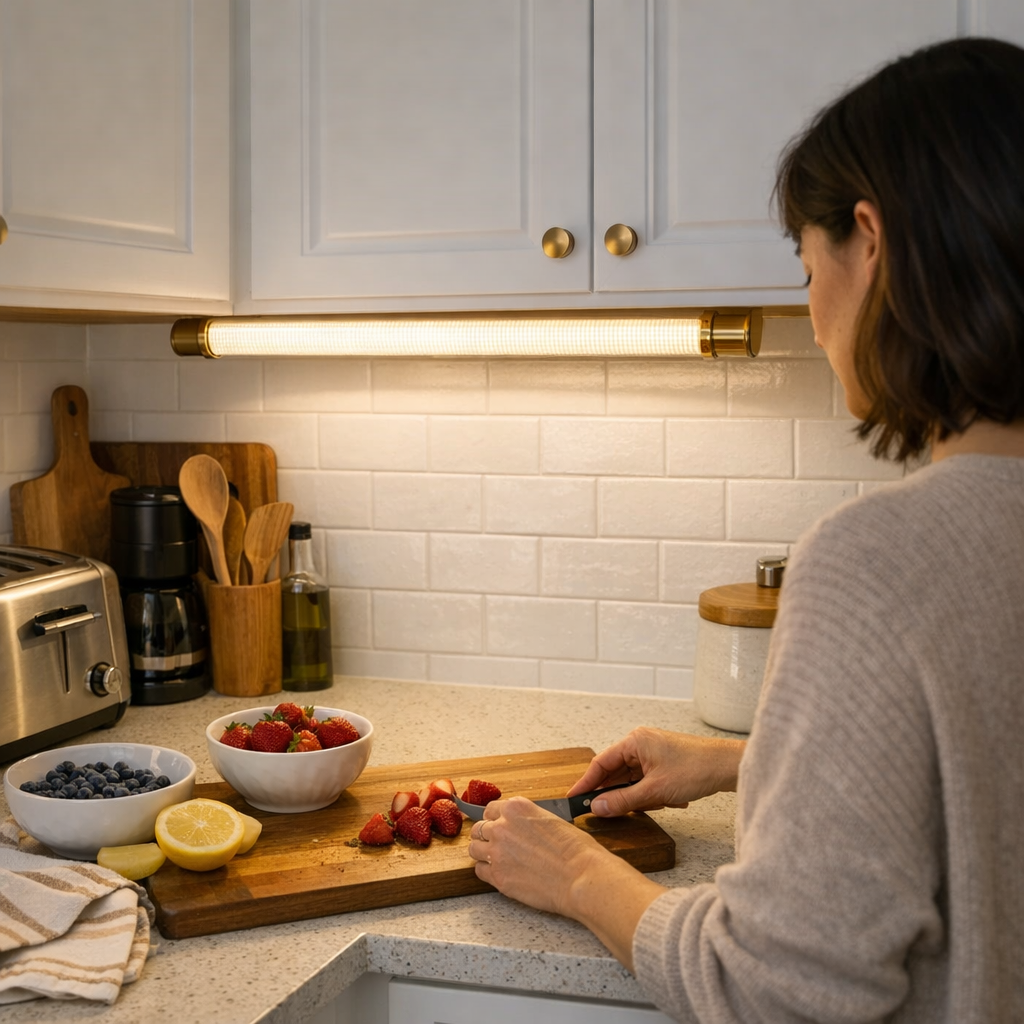
    Under-cabinet lighting reveals its flaws quietly but relentlessly. Slice vegetables at dusk or wipe crumbs along the counter and the problem isn’t how bright the kitchen looks—it’s where the light fails. Shadows swallow the backsplash, glare bounces off polished counters, and entire stretches of workspace demand awkward body shifts just to check if they’re clean. The biggest friction point isn’t bulb wattage or fixture style; it’s the constant struggle with uneven light, forcing you to drag your hands, chopping boards, or bowls in search of a patch that’s reliably visible. In a kitchen used every day, the wrong lighting setup doesn’t just annoy once; it rewires your routines into workarounds.

    When “Bright Enough” Isn’t Useful: The Case for Even Spread

    What matters most in under-cabinet lighting isn’t how a space looks when you flip the switch—it’s how that lighting holds up after dozens of meals and late-night cleanups. Early on, you might think you’ve nailed it: LEDs seem strong, puck lights punch their circles of crisp light. But by the third or fourth week, patterns emerge: dark bands haunt the edge by the cutting board, glare rides the countertop lip, and small items seem to disappear unless you shift everything into a tiny “good” zone.

    This stumbling isn’t fixed by simply adding brighter bulbs. Spotty lighting creates gaps—places where crumbs collect unseen or knife tips vanish into shadow. Instead of moving freely, you become acutely aware of where the light lets you down, and every prep task starts to feel like moving pieces into sunbeams rather than working where you want.

    The Persistent Problem Zones: Corners, Edges, and Long Runs

    Where do these shadows and glares actually show up? In lived-in kitchens, it’s the corners tucked behind appliances, the far edge of a coffee station, or the deep bend near a microwave. At first, they blend into the room; over time, you catch yourself nudging bowls to the brightest patch or turning plates just so the glare doesn’t blind you mid-rinse. These problem zones aren’t random—they’re a direct result of narrow lighting patterns and the way cabinets cast their own shadows onto the tasks beneath.

    Long countertop runs without continuous lighting turn into a topography of low-lit valleys and bright ridges. Cabinets that aren’t matched with a wide, even wash create breaks in illumination, letting debris and missed stains build up in what looks like “clean space” from a distance. The inconvenience is subtle but constant: extra work that creeps into every cleaning and cooking routine.

    Puck Lights, Spots, and Why High-Lumen Isn’t the Solution

    Puck lights and spotlight-style fixtures promise intensity, but too often deliver hard-edged circles of light that exaggerate the problem. Walk into the kitchen at night—one spot is bright enough to cut through, but the rest fades away. High-lumen fixtures pull the eye, but they can’t overcome tight beams or poor diffusion; all the brilliance collapses into the middle zone, and the edges are left in gloom.

    Instead of boosting clarity, these setups demand you shift your cutting board, angle your hand, or lean dangerously close to the edge. On glossy counters, glare ricochets from the brightest spot but fails to lift the shadows in the corners. The daily impact? You’re always chasing the light, not supported by it.

    How Wide Diffusion Changes Your Daily Use

    Switching to an integrated LED bar with a generous diffuser transforms not just the look, but the rhythm of kitchen work. Light stretches evenly from cabinet face to backsplash, flooding the whole work surface instead of spotlighting a single tile. Vegetables get chopped in place, wipedowns actually reveal spills, and your hand stops hovering, searching for illumination.

    Placement is key: push a fixture up against the wall and you get half-shadows; install near the cabinet’s front edge and you light the full counter depth. Wide-angle diffusion matters most if your counters are glossy—the spread softens harsh bounce and replaces jagged glare with consistent visibility, no matter the time of day.

    Real-World Fixes—And What Actually Changes

    One kitchen swapped three puck lights for a single continuous six-foot LED bar, and the contrasts were immediate:

    • The once-shadowy gap by the stove became useable space, so simmering pans could be watched without leaning in.
    • Glare along the backsplash quieted, making it easier to spot splatters and cutting down on squinting during late cleanups.
    • No more dragging ingredients into an awkward spotlight—every corner, even by the sink and wall outlets, held steady visibility.

    The game-changer wasn’t higher wattage or more “power”—it was how the available light diffused and stretched. The kitchen stopped looking dramatic for photos, but started working better: fewer missed messes, less shifting, and no blind spots waiting to create tomorrow’s extra chore.

    Simple Tips for More Reliable Under-Cabinet Lighting

    • Use continuous light bars, not separated spots: Long LED runs with broad diffusers close every coverage gap—pucks leave dark seams almost by design.
    • Pull your lighting forward: Mount fixtures toward the cabinet’s front edge to brighten the full counter, not just cast light against the wall.
    • Always check for gloss and stray glare: On polished surfaces, adjust placement and diffuser width until reflected hotspots shrink or disappear.

    Each of these fixes attacks the silent micro-adjustments that slow down daily kitchen tasks—getting you from cleanup to comfort with less friction, not just more lumens.

    Why Wide, Even Spread Should Be Your Priority

    Kitchen usability depends on clear, shadow-free light exactly where routines happen—not just the feeling of overall brightness. Once the excitement of new fixtures wears down, routines get sharper: prepping, rinsing, cleaning, all without chasing after the light. A setup with wide, even diffusion stops the silent drift toward workarounds and lets you move as if lighting barely needs thinking about.

    For any space where repeated action matters, prioritize lighting that stretches evenly and covers real task zones—not just what looks good on the ceiling. The difference is visible every time you notice no more edge shadows or wasted movement. Find more real-world solutions at LightHelper.

  • How Small Changes in Pet Travel Gear Improve Every Stop on the Road

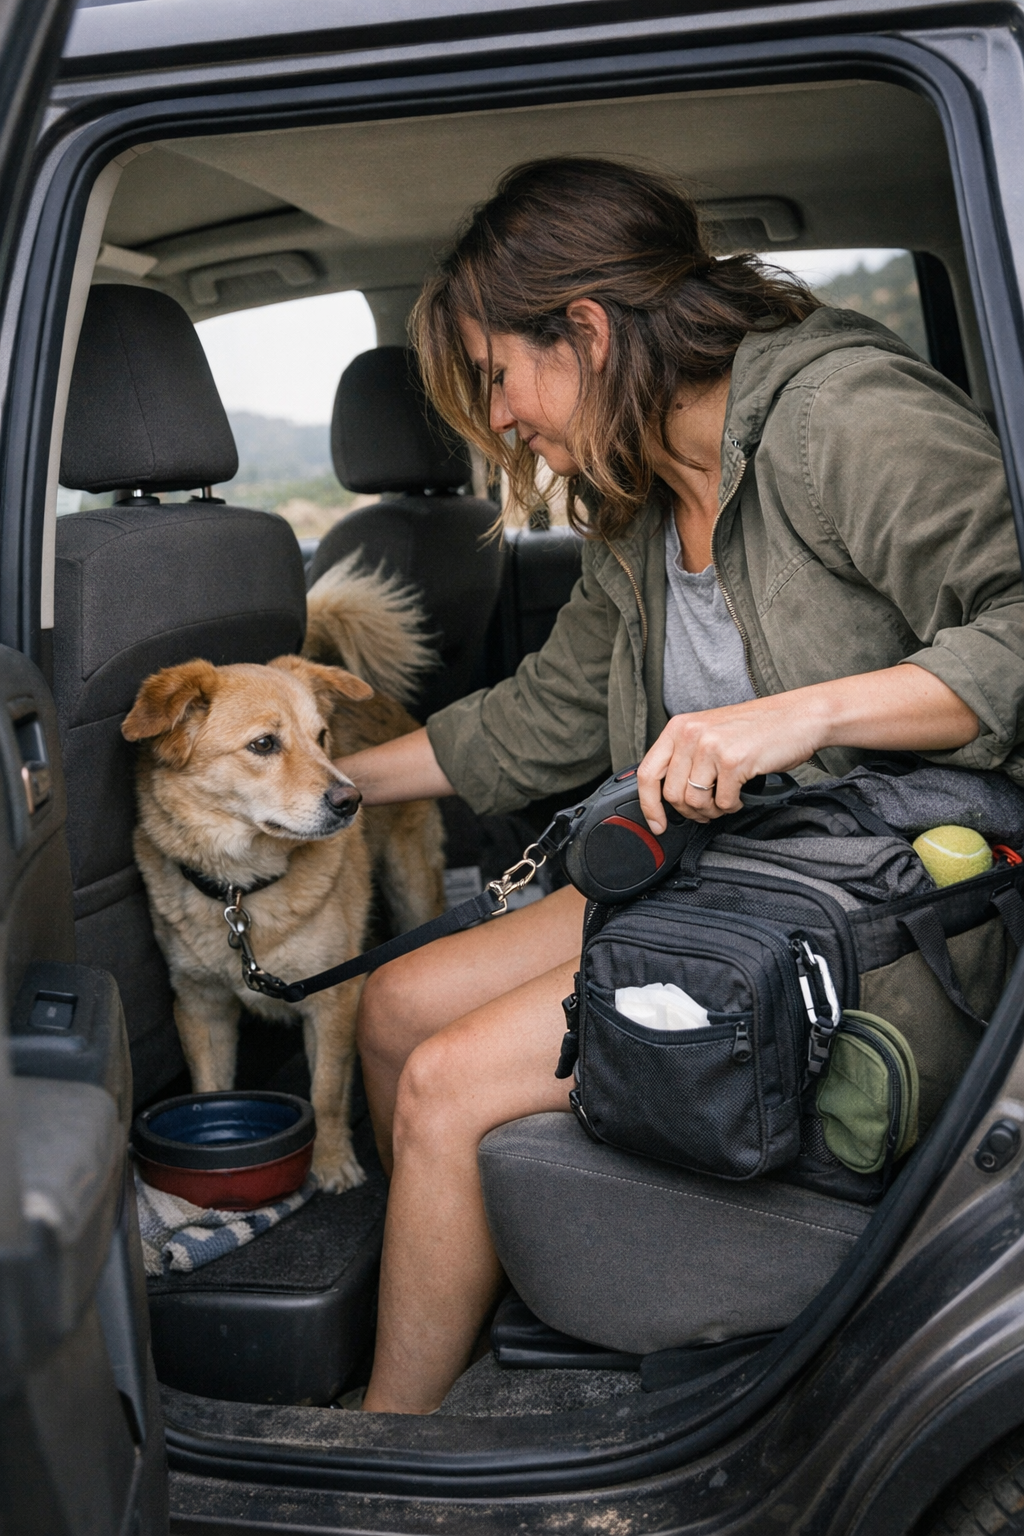
    Most pet owners find out the hard way: the travel bag that looks set at home—neatly packed, every item in its place—unravels at the second or third stop. Not with disaster, but with subtle drag: wipes buried near the floor, the leash under a blanket, the bowl wedged tight just as you need a clean grab. Suddenly, “organized” isn’t the same as ready—especially when your dog is restless, the parking lot is crowded, and you can feel every lost second stacking up. PawGoTravel was built for these exact moments—when your setup is only as good as its fastest, one-handed reach under pressure.

    When Ready-to-Go Doesn’t Mean Ready in Real Life

    The difference between a packed bag and a usable setup only shows up in motion. You line up leashes, wipes, bowls, and comfort items at the start, but routines outside the house—curbside pickups, rest area breaks—expose the gap. The first time you aim for a quick leash-off or cleanup, friction creeps in: a leash tangled beneath a blanket, a pouch stiff or stuck at an angle you can’t manage while keeping a hand on your squirming pet. The same clean packing that felt clever at home becomes a hidden time cost as soon as you need real-world speed—or fast fallback after a messy moment.

    The Cumulative Cost of Slow Access

    Stop-and-go travel doesn’t punish you with one big failure; it nags you with delay after delay. You dig for wipes by touch, wedge a treat pouch out from between seats, untangle the water bowl’s handle for the third time. These aren’t emergencies, but they wear you down—every minor delay builds into a heavier, slower-feeling routine. By the fourth pit stop, you notice the friction: a zipper snags again, the wipes have slipped backwards, and your system is now making fast movement harder instead of easier.

    Short Trips Reveal Weaknesses You Miss at First

    A travel bag feels fine after one or two stops; it’s the repeated, everyday trips that reveal the pain points. Vet runs, city errands, quick park breaks—they show where your “system” doesn’t actually stand up to movement. Items migrate: wipes slide behind bulky blankets, bowls shift to block zippers, leash clips overlap with treat containers. You unlock the car for what should be a quick leash grab, but gear gets jammed or caught, forcing you to fumble with both hands while steadying a jumping dog. The same slowdowns come back again and again.

    Where Order Clashes with Access

    Travelers quickly learn: the best-looking organization can create new roadblocks. Tidy layers, “clever” fold-ins, and compact zones lead to practical overlap—one item blocks another, main tools get boxed in by accessories. Unclipping a leash just to reach wipes is a loser mid-routine. That cozy blanket or comfort toy? Helpful for your pet, until it blocks a main pocket or buries the treats. You’re left making extra movements that disrupt your pet, extend every pause, and turn setup into an obstacle course instead of a help.

    What Actually Changes Travel Flow?

    The most effective upgrades are sometimes unapologetically simple. For instance: moving wipes from a zippered central pouch to a clipped, exterior spot means you get them and the leash—one movement, one hand, nothing dropped. Suddenly your trips don’t stall at the seat edge. A less “Instagram-worthy” bag, maybe, but you cut out the slowest delay: wrestling with the bag instead of restarting movement. After switching to exterior access for quick-clean gear, stops ran smoother, fewer items hit the floor, and the flow kept up with the unpredictable speed of real pet travel.

    Repeated Movement Exposes the Real Test

    Piling on pockets isn’t a fix if the actions between stop, clean, leash, and go keep getting stuck. The true test isn’t setup at home—it’s whether you can grab, return, and restart on the fourth stop just as easily as the first. Supplies that are “there” but buried aren’t helping when it counts. Even attachable bowls or pockets aren’t solutions if they tangle or block other essentials. Reliability is measured in motion—how fast you reclaim ready-to-move after each routine interruption, and how few steps it takes before you’re moving again, not reshuffling gear.

    Recognizing Patterns Makes All the Difference

    After enough rounds, hesitation becomes its own pattern—you pause at the car door, run a mental checklist while handling your dog, and brace for another quick reshuffle. You reach for wipes, realize they’ve shifted (again), and mentally note the familiar snag: the system isn’t matching your actual stops. Small fixes, like relocating a high-frequency item to a spot you can hit blind, break this loop. Systems that “look” together but quietly layer on delays end up raising stress. The moment you relocate essentials to always-available positions, even a single improvement, the mood of the trip changes—more motion, less stall, less juggling, more trust in the routine.

    From “Looks Organized” to “Works Every Time”

    Real pet travel isn’t a packing game or a contest for neatness—it’s whether, in the most restless, seat-side moment, you can get what you need with one hand on your dog and not lose pace. The more invisibly your gear works for you, the more every stop feels manageable—less a string of tiny setbacks, more a rhythm you can repeat and rely on. Flaws show up at real edges: when you’re half out the car door or faced with that unexpected bark. The right shift—adjusting for actual grab, placement, and reset—makes the difference between a system that just looks sorted and one that actually travels well.

    Find practical pet travel setups designed for real-world movement at PawGoTravel.

  • Maximizing Vertical Space with Smart Tall Slim Storage Towers

    That empty strip of wall or narrow gap by the closet looks perfect for a tall slim storage tower—until you live with it for a week. At first, the extra shelving promises order, but daily use exposes weak spots: upper shelves go untouched, lower tiers collect whatever doesn’t quite fit elsewhere, and before long the “organized” tower is another bottleneck in the routine. Vertical space alone doesn’t solve storage problems; in real life, you notice the same annoyances crop up, just stacked higher out of reach or pressed further into corners.

    Where Tall Slim Towers Help—And Where They Fall Short

    These thin, vertical units seem ideal for squeezing storage into leftover wall space near entryways, closet ends, or beside the bathroom door. The theory: you get more shelves and less wasted floor area. The reality: after days of actual use—especially on busy, high-traffic mornings—the friction shows. Anything placed above eye level fades from reach and memory. Bottom shelves fill with overflow, mixing shoes with scarves or bags nobody wants to stoop and sort. Instead of organizing, the tower now absorbs clutter you can’t or won’t put anywhere else.

    This isn’t a discipline problem. It’s built-in friction:

    • High or deep shelves slide into being dead space, only reached for seasonal or rarely used items.
    • Tightly packed shelves turn quick retrieval into awkward shuffling, especially for things you actually use daily.
    • Deep shelves look generous but end up hiding things behind the front row. Soon, the only way to find that missing glove or umbrella is to empty two other shelves first.

    So while the tower looks like it can “hold a lot,” real-life use divides the unit: some shelves are overworked, others ignored. Suddenly, half the tower is just there for show.

    Everyday Routines vs. Storage Tower Reality

    Picture this: you install a tall slim tower right by the door, hoping to tame hallway clutter. First day, it works—each bag and pair of shoes in perfect order. But by Friday, the system has buckled: easy-to-reach shelves overflow with daily shoes, jackets get jammed in the center, loose scarves retreat to the bottom, and upper shelves are undisturbed except for the dust. Good intentions get swamped by routine:

    • You move the same boots twice just to get your gym bag into place.
    • Only the shelves roughly at standing reach see daily action; anything higher or lower sits untouched for days.
    • Categories slip: umbrellas mingle with backpacks, gloves migrate to strange baskets, and any attempt to “reset” means pulling half the contents out first.

    In tight spaces, these losses add up. The “quick grab” routine turns into dodging, bending, and reshuffling. Instead of freeing movement, the tower becomes one more obstacle—not a help, but a slow, movable bottleneck in your path.

    Why “Looking Organized” Isn’t Enough

    Freshly emptied or restyled, most tall towers look sharp. But the test isn’t how clean it looks on day one—it’s how well you can actually put things back without creating new work. If drop-off and retrieval aren’t instant, resets take longer, corners fill up, and items creep back onto the floor. Well-dressed shelves soon slide into a sort-and-shuffle cycle that costs time every week. A storage solution that’s only organized when it’s empty usually signals the core problem: flow, not space, is what’s missing.

    Small Adjustments, Big Difference

    Fixing this isn’t about squeezing in another shelf. It’s about aligning the structure with the way you actually reach, move, and reset. For instance, moving a shelf up or down by just one slot—to where your hand naturally lands—can turn a “dead zone” into the shelf you use every morning. This adjustment stops crowding at the bottom and makes it easier to sort at eye level, cutting out the constant bending or overreaching.

    It’s not about maxing out storage but about reducing friction. When the tower adapts to your reach and return flow, you spend less time reshuffling—and less energy sidestepping overflow piles or digging for lost things at odd heights.

    Questions to Quietly Test in Your Own Space

    • Do you have to move something else every time you put an item away?
    • Are top and bottom shelves gathering overflow you never bother to sort?
    • Can you walk by comfortably, or are you always stepping aside?
    • Does one shelf turn into a magnet for whatever doesn’t fit elsewhere?

    Spotting these pressure points reveals exactly where your tower works—and where it’s failing you. Instead of rushing to fill shelves, experiment with spacing first. Use prime, easy-reach shelves for daily items; relegate high, deep, or tucked-away spaces to what you almost never need. Skip narrowly stacked shelves unless you’re fine with constant shuffling and category drift.

    Wall-Mounted vs. Floor-Based: Impact on the Routine

    Wall-mounted towers offer a way to keep floors clearer, which matters in tight halls or small bedrooms: less underfoot means no bumping or tripping. But every advantage depends on measurement—if daily-use shelves end up too high or too far back, out-of-sight quickly becomes never-used. Floor-based towers are sturdier for heavier things and adapt better to shifting needs, but only if you can actually walk around them; even a small shift can block traffic, forcing a detour 20 times a day. Every inch of placement counts when movement is tight and routines repeat.

    Reset Without the Chore—Making Zones That Work

    The best tall towers learn from repeated reset, not a perfect first setup. Strong setups share three traits:

    • Shelves match where hands naturally reach—ignoring unused height in favor of practical return flow.
    • There’s enough vertical space to pull or drop something back without shuffling everything else.
    • Deepest shelves are used for containers or bins that contain a single category, not as open dumping grounds buried behind daily-use items.

    Even small misalignments—an inch too high, a shelf too deep—compound into daily frustration and longer resets. The tower is working when you reset without friction, not just when it stands empty and neat.

    A Useful Real-World Reset Tip

    Before you load up your tower, mimic a week’s flow: place, retrieve, and “reset” a few imaginary cycles. If you must stop, stoop, or move around another item during this drill, that’s a cue to reconfigure the shelves before real habits crystalize and block easy use.

    The real job of a tall, slim storage tower isn’t to fill a blank wall with shelves at all available heights. It’s to absorb the brunt of daily movement without introducing new bottlenecks—by matching shelf position, depth, and return flow to the way your home actually runs, not just how you hope it looks on clean-out day.

    For storage systems designed to make your everyday routines easier and your inside spaces calmer, visit Gridry.

  • Why Visible Car Safety Kits Improve Emergency Readiness and Daily Use

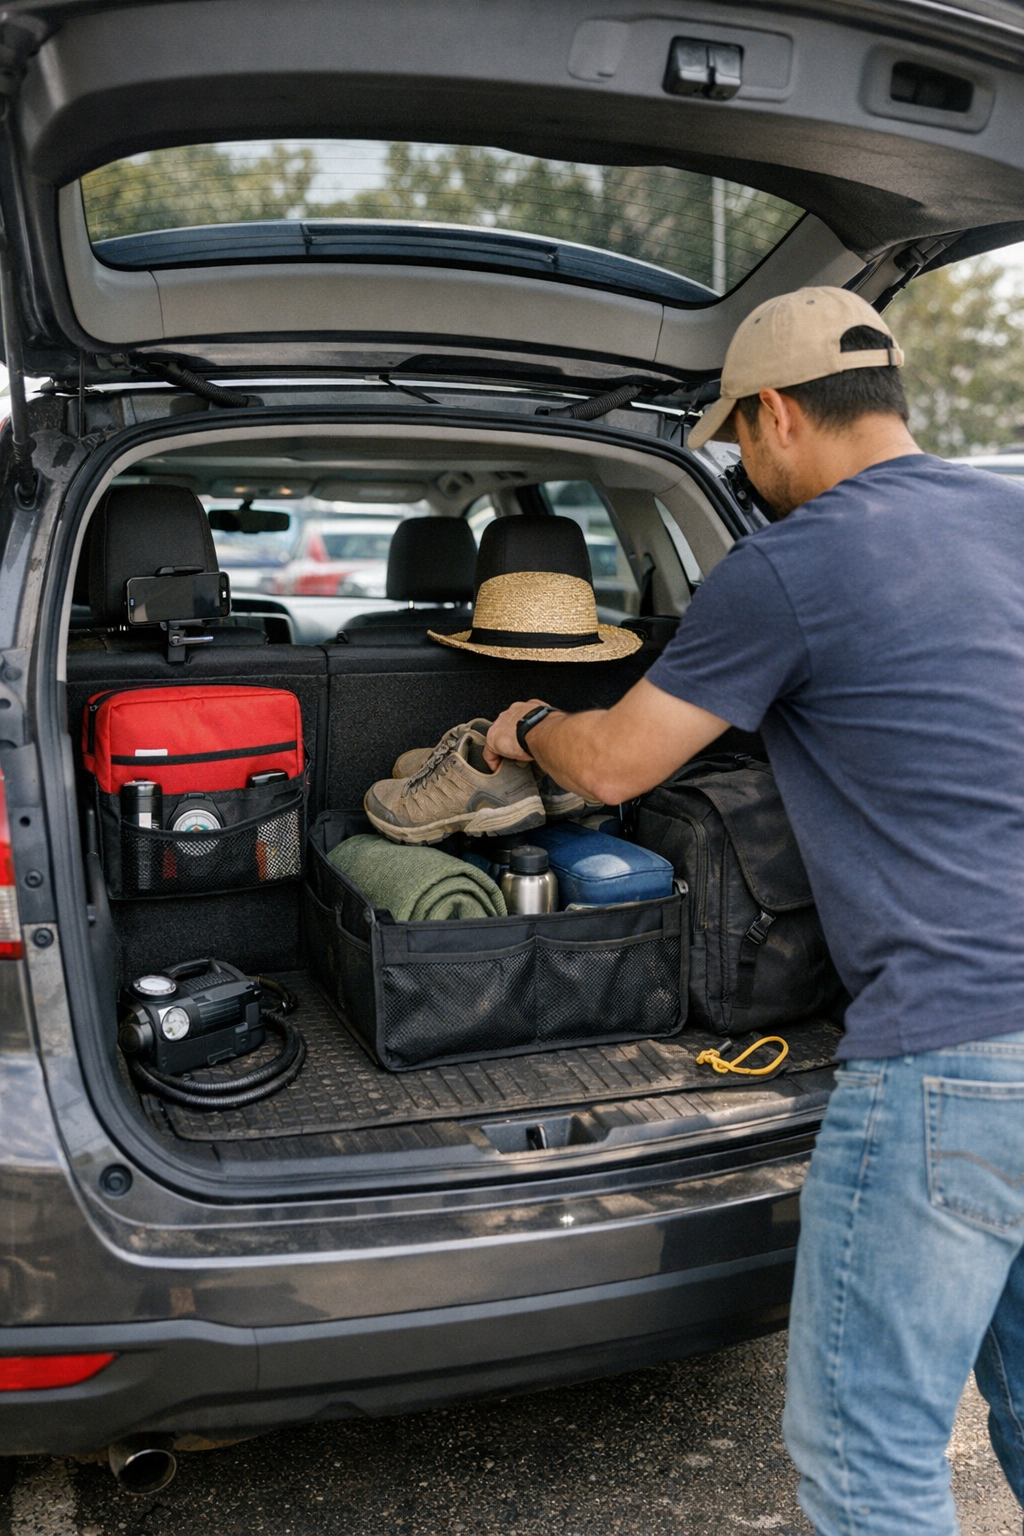
    A hidden car safety kit promises less clutter—but in daily use, “out of sight” often means “out of mind, out of reach, and out of date.” On paper, it sounds smart: stash your emergency tools in that niche behind the cargo bin or under the trunk mat. But days later, real driving takes over, and what felt under control in a freshly cleaned car quickly becomes a source of friction. The first time you dig for a first aid kit blocked by groceries, trip gear, or a stray bag of dog treats, it’s obvious: the setup that looks neat can turn basic safety into an exhausting scavenger hunt. Every extra second spent hunting for essentials in a pinch—when access should be instant—chips away at your car’s true readiness.

    What Hiding Your Safety Kit Really Means in Daily Car Life

    After the satisfaction of a thorough car cleanout, the “perfect” hiding spot for your safety kit seems like a win. No loose bandage packets rolling around, no visible bulk—just a tidy trunk, with the kit perfectly tucked away. But real world use erodes this order fast. You start loading groceries, chasing after kids’ shoes, or shifting sports gear in a hurry. Now the safety kit slides deeper, or gets buried. When you realize you need to check your flashlight, you’re facing a wall of backpacks, a half-deflated stroller, and soccer cleats blocking access.

    Small Annoyances Stack Up Over Time

    Minor hassles compound: each awkward reach, blocked pocket, or forced trunk shuffle quietly undermines your confidence in the setup. The first time you pause for a “quick” tool-check and have to unload half the trunk, you shrug it off. By the third time, it’s tempting to skip the check altogether. Weeks pass, and you’ve missed replacing those AAA batteries, or discover the kit’s travel-size bottle of sanitizer dried out ages ago. That kit is now just extra weight—a box of expired intentions, not a tool you trust.

    Hidden kits make routine checks inconvenient. Most people don’t forget their own systems all at once—it’s the small delays, the repeated “next time” promises, and the creeping sense that some vital tool or supply might be out of reach when it really counts.

    Missed Checks, Faded Confidence, Slower Response

    Keeping car safety gear up to date isn’t exciting, but missing just one backup tool or forgetting to restock something simple—a bandage, a tire gauge—can make the difference between an annoyance and a crisis. A kit jammed behind cargo or stashed under a pile doesn’t get checked after errands or before weekend drives; routine turns this five-second assessment into a skipped-afterthought or ignored task. Accessibility isn’t just about emergencies—most drivers first notice the hidden kit mistake the fourth or fifth time they wonder, “Is the jump pack still there?” and decide not to bother digging it out to find out.

    Here’s an everyday miss: packing for a family trip on a foggy morning, you can’t recall if you returned the small flashlight after last week’s breakdown. But your safety kit’s at the bottom of a trunk fortress—under the cooler, behind the folded picnic blanket. You leave it unchecked. The gap between assuming you’re prepared and actually knowing it grows a little wider with each drive.

    This creeping uncertainty isn’t dramatic, but it’s real, and it’s routine. Out of sight slowly becomes unchecked, unused, unreliable.

    Real Disruption in Everyday Routines

    You notice good kit placement the hard way—sharp turns send things sliding, groceries are wedged tight, and you realize the safety kit has vanished under the detritus of daily life. Even a “clean” interior only matters if it speeds you up, not slows you down. Every driver has faced the scenario: groceries crammed in, gym bag tossed, a dog bed thrown on top of the pile, with the kit shoved further and further from reach. Rain falls, time slips, and now you’re wrestling with three layers of cargo just to find bandages or a tire gauge. The hidden kit doesn’t make emergencies easier; it makes regular use slower and last-minute fixes exasperating.

    How Visibility and Reach Change Car Safety Habits

    Routine checks only happen if the kit is actually visible—within reach where real driving puts your hands and eyes. Instead of making the emergency bin invisible, place it behind a rear seat, in a back corner of the trunk, or clipped into a rear cabin pocket. Setup location is the secret: when a kit is “in the way,” it’s also in the habit stream—easy for a glove check, an inventory glance, or a quick refill between errands. Everyday exposure keeps your supplies current without forcing you to reorganize every time. That shift closes the gap: instead of “I’ll check it next time,” you find yourself checking it now, just because you actually see it in daily routines.

    Balance Order and Access—Placement Beats Hiding

    A safety kit serves as backup only if you can reach it when things get messy. Looks matter, but they mean little if every trip demands a trunk excavation. Most cars have a near-perfect access zone: the near edge of a trunk, a side cargo cubby, a rear-seat pocket, or a door bin reachable before loading heavy bags. A compact, secured kit doesn’t need to live in plain sight, but it should never be “lost” for the sake of a clean surface. The difference is not just a few seconds saved—it’s the feeling that your setup works with your habits, not against them. Notice when a kit lands back in actual use: before the Monday commute, after kid pickup, or just after a grocery run. Contrast that with setups where the kit hasn’t been touched (or trusted) since the last deep clean.

    The Everyday Tradeoff: Tidy Appearance vs. Reliable Readiness

    Day-one neatness tricks you into thinking you’ve solved preparedness—till new messes bury your kit out of reach and every check slows you down. The real benefit comes from setups designed with function first, giving the lowest-friction access for your actual routine. Let your car’s structure adapt to your repeat use: visible, checkable, reliable. When your gear stays ready after a month of errands—not just after the last organizing binge—you know the balance is right.

    Explore practical safety kits and real-world car solutions at DriveWellSupply.

  • How Adjusting Cat Bowl Placement Can Reduce Feeding Time Tension

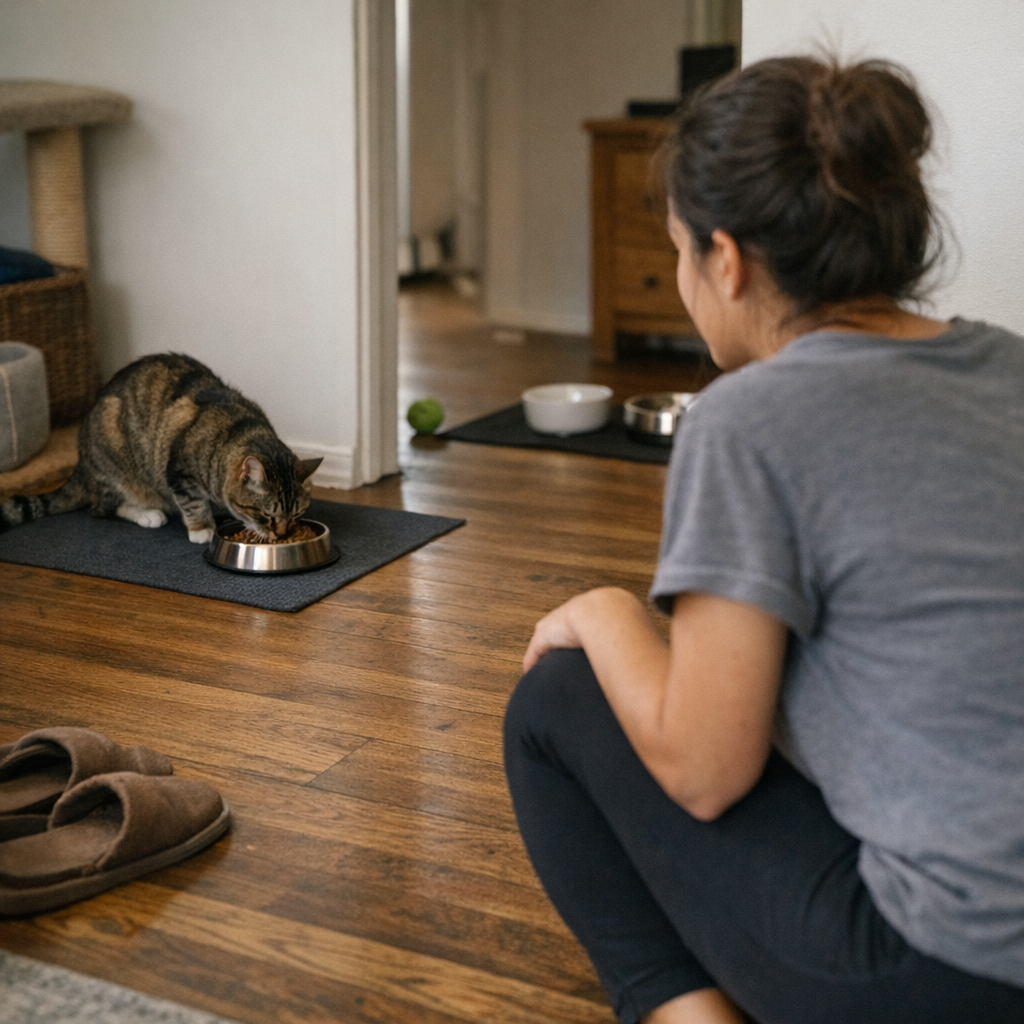
    The difference between a feeding setup that just “looks settled” and one that actually works appears within days. Most indoor-cat homes start with matching bowls lined up on a mat, everything photo-ready. But fast-forward a week: the same mat now slides off-center, food bits stick just beyond reach, and one cat keeps pausing mid-step, waiting for the other to move. If every meal ends with crumbs edging past the mat and a silent standoff over who eats first, you’re dealing with the real limits of a standard shared feeding zone. What looked organized is quietly draining minutes—and momentum—from your routine. In the StillWhisker world, that gap between tidy appearance and practical function matters.

    The Hidden Friction of Shared Indoor Feeding Spots

    At first glance, a shared cat feeding area with bowls lined up on a mat appears fine. But daily patterns expose what the photo misses. If you find yourself scrubbing the same stubborn mat edges or watching one cat linger on the fringe while the other circles in—those are early signals of a setup that’s slowing your day. Seams become obvious: bowls push further apart after each meal, wipedown feels never quite complete, one cat darts away before finishing because the shared space pushes them both into uneasy negotiation.

    These frictions aren’t always dramatic, but over time, they’re hard to ignore. Food piles up where the mat doesn’t reach; cats pace and retreat instead of eating together; bowls migrate out of line as if pulled by routine tension. The clearest sign? Spotting yourself, once again, fishing stray kibble from under the baseboard just as you’re trying to leave for work. That’s the sound of a setup creating new chores by being only “good enough.”

    When “Looks Settled” Isn’t the Same as “Works Well”

    Most problems aren’t about mess—they’re about setups that clash with your cats’ rhythms. When bowls bump up against each other or share a mat without boundaries, both cats stall. One circles, one hesitates, and neither fully commits to eating. Even with spotless surfaces, you end up with half-finished meals and repeat wipe-downs. The silent negotiation between cats isn’t just background drama—it adds invisible seconds and cumulative friction for you too.

    In practice, you take extra steps: another sweep after every meal, a double-take at that bowl lingering half-full near the edge, a sinking feeling of “not quite done” that shadows every feeding. The signals stack up:

    • Stray food always escapes the mat, pulling your broom out every time
    • Bowls creep out of position or wedge into corners, forcing awkward cat approach
    • Cats flick between approaching, circling, and avoiding the food space altogether
    • Water bowls crowd the entry—meaning you step over them, detour after detour
    • Organization that looks good on Sunday, but piles up new micro-tasks by Tuesday

    Day-to-Day: What Friction Really Looks Like in a Busy Home

    Picture the ordinary work-morning cycle: you’re juggling your coffee, and one cat edges up to the bowl, stalling and peering at her housemate. The other paces at the mat’s edge or hides around the doorframe. Food sits untouched, or both make hurried, incomplete visits, leaving half the meal behind. Within minutes, you notice a few rogue kibbles trailing toward the living room, and the mat’s shifted again—resetting the bowls for the third time that week.

    The true problem isn’t just crumbs—it’s the way every feeding drags in more steps: fidgeting with bowl placement, shaking crumbs free, straightening the mat, redirecting traffic around a too-close water dish. Add it up, and breakfast for your cats takes longer than your own. Worse: even after resetting, the lingering feeling that the problem is waiting for you at the next meal never quite disappears.

    The Overlap Problem: Where Cat, Human, and Space Collide

    Most feeding spots end up squeezed into corners or run alongside doorways. Bowls technically fit, but your day keeps running into them. The water bowl blocks your route to the fridge; the mat’s short edge lets food pile up just out of easy reach. Instead of a quick mat shake, you’re stuck sweeping the entire area—and the setup slowly tugs your routine toward more cleanup, more adjusting, and more small avoidable interruptions. “Organized” counts for little if your real flow falls apart over a few inches of misplaced mat or a bowl nudged into walk space.

    Some issues only reveal themselves after living with the setup: that “tidy” plan becomes cleanup glue, drawing your attention back every meal. A bowl always off-kilter, a mat caught on the table leg, a cantankerous bit of wall that blocks a cat’s favorite path—each is a trigger for hesitation, owner interruption, or both. Fixing them once rarely holds; the repeat work sneaks right back in.

    How Personal Space Impacts Meal Flow

    Cleanliness is only half the story; the rest is about respect for invisible boundaries. Every shared mat or clustered bowl arrangement pushes cats into close quarters, raising tension even without a scuffle. Direct line-of-sight, overlapping mats, and unbuffered corners are the usual suspects for stalling routines. Watch for the adaptation you don’t hear—slower eating, food abandoned in the bowl, one cat hovering until the other retreats, a wave of toy drop or litter scatter right after feeding fails.

    Real-World Adjustment: Spacing Bowls Further Apart

    If you see the signs—hesitation, slow starts, or meals that seem to drag—one of the most reliable fixes is simple: space the bowls out. Leave three to four feet between feeding spots. Create visual breaks so each cat eats without staring down her housemate. Set bowls at the room’s edge or around a corner, out of frequent foot traffic. Use mats that actually extend several inches past the bowl (not just beneath), so stray food lands where you expect—and nowhere else.

    This low-effort reset quickly changes the routine: cats eat faster, leave fewer scraps, and the work zone shrinks. What felt like a battleground that needed constant resetting becomes a background process that rarely interrupts your day—and stops pulling you back for more cleaning.

    Bowls and Mats: Tiny Details That Change Daily Cleanup

    The most stubborn messes aren’t solved by new gadgets, but by structure tweaks that cut repeat work. The mat should catch the actual spill zone, not just be present. A mat that’s too narrow or short means you’re vacuuming the perimeter after every meal. Stable bowls, not just pretty ones, prevent sideways drag and food scatter. If you keep resetting the same spot after every feeding, that’s where the system is quietly siphoning your time.

    Placement of cleaning tools is just as real—if your broom, paper towel, or sanitizer stays a detour away from the feeding spot, cleanup multiplies. Store supplies within arm’s reach but tucked from view, so you’re never forced to cross the room or bend awkwardly around furniture mid-reset. Every task that costs one more step is a setup asking for redesign.

    Recognizing When the Setup Needs an Overhaul

    Multi-cat homes know the “fix and slip” cycle: after a deep reset, the area looks solid—then bowls creep closer, mats crumple, crumbs reappear in the same corner, and suddenly one cat’s hanging back again. If you’re resetting more often than seems reasonable, or see the same hesitation in your cats, the setup isn’t just slightly off—it’s repeating its own weak point.

    Ask these silent diagnostics:

    • Am I wiping the same area after every meal?
    • Do both cats finish eating in the intended spots?
    • Is one bowl always half-full, ignored, or sidestepped?
    • Are cleanup tasks carving into my own flow every day?
    • Why do cleaning and feeding tools never feel instantly accessible?

    If these resonate, skip lineup upgrades and focus on small, structural adjustments: add space, realign bowl and mat boundaries, and store tools for real-time use. These micro-resets outperform nearly any product switch.

    Building a Setup That Holds Up—Even After Hundreds of Resets

    The only measure that matters for an indoor-cat feeding zone is whether daily friction stays low after endless cycles—not how neat it looks right after a reset. The goal isn’t a photoshoot moment. Instead, aim for a layout where you refill, wipe, and walk away without hesitation—where repeated resets shrink down, not pile up. The feeding zone you can use, reset, and ignore for the rest of your morning is the only one that really proves itself after months in a lived-in home.

    The strongest feeding setups quietly contain food to defined areas, minimize micro-cleanup, keep cats from crowding and stalling, and store all supplies within arm’s reach—without creating new clutter or detours. If your setup still demands attention after each meal, or you find yourself dodging bowls and regrouping mats yet again, it’s a

  • Why Air Compressor Pressure Stability Matters for Consistent Tool Performance

    Midway through the job, it starts—the subtle resistance, the telltale pause, the first few nails not driving cleanly. You feel it before you see it: a finish nail sits a sliver too proud, your spray gun spits instead of blending, and suddenly you’re second-guessing every cycle. If you rely on an air compressor to drive fasteners, paint, or sand, you know the agony isn’t about flashy specs. The difference between smooth progress and a late-night patch session almost always comes down to pressure stability—how well your compressor keeps up, not just the size of its tank or its top number printed on the side.

    Spec Sheets Can’t Warn You About this Problem

    Specs make shopping look easy. On the shelf, two compressors match up tank for tank, riding the same PSI numbers. But roll them out on-site and let the real work begin—a dozen rounds of trim nailing, stapling under a deadline, or carving through plywood while the garage bakes in the afternoon sun—and that’s when true performance reveals itself.

    Jobs aren’t won on a single blast—they’re lost in the rut of repetition. What the data points miss is the way a compressor holds (or loses) pressure across a string of activations. If your pressure swings wildly—7 to 10 psi between cycles instead of holding close within 2 or 3—it’s not just numbers. Suddenly, fasteners need hammering, you spend time correcting spray sags, and seams that started snug begin to open up. It’s a slow, sneaky tax on both quality and time.

    How Pressure Drift Chips Away at the Workday

    The real trouble never feels explosive. For the first handful of cycles, everything fires smoothly. The gauge is in the sweet spot; you think you’re winning. But hoses warm up, your rhythm quickens, and by cycle twenty the first head sits proud or a cut stalls for a split second. By cycle forty, misfires and half-done seams have you swapping out tools or reaching for sandpaper again.

    What you’re fighting isn’t a dramatic blowout—it’s an incremental drag. Every small pressure drop means fasteners don’t drive flush and need a second hit. Cuts burn or chip out. The spray gun starts spitting, so you double back with fine-grit or filler. The job gets longer while the finish suffers, and you feel it in your hands and your schedule.

    Fastening Under Pressure: A Scene from the Floor

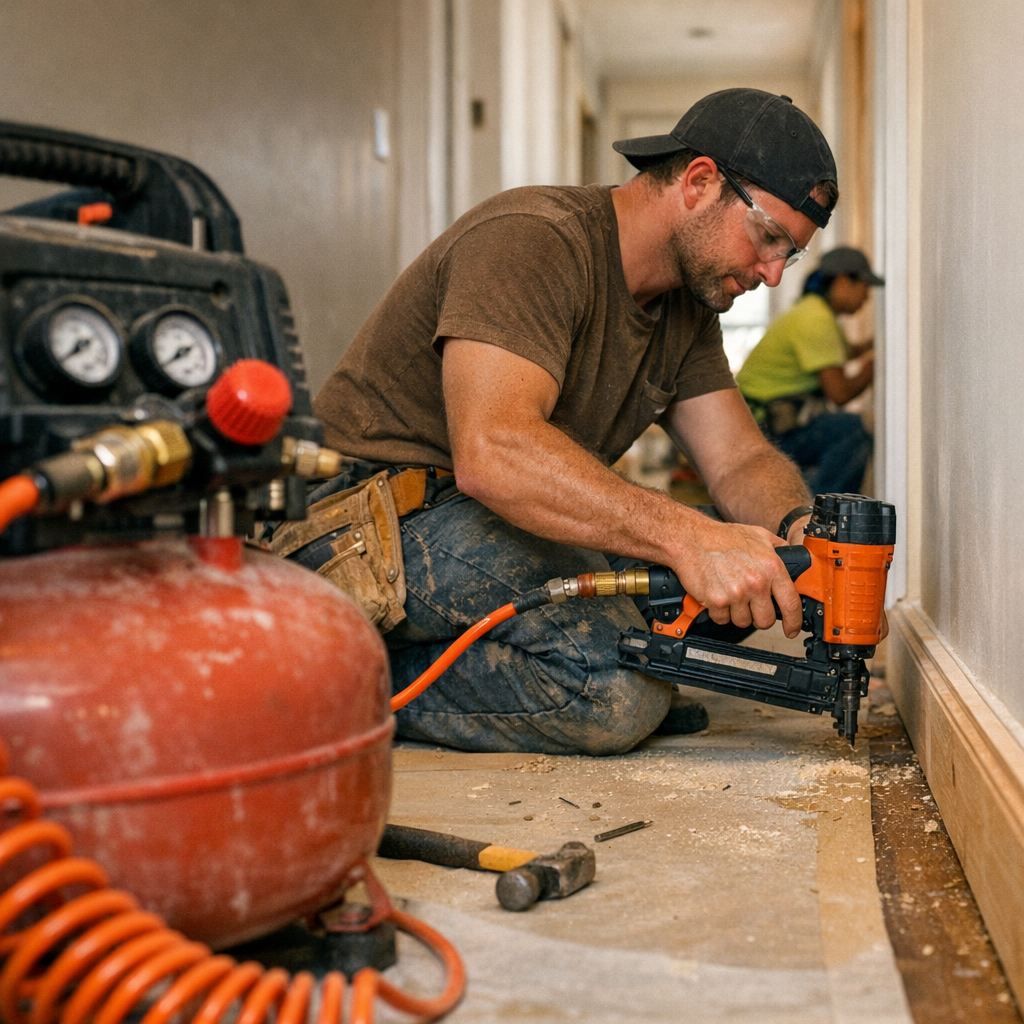
    Picture this: You’re running baseboards through a hallway, knee pads scraping tile, peace shattered by the compressor wheezing to keep up. At first every nail zips in. Then you speed up, and before you know it, the finish gun hesitates. You can feel pressure lag through the trigger—not just noise, but your workflow stumbling. A couple of staples stand proud, the hose is warm to the touch, and now you’re spreading filler and prepping for a round of sanding that never should have been needed. One hallway becomes an hour of extra work, all because pressure slipped at the wrong moment.

    Instability that Wears Tools—and Patience—Thin

    The slow breakdown is the worst kind. It’s not just nailing. During cabinet assembly, drilling repeated pilot holes, or long runs with a sander, hidden pressure swings show up as skipped cuts, torn-out grain, or motors straining to keep up. Spray finishing? That perfect early pass turns unreliable as the pressure dips, making you tip the gun, overspray, or chase patchy coverage. Work overhead and you’ll find drive consistency evaporates—raised nails and missed drills you only notice on teardown.

    Spot the Creeping Signs Early

    Notice yourself waiting for the compressor to catch up? Do you pause after every string of activations, or wonder why some nails bury deep and others won’t set? That’s unstable pressure eroding your control and adding repairs to your list. If you catch that rhythm—adjusting your pace for the machine’s recovery—it’s not just annoying. It’s robbing your efficiency and tiring both you and your tools faster than you realize.

    Quick reality check: If your workflow is bending to fit the compressor’s recovery—not the other way around—the real problem is hiding in plain sight.

    The Real Upgrade: SCFM Where You Need It, When You Need It

    The leap wasn’t swapping up to a bigger tank or chasing the highest possible PSI. The true fix came from finding a compressor that delivered steady, repeatable SCFM at actual working pressure. Compare a 2.6 SCFM machine to one confidently running 4.0 at 90 psi: the difference is felt over fifty uninterrupted cycles. No stubborn fasteners, no tool lag, no patching nail heads. The last cut matches the first, and momentum carries you—not the compressor’s delay.

    When pressure stays rock solid, you spend less time sanding, less time re-drilling, and far less time in post-job cleanup. Tools run brighter, jobs end cleaner, and—maybe most important—you’re less fatigued, both mentally and physically, at the bell.

    Choose with Real-World Work in Mind

    If your day is packed with repeated activations—trim, cabinetry, sanding, drilling—focus on SCFM delivered during runtime, not just in a manual’s boldface. Ask yourself: will this compressor keep pace through twenty, thirty, fifty cycles, or does it sag, forcing you to circle back for rework? Don’t be fooled by top-line stats. Dig for what holds up under true, repeated use.

    One overlooked trick: Gauge pressure not just at the tank, but where it really counts—at your tool, especially during heavy runs. Upgrading to a shorter, higher-quality hose and checking your couplings can squeeze out that last bit of consistency and make tough sequences more manageable.

    The Number One Workshop Bottleneck

    Real shops aren’t perfect. Dust sneaks in. Weather swings. Someone else plugs into your air line. The compressor you trusted for casual weekend jobs staggers on a high-output day or when tool demands overlap. Try dividing your attention between sanding and nailing off a panel with a wheezing tank—you’ll watch momentum vanish quickly.

    Pressure stability doesn’t just smooth out your workflow—it shields you from backtracking, wasted effort, and avoidable fatigue. If you’re spending more time fixing than finishing, that’s the sign: invest in a compressor proven to stay the course, not just make the cut on paper.

    http://gumboll.myshopify.com