Author: jaesoon_admin

  • Why Oscillating Multitools Slip During Detailed Cuts and How to Fix It

    In finish carpentry, there’s no buffer for mistakes. You’re midway through a flush trim or slicing an exact opening, and suddenly every slip matters—because you can’t hide crooked seams or frayed edges behind caulk forever. This is where tool choice doesn’t just matter—it decides whether the end of your shift is clean-up or touch-up. For every remodeler or pro trying to keep lines straight, the familiar heartbreak kicks in when the oscillating multitool starts wandering, even as you focus harder.

    When Multitools Demand Too Much Rescue Work

    You gear up for a delicate trim cut—a bit of quarter round, that last length of shoe molding against an out-of-square wall. The multitool seems like the fastest route. At first, you’re in control. But as you dig in, the blade jitters side-to-side, leaving ragged grain and a slight curve where you wanted dead straight. That wavy edge isn’t just cosmetic—a paint line won’t sit right, and you’ll be back with filler or a tiny sander, erasing the mistake in fifteen painful-minute stretches.

    This is every finish worker’s recurring headache. The multitool offers a fast start but wobbles when the pressure’s on: uneven gaps, fuzzy corners, and endless correction after the cut. What you saved in setup you pay for in recovery.

    Why Multitools Let You Down on Finish Cuts

    Oscillating multitools are built for access, not absolute control. Their quick, side-to-side motion helps when you’re notching inside a cabinet or slicing through grout, but that agility transforms into flex and chatter when you push for long, clean lines. Thin blades heat up and bend—especially on dense material like oak, MDF, or plastic laminate. With each pass, vibration creeps up your wrist, and any hesitance or uneven pressure shows up as divots and chatter marks in your finish.

    Fatigue builds up fast, too. You’re trying to hold a vibrating body steady, easing through the cut, but one distraction sends the blade drifting. Worse, the multitool’s sweet spot is fleeting: push too fast, and the blade scorches; too slow, and it melts plastic or fibers instead of slicing them.

    When the Reciprocating Saw Takes Over

    Reciprocating saws come into their own the moment the cut demands consistency. Their longer blade offers predictable tracking—you can guide it firmly against a shoe, anchor it to your working line, and keep the cut true. Instead of fighting the tool, you work with it: the blade rides the mark, the handle absorbs vibration, and each stroke follows your lead.

    The payoff is visible on every finish pass. Run a reciprocating saw—with a 10–14 TPI blade, not a demolition monster—down the edge of hardwood trim or through laminate flooring, and the result is startling: pencil lines matched, minimal cleanup, surfaces ready for paint after a quick sand. No chasing missed spots, no hiding chattered edges.

    Jobsite Example: The Laminate Floor Cutback

    Picture a common job—trimming back laminate under a fixed kitchen cabinet. Space is tight. Grab the multitool, and you’ll probably get 70% through before the vibrations eat the teeth and leave a melted, messier line than you started with. What looked like a “quick” tool fix leaves you bailing out with a belt sander, trying to force that seam tight against baseboard that refuses to sit flush.

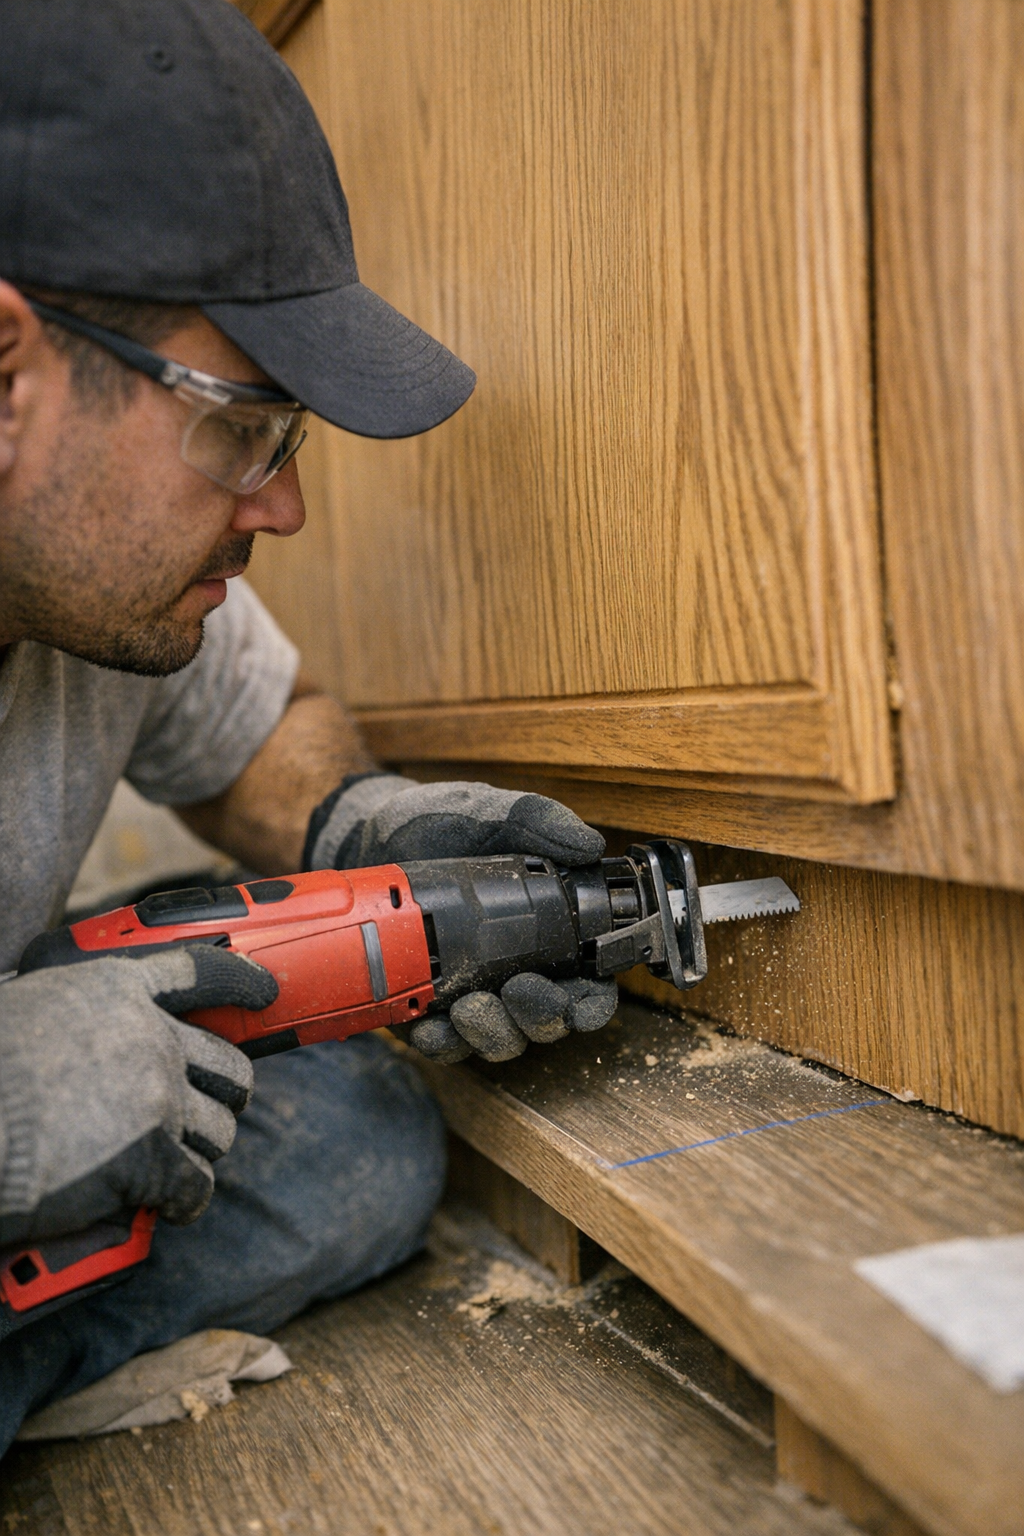
    Now, go at the same floor with a reciprocating saw—short, new 10–14 TPI blade locked in, speed dialed down, shoe pressed flat. The blade slices clean, following the chalk. The edge is crisp, the blade runs cool, and the finish is ready almost immediately. The difference? The time you’d spend fixing mistakes is now yours again.

    Sharpening Your Blade and Your Approach

    Finish work isn’t just about choosing tools—it’s about the setup. Reciprocating saws let you fine-tune by blade length, tooth count, and, crucially, speed control. Under six inches and higher TPI is the magic formula for detail—not brute force. A good blade makes control natural; a sloppy or worn blade puts every flaw on display. Stop and swap before the blade burns out. Multitools, meanwhile, punish dullness with every pass, often turning one slip into five new flaws.

    Pro tip: When the line must be perfect, install a fresh, fine-tooth blade and slow down the stroke. Two steady, overlapping passes beat one hurried attempt that spirals into patch-work every time.

    Multitools: Great for Corners—Not for Finish Runs

    Resist the habit of forcing multitools into the wrong role. They’re unmatched when you’re boxed in—nibbling a notch inside a shelf, trimming inside a case, ducking behind a sink. That’s their lane. But on a long cut where appearance matters most, what feels nimble up front rarely looks sharp at the finish. Reciprocating saws aren’t just a workaround—they’re the answer for straight, ready-to-finish lines, with less sanding, less patching, less cursing the last tool you grabbed.

    Choose the tool for the outcome, not just for convenience. The minutes saved avoiding a blade swap or setup can add up to hours of unforgiving fix-up work later. Good finish work is a habit—don’t let impatience turn your details rough.

    Catching Problems Before They Snowball

    You know trouble is coming the second it starts: vibration rattling through your grip, a cut line that looks frayed instead of clean, the motor bogging down and teeth smoking. Don’t push past those signals—otherwise, you’re signing up for a cycle of patch, sand, and never-quite-right. Watch your technique as much as the tool: if the line’s going wonky or the work goes from precise to strenuous, hit pause. Change the blade or change the saw before the problem multiplies.

    Want tools and blades that don’t leave you stranded in the middle of the job? Visit Gumboll.

  • How Proper Bathroom Lighting Eliminates Shadows and Reduces Cleanup

    Most people don’t realize their lighting fails until the consequences show up—like a damp towel wedged below the sink that’s always just a little too wet, day after day. The room feels bright from the doorway, but as soon as you wash your hands or rinse out a shirt, frustration creeps in: missed splashes, hidden puddles behind the faucet, and a steady drip that only gets found at chore time. You mop, dry, and still never feel caught up, as if the simple act of cleaning invites more hidden work. In a bathroom or laundry zone, every “invisible” cleanup is a signal: your light isn’t just underpowered—it’s missing the area you actually use.

    The Overhead Light Trap: Why Some Fixtures Look Bright But Fall Short

    It’s easy to install one overhead fixture and think the whole room is handled. The problem is, light that covers the floor doesn’t guarantee you’ll see what matters on the counter, in the basin, or along the mirror. The room glows until you move. The difference becomes obvious when you lean in to check your jawline and catch your own shadow blocking the task. Corners near the sink fade away. A slightly glossy counter suddenly hides stray droplets unless you hunt for a better angle. The farther from the center, the worse it gets—scrubbing the edge of the basin turns from “quick wipe” to random guessing at dark patches.

    The biggest differences show up right where routines repeat:

    • Does the light fall directly along the faucet, or skip past the work area?
    • Do your own hands or arms throw back harsh shadows as you move?
    • Does glare bounce off the mirror and force you to reposition to see clearly?

    Routine Disruptions: Small Signs That Something’s Off

    The wrong lighting feels like nervous effort disguised as caution. Quick shaves end with a check for missed spots and unexpected droplets. After a hand-wash, you find a trail the overhead never showed. In the laundry, cuffs come away wet from a splash that looked invisible moments before, and the towel below—still always needed—quietly soaks up what your eye missed. Each “minor” cleanup isn’t just bad luck; it’s a routine being distorted by lighting that only looks good from arm’s length.

    Watch for these moments:

    • Shaving in your own shadow: You reach in, but the main beam lands behind your head. Half your jaw disappears into darkness and every move demands a new angle.
    • Mystery puddles after chores: Rings of water creep across the far rim of the sink, often only becoming visible when you stoop or drag the backup towel across the counter—again.
    • Laundry zone misfires: The center of the basin shines, but wet edges are left to hope and feel. The result: another damp cloth forgotten on the ledge, and another “oops” at the end of the week.

    The routine never feels smooth. You finish, but can’t trust the surface is truly clean. Every action includes a small correction or a backup check, and that towel under the sink isn’t just a formality—it’s a silent confession the light isn’t keeping up.

    Brightness Isn’t Enough: Understanding Shadow and Glare

    High-watt bulbs and big fixtures may fill the room with light, but what matters is whether that brightness ends up where the work happens. Many ceiling and wall lights promise high output but throw dark lines across faucet handles or leave the near side of a mirror murky. Even in a room painted white, you can find yourself aiming bottles or running your hand along the wrong spot, chasing shadows that move every time you shift.

    Worse yet, poorly aimed fixtures turn the mirror into a spotlight—glare hits your eyes, not the actual detail you need. Stand in the real task zone and you’ll block or scatter the only useful beam. The brightest install on paper becomes a blur of missed spots and random reflection in real life, with the same towel chasing what you never quite catch in time.

    Lighting That Moves With You: Fixing the Missed Spots

    The real fix isn’t more brightness but placing damp-rated wall fixtures at the points where hands, face, and water meet: on both sides of the mirror or tight above the basin. Suddenly, shadow lines melt. Faucet ledges are crisp and dry at the end of chores. The backup towel goes untouched for days—finally a precaution, not a lifeline.

    This isn’t about technical specs—it’s about closing the gap between the way you move and the way your light moves with you:

    • Light fills the task zone, not just the empty floor
    • Shadow “dead zones” shrink as you bend or reach
    • Glare backs off; you see detail even while shifting position at the mirror

    The invisible mess—the one you only spotted after staining your sleeve or wiping a missed drip—becomes the rarity. Cleaning stops feeling like an afterthought, and the routine pushes forward instead of retracing steps.

    Real Tips for More Usable Light Where You Need It

    1. Place Lighting at Face and Hand Level

    Fixtures above and to the sides of mirrors balance light directly across your face and sink. This wipes out the harsh shadow that overhead-only setups throw right where you need clarity for shaving, cleaning, or detail-ready routines.

    2. Use Damp-Rated Fixtures for Busy Zones

    Fixtures near water and steam must resist fog and corrosion. Damp-rated options stay clear and safe even as splashes become routine, keeping performance steady after dozens of wash-ups or chore sprints.

    3. Test Every Angle Before You Commit

    Before wiring in, bring a temporary lamp through a real routine—wash, wipe, check the mirror. See how the shadow travels, watch the glare. This quick trial reveals the weak points no catalog shot ever does, and gives you a daily gain instead of an endless workaround.

    Beyond Looks: Lighting That Matches How You Live

    Switching your lighting isn’t about chasing a brighter room—it’s about getting every corner, ledge, and work zone to actually show up as you move. A fixture that finally closes the gap between “looks clean” and “is clean” means hallways feel balanced, edges don’t vanish, and the laundry counter helps you finish faster. Each routine becomes quick, clear, and doesn’t leave behind another hidden task.

    That backup towel? With the right setup, it returns to its original purpose: backup, not a lighting bandage.

    See more tailored solutions for real indoor lighting at LightHelper.

  • How Structured Car Interiors Reduce Daily Driving Friction and Clutter

    It’s a familiar story: your car looks freshly organized, cables tucked, and every item in its spot. But after the second grocery run or a few days of normal commuting, small problems return: the charging cord drags across the gear shift again, an empty water bottle bumps your heel after a turn, and the organizer that looked clever on day one now blocks the fastest spot for grabbing your phone. Clean lines and a tidy surface do nothing for the small jams and slowdowns that creep in by midweek. The difference between a car that looks under control and one that actually works during daily use usually shows up after the first few real trips.

    The Slow Return of Everyday Friction

    Early in the week, the car feels put together. But with every school drop-off, parking-lot exit, or trunk load, your “finished” setup starts fighting back. Friction isn’t mess—it’s in the habits that force you to pause, adjust, or hunt for things that were just organized:

    • Cables slip loose, arcing over AC knobs or blocking access to cup holders no matter how you try to route them.
    • The phone mount shifts just enough by the fourth turn to require awkward reach—especially if you need a fast grab while still buckled in.
    • Loose items, from sanitizer to parking cards, escape their compartments and wedge themselves into seat cracks after two bumpy drives.

    By Friday, you’re not overwhelmed with clutter—just slowed down by these small, persistent interruptions that break your flow every trip.

    When Surface Tidy Isn’t Enough

    What looks organized for an Instagram shot or the once-a-month deep clean rarely holds up to real errands and returns. The cupholder phone “solution,” the cord loosely looped under the shifter, the cute mini-bin in the center—these details crack when the routine heats up. Fast braking or a tight parking spot exposes what doesn’t hold:

    • The just-tucked cable flops into gear territory halfway through your commute.
    • The organizer you hoped would tidy everything blocks your go-to spot for sunglasses or backup keys.
    • Returning to the car after a short stop, you find at least one everyday item in the wrong place, forcing a micro-cleanup before you can start driving.

    The result: those welcome improvements at first start to feel like obstacles. You clean, straighten, and reload—only for the same invisible problems to return.

    Real-Life Routines Expose Hidden Weaknesses

    See it in action: you head out in a hurry, slide into the driver’s seat, hit the brake, and suddenly your phone cable, which looked neat before, snags and tugs—one more block in the way. Groceries slide between corners of the trunk, jostling emergency gear out of place. Backpacks and jackets cover organizer pockets, making them slow to access. The repeated frustration isn’t about being untidy—it’s that your car’s “organization” floats, shifting out of usefulness every time you move, load, or park.

    Most setups offer temporary peace, not true reliability when you test them under real movement and city stops. Each in-and-out, every errand loop, exposes the cost of solutions that only work when nothing changes.

    Anchoring Structure Means Less Daily Hassle

    Lasting convenience depends on anchoring, not just arranging. Improvements stick when essentials are fixed to where you naturally reach, move, and return:

    • Cable routes that use fixed clips or edge channels—not just a tidy tuck—so lines don’t slip into hand space or cup holders during normal driving.
    • Organizers moved off busy zones: seatbacks, door pockets, or side-mounts keep essentials in reach but out of the line of fire for quick grabs.
    • Cargo and trunk zones made stable with non-slip bases or attachable dividers, holding the emergency kit or shopping bags in place even when the trunk fills and empties fast.

    This kind of structure isn’t about showroom minimalism—it’s about spending one less moment fighting with loose cords or searching for what just slid away three turns ago. Each fix removes a repeat drag, not just cleaning the look but removing the slow creep of minor aggravations that chip away at your daily patience.

    The Difference Between Order and True Usability

    Surface order fades—a car that only looks tidy on day one quickly collects invisible barriers to fast, smooth routines. True usability means the phone mount stays put, cables don’t cross pedals or controls, nothing vital requires a reach that strains your shoulder, and even the emergency kit is where you expect after a week’s worth of trunk shifts. Skip the aesthetic overhaul: small, practical changes that hold up under movement mean less fixing, fewer detours, and a car that delivers on the “organized” promise when you actually use it, not just between cleans.

    What to Watch: Hidden Friction Scenes

    • Blocked seat-side entry: that perfect organizer sits flush and neat, but becomes an obstacle when you load in coats or a gym bag, forcing sideways twisting or extra drops.
    • Cables that reset themselves to inconvenient: even after you untangle and route neatly, they find their way back into your path after two commutes or a couple of parking brakes.
    • Trunk organizers drifting under load: non-slip pads help, but one tight turn and small gear tips over, spilling kit contents or burying them beneath today’s bags.
    • Short-trip cleanup fatigue: not a disaster, but always an extra item to pick up, shift, or clear before you can just drive away—especially after repeated short stops.

    These aren’t big messes—they’re small, repeated slowdowns. The most useful setups make you fix fewer things after ordinary drives, not just make the car look in order when it isn’t in use.

    Creating a Cabin That Holds Up Under Real Use

    The biggest difference between setups that work and don’t isn’t how clean they look—it’s how little fixing they demand after real movement. Organizers, mounts, cable channels, and trunk dividers are judged not by how well they hide clutter, but by how reliably they keep your routine friction-free every time you get in—whether it’s a hectic Monday or another after-work errand spree. When what matters is locked into place and the path from grab to drive stays clear, your car does more than look functional—it is. Each drive gets easier, and the hassle of fixing the same problems over and over disappears.

    See options for real-world car organization at DriveWellSupply

  • Recognizing Hidden Struggles in Your Cat’s Daily Care Routine

    When Calm Routines Build Up Hidden Friction

    A pet care corner can look squared away—bowls pushed into their spots, waterproof mat down, wipes in a tidy stack, brush at the ready. But the real test starts after the first feeding of the day, when “organized” proves much less smooth in real motion. One bowl is still damp from last night’s wash; a brush sits inches out of reach when fur starts to shed; a water dish is full but stale. What looks like control on the surface often hides a slow-moving mess: unfinished resets, blocked grab-points, and basic items migrating just far enough to get skipped, delayed, or forgotten.

    The Slippery Slope of Unfinished Steps

    Mornings seem handled: breakfast poured, bedding brushed off, a quick wipe of the nearby mat. But if your dog hesitates at the bowl—sniff, pause, side-eye at a half-wiped dish—or your cat circles and hops away before you can clean a tangle, the small stall starts multiplying. The bowl stays out for “one more hour.” The water dish isn’t swapped until you’re looking for it late in the day. Towels for drying bowls dry out on a chair all afternoon, never making it back to good use.

    These incomplete resets stick around. Instead of a quick meal prep, you’re facing last night’s crusted bowl after work—again. A grooming brush floats from shelf to countertop, then gets lost under yesterday’s mail. In a single week, what felt like a crisp morning setup devolves into a background of catch-up chores, one lingering step at a time.

    Real-Life Bottlenecks: What Keeps Slowing Things Down?

    Anyone with a dog or cat recognizes the daily loop. You reach for a refill bottle, but the cleaning spray is blocking the way. You set down a meal, only to confront the bowl you meant to clear earlier, old food now dried into place. A hair-removal glove is tossed on a table “for later,” only to disappear under other clutter. Cleanup wipes are visible but never within fast reach—so you run across the room mid-task while your pet hovers, attention slipping.

    Items meant to help the routine can tangle it instead. You bury a brush in a drawer to keep counters clear, then let tangles go because it feels just out of reach. The feeding area is wiped down, but bowls end up on windowsills, becoming trip hazards or blending into kitchen clutter until night. The result: a space that passes a glance test, but a daily flow that’s still snagging on missing basics and deferred resets.

    How Subtle Delays Change the Whole Routine

    Even when pet areas look calm, every skipped or delayed step stacks more handling on the owner. After an early meeting, you find your cat circling the feeding spot. The water looks clear, but you’re juggling yesterday’s bowl, the half-damp cleaning towel, a while-ago-grooming mitt—all collecting near shared living space. Each reset drags another item out, inching pet supplies into high-traffic zones: a mat that shifts underfoot, towels now sharing your entryway, a brush left on the mail table. A routine that should take thirty seconds now sprawls across spaces, blocking a quick reset or a calm handoff from one care phase to the next.

    Over the week, these patches turn into workarounds: moving dishes to make room for a refill, chasing down a stray brush before prepping the next meal, coaxing your pet back to a zone that no longer feels orderly. “Almost done” becomes the norm, and you watch minutes slip away, especially on jammed schedules or after guests disrupt the usual flow.

    The Practical Fix: Specific, Repeatable Adjustments

    The way out isn’t an overhaul, but smaller moves: anchor routines with fixed steps and avoid setups that depend on willpower to keep order. Shift the food bowl just off a main walkway—easy for your pet to find, but not sitting where it snarls foot traffic or blocks a quick tidy-up. Keep grooming tools at the actual pause-point (the back corner your dog always stops or where your cat likes to observe) but out of direct sightlines. Build in one reset—wiping the bowl right at refill with the same cloth, same moment—so that repeat work can’t slip into “later.”

    Placement patterns cut future friction. For a dog, anchor the leash on a single hook: avoid the pile, stop digging. For a cat, park a favorite blanket beside, not on top of, the food mat: comfort, but less clutter. Don’t react to every stray item with a new habit—nudge routines where they fail most often and accept your pet’s patterns instead of fighting them. Let familiar resets replace the slow tide of unfinished jobs piling up around the edges.

    Steady Routines Work When They’re Actively Maintained

    Reliable routines don’t hinge on spotless spaces; they cut down repeated stalling where small inefficiencies take root. A quiet dog or a patient cat doesn’t mean the setup works—it just means friction has shifted somewhere harder to spot. When you catch yourself looping back for the same brush, resetting the same bowl, hunting for a supply that’s now migrated rooms, it’s time to address the pattern, not just the mess. Early fixes to repeated friction—bowl always back to its spot, wipes in arm’s reach, leash never lost—turn “one more thing” evenings into routines you can rely on, with fewer nagging chores and more real time left at the end.

    For more ways to keep your setup both calm and functional, visit CalmPetSupply.

  • Choosing Narrow Hallway Benches That Maximize Space and Ease Movement

    The right hallway storage bench can transform quick exits and chaotic returns—or instantly turn your main pathway into a daily obstacle course. The difference doesn’t show up on day one. At first, the new bench seems useful: a seat for pulling on shoes, a home for stray bags, storage that hugs the wall and looks efficient. But after a week of real comings and goings, the cracks start: extra depth shifts the walking line, a heavy lid discourages use, and bags pile up in awkward pockets. Shoes wind up on the floor instead of inside. What was meant to sort the mess now blocks the route, forcing sideways steps and shoulder turns. Instead of helping, the bench quietly increases friction every time someone passes through.

    When Good Intentions Block Good Movement

    In tight hallways, the smallest storage mistake compounds every rush hour. Even a bench that sticks out a few centimeters too far makes direct movement impossible when the family’s schedule collides—kids dash out, work bags swing, coats get grabbed, and the pass-through narrows. Suddenly, every routine trip becomes a clumsy shuffle, and first-week tidy edges get lost under a growing pile of stray shoes and abandoned bags. If benches aren’t tuned to fit both the space and the rhythm, the cost is measured in detours and delay, not neatness.

    Normal habits test every detail: Shoes come off fast, bags land wherever an opening appears, coats dangle above as people come and go. When the compartment requires fiddling—lifting a stiff lid or stooping for a deep bin—no one uses it as intended. Items stack alongside instead. The “I’ll put it away later” zone grows, and resets stretch from a quick toss-in to a near overhaul. The promise of a calm entry collapses into the burden of another pileup zone. Each week, movement slows under the weight of unsorted overflow.

    Bench Types and Hidden Obstacles in Real Life

    Some benches blend with the wall to look invisible, but the footprint gives them away. Five centimeters of extra depth is enough to reroute everyone’s walking path. Heels catch, bags scrape, and shins bruise as people squeeze past, especially with multiple routines colliding. What looked streamlined on paper becomes constant sidestepping in practice.

    Closed-lid benches offer the illusion of order, hiding everything under heavy covers. But in living use, they betray their flaw: two hands or a crouch are required just to open them. Retrieval slows. People abandon the system, and what was meant to hide mess inside just shifts the real mess to the edges—shoes pile up on top, bags slip underneath, and the intended storage rarely sees use.

    Open-shelf or basket benches make it easier to drop and grab on the move. Access is fast, and resets are less of a chore. But category drift sets in quickly: shoes, bags, scarves, even keys blur into a visual scatter that seeps onto the floor. The zone starts neat but dissolves with every swapped item, and the room’s appearance gets busier by the day.

    One Narrow Hallway, Many Collisions

    Picture the real-world stress test: a hallway barely wider than the bench, 7:45 a.m. energy, three people, and two exit deadlines. Shoes get kicked off and line up in front of the bench. Backpacks land anywhere there’s an opening. The bench’s width or depth forces each person to pause, pivot, or retreat to let another through. It’s not organization—it’s a queue at the bottleneck.

    Consider trunk-style benches labeled “extra storage.” In theory, open the lid and clear the chaos away. In practice, if you have to lift the lid and move everything already on top, that step will be skipped. Soon, shoes stack outside, bags sprawl across the floor, and the “organized” storage becomes an ignored chamber. Categories break down—keys nestle with sneakers, scarves cover everything, and the path becomes a minefield of misplaced items. The rush slows, and you’re left navigating around the very thing you bought to declutter.

    The Case for Slimmer, Lower-Profile Designs

    Small changes tilt the routine toward flow: Testing a bench around 30cm deep—just enough for shoes but not so much it steals corridor space—brought an instant shift. Without a heavy, slow lid, putting things away became a one-handed drop instead of a wrestling match. A shelf or pull-out basket meant each item could be returned with barely a pause, and the reset became invisible: everyone’s things wound up back in their place almost by accident.

    After several weeks, the space signaled the change: no traffic jams, no overflow bunching at bench edges, no missed exits. Categories held steady—shoes with shoes, bags never straying into coat territory. Reset time shrank from weekly battle to almost nothing. The bench itself stopped drawing attention because friction disappeared, and hallway movement returned to direct lines instead of complicated detours around new piles.

    What Depth Actually Works?

    For most halls, 28–35cm depth is the safe zone: deep enough for everyday storage, but slim enough to keep the walkway clear. Don’t just measure wall space—watch for real-life traffic. Every extra centimeter risks turning a pass-through into a squeeze point. The right fit allows direct, unimpeded movement even as routines overlap.

    Open or Closed? It Depends on Your Family’s Pattern

    Open shelving: Allows fast drops and quick grabs, ideal for repeated comings and goings. The catch: you’re on the hook for keeping categories disciplined, or the visual jumble returns faster than you expect.

    Closed compartments: Contain mess visually—but only if the access is instant and light. If you have to use both hands, bend awkwardly, or remove a stack to reach inside, the system breaks. Items stay outside, the bench becomes a surface—not storage—and the “reset” happens less and less until the zone collapses into clutter. The only order that matters is the one that survives everyone’s actual routines.

    The Trap of Pretty But Impractical Benches

    Choosing by style alone sets up daily regret. A “look” that impresses guests may work in a catalog, but in a working hallway, form without function creates new problems: blocked flow, zigzag paths, items reappearing in random corners. Every decorative shortcut you take on depth, openness, or lid weight turns into ongoing management—dodging piles, reminding others to tidy, or carving a new path around storage meant to simplify your life.

    Pilot your real use: Can you put things away in one swift move? Will another person find what they need without tearing the system apart? Does the reset happen naturally, or do items always get stuck halfway back? The bench you notice least is the one getting it right: categories keep their boundaries, routines move unimpeded, and the storage never demands extra attention just to stay functional.

    Getting It Right: A Bench That Fades Into the Pattern

    The most effective hallway bench preserves the path—physically and visually. It vanishes into your routine, supporting quick resets and keeping items sorted with minimal input. When the structure matches your actual movement and return patterns, belongings find their spots without effort. The wrong design builds up silent resistance: resets slow, piles edge outward, and every walk-through feels heavier. The right design simply disappears: shoes go away, bags don’t drift, and the hallway remains clear even under weekday pressure.

    Measure for traffic patterns and repeat use, not just for storage volume. Look for compartments, shelves, or baskets that match the way your home really moves—not how you wish it would look empty. The bench that “works” is the one no one has to manage after the first week—and that’s harder to recognize than a tidy showroom photo. But get it right, and the hallway stops being the choke point and quietly supports order, every day.

    Visit Gridry for more inside-storage solutions made for real repeated use.

  • Why Wall Hooks and Shelves Outperform Bulky Coat Trees in Entryways

    The difference between an entryway that keeps pace and one that collapses under daily pressure shows up faster than you’d think. Within days, setups that seemed organized—coat tree, shoe row, quick bench—begin to snarl. Bags land wherever’s open, shoes scatter far from their original “line,” and the morning’s neat look fades as soon as family routines collide at the threshold. If you care about more than appearance—if you want a drop zone that holds up to the real scramble—how you structure that space decides whether you’re resetting every night or tripping over your own gear by Wednesday.

    When Floor Space Becomes an Obstacle

    Coat trees look tidy for about 48 hours—but by day three, the limits surface. Shoes at the base spread from a single row outwards, forcing sideways steps just to navigate the space. Backpacks loop over hooks until the top sags, scarves slip off, and the floor beneath turns into a bag-trap. If you have to pass someone at the door, it turns into a bottleneck: sidestepping, scooping up what fell, trying not to grind a wet boot further into the zone. The shrinking walkway rarely feels obvious until the clock’s against you and suddenly, your own drop zone slows you down.

    This breakdown is nearly guaranteed in any busy threshold. Mornings might start under control, but by evening: shoes kicked at strange angles, hats quietly migrating, “temporary” bags now camped out for days. Resetting doesn’t restore order—it just shifts the mess. Instead of a usable flow, you get a rotating pileup with less and less walkable space between the piles.

    Why Wall Hooks and a Shelf Change the Equation

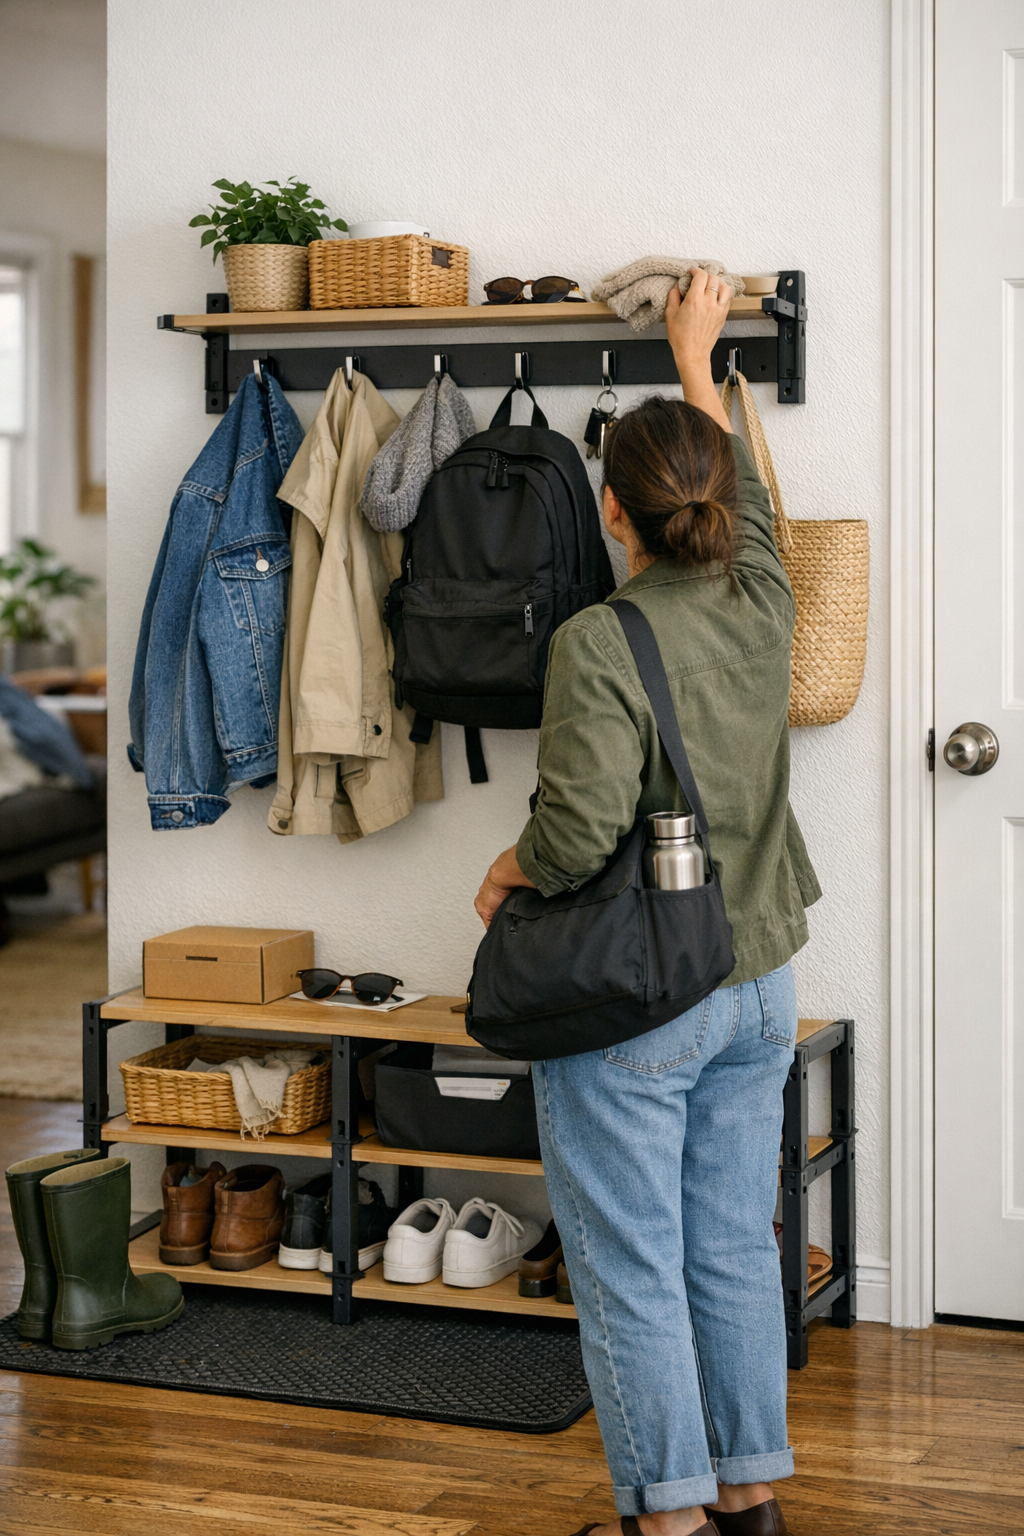
    The major shift is vertical—lifting the whole system off the floor. Wall hooks carve out set landing spots: coats each to their hook, backpacks to their own peg, loose items to a shelf. Now, nothing layers over something else, and nothing drifts beneath your steps. Instead of a pile swallowing new arrivals, each piece has a boundary—if it’s out of place, it shows. Bags can’t hide under damp jackets, shoes don’t block the door, and the process of getting out or coming home actually fits how people move through the space.

    In small or high-traffic entryways, this separation controls the spread. Hooks prevent category collapse—coats aren’t fighting for space with bags or hats. Resetting is direct: hang, straighten, maybe wipe the shelf. The time spent untangling a shoe pile drops to seconds. The cost of a weak system isn’t mess; it’s friction—delayed departures, awkward entries, and repeated micro-resets that chew up every transition.

    When the System Holds (and When It Slips)

    The right gear still depends on the right pattern. Hooks spaced about a hand’s width apart let even oversized coats hang without a tangle. Pack hooks too tightly, and you’re back to awkward overhangs and stuff slipping to the floor. Too wide, and you waste the most precious real estate on the wall. The shelf works only as a strictly limited landing zone—overflow invites a quick return to chaos. For entryways to stay workable, discipline trumps decoration: assign hooks and enforce what goes where, or the vertical system just becomes a new kind of drop pile.

    Scenes from Real Daily Use

    The After-School Wave

    The moment the kids come through the door, the test begins. First backpack dropped, coat added, shoes—still wet—kick off at the border. With a coat tree, just two or three bags tip the whole thing toward collapse: straps slip, the walkway isn’t really open, and you owe yourself a reset before dinner. But with wall hooks properly lined, every kid’s gear lands in its slot, shoes gather under their spots, and you can still get through. The need for a late-night scramble to clear the path? Mostly gone.

    The Wet Gear Problem

    Coat trees clump damp jackets together, trapping moisture and hiding drips below. Anything on the floor—bags, shoes, hats—ends up soggy or worse. Wall hooks, even at a modest spacing, leave enough room for sleeves to air-dry, and a hard mat underneath shields the floor. The difference is obvious not from how it looks, but in how much less cleanup you do after back-to-back rainy days. There’s still drying out and stowing to do, but you’re not prying up damp piles hours later.

    Late Arrivals and the Reset Crunch

    When you get home late, the urge to toss things high and collapse is real. If the coat tree is already near its limit, one rushed drop sends the rest slipping to the ground and blocks tomorrow morning’s exit. With wall hooks, every decision happens at eye level, one item to one bracket: the moment anything’s out of place, it interrupts the line. Instead of cleaning up a zone-wide sprawl, reset is a matter of rehanging and nudging a pair of boots—not a nightly production.

    Setup Matters: Small Adjustments, Big Difference

    The strange part of optimizing an entryway isn’t the hardware; it’s the boundary discipline. Hooks must be close enough to discourage doubling up. If, after a few days, kids or adults start sharing hooks or overfilling the shelf, category drift wraps the space right back to where it started: bags on the ground, shoes beyond their edge lines, and coats layered so thick they slide. Fixes that aren’t anchored or suit only the first week’s gear will drag the whole system down—sometimes literally, if a sagging shelf or loose nail lets half the zone spill at once.

    Recognizing the Difference: Looks Versus Working Flow

    What looks restful at first—namely, a new coat tree or floor rack—usually misses what the entryway is actually asked to handle. Real use is measured not by neat stacks but by how smoothly people pass through, how quickly the area resets, and whether you can see irregularities at a glance. Wall hooks and a narrow shelf don’t just show less gear—they force a return flow. If something’s off, it sticks out, making the next trip through less likely to bottleneck or collect new clutter at the threshold.

    The strongest test isn’t initial order but repeated movement. Systems that ignore motion and allow for hidden overflow might “store” more, but they interrupt the most basic function: coming and going. A hook and shelf setup keeps those movements sharp and the burden of fixing—at the end of a messy day—light enough to do without a second thought.

    If Your Entryway Fills Up Fast, Vertical Storage Holds the Line

    If every return home means dodging bags, stepping over shoes, and squeezing through the same pinch points, it’s more than a small annoyance—it’s a sign your setup isn’t holding up. Wall-mounted hooks and shelves draw a visible edge: this is where gear goes, this is what’s out of bounds. With boundaries set, resets stay simple, and the floor stays open enough for everyone to pass—whether the week is calm or frenzied. The layout answers not just to appearance, but to repeated, real daily movement; vertical storage quietly holds the line where other solutions break down.

    Visit Betweenry for practical transition-space storage designed for real entryways.

  • Why Pet Travel Bags Fail After Multiple Stops and How to Fix It

    The moment your trip turns from calm to chaos usually isn’t dramatic—it’s that third stop, where your so-called organized pet setup leaves you elbow-deep in your own travel bag, searching for wipes or your pet’s comfort item while your dog pulls against the leash and the door clock ticks on. Everything looked tidy when you left the driveway: leashes coiled, wipes inserted, bowls nested. Half an hour later, the cracks show—what you need has drifted out of reach, bowls spill into pockets, and items that were “packed for anything” now block the one thing you actually need. Travel with pets doesn’t break down because you’re unprepared; it breaks down because most organizers are prepped for display, not for repeated hands-on use in a moving car.

    Why Do Pet Travel Setups Break Down So Quickly?

    Most pet travel kits fail in the same predictable way—not at first, but once you’re two or three stops in. A neat bag at departure means nothing when motion, restarts, and real-world mess get involved. The leash that looked simple to grab is now tangled with a blanket. That “easy-access” wipe pack? Pinned behind a sloshed water bowl. Try to calm your pet mid-trip and suddenly the comfort item is anywhere but accessible. Each restart magnifies the disorder until every quick pause demands a full reorganization, robbing you of any rhythm. The friction builds with every round-trip to the trunk or scramble at the seat edge—yet, to an outside eye, your setup still looks organized.

    Most “minimalist” travel organizers or all-in-one packs aren’t built for motion. They promise less clutter, but tiny, overfilled compartments and undivided spaces simply trap your essentials together, so every attempt to grab-and-go launches a minor rescue mission. Packing to look organized—versus packing to handle pressure—are opposite skills.

    The Too-Tidy Trap: Organized, but Awkward

    A pet travel bag with single zippers and shallow dividers looks sleek at rest. But the second you’re moving—pet shifting in the back seat, traffic stop after traffic stop—its structure reveals its weakness. Two stops in, your bowls and bottles are wedged under a leash, which has spiraled through the comfort blanket. The wipes you meant to reach one-handed are sandwiched between owner snacks and spare gloves. Each stop, you dig and re-layer, burning patience and letting your pet grow more agitated at the hold-up. Efficient on paper becomes awkward in practice, and the time saved by “clever” storage is eaten up by repeated interruptions.

    Here’s the core problem: Real-world travel exposes organizers that only work when untouched. Friction isn’t obvious in a static, zipped bag, but in motion—especially after a few restarts—the wasted seconds, muscle memory of the repeated hunt, and the sigh you hear from the passenger side add up.

    Repeated Stops: Where the Weak Points Surface

    Picture a standard highway run. Three stops in two hours, your pet is restless, the bag now a minor battlefield. That comfort blanket folded neatly by the door? Wedged under a seat. The spare leash? Looping around a bowl. Wipes, which looked ready, now drift into a chaos pocket or even roll onto the floor. It’s death by a thousand small inefficiencies: fumbling for a single item, the drag of a five-second pause here, a muttered apology there while your pet watches your process fall apart.

    It’s the routine that collapses, not just the system. Suddenly, you’re not just grabbing a comfort toy—you’re pulling half your day’s supplies into the parking lot to find it. A travel kit designed for “before and after” moments (packed neatly, zipped closed) won’t keep up with the stop-and-go reality of travel. Even your travel partner notices the delay, feeling the travel flow break under the strain of clashing compartments and unpredictable item migration.

    Setup Overlap: When Essentials Keep Getting in Each Other’s Way

    You’ll spot a failing setup not by its appearance, but by the way essentials migrate against each other. Bowls and leashes tangle, wipes disappear into the main pit, treats drift toward your own backpack, and comfort items get buried under owner-layered jackets. What felt sleek at the start is now a slow shuffle at every stop. Instead of an answer for each problem, you get a tangle that demands a puzzle-solver’s patience just to find the basics for a bathroom break or hydration stop.

    Typical weak points include:

    • “All-in-one” main spaces that force every item into collision—making a quick grab for one, a full empty-out for all
    • Pockets that don’t truly separate: wipes jammed behind bowls, small gear sinking out of sight after sharp turns
    • Pet/owner spillover zones—phone, gloves, and snacks drift into the only wipe compartment, making two routines unravel together

    Real Use Says “Separate, and Keep It Accessible”

    Setups that make pet travel easier aren’t the ones that boast compactness or symmetry—they’re the ones that let you reach exactly what you need at exactly the right time, without a reshuffle. It means:

    • Side-access wipe pockets you can hit with either hand while half the gear stays contained
    • Dedicated comfort sections where a blanket or toy never slides under bowls or gear, but always sits at the edge for single-move access
    • Total separation of pet and owner items so your bottle or keys never disrupts leash or treat access

    Just having a left-handed wipe slot or a no-migration leash section changes the entire travel flow. Spills can be handled in one move. The comfort item comes out with zero dig. After several stops, you notice you aren’t hesitating or mentally rehearsing what’s in which section—you simply reach, handle, move. The structure finally fits the real world of travel, not just the “packed” moment.

    How One Tweak Made Real Stops Feel Simpler

    The improvement isn’t just incremental—the difference is immediate once you put a separation-first organizer to the test. Shift from a jumble bag to a kit with quick-access saddle pouches, fixed comfort zones, and true leash slots, and you cut not just time, but the frustration that saps every trip’s energy. What was a source of repeated hassle turns into an afterthought.

    Here’s how it shows up: Pull off for a break. Without even turning, you reach the right zipper and the wipes are in your hand. The comfort blanket lifts out without disturbing anything else. Bowls stay upright, each in its own spot; leash never blocks your fast exit. Restock and reset take a moment. Suddenly, those tense hold-ups vanish, and your pet watches you—not because your system failed, but because you’re already moving again. That anxious pause at the seat edge? Gone. Even after multiple stops, the kit is still working for you, not the other way around.

    If the structure gives you back your rhythm—every trip, every restart—it’s the sign you’ve outgrown ordinary travel gear.

    Spotting the Right Structure for Your Routine

    Repeated frustration is your cue. Find yourself fishing for one item, elbowing past snacks and gloves, or catching a restless pet’s eye as you delay yet again—it’s not about bad planning, it’s about outdated setup. Organizers meant for “real travel” reduce drama at the seat edge, let you return to movement faster, and protect both your routine and your pet’s calm. The bag that supports you isn’t the one that looks good zipped shut; it’s the one you barely notice because every motion just works.

    The ultimate feedback isn’t how tidy your kit looks after packing—it’s how invisible the kit becomes after three stops. If you’re reaching in the same place and finding what you need without a search, you’ve finally found a setup that travels as hard as you do.

    For a practical range of pet travel bags, organizers, and kits built for repeated real-world movement—not just for the moment before departure—visit PawGoTravel.

  • Why Bathroom Rated Lighting Outperforms Standard Fixtures Over Time

    Every bathroom fixture faces a quiet, daily stress test from steam. A light that looks solid straight out of the box—flush to the ceiling, bright and polished—can start giving itself away within weeks. Steam collects after showers, builds up in small corners, and seeps into mounting points that seemed sealed. Suddenly, a lens is slow to clear, a faint moisture outline lingers on the trim, and screw heads take on early flecks of rust. Day after day, these marks accumulate: not dramatic failure, but an unmistakable signal that ordinary fixtures lose ground fast in actual bathroom conditions.

    How Daily Steam Creeps In

    Most standard fixtures aren’t designed for persistent, humid cycles. The consequence isn’t immediate—it’s the haze that develops behind the lens after days of repeated showers and poor venting. Edges that started out glossy now tint yellow where moisture migrates. Wherever water pools, a streak appears and refuses to wipe away fully. By the time you realize the mounting won’t dry out or the lens keeps holding a fog line, the invasion is set. These signals don’t just show up on cleaning day—they settle in, week after week, until the fixture feels permanently tired.

    Visible Clues: Small Issues, Big Frustration

    The friction is clearest during basic routines. Flip the switch for bright, clear output—there’s a pause, a shadow, a dull haze. You squint to shave or re-angle for makeup, noticing that one edge of the sink stays dim and the other shifts yellow. Cleaning turns into a midweek chore, scrubbing stains that always return. Corrosion creeps along screw heads. Every “quick wipe” barely undoes what steam does all over again by morning. It’s not just visual clutter; it’s daily lost time and effort that shouldn’t be part of your routine.

    The Real Risk Isn’t Just Looks

    Steam quietly attacks the core function. Unsealed seams and exposed cable runs give moisture a direct entry—not just dulling appearance, but causing flicker, uneven spread, and breakdowns when reliability matters most. A shadow appears above the tub where light once reached. Around the mirror, a shadow stains a side you need clear. The fixture risks failing at rush hour, forcing awkward resets or repairs when you have no bandwidth to deal with it. Even minor patchiness in output leaves the room less functional, and the setup less trustworthy, every single day.

    Bathroom Rated Fixtures vs. Standard Looks

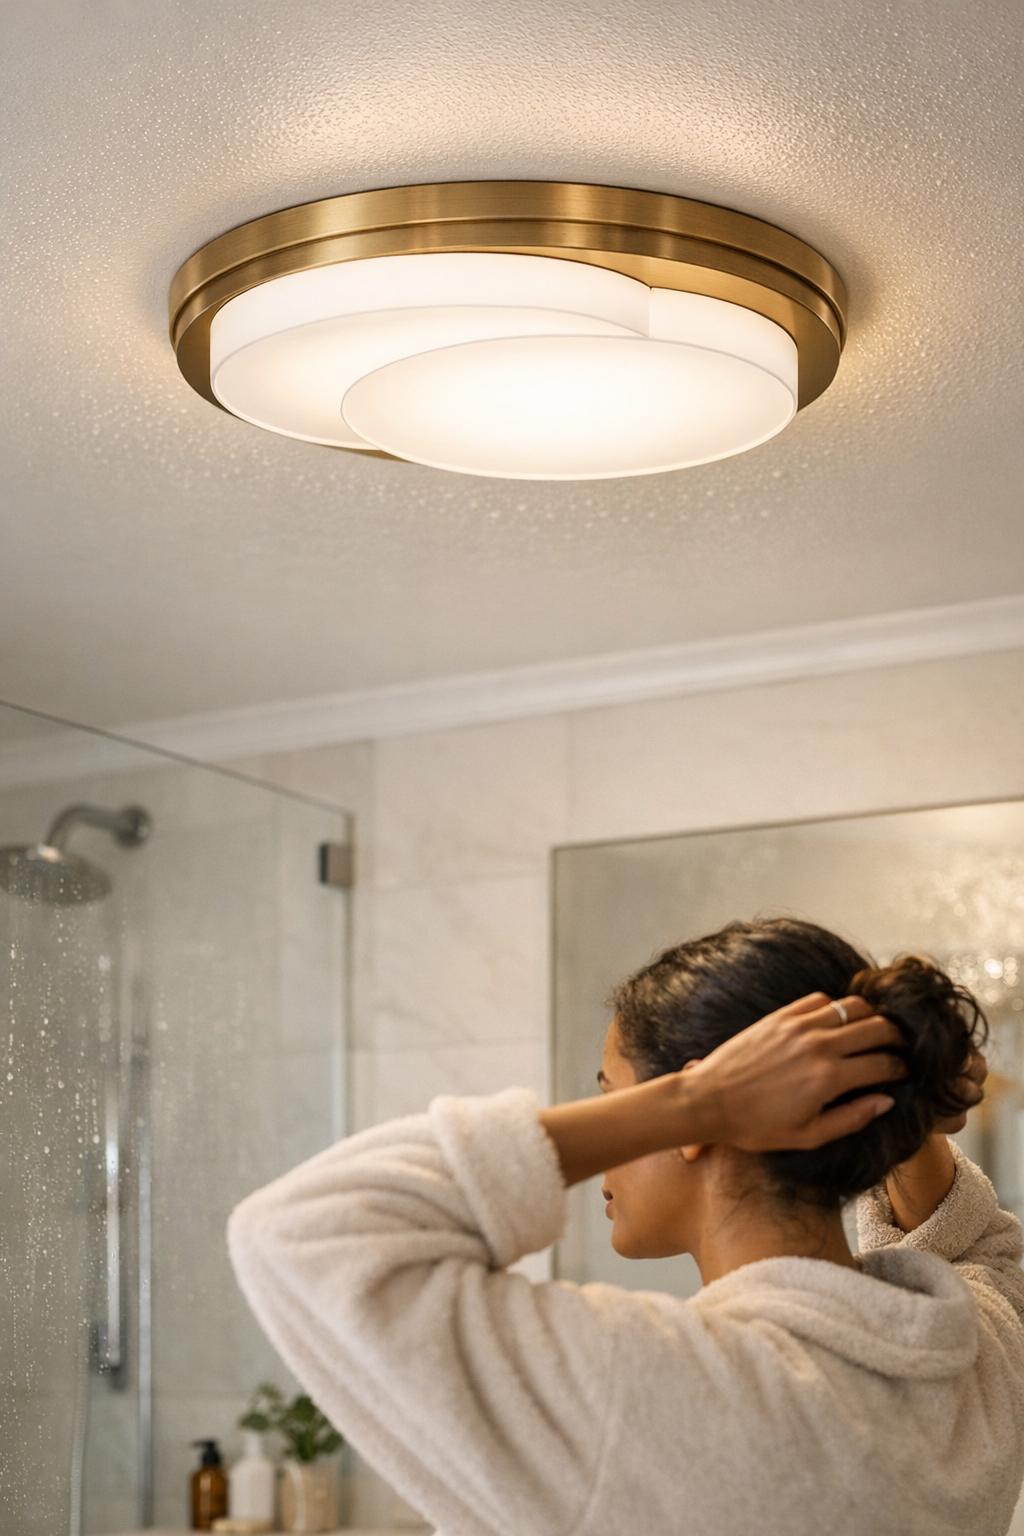
    Flush-mount “bathroom” and standard ceiling lights seem similar on first install: both look finished and neat. But use separates them quickly. Two identical bathrooms—one with an everyday fixture, the other with a true bathroom-rated model—illustrate the divide. The differences don’t yell, but they don’t go away.

    • Standard fixture: After a month, fog forms behind the lens. Condensation rides the glass and never quite dries, so each week’s output softens—not from design, but from a slow invasion of moisture and film. You polish and the result barely lasts a few days.
    • Bathroom rated fixture: Output stays clear, even as steam fills the air. Gasket seals block damp from sneaking inside. Hardware doesn’t corrode; you wipe dust, not residue. The mounting feels as tight as day one, and the light acts as expected—never lagging, never patchy—no matter how many showers pass.

    Where the Details Matter Most

    It’s the invisible armor—extra gaskets, hidden seals, tight cable ports—that keeps a bathroom’s routine from turning into a constant battle with steam. With these details, cleaning means less friction: less shadow at the periphery, less random yellowing, fewer panic scrubs before guests arrive. The room delivers the coverage and clarity you count on, so your morning doesn’t stall over details that shouldn’t break down.

    The Repeated Friction of a Poor Setup

    Picture the rush to get out the door: condensation clouds the mirror, and the light over the sink only throws brightness one way. Wiping the glass clears your reflection for a second, but the actual light stays uneven—half the counter in shadow, the other in dim yellow. That’s not a cleaning issue—it’s the buildup of months with the wrong fixture. You only realize the problem in the moments you need reliability: mid-shave, makeup half-applied, or when the fixture flares out under routine use.

    Shared, low-vent bathrooms double the effect. Fixtures chosen for looks or “good enough for now” stories lose the fight to steam faster. The price is paid not just in appearance, but in small, repeated interruptions—swapping bulbs, hand-wiping rust, hoping the mounting won’t loosen after every deep clean. The surface may look intact, but every morning starts with a new hassle you didn’t notice the first week.

    Small Fixes with Real Payoff

    Switching to bathroom-rated lighting is less about technical specs and more about eliminating the routine frictions that stack up day to day. Gaskets that actually seal, cable entries that block moisture, and brackets designed to resist corrosion mean cleaning returns to being occasional, not desperate.

    • No more drywall stains or ceiling rings. Good seals keep steam out of the mounting, so marks don’t return.
    • Consistent brightness. No more edge gloom or slow light-up—coverage remains even, eliminating the telltale shadows that signal stubborn condensation.
    • Stable cable paths. Covered cable entries prevent hidden stains and out-of-sight corrosion, so the support stays solid even behind the trim.

    You won’t see instant change, but you’ll notice what’s gone—the need to fight glare, chase shadow patches, or clean the same streaks repeatedly.

    What to Check Before You Replace—or Buy

    The label and build matter as much as style. Check for real IP (Ingress Protection) ratings, or clear “damp/wet location” listings—not vague claims, but explicit specs on the product tag or manual. A fixture that skips these isn’t made to stand up to bathroom conditions, especially directly over a shower or beside a mirror constantly fogged by steam.

    Key warning or deciding signs:

    • Gasket seals tight against lens and trim, not just decorative bands
    • Mounting screws and brackets coated or made rust-resistant
    • Cable entries with visible moisture blockage—nothing left exposed behind the housing

    Miss these, and you’re left with a setup that demands constant “fixing,” never truly resolved.

    Why the Right Details Outlast Quick Installs

    Bathroom-rated fixtures aren’t about overbuilding for code—they’re about defending the daily routine against the slow creep of dim corners, stains, and breakdowns. Seals, cable supports, and real water resistance mean a busy bathroom keeps functioning without distraction. You don’t have to second-guess the mounting after a humid week or race to clean before light output dips again.

    No installation is immune to every flaw, but when you choose setups that solve for steam and repeated friction, the room keeps working for you, not against you. The difference isn’t just in appearance, but in how often you’re interrupted—or finally left alone—by your lighting.

    For practical indoor lighting, bathroom fixtures, seals, cable supports, and more, visit LightSupport.

  • Why Routing Cables Along the Shortest Path Improves Workstation Efficiency

    A desk that looks organized at 8 a.m. can start working against you by noon. Cables that were “tucked away” during setup slip loose the first time you swing your chair out, stretch for a notebook, or push a drawer back in. Suddenly, that spotless surface is undermined by hidden slack bunching near your feet, cords dragging under the chair base, or a USB cable knotted behind an organizer. The frustration isn’t just visual—each detour or interruption in your workflow, from accidentally yanking a charger to untangling cords in a rush, signals that the setup isn’t actually suited for real, repeated work. This is the difference: either the way you route, clip, and control cables shields you from daily slowdowns, or it lets small friction points wear at your flow all week long. This is the world of desk organizers, cable trays, clip sleeves, under-desk storage, and the quiet but constant pressure they impose on—or remove from—your day-to-day session.

    Why the Clean Desk Snapshot Rarely Survives the First Week

    Initial order rarely means functional order once you get to work. The routes your cables take—tucked behind a drawer unit, zigzagged with extra slack, crammed around under-desk storage—begin to reveal weak points as soon as you start moving between laptop, keyboard, and paperwork. The clean look fades fast when a monitor cord pops free during the first big chair scoot, or a charger’s extra line pools underfoot by midweek. If you need to pull out a notebook beside your keyboard or reclaim desk depth lost to organizers, you may find hidden cables suddenly right in your reach path. The setups that survive aren’t just neat; they handle movement without letting friction return.

    Every dropped wire in the under-desk zone, every cable loop slipping out between your legs or pinched by a barely-closed drawer, can balloon into actual workflow cost—untangling messes, dealing with dust clumps, pausing to hunt for the right plug. Those seconds add up and quietly break your focus far faster than pure surface clutter ever did.

    Direct Cable Clips: A Small Change with Daily Impact

    Clipping cables directly and tightly along the shortest route—from device to outlet or hub—locks your setup into usable shape. No more shifting bundles falling out after every desk reset. No exposed slack waiting to snag an ankle during a fast swivel. Instead, cords follow your desk’s frame and lines, staying clear of both legroom and reach zones. It’s not about hiding wires for a cleaner look; it’s about stopping the pattern of repeated cable rescue when you swap devices, move a monitor, or spread out paperwork for a midday draft.

    Every cycle—sliding into a task chair, re-connecting a laptop, switching from typing to handwriting—happens without interruption. No time wasted shoving cords back behind an organizer, kicking aside a slack loop, or re-seating a misplaced cable box. The desk finally keeps pace with you, not the other way around.

    What Really Happens When You Choose a Longer Cable Route?

    For most people, the first instinct is to hide cables deep in trays, snake them behind drawers, or wrap them around the far edge to keep the desktop clear. But with each foot traveled, slack collects out of sight. By the end of the week, that hidden slack pools up where you move—cables drooping into leg space, popping out when you shift the chair, or jamming behind under-desk storage you thought kept things organized. Switching devices becomes a game of follow-the-cord to wherever it got wedged last. The tradeoff for concealment is constant micro-adjustments and the routine “where did the end go?” delay every time you set up for the next work block.

    Wider cable paths are also more exposed to accidental bumps—especially if you’re using under-desk storage, rolling task chairs, or need to shift your keyboard and monitor for changing tasks. Over time, surface tidiness gives way to returned clutter and the hidden friction of cords blocking basic movement or getting yanked unexpectedly.

    Everyday Friction: How Cable Routing Affects Real Routines

    Consider a typical session: you roll in, slide your arm forward to wake the laptop, and shift a notepad beside the keyboard. If a charger cable runs under your legs or a USB cord snakes around a filing unit, you’ll feel it: a tug on your foot, an awkward pause as a wire hooks under a chair wheel, or momentary hunting for which plug got stuck. Even a tidy surface can betray you if each device change means ducking under the desk or pulling slack from a tray. These aren’t rare events—they’re the everyday friction that builds until the desk starts to feel like a barrier instead of a tool.

    Short clipped cable runs protect against this by following the edge or underlip of the desk, where your feet and reach never interfere. When you move from typing to sketching, reposition a monitor, or swing for a quick file grab from a drawer, nothing snags or needs a reset. This isn’t just about power lines; it’s the same for USB hubs, docking connectors, or even the stray charging cord for wireless headphones. The workflow stays unblocked even as your surface shifts throughout the day.

    The Rediscovered Comfort: Desk Resets Become Effortless

    There’s a hidden payoff when cables are clipped short and anchored out of reach: rapid resets after every task switch. One hour’s focused work, the next juggling a video call, then spreading files for a review—your desktop stays clear, and there’s no pile of tangled cords to sweep aside or tuck back. It lets you reclaim desk depth, shift devices without tracing stray wires, and move back into the zone without a physical cleanup every session. This is what makes a setup easier to revisit, day after day.

    In practice, cutting cable length and clipping tightly to the desk meant I stopped dealing with cords coiling around my ankles or blocking drawer openings. The power strip, anchored out of my leg path, no longer collected dust. Plugging in, switching monitor sides, or grabbing a notebook from beside the keyboard started happening in seconds instead of minutes, without needing to untangle or re-route anything after a busy stretch.

    Practical Observations from Repeated Use

    How Many Clips Do You Really Need?

    For most setups, two or three clips per cable run are enough to lock down power and data lines both above and below the desk. Place one near each endpoint—close to the device and near the socket or hub—with a third midway if the cable crosses open space or passes by a drawer. Always leave just enough slack to swap devices without tugging, but not enough for loops to dip into reach or leg zones. Overtightening risks damaging cables and also creates new problems when something needs to move.

    Clips vs. Trays and Boxes: Which System Fits Your Routine?

    Concealed trays and boxes fit setups where nothing ever moves—where your devices stay locked and you never unplug. But for any active desk, clips beat trays for actual usability. Swapping a charger, unplugging for a standing session, or switching a display’s position? Clips let you change things instantly, while trays hide mess until it spills out or slow every adjustment with extra steps. The more you move monitors, swap devices, or reset your work zone, the more the open, visible logic of clipped cables makes life easier.

    Stopping Clips from Failing or Falling

    If cables keep appearing on the floor or out of their clips, it’s almost always dust, old adhesive, or leftover unused slack. Clean surfaces thoroughly before sticking, tension the cables gently, and give everything a test-adjustment after setup. After an hour or two of use, check for droop and reseat any weak points before they become problems. This two-step approach—cleaned surfaces and immediate feedback—catches 90% of repeat failures and keeps resets genuinely frictionless.

    What Makes Clipped, Direct Cable Runs Work Long-Term?

    The win isn’t aesthetic. Direct, well-anchored cable runs remove the invisible friction points that grind down momentum—stealth foot snags, charger loops springing onto the floor, or missing cables delaying a meeting. Over weeks, that reliability is what makes the desk inviting instead of something you “reset” out of guilt. Even as priorities and layouts shift, the system keeps pace.

    It’s almost automatic: setups that genuinely support movement, fast device access, and routine resets stay in the background—never returning as a source of small, compounding annoyance. By contrast, hidden or extended cable paths come back to haunt you at the worst times: a charger disappears when you’re already late, or a power lead pops loose during the last work sprint. Either your setup shrinks friction with every cycle, or it hands you invisible obstacles as the real routine returns.

    Explore the full WorkBasic collection

  • Choosing Outdoor Storage That Adapts to Real-World Yard Use

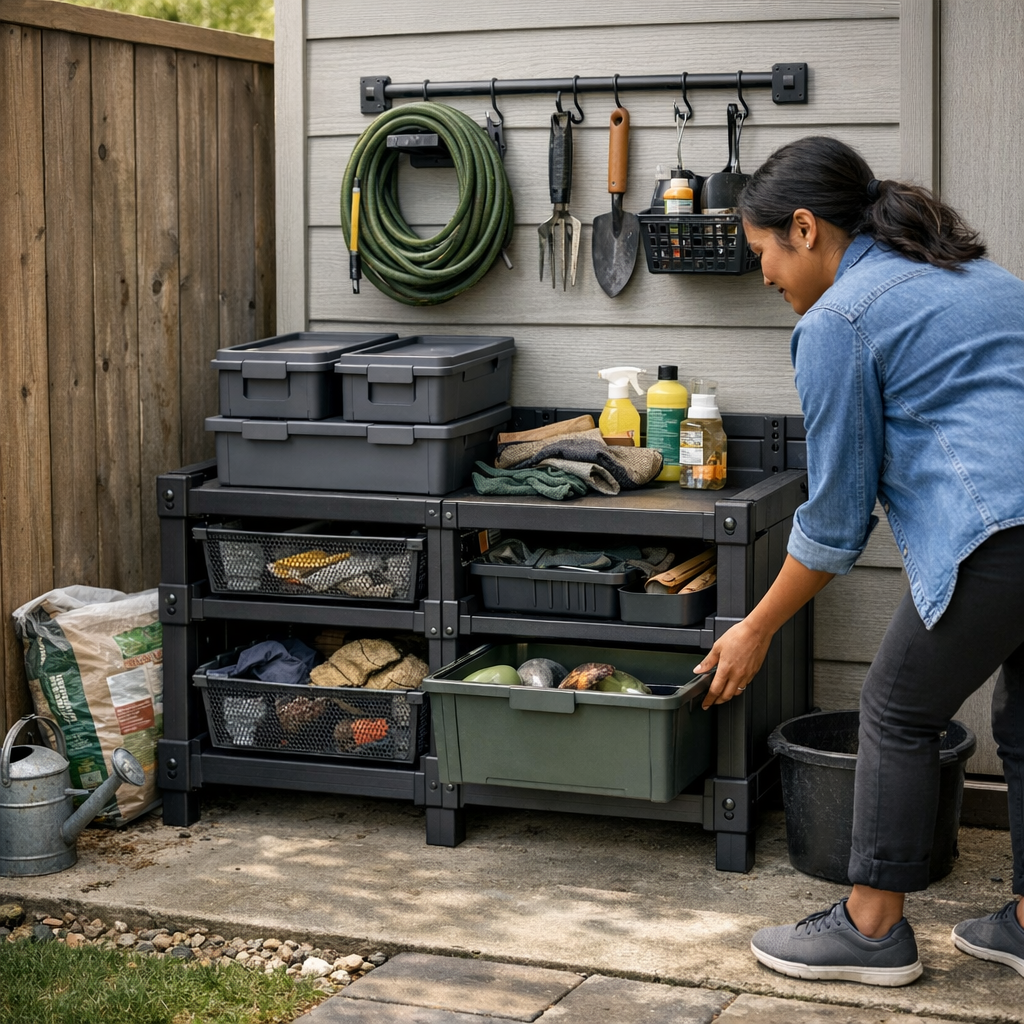
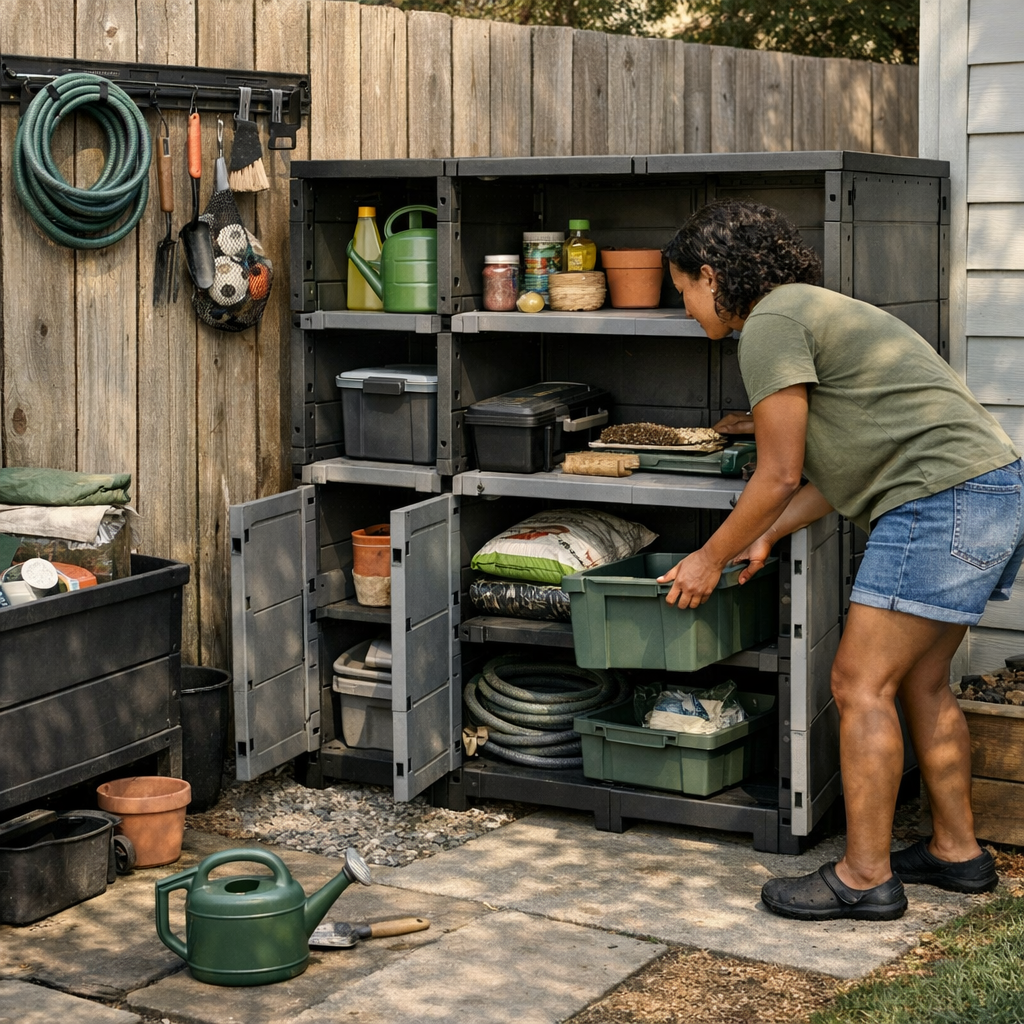
    The difference between an outdoor setup that actually works and one that quietly wears on you shows up the first time you try to put something back in a hurry. Out here, it’s not about how much storage you line up along the fence or how clean the shelves look to visitors. The test is what happens after three weeks—a regular Saturday, kids’ gear back from the grass, garden tools trailing fresh dirt, and barely a square foot left uncluttered on the patio edge. Suddenly, the question isn’t “Does it fit?” but “Can anyone move through here without redoing yesterday’s whole reset?”

    When Outdoor Storage Looks Right But Doesn’t Work

    That new wall rack or modular cabinet promises order at first—bikes lifted, hoses untangled, bins off the patio. And yes, for the first week, the visual is strong. But real use starts to expose each small friction. The side-yard wall system fits—until it blocks the only path to the outdoor faucet. Those tall hooks you installed for floaties work—until they require a two-handed reach after a long swim. Shelving that measured out perfectly on paper feels pinched in real life, hemmed in by deck rails and grill wheels, forcing you to sidestep around every “just for now” pile that accumulates by day three.

    The real break isn’t sudden mess. It’s when returning something takes a workaround—a pause, a shuffle, a “just put it here for now”. The storage starts to look efficient, but it feels interruptive. That’s where most setups reveal if they actually hold up under repeat use.

    Where Friction Builds Up: Ordinary Use, Real Blockages

    If It’s Easier to Set It Down Than Put It Back, the Setup’s Losing

    End of the afternoon: the chalk bucket and scooter in hand, you head to the garage wall. But now the track system is buried behind the bikes, and the idea of threading everything into place is more chore than incentive. So the “temporary” stack grows next to the racks. Each round, the pile gets more permanent—and returning things, in theory, gets slower in practice.

    The ‘Front Row/Back Row’ Trap

    Wall racks with two or three rows: great in the store, crammed in reality. Reach for a saw behind the trimmer and you’re wiggling past the last three things you managed to hang up. Less-used gear creeps deeper behind the regulars, and every Saturday becomes a low-level reshuffle just to get out a ball or clip a hanging basket. More rows don’t help when the path through them gets tighter every week.

    Stand-Up Cabinets and “Door Pinch”

    Big, vertical storage units promise space—until you try to open the doors with the patio chairs pressed close, or the grill halfway rolled into the zone. Each trip becomes a shuffle: swing the door, dodge the edge, nudge a chair, wedge in the rake. Soon enough, doors are left half open, and what you meant to clear just piles up at the entry—staring you down next time you pass by. “Door pinch” only shows up when the daily flow gets squeezed sideways.

    Modular Promise vs. Modular Pile-Up

    Flexible modules—one for trowels, another for soccer balls, maybe a tall one for yard bags. But when pieces are heavy or only fit one way, the flexibility is mostly theoretical. Need to swap bins? You unload half of what’s there. Modules become static islands that attract overflow rather than fix it. The “move it anywhere” pitch dissolves when moving it anywhere requires a complete empty-and-shift.

    Rolling Bins: Fast Access, Fast Chaos

    Bins on casters solve quick resets—until you’ve got two crowding the only path or one drifting sideways into the side-yard route. In tight utility strips, mobile bins become obstacles. They’re designed to speed up cleanup, yet often block the very thoroughfare they’re supposed to clear. Not anchored, they turn into stray item magnets and reason for roundabout detours on the way in and out.

    Mixed-Use Zones: The Setup Tension Appears Fast

    No backyard or garage edge stays single-use. The soccer patch becomes an outdoor dining spot, the spot for tools flips to bikes, and summer’s perfect cube storage serves as July’s overflow pit. Actual use always pushes against the original footprint: that one fence corner swallows all the forgotten gear, the patch near the gate becomes a dead zone for wayward shoes and bags. It’s not just clutter—it’s a signal the system’s traffic lanes aren’t keeping up with reality.

    Day one, the layout looks tight. By week three, you’re squeezing the mower past a rolling bin that’s drifted half a foot too far, or shifting a stand-up shelf two inches just to clear the gate. It feels minor until it happens every weekend—slowly stealing walkway space, making daily resets drag out, and crowding out the clean lines you started with. “Fits outside” turns out to guarantee nothing about movement or reset.

    How to Know When Your Setup Actually Works

    Forget how tidy it looks right after setup. The test is how easily you can return things after a regular day—with kids, projects, and guests in the mix. Do you end up blocked, or does the loop flow? Here’s what to watch for:

    • You don’t have to pull out three things just to put one back.
    • There’s no overflow pile that keeps returning to the same edge, week after week.
    • Main walkways stay open—no matter how much gets used and returned.
    • Putting away one thing doesn’t trap what you put away yesterday.
    • The reset gets faster (not slower) the more familiar you are with the setup.

    The goal isn’t maximum storage. It’s a smoother loop: fewer roadblocks, less double-handling, no mystery piles building up at the boundaries. When the setup takes care of the return flow with minimal thought, you see the actual difference between organized and just “organized-looking.”

    Setup That Holds Up: Built For Repeat Use, Not for Show

    A storage system that works makes itself nearly invisible—paths stay open, the right wall spots do the heavy lifting, and return trips don’t trigger a new mess. There’s no such thing as flawless: the fence still blocks a door some days, or the deck eats up half the available floor space. But a setup that fits the odd angles, avoids corner pile-ups, and doesn’t let a single clumsy bin rule the reset changes the entire rhythm of outdoor life. You’ll still bump into the occasional bottleneck, but you won’t keep circling the same frustration, over and over.

    The real win isn’t visual—it’s practical. When moving through your space doesn’t require detours, shuffling, or repeated second-guessing about where something should go, the setup is doing its job. When every reset spirals back into the old pattern—blocking access, stacking in dead corners, forcing a two-step just to use the patio or side yard—it’s time to reevaluate. Not for appearances, but for flow and function.

    Find solutions built for real outdoor routines at TidyYard.