Blog

  • How Organized Pet Travel Bags Reduce Friction on Every Stop

    A pet-travel bag that looks organized in the driveway often collapses into chaos by the second or third real stop. The first time you reach for wipes or treats, everything is where you placed it. But once the bag hits the daily loop—seat to sidewalk, drive to curb, repeat—preparation starts losing to awkward overlap, tangled essentials, and that creeping sense of not knowing where anything actually is. Anyone who’s rushed to grab cleanup supplies while a leash knots around their arm or who has dug past their own keys to find a snack for a restless dog at stop four knows: “packed” doesn’t always mean “ready.” The real test of your setup isn’t at launch—it’s how it resets after your third interruption, your fifth reach, your seventh little mess.

    Prepared—but Only Until Real Movement Begins

    Carry a pet bag that seems sorted—carrier in one hand, wipes tucked, treats zipped away—and it lasts until real-world repetition hits. One smooth grab for a leash is all it takes to begin unraveling that early neatness. By midday, wipes are twisted in leash clips, your keys have joined the treat packet, and what started as compartmentalized dissolves into a muddle that blocks every quick seat-side reach. Each stop multiplies small setbacks, turning basic transitions—exit, re-load, next errand—into hesitation and scramble.

    What looks tidy isn’t always built for continual movement. A bag that shines in a pre-trip checklist rarely holds up to seat-side use, especially once your stops run back-to-back.

    The Hidden Cost of “All-in-One” Packing

    Most pet-travel bags capture buyers with a deep center space and a few loose pockets. But movement throws everything off balance. Bowls crowd comfort blankets, wipes vanish under hardware, and treat pouches run loose. With each ride, you lose a little more structure. By the third or fourth stop, every grab is a guess—one extra reach here, a handful of items shoved aside there, wipes suddenly buried just when you spot a puddle on the sidewalk. It’s rarely a meltdown, just a low-level scavenger hunt that slows down every pet-handling reset.

    This friction isn’t dramatic, but it sticks: sliding a harness aside again, nudging a comfort toy out of your reach, or fumbling for owner items under dog gear. The afternoon’s errands start to drag. It’s not about disaster, but about the slow drag in every repeated motion—a bag that looks like it could save you time actually steals it, stop after stop.

    Overlap: The Repeated Weak Point

    The hidden flaw isn’t a messy bag; it’s the silent overlap at critical access points. Put wipes and comfort toys together just once and you’ll chase both at every stop. Share space between pet and owner items and keys migrate to the wrong corner. Those overlaps create jams—not just in big moments, but in every reach when you want a quick cleanup, a leash swap, or a treat for a bored dog at the curb. Packing “together” guarantees distraction and delay, multiplying interruptions the longer your trip lasts.

    Real-World Scenes: When Repeated Use Exposes Every Flaw

    • Stop one: The leash is exactly where you stashed it. You’re in control, for now.
    • Stop two: Wipes, now twined around your water bottle, make one-handed cleanup clumsy. Your keys drop into the wrong pocket chasing a snack.
    • By stop four: Comfort toys have slipped under owner gear. The treats have drifted—soothing your restless pet means emptying half the bag just to dig them out. Momentum stalls at every access point; you shuffle, reshuffle, and reset on the fly.

    The issue isn’t a single mix-up, but the feedback loop—each lost second on cleanup or comfort starts compounding, making every restart less smooth. Overlap and slide turn a bag that looked “prepared” into a fumble zone, especially when every reach is a fresh interruption and new friction stacks onto the last one.

    Dividing by Function: Where Real Travel Improvement Happens

    Organizing by checklist fails under pressure. The breakthrough? Separate what you use, not just what you own. Dividing by real travel moments means:

    • Cleanup: Wipes and waste bags each in a side pocket, always ready at the car door—never competing with bowls or leashes.
    • Comfort, hydration, and treats: Grouped together, not buried or floating next to your wallet or phone. Water bowls stop sliding, chew toys are held in place and remain accessible.
    • Owner essentials: Wallet, phone, keys—isolated, never stranded under pet supplies. No more accidental pet hair stuck to your money or delays with your hands full and no key in sight.

    On paper, it’s a minor change. In practice, it works: each item’s job fits its pocket, every stop gets easier. The bag resets after each use, not against you but with you. Your most-used travel essentials sit at the edge, not buried. Cleanups happen on time. No more hunt-for-treats while your dog pulls at the leash or wipes lost the moment you actually need them. The tempo of pet travel—quick stops, seat returns, leash transitions—finally flows with less interruption.

    Repeated Reach, Real Relief

    The payoff isn’t some magical “never messy again” promise. It’s small, real advantages: fewer repeated grabs to get essentials, less time spent digging for wipes at curbside, steadier handoffs between errands. The pet stays calmer. Restarting the trip feels less like hitting reset on a puzzle and more like picking up exactly where you left off. Structure, not just storage, lifts the friction out of daily movement rhythms—and you notice the difference with every reach that just… works.

    Recognizing the Difference: Looking Organized Vs. Moving Smoothly

    Initial neatness fools almost everyone. The difference between a “showroom-ready” pet-travel setup and one that survives a busy afternoon boils down to this: does it keep friction away after your fifth repetitive seat-side stop? The real value of a bag shows up in how little it interrupts the flow, not just in tidy packing layers. Visual order is great for a single photo—but only a structure built for repeated movement lets you make stops, quick pivots, and cleanup without dragging out every restart.

    Packing for pet travel isn’t about assembling a perfect-looking kit. It’s about a setup that resists mess, spillover, and overlap—even after repeated reaches, pit stops, and in-motion resets. If you’re tired of a bag that gets heavier, messier, or slower with each use, it’s time to rethink what “prepared” actually means. Sometimes, what you need isn’t more gear—but a better structure behind every stop.

    Visit PawGoTravel for practical, real-world pet travel solutions: http://www.pawgotravel.myshopify.com

  • Why Leaving Slack in Wiring Prevents Flickering and Light Failures

    The real test of a lighting install isn’t the first flip of the switch—it’s weeks later, in the spaces you cross by reflex. If you’ve paused mid-stairway because the landing vanished into shadow, or crossed a hallway and felt one side dull for no reason, you’ve seen how the wiring beneath a flush mount or sconce matters long after the room looks “done.” In high-traffic spots—hallways, stair turns, laundry corners, anywhere you move without thinking—the way those wires were routed makes or breaks daily ease. You can have a room that looks bright all day, but if illumination stutters at the wrong moment, it’s not just cosmetic: it’s a real drag on movement, safety, and routine.

    When Tight Cables Create Subtle Failures

    A fresh flush mount or wall sconce might look solid, wires crisp and hidden, but space isn’t static. Floors flex, stairways shake, and what felt immovable on install starts to shift as a home breathes. Tight wiring—pulled for appearance, not function—can’t flex with this movement. The insulation stretches right behind the ceiling or wall, usually out of sight until trouble starts.

    The first week or two everything behaves. But then: a flicker as you reach for the laundry detergent, a light that hesitates when you round the hallway’s bend, or a stair landing that falls into a dim patch just when your hands are full. The culprit? That hidden wire, straining every time the room moves or you nudge the fixture. What was “neat” at install has become a weak link.

    Scenes Where Slack Makes the Difference

    Hallways and Stair Turns: Where Weakness Shows Fast

    Consider a hallway ceiling light installed where the corridor narrows or a stair meets a landing. At first, the spread feels even—no dark corners, no second thoughts. But let the weeks pass, let footsteps thump above, and subtle failures emerge. You notice a side wall growing dimmer, or the whole fixture blinking when someone jogs the stairs. This isn’t bulb failure but wiring that was stretched too taut. Suddenly the lighting stops behaving intuitively. A missed footing or a half-lit step isn’t minor; every unreliable cycle is another reason to distrust what should be predictable visibility.

    Laundry and Utility Areas: Lighting That Doesn’t Keep Up

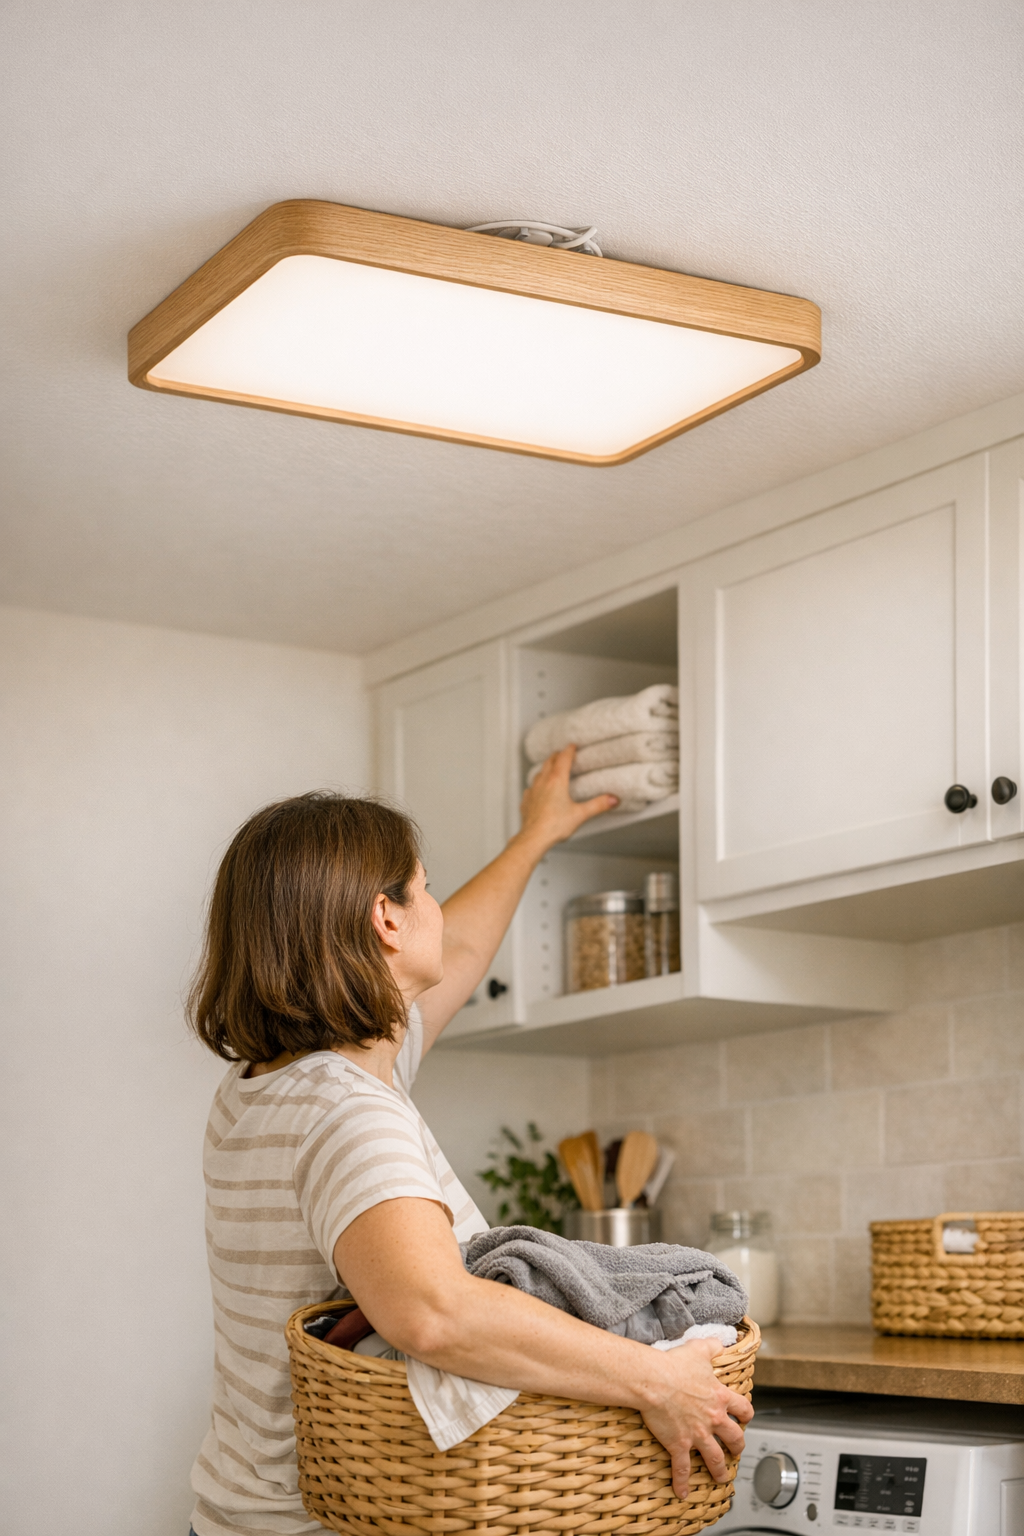
    In the laundry room—often cramped, lined with appliances, cabinets crowding the ceiling fixture—poor slack is a repeat offender. Maybe there was never much light to begin with, but now the fixture blinks off just as you balance bleach and towels. This headache usually isn’t the bulb but over-tightened, stressed wiring hidden behind a panel or clipped by shifting sheetrock. The result: the very zone built for routine gets less reliable every time a load cycles through.

    Mirror and Task Spots: Subtle, But Unforgiving

    Even in spots that seem benign—vanity wall sconces, hardwired bath lights—a too-tight wire becomes a problem over time. Doors slam, pipes vibrate, the room reverberates. Suddenly, the light over the mirror winks out as you reach for a razor or adjust the faucet, making grooming awkward and uneven. It’s not always obvious from the outside, but the sign is unmistakable: an area meant for precise visibility becomes unreliable, turning daily routines into small calculations around light that can’t be trusted.

    Why Leaving Slack Safeguards Reliability

    What does an extra curve in a cable change? Everything about ongoing function. Slack wiring absorbs vibration, lets insulation flex, and keeps connections whole even after countless nudges and minor shifts from cleaning or movement. In high-passaged spaces—think kitchen-to-laundry transitions, narrow stairwells—a small loop behind the fixture is the line between a light that survives daily use and one that gives out under pressure. The risk of failure here is practical: a loss of usable light, not just for a second, but every time you need that zone illuminated for real tasks or safe movement.

    The rule? About an inch or two of extra cable past the minimum needed at the terminals—enough for a gentle bend, never so much it feels loose or hazardous. This isn’t messy work. It’s a deliberate adaptation so the fixture “moves” with the building instead of being set up for its own failure.

    What Does Pinched Versus Slack Wiring Feel Like Day-to-Day?

    This isn’t an installer’s quirk—it’s a structural reality you live with. Taut wiring means flicker-prone lights, sudden outages when jostled, or switches that sometimes need a second nudge. On the wrong day, that’s an armload of laundry dropped in the dark, a staircase paused in half-step, or a countertop edge you lose track of in shadow. These aren’t luxury annoyances; they disrupt safety and the natural flow of tasks.

    Where slack is left, the difference turns invisible in the best way: the lighting just works, from season to season. No surprise dark spots as the house settles, no guessing if your grooming light will keep up, no sudden disconnects after washing the cabinets. The area functions exactly as intended—secure, repeatable, predictably lit for whatever you’re doing.

    Where Slack Matters Most Indoors

    • Hallways and corridor turns: Constant movement leaves no room for outages—lighting must stay stable for every step.
    • Stairways and landings: Minor interruptions become split-second hesitations; slack prevents these stutters in visibility.
    • Laundry and utility spaces: Tight quarters, frequent shifts, and appliance vibrations all punish rigid wiring harder than open rooms.
    • Under-cabinet and task lights: In snug installs, a small allowance prevents premature connection fatigue, keeping surfaces consistently usable.

    Practical Tips for Everyday Installers and DIYers

    If you’re replacing or installing fixtures in these problem zones, bias toward just a bit of forgiveness behind every connection. A small, deliberate curve—never a straight, tensioned wire—makes all the difference. Ignore the urge to “tidy” by pulling everything tight and flat. If you’re chasing a new flicker or unexplained failure, especially after a week or two, open the fixture and check if the original install locked the cable in tension.

    One proven check: before finalizing a fixture over a laundry zone or in a high-traffic corridor, gently nudge or wiggle the housing—watch for instant flicker or dimming. If it responds, back off and allow a bit more play in the cable reroute. That tiny adjustment is often the difference between weeks of steady use and endless small annoyances.

    Not Just a Pro Trick—A Routine Change That Pays Off

    The advantage here isn’t theory, it’s everyday life. Fixtures installed with just a bit of allowance keep working during the mundane: when your arms are full, when the stairs creak, when the mirror gets wiped down one more time. These are the differences that separate a light that behaved for photos from one that’s still working when the routine is anything but ideal.

    Good wiring isn’t about chasing a perfect install—it’s about lights you don’t have to second-guess, season after season, routine after routine. When lighting becomes seamless rather than a source of friction, movement and tasks regain their simplicity.

    For indoor lighting that’s built to last through real movement and change, see the range at LightHelper.

  • Why Soft Cable Sleeves Outperform Rigid Trays in Dynamic Workspaces

    When the first cable snags—a charging wire dragging your chair or knotting up behind the monitor—that’s when the reality of desk organization cracks through the tidy promise. It doesn’t matter how carefully you route everything at setup: trays installed, surface empty, wires tucked away. The moment you actually start working, friction returns. A notebook crowds the keyboard, a laptop swaps out for another device, a monitor joins in a hurry, and that rigid cable system that looked so sharp starts fighting back. Cords pull tight across real reach paths, force you under the desk to swap chargers, and trap you into awkward resets. Every ‘quick update’—switching a device, moving the charger, making room for notes—costs actual minutes, lost not to mess, but to the hidden fight beneath the surface.

    Why fixed cable trays feel neat, but cost you time

    Fixed cable trays and boxes give the illusion of perfect order—wires locked out of sight, the desk surface museum-clean. But perfection collapses as soon as you need to interact with the system. Daily tasks like unplugging a phone or swapping a charger mean blindly reaching around, tracing wires trapped in unforgiving channels, and accidentally pulling loose a cord you didn’t mean to touch. Instead of a seamless workflow, you get resistance: under-desk wires bunching near outlets, compressing at the corners where every device converges, and growing less manageable with each routine adjustment.

    On compact desks, or in shared work areas that see a parade of tablets, notepads, and multiple computers, the limits show up fast. Changing where a charger lands so it clears the keyboard means rethreading and re-routing, not a quick grab. That clean aesthetic starts to cost time and posture: you bend, you reach, you reset—again and again. What should be an efficient workspace becomes a sequence of obstacles, each one breaking your train of thought.

    Soft cable sleeves: Flexible order for real work cycles

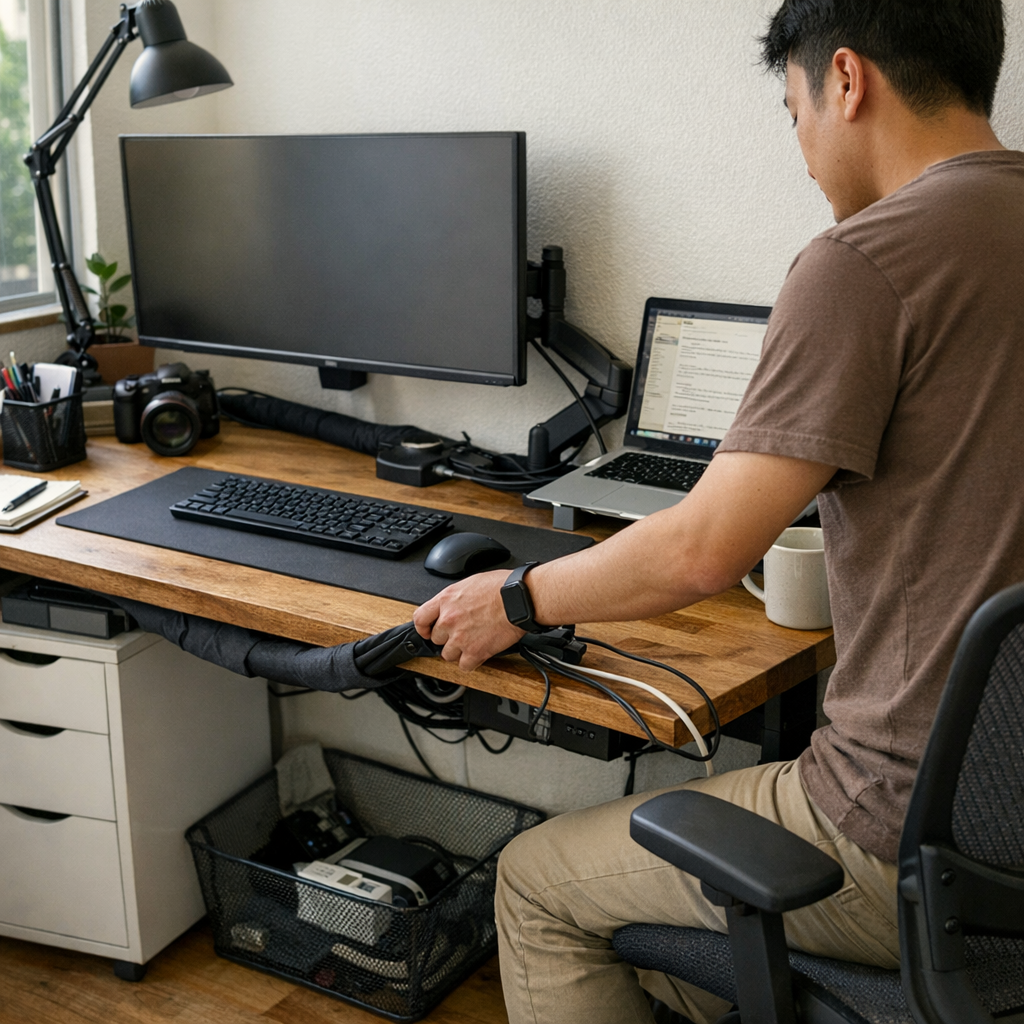
    A soft cable sleeve is not about invisibility—it’s about flexibility on demand. Instead of forcing every wire into a fixed duct, a sleeve runs along the back edge or through the main reach zone of your desk, letting you group cables but keep them mobile. The difference shows up at the reset: with a good sleeve, adding a new device or unplugging after a session becomes a one-handed, above-desk motion. There’s no full system teardown. No crouching.

    If your week means swapping laptops, grabbing a docking cable for a meeting, or pulling a charger from your seat, a sleeve gives and moves with you. You slide the wire free at arm’s reach—no tools, no hunt. The core of your setup stays untouched; the cables respond to you, not the other way around.

    Scenes from a typical desk: Where sleeves outpace hard channels

    • End of day, quick change: After hours of device rotations—laptop, tablet, USB drives—the cables in the soft sleeve haven’t knotted or tightened. Unplugging a charger is a single, upright motion. No crawling for slack, no posture break.
    • Multi-device juggling: In setups where you constantly switch from monitor to handheld, rigid trays trap cables together so each change means two steps. Sleeved cables run parallel: move one, the rest lie flat. No chain reaction, just a simple swap.
    • Reset between sessions: Clear the notebook, bring in a keyboard for focused work, and the soft sleeve shifts in step—no tangles forming at the edge, nothing snapping or catching as you adjust position mid-task.

    When the setup’s limits become obvious

    Flexible work demands flexible structure. Rigid trays turn every device swap into a chore: Need to reach an outlet blocked by a drawer unit? Want the monitor shifted sideways late in the day? Hard paths fight every nudge. Cables pull taut, plugs stretch to the limit or pop loose, and the only way forward is crawling beneath the desk—hoping you don’t lose track of which wire you’re tracing in the shadows. Friction piles up quietly until it’s habit.

    Sleeves flip the logic. The cable bundle hovers at the hand’s edge. One glance—one reach—delivers the wire you want. In desks with little depth or too many accessories packed in, sleeves prevent the constant crowding of cable paths against legs, drawers, or moving equipment. Flow returns to the surface.

    Real changes from swapping out hard routes for sleeves

    Replace rigid trays with sleeves, and daily motion loses its obstacles. Instead of plotting how to fight the setup, you finish a call and reach for your notes in one move. Cables flex and follow, no snag at the wrist or elbow. Uprooting the whole under-desk system is done. Changing monitor height no longer means resisting the cables through brute force—everything adjusts, no tension left behind. The desk feels open to changes, not locked down by previous decisions.

    Not always prettier, but unmistakably quicker

    Soft sleeves aren’t invisible—if you want a display-model look, this is the trade. But during actual work, the benefit is immediate access and faster resets. No more searching for missing clips or re-routing half the desk when a device changes. Just a direct, tool-free adjustment—whatever your routine or how often it shifts. Unlike rigid channels, sleeves hold their shape without policing every move.

    Beneath the surface: Small issues that add up

    Most cable management advice celebrates hiding chaos, not clearing friction. But you feel the difference in the details—every time a rigid path ignores your new plug or forces another awkward reroute. Tray systems make you re-pack channels for every shift or else live with dangling wires. Over time, cables wear faster, sleeves split, sharp edges cut in, and the system feels less like an assistant and more like a daily speed bump.

    Sleeves trade visual uniformity for the real power to reset: slide, swap, change direction at any point in the cycle. The desk adapts to routine instead of demanding you adapt to it. Micro-interruptions slip away as the setup fades into the background—your focus stays on work, not on how the tools connect.

    Quick FAQ: What’s genuinely different about sleeves?

    How do soft cable sleeves compare to cable boxes or trays?
    Sleeves offer slip-and-grab access—no screws, no set routes. Rigid boxes and trays are great at hiding, but every change is a mini undo/rethread project. When devices swap regularly, that’s lost time and extra hassle.

    Who benefits most from switching?
    Anyone who actually changes their setup: multiple devices, plug-and-go work, or shared desks. Families, hybrid teams, or single users with a shifting routine see immediate payoff—fewer hidden tangles, less reset lag, and more usable surface.

    Where do hard channels go wrong most often?
    At every pinch point—corners where cables pile up, outlets shared between chargers, or any desk with drawers and movable gear. Fixed tracks turn all cables into a single rigid unit, making every tweak a bigger process than it should be.

    The cleaner look versus the easier reset: What really matters?

    A flawless-looking desk means nothing if every change becomes a delay. Over time, the setups that keep pace with your routine—not those that freeze it—return the time and focus each day. Swapping rigid trays for sleeves isn’t about aesthetics; it’s about a desk that’s easier to reset, easier to reach, and allows real work to happen, even while your needs keep changing.

    The difference isn’t just cosmetic or “nice to have.” It’s whether your workstation falls into daily friction or quietly supports whatever your next work cycle throws at it.

    Explore the full WorkBasic collection

  • How a Simple Pause at the Door Transforms Your Dog Walk Routine

    If there’s one spot where your daily dog routine keeps tripping you up, it’s the before-door scramble. You feel it in the pressure to get out: leash in one hand, shoe half on, hunting for a poop bag while your dog vibrates at your feet. The “walk” always starts at the threshold—but the first real problem starts there too. One rushed moment and you’re fighting a leash knot before you hit the sidewalk, dog already surging, your plans and mood disrupted in seconds. Over and over, it’s the same friction point—no matter how tidy the area looks or how many times you declare you’ll get out smoother next time. The DogPile world starts right here, where setup and flow collide every single day.

    The Real Flow Problem: Skipping the Pause

    Running late? Most owners try to power through, yanking open the door as soon as the leash is clipped. The logic: why slow down when your dog is practically bouncing through the wall? But that skipped pause is exactly where the chaos begins. Dog lunges, leash tension spikes, your arm’s twisted, and control is already gone—long before you see the street. That scramble isn’t a one-off mistake; it’s the usual pattern, replayed until the routine feels less like a dog walk and more like a starting pistol for daily hassle.

    Most days, you try to ignore it. Entryway tangles blur into background noise, and maybe you only really notice when your dog nearly sweeps your legs or sidesteps out the gap before you’re ready. But walk after walk, you end up bracing for that initial burst—not enjoying it, not really resetting. The doorway isn’t just another spot in the house; it’s the daily edge where your system either holds or slips.

    Small Oversights, Big Repeats: Why the Entryway Routine Matters

    On paper, an entryway feels basic—grab leash, open door, go. But the difference between “fine” and “friction” is buried in the seconds before you step out. Every skipped pause multiplies annoyances:

    • Leash looped under your dog as they corkscrew for position
    • One hand scrambling for the handle; the other juggling bag, keys, or phone
    • Dog gear—towel, boots, wipes—sprawled near the mat, exactly where you need to move
    • Your dog picking up on your rushed movement and turning it into more chaos

    The entryway can look organized, but still jam you up with the same old tangle. Order isn’t function—and the same weak spot keeps reappearing, no matter how neatly you restack hooks or bins.

    The Built-Up Cost: Repeated Minor Friction

    This isn’t about a wild morning. It’s about the way impatience and small blocks stack up and turn the whole process into something you brace against. All those micro-frictions build steam: your dog’s excitement gets mistaken for readiness, you rush to match it, and the first five minutes become a series of leash knots and off-balance moves. Day after day:

    • You lose control and pace the moment you step out
    • Your dog keeps zooming far longer than needed
    • You’re left resetting your grip, leash, and attitude almost immediately

    The setup sends the signal: launch now, don’t settle first. It shows up in the walk’s choppy start—one fixable thing spiraling into a routine mess.

    Scenes from Real Life: Where the Routine Breaks Down

    The Leash-Grab Gauntlet

    Picture weekday morning: leash buried behind another harness, wiped tangled in a boot, towel slumped dangerously close to your line of movement. You reach for your gear—realize something else is blocking it—and by then your dog’s spinning circles, feeding the tension. Even on a neat-looking hook system, if the path isn’t clear, scramble returns the moment you move.

    Re-Entry Woes: When Reset Comes Too Late

    The mess doesn’t stop on the way back in. You try to wipe paws, but the towel’s somewhere under scattered shoes, or you’re shuffling past a bag pile to hunt down the wipes. By the time you finish, paw prints are already past the mat. Every missed setup is another cleanup job—avoidable, but repeated because access patterns don’t match what you actually need in the moment.

    Surface Calm, Hidden Hassle

    Sometimes, everything looks managed—shoes lined up, hooks clear, mat in place. But standing at the door, you hesitate: do you have to dodge toys, move a bag, or reach awkwardly to avoid knocking something loose? A tidy look doesn’t translate into a flow that works. You’re still doing little reshuffles just to get out the door, and every pause becomes forced instead of built-in.

    Why a Pause Works (and What Counts)

    The fix is blunt: stop yourself and your dog for a real pause at the door. Not to demand obedience—just to let tension bleed out for three to five seconds. Leash settles, you and your dog physically reset.

    • Hang or set down the leash so it isn’t taut—let it truly rest
    • Leave the door closed until everyone visibly slows, even if it’s just a half-breath’s worth
    • No command or perfect “sit” needed. Just a mutual stop in the action—the dog’s front paws steady, body quiet, the energy dialed down

    When you start with a pause, the immediate difference: the leash stays slack, you don’t get yanked out, your own shoulders drop. Pressure releases before you ever cross the line. The expectation for both sides resets—from “explode out” to “move as a pair.”

    No Calls for Perfection—Just a Pause

    This is not about controlling your dog. It’s about letting that one overlooked moment change the feel of the entire outing. When the pause is normal, the scramble start vanishes; tension drops, leash stress vanishes, and you’re no longer bracing yourself at step one.

    From Threshold to Sidewalk: The Flow Difference

    As the pause becomes habit, so do its payoffs. First steps out are quieter, the dog’s pace matches yours, the leash rarely knots, and you stop running the same rescue routine—untwisting, lunging, self-resetting—over and over. Instead, you cross the threshold in sync, starting with actual control and momentum that holds past the first block.

    Repeating the pause anchors your whole walk. It doesn’t just solve the opening seconds; over days, it erases the chain of hassles that used to flood your early minutes outside. The physical habit stays small, but the functional difference only grows.

    Small Setup Tweaks: Making the Pause More Reliable

    If the pause never feels natural, your setup is probably blocking you without you seeing it. Notice where friction hides:

    • Is the leash actually within arm’s reach? Or do you cross the entryway?
    • Are wipes, bags, towels grab-able without interrupting your flow?
    • Is there a clear place for both you and your dog to pause, or will you always step on something?

    A neat entry can still be cramped. Try simplifying: put the leash on the closest hook, clear out one blocked corner, or swap storing items in piles for a single reachable hook or bin. Even small changes can free up the seconds you need for things to settle—making a calm start much more likely, every single day.

    Resetting Friction Points: How Setup Affects Repeated Use

    An entryway that works “fine” on slow weekends can collapse the moment weekday rush returns. If towels, bags, or boots aren’t placed for grab-and-go when your hands are full or your dog’s hyped, friction sneaks back:

    • Stumbling over stray boots or spilled dog gear
    • Juggling last-moment items while your dog surges at the leash
    • Flow that looks organized, but interrupts real pace when put to actual repeated use

    Keep reworking where everything sits, hangs, or lands. The right setup makes the pause almost automatic—less a chore, more a genuine improvement in daily rhythm. If a pause always takes unreasonable effort, your setup is costing you. Catch and fix it where the friction reveals itself, not just where things look best on a hook or shelf.

    The Difference Between “Looking Managed” and “Feeling Easier to Live With”

    You can arrange everything to appear neat and logical—leashes on hooks, shoes in line, gear binned out of sight. But the signal that matters is invisible: whether the flow stops tripping you up once you start moving for real. Look for the places you always have to adjust, detour

  • How Flexible Trunk Organizers Transform Everyday Car Storage Challenges

    Open your trunk after a week of driving, and you’ll see what actually holds up—not in the first tidy glance, but in the repeated returns for one charger, a stray bag, or the umbrella that’s always moved. Every “organized” setup looks fine on Sunday. By Thursday, bags topple, wires tangle under the next bag in line, and reaching for what you need means digging or shifting something in your way. In real use, the cracks show fast: a neat trunk can quickly become a slow obstacle course the more you move, shop, load, or clean. And that’s where the right organizer—flexible, not just pretty—starts to matter in the DriveWellSupply world.

    Why “Clean Once” Organization Can Leave You Stuck

    What makes a trunk setup fail isn’t chaos—it’s the slow drain of speed and sanity from routines that don’t fit the container. A simple bin or net is fine after a single reset. But after two grocery runs, one late return, and a random pet food stop, those “efficiencies” quietly unravel:

    • Grocery bags and boxes drift, rolling cans find their path under seats.
    • Emergency kits end up buried under this week’s new haul.
    • Chargers and cords slip beneath piles, forcing a trunk dig just to charge your phone.
    • Protective liners bunch near the latch, catching on keys or shoes every time you grab a bag in a rush.

    Every short trip adds friction. Loading and unloading stretch out. Cleaning becomes a process, not a quick sweep. The worst part isn’t making do with a messy trunk—it’s when “organized” makes things slower, not faster. A charger lost beneath a heavy bag, a spill demanding relocation of half your cargo: that’s when most drivers realize their setup isn’t keeping up.

    How Flexible Trunk Setups Survive Real-Life Chaos

    Rigid organizers trap gear in a shape that rarely matches your week. After setup, everything feels settled. But the moment your plans swerve—a big return, a heavy sports bag, grocery overload—those fixed bins resist real change.

    Rigid Systems: Stable for a Day, Frustrating All Week

    Take one typical week: you pick up bulk pet food, drop off a large return, and bring home everyday groceries. The hard bin or fixed side organizer can’t stretch:

    • Oversized cargo wedges in, stressing seams or sliding at turns.
    • Every new item shoves “essentials” closer to the back wall—precisely where you hope you never have to reach in a rainstorm.
    • Lighter things slide below, poking out at corners or gathering by the wheel well.
    • That “organized” emergency kit? Pinned under a box you can barely move without leaning all the way in.

    Suddenly, fast access takes two steps. Each re-entry means delay—sometimes just a second, sometimes a full repack.

    Flexible Organizers: Adapting Instead of Interrupting

    This is why setups that flex—Velcro panels, shifting pockets, quick-move dividers—quietly outperform rigid gear in the real world. They aren’t about decoration. They’re about moving panels aside for a grocery hauler, slotting chargers up front for morning commutes, and stretching a liner into a catch zone for the messy spill you never planned on:

    • Movable dividers clear section space for whatever enters the trunk—big or small.
    • Stretch pockets keep keys, cables, and emergency gear findable in seconds, not minutes.
    • Adjust-and-stick panels slide with routine changes, so you never have to empty the trunk just to stash a sports bag or grab a charger.

    The difference becomes visible by the end of each week: fast unloading, less shuffling, and gear that’s still in sight. Sudden stops don’t scatter cans. No more grocery bags pressed sideways under a leaking bottle. The setup proves itself not by staying perfect—but by getting less chaotic, even on unpredictable days.

    What Repeated Use Really Looks Like: Mess, Cleanup, and Speed

    Real car use breaks any setup that only survives single days. Routines bend: quick errands turn long, new bags hide old tools, and every after-parking re-entry tests accessibility in ways a perfect photo never shows.

    • One quick trip turns into two, so bags stack up in the “good” grab zone.
    • That umbrella or charger you placed in reach now sits under two new bundles, exactly out of reach.
    • Cleanup stretches longer, as every protective cover also needs adjustment, shifting, or re-smoothing after normal loading and unloading.

    When trunk organizers can’t flex, these minor moments add up. Bags slide. Must-grab items retreat. Simple cleaning means moving and replacing half your setup. Even floor liners—meant to help—can bunch or shift, forcing you to wiggle things just to get a clean exit.

    Real Fixes That Change the Everyday Flow

    Switching to a segmented, adjustable organizer with Velcro panels is less about looks and more about stopping the friction points you notice most. The true shift comes when a single push lets you collapse space for unpredictable cargo, pockets swing to hold your always-missing charger, and a side panel finally blocks items from drifting without trapping your fast-access gear.

    Over a month, what stands out isn’t a picture-perfect trunk—it’s realizing you’re not shuffling, reaching, or re-cleaning after normal days. Groceries stay put. First-aid kits stay visible. And speed returns, because unloading one thing doesn’t mean touching every other item “just in case.” Not a revolution; simply a trunk that catches up to your real routine, not just the ideal one.

    Should Everyone Use a Flexible Organizer?

    Not everyone needs flexibility. If you only haul boxes that never shift, a rigid bin serves you well. But if your week splits between errands, shopping, work bags, and family gear, a flexible structure isn’t extra—it’s basic. The gain isn’t in more pockets or maximum compartments; it’s in letting your gear and reach points adjust as life does, without adding new slowdowns or requiring constant resets.

    Signs Your Trunk Setup Isn’t Matching Real Use

    • You’re digging for a charger or kit that was “perfectly placed” yesterday.
    • Loose items creep into the same corner after ordinary driving, no matter how neatly you started.
    • Loading, unloading, or cleanup now takes longer, even though the clutter looks tamed.
    • A recurring spot—near the back seat, by the latch—always catches something, blocking you after every park-and-grab.

    If these sound familiar, your trunk’s structure isn’t adapting—it’s just hiding slowdowns under a neater look.

    Staying Organized Isn’t an Event—It’s a Routine

    The real win isn’t a spotless trunk for show, but a setup that makes everyday parking, loading, and cleaning less of an obstacle course. Fewer slowdowns, faster access, and shrinking cleanups; that’s when you know your organizer is working with your routine, not just sitting pretty for a single tidy day. In the end, the best car organization holds up to constant use—so your next week feels less like starting over, and more like picking up right where you left off.

    Visit DriveWellSupply for practical trunk and cargo solutions built for real car routines.

  • Creating Seamless Return Flow to Prevent Backyard Clutter Build-Up

    Tidy never lasts long in a real outdoor zone. If you’ve ever reset a backyard corner, side-yard strip, or garage threshold, you know the drill: after a big clean, the area feels open, almost finished—until normal life returns. Hand tools and gloves start drifting, pruners migrate toward the closest bench, and within days, “just for now” piles stick to any flat surface near your movement path. The space tricks you; the center stays clear, but mailbox routes, gate entrances, and utility paths pick up overflow, snagging shoes and stalling the next job. You beat back the clutter, walk inside, and the cycle is already starting again.

    Why Clutter Builds Up Where You Walk, Not Where You Store

    Most outdoor storage plans focus on adding containers: more bins, new racks, more wall hooks. But the frustration never comes just from a lack of “space.” The everyday headache is return flow. After a muddy stretch of weeding, or when hurrying out with both hands full, the odds of extra steps to a closed bin drop to zero. Tools land wherever you stop moving—too often, right at the base of steps or in the middle of a transit path. Routine choices, not a shortage of cubbies, shape the terrain: practical mess, not a deficit of shelving.

    Think of any narrow side-yard. The shelf holds what it promised to hold, the main bin is accessible—but by day four, gloves and shears cluster at the utility bench, and now you’re tiptoeing around a trowel left exactly where you dropped it to answer the phone. Temporary “parking” zones solidify into semi-permanent drop spots. Corners get heavier. By trash day, the path for bins shrinks into an obstacle course, and somehow it’s back to square one.

    When Setup Looks Good But Fails in Motion

    Symmetric wall systems and modular units photograph well and look organized after a weekend reset. But during actual weeks—rainy seasons, batch gardening, repairing the fence—organization unravels. Open bins fill up. Closed cupboards are left shut “until later.” Everything is tidy except the top of the bench, or that open space just inside the gate. Patterns emerge: the right storage exists, but real use gets rerouted. Gear piles up exactly at the edge of movement, not inside the planned zones. It’s the difference between designed order and the drag of everyday workarounds.

    Here’s a scene: After evening cleanup, you toss pruners and cracked gloves on the bench instead of walking them three extra steps to the right cubby. You’ll come back—just not tonight. By morning, that bench blocks the path for recycling bins or sets up the next family member to shift your pile “just for now.” Each shortcut adds to the reset list. Multiply that friction over a week, and the energy cost grows bigger than expected. Neat plans, interrupted by normal movement.

    How Deep Storage Backfires in Daily Life

    When storage is designed for maximum volume, not for minimal friction, clutter doesn’t disappear; it finds new places to stall you. Closed cabinets outer-edge the workspace, but after long projects or wet weather, the idea of unlocking and relocking doors is just too much. High-turnover gear—gloves, snips, bags of ice melt—shifts to wherever you can drop it fastest. You spot the sign: a growing patch of gear where the return home is a hassle. Closed storage wins on design, but in real life, surface mess has found a back door in.

    The Real Test: Making Returns Frictionless

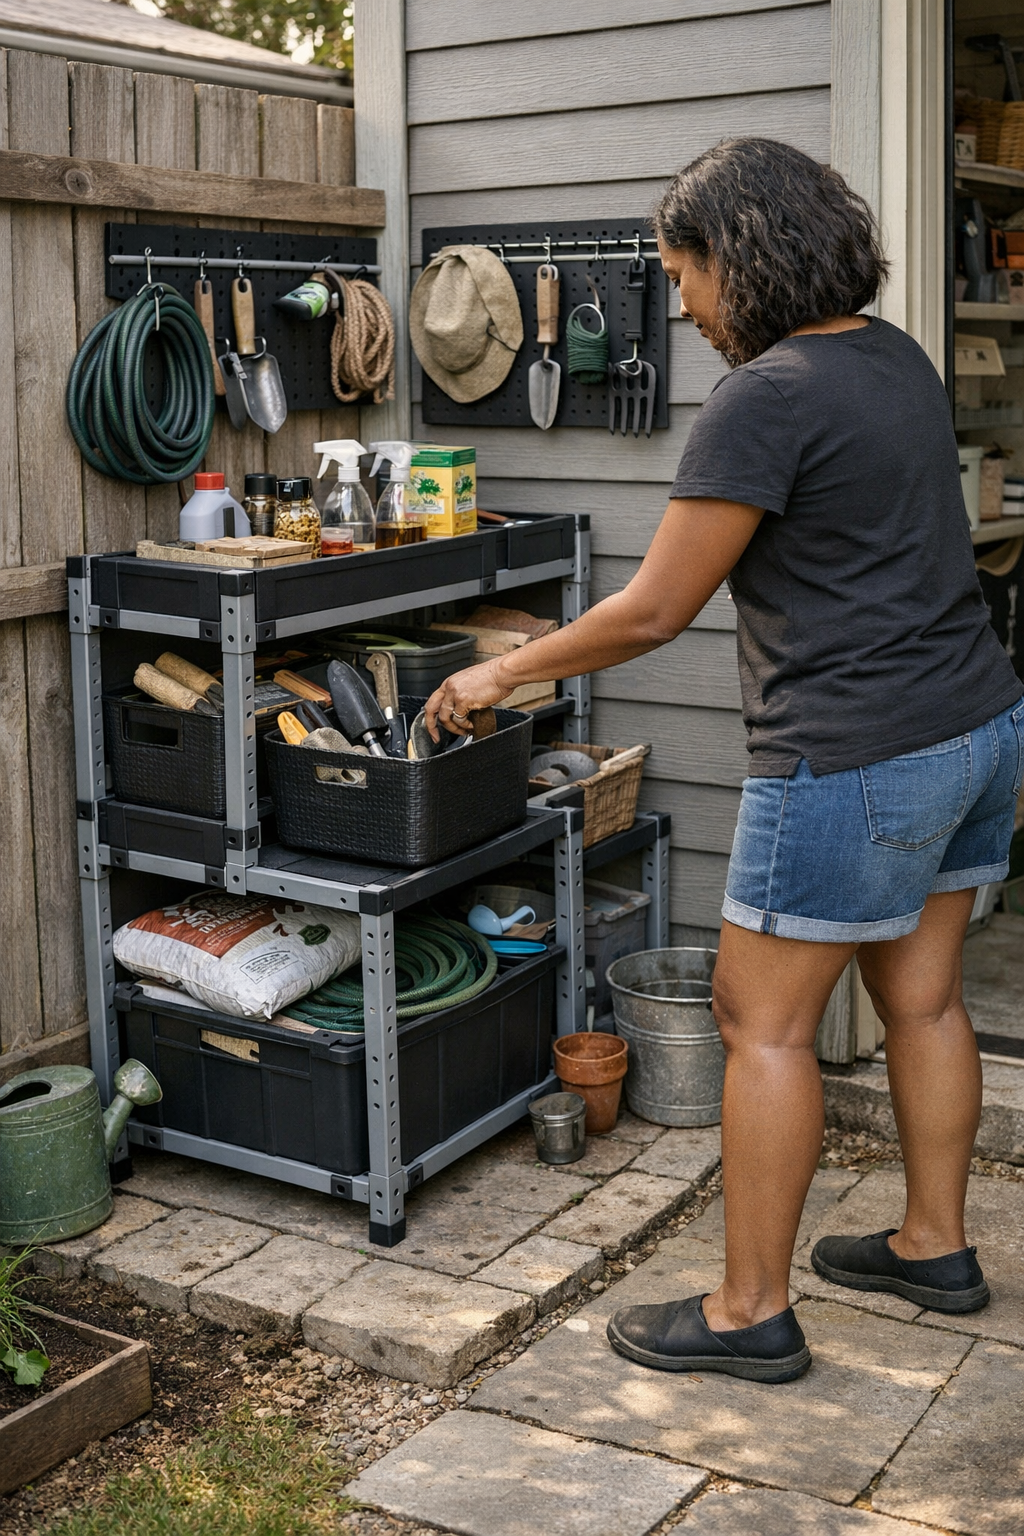
    The question is simple: Does your setup make returning things easier than abandoning them? Consider one shift: an open catch box posted less than an arm’s reach from the main shed exit. Suddenly, dropping off dirty trowels means zero detour. Over a week, what would’ve become a stepped-on puddle of gear at the doorstep now collects safely in one spot. Not sorted, not hidden—just corralled, visible, and ready for later. The nightly “corridor sweep” becomes a 30-second dump; nothing clogs the footpath or trip spot by morning. Clean lines survive even after project days where nobody wants another chore at dusk.

    This isn’t about changing habits—nobody learns a new routine when tired or rushing. It’s about re-routing the same moves so resets happen almost accidentally. When the open drop zone is easier than any other flat surface, friction drops, and overflow stops blocking the rhythm. The difference by week’s end feels tangible: less shifting piles, less stepping over gear, less surprise clutter cutting off access to bins or utility corners.

    Weak Return Flow in Real Scenes

    • Zone creep: Pruners left at the patio edge, then nudged by the door—now they’re a trip point, not a stored tool.
    • Double handling: Gloves dumped on the bench have to be moved again when it’s time to use the workspace or bring out the mower.
    • Permanent “temporary” spots: The same stairs or low wall keeps filling up, no matter what the plan says (“I’ll deal with it later” wins every time return is a hassle).
    • Wall units running at half-strength: Grid of hooks looks complete but gets skipped—instead, piles grow at hostage corners of the path, proving setup but not service.

    Turning Fast Return Into a Habit—Within Reach

    The breakthrough is never just “more storage.” It’s a visible, accessible landing spot for daily-use chaos—mounted or placed roughly at that last moment before you set something down anywhere else. Every sideline strip, garage threshold, or narrow patio can house a catch tray or open crate within a step or two of the exit or entry point. Even small spaces get the benefit. Litter on the surface is cut before it grows into an avalanche. The daily loop tightens: use, drop, batch-sort later, path stays open.

    The payoff isn’t a photo-perfect scene. It’s a walkable path at dusk. No more late resets or reshuffling every time you want to take the bins out. Drop spots tuned to real movement keep zone lines clear; modular storage you can adjust means reset jobs scale down, not up. The outdoor setup starts supporting the way you move, instead of interrupting it.

    Quick Reset Tip

    Keep your catch spot only as large as one day’s gear. Batch-sort before you head inside for the night. Creep never outruns routine if you use daily volume as the limit.

    When Organization Survives Actual Use

    Real outdoor order doesn’t live in staged photos. It’s what happens after a week of weather, surprise repairs, or an evening with three jobs half finished. Walkways aren’t blocked. Corners don’t fill with gear limbo. You don’t lose a Saturday just rescuing the edge zones from slow-motion pileups. The area still looks used—muddy tools, dropped gloves, proof of real life—but the mess isn’t in charge. That’s the real win: an outdoor setup that keeps supporting the movements you actually repeat, no matter how many resets you’ve powered through before.

    See what real-world storage designed for real outdoor zones feels like at the TidyYard store.

  • How Consistent Docking Transforms Garage and Workshop Organization

    In every garage, workshop, or backyard work zone, there’s that moment of optimism: the shelves are up, bins are labeled, carts wheel smoothly, and for a day the space feels under control. But beneath the shine of a just-installed system lurks a subtle difference most people only notice over time—whether those bins, carts, and racks actually return to their spots, perfectly aligned, every single use. That’s the line between a setup you can trust to stay clear and a space that slides, week by week, back into chaos.

    How “Almost Put Away” Becomes the Everyday Headache

    The clutter starts quietly. At first, everything sits where it belongs—labels lined up, floors open, carts waiting for action. Then a weekend project hits. A bag of tools lands near but not quite in its slot. That rolling cart? It’s angled, not flush, so you squeeze past it each time you reach for the wall rack. A bin settles a few inches off home, trailing a small stack of overflow behind it. Doors don’t open cleanly, one corner morphs into a catch-all, and before you know it, an entire zone is devoted to whatever couldn’t quite find its way back.

    True organization isn’t about the fresh, empty look on setup day. It’s about whether your system naturally resets—day after day—without you needing to think about it, even after the busiest weeks.

    The Real-World Cost of Drifting Modules

    Here’s what actually happens: Saturday morning brings a series of quick-fix projects. You roll a cart out, but have to nudge a poorly parked tote or edge around where the last toolbox landed. That “five-minute tidy” becomes twenty, filled with micro-adjustments. You shift carts so cabinets open, move a bin out of the walkway, dig through a pile that should have been sorted a week ago. Each module a little off from its mark means the next action is slower and less smooth. The space starts demanding attention for the wrong reasons: not the work at hand, but the blockages, the loose ends, the missing screwdriver that went wandering when its bin drifted from the wall.

    The problem isn’t clutter—it’s the system quietly unraveling because nothing reliably snaps or docks in place. A return to order starts to feel less like a quick sweep and more like solving a puzzle that never stays solved.

    A Docking Point: The Backbone of a Real-World System

    It sounds almost trivial, but giving every cart, bin, and rack a precise physical “home”—a dock, a stop, a mark—radically changes how the area lives day to day. The difference is instant: carts always return flush to the bench edge, bins land at the same notch on the rail, shelves aren’t left guessing where baskets go. No creeping drift, no need to explain the system to anyone borrowing your tools. Resetting the workshop is quick and mindless; clutter can’t take root because everything has a clear endpoint.

    This isn’t about looking neat for its own sake. When modules dock exactly, pathways are open; you don’t have to drag carts aside to get by. The route to every shelf is clean. Walls actually serve their storage function instead of hiding overflow in awkward dead zones. And most importantly—resets stay fast, so you’re back to working (or relaxing) with little effort spent on upkeep.

    Simple Anchors with a Big Impact

    You don’t need costly hardware. Sometimes a block screwed to the floor, a strip of tape to line up casters, a discreet label, or a shelf lip is all it takes. The key is repeatability—no matter who’s using the space, every module returns to the same spot. It’s this small but steady discipline that separates a system that holds together from one that melts into ad-hoc shuffling and improvised piles.

    When Docking Becomes Routine—and the Space Stops Fighting Back

    Suddenly, you’re not pushing a cart out of the way just to reach a drawer. The bench is open. No patchwork pile blocks the door. Nothing collects in the dead corners. The floor space is bigger—not because you added square feet, but because the system lets you use every inch as intended. And when you need a tool, it hasn’t wandered off on a rolling bin halfway across the shop. Order isn’t a constant battle; it becomes automatic, even when multiple people share the space.

    Watch for the signals: bins that never dock the same way, tools going missing, movement slowing down, piles collecting in “temporary” spots that become permanent. That’s not just clutter—it’s your system warning you that return flow is broken.

    A Real Tip: Make the Dock Spot Obvious

    Physically mark every landing point—a strip of tape on the floor, a low-profile rail, or a labeled bump stop where each cart comes to rest. Even a small tactile feedback makes a massive difference. Over time, you’ll notice less clearing up is needed, and resetting the space feels like a simple routine, not a big project—even on your busiest days.

    The Subtle, Enduring Advantage of Reliable Docking

    The best setups are not just clean—they’re built to hold their shape under real, repeated use. When every bin, rack, and cart has a fixed dock, the space stays fluid, resets are quick, and storage supports your routine without becoming its own source of friction. If your current system is always one shuffle away from chaos, it’s not more gear or space you need—it’s a defined return. That’s the upgrade that lifts your workspace from maintenance mode to actual utility—predictable, usable, and peaceably organized, week in and week out.

    Visit StackNest for storage systems designed for real spaces and real routines.

  • Choosing Between Linear and Panel Ceiling Lights for Reliable Workspace Lighting

    Swap out just one ceiling light above a busy desk or kitchen counter and you’ll see where the trouble starts—shadows sliding across your work, exposed cables cutting through the sightline, or an off-center bracket pushing light in the wrong direction. The real test for panel and linear ceiling lighting doesn’t start at installation; it starts after a week of real use, when small oversights become daily interruptions. If you’re deciding between a panel or linear fixture, or simply trying to anchor lighting that just won’t stay aimed where you work, surface coverage and mounting reveal their true cost fast—often at the exact spot you grab your pen, check your recipe, or nudge a laptop back into place.

    Where Surface Coverage and Support Collide

    Style and shape might draw your eye, but how a light actually performs above a work zone matters more after a dozen uses than it ever does in the box. Panel lights spread a broad, even flood—but the minute a cable run droops or a bracket slips, that “finished” look falls apart, and the distraction is impossible to ignore. A single missed cable clip or a low-tension mount lets gaps and wires claim attention, making the whole setup look half-resolved no matter the brightness.

    Linear ceiling lights show a different flaw: they often throw crisp task light down the center, but leave the edges of desks and counters in the shadow. It’s the recurring routine—lay out a cutting board or shuffle papers, and notice the outer 20 centimeters missing usable light. Even after adjusting the lamp three times, there’s still a strip you can’t see clearly, pushing you to twist in your chair or cover the spot with your free hand.

    The Experience After the First Week

    The first few days, most setups pass as “done.” But over a week, true friction appears—support brackets quietly loosen and fixtures drift out of alignment, turning barely-noticed errors into new sources of glare or shadow. Cable runs that looked fine wrapped flush start sagging, dipping into view at odd angles. Shelves and work edges that seemed evenly covered now cast uneven lines, catching your focus with every reach or shift. Each adjustment feels minor until they stack up, especially if you start budgeting micro-fixes into your daily routine just to reclaim clear visibility across the whole surface.

    Unpacking Real, Repeated Friction

    Cable management is rarely anyone’s first concern—until it turns constant. From across the room, a fixture might look perfect. Up close, a wavy wire or a cable left exposed by a soft clip becomes the first thing you notice every time you sit down. Panel lighting is unforgiving here: even a small sag makes an otherwise clean ceiling into a restless visual obstacle course. You get intense brightness, but your attention flickers up—to cables, to slight bracket twists—not forward to the work you came to finish.

    Linear lights flip the pain points. Install to avoid glare, and you’re likely to lose even coverage. Get the bracket mount off by a few centimeters and you start living with a permanent sliver of darkness along the desk edge or counter. The space is bright, but you keep repositioning your chair or shifting tools just to avoid working in half-shadow—a fix that’s physical one day, mental the next, and never really “solved.”

    How Messy Details Surface in Shared Spaces

    In shared or multi-use rooms, flaws get amplified. A bracket that feels rock-solid solo will rattle when someone pushes a chair away or sets a heavy bag on the table. The “minimalist” fixture transforms into another thing you monitor for droop or wobble. And every time guests comment on a visible wire or a drooped end, the intended effect—clean, functional lighting—feels undermined by one careless detail. What seemed subtle at install snowballs as routines repeat and the chores pile up.

    The Small Fixes That Quiet Big Distractions

    Fixing these problems rarely means starting over—it means tightening details that decide whether the setup helps or hinders. After months of rehanging a linear fixture hoping to squeeze usable light from a bad angle, the fix was simple: run the cable taut and flat inside a rigid ceiling channel the entire length, not just the final meter. With around 120 centimeters of cable redirected and clipped along a ceiling beam, the ceiling stopped drawing unwanted attention and the true working edge finally stayed lit—no rotation, no creeping shadow.

    Solid bracket mounts are the other unsung hero—a small reinforcement stops the fixture from shifting with every bump or table nudge. Combined with an evenly-spread panel or a precision-aimed linear light, the setup finally works on autopilot. Quick tweaks to anchoring and cable discipline transform the light from “half-done project” to “silent partner”—there when you need it, gone from thought when you don’t.

    One Useful, Underused Tip

    If there’s one trick that fixes more issues than it should: “mock up” both cable lines and fixture placement with temporary tape or adjustable clips and use the area fully for several days before setting anything permanent. You’ll catch weak bracket points, unforgiving glare angles, and unavoidable cable distractions before holes go in the ceiling or anchors are set. Five minutes of fake-mounting can save five years of tiny, compounding annoyance—the kind nobody warns you about until it’s too late to move a bracket or tuck away a wire.

    It’s the Routine That Reveals a Good Setup

    The goal with ceiling and work lighting isn’t perfection—it’s silence. The best-mounting hardware and cable runs disappear into routine, instead of demanding attention after every homework session, kitchen rush, or shared-table project. When small weak points are ignored, gaps and cable clutter grow until they rule the space. But when those details are tuned—especially cable anchoring and bracket stability—the difference shows up every single time you sit down and realize you haven’t thought about the lighting once.

    For more practical indoor-lighting solutions, mounting accessories, and support aids that survive real daily use, visit LightSupport.

  • Smart Charging Habits to Preserve Power Tool Battery Life Longer

    Every trade has a moment when a job stalls for one simple reason: the battery is dead. The tool’s still in your hand, the board half-cut, or your last anchor only halfway in the hole. In that half-minute pause, you realize—battery reliability isn’t just a background detail. It’s the line between a workday that flows and a morning spent scrambling for a fix.

    You don’t notice battery habits when everything runs right—drill spinning clean, sander gliding smooth, drivers snapping home fastener after fastener. But months in, if runtime drops or tools choke halfway through a sheet of drywall, the real root cause usually traces back to quiet, daily lapses in charging discipline. One unthinking shortcut becomes the recurring headache that slows the whole crew.

    The Hidden Cost of Bad Charging: When Power Fades Mid-Job

    Battery decline creeps up. The early signs—overcharging packs, defaulting to fast charging “just this once,” or grabbing whichever charger’s closest—don’t show up on day one. It might take sixty or a hundred cycles before you see it. Suddenly your rotary hammer pulls up short on the third hole, your multi-tool sputters through only half a window cut, and swapping to your backup reveals both packs are limping.

    The interruption isn’t subtle. Tools stall in the middle of drilling tapcons into concrete. The circular saw won’t finish a crosscut before bogging down. Fatigue sets in: you grip tighter, make slower passes, and fight for precision as voltage flags. Each unwanted stop means a walk back to the bench, a break in rhythm, or settling for a corded tool that puts you out of position—especially when you’re perched two stories up or buried deep in a crawlspace.

    Workday Reality: Where Weak Charging Habits Show Up

    Picture the scene: mid-morning in a gutted kitchen, wall cavities exposed, your compact drill chewing through studs with a fresh bit. You reach for an 18V battery that’s been left charging overnight—a habit almost everyone’s tried. It slides into place, still warm. Midway through installing boxes, power slumps. The tool loses its edge. By the next fastener, it’s dead weight in your palm—battery warm to the touch, charge evaporated.

    Contrast that with a well-managed pack. You grab another battery—a pack never left to roast overnight, always unplugged at full. It’s cool, clicks home, and delivers a runtime that actually matches what the label promised on day one. Nothing awkward, no stops, just smooth drilling and cleaner holes—with less wrist fatigue fighting tool slowdown. That’s the day-to-day gap between mindless charging and small, daily attentiveness.

    Smart Charging: What Actually Works on Real Jobs

    It’s not complicated science—just habit. Always unplug lithium-ion batteries when they hit full. Save fast charging for emergencies, not your default. Stick with the charger that was made for your battery chemistry and voltage. That discipline—small, repeated, nearly invisible—means batteries stay cooler, deliver steadier power, and let you sand, cut, or fasten full stretches without losing control halfway through.

    Shops running piles of drills, vacuums, and wood saws know how routine trumps intention. Let bad habits settle in, and even two “identical” batteries will start to drift—one suddenly struggling to hold a charge, the other still running close to spec. Heat and chronic overcharge leave lasting scars. That doesn’t just mean swapping batteries more. It means interruptions when accuracy and pace are what count most.

    Timer Plugs: The Smallest Upgrade No One Regrets

    Here’s one change that sticks: plug your chargers into a timer and set it for four hours—a sweet spot for most lithium-ion tool packs. That’s how you prevent batteries from slow-cooking on charge through a weekend, or from sitting at max voltage all night after a late finish. The shift is instant: cooler packs, more predictable output, gear that goes end-to-end on most tasks without shuffling batteries or changing technique.

    In our own workshop, this one tweak cut out the mid-cut “battery surprise” and meant less tool slowdown—especially on jobs where control and steady torque matter as much as speed.

    Real Warning Signs: When Your Charging Routine Is Losing You Power

    • Batteries overheating after charging or fading early—even through gloves—usually mean chronic overcharge or missed cool-downs.
    • Unexpected tool cutouts right before the finish, or voltage sag when hammer drilling or plunge cutting, hint your packs aren’t holding up under stress.
    • Job after job, runtime shrinking—particularly after leaving packs on charge all night—means your workflow is fighting itself.
    • Packs swelling or no longer fitting flush are red flags of months of fast or careless charging cycles. At that point, there’s no getting the lost performance back.

    No site escapes this completely. All it takes is watching one job get jammed up by dying batteries because “everyone does it this way” and the better habit starts making sense. Watch charging intervals, keep packs cool, and you’ll get more done with fewer breakdowns—not perfect, but enough to keep pace no matter where the next problem pops up.

    Charging Discipline: The Invisible Edge

    No battery lasts forever. But it’s the habits—how and when you charge, whether you break the cycle of convenience—that outlast the sticker on your tools. Pricey gear won’t save a careless routine. But a few disciplined charging habits outlast the tools themselves. You notice it in the quiet moments: when you’re able to complete a long rip cut in a single stretch, drill six anchor holes without voltage drop, or keep your sander running until the fine finish pass—less time scrambling, more time pushing the job ahead.

    Smart charging isn’t dramatic. It’s the background work that lets you focus on skill, not just on swapping packs. That’s what keeps the real job moving—day after day, pack after pack.

    http://gumboll.myshopify.com

  • Why Screw-Mounted Entry Storage Outlasts Rental-Friendly Alternatives

    The entryway is where order lasts exactly until the first real-life return. One bag slung down, and that clean path you set up is already fractured. Shoes, lined up with hope, start splaying sideways by Wednesday. A bench that looked disciplined at move-in drifts two inches every time someone swings a bag past. Not one big mess—just the steady breakdown that happens when storage solutions meet actual daily use. Entryways don’t fail all at once; clutter spreads from the first week, reset after reset failing to hold the line against backpacks, damp jackets, and everyone rushing through the same narrow zone.

    Permanent Mounts vs. Renter-Friendly Storage: The Immediate Divide

    If your security deposit is on your mind, the line is clear: Wall-mounted storage anchored with screws doesn’t care about rental agreements—it stays put, even after winter boots crash through or bags stack up at rush hour. Renters, stuck with rules, go for adhesive hooks, tension rods, and benches that won’t mark the wall. Day one: it looks just fine—a “no-drill” setup holding its pose. But by the second week, the signals start: a crooked hook, a sliding bench you have to toe back, shoe bins edging into the walkway. Lease-friendly storage buys you safety from landlords, but lets daily habits erode your setup one wobble at a time.

    Where Small Shifts Become Big Everyday Hassles

    This isn’t a dramatic collapse. It’s the quiet grind: the rack isn’t where you left it, shoes spill into the path, bags droop lower every day, and the threshold shrinks. Each re-entry nudges storage out of line—by Thursday, what started as an organized “zone” is now a spread of bins and shoes chewing up your walking space. Kids double the drift; a bench for sitting becomes overflow; what was a clear path now forces you into sidesteps and shuffles just to get past. The setup that looked good for a photo never matches the mess of Tuesday night returns.

    Scenes from the Threshold: Ordinary Use, Reluctant Storage

    The friction is quiet but relentless. Shoes quit following their row. Drop a gym bag, come back from groceries, and the bench has prowled closer to the walkway. Hooks set at perfect angles tilt half-down as adhesives soften. What should be a straight divide between “gear” and “walkway” blurs out. Every time you set down one item, you’re nudging three others back into formation: a bench, a bin, the spread of shoes drifting for the door. Catastrophe never comes, but the space asks you to reset it again every single evening.

    Renter’s Dilemma: Protect the Wall, Pay with Constant Rework

    Most leases mean no permanent holes—so renters avoid drills and screws, but the cost hits on the return. Temporary storage starts drifting under real loads: hang up a coat, toss a backpack, and the adhesive rack shifts just enough to throw off the line. The result is a clutter-prone zone that needs correcting after every arrival. Benches back too close to the door, shoe racks drift off-center, hooks hang but don’t absorb any rough use. The “temporary fix” becomes a permanent inconvenience—safe for the walls, but always one step from disarray.

    How Screw Fixes Change Daily Pressure

    Screw-mounted setups stand their ground—literally. Racks hung with anchors stay straight, hooks don’t sag, and a bench stays lined up no matter how fast kids barrel through or how heavy the gear gets. It’s not about brute strength—it’s the way permanent fixes soak up routine impact, stopping the slow creep that sabotages renter setups. Rows stay aligned, and “reset” means a 30-second tidy, not a reshuffling marathon. In practice, a screw-fixed rack above a bench can hold shape for months, handling dozens of weekday returns without a single adjustment.

    The Real-Time Cost of Renter Alternatives

    Put that against the real-world renter setup: a sliding bench, adhesive hooks that unpeel in humidity, bins that drift until the door barely opens. Drop zone order dissolves fast—ten quick returns and you’re dodging the bench edge, the bag caddy has leaned off-square, and shoes now live in the center track. The “flexible” setup you picked to protect the lease demands a nightly correction just to restore any sense of order. Every trip inside is another round of minor, necessary repairs.

    Containment Strategies: Making Renter Setups Work (or Work Enough)

    If you can’t bolt anything down, you have to buy time, not permanence. Heavy rubber pads under benches, non-slip mats, or wedging storage into corner nooks can slow the migration. Even tension rods or discreet brackets can fence in movement for several days. These improvisations aren’t flawless, but they can hold the drift to a couple inches, buying enough stability that a single reset lasts a week, not a day. It’s about blunt resistance, not beauty—keeping the bench from walking and bins from sliding until you get a full week of clear passage before the next shove back into line.

    Small Fixes, Noticeable Gains

    The clue is always in the minor failures: one shoe nosing for the hallway, a bench now living half in the walking zone, hooks that twist under a new bag’s weight. Spot these signs early and blunt the movement with physical fixes—extra friction, modest repositioning—before your entry dissolves into regular chaos. Don’t wait for total collapse: temporary setups only survive repeated use if you actively reinforce them. Stop one drift and you might avoid a dozen resets.

    What Actually Works for Real Entryways?

    No universal answer exists. If permanent anchoring is on the table, routine friction nearly disappears—wall mounts and screw-fixed benches shrug off daily impact. In “no-drill” homes, look for storage with wide bases, low centers of gravity, and natural corner leverage. Plan to add friction—rubber, weight, resistance. If you find yourself moving storage pieces three times a week, your setup is losing the entryway battle, one small drift at a time.

    Entryway Storage Is About Pressure, Not Just Volume

    Don’t count hooks; count resets. The best setup isn’t defined by how much it can hold, but by how well it holds up to repeated cycles of drop, store, grab, and go. Permanent fixes erase drift. Renter-friendly options bend—sometimes literally—under daily pressure, and the flexibility that saves your wall becomes a slow-motion undoing for order. Still, with some simple physical tweaks and attention to early warning signs, you can get most of the stability you need—long enough for the entryway to feel use-ready rather than just photo-ready. But every renter has lived this truth: only a system that actually holds its ground gives you a threshold that isn’t always on the verge of collapse.

    Find storage solutions built for real entry and exit at Betweenry.