Category: Lighting & Work Setup

  • Transform Your Workspace with Hidden Cable Routes for Seamless Flow

    A desk can look immaculate—cords tucked behind the monitor, every pencil and notebook placed just so—but only until you start putting it through real-life work cycles. After a week of repeated typing, notetaking, and quick device swaps, the actual points of irritation emerge. It’s never what you notice in a pristine setup shot: it’s the mouse cable brushing your wrist each hour, the stubborn drawer edge blocking your knee every time you roll in, or a chair that snags on the under-desk storage box when you stand up in a hurry. Friction hides in plain sight—small snags that break the flow and force tiny resets. Those micro-interruptions build up fast, especially if you’re moving between keyboard, notebook, and screen a dozen times an hour. What passed for neatness starts to feel like slow-motion clutter—a clean look that quietly wastes your time.

    The hidden friction of a desk that just looks tidy

    Visual order can cover for real functional slowdowns. Stashing cables along the back edge or hiding them in a tray feels like progress, but watch how you work during an actual session. Does a cable sleeve shift into your reach zone, making your mouse drag just enough to lose rhythm? Do your fingers always brush the under-desk USB hub, waiting to catch? Is that power strip fixed in place, or does your foot bump it three times a morning as you scoot over for a notebook? The small collisions are mostly invisible at first, but their effects compound: tiny breaks in concentration, repeated hand corrections, slight posture kicks that leave you shifting just a bit more each session.

    Repeated-use reveals the true value of hidden cable paths

    The gap between a desk that looks sorted and one that actually flows comes into sharp focus once you settle into regular routines. Messy cables scream for attention—until you hide them. But the real difference shows up during normal reach: a cable tray that hugs the desk underside, or a clip sleeve that follows table edge contours, removes those catch points from the places your hands, feet, and chair travel dozens of times every afternoon. The payoff is silent but unmistakable: you slide the chair back, grab your pen, open a drawer, and find no resistance. The desk feels emptier, not just cleaner. As you finish another cycle—swift switch from keyboard to sketchpad to laptop—you notice you haven’t shoveled a single cord out of the way or winced at an ankle bump all day.

    Where well-meaning storage turns into a new obstacle

    Adding under-desk trays, drawer units, or supply boxes seems like the obvious fix for clutter. But each organizer you add can turn into a daily obstacle if it doesn’t fit your actual behavior. A drawer might block the only leg angle that lets you anchor your posture; a heavy metal tray under the surface solves surface mess but hems in your chair’s movement, especially when you push in after a break. Cable boxes or bulky power strips clear up floor tangle but can hijack precious foot space—so every time you stand, you catch yourself avoiding, nudging, or side-stepping a solid object that isn’t supposed to be disruptive.

    None of this shows up in a setup photo. Instead, it surfaces every time you find your stretch shortened, your seat nudged sideways, or your arm path forced into an awkward arc. The more you work, the more these “solutions” pile on seconds lost to sidestepping what’s in your way.

    The change that finally made my desk reliable

    After months of half-fixes and incremental annoyance, one upgrade finally stuck: I ran every main cable through a slim, fixed raceway beneath the desktop—one cable drop by the monitor, none underfoot, nothing free to shift. Instantly, the difference wasn’t how tidy it looked, but how consistently unblocked each action became. The cable that hovered near my keyboard vanished from hand’s reach. The chair rolled in and out—no friction, no catch. Even the gesture of pulling open a drawer felt smoother, as if the desk had relaxed. Over time, the endless micro-pauses—the ones that used to fragment my train of thought—faded out. The desk still looked organized, but now it actually got out of my way.

    What really matters: A reliable desk isn’t just photogenic—it quietly eliminates the friction that interrupts your routines, revealing the setups that flex with your habits instead of forcing new ones.

    FAQ: Living with a hidden cable route

    How do hidden cable routes actually improve my workflow?

    They remove the daily irritations—cord snags, chair bumps, under-desk tangles—that would otherwise keep you shifting, pausing, and resetting. With cords routed out of every common movement path, you stop spending effort on workarounds and manual fixes. You just move between keyboard, mouse, notebook, and drawer without hesitation or interruption.

    Are there trade-offs to fully concealing cables and trays?

    There’s a cost to making things too hidden: cable routes that are over-tight or blocked by under-desk storage are tough to access when you need to swap a charger, upgrade hardware, or reroute a device. The right setup strikes a balance—you want frictionless use, but not at the expense of needed flexibility for future changes.

    What are signs my cable or storage setup is due for a rethink?

    If you’re pushing cables aside hourly, tilting in your chair to avoid a storage box, or holding a drawer partially open to dodge a clash, the desk is working against you. Every repeated workaround is a clue: the structure isn’t fitting your routine, and you’re paying for it in lost flow.

    Everyday order that holds up under pressure

    A mature desk isn’t about a picture-perfect desktop—it’s about the absence of anything stopping you during real work. Cable trays that unblock your natural hand and foot paths, drawers that keep out of the way, chairs that roll without snag—these are the upgrades that don’t just tidy up, but actively erase the obstacles that show up after the fifth, fiftieth, or hundredth work cycle. The best sign: you barely think about your setup at all while moving between tasks. Push concealment too far and every tech upgrade turns into an hour of wrangling; neglect it, and the daily annoyances never go away.

    If your desk structure disappears from your attention—no nudges, no catches, no reach corrections—then your setup is finally working for you, not against you.
    Explore the full WorkBasic collection

  • Why Solid Joist Mounting Prevents Lighting Fixture Flex and Sagging

    Looks can fool you—especially with indoor lighting. That new ceiling fixture might sit flush and look seamless on day one, but real use quickly reveals its limits. In high-traffic zones like busy hallways, cramped stair turns, fogged-up bathroom mirrors, or workhorse laundry counters, you stop noticing how pretty the fixture is and start noticing every wobble, shifting shadow, glare patch, or dark edge. When the base flexes or drifts—barely visible at first—your morning routine turns into a hunt for the right angle or a silent battle against poor visibility. “Finished” lighting becomes the nagging chore you revisit every week.

    Where Flawless Looks Fade: The Real-World Consequences of Flex

    Showroom fixtures all pass the eye test, but daily life exposes differences fast. Flex enters the scene when a fixture’s bracket only bites into drywall or patched plaster—never quite reaching the certainty of a joist or stud. At first, you’re fooled: the ceiling looks clean, seams are tight, the room’s bright. But daily routines begin to strain weak points that escaped notice on install day.

    After a few weeks, walk those same routes—upstairs corridors, around bathroom mirrors, along laundry counters. Soon, shadows stretch where none used to be, the fixture sags a fraction, or a seam collects dust that never used to settle there. Maybe you hear a creak every time you dust, or reflections stay off-balance no matter how many times you nudge the bulb. None of these changes are dramatic—just a steady accumulation of small, irritating mismatches that remind you the job isn’t really done.

    When “Illuminated” Isn’t the Same as “Usable”

    Different rooms reveal the problem in their own way:

    • Hallways and Corridors: The bulb is on, but every slammed door sends tremors through the fixture. One wall starts to vanish into shadow; you don’t notice until your path shifts to avoid the dark edge.
    • Bathroom Mirrors: The fixture lines up over the center—at first. Over time, flex causes a shadow to creep over one side, or glare pools right where you need clarity. Shaving or makeup gets slower, less precise.
    • Stairway Turns: Light looks fine from a distance, but take the turn and realize the angle’s shifted again. The bright patch never matches the safest path, especially after heavy use or a round of cleaning.
    • Task Counters and Utility Areas: Under-cabinet light starts strong, but after weeks of routine bumps, part of the counter fades. You fumble to see cutlery or tiny hardware because a loose base sent light askew.

    These are not just small aesthetic annoyances—they are practical, ongoing visibility problems. Not quite bad enough for 911, but just frustrating enough to slow you, break your focus, or make routine tasks a pain.

    Small Flex, Big Friction: The Subtle Strain of Repeated Contact

    Anyone who’s dusted a creaky flush mount knows this ritual: at first, it barely budges—a whisper of movement during cleaning, a tilt after a bump in a narrow spot. Over weeks, the base arcs away, seams fray, and the weight starts prying at the fixings. Shadow lines deform, light spreads unevenly, eventually even the wiring junction feels the pressure.

    Field rule: If a fixture crunches under your fingers or shifts too easily, don’t just twist it back and forget it. Many homeowners keep fighting the same crooked fixture every season, never tracing irritation back to weak mounting under everyday wear.

    The Hidden Cost of Weak Mounting: Wiring, Alignment, and Your Routine

    Two lights from the same box might look identical on day one—same brightness, same finish, same LED promise. The difference isn’t visible until weeks later: one still sits snug and even, the other has begun its slow slide into misalignment. A joist-mounted fixture just stays put—shadows fall where planned, the space stays tidy, and clean-up is fast. Support from drywall or thin plaster means even small jolts—from a spring-cleaning, a slammed door, or a toddler’s reach—become cumulative drift.

    Frustration pops up during:

    • Foot Traffic: Corridors see every step rattle the mount, shifting light and forcing you to squint or adjust stride.
    • Maintenance: Bulb changes or a simple wipe-down disrupt alignment, turning quick chores into repeat fixes.
    • Routine Changes: Each new season or minor schedule twist reveals the weaknesses in lighting that should have stayed invisible.

    The Real Fix: Rethinking How Fixtures Meet the Ceiling or Wall

    Toggles, anchors, and patched holes might stall problems, but long-term, the fix is simple and rarely cosmetic: secure the fixture—or its backer bar—directly to a joist, stud, or solid blocking. It’s less about weight, more about how each daily jolt, shift, or cleaning attempt is silently transferred through the mount. Done right, this stops seams from growing, shadows from creeping, and—most important—keeps wire connections healthy for years instead of months.

    Scene: Fixing a Bowed Hallway Fixture

    Picture a narrow corridor, overhead plaster, a semi-flush light anchored only by wall plugs. Looks fine—at first. But after weeks of footsteps, the fixture bows, shadow lines drift, and hairline cracks gather dust overhead. Light stops reaching one side, and the walk feels strangely unbalanced every night.

    Remount it to the nearest joist—the bow ends. Shadows quit migrating. No more hunched dusting or wondering why the hallway feels “off.” You don’t notice what’s changed at first—what’s different is the daily nagging finally stops.

    One Reliable Upgrade for Living With Your Lighting—Not Just Looking at It

    Fixtures anchored to solid support earn their invisibility. Day after day, the light works, surfaces stay evenly bright, and you no longer choreograph your movement to avoid a glare, an awkward angle, or a shadowed patch you can’t reach. Whether you’re checking the stairs at night, cleaning the bathroom mirror, or prepping food along a counter, everything just functions. No flex. No repeats. No subtle drift that pulls attention away from the task at hand.

    The best lighting upgrade isn’t more fixtures or new bulbs—it’s fixing the part you can’t see: the attachment that holds the line against real, repeated use.

    Visit LightHelper for practical indoor-lighting solutions built for real use.

  • Why Slim Lighting Needs Smart Support for Lasting Work Surface Clarity

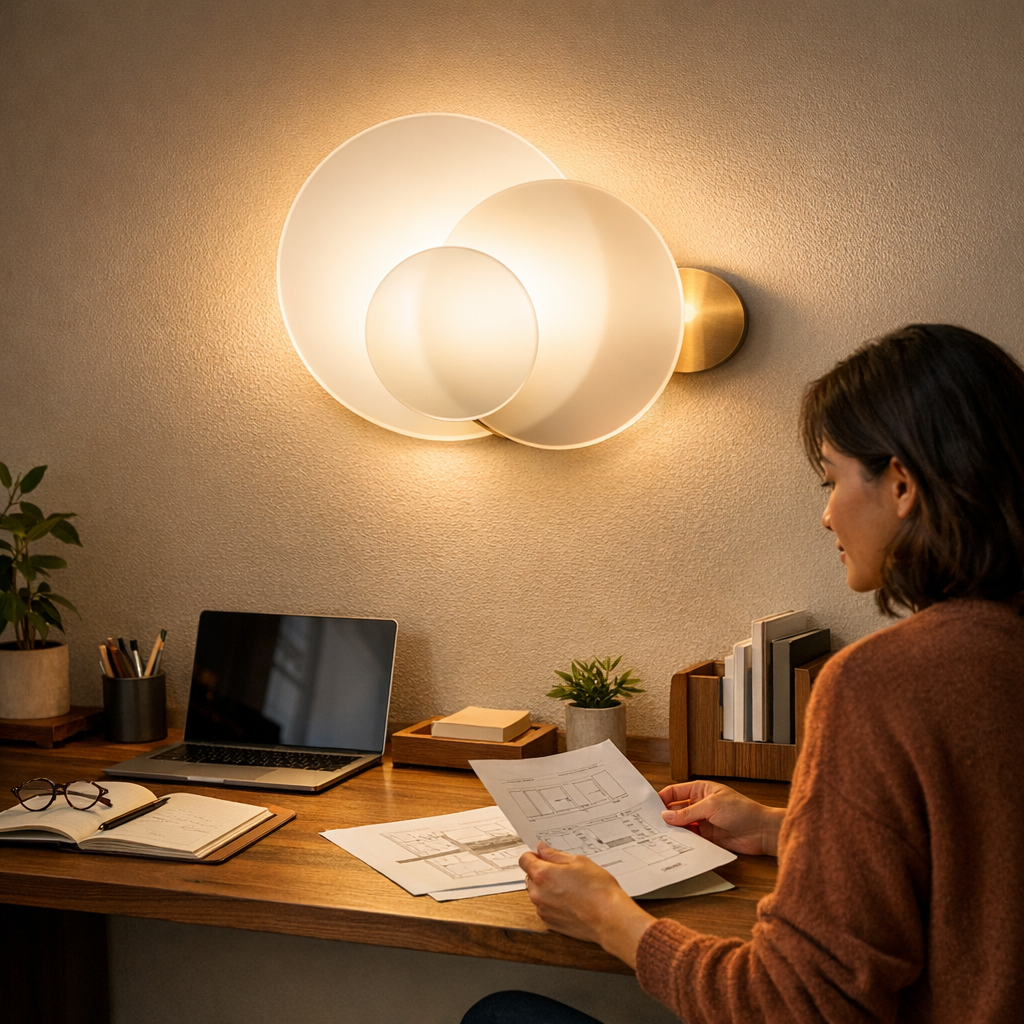
    Minimalist lighting setups often solve one problem by creating another. A slim desk lamp or flush-mounted LED strip may leave your work surface looking pristine—until the first week of real use reveals the cracks. Suddenly, the left side of your desk is hidden in a fog of half-shadow, monitor glare makes you shift your seat, and crisp cable runs start slipping loose with every new device you plug in. What appeared effortless at install becomes a subtle daily hassle, felt not in the photo but in every moment you chase lost pens or push lines of glare off your notes. The promise of “barely-there” quickly gets outpaced by the friction of actual routines—who cares if your setup fades visually if it leaves you stuck mid-task?

    Where Clean Install Meets Daily Interruption

    The first day after mounting a panel light or running cables tight against the wall, your space looks resolved—no clutter, open surface, no visible mess. But order that only holds still doesn’t stand up to repeated use. Reach for a marker at the edge of your work area, and your fingers land in the dim because the beam stops short. Adjust your laptop position, and now a cable is clipping the corner of your hand. Every plug-in or device swap nudges another wire out of line. None of it loud, but all of it repeated. The product disappears visually, but the inconvenience it creates keeps cropping up in the background—proof that hidden doesn’t mean handled.

    Desk Edges and Work Surfaces: The Reality Check

    Desk edges and task surfaces are where slim lighting reveals its weak spots. A perfectly flush under-shelf strip can spray enough light for most of the desk, yet leave the front few centimeters stubbornly dim. That’s the real-life storage zone—where tools drift, crumbs land, and your eyes get strained scanning printouts. Even a slick, cable-free look won’t offset a dead zone where you need to actually see. The result? Day after day, you find yourself constantly pulling things forward, shifting positions, or just ignoring that shadow stripe—a tiny flaw that scrapes at routine efficiency.

    Shared Zones: Tidy Install, Uneven Outcome

    On a shared study table or busy kitchen counter, a minimal fixture with neat cable paths can’t control what happens once the routine picks up speed. One person’s book stays well-lit; another’s recipe lives in a gray patch. Reflections off glossy surfaces throw hot spots back in your face. Cables that started tucked flush start trailing into arm’s reach after a few quick movements. The system that looked finished on day one becomes increasingly fussy to use, and everyone adapts with small workarounds—twisting, repositioning, taping down one more segment—but the basic mismatch is still there.

    The Cable Compromise: Invisible or Just Out of Sight?

    One of the biggest draws of low-profile lighting is the hope that wires will finally vanish. But nearly every “invisible” cable run starts falling apart the first time you move gear, recharge, or unplug. Adhesive clips pop free in the heat, velcro tabs sag, and a snug path from last week is now a new trip wire in today’s routine. Instead of noticing the light, you notice the mess—cables peeking around the desk edge or pulling power bars out with them. The detail that was supposed to stay backgrounded makes itself impossible to ignore.

    Support Hardware: Strong Start, Sliding Finish

    Most bracket mounts or cable clips feel bombproof during install, but the test doesn’t start until you start using them. Each lamp angle adjustment, each unplugged device, puts slight pressure where adhesive eventually gives up. Screw-in brackets or deeper anchors help, but a weak mount quickly turns stable light into wandering illumination—a desk that flickers not from tech issues, but because the light bar keeps sliding off-track. Before long, you spend more time pushing pieces back into place than getting work done under their beam.

    Adapting in Real Time: Micromoves, Major Relief

    One small shift can unlock a big difference. Sliding a bracket a centimeter forward finally lights the desk’s edge—a zone you kept losing pens in. Replacing a sagging adhesive strip with a rigid screw mount means your cables hold shape no matter how often you work or swap devices. When each visible beam actually covers the active work area and wires hold their run, the surface stays both clean and easy to use, even on days when everyone shares the space or uses it hard. Suddenly, there’s less pushing, searching, or compensating, and more just getting things done.

    Everyday Adjustment: Clarity Over Clean Lines

    The real verdict on any slim lighting setup comes from the hundred small moves you make after install. If you’re nudging the lamp again to chase away a shadow, adjusting your seat angle for the third time to dodge glare, or re-taming cords by lunchtime, the friction is not solved—it’s just better hidden. Minimal hardware has to hold up not just for the first Instagram photo but for the daily routine it’s there to support.

    Real-World Fixes: Make Minimalism Work Under Pressure

    • Reach the edge: Place your beam so it covers the entire work zone, not just the center. Adjust brackets or shift strips so the useful edge—the place you actually write or handle small parts—isn’t lost in shadow.
    • Secure where it counts: Anchor cables at the real points of use—right at the plug-in, not just along the back edge. Over time, physical fasteners (screws, mechanical clips) keep lines in place better than any adhesive.
    • Fight glare, not just clutter: Where shiny surfaces reflect the beam back, change the angle or add a diffuser. A desk lamp that’s ultra-thin but aimed wrong turns task lighting into eye strain.

    Beyond Looks: Minimal Still Has to Work

    The setups that succeed don’t just hide hardware—they remove the interruptions you would have put up with anyway. A “silent” light isn’t silent if you’re constantly compensating for what it misses. A line of cable that never sneaks out, a bracket that’s solid months later, a beam that reaches right where it’s needed—these upgrades shrink daily friction and disappear by truly supporting your routine. Minimalist doesn’t mean accepting less function for a sleeker look. If your surface looks clean but still feels awkward to use, you haven’t solved clutter—you’ve moved it from the eye to the fingertips.

    A little more attention to bracket placement, cable support, and light spread at day one can mean months without mid-task frustration. The best hardware lets you actually ignore it, and focus on the work, hobby, or gathering in front of you. That’s when setup stops being the problem—and the light starts letting the space work as intended.

    http://www.lightsupport.myshopify.com

  • How Smart Cable Management Transforms Your Workspace Efficiency

    The moment a desk looks organized is deceptive. A clear surface at 9am can slide into chaos by early afternoon—a phone charger creeping under your notebook, headphones looped around the arm of your chair, one cable always positioned in the worst possible spot just as you reach to jot down a note or adjust your monitor. Even with minimal gear, loose cords twist visible order into daily irritation: blocking notepad space, grabbing wheels, or dragging beneath your feet. This isn’t cosmetic. Every snag or pause pulls momentum off track and leaves your “organized” setup feeling slower, more awkward, and harder to reset after every shift in task.

    When cable management changes how a desk actually works—not just how it looks

    Cable control does more than tidy up the view—it directly shapes how smoothly you move, switch tasks, and recover workspace hour by hour. Desks that see regular switching between keyboard, notebook, and digital device make cable friction show up fast. If you have to sweep a charging cable aside before writing or snag a headphone line every time you shift your chair, the surface isn’t helping you. Under-desk cable trays, surface clips, and sleeves lift those lines out of the real traffic zones: above your knees, across elbow distance, or between your monitor riser and note-taking spot.

    There’s a downside. Push too many cords out of sight, and flexibility disappears. Need to swap out a device, change charging sides, or drop in a new adapter for a quick video call? An ultra-clean arrangement can make that simple change slow and fiddly. Clean lines on the surface sometimes mean a clumsy tangle of rules and reacharounds under the hood.

    Workstation realities: What happens when cables fight your workflow

    Consider a typical compact desk built for “efficiency”: laptop, tablet, phone, maybe a monitor riding on an arm. Even with little gear, by lunch you’re sidestepping a power brick with your foot and pausing to pull a headphone cable out from under your chair wheel. Slide the notebook next to the keyboard, and a charger blocks your elbow. These are not dramatic disruptions. But add up enough small stumbles—when a reset after a task swap takes longer, when every shift means another cable crosses your path—and even a clean desk becomes friction you notice.

    Contrast that with a desk after everything has its anchor: cable clips at the underside corner for chargers in active use, a cable tray catching the rest of the mess near the back edge, no lines crossing workspace or crawling onto your lap. Now the chair swings in and out cleanly. Flipping from the keyboard to the notebook takes one movement, not two. That phone cable no longer invades precious writing space or trails across the edge. Resets shrink to a flick or a quick replug instead of a full cable fishing session.

    Why pure tidiness can backfire: The flexibility gap

    If you regularly switch gear—external drives during a video call, new dongles for a test run, a monitor that shifts position by the week—fixed cable routing gets old, fast. When you need to reroute a cable threaded through multiple guides or bound beneath a tray, every adjustment interrupts your flow. That “clear” desk begins piling up deferred changes under the surface, and annoyance grows every time quick swaps transform into a mini project. Too much order creates new hidden drag where you used to have visible clutter.

    The shift: From perpetual rewiring to anchored flow

    Trial and error rewrites most desk setups. Transitioning from tangled accessibility to intentional routing didn’t mean locking everything down, but finding a balance. Anchoring a cable tray along the rear edge—behind the monitor’s zone—kept surge protectors, chargers, and adapters running flat, never low enough to trip a foot or block a drawer. Only a short lead made it above the surface—always deliberate, never sprawling.

    Over a week of normal work, that meant fewer detours: no more dragging the chair around old cables, no more rescuing a charger from the floor. Plugging in or swapping devices became ‘reach, click, done’. What changed wasn’t an absence of clutter on the desk, but the disappearance of three or four micro-annoyances repeated dozens of times a day. During busy cycles—full device swaps, shuffling between screens and notebooks—order held without constant fidgeting. The friction wasn’t just hidden; it was nearly removed from the routine.

    The real cable management tradeoffs: Trays, boxes, resets

    Under-desk cable trays are nearly invisible but powerful for stable, set-and-forget setups—best for anyone who hates kneeling under desks, loves open foot space, or regularly shifts seating without thinking. No line blocks a rolling chair or a long-legged stretch. But if your device lineup changes daily, fishing out new ends from the tray slows things down.

    Cable boxes—those compact bins sitting under or near your surface—let you swap cords in seconds. They’re the friend of freelancers or anyone in a shared workspace, where adapters and chargers rotate all week. The danger? These boxes eat clutter as quickly as they hide it. Add just one extra cable every morning, and by Friday, you’re digging through a new tangle crammed inside the box itself.

    Stability vs adaptiveness: When “fixes” start causing problems

    Clamp-on or adhesive routes guarantee stability. But each fixed cable multiplies the labor of any small change. Add a device, rotate the monitor to show a colleague, or swap a failed mouse mid-meeting—suddenly, the very system that stopped chaos now blocks your next move. The trick is landing at “organized enough to help, loose enough to flex”—and recognizing the warning signs that you’ve slid too far in either direction.

    Signals your cable setup is slowing you down

    Watch for these workstation flags:

    • Cables crawl back into your active reach zone by the afternoon—especially around the mouse, notebook, or phone stand.
    • Your chair always hesitates near the same cord or adapter, cutting off smooth in-and-out movements.
    • Quick resets—a device swap, notebook drop-in, or charger switch—come with a quiet sigh as you prep to untangle or reroute first.

    When “just work” moments slow down—when even small moves create hesitation or annoyance—your cable arrangement is no longer background. That’s your trigger for rethinking what stays, what gets anchored, and what needs faster change access.

    Building a better desk: Repeatable order, without over-fixing

    No cable management answer lasts forever. Real work shifts, hardware rotates, and habits form or break—so every hyper-stable setup risks becoming the newest friction. The goal isn’t flawless neatness, but predictable, reliable order that survives real routine: cables off the working surface, out of foot zones, always ready for a change but never dumping the problem straight back onto the desktop.

    The desk that works isn’t the one that never shows a stray cable—it’s the one that helps you move, jot notes, reset, and swap devices as needed, without the background dread of an inevitable snag. Clean looks don’t guarantee flow. What matters is that every reset, shift, and adjustment gets easier—not just neater—every week you use it.

    Explore the full WorkBasic collection

  • How Under-Cabinet Lighting Transforms Kitchen Counter Visibility and Usability

    Kitchens that look brightly lit from the doorway often break down under real use. The ceiling fixture switches on, the room floods with a pleasant glow—and then you grab a knife, lean over the counter, and stare into your own shadow. No matter how powerful that ceiling light is, it can’t reach under cabinets or along the backsplash where you prep, wipe, or search for lost tools. The result isn’t just a dim spot; it’s a stubborn, daily gap that works against you every time you move from “seeing the space” to actually using it. In the world of indoor lighting, nowhere does the difference between visual brightness and functional visibility become clearer—or more frustrating—than on the kitchen counter.

    Where Ceiling Lights Fall Short—And Why It’s Hard to Ignore

    It’s a familiar trap: ceiling lights pour an even blanket of light across the room, but the moment you step up to the counter, crucial zones turn unreliable. The backsplash sits in a permanent dusk. The tight line under upper cabinets never catches a direct beam. Every time you rely on these spaces, you find the same points of friction:

    • Knife work stalls: Your hand and tools throw double shadows, obscuring the exact point of the cut.
    • Cleaning gets patchy: Spills and crumbs cling to the back edge, invisible during a quick wipe-down.
    • Small items vanish: Spoons, scoops, and measuring cups slip into shadow, turning a two-second grab into a blind search.

    The consequence is small but constant: squinting, leaning, and shifting position to chase clarity that simply isn’t there. Kitchen work gets slower, less certain, and fractionally more annoying, every single day.

    The Problem Hides in Plain Sight

    “More light in the room” doesn’t mean “usable light at the counter.” Shadows at the far edge and under the cabinets never clear up, even with a stronger ceiling bulb or whiter paint. The angle is wrong; the cabinets themselves block the path, trapping darkness along the critical work zone.

    This creates an everyday trick: the kitchen appears ready and bright, but the very surfaces you use most often—back edge, right under shelves—stay stubbornly shadowed. If you prep at the wall, you push your work forward or put up with uncertainty. Missed spills and off-target cuts aren’t dramatic injuries—they’re quiet, recurring friction that dulls the entire kitchen experience.

    Seeing the Real-World Impact During Daily Use

    Take one evening routine: ceiling light on, onions out, you reach for the cutting board. The instant your body leans in, a thick shadow swallows the precise spot you need to see. You twist or shift, trying to catch an angle where the light fills the space, but the shadows simply rearrange, now duplicating or splitting under your hand. Even when nothing goes wrong, you’re working at half-clarity.

    Same problem during cleanup—a line of gloom at the back edge lets sticky streaks linger past multiple wipes. On busy mornings, the far corner swallows a measuring spoon, costing you time and a rinse. No one tells you why kitchen routines feel clumsier than they should. But it’s the invisible structure of the light—its reach, not its wattage—that keeps tripping you up.

    How Under-Cabinet Lighting Quietly Solves the Problem

    Under-cabinet fixtures target these blind spots with precision. Continuous, diffused LED strips or slim bar fixtures cast light right where ceiling setups fail: across every inch of the counter’s depth and into the backsplash’s farthest edge. The shift is practical and immediately obvious:

    • Every part of the counter—from wall to front—is evenly illuminated without break.
    • Double shadows shrink or vanish, restoring detail for chopping and reading recipes.
    • Nothing gets lost in darkness; spills, crumbs, and tools stand out instantly.
    • Movement becomes automatic—you stop hunting for light, and just get the job done.

    This isn’t about transforming your kitchen into a showroom. It’s about removing a subtle, built-in handicap that you stop noticing until it’s gone.

    Why Diffused Lighting Beats Spotty Puck Solutions

    Trying to patch the problem with puck lights or spot LEDs usually leaves you with worse contrast: some areas blindingly bright, others still in shade. The result—stripes of light and shadow—solves nothing for a long counter or wide prep zone. Only edge-to-edge, uninterrupted strips provide seamless working visibility.

    Replace pucks with a single diffused run under your cabinets, and the last stubborn dim spot disappears. You stop leaning or moving awkwardly just to see what your hands are doing—and finally, you clean and prep without working around the light itself.

    When Lighting Matches Routine—The Difference You Feel, Not Just See

    The goal isn’t just a dazzling kitchen. Reliable under-cabinet light locks in day-to-day ease that you can’t get from ceiling fixtures alone:

    • Prep tasks become automatic—no wasted attention on where the light lands.
    • Every surface cleans fully, not just the ones you can see at first glance.
    • No more searching by feel or shifting breakfast forward for lack of visibility.
    • Visual strain drops; the work zone feels finished and trustworthy all the way to the wall.

    That difference grows as the months pass. The proof isn’t just in a brighter kitchen, but in how you stop noticing shadows, awkward reaches, and small mistakes. Reliable coverage means one less invisible hassle—every day.

    Bringing Balanced, Task-Focused Light to the Kitchen Counter

    No ceiling fixture, however bright, can erase the deep shadow lines caused by cabinetry and awkward angles. Under-cabinet lighting closes that gap—delivering unbroken task light exactly where routines need it most. Diffused, edge-to-edge coverage shifts the kitchen from “bright but incomplete” to a workspace that simply works, no maneuvering or second-guessing required. Visibility becomes an unspoken part of the flow, supporting every meal, cleanup, and search—especially when the overhead light only gets you halfway there.

    Find practical under-cabinet solutions and more at LightHelper

  • Slim Lighting Solutions That Maximize Space in Small Homes

    Crowded lighting setups erode usable space—slowly but relentlessly. In tight work zones or shared surfaces, oversized lamps, jutting brackets, and trailing cords become more than visual noise: they’re real, daily obstacles. After a few weeks, it’s not just about how the room looks; it’s about what you have to push aside, reach around, or keep re-correcting. That lamp base that eats up half your desk, the cable that snags every time you roll your chair, the under-shelf fixture with an awkward bracket throwing shadow on the only spot you actually use—they’re not minor quirks. Each becomes a repeated interruption, carving out less comfort and less clear space than you planned for. The shine of a new fixture dulls quickly when every routine runs into one more setup drag.

    The Real Price of Bulky Lighting in Daily Routines

    Bulky or crowded lighting rarely feels like a problem on install day. In reality, the trouble appears as friction: moments where a lamp foot competes with your notepad, or a chunky fixture pushes your elbow off the best part of the counter. It’s the slow grind—clutter accumulating at the edges, cables slipping into view, dark lines forming wherever a bracket interrupts the throw of light. Kitchens with boxy under-cabinet fixtures often trade one shadow for another, with “solved” spaces gaining a new dead strip where the countertop matters most. Workstations seem complete until you’re forced to squat and untangle a cord cluster after your bag catches a loose plug yet again.

    Every “just for now” setup steals from your routine in ways that build up: keeping one hand clear of a bracket that won’t stay tight, or shifting bills and pens away from a murky desk corner. A fixture that looked resolved still demands navigation, cleaning detours, and extra care you never intended to give it.

    • Turning a lamp to chase paperwork, only to leave half the desk lurking in shadow
    • Bumping a too-tall bracket on your way to get a book, elbow stinging for the third time this morning
    • Vacuuming around a nest of cords, adjusting your path out of habit, never quite trusting the setup to stay put
    • Re-straightening a desk light that never sits flat, interrupting your routine every single week

    Slim and Low-Profile Lighting: Not Just for Looks

    Thin, low-profile lighting changes the surface rules the moment it’s installed. Instead of sacrificing desk area or walk space to lamp feet and curling cords, flat panels and compact strips tuck tight to shelves or stretch across wall edges, opening every inch of usable zone. Cables are routed sharp and out-of-sight, mounting hardware disappears below line of sight, and the surface feels genuinely clear—nothing to sidestep, no exposed cable path to snag or clean around.

    But the proof isn’t in the first day’s photo. Over weeks, the absence of friction stands out most: no glare skim across half the desk, no need to prop a book around an awkward support, no mysterious shadow right where you jot notes. Each workday, clutter remains at bay. Shelves stay practical—not just presentable. The improvement is lived, not just seen: you stop navigating around fixtures and start using your space without second thought.

    Spotting Common Pitfalls in Slim Lighting Setups

    No slim fixture can save a poorly supported or half-planned install. Mount a sleek LED bar too close to one edge, and you’re left with a constant patch of shadow under the opposite arm. Choose a bracket that interrupts the light run, and even the flattest fixture can cast a useless dark strip where you prep. Hardwired wall lights might banish cable clutter, but mess returns instantly if power lines are routed awkwardly or brackets wobble with every reach. Even slim plug-ins fail if a lazy cord loops across the writing area—visible, vulnerable, and always needing to be brushed aside before the work really starts.

    Scenes from Real Life: Where Lighting Friction Sneaks In

    The breakdown isn’t usually dramatic; it creeps in through daily use:

    • Dim desk corners: Install a slim panel just a little too far to one side, and pen, note, or keyboard falls half into shadow—the zone where clarity disappears and you catch yourself shifting everything for one more inch of light.
    • Cord drift: Unanchored cables snake their way back into view, curling across mousepads, knotting with laptop lines, and multiplying the mess every time you adjust position or swap a device.
    • Under-cabinet dead zones: Mounting a light short of wall-to-wall—or letting brackets interrupt the run—leaves a visible dark strip along the edge, right where kitchen tasks or sorting happen most.
    • Support failures: A bracket that starts solid sags with every routine shelf grab, pulling the fixture off alignment and making each day’s use less smooth and less trustworthy.

    Making Slim Lighting Work: Placement and Support Matter

    The real upgrade isn’t just visual—it’s practical space freed by correct placement and smart support. The best results come when fixtures span the entire usable length, not just the space between existing brackets or wherever seemed easiest to mount. Extending a slim panel to cover shelf-length or rounding a fixture around small obstacles prevents those recurring dead spots and shadow patches that sap clarity no matter how nice the room looks.

    Cable management needs more than hiding: it’s about rerouting cables so they never drift or intrude. Replace loose lines with a rigid, clipped-down feed that runs flush behind shelves or out of reach, and everyday work stops bumping against unsightly slack or exposed plugs. Every inch of the work surface stays open and genuinely ready—no cord to dodge, no bracket jutting out, nothing in the way when you move, lean, or wipe down the counter.

    Immediate Results, Noticeable Comfort

    • Full work surface stays visible and evenly lit—instead of fighting glare, shadow, or cable clutter
    • No physical distractions to dodge when cleaning or clearing space for a task
    • Cords and fixture supports disappear from daily memory, tucked snugly enough to stop snagging, drifting, or reappearing in the corner of your eye

    Tip: Plan for the Real Surface, Not Just the Fixture

    Start by reading the actual paths you use—not only the easiest spot for a fixture, but the full stretch where light and access matter. Choose mount points that allow the fixture to cover the whole run, even if this means modding the install with extender brackets or trimming panels to fit tight edges. Route every cable with intent: power lines should drop out of the way and outside all main work and walk zones. Small touches—flush clips, tight cable channels—cut down weeks of micro-interruptions and keep cleaning simple instead of a fight against creeping mess.

    Don’t Let the Details Sabotage the Solution

    Lighting that “looks clean” can still sabotage your work if cabling sags, a support gives way, or a bracket puts press on the wrong spot. Loose clips, visible slack, or unstable mounts remain in your awareness, spoiling hours of use with a single repeated annoyance. The best low-profile fixture will still frustrate if mounted in haste or supported by parts that flex, fail, or just don’t suit the real-life friction of your routine.

    Solid support turns thin lighting from a cosmetic fix to a routine-saving upgrade. The setups that earn their keep are the ones that feel as good on day 30 as day one—nothing to trip over, no new shadows to chase, and no fussy details clawing at your attention. A truly finished surface means less fuss, smoother movement, and open space you don’t have to think about beyond just turning on the light.

    LightSupport — Slim fixtures, smart supports, and accessories for practical, frustration-free indoor lighting.

  • Why Properly Fitting Indoor Lights Prevent Early Failures and Shadows

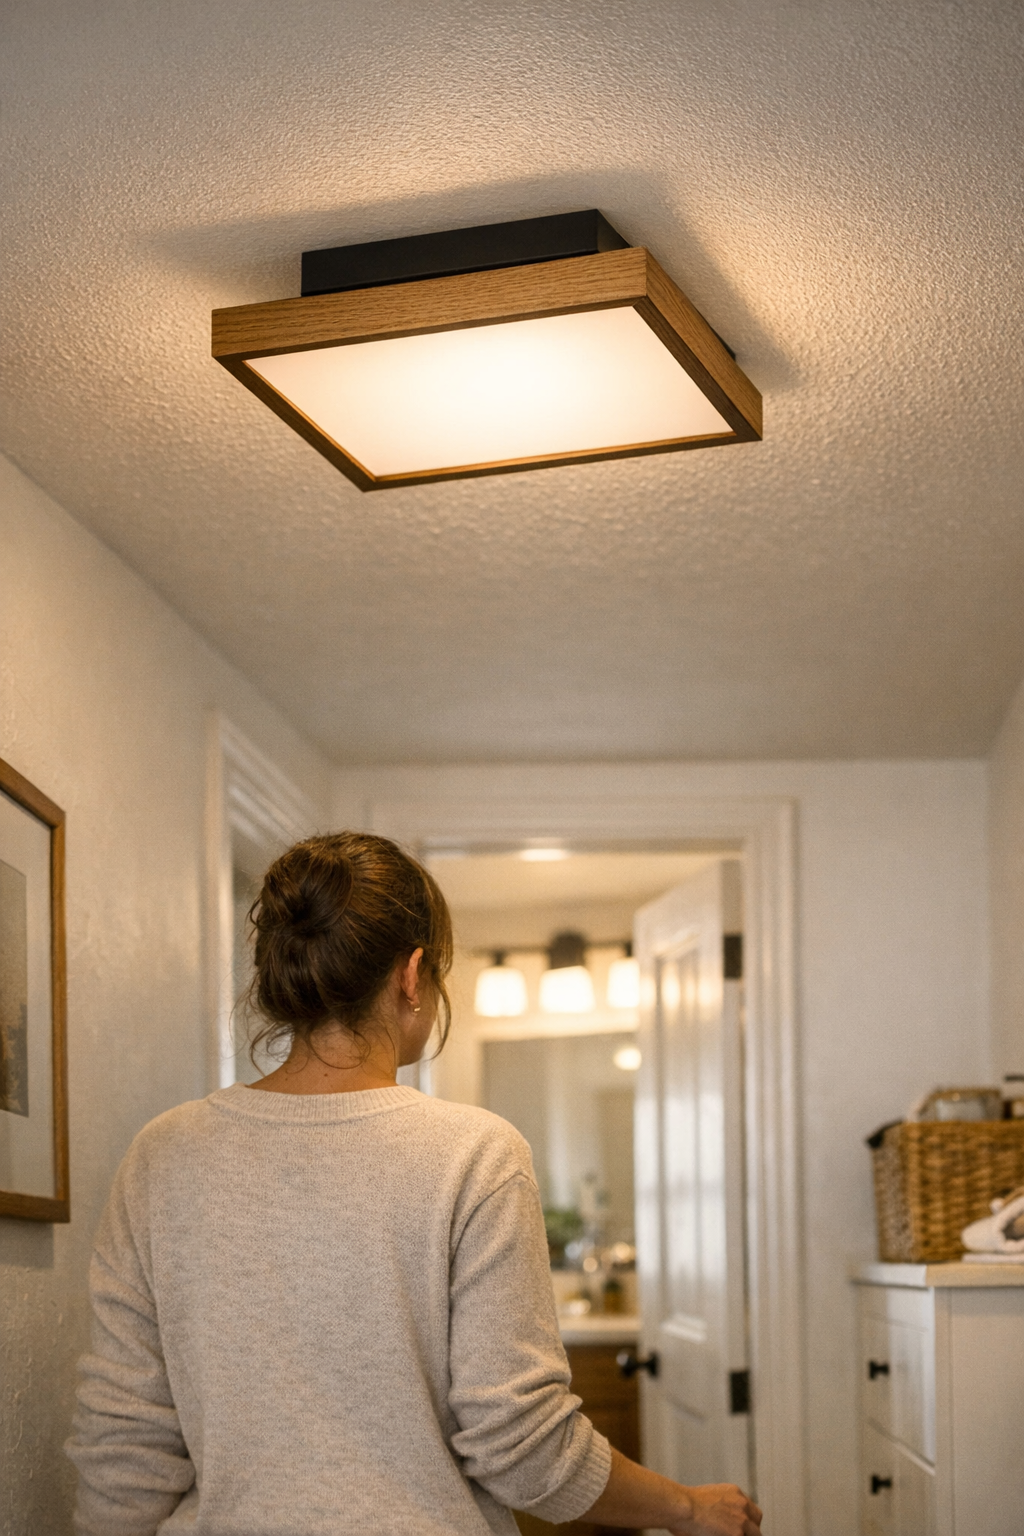
    The true disruption in indoor lighting isn’t in how stylish a fixture looks—it’s in what happens after it’s pressed too tightly against your ceiling or wall on day one. When you over-tighten a flush mount in a hallway or a damp-rated fixture above a bathroom sink, the wrong fit rarely reveals itself while you’re still on the ladder. The real signs appear weeks later: that streak of dimness stretching across your stair landing, a bathroom light that flickers softly every time steam lingers, or a shadow line that makes you shift left just to see the edge of your mirror. These aren’t casual quirks or design moodiness. They’re daily irritations—a sagging seam, an edge collecting dust, a work surface refusing to stay evenly lit—all triggered by a fixture tightened harder than the room was built to handle.

    Why Snug Really Matters: The Everyday Difference

    Daily routines expose weak lighting faster than any product sheet. In a narrow corridor, you find yourself slowing at the same patch where light doesn’t reach the floor. In the bathroom, you lean in to the mirror and your face splits between bright glare and persistent shadow. Grab a bottle in the laundry room and you have to hold it under the fixture just to read the label—the rest is lost to dim, mismatched spread. Each time, the space looks “well-lit” at a glance, but the experience is off: movement gets interrupted, task edges go undefined, and fixture seams catch dust you never remember noticing before.

    The cause is almost always the same: a ceiling or wall light clamped down too hard, bending its frame, distorting gaskets, or straining its contacts. The change goes unnoticed right after installation, but within a month, shadow arcs grow more obvious, small flickers invade your routine, and what was once clear and efficient becomes a source of hesitation or annoyance. Style doesn’t save a bad fit—if daily use makes you pause, squint, or sweep the same shadowed stretch yet again, overtightening may be quietly at work.

    Recognizing Subtle Signs Before Lighting Becomes a Problem

    In the world of indoor lighting, the damage rarely starts loud. Look for these recurring, easy-to-ignore signals:

    • Hallway flush mounts that leave a “dead zone” on one side at dusk, making half the path fade out as you cross
    • Mirror or wall lights that flicker after every hot shower, hinting at hidden moisture creeping in or a seal compressed too tightly
    • Stairway lighting that starts to rattle with each step, injecting hesitation right at every turn
    • Condensation tracks building above a utility sink, or fixture rims where dust returns in patterns no cleaning seems to resolve

    Both a perfectly snug and an overtightened fixture can look identical on install day. But as weeks pass, real differences emerge: paths you adjust for, awkward glare you learn to avoid, or bathroom routines stretched by uneven mirror light. If you catch yourself recalculating movement, dabbing at stubborn dust streaks, or tracing down the reason for new flickers after a seasonal change, the issue is no longer hidden.

    Room by Room: How Overtightening Quietly Undermines Use

    Narrow Hallways: When the Light Stops Following Your Path

    With every door swing and footfall, a hallway’s flush mount faces small but constant movement. Overtighten that ceiling base, and the fixture’s housing bends slightly with building shifts and temperature. It only takes a few weeks before you notice a band of shadow collecting where you need clear footing—or a hot spot of glare reflecting off a painted wall. The so-called even brightness is deceptive: you unconsciously dodge the dim edge, your stride briefly slows, and safe movement gives way to low-level adjustment, every single day.

    Laundry Rooms: The Cost of a Warped Edge

    Laundry and utility rooms push fixtures harder—moisture, abrupt temperature swings, and constant motion quickly reveal poor choices. When a flush mount or semi-flush light is too tight, humidity from dryer cycles seeps into small gaps opened by a flexed rim. Suddenly, the light falls away from the countertop, throwing a dented shadow over the load you’re folding. Lift a detergent bottle and you step left just to find useable light. Condensation beads at the fixture’s edge, making the next cleanup cycle a certainty and leaving you second-guessing how long the fixture will last before replacement.

    Utility and Bathroom Zones: Where Moisture Finds Its Way In

    Bathrooms are unforgiving to weak seals. A vanity or wall fixture pinched tightly to the wall can push its gaskets off center, inviting steam behind the lens with every shower. Over time, those droplets turn into a permanent lens fog or—worse—persistent flicker that pulls your attention every morning as you shave or apply makeup. Glance in the mirror and you see half your face clearly, the other half blurred by shadow, forcing makeshift adjustments in your daily routine. Corrosion risk and unreliable contacts hide behind the glass—what was “sealed” on install now collects problems in silence.

    From Friction to Fix: Returning to a Snug, Balanced Fit

    The fix is not a teardown—it’s a reset and a softer hand. Remove the lighting base, realign it, and tighten gently, only until truly flush—and never by wrenching force. Ensure gasket pressure is even and that the lens sits flat, no bowing, no visible tension. Even a minor readjustment can reclaim the original quality: stray shadows disappear from your movement path, obscure glare fades, and repeated condensate streaks hang back instead of invading lens seams. The lit zone feels whole, routine friction recedes, and your everyday movement resumes without that faint, automatic workaround you barely realized you were making.

    With a balanced install, you no longer find yourself glancing up in doubt, favoring one half of a mirror, or tracing dust lines that refuse to stay away. The space works, quietly, the way it should—movement and sightlines uninterrupted, brightness landing exactly where routines demand it.

    Recognizing and Preventing Future Lighting Headaches

    Pay attention during install and seasonal upkeep for the quiet warnings: a lifted rim, patchy seal pressure, odd creaks, or a persistent mini-flicker after cleaning. If the gasket’s not flat or the housing shows strain, reset before frustrating habits—and preventable problems—become permanent.

    Trust the most basic principle: tighten only by hand, just flush—never forced. A fixture should be secure and aligned, but never visibly compressed or under tension. The difference will show up faster than you expect in every daily move you make.

    Lighting That Works—Because It Disappears Into Your Routine

    The best indoor lighting isn’t the design centerpiece—it’s the solution you never notice once in place. If you’re not pausing at stair turns, shifting closer to the mirror, or working around a dim edge on your countertop, it means the fixture is doing its job: lighting the space, not interfering with it. In every real-use test, the quality of fit beats wattage or trend. Start with a snug, balanced install—and no overlooked hallway, stair, utility patch, or sink routine needs to suffer dullness, disturbance, or extra work to stay safely and clearly lit.

    Find dependable flush-mount, semi-flush, wall, and utility lighting built for real rooms and actual routines at LightHelper.

  • How Proper Cable Management Transforms Your Desk Workflow and Focus

    A desk can look sharp—pens lined up, monitor raised, everything seemingly in its place—while still delivering the same annoying slowdown: cables constantly tangling or dragging under your feet. The real friction starts beneath the surface, out of sight but not out of the way. Step in for a quick note beside your keyboard, adjust your chair to reach the second monitor, and suddenly your shoe hooks a cable, or a wheel grinds up against a charger you thought was tucked out of the way. Organization on paper doesn’t stop the reality: each time you change positions, cables pull or shift, breaking your concentration and forcing a reset. That line between a desktop that looks “organized” and a space that actually supports uninterrupted work is thinner—and more consequential—than it first appears, especially where cables are concerned.

    From clean surface to foot traffic: where cable friction really lives

    Desk setups rarely fail from a messy surface alone. Most slowdowns hide below, where legs, chair wheels, and cords battle for dominance. Maybe cables are looped behind the monitor and only a laptop charger is visible. But as your workflow shifts—grabbing a notepad, leaning to plug in a phone, gliding over to pull up a document—the cables beneath start drifting, sagging, or sliding into new paths. What felt clear at 9 a.m. turns unpredictable by late afternoon.

    Interruptions that never look big—just feel constant: Tripping a cable is a small event, but the aftermath costs more than you’d guess. Crouching to untangle a snag or hunting for what got unplugged pulls you off task repeatedly. In crowded desk corners, every charger or mouse cable that’s out of place means more cautious movement. Multiply that by each rush to switch devices or adjust your work zone, and sudden cable friction becomes part of your day whether you see it or not.

    Why “looks neat” doesn’t mean “runs smooth”

    Tidy cable paths taped along desk legs or routed behind drawers hold only until real use intervenes. Desk depth vanishes quickly—especially on compact workstations—leaving cables one bump away from spilling into leg space again. Routine resets add up: curling stray cords back, wrestling with a phone charger that pops free when you move your office chair, or sweeping the surface only to find the clutter has shifted below. A space can pass the visual test but fail under real pressure: the difference comes out in every tug, block, or pause you make without thinking.

    How subtle cable problems interrupt the whole work cycle

    Hidden cable trouble is the quiet enemy of repeated, focused work. It creeps into key actions, pulling attention and body alignment off track with every cycle:

    • Chair friction: Chair rolls aren’t smooth—you brace with a foot to dodge a loose cord, or your next move is slowed by a wheel hung up on something that shifted since last time.
    • Plugs you can’t trust: That lamp cable or monitor power cord, loose just enough for subtle flickers or full disconnects mid-call, triggers an unexpected scramble during work sprints.
    • Workarounds in posture: You alter your sitting angle, shifting right or leaning forward, just to avoid a recurring tangle by your left ankle. Over days, even a slight adjustment compounds into stiffness, distraction, and slower workflow.
    • Nagging resets: After a near-miss—like a sudden lamp shutoff—you become cautious, pushing in your chair with unnatural precision or scanning for slip zones, feeling the friction in every repetitive action.

    Each missed beat might look trivial. But over weeks, the total cost is lost focus, shortened work bursts, and physical wear—frustrations most visible not in your desktop, but in how you move and how often you have to recover momentum.

    Real-world fix: reclaiming movement with simple cable structure

    Immediate impact, no overhaul required: Elevating cables just a few centimeters—using an under-desk tray or channel—transforms leg space and movement. No more accidental unplugging as you slide in. No stopping to nudge a charger away from the chair wheel. The real upgrade isn’t aesthetic; it’s functional. On the left side of my own desk, regular entries and exits always meant brushing cables. Installing a slim tray solved this, clearing the movement lane so sitting down and repositioning became automatic again. The visual surface didn’t change; the experience underneath did, breaking the habit of double-checking for trip hazards after every work break.

    This isn’t about a big system overhaul. Even desks with barely enough clearance benefit from the shift: the repeated micro-stress of checking, fixing, and resetting simply drops away. The desk finally supports your movements instead of resisting them—day after day, not just after a tidy-up session.

    Why quick fixes rarely last in real routines

    Temporary solutions—tape, zip ties, office supply workarounds—fail fast under daily movement. Tape peels away from sweaty summer legs. Binder clips loosen just as wheels roll close. The cables you managed yesterday return to snag territory after a few hours, and new messes appear (sometimes stickier, often more tangled). Each short-term hack adds hassle, not stability, dragging your reset routines even further from smooth operation.

    Lasting cable control wins silently: Permanent under-desk structure is the only answer that actually protects your pathway. It doesn’t have to be elaborate—just consistent enough to hold the line between your feet and the cords meant to stay above them. The win isn’t just a less cluttered look, but a working rhythm not interrupted by sudden resistance every time you move.

    Daily returns: What actually changes with better cable flow

    As you tweak your setup—each cable tray, raceway, or upgraded organizer—the gains show up not on your desk but in your routine. No more second-guessing whether the charger might have migrated into chair space. No more hesitating before pushing back or leaning in. Sitting, working, and readjusting flow with far less interruption. What disappears are the “small” problems: accidental unplugging, cable drags, foot-level clutter. What’s left is a space that works with you, even as your workload, number of devices, or seating habits change across the week.

    Please don’t aim for perfect: Real desks evolve. But solid cable management holds its value through every change, making the space sturdy enough for long work hours, device swaps, and spontaneous note-taking. The relief isn’t showy—it’s felt every time you move and don’t get pulled out of the task.

    Quick answers: Cable clarity for your everyday desk

    • How does cable clutter hurt workflow? It blocks free foot and chair movement, pulls your eyes and attention, and turns small resets into constant, accumulative interruptions that eat away at focus.
    • Why not just tape, clips, or quick fixes? Because motion, gravity, and real desk use win every time—makeshift solutions break or slide, putting you back in the same tangle with more frustration.
    • What clears the way permanently? Elevated trays, raceways, or cable management solutions that keep cords above your contact zone—preserving clean movement even as device routines and layouts change.

    Desk efficiency seen, and felt, from underneath

    The test of a workstation isn’t what you see on first glance—it’s how easily you can move and reset throughout the day. Elevating cables out of foot and wheel space makes every shift, stretch, and routine work reset friction-free. Even if the surface looks similar, the space works better. For anyone moving between long sessions, fast interruptions, and shifting setups, these underneath fixes lock in real, repeated gains—minutes recovered, movement restored, and yet another invisible hassle cleared for good.

    Explore the full WorkBasic collection

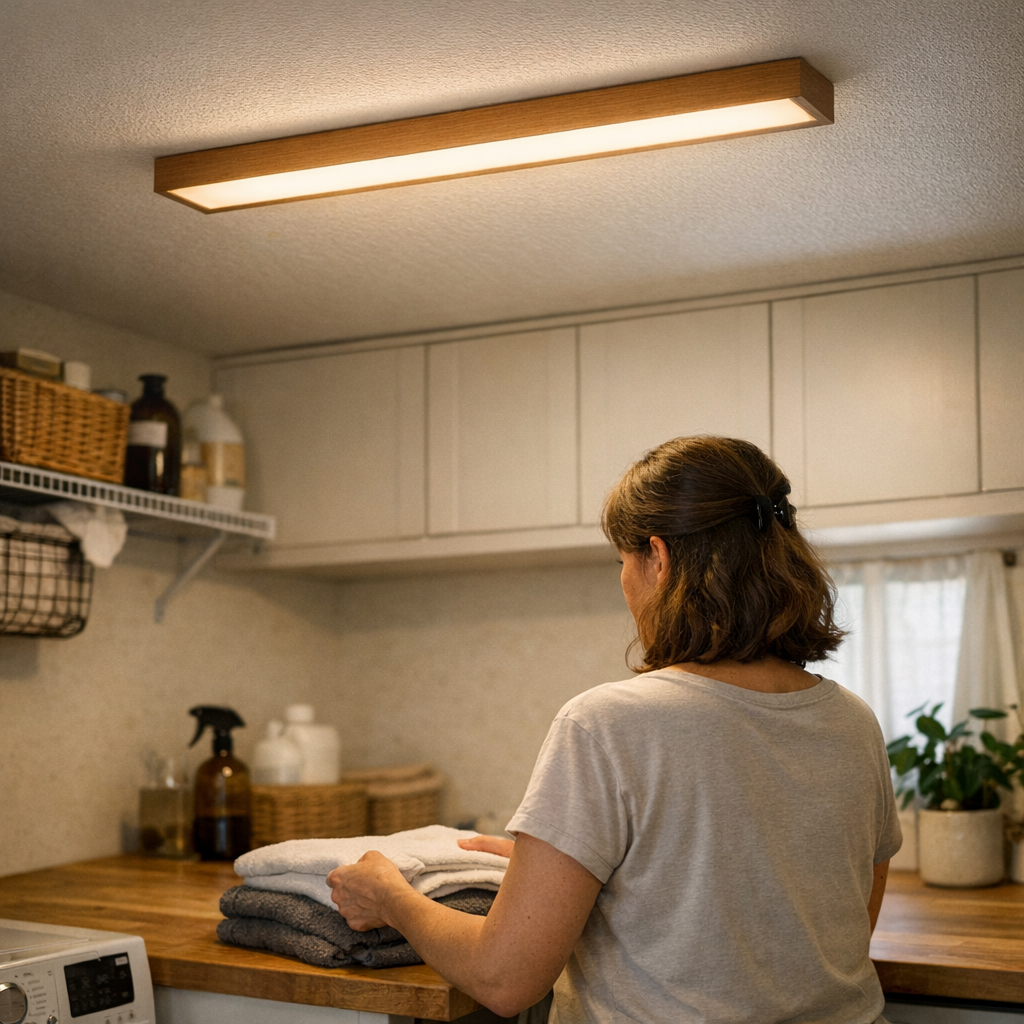
  • How Linear and Panel Ceiling Lights Solve Everyday Lighting Frustrations

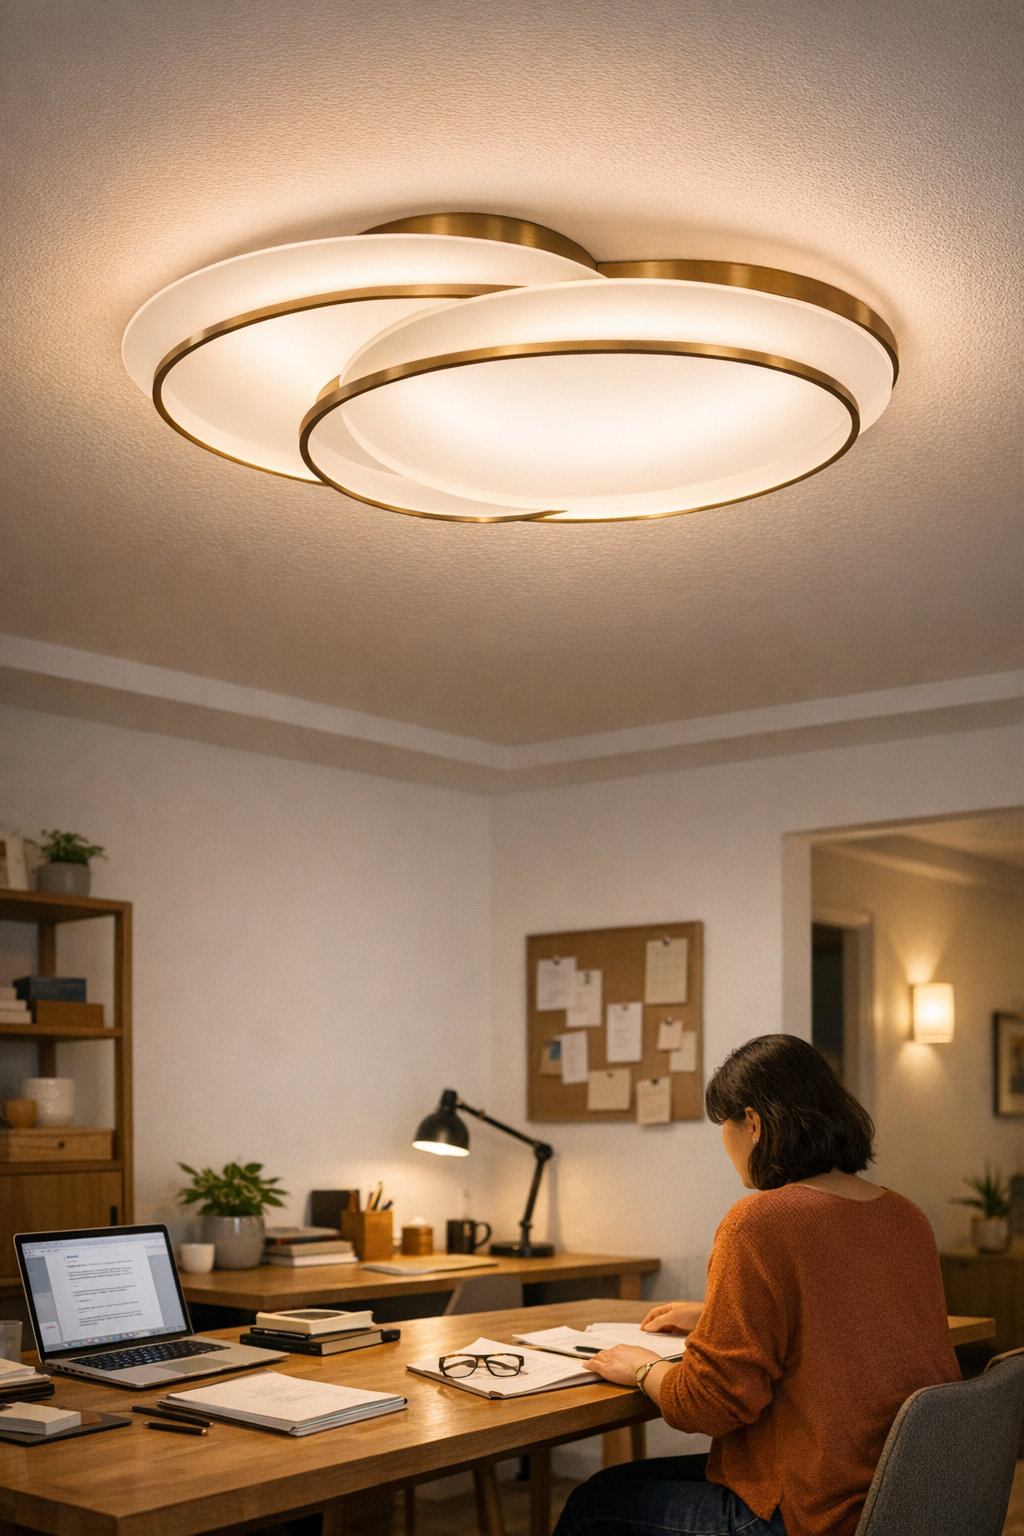
    Ceiling lights that look organized rarely solve the real problem: daily use keeps exposing the weak spots. Upgrade the fixture, reposition a lamp, adjust a dimmer—yet within a week, you’re back at the same routine: shifting seats to dodge glare, dragging in a backup light to reach a shadowed edge, dodging cables that break up the view, or working around a bracket that quietly eats into your space. That visual order you created vanishes under the hassle of constant micro-adjustments and persistent underlit zones that never quite disappear. If the lighting looks streamlined but keeps interfering with your routine, the setup’s failing where it counts.

    When Lighting That Looks Right Isn’t Actually Working

    Getting a fixture to “fit” visually is easy; making it support your real routine is where most setbacks begin. The mismatch becomes clear not in the first walk-through, but once the room is used in earnest. Shadowed desk edges make sustaining paperwork a daily strain. That glare-free tabletop turns into a source of eye fatigue when one half stays dim and the other starts bouncing harsh, direct light. Cables, at first pressed out of view, start creeping into sightlines during long evenings. Even the sturdiest bracket can trap usable surface, cutting off a key task zone or passage—reminding you, every time you sidestep, that the support was designed for order, not actual movement.

    • The far side of your desk is lost in shadow, no matter how often you reposition your chair.
    • Dinner becomes a test of endurance as bright spots alternate with dead zones along the table.
    • Exposed cords come back into view every time the room is used for what it was meant for, not what it was staged for.
    • A bracket solves visual symmetry but forces you to reach around it, changing how you use the work area.

    The grind isn’t about brightness—it’s about the slow, unfixable drag of uneven light and physical obstacles that no new bulb or higher lumen figure really resolves.

    Why Linear and Panel Lights Change the Routine

    Linear and panel ceiling lights shift the daily experience from “managing around darkness” to finally using every part of the room as intended. Their broad, even spread fills in the weak zones, leaving no excuse for a dim desk edge or a repeatedly shadowed corner. The difference is clearest at the edges: where a compact or spot fixture fizzles out, a panel carries light smoothly, so you stop moving the lamp or hovering near a single bright point. With less adjusting and chasing after clarity, the surface—worktable, hallway, or reading zone—just starts working without fuss.

    Standard options—can lights, spot fixtures, and most table lamps—scatter bright islands with dark patches in between. The result? Simple activities like switching from reading to team work become mini logistics puzzles; at least one person ends up in the shadow, or you keep tweaking lamps and adding cords just to smooth out the light. Attempts to patch these gaps—more lamps, new angles, an endless cycle of “quick” upgrades—merely add clutter, interrupting both the visual order and the routine. Even a bigger light backfires if mounting, cable path, or bracket placement ignore how you actually use the space: it’s easy to install a fixture that solves the schematic, but frustrates every day in practice.

    • Collaborative work leaves someone struggling with a shadowed stretch while the other squints into spillover glare.
    • Hallway travel turns into a hunt for shoes or keys as the light skips across the room center, missing the floor near the wall.
    • Patching one flaw creates another: more fixtures mean more cable paths, more supports, and more ways for glare—or a clumsy route—to creep back in.

    Clean Lines Matter—But Daily Behavior Matters More

    The instant appeal of panel and linear ceiling lights is all about visual calm—cables hidden tight to the beam, brackets flush with the ceiling, and work surfaces left open. But after a week, surface-level neatness is exposed by lived routines. A true flush-mount fills the edge spaces spotlights miss, maintaining usable brightness wherever you reach or sit—not just in the design mockup, but as you shift from task to meal to recharge. Makeshift combos or shotgunned task lamps may photograph well, but quick reveal their price: mismatched levels, reflections cutting across work, and the constant urge to tweak a lamp or adjust a shade just to get comfortable at night.

    The Tell-Tale Signs a “Clean” Install Isn’t Performing

    • The light covers most of the room, but leaves a dim strip right where hands rest or laptops sit—a sign the “fit” was only surface-deep.
    • Cable lines, bundled out of the way at first, end up exposed in real use as you sit, shift, or move deeper into the room.
    • A support bracket that keeps everything level still intrudes into the workspace, meaning you work around the solution instead of with it.

    These aren’t just small tradeoffs—they’re everyday distractions that chip away at comfort, add clutter, and erode the sense of calm the clean look first promised.

    Real-World Lighting Scenes: Where the Details Sneak Up

    Setup choices show their impact fastest in these two trouble spots:

    In the Hallway: Darkness Lurks at the Edges

    Two shallow panel lights installed along a hallway floor—not down the center line—turn low corners from blind spots into clearly visible paths. By contrast, a run of ceiling cans spaced only for aesthetics leaves shoes, cords, or dropped items in the dark, while glare splashes across unused wall surfaces. Walk the hallway at night, and the weak setup gets exposed: missed floor edges force you to slow down and avoid obstacles that shouldn’t be in your way at all.

    At the Shared Desk: Shadows and Surface Blind Spots

    A “minimal” ceiling fixture above a shared workspace might tick every visual box, but test it in action—two people lean in, one gains nothing but hand shadows while the other copes with direct glare off glossy papers. Task lamps breed across the table just to patch the blind zones. Cables sprawl, nightly cleanup includes another tangle, and the shortfall isn’t fixed—just disguised. With certain supports or brackets placed for symmetry rather than movement, you end up circling the problem: reach, adjust, reposition, repeat. Light that looks right on day one keeps interrupting each routine long after.

    And if cables or bracket arms rest too near reflective surfaces, glare is baked into the design, forcing a round of re-aiming or extra filters that just bring more mess and less comfort.

    The Pattern: Small Inconveniences Add Up

    None of these issues are rare—they simply accumulate in any room where lighting was chosen for appearance rather than real-world use. Within days, the setup that should have solved everything becomes another source of friction: chores take longer, comfort erodes, and what was meant to be maintenance-free demands constant attention.

    How Setup Details Actually Solve the Problem

    Lasting comfort starts with small, targeted adjustments—they matter as much as the fixture itself:

    • Moving a linear light’s support bracket to dodge a ceiling beam lets you neatly hide the cable along trim—suddenly, the light recedes into the structure instead of fighting it.
    • Routing power cords along the shadow of a wall or inside molded detail keeps exposures out of main sightlines and stops them from dominating the view every time you sit or get up.
    • Lifting a panel as little as a centimeter can erase missed edges on a desk or counter, restoring the surface to full, comfortable use—no extra lamp required.

    After dialing in these structural details, routine tasks become automatic again. No more nightly hunt for a better-lit spot; no more last-minute lamp shifts; no more tripping on cords you forgot to tuck away. The light simply works. The support setup fades—you no longer register it as a problem or a project, just as part of how you use the room.

    Is a Linear or Panel Light the Right Solution for Every Space?

    Panel and linear fixtures deliver higher payoff in open, broad-surface rooms where coverage, not visual novelty, matters most. But effectiveness always traces back to support—cable runs and bracket choices have to work with the structure and how you really use the space. If install logic breaks down, even the most “complete” light falls short during repeated use.

    The actual fix isn’t just choosing a bigger or brighter fixture, but rethinking how it gets positioned and supported. Cable paths work best when routed toward beam edges or concealed within architectural breaks; brackets need to clear major movements and work not just overhead, but around hands, tools, and paths on the surfaces below. It’s how you position, mount, and route support hardware—not just which light you install—that quietly decides comfort, downtime, and the look you keep living with.

    Height, Angle, and Space: The Subtle Difference

    Low ceilings demand flush panels or shallow-m

  • Prevent Lighting Installation Failures with a Simple Ladder Parts Cup

    Most lighting installations don’t fail with sparks or shattered glass—they fail by degrees, in the small, invisible ways that keep showing up every time you cross the room. Miss one screw or drop a vital clip during a ceiling or wall fixture swap, and what feels like minor lost time on the ladder turns into a chain of daily annoyances. Anyone balancing awkwardly on a ladder, wedged beside the washer or squeezed between hallway walls, knows the friction: reach for the next fastener, realize it’s vanished, and now you’re juggling brackets, shuffling hardware on top of an unsteady light, improvising a fix that never quite sits right. The job looks finished from below—but the minute someone slams a door or you grab the stair railing, the fixture wobbles just enough to make the whole upgrade feel questionable.

    The Real Cost of Lost Parts in Lighting Installs

    The hidden enemy of reliable lighting isn’t slow work—it’s the shortcuts and compromises forced by missing parts. Screw up a flush-mount install in a narrow hallway or a wall sconce beside the bathroom mirror by losing just one small connector, and you’re left with more than lost time. That fixture sways after every closing door, its mount loosens with regular vibration, or it flickers unpredictably. The light looks okay at first, but days later, shadows creep across the stairs, mirror edges show uneven glare, and you find yourself re-torquing screws that should never need another turn. All from one dropped washer or mislaid clip.

    Every shortcut here ripples outward—turning “good enough” light into new blind spots, unreliable movement on stairs, or the sense you should keep tools handy for another round of fixing. A bright hallway becomes a nothing-special zone. Uneven glare at the bathroom mirror reduces usable space. That feeling of trust in a room’s light begins to fade, replaced by small doubts: when will this fixture need to be patched up again?

    Practical Setup: The Small Parts Cup That Changes Everything

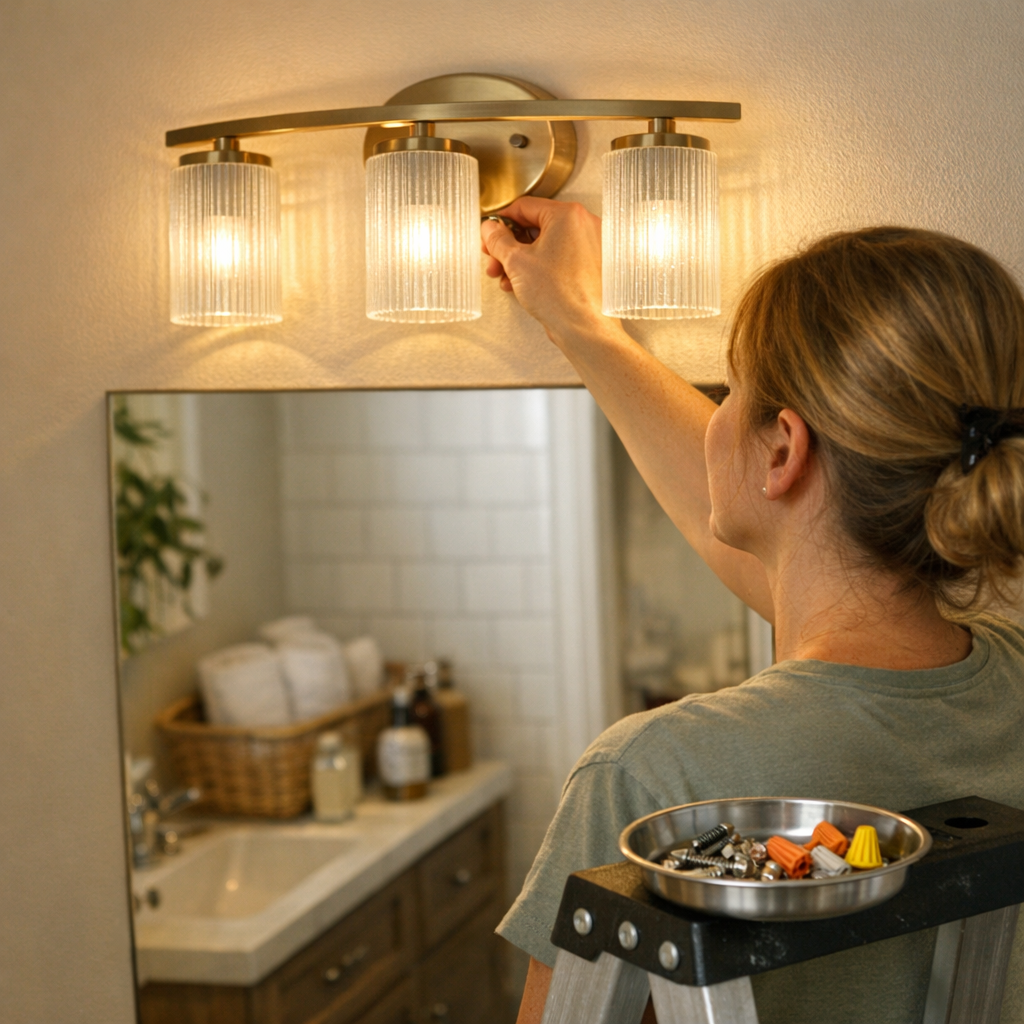
    Veteran installers don’t trust luck—they keep a small parts cup fixed to the ladder before even unpacking the fixture. It isn’t elegant, but it prevents nearly every “vanished fastener” scenario that derails the job. On a metal ladder, a magnetic cup locks in. For fiberglass, a clipped or hooked tool cup does the same work—keeps nuts, screws, and clips in grabbing range no matter how much you’re twisting over a stair turn or tight laundry alcove.

    Why is this non-negotiable in lived-in rooms? Areas like stair landings, behind stacked units, or tight hallway corners multiply the odds of dropped parts. One lost screw can turn a routine install into a half-hour of searching crevices, or worse, an unfinished fixture you have to work around for days. A parts cup—magnetic, clipped, or even just zip-tied to a rung—locks down routine chaos. It means each step from prep to finish goes without the awkward slowdowns that allow subtle failures to creep in.

    Fewer Interruptions, Fewer Quiet Failures

    Consider the flush-mount ceiling light in a corridor: with every piece at your fingertips, there’s no shuffling down and up, no lost energy hunting for a screw that’s wedged by the baseboard. The install clicks along—and so does the long-term stability. Skip the parts cup, and you invite the silent kind of breakdown: a bracket left loose so the fixture drifts, subtle shadows that creep along the wall, a mounting screw missing that lets the whole light vibrate itself loose after a week of foot traffic.

    • No half-attached brackets: Fixtures hold tight, avoiding slow sags and sideways drift after daily use.
    • Shadow stays controlled: Proper mounting keeps light spreads even, so you’re not shifting at the mirror to dodge a glare line or dark edge.
    • Vibration becomes irrelevant: All fasteners in place means regular door slams or hurrying feet won’t knock the fixture off level.

    Recognizable Fixes in Everyday Spaces

    Walk through your actual routine—mirror at the sink, edge of the laundry counter, tread at the stair turn. Miss a spacer or bracket in these setups and the flaw turns up fast. That vanity light looks fine first night, but shifting screw tension twists the spread after a few days, misdirecting light or casting new, unflattering shadows across your face.

    Hallways reveal the difference clearest: a properly finished ceiling mount feels stable long after install, but shortcut the process and every set of footsteps risks a rattle or a tick—a constant reminder of what didn’t get done right overhead. On a stair landing, unfinished work shows itself with every grab at the rail—small fixture flex means the nagging fear that something’s always a little loose, a little uncertain. Tight laundry rooms expose any missed step; a missing clip forces you to patch, prop, or live with skewed light on the folding surface until you can try again.

    Real-World Repeats: Where Friction Builds, Not Fades

    Unlike a decorative fixture in a guest room, core lighting gets tested in cycles: morning movement, after-dark trips, every quick mirror check. Repeat use in these key spots amplifies any install oversight. A hallway sconce that loosens means more interruptions—and, sometimes, more real risk. Shadows nudge into the wrong place, routine movement slows to avoid a dark step or glare patch, and what started as a 30-second stumble for a dropped screw now disrupts your schedule week after week.

    One Simple Habit: Reducing Lighting Frustration for Good

    Regularly fixing a small parts cup to the ladder before every lighting change cuts straight through these minor disasters. The difference gets sharpest at mirror wall lights: no more lost fasteners behind the sink, no more off-center drift or glare pattern you have to “live with” because the hardware’s now inaccessible. You don’t win by perfection—you win by default, with every fastener exactly where it belongs and no need to second-guess a shaky fixture during daily routines.

    If you use a non-magnetic ladder: Grab a fabric or silicone tool cup with a stout clip and clamp it to the top tray or side rail—just keep it within reach. Even the most basic zip-tied dish beats crawling for a runaway part behind appliances or inside cabinet runs.

    Better Lighting Begins With Strong Structure—Not Just More Bulbs

    Consistent indoor lighting isn’t about maxing out lumens or spending on fancy fixtures. The real payoff—stability, safety, light where it’s truly needed—lives in the install details you don’t see from the floor: how tight the base sits, whether every screw holds, if the mount will stay level after a month of commotion. Secure structure stops glare lines, blocks random shadow streaks, keeps the room usable for movement and routine tasks long after the “new fixture” effect fades.

    A lighting job that starts with every part accounted for and every connection solid becomes a room you barely think about: no more last-minute tightening, sidestepping dark patches, or bracing for a rattle each time someone rushes past. That’s the line between a space that simply “looks new” and one that actually works right for all your lived-in routines.

    Visit LightHelper for practical indoor lighting solutions.