Category: Lighting & Work Setup

  • Ensuring Reliable Bathroom Lighting That Withstands Daily Steam Exposure

    Every “damp rated” bathroom fixture looks like a solution—until daily steam routines expose the missed details. The mirror’s edge blurs, the lens fogs from beneath, and corners lose definition right where you’re trying to shave or read. The box claimed reliability, but the real test isn’t the first week—it’s the fifteenth morning you’re wiping water from a supposed upgrade and still hunting for clarity at the edges.

    When “Damp Rated” Isn’t Enough in the Real World

    Most “bathroom approved” lights carry an implied promise: install once, forget the problem. But as steam finds its way along every seam and bracket, the compromise becomes obvious. Forget the catalog-perfect center glare—the friction lives at the fog-prone edge, the dim patch above the sink, or the silent drip where a cable meets tile. If normal routines now involve extra wiping, squinting to catch detail, or missing the quick clean hit of light across the mirror, then the setup isn’t holding up under real use.

    Everyday Frustrations That Signal a Deeper Issue

    Small irritations stack fast: fog creeps behind the lens, an edge flickers on a rushed morning, or you catch the first sign of corrosion at a half-covered cable entry. A fixture that looked “right” on paper turns into a repeated nuisance—forcing you to adjust your routine, shift for task light, and wish you’d checked for better mounting. These aren’t style imperfections; they become daily penalties for missing the right support logic.

    How Real-World Steam Cycles Expose Weaknesses

    Steam skips past labels. A bracket that seemed flush now shows a thin fog track by the mounting plate. Cable runs that sat tight on day one become moisture channels. Light that once spread evenly now draws shadows at the mirror edge or a dull haze on shelves. The core question isn’t “is it damp-rated” but “does it actually block steam from reaching the wiring and seams after weeks of routines?” A fixture failing this test leaves you with missed corners, inconsistent brightness, and visible weaknesses right at peak routine hour.

    Real bathroom lighting support isn’t defined by claims. It’s measured by whether visibility stays sharp after daily hot showers—and whether you find yourself reaching for a stronger bulb or just wishing for steadier light along the walls and glass.

    The Telltale Signs of a Setup That’s Failing

    • Mirror fogging and blurred details even after the fan clears the air
    • Moisture streaks or haze visible inside a lens—sometimes trapped for days
    • Corners and shelf edges that remain dull, making details disappear
    • Pitting or rust at cable inlets, bracket seams, or wall interfaces

    Each is a signal that cable paths, bracket coverage, or mounting logic let real-world humidity win out over “approved” sticker comfort.

    What Actually Works: Tight Mounting, Sealed Cable Routes, Real-World Ratings

    Lasting improvement starts with setups made for steam’s persistence. High-performing bathroom fixtures aren’t just sealed—they physically close off gaps at every stress point:

    • Gasketed backplates block moisture where the fixture touches the wall, so steam never crosses into wiring.
    • Brackets that set completely flush prevent subtle sag or mounting flex—so cables and seams don’t open up after repeated cycles.
    • Fully routed and covered cable entry keeps each cable run tight to the wall groove, leaving no exposed track for drift or condensation.

    From Clean Appearance to Lasting Clarity

    The visible difference doesn’t show on install day but after daily routines. After a run of showers, the right setup means no more mirror haze, no need to wipe down the lens, and—crucially—no dimming at the edges or shelving out of reach for light. Instead of increasing the wattage to fight fog, the support hardware keeps the coverage stable, the edges lit, and the hassle out of your routine. The true advantage isn’t more output, but fewer weak points—and the confidence that your setup won’t let small annoyances stack up over time.

    Real Bathroom Routines: Where Good Lighting Holds Up

    In a real hallway bathroom, it only takes a long weekend for weaknesses to show. A fixture mounted without full sealing leaves the vanity dimmed at the corners, storage shelves receding into indistinct shadow. Moisture routes through any open bracket slit or missed gasket slot, undermining the promise of the “right” label. Every attempt to compensate—angling for a clearer view, bumping up to a harsher bulb—shows another subtle flaw in the support logic.

    Set that against a bathroom where mounting, gasket, and cable choices seal out the steam: visibility holds, mirror edges stay crisp, routines move without fidgeting, and there’s no slow buildup of irritations. There’s no need to twist for brightness or track down water intrusion. The entire setup remains as even and usable as the day it was installed, because the structure keeps holding up—not just the style.

    Small Tips for Immediate Improvement

    • Check cable paths closely before installation: even a millimeter gap can turn into a constant fog point within weeks.
    • Mount brackets with no give; align flush with wall or tile so that steam has nowhere to enter and expand inside.
    • Select fixtures with full gasket coverage—don’t trust an “approved” label if you can see an open seam or entry slot.

    Seeing Past the Stickers: Choosing What Lasts

    Every fixture looks convincing on day one—but bathroom steam will call out every shortcut before week’s end. What matters is beneath the surface: whether mounting hardware, cable routing, and true sealing logic defend against the real-world cycles that test every bathroom. Lasting lighting isn’t about passing inspection; it’s about functional, repetitive comfort—corners that stay clear, edges that don’t haze, and surfaces that never need extra wiping just to stay usable.


    http://www.lightsupport.myshopify.com

  • Why Flexible Cable Routing Improves Workflow and Reduces Desk Clutter

    If you’re starting every morning by dragging a power cord back onto the desk or untangling the same cluster of wires near your feet, it’s not just “clutter”—it’s an obstacle that keeps coming back. A desk might look spotless after a careful cable arrangement, but by Wednesday the friction wins: charger sliding out of reach, headset cable caught on the edge, plugs buried under a tray that’s supposed to tidy everything up. On a small desk, even one misplaced cable can push your keyboard forward, eat into notetaking space, or block your mouse. The setup might pass as organized, but every phone charge, device swap, or late-afternoon monitor shift exposes the gap between “looks fine” and “actually functions.” In real work, workstation order is constantly tested—not by mess, but by the simple motions that keep getting interrupted.

    Where “clean” cable setups break down in real work

    That chasing-after-perfect order breaks the moment you work for real. Hiding every cable in a box or squeezing all wires through a single tight sleeve promises a calm surface—but using the desk quickly reveals the trap. Unplug a laptop, add a monitor, or swap devices on the fly, and suddenly you’re fishing through a packed tray, undoing zip ties, or crawling under the desk to free a stuck cable. What should take seconds—plugging in a drive, using a backup charger—turns into a hassle, especially if your routine swaps between setups for meetings, notes, or calls. Cable order that hides everything quickly becomes cable order that blocks everything.

    Relying on a “bare surface” look, you only notice resistance after sitting for a full session: cables tug as you move the mouse, headphone cords won’t reach the right side, and that neat box at the rear means stretching behind your monitor for every basic connection. Each reset, each adjustment starts to reveal just how fragile surface order really is.

    The friction that creeps back by midweek

    Real cable management fails or succeeds on repetition—not on day one. By midweek, the weak points stack up. Plug in a second device and suddenly half the bundle shifts, unseating another cable from the power strip. Slide your chair for a quick call and accidentally catch your heel on a wire running to a too-tight tray. The sleek setup that hid cables now requires both hands and a shoulder against the desk edge while you wrangle a lost plug—often with five minutes before your next deadline. These aren’t isolated annoyances: every rigid zip tie or tangle in a hidden box steals a few more moments, slows the reset, and chips away at focus.

    On compact desks, even a little extra cable slack steals keyboard or mouse space—or forces your notebook off the usable area. Tiny flow breaks—having to push a charger back, drag a monitor cord free, shift papers squeezed by a stray power cable—build into routines that sap energy and time, even if the desk still “looks” controlled to someone passing by.

    Why over-organized cables can drag down workflow

    Surface order often comes at the cost of movement. Stuffing every cable into a single tray, or binding everything tightly, leaves no flexibility for quick changes. Standing up for a different posture, sliding the chair for a team huddle, or running a second device for a short project should take seconds—not a careful unthreading of knots beneath the desk. The desk stops adapting and starts demanding: unfasten that tie, release the stuck cable, undo what yesterday kept tidy. Visual peace turns into a recurring job.

    Sacrifice flexibility, and you pay in effort for every reset. For anyone who adjusts setups daily—switching from writing to design, moving between devices, seating, or standing—the “perfect” concealment proves unsustainable. The time cost isn’t just in the initial install; it’s in every minute spent tracing a cord’s path or untangling after a simple device change. A desk can look calm but stay slow, every reset slightly grinding down your pace.

    A small shift: modular routing over rigid bundling

    Repeated resets finally push a change: more cable-boxes or tighter ties just don’t improve flexibility. The smallest real-world fix is usually spacing out modular cable clips at specific points—a few at the desk’s back edge, one or two along the nearest leg to an outlet. With each main cable—monitor, laptop, phone charger—anchored but not trapped, movement and reach return. Now, swap out the charger or shift a monitor and the motion stays local: nothing else tangles or pulls free.

    The benefit is instant but deepens over time. What used to involve tugging at one cable and disturbing three others shrinks to a single, visible move. The morning reset—grabbing a sliding charger or freeing a cord caught under the desk—becomes a matter of seconds, not a chore. The desk holds its organized look if you want it, but starts behaving properly: quick, frictionless device changes without a chain reaction of disorder.

    Scenario: A mid-afternoon device swap without the usual pause

    Late in the day, shifting from a laptop to a tablet for sketching highlights the impact. With all cables stiffly bundled, reaching the right charging cord means fighting the tray, disturbing the whole setup, and often re-adjusting your keyboard’s position. With spaced-out modular clips, you just lift the tablet cord from its clip, move it to the other side, and plug in—no forced shuffling, no accidental disconnections, no loss of surface order. The friction fades out, and you don’t lose your flow just for switching tools.

    Recognizing real cable friction in your setup

    Spot the signals before they build up:

    • Cables tangle near your feet or hook the chair as you move during longer sessions.
    • Charging cords drop behind the desk, turning every meeting into a cable hunt.
    • Adding a device means crawling under the surface or navigating a packed, hidden tray.
    • Resetting between tasks still feels awkward or slow, even with a tidy-looking setup.

    If you keep working around cable routing instead of through it, your setup is built for a diagram, not for daily work changes.

    Choosing cable tools that fit both order and daily fluidity

    Total cable concealment might win a photo, but real desk life rewards flexibility. Adhesive cable clips, open under-desk trays, and wisely spaced anchors give every cable a path and enough room to stay useful. You get visibility—quickly spot the right plug—with enough restraint to keep things from sliding everywhere. The main trick: never batch every cable just for tidiness. Modular spacing lets you swap or move gear without triggering a reboot of your whole setup, and keeps each disruption contained to a single cable.

    For anyone who shifts tasks often, stands part of the day, or rearranges devices depending on focus, modular cable control is the difference between a setup that quietly adapts and one that drains you with invisible interruptions. Shrinking those minor moments of wrestling with your desk pays off—not by erasing every wire, but by making every move easier and every reset less tiring, week after week.

    When cable order supports, and when it interrupts

    The make-or-break difference isn’t neatness—it’s whether the system actually keeps up. The desk that truly supports you is the one where every routine change—a charger grab before a call, switching screens late in the day, a batch-connect for several devices at once—happens without extra moves. The right route for each cable isn’t hidden away forever, but settles quietly into the background, never so rigid that one tweak brings down the rest of the system.

    Order only matters if it speeds up your work, not just sanitizes the look. Modular cable paths make visible clutter vanish—but also keep the physical friction off your mind. When resetting is quick, device swaps don’t mean chasing wires, and the desk feels responsive to your week (not just the morning), you notice: the real cost of messy or over-tight cable setups isn’t visual, it’s in every silent little battle lost to wasted effort. That’s the real case for better routing.

    Explore the full WorkBasic collection

  • Ensuring Consistent Ceiling Lighting with Proper Support and Cable Management

    Lighting setups break down at the edges—fast. That ceiling panel looked perfect when you stepped back on install day. But a week later, one bracket has slipped, and now the light throws glare across your desk while leaving your keyboard in shadow. Instead of blending in, a sagging cable starts competing with your monitor for attention. One dim shelf edge, one dangling wire, and your “finished” room turns into a tangle of quick fixes and small daily annoyances. These aren’t cosmetic irritations. Misaligned lights, exposed cables, and loose brackets make clear surfaces harder to use and routines slower to finish.

    The Subtle Impact of Uneven Lighting Support

    Perfect symmetry rarely survives real life. A row of slim LED panels, level on day one, shows the first weak spot when a bracket sags half a centimeter and throws your walkway into uneven shadow. Cable channels come loose the moment you add a new device or slide a shelf. The result: you’re shifting chairs to avoid glare, reaching for the brightest spot just to read a label, or pausing mid-task because a cable blocks an outlet you need. The smallest misalignment multiplies over time, slowly turning easy routines into repeated, visible friction that never fully disappears.

    From Install Day to Real Use: What Changes?

    Visual neatness rarely survives contact with real use. Symmetry and clean lines fall apart the first time you unplug a charger, dust a shelf, or nudge a lamp for a project. What looked flush now tilts. Cables that once hugged the wall droop or slide out of place, especially when anything plugged in gets moved. One bracket, out by a washer’s width, starts a chain reaction: the fixture leans, the cable pulls unevenly, and you start compensating—shifting your things, tweaking the light’s angle, stacking objects to block the worst glare. The promise of ‘finished’ wears off with every small adjustment you make instead of just using the room.

    Small Shifts, Big Frustrations: Real Examples

    Picture a shared desk edge where one under-cabinet light sags lower than the rest. Now one side glares into your eyes, while the opposite corner is barely lit—forcing you to keep moving papers just to work comfortably. Or that slim task lamp you measured by eye, only to realize it throws a persistent shadow over notes every time you reach for them. Even compact spaces strain under these details: an exposed cable dangling under a shelf means your supplies no longer fit or a charger constantly slides out of reach. Instead of the setup working for you, you’re adapting around every minor flaw—and feeling them multiply with use.

    The pain is physical as much as visual. Plugging in a laptop becomes a two-hand job so the cable doesn’t drag another fixture off center. Sturdy boxes and objects get conscripted to block glare or hide a drifting cable. That ideal reading spot? Now you avoid it because the light splits the surface too sharply. The original sense of order collapses under the reality of what you see and reach for every day.

    Cable Clutter and Support Weakness: Problems That Multiply

    It’s easy to ignore a loose cable clip or a bracket slightly out of line—at first. But in daily use, these small errors refuse to stay small. Every unplugged device tugs a cable lower, leaving a telltale bulge across what was a clean wall. Once the fixture tilts even a little, you lose reliable coverage: half the shelf gets light, the rest sits in vague shadow. Wires cut across access to the outlets you actually use. Over time, all those “just barely” misaligned pieces turn a space that looked resolved into one you have to work around, again and again.

    The Difference Precise Support Makes

    Getting back to a usable space rarely means starting over—details just need adjusting where repetition breaks them down. Shimming a bracket to achieve a real, stable level (not just straight by eye) reclaims an entire shelf edge. A two-centimeter adjustment in cable route changes where clutter accumulates—and what surfaces stay clear. Replacing a chunky power brick with a low-profile adapter frees an outlet and lets cable lines stay tight to the wall. The fixes take minutes but shift the whole logic of the room—moving you from constant workaround to reliable, repeatable use.

    Tips for Keeping Lighting Even and Cables Calm

    Guesswork fails at the first move. A bubble level and tape measure are not optional; they’re essential. Measuring from fixed points like ceilings and walls—for every fixture, in every zone—prevents gradual drift and misalignment that wasn’t obvious at install. Adding a washer where a bracket leans sharpens the angle and stops the whole row from falling out of sync with surface lines.

    Cables demand their own logic. Direct, straight, and anchored routes with sturdy adhesive clips stop wires from slipping into sightlines, blocking access, or bulking up in unexpected places. After the third or fourth time cleaning or rearranging, you’ll know whether the support holds, or if you’re battling the same drooping line and tangled cables week after week.

    Living with Lighting: The Real Test is Repetition

    Lighting support wins or fails outside the installer’s view. If a setup blends in first but makes you adjust your seat, squint, or walk extra steps every day, that’s not working light—it’s a surface problem hiding behind a sleek fixture. When task zones demand compensation—stacking objects to block a glare patch or dodging a shadowed corner—the limits of your support system show through. Evenness, bracket stability, and cable order aren’t aesthetic extras. They decide whether your desk, shelf, or room edge stays actually usable or keeps quietly undermining your routine.

    Noticing and solving these repeat breakdowns isn’t for show; it’s the only way to protect the comfort and clarity of spaces used all day, every day. Taking an extra five minutes to check bracket level and cable logic means a surface that welcomes work, reading, or shared use—without the next dropout, distraction, or dim edge sneaking back in.

    Find practical products and better lighting support at LightSupport.

  • How Effective Cable Management Transforms Your Workspace Efficiency

    Your desk can look organized and still sabotage your workflow within an hour. It starts clean: devices lined up, cables tucked away, everything in its place. But as soon as you move the monitor, charge your phone, slide a notebook in beside the keyboard, or reach down for a rarely-used accessory, friction resurfaces. A cord blocks the top drawer, the charging cable drags across your reach zone, and shifting your chair means dodging a low-hanging power brick. Desk setups that hide mess with quick fixes or boxy containers look good for photos, but in real use, their failure shows up in every small, repeated interruption. Instead of seamless work, you’re negotiating with the setup, losing focus to micro-obstacles that multiply as the day goes on.

    The Subtle Ways Cords Disrupt a Work-Ready Desk

    Cable friction doesn’t always announce itself. The surface might look reset, but as the hours pass, the buried inconveniences take over. Picture a small desk: laptop, monitor, phone charger, everything positioned neatly. Early in the day, you can reach across to jot down notes or swap devices without thinking. But by midday, cables drift—creeping into drawer paths, knotting under the keyboard, or looping in front of where you rest your wrists. The technical “clean up” you did in the morning disappears fast when the contents of the desk keep moving.

    • A drawer jams because a fallen charging line wedges against its edge.
    • You reach for a pen, but the cable now runs over your notebook, breaking your train of thought.
    • Under-desk clutter forces an awkward shuffle to avoid stepping on a stray brick or adapter.

    The more you swap devices or switch between tasks, the more obvious it becomes when cable organization isn’t built for repeated, real use. A setup that seemed “contained” unravels as soon as you shift from focused typing to a hasty video call or need to switch charging duties between gadgets.

    Why “Looks Tidy” Isn’t Good Enough

    Visual order alone does not equal workflow order. Take two desks: One channels every wire into a fixed under-desk box, hiding the mess completely but leaving you on the floor whenever a new device joins. Another makes the cables visible in front, but with routed clips and adjustable sleeves, letting you swap gear without untangling or crawling under the surface. In reality, most workspaces aren’t static. Maybe your laptop rotates with a teammate, your tablet joins in for sketching, or your monitor shifts by late afternoon. What looks pristine with everything stashed in a box often slows you down most—delays and cable reveals that ruin any sense of desk flow. The clean “edge” of a desk rarely holds up if function means reaching past cable bulges or detouring around once-invisible snags during normal work.

    Everyday Scenes Where Cable Drift Adds Up

    Repeated desk tasks expose these weak points fast:

    • During a rushed reset before your next call, a charging cable loops across the only open drawer, halting everything.
    • Power cords slip in front of your keyboard just as you hit a new document streak, forcing an awkward pause to clear the space.
    • In shared workstations, one cable pulled out of place becomes a group problem—two people stop to trace and untangle, losing even more time.

    No single event is dramatic, but the sum is clear: every minor snag costs movement, focus, and patience. Desk “organization” isn’t about appearance—it’s about reducing interruptions that steal your time and sap repeatable momentum.

    Containment Means More Than Clean Lines

    If you’ve found yourself re-tidying cables after every other work session, you already know neatness fades unless there’s a real containment scheme. Mounting a cable tray along the desk’s back edge eliminates most cable drama from your working path—no more loops blocking drawers, cords sliding into leg space, or stray bricks creeping forward. What changed? Resets became quick and predictable. At the end of the day, getting back to a ready state takes two steps, not ten: plug, path, done. Fewer touchpoints mean less delay, and device swaps start to feel routine instead of frustrating puzzles. Freeing up just a few inches in your primary reach zone makes a visible difference—especially on smaller desks where every inch lost turns into another obstacle.

    Why Maintenance Matters in Cable Organization

    Many cable solutions fall apart when used in real life—the “contained” zone gets overstuffed, and every added cord is jammed into the same overcrowded tray or box. Weeks later, the clutter returns in silence. True containment adapts: removable clips at the front for daily swaps, fixed trays for rarely-moved power lines routed behind, and clearly reserved tracks for hand space and drawer access. If you can’t quickly return the area to its ready state without digging or guessing which cable is which, the system isn’t holding up. Choose solutions that support changes, not just a one-time clean-up.

    Quick Reference: Cable Containment Solutions That Hold Up

    • Power in trays, away from reach: Place bulkier chargers and adapters in a tray along the rear desk edge, not the drawer path or knee zone. This prevents shifting clutter each time you move a chair or reach under the desk.
    • Removable clips for active devices: Phone and tablet lines, swapped in and out daily, should clip out of true work paths—easy to grab, not tangled, never interrupting drawer or surface clearance.
    • Watch for overfilling: If trays or clips start holding more than two or three lines per zone or you find yourself always adjusting and re-routing, it’s not containment anymore—it’s a bottleneck.

    The best setups don’t just tidy up—they make resets, cleaning, and device changes smooth and nearly automatic. Hands don’t need to duck under the desk. Cord locations shouldn’t be mysteries. If you always know where to plug in and nothing slows access to essential gear, you’ve found real containment.

    Your Setup’s Best Sign: Fewer Interruptions, Not Just Fewer Cables

    Cable management is not decor. A system that lets you sit down, charge, switch, and reset without breaking pace marks the difference between a desk you can actually use and one you’re always fixing. Real containment is visible—clips, trays, managed lines—but it’s never in the way. As the desk fills with more hardware—work laptops, tablets, shared peripherals—the only containment that succeeds is the kind built for daily, unpredictable movement. When it’s end-of-day and your keyboard, notebook, and monitor are still easy to reach with no detours past unraveling cords or jumbled adapters, you know your workflow is protected—not just your sense of order.

    FAQ: Real-World Cable Questions

    How do I keep cables accessible without adding clutter?
    For semi-permanent power, an under-desk tray is your anchor. Routes for chargers and devices frequently added or removed should use clips or sleeves that guide lines out of reach zones but never trap them out of easy access. Don’t aim for invisibility—aim for predictability: if your hand goes where it needs to without snag, it’s working.

    Will cable management really affect how comfortable my desk feels?
    Absolutely. Each blocked movement or shoulder shift around a loose cable breaks your flow. The setups that feel “yours” are the ones that open paths—between keyboard and notebook, under the surface, beside the chair—never closing them off just to hide mess.

    How do most setups fall back into mess?
    By overfilling containers, delaying swaps for another day, or using fixed solutions that don’t match changing needs. If you can’t return the desk to “ready” fast, it’s time to rethink the system.

    The difference between a desk that just looks ready and one that actually feels ready comes down to whether everything is accessible, predictable, and interruption-free—even after a week of real work. Cable containment is infrastructure, not an afterthought. The best setups don’t just hide clutter—they clear the path for work that flows.

    Explore the full WorkBasic collection

  • Why Fixture Placement Matters More Than Brightness for Safe Ladder Use

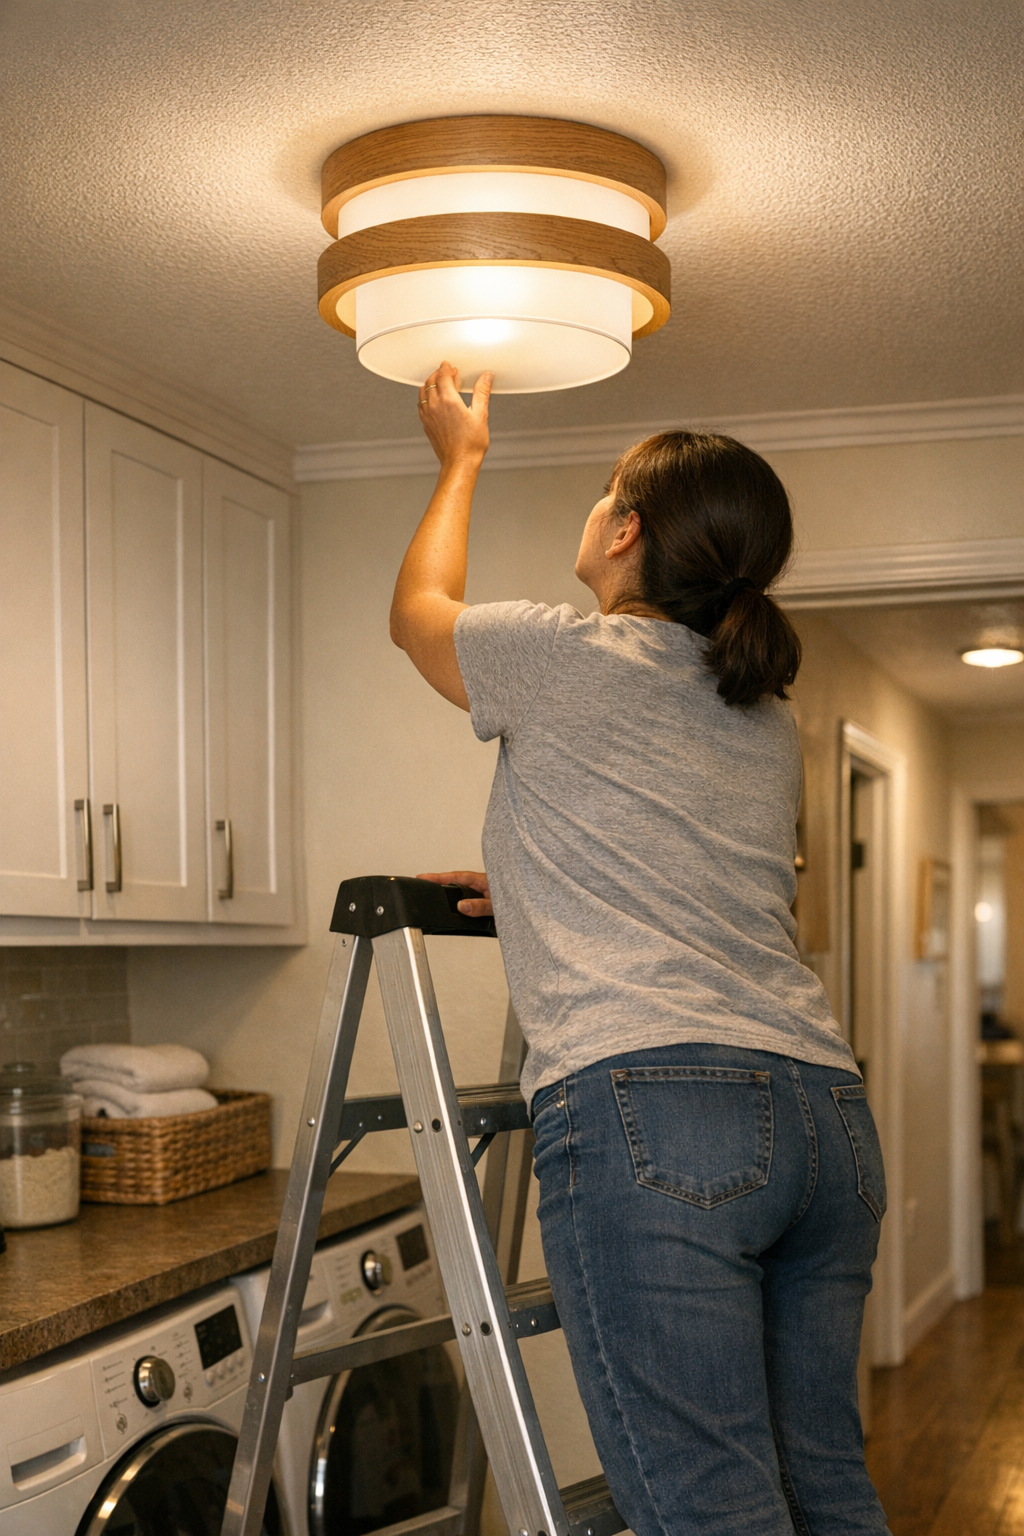
    The real weakness in home lighting is rarely about brightness—it’s about what happens the third, tenth, or twentieth time you need to get up and replace a bulb or clean a lens. A ceiling fixture that looked efficient on install day can quietly become a maintenance trap: access gets awkward, especially in tight corridors, over slick laundry room floors, or where storage creeps into the only clear patch of ground. If every trip up the ladder means bracing on shifting mats or squeezing past baskets, the setup chips away at your confidence and routine—no matter how good the lighting looks after dark.

    Why Maintenance Access Becomes the Real Weak Point

    Lighting placement isn’t purely visual—it decides whether care and upkeep fit into real life or turn routine tasks into calculated risks. The design flaw doesn’t announce itself at first, but it gets sharper every time you edge a ladder across wet vinyl, wedge it between stacked bins, or balance in the corner just to reach the light. That low-simmering friction—never quite dangerous enough to force a fix, but always enough to discourage maintenance—stays hidden until it becomes part of your routine, not just a single hassle.

    Hallways and Laundry Rooms: Repeated Risk, Not Just Routine

    Spaces like laundry rooms and hallways seem straightforward—until you try to maintain their lighting. Laundry setups are rarely dry, with mats slipping as floors collect stray water, and pathways narrowing between ever-present baskets. A fixture directly above the busiest zone means you clear clutter or risk a bad footing every time. In a hallway, even with even illumination, shuffle room disappears behind boots, coats, or storage, so maintenance means fighting not just height, but your own belongings. These aren’t dramatic accidents; they’re slow-drip limitations that make quick fixes anything but quick.

    The Subtle Threat of “Looks Good Enough” Placement

    Fixtures centered in a room or designed for symmetry often miss the mark for daily use when the real conditions aren’t considered. A bright light placed over a chronically damp or narrow patch may look perfect—until you have to stretch, reach, and lose solid footing again and again just to change a bulb. The anticipation starts to feel like a silent burden—hesitating at the doorway, knowing what’s ahead before the ladder is even out.

    How Floor Conditions Undermine Confidence

    When you finally tackle maintenance, can you set both feet of the ladder on solid, non-slip ground? If not, even a small spill or uneven grout line makes the job feel unstable. Needing to pause and dry the floor or shift half the room’s contents just for safe footing is a clue: a lighting choice made for appearance is quietly eroding your willingness to follow through with basic care.

    Everyday Reality—Not the Spec Sheet—Defines Good Lighting Setup

    The real test of a fixture isn’t on install day, but after months of use. Shift a hallway light by eighteen inches to land it over reliably dry, textured floor, and the routine transforms: maintenance happens in seconds, no more dragging mats or working around baskets, no more double-checking for slip hazards every time. The visual change is almost invisible, but the reward is real and permanent—safe, routine upkeep becomes background, not a source of nervous calculation. Changes like these show their value only with the daily repetition others overlook.

    Field-Tested Tips: Making Maintenance Safe and Repeatable

    • Always dry the floor right before setting your ladder, and use non-slip pads or a rubber mat under each foot—even in rooms that don’t usually seem wet. Routine laundry or bathroom moisture is persistent and often underestimated.
    • Check for creeping clutter or new obstacles on the way to your fixture. If storage, laundry, or bins are routinely in the way, the fixture placement is already clashing with real life. Move it closer to the open area—even if the result is slightly off-center—and you’ll feel it every time you need access.
    • When jobs require awkward tricks—propping ladders, stacking towels underfoot, reaching at odd angles—it’s a visible sign: this light needs a better setup or a new position.

    Listening to Friction: When to Rethink Fixture Placement

    If upkeep means hesitation, tiptoeing, or hyping yourself up, your fixture’s placement is silently working against you. Symmetry and centered light may satisfy the eye, but it’s reliable access that lets you actually keep the space functional without dreading routine care. Move a fixture toward a stable, dry patch—even at the cost of pure alignment—and the reward is immediate: maintenance becomes uneventful, not a carefully managed risk.

    Recognizing When It’s Time to Act

    If every routine repair means shifting furniture, clearing debris, or inventing a workaround, that’s a clear prompt—your setup isn’t matching the way you live. Any fixture that turns basic maintenance into a stressful project is out of sync with its room. There’s no reason to accept a design that triggers new tension every time a bulb burns out.

    The Quiet Value of Access-Aware Lighting Decisions

    Lighting that works in real life isn’t just bright or stylish—it’s easy to reach, simple to clean, and feels safe and obvious to maintain. The payoff is the difference between worrying about a ladder on soapy floors and just getting the job done without a second thought. Every shift that minimizes risk and maximizes movement turns the fixture from a worry-source to a quiet background strength. The best setup is the one that disappears into your routine by never forcing you to work around its limitations.

    Shop practical lighting solutions at LightHelper

  • How Separating Power and Data Lines Enhances Desk Workflow Efficiency

    “Cable management” isn’t just a battle against ugly wires on the floor—it’s a silent decision that shapes how every desk session unfolds. Even when a workspace looks perfectly organized, most setups begin to fail in the same hidden way: power and data lines—chargers, monitor cords, ethernet links—all crammed together under the work surface, out of sight and supposedly “solved.” The clean look fades fast once real work kicks in. Every time you need to charge, reconnect, or swap a device during a task, access turns clumsy. The tidy tray you admired on day one becomes a single snag point—a source of cable drag, surprise disconnections, or the time-wasting hunt for the right end. What started as an improvement starts to quietly slow you down, one tangled interaction at a time. That’s where the real friction lives: a setup built to hide mess but not stress. Instead of a smooth reset, you get a prettier version of the same interruptions.

    Where visual order masks real interruptions

    That initial rush when no cables dangle and every wire disappears behind a smooth tray? It fades by midweek. Repeated use doesn’t just fray the surface—it exposes where the system quietly breaks down:

    • USB cables anchored tightly against oversized chargers. Plugging in a device means prying twisted cords apart, not a quick in-and-out.
    • Monitor leads shift or snag when tugging on a charger, causing screens to flicker, glitch, or briefly power down mid-report.
    • Ethernet and power lines pinch each other in cramped trays, setting up dropped calls or flickering internet right at the wrong moment.

    At first, the irritation barely registers—a repeated pause, a device swap that drags. But with each reset, those seconds spent untangling or re-plugging eat away at the benefit of the organized look. Clean lines do nothing for desk flow if they collapse under real use.

    Day-to-day wear: When form slides out of sync with function

    Mid-task, try plugging in a dying laptop. What should be a reach-and-click turns into cable negotiation—nudging chargers, easing a block of knotted plugs, grazing a network wire and hoping nothing else disconnects while your uploads run. The drag isn’t just cable on cable—it’s lost focus, a manual interruption built into the setup itself.

    This isn’t a one-off. Count every routine: connecting headphones, adjusting a monitor, resetting a jammed peripheral, sliding out from your chair and catching a cable underfoot. When power and data lines share a path, each task builds friction—compressed cords overheat, signal cables get soft spots, USB ends bend just a little more each day. You start planning your workflow around the hassle rather than the desk helping you. Tiny delays accumulate, and the “order” shows its real cost.

    Small setup changes that rescue the daily rhythm

    The fix isn’t more hiding—it’s smarter separation. Rerouting cables by function changed not just how the desk looked but how it worked:

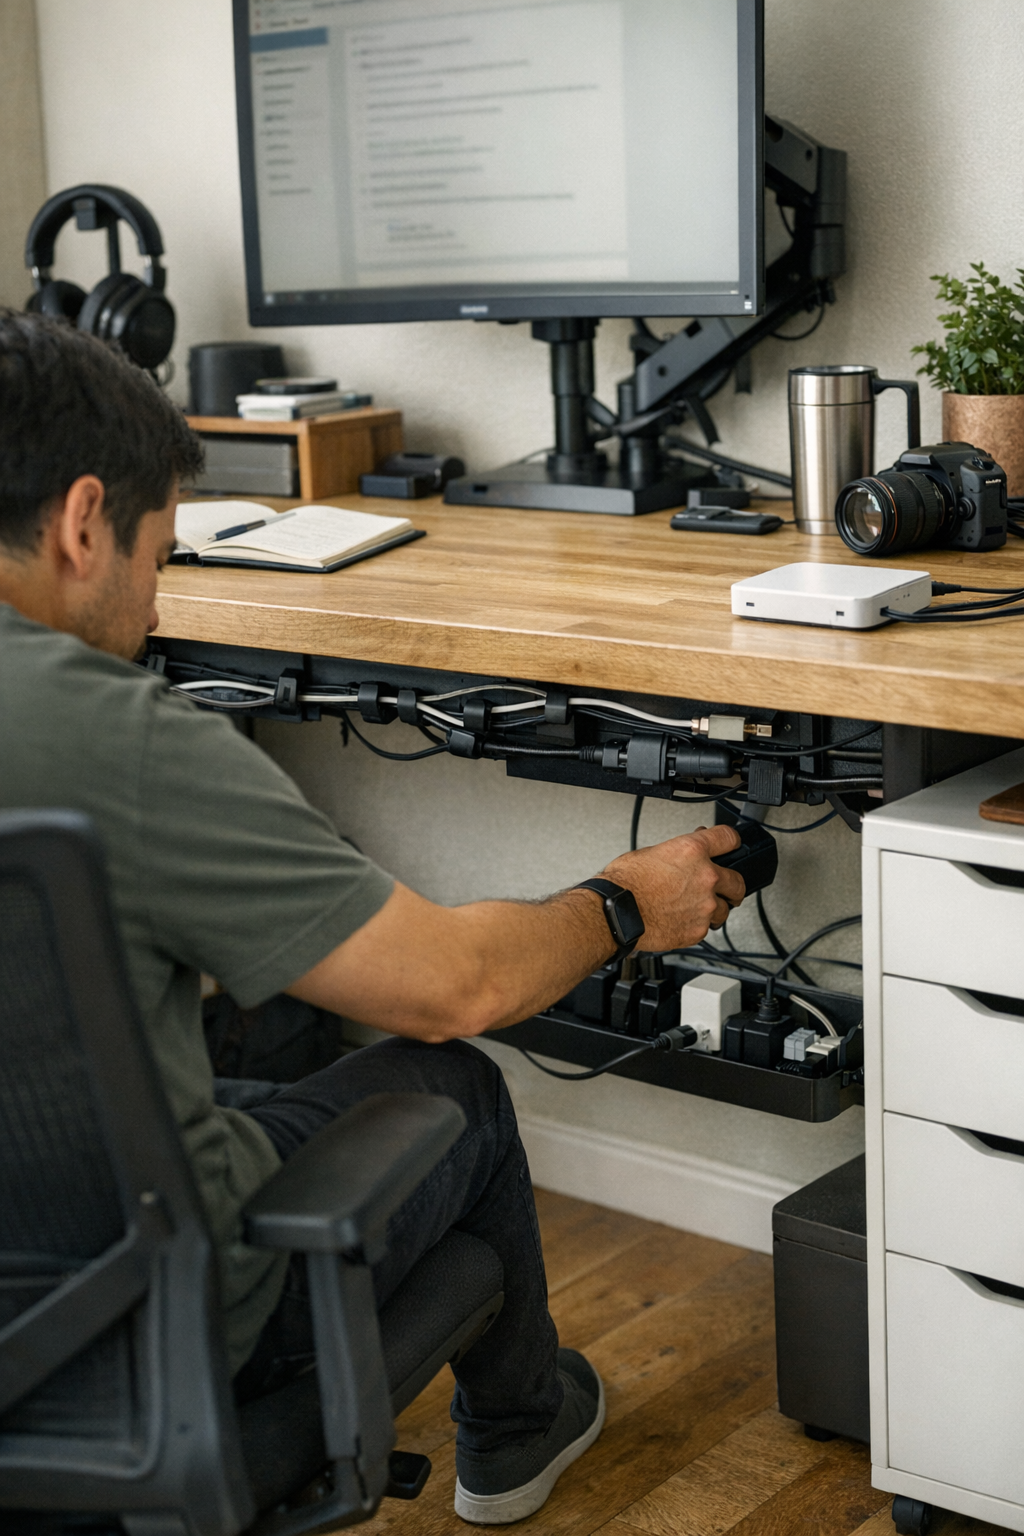
    • Power strip anchored out of direct reach: Mounting the main strip to the back underside of the desk makes AC adapters accessible for charging but keeps the bulk out of the way of everyday reach.
    • Data cables mapped separately: USB, HDMI, and ethernet lines roam along the upper desk edge with adhesive clips or split sleeves. Power bricks can’t drag them; nothing tugs unexpectedly.

    Straightforward, but the impact is instant. Laptop comes out—charger slips free, monitor stays live. Swapping from a phone dock to a tablet is done in one motion, not two. Accidental yanks stop, reset cycles shrink, and every swap takes less thought and less time. Interruptions don’t just decrease; they almost vanish from routine notice.

    Scene from a typical reset cycle

    Monday, early: Switching audio from headphones to a desk speaker used to mean ducking under, guessing which cable, and gambling—sometimes unplugging the wrong one and losing power or the network. Now, the cable is clipped up and separate, always within visual reach. No interruptions, no do-overs.
    Friday, late: Battery running low during an upload. It used to mean reaching around, bumping the USB hub, or getting a flicker on the monitor with every move. Now, power is its own run, plug-in happens instantly, and nothing else wobbles.

    Recognizing signs of hidden cable friction

    How can you tell if your setup is failing function beneath the surface? The clues repeat if you know what to watch for:

    • Devices disconnect when a different cable is moved—one line’s tangle drags the others down.
    • Warm, flattened cord spots in your trays or under the desk—places where wires are pinched against adapters or brackets.
    • Hesitation before every swap: If plugging in or out reliably takes two tries or extra checking, your flow is being taxed by hidden friction.

    Cable containment isn’t the real solution

    No box or tray eliminates friction if it crams every wire into the same corridor. Neatness is not enough—actual improvement comes from giving each cable type its own logical mapped path. Use trays for power only, keep data lines clipped at the edge or above the surface, and make critical connectors visible, not buried. That way, mid-task resets don’t derail your focus, and the desk supports the way you actually move—no matter how cluttered the day gets.

    Spot-check: Is your new structure actually helping?

    Proof isn’t the clean look—it’s the reset test: Can you grab or remove a power cable in one motion, without yanking a monitor cord or fumbling for the Wi-Fi? If not, you’re still living with micro-interruptions that eat away at workflow. If untangling is a routine, the “organized” system is just hiding its failure in plain sight.

    Workstation flow is built on real cable simplicity

    A desk that looks perfect but disrupts your rhythm isn’t really organized—it’s dressed up dysfunction. Every moment you spend not untangling, replugging, or tracing a mystery wire is time given back to your actual work. When separation becomes part of the structure—not just a surface fix—the workstation feels awake, lighter, and more usable, every session. The difference isn’t flashy. It’s in all the problems that quietly stop happening.

    Explore the full WorkBasic collection

  • Why Soft Edge Stairway Lighting Enhances Safety and Usability

    Stairway lighting isn’t truly judged in the packaging, on a display board, or in empty daylight. It’s tested at the friction points—when your hands are full and a stair edge blurs into shadow, or when a guest slows and squints at the last step while the hallway behind is dark. The surprise isn’t how lighting looks at a glance, but how a setup fails or irritates the real user: a half-visible step here, a shadowed tread there, a moment’s hesitation that repeats every evening. Stair lighting done wrong isn’t just a visual compromise—it becomes a pattern of small risks and repeated, invisible adjustments you never wanted to make.

    Why Stair Edge Clarity Matters More Than Brightness

    Not all “bright” stair lights deliver actual safety or comfort. The common mistake: assuming the most powerful or streamlined fixture solves everything. In reality, general brightness throws light where it’s least needed, bleaching out details on smooth treads, smudging the stair edges, and letting corners fall away into shadow. You notice it at night—someone hesitates at the landing, slows at the top, or makes unconscious micro-adjustments as their foot hovers, guessing at the next step. These hesitation points multiply with every pass, from quick commutes in a family entryway to careful night trips in a shared apartment stairwell. The real problem is not light levels—it’s the missed definition where you move.

    Signs the Setup Isn’t Holding Up

    Does anyone—resident or guest—move tentatively near the first or last step, especially after dark? That’s not just cautious habit. It signals a stair lighting setup failing where it matters most. If you catch visitors tilting their heads to “read” depth, or regularly see someone pause to test the landing with a toe, you’re watching the cost of bad edge clarity. In homes, the drag shows up whenever someone slows at dusk, clutches the rail tighter, or asks for help going down. Even pets will linger at a dark transition. Stairways that force you to double-check your own footing turn flow into effort every time the light shifts—or when a single bulb fails.

    The absence of crisp edge cues creates daily, automatic caution. Most people assume this is just how stairs feel after sunset. But the repeated burden—watchfulness where you should have trust—wears on everyone in the house.

    Where “Clean” Lighting Schemes Start to Fray

    “Minimalist” fixtures impress in photos: smooth wall plates, hidden wires, no surface clutter. But once real life takes over, weaknesses show. A ceiling downlight may leave corners murky and treads washed out, especially if the surface is shiny or the stairs curve away. Carry something broad—a laundry basket, messenger bag, or kid’s backpack—and you can block the only light, projecting a confusing shadow across two steps at once. Every “clean” lighting solution is only as reliable as the shadow it leaves behind. A perfect showroom look loses its worth the first evening someone misreads a tread because the angle hides a step or a bright spot makes depth harder to gauge. Clean lines that can’t keep pace with real movement end up as another visual tick box—one that doesn’t hold up in daily use or low light.

    Habitual Frustrations That Reveal Poor Lighting

    • Pausing mid-stair to re-find the next tread with your foot
    • Using your phone flashlight to check the bottom steps at night, even when lights are “on”
    • Kids asking for “the good light” instead of using the main switch
    • Reaching hard for the rail after sunset just to feel steady

    If these frictions are familiar, your setup looks finished but isn’t actually livable.

    Lighting That Makes Each Step Clear—From Any Angle

    The best fix isn’t more overhead light, but targeted edge illumination. Continuous step-edge or wall-side lights—such as low-profile LED strips installed just beneath the overhang or along the wall—cast subtle, readable shadows on each riser. It’s not about maximum output but about how the light maps the edge: every step’s profile pops, whether daylight is gone or someone’s shadow blocks the main fixture.

    In these setups, you’re never guessing if your foot has landed on the last tread, or whether there’s another drop. Edge definition holds up from both directions—going up with arms full, heading down with tired eyes. With real edge lighting, you avoid:

    • Dim or disappearing steps, even if hands or baggage block a ceiling lamp
    • Corners fading out, especially on stairs that twist or change width
    • Gaps in confidence: people flow, not pause, from top to bottom

    The result: stairs become background—no more stopping to interpret where each step begins or ends, even in the weakest ambient light.

    Cable Management: The Often-Overlooked Factor

    Lighting that fixes visibility but ignores cable logic creates its own mess. Exposed power runs, taped cords, or slapdash cable routes distract the eye and collect dust. Worse, they risk creating real tripping points in narrow, high-traffic runs. Even a short, out-of-place cable along the baseboard stands out more than you’d expect in a stairwell—especially when sightlines are already focused on the floor.

    Clean, concealed cable management isn’t decorative—it’s a safety and comfort upgrade. A tightly placed LED strip, with power lines guided behind trim or within purpose-built channel, respects the space as much as the user’s movement. Ignore this, and you’ll notice the problem fast: cables start to drift out, need re-tucking, or collect mess. Retrofits that “almost” solve the problem end up being redone after the first few months, often because cable chaos outlasts the lighting’s novelty itself.

    Small Tips for Real-World Stair Lighting

    • Test your setup at night, hands full—don’t trust the “installed” look until you try actual movement
    • Make sure every angle—including up and down—has consistent edge visibility, not just overall light
    • Invest in mounting or support pieces that make cable runs invisible, not merely less obvious

    “Finished” Is Only Real When the Use Is Seamless

    Installation can trick you: a new light may look flawless at noon, but if daily patterns reveal stray glints, dark zones, or constant distraction from a wandering cable, you’re stuck with setup friction that no “designer” look covers up. The stairway that actually works is one where nobody has to pause or recalculate—a result built not on looks alone but on the invisible work of lighting choices, edge visibility, and support logic that fades into daily use. “Finished” isn’t aesthetic; it’s the absence of friction—the simple, repeated comfort when each step feels obvious and safe. In the end, the most successful stair lighting is barely noticed by the people who count on it most.

    http://www.lightsupport.myshopify.com

  • How Proper Ladder Angles Improve Indoor Lighting Maintenance Safety

    Walk into any laundry room, stairwell, or hallway that “looks” bright, and you’ll still find yourself fighting for clear sight during the simplest maintenance tasks. Because it’s not just the fixture—flush mount, semi-flush, sconce, or panel—that makes the difference. It’s how your setup actively blocks, distorts, or wastes the reliable spread of light you assumed you had, especially the moment a ladder enters the picture. A badly placed ladder instantly fractures visibility, turning a routine bulb swap or cover tightening into a mess of shadow, glare, and guesswork—regardless of how modern or rated your lighting is.

    The Not-So-Hidden Trouble with Ladder Angles

    Anyone who’s changed a flush mount in a narrow hallway or reached for a sconce above a stair knows the pattern: the second you position the ladder without checking the light’s throw, your body blocks the best part of the beam. Instead of helping, the fixture turns every maintenance move into a struggle against your own shadow. Small jobs, like cleaning the edge of a glass dome or tightening a ceiling screw, suddenly demand one-handed balancing and blind fiddling. The core problem isn’t discomfort—it’s repeated lost visibility, which raises the risk of missed screws, slipped covers, and low-level tension in every “easy” fix.

    Maintenance That Gets Harder Every Time

    The first time you wiggle a fixture loose while stretching around a badly set ladder, you might shrug it off. Do this a few times—especially in tight spaces like laundry nooks or narrow bath corridors—and a pattern forms: dropped hardware behind machines, scratched sockets, and awkward work-arounds just to compensate for blocked or lopsided lighting. Bad positioning becomes muscle memory, and before you realize it, you’re solving the same visual problem every time you service your own indoor light.

    Where Ladder Angle Shows Up Most: Real Home Scenarios

    1. The Hallway That Looks Bright… Until You’re Reaching Up

    Hallways seem solved with a flush mount or strong linear ceiling fixture. But try to change a bulb or dust a panel by placing a ladder straight underneath, and you make yourself the shadow, losing the precise focus that’s needed. Fine tasks go sightless; glare ricochets off polished covers, washing out panel detail or turning glass domes into glare spots. Even with technically “good” fixtures, a careless ladder angle can turn an overbright setup into a visibility trap.

    2. Tight Laundry Rooms: Shadows Where You Need Clarity

    Maintenance in a compact laundry room feels routine until you press the ladder up against a cabinet for support. Now, to reach a flush mount, you’re forced to lean, blocking half the fixture and putting your hands right in the path of the worst glare. Drop a screw, and it’s lost behind the washer. Smudges along the fixture’s edge go unseen. After three or four rounds, you know exactly which movements will cost you: sideways straining, blind reattachment, and habitual shadow problems that never seem to clear up.

    3. Stairways and Low Ceilings: More than Just a Reach Problem

    Stairwells demand more than safe footing—they force tough choices about ladder placement. With a sconce or semi-flush at a landing, the safest setup for balance leaves your body ghosting over the work area. Your own shadow hides loose wires or missing screws. Miss a footing and drop a fastener, and it disappears into the gap between steps. Stairway lighting should help with those risks, but a poor ladder setup means the lighting actually intensifies mistakes by pulling shadows right where you can’t afford them.

    Why Small Adjustments Make Lasting Differences

    Shift the ladder’s base just the width of a cabinet door or one stair riser away from the default and the entire work area transforms. In a utility alcove or beside a wall run, sliding over twelve inches might clear enough angle for the light to fall directly on your work—no more casting your own shoulders and face into deep shadow. Suddenly, the entire fixture edge becomes visible; glare backs off; small tasks flow instead of frustrating. That shift makes routine maintenance predictable and eliminates the worst “work blind” risks.

    This applies everywhere: entryways, stair turrets, or narrow corridors. If you place the ladder slightly outside the beam’s natural center, hands and head clear the main spread. You see the fastener holes, not your own silhouette. There’s less twisting, steadier footing, and a direct view for everything from bulb replacement to precise fixture cleaning. Repeated jobs, which once felt vague or awkward, snap into crisp, reliable routine.

    Tip: Think About the Space, Not Just the Support

    The instinct is to anchor the ladder against whatever solid edge is nearest—wall, cabinet, or shelf. But that “safer” spot often steals visibility. Instead, judge where your arms and body will land and give priority to unobstructed light, even if it means shifting away from the most obvious brace. Yes, it can feel less secure, but clear sight and fewer accidents outlast the illusion of stability that comes with crowding up to a wall. Run a test: before climbing, check where your working hand falls in the light. If it’s cast in shadow, adjust the ladder until the beam is uninterrupted—your routine, and the room’s real safety, will both improve.

    Repeated Use Reveals the True Setup

    No matter how modern the lighting, the wrong ladder angle punishes you on every round of maintenance. Layered bathroom lighting with strong vanity or mirror fixtures? An awkward climb blocks the best output, forcing neck bends, missed details, and a rush through spots where glare and shadow compete. Ceiling flush mounts or wall sconces above stacked bins in a storage corridor? One misstep and you’re operating blind, even in a “bright” room. Durable lighting setups only matter if the space supports repeated, unblocked access—not just visibility during idle hours.

    Over time, every repeated workaround—forced stretches, lost or bent hardware, uneven cleaning, incomplete replacement—chips away at the whole point of strong indoor lighting. The proof doesn’t show during a walkthrough; it shows in the clarity (or absence) you feel the third, fourth, or fifth time you’re up a ladder.

    Seeing the Room Differently after a Small Change

    Even a single shift—offsetting the ladder a foot from where you’ve always put it—turns the entire maintenance math around. Suddenly, your head and arms stop breaking the spread. Your grip steadies. The job goes from workaround to standard task: covers seat evenly, screws align on the first try, and you stop guessing what you can’t see. You’re not just checking a fixture off your list; you’re restoring trust in the room’s lighting to actually work in practice, not just look bright online.

    Let each small, deliberate adjustment add up. Over months, this reduces frustration and fatigue, and you recognize which design choices actively support both routine and surprise tasks. It becomes obvious which rooms need a change in fixture—switching flush for semi-flush, wall for ceiling, or adding a task light—because the “well-lit” feeling finally matches with real, unimpaired use.

    Field-Tested Quick Tips for Next Time

    • Never place your ladder directly in line with the fixture’s brightest output if you can avoid it. Offset by a foot or two and check that the main light falls cleanly onto your hands, not just your face or shoulders, before starting any work.
    • Pause before bracing a ladder against cabinets or machines. Step back, run a fast hand check where you’ll need to work. If you see shadow, adjust your angle until the beam reaches your point of action. This single check prevents most repeat maintenance frustration.

    The most “invisible” mistakes in indoor lighting come from careless setups: ladders that block, shadows that multiply, bright rooms that still make you work in half-dark. When setup quietly supports your sightline and movement—whether by fixture choice, placement, or just offsetting the ladder—you’ll feel the difference every time you reach up. http://www.lighthelper.myshopify.com

  • How Dedicated Cable Paths Transform Your Workspace Efficiency

    Cable clutter on a workstation is rarely dramatic until you try to move—then it turns into an invisible snag that never quite leaves you alone. A single charging cord scraping the back of your hand, a mouse cable catching under a chair wheel, a notebook teetering on top of a wandering USB line: these are not one-off irritations. They’re the background friction that keeps desks from actually working smoothly, slowing down every reset, every device swap, and every return from a break, no matter how neat the surface looks at first.

    The break point isn’t when the desk looks messy, but when the setup refuses to cooperate the second time around. Grabbing a charger only to find it blocked by a drawer, dragging a cable as you shift screens, or getting your foot snagged on a charging line—these moments expose cable drift as more than cosmetic. They slow you down when you’re switching between notebook and keyboard, reaching for storage, or rolling your chair back after a long stretch at the screen. The pain point isn’t visual disorder; it’s friction in actual, repeated work.

    One neat surface, many hidden problems

    A fresh desk might look clear: cables tucked behind the monitor, no wires on the writing surface, floor empty beneath your feet. But regular use quietly reverses that order. Every loose wire is a repeat offender. Cables slouch back across the drawer you need, twine around chair casters, or creep onto your note-taking area. What seemed organized at setup becomes a scramble for a missing charger or an impromptu untangling session just to clear the way for actual work.

    Contrast this with a workstation using under-desk trays, adhesive clips, or cable boxes anchoring every line. Instead of improvising, every cable returns to a single, predictable route. There’s no hunting and less hesitation; your hand knows where to reach for a charger or USB line. This isn’t just tidy—it’s a shift in desk behavior. Especially in tight setups, or when opening a drawer or accessing storage interrupts your main workspace, reliable cable routing stops these hidden derailments before they build up.

    The moment friction accumulates

    Routine device switching is where cable chaos multiplies. If you’re moving daily between monitor, laptop, phone, and tablet, even a morning’s cable neatness will break down by lunchtime. Suddenly, a charger has slipped beneath your notebook, a headset wire weaves through a chair leg, or an extra line blocks access to an under-desk drawer. Each choice to let a cable dangle or drift is paid for when you have to dig a line out from under a pile or—worse—when you move hardware and find three different wires bunched up, yanking at the power strip.

    Every disruption stacks up: drawers jam against loose lines, unplugging means shifting two other cords out of the way, cable piles sabotage even small resets. The supposed ten-second fix takes five times as long—and the more hardware shifts or accessories you add, the more this drag grows persistent, not just annoying.

    Repeated resets expose the flaws

    Desk friction doesn’t hit all at once; it wears you down in increments. The first day, you barely notice pausing to clear a cable from a drawer’s path. By the end of the week, every switch—webcam in, monitor out, notebook on, new device plugged—demands a micro-reset just to keep the desk working. It’s not hours lost; it’s dozens of tiny interruptions that undermine focus and make the space less reliable, less ready every time you sit down.

    Setting one fixed route: a real-world upgrade

    At a certain threshold, clever arranging stops working—what you need is a structural fix. In practical terms, this means installing a cable tray right beneath the desk’s edge, wide enough to handle all major power, USB, and display lines. Every cable threads through the tray, emerging at one deliberate, reachable point—often at the monitor riser or the side most accessible while seated. The logic is simple: one repeatable path beats endless improvisation.

    This reroutes daily movement. No more cables yanked by your feet or chair, no extra time spent untangling after moving a monitor. Under-desk clearance improves, so legs don’t bump into bunched wires and chair wheels roll free—a daily nuisance, especially if your setup is shallow or doubles for multiple uses. Sitting back down after a meeting or break, and finding every cord exactly where you expect it, is a quiet advantage that stacks up over time.

    Common questions about cable control

    How can I keep cables from encroaching on my work surface?

    Force cables into a strict route. Use under-desk trays or adhesive clips, and make sure both entry and exit points are fixed. Take away a cable’s freedom to stray, and you strip out the cause of clutter—both seen and felt.

    Isn’t hiding cables behind the monitor enough?

    No. Cables stashed behind the screen usually find their way back out, jumble with bricks, block air flow, or smother ports. The first time you need to swap a device or reset the setup, the hidden nest is two steps messier than what you started with.

    How often will I need to adjust my cable setup?

    There is no “set and forget.” Any time you add, remove, or swap gear, you’ll want to assess and update what runs where. Rigid cable trays and cable sleeves make these tweaks smoother—far better than scrabbling to push loose wires into place after every change.

    Workstation behavior, not just appearance

    The difference between a desk that works and one that looks organized but fails under pressure is how resilient the setup is to routine disruption. A fixed cable route doesn’t just hide mess; it means the work surface is always ready for action, not waiting to be reset. Drifting, cluttered cables don’t just spoil appearances—they actively resist efficiency, making every minor reset slower and every return to work less automatic.

    This is not a small ergonomic footnote: cable control directly shapes whether you can reach the keyboard edge to jot notes, slide a chair cleanly, open a drawer, or actually reset the desk quickly. The risk isn’t just tangled lines, but bent USB heads, pinched power cords, or a good chair blocked by bundled mess every time you adjust your sitting position.

    The best-looking workstation is almost never the best for real work if cable behavior is ignored. Setting a path for every line—power, USB, display—silences the drip of micro-disruptions that pile up with each device change, drawer open, or chair reposition.

    If your setup involves frequent device swaps, compact desk depth, or demands clear reach paths for storage or open space, disciplined cable routing isn’t an aesthetic upgrade: it’s baseline infrastructure for rapid resets and steady workflow. Every time a charger drops behind a drawer, or your chair gets stopped by a cluster of wires, that isn’t just a nuisance—it’s a red flag. These are real, solvable signals that the workstation can do better with a structural change.

    Explore the full WorkBasic collection

  • How Consistent Stairway Lighting Enhances Safety and Comfort at Home

    Most stairway lighting failures have little to do with how a setup looks in daylight—or on paper. The real friction hits at the edges: a harsh glare that forces you to squint mid-step, a riser swallowed in shadow just when your hands are full, or cables that slip from tidy lines into your peripheral vision after a week of hurried routines. Stair safety can break down not from a lack of total brightness, but from sudden, jarring changes between overlit patches and hidden steps. If you’ve ever stopped short at an unexpectedly blinding step or tested the bottom edge with your foot, you’ve noticed how one lighting mistake turns every trip into a negotiation.

    Why Contrast Jumps Sabotage Stairway Comfort

    Stairway lighting is thrown into question the moment the light shifts without warning. One riser glares bright, the next fades into murk; a ceiling fixture beams overhead, but loses the last steps near the landing. Harsh, angled light can turn every descent into a messy test where your eyes scramble to process new edges. Instead of a quick, forgettable walk, you’re pausing, tiptoeing, and recalibrating step after step. A fixture that seems “good enough” on installation often becomes a weak link by the tenth trip—serving as a reminder that minor misfires add up daily.

    The issue scales up quickly: hesitate at a glaring patch, prod for a lost tread with a loaded arm, or flatten yourself to avoid a cable nudged loose by a backpack. Each small pause doesn’t simply interrupt the flow—it sticks in memory. What’s missing isn’t sheer power, but repeatable clarity—making every tread easy to find and each riser visible, whether your hands are free or you’re balancing a basket in low light.

    The Gap Between Looks and Daily Ease

    Many setups tidy up the appearance of a stairway only for repeated use to highlight the flaws. Common problems:

    • Ceiling fixtures—brighten the stair zone generally, but often flare overhead and fail to reach the first or last steps where footing matters most.
    • Wall-mounted lights—promise clean lines but can throw raking shadows, making foot placement uncertain, especially on textured steps or when shoes change the surface profile.
    • Handrail LED strips—read as gentle and indirect at first, but install one a half-inch off and foot shadows split the run, creating unpredictable dark bands.
    • Concealed cable paths—look crisp until a basket, vacuum, or coat sleeve nudges them crooked, sending a bright line sloping into view whenever you turn the corner.

    Small in theory, but as family routines layer on—kids darting, adults managing loads, the dog brushing a bracket—any slip or weak angle gets exposed faster than in a staged install photo. At corners and mid-flights, especially, even an “invisible” support can become the snag your hand grazes or the dark spot your foot second-guesses.

    Real Moments Where Lighting Choices Get Tested

    Picture the actual problem points: Evening, both hands full, you descend and the stairwell seems softly lit—until one edge disappears. Your step hitches as the next tread blurs into shadow. Instead of moving smoothly, you find yourself mentally repeating, “Don’t miss the next one.” It’s rarely about total output; it’s about unreliable step definition that forces a slower, distracted routine. At night, a bracket in the hand path, or a shifted cord, can be enough to break concentration and force a stop-and-check, even when the setup looked sharp at install.

    The difference reveals itself over days: an overhead fixture bounces glare into your eyes, or you start catching a cable edge when rounding the landing. Routines—finding a handhold, balancing a laundry basket, or guiding a half-asleep child—show where the setup unravels, one daily interruption at a time. Visual tidiness is quickly outpaced by the friction of repeated, real-life use.

    How Consistent Lighting Quietly Changes the Routine

    Swapping scattered wall spots for a continuous, low-glare LED strip below the handrail rewires the experience. Placement matters—when the strip tracks just under the rail and avoids the sweep of the hand, the problem zones vanish. Over the first dozen trips, irritation fades: the last three treads, which vanished into shadow after dark, are now calmly defined even with both hands full.

    This isn’t a showy transformation—it’s a gradual erasure of small irritations: toe-searching for the bottom, swinging a basket for more light, or tensing for a missed edge. The reward isn’t drama, but the slow normalization of walking the stairs without a pause or second glance.

    Placement and Cable Management: Where Details Matter

    Brighter overheads may look impressive but introduce new contrast jumps where you’re least ready for them. Bracket placement that feels “invisible” when empty-handed can turn intrusive when you’re guiding a stroller or running late. Cables that aren’t locked out of every-day traffic migrate—sometimes into your sightline, sometimes underfoot.

    Field observations make a difference:

    • Blend cable covers to match nearby trim or wall, anchoring lines along existing seams or tucking them behind support brackets—making them nearly invisible and less likely to be snagged out of place.
    • Map cable routes out of the main walk path; even one exposed span at a corner attracts friction from backpacks or laundry baskets and slowly unravels a once-neat install.
    • Simulate real traffic—test both up and down, after dark and with full hands. What looks fine at install reveals friction only after a week of lived routines.

    Choosing Hardware for Real Life, Not Just the Blueprint

    There’s real value in a stairway where lighting and supports perform under pressure—where the right balance of clarity, unobtrusive cable routing, and bracket placement stands up to the messy rhythm of daily life. The solution that made the setup look done on day one can let hidden cables drift into view, or leave familiar steps in guesswork shadows, once the real routine kicks in. A bracket that “hides” at eye level may interrupt your grip on the 50th climb, not the first.

    The goal isn’t a perfect showroom finish—it’s fewer silent disruptions, fewer distracted hesitations with every trip, and a setup you stop noticing because it simply works. That kind of reliability outlasts first impressions.

    For more practical stairway lighting, mounting, and cable management solutions that hold up to real use, visit LightSupport.