Category: Lighting & Work Setup

  • How Thoughtful Cable Management Enhances Posture and Productivity at Your Desk

    Cable clutter isn’t just an eyesore—it’s a workstation problem you actually feel, even if you don’t realize it at first. A clean-looking desk can still trip you up with tangled charging cords underfoot, cables dragging behind your monitor, or plugs vanishing just out of hand’s reach. By midweek, those daily cable chases and awkward stretches start showing up in real discomfort: your posture slips, your chair creeps closer to the desk, and a creeping shoulder tension lingers. What seems like a minor mess slowly rewires your work habits, turning a tidy workspace into a subtle source of strain. The friction isn’t theoretical; it’s built, hour by hour, into how you move through every device swap and workstation reset.

    How cable chaos quietly rewires your work posture

    Cable disorder doesn’t just disrupt your focus—it shifts your entire routine. Nearly every day, you’re reaching across a desk for a charger that’s slid behind a tray, leaning down to snatch a cord wrapped around a chair leg, or twisting awkwardly to fish a connector off the floor. You don’t count these movements, but your shoulders and neck accumulate the tally: by the end of the week, sitting feels tighter, small aches creep in, and your posture withers through repetition—not because of one dramatic moment, but thanks to the repetition of tiny, avoidable contortions that never quite reset.

    Why visual order can sabotage your everyday workflow

    It’s one thing to hide every cable out of sight with boxes, trays, or wraps—the desk surface looks uncluttered, wires tidied away. But try plugging in a phone or swapping between a laptop and tablet, and the friction returns: next thing you know, you’re kneeling under the desk, stretching for stiff wires routed too tightly or blocked by under-desk trays. Smooth in theory, slow in real use. The actual improvement isn’t surface-deep; it’s buried in the access routine. A cable “solution” that buries your connections away pulls you out of your seat and out of your flow, every single time you need to connect or reset.

    The difference after a week is physical, not just visual: Your position drifts; you’re reaching past a drawer, nudging the chair forward, arching your back one plug at a time. By Friday, it’s not just a tidy view you need—it’s relief from a tired, misaligned work session.

    “Invisible” cable friction in the middle of a normal workday

    A standard day runs through more cable cycles than you notice: laptop, phone, tablet, headphones, charger swaps mid-call. Wires bundled loosely or tucked out of reach invite a repeating pattern—cables slip, you fumble for an adapter that’s drifted behind your leg, a notebook refuses to sit flat because a power brick crowds your limited desk depth. Every retrieval is a posture break: your shoulder pitches forward, you hunch down, and unconsciously shift in your chair. Especially as hours build up, these disruptions multiply into lingering aches and poor alignment that you only notice when tension becomes routine.

    The real toll is cumulative. After just ten work cycles spent stretching and leaning for cable ends, something as small as an upper back cramp or an irritated neck stops being a mystery—it’s just part of the desk’s daily friction load.

    The change that made cable problems finally stop stacking up

    The turning point is concrete: adding a cable tray above knee level, but bringing charger ends forward—anchored just a hand’s width (about 10 cm) from the desk’s edge, never dangling or hidden entirely below. Suddenly, essential plugs stay where your hand naturally lands. Device swaps, mid-meeting plug-ins, or a quick notebook move no longer drag you out of position. Your chair stays back, posture upright, no forced stretches. Even in a multi-device rush, every cable grab is a quick reach, not a scramble. That small repositioning turns posture drift and muscle fatigue from a daily default to a rare exception.

    When “neat” and “usable” aren’t the same—finding true cable access

    It’s easy to overcommit to hiding every wire. But an actually usable setup finds the right slack: working cables rest within reach, excess is tucked firmly above or behind, never cluttering the desktop but never out of the hand’s natural path. The desk keeps a clear outline, but every routine swap now happens from your seat—no posture break, no surface mess, no delay. Aesthetic clarity is preserved, but functional speed is restored.

    What happens when cable “organization” blocks the workflow

    All it takes is mounting a cable box at the back or slipping a tray under the desk in a rush: out of sight, but suddenly out of daily reach. You don’t notice it until you’re typing with one hand and trying to rescue a charger with the other, or you’re sketching beside a keyboard while a stiff cable tugs your notebook out of place. If every swap takes more than a second, if you stand up to fix a cable for a brief phone charge, you’ve lost more than just time—a tight or twisted posture has already crept in. Each interruption shortens your comfort zone and shaves focus off the rest of the day.

    Direct answers for defeating cable friction in real work

    • How does smart cable structure protect posture? By ending awkward reaches and forced angles, it keeps shoulders level, back straight, and arms moving naturally—even over long sessions.
    • What’s the classic cable management mistake? Organizing every wire out of sight but also out of reach. If you have to lean, twist, or shift just to plug in, the system isn’t reducing friction—it’s just hiding it.
    • What actually works? Keep cables with about a hand’s width of slack at the front desk edge, the rest routed securely behind or below, never left trailing across the top. This combination delivers a clear desk view and consistent, immediate access—without repeated interruptions.

    How small cable tweaks pay off over time

    The real cost of mismatched cable “solutions” is in slow, distracting disruption. A desk that looks organized but blocks workflow makes every session feel heavier. Real cable control isn’t minimalism for its own sake, but a setup that removes routine hassle: faster device swaps, smoother transitions, fewer forced reaches. Subtle—but the effect adds up.

    Each well-placed tray, slack cable path, or accessible plug either costs or restores valuable comfort and efficiency. It’s not about a staged desk—it’s about structure that lets your work flow, without posture and focus crumbling day by day. A better cable setup doesn’t show off; it simply goes unnoticed as your productivity and comfort hold steady.
    Explore the full WorkBasic collection

  • Avoid Overheating and Fixture Damage with Proper Bulb Choices

    The real test for indoor lighting happens after the first week, not the first switch-flip. You turn into the stairway and realize the far step is vague, not from shadows—just from heat lingering at your shoulder. In the laundry corner, what should be cool ceiling light turns muggy by midweek. It’s not catastrophic failure; these are slow, invisible costs: warped diffuser edges, steamy air, color drift in your mirror or shadow lines growing unpredictable under fixtures that should be invisible to your routine. Most rooms pass the eye test until you live with them—then you start noticing what the wrong bulb, fixture, or rating really does to your path, your cleanup, your habits.

    When the Wrong Bulb Stays In

    You don’t always catch a bulb mismatch until it’s left a mark: plastic rims softening, a lens yellowing, or just heat clinging around the dome long past use. In hallways or bathrooms, it’s the light that feels “dense,” not just bright. The first hint is rarely visible—it’s sensed in the daily moves you make: quick hallway crossings, rinsing at the sink, handling laundry on repeat. A fixture isn’t built for unvented warmth, and when the bulb pushes past its rated limit—sometimes by just a few watts—wear piles up with every cycle. These are the edges where comfort and fixture life both quietly erode.

    Flush domes, closed sconces, and damp-rated setups have tighter tolerances. Using a too-strong bulb (even “any LED” that isn’t made for enclosed or damp space) vents nothing. Heat gets trapped, the fixture softens or clouds, and what started as a solid setup drifts into annoyance—glare marks, color loss at the rim, plastics that start to warp or shift the way clear light is supposed to fall across cabinets or mirrors.

    Comfort and Wear are Slow-Burn Problems

    No fixture fails in one night. Instead, the routine suffers: the dome that’s still warm after you leave; the mirror edge where colors smudge subtly over months; the feeling of stale air or a sticky dome mid-laundry. Each use builds friction. You stop using the spot the same way—avoiding a too-hot sconce, ignoring that shadow by the door. Over time, the fixture and light setup become obstacles, not supports.

    Where Fixture Type Makes Routine Harder or Easier

    Stairway turns, windowless laundry rooms, cramped bathrooms, shallow entry zones—these are places where poor light is more than a style issue. Fixture choice here sets the daily pattern. If the bulb runs hot in a dome, the ceiling above the washer gets sticky, the air feels like it never cools off. In a closed vanity, a small wattage mismatch means you feel warmth at the lens, notice a haze in the mirror, or see edges darken and lines drift as the plastic sags. Every time that fixture is flipped, it’s working against its own setup.

    This isn’t about “pretty” light. It’s about a fixture holding form—and function—amid real humidity and zero airflow. Over time, plastic domes yellow, rim lines fade, and movement feels heavier. These quirks aren’t just cosmetic: they signal the fixture is past what it should handle, reshaping how you use and avoid parts of the room.

    Not All “Any LEDs” Are Equal—And It Shows Up Fast

    “Switch to LED” only covers half the problem. Plenty of LEDs can still overheat in closed or semi-enclosed fixtures, especially in baths or stairwells with no draft. Even so-called “cool” bulbs, if not rated for those conditions, will cycle heat into the fixture. The result isn’t dramatic—just increased shadowing under cabinets, edge glare, or a constant slight haze that changes how clean corners and mirror tiles stay. The only fix is matching both rating and output, so the routine goes unnoticed and the room stops feeling incomplete no matter how many times you cross it.

    The Subtle Differences Over Time: A Real-World Breakdown

    Take two bulbs—one standard halogen, one LED meant for enclosed, damp, or utility setups. At the start, both look fine. But give it a month of hallway crossings, laundry loads, or mirror scrubbing, and the real impact sharpens:

    • Incandescents and halogens: Trap heat fast, leaving plastic soft, coloring edges, and deepening shadow intensity near walls or cabinets. A fixture starts to feel like a low-grade space heater, with every pause or cleaning becoming slightly less comfortable.
    • Wrong-fit LEDs: Seem safe but quietly overheat. Light quality turns “off”; fixture edges haze or yellow, and even regular cleaning can’t stop the creeping heaviness in the air or the drift of true colors and shadow lines.
    • Properly rated, low-wattage LEDs: Keep both fixture and air clear. There’s no temperature spike even after hours. Shadow lines stop shifting, no touch-hot plastics, no lens discoloration. The light doesn’t just look right—it lets you ignore it completely, which is what a ceiling or task light should do when used as often as needed.

    Real-Use Scene: The Laundry Dome

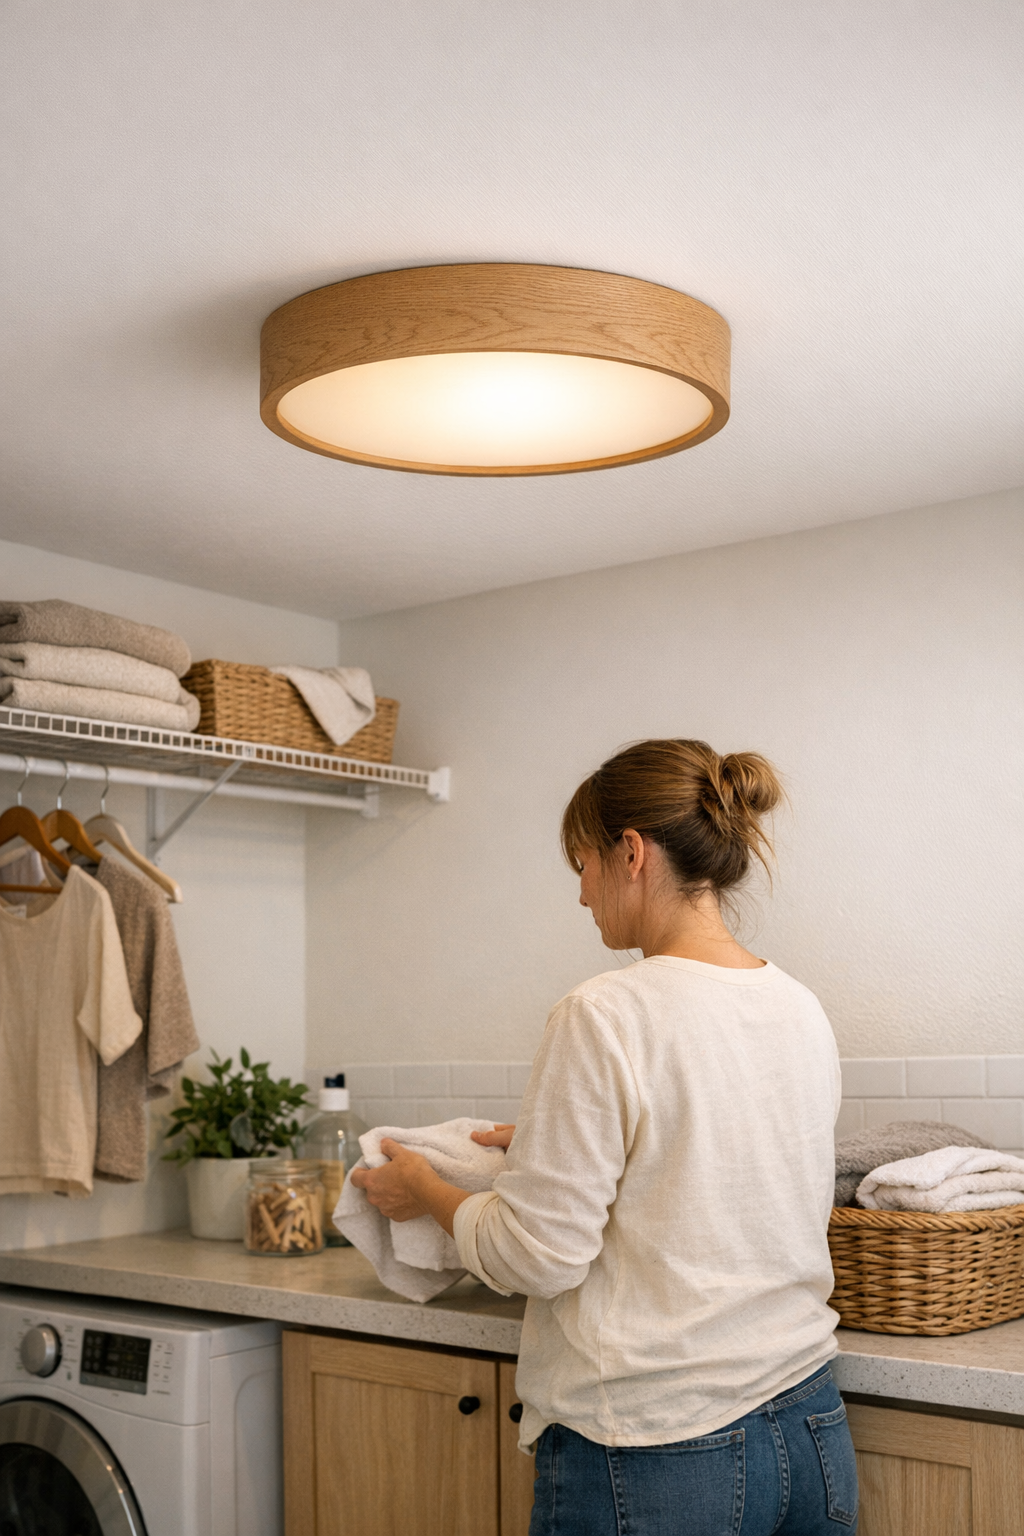
    Typical setup: a flush-mount dome squeezed close to the ceiling in a windowless laundry alcove. New bulb goes in Monday; by next weekend, the dome ends every wash cycle warm—sometimes sticky. If the bulb is over-wattage or not approved for closed housings, plastic yellows, shadow lines break at the counter, and the air thickens with every laundry load. In one real case, a neighbor’s over-watt halogen didn’t just run hot—it left the diffuser warped and useless before the first bulb actually burned out.

    The Quickest Fix is Also the Most Durable One

    Getting lighting that just works is less about picking “an” LED, more about picking the right match for the install and space. If the dome is labeled for enclosed or damp rooms, only pair it with a low-wattage LED designed for those zones. The difference surfaces fast: no more lingering warmth, no more plastic fatigue, no shift in shadow or light balance after weeks. That muggy, off feeling in entryways, stairwells, or laundry corners disappears—and so does the subtle background stress of fixtures fighting their own hardware limits. The best setups are the ones you stop noticing, even after a hundred cycles or crossings.

    Small Tip: Always Double-Check the Bulb’s Enclosure Rating

    Taking 30 seconds to check for “enclosed fixture compatible” beats months of fix-it headaches or surprise discoloration. Damp-rated, low-wattage LEDs extend both fixture and light quality, so daily rooms stay safe and easy—no hot spots, no flicker, no lens stress. For high-use, low-vent zones, this is the only way the light vanishes into the background—the way a good ceiling, wall, or vanity fixture should.

    Lighting That Just Works, Every Time

    In stair landings, utility rooms, bathrooms—rooms you don’t decorate but navigate—the difference between a smooth routine and subtle daily friction lives in the fixture and bulb pairing. The right choice means: no pausing to check a step’s edge, no dodging a hot dome, no creeping scent of plastic mid-task. Lighting should erase itself from your mind, not pull your attention back every time one detail stops working. The cost of ignoring real-use ratings is paid over months, not days—so when you see these signals, treating fixture setup as routine maintenance makes the whole house flow better, errand after errand.

    Find fixtures and solutions built for these real moments at LightHelper.

  • Balancing Wall Sconces and Ceiling Lights for Comfortable Spaces

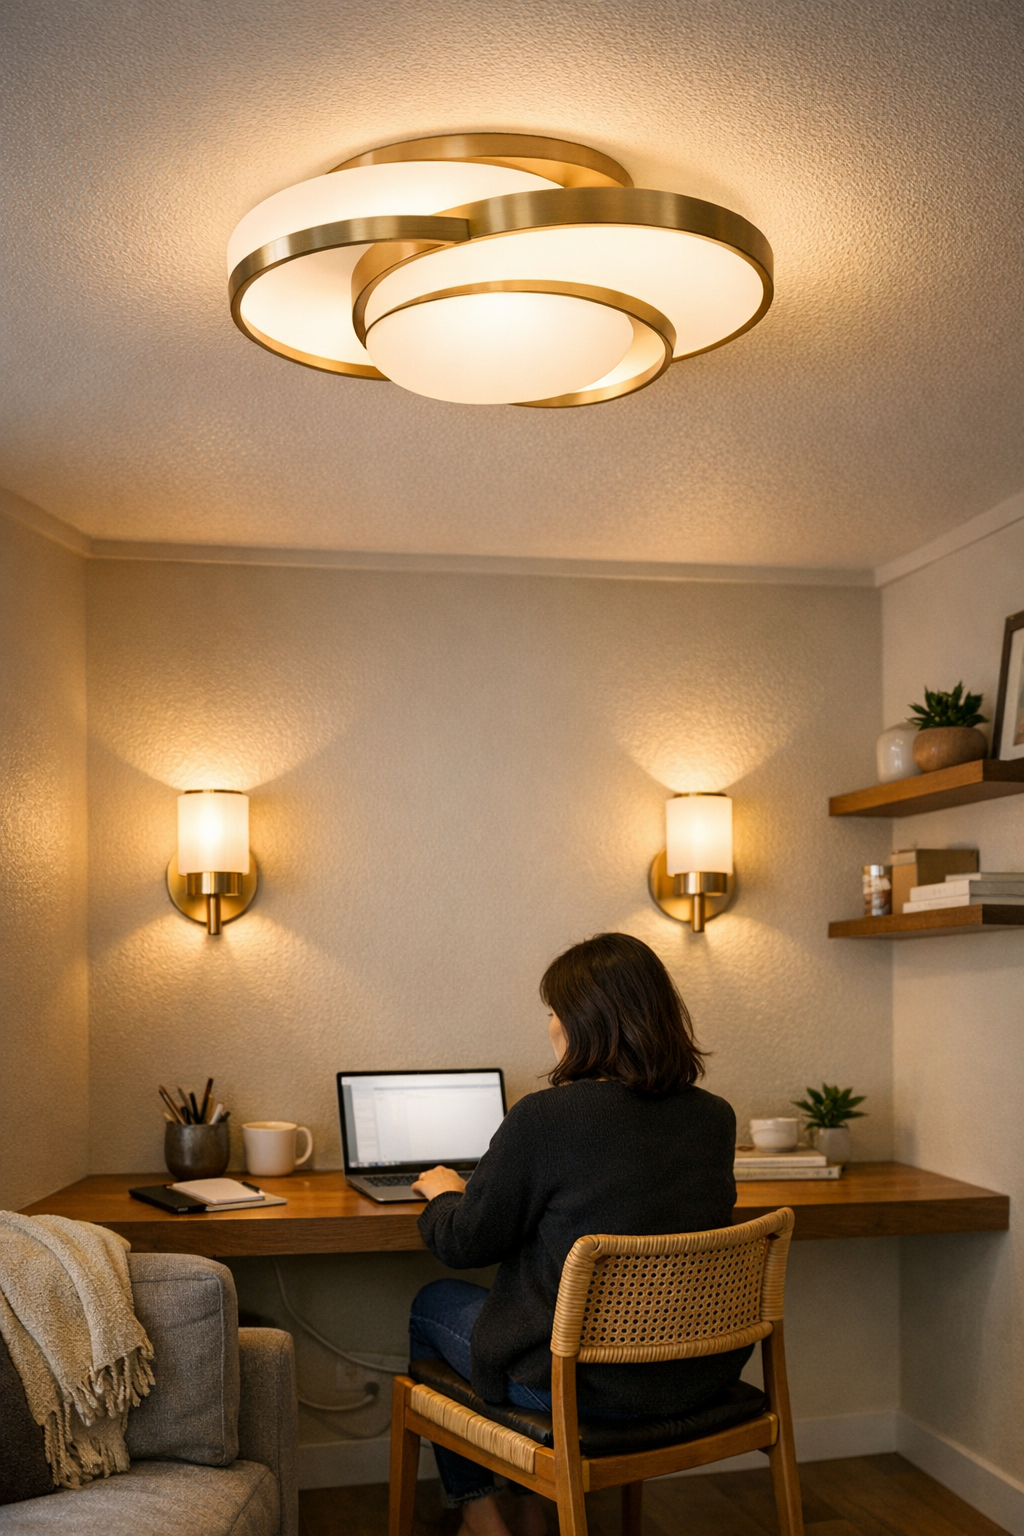
    The most aggravating indoor lighting problems don’t show up until you actually start living with them. The desk that looked “finished” now casts a sharp shadow where you set your coffee mug. A reading corner with its sleek sconces feels oddly unsettled. Overhead glare swallows up the effect of wall lights, and the cable you thought you’d hidden becomes the first thing you notice when you sit down to use the space. What appears clean and resolved on setup becomes distracting and awkward in daily use, especially in small rooms or mixed-use corners where every lighting choice exposes its limitations again and again.

    Why Ceiling and Wall Lights Clash More Than You Think

    It’s easy to install a bright ceiling fixture and feel the job is done—until you notice it overpowering your wall sconces and flattening the room. Most setups start this way: one strong overhead panel, secondary sconces or desk lamps for “comfort.” But instead of layering smoothly, the ceiling throws blunt, uncontrolled light everywhere, killing off the subtle work wall fixtures are meant to do. Sconce beams become washed-out smudges. The space feels visually crowded by glare, and surfaces look uniform yet hard to use.

    This isn’t about general brightness. The problem is ceiling light that bullies everything below it: its glare coats worktops and walls, erasing contrast and exposing every cable, bracket, or seam you hoped to keep hidden. Suddenly, hardware and wire runs become a distraction, and the whole layout feels constantly unsettled, as if nothing quite “sticks” in the visual structure—even after careful installation.

    Looks Clean, Feels Awkward: When a Setup Fails Under Routine Use

    From a distance, the room checks every technical box: modern LED panel, slim sconces at the right height, every cable tucked with care. But actually working or relaxing in the room exposes the flaws immediately:

    • The front edge of your desk is swallowed in shadow, while the main surface is overexposed and tiring to scan.
    • The supposed reading corner forces you to shift your seat, adjusting the lamp angle just to see a page clearly.
    • Cables and brackets—painstakingly routed—become visible again, highlighted by cold ceiling spill or clashing lighting tones.
    • Everyday actions—unpacking a bag, finding a document—somehow become more awkward, because your eyes keep tracking the lighting weaknesses, not the task.

    This friction isn’t cosmetic. Broken cooperation between ceiling and wall lighting leads to practical slowdowns, cluttered surfaces, harsh edges, and the sense that something small is always getting in your way, no matter how organized it should feel.

    Real Scene: The Lounge Desk That Never Quite Worked

    Consider a narrow lounge with a floating desk: centered ceiling panel, matching wall sconces. Visually, it’s clean. But then the routine returns—a laptop open at the far end, a coffee mug at the corner, a quick evening call. The overhead panel drops a flat sheet of light that shoves hard-edged shadow across half the desk, killing sconce definition. Cables, run tight and flush, now catch every catch of light, turning minor supports into constant visual noise. And every task—a quick search, a note, grabbing your phone—stretches longer, simply because you can’t settle into the space comfortably.

    This discomfort isn’t just a quirk of taste. It means you miss small items at the desk’s edge, fumble with cables that glare out against the wall, and find that “quick, low-effort” work always takes more attention than it should—purely due to unresolved lighting and support behavior.

    Small Shifts, Big Relief: Breaking Out of Ceiling Light Dominance

    Most flawed setups don’t need a total overhaul. In this lounge scene, two specific changes cut through the friction:

    1. The ceiling panel was reduced to roughly a third of its output and switched to a warmer tone. Instantly, harsh lines faded and wall sconces actually began to define their areas without glare interference.
    2. Sconce brackets, previously set at head height, were nudged above eye level—letting cable runs blend into the wall edge instead of spotlighting messy loops beneath.

    The difference was immediate: Glare melted away from work edges, surfaces became calmer, and the view stopped jumping to cable clutter. The setup became quietly usable—no new hardware, just smarter interaction between the lights and their supports.

    Often subtle tweaks—dimming the ceiling, narrowing a panel’s spread, re-mounting a bracket, or bundling cables into a wall’s shadow—have a dramatic impact on how a space works in practice. It’s the daily routines, not the first impressions, that feel lighter, easier, and less visually distracting.

    How to Spot the Tell-Tale Signs of an Unbalanced Setup

    Most rooms with clashing lighting and awkward cable exposure share the same signals:

    • Desk and counter edges stay dim or shadowed, even if the overall space feels bright.
    • Cable runs or bracket mounts are fresher in your eyesight than the work to be done, because glare or uneven color actually highlights them.
    • You find yourself moving the lamp, your chair, or your work items just to “chase” decent visibility—even after you thought the room was finished.
    • Support hardware—meant to blend in—stands out sharply, often thanks to a clash in shadow or color temperature.

    If these hiccups repeat, resist the urge to just add another lamp. Instead, dial back or warm up the ceiling fixture, shift mounting heights, or contain cables tighter to their supports, and see whether your sconces or task light finally do what they’re supposed to: make the space work for you, not against you.

    Temperature Clashes Make Everything Worse

    The friction nobody plans for: mismatched color temperature. When overhead panels pour cool white onto walls meant for warmer sconce light, every cable run, bracket, and support detail is thrown into relief—not smoothed out. Even expensive fixtures can’t hide the chopped-up visual field this creates. The quick test? Flip off the ceiling, and see if your wall lighting alone keeps the area useable and visually steady. If yes, layer the ceiling back in gently; its job is coverage, not dominance.

    Lighting and Support Routines That Actually Work

    Perfect cable routing and designer fixtures don’t matter if the lighting fails every time you actually use the room. Watch for these tells:

    • Your worktop is easy on the eyes in the evening but not in the morning—because ceiling and sconce temperatures are out of sync.
    • The layout looks straight in photos but always requires you to swivel the lamp or slide your chair so your routine isn’t interrupted by glare or awkward shadows.
    • Support pieces or cables vanish at first glance but crowd your focus in real use, lit up or outlined by harsh spillover.

    More hardware rarely fixes these. Often, pulling glare back, shifting a bracket, or narrowing a light’s beam makes the space feel settled at last. Day-to-day comfort won’t ever come from a space that only looks organized—only from repeated use feeling truly easy, natural, and visually quiet. If you’re still wrestling with the setup—even a little—there are still gains to make.

    http://www.lightsupport.myshopify.com

  • Why Tightening Your Clamp Lamp’s Second Joint Improves Desk Lighting Stability

    A desk that looks spotless is not always a desk that’s actually ready for work. The difference shows up fast when you rely on a clamp lamp: tightening the base clamp makes everything seem secure, but real use exposes what the tidy setup misses. As you switch between typing, grabbing notepads, sliding a drawer open, or shifting your screen, the lamp’s head quietly drifts off-target—unless you’ve remembered to lock down that second joint. The lamp that seemed “set” turns tricky, pulling your focus with every bump, reach, or adjustment.

    How an “Almost Secure” Lamp Interrupts the Routine

    Most clamp lamps use a two-joint system: a base clamp plus an elbow or neck joint holding the lamp’s angle. Tighten just the base and the whole lamp looks finished—until you move. A glance won’t reveal anything wrong, but the next time your elbow brushes past, or your notebook creeps too close, the lamp head tilts away or slips an inch, scattering either shadow or glare exactly where you don’t want it. It’s not a big slip, but by the end of the day, the light never matches where you expect it. Those small mismatches force you to pause, reposition, and reset—especially noticeable when you work quickly or change tasks often.

    You don’t register the disruption until it starts adding up. By midweek, you stop trusting that the lamp will be right when you reach for it. Each time your chair grazes the desk, or you slide open an under-desk drawer unit, the angle shifts and the old annoyance returns. The friction goes from invisible to everywhere—a lamp meant to help actually slowing you down.

    When Visual Tidiness Masks Real Instability

    A base-clamped lamp fits a desk aesthetic: cables vanished, monitor lined up, nothing loose. But it can be deceptive. Outward order hides functional drift. On a compact work surface where bins and organizers tuck under the top and stacks sit within arm’s reach, even a slight looseness at the joint means a routine reach—pulling a storage tray, grabbing a reference book, brushing away a charger cable—gently dislodges the lamp every time. The misalignment is subtle at first, but eventually you’re dodging glare on your screen, chasing shadows along your documents, or annoyed by needing to re-aim lighting after each desk adjustment. The desk “looks organized” but never actually works smoother.

    Daily Patterns: How Subtle Drift Adds Up

    These shifts show up most when you’re moving between tools. Slide out a notepad beside your keyboard, the lamp slides; adjust the monitor, the lamp leans; reach for a drawer, the lamp sags a notch. If the joint isn’t locked tight, each nudge drifts the beam off the critical zone. What you notice is:

    • Shadows landing on your keyboard just when you need clarity for notes
    • Reflections creeping across your main screen mid-task
    • The right lighting never quite where you last left it, breaking focus after each small reset

    These aren’t dramatic, but they slow your pace and distract from the actual work. The true cost isn’t in big mistakes—it’s in a desk that never quite disappears as a tool, always demanding attention you meant to give to your tasks instead.

    What Changes When the Second Joint Is Locked In

    Locking down that second joint, right after you’ve aimed the beam the way you want it, moves your desk from looking organized to actually behaving organized. From then on, even as you adjust the monitor, shift your chair, or use under-desk storage, the lamp holds its aim—no tilt, no sag, no need for constant readjustment. You swing it aside to clear space, bring it back, and the light picks up exactly where you left off. The friction is gone. The space adjusts to you, not the other way around.

    It’s not about chasing some perfect, showroom-ready desk. It’s about cutting the minor headaches that build up in every desk session. You go for the reference book below the surface; the lamp holds position. You come back from a long call; the light’s right where your hands expect it. Instead of fighting your tools, you actually work—fewer slowdowns, fewer mental resets, fewer moments lost to a lamp that won’t stay put.

    Not Just for Flexible Desks: Stability Matters Daily

    Even a fixed workstation—one where you almost never move the lamp on purpose—reveals the problem over time. With every small vibration, cable drag, or adjustment to other gear, gravity works the loose joint. Week after week, bending the lamp back into place becomes a recurring part of your routine. No layout is immune. Clamping both joints from the start removes this constant slow leak of time and patience, whether you’re in a creative studio, project workspace, or a home office that doubles as storage and charging station.

    Real Answers to Recurring Lamp Friction

    Why does my clamp lamp keep slipping out of position?
    Ninety percent of the time, the culprit is the second joint at the neck or elbow—it’s rarely fully tightened when setting up. The base clamp alone can’t hold the head against daily nudges, cable movement, or the effect of drawer access under the desktop. Repeated drift is the signal the joint isn’t secure.

    How can I keep my lamp rock-steady during a busy day?
    Set the lamp for how you actually work—illuminating notes by the keyboard, reaching into under-desk storage, lining up with your monitor. Then, lock the joint at your chosen angle. If slipping returns, check for worn internal threads or a washer issue. Only a tight, stable joint keeps the lamp focused through real tasks, not just at setup.

    Is this a problem in every kind of workstation?
    The instability stands out most in active or shared spaces—creative desks, technical review setups, hybrid home offices—where gear and layout shift often. But even in static arrangements, a lamp that resists drift cuts down mental drag and prevents the subtle but constant reset-churn that can accumulate day after day.

    A Simple Habit That Pays Off Every Week

    Locking the second joint of your clamp lamp isn’t about a cosmetic win—it’s a tiny, practical fix that changes the flow of your work. Tidy isn’t enough when light and reach fall out of line at every turn. This upgrade pays for itself not in visual order, but in the way your desk actually feels: steady, responsive, and finally invisible. You don’t see the stability—but you notice the difference every time you don’t have to reset it.

    Explore the full WorkBasic collection

  • How a Tiny Shim Can Perfectly Level Your Wall and Ceiling Lights

    Most people won’t spot an off-level light fixture when they first walk into a room. But step up to the bathroom sink, climb the stairs after dusk, or fold laundry in a tight corner, and the flaw becomes clear: shadows stretch the wrong way, glare hits the mirror at just the spot you need clarity, or half the hallway drops into gloom while the other side is washed in excess light. The ceiling or wall might look finished at a glance, yet daily routines quickly expose a tilted fixture as more than a cosmetic miss. Each time you lean, reach, or turn, awkward light repeats itself—reminding you, in real use, that something is out of line.

    Why a Slightly Tilted Fixture Matters More Than You Think

    Just a few millimeters off level isn’t a small issue in practice. Lighting that looks decent on install day can turn tasks into annoyances: harsh shadow splits across your bathroom mirror, dark corners on a kitchen counter where you prep food or fold a towel, or angled glare cutting across the path you take every evening. Real routines make weaknesses obvious—especially when using wall sconces, vanity lights, or flush-mount ceiling fixtures designed to provide even light. One side of your reflection might be crystal clear while the other is trapped in uneven dimness. If you notice yourself unconsciously turning or shifting position in front of the mirror to “catch the light,” you’re already compensating for sloppy fixture alignment.

    When a Bright Room Still Feels Off: Hidden Friction in Everyday Light

    Lighting isn’t just about total brightness. Leveling is what steers light predictably, giving you usable clarity where you need it. An off-kilter light sends stray shadows along your main workspaces and blindsides you with glare. In narrow corridors or stairwells, a half-lit wall makes each step uneven and every turn less certain. Instead of a room flowing with clean, helpful light, you navigate around the fixture’s failings: working only at one end of the counter, avoiding a reflection, or slowing down to spot the next stair tread. The problem doesn’t fade into the background. It quietly shapes your behavior, baking clumsy routines into daily movement just to avoid the weakest spots.

    Small Tilt, Large Effect: Scenes Where It Shows Up Again and Again

    Staircase turns: Dark patches collect at the landing, just where you need confidence in your step. With the fixture skewed, the stair edge is murky, and glare from above distracts more than it helps.

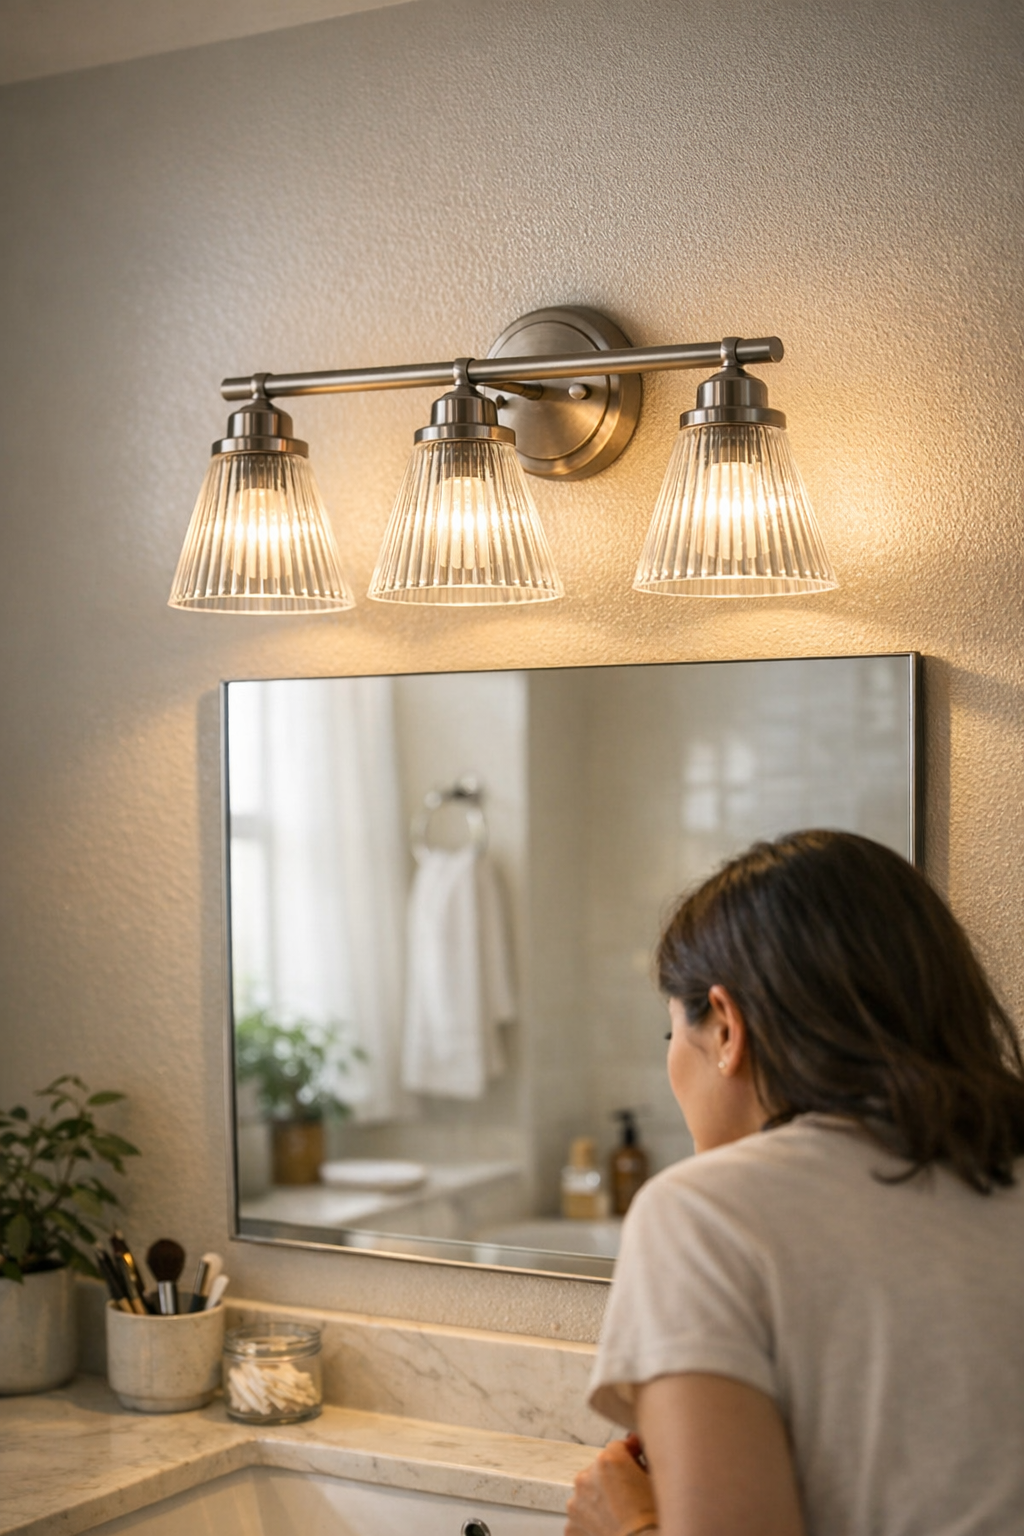
    Bathroom mirrors after dark: No matter how many times you adjust, half your face is reliably in shadow because the vanity light isn’t squared to the mirror. Applying makeup or shaving means shifting angle, not just standing still.

    Hallway crossings: Entering a corridor, one wall jumps out in bright relief while the opposite side hangs back, feeling vacant. The path lights unevenly, urging you toward the better-lit side despite the whole ceiling glowing overhead.

    These small failures mount up. The room itself hasn’t changed shape, but the way you use it narrows—guided by where the light isn’t reaching, by the shadows you work around, by the side you squint at nightly.

    The Simple Solution: Leveling with a Shim

    The fix is mechanical, not decorative: slip a flat washer or slim plastic shim behind a mounting screw—raising or lowering a single point—before tightening the fixture back up. This minor adjustment resets the fixture against real reference lines like the edge of your mirror, the run of cabinets, or the true ceiling plane. Forget “eyeing” the alignment on install; use a torpedo level or straight room feature as your guide, especially in narrow or angled spaces where what looks straight from the door turns wonky at a sink or stair landing.

    How a Tiny Adjustment Resets the Whole Space

    Once level, the shift in routine is practical and immediate. You stop tilting your chin for better light at the bathroom sink; both sides of your face appear evenly in the mirror, and shadows don’t pinwheel with every move. Hallways feel stable and evenly lit—no more dodging glare on entry or hesitating on a dim stair. Laundry and kitchen counters regain their full usable width, without reaching into dim corners or squinting past streaks of light. The real change isn’t just “brighter”—it’s smoother movement, clearer work surfaces, and the end of unnecessary workarounds for routine visibility.

    Is This Worth Tweaking Everywhere?

    You’ll notice the difference fastest in rooms where precise, consistent light matters every day: hallways you walk through before sunrise, stairways you climb at night, bathroom mirrors where detail counts, laundry rooms where you need every inch visible. Leveling turns a fixture from tolerated background to invisible supporter—removing the distractions created by even a tiny tilt. If you’ve ever shifted habits to dodge awkward light, there’s likely a fixture begging for a shim and a second look.

    Bringing the Room Back to Its Real Potential

    Leveling is less about chasing perfection and more about ending a pattern of small, stubborn friction wherever you rely on your lighting most. Getting this right removes ongoing annoyances from spaces you otherwise take for granted. The difference isn’t showy—it’s letting the room do its job, every single day, without forcing you to compensate for weak light or odd shadows.

    Find lighting that’s made for real use, visible clarity, and daily reliability at LightHelper.

  • Why Proper Corner Lighting Transforms Your Under-Cabinet Spaces

    Dim edges turn any “finished” under-cabinet or shelf lighting setup into an everyday compromise—fast. Even with cables hidden and the surface newly bright, the reality sets in during week one: you start avoiding the ends, shifting meal prep or paperwork to the safe, central glow. Things migrate—chopping boards, chargers, the “good” utensils—always toward the brightest spot, leaving the corners in dim neglect. Suddenly, the newly installed light isn’t extending the usable area. It’s narrowing your habits, and every day, a so-called upgrade slowly becomes a limitation you plan around.

    When the Glow Stays Central—and Corners Fade Away

    After days with standard under-cabinet lighting, clutter collects in the lit zone, not by accident but out of necessity. Bowls, documents, and small tools pile up in the center because the edges slide into shadow. Even at midday, you might catch yourself squinting for a dropped cable or that farthest spice tin. As evening falls, the border between usable and unused becomes sharp: the full width of your counter, shelf, or desk reads as available, but the only area you actually reach for is the zone the light fully covers.

    This is more than personal preference—it’s strain built directly into the layout. Shared kitchens and office nooks become cramped as everyone clusters at the lone truly visible spot. Underused edges aren’t decorative; they’re a daily friction. Each sidestep or detour around a dull patch is time and comfort lost, even if you only notice when your routine pulls toward the middle yet again.

    The False Comfort of a Minimal Install

    Most setups start with the lure of visual order: a slim LED strip flush against the cabinet, hardware neatly hidden. But if the light beam falls short—too centered, too shallow—the “minimal” install turns cosmetic. Impeccable lines spell out the problem even faster: darkness crowds every edge. Every day, the setup looks resolved but works incomplete.

    Workarounds multiply: you inch cutting boards away from the wall, shift devices toward safer zones, constantly nudge everyday items from one patch of light to another. Sooner or later, you’re using just two-thirds of a full run. That’s not a subtle tradeoff—it’s wasted space built into your routine, not because of a technical gap, but because coverage got sacrificed for appearance.

    Glare vs. Shadow: Getting the Light Out Far Enough—But Not Too Far

    Slide the fixture forward to erase those dim edges, and you trade one annoyance for another: glare. Light spears out under the cabinet or shelf, bouncing directly into your eyes or splashing onto countertops at the wrong angle. That supposed sweet spot—broad coverage, glare-free lines—never lands by chance. It demands bracket tweaks and an honest look at shelf depth versus beam spread, not a guess from the spec sheet.

    If you’ve found yourself fidgeting with fixture position, or pivoting to escape hard glare during a late-night task, you’ve run into the real balancing act. It’s not technical specs that matter, but lived awkwardness: broad, low-glare light that actually fits your real working habits. There’s no universal answer—only patient adjustment, right until both the edge and the line of sight finally make sense for your own space.

    The Cable Conundrum: Neat, Calm, and Out of Sight

    Even the best lighting plan falls apart if one cable snakes down the wall or flickers into view at eye level. It’s not just visual mess—it’s a split-second distraction, pulling attention from the work surface before you even realize what’s different. Every “almost right” install seems to leave at least a few inches of white line climbing out from a shelf, or a black adapter hanging from an outlet with nowhere to hide.

    Small, decisive hardware wins here: adhesive channels or rear-edge guides route lines so tightly you forget they exist. When cable runs follow the fixture, hugging the underside contour or ducking sharply out of sight, both the room and your attention feel clearer. It’s a minor detail with outsized impact—especially during a rushed morning or group meal, when even small distractions add up fast.

    Everyday Use Reveals the Gaps: Real Scenes, Real Friction

    The first days after a lighting upgrade often sell the installation short. As routines settle in, new limitations surface, including:

    • Reaching for a canister at the shelf edge, but having to double-check the label where light failed to reach.
    • Pushing paperwork to the middle of a wide desk, though the ends “should” be usable—and telling yourself you’ll sort the rest later.
    • Watching everyone cluster in the same bright spot at a communal counter, while shaded ends gather untouched clutter.
    • Retrieving a dropped pencil or cable from a dim bin at the edge, hours later than you needed it.

    Each act builds a pattern: the visible area sets the real limit for use, and you quietly train yourself to ignore everything beyond the comfort zone of proper lighting.

    Small Shifts That Restore Real Utility

    Most fixes aren’t dramatic. Sometimes, moving the light fixture outward even an inch, or tucking the cable path above the cabinet lip, changes the entire feel of the space. Suddenly, the outer “catch-all” zones—once shadowy, awkward, or ignored—come back into use. Plates, keys, and chargers stop drifting toward the center. The whole surface earns its keep, not just the spotlighted sliver.

    Use a diffuser or custom cover if supplied. It’s not an accessory—it prevents raw glare while letting light reach out into those corners. Check the lateral spread; don’t settle until the entire usable width is comfortably, softly visible, but the beam itself doesn’t shine straight at your face. For dense or changing setups, don’t be shy about chunkier brackets or adhesive mounts: the last inch of cable or fixture length can be the dividing line between a half-measured fix and a truly usable solution that adapts over time.

    True Comfort Means Every Edge Works—Not Just the Center

    A lighting run that looks perfect but leaves half the shelf in shadow is a daily chore in disguise. Real comfort comes not from minimal aesthetics, but from making every inch function—edges lit, cables low-profile, traffic flow maintained, and bright spots distributed where activity actually happens. If you’re sidestepping the ends or if a group keeps crowding toward the one clear patch, your setup isn’t supporting you yet. There’s no reason to settle for surface-level neatness when small, hands-on changes can unlock the whole area’s potential.

    Purposeful under-cabinet and shelf lighting isn’t about aesthetics as much as about reliable routine. Once you strip away unused dim sections and stray cables, what remains isn’t just clarity—it’s daily usefulness that matches how you and others actually work. That difference is felt, not just seen. Small adjustments in position, angle, and support can turn your installation from “presentable” to a surface that finally does its job.

    http://www.lightsupport.myshopify.com

  • Why Cable Management Systems Fail After Setup and How to Fix Them

    Clearing cables from the floor instantly changes how a desk functions—but it doesn’t erase friction; it just moves it. The moment cords are tucked into trays or cable boxes, superficial mess disappears, chair movement is smoother, and nothing gets trapped under wheels. But the real test kicks in later. By Wednesday, chargers vanish behind trays. Every new device means twisting to reach past the desk edge or unlatching a box mid-call. What started as a spotless workspace quickly spawns new interruptions: hidden, harder to spot, and far more likely to break focus when you’re under pressure. If your cable system only looks clean on setup day but slows down your second week, you’ll end up right back in frustration—just more quietly.

    The invisible upgrade—when cable trays change the problem, not the routine

    On the surface, cable trays and boxes promise a cure for cord chaos. No more loops snagging chair wheels. No more spirals of wire spreading across the footpath. But after a few device swaps and a handful of resets, the catch shows up: that perfect cable box under the desk now blocks you from quickly plugging in a guest’s charger or grabbing your headphones. Need to connect something fast? You wind up on your knees, prying lids, or groping blindly for a cable tip. The snags move out of sight but edge closer to your workflow.

    This shift gets sharper on stressful days: hardware gets replaced, you’re chasing a deadline, or juggling devices for a client call. Neat lines turn into barriers. Simple acts like plugging in a backup drive become mini-projects, not just quick, one-handed moves. The “hidden” mess is now an accessibility problem—less visible, but more capable of stalling you at the worst possible moment.

    Picture the real day: is the setup slowing you down or clearing the way?

    A desk that looks organized can still feel crowded once the work starts. Every session reveals the friction: you reach for your notebook, elbow bumping a tray lip; you shift your chair, foot meeting the solid edge of an under-desk box. Plug in a new device? Now you’re stretching or dragging at cords, just to get past a neat solution that doesn’t actually fit the routine. The trouble isn’t always obvious at first. Late in the day, you realize your charger is out of reach. During a meeting, standing up yanks a monitored cable taut. Organization isn’t a one-time reset—it lives or fails in repeated reach, movement, and device churn. If your system only maintains looks, it will lose against the grind of daily workflow.

    Small tradeoffs that come back to bite

    Floor-level cable boxes keep everything visible, but the mess and tangles stay in the peripheral vision—and underfoot. Trip or roll over a loose cable, and the whole arrangement resets itself the hard way. Under-desk trays give back floor space and hide the clutter, but the gain is fragile. Place the tray too far from the edge, and every device swap means standing up or fishing at arm’s length. Place it too close, and your knees or mobile drawer crash into it. The lesson is blunt: if reach or adaptability is sacrificed for surface neatness, real usability slips fast.

    Functional order: the setups that survive deadline weeks

    The gap between “looks organized” and “works organized” appears after your fourth device change or third week of deadline stress. Sit-stand desks, hot desks, even simple shared surfaces show this quickly: no cable system that needs both hands and a flashlight survives routine change. You can’t pause to uncap every time your laptop charger rotates through—or reroute a cable whenever a monitor arm shifts position. When a system locks you into a single pattern, it breaks under pressure. And the mess you fought to hide begins creeping right back over the desktop and floor.

    Every fixed arrangement becomes a trap when new devices, visiting coworkers, or a shift in task flow lands. Rigid cable boxes and locked trays work only as long as your routine stays frozen—and no modern desk does. The moment routine bends, you spend more time reaching, unplugging, and re-routing than actually working. Real solutions let the system adapt around your workflow—not the other way around.

    Quick scenario: the everyday cable shuffle

    Midweek, your main laptop goes down. You’re handed a loaner—keyboards and monitor stay put, but connections change. Inflexible cable setups mean downtime: you crawl under the desk, move the chair aside, unplug half your gear just to add one adapter. The interruption isn’t dramatic, but it chips away at the day. But with an open tray, or a cable channel with a movable slot, you just drop in a line and keep moving. No digging, no dismantling, no pause. The right organizer stays silent—the wrong one makes you work for every small change.

    What finally worked: a tweak that survived the rush

    After too many workday resets, I ditched the full-seal cable box. It kept the desk visually pure, but every adjustment meant shifting my seat, digging under the desk, and popping off a lid that was always grimy inside. Upgrading to a tray with one open slot made every shift immediate—extra charger? Slide it right in. Reposition for a sit-stand switch? No more wrestling cables back into shape. Swapping devices, lending a charger, or adding a barcode scanner takes seconds. The clutter doesn’t have a chance to pile up, because the setup never makes simple moves annoying.

    FAQ: Desk cable organization in real life

    How do I keep my cords both hidden and accessible?

    Choose organizers and trays with open slots, drop-out ends, or flexible rails. These create stable channels for cables but allow quick rerouting as work shifts—no need to take apart boxes or loosen every wire just because of a new charger or guest device. That’s the dividing line between a “picture-ready” desktop and a workflow that doesn’t stall when work moves faster than expected.

    Will cable trays interfere with my chair—or with standing desk positions?

    Most under-desk trays mount flush and stay clear—if you place them right. Keep enough space (5–8 cm is a good rule) between tray and back wall to let legs and chair pass freely. If your chair path, mobile pedestal, or knee room gets squeezed, you’ll feel it by lunchtime. Measure your chair’s swing before mounting—what seems organized on day one might get in the way during a reset, longer session, or when you shift postures in the afternoon.

    What’s the biggest mistake people make hiding cables?

    Lock-down thinking—over-tightening or over-sealing the setup because mess feels urgent. But the price for “maximum tidy” is slow, awkward changes. The best desk cable systems hold the mess in, but they don’t punish you for switching cables, trading chargers, or re-arranging after a busy week. If you wince every time you need to move something, the clutter will leak right back onto the work surface and floor.

    It’s not about perfection—just less interruption

    Pulling cables out of the way should clear mess and friction—not create new projects every time your routine moves. Any system that makes device swaps slow or charging awkward will fail during an actual workweek. Desks that work are built for real routines: messy, changeable, and pressure-tested. The best cable setups disappear into the background—no pauses, no new hurdles, just reach, plug, and get back to work. When cables become something you don’t have to think about, your setup is finally working as intended.

    Explore the full WorkBasic collection

  • How Under-Cabinet Lighting Transforms Rental Kitchens for Daily Tasks

    The Real Kitchen Lighting Issue You Notice Too Late

    On first glance, the rental kitchen looks bright enough. Overhead, a flush wiry ceiling fixture throws light across the center, bouncing off tile and countertop, giving the space its “move-in ready” glow. But the weak spot isn’t obvious until you actually start working. Your first chop, your first onion peel, or the first time you reach behind the coffee maker—and the overhead light’s failure is immediate: shadows swallow the counter’s edge, especially at the wall. No matter how strong that ceiling fixture, a dark band stays put where you prep, wipe, and cook. This isn’t just a mild annoyance; it’s friction built into daily kitchen life. The lighting looks “done” but leaves you squinting and shifting bowls to chase usable visibility, every day.

    Why Overhead Fixtures Lose the Battle With Kitchen Shadows

    Flush mount or semi-flush fixtures do one reliable job: flooding the middle of the room. But kitchens are not meant to be lit like empty corridors. Every upper cabinet introduces a shadow line along the back of the counter. Anything—hand, chopping board, bread bag—instantly blocks the overhead beam. What should be a simple act—reading the label on a spice jar, wiping spilled coffee off a backsplash—becomes a two-step process. You either drag everything forward into the glare or lean awkwardly to see what you’re missing. Stand in this setup for a week, and it becomes routine frustration: slower prep, missed crumbs, hesitating when checking if marble is actually clean. Brightness from above does nothing for the dead zone under your cabinets. Your movement adapts, but the lighting never does.

    The Shadow Strip at the Counter’s Edge: Why It Stays a Problem

    Every kitchen with upper cabinets creates a shadow trap a few inches from the wall. You know it if you’ve ever nudged a mixing bowl forward for a better look, or tipped a bottle toward the center light to check for expiration. Rental kitchens age the problem—they almost always have just an overhead fixture spaced for general light, not actual workflow. The worst part? The discomfort fades into the background, misread as part of “working in the kitchen,” until you step into someone else’s well-lit setup and the difference hits: it wasn’t you, it was the lighting.

    Under-Cabinet Lighting: Precision Fix Where Daily Tasks Fail

    Direct Illumination for the Actual Work Zone

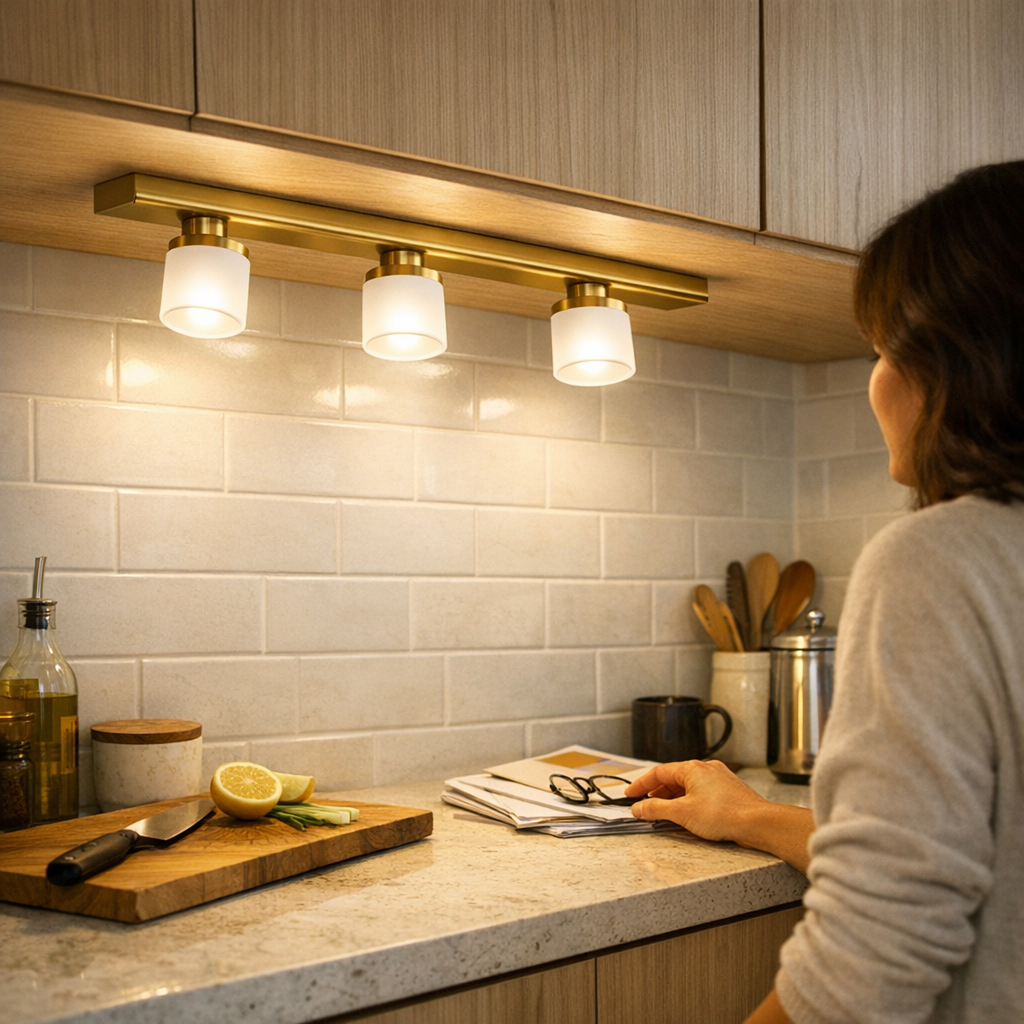
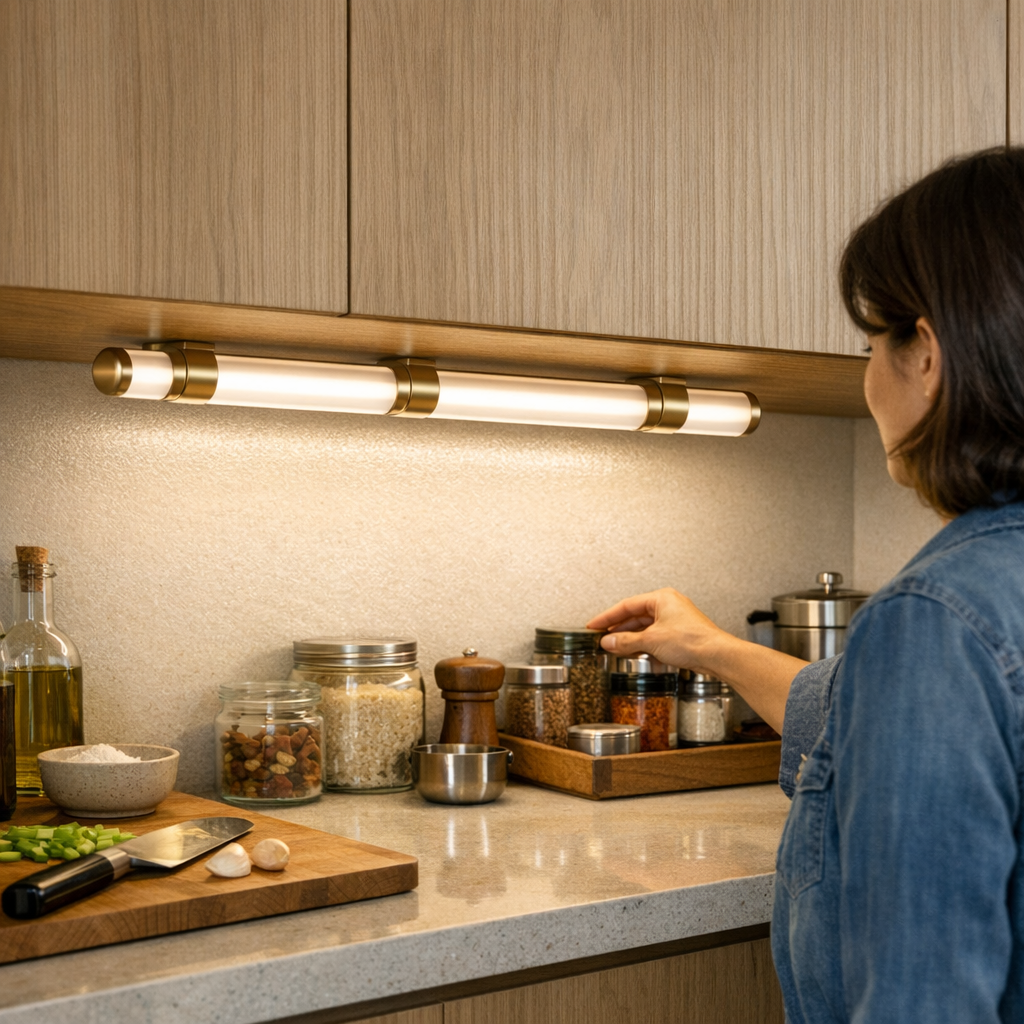
    Under-cabinet lighting doesn’t just “improve atmosphere”—it eliminates the core visibility flaw built into most kitchen designs. By mounting strip or bar lights along the underside of upper cabinets, aimed out toward the counter’s front edge, you kill the standing shadow strip that overhead fixtures always leave behind. The entire worktop—especially the zone behind the toaster and spice caddies—becomes clearly, evenly visible. No more moving bowls into the “safe” circle of light. Small routines change fast: you notice leftover crumbs on the first swipe, read faded packaging without squinting, and chop without fighting your own shadow.

    It’s not extra “brightness.” It’s an end to workaround habits—no more double-checking, no more guess-wiping, no more kitchen yoga to bring things into view. Each task happens in the direct light meant for real use.

    Rental Constraints: Plug-In & Adhesive Lights Avoid Damage

    If your lease forbids hardwired fixtures or new cabinet holes, you’re not locked into bad lighting. Plug-in and adhesive under-cabinet strip lights exist precisely for rental kitchens. With no drilling and simple routing along cabinet trims, they pull power from a standard outlet and can be removed without a trace. You gain targeted task light where the repeating frustration happens, not just a cosmetic accent for photos.

    Tip: Always confirm your landlord’s policy before plugging in new lighting, even if most leases allow removable solutions. Avoid last-minute move-out costs by checking first.

    Kitchen Life With—And Without—Under-Cabinet Lighting

    Think through your actual kitchen moves: reaching for a pan in the pre-dawn, searching for a misplaced scoop behind the blender, or trying to spot a spill before it dries hard. With only ceiling light, hesitation and mild error become routine—narrowed sight, slow hands, dim spots hiding the mess. You stop trusting what you see.

    Switch on under-cabinet strips and the counter’s entire depth is bright. Reaching behind appliances is straightforward—no more dragging the toaster forward to see if the surface is clean. Night or early morning routines become smoother: you prep and pour without squinting, no matter how dark it is outside. Cleanup is faster because shadows can’t hide what needs wiping. The change isn’t dramatic—just plainly better with every task, not just for “looks.”

    Why Countertop Clarity Is Workflow, Not Décor

    Direct, even light from under-cabinet fixtures does what a pretty fixture in the ceiling can’t: it turns “guess and check” workflows into efficient routines. With the whole prep zone clearly lit all the way to the wall, spill cleanup is thorough the first time. The days of squinting at a measuring spoon in semi-darkness are over. Even new users notice quickly—when the shadow problem is gone, you stop thinking about lighting and start moving through the kitchen like it was designed for people.

    Making the Right Under-Cabinet Choice

    Not all under-cabinet lights are equal. The common mistake is to grab cheap “puck” fixtures: they create pools of harsh light, leaving gaps and glare arcs over shiny countertops. If you want full counter clarity, choose diffused strip lights run nearly the full cabinet length and mount them toward the cabinet’s front—not buried deep near the wall. That’s where hands work, where the shadow falls, and where every unnoticed spill or crumb starts. Placement makes the difference between half-fixed and solved.

    The Limits of Under-Cabinet Lights (And Why They Matter)

    Even a perfect under-cabinet strip can’t light your whole kitchen. They’re designed for the work zone: prepping, wiping, reading labels. Overhead and wall fixtures still matter for cooking at the stove, seeing into corners, or navigating around the room. Ignore the sales promise of under-cabinet lights “transforming” the whole space—they fix the task shadow, not the entire kitchen’s lighting structure. But in the zone where you face the most repeated friction, targeted task lighting beats cosmetic fixes every time.

    If Shadow Frustration Persists, It’s Not “Just How Kitchens Are”

    If you’re tilting labels into hallway light, re-wiping the counter every morning, or fishing for dropped items you couldn’t spot the night before, those are design signals: your kitchen isn’t lit for actual use. Galley kitchens with heavy upper cabinets make this problem worse, no matter how “modern” the ceiling fixture looks. Under-cabinet task lights are not an afterthought—they’re the practical, answerable fix to a built-in, repeated-use flaw.

    Small Lighting Upgrades, Big Daily Change

    Switching to under-cabinet lighting is less about cosmetic glow and more about reversing constant, low-level inconvenience. Once installed, the difference shows up in every move: less searching, cleaner prep, no hidden mess. Lighting that finally works with—not against—your everyday kitchen behavior.

    For more practical indoor-lighting solutions, visit LightHelper.

  • Why Lowering Under-Cabinet Lighting Improves Everyday Visibility and Comfort

    The promise of a “clean” lighting setup rarely survives a week of real use. That crisply mounted under-cabinet or slim shelf light looks perfect the day the cables disappear and the fixture hides behind trim—but friction quickly returns. Every time you chop vegetables or reach for supplies along the rear edge, you’re chasing shadow lines, glaring at the cabinet face, or stretching awkwardly to catch what the lighting missed. The setup that seemed finished now interrupts your routine, and the surface that looked resolved by mid-afternoon snaps back to frustrating reality by nightfall.

    Why Clean Looks Don’t Always Translate to Clear Working Light

    Minimal lighting installs—tight under-cabinet strips, flush LED bars, slick linear fixtures—are sold for their vanishing act. Wires vanish. Brackets recede. The counter or shelf glows evenly—until you actually start using the surface. That’s when the real issues appear: glare thrown off shiny trims, shadows swallowing the back edge, and core work zones left frustratingly out of reach. The crucial strip of workspace—where you set down a mug, review a manual, or hunt for a missing part—fades into gray.

    Lighting fixed high and hidden solves visual clutter but creates new obstacles. Reach under a low cabinet or deep shelf, and the front half is overexposed while the far side recedes into shadow. A setup praised for its seamless look reveals its limits the first time you have to adjust your position just to read a box label or grab a tool without guessing.

    Shadow Lines and Dim Corners: Where Streamlined Installations Fall Short

    The problem shows up in the same way, every day: hands cast dense shadows onto the space you need most, while the well-lit foreground distracts from what’s actually missing. In a kitchen, the place you rest a spoon or line up spices never feels fully visible. On a workbench or shared desk, small hardware and paper piles blur into the dim rear, forcing repeated shifting and squinting. Lighting that scores on looks stumbles on use—especially where routines keep circling the rear corners, not just the clear center stripe.

    These are not one-time annoyances. A week in, you’re adjusting your angle, dragging in another lamp, or leaning closer against the cabinet edge—proof that a setup considered “minimal” doesn’t always keep up with real-world movement or reach. The discomfort isn’t glaring, but it’s persistent: a subtle design flaw that keeps inviting workaround after workaround.

    Lowering the Fixture: The Simple Adjustment That Brings Real Clarity

    There’s a small, specific fix: Lower the under-cabinet or shelf-mounted light just 4–5 centimeters below the surface lip. This one shift releases the beam’s reach, pushing the light field all the way to the back wall or inner shelf edge—filling the shadow zone where hands, labels, and tools actually land. Suddenly, detail returns where it matters. The contrast between front glare and rear murk fades; the space behind jars, bins, or devices emerges as naturally usable.

    This isn’t about amp-ing up brightness or flooding surfaces. It’s about beam direction—preventing a fixture designed for stealth from robbing the very clarity it’s meant to deliver. Lowering the light doesn’t sabotage neatness; it corrects the balance between invisible hardware and visible function. The difference is tangible from the first meal prep or project night—no more faked minimalism that quietly drains productivity.

    Real-World Scene: Where the Lighting Position Pays Off

    Picture this in use: By day three, you’re prepping dinner under a flush-mount strip. Each time you slide a tray or scan for a label, your wrist blocks the light, forcing mid-task reads and guesswork at the back. You start angling yourself sideways or switching on a phone light. Drop that strip a modest notch—and now the far row of bottles, the onion skin, and even scattered crumbs fall plainly into view. Labels are legible without head-tilts. There’s no more moving twice to finish one task. The light covers the job, not just the décor.

    Shared Desks and Work Surfaces: Where Minimal Looks Can Slow You Down

    Kitchens aren’t the only danger zone. On workshop shelves, classroom desks, or shared counters, the same tight-mount setups leave half the surface ambiguous. Lowering a fixture turns a row of shadowed bins or half-lit paperwork into a clearly visible workspace—the near edge ready for fast grabs, the rear edge free of lurking details. It also fixes the annoying problem of partners or colleagues repeatedly shifting the lamp or hunting for what they can’t quite see. The area now matches intention: work moves forward instead of circling lost in half-light, without the pause to chase every shadow with a flashlight.

    It’s easy to credit a surface for looking less cluttered. It’s more convincing to count how much less you have to adjust after a fixture drops into its effective zone—quiet measurable difference, not just visual promise.

    Slim LEDs and Cable Placement: Balancing Neatness and Performance

    Some setups resist adjustment out of fear of cable mess or “visible” lighting. But slim LED bars and smart cable routes make this concern smaller than the headaches of living with half-lit surfaces. Pin cables tight along seams and supports; they fade from awareness faster than the persistent strain of missing screws or misread labels. A fixture that sits slightly lower does become more physically present, but in daily use, what stands out is the absence of friction: no more leaning, no more compensating, no mental note to “fix the light someday.”

    A visually minimal bracket or cable that fails in routine use is less “clean” than a slightly visible support that keeps your workflow seamless. Practicality wins—within days, the truly invisible element is the annoyance you’re no longer working around.

    How Small Adjustments Turn Into Lasting Routine Improvements

    Lighting setups that look perfect at install often turn into silent routine traps by week’s end. The easiest fix—lowering a mount—turns a kitchen, study, or work zone from “picture-ready” to genuinely usable. Glare softens. Blind corners fill in. Cables, if routed correctly, recede alongside brackets into the room’s structure. The best lighting support helps not by staying unseen, but by putting every label, handle, and edge within easy reach—cutting the lag between setup and fluent everyday motion.

    Minimal never means invisible at the price of comfort. The small, visible shift—a light dropped to the right level, a cable tucked clean but not buried—changes the room without ever getting in your way again. Most routines don’t need perfection; they need light that moves with them. That’s the difference between “perfect look” and real support.

    Find more practical lighting and support solutions for real indoor routines at LightSupport.

  • How Structured Cable Routing Enhances Desk Usability and Workflow Efficiency

    The line between a desk that simply looks organized and one that actually holds up under real work pressure shows up the moment you need a cable fast. You reach for your charger—that’s when the “tidy” surface fails: the cable has already slipped to the floor or vanished behind a pile of folders, forcing you into awkward reaches or a full crawl under the desk. Repeated drops, tangled lines, and off-balance surfaces create small setbacks that chip away at your session. A loose charger is more than a minor mess—it’s a daily test of patience and an invisible drag on workflow.

    Recognizing the Cable Problem Before It Slows You Down

    A charger left to dangle is more than stray clutter; it’s an early alarm for routine breakdowns. Even after a morning reset—pens lined up, papers stacked, cables coiled—the illusion cracks by lunchtime. By day’s end, your hand goes searching for a vanished charger, first on the surface, then behind the monitor, maybe finally under the desk. Each time, the “simple” search interrupts your working flow, piling on seconds and low-grade irritation. What feels minor on Monday turns into a repeated roadblock by Thursday.

    The hidden cost: snapped focus, bent connectors, cables yanked by moving notebooks, the charger’s heavy smack as it hits the floor again. The setup looks clean but never feels ready.

    Why Quick Cable Fixes Rarely Hold Up

    Temporary fixes always tempt: loop the wire over a monitor arm, wedge it under a mousepad, let it rest just out of sight. For a day, it works. After that, gravity wins. A device swap or erase of a whiteboard drops the cable again. These “solutions” create their own mess: the charger ends up bent at odd angles, cables knot with each new item you move, and what was once at hand now requires a daily scavenger hunt. Routine work becomes an obstacle course of stops and resets.

    The trap is obvious in hindsight: saving steps now simply moves them later, multiplying small, distracting resets across every round of work.

    How a Small Change in Routing Produces a Big Return

    Real desk improvement rarely means buying bigger trays or hiding everything. The fastest difference comes from anchoring just what keeps causing friction. An adhesive cable clip, set a thumb’s width—about 4 centimeters—from the desk edge, locks the charger in place: it stays visible, always in reach, no matter how often you plug, unplug, or shift your notebook. You stop losing minutes to cable fishing and dragging wires back into place.

    Just this correction does the following:

    • Stops the charger from dropping each time you shift a device
    • Keeps the cable exactly where muscle memory expects it to be
    • Makes tidy resets between tasks almost instant—no searching, no untangling, no crawl under the chair or desk

    It’s not about perfect concealment; it’s about stable cable points that survive repeated transitions—writing, typing, plugging in, shifting back to your screen. Your desk looks less cluttered, but more importantly, it works without interruption.

    Where the Friction Usually Pops Up

    There’s a pattern to cable chaos: jotting notes with a charger loose, a single gesture shoves it beneath your folders; in the clutter of task switching, the charging head slips out of reach—again. Slide a notebook forward to make more space, only to drag the cable halfway off the desk. Even when longer lines get stashed in under-desk trays, short chargers become harder to grab if you’re unplugging multiple times per day. The point isn’t to hide every trace—it’s to have the charger always right where your workflow pivots, matching how—and how often—you use each device.

    Practical, Repeatable Desk Scenarios

    Picture a compact workstation: laptop in the center, external monitor pitched at an angle, a tablet parked on the right edge, keyboard sharing space with stacks of notes. You switch between typing and sketching, phone pings, you reach—cable falls, notebook catches, everything in your way for a task meant to take seconds. By early afternoon, the time lost to wrangling basics adds up.

    When you anchor the cable, the routine transforms quietly. Plug in, unplug, reset for a call, jot down an idea—no dropped wires, no rummaging. The right cable returns to hand every time not by accident, but because the desk reroutes your reach just enough that distraction never has time to build.

    What Actually Changes Across a Workweek?

    The upgrade isn’t dramatic and that’s its strength. The hassle leaks out of the week, little by little:

    • No more crawling under your chair for a charger after every device swap
    • Chargers stop bending or losing grip from being twisted behind the monitor
    • Folders and notes don’t push cords out of play during rapid task shifts
    • Surface resets become smooth, quick, and routine—delays drop away, and flow returns faster at every session’s restart

    You only notice how often you used to get interrupted by how quiet and frictionless the day becomes—the charger just works, and the problem vanishes into the background.

    FAQ: What Desk Users Keep Asking About Charger Cables

    How do I stop chargers from sliding off my desk?
    An adhesive clip or channel right at the desk’s working edge makes all the difference. Place it where your hand goes when reaching for the device you charge most often. Retrieval becomes automatic—you stop losing time and patience to repeat hunts for a fallen cable.

    Will hiding cables in a tray make it harder to plug and unplug devices?
    Yes, for short, frequently moved chargers, trays can get in the way. Under-desk trays work best for the cords you rarely touch. For daily chargers, surface-edge clips strike the balance—orderly, but never out of reach or a hassle to reset. Don’t hide what you need to grab on the fly.

    Does combining cable boxes, trays, and clips really help?
    It works if you separate constant-use from rarely used cables. Store heavy, long lines out of sight in trays or boxes; keep your main charger secured on the surface with a clip. Added systems are only helpful if they don’t force you back into slow workarounds during high-traffic device changes.

    The Real Win Is in the Routine, Not Perfection

    Locked-in cable routes aren’t about showroom looks or desk envy—they mean you stop thinking about the cable at all. Every structured touchpoint frees up your focus, removes tiny setbacks, and lets your desk flex with repeated switches, resets, and bursts of work. The real signal of improvement? Not how the surface looks at 9 AM, but how quickly it goes from chaos back to ready after every full cycle of use. The cable you use most isn’t buried, blocked, or halfway to the floor—it’s where you need it, session after session, mistake after mistake, reset after reset. Explore the full WorkBasic collection