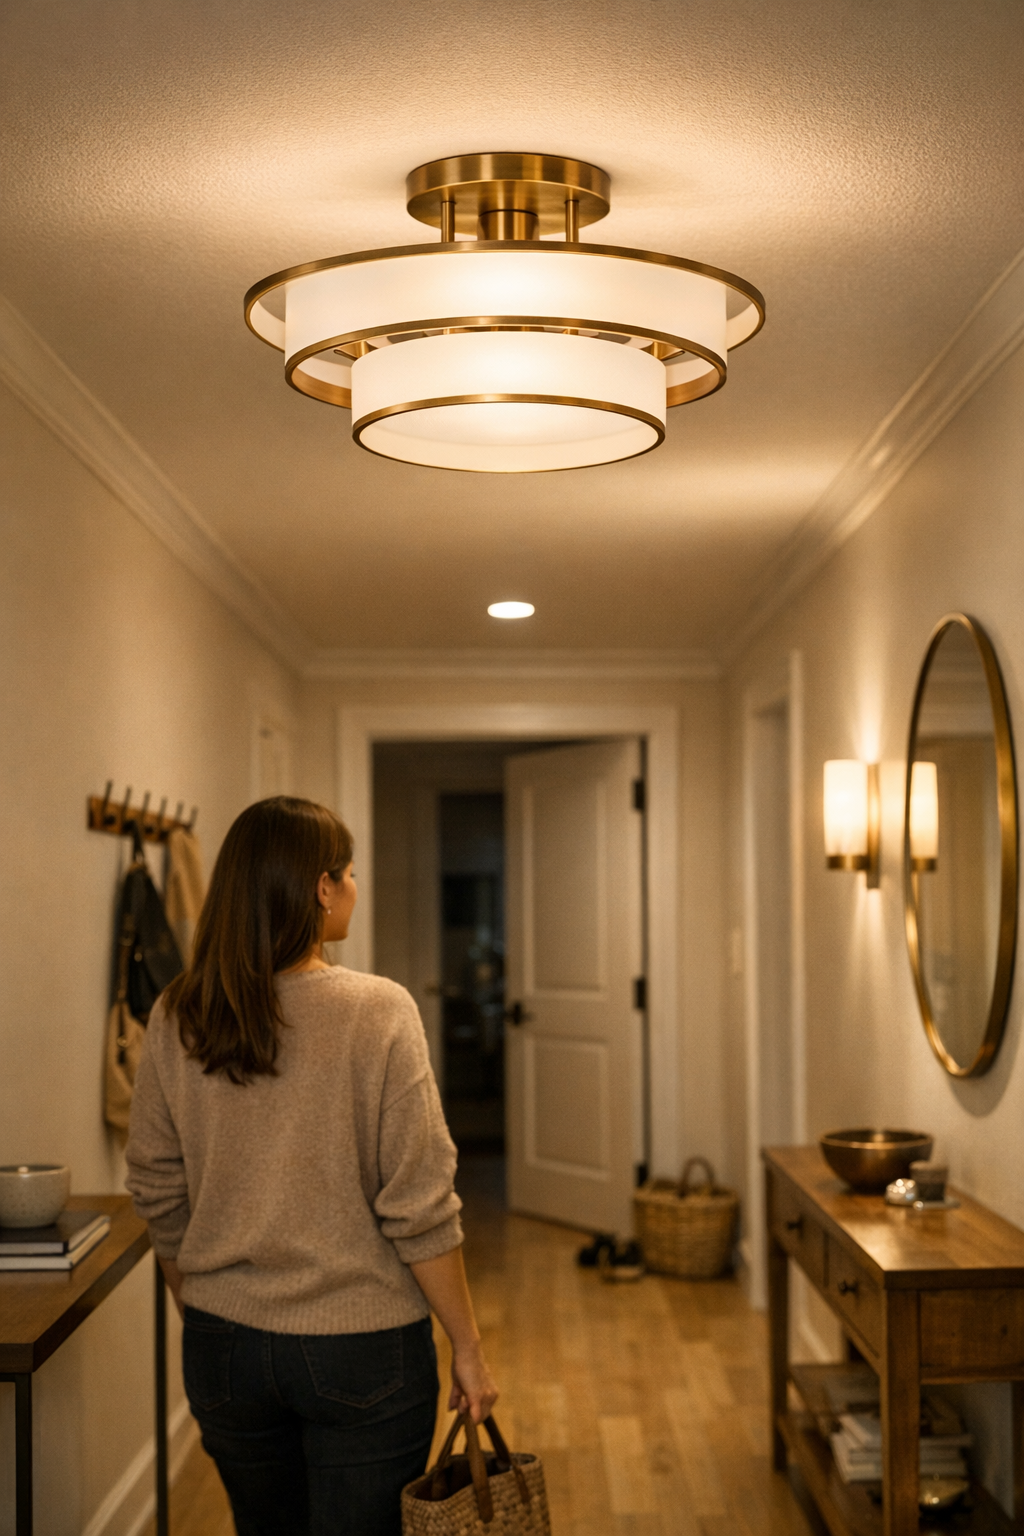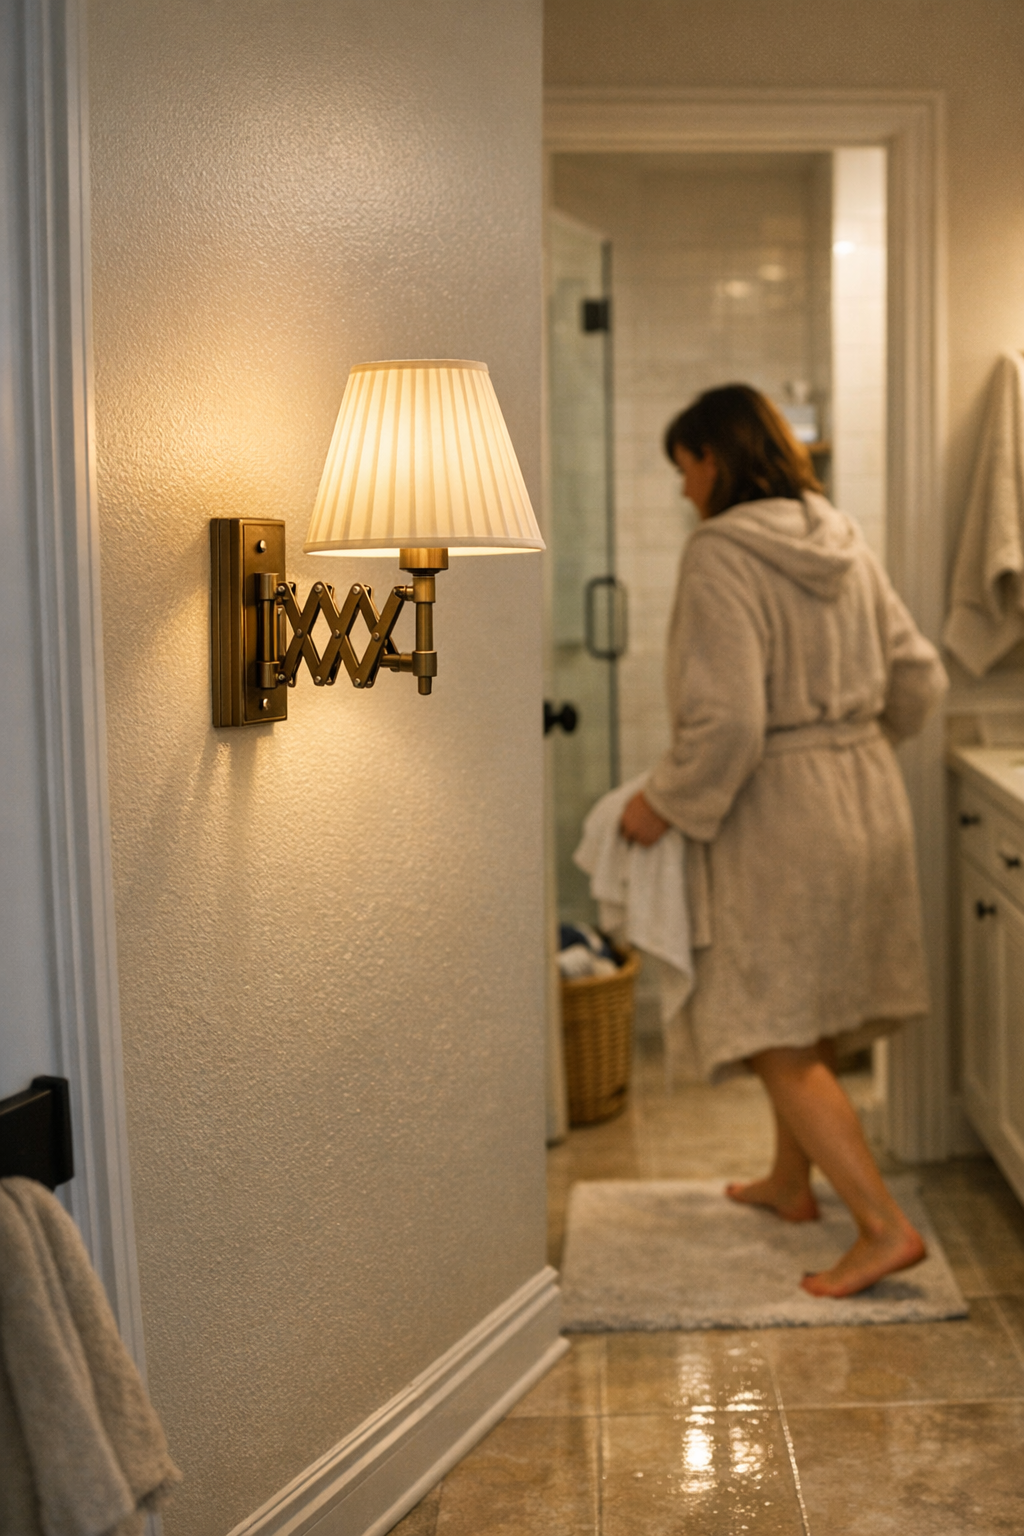
Category: Lighting & Work Setup

  • Why Proper Lighting Matters More Than Brightness on Slick Floors

    Slick floors expose lighting failures you don’t notice until you’re in motion—pausing at a stair turn because you can’t see the next step, squinting to spot a puddle on wet tile, or feeling one side of a glossy hallway vanish as shadows swallow the baseboards. Overhead lighting that looks bright on paper can fall apart the moment you cross polished tile or lean in at a fogged mirror. If you’re hesitating in spots that should feel direct—a bathroom exit, a laundry zone, a hallway corner—you’re living with the daily cost of light that misses real movement paths and leaves practical visibility to chance.

    Where Light Fails Slick Surfaces: More Than Just a Brightness Issue

    One ceiling fixture might seem to drench the bathroom or laundry in light, but actual routines keep finding the missed spots. Step from a steamy shower—every tile gleams with reflection, but you’re forced to track a safe place to land your feet. Glare pools under overhead bulbs, catching your eye when all you need is to check for wet patches. Hallway turns collect uncertainty: shadows thicken at trim lines, just where your stride demands clarity. Stairs, baseboards, and doorframes become pockets of unlit risk—encouraging shuffling, deliberate movement, and small course corrections that slow you down and force your attention away from your actual task.

    Repeated use makes the flaws impossible to ignore: slowing at slick thresholds, bracing at a darkened stair, drifting away from the brightest reflections just to keep your footing. These are more than small bothers—they’re repeated micro-decisions that drain confidence from each step and quietly raise the risk of a slip on the days you least expect it.

    Struggles in Hallways, Bathrooms, and Laundry Zones

    High-traffic, hard-surfaced areas create frictions that pure brightness can’t solve. In bathrooms, the supposed brightness turns against you—glare bounces off chrome and tile, bands of harsh reflection scatter right across your footpath. Hallways with ceiling-only light flatten at the center yet push the shadows out, so you feel one edge dissolve beneath your peripheral vision as you cross. On stairs, a single ceiling flush mount might blast the upper treads, but the landing lurks in partial gloom, marked only by a murky stripe where the surface shifts. Each missed spot isn’t theoretical—it’s where balance, visibility, or even the edge for a safe step disappears just before you need it.

    Regular routines amplify these failures. You carry piles of laundry but must slow at the wet doorway, half-seeing the tile seams. Shoes leave water by the entry and the far side of the hallway feels like it falls away into shadow, even if the fixture above looks powerful when the room is empty. Weak spread and glare become conditions you adapt to, but never solve, leaving the space visually incomplete in every real use.

    Common Friction Points That Interrupt Movement

    • Post-shower footing: A field of reflections breaks up the floor, forcing a visual hunt for solid ground.
    • Sharp hallway corner: The shine of the floor meets thick, shifting shadows—your step hesitates where clarity is most needed.
    • Stair descent: Well-lit upper treads surrender to shadowed landings, making the next surface an uncertain guess.
    • Laundry work zone: Overhead bulbs bounce from chrome and lids, making the workspace harsh while the floor blurs out beneath you.

    Why Traditional Ceiling Fixtures Leave You Second-Guessing

    Flush mounts and linear ceiling lights give a false sense of control—they promise coverage but deliver uneven spread, especially in rooms where slick surfaces multiply shadows and glare. The geometry of tile, the angle of baseboards, and the curve of a stair landing all work against uniformity. Turning up the bulb only intensifies these imbalances: glare clusters near your line of sight or blinds the shiniest patches, while corners and floor transitions retreat into darkness, waiting to catch your foot as you move on instinct instead of clear sight.

    The gaps show up in routine, not emptiness. An immaculate bathroom may gleam after cleaning, yet you can’t find the edge of standing water until it’s under your heel. Overhead lighting leaves blind triangles beneath vanities and unpredictable shadow falls under sink lines and stair turns. A space can look illuminated but still fail—if every step requires a check or a detour, the lighting is only delivering surface-level satisfaction, not real usability.

    Solving for Movement: The Power of Lower, Wall-Mounted Lighting

    The difference comes from moving light where it’s needed—not from brightness, but from placement. In slick-floor, high-use spaces, adding wall sconces or hardwired wall lights at elbow height changes how the room behaves. Suddenly, persistent shadow pockets dissolve and glare is tamed, because light skims across the target surface without reflecting straight into your eye. The last risky patch at a stair or hallway edge doesn’t vanish through sheer brightness, but through careful, targeted illumination of the path you actually use. The improvement isn’t theoretical: awkward pauses and cautious steps disappear, replaced by the ability to move naturally and see at a glance where to plant your feet—no more hunting for the safe spot or angling away from a blinding streak on the tile.

    Practical Tip: Where to Place Fixtures for Best Results

    • Mount wall sconces or hardwired wall lights at or just below eye level, focusing on main movement routes in bathrooms, hallways, stairways, and laundry entries.
    • Prioritize fixtures with a diffused, wide spread designed specifically to reach down and across the floor zone—not just above counters or doorframes.
    • Skip bare bulbs and narrow-beam spots; these create new glare, compounding the old problem instead of solving it.
    • Walk the space after dark: if any corner or passage forces you to hesitate or look twice, lighting adjustment is still needed.

    Frequently Asked Questions on Slick-Floor Lighting

    How can I reduce glare on slick bathroom floors?

    Choose diffused, wall-mounted fixtures with wide beams. Position them to send light directly across both walking surfaces and approach routes to tubs or sinks. This levels out shine and shadow, letting you see hazards without needing to squint or hunt for edges. Avoid direct, exposed bulbs—they often trade one hard reflection for another.

    Where should task lighting go in laundry or bath zones that get slippery?

    Target the zone at or just below eye level, especially near areas of repeated foot movement: entrances, laundry edges, tub approaches, and around any tight corridor. Good wall lighting fills gaps where tile meets wall and at turns, keeping steps clear and reducing surprise shadows before they interrupt your routine.

    Will brighter bulbs fix poor visibility in these areas?

    No—adding brightness usually magnifies problems by deepening contrast. The solution is not higher wattage but smarter spread: fixtures that bathe the movement zone in low-glare, even illumination and erase the shadow lines hiding at edges, corners, and under fixtures.

    Lighting That Supports Real Life, Not Just Good Looks

    A room that passes a brightness test can still trip up real routines—uncertain steps, hunched posture, split-second hesitation at the very spots you travel most. The best setups don’t just flood a room; they focus illumination wherever hesitation, shine, or shifting surfaces disrupt your habits. Balanced lighting removes those blind moments, turning each trip through a slick-floor zone from a string of micro-adjustments into a straightforward routine where you move naturally, without overthinking hazards or angles every time you cross the tile or circle the stair.

    For lighting that actually keeps up with how you live—without leaving dangerous or annoying gaps—see what’s possible at LightHelper.
  • How Adjusting Under-Desk Space Transforms Your Workday Efficiency

    Most so-called “organized” desks hide their worst problems just out of sight—below the surface where clutter turns into daily friction. You see a tidy workspace at first glance. But under the desktop, cables drag against ankles, charging bricks get snagged by rolling chair wheels, and drawers that promised storage now block your knees every time you try to sit naturally. In the background, these irritations quietly repeat, shaping how often you lose focus, break your flow, or even avoid deep work at that workstation.

    The hidden drag of under-desk friction

    It doesn’t announce itself. The setup still looks clean mid-morning, but after a few hours, the friction adds up: feet catching an ethernet loop again, the power adapter bumping sideways every time you stretch your legs, that “space-saving” drawer repeatedly clipping your shin. These aren’t disasters—but every dodge, untangle, or forced posture shift chips away at your attention. By week’s end, your “minimalist” desk has become a series of near-invisible workarounds, sapping concentration and speed, even though nothing looks wrong above the surface.

    One adjustment that resets the workday

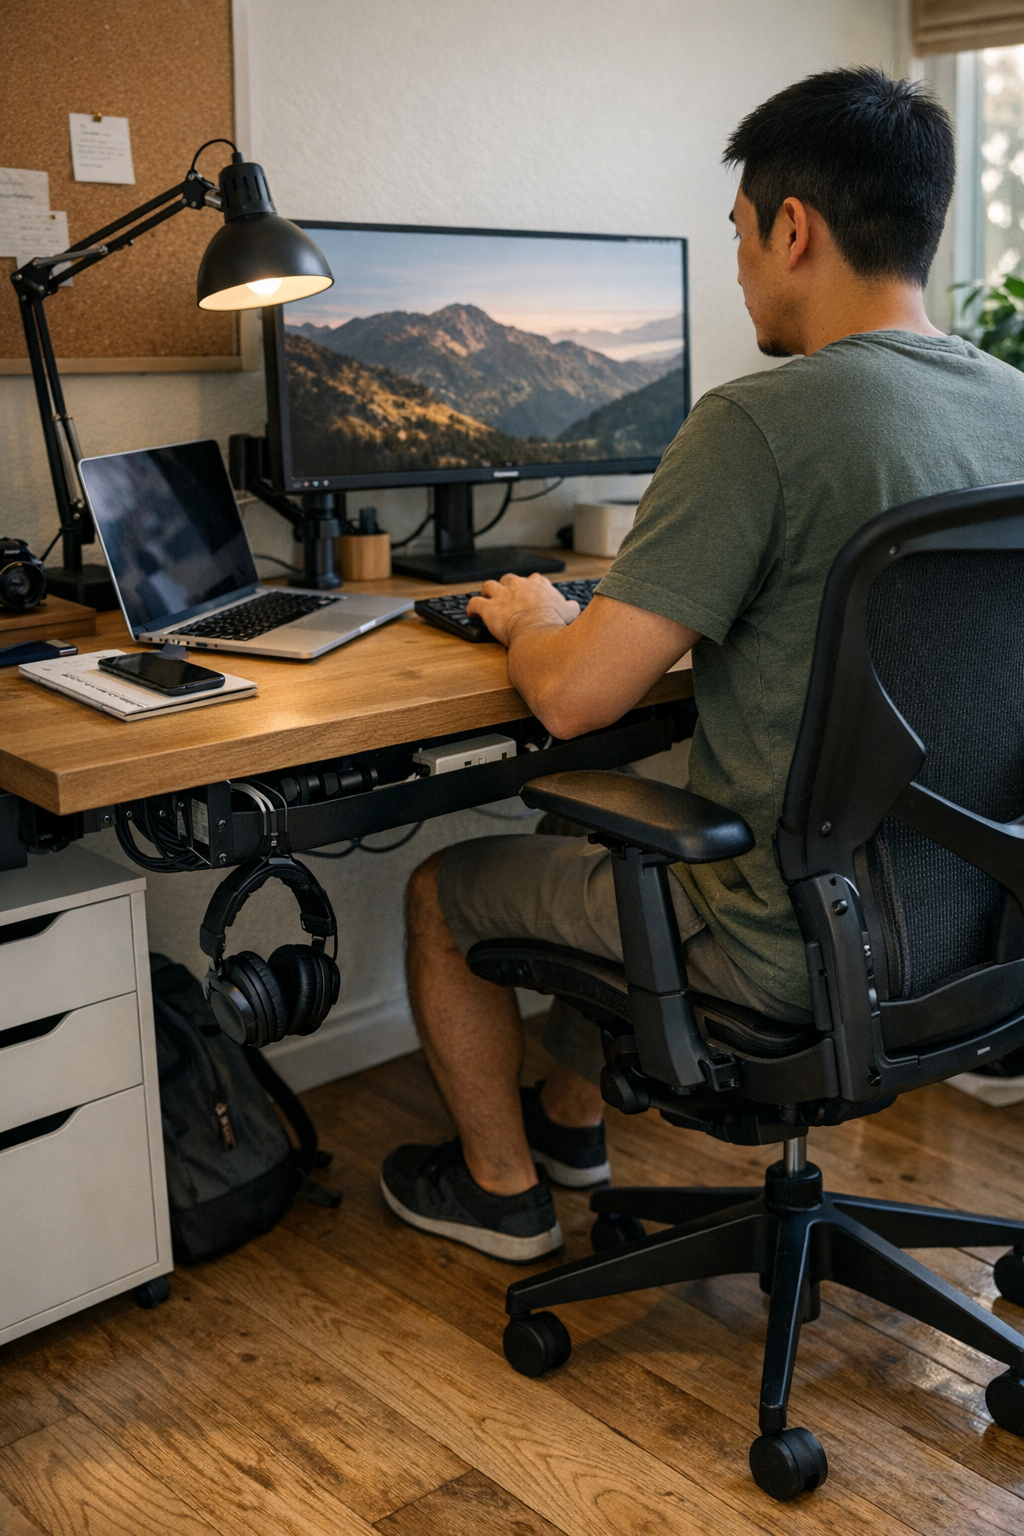
    Change just one under-desk detail and you change your entire workflow. Replace the mess of exposed cords with a clean cable tray, or reposition that oversized power strip to a less crowded spot. Suddenly, the path under your desk is clear. You sit down naturally—no more obstacle course for your legs or knees. Pulling a mobile drawer doesn’t mean contorting your ankles, and untangling a monitor wire mid-task no longer happens at all.

    Real use shows it instantly: instead of crawling under the desk to fix something, you’re reaching down or sideways, plugging in or unplugging with one hand—resetting your workspace without breaking momentum. Swapping between keyboard, trackpad, and notebook doesn’t knock anything loose. The right tweak aligns with your habits—not just your cable count—so the setup invites your return rather than daring you to try again.

    When “clean” isn’t enough: What actually changes workflow

    Hiding cables and clutter in boxes sounds like a fix, but it often just sidesteps the problem. Try stuffing every cord into a tight cable box and sliding it against the wall; now when you need to swap a charger or connect a device, your feet find the box first—and heat and dust collect underneath. Install a solid vertical panel to “clean up” the tangle, and those quick plug swaps turn into awkward reach-and-grab sessions. Visually, it’s neater. Functionally, it slows down every device change or leg stretch.

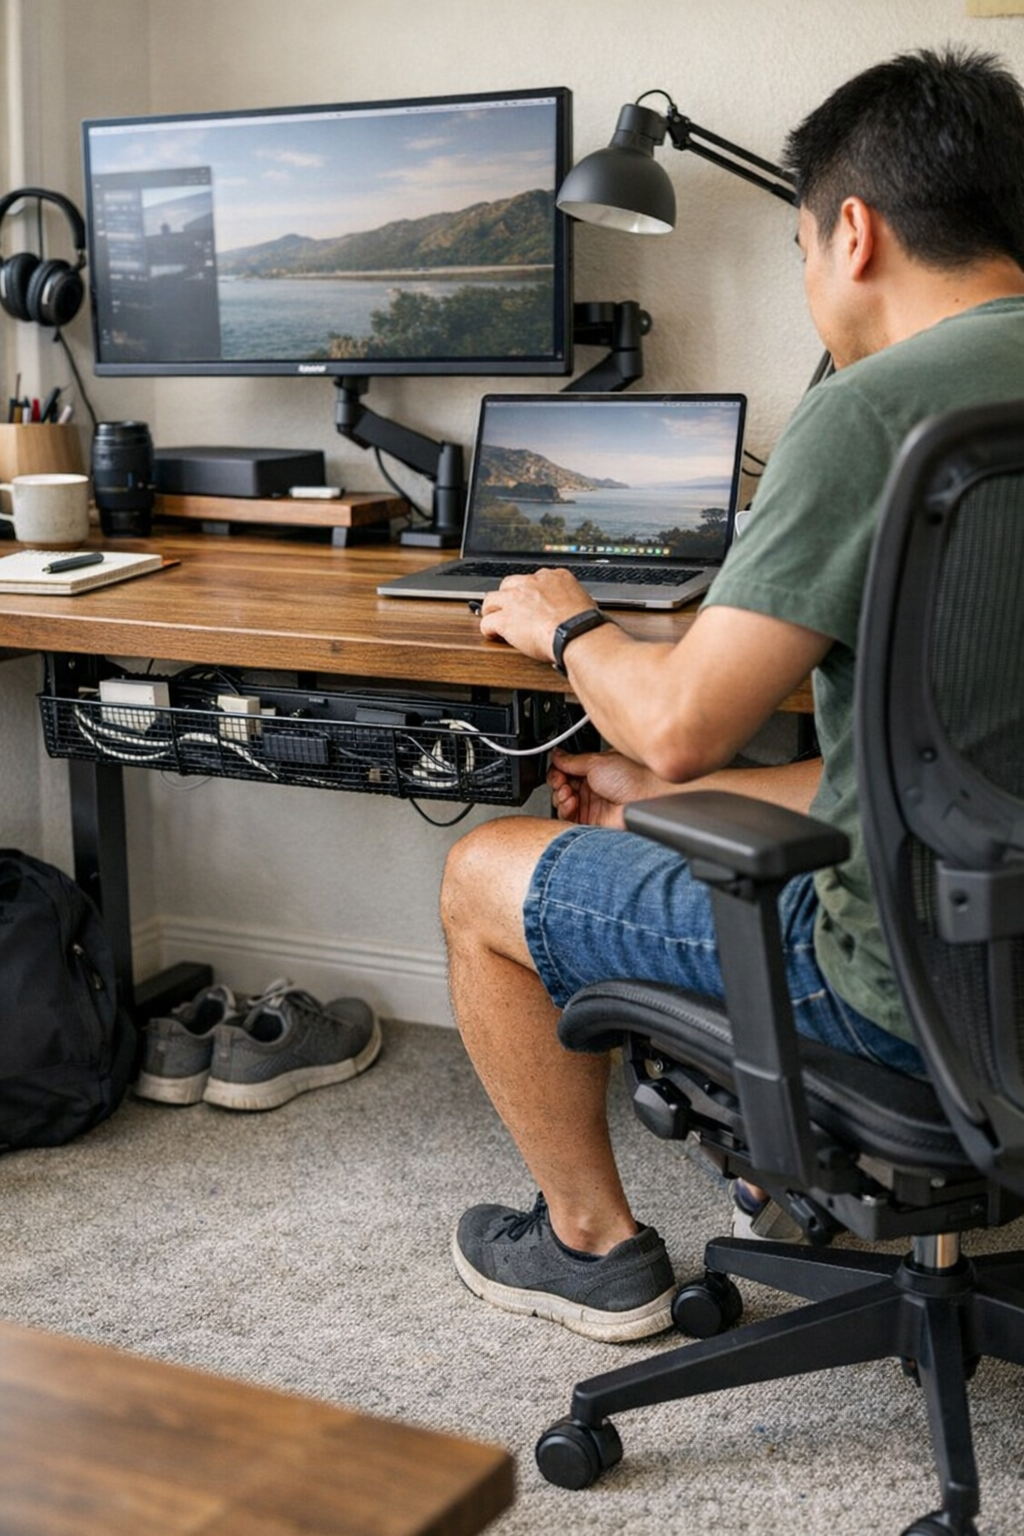
    Contrast that with an open cable tray mounted just under the desktop: cords are tidy yet accessible. If you need a charger or device, it’s within normal reach—no bending, crawling, or knee-banging. Movement stays smooth, and when workflow shifts—say, sliding a notebook into place, or adjusting for a second monitor—nothing snags, drags, or stalls.

    Workstation flaws that only appear during real use

    Most setups “fail” when actually used—not when photographed. Late afternoon: you shift your chair and clip a forgotten adapter. You need to grab a notebook from a shallow drawer and find the handle blocked by a loose cable. These moments don’t show up in product descriptions, but the repeated micro-friction makes a real difference: you pause before sitting, hesitate before stretching, or leave cords unplugged for “next time.”

    Accumulation is visible: a power plug working loose after days of gentle kicks; a drawer that never closes right because a phone charger migrated over just enough; a monitor’s angle slipping when forced by inflexible wire runs. Every misplaced piece beneath the desk turns into a tiny focus leak you correct in the background—sometimes without realizing it until the fifth or tenth irritation of the week.

    What changed: A simpler under-desk cable flow

    It took months of low-level annoyance before moving every cable into a simple open tray finally changed the baseline. Mounted about seven inches off the floor at the back, the tray formed a definite “channel”—not a tangle, not a guesswork pile. Now, cords aren’t targets for your feet, and you stop second-guessing every chair roll or charging routine.

    Resets became nearly frictionless: instead of ducking below the desk, pulling in or out was one motion. The desktop stayed almost empty by default, and the “where’s that charger?” routine disappeared. No more risky wheel-over-cable moments—just smooth switches and tidy returns, without vigilance or calendar reminders.

    Quick realities: Under-desk setup questions answered

    How do you choose the right under-desk organizer?

    Start with your movement, not your mess: Map where your feet and knees actually move—where obstacles force detours or shifts. Pick trays, drawers, or storage pieces that let your regular tasks—plugging in, sliding back, swapping gear—happen smoothly. Managing quantity isn’t enough; only form and fit that respond to your path stop new annoyances from showing up.

    Does cable management underneath actually change productivity?

    Every catch, drag, or accidental unplug slows you down—often by seconds, always by focus. Even small, repeated interruptions build up until the desk feels less welcoming. A clear cable path and unobstructed leg space mean you aren’t losing steam or troubleshooting after each work session—small but cumulative gains that make the difference between “organized” and actually usable.

    What do most people get wrong with under-desk storage?

    The fit to your movement matters more than the size or style. Overbuilt trays, deep drawers, or storage boxes wedged underfoot usually block your reach path, forcing adjustments elsewhere. The classic pitfall: creating new inconvenience in the name of hiding clutter—trays you can’t reach, drawers that turn cables into hinges, bins that steal your stretch space. Storage should help your workflow, not force a new routine.

    After a week: Does the new setup really hold up?

    One cycle is enough to feel the shift. With cables corralled above ankle height and nothing blocking daily movements, the desk stops being a test of patience. No more stealth interruptions, no more adjusting posture to dodge hardware. Instead, workflow resets, notebook switches, or chair pivots register as one smooth motion—the disruptions you didn’t know you were fighting simply don’t come back. Attention leaks close up, teaching you which fixes matter and which just rearrange the same issues. Most visitors never notice, but you recognize it every day you sit down.

    Explore the full WorkBasic collection

  • Improving Entryway Functionality with Targeted Surface Lighting Solutions

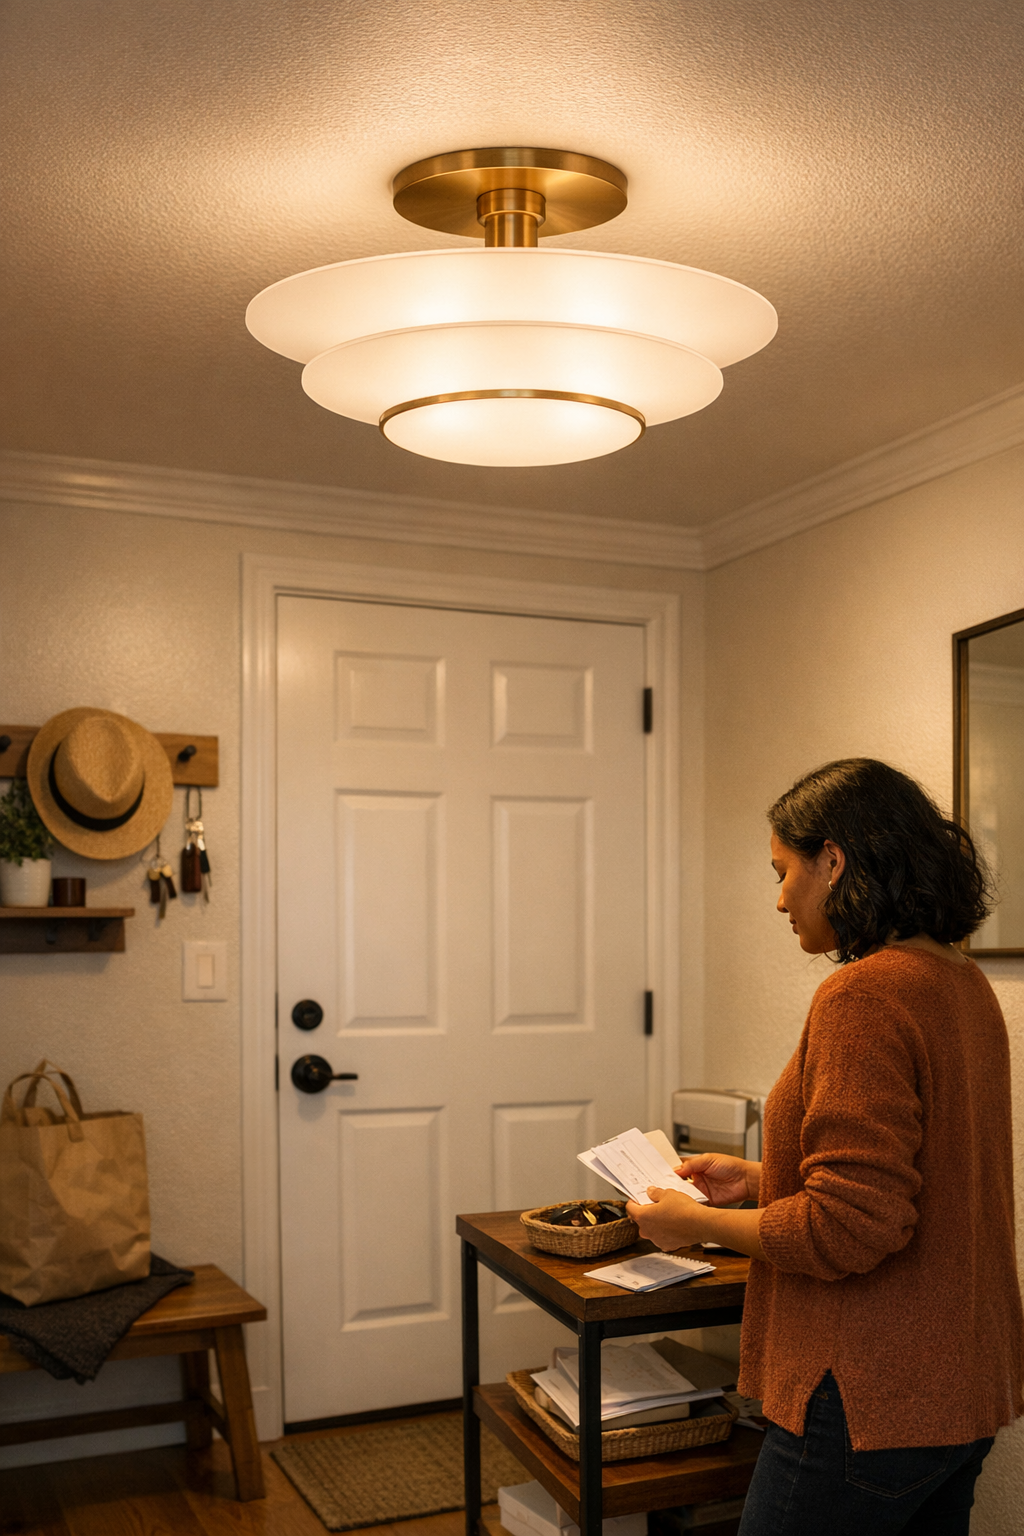
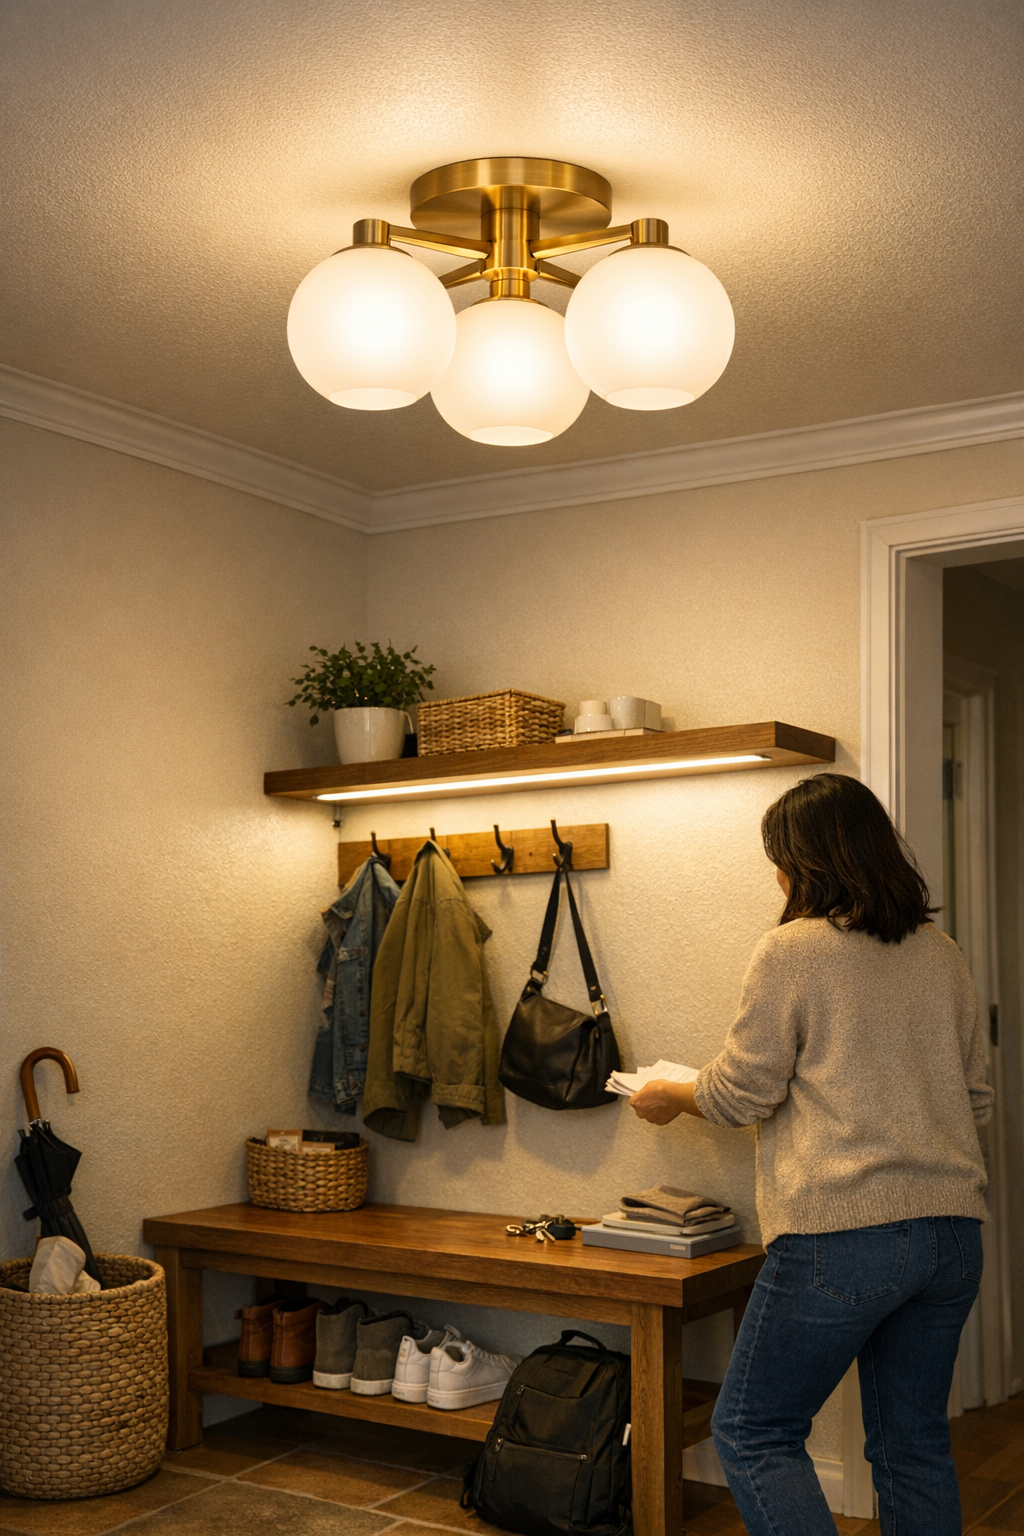
    There’s a catch to a tidy entryway under a new ceiling light: the room looks finished, but every morning, shoes vanish under a shadowed shelf, keys get hunted by feel, and the one cable you tried to route cleanly is still the first thing you notice. The main fixture handles “at a glance” neatness, yet the routines—dropping bags, reaching for bins, glancing for essentials—start to grind. If the space feels ready but keeps slowing you down, you’re not missing brightness. You’re missing the kind of lighting and support that actually gets used.

    When Overhead Lighting Leaves You in the Dark

    Flush-mounts and pendants promise a streamlined look, but by the second week, you’re side-stepping glare, tripping over bag straps left in blind spots, and realizing the corners where you drop things feel invisible after dusk. Overhead lighting almost never lands where hands, feet, and shelves actually operate. A clean glow across the general zone does nothing for the bench’s dim edge, the shelf’s run of shadow, or the mail slot that’s bright at noon but useless at night.

    Everyday friction builds in the same places: missed sneakers in a shadow pocket, keys somewhere on the shelf but out of sight, bags tangled at the bench’s dark end. In busy entryways—high traffic, quick departures—the wrong light isn’t just “less perfect.” It makes routines clumsy. The more you ask of a cramped zone, the faster a single overhead source fails.

    Shadowed Surfaces: Where Friction Builds

    A room can measure bright—but if drop spots are dim, the illusion is short-lived. Picture a narrow hall, shallow shelf, and hooks meant for fast exits. Central light smooths out photos, but by night two, you’re dropping mail into partial darkness, losing keys at the shelf lip, and nudging bags toward the only bright sliver. The minimalist setup stays “undisturbed” until repeated use makes the inconvenience hard to ignore.

    Why Key Surfaces Stay Difficult

    Benches end up striped in shadow. Wall hooks—perfect on paper—fall into the dark. Move through this space and the patterns surface fast: someone fishes for shoes under the bench with a phone flashlight, someone else pauses because the bag hook is just past the glow. The one spot near full brightness becomes the traffic jam. The rest turns from “organizing solution” to friction factory.

    The Real Difference: Direct, Low-Profile Lighting

    What’s usually missing isn’t total lumen count, but usable, reachable light right where it’s needed. Surface-focused lighting—slim LED bars under shelves, compact wall fixtures on support brackets, adhesive-mounted mini strips—creates a direct improvement you notice mid-motion. Instead of adding another dose of harsh ceiling glare, these setups target the edge of the shelf, under the bench, over the key tray. Suddenly, finding what you need means looking—not guessing.

    Real change kicked in with one slim under-shelf bar: the key pile stayed visible, drop-offs got snappier, and nobody even noticed the cable because it was clipped snugly along the wall, out of the step path. No more groping for sunglasses, no more overlooked bins. The main shift wasn’t extra “brightness”—it was the end of minor, annoying detours in the morning rush.

    Glare, Cables, and the Setup That Stays Stable

    Adding surface lighting should solve, not swap, problems. Cables left exposed, sloppy support brackets, or loose routing just replace one nagging distraction with another—even launching new hazards if cords drift near feet. Lasting setups use thin brackets pinned out of sight, adhesive channels to guide cords behind shelves, and wall lines to keep wiring invisible but accessible. If any support or cable reroute makes the zone feel messier, setup stability wasn’t solved—it just moved.

    Recognizing When the Setup Actually Works

    A usable upgrade shows as less pausing, less fiddling, fewer “Where did I put that?” moments at the threshold. Shelves don’t blot out stretches of cable at night. Bins and hooks snap into clear view, not half-glare. The difference is the flow: people make fewer adjustments, bins get used as intended, and the sensation of the routine falling apart vanishes. Light that helps the action, not just the photo, is what settles the entryway down.

    Avoiding the Ceiling Fixture Trap

    It’s a common assumption: if the main space feels dull, just swap in a brighter bulb or flashier pendant. But the only thing that ramps up is glare and shadow contrast—surface and support lighting fixes half-used corners much faster. The first sign of failure is always the same: glare bomb at the ceiling, shadows under shelves, and cabinet corners left unused. Replacing one fixture after another never touches the real cause—active surfaces stay out of the beam.

    This is why the next step often means shuffling furniture around the light, re-angling benches, or giving up on symmetry to make the spot actually work. The “best looking” entry rarely survives the first month of real use; the most livable one fades into the background because it keeps hands, bags, and keys moving—no readjustment needed.

    Setups That Support Repeated Use

    Light where people handle things, not just where a fixture lands. Entryways that work keep illumination anchored at the drop-off, bin, or hook, not floating overhead. A well-placed under-shelf bar, wall bracket light, or shelf-run strip may draw a bit more attention than a perfect ceiling-matched look, but it’s the setup that stops daily micro-irritation cold. If you find that everyone stops mentioning the lighting after a week, that’s the real win: nothing is lost, no routine is interrupted, and every morning feels slightly—quietly—easier.

    LightSupport: Solutions for Everyday Entryway Friction

    Effective entryway lighting isn’t about more bulb power. It’s about making every shelf, drop point, and grab zone visible, safe, and frustration-free—especially after dark. Put usable light where it’s needed, hug cords out of sight, and choose mounts and supports that don’t draw attention for the wrong reasons. A small adjustment—one surface fixture, one clean support, one invisible cable—can be the difference between missing a step and moving through the door without a second thought.

    For more ideas and solutions that focus on real, repeated indoor use—without trading clarity for superficial neatness—visit LightSupport.

  • How Proper Lighting Placement Transforms Everyday Bathroom and Laundry Tasks

    The room looks bright—until your hand hovers over the soap or your foot hesitates at the stair turn. Most homes are filled with fixtures that promise visibility but carve out shadows right where you need to see. The typical ceiling light makes a floor shine, yet lets the edge of the counter vanish, or throws a wash of glare across the bathroom mirror. You pause at the sink, feeling blindly for the faucet; you slow your step, guessing where the shadow breaks as you cross from hallway into a dimmer stairwell. If your lighting leaves you working by memory instead of by sight, the interruption isn’t occasional. It’s structural—and it repeats, every single day.

    Why Glare and Shadows Become Repeated Problems

    Friction creeps in not because the room is “dark,” but because task zones go half-lit at the worst moments. Every standard flush-mount or panel ceiling fixture pushes brightness downward and outward, but does little for sink lips, counter edges, cabinet undersides, or the detail lines of a mirror’s frame. Step into a new angle or open a cupboard, and the overlooked recess turns into a guessing zone. The cost isn’t just a one-time adjustment: you lean, squint, slow down—exposing how little confidence you actually have in your space’s layout. Over a week, those subtle hesitations fracture your routines and make surfaces you should trust feel unreliable beneath your hands.

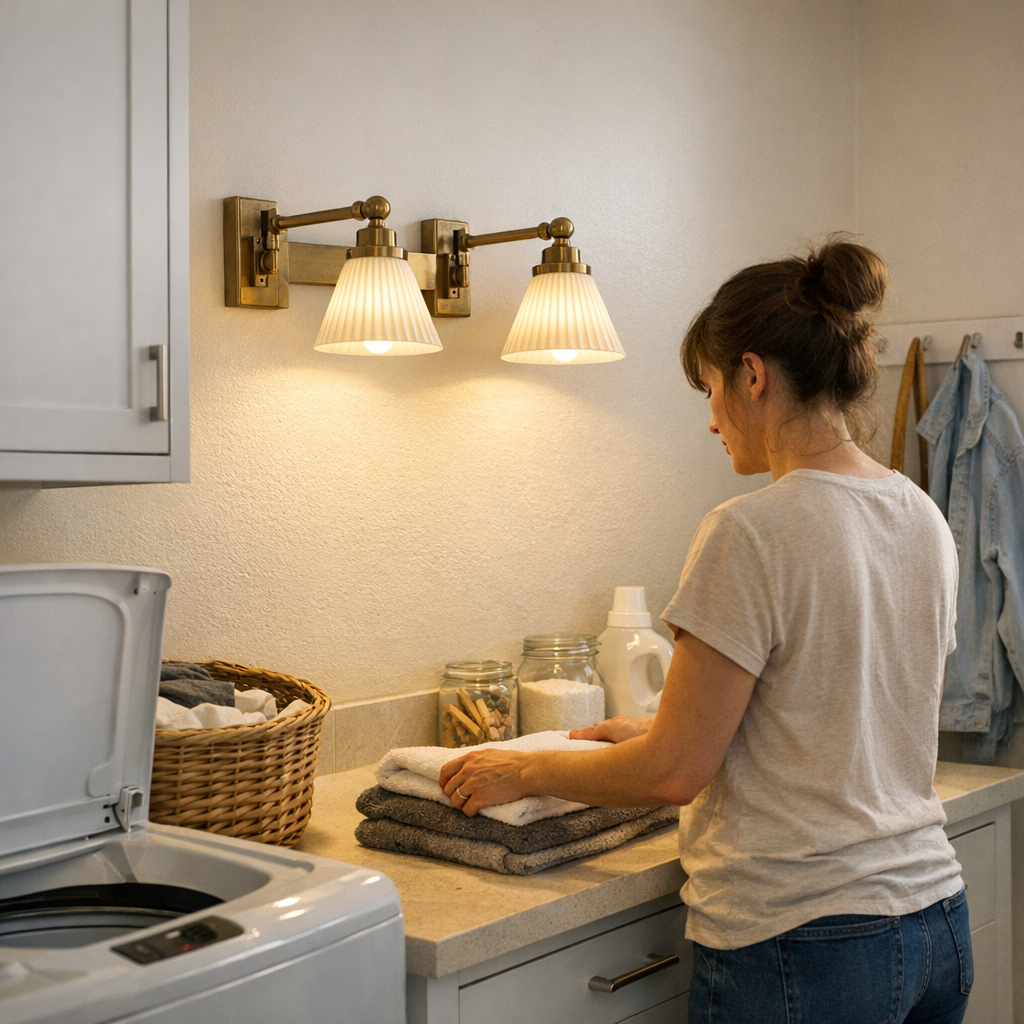
    Glare on mirrors is another trap. Ceiling fixtures bounce harsh white light into your eyes, obscuring face and hand detail when you need to see most clearly—shaving, fixing hair, touching up a spot at dawn or before bed. At the same time, overhead light behind you casts your own shadow onto every counter, turning each small task into a question of angle and adaptation. In laundry corners, one arm or a basket throws a shadow right across the stain you’re hunting for, and you find yourself hunched, nudging, or shifting the light source just to make sure.

    Recognizing the Lighting Patterns that Trip You Up

    It’s easy to be fooled by brightness at first glance—a “renovated” bulb doesn’t guarantee practical clarity. The mismatch only appears after repeated use. Common mistakes unfold in zones like:

    • Mirror zones: Step close and your face halves in shadow; lean back and the glare hides all detail. Grooming turns into trial and error, not smooth routine.
    • Under-cabinet counters: You see a spotless counter from the doorway. Stand to chop or clean and your hands suddenly disappear into uneven shadow along the working edge. You fumble more, grabbing at items by shape, not sight.
    • Stairways and landings: Open staircase above and below, but every mid-turn the closest step softens into shadow—your stride instinctively slows as you test for the riser’s edge.
    • Laundry and utility areas: Overhead lighting creates bright rectangles, but your own body blocks the spread as you move. Sorting or cleaning requires constant side-stepping to keep stains or spills visible.

    The Confidence Gap: When Lighting Slows You Down

    Confidence in movement is built—or undercut—by how reliably light covers the places you put hands and feet. When you have to lean close to check a spot, double-back on a dark stair, or squint for detail at the mirror, routines devolve into small compensations. Each act becomes slower, less precise, and less certain. The “bright” fixture overhead, for all its watts, lets these friction points persist—turning a workspace or passageway into something you have to adapt around, repeat after repeat.

    Shadow at the Work Edge

    Bathroom and laundry counters highlight this most clearly. Overhead fixtures appear to light the whole zone, but as soon as you reach forward—scrubbing cloth, sorting clothes, or looking for keys—your own arm throws darkness onto the work surface. This isn’t a one-off; the same pause happens every time. The result is a string of half-blind, tentative movements rather than seamless flow.

    Glare at the Mirror

    Direct overhead light on bathroom mirrors blinds rather than reveals. Instead of seeing blemishes, stray hairs, or makeup accuracy, your vision splits between squinting through reflection and searching for shadowed detail. The strain shows up especially in morning and evening routines: what should take a confident second becomes a drawn-out, error-prone pause.

    Simple Placement Shifts Create Reliable Visibility

    Improvement doesn’t mean raw brightness. It means dropping the light source to the level of eyes and hands, placing illumination right where interaction happens. A wall sconce or hardwired side light above laundry counters, for example, erases persistent murky strips so stains, lost buttons, or detergent spills can’t hide. Set flank lights on both sides of a mirror—not just above—and the facial shadow breaks, making grooming straightforward and balanced. Under-cabinet strips in kitchens put usable light directly onto chopping or cleaning zones; a hallway or stair run lit with panel fixtures near turns rather than in the center keeps every tread or pivot clearly marked by direct light, not guesswork.

    • Install wall or sconce fixtures at the level hands and eyes engage—beside mirrors, anchored above work tables, along stair midpoints.
    • Mount under-cabinet strips so work areas stay even and readable, not interrupted by a hand’s own shadow.
    • For hallways and stairs, shift ceiling fixtures toward corners, pivots, or bends where movement tension actually collects in the dark.

    Task-focused placement solves the hidden gap: you no longer twist, lean, or double-inspect what should be obvious. Daily paths smooth out; simple motions—reaching, stepping, glancing—regain their speed and ease. The room works as instinct promised, not as old lighting trapped you into expecting.

    When to Upgrade: Recognizing It’s Not Enough

    The tipping point is repetition. If you catch yourself constantly adjusting—checking the counter twice, shifting position at mirrors, slowing before a stair—your space is signaling that surface-based, targeted lighting is overdue. When “illuminated” never equals “usable,” or when shadows and glare become routine obstacles, it isn’t an aesthetic shortfall. It’s a fixable boundary in your everyday movement—an interruption you only stop noticing when you finally address it head-on.

    Lighting That Quietly Improves Daily Movement

    Effective indoor lighting barely calls attention to itself, but rewires every routine it touches. When the position, height, and focus of fixtures finally match the way you actually use your space—again and again throughout the day—the grinding hesitation fades. You stop making adjustments, stop second-guessing, and start trusting each step, reach, and task. Lighting does its quiet work. The difference is visible in the routines that no longer slow you down.

    See how practical indoor lighting setups can simplify the routines that matter most at LightHelper.

  • Choosing the Right Monitor Riser to Balance Desk Clutter and Ergonomics

    The hidden slowdown of an “organized” desk

    Your desk looks clean—paper stashed out of sight, cables routed behind stands, a monitor riser tidying the surface. But that “organized” upgrade, chosen for its storage or style, might quietly drag down your workflow in ways you don’t see until later. Extra reach to the monitor. Slow, creeping tension in your shoulders by midday. That awkward gap under the riser where documents disappear but never quite fit—forcing a shuffle every time you switch tasks. For workstyles built on frequent paper checks, fast keyboard-to-notebook transitions, and a screen that stays properly centered, an ill-suited riser can turn visible order into a new layer of daily hassle—one that repeats every hour, not just at reset.

    Small-clearance risers vs. tall risers: Where the difference lives

    Height is not a small detail—it’s the difference between use and interruption. The typical logic is tempting: a tall riser opens up more space, so you can park a laptop or stash bigger trays underneath. But after a week or two, even a half-inch of extra elevation pushes your monitor just above a natural sightline. You start re-adjusting your chair to compensate, sliding lower in your seat, or craning your neck late in the day. The desk looks organized, but feels subtly harder to use—each new item placed under the riser is another reason to reach, stretch, or recalibrate your screen or posture.

    By contrast, slim risers enforce a desk discipline that pays off every day. With just enough clearance for a paper stack or slim notebook, you gain a home for active documents—no juggling, no arc over tall piles. The motion becomes automatic: slide a sheet in; grab a page out. No stack growing so high you have to tilt your monitor to see over it. It’s the difference between a setup that resets cleanly and one that quietly reintroduces clutter under another name.

    How friction appears in daily routines

    What gets missed in desk makeovers is how minor friction, multiplied, wrecks daily flow. Early days with a new riser, that extra bit of monitor lift is invisible. But by the fourth or fifth work session, symptoms emerge: reaching out farther for a notebook wedged under the screen, wrestling a cable that doesn’t fit cleanly under the riser lip, or hesitating every time you want to drop a note in your main work zone.

    The daily signals are subtle but clear:

    • Your eyes tilt up, not glide naturally to the monitor
    • Charging cables catch when you move devices or shift your keyboard after lunch—one more tug, one more adjustment
    • Papers meant to be “at hand” vanish into semi-hidden trays, breaking your focus just to bring them back

    Individually, these are small slowdowns. But together, they add up: a desk that looks reset in the morning slowly turns into a series of micro-barriers by the afternoon. What starts as efficiency becomes an invisible tax—on posture, speed, and attention.

    What improved when I changed setups

    Dropping the tall riser for a thin, low one made effects show up right away. Any document I needed could slide beneath the screen without lifting it out of view. No more hiked-up monitor, no low-key neck ache during lengthy calls, no pause searching for a place to toss pages beside the keyboard. Crucially, workflow snapped back: active papers lived front and center, ready to move in one hand, not locked in trays off to the side.

    The bigger reveal came midweek—the day when a new device and extra cable needed a spot. With a thinner riser, threading adapters took seconds; no scraping on the riser underside, no bending plug housings, no re-routing power cords just to avoid knocking over a mug. Clearing the desk to reset for a new round of work stopped being a project and became a three-step move. By the end of the week, I noticed I’d gone days without sliding monitor arms, restacking trays, or correcting a hunched posture mid-session.

    Common setup questions, answered

    Why not rely on classic desk trays?

    Desk trays collect loose papers, but always off to the edge. Each time you grab from a tray, you rotate or stretch, breaking your workflow rhythm. Sliding two hands sideways, shifting your chair, searching for yesterday’s note—all while your shoulders drift forward. A riser with the right under-clearance keeps current pages squarely in your main zone—centered, within natural reach, protected from spills. The real point isn’t hiding documents, but ensuring active materials move in and out of your workflow without thought or delay.

    What’s the optimal clearance under a riser?

    Half an inch to one inch. That space fits a tight paper stack, a single notebook, or a thin planner—everything instantly accessible. Anything thicker belongs in a drawer, not inside your core reach area. Tall risers, meant for storing large piles, tend to create more clutter and block comfortable monitor height. Narrow it down: only what you reach for every session should be within the monitor zone.

    How do I avoid a cable jumble under the riser?

    Even compact risers can squeeze cable runs, especially with multiple devices. The trick is mapping cable paths before loading up the desk—plan where charging lines exit, and use adhesive cable clips or sleeves under the desk’s back edge to guide cords before they tangle beneath the monitor. Don’t overfill the space: a little open zone around cables means less drag, cleaner resets, and fewer knocks against loose plugs each time a device moves. Cramming every gap with storage only reintroduces cable mess in disguise.

    Real scenes from an improved workstation

    Three days with the low-rise stand, and reaching for pens, switching from laptop to notebook, and puling reference documents forward all happened in a single, straight motion—no pause to clear space, no sidestep around a stray tray, no paper jammed under a riser’s lip. My posture held up through longer stints at the desk; the need to adjust the screen or chair barely cropped up. The active workspace stopped feeling like a balancing act, and started working as muscle memory.

    Even reset routines improved: end-of-day meant closing the laptop, sliding a small document stack under the monitor, and finding every cable still where it belonged. No combing through trays or managing cables that had snuck into the wrong gap. The desk itself signaled what to do next—a setup supporting repeated flow instead of demanding another cleanup.

    When “looks organized” does not mean “works well”

    It’s common to finish a deep clean, add new organizers, and still find that your process hasn’t changed—you still reach awkwardly, still lose momentum shuffling between tasks. The key distinction with the right monitor riser isn’t just that things look tidy, but that work switches from one mode to another without hesitation. Documents move in line with your typing. Cables remain untangled after multiple resets. Eyes land right on the screen, not slightly above or below after each session.

    Small frictions add up fast. A desk upgrade isn’t proven by its morning appearance, but by whether you stop fighting it in the middle of your actual work. For most, a slim riser is just enough to keep necessary papers and accessories within reach—without raising your field of view too far or inviting another round of reset friction. Less attention to the setup, and more time where the workflow just happens.

    The best desk setups aren’t the ones that disappear—they’re the ones that keep your process clear, natural, and predictable, even after a dozen switches and resets in one day. Make each improvement earn its place through repeated, real use—anything else just puts friction out of sight, not out of reach.

    Explore the full WorkBasic collection

  • Choosing Warm Color Temperature for Comfortable Entryway Lighting

    The wrong bulb makes itself known every time you enter. The entryway appears crisp at first: cool light, hidden cables, shelf edges that look sharp—almost professional. But after a week, you start feeling the real drag: glare when you reach for keys, the mirror shows tired shadows, and dropping a package means half-turning away from light that’s too bright and too cold. It’s not the fixture’s fault. It’s the color temperature—impossible to ignore once you live with it.

    Cold Light Looks Clean, Then Turns Against You

    Flip the switch on a new 3500K or higher LED: entry lines snap into focus, surfaces gleam, and cables seem to disappear. The setup passes the “just installed” test. But after a few days, daily use breaks the illusion. The blue-white glow exaggerates marks on the floor, casts hard-edged shadows over the shelf, and makes metal supports reflect in ways you can’t unsee. Pause to sort mail and your eyes squint against the glare, every label dulled and your own face washed out in the wall mirror. The supposed “finished” look begins to highlight what doesn’t work instead of what does.

    This is friction you can’t clean away. Rushed exits get sharper and less comfortable. Pausing to untangle headphones or check a bag leaves you with a metallic glare off every hook. Shelves that once vanished into the background now demand energy to ignore, and every tangle of wire beneath looks newly exposed. The modern look doesn’t change—the lived-in drag is what you feel.

    Unseen Problems Build Up in Everyday Details

    Even slim LED panels and flush ceiling mounts amplify the issue if their color temperature stays too cold. Shelves look tidied in catalog photos, but in use, cool light throws out long, blue shadows where you actually need to find things. On a normal weekday, as you drop groceries or hunt for keys, small annoyances gather:

    • Glare bouncing off hooks and hardware interrupts your focus
    • Blue, sharp shadow lines break up work surfaces and hide the objects you actually touch
    • Every cable, plug, or support bracket stands out in relief, no longer hidden by lighting design
    • Notes and deliveries look oddly colorless, losing visibility when you need it

    You start adjusting habits—standing differently, shading your eyes, shifting packages out of the direct light—just to avoid the strain. The hardware isn’t failing. The light just isn’t tuned for routine use.

    The Routine Gets Clumsier—and Doesn’t Stop

    Most entryways aren’t pure pass-throughs. You pause: dropping a jacket, reading a note, or searching for headphones at the worst moment. Under cold lighting, every routine stop feels exposed and hard-edged. Fine details get lost in glare—the doormat’s texture disappears, keys blend into the background, and cables or brackets that once felt hidden now stand out. Each pause comes with a visual penalty.

    The strain spreads. Bring in guests at night and they glance away or hurry past, dodging the overlit feeling. Try to read a label while standing in the edge shadow—now you’re angling items or physically moving to find a spot where the light isn’t working against you. Minimal fixtures and flush supports create a tidy silhouette, but if the light’s temperature is off, your entryway becomes a series of interruptions, not a landing zone.

    Warm Light Restores Comfort at Every Station

    Switch to a soft white bulb—around 2700K—and the difference is immediate. Edges soften, glare drops, and the spaces you actually use lose their visual harshness. Swap out a “daylight” bulb for a warm one, and you’ll find shelf details reappear, doormat texture stands out, and keys become obvious without effort. You stop repositioning yourself just to avoid the sharpest line of sight.

    Warm light clarifies what matters: notes stay readable, packages are easy to inspect, and cable runs fade into the background instead of drawing the eye. Wall brackets lose their blue-shadowed outlines and become visual afterthoughts, not daily irritants. The background looks resolved, and the friction points step back where they belong.

    Real-World Use Decides If Lighting Works

    The value of a 2700K-3000K bulb shows up because you use your entryway again and again: there’s less glare, softer transitions, and fewer visual interruptions. The right color temperature doesn’t draw attention to itself—it lets routines run smoother. When you’re not forced to notice cables, squint at shadows, or adjust to avoid eye strain, the space finally fits its role: a working, welcoming passage.

    Most people don’t blame lighting at first—they blame clutter, support hardware, or floor mess. But if you’re constantly catching visual distractions or dodging glare, the color temperature is almost always the real issue. Even the best bracket, cable manager, or fixture style can only do so much if the light itself keeps throwing obstacles into daily use.

    Simple Fix, Noticeable Shift

    The most effective adjustment: switch to a bulb marked “soft white” (2700K), or install adjustable color-temp fixtures and dial down the coldness before calling it done. In entryways with metal, gloss, or any line of exposed cable, warmth wins over sterile brightness every time. The improvement isn’t just visible—it’s immediate: less shifting for comfort, less glare, and fewer small irritations. The space stops feeling like a collection of problems and starts working as an actual entry zone.

    Prioritize the comfort of real use over the cleanest first impression. A minimal profile can look perfect, but only the right light temperature will make your entryway feel—and work—right with your daily routines.

    Find smart indoor lighting, support parts, and practical accessories that make every everyday setup easier at LightSupport.

  • Improving Stair Safety with Strategic Lighting Placement and Shadow Control

    Stairways that look “well-lit” on paper can still trip you up—literally. It only takes one off-angle shadow or washed-out tread for a safe staircase to become a daily hazard. You think you’ve solved lighting by installing a bright ceiling fixture, but halfway up with a laundry basket, your own shadow erases the step edge right when you need it most. The difference between looking illuminated and actually moving confidently comes into focus fast, especially in spaces where safe footing isn’t optional.

    Where Lighting Looks Fine—but Fails in Use

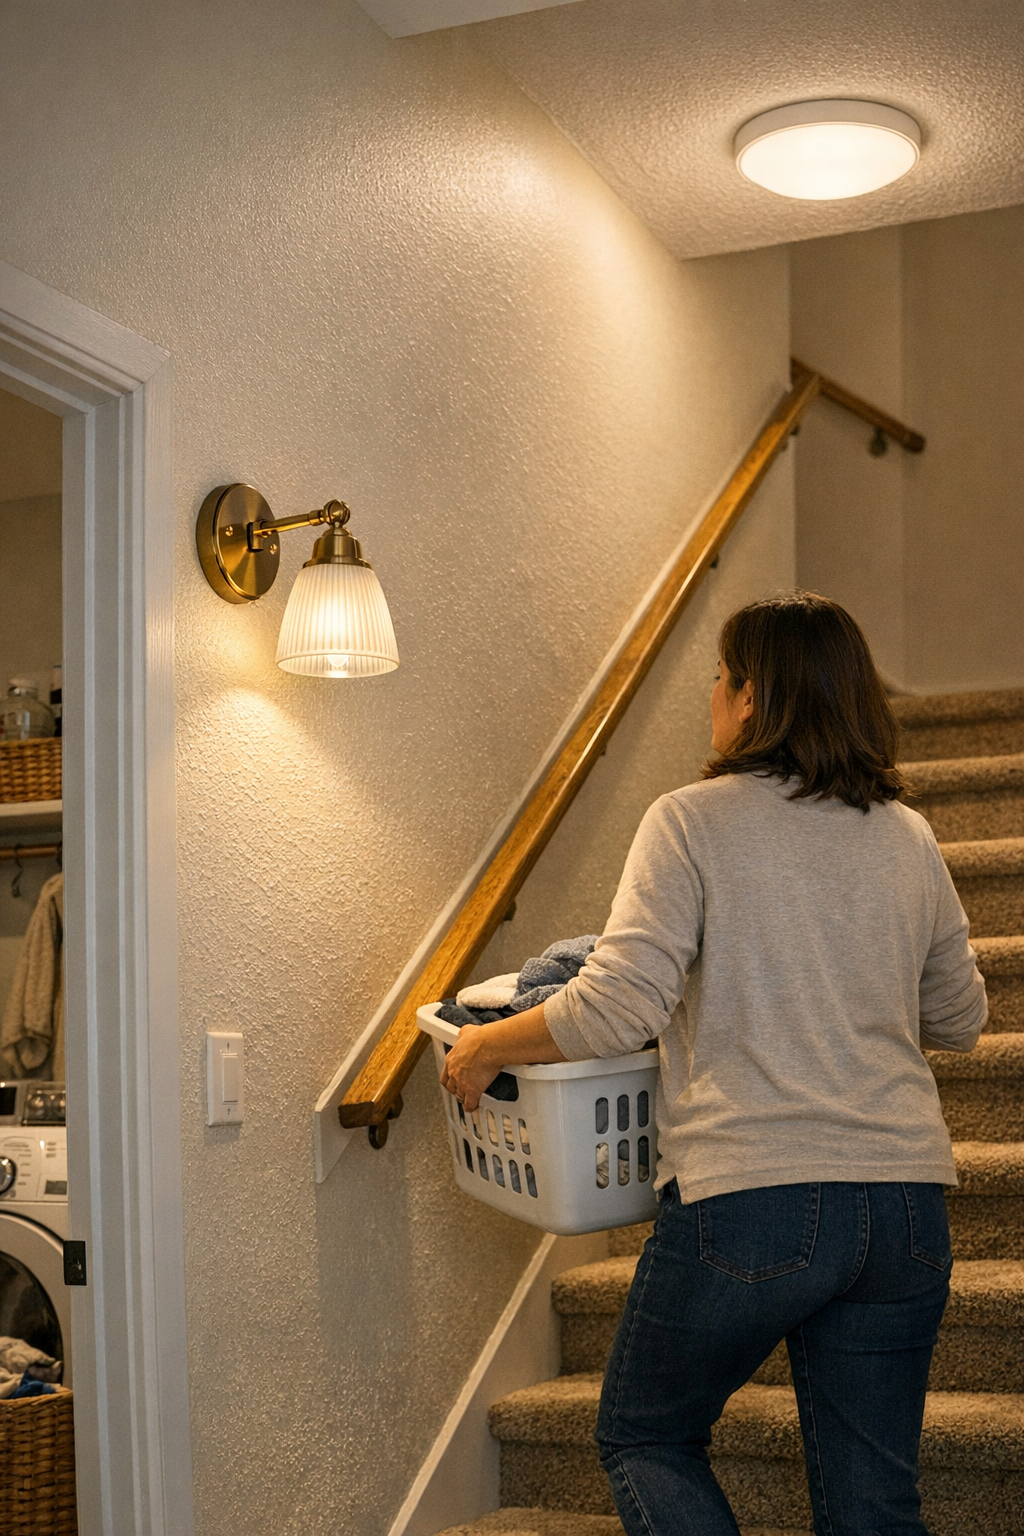
    Lighting that seems balanced at rest falls apart during real movement. You notice it on stairs, landings, and corners: any time the layout, humidity, or what you’re carrying shifts, so do the shadows. Take the routine of hauling laundry upstairs. Arms lifted, basket in hand, your own load blocks what ceiling light was doing. Steps that looked clear vanish under your elbow, and steam from damp fabric scatters reflection into odd, harsh lines. It isn’t a crisis; it’s a slow, constant friction—hesitation, feeling for the rail, moving slower because visibility is suddenly unreliable.

    The weakness isn’t just theoretical. A single ceiling light creates a false sense of completion, but leaves pockets of uncertainty where shadows pile up on the tread’s leading edge, or glare bounces from glossy paint. You have to aim your next step, not just take it. Every trip becomes a negotiation with the space, not a routine part of your day.

    Layering Fixtures: The Practical Case

    Flush-mount and semi-flush ceiling lights offer wide coverage but almost always miss problem zones—around stair turns, under low ceilings, or in oddly angled runs. On damp, busy days, their light scatters, but still doesn’t fill in the zones where movement happens. The problem becomes clearest when condensation or everyday chaos throws shadows into the exact places you rely on.

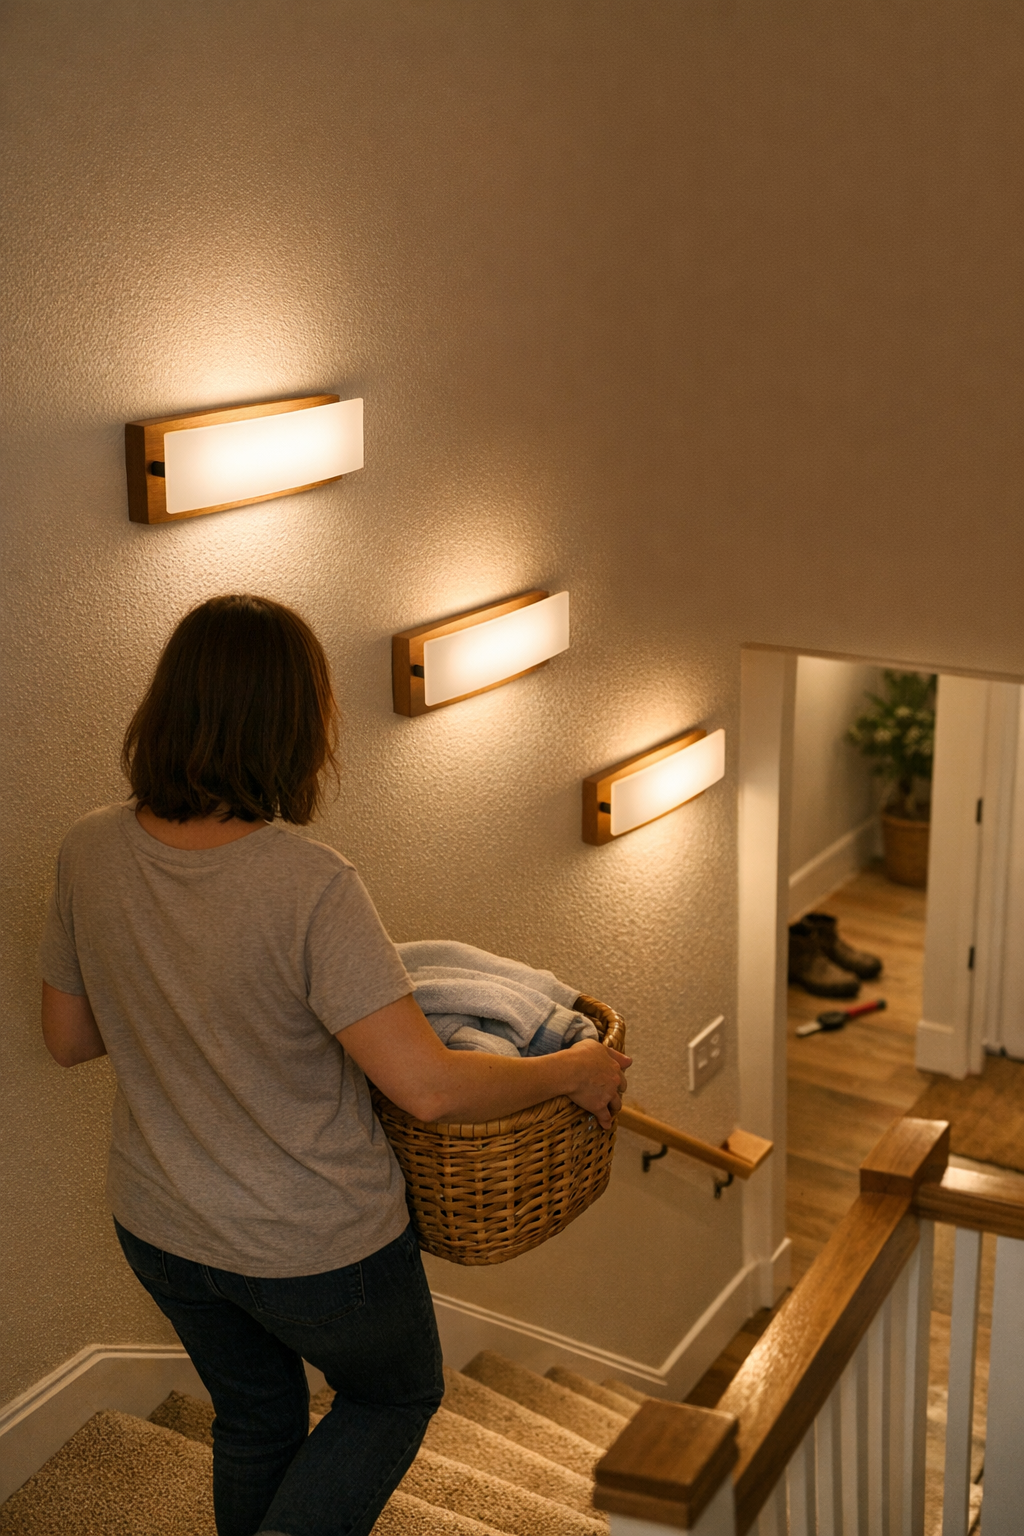
    Wall sconces and directional wall-mounted lights bypass this limitation: Placing a sconce along the ascend or next to the landing cuts through shadowed “dead zones.” Side-light along the stair and rail restores contrast right where feet and hands move. Now, when you pass with a load, shadows can’t erase the step’s outline; visibility stays reliable from both above and beside. The intensity isn’t higher, but the usefulness is. Instead of a broad, overhead wash, you get targeted clarity that doesn’t collapse the second your routine changes.

    Real-World Friction: The Laundry Room Stairs

    Picture the stairway just off the laundry area. A flush-mount ceiling fixture casts plenty of light until you, a basket, and humid air enter the scene. Suddenly, every upward step is half in shadow, half faded by steam—perfect conditions for a misplaced foot. You slow down, feel for the rail, and check every tread. Week after week, it doesn’t get easier. This isn’t rare or dramatic; it’s how an “adequately lit” space sneaks risk into ordinary routines, turning what should be automatic into a mild obstacle course.

    How a Small Change Makes a Big Difference

    Add a wall sconce at stair-rail height—set about 70 centimeters above the run—and the game changes. Tread edges stay outlined, even when arms and loads get in the way. What used to turn foggy under damp air and awkward shadows now shows crisp, predictable step shapes every time. That constant second-guessing at the stair edge? Fades out. Movement becomes smooth again—three points of contact aren’t a feat of caution but a true habit, restored by light that fits the space’s real demands.

    Blended Lighting: Addressing Everyday Movement

    Layered lighting isn’t about overkill or ornament—it’s about control and confidence where you use it most. Combining wall sconces with carefully placed ceiling lights covers what wide ambient fixtures inevitably miss. Short stair runs, cramped ceilings, or odd geometry all amplify the flaws of single-source lighting. But place a directional wall fixture to highlight treads, or shift a ceiling panel toward a darkened sidewall, and the whole movement path changes. You stop compensating for the light’s limits, and the space starts supporting you instead.

    This approach isn’t visible in style photos, but it’s obvious every time you carry groceries upstairs after a shower, or cross the hall with full arms. Small shifts in fixture type and placement decide whether “enough” light really means safe, fluid movement—or if confidence quietly drains away, trip by trip, until you’re always pausing or favoring one side.

    When to Rethink Your Fixture Layout

    Notice yourself pausing on a stair landing, leaning into corners, or checking the sweep of a handrail under your palm? Those aren’t quirks—they’re signs your lighting isn’t keeping up. Shadows that crawl over the edge of a step, rails that drift in and out of sight, or corners that stay murky after upgrades: all mean the fixture mix isn’t matching real movement. Swapping in a higher wattage ceiling bulb only blunts the problem. True improvement comes from added direction and coverage, not simply more brightness.

    Look for these friction points:

    • Dark bands and shadow traps at tread edges or along railings
    • Lopsided light that only works from one direction (usually overhead)
    • Pathways that get “dimmer” while hands are full or after a shower
    • Harsh glare from reflective paint or awkward fixture angle

    Addressing these means your movements become automatic again, not calculated. Often, just one or two added fixtures—a stair-side sconce or a shifted ceiling panel—quietly erase the obstacles, making every trip less tense and more predictable.

    The Value of Lighting That Adapts to Real Life

    Reliable indoor lighting is judged by daily routines, not just first impressions. It has to deliver during humidity from showers, arms full of laundry, crossings when your hands can’t probe for the next step. Decorative fixtures and bigger bulbs rarely solve the problem zones—they just hide them behind a gloss of general brightness. Lighting that layers sources, controls shadows, and matches the space’s real pattern of use keeps confidence high and routines brisk. It’s the change you only notice when trips up and down the stairs finally go back to being forgettable again—in the best way.

    Find practical solutions for every critical indoor space at LightHelper.

  • How Hidden Cable Management Transforms Your Workspace Efficiency

    Desk chaos doesn’t start big. It seeps in—one cable at a time. Even when a workspace looks clean, the clutter finds a way back: cords snaking across the keyboard zone just as you reach for a notebook, a power brick blocking your foot path, or a charger unexpectedly trailing past your mouse. The early promise of a tidy desk never survives the second or third device swap. Within hours, you’re dodging cables to clear space, untangling adapters from the sides of drawers, or lifting your chair wheels over yet another fallen wire. What looked “ready to work” in the morning quickly turns into a desk that resists every reset, demanding little corrections again and again. The real issue isn’t visual mess—it’s the slow leak of attention that unchecked cables cause, breaking flow just when you need to stay locked in.

    Why cable clutter always returns (even if you think it’s handled)

    The battle with cables is usually lost in the patterns you repeat: shifting your laptop for a call, dragging a mouse outward, plugging in one adapter while bumping another loose. Clean-desk setups last until real work begins. As soon as routines restart—switching monitor inputs, recharging devices, or moving a desk lamp to chase a shadow—cords slip back into view or tangle themselves into every reach path. A single keyboard shift can send a cable sliding off the back, or a casual chair turn catches a charger underfoot. What was smooth for show becomes a series of friction points you can’t ignore. Over the day, each moment spent untangling or repositioning adds up—a steady drag that erodes both focus and pace.

    The visible order vs. actual usability problem: Bundling cables or slapping on a few clips might make the desk camera-ready or neat enough for guests, but most work cycles don’t allow everything to stay untouched. The minute you replug, slide a notebook over, or adjust your chair, unanchored cables work loose and block your path. It’s not one obvious disaster; it’s a cascade of small resets: a charger hanging down, a pulled headphone wire, the return of desktop mess after every new task. Keeping up takes constant, unnecessary effort—and after a few cycles, what started as a fix becomes a new routine of minor interruptions.

    Open access setups: easy today, awkward tomorrow

    A setup that keeps cables “open” and flexible—dangling from the desk edge or loosely trailing beneath—feels like freedom at first. Swapping laptops or plugging in a tablet is fast. But the cost shows up in real use: each extra cable is another risk for getting snagged by a chair leg or knocked down mid-move. Routine actions—pulling in your chair, shifting a monitor with a mounted arm, replacing a notebook—are all new chances to drag a charger across the surface, knock a power brick onto the floor, or have adapter lines interrupt your reach. The result is a desk that never really settles, where “clean enough” slides back toward chaos with every reset. Even in a polished setup shot, the system feels brittle once you’re in motion.

    Desk activity shows what works—and what creates friction

    Consider a normal midday workflow. Slide your laptop closer for typing, nudge the mouse to the right, and plug a charger in to keep the monitor powered. Each movement tugs at a line. Now a charging brick slips off the back corner—lodged under your chair wheel or waiting to catch your foot. A quick reach for a pen finds your hand threading around a dangling USB cable. The desk “system” turns into a maze of micro-obstacles. By late afternoon, before you even get to focused work, you’re clearing the surface just to reset everything that drifted. The setup may start out organized, but it acts like a booby trap when put through the pace of real work cycles.

    The under-desk cable strategy: one simple shift, fewer repeat problems

    Most surface-level fixes—random clips, decorative ties, or stash boxes—only delay the inevitable. The change that actually lasts comes from pulling the main tangle under the desk, anchored out of daily reach. Using a fixed under-desk cable tray with a single, deliberate exit point means cables stay in place: they emerge at one planned spot, instead of erupting anywhere on the surface or falling into foot space. In practice, this stops the daily fight. You stop catching wires as you roll in or adjust posture. The reset you do after closing your laptop is now quick, not a sequence of re-routing, untangling, and rerunning cables.

    The difference shows up in everyday moves: The mouse zone stays clear. Notebook reach is never blocked by a surprise charger. No more kicking fallen adapters, no more steady drag of cables slipping into the “just cleaned” workspace. Even with frequent device changes or a habit of standing up and sitting back down, leg space stays open and the routine doesn’t demand extra fixing. Every connector has a route, every wire stays where it belongs, and you get the surface reset in seconds—not minutes.

    • No cable drift between mouse and keyboard during quick note-taking
    • No snagged chair wheels from dangling power bricks
    • Both surface and under-desk footwell stay clear—even after three or four full work cycles
    • Device swaps don’t require pausing for a new round of detangling

    Cable management in the real world: common questions, quick answers

    How do I keep cables from making the desk look messy no matter what I try?

    Mount an under-desk cable tray and keep all exits to a single, reachable spot (usually back corner or rear edge). This removes cables from eye level and stops the creeping return of surface clutter, letting you reset faster after each session.

    Will hiding cables make it a pain to connect new devices?

    Not if you plan enough slack and keep the exit point flexible. Avoid tying everything so tightly you can’t move. Leave extra length at the tray’s opening, and connections will stay easy without a full system overhaul every time you add a new device.

    How do I keep my power strip or large adapters from slipping to the floor?

    Secure the power strip inside the tray or use adhesive brackets under the worksurface, above the main cable route. That way, heavy adapters stay anchored, out of the way, and protected from the constant nudge of sliding chairs or shifting bags.

    Small changes, steady impact: what actually improves workflow

    Whether your setup is a slim home desk or a large workstation with dual monitors and side drawers, real usability isn’t about keeping up appearances—it’s about how the space reacts every time you work. Visual order means little if every session starts by clearing tangled cables from the keyboard zone or maneuvering around a blocked drawer. The real shift happens when cables and adapters are kept out of high-traffic reach, device swaps can happen freely, and no routine action returns the mess. The desk then becomes a surface that supports your next task without slowdowns or repeated adjustment breaks.

    Perfect organization isn’t necessary, but strategic setup is. Anchor cables out of sight. Limit exit points to where you need them. Don’t be fooled by a tidy desk that collapses at the first day’s use. Instead, look for a repeatable fix—one you’ll feel every time the work zone is clear, the cable mess stays gone, and the next reset is just a motion, not a chore.

    Explore the full WorkBasic collection

  • Why Consistent Corridor Lighting Tone Enhances Visual Comfort and Flow

    Corridor lighting doesn’t fail on installation day—it slowly undermines routine every time you pass through. The real problem shows up a week in, when the hallway just feels “off.” One step is bright white, the next is faded amber, and the last bulb in line casts a cold, uncomfortable tint. Glare shimmers above a coat hook; a dim stretch by the entry hides keys and shoes in the shadows. The corridor doesn’t link rooms; it slices itself into uneasy patches. Even small differences—bulbs swapped at different times, panels from mismatched batches—build up until every trip down the hall delivers a visible, nagging inconsistency. What looked seamless in daylight now feels distractingly unfinished at night, especially when movement stops being fluid and becomes a string of micro-hesitations.

    When Light Tone Splits the Corridor

    It only takes a subtle shift: one “neutral” bulb, another “soft white,” and suddenly the hallway betrays itself. Step from zone to zone and the color temperature dips or spikes, forcing your eyes to adjust inside the same supposed passage. Edges blur, corners bounce mismatched shadows, and fields of glare or dull spots show up exactly where daily movement happens. The shift is worst after sunset—no daylight to dilute the contrast—so corridors meant for quick, direct movement instead trigger side glances and slowed steps. Functional space fragments into interruptive mini-scenes, exposing every substitution or shortcut in the lighting plan.

    The result is not just a different look but a drag on routine. It’s hunting for shoes in a yellowish bubble while the coat hook sits in a harsh beam. Pausing beside a glare-pool to let a guest pass, feeling shadows change as you cross threshold after threshold. Practice anything in that passage—putting on sneakers, hauling groceries, nudging the door open with a backpack—and the interrupted flow makes itself known over and over.

    How Small Inconsistencies Creep In

    Even deliberate planning can backfire. Matching fixtures is only as safe as their underlying batches. One missed detail—a replacement bulb pulled from the kitchen drawer, a panel strip reordered months later—sets off the chain. A “4000K” is not always a true match when the tint or batch has drifted. A corridor that looks aligned on install day drifts into patchwork reality: faint amber against cool white, haloes skipping from ceiling to wall, hotspots on tile or wood, awkward shadows down the baseboard. Under repeated use, the inconsistencies get easier—not harder—to spot.

    Daytime hides, nighttime reveals

    By day, mismatched tones fade behind other distractions. But at dusk, a corridor’s misalignments glare into view. Cold light bounces off one side of the wall, turning coats or pale surfaces blueish, while an opposite edge glows tired yellow. Pausing to check what’s underfoot, glancing back at a half-open door, you feel the disconnect more than see it outright—shadows that don’t line up, objects half-lit where you expected clarity. If you’ve caught yourself adjusting, squinting, or leaving something at the “better lit” end, you’ve run into the problem directly.

    Movement Exposes the Weak Spots

    Staying still can hide poor lighting, but hallways are built for movement. What seemed balanced across ceiling and wall breaks apart underfoot as you walk: floor shadows jump, glare streaks past hooks or shelves, depth flattens near doorways. Every change of step—especially when carrying something or rushing—makes the flaw obvious. Peripheral vision catches light shifts even faster: a misplaced panel, a too-cool surface, a streak of glare from an exposed LED strip that seemed fine on paper but disrupts repeated use.

    Crossing a five-meter corridor after dark becomes a silent checklist of small corrections. You slow down at a dim patch, sidestep a coat dumped in the glare, try not to miss the pair of shoes you can’t quite see in the corner. The “straight line” between spaces becomes interrupted by light—so much that you catch yourself wondering if a simple route could be simpler still.

    How Uniform Tone Transforms Corridor Use

    The fix isn’t an architectural overhaul—it’s consistent tone and matching support. Align every bulb, panel, or strip to the same neutral output (usually 4000K) and the physical corridor becomes functionally continuous. No more abrupt edge shifts. Baseboard shadows hold their line; door frames stop throwing weird bands. Grabbing a tote from the hook no longer means pausing to adjust your eyes. Even piles of shoes, which once vanished into a dark corner, become clearly visible with no effort. The upgrade isn’t about a showy change, but about making the corridor work so smoothly that it fades into the background of daily movement.

    Visibility you don’t need to think about

    A corridor with true tone consistency operates quietly. Whether you’re carrying groceries, reaching for a scattered toy, or walking with a guest, your movement no longer “bounces” against the light. The visual field stops shifting. You stop scanning for missed objects or hunting for a switch that shouldn’t be needed. Instead, the space finally acts as the seamless connector it was meant to be, supporting real routines without extra pause or friction.

    Common Misses and Field Lessons

    • Don’t trust visual similarity in the shop. Always bring a sample bulb and confirm both Kelvin rating and maker—similar appearance is no proof of identical tone when installed.
    • Never mix batches for panels or strips unless you’ve staged them side-by-side in your actual space. Factory drift—usually invisible in the box—can jump out once the lighting is installed down a linear passage.
    • Test before going all-in on installation. Lay out panels or screw in bulbs temporarily, then walk the corridor at dusk. Subtle mismatches become glaring under real-night conditions that no daylight or phone test can reproduce.

    Even a single inconsistent fixture unravels the intended flow. Narrow passageways punish poor alignment the hardest—side vision immediately picks up on odd tones and shadow breaks. Wide corridors disguise mistakes better, but in tight, high-use transitions, tone drift and panel mismatch pile up fast. The point isn’t to stage-perfect “design,” but to achieve comfortable utility quietly, so the corridor’s lighting supports, rather than interrupts, the routine it was meant for.

    Making Simple Setups Actually Comfortable

    If your corridor still draws attention after it’s “done,” something’s off. True lighting support isn’t about flash or fiddly options—it’s about resolving the basic sequence: clear sight, steady tone, smooth movement. When you can walk, reach, or check for essentials without thinking, the improvement feels invisible but real. Don’t add complexity; settle for a consistency that’s so natural you forget you ever needed to think about it. That’s when the corridor finally works.

    For practical indoor lighting, lighting support, and accessories to help corridors (and every space you repeatedly use) feel easier and more comfortable, visit LightSupport.

  • Why Adding Wall Lights Transforms Stair Safety and Visibility

    Most stairways look bright enough—until your routine exposes what the lighting misses. You’re halfway up, arms full with laundry or groceries, when a sharp shadow erases the landing edge. The ceiling fixture pours light over the general space, but the step in front of you blurs right where a stray shoe could hide. Every squint, pause, or foot that searches for a tread in the half-dark is a reminder: “well-lit” in theory can leave you guessing, especially at corners, top, or bottom steps. The real decision isn’t between bright and dim—it’s whether relying on just an overhead fixture lets unseen risks build up in your path, night after night.

    Why Overhead Stair Lighting Doesn’t Tell the Whole Story

    An overhead ceiling light covers the stairwell—but not the details that keep movement safe. Flush mount and semi-flush ceiling lights scatter a general glow across the steps, making the area look lit. On paper, it’s enough for routine traffic, especially during the day. But under real use, overlooked shadows and disappearing edges surface at the worst moments: the very spots where clutter gathers, or where a split-second glance can miss a tool, sock, or shifted tread. A bright zone overhead still leaves blind spots low on the stairs or at tight turns, regardless of bulb strength.

    It’s not about total darkness. What shows up is an uneasy hesitation: your foot slows before a shaded step, or your eyes linger, uncertain if you’re seeing a trick of the light or something you should avoid. These are holes in coverage—quiet friction points—missed in daytime but stubborn after dusk. They’re why even “bright” staircases trip up real routines.

    Everyday Routines Expose the Weak Points

    The limits of ceiling lighting become obvious the moment daily movement challenges them. Hauling laundry or carrying groceries, you ask yourself: Are all treads clear—especially that corner, that dip, or the first and last steps? Half the trouble isn’t in finding your way, but in second-guessing whether a shadow means something’s there. If you regularly slow down at the same spot, it’s not just habit; it’s compensation for what the lighting fails to show.

    The signal isn’t catastrophe, but irritation that builds every day: pausing at the landing, testing a toe before turning, peering into shadow for a dropped object. These micro-stalls don’t make headlines, but erode confidence in the space one hesitation at a time. Each routine stumble is less about clumsiness and more about fixture placement—not quite matching how people actually use stairs, especially as daylight drains or the house gets busier.

    Where Single Fixtures Fall Short

    On a straight, narrow set, a single ceiling light may just hold up—until autumn evenings or late-night returns stretch your routines. Add a stairway turn, open up the width, or increase foot traffic, and the problems multiply. Shadows invade the outer corners and landing edges, just as the main fixture bounces light onto walls or glossy surfaces, sometimes creating glare overhead and darkness underfoot.

    The issue isn’t the fixture’s design, but the one-size-fits-all approach. High-use steps fade first, while bright highlights stay above eye level and real visibility thins out below. On busy days, it’s easier than you think to overlook a wayward toy, misjudge a step’s edge, or stall in front of that same dark patch—while the ceiling glows, but the stairs themselves test your attention with every pass.

    How Supplemental Wall or Step Lighting Changes the Experience

    Adding wall or step-level lighting doesn’t just make the stairs look different—it changes how you move. Shielded wall sconces or discreet, low-mounted step lights don’t decorate; they deliver clarity along tread lines, corners, and landings. Suddenly the spot you used to pause is mapped out in calm, direct light. Edges become certain, dropped items stand out before you reach them, and late-night trips stop demanding double-checks at every landing.

    This isn’t about more wattage. It’s about putting focused light where movement and safety actually happen. When each crucial step, from top to bottom, is neatly defined, the difference isn’t just visible—it’s felt whenever your foot lands exactly where you expect, and the routine pause at the turn disappears on its own.

    Not Just “Brighter”—But Clearly Safer Movement

    During daylight, supplemental lights may fade into the background, but as routines return—pets dashing, kids carrying books, you rushing at dusk—the transformation is unmistakable. Safer passage comes from fewer blind guesses and more routine confidence, not from flooding the stairwell with raw brightness. The stress isn’t in darkness, but in the need to look three times before stepping; step-level lighting removes this tension by making the next move obvious.

    Practical Tips for Reliable Stair Visibility

    • Use shielded or diffused fixtures. Bare bulbs and intense downlights create glare or harsh patches; aim for fixtures mounted just above tread level, washing light gently across each step instead of blasting it downward.
    • Tackle the weak spots first: Prioritize the riskiest areas—the top step, first landing, and at any sharp turn. Even a single added fixture at these points can eliminate routine hesitation where it matters most.
    • Test lighting at night—and with normal movement flows. Setups that seem fine during installation can feel inadequate after dark or in real use. If you still find yourself squinting, pausing, or prodding a step, shift the angle or add a fixture until those moments vanish.

    When Lighting Matches Actual Stair Use

    The mark of a properly lit stairway isn’t a wow factor—it’s friction that quietly disappears. Lighting that follows your steps, your turns, and your armloads lets the space adapt to real movement, not just floorplans or catalog shots. The impact is plain: no more reaching a landing in doubt, no more searching with your foot for a hidden edge, no more annoyance when dusk arrives before you expect it. Instead of adjusting your stride to fit the lighting, the lighting adapts to you.

    Even familiar homes reveal the gap between “looks bright” and “feels reliable” once routines put fixtures to the test. The payoff isn’t luxury; it’s simpler, safer movement—one that’s felt every night, every errand, every trip up or down. Find solutions for safer, clearer stairway lighting at LightHelper.