Category: Lighting & Work Setup

  • Why Re-Checking Lighting After Power Restores Ensures Safer, Clearer Spaces

    Most indoor lighting problems wait until routine kicks in. A hallway looks bright at a glance—but one step in, your heel slows at a shadowed stair edge or faded landing. In the bathroom, overhead bulbs promise “full illumination,” but the moment you reach the mirror, glare hits your eyes or your reflection slips into shadow, making basic grooming awkward rather than effortless. These aren’t rare annoyances—they’re clear signs that lighting comfort doesn’t come from wattage or first impressions, but from how a fixture lines up with actual, everyday use.

    Why Lighting Problems Hide in Plain Sight

    Rooms fool you at installation. The day a new fixture goes up, the lounge, corridor, or stairway reads as “complete.” But routines expose misses: a semi-flush hallway light shines straight down, casting the center bright but leaving corners dim and alcoves in shadow. A bathroom sconce looks gentle from afar but suddenly throws unwanted glare right into your morning routine. These misses don’t announce themselves on day one—they trip you when you’re moving fast or relying on habit, not when you’re standing still admiring the upgrade.

    The problem isn’t brightness—it’s coverage and direction. The wrong fixture leaves part of the room underlit, shadows in high-use corners, or glare where your eyes need comfort. You spot it only when you resume real patterns: walking the hall at midnight, using the kitchen counter, or leaning in close at the bathroom mirror.

    Hallway and Stair Lighting: Looks Bright, Moves Slow

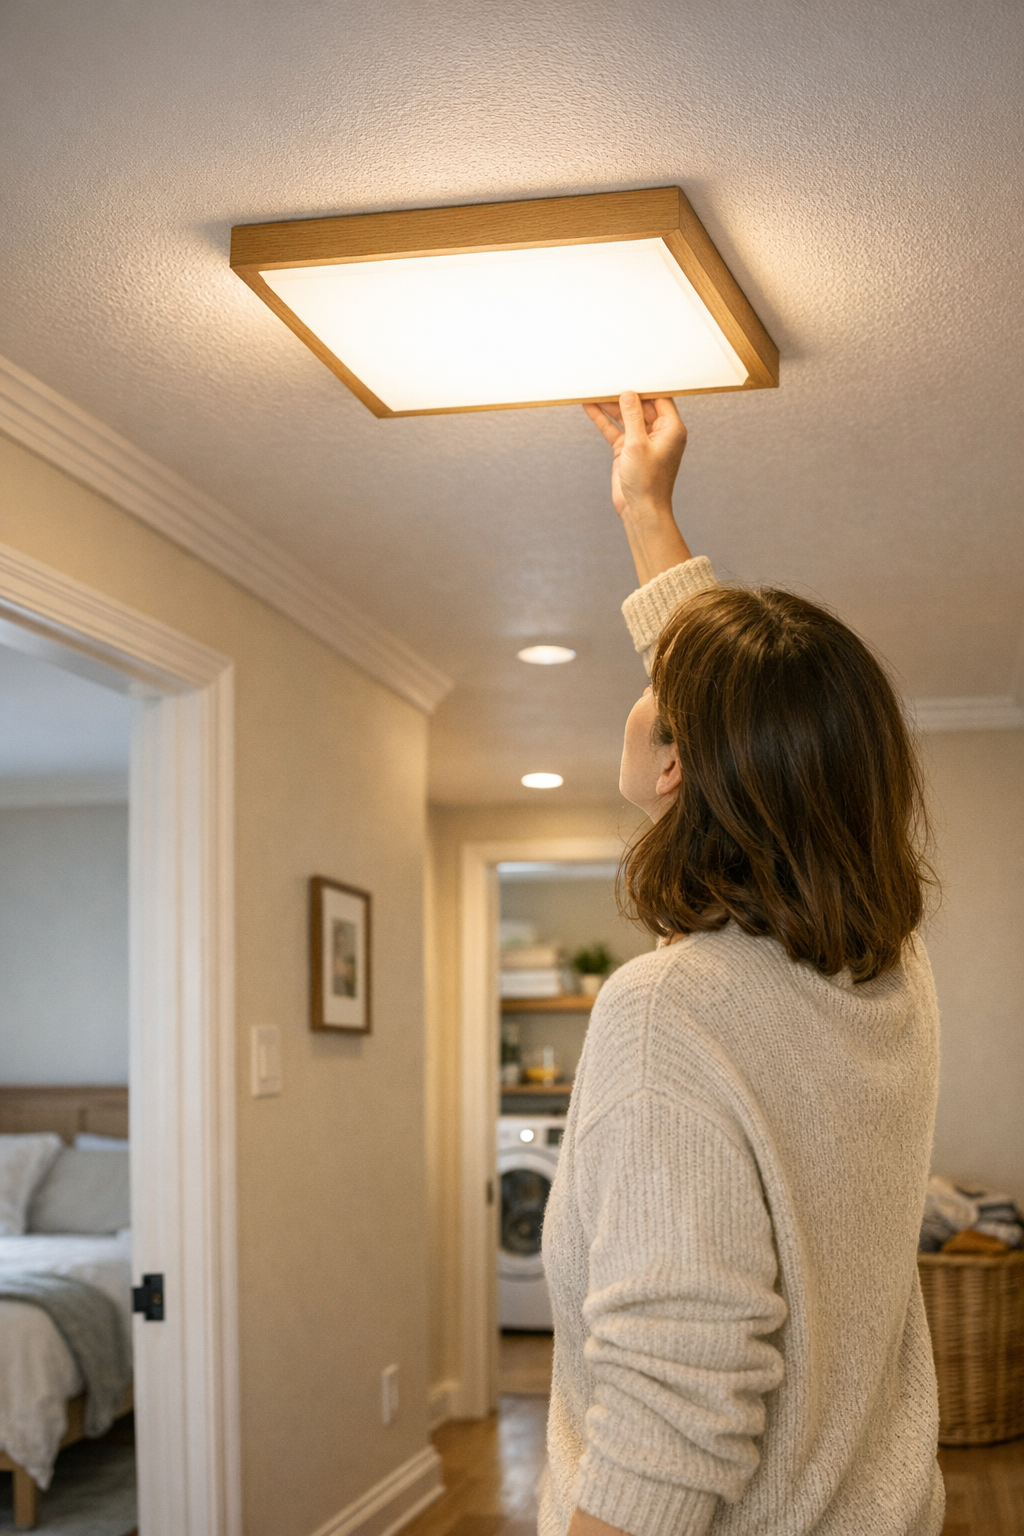
    Hallways and stairs are classic for this. Stand at the entrance and the area looks flooded with light. Start walking, and you slow down at the landing or stair turn, feeling the edge blur into shadow or the wall go dim. The trouble isn’t how much light—the trouble is where it falls. Ceiling fixtures often create a bright central spot but miss the critical path around corners or onto each stair’s edge. Subtle shadow bands make people hesitate or miscalculate footing.

    If you want safety, don’t just assess standing still. Walk the actual route in real lighting—notice where you slow, hesitate, or feel a step less visible. Often the fix is not buying another fixture, but tweaking placement—a broader flush mount over the bend or repositioned ceiling light to hit the stair wall directly, softening those trouble spots and keeping pace steady.

    Vanity and Mirror Zones: Where Glare and Shadows Sneak In

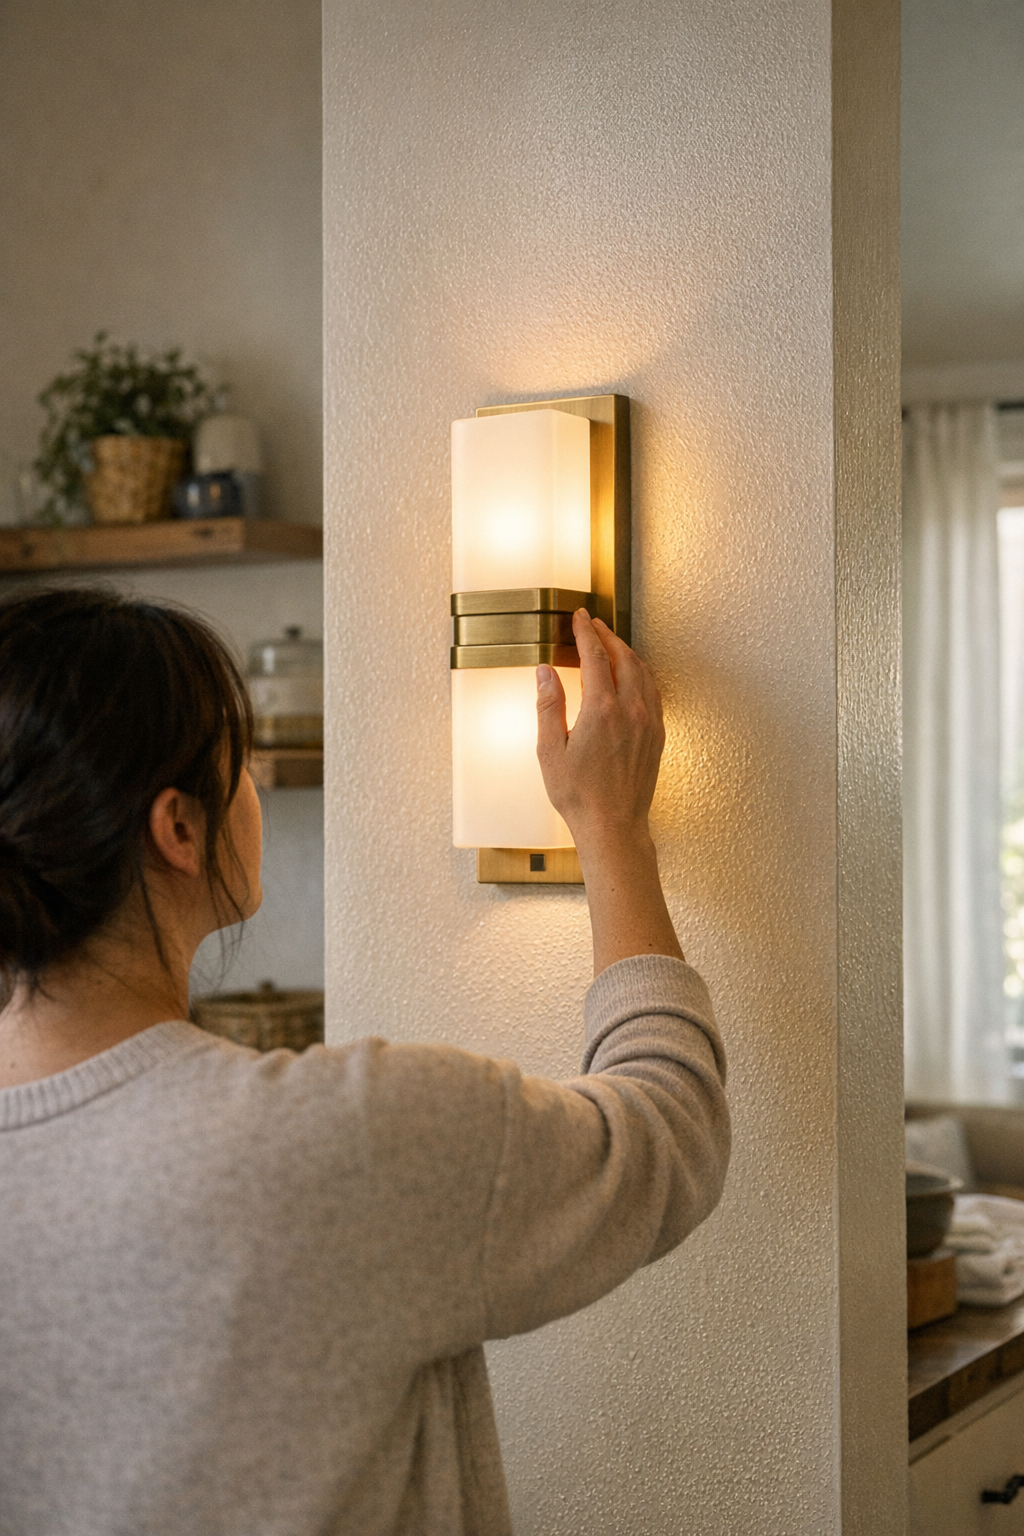
    Bathroom lighting reveals its real character the first morning you use it. Over-mirror bars and ceiling globes often leave cheeks and eyes blanched while jawlines vanish into shadow. Glare jumps back from the glass right at eye level. The mirror appears well-lit from a distance, but up close, details drown or shift into awkward shadows. Daily tasks, from shaving to makeup, become a small battle against the light instead of a seamless step in the morning.

    The solution isn’t just dialing up bulb wattage. The gain comes from structural change—lensing that smooths the throw of a fixture, or a wall-mounted vanity light long enough to balance horizontal and vertical shadows. When the right light softens and broadens at the right height, grooming stops feeling like guesswork in a spotlight.

    Shadowed Work Surfaces: When “Bright Enough” Isn’t Useful

    Kitchens and laundry rooms often fail the real test: task surfaces end up shadowed by your own body, even in “bright” rooms with modern panels. You stand at the counter, hands in the path of a ceiling beam, and the chopping board falls half in gloom. Reach for detergent, and the shelf edge is lost in murk. People slide sideways or settle for “good enough” visibility—until the next time a task slows down or a knife hesitates mid-chop.

    True fix? Don’t flood the room—target the actual working line. Under-cabinet or fixed task lighting makes the countertop, sink, or laundry shelf not just visible but easy to use from any angle, at any time. Problems vanish not with more light, but with better-placed, purpose-driven light.

    Real Patterns, Real Friction: The Cost of Everyday Interruptions

    Lighting failures aren’t always dramatic—they chip away gradually: a hallway walk that’s “almost fine” until one section feels risky at night; the daily workaround to dodge glare at the sink; hands casting their own shadows over a workspace that only seemed bright enough. These repeats have a cost: minor hesitation, eye strain, and a steady undercurrent of inconvenience that becomes background irritation.

    If your routine feels interrupted or awkward where the room “should” be covered, you’re witnessing the weak spots in real time. Most homes are left at “good enough” once the room registers as generally bright. But the difference between “lit” and “fits your life” is noticed only when routines expose the same shadow lines and glare points, again and again.

    Practical Fixes: Focusing on Placement and Structure

    Patching these gaps doesn’t mean adding endless fixtures. Improvement comes from noticing real-use patterns and refining coverage: swapping a narrow spot for a broad flush mount in a corridor, choosing a damp-rated sconce for horizontal light in the bathroom, or adding strip lighting beneath cabinets instead of hoping overhead bulbs will reach. Payoff is practical: smoother hallway crossings, safer stairs, no more dodging the mirror, and work surfaces that stay clear without awkward maneuvering.

    Tip: Test setups with real routines. Walk the hallway at night. Lean in at the mirror. Prep food or fold laundry as you normally do. Where you squint, pause, or sidestep, that’s your structural clue—not just a sign for brighter bulbs, but for smarter placement or fixture shift.

    Lighting That Adapts to Real Use—Not Just the Paper Plan

    Good lighting isn’t measured by empty-room brightness, but by what stops being awkward in daily use. The first days after power returns, or after new installs, are prime for catching the spots where the plan falls short—before those hidden shadows and glare patches settle into your norm. An adjusted fixture, a new zone of coverage, can change the story of how a space is used—making light feel less like a static backdrop and more like a responsive tool for actual living.

    For practical, repeat-use focused indoor lighting—covering hallways, stairs, vanities, work zones, and all the lived-in corners where light needs to pull its weight—visit LightHelper.
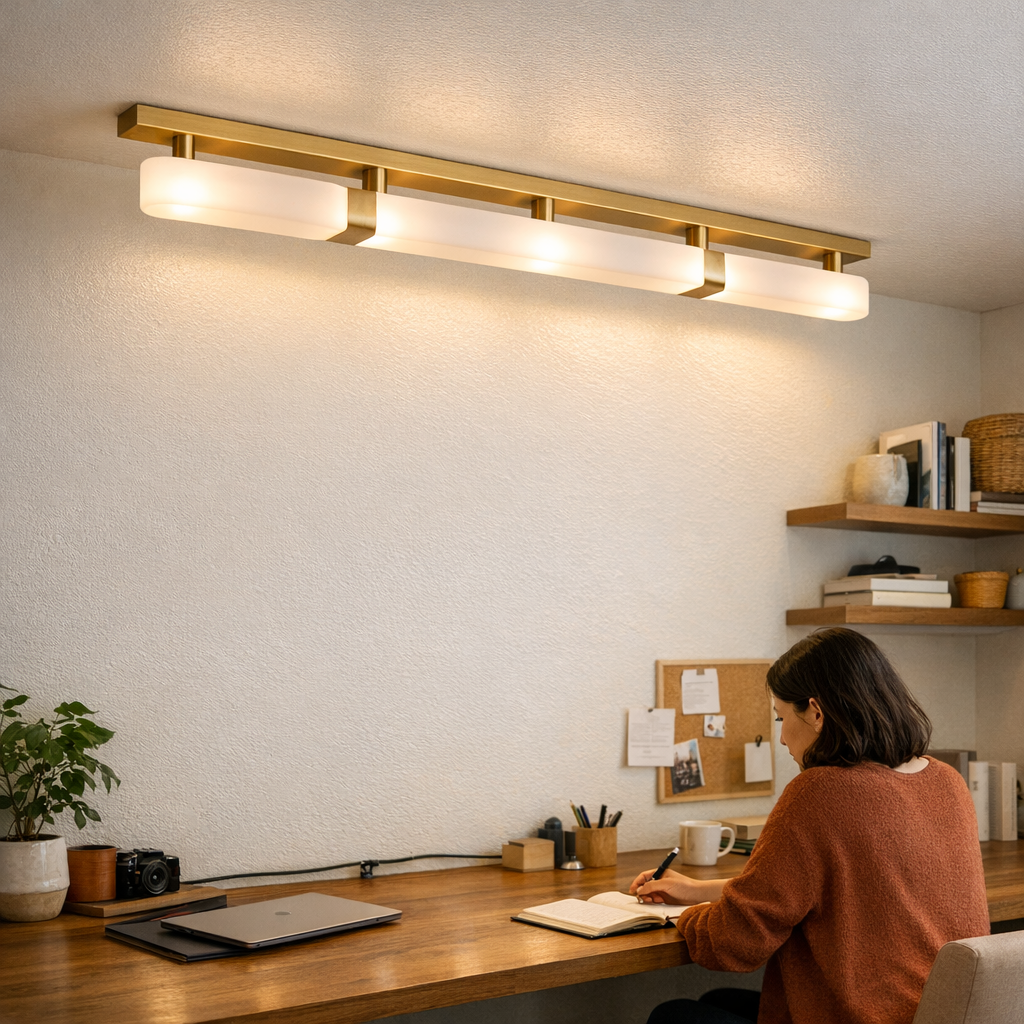

  • How Linear Ceiling Lights Solve Common Workspace Lighting Problems

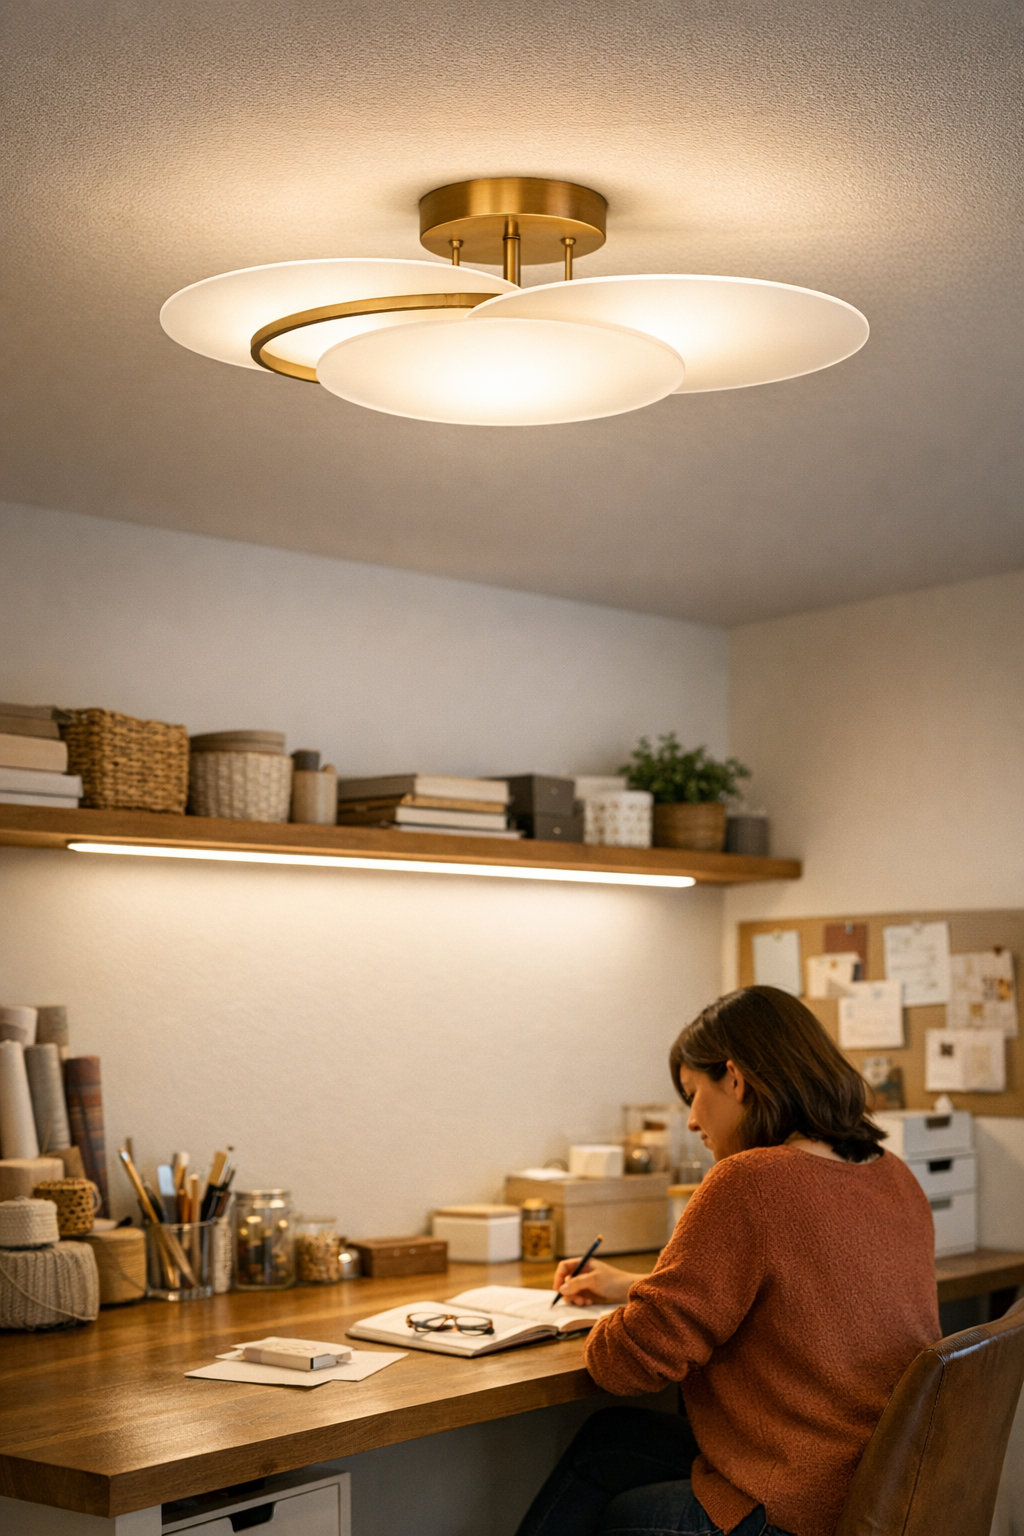
    Ceiling lights promise a finished workspace—until routine use exposes what’s actually unsolved. The desk looks clean, the panels line up, but after a week or two, the comfort cracks start: glare over the screen, dim strips at the far edge, or stubborn shadows under a shelf you use every day. The ceiling stays uniform, but reaching for what you need still brings back awkward cables and uneven light.

    The Problem With “Finished” Ceiling Lighting

    Step into any “ready” workroom: lights overhead, desk surfaces staged, everything seemingly planned. Yet by the end of the first month, a familiar discomfort returns. Ceiling panels that made the room look seamless end up spotlighting glare right where you sit, or leave the back third of your work surface faded and easy to avoid. The difference shows not in brightness numbers, but in small, daily disruptions: screen reflections, awkwardly reached power strips, and the recurring appearance of table lamps meant to be “temporary.” Everything on the surface seems stable, but every session makes the mistake clearer—light that pleased your eyes on day one quickly fails the real test of use.

    This isn’t a dramatic collapse—it’s a pattern of small, persistent hassle. One side of a shared desk feels usable while the other always loses out, as shadows cross the work area no matter how you shift. A shelf that needs to be bright stays dimly out of reach. Moving your monitor, adding another lamp, or trying to reposition a panel doesn’t solve it—if anything, exposed cords and workarounds pile up until the “tidy” setup is visibly cluttered again. The desk won the ceiling game but keeps losing at the surface, session after session.

    Linear vs. Panel: Why The Difference Matters During Real Use

    Panel and linear ceiling lights claim the same territory: a “resolved” overhead appearance. But the lived results often split in two. Panels spread soft light broadly—but mostly at the center, fading at the edges where you actually need coverage for reading, detail work, or shared surfaces. Once tasks move to the outside, the shortfall is clear. It’s not obvious at first, but over time, under-lit desk edges and shadowed perimeters become a daily inconvenience you can’t ignore.

    Here’s the real divide: Wherever a work zone meets a wall or stretches across two users, panel lights rarely reach every inch. That leaves the edges dim, so you and a coworker either bunch in the middle or set up rival lamps—cable mess and new glare included. “Finished” overhead look, but now surfaces turn into problem zones: one end useful, the other a home for drifting cables and unread papers. The problem isn’t lack of lumens, it’s the mismatch between clean ceilings and real, reachable tasks.

    Linear fixtures, especially when installed parallel to the desk edge, flip this outcome. Light follows the length of the surface, so the whole depth is activated—no dead edges, no “good” vs. “bad” seats. You use both sides of the table, not just the sociable middle, and the full span stays equally readable. Instead of layering on more add-ons, one support solves the job at the structural level, giving you practical, everyday relief, not just a neater overhead.

    Everyday Friction: What a Poor Setup Really Means

    Repeat annoyances expose system failure—here’s how it adds up with most panel setups:

    • Your laptop always needs nudging to the brightest strip, while the outer desk edge gets ignored or left dark.
    • Shared spaces ration “good” light, so one user habits the shadow, or both jockey for the bright spot.
    • Clamp-on or clip-on lamps multiply cords, crowd power strips, and tangle setups just to light the edge.
    • Reconfiguring shelves or rotating lights never fixes the persistent shadows along the work-back or wall.
    • None of this is dramatic, but every session, something feels compromised—appearance wins, routine loses.

    It’s not a hardware defect, but a real mismatch between ceiling calm and surface confusion. Desks look composed once, but as soon as you’re actually searching for notes, plugging in a charger, or setting up side-by-side, the problems repeat: shifting shadows, odd glare, exposed cabling intruding where you wanted clarity. These little dysfunctions become the rhythm of your room, replacing order with improvised solutions and never quite solving the strain around cords, corners, and coverage.

    The Real-World Shift When Lighting Is Oriented For Use

    Consider a real adjustment: After steady frustration with shadows and cord nests on a shared workbench, switching to a linear fixture—mounted just out from the wall and parallel to the work surface—immediately killed the recurring dimness at the back edge. Suddenly, every seat along the table was equally usable, and reading across the whole surface felt natural. No one needed to angle extra lamps just so a notebook was visible; stray power cords faded under the desk, not dragging across the top. The visual calm finally matched the routine: work areas stayed tidy because the main light now reached what people actually touched and read.

    At first, not everything looks transformed—but over each week, the improvement deepens. Gone is the shuffle of moving lamps, chasing the last unlit inch, or overloading outlets for the sake of a brighter edge. No more dealing with blind spots, low contrast, or last-minute cable jumps to reach an ignored corner. The space becomes quietly easy. Use feels smoother, glare recedes, and you spend less time “fixing” what your lighting should have covered from the start.

    Supporting the Setup With Clean Cable Management

    The benefit extends past light path: with a planned, well-supported linear fixture, cable management gets dramatically easier. Wires follow neat, hidden routes—clipped along brackets or tucked behind supports, not looping in the open or creeping toward work surfaces. Nobody notices a perfect cable run, but everyone relaxes when cords stop hijacking the first glance or getting in the way, session after session. Good support strategy—choosing correct brackets, planning conduit paths, setting up stable mounts—means less visible clutter and more dependable comfort, so the setup holds its own under real traffic, not just on photo day.

    What Makes A Lighting Setup That Lasts?

    The measure isn’t a perfect ceiling or day-one wow factor—it’s whether your lights make routine work easier after weeks, not just hours. Well-chosen, properly supported lighting keeps every surface usable, brackets and cords where they belong, and distractions out of the path. This isn’t an aesthetic upgrade: it’s daily stress prevention, the result of matching support hardware and fixture orientation to the way you actually use the space.

    If you’re living with dim desk edges, repeat glare, or constant cable drift, take a closer look: does your ceiling lighting actually solve the conditions you deal with at the surface? For most, orienting a linear fixture with real cable management is the detail that finally delivers the working comfort promised by overhead panels. It’s not about trends; it’s about fewer friction points—light where you need it, cables where you never see them, and a workspace that stays as clear to use as it looks.

    LightSupport

  • Creating a Reliable Workspace by Organizing Desk Undersides Effectively

    The desk that only looks organized is the desk that quietly drains you. Line up your organizers, stash the loose pens, file the spare notebooks, and the surface plays the part—until you actually work. Shift from keyboard to notebook, adjust your screen for a late-afternoon check-in, or roll your chair back to stand: suddenly, what you can’t see—cables stretched just enough to catch your shoe, power strips nudged sideways, adapters clinging to the edge—starts to sabotage flow. What shows as neat at 8 a.m. slowly turns into another under-desk tangle by midweek. With every device swap, drawer slide, or simple posture shift, the gap widens between the appearance of order and the way your desk actually behaves. The routine becomes wasteful: a daily scramble to reset what looked perfect not long before.

    Why a neat desk underside matters far more than appearances

    The real trouble with a desk isn’t on the surface. Problems appear where you don’t watch—chargers drooping past the edge, adapters swinging every time you shift your chair, and legroom swallowed by sprawling storage boxes. You notice too late: a loop of cord snagging your shoe, a charger jolted loose as you stretch, power blocks collected where your feet want to land. These aren’t one-time annoyances but repeating interruptions—minor, cumulative, and slightly embarrassing when you have to crawl around during a call. Out of sight means out of control, especially in cramped spaces or days packed with device switching. The desk looks calm, but the underside chaos interrupts your work so frequently it becomes the real “mess.”

    Surface order vs. real repeated-use behavior

    Most desk setups pass the first glance: cables tucked along the back, organizers lined up, a few clever clips doing all the visual work. But repeated use exposes the structural weaknesses that a stylized desktop can’t hide. Trays sag after a week under too much cable weight. Adhesive clips surrender, dropping lines onto your footpath or behind the drawers. That cable route that worked perfectly for your laptop stops making sense as soon as a monitor, power bank, or extra phone enters the mix—new lengths, new tensions, new drift toward your feet.

    The moment you reach below for a charger, only to pull up a snarl or catch a loose adapter, drives home the point: efficiency that looks fixed from above unravels underneath with every session. Surface order hides slow-motion failure—cables drifting down, adapters creeping into leg space, and constant small corrections that never really fix the flow.

    Desk routines: the real test for cable flow and storage

    Desk reliability isn’t about a “good” first setup. It’s about what happens after dozens of resets, nightly device swaps, or sudden pace changes. In a normal workday, you drop into the chair for a call, nudge aside a notebook, twist to find a charger, adjust a monitor, or shuffle drawers. Each action meets resistance or delay if the underlying setup can’t keep pace. If a storage box blocks your knees, if the cable route breaks across the drawer slide, or if clips force you to grope under the surface for the right cord, the irritation multiplies. Sooner or later, the need for “just another quick adjustment” starts feeling like a built-in tax on your attention.

    Example: everything’s moving smoothly until you roll your chair and feel the telltale snag of a cable you thought was routed clear, or you reach down for a charger but bump into a tangle of speaker wire and phone line. These aren’t dramatic problems—they’re friction loops that waste seconds every time and defeat the whole principle of an organized workspace. You end the day not with a cleaner setup, but with a low-level suspicion that you can’t return to work without crawling back under the desk.

    What actually improved the return-to-use feeling

    The shift happens not with another round of decluttering, but when under-desk structure finally controls where everything ends up. Mounting a solid cable tray, anchored firmly to the back edge, prevented adapters from creeping into legroom. Charger lines routed through a tray—not draped, but held a few centimeters under the desktop—stopped hanging where feet or drawers move. Now even frequent unplug/replug cycles don’t end in cables falling to the floor or tangling with storage units. Leg space stays open. Power doesn’t migrate to the worst possible spot. No more tracing cords by hand just to re-activate a device. Real improvements are quiet: accidental disconnects drop, drawers glide without a snag, and power blocks stay away from rolling casters, even as routines change through the day.

    The desk doesn’t suddenly look “more” organized—it finally works. Each reset between calls, work sessions, and charger swaps is simple: nothing shuffles out of place, nothing distracts you with small failures in the background. The friction that trailed the old “clean” setup is gone—not because it’s hidden, but because it finally doesn’t happen.

    When improvements create new problems (and how to spot them first)

    No under-desk solution is immune to unintended consequences. Fix one problem and another pops up: a cable box eliminates the visible tangle but blocks the bottom drawer, or heavy cable bundles rip adhesive clips free after a few weeks, dumping the mess back into leg space. Sometimes a storage fix interrupts the path you use most, or a cable tray is mounted just close enough to hamper chair movement. The patterns repeat: minor obstructions that only become obvious after days of extra effort or distraction.

    The best signal you’ve missed something? If under your desk needs fixing every few days—re-routing a wire, smacking a block out of the way—the system isn’t working. A durable desk solution is one you forget about. Cables remain grouped, adapters don’t wander, and swap-outs are deliberate, not desperate. The only time you need to reach down is when you actually mean to.

    Real questions from messy desk moments

    How do I keep cables from tangling under my desk after the second or third week?

    Secure the heaviest gear—power strips, adapters—directly in a sturdy under-desk tray or closed box, fixed at the rear. Don’t overload adhesive clips or cram every cord into a single channel; sag and detachment come fast. Use cable sleeves for related lines, but keep them loose enough for regular device swaps. Over-concentration in any single clamp turns that spot into a new tangle point by week three.

    Should I stick with open clips or go all-in on hidden trays?

    Hidden trays and cable boxes keep your leg space clear and greatly reduce accidental yanks, but make spontaneous device swaps slower. Open clips offer speed and flexibility, but also need more frequent adjustment as cables shift. Choose based on whether uninterrupted footroom or rapid access matters most for your day. Both beat letting everything slide into general chaos, but neither is flawless in real rotation.

    What’s one mistake most people make with cable management under the desk?

    Packing too much into too little room—overfilled clips, cords stretched across moving drawers, or power blocks plopped where your knees need to swing. These setups look managed until you’re pressed: then plugs slip, wires get yanked, and every disruption means hands-and-knees troubleshooting between tasks when you least expect it.

    What actually makes the desk feel reliable over time

    The real mark of a strong desk isn’t the show of surface order—it’s the near-absence of problems after days of intense use. Reliable workstations protect foot space, keep cable flow off the floor, and make storage stay put in the rush of actual tasks, not just in photos. The less attention your setup demands between work cycles, the more you can give to the work itself—not another under-desk rescue mission for wayward power bricks.

    Explore the full WorkBasic collection

  • Why Accessible Ground Wires Matter for Safer Indoor Lighting Maintenance

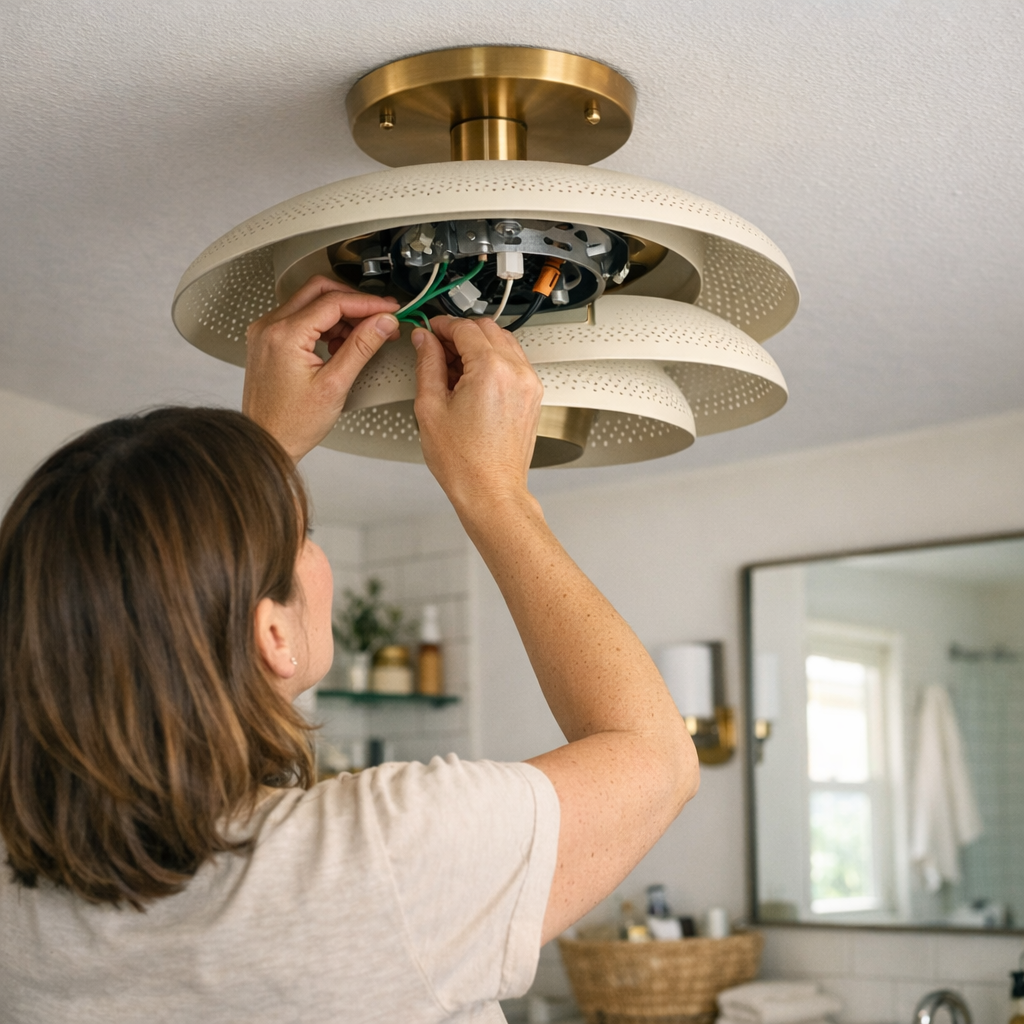
    The real difference between a lighting fixture that works and one that fails isn’t the way it looks on installation day—it’s what happens the first time you have to touch it again. In the actual rhythm of a house—busy mornings, rushed repairs, cleaning routines—a flush-mount ceiling light over the laundry, a hardwired wall sconce by the steps, or a vanity bar above the mirror can turn from “done” to demanding far faster than most people expect. One detail almost nobody notices at first—the ground wire, buried tight with no slack—can make every simple job risky or impossible: pulling at stuck screws in dark stairwells, straining to change a bulb by the mirror, struggling to reach across a damp laundry shelf. If the ground wire hides behind a powder-coated plate or jams stiff inside a wall box with zero give, what started as a “clean” install gets complicated overnight.

    The Hidden Friction Behind Everyday Fixtures

    This problem hides until it doesn’t. A ceiling light sits flush and even over a laundry counter. A pair of wall sconces bookend a mirror—lines sharp, everything anchored neatly out of sight. Only when you try to open the fixture do you discover the catch: ground wire clipped short, stiff, or stuffed behind heavy plates. It’s in the hurried moments—late morning, running to swap a bulb—that you find yourself half-blind, one hand losing grip as the fixture tugs down on its wiring. Cutting corners “just for now” or leaving the ground disconnected isn’t rare; it’s the desperate fix when access stalls. And this chronic strain creeps in fastest in places with regular interruptions: steamy mirrors, low hallway ceilings, vibrating stair turns, utility rooms where every screw seems to rust by month three.

    Real Use Reveals What Installers Don’t See

    Catalog-perfect lighting doesn’t show its limits until regular use exposes the weak points. The day-to-day tells the real story:

    • Mirror sconce, midnight: You lean close and half your face still falls in shadow. You go to adjust, only to find the wiring barely long enough to hold the fixture—your hand trapped, juggling the shade and searching for a connection you can’t even see. If the ground is free and visible, that fix takes one calm minute.
    • Stairway pause, weak light: A flicker draws your eye, and you reach up to check the mounting. When ground access is straightforward, you can detach, inspect, and re-secure without risking a short. Pinned wiring? Most just close it back up or risk a workaround that leaves things worse.
    • Hallway fade: Rows of semi-flush lights seem fine until months of door slams and vibration make coverage uneven. To open a fixture with buried wires, you either call for backup or risk stripping hardware—one misstep, and the next repair just got even harder.

    The cost: every time you jury-rig a solution or put off “fixing it right,” you leave behind a tougher problem for next time—sometimes a safety oversight, sometimes an invisible bottleneck that only gets worse with age and use.

    Moisture, Movement, and the Real Cost of Inaccessible Ground Wires

    High-traffic and damp rooms double the trouble. In a bathroom or utility corner, moisture seeps behind trim and fasteners, accelerating wear. The difference: when a quick moisture check means wrestling with a cramped, short ground, every cleaning, code update, or loose bracket becomes a low-stakes hazard. A shortcut—leaving the ground temporarily disconnected to fit things back—quietly builds a safety risk, especially in rooms with steam, vibration, or sudden fixture movement. As regulations or building codes evolve and hardware ages, what started as a “hidden” flaw increasingly blocks safe repairs and simple maintenance.

    Movement is its own pressure test. Step onto the landing, open a stairwell sconce, or try maintenance on an entry flush mount after a year: vibration and repeated access make all the difference between easy upkeep and another half-finished job. Fixtures with bad ground access turn even a bulb change into a stress point; every shortcut, every postponed tweak, and every forced maneuver adds silent friction to daily life.

    Why Visible, Accessible Grounds Make Every Fix Easier

    If you want your lighting to stay fixable, visible ground wire slack is the most important hidden upgrade. Four inches of reachable ground, positioned above the mounting or accessible near the wall box, means you can revisit, replace, or clean the fixture without turning your next morning upside down. The changes are immediate and cumulative:

    • Five-minute bulb swaps at a fogged bathroom mirror—no risky stretching, no wires yanked from inside the wall.
    • Shade adjustments or moisture checks in tight areas—handled solo, without fingers wedged behind metal or makeshift tools propping a fixture in midair.
    • Simple code updates or fixture replacements over time—done without rewiring short grounds or scheduling a return visit for what should be routine.

    Once you experience zero-fuss access, you notice every spot that’s missing it. It becomes the filter for what kind of lights and mounts you trust—not just for yourself, but for anyone who’ll face that ceiling or wall later.

    Tips and Lived-In Fixes from Repeated Use

    This fix isn’t exclusive to professionals. Whether upgrading a hallway sconce, stringing under-cabinet task lights, or swapping out a ceiling flush mount in a laundry, these habits spare you the usual headaches:

    • Coil ground, never cut flush: Leaving an accessible loop pays dividends with every fast bulb change, cleaning, or bracket inspection across the years.
    • Test final reach before tightening: Gently tug the wire at install—if removal still means disassembling the bracket or scraping hands on sharp edges, add slack before you call it finished.

    Neither step is visible after install, but both mean you avoid balancing fixtures midair or improvising unsafe repairs down the road.

    Lighting That Remains Useable, Not Just Bright

    A room can look fully lit and still let you down: glare on bathroom glass, a shadow line across the prep counter, lost edges along hallways, or a work surface that’s bright but half-obscured in use. So it is with maintenance—polished finishes and high output mean nothing if every fix is an ordeal, or if an unseen flaw guarantees stress next time. Ground wire access isn’t decoration—it’s the line between lighting you live with and lighting that actually supports living.

    Over time, what makes a ceiling light, wall sconce, or vanity fixture feel genuinely useable isn’t “how it looked when new”—it’s whether each return, adjustment, and regular check happens with confidence, not dread. Leave grounds accessible from the start; the small effort up front is what keeps every future change quick, safe, and clean instead of slow, risky, or left undone.

    Visit LightHelper for practical indoor-lighting solutions that stay reliable after installation.

  • Achieving Balanced Ceiling Lighting for Comfortable Everyday Spaces

    Your lighting setup looks finished—until your routine proves otherwise. Ceiling fixtures lined up, cords hidden, surfaces swept: it feels resolved for a day or two. But sit down at a shared desk or pace past the far edge, and the cracks appear fast—a shadow always hugging one seat, cables that start escaping their “tidy” routes, or a persistent dim zone where you actually work. These aren’t rare misses; they’re the points where “looking done” fails under daily use, forcing repeated, annoying adjustments.

    Where “Looking Done” Falls Short: The Hidden Gaps in Ceiling Lighting

    Symmetry from above doesn’t guarantee usable, shadow-free surfaces below. The reality: one seat stays in the dark regardless of where the fixtures land. The furthest spot on a dining table or worktop—prime territory for spreading out—remains weirdly underlit, while the rest falls into patches of uneven light. Even with careful downlight planning, the corners or edge-seats become the weak links, introducing friction every time you reach for papers or shift your chair.

    Most flaws stay masked during a quick tour, but the moment you use the space—leaning in to work, reading into the night—your attention snaps to these shadow traps. Cords meant to be hidden brush against shoes, mounting points that seemed subtle before now get snagged on a jacket or catch your eye every pass through the room. Visual “neatness” dissolves with every inconvenience.

    Micro-Adjustments: A Routine Interrupted

    That “resolved” look gets tested and undone with every routine. You’re always reaching—pulling a lamp closer so you can see, shifting your laptop to dodge the glare from a fixture placed just off-center. One cable detaches from its clips after a desk shuffle for a call; a discreet bracket turns into a knuckle-bumper or a visual sore point with every lap around the room. What started as a lean setup spirals into a series of micro-fixes—lamps repositioned, chairs inched away from bright spots, tabletop clutter by necessity instead of choice.

    Task Corners: Where Frustration Builds Fastest

    Desks and work surfaces—especially in multi-use rooms—reveal these design gaps right away. Take a compact office with a dual-purpose craft table: overheads flood the main section, but the perimeter—where most tasks creep—stays persistently dark. By evening, someone’s fetched a spare lamp, its wire looping unpredictably across busy paths, creating trip risks or crowded outlets. Each workaround stacks more stress, and reaching for a plug or shifting tools mid-task becomes part of the expected struggle.

    Every new device, rearrangement, or shift in the day’s use exposes fresh limits. The sense of a “clean plan” turns brittle—now it’s just a shell over constant patching and cord wrangling, with small physical irritations compounding into real drag on comfort and flow.

    Lighting the Edges: Subtle Fixes with Lasting Impact

    Flooding a room with more overhead light rarely solves these edge failures. The improvement comes from pushing light—not just out—but right to the places your routine breaks down. A slim LED bar along the desk edge flips the script: previously murky corners become plainly usable, with no more angling a lamp or blocking your own shadow. Instead of chasing visibility, the brightness lands where your hands, papers, or tools actually sit. You no longer need to reshuffle light sources after every meeting, craft session, or late-night read.

    Cable discipline shifts from “temporary tidy” to a quietly stable baseline: integrated routes and brackets mean wires retreat from your daily field of vision and physical path. No dangling reminders; no subtle daily re-cluttering. Tiny hardware choices here directly reduce distraction and pre-empt rework as the ways you use the room flex.

    Not Just Overhead: Bringing Light Down to Usable Level

    Most failed setups rely too heavily on centralized, ceiling-mounted lights. These setups produce a glare zone directly under each fixture and under-serve shelves, desk perimeters, or display edges. Move your laptop three inches, and you’re back in shadow. Place a notebook along the outer quarter of the table—a real-life behavior—and it falls into the half-lit gray. Even a well-placed fixture, if not paired with low-profile, targeted light (under-shelf strips, panel LEDs, plug-in runs), can leave users trading off between too-bright central spots and dim, frustrating gaps at the margins.

    It isn’t only about prettier light—it’s about breaking the rhythm of interruption: surprise glare when standing up, stumbling over a pop-up extension cord that wasn’t meant for daily visibility, or juggling too many support brackets just to keep things in reach but out of the way. Each missed cue is a minor drain on flow.

    Practical Setup Observations

    • Frequent Lamp Relocation: If a lamp gets pulled and pushed constantly, your ceiling coverage skips the zones you actually use—especially surface edges and work corners.
    • Cable Sightlines: When the first thing you notice is wire—not workspace—your support plan has failed quietness. Bracket and route decisions up front erase daily visual and physical obstacles.
    • Shadowed Corners: Rooms that seem evenly bright under direct daylight reveal surprise shadow pockets at night or under bad weather. Test each area against your real schedule, not a perfect daylight walkthrough.

    Reducing Routine Hassle: Small Adjustments, Big Difference

    Lighting setups that truly support daily life earn their keep with a handful of low-drama, high-payoff tweaks. A targeted under-cabinet LED eliminates the nightly search for a flashlight or stray desk lamp. Cables fixed along support lines—not swinging loose—mean less visual noise and fewer stumbles. A secondary plug-in light at the far edge of a surface lets you stop moving your chair just to get clear, shadow-free visibility. The fixes aren’t flashy; they’re friction-stoppers.

    The acid test: when lighting stops dominating your awareness, and your attention sticks to work, crafts, or conversation, you’ve landed closer to the right setup. It’s not about being impressed by your own lighting, but about using a space that just gets out of your way.

    What “Evenness” Really Delivers: Quiet Comfort Over Time

    Perfect grids on the ceiling mean little if your routine still catches on surprises. Lighting evenness isn’t symmetry—it’s whether every used surface matches your actual habits: clear, consistent, no rerouting, no visual static. The test comes weeks later: are the cables still discreet, are brackets only visible if you look for them, do shadows creep in when schedules or seasons change? The best setups quietly track what you do, adjusting once, then holding steady—so you spend zero time second-guessing the light or moving things out of the way.

    Tips to Keep Everyday Use Smooth

    • Supplement close to routine points. Mount a narrow LED along the edge you use most, not just around the room, for practical, lived-in coverage.
    • Choose bracket and cable solutions that reinforce your lines of movement. Route wires off worktop edges and out of footpaths; integrated support hardware is often quieter than decorative.
    • Audit for reality, not ideal images. Meet your space in the evening, test your real patterns, and watch for any surface that sends you hunting for more light or hiding from cables and glare.

    A room that stops forcing you to tweak, shuffle, or tolerate small annoyances is what holds up in real use. Setups that still demand intervention after move-in weren’t actually finished; setups that need nothing more than being used are the ones that last.

    Shop LightSupport for smarter indoor lighting and cable support solutions

  • Hidden Desk Clutter That Slows Your Workflow and How to Fix It

    The trouble starts when your desk looks controlled, but your feet, knees, and chair never get a clear path. A surface wiped clean of pens and cables doesn’t mean your workflow is smooth. Under the desk, cable piles slow the chair, power bricks drift, and that storage bin you introduced for “order” quietly eats into legroom—until every entry to your workstation turns into a nudge or a workaround. You roll forward and scrape your shin against something you meant to contain clutter. By day’s end, you’ve paused three times to untangle a wheel, clear a path for your bag, or reach behind a drawer that’s never quite out of the way. The surface looks ready, but every transition is slower, and the routine stalls start collecting—unseen, but constant.

    The mistake is easy to make: under-desk headaches blend into the everyday shuffle until each session starts with minor course corrections. In most real-world setups—especially tight home offices—it’s the spaces below that test the logic of the layout. That zone is where the system either supports your natural movement, or it quietly fights you. Early signs barely register: a cord that snags a shoe, a knee nudged off-center, a bin that feels “temporary” but sticks around for months. After a week, friction shifts from barely-there to a foundation of your routine:

    • Chair wheels trapping themselves around stray power cables, breaking concentration mid-reach.
    • Knees squeezed by a misaligned storage unit, making every stretch or posture shift a negotiation.
    • Cable clusters that pass a visual scan but drag along every time you switch devices or shift a bag.
    • Bins ending desktop pile-up—only to swallow the walkway needed for an easy reset between tasks.

    The Illusion of Surface Clarity: What Hides Beneath a Tidy Desk?

    The common trap: polish the top of the desk, then offload everything else underneath, trusting that out of sight equals out of mind. It works for about a day. Cable trays deliver instant visual relief—until you try charging a second device or trade adapters and wind up wrestling cords through a cramped tangle. The neater it looks, the slower it responds to real-life adjustments.

    Rolling drawer units promise control, too. Everything gets a slot, but now the drawer box inches into your path. By mid-morning, you’re rolling your chair away to grab a notebook and the bin wedges your foot, or sticks out just enough to angle your whole position off-center. The organized desktop quietly builds new interruptions underneath: you exchange clutter above for hidden obstacles below, trading visible mess for compressed movement and slower transitions.

    Where Daily Friction Begins: The Moments That Break The Flow

    A workstation passes or fails not when you first sit down, but in the details of every return, stretch, or device switch. Most friction isn’t dramatic—it’s constant:

    • Your bag knocks a power brick from its spot, unplugging something essential mid-call.
    • Extending your leg bumps a bin that’s migrated into your main path for the fourth or fifth time.
    • Plugging in a headset means ducking under the desk, prying apart a cable cluster, and re-emerging with your focus dinged.

    These are not outlier moments. Add a monitor arm, introduce a tablet, or file desk supplies into a rolling cart, and each “solution” can shift friction from one place to another. Hiding gear below is efficient—until every added object becomes a new minor obstacle. Over a standard week, these detours slow resets, crowd movement, and quietly steal more time than any surface clutter ever did.

    Clearing a Path: Small Shifts That Made The Space Work (Not Just Look Tidy)

    Order below the desk rarely comes from adding another box or bin—it comes from removing the quiet friction points. When one rolling bin was pulled entirely, the result wasn’t just visible space: for the first time, chair movement from desk to wall happened in a single glide, not a sideways “s” around low obstacles. Adjustments got faster. The route to stand, switch notebooks, or come back during a break required almost no correction.

    Power cables used to snake along the floor, waiting to catch ankles or block chair wheels. By mounting a power strip to the back edge of the desk with a clamp, all cord slack left shoe and wheel space, instantly killing off cable drag and reducing daily resets. One clear 12-inch corridor—bare, straight to the wall—meant every return felt lighter and nothing needed to be pushed or rewound. Even under a heavy workweek, the setup re-centered in seconds, not minutes.

    Functional Tweaks You Actually Notice

    • Mount power strips off the ground: Secure them to the desk’s rear edge or into an elevated tray; outlets are accessible, and all the plugs stay outside the chair’s wheel-path.
    • Anchor cables above leg level: Use clips or a cable sleeve under the desk—cables stay parallel to the back, not trailing under knees or shoes.
    • Designate one-sided storage only: Anchor any under-desk unit fully to a lesser-used edge, keeping the main entry and leg zone unobstructed. Any storage you roll in and out is likely to end up in the way.
    • Edit, don’t accumulate: Each extra bin or cable box multiplies interference. The less you have to alter your line of movement, the more fluid every reset and shift becomes.

    Everyday Questions: Getting Under-Desk Setup Right

    Where should cables and power strips go to minimize under-desk friction?

    Clamp power strips to the back edge of the desk instead of letting them rest loose on the floor. Route all primary cables directly along the underside, behind and above where knees travel—leg and chair movement should never have to dodge stray wires. For frequent swaps, cable clips let you pull or add cords without dislodging the entire setup or reaching into a mess.

    Rolling drawers vs. fixed storage—what’s actually less disruptive?

    Rolling drawers rarely behave as intended in limited spaces—after a week, they end up floating into high-traffic zones, blocking the natural approach for legs and chair. Fixed storage, anchored far to one side (the non-dominant leg), always keeps the main movement lane free. For repeated resets, immobile storage is clearer, while anything rolling quickly becomes friction you have to manage.

    What’s the most common under-desk mistake that kills flow?

    The pattern is always overcrowding: too many things vying for the same inches of movement path or plug access. If cables or boxes are anywhere in the main chair glide or leg extension zone, every transition gets harder. If sitting down or shifting out feels like a tactical puzzle instead of a single move, the under-desk plan needs a reset.

    Predictable Pathways, Not Just Cleared Floors

    Workstations that actually perform—especially over high-repeat sessions—rely on predictability below the desk, not just looks above. The only success test is whether you can slide in, shift leg position, and get up for a break without noticing the storage or the cables at all—every single time. After a day of interrupted resets, or a week of nudging bins to reach the screen, the “neat” desk shows its gaps.

    Often, fewer under-desk features mean better daily function. Instead of more organizers, start subtracting or sharply limiting anything that overlaps main movement or power routes. When cable paths, plug points, and storage units are set and clear, the gain isn’t surface order, but the vanishing of small distractions: you stop thinking about barriers altogether.

    If every workday starts with minor corrections, try removing one storage piece, lifting the cable cluster, and carving out a single clear chair lane. Most setups feel instantly lighter, and that fast, brainless re-entry is the whole point of an effective under-desk design.

    Explore the full WorkBasic collection

  • Ensuring Long-Term Lighting Reliability by Proper Wire Tucking Techniques

    Lighting can look flawless in the walkthrough—yet still fall short when it matters most. Step into a hallway at night and your eyes adjust to a bright fixture, only to find one corner stubbornly in shadow or a flicker as you cross. Lean closer to a bathroom mirror and notice the best-lit spot is always just out of reach, washing your face in uneven halos. At the kitchen counter, overhead lights seem crisp until a dull edge creeps into the work zone, right where you need clarity. These aren’t just quirks of design; they’re the real cost of wires forced flat behind slim canopies, cables pinched by shallow boxes, and flush-mount fixtures that squeeze out proper slack in favor of a tidy finish. The surface glows, but the structure strains—and over days and repeated routines, that hidden stress becomes impossible to ignore.

    Hidden Trouble: Where Wire Stress Begins

    Most lighting wire problems don’t flag themselves the day you finish the install. The cover looks sealed, the sconce lines up, and nothing seems out of place. But the first bump, bulb swap, or deep clean starts an invisible tally: every slight tug compresses cables that were crammed to fit the plate or bent hard to clear a junction. Slowly, you start living with consequences—shadows sneaking around stair turns, the dead corner of a vanity mirror, a hallway light that fights to stay steady each time someone brushes by.

    What’s beneath the finish matters most where movement and visibility overlap—tight corridors, mirror walls, task counters, and any spot where people reach or adjust. Squeezing a flush mount fixture into a shallow ceiling box, or over-bending hardwired cables against a flat canopy, builds friction you’ll feel week after week.

    Lighting That Looks Fine—But Fails in Use

    Real-life lighting isn’t just about first impressions. Here’s where tension exposes itself:

    • Stairway Stall: Pausing on the landing with a laundry basket, the ceiling light flickers or casts just enough shadow to make your next step uncertain.
    • Mirror Gap: Over the bathroom sink, a tidy fixture throws an annoying shadow split across your face, making precision tasks feel clumsy every single day.
    • Hall Drift: Narrow hallway sconces glow at one end—but the opposite corner fades, flickering whenever a shoulder scrapes past or the door slams.
    • Counter Fade: Under-cabinet strips go dull along the far edge because every cabinet door opening tugs a tight cable, turning even illumination into a patchy half-light across meal prep zones.

    The common thread? Every movement, nudge, or cleaning exposes flaws in hidden wiring that looked “correct” on day one. When the structure underneath is stressed for the sake of appearance, the result is lighting that jerks between useable and unreliable with every real-world touch.

    Soft Loops Over Sharp Bends: The Unseen Difference

    Unstressed cables are everything. If wires aren’t allowed to rest in a natural curve—if they’re pressed hard behind a minimal fixture or flattened for a cleaner silhouette—persistent trouble follows. It shows up instantly the first time you change a bulb or adjust a tilt, but multiplies over seasons of use: insulation wears down, connections loosen, and that crisp install slips into constant troubleshooting territory, especially in bathrooms or multi-use rooms prone to movement and moisture.

    Real-World Fixes: “Calm Tucks” Instead of Forced Hides

    Durable setups happen when you resist stuffing all slack into the tightest cover. A stairway sconce will last longer when its wire draws a relaxed arc along the wall’s curve—absorbing bumps and micro-movements. Even in a cramped laundry corner, leaving half an inch of extra loop behind the fixture can mean the difference between quiet, steady light and another outage at the worst time.

    Practical cue: When a shallow or flush fixture feels essential, never flatten every cable tight for appearance. That slim loop—barely visible—protects the function far longer than a perfectly concealed tangle. It means less downtime, fewer surges, and no scramble to reseat a fixture after every routine jar or tap.

    Recognizing the Signs: When Wiring Trouble Surfaces

    Hidden stress only becomes obvious when it becomes disruptive. Watch for these repeat indicators:

    • Lights flicker after dusting, bulb change, or even slight movement
    • Shadows slice across key areas—mirror, wall, step—despite a high lumen reading
    • Edges of task areas (like counters or sinks) stay persistently dim, while the rest glows
    • Outages triggered by vibration, touch, or shifts in humidity—rarely a bulb’s fault

    If you’re looping back to the breaker or swapping bulbs only to have the problem return, odds are good the source is a cable under stress, not a failing lamp. Trace the issue to the wire path—not just what’s visible on the surface—and fix the structure that feeds the light.

    Repair Without Full Rework: What Actually Helps?

    You don’t always need a total teardown to regain reliable light. In the field, carefully lowering a ceiling plate or sconce, letting the cable fall into a gentle loop, and reseating the cover with minimal adjustment is often enough—as long as no insulation is breached. The fix is about movement, not force: prioritize a pathway for the wire that won’t strain with every reach or vibration, and let the cover follow the cable’s lead, not the other way around.

    Lighting Where People Move: The Difference Shows Up Over Time

    Long-lasting clarity isn’t an abstract goal—it lives in moments such as:

    • Landing safe on the right stair tread with no hesitation after dark
    • Turning on a sink task light and not squinting through glare or patchy dark bands
    • Checking a laundry tag without making the room flicker by shifting a load
    • Opening a cabinet or crossing a hallway and not watching the shadow jump from bright to dim each time

    Reliability starts behind the scenes. The right wire path lets flush mounts, wall sconces, and bathroom lights support actual human movement—not just look correct when untouched. Ignore the structure and every routine exposes the compromise; respect the cable path, and lighting adapts to life, not the other way around.

    Quick FAQ: Avoiding Invisible Lighting Flaws

    How much slack should wires have behind indoor fixtures?

    Let each cable bend gently behind the entry, without pressing it flat or forcing all slack behind the minimal cover. Especially with rigid or shielded wire, a natural arc makes the difference between a stable setup and a repeat call for flicker fixes.

    Why does lighting flicker or fade months after install?

    Strain from tightly packed wires, persistent compression from shallow mounting, or vibration across high-traffic zones gradually loosens or deforms connections. Flicker and shadow lines often trace back to this hidden pressure—not the bulb or the breaker.

    Is full rewiring required to fix minor outages or flicker?

    Usually not. If the insulation is sound, easing the fixture down and letting the wire find a soft loop often restores steady light. Avoid tugging or brute force—address the cable path first, not just the bulb or faceplate.

    The Lasting Impact: Lighting That Works With You, Not Against You

    A room can look finished while still tripping you with bad shadow lines, unreliable task visibility, or off-balance movement. The difference isn’t in the fixture’s outer shape, but in how its wiring was set up to last through actual routines. Don’t settle for a setup that only survives inspection—the results show up in every hallway pass, mirror glance, stair step, or prep surface you actually use. Letting the wire breathe quietly behind the scenes makes lighting easier to live with, week after week, routine after routine, instead of another silent frustration waiting for the next flicker.

    Find practical ceiling, wall, and utility lighting that’s built for real use and real routines at LightHelper.

  • How Even Ceiling Lighting Transforms Shared Work and Living Spaces

    Every weekday evening, the same problem appears: Your kitchen counter looks clean and “done,” but daylight is gone, and now one patch burns with overhead glare while the next slips into a dull shadow. Slicing vegetables or wiping up crumbs, you keep dragging everything back to the only spot where the light actually helps—and each time you catch yourself, it’s obvious the ceiling lights aren’t matching how you use the space. Instead of evenly-lit surfaces, you get harsh bright zones broken by gray bands. The kitchen worked on paper; in practice, daily tasks keep colliding with lighting that divides the counter into neglected stretches and overexposed pools. The setup isn’t broken, but it keeps forcing small, silent workarounds.

    The Real Annoyance of Ceiling Light “Pooling”

    This friction doesn’t show up the first night the new fixture is installed. At first, a fresh ceiling light or grid looks tidy, even impressive. But after a week of late-night emails at the kitchen table and morning meal prep, the reality sets in. Patterns form: You keep shifting the mail into a bright rectangle. You avoid one corner where reading labels means squinting. The overhead fixture makes some surfaces look “fixed,” but in motion, those zones of light chop the space into areas that interrupt your routines.

    This uneven coverage—where brightness clumps in one spot and tapers off too soon—is classic light pooling. Overhead fixtures that look clean at rest create visual seams and blunt shadow lines along your counters, desks, or hallways. Try reaching for the edge of a workspace or checking what rolled under a shelf: You find yourself compensating, angling, and moving, because the fixture’s light stops just short of where you actually work. It’s a slow, creeping performance problem, not a dramatic failure.

    Why Even “Minimal” Setups Still Create Friction

    Flush-mounts, recessed cans, and slim ceiling panels all sell “minimalism,” but when these fix light in one direction, the problem just shifts shape. Tight beam cones make for neat blueprints but leave real surfaces split into bright spots and shadow-rims. Even a grid layout, meant to banish clutter, can map invisible boundaries across a room—especially once you start working or cleaning in real locations, not just standing where the catalog photo aimed the light.

    Each time you slide paper to a different side of the table or reach under a floating shelf, the line between enough light and not-quite reaches your hand. The surface tempts you to use it, then splits your work between a hot pool and a dim edge. There is rarely a total failure, but the friction is steady: surfaces half-lit, one side of a walkway always murky unless you relocate your routine to suit the fixture’s grid.

    Repeated Discomfort Adds Up

    Annoyances compound, not because light is missing, but because it’s in the wrong place at the wrong time:

    • Cutting with one hand while shielding your vision from overhead glare
    • Feeling along a shelf, never quite finding clean edge visibility
    • Catching a cable run or bracket in your line of sight every evening
    • Assigning a corner of the worktable as the only area “worth” using

    This isn’t a layout quirk—it’s a repeated failure to support how a room actually gets used, especially in zones that blend work and daily life.

    How the Right Fixture Turns “Resolved” Into Actually Usable

    The improvement is instant in demanding spaces. Consider a kitchen doubling as a home office: Adjustable ceiling spots once “solved” the need for flexibility, in theory, but left a blacked-out counter edge every evening. After switching to a flat, broad LED panel flush against the ceiling—with cabling hidden in an unobtrusive bracket—the forced dance between bright and dim ended. Light finally reaches both the main prep area and the far corner, so you’re not forced to haul your work or cleaning supplies back and forth, tracking the light across the room.

    No need for heavier bulbs or extra lamps—the win comes from smoothing the distribution. By replacing those two old overhead darts with an evenly-diffused, low-profile panel, the room stops dictating where you stand. That stubborn band of shadow (the one you learned to avoid with a soft shrug every week) simply stops existing. Where you once thought about stick-on task lights or running another extension cord for a lamp, suddenly you’re done. Edges are visible; counters stop hiding smudges. The light no longer divides the room into “usable” and “annoying.”

    Support Hardware Should Fade, Not Distract

    With many setups, the hardware itself becomes the friction point. Exposed brackets, cables, or makeshift management schemes push themselves into your view every time you look up. Good lighting support—clean brackets, hidden channels, or snap-in hardware—disappears from attention. The test isn’t whether you admire the bracket, but whether you stop seeing cable paths entirely as the surface keeps working for you. When support stays visually silent but removes setup drag, the change is genuine.

    When to Upgrade: The Telltale Signs of Pooling and Patchiness

    Even with an uncluttered ceiling or sleek fixture list, you see it if you look for it:

    • Persistent reading trouble at the desk edge—no matter where you sit
    • Hallway sides and shelf backs lingering in shadow, forcing awkward stretches or missed dust lines
    • Spots of glare or “hot zones” so strong you flinch or consciously avoid them
    • Cables or DIY supports drifting back into sightlines, undoing even your best tidy-up effort

    The workarounds become habits: stacking tools in one favored light spot, leaving an area unused except as storage, nudging the lamp for each task. The fix isn’t “more light”—it’s even, background light that actually supports activity. When minor frictions—dim halves, glare blooms, stray hardware—vanish, you realize how much smoother the room can feel.

    Uneven vs. Even: Real Use, Not Just Visual Calm

    Linear LED panels and broad diffused fixtures change behavior, not just atmosphere. One thoughtfully-placed, low-profile panel sends light smoothly across an entire surface, eliminating the old patchwork of brightness. Multiple compact fixtures only work if their beams blend with no seams; too often, they carve up your working areas into bright cores and dead borders. The real test is how you move: If you’re no longer driven to follow the brightest patch or clean only what you can see in a beam, you’ve found the setup that works with—not against—your routines.

    The goal isn’t a ceiling that looks spare on a video call. It’s a countertop that’s readable end to end, hardware that quietly recedes, and a surface you can use without thinking about “where the good light is” every single day. Once the friction fades, the room frees up for any task at any angle, at any hour.

    Small Adjustments, Big Practical Gains

    It often takes less overhaul than expected to clear out these annoyances:

    • Swapping narrow-throw fixtures for a flat LED panel wipes away those jagged edge shadows instantly
    • Replacing a tangle of visible clips with an integrated, hidden bracket eliminates sightline bugs and setup fidgeting
    • Thinking in terms of even coverage, not just fixture count, ends the habit of nudging lamps or dragging work to follow the light

    The key isn’t bumping up total brightness. It’s about ensuring that every square inch you actually touch—prep zones, tables, shelf edges—stays visible and ready, with zero cable distraction or visual clutter added in the name of order.

    Daily Routine Should Dictate, Not the Fixture Grid

    The real verdict comes after a month of real-life mess and movement. Are you still skirting one dim section? Still untangling cable runs that aren’t as hidden as you hoped? Or do you simply stop thinking about where the lighting ends and the work begins? A setup that looks seamless but divides your surfaces into shadowed puddles is just another round of rearranging around a ceiling plan. The right lighting-support approach—clear surfaces, low friction, no more shifting for better light—translates not into “newness,” but into a room that actually works as hard as you do, no matter how repeatedly you return to the same spot.

    LightSupport – making lighting and support perform for everyday spaces

  • How Proper Cable Slack Management Enhances Workstation Efficiency

    Cable drag ruins a clean desk faster than clutter ever does. You feel it the moment a chair wheel snags a charging cord or a monitor resists your hand—an invisible flaw hiding beneath a surface that looks organized. Most setups fool you at first: cables routed out of sight, a newly tidy stretch of desk, everything visually under control. But the real test isn’t on day one—it’s when daily work turns cable management into a bottleneck, slowing every adjustment, every device swap, every reach for space behind the keyboard. If your setup only looks clear but forces you to untangle, reset, or work around hidden drag lines, the promise of “organization” collapses into repeated frustration.

    Where “Tidy” Fails: Cables and the Hidden Interruptions

    Most desk makeovers begin by vanishing cables—power bricks vanish into trays, ethernet cords zip-tied along the frame, chargers crammed in boxes beneath. Everything appears open; finally, no wires spill across the surface. Then, reality undermines the fix: the monitor arm moves, a cable jerks everything off center, or you roll the chair and hit a stubborn, tensioned wire. Needing to unplug or slide a device means fighting tight cable runs, not just moving your hands. What looked smooth now feels rigid.

    Visually clear does not equal comfortably usable. A spotless desktop often turns clumsy when slack is overcontrolled. You can’t adjust a screen or share space for notes without cables pulling back. Rigid loops keep USB hubs from reaching, power lines clamp monitors in place, and legs tangle with cords that looked out of sight. These aren’t flukes—they’re constant interruptions on a desk that values appearance over actual workflow.

    Routine Work Reveals the Real Cable Test

    Friction sneaks in during the routine—the video call ends, you slide the chair, and a too-short cable drags on your ankle. Switch from notebook to keyboard and the charger yanks everything taut. Plug in a new device, only to trace resistance all the way through a box or tray that let style win over movement. Seconds lost on each reset don’t feel like much, but multiplied by every day, minor snags erupt into chronic wasted motion.

    When you’re working at a compact desk—where keyboard, notebook, notes, and power all share one tight strip—mistimed cable slack is exposed by every quick reach, every attempt to shift position, every reset between tasks. Smoothed-over cabling can’t hide a workflow that keeps grinding to a halt as you try to pull, slide, or stow devices. In these spaces, a “clean” look becomes a trap if it kills flexibility.

    What Actually Changed: Small Slack Adjustments, Big Differences

    The breakthrough came not from fewer cables, but from freeing their movement: ditching hard cable ties for an adjustable loop behind the monitor, roughly two fingers wide. That tiny extra slack let the monitor glide for note-taking, device swaps, or a late-day screen shift, without jerking everything else off-axis. No more straining under the desk to fix connections, and devices could be pulled, pushed, or rotated in place—without setting off a new round of untangling or crawling for lost plugs. The visible effect didn’t suffer; the work path finally matched what the clear desk promised.

    Now instead of stashing every wire out of sight, there’s just enough movement for frequent adjustments. Device changes became a quick slide and plug, not a full teardown. Cables float with the motion, not against it. Once the right amount of slack was dialed in, the “organization” stopped being an obstacle and started making repeated routines less of a reset.

    This is about reliable movement, not staged neatness. Controlled slack creates a workspace you can use without hesitation—preserving the routes you actually use, and keeping small interruptions from becoming daily friction.

    Spotting Slack Problems Before They Multiply

    Slack issues are easy to miss if you value looks over movement—until the same pain points keep breaking focus. Watch for these desk-life signals:

    • Chair wheels tug cables — If rolling back always meets resistance, your slack is either routed through the wrong zone or simply too short for everyday moves.
    • Monitor won’t stay centered — Any time a screen jumps or pulls as you adjust, the cable isn’t flexing close to where movement happens.
    • Feet scuff or trip wires — Repeated contact means cables are routed where your legs need to move, damaging both the wires and your work rhythm.
    • Swapping devices feels like a reset — If every change requires unplugging, unlooping, or untangling, rigidity has won and workflow takes the hit.

    If you’re seeing these patterns, your setup isn’t failing on looks—it’s bleeding time on every routine action.

    Cable Control That Survives Real-World Desk Life

    Invisible cabling can become unusable cabling. Real workstations demand flexibility—screens shift, chairs roll, and feet need space to move. A practical desk doesn’t suffocate every wire; it leaves key slack visible and close to points of adjustment, while heavy main runs are lifted out of leg range with trays, or routed along the rear with a cable box. One adjustable loop behind the monitor or docking station can often hold the line between daily flow and clumsy resets.

    Hybrid approaches outperform pure concealment: anchor major cables above knee height with trays, route main power at the back, but leave one floating, adjustable segment where movement matters—behind each device that earns daily use, not buried out of reach where slow tension builds up. This keeps clutter out of the work zone while removing the headache from repeated, real use.

    FAQ: Tackling Cable Slack in the Everyday Workstation

    How much slack does a monitor or moving device actually need?

    A loop about two fingers wide behind the device is enough. This lets monitor arms glide and screens pivot for daily adjustments, while stopping cables from pooling underfoot or near wheels.

    How can I spot when slack management is failing?

    If a cable snaps, tugs, or scrapes, or your feet and hands start working around hidden resistances, your organization has crossed into obstruction. Cables should follow you—not the other way around.

    Should I just hide every wire?

    No. Total concealment is a trap if it freezes the setup. Leave visible loops where friction always returns: monitor centers, plug points, docking stations—the spots you touch and move every day.

    Lasting Usability Is Built on Forgiving Structure

    A desk that actually adapts doesn’t pretend that perfect order fixes workflow. The hidden win comes from setups where screens move naturally, chairs roll clear, and cables flex—not snap—as routines change. It’s the slack you never see in pictures, but always feel in the flow of real work. When your setup responds to you, not just your sense of order, you spend less time wrestling with wires and more time working how you intended.

    Explore the full WorkBasic collection

  • Why Careful Wiring Makes Indoor Lighting Reliable and Safe Over Time

    Most indoor lighting problems don’t start with dramatic failure. The fixture powers on, the room looks “done”—but you only notice the real problem after weeks of daily use. That soft flicker at the stair turn, the moment your bathroom vanity light creeps from crisp to uneven just as you lean toward the mirror, or the faint buzz in the laundry room when your hands are wet and visibility matters most. The issue is almost never sudden blackout; it’s the subtle, repeated interruptions—tiny hesitations at corridor thresholds, unexpected shadows over the only uncluttered patch of counter, light drifting from reliable to irritating. Poor connections behind the plate turn “okay for now” into a routine inconvenience that’s easy to excuse until it costs real comfort or clarity. In the world of flush mounts, sconces, vanity lights, and under-cabinet runs, the difference between “lit” and “usable” emerges only as you live with the light day after day.

    Where Weak Connections Surface: The Spaces That Reveal Trouble

    No one expects a new ceiling or wall fixture to become unreliable after just weeks—but certain spaces turn small flaws into daily friction. Hallway lights often flicker as you cross a worn patch or nudge a door closed; the bathroom sconce dips or hums, just when you’re checking your face in the mirror; under-cabinet spots lose even spread as you stack groceries or slide dishes, leaving the work surface half-shadowed. The frustration isn’t a full outage. Instead, it’s a ritual of double-tapping the switch, pausing to adjust, or shifting your stance to catch clear light. Every movement near these fixtures tests their stability—one closet slam or laundry pile can jar a “good enough” connection, pushing it closer to failure. When wiring shortcuts hide out of sight, even the best fixture can undermine your daily routine without warning.

    How “Just Installed” Turns Into a Daily Problem

    Lighting that looks flawless on install often reveals its weakness at the worst times—not in showroom calm, but during daily repetition. That’s when the second, tenth, or hundredth switch cycle, a week of humidity in the bathroom, or the steady thumping upstairs finally exposes how well (or badly) the fixture is wired. Flush mounts in hallways might rock subtly when doors close, and corridor edges can fall into shadow with uneven connection. A semi-flush or wall sconce, fine out of the box, begins to buzz or dim as vibrations or damp air creep into the wiring. Nowhere is this clearer than at the vanity: a rushed job creates exactly the kind of shadow line or color drop that makes you second-guess the mirror. Lighting that looks “bright enough” on day one can become tiringly unreliable when every movement, appliance, or passing footstep exposes inconsistency.

    Seeing the Bottleneck: It’s Not Always in the Bulb

    If you change a bulb and the flicker or dimness returns within days, the problem is almost always deeper. Poor wire connections behind the fixture turn every use into a gamble: laundry room lights blink as you slam the washer shut; under-cabinet strips create jumping shadows when drawers slam. Counter edges vanish at the wrong time. When a fixture regains brightness after a nudge or goes silent after you tighten the switch plate, it’s the wiring—out of sight, but not out of impact. Each repeated action—a pulled drawer, cabinet door swinging, stair footfall—tests whether the connection is solid or primed for another minor failure.

    Warning Signs in Everyday Spaces

    • Hallway and corridor: Flickers or dull spots as you cross, breaking your pace, even as the fixture glows overhead
    • Bathroom mirror zone: Dimming, buzzing, or shifting shadow bands as you reach for the hair dryer or swipe at condensation
    • Under-cabinet task areas: Light dims or jumps as you move items, and the work surface loses even coverage right where you need it
    • Stairways: As you turn the landing, light lags or steps fade into unevenness, making each transition less automatic (and less safe)

    The Simple Fix: Intentional Wiring, Real Results

    The gap between a light that just looks right and one that stays reliable year-round is almost always care during installation, not expensive maintenance. Deliberate, tight wire connections—slow, confident twists and fully seated connectors—prevent nearly all the habitual flicker, fade, and hum that creep up after the fixture’s in place. A single local laundry upgrade proved it: once the strip light’s wires were resettled with screw-tightened firmness, months of machine vibration and wet hands couldn’t shake its steady glow. The “fix” isn’t complex; it’s a matter of blocking the gradual decline before it picks away at your routine. No more squinting over stains, no more second-guessing if the counter’s actually clean, no more need to tap the fixture back to life.

    Why Reliability Matters in High-Use and Humid Zones

    Certain home zones—stairs, tight corridors, bath vanities, laundry nooks—demand lighting that just works, every time, without pause. In these areas, each missed step, hesitated movement, or shadowy patch adds up: a flicker on the stair isn’t just annoying, it slows you down or nudges you into leaving a light on all day out of caution; a foggy, shadowed mirror means you might miss details or repeat tasks. These aren’t theoretical problems. A small break in visual confidence can disrupt your whole routine, making once-simple spaces a source of unease or delay. True lighting success isn’t a burst of brightness—it’s steady, invisible support that stays out of your way no matter how often you cross the threshold.

    Diagnosing Unstable Wiring Before It Disrupts Your Routine

    The real giveaway is repeat disturbance: flickering after a new bulb, light that comes back with a nudge, brightness ebbing after every round of switching, or sudden buzzing when the room is crowded. These aren’t “just” quirks—they’re clues that the problem is wired in, not a function of bulb or fixture style. Try crossing the hallway at dusk and see if your eyes ever need to catch up; check a bathroom mirror on a rushed morning for even, unwavering light; experiment with under-cabinet strips, noticing any fade or jitter as you stack, clean, or cook. Reliable connections make light vanish into your day. Unstable wiring keeps reintroducing itself, just enough that you adjust your routine without even seeing why—until you finally pause to fix what’s hidden behind the plate.

    Lighting You Can Trust: The Payoff in Everyday Calm

    A fixture you don’t notice is not just free from outages—it’s free from interruptions and doubts. Each unbroken trip down the hallway, every mirror check without a frown, every unobstructed kitchen task is a direct result of solid, intentional wiring and fixtures matched to space demands. Indoor lighting isn’t decoration—it’s the silent backbone that keeps rooms not just looking good, but working right. The best setups aren’t always the brightest or boldest; they’re the ones that let you move without friction, see without squinting, and trust the space to keep up with your routine, no matter how often you pass through.

    Find lighting designed for real indoor movement and clarity at LightHelper.