Author: jaesoon_admin

  • How Recognizing Your Dog’s Doorway Pause Improves Leash Walks

    The difference between a smooth dog walk and a routine that grinds every morning often comes down to those 15 seconds at the door. You reach for the leash—only to find it half-hidden behind the coat rack. Your other hand tries to fish out the wipes because someone (maybe you) piled a muddy towel on top of the entry bench. The dog hovers at the frame while you shuffle shoes and keys and coax her out, but the leash snags, your knee bumps the bin, and already the walk feels like something you’re working against instead of for. These doorway pauses and gear bottlenecks aren’t random. They’re small signals that add up fast—and show exactly where a daily setup isn’t quite working. It’s the difference between a home that just stores dog supplies and a DogPile-ready zone where walk routines run smoother, not slower.

    When the Doorway Pause Isn’t Just a Pause

    Call it stubbornness or confusion, but most delays at the door start when dog supplies drift into paths meant for people—or when routines keep tripping over the same misplaced towel, leash pile, or rogue toy. The pause at the threshold stops being brief. You’re mentally ticking off missing items, trying to clear a strip of floor space, while your dog reads your tension and hangs back. That little hesitation isn’t neutral; it’s the first crack in the routine. Clumsy setups—gear edging into walking space, wipes buried under treat bags—turn doorway pauses from forgettable moments into slow buildups of irritation.

    Each trip through the threshold with a tangle or a missing item reinforces the friction, not just for you but for the dog. You nudge; she resists. The walk starts with correction and tension. Over time, neither of you launches cleanly: leash tension replaces momentum, and anticipation gives way to correction. Walk energy drags before you’re out of sight of home. If every morning stumbles over the same five-second snag, eventually the walk itself feels like a series of corrections—right from the first step.

    How Small Friction Grows into Habitual Snags

    Rarely does dog routine friction blow up in a single flash; it builds from small, repeatable annoyances. Your dog hesitates because yesterday, her leash yanked sharply—because the harness was at the bottom of the pile, or you had to sidestep water bowls that always crowd the threshold after breakfast. Wiping muddy paws gets delayed because the wipes slid behind the shoes. The “cleanup zone” is technically there, but it never seems to be close enough when the actual mess happens. Eventually, daily prep devolves into a series of micro-recoveries—fetching, rearranging, and subtly hurrying through steps that should be simple.

    Every repeated urge to keep moving—every “let’s go” said with growing impatience—adds a thread of tension that compounds with each walk. Watch for how quickly your leash snags now versus a week ago, or how often your dog turns back or pulls away before you’re halfway down the block. A walk interrupted at the threshold rarely gets its flow back. The speed bumps aren’t just at the door; they echo until you’re home again—and next time around, the cycle repeats, usually in the exact same spot.

    The Walk Starts at the Threshold—Literally

    Picture the weekday rush: keys wedged between your fingers, leash jammed under yesterday’s raincoat, and a vague sense you’re forgetting something. Your dog stands at the frame, bracing her paws, glancing back to see if you’re ready, even as your hands are busy untangling the gear mess that seems to remake itself daily. If every walk starts with this scramble, the result is obvious: a launch that feels late before it begins, a dog more alert to your frustration than to the world outside, a leash under tension before the first step.

    This isn’t about a single step—it’s about your readiness and your dog’s. Rushed starts show up as more frequent leash corrections, zig-zagging at the curb, and failed attempts to find a rhythm. Owners notice it most when routines snarl: towels out of reach post-mud, harnesses MIA under a toy heap, bags buried behind other chores. Entryways that pass the “look neat” test in photos can still fail in live use, hiding obstacles that cost time and focus. Dogs feel these missed beats faster than you might notice—they know the difference between a settled launch and a scramble.

    Turning the Pause Into a Useful Reset

    After enough fumbled starts, some owners finally try a different approach: What if that threshold pause isn’t just tolerated, but used? Instead of dragging your dog or shuffling impatiently, both of you wait—feet and paws square, leash loose. You watch for the real sign of readiness: your dog’s body angles forward, attention shifts outside, and the hesitation melts. Sometimes you catch a tail wag, a sigh, or a subtle shift that tells you she’s unplugged from the hallway tangle and plugged into the moment outside. It’s not a trick; it’s a reset—brief, simple, and more powerful than most commands.

    Add this reset to your walk prep and you’ll see the pattern change: the leash stays calm over those first ten steps, corrections fade, and the back-and-forth tension drops. Over repeat use, the threshold becomes less a battleground and more a shared launchpad. Dogs learn; so do people. The pause transforms into a clear signal, not a moment to rush or ignore.

    Spotting True Readiness: What To Look For

    Posture tells the story. A relaxed, upright dog—tail soft, shoulders loose, steady glance forward—signals true readiness at the threshold. If your dog averts her eyes, stiffens her stance, or fidgets every few seconds, she’s not with you yet. Owners who learn to wait (by seconds, not minutes) start to see the contrast: less rushing, more focus, fewer leash fights on the sidewalk. There’s no need for elaborate cues or endless patience. The takeaway is simple: allow a pause for both parties to sync up before heading out.

    Practical Obstacles: When Setup Still Gets in the Way

    Even if you master the pause, real-life setups keep testing you. Some days, you reach for the leash but grab a tangle of jackets instead. On return, the wipes you always mean to have close are lost behind a pile you rearranged just yesterday. The dog comes in muddy, tail wagging, while you’re patting down bins or digging in drawers—attention lost, mess spreading. Even “organized” spots sabotage you if the right gear isn’t right where you need it, at exactly the right moment. Cleanup supplies look accessible until it matters; bowls look tidy until your hands are full and a shoe rack breaks your stride; re-entry stalls because the towel is always just out of comfortable reach.

    This is where most setups fail their real test—not that they look messy, but that they demand micro-adjustments mid-routine. The reset gets rushed, the flow stalls, and dog energy rebounds unfocused. However much the area looks “ready,” friction returns whenever actual need meets delayed access or tangled gear.

    Making the Most of the Pause: Real-World Tweaks

    To fix the routine, don’t just declutter—rethink reach and placement:

    • Keep essentials truly at hand, not tucked away. Place leashes, towels, and pickup bags where your fingers touch them—no bins to dig behind, no awkward sideways shuffle. The most usable spot is just before the physical threshold, where you pause anyway.
    • Add a joint reset cue. A mat, corner rug, or even a strip of tape can mark exactly where both you and your dog pause together—making the habit easier to repeat by design, not just luck.
    • Check your body language for slippage. If you start to lean, fidget, or multitask at the door, your dog will mirror the distraction. Stand square, breathe, and watch how your dog settles faster with a calmer lead-in.
    • Stage for the return, not just the exit. After muddy walks or scattershot outings, place towels and wipes in arm’s reach of the door—visible and ready, not buried under laundry or forgotten in another room. The right setup cuts time lost to scrambling and keeps your dog with you for the whole return routine.

    The Long-Game: Less Tension, More Usable Trust

    Repeating the threshold reset doesn’t solve every snag overnight. Some days you’ll backslide—reshuffling gear, losing wipes, fumbling through clutter you thought you’d fixed. Yet, over the weeks, the entry zone gets easier to use, the pause becomes a cue instead of a delay, and you’ll notice your dog checking in with you instead of resisting. The walk flows out the door, not against it. The post-walk reset gets easier, not harder, and the cycle of tension starts to break.

    Routine friction hides in the little things—a leash in the wrong bin, a towel just out of reach, gear that spreads back into your space when you’re not looking. A setup that looks tidy but still makes daily flow harder signals exactly where DogPile thinking starts:
  • Why Proper Brackets and Cable Management Keep Lighting Perfect Longer

    Even the sleekest indoor lighting setup can start to unravel within days of use. That flush-mounted LED? It creeps askew after the second desk shuffle. Cables that vanished at install reappear, catching the eye—or a sleeve—every time someone plugs in a device. One week in, you’re not admiring a crisp workspace; you’re nudging lights back into line, pushing cords aside, and wondering why all that supposed “minimalism” now feels like a recurring maintenance job instead of a solved problem.

    The False Security of a Finished Look

    Minimal cable clips and slim brackets promise calm surfaces but rarely outlast a real week in a shared or flexed room. If support fails, convenience collapses—no matter how neat it looked initially.

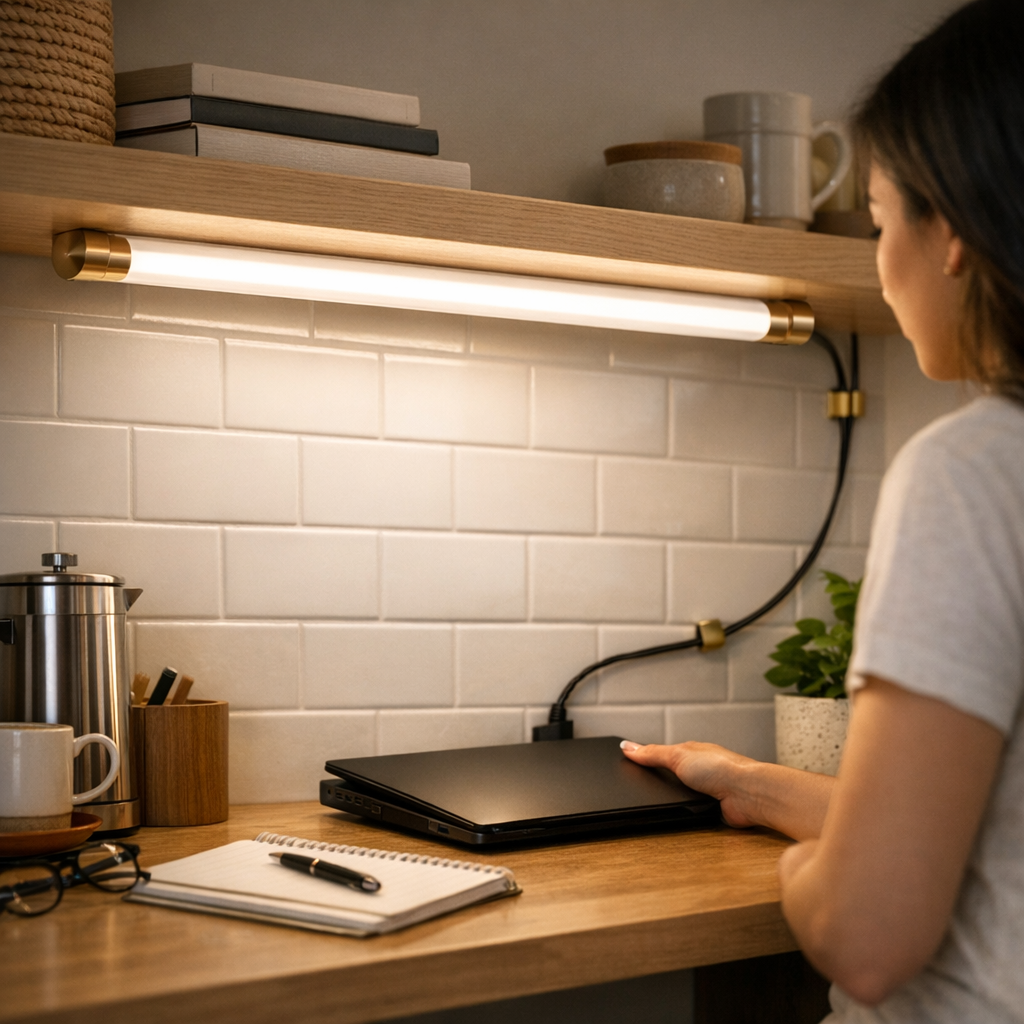
    Picture a desk: On day one, the linear LED disappears under the shelf, cable hidden. By Friday, the bar leans just off-parallel, leaving one edge in shadow. Cable clamps loosen as laptops come and go, until an exposed wire cuts across that “clean” line. Suddenly it’s not just the look that suffers; it’s the way you use the space—constantly realigning, tucking, re-routeing. The sense of “done” dissolves as you fight the same annoyances, one interruption at a time.

    • A fixture that sags a few millimeters throws glare onto the work surface or leaves half the desk in murky light
    • A cord, at first tamed by a discreet clamp, slips forward and becomes the obstacle you move around every morning
    • Daily use turns a “solved” setup into a slow cycle of repeated, forgettable corrections

    This is more than cosmetic. In high-traffic kitchens, compact shared desks, and shallow shelves, every flex or bump makes minor weaknesses obvious and unignorable.

    Where Most Lighting Setups Start to Unravel

    The illusion ends after you clean, plug in, or adjust—usually by the third interaction. Weak points consistently emerge, including:

    • Brackets that flex, so an edge droops and uneven light spills onto backsplashes or out toward the user—making small tasks harder and reintroducing glare
    • Cable management designed to hide, but not to hold, slips near high-tension spots—think of where power strips meet desk legs, or where a cable rounds a corner that sees constant movement
    • Single-point supports, which rotate or slide with a brief nudge, especially on floating shelves or flexible wall panels

    These failures rarely announce themselves. Instead, they erode visibility, inject glare, or leave once-lit corners in a new dimness. An under-shelf LED brightens a counter until a bump leaves a dull shadow. In every shared workspace, the hidden cord migrates—first off-stage, then snaking visibly, then snagging as soon as a chair is rolled back.

    How Subtle Drift Becomes Everyday Friction

    Lighting drift and visible cable creep aren’t dramatic. They build subtly, with the next realigned light, jostled wire, or minor tilt. The test: Do you fix the same little thing every few days?

    • A student’s under-shelf lamp, mounted with a center bracket, demanded near-daily nudging. Switching to a dual-lock bracket and clamp kept it set—the “finished” feeling finally lasted through a month of use.
    • Two side-by-side kitchen LED bars: one secured on both ends stayed even, giving full counter light; the other, clipped at one point only, slouched until a prep area faded half into shadow and made chopping awkward.

    Fixes That Actually Last Beyond Day One

    The difference between constant fixes and true clarity isn’t surface-level minimalism but real support matched to repeated movement.

    • Double-bracket supports, especially with locking tabs, stop dips across longer LED bars or heavy shelves; single brackets rarely survive repeated shelf flexes or hands brushing past.
    • Cable clamps belong where force happens most, not just where wires are visible—usually at transition points, plug-ins, or the edge within arm’s reach, not halfway along a hidden run.
    • Early, intentional retightening during the first week makes a visible difference—pressing a clip or adjusting a bracket after the room settles can prolong the setup’s clean look and real use.

    It’s not about over-accessorizing. The right choices, placed by habit patterns, make the clutter disappear—and stay gone—despite hands, chairs, and plugged-in chaos.

    Small Setup Tweaks: From Daily Fix to Seamless Use

    Still fighting alignment drift? Move your anchor point closer to where hands interact with the surface—often just a few centimeters is enough to keep things steady under real-world traffic.

    Cables inching back toward visibility? A clamp or adhesive guide placed right at the main trouble spot (entry edge, wall drop, plug socket) can lock the cable’s path. When supports anticipate the room’s daily behavior, maintenance falls away—you notice the light, not the setup.

    Questions That Come Up Again and Again

    Why does my light fixture keep drifting out of place?

    The most common reason: brackets are undersized or fixed only at one end. Every shelf flex or accidental bump nudges the bar, and edge droop accumulates. Secure two-point brackets and periodically check for slip in real use—not just after install.

    How do I stop cables from becoming visible, even with cable management?

    Clamps often fail because they’re not placed where movement happens. Install them at transition spots—corners, plug zones, or emerging from behind desks—to prevent creeping wires from reappearing with every user adjustment.

    What’s the most frequent mistake people make in lighting setup?

    Choosing accessories based on visual neatness instead of how the space is actually used. “Invisible” brackets or once-tucked cables turn into visible distractions if real-world motion, tension, or flex isn’t addressed at the setup stage.

    Recognizing What Really Lasts in Lighting Setup

    The value of a lighting support setup shows up weeks later. If you’re still straightening, untangling, or nudging month after month, the solution failed silent stress-testing. Areas that truly feel “finished” let you walk in, use the space, and never think about the hardware—because every contact point, wire path, and bracket was judged for how you really move, plug, or clean, not just how it looked in photos.

    For practical, lasting solutions in indoor lighting support and cable management, visit LightSupport.

  • How Vacuum Dust Seal Wear Impacts Cleaning Efficiency and Finish Quality

    Dust doesn’t launch an all-out assault on your shop—it simply leaks in, bit by bit, until you’re wondering why nothing ever stays clean. You push into another long sanding session or swap between the miter saw and drill, vacuum humming in the background. Everything looks fine at first. But then grit collects in the corners of your work, dust streaks appear under clamps, and that dry, persistent film blooms onto tools and bench surfaces you just wiped. Most days, it isn’t a catastrophic failure. It’s the slow betrayal by a tiny part you rarely think about: the vacuum dust seal.

    Good Seals Turn Problematic—And You Won’t Notice Immediately

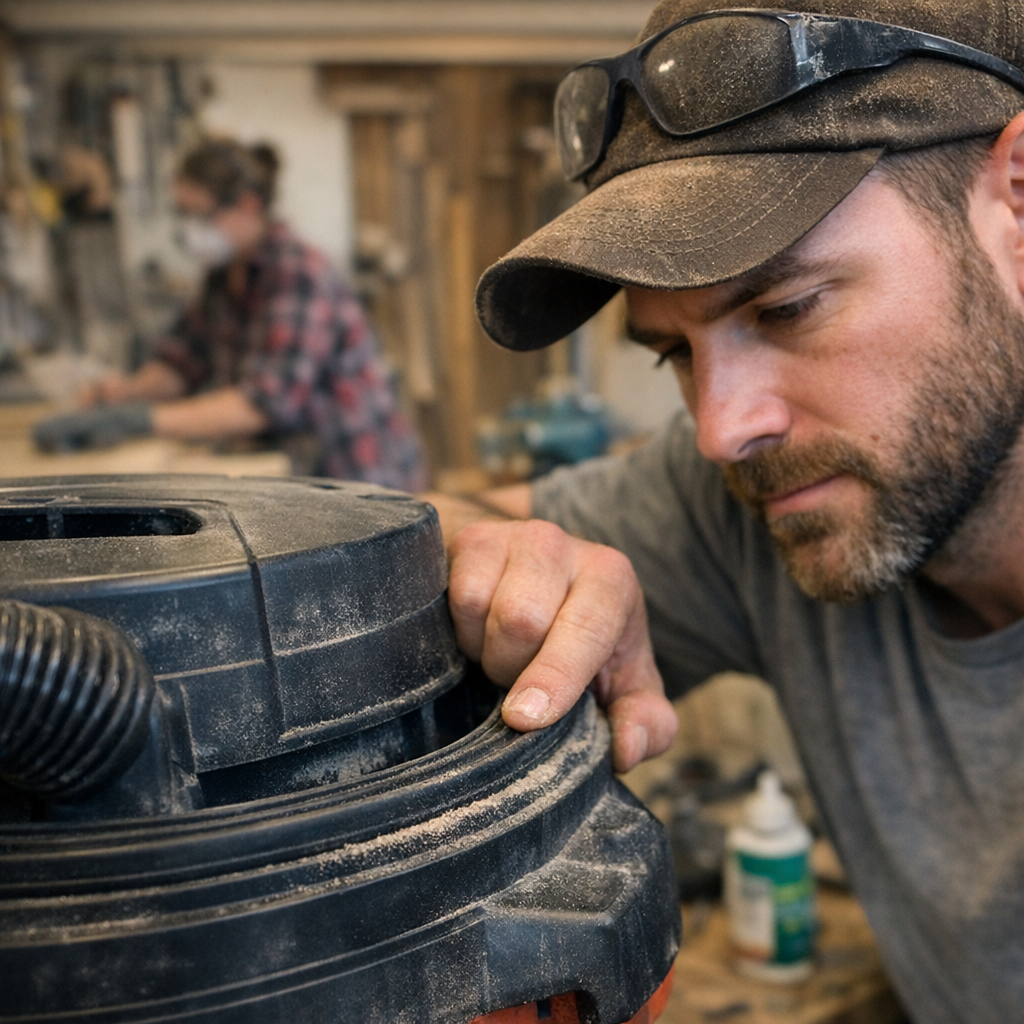
    Vacuum dust seals usually survive a few projects looking completely normal. The rubber feels intact, the fit still snug, so during your quick pre-job check—right before you line up that first cut or clamp down for sanding—there’s no hint anything’s off. But midway through a batch of router passes or while driving a run of screws, thin clouds of dust start leaking past. It’s subtle: traces of powder at the vacuum’s rim, buildup ringed around hose fittings, a thin residue edging into your finish zone. The next time you wipe down after drilling panel holes, you catch your own reflection in a thin layer of grime you could swear you’d handled hours ago.

    These leaks add up fast in the real world. Seals wear out without dramatic visual cues—no bold cracks or rips, just a slow collapse. You get ghostly outlines under vise jaws, silt layering behind jointer stands, and dust sneaking into the spaces between tools. Suddenly you’re re-cleaning the same area or re-sanding a board you finished just minutes before, losing time and rhythm to dust you can’t keep up with. The missed warning signs are all small—until the mess becomes impossible to ignore.

    How Real Inspection Feels—Not Just What It Looks Like

    Don’t trust your eyes alone; dust seal failures rarely show up in a quick scan. The only way to catch problems early is to run your finger along the seal—feel for even compression, for that small but critical “spring” when you press in and release. Flattened, aging gaskets look perfectly normal but squash too easily or rebound only halfway. By the time the lid demands extra pressure to close, you’re already losing suction and containment, and dust is mapping out detours around your collection point.

    With every tool you run—circulating saw, sander, router, even when swapping out batteries to keep pace—the pressure grows. A tired dust seal turns every vacuumed moment into a cycle of diminishing returns. You’ll see the difference on edge work, in those hard-to-reach shelf corners, and most annoyingly, on just-painted surfaces that refuse to stay dust-free. You clean, and the powder comes back. Every finish pass feels sabotaged; your grip slips from surprise grit, and blade life quietly shortens as debris keeps sneaking back in.

    The Shift Midway: Telltale Signals That Matter in Real Time

    Picture a busy afternoon cycling between sandpaper grits and the drill press. Early on, everything is under control—your vacuum setup keeps pace without fuss. After lunch, though, dust laces the fence, clamps feel gritty, and the same haze shadows your workbench. When you pop the vacuum open to dump the bin, the rear seal has gone stiff, nearly flat, demanding awkward force to seat it again. That slight increase in hassle is a real-world signal: the gasket’s elasticity is shot. By closing time, your tools and surfaces have collected a stubborn silt, creeping into every corner, spoiling your final results and dragging out cleanup beyond the last cut of the day.

    The Real Cost: How a Faded Seal Wastes Time and Weakens Results

    A leaking seal sabotages more than cleanliness. Finer dust infiltrates moving parts, gums up delicate adjustments, dulls drill bits, and erodes blade precision. If you’ve ever had to wipe down mid-project or re-finish wood because unseen dust settled after your last sanding pass, you’ve paid the price. In active shops—cycling between fast cuts, grinding, and repeated fastening—a single seam leak means more stops for vacuum resets, wasted prep, and energy spent chasing the source instead of focusing on the actual work.

    Swapping out a crushed seal isn’t just a maintenance detail; it restores the baseline performance you need. That firm, uniform gasket isn’t hype—it’s the difference between an efficient cleanup that keeps your workflow smooth and a futile battle that eats away at your time and results. The fix is immediate: a fresh seal locks in airflow and stops the dust drift, so more goes straight into the vac and less finds its way underfoot or into your battery charger.

    Quick Checks: Catch Subtle Failures Before They Compound

    With each round of sanding, driving, or repetitive drilling, use these checkpoints:

    • Dust edging the perimeter of vacuum housings or hose connections—especially if it rings only part of the seal
    • Floating particles settling fast on just-cleaned tools, charger docks, or bench trays
    • Resistance when opening/closing the vac, or a seal that sits noticeably low and doesn’t “bounce” anymore

    Don’t be fooled by spotless appearances—dust will escape through the smallest breach, often lurking in baseboard nooks or drawer slides. Small, targeted checks catch trouble before it snowballs, saving you from wasted motion and drawn-out frustration.

    Swapping and Keeping Up: Habits for Shops That Actually Stay Clean

    If your days are spent knee-deep in sawdust or you’re clocking hours on high-dust jobs, make monthly seal inspections second nature. Press, don’t just look. If the seal compresses to half its original height, feels hard instead of pliable, or no longer rebounds, swap it—don’t wait until it ruins your next run. Most seals fail slowly, with stiffening rubber turning up only when the mess is already made.

    Pro strategy: Keep at least one backup seal in reach, especially before heavy weeks—falling behind on dust control during critical jobs means trading quality for frantic rework, or losing time that drains the whole schedule. As soon as you feel the seal lag, or catch dust sneaking in by the end of the shift, make the swap. Fast action locks in better tool control, less fatigue from redundant cleaning, and more time spent actually building or finishing instead of just managing debris.

    Chasing Dust Is Wasted Time: Rely on What You Can Feel

    Dust seals do their job best when you barely notice them. When they slip, the difference cuts straight into your energy, precision, and end-of-day pride. Don’t let quiet failures and skimmed-over details pile up—let your hands and eyes lead routine checks, respond early, and keep seal swaps easy. It’s not just about a cleaner shop; it’s about controlling the small frustrations that slow you down and quietly wreck your finish. The sooner you build these habits, the less time you lose to the dust that’s impossible to ignore.

    http://gumboll.myshopify.com

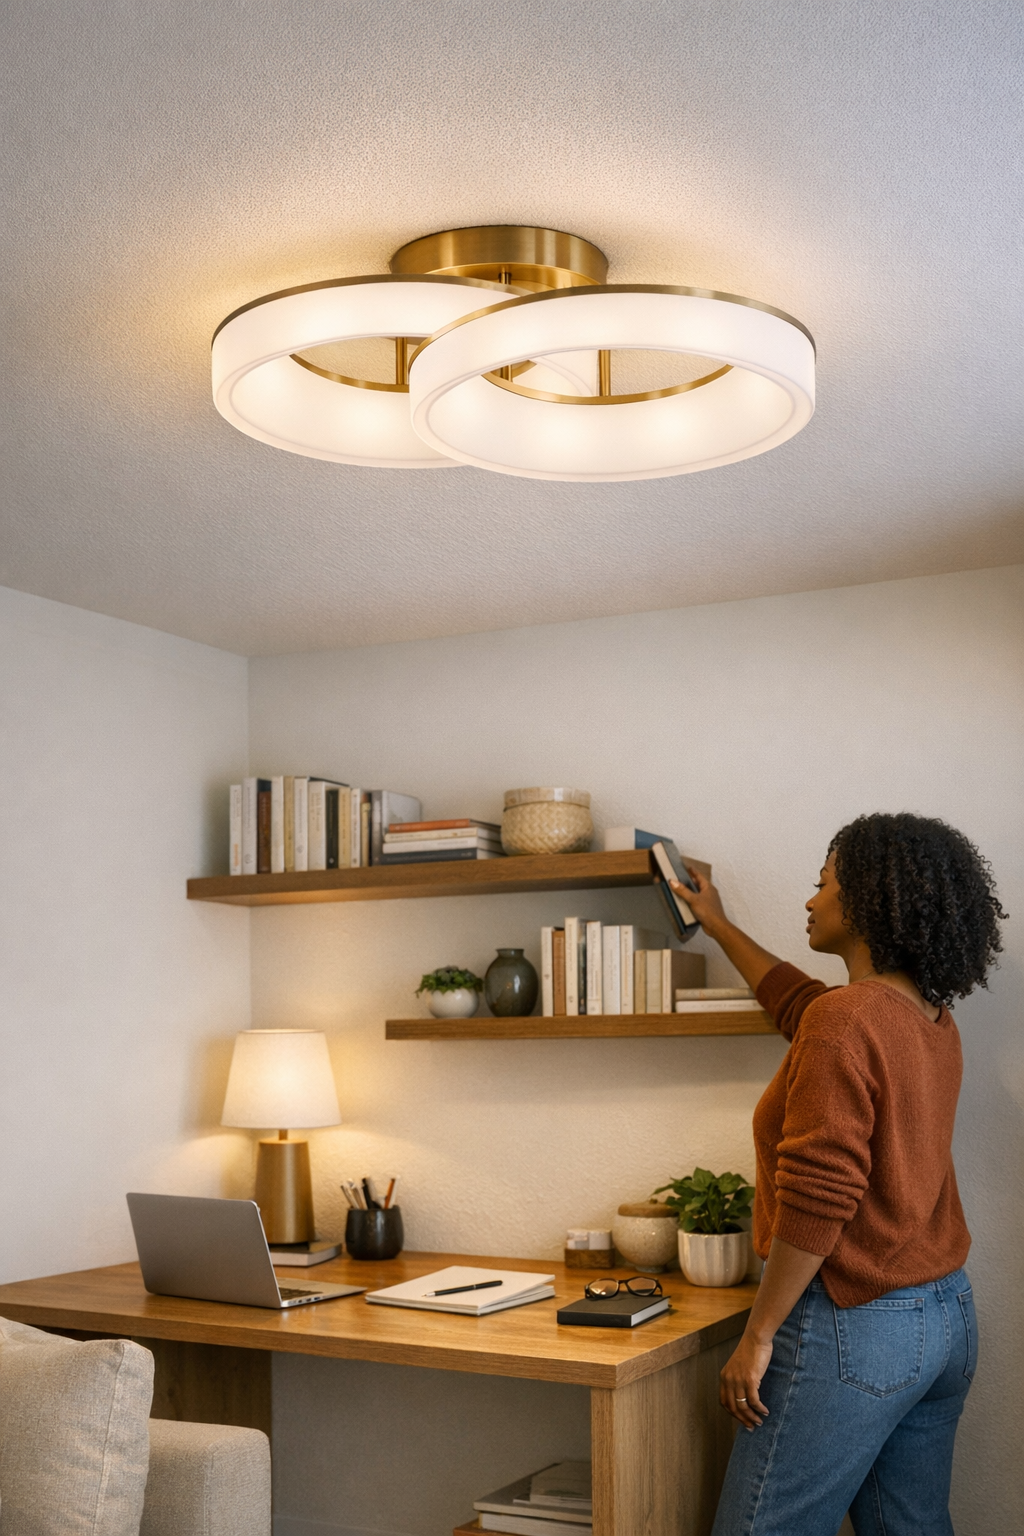
  • How Linear and Panel Ceiling Lights Cut Eye Strain with Smart Placement

    A workspace that looks finished can still feel wrong within days of real use. The problem isn’t just a question of “enough” light—it’s where the bright zones hit and where convenience falls apart. You shift between tasks at a desk squeezed by a walkway, reach for the edge near a shelf, or push your laptop back after lunch, and run into the friction: glare slices across your screen, cables drag where your arms need to move, and that supposed upgrade overhead leaves the same dim border where your mouse always travels. Lighting that photographs as “clean” can still interrupt every routine, exposing support mistakes and coverage gaps that surface only after repeated use—the drag that signals your lighting and support logic needs more than an appearance boost.

    When an “Upgrade” Only Shifts the Problem

    The fresh fixture goes in—maybe a crisp LED panel, a more modern linear, anything to banish the old bulb. Day one, the difference feels like progress. The desk lights up, the setup looks tidier. But by the second week, as you move through real work, new friction appears: shadows return to the corners, glare traces the papers whenever the sun shifts, and cables—pitched as discreet—slide into sightlines or tangle the gear. Classic domes and spotlights do this in familiar ways:

    • Desks with a bright center but edges that never leave shadow
    • Walkways half-lit while glare interrupts the main work zone
    • Loose cables crossing surfaces, always just in reach of elbows or peripherals

    Function that looked “solved” feels less stable as routines settle in. The working edge gets dimmer; cables pull focus; your eyes work harder in the exact spots that matter most. At some point, it’s not background annoyance—the design is failing in repeated use.

    What Linear and Panel Ceiling Lights Actually Fix

    Broad-beam ceiling panels and linear lights promise a more usable room: smoother coverage to the full edge of shelves or desks, and less jump between brightly lit and underlit patches. They help most where real patterns test the setup:

    • Low ceilings compress fixture spread, raising the odds of annoying halos or dark outer corners
    • Mixed-use rooms demand even light from surface to shared area, not just over the “main” zone
    • Edges matter—where books, gear, or hands actually end up day after day

    But that promise breaks fast if the details miss. A panel sized for looks instead of coverage leaves the final few inches stubbornly dim. Cables that aren’t routed tight, or bracket supports angled for speed, shed the illusion of tidiness, pulling distraction into every routine. An exposed wire grabs attention just as fast as a patch of shadow in the wrong place. What’s supposed to “solve” the surface instead sets up the next round of minor workarounds.

    The Overhead Trap: Looks Tidy, Feels Awkward

    A slim fixture overhead often hides the same flaws as old domes—a tidy appearance isn’t clarity at the work level. Common misses become obvious in the flow of the week:

    • Weak edge coverage: Light lands where you don’t work, leaving hands or notes in a half-shadow you can’t eliminate by shifting your chair.
    • New glare lines: Panels reflect on smooth or glossy surfaces, tracing bright streaks across your direct sightline whenever you check documents or adjust screens.
    • Cable and bracket distraction: Extension lines drop into view or brackets land at eye level along a shelf, so every walk-by or reach risks a snag or unwanted visual anchor.

    “Clean” up top quickly becomes a practical burden where lighting and support aren’t mapped to how the space actually gets used. The clarity you expected slips as soon as annoyance sneaks back in from cables, clamp points, or missed zones.

    Where Small Annoyances Turn Routine Into Work

    Friction often builds quietly—by Friday, the same space that looked sharp on Monday wears you down:

    • A corner desk gets an overhead upgrade, but the print zone always sits in stubborn dimness. Each time you shuffle paper, a heavy shadow follows your arm, undoing the promise of “full” coverage.
    • A shallow shelf blocks the panel’s spread, so the desktop center is bright while the edges are drained of useful light. When you reach for books, glare kicks up at just the wrong moment.
    • Cables tucked cleanly on install begin to sprawl after a week of moving power adapters or sliding monitors. Mouse movement meets fresh resistance, and that “unused” desk edge collects dust and frustration in the poorly lit margin.

    These slipups aren’t exotic—they repeat as routines change, as hands, eyes, and devices react to unfinished setup logic. Repositioning a lamp, sliding accessories, or learning to ignore cable drag may feel minor, but the toll compounds every hour the habit persists.

    Smart Adjustments That Restore Comfort and Order

    Some fixes show results the same day—and keep working as use shifts:

    • Panel placement: Redefine the fixture’s angle or lateral position to prioritize edge coverage, not just central brightness. Suddenly, that persistent shadow line gives way and the whole surface becomes usable—not just the showcase area.
    • Cable re-routing: Reposition runs along walls, under shelving, or behind main zones. Use smaller, higher brackets to remove sightline clutter—a shelf-top cable is easy to miss, one mid-wall never is.
    • Support tweaks: Move brackets or mounting points a couple of inches off the “obvious” spot to avoid snags or blockages where you write, swipe, or reach. Small geometry changes eliminate daily fidgeting that would otherwise erode focus.

    With clear, physical logic behind each support and cable line, the space becomes easier to use: the surface stays evenly lit; transitions between zones are smooth; and visual noise drops away as function matches how you actually move through the day.

    What Causes Panel or Linear Lights to Fall Short?

    Even good fixtures create new headaches when installed without room awareness:

    • Panel too narrow: Edges of the surface remain off-limits, and the setup becomes “nearly” right but never quite comfortable.
    • Mounting in the line of sight: Brackets and wires cut across areas where you look, move, or reach, increasing daily friction instead of reducing it.
    • Insufficient throw in tall rooms: Panels that work in compact spaces lose strength when ceilings rise, washing out for ambiance but falling short for real work zones.
    • Reflective mishaps: Any high-gloss or polished finish amplifies stray light, setting up unwanted streaks or spots in the path of your hands and tools.

    The room’s actual conditions—not just abstract needs—set what a fixture must solve. Only when placement, spread, support, and cable logic sync with day-to-day use does the benefit of panel or linear ceiling lights really show up.

    Which Rooms Benefit Most?

    Compact rooms under nine feet, crowded work-plus-life areas, or any desk/shelf run where every inch is worth using will almost always gain from a logical, well-set ceiling panel or linear light—if the install treats edges, cable path, and support as recurring decisions, not just a first-day reveal. Big, open, or tall spaces need stricter mapping: more panels, distributed brackets, sharper cable control—to sidestep the “almost finished” feeling that drags on every routine.

    Quick Practical Tips:

    • Start with your own routine: Map where you move, reach, and pause most often. Watch for shadow pockets or flashes of glare that mark incomplete coverage.
    • Route cables after living in the setup: Wait a week before final cable and bracket choices—premature tidying always misses how surfaces are really used.
    • Edge audit: After several work sessions, check whether you avoid the last visible inches of desk or shelf. If shadows, cable crossings, or glare make you shrink from the edge, the setup isn’t tuned yet.

    The Real Standard: Does the Setup Stay Easy to Live With?

    Lasting clarity—and comfort—grow from setups that make light, cable runs, and bracket positions quietly invisible in repeated use. Linear and panel lights can solve most shared or edge-dependent surfaces, but only when matched to the way the room flexes through daily shifts and not just to what looks better overhead. The real test comes a week later: if your hands, eyes, and gear all reach further without friction, the setup is finally working.

    Explore more lighting and support solutions for real-use spaces at LightSupport.

  • How a Simple Doorway Pause Shapes Your Dog’s Leash Behavior

    You know the drill: leash clipped, hand on the knob, dog at your side—and still, you’re not out the door. The leash snags, a tote catches your shoulder, your dog hangs back, and the clean “out-we-go” never quite clicks. That tiny doorway pause gets dismissed as nothing, but it drags on the whole routine—nudging every walk to start with a hitch instead of a flow. Stack those snags over a week, and you’re not just losing seconds—you’re battling a routine that feels clumsy, one frustrated reach at a time. The friction isn’t always where you expect: that supposed “quirk” at the threshold signals a breakdown you can feel long before you hit the sidewalk. Efficient routines don’t come apart in obvious ways; it’s the slow grind of a stubborn pause that sours repeated use.

    The Hidden Costs of Doorway Pauses: Beyond the Two-Second Delay

    Most dog routines aim for smooth exits, but the first problem often happens before you even step outside. That initial hitch at the threshold isn’t just a delay—it pulls the air out of the whole outing. At first it’s just a small check: dog’s ears up, one paw lifted, nose scanning for what’s new. You stand there, leash slack, already feeling yesterday’s awkward launch. By the third day of door-edge fumbles, you barely notice the buildup—but now you and your dog depart out of sync, walking with tension instead of stride. The pause becomes routine, and “quick exit” slides into recurring bottleneck. The worst part? You stop noticing how much drag it adds to every attempt at a fresh start.

    Letting these doorway hurdles fade into the background means accepting mismatched walking rhythm and more leash tangle—problems that didn’t start on the sidewalk, but right at the door.

    Routine Stumbles: Why the Pause Creeps Into Everyday Walks

    Leash-up routines look simple—clip, reach, go—but real life scrambles the choreography. Most owners are wrangling keys and bags with one hand, leash with the other, eyes on the dog, and a quick scan outside for distractions, all at the same time. The dog’s pause isn’t just a hiccup; it flags a transition that’s jammed before anyone takes a step.

    The hitch flares up during rush hour or bad weather. You’re late, trying to hustle, but a hanging leash or bunched-up mat blocks your flow. Or your dog sniffs the air for half a beat longer in the rain, making your patience stretch thin. That initial hesitation doesn’t just slow you down—it sets the tone for the next block: choppy, start-stop movement, leash snagging on corners. Frustration builds because neither end of the leash is fully ready—and both of you sense it.

    Missed Signals: Not Every Pause Means Stubbornness

    It’s easy to call any doorway slowdown “stubbornness” or a weird quirk. But door pauses almost always mean your dog is gathering themselves—not plotting resistance. Most dogs stall to process what’s new, or to transition from inside calm to outside stimulus. If you respond by yanking or rushing, the pause morphs from gentle check-in to everyday standoff—and the cost shows up in jerky walks, more leash tension, and zig-zagging from step one.

    The “problem” isn’t random; it’s a feedback loop. Pulling through a hesitant pause plants seeds for the next tangled leash or off-beat stride before you leave the porch.

    How Everyday Setups Can Make Things Smoother—Or Trickier

    The struggle starts well before your dog hesitates—usually with a snagged reach or cluttered grab. If your leash tangles around a hook, a toy blocks the walkway, or a bin sits just out of reach, a calm exit is wrecked before it begins. “Organized enough” sometimes means: not actually workable. Over a week, shoes drift, bags pile, a crate jams the exit, or the treat pouch goes missing—and each tiny obstacle inches up your frustration and your dog’s uncertainty. That’s how five-second pauses stretch into a haze of hurry, shuffling, and apologizing to your own routine every morning.

    Real entry setups shouldn’t just hide clutter—they should cut invisible barriers. The difference shows up in those urgent moments: can you actually grab, clip, and step out with one hand, or are you forced into reshuffle mode every time? The gap between “looks tidy” and “works under pressure” grows with every repeated use.

    Resetting the Start: Routine Adjustments that Respect the Pause

    Most threshold struggles don’t come from bad gear or a difficult dog—they stem from routines that snap instead of flex. When the pause repeats, so does the urge to hurry, tighten the leash, or force momentum. But precise, repeatable tweaks can reset the pattern.

    Whenever you hit that doorway pause, pick one steady cue—maybe a quiet “let’s go”—and hold still, leash loose. Resist the urge to urge. If your dog lingers, stay neutral. The “fix” is in predictability, not force: a pause that gets the same response every time loses its edge as a source of tension.

    Change won’t thunder in overnight. But as you stack outings, you’ll feel the pivot: the doorway becomes a checkpoint, not a blockade. The routine gains elasticity—you’re not fighting your own setup, or your dog’s instincts. Outings pick up flow. Friction that lived at the beginning gets crowded out by a smoother launch, and the rest of the walk follows suit.

    The Ripple Effect: How Doorway Friction Shapes the Whole Walk

    Don’t underestimate that two-second doorway stall—it can define the walk’s next fifteen minutes. A clumsy start infects momentum: leash tangles, dog lunging off-pace, owner attention jumpy. Most of this isn’t “bad dog behavior”—it’s energy stuck at the threshold, bleeding into every block. Remove the awkward entry and you nudge every other sticking point downstream—less need for reset mid-walk, fewer strained corrections by the curb.

    A smoother start pays back at other pinch points too. Coming back inside, you’re less likely to scramble for a towel buried behind the crate or to trip over gear that multiplied since you left. What was only “neat” is now reliably ready—less shifting, more doing. Function rises as micro-obstacles fall.

    Real-Life Tweaks from Repeated Friction: What Actually Works Over Time

    You don’t need a fresh build or a showcase entryway. What matters is repeat viability. Keep every walk tool—leash, bags, wipes—within immediate reach. If you can’t grab it without a shuffle, it’s in the wrong spot. Do a reality-check after a standard week: what are you always stepping over, moving, or losing track of? Does your dog have true standing space, or does each movement send you both off-balance at the door?

    Watch out for these creeping friction points:

    • Hooks that look smart but need twisting or two hands to unclip the leash.
    • Dog gear or toys leaking into the walkway, forcing awkward sidesteps at go-time.
    • Cleanup wipes easy to find, but never right when you need them for muddy paws at the exit.
    • Household clutter flowing into the threshold zone, making “waiting” blend into chaos instead of action.

    What trips you up most days? That’s where setup should adjust. The right fix isn’t a one-time reorg—it’s a reaction to repeated friction. Reshuffle with routines in mind and weak points fade—not just in appearance, but in actual, daily function.

    When to Worry (and When Not To) About a Doorway Pause

    The standard doorway pause is rarely a refusal—it’s a moment to check in before the next environment. Typical hesitations mean the dog is deciding, not dreading. Only when you see your dog back away, shrink, or flat-out avoid the threshold do you need to dig for bigger causes—too-tight harness, real anxiety, or a trigger outside deserving more attention.

    For almost all ordinary, repeated pauses: don’t yank, don’t rush. Hold the space, offer a steady cue, and set the stage for smoother movement right at the start. These adjustments aren’t about training—they’re about design, attention, and building a daily flow that doesn’t crumble under repeated use.

    For setups that actually match real routines, and gear designed to reduce silent friction before you step out, see what’s new at DogPile: DogPile.

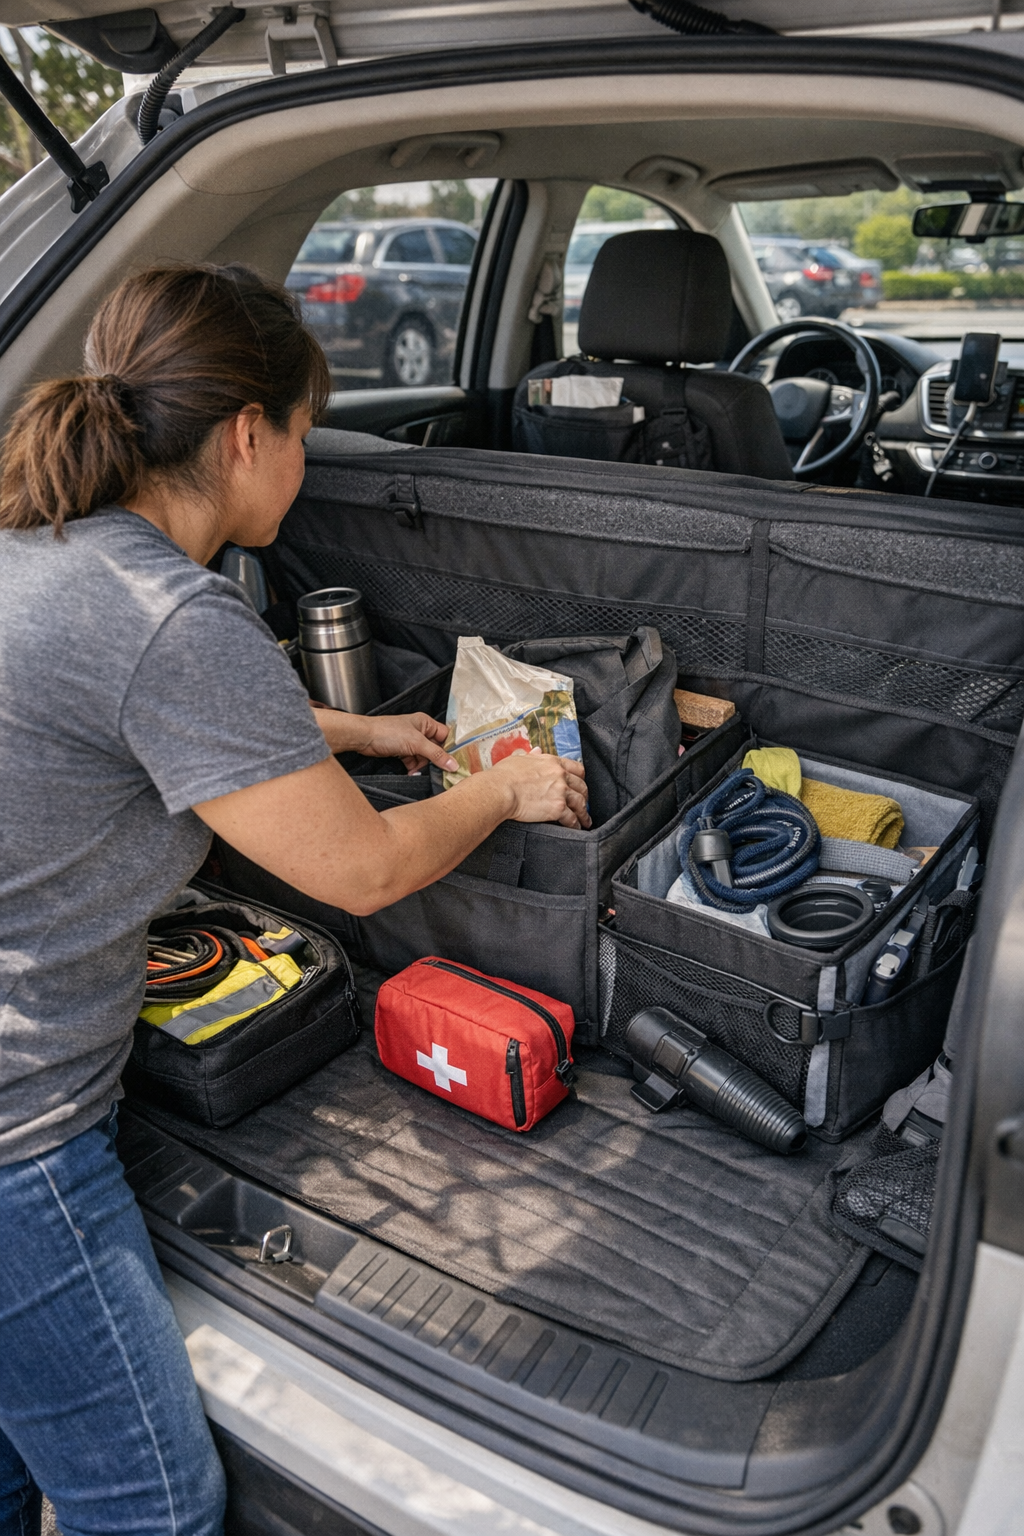
  • How Small Car Interior Details Shape Your Daily Driving Comfort

    If you’ve ever slid into your “organized” car—catching your heel on the edge of a bunched floor mat, nudging a phone mount out of the way for the third time that week, or feeling for your charging cable only to find it tangled yet again—you already know what a showroom-tidy interior hides. An interior that looks fine can still fight you in all the small, repeated ways: cords pinched under seats, cargo bins shifting during turns, dog covers fixed on Monday and crumpled by Thursday. When you use your car for real routines—parking haste, fast pickups, grocery loading, and endless re-entry—a setup that’s only neat on the surface quickly reveals its flaws. What matters is how your gear holds up, not during the first clean sweep, but after dozens of ins and outs when shortcuts and stopgaps start breaking down.

    The Repeated Reach: When “Organized” Still Sabotages Access

    Organization you don’t feel fades fast—what slows you down is always noticed. You remember the friction whenever a cable needs fishing out from under the cupholder again, or when a quick stop means fixing a floor mat before closing the door. That “just tidy enough” setup turns on you during rushed routines. A phone mount might look minimal, but if it blocks your charger or crowd the shifter, each in-and-out becomes a fumble. The thousand tiny corrections pile on: essentials sliding an inch out of reach, cords wrapping around gear levers, small items wedging where hands must go. One interruption is forgettable; a dozen a week means you’re losing flow and time every day you drive.

    Hidden Friction: When Comfort and Convenience Unravel

    It’s one thing for a setup to seem stable—until your floor mat slides forward as you step in, or your seat cover starts to curl away with every entry. Console organizers that dig into knees or elbows turn every drive into a negotiation with your own gear. An out-of-the-way cable route on day one becomes a hunt beneath the seat by week’s end. Tasks you expect to be automatic—coffee drop, charger grab, glove tap—turn into momentary stumbles when your setup can’t withstand real, repetitive movement. Fast errands, school runs, and back-to-back pickups reliably stress-test interiors far past what “neatness” can handle. Even when mess stays hidden, you notice every time something essential is a stretch too far or stuck behind another accessory.

    Not Just a Visual Problem

    Many “solutions” trade visible mess for buried hassle. That side door pocket stuffed with random cables and receipts? Looks clear, but you dig for keys every time. A low-profile mount may save your view but block a vent dial you reach constantly. Weak points show up as repeated reaches and corrections—never as Instagram-ready as they first seemed, always as practical slowdowns in the rush of real use.

    The Week’s Patterns: When Setup Defects Steal Your Time

    The difference between “done” and “functional” never shows up all at once. You only notice what’s weak after routines stack—toting a kid, juggling bags, grabbing the phone a dozen times. A cargo bin that glides loose at every hard stop means every trunk unload starts with a nudge back into place. Console bins that block your knee or swallow small items quietly turn retrieving a ChapStick or parking stub into a two-hand event. The wrong gear doesn’t ruin a single drive—it erodes your routine in fragments, one frustrating moment at a time, until daily trips feel heavier than they should.

    Invisible Failures That Add Up

    • Gas station detour: Phone is jammed beside the seat, cable knotted; every pit stop is a fresh tangle.
    • Errand unload: Cargo organizer has shifted, again, misaligning the latch so you can’t open the trunk smoothly.
    • School pickup: Seat cover’s edge scrunches as kids pile in, and you reflexively yank it flat before the next drive.
    • Evening commute: That side-mounted bin presses against your elbow—the same sore spot, every ride.

    No one episode is catastrophic, but the sum is time lost, rhythm broken, and just enough drag to sap energy from already busy days.

    When Setup Choices Become Everyday Obstacles

    It’s easy for car organizers and mounts to promise order. The harder test? A week of real use—does your setup dissolve quietly into the background, or trip you up again before Friday? Drift-prone mats force a reset on each entry; cables running wild catch your foot or fall beneath the pedals; trunk bins not anchored right slide just when you’re rushing most. Even “smart” organizers and covers can block crucial access if their fit ignores actual movement patterns, turning convenience back into manual labor.

    Protection That Needs Constant Correction

    Seat protectors that bunch at the door edge start as peace-of-mind, end as a fixed annoyance. Fitted mats, perfect before the first slushy walk, shift and curl a bit every wet day—until “protection” becomes yet another maintenance chore. The real frustration isn’t mess but the subtle, persistent burden of gear that only half works: solved in one way, sabotaged in another.

    What Actually Helped: Anchoring Change in Real Use

    Real fixes go unnoticed—because they stop producing extra steps. A mat anchored under the pedals stopped daily heel drags. A well-placed cable clip meant one-handed, one-shot phone grabs—no more cable yanking or cupholder battles. Simple, reachable storage for your daily-use gear took seconds—and a little tension—out of every routine. These are small gains you feel every time, even if nobody else notices. True organization isn’t impressive at first glance; it’s the absence of friction after the tenth drive or the hundredth re-entry. That’s when you actually trust your interior to keep up, not catch you out.

    Find practical gear that upgrades usability, not just appearances, at DriveWellSupply.

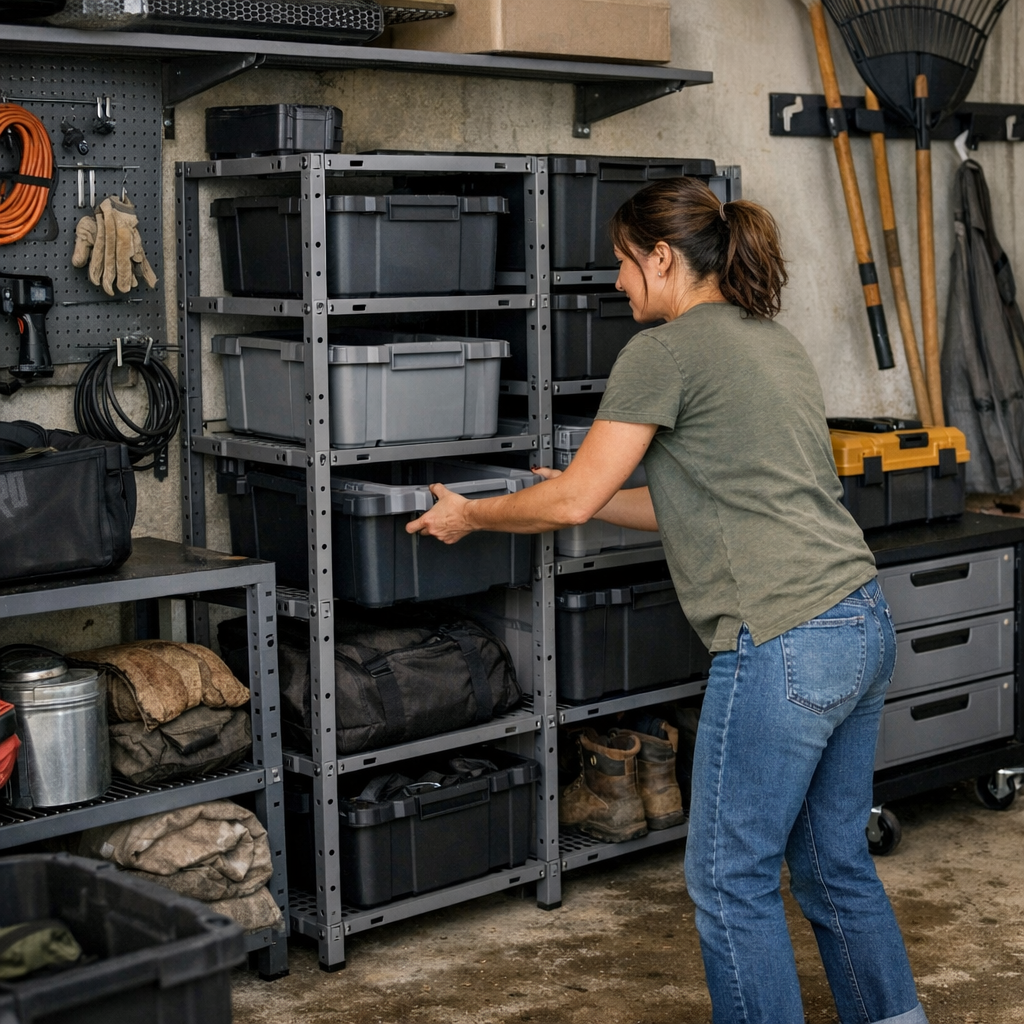
  • How Modular Storage Flexibility Solves Everyday Clutter Challenges

    Organized storage almost always starts with optimism. In that first week after installing new racks or lining up rows of bins, everything snaps crisply into place. Every item has a clean home. Pathways are clear, workbenches are easy to reach. It feels like friction is finally over. But the real tests don’t come on setup day—they creep in slowly, as your daily rhythm starts putting pressure on those seams. Suddenly, the system that looked seamless begins to catch and snag on routine use. A once-perfect layout becomes the background noise of inconvenience.

    The Neat Setup Mirage: When Order Hides New Headaches

    On day one, modular storage is a fresh slate. You stand back, admiring the symmetry—bins perfectly flush with the wall, cabinets squared in each corner. But within a few quick cycles of real use, small annoyances start to bubble up. The cart that rolled straight to the workbench now has to detour around a stubborn pile left by the entryway. That “temporary” stack of garden tools in the corner? Suddenly it has squatters’ rights. Even with everything technically put away, one area closest to the door always fills up, swallowing bags and gloves with each day’s return.

    This isn’t a matter of carelessness. It’s a side effect of treating appearance as function—confusing the visual order of bins and labels with the actual flow of your routines.

    How Clutter Mutates in a Modular World

    No plan survives contact with daily use. Rigid setups—no matter how modular they claim to be—install obstacles as soon as life deviates from their blueprint. A wall rack that “fills the space” translates to blocked corners you constantly shuffle around. Suddenly, to get a single tool, you’re reaching over carts or moving bins just to clear room for what’s next. Bins slide against each other so tightly nothing flexes. So the gear without a spot gets shoved wherever there’s a gap—often right in the path you need clear.

    In practical terms, it looks like this: stepping over the same stack of totes every time you try to get to the back door. Positioning a mobile chest in the only spot it fits, then having to muscle it out of the way each time you need the rake behind it. Outdoors, hoses and hand tools pile up around the gate, since the storage system doesn’t open up enough for a direct return. The footprint is used, but not useful.

    The Real Barometer: Can You Adjust Without the Domino Effect?

    The promise of modular storage is adjustability. But if making a change means pulling apart half your wall, the “modular” claim rings hollow. If every tweak means emptying shelves, shifting bins, or disrupting the whole lineup, what should be simple turns into a time sink. True modular design should let you change a piece—add a shelf, widen a gap, relocate one rack—without taking everything offline. The space should flex without forcing a tedious reshuffle.

    Real adjustment looks like this: you notice overflow forming near the entrance. Rather than dread a major teardown, you unclip two small panels, nudge one section a foot to the side, and open just enough room for carts to roll smoothly again. The rest of the system stays loaded. No pileup. No emptying bins. Minutes, not hours, to restore a clear path.

    The Everyday Creep: When “Just for Now” Becomes a Daily Hassle

    Consider a week in a busy garage. By Monday evening, everything’s tidy. By Thursday, that work zone by the wall has become a minor obstacle course. Each time you load out or return, unsorted gear builds in the same spot, steadily choking the main walkway. Getting a cart in or out becomes an awkward, multi-step shuffle. You don’t notice it happening in one big event—it creeps in through repeated, minor annoyances. The neat lines remain for show, but your mobility shrinks, and quick resets get sluggish. The system stops preventing mess and starts requiring extra effort to stay usable.

    This is the dividing line: a layout that stores your stuff but interrupts your routine is still a friction point, no matter how clean it appears.

    Fixing Bottlenecks Without Hitting the Reset Button

    The beauty of modular storage—when done well—is that you can solve workflow headaches with targeted tweaks, not monumental resets. Faced with a clogged entry, you shouldn’t need to unload an entire wall. In practice, undoing two anchor panels and sliding a section outward by a single shelf-width can clear the way. Nothing gets dumped out or stacked elsewhere. The floor is suddenly usable, and movements become direct again.

    The ability to make these small, strategic moves is where real flexibility lives. Access points reappear. Floor space isn’t doubled up as overflow. The system breathes with your routines instead of boxing them in.

    When to Rethink Your Layout: Real-World Warning Signs

    Keep an eye out for signals of a system grinding against daily life: narrow walkways that didn’t used to be crowded, tools that end up stranded in the same spot, repeated sideways shuffles to access a corner. If gear collects in familiar piles despite regular resets, or you’re forced to wriggle around the same cabinet edge every time you roll a cart, it’s not a passing phase—it’s a sign to adjust the pain point, not the whole system. Target the friction, reduce the busywork.

    What Makes Modular Storage Truly Adjustable?

    Not all modular systems are created equal. Durable construction matters—a lot. If shifting one section causes wobble or throws off the whole alignment, tiny fixes become new risks. The true test: can you detach, move, and re-anchor panels or racks without sagging, tilting, or needing to empty everything first? Sturdy panels and secure anchors let you flex the setup without sacrificing safety or ease of use. If a “modular” system can’t handle realignment on the fly, it’s just static storage in disguise.

    Better Storage Habits: Tweaking, Not Just Tidying

    The first setup is only a draft—never the final version. Expect edits. The minute you spot a pattern—overflow always in one corner, returns always blocking the walkway—move things around. Loosen up densely packed zones, even if it means the lines aren’t photo-perfect anymore. Modular is meant for evolving, not locking in. Don’t let bins cluster for weeks in a “temporary” zone that becomes permanent clutter. Embed quick, small resets after use instead of waiting until the pile demands an overhaul.

    The result: less repeated shuffling, clearer walkways, and a system that keeps adapting to make your routines smoother instead of slower.

    The Real Value: Storage That Changes with You

    Modular storage isn’t about how sharp it looks in the first week. Its value shows up in the months that follow—in the ten-second fixes, the paths that stay clear, the corners that adjust to new habits or gear. If you can fix a bottleneck, open up a zone, or get a return flow moving again—without pulling apart the whole structure—that’s a setup pulling its weight. Functional order, not just visual order, makes the difference between a space that supports your routine and one that quietly interrupts it.

    http://stacknest.myshopify.com

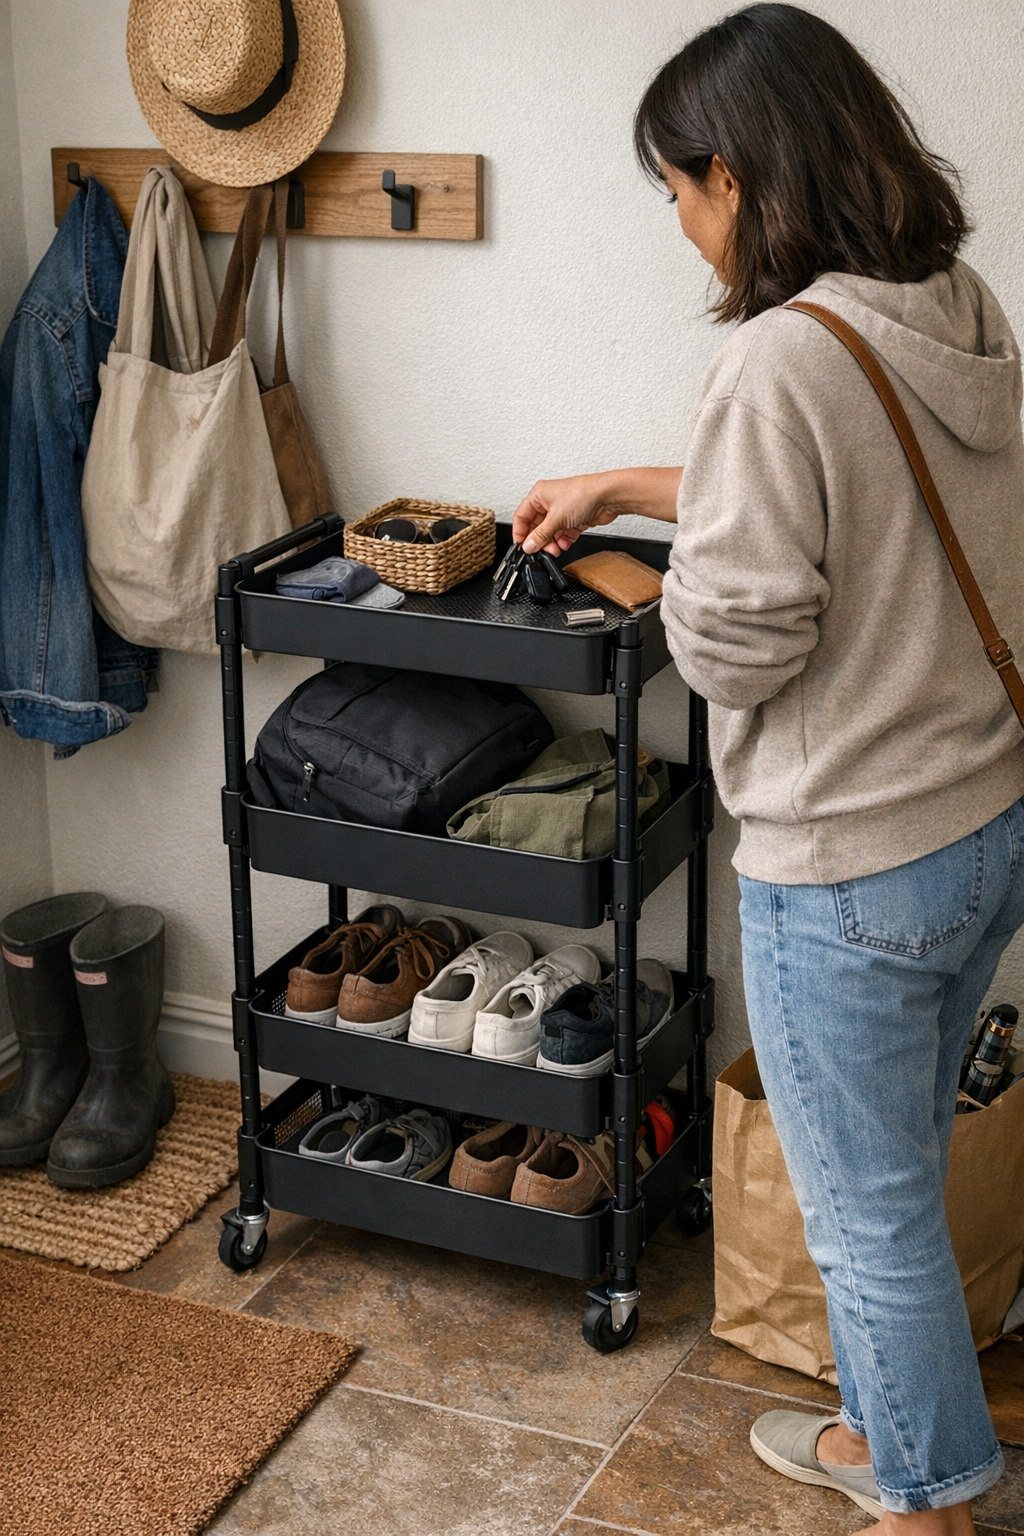
  • How Tiered Carts Transform Entryway Organization and Save Time

    Entryways don’t get messy by accident—they unravel because real routines push every bin, bench, and basket past its promise. That clean line of shoes splays out by Thursday; the storage bench that looked organized last weekend is now buried under backpacks and umbrellas. Everyone rushes in and drops everything, and within days the path narrows, you’re stepping sideways, and the “simple fix” becomes a slow and frustrating reset. The storage setup you pick isn’t just about looks—it’s about whether you keep tripping over the same clutter or actually move through the threshold without pause.

    Where Clutter Hides: The Tradeoff Between Closed Bins and Tiered Carts

    Closed bins and oversized baskets promise order at the surface. Pile everything inside, close the lid, and for a moment the entryway looks calm. But after a few busy days, the hidden truth appears. Shoes migrate beneath scattered mail and hats. That water bottle you need for the gym vanishes under grocery bags. Bins mask the chaos but bury the everyday essentials, so you go from “grab and go” to “stop, search, and dig,” especially during those morning scrambles or last-minute dashes out the door.

    The real breakdown happens when each new arrival—shoes, gloves, mail—pushes everything down and deeper. Most bins aren’t sorted, just loaded. That second glove, the car key, the fast pass—they sink out of sight. When you’re late, the cost isn’t clutter you see, it’s the routine you lose: delay, backtracking, and a reset that always takes longer than you want to admit.

    Tiered Carts: Visible Layers Make Mess Manageable

    Tiered carts break the cycle by forcing everything to the surface. Instead of layering items blindly in a bin, you get low open trays that make every shoe, bag, or water bottle easy to see and easy to grab. Shoes stack in a row, bags land in their own lane, small items sit on top. The benefit is immediate when life gets busy: groceries in one hand, lunchbox in the other, no stopping to dig or reshuffle. Clear layers mean friction—when you see socks drifting or that last tier overflowing, it’s visible before it spreads everywhere else. The reset becomes a quick shuffle, not a buried excavation.

    This setup isn’t flawless. Use it as a free-for-all, and the lines blur—hats drift into the shoe row, a jacket ends up sprawled beside bags. But the logic of the cart pushes spillover to the edges, not the bottom. You’ll see problems forming before someone turns it into a dumping ground or blocks the entry completely. The mess surfaces early, so course corrections are smaller and faster.

    Real Life in the Threshold: What Actually Changes?

    Closed bins compress everything into a single mystery pile. One kid drops a jacket on top, another buries a shoe underneath, and soon the routine is slowed by minor but multiplying bottlenecks: stepping over piles, circling the bench to reach the wall hooks, or nudging aside something you forgot was even there. By midweek, the threshold shrinks and the entry starts backing up.

    With tiered carts, the routine shifts: You enter, drop your bag in its own lane, shoes go onto their row, keys or mail stay visible up top. If something drifts—a scarf droops off the edge or a hat teeters on a corner—you spot it in a glance. Nothing disappears, and fixing it rarely takes more than a few seconds. The path through the entry stays clear. Moving in and out isn’t a project—it’s a habit supported by the setup, not slowed by it.

    When Setups Break Down: Recognizing the Weak Spots

    Every entryway setup breaks down eventually, but some fail faster under pressure. Temporary drops—a week’s worth of mail, a shopping haul, or wet shoes—solidify into permanent clutter if the layout hides instead of sorts. Bins give a false sense of order: everything looks contained, but items get harder to retrieve the deeper the pile grows. Even wall hooks or benches start as helpers but turn useless once the overflow finds their edge.

    This is where carts with open, layered design hold up better. Problems announce themselves: when bags spread across two tiers, or the shoe row is close to spilling, the fix is clear and quick—right as you see it. Visibility isn’t meant to call out your mess, but to keep the routine recoverable. Micro-resets—grabbing stray items or re-sorting shoes—are simple, not disruptive. Bins bury the clues until chaos is baked in; carts let you intervene at the edge, not after a crisis.

    Small Adjustments, Big Impact: Practical Tips for Everyday Entryways

    1. Give each tier a single job. Map it out once: shoes on the lowest level, bags in the middle, keys, sunglasses, or returns on top. Once everyone knows the logic, return flow is automatic, not a constant explanation. What fits becomes obvious—so do the items that don’t.

    2. Pair with wall hooks to cover both quick-grab and hidden clutter. Hang coats, bags, or hats at eye level for fastest access, while the lower cart handles shoes, bottles, small gear. This combo clears the floor and reduces path-tightening, making rush-hour movement easier.

    3. Keep it underfilled—don’t overload tiers or overpack with odd-shaped items. When the cart is more than 80% full, categories blur, things topple, and daily resets start to stall. Leave enough space for sudden arrivals, resist the urge to fill every gap, and run a one-minute scan at the end of the day. The edge of order stays visible, and the setup lasts longer with less effort.

    Seeing Past the Surface: The Real Function of Storage at the Door

    It’s easy to buy into the illusion that closed bins mean a controlled entryway—but the real cost surfaces in lived routines. Transition spaces don’t just need to look organized for a single reset; they have to withstand dozens of passes, returns, and threshold scrambles every week. The right layout doesn’t just store things—it keeps them in sight, in reach, and out of the path.

    • Shoes that stick to a single, visible row instead of spilling into tripping hazards.
    • Bags and gear that hold their spot, so each family member can claim a tier instead of merging into an untrackable pile.
    • Entry paths that stay clear even when the week gets messy—and still open up fast for cleanup.
    • Resets that take moments and never mean dumping everything out just to find one missing item.

    Switching to a tiered cart won’t erase clutter forever. Rushes and overflow still happen, and not every item will stay in its lane. But the reset is visible, nearly instant, and never spirals into a multi-hour project. Entryways stay workable; routines stay intact. The difference is small at first—an easier exit, a clear path, five fewer frustrating searches—but cycle after cycle, it’s the difference between wrestling with your space and finally moving through it with less effort.

    http://www.betweenry.myshopify.com

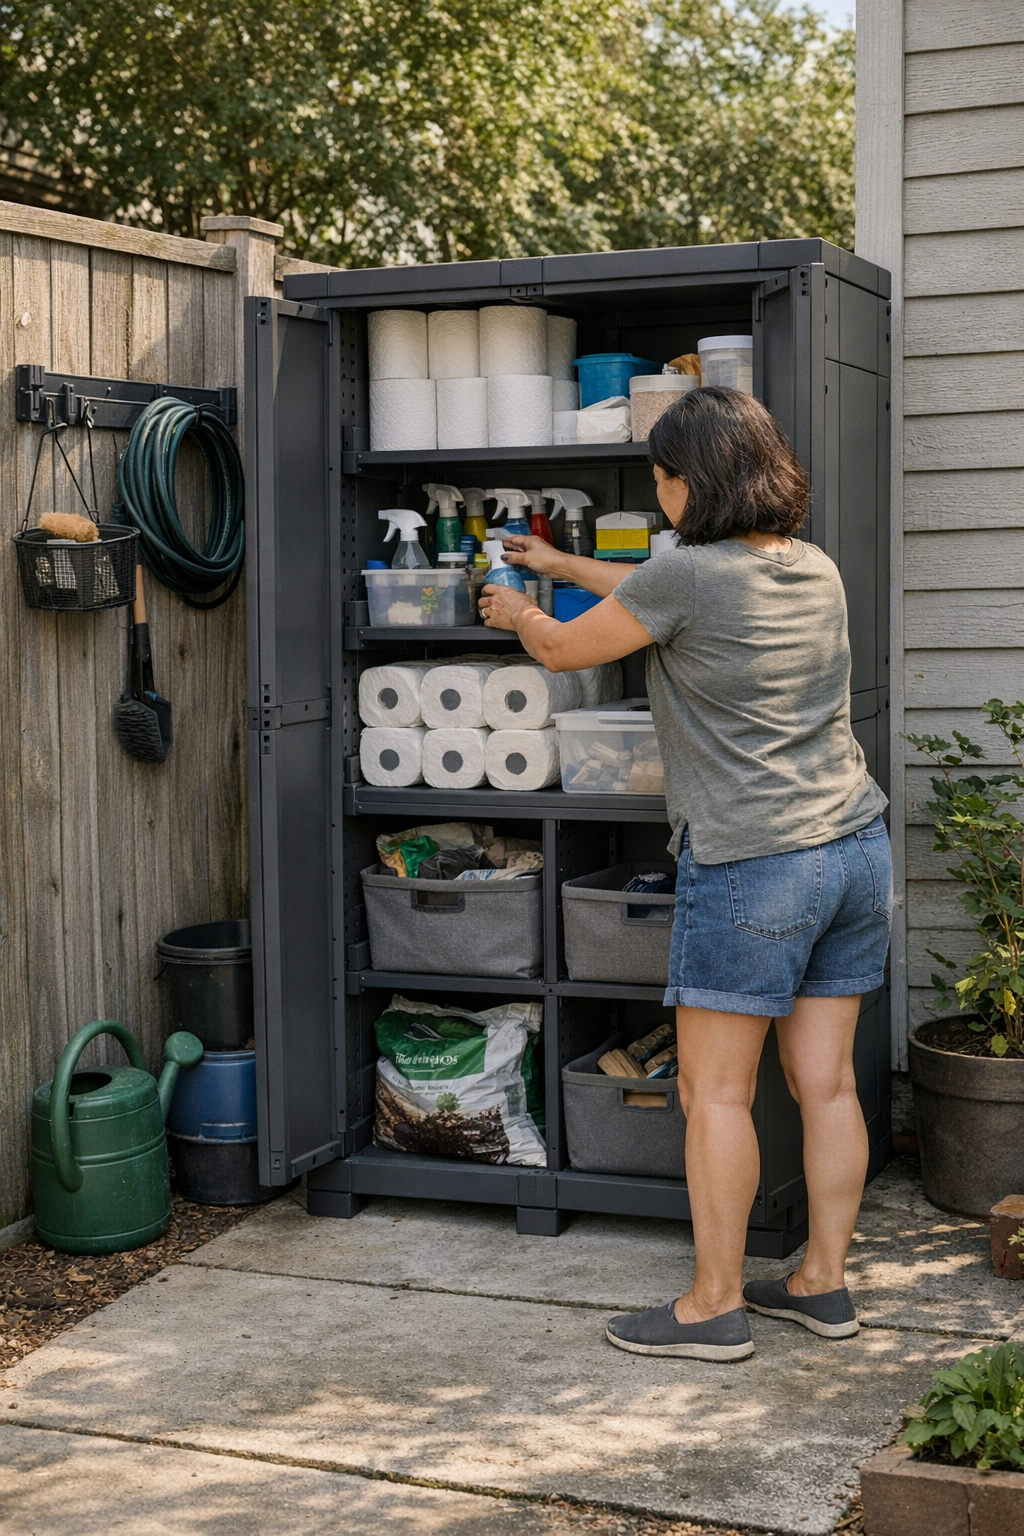
  • How Proper Shelf Layouts Keep Closed-Door Linen Cupboards Organized and Accessible

    The trouble with most linen cupboards isn’t mess—it’s the hidden blockages and slowdowns once daily use kicks in. Closed doors and a tidy row of shelves trick you into thinking the problem is solved, but the real issues reveal themselves after a week: toilet rolls vanish behind towels, paper towels slip under unused sheets, and what looked organized becomes a repeated hunt through piles. The outside calms the eye, but inside, every grab turns into a search party, especially in a shared home where everyone’s “just putting things back” means new hiding spots appear overnight.

    When Order on the Outside Hides Trouble on the Inside

    It’s the classic trap: clean, shut doors and a room that looks calm. In reality, the slow hassle builds quietly behind those doors. You go to grab a new pack—maybe in the middle of cleaning or with guests already waiting—and realize it’s wedged out of reach, under towels not even meant for this room. Pull one thing, three more tumble. The system that looked sorted on day one starts slowing you down exactly when you don’t have time to deal with it. The fix is always the same: close the door and forget the problem. But the next person walks straight into the same shuffle, with even less idea where to look.

    The Hidden Cost of Too Much Depth

    Deep shelves in closed cupboards often hide the real problem: lost access and daily bottlenecks. A shelf that stretches too far back is not more useful—it’s just more space for paper towels, toilet rolls, and tissue packs to vanish behind compressible linens. Towels adapt and fill available space; paper goods do not. You find one box flattened out of sight, another package jammed at the back, and suddenly the main reason for the shelf—quick backup supplies—runs in reverse: you reach in, can’t spot what you need, and end up lifting and shifting half the contents just to reach a basic item. In shared homes, this snowballs. One person pushes tissue boxes deeper to stuff in a towel, the next returns half a six-pack on top, and before long, it’s a category mix-up with buried supplies and no signal of what’s running low.

    Category Drift and “Treasure Hunt” Retrievals

    Category boundaries inside a linen cupboard only hold as long as real-life use lets them. Even careful initial sorting fades when daily routines take over. Linens spread into zones meant for paper, packages edge between stacks, and the lines between categories dissolve. What starts as “paper on the left, towels on the right” ends up as random returns to any open space. Now, grabbing a tissue can mean fishing below pillowcases, or unloading the front row to reach a crushed pack at the back—each retrieval is slower, and each reset feels heavier. The system that promised efficiency turns routine restocks into multi-step searches. Sometimes you have to open another shelf just to reach behind, or make two trips when the first path is blocked. Slow, friction-heavy routines replace quick, reliable access.

    What Turns a Closed Cupboard Into Real Everyday Help?

    Lasting order has nothing to do with what you see when the doors close. It’s about systems that actually fit the way you retrieve, restock, and return items—especially when you’re in a rush. Effective linen cupboard setups do at least three things:

    • Put paper goods at waist height. No more kneeling, stretching, or shifting piles to grab basics in a hurry. Tissue, toilet paper, and napkins live within your natural reach path.
    • Use shallow storage zones—never more than two packs deep. Every item is viewable and accessible. Nothing is hidden behind compressible stacks or lost in the shadows at the back.
    • Employ horizontal separation, not just vertical stacking. Paper isn’t crammed above towels or stuffed under sheets. Each category gets its own accessible lane, allowing direct, unblocked retrieval and clearer return flow for the next use.
    • Limit shelf depth to what you can actually reach—around 14–16 inches. This single boundary is often the difference between a system you trust and one that quietly fails during busy weeks.

    How Small Fixes Help Day After Day

    With these changes, the shift is immediate and visible. You reach for a roll—no search, no shifting piles, just a direct grab. Restocks don’t mean lifting half the shelf. Guests and family no longer ask “where did you put the tissue?” because the system itself signals what goes where, reducing day-to-day friction and cutting down on misplaced returns. A glance is enough to see what’s low, stopping the panic run to restock in the middle of a hectic week. The difference isn’t a prettier cupboard—it’s a setup that supports your real routine, not just the day you first organized it.

    Recognizing and Avoiding the Trap of “Looks Organized”

    Looking neat is not the same as staying usable. A shelf that simply closes over the mess does nothing for your routine if you’re always reaching, shifting, or blocking others from using it efficiently. The only systems that hold up are those built for your actual flow—shallow shelves, clear lanes, and boundaries that last beyond the first tidy-up. Don’t be fooled by calm surfaces; the best closed-door linen cupboards are the ones that reduce friction when you need them most, not just when you’re showing off your storage to visitors.

    For shelving, modular storage, and linen cupboard systems that fit real routines and hold up after the doors close, visit Gridry.

  • Streamline Your Carry-On for Faster Access and Less Travel Stress

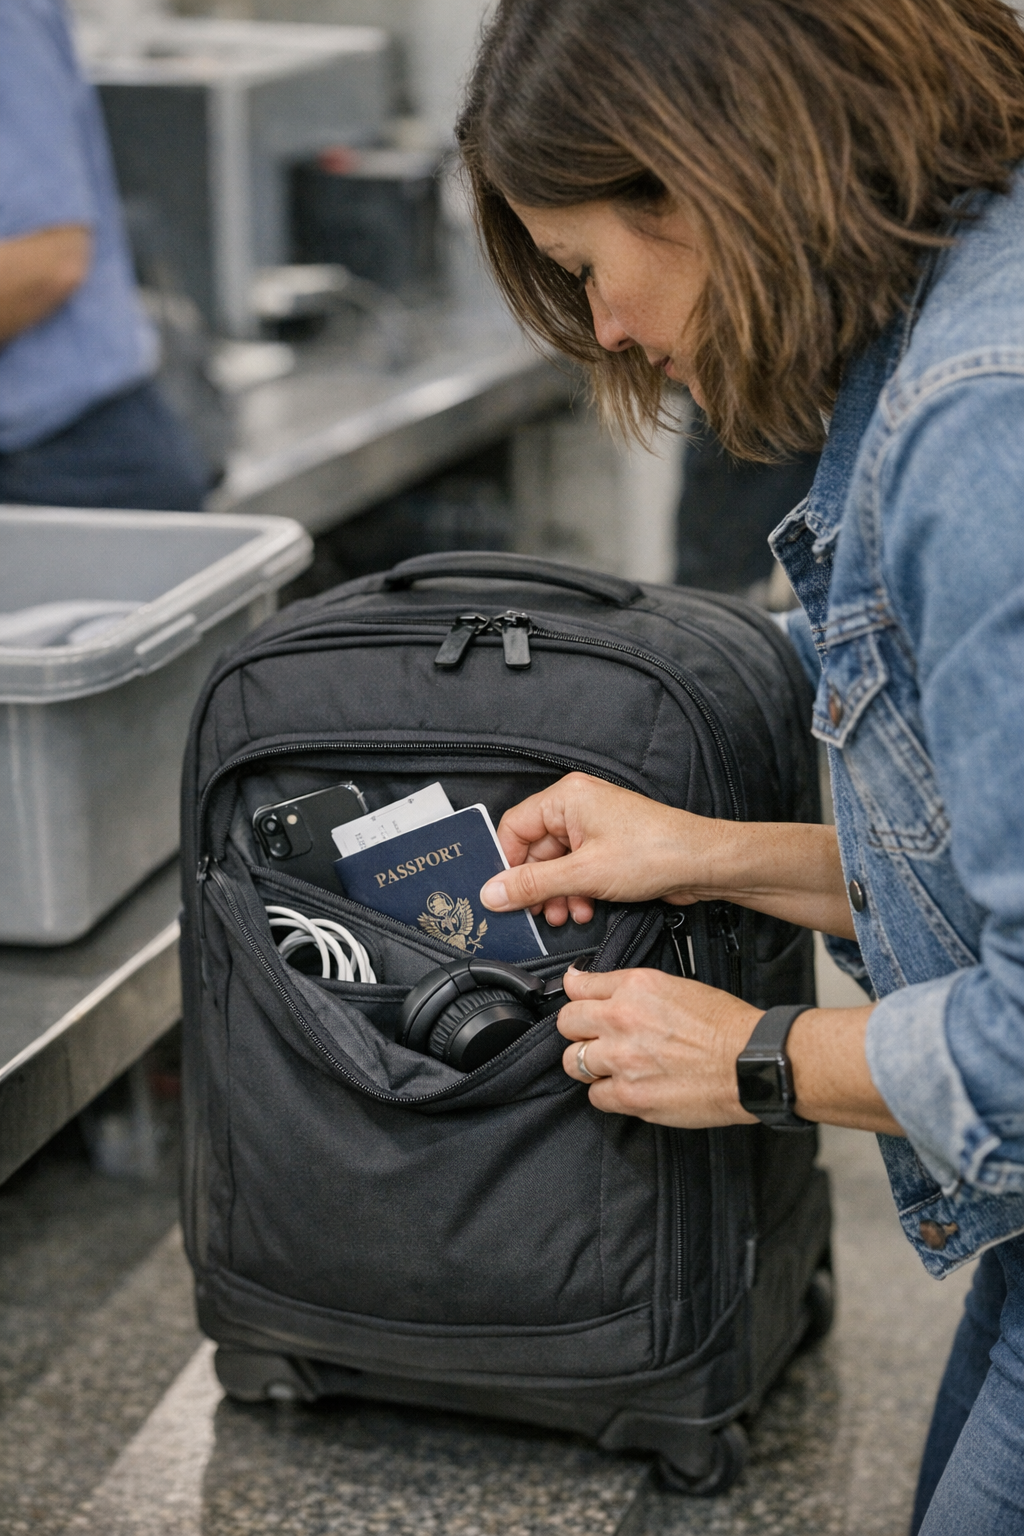
    A carry-on that looks organized still breaks down the moment you need it most. That neat setup—pouches lined up, cables in order, passport visible—unravels at your first real checkpoint. It isn’t big chaos, but the second you’re digging past a pouch for your boarding pass with a security line behind you, the “well-packed” setup turns slow and clumsy. You might only need two things, but both are wedged behind something else. The main problem isn’t visual mess; it’s hidden friction. The bag you perfected on your kitchen table rarely stays that way once you’ve reached for your passport, fished out a charger after boarding, or tried to get your headphones without blocking the aisle. In real travel, organization fails quietly—by demanding two or three steps where there should be just one, by hiding the item you just put back a moment ago, by turning fast movement into hesitation.

    Pocket Competition: Where Friction Starts

    Friction in carry-on use is less about visible disorder and more about losing single-step access under pressure. The first reach might work. The third reach—the one where your hand pauses—exposes the flaw: passport under a mesh pouch, charger stuck behind toiletries, document sleeve migrating again after security. Bags shift in trays, compress in overhead bins, reorganize themselves during seat entry. Every squeeze, shuffle, and re-stack turns that “clean” configuration into an unpredictable sequence. The result isn’t dramatic mess—it’s a stacking of micro-delays, fumbled motions, and interrupted flow, especially when the right zipper path is suddenly blocked or the outer pocket feels overcrowded.

    The subtle slowdown shows up fast when travel flow matters most. Pockets overlap, pouches press against each other, and zippers stick—not because they’re broken, but because your setup was built for packing, not repeated checkpoint access. Resetting feels constant: slide this pouch aside, dig for the buried passport, tug a charger cable that’s looped around something else. Nothing is “lost,” but everything takes longer than it should—stealing your mental focus and making you more visible in moments when you just want to get through quickly.

    Home vs. Airport: Why Packing Logic Breaks Down

    At home, the packing rules favor symmetry and contained categories—a tech pouch here, a tidy document holder there, toiletries stacked perfectly, each layer deliberate. It looks disciplined and prepped for anything. But travel doesn’t reward tidy layers; it punishes setups that force repeated digging. The first time you unzip your bag at the airport—one foot forward in the security line, arm awkwardly reaching from above—you often grab the wrong organizer or tip over a pouch, only to find your passport or boarding pass has migrated. Now what seemed efficient becomes a sequence: unzip, fumble, re-stack, repeat. Multiply that by every checkpoint: the time lost to correcting small packing errors adds up, and your supposed “system” becomes a quiet liability.

    The Reality of Layered Organization

    Visual order rarely equals functional speed in repeated use. Each checkpoint—document checks, bag searches, gate calls—tests whether your layout works under pressure. A setup that passes for order at a glance often fails fast in motion. What matters is whether you can grab essentials in one fluid reach, not whether every pouch has its category. If repeated access to primary items means moving or dislodging something each time, you’re trading away the only rhythm that matters in transit: smooth, fast retrieval without backtracking.

    Checkpoint Slowdown: Small Delays, Compounded

    Real burden isn’t a dramatic spill but a quiet, repeated drag: standing in a boarding queue, half-listening for your zone while wrestling with a zipper; reaching for headphones only to find them tangled around a charger in the main pocket; pausing at security as you try to slide a document sleeve out without exposing toiletries. Instead of quick, one-step retrievals, you build a ritual of shuffling and mental mapping. Each time, small delays pile up. You block the aisle, stall the security tray, and start to see the tradeoff—every time you go past three items for one, the order you created yesterday has already failed the day’s first real test.

    It isn’t about losing your place; it’s about repeating pointless micro-motions until travel feels tiring before you reach your gate.

    A Better Rhythm: Single-Zone, High-Frequency Access

    The difference is obvious once you focus on a structure built for repeat movement, not just initial tidiness. The answer isn’t to add more pouches or separate everything—it’s to group all high-frequency essentials (passport, wallet, phone, chargers, glasses) into one stable, outer-access pocket. No more unzipping layers, digging through stacked organizers, or remembering where to repack after every tray check. All secondary items—change of clothes, backup cables, snacks—can stay deeper in the main compartment, untouched through most of the routine. You eliminate the need to shuffle the same few pieces multiple times in every sequence.

    Less Shuffling, More Movement

    The payoff is clear the first two times you use the setup in the wild. In security lines, documents pass from bag to tray and back in one motion. In the boarding aisle, headphones come out without knocking over pouches or re-layering the whole bag. Returning items is automatic—everything lands in the same place, no re-mapping, no reshuffling. You stop monitoring your own process. Instead of quietly resetting after each move, you experience continuous flow—multiple retrievals without friction or regret. By the third checkpoint, the travel drag is gone. The fact that you barely notice your setup is evidence the structure works.

    The Invisible Difference: Look vs. Feel

    A carry-on can look flawless zipped up and still betray you in real use. The mark of a better setup isn’t how the bag looks before departure, but how little it interrupts your movement after two hours of travel. The best structure stays invisible—everything you actually need is always a single reach away, no matter how much the bag gets jostled or compressed en route.

    If you find yourself double-checking compartments, digging for the one thing you just used, or opening multiple sections after a short walk, the underlying structure is fighting your actual travel needs. Streamlining high-frequency items into a single, stable access zone isn’t just a trick—it’s a real test of travel resilience. Efficiency is built with fewer pouches for the things you grab every time, not by adding new containers to solve yesterday’s tangles.

    Redesigning for Repeat Access

    Designing your personal carry-on structure for repeat access doesn’t mean losing control or order—it means recognizing that repeated use matters more than initial symmetry. The “packed well” setup is only proven by how it performs: checkpoint to gate, aisle to seat, arrival to hotel. When every reach is quick and repeatable, when your hand always finds the right pocket, travel stops feeling like a cycle of minor corrections. That’s the turning point—when order and function finally meet, flight after flight.

    Explore carry-on travel tools at CarryOnSupply